weasel
-
Posts
883 -
Joined
-
Last visited
Content Type
Profiles
Forums
Events
Gallery
Everything posted by weasel
-
8 out of 11... a couple of the lesser known[to me..] fed's threw me...
-
thnx all.. I just found the steering link on the bench... should go from firewall 'ish to front 'knuckle'...lol
-
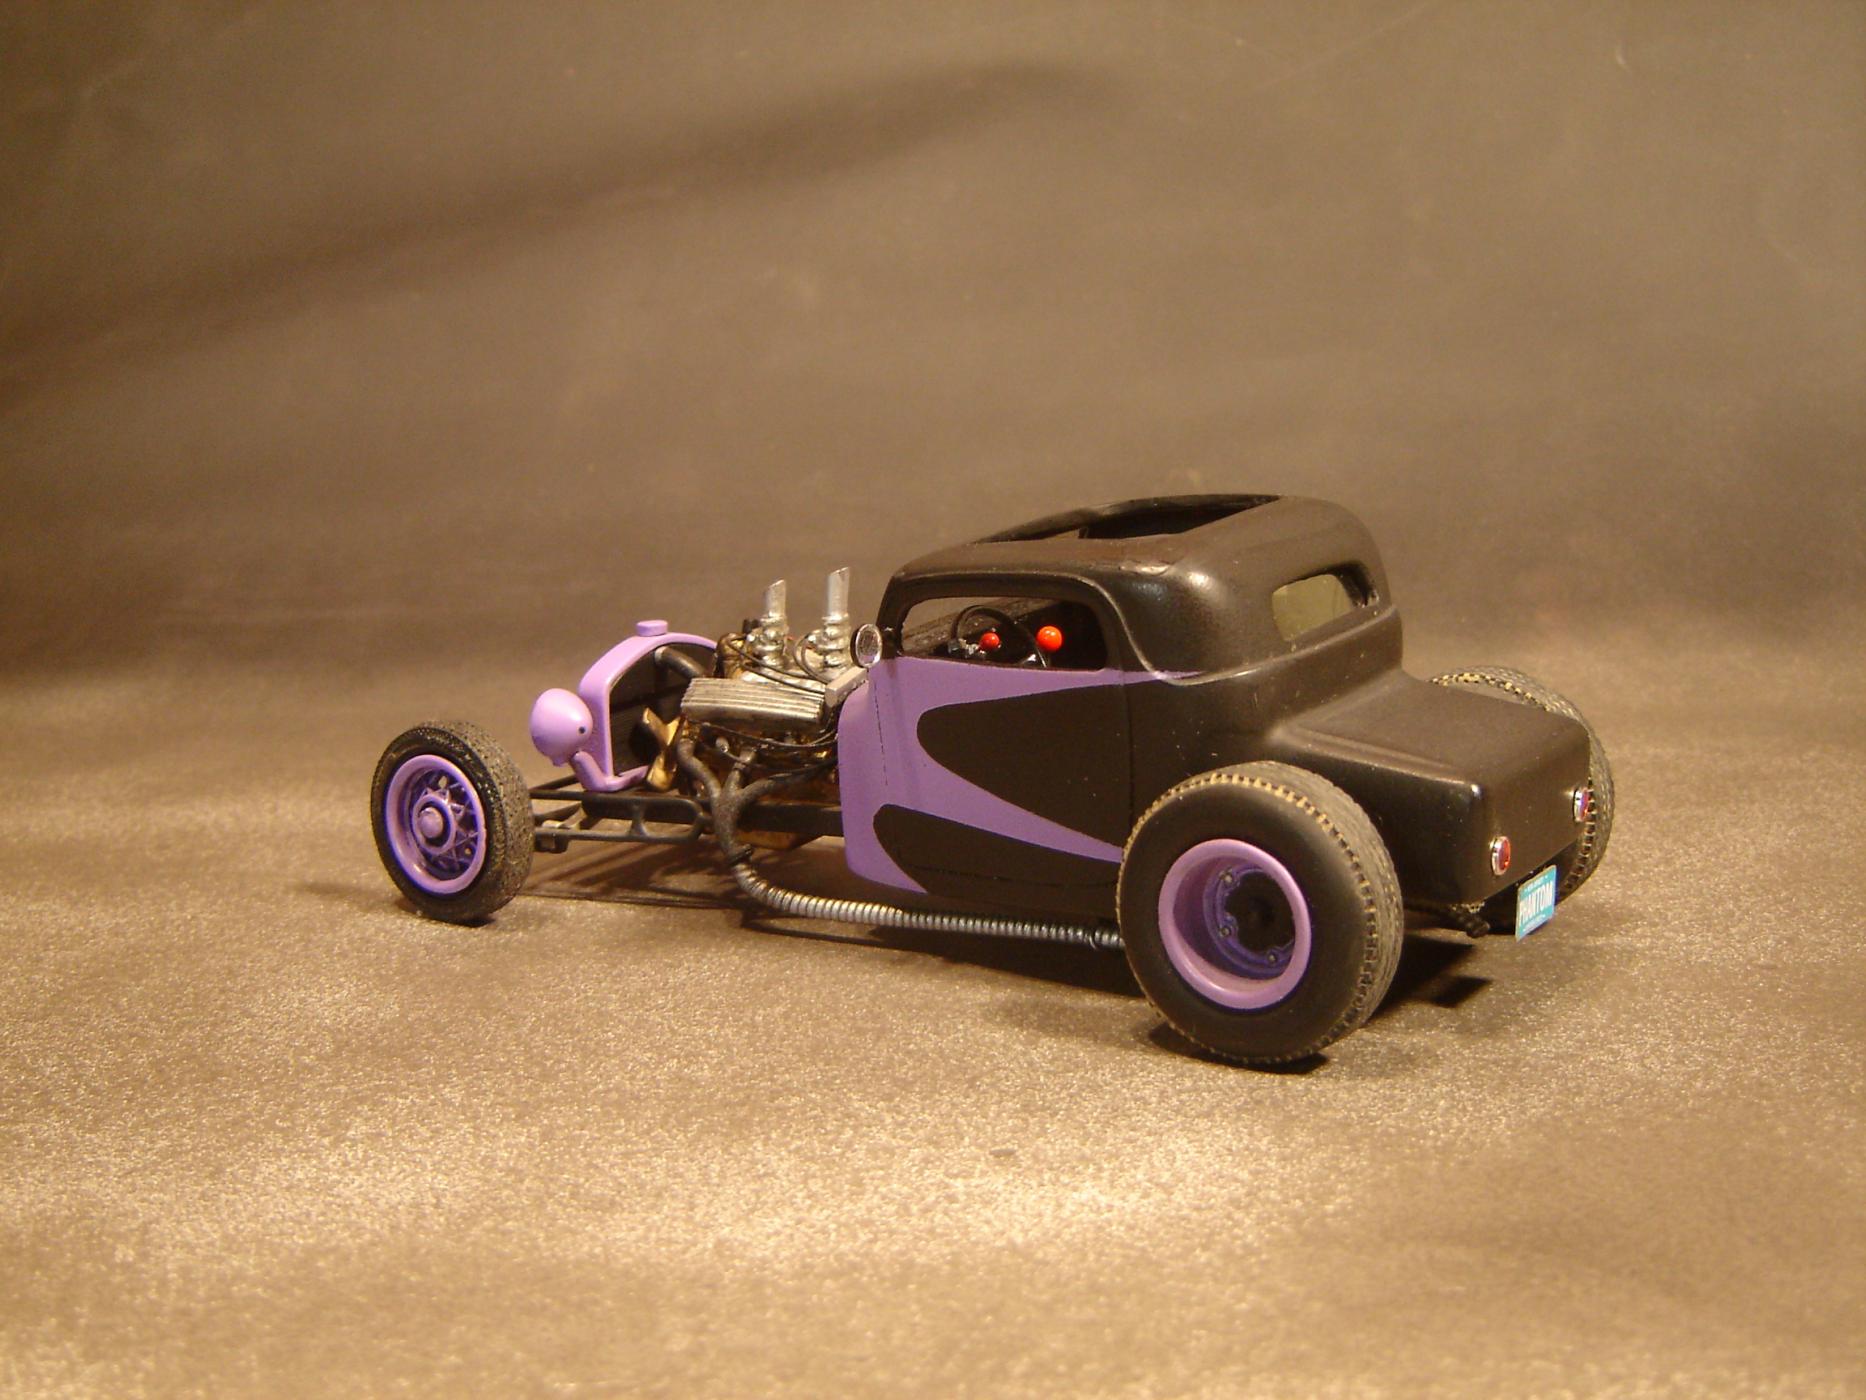
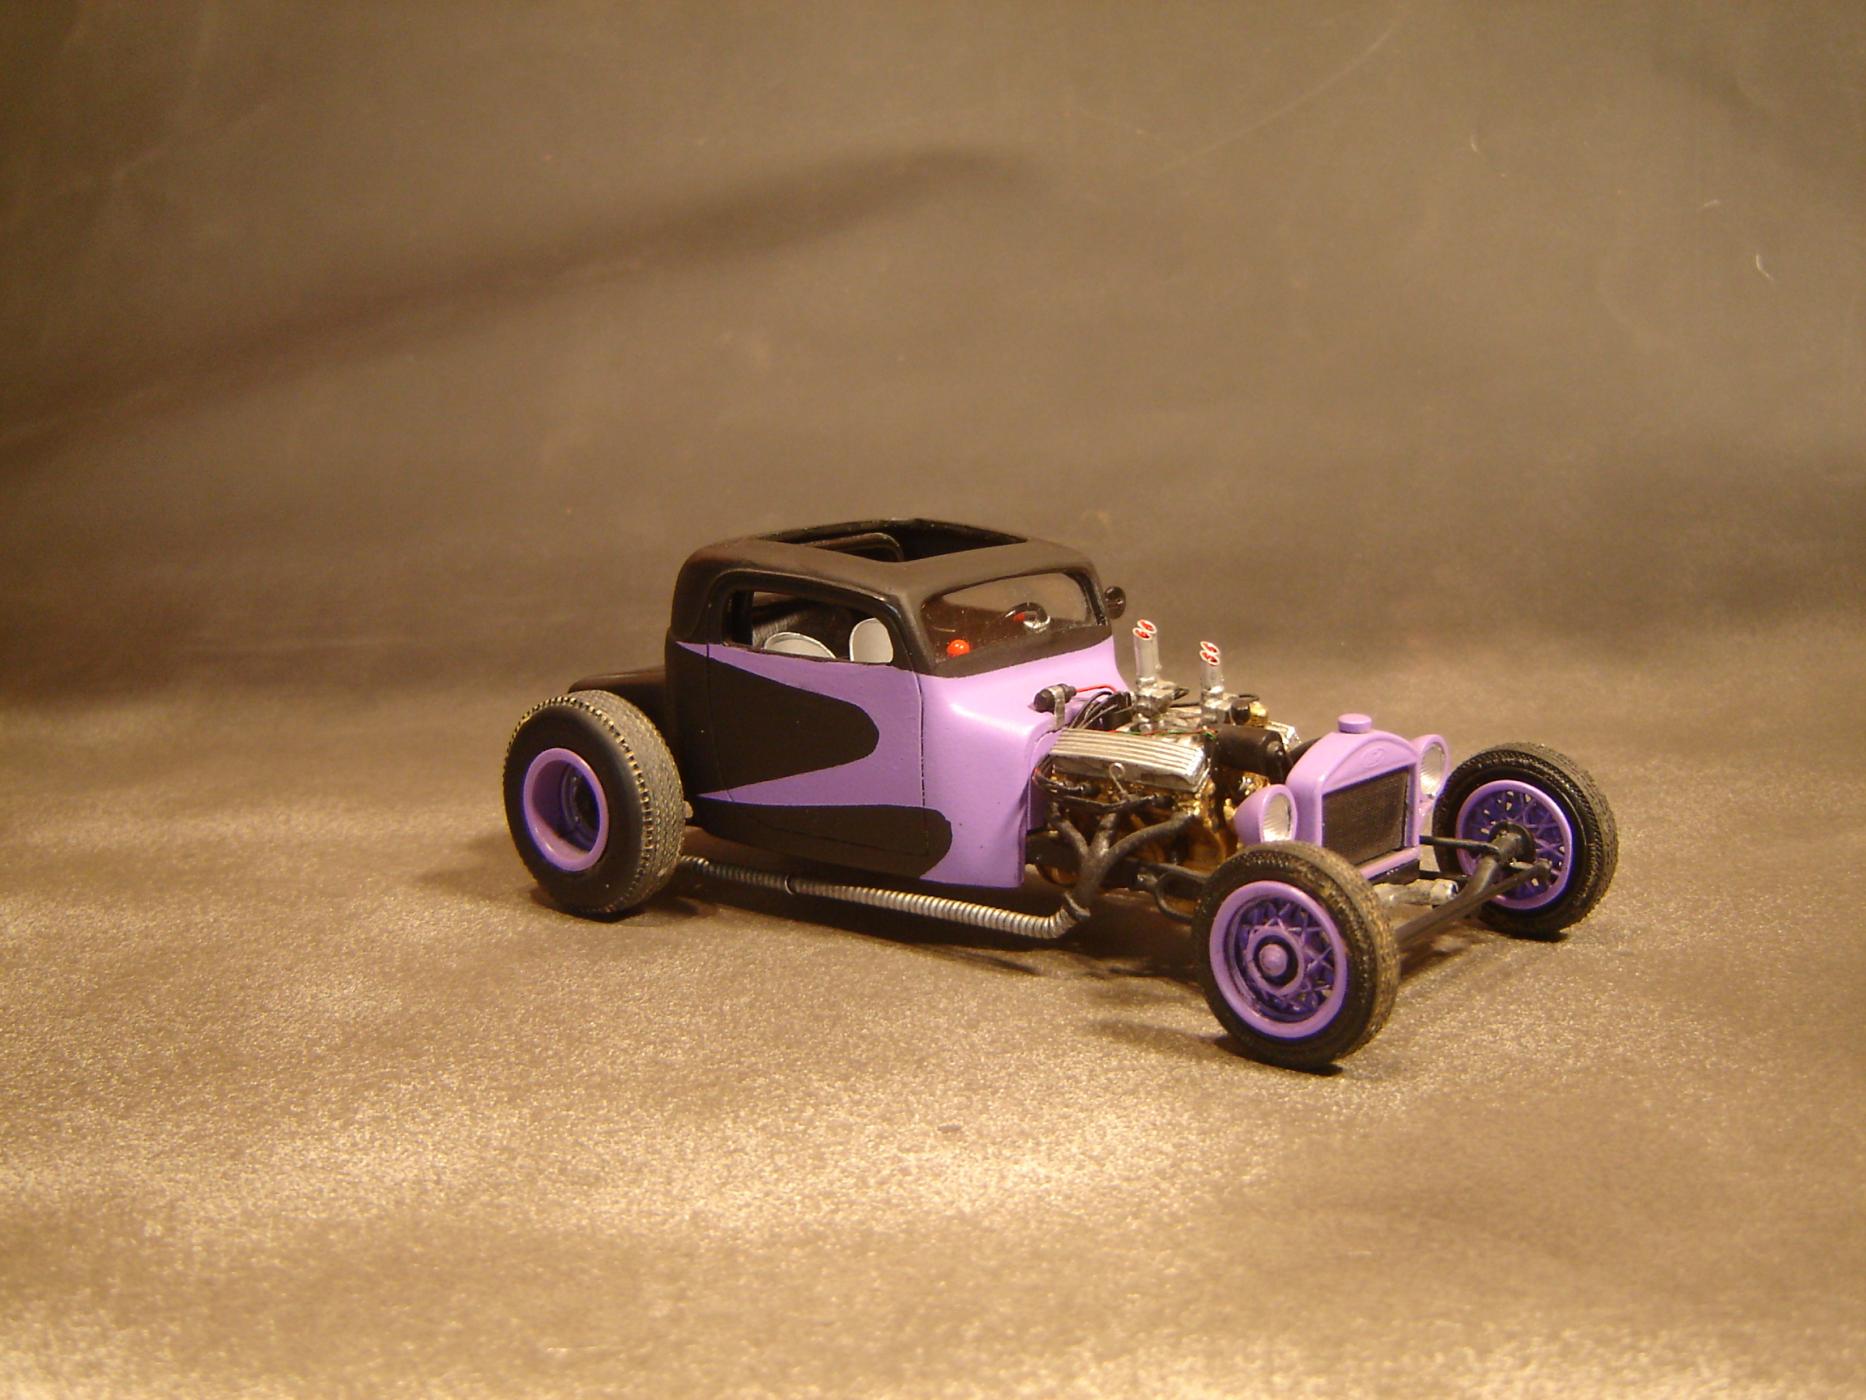
I've had this body forever... really, I got it at Toledo NNL at least 10-13 years ago, anyway, had started a bunch over the years but never quite got to 'that' level...lol so, was bored one night, built a PartsPak Caddy motor, something to do...and low and behold, I had a revelation!! old racer turned hotrod using the Flintstone body... 25 T Switchers was the donor kit for chassis and running gear... scratched interior, seats, rollbar, inner door handles... BigDonkey rear wheels/tires, fronts were kit inners and '32 Ford outers with partsbox tires...

-
nah, use a dryer sheet... in the box for couple days..
-
you can also[w/Tamiya tape] just use the template directly on the decal sheet!! it won't 'pull' any of the clear carrier from the sheet... and, on 'curves', I've found using a hairdryer on low and setting solution is all that's needed... just my 2 pennies...
-
Lack of motivation to build
weasel replied to MPi-KM's topic in General Automotive Talk (Trucks and Cars)
it it makes ya feel any better, until last Thursday, my last completion was in 2006!! a lot of my wip's are anywhere from a couple hours to a couple days for completion... the one I just finished had been sitting, painted, detailed*, just mocking me on the bench for at least 4-5 years... one evening I felt like building sumptin... how 'bout a hotrod motor?? perfect... pulled a PartsPak Caddy and had at it... as I was building the motor, got to thinking about a body [Flintstone 25/34 from Toledo a long time ago], chassis and stuff... checked the stash and found a Switchers 25 T donor game on... that was the beginning now all I had to do was finish it!! here in lies the rub... I was stuck on 2 areas/items, throttle linkage for the 4 97's and roof slats of balsa... and back and forth...finally found/saw a pic of the same carb/manifold I was using but, the kit doesn't have any real spacing 'tween the carbs, so...no linkage wound up taking out the roof slats also, anyway, point being, while I had not finished anything, I was indeed building, well, starting kits all along... * don't go nuts or it'll make you crazy... hmmm, seems it doesn't like the direct addy on the pix, won't load.... oh well, it's on FB in the Model Cars group... -
not being able to load pics??? can't figger it out... I use the 'direct' addy in PB just like the tut in the beginning, but, no workie... alas...
-
depending on how bad... what kind of paint...enamel or lacquer.. a lot of times just take some sandpaper to it and re-shoot... if it's saggy or has a bunch of runs, make sure it's completely dry and sand the runs out... if that doesn't work out, strip it and try again!!
-
Seagull bums a ride on the front of a race car...during a race
weasel replied to Quick GMC's topic in The Off-Topic Lounge
hmmm, is that nose wing legal?? lolo -
we called them 'dumps'....
-
hmmm, a Willys with no fenders... I may or may not 'borrow' yer idea...lol
-
"Hydrographics"...
weasel replied to johnbuzzed's topic in General Automotive Talk (Trucks and Cars)
BUT, these 'decals' MUST be applied to a SMOOTH surface... remember the Saturn Ion?? they had replacement interior parts that had this 'hydro transfer' applied in various designs, BUT, they[saturn] never got the concept of the 'smooth surface' thing and as a result, replaced many[most ALL] pieces as the 'decal' would just come off!!! especially after a long hot day in the sun... I tried to explain to them about 'decals' sticking to a 'grainy' surface... -
nicely done!!! what chassis did you use as I've got the same Jimmy body...
-
think plastic spoons.... trim to fit...
-
Modelhaus Cheetah kit mini review
weasel replied to cobraman's topic in Car Aftermarket / Resin / 3D Printed
the MiniExotics kit came with the covers on the vacuum formed 'glass'... my kit had 2 'glass' ...so, the other set is going on the Modelhaus version... -
Can anybody ID this car?
weasel replied to Jon Haigwood's topic in General Automotive Talk (Trucks and Cars)
a Cunningham?? can't remember if they ever had a hardtop... -
Modelhaus Cheetah kit mini review
weasel replied to cobraman's topic in Car Aftermarket / Resin / 3D Printed
I agree on the wheels/tires... I used a 'trans am wheel/tire kit' from Perry's Resins, came with rotor/hubs as a mounting point... dunno if they are still around... this is the MiniExotics not the modelhaus...have one, still bagged... anybody need some 'cheetahs always win' decals pm me... -
real.....
-
holy old thread batman...lol originally, this was gonna be a gravity drag car 'till the paint came out too nice...lolol
-
read a story about this photoshoot... the reason they used a right side shot is because they had damaged the left side in route!!
-
Paint Strippers - What to Use?
weasel replied to pbj59's topic in Model Building Questions and Answers
+10 on 'Lake Brake'...won't hurt/effect the plastic...a long soak WILL remove bondo, and as long as the filler is on bare plastic, a short soak[overnite] USUALLY won't effect the filler... brake fluid here all the way... oh, and it even removes Tamiya sprays... -
exactly... Guy Martin is a truck mechanic during the week... no big a$$ semi's, some box trucks w/trailers, motorhomes and vans w/trailers, etc... ya break something, you 'borrow' it from the dood in the next pit...that's just the way it was/is... traction control was the right wrist... wheelie control was the rear brake...abs was in the fingers/front brakes... NOT some program for the ECU...
-
oh yeah... actual ROAD races on public biways...
-
wow...this stuff is just amazing!! and to think when I started in '61 with my tube glue and bottle paint... maybe in the next 10 years or so i'll be able to 3D model at home like makin decals on the Alps printer... lol
-
the MiniExotics comes less motor as it's a curbside, but, there is a 'box' built under the hood for an induction of choice... I saw the HRM Cheetah at NNLEast when it was released, verrrry nicely done, high detail, high price...the Modelhaus kit is the same way, except, the front pan is molded onto the body of this one...oddly, that was the only gripe I had with the R&D kit, the pan didn't quite fit on the right side... no big deal, just a gap of sorts...