ScottH454
-
Posts
179 -
Joined
-
Last visited
Content Type
Profiles
Forums
Events
Gallery
Everything posted by ScottH454
-

1970 Chevelle Underside of Hood Color?
ScottH454 replied to crowe-t's topic in General Automotive Talk (Trucks and Cars)
I'm gonna share a website that I use for reference that should help with this answer. They are all about the original restoration. http://www.musclecarrestorationanddesign.com -
Yeah, search for that channel an look for a video "1/25 Resin BB Chevy “427” Engine Kit". I will work on getting a kit together this weekend.
-
I could help with the engine in resin. It has plenty of extra detail that you may not need so if you did want one you can tell my what you do or don't. I have a video that will show you what I offer. https://youtu.be/WJ4SejxpEx4
-
A few 4bbl carburetor reviews
ScottH454 replied to brodie_83's topic in Car Aftermarket / Resin / 3D Printed
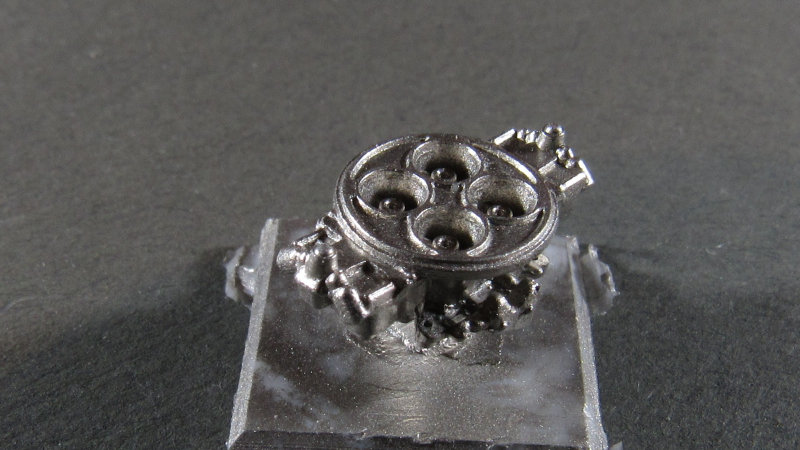
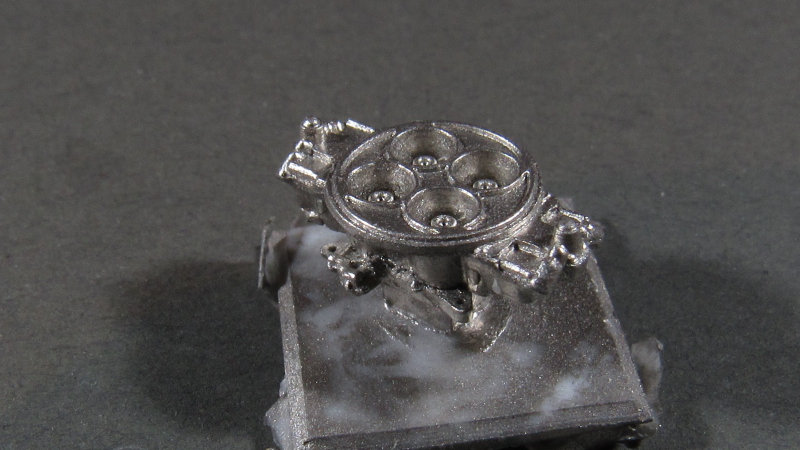
Got my(action-modeler) version of a Dominator carb ready after motivation from this post. This one was cast using silver powder. For what it's worth there were two versions of those blocky carbs originally mentioned. The center on them are different, one has an extra step-down.
-
A few 4bbl carburetor reviews
ScottH454 replied to brodie_83's topic in Car Aftermarket / Resin / 3D Printed
Thanks for the close ups. The metal carb is probably pretty hard to cast fine details. I wouldn't think VCG copied the Pro Tech but more they both did the same kit carb. That resin VCG carb is absolute garbage, not need to bad mouth with your pictures. I can say that as a caster myself. I don't sell anything with a single void or leave flash. There is another dominator carb from older kits that I was putting the baseplate from the revell two piece carbs. I got ahold of some fireball carbs an well they put everyone else to shame. -
Plymouth 383 auto.
ScottH454 replied to RichCostello's topic in Model Building Questions and Answers
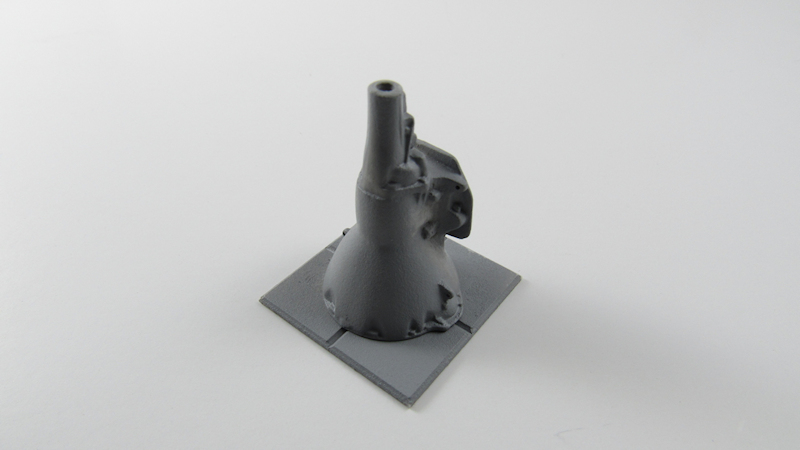
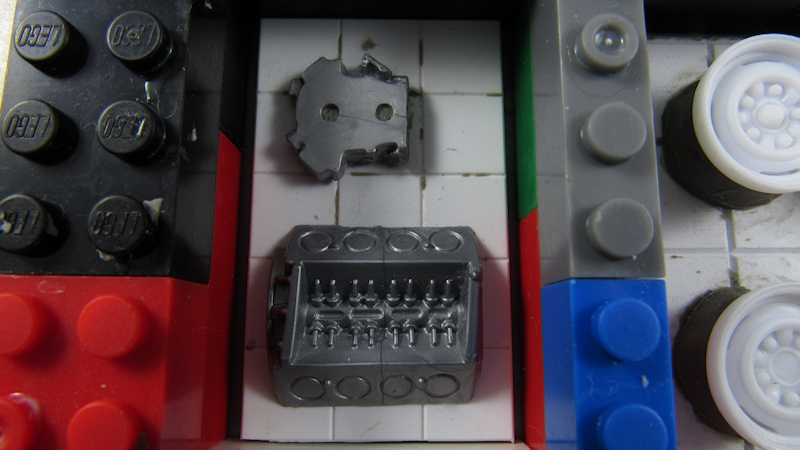
No not at this point, I have plenty of options to pick an assemble a more detailed an correct engine kit. From what I was reading the horizontal rib was the only difference in the years of blocks. The intake an valve covers from this kit have an unrealistic texture on them so wouldn't be used. I have a few images of what I am working on for a better 440 and to get you guys a better transmission. I have this trans cleaned up an shaved the molded in wires on the one side, also pre-drilled holes for realism. The engine top has the rib detail at the back of the block that I will mold into the 71 Charger block an heck maybe even try for the lifter valley.
-
Plymouth 383 auto.
ScottH454 replied to RichCostello's topic in Model Building Questions and Answers
Just got this today, 440 with an automatic from the AMT 71 Dodge Charger kit. Yes ugly car, but this is gonna be my top pick for this engine series. The horizontal ribs on the side give it a later generation but imagine most people won't be that picky for use in a 69.
-
'64 Plymouth Al Eckstrands "Lawman"
ScottH454 replied to ScottH454's topic in WIP: Drag Racing Models
Hey Snake45, that's what I did an think it stayed pretty dry. Still fighting getting anything to spray wet out of an airbrush. Well, this was just a coat to seal the paint an give a base for the decals. Tonight I got decals on one side. -
The project post starts off with the car already prepped an airbrushed with a white base. The script emblems were removed from the side fenders as per reference photos. The hood center molding was shaved down to represent as if it was left off. The body has been in the masking stage for months. Countless Google searches looking for other photos or tips on such a complicated masking yielded nothing. With the very few 1:1 scale images I did find I was able to finally get it to the point of painting the second color. Now I have read the actual two-tone color was some red candy color but I was not gonna risk a thick edge for this detail so I went with Turbine Bronze. There was very little color bleed, some around the back window near the molding that I hope to sand off avoiding brush touch up. My next step from here is an intercoat clear from Inspire Airbrush Paint. This is a solvent based clear as was the paint so I need to build up some courage to spray.
-
He has three posts asking actually. He stated he wasn't interested in who was suggested in the other thread, likely Fireball. 3D printed parts leave a textured finish that some modelers don't want so maybe he is one.
-
Not yet but they are on my to do list. If people are gonna be that interested I can make the mold over next few days. I have the rims already mounted to a base so if all goes well I could be casting by end of the week. I bought the kit specifically to cast those wheels.
-
What pinning I have done I used a piece of copper wire. Sanded the wire to give the glue something to bite into. Drilled into one side of the part with a bit close to what the wire is an glue the wire in. Then trimmed it off with enough to go into the second part. I still wing it an eyeball where to drill seeing what I pin is pretty small parts. But to help locate the second hole you could press the wire against the other side or dab a drop of paing on the wire or use the wire to scrape painted area on the second part.
-
Casting black rubber like tires
ScottH454 replied to Psychographic's topic in Model Building Questions and Answers
I gave it a shot an made some tires. The hardest part for me was understanding how to set up the mold. I get them to cast fine it is finding away to let the air bubbles vent. Here is a video of me opening a tire mold. https://youtu.be/e2ZSsUOfWu0 I am using Task 14 from Smooth-On an seems like a great choice. Does cure to a hard urethane rubber pretty much like kit tire. https://shop.smooth-on.com/task-14 -
Take a look at scalefinishes.com for factory paint colors. You can figure out which color you need by the year. As long as you have an airbrush it is your best bet. One thing I am learning as this paint is pretty thinned out and take many coats you would want to spray a like color for a ground coat first.
-
Paint Chipping when Foiling
ScottH454 replied to Billschneider64's topic in Model Building Questions and Answers
Ok now that I am home I can see the photos bigger an that looks like silver in the chips, so you would want to try a regular primer. -
Paint Chipping when Foiling
ScottH454 replied to Billschneider64's topic in Model Building Questions and Answers
I didn't want to go there but since Steven did then I'll second that using metallizer. I imagine that paint as a metallic powder an barely able to hold onto itself let alone a topcoat. If you have a Hobby Lobby nearby then a can with thier 40% off coupon is worth the investment over what you save using the metalizer. -
Paint Chipping when Foiling
ScottH454 replied to Billschneider64's topic in Model Building Questions and Answers
Is the chipping all the way back to plastic? If so an you are washing the body then have you scuffed the body? I have been using a sanding cloth called super assilex to prep my bodys before priming with Tamiya rattle can primers. I have a link to the jobpack for the sanding kit, great stuff as ot is a soft cloth vs a rigid paper. https://www.amazon.com/dp/B00XD8MWFC/ref=cm_sw_r_sms_awdb_t1_HgmNAbGA6BRJG -
Masking future glue spots
ScottH454 replied to NOBLNG's topic in Model Building Questions and Answers
I use the microscales mask that is water release. The thing I noticed when you paint over it then it seals it. So still had to scrape it open for water to get in there. Maybe if there was a rubber type that can rub off. I use it for glue points an to avoid over painting into details. To just glue your parts to the painted surface leaves you to the mercy of how well the paint is sticks. An I have seen it fail enough to not recommed that, especially if you still need to handle the parts. -
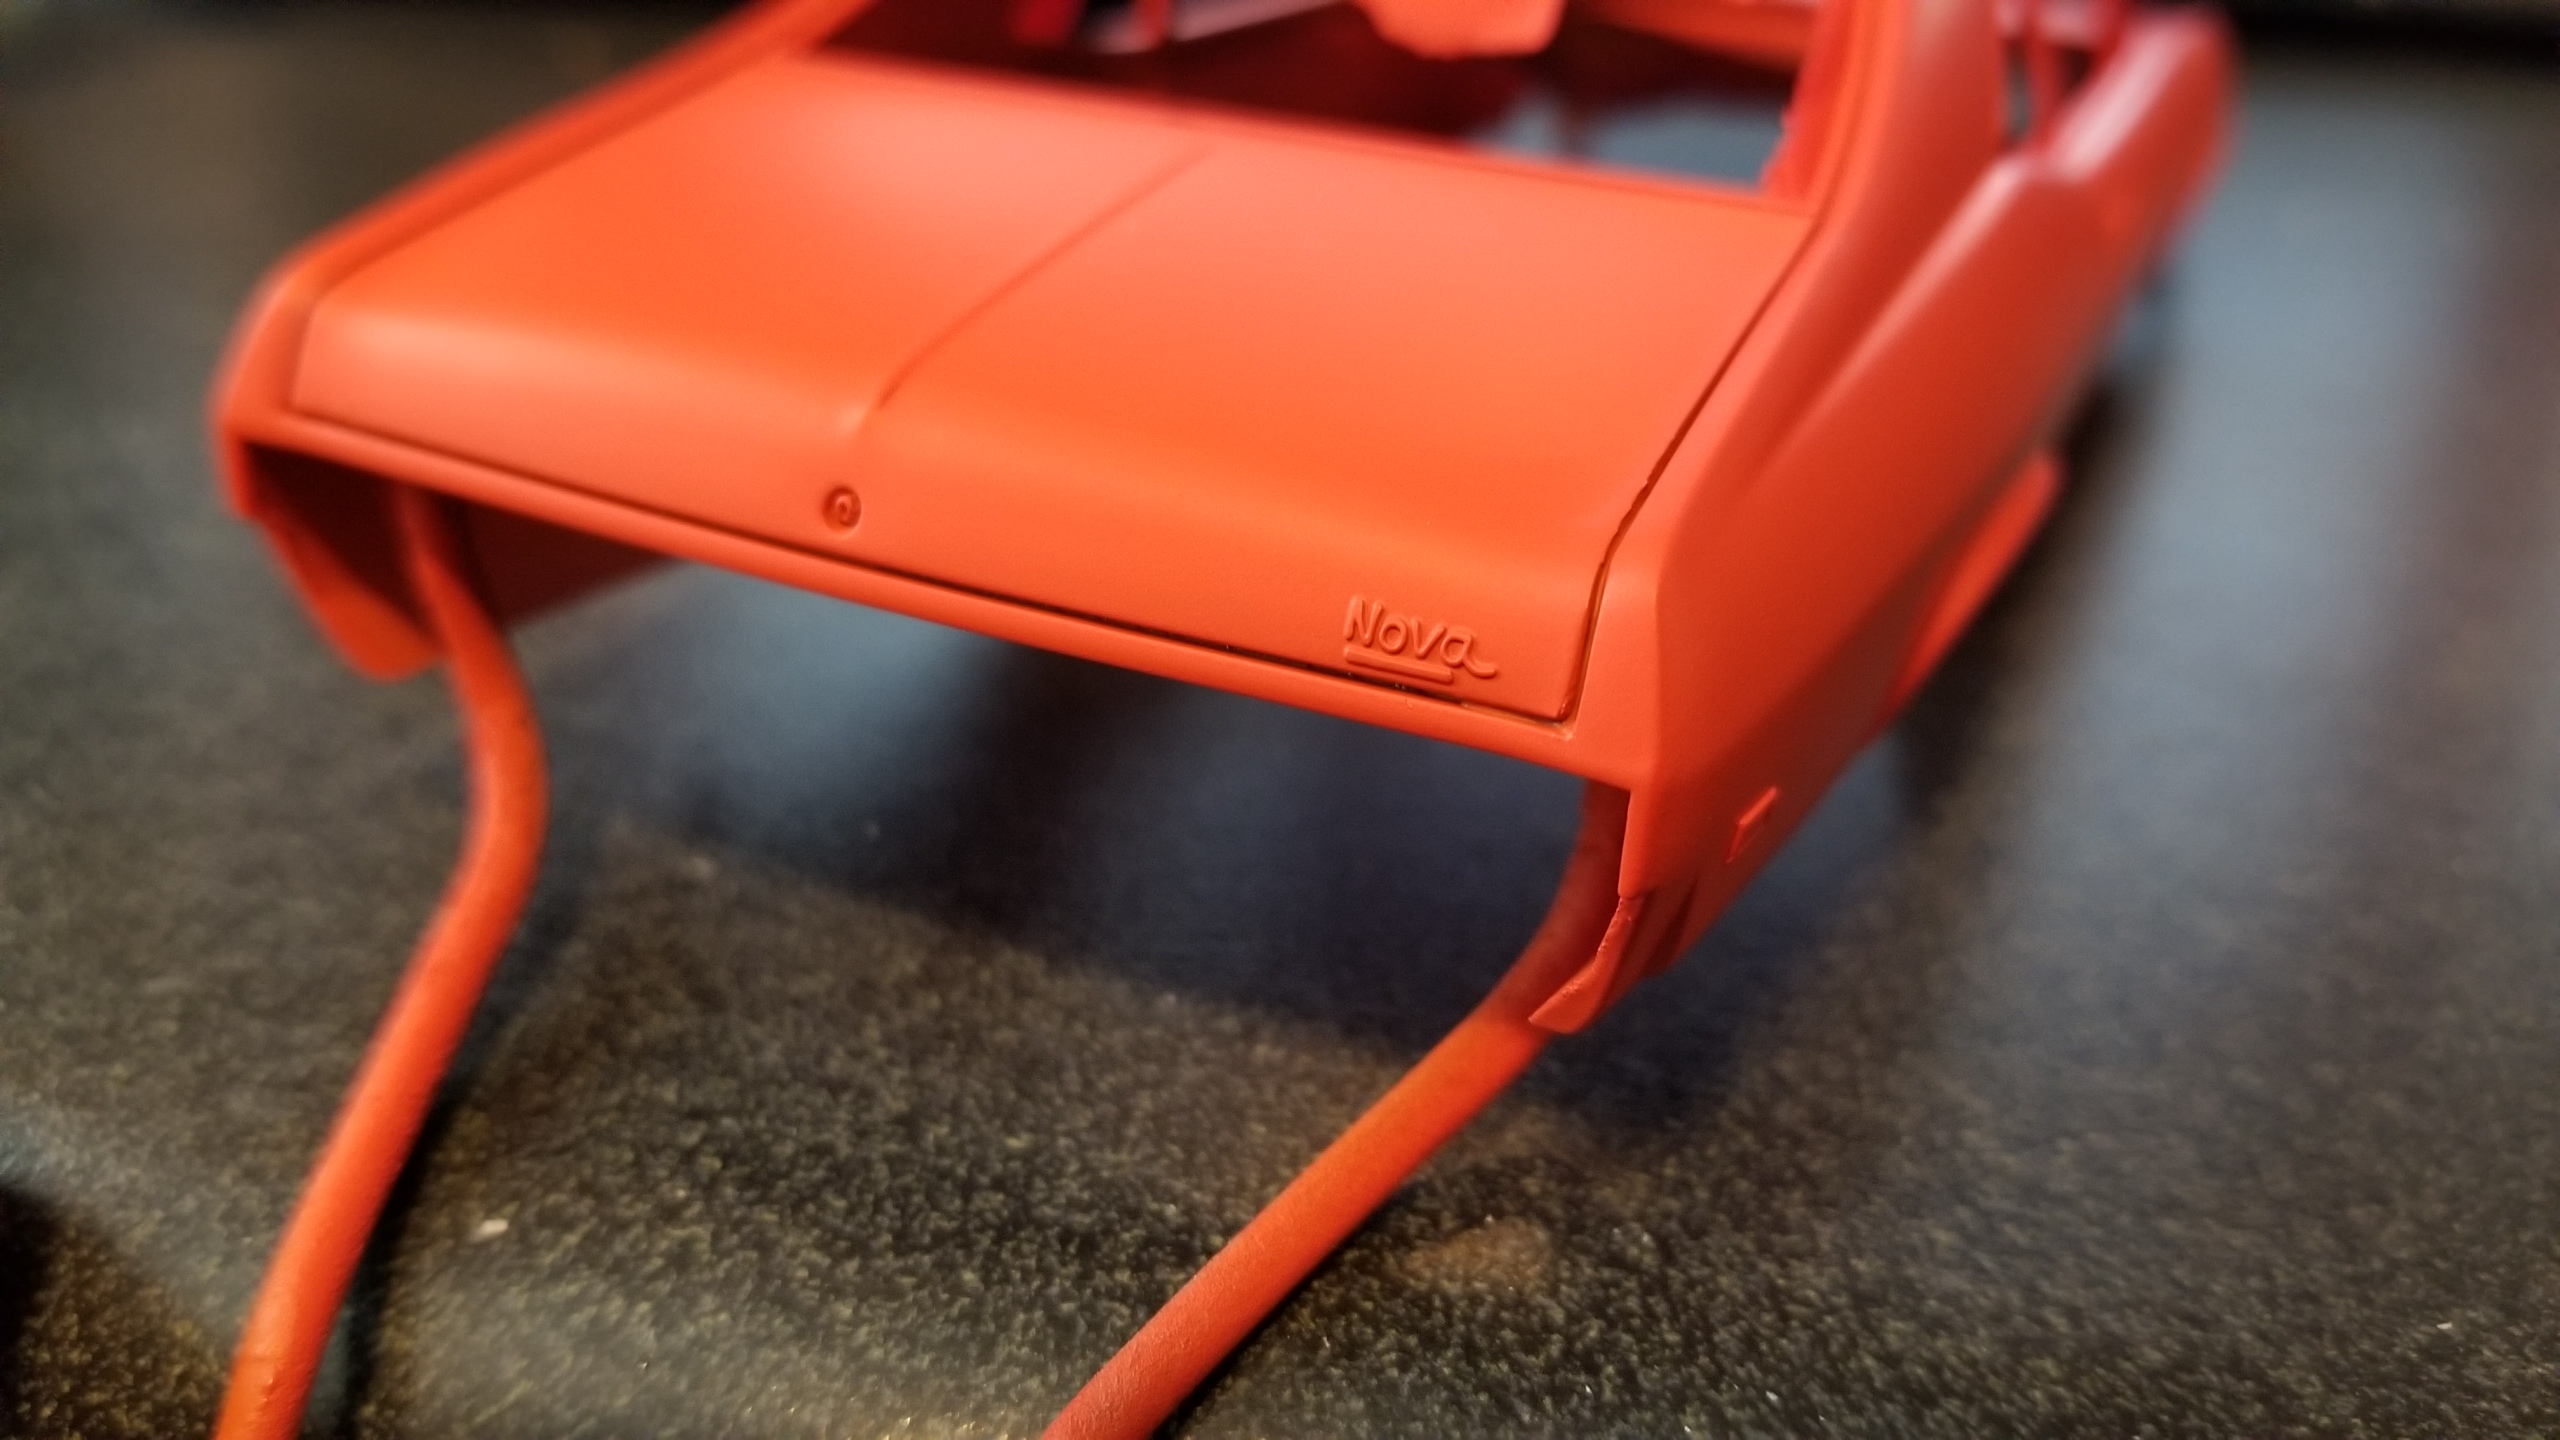
I knew what you were doing there as I have one I have to do the same with. Grey primer is easier to see imperfections but expensive to cover up. Hence the 20 coats of ScaleFinishes paint at $12 to cover the grey I sprayed over on that Nova.
-
You probably lost it when you used that primer. I used a general rattle can primer and yeah there meant to give a high build coating. If you do have an airbrush you should spray your primer with that. My advice to avoid using two colors of primer would be to tint the white with some of your red paint, assuming you have compatible paints. One coat to sand an fix any issues then go back over with enough to cover your sand through. Edited to add pictures of a Nova body I just sprayed. At least to coats of Tamiya spray can primer sanded smooth, enough to cover the plastic is all that was needed. Then based with many coats of a cheaper orange automotive paint from an airbrush. Nearly the whole 2oz bottle of paint from scalefinishes. Then with any lint an dirt cleaned up I sprayed with maybe five coats of Hugger Orange. While I may have put 20+ coats of paint on this body the airbrush coats where always a very light coat. I never tried to put on a "heavier" coat cause guess what, heavy paint flows into that detail. So from this step forward I'll be using automotive two part clear tinted with this orange paint to airbrush on a coat of clear to "seal" this base coat from damage during decals. Then use straight clear to cover all that up. This is where I can get in trouble with to much clear an my paint job looks like your Firebird.
-
Ok, so you are trying to avoid painting after it is on the seats? A black marker would give a thinner coat that should let you bend it, but the glue you use might not like it. You could still mask off the piping afterward then paint it black with a marker. From the photos you shared you won't be happy with thread, it won't be smooth enough even after soaking in glue. At the least try the glue on some threads to see how it dries on some scrap plastic will you wait for some .015 plastic rod. The seats I am doing are all the same color so I was just painting them complete with a thin coat of paint. Inserting some photos of the latest seat. The outside was .015 rod an the inside seams is 0.10. I used Tamiya extra thin to glue it down in sections, it softens the rod to help it bend. It did break a couple times an that meant pulling it off to avoid a noticeable seam.
-
Yes, as far as I know, I'd be the only one selling MPC Camaro seats. Certainly ones with the extra details. If you look at http://action-modeler.com it lists what I have.
-
Did you try ordering off MCG website? I was looking myself an seen they still have them on thier store. I ran my cart upto $35 for 3 things an wasn't ready to commit. I hope so cuase the detail master ones are not what I wanted.
-
Oh yeah well I started with MPC seats an detailed from there so they are gonna be better. I have a set on ebay now actually so search "resin camaro seats". My most recent feedback on my profile was from a guy that just bought a set if you want to know what others think.
-
What is your tuck n roll made out of? I have redone three seats now with .015 plastic rod onto plastic seats. Might be easier to manage than thread.