

jmpsebring
-
Posts
236 -
Joined
-
Last visited
Content Type
Profiles
Forums
Events
Gallery
Everything posted by jmpsebring
-
Casesforcollectibles.com is the site. Acrylic boxes is the catagory. I have purchased approx 10 cases and have had zero issues with anything. Make sure it's under 6' though.....that's their limit. Shipping is not cheap, but it's 100% first class packing. you might find a cheaper case from plastic, but these acrylic cases are built to very high standards without getting into the cost of wood furniture bases. This big 19x10x8" case was approx $84. You could easily go smaller. I'm making this 8*' tall for the Transporter wall.
-
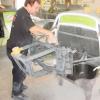
My case came in today. Premature perhaps. But keeping things clean and knowing where to stage everything has to be planned early. Plus while it looks pretty big, once you put a car on jacks and a back transporter wall, at an angle...(because that's the law of Dio's) it will be, pushing the limits.
-
 ...that was funny
 -
As a figure painter, I would suggest you paint them in oils....but that scares people like building a frame in brass. (It's very easy)I think they need to be toned down, shaded and drybrushed. When people think chutes, they don't think bright colors. So that works against you. With no dis-respect intended at all, if you can't pull it off to your liking, then learn to edit. Don't dumb it down with an item not as good as the focal point. Like don't put a J flinstone figure next to a high detail model. Good news is that you could make a couple sets and they would not affect the model at all unlike lets say...chassis color. try recovering from that!
-
I too buy from Costal and Dick Blick depending on the item. On big bodies, the airbrush is not critical. In fact acouple of my brushes are too small for 1/16th. Even wide open. That Dupont clear in a can might be a great product for large surfaces. At least it's clean paint. Looking forward to a review Romell...ie; decal recaction, gloss, hardness, drying time.
-
California Charger F.E.D. update
jmpsebring replied to vintagedragfan's topic in WIP: Drag Racing Models
What is the finish on the blower? I just keep staring at it... -
Romell, I'm almost think'n the paint part of this and future questions, tips could/should be a thread for hi-tech paints. I'm pretty sure , Ca has different greener rules for paints. I have Zero's 2K clear (a guy in the UK that bottles pro-paints in matching F1,Euro team colors) and figured it would be perfect for clear-coating. I understand keeping with one brand is smart, but don't most shops across the country usually spray the same clear on everything they paint? They will use the same system(clear/hardner/reducer) but 2K clear is 2K clear (Or am I wrong? ?.) I would guess that HOK 2k clear is made by someone else. I recieved my HOK paints this morning and it does make me wonder if I should switch to a current 2k primer too. I like chemical drying! I use Tamiya can primer and while it's a great primer, it's very $$$. Did you use spray-bomb can primer? I'm getting my supplies from TCP global in SanDiego. Prices are good and they even have cheap striping tapes, masks, papers,etc. Also found a company called uline that makes everything for shipping/containing things. I bought 24 2oz glass bottles with lids. Should last me for years. Don't mean to change the thread...but it is related to what your doing. Plus the jack's, chutes and Jacket are all looking great!
-
Before I get buried in more and more frame work, I decided to make some of the panels and inner details. The tunnel was made by splitting to piece of tubing in half, and soldering in a couple of panels. I was playing wth the idea of making the tunnel adjustable. Not sure it will stay. The center cover between the wheels is made by making one side over-lapping the other...then spreading them out until they butt up against the tubs, then gluing. Then a third upper part was trimmed to width, then push up to the rear bars then glued. That will now be a quick perfect pattern that took just minutes to make. BTW, I'm keeping the tubs too wide until they have to be trimmed.
-
Now your just showing off Next...on Project Runway!
-
Joe I did recieve the 3" turbos. Do you want their dimensions?
-
OOOOOHHH...Braswells
-
I had no idea how I was going to mount these tubs. When I got the rather pricey parts, I was not too impressed. They are not 'set' in their shape that well. But having designed the mounting method by 'pushing' the part against the frame, they fell back into place and now I think they were a huge time saver. I used a piece of L- shaped stock to define the mounting point. Never would have drilled where the holes were..until I set the tubs in place and noticed the band running around the tub. I didn't want to drill there. so I divided the space left over and pre-drilled some mounting holes. Once the top 1/16th tubing was in place and the tubs tight around them, they were marked with a marker and trimmed (a little long) and presto...Done!! I will build a center fill panel and all will be finished in carbon fiber. The rear of the tubs will be modified...on another day I'm done for now.....
-
I never thought I'd have this much done after a few days... On the other hand, I worked serious hours everyday. The TDR rear end came in :P and it is a tad(???) narrower. That meant everything needed to be narrowed. So this is start no# 3 on the rear section.
-
1/16 Scale Army Vega Funny Car - Finished 10/14/2018
jmpsebring replied to Mooneyzs's topic in WIP: Drag Racing Models
Outrageous! What are you using for a driver on the tiny Scale Hardware bolts? I figured needle nose or tweezers, but they mark the surface. The L.E.D. page is scary.....Puts the old grain-of-wheats bulbs to bed forever!. The Good thing about the low heat LED's, is keeping the colors bright and true. Flouresent's can just kill certain colors. -
I've enjoyed building tube frames ever since I built my birdcage Maserati cockpit. Thank You Andy, I'm humbled by your presence.
-
68 Camaro El General Pro Mod (updates 05/06/12)
jmpsebring replied to tyrone's topic in WIP: Drag Racing Models
That was fast! One thing I like about your photos is that black trailer in the background. Never get tired seeing it! -
That just transformed the whole paint job! Congrats on the design, tecnique, color choice....the blue pops so nice against the orange
-
I'm thinking a display with doors/nose/slick off and up on Pro-jacks. I've been looking everywhere for some small- pattern sheet for use as Temp flooring. This stuff is slightly large, but it's not as noticable when looking at "normal viewing" angles. I hit one corner with primer gray killing the gloss, and it's easily the best thing I've seen so far. One could easily use team colors by painting a border like teams that use different color tiles often do. Or you can buy it in colors at the store. It's cheap too! Find it with the knitting stuff at a craft store near you. The Back ground will be the wall of the trailer. Anyone reading this knows what I mean. Put a door on the wall, reflectors, space underneath, maybe the outside of one tire to prove it's a transporter. Deployed chutes and team paint will make a perfect natural setting. Plus it's alot of bang for the buck....visually. It seems logical to use an awning to angle up to the front of the case, but you have to be careful cutting off light sources from the car. One could light the project with batteries behind the wall....and it's never been easier finding bright Low-amp lites (LED's)but thats all stuff to decide later. I do however plan this far ahead. I will order the 17x9x8"case to keep things clean and dustfree over the months while building and as it sits now and then when I lose motivation. (AKA...get another model) . The base is critical since the Jacks must be bulletproof, yet appear to be portable while holding a top heavy & wide car .
-
Thanks for answering the paint ????'s I noticed on youtube quite a few technique vids. Some from a fellow member...Dr Cranky i think. Some guy showing real flame and bubble techniques.
-
The glass beader does a great job smoothing out everything and cleaning everything. Some joints will need more solder to fill, some are perfect. Time to start over with a clean desktop and then round two of smaller bars.
-
Time to dig out TOO much stuff! BTW, one of my fave project bases, are from the 'as-is' section at Ikea. Various shelves from various units. Perfectly finished, completely square and they are usuallly $.50-$1.50.
-
various strips of plastic to start forming a bumper
-
What you all fail to understand...is that I put that part there simply to admire my own work Good thing it stuck there! I spend way too much time stacking/sticking parts after every step..I can't help it So the midplate has the housing mounted to it. It must go through a hole cut big enough to allow a clucth housing's O.Dia. to pass through. Plus the midplate can't act as both a midplate and firewall. So the housing must be moved forward enough to match the thickness of the firewall. Plus there is no space bewteen the plate/firewall and housing. They form a solid sandwich...? Or is the fire wall flush with the tubing and welded in place forever? Also is the material around the whole firewall aluminum...or steel or composite? With the sunken panels I see it appears to be aluminum? Still another question. Are removable floor panels on the pass/NOS side removed from the bottom or top? I would think they must mount from the top with the Dzus tabs under them to ensure they can't blow through from wind. Is there a 2nd floor pan covering the whole floor area mounted on the bottom? Are welded steel panels from seat to pedals required around the driver's floor area ?
-
I did build most of a Paris/Dakar racing/service truck once. Crazy Trucks! Youtube has some great vids. I placed thin strip all over the body with white glue. Then built a frame over the strips. Removed the strips and had a perfect little exo-skeleton frame wrapped around the cab. It's waiting for the last step......15 years ago!