jmpsebring
-
Posts
236 -
Joined
-
Last visited
Content Type
Profiles
Forums
Events
Gallery
Everything posted by jmpsebring
-
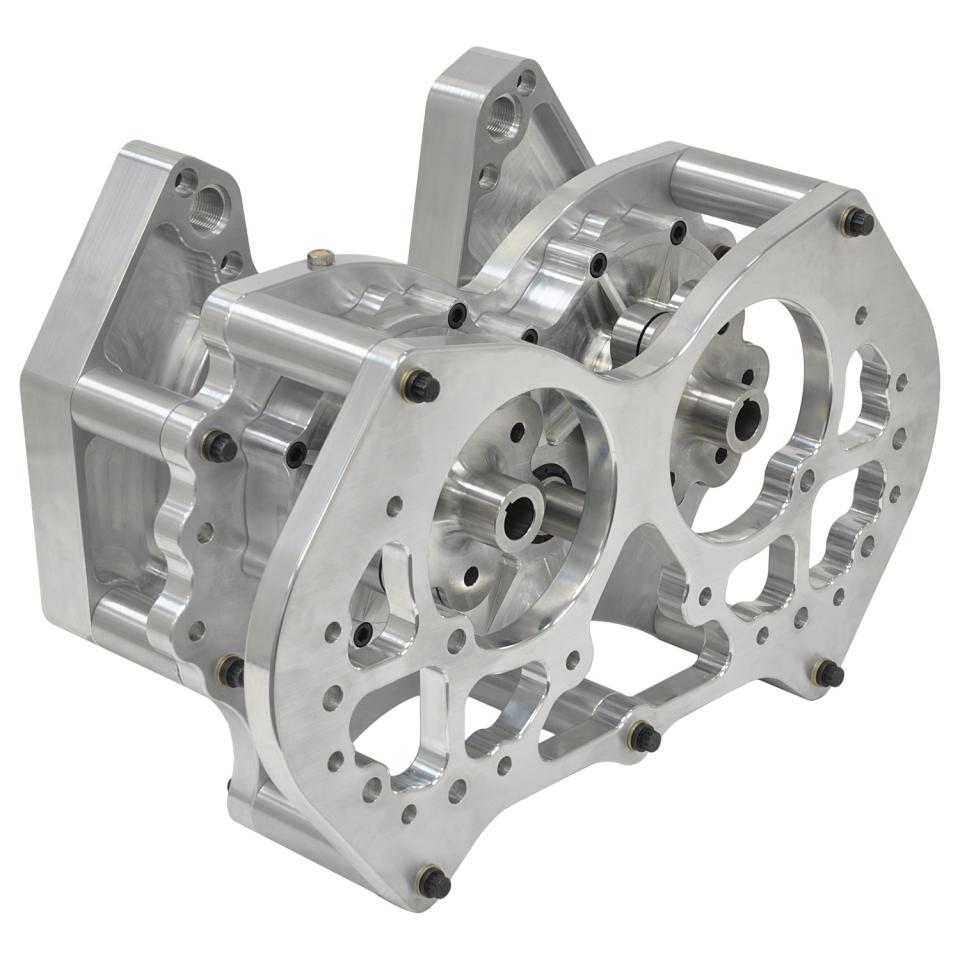
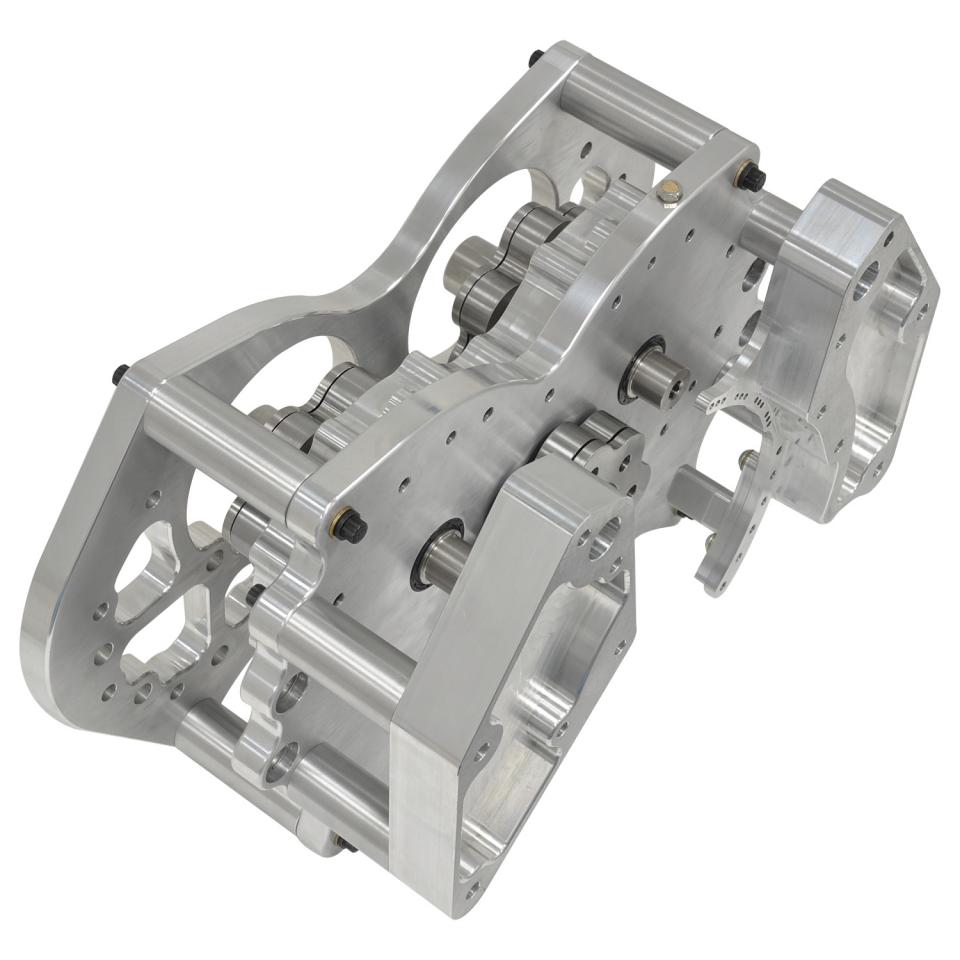
NICE!!
-
It's difficult to decide on a subject. I like the idea of a Duster and the plastic body is well molded. I ordered the 41 Willy's and will make that the body or just make it curbside. I don't see myself building a bunch of these with full detail. It's all about space under the Willy's hood and if it will look "bad enough" without a giant PSI and hat sticking out of it. Perhaps I should scratch the gear-drive front superchargers. Plus with some of the bodies, there's very little space between the engine and A-pillars/firewall. I really like the tapered sheet metal depth on some these Pro mods chassis. Your thread has been inspiring for sure!.
-
I went to add attachment and it stopped at the second photo. I've used 9.69 meg of my 9.77 quota. They are not even big photos. Do I have to link and create to some other place like photo-bucket to do a WIP?
-
I went to post more updates on my 1/25 comp coupe and It says I'm over my global limit. Is that per month or forever? I was only on page two.
-
Why Did Figures in Model Kits Disappear?
jmpsebring replied to Casey's topic in General Automotive Talk (Trucks and Cars)
Figure sculpting is such a unique art form. The hobby has it's own shows and they hang with each other. Plus painting is another skill to master. How many hobbies are you going to learn? I took up painting, and enjoy it. I tried sculpting.......not very good at all. Model Factory hiro has hired someone to sculpt figures. It's a new venture, but they do everything first class. We may soon have quality figures for car models. I agree with others, most figures are the weak point of a display. -
Newer Model Factory Hiro kits are state of the art car models. They may be $$$ kits, but by the time you buy everything after-market, you end up spending lots anyway. Hundreds of white metal parts, perfect resin, perfect decals, great customer service. East to build because of their engineering, and quality control. They really have set the bar higher than others. The Tamiya Honda RC166 bike with upgrades is also deserving of the crown. On a slightly different note, With their Photo etched sheets and other details, model ships finished to a high level are often in the running for "best of show" at national events.
-
1/16 Scale Army Vega Funny Car - Finished 10/14/2018
jmpsebring replied to Mooneyzs's topic in WIP: Drag Racing Models
Chris, send me your address OTB and they are yours. I'll even pay for the stamp!!!! -
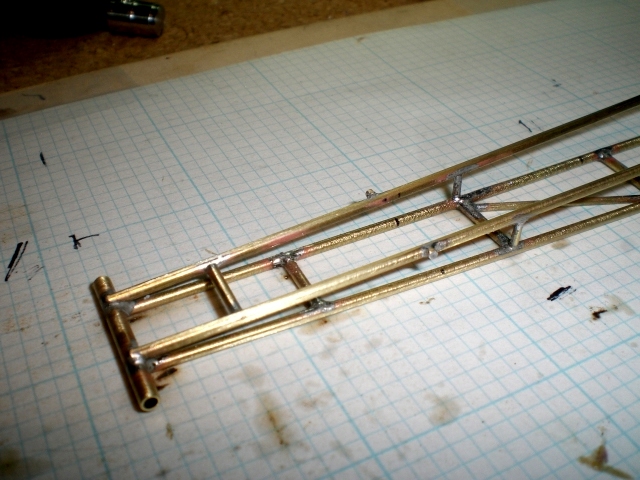
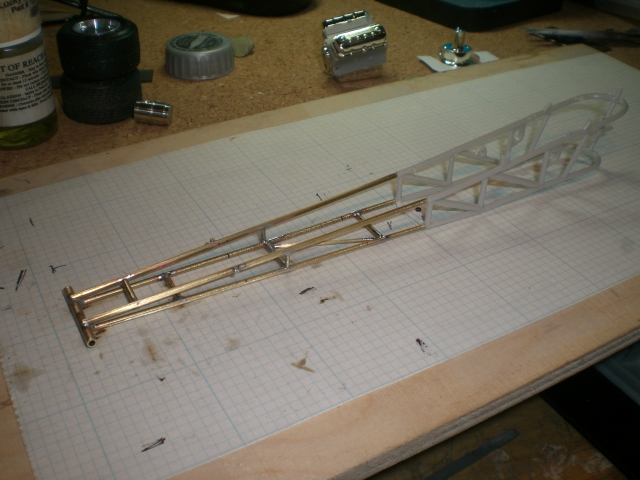
39 pages and I want even more! Great job, I have all my brass ordered and plenty of cutoff wheels It might be harder to cut, but soldering the joints saves time as the solder flows around the joint, filling the areas. Can I assume the graph paper squares are 1/4 inch? I think your window frame proves the need for a 1/16 photo etched sheet of promod/drag parts. Window frames, Steering wheels, rotors, rear axle plates x2 for thickness, door levers, etc, etc. This is all big $$$ model building. There seems to be enough people here building 1/16th a have them made. You think you would have used them if they were availible? Even at $20 a sheet, if 50 were made, that's big money. It couldn't cost $1000 could it?
-
A great time to say "fantastic". As a new guy on this site, your build along with all the other 1/16th promods are inspirational. On the other hand...wheels, tires, hubs, struts, rear ends, engines, bodies, etc....my visa is burning up!!. Big $$$ to go fast
-
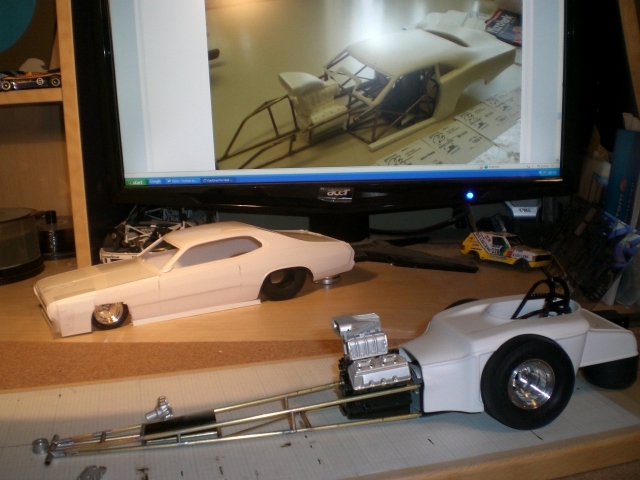
I know none of this is comp coupe stuff, but I'm having fun trying to see what works and what I want to do next. I figure it's my thread so if I mix things up a little it won't be someone elses thread I'm posting to. I think this Revellution body is 90% promod already. I 'm giving it a little more rake and moving the front wheels back to 112"

-
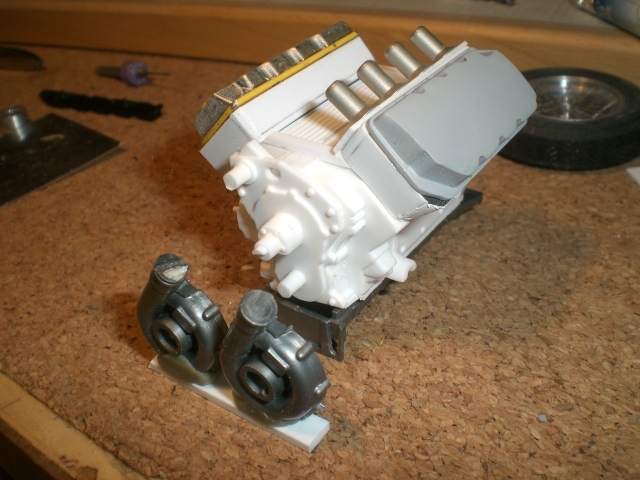
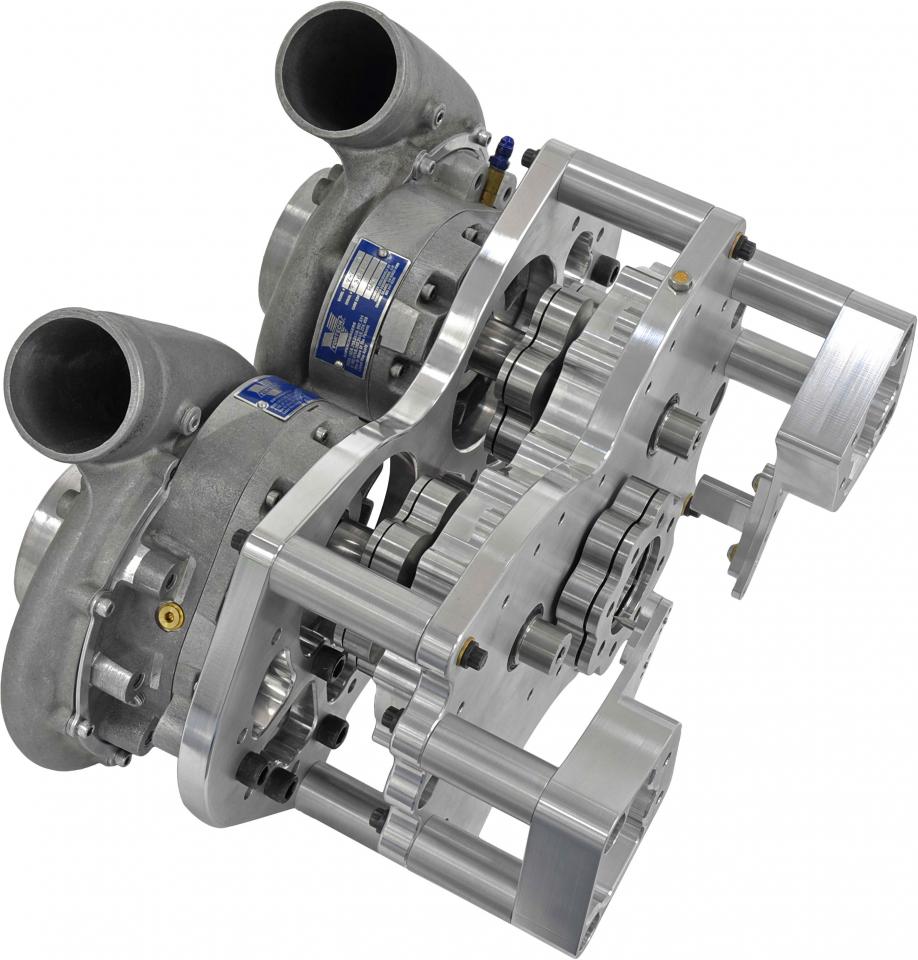
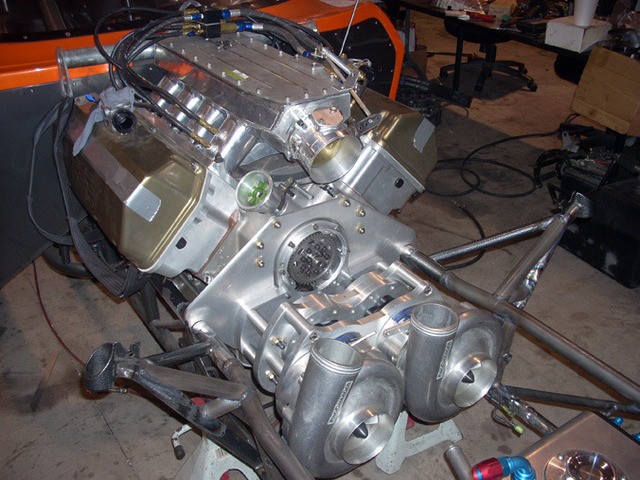
That's true...These came off a 1/12 renault F1 car. There, with their exhaust side they were turbo's. These will be gear driven superchargers if I can make them look good.
-
1/16 Scale Army Vega Funny Car - Finished 10/14/2018
jmpsebring replied to Mooneyzs's topic in WIP: Drag Racing Models
My decals are in perfect shape and your welcome to them. The blue isn't very bold, but that's just the color they were printed. I have alot of 1/16 stuff now and have been playing all last week. Still waiting for engines. I haven't bothered starting a new thread, just adding some shots to my comp coupe thread. This weekend I spent a good 24 hours trying to make a Sonny-type motor. Honestly....all of these PROMOD builds have shifted my desires! How can one not be inspired? This is one tubeframe-building group here. -
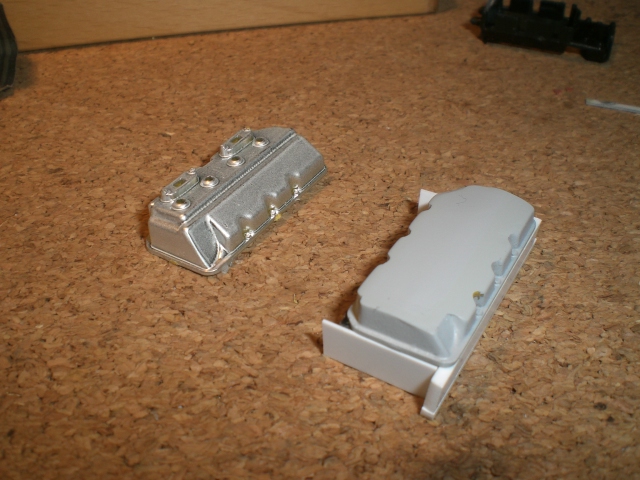
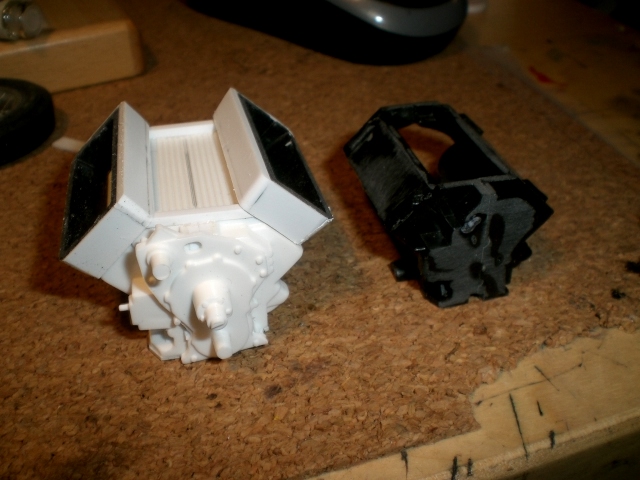
I'm always struck by the shear size and style of the Sonny's wide bore engines. I really like the valve covers. So I took the 1/16th funny car valve covers and cut them down. I filled them with epoxie putty and let dry. Shaped the cover with nailboards and put on a coat of primer to see if they looked the part. I was happy enough to keep right on going. I then added a .060 strip to widen the heads. Very thin end caps were glued on over ground down ends just to clean up the design. I took the funny cars block and widened it with two .060 strips of evergreen. I capped the top of the block making the head area of little bit wider. A couple of turbos have been temporarily set at their final angle with a bit of epoxie putty. The rest is just stuff to play with as the design continues. It's now a bigger more modern engine for sure. Nothings done...just getting some basic shapes together.
-
Look at this cool setup! A gear-driven twin turbo allows you to keep the headers simple and the intakes feeding the intake manifold from the front. It's different, and it would be tough to make exact, but not real hard to make it capture the look. Of course one would need a couple turbo's.....
-
Just untill I get some M&H slicks! I'm keeping the coupe as an old car. Just HAD to put some wheels in place. I think the slicks will barely stick out from the sides. Wire wheels are on their way for the front.
-
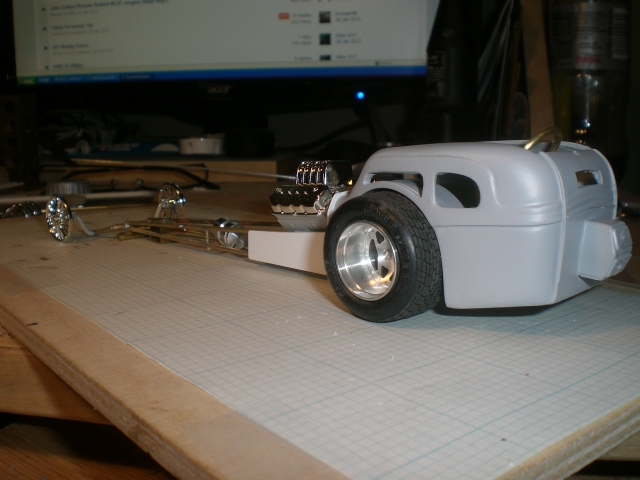
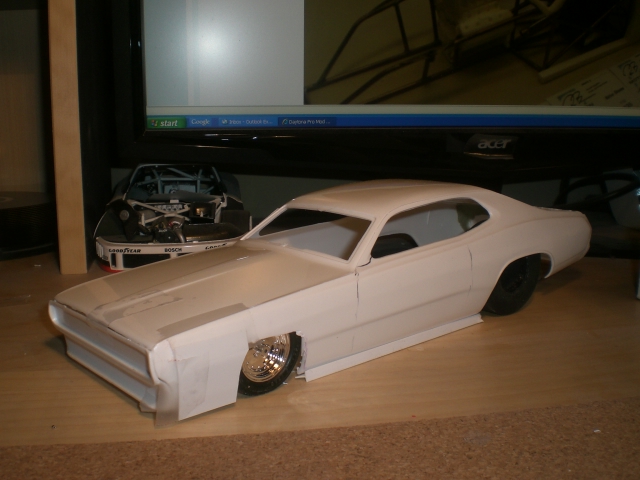
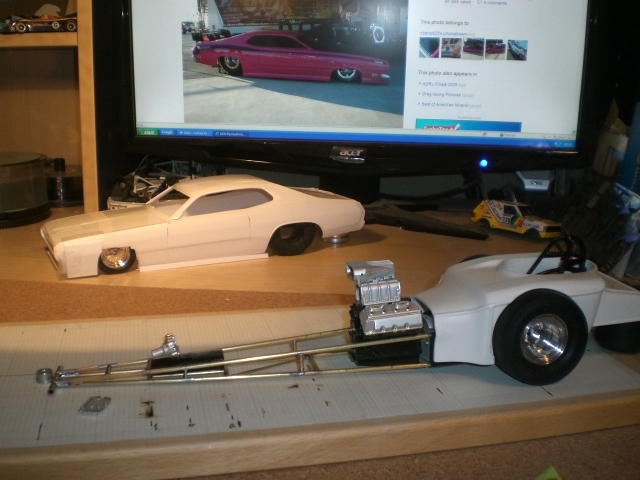
Sometimes work..or toys in the mail.. stop progress altgether. Every day this week something came in the mail. All of it was 1/16th car stuff. My dragster came in the mail so I cut the frame up. I can ruin a kit in seconds!! The wheels came in and they were stunning. The next day a Revellution funny car arrived and all I could see in that body was a PROMOD Duster in the rough. Shaved off the rear spoiler, and moved the front wheels back to 112" . This might become a full blown model. I saw a front gear driven twin turbo setup online. It will be a cool combo. The 1/16th dragster with the comp resin 23T body is taking shape quickly. I built the frame today, and of course did another mockup for visual stimulation. I swear I made no engine noises.
-
Jim, if it wasn't for your products and an aftermarket engine, I would not have jumped into 1/16th at all. My kit should be here Mon-tue and I can't wait to see my hubs and wheels from you.!!!! Remember to bill me that 2nd charge for the added front wheels.
-
Thanks!! One jumps back in only to find some of the old stuff long gone. I'll keep an eye on ebay for the resin bods. Nice project, I'm beginning to appreciate this older stuff. When I was younger, i just wanted the newest, fastest, cars out there.
-
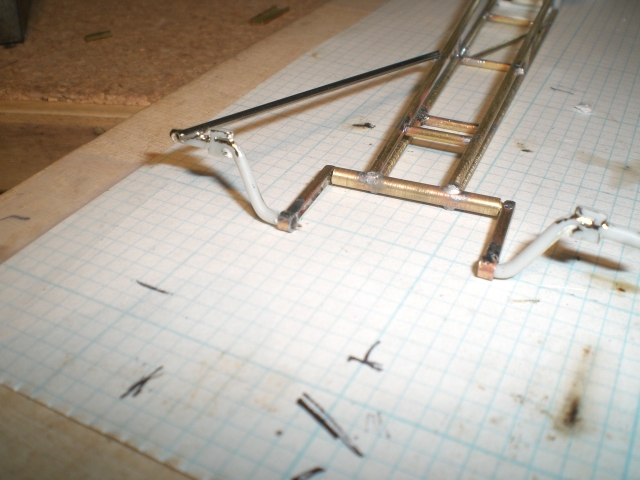
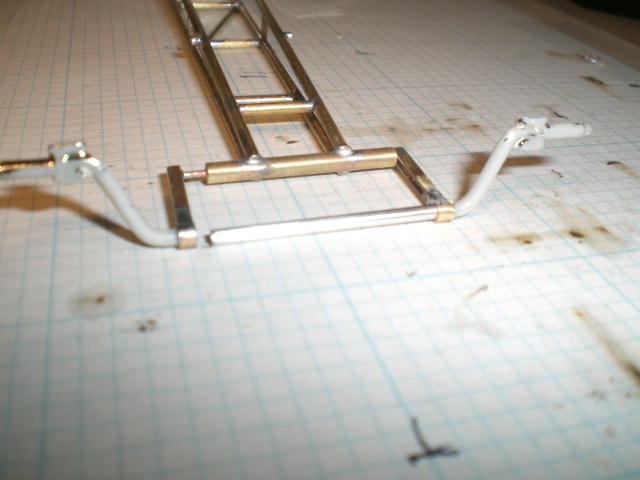
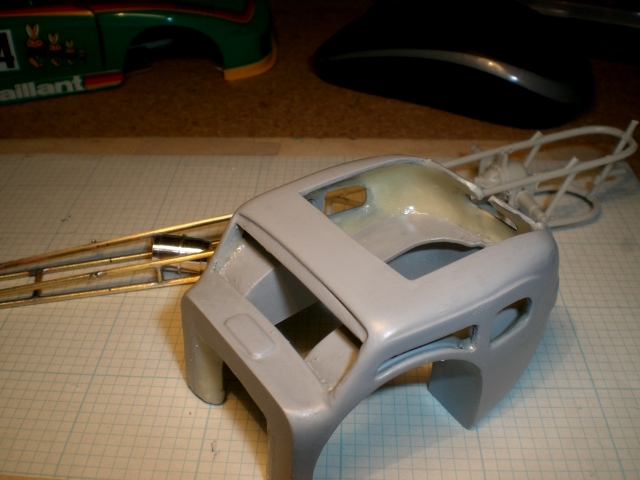
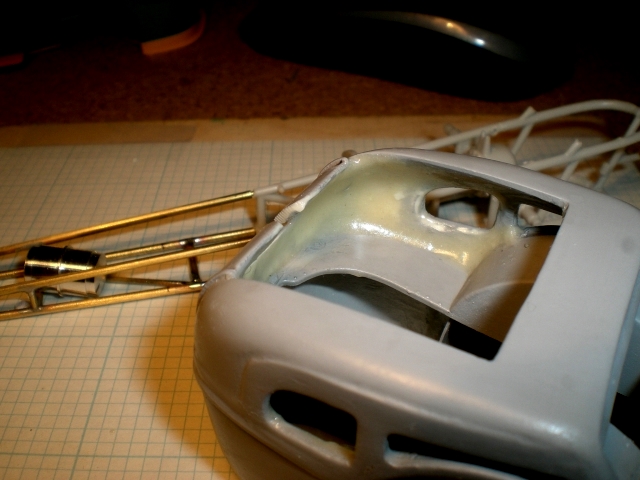
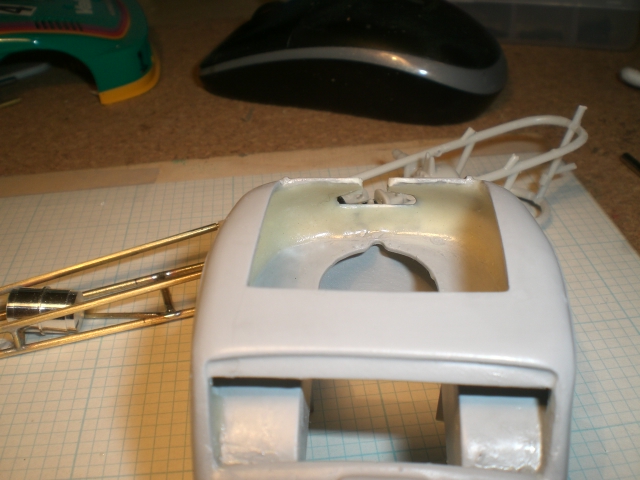
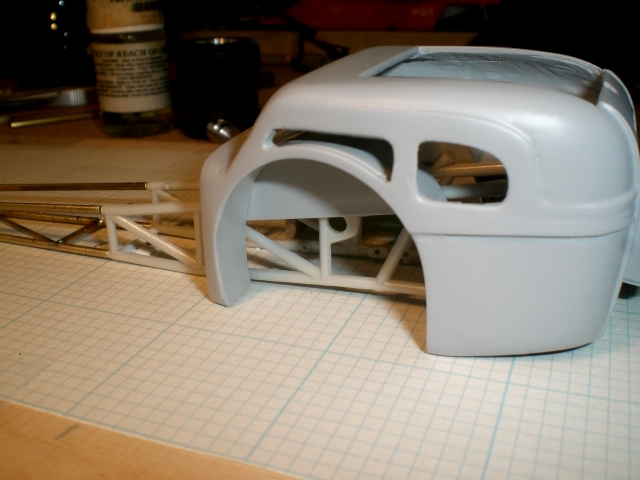
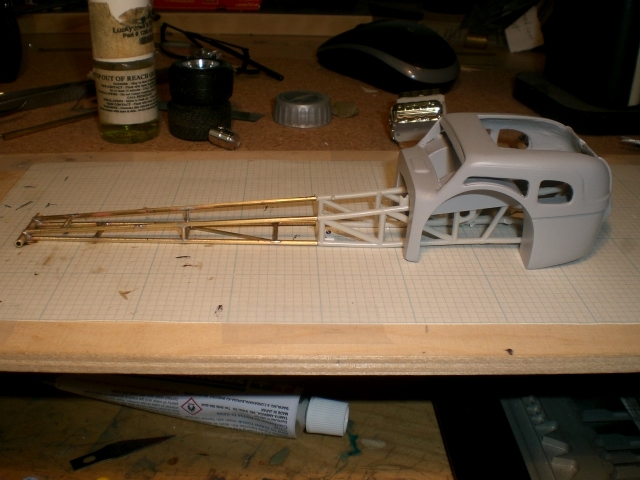
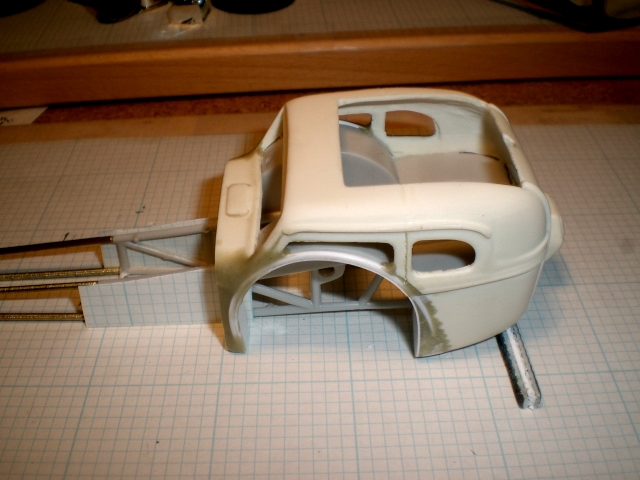
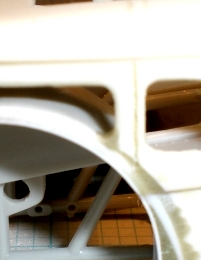
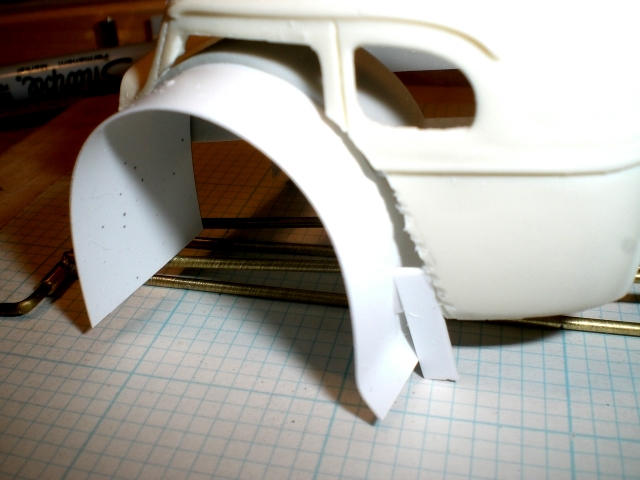
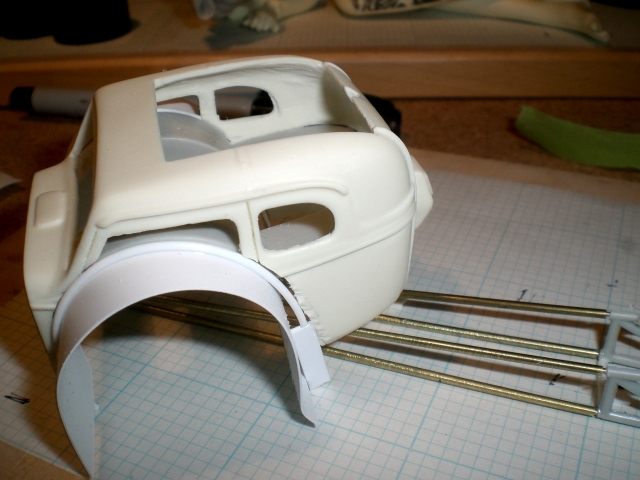
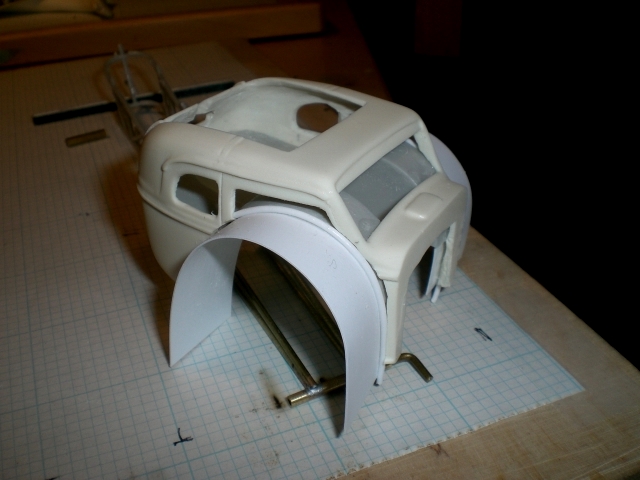
I started on the front suspension with no plan at all. The kit's axle was held together with the bodywork, not really attached to the frame. The part itself was horrible. The middle section would never look as round and polished as it should. I tried bending an axle, etc, with no great breakthrough. Then I decided to just use the ends. I cut a couple pieces of brass 3/32nds tubing and soldered them to the end of the fork. I piece of 1/16th alum tubing held them in alignment while soldering with no fear of soldering the tubes together. A piece of tubing will be kept in place with hidden joints, when the parts are finally installed. The outer parts are glued forever. It will allow me to build the radius rods, steering ,etc. The next big problem was the inside of the shell. It was rough from chopping and grinding and was pretty poor to begin with. I smoothed it out some and brought out a marvelous product. Apoxie Paste, is a must for blending shapes together. It's the worse product ever to apply, being an extremely sticky, gooey paste. I put it in place then cleaned my hands and the car body surface. Once you wet your fingers with their solvent, the top surface melts away allowing you to push and contour the paste into a perfect smooth surface. I also used a wet Q-tip to shape the paste. Once finished, the paste appears continues to pull back and recess itself into the corners (i think) while it dries. Or it's just getting translucent so it appears to be shrinking. Anyway the stuff is like magic. The photo's are right after i finished smoothing out the paste and a final wipedown of the surface.
-
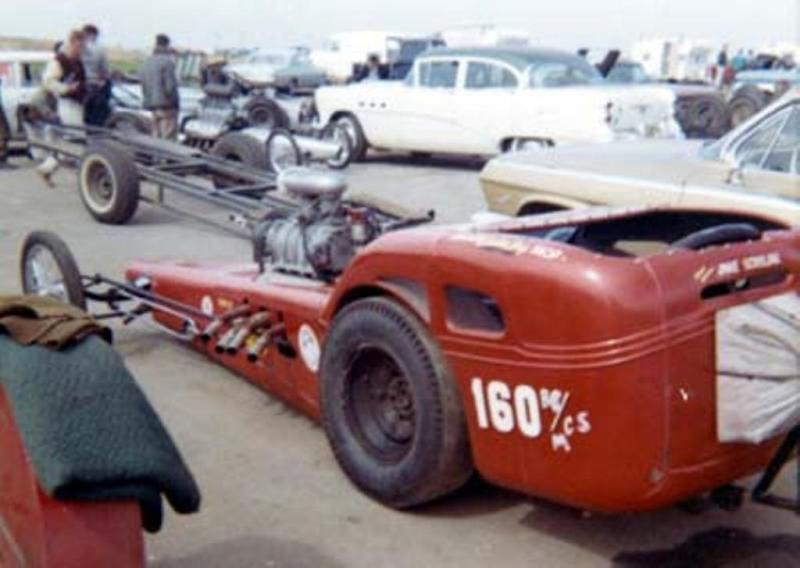
I haven't built a drag car in decades. But this photo is what did it. Thanks for the kind words!
-
More 1/16th stuff arriving! But I don't have this body in 1/16th so this will have to do. This doesn't have to be any super detailed build. Just having fun and it's capturing the look I am striving for. I started on the forward frame this morning. While it's harder to cut brass, it's way easier to allow solder to fill and contour around a joint. I'm trying to get in the habit of pre-sanding all tubes before cutting and installing. It's so much faster than cleaning up after the build. The Flintstone body is what it is. I sanded off the drip rail over the windows because it was poorly finished. I'm almost to the point where the rough body work is done. Some internal smoothing, exterior sanding and body mounts come next. I need some old school M&H slick tires. I'm out of my element here. I had a set in the 60's! They are gone now. I did find an aluminum moon tank. Always wanted one as a broke teen....but never bought one. Any aftermarket making a good resin slick? Every time I look at this, all I see is red color on a black frame. If this is an old car, I guess there wasn't alot of choice back then.
-
1/25 Revell Tony Nancy 22 Jr Dragster/Roadster
jmpsebring replied to regular guy's topic in Car Kit News & Reviews
What a fantastic reference. Thanks. -
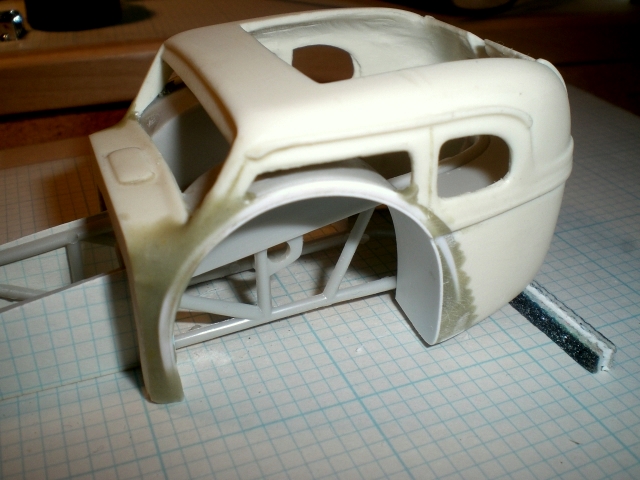
Once filled and dried, I cut off the excess, then ground down the outside edge to tidy things up. A little careful sanding and then more APOXIE around the A-pillar and down the front of the body. This stuff feathers out perfectly with their alcohol-based thinner. Also vital to the look was rounding out the bottom corners of the side windows. Visually it makes the modifications look planned & finished instead of just assaulted!
-
More 1/16 Pro Tech Parts
jmpsebring replied to Pro Tech's topic in Car Aftermarket / Resin / 3D Printed
Can one order items by phone or online? -
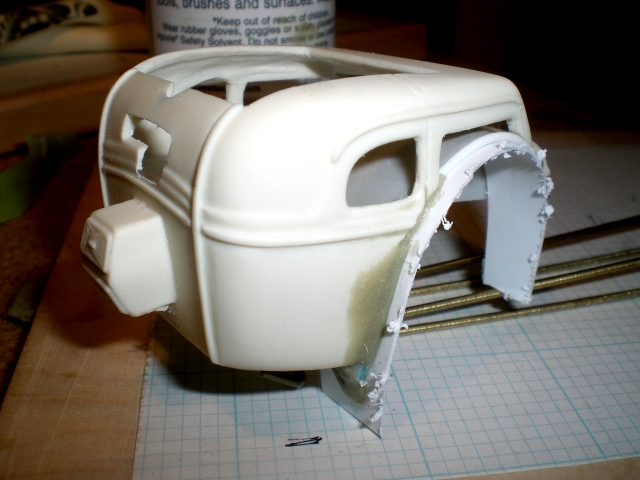
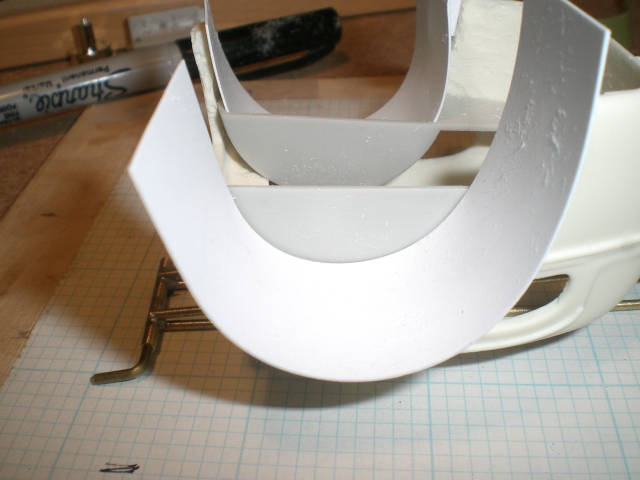
Thanks for the heads up. I will slow down a little until I get some of my 1/16 stuff in hand. I did get my 1/16 Comp resins body in today!!! Very nice casting, nice master, I'm very happy with the product. Back to this tiny model. I know it's looking rough right now. It's about to get worse. I'm not saying this is the best way to do this...just another way to do this. We all have something to offer. I cut a couple of strips and pre-bent them over a 1/2" rod to 'help' it conform to the inside wheelwell. They were glued in place. One side was pretty close..the other way off. I bridged the gap with a piece of plastic. I use a fantastic product from AVES Apoxie called Apoxie Sculpt. It's basically A/B epoxie putty. It's a little like soft warm clay. Not sticky to your fingers and easy to mold in and around areas. I bridged the gaps all around the body and wheelwells and let it dry for a couple hours. It was important to get the new bottom side window line equal in thickness. Also the edge is not square, it's rounded. I used a piece of rod to define the path and create the new wheelwell's outer edge. I got lucky. The gap just happen to be wide enough to countersink the rod to the depth of the bodies outter surface..... Ya following that!!??