

PatW
-
Posts
4,530 -
Joined
-
Last visited
Content Type
Profiles
Forums
Events
Gallery
Posts posted by PatW
-
-
Thanks guys. Yes I fitted the strut brace just before the bonnet went on.

-
Thanks guys for your comments and advice.
Yes Roy they are the kit decals and yes the white circle backing on the numbers is a bit opaque!
I can put some more pics on showing the brace bars at the end of the build. I'll do that in a couple of weeks when I'm back from the Panama Canal Cruise that I'm just starting!
-
Very nice indeed Douglas, as a WRC watcher for some years, that is very realistic well done.
-
Just finished this on previous thread.....................
-
Thanks Martin The Mustang kit is a good one. Yes the decal backing is particularly thick and takes a lot of soaking.
And also the cabin kit works too! As you say it keep glue spots off the table, and I can also spray paint without any aggro!
I've also got this on the shelf, still in plastic wrap, so not opened/washed yet...................
That's for another day!
-
Cheers Andre, yes both are nice builds, The Mustang and the cabin!
I can imagine Toronto is a bit cool this time of year, temperature wise? Our eldest son has recently moved from Manitoba to Alberta. Unfortunately the authorities are messing about with re-newing his work permit, as regional offices have closed through cost-cutting, he only has one office in Vancouver to request a new one but that's over 18 months ago and he can't work in the meantime!
-
Thanks guys for your comments.
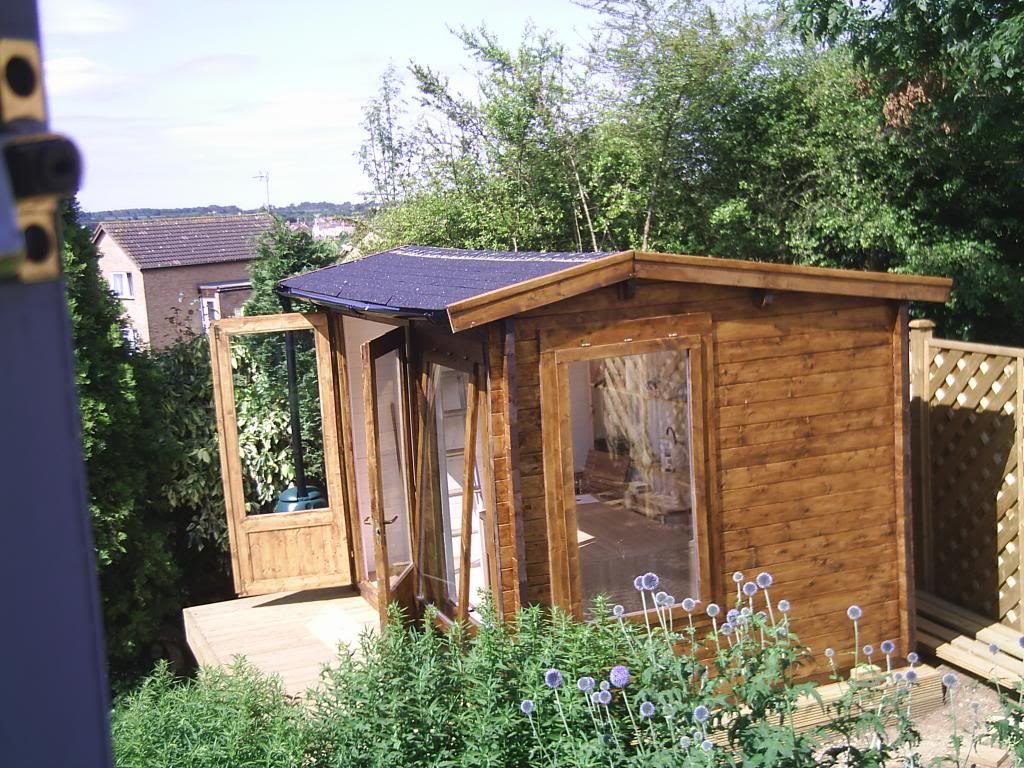
Yes Joe that's where I build/spray/ with shelves/lights/heating. After 40 years of marriage my wife wanted the dining room table back, something to do with family coming over for Christmas Day dinner!
We don't have basements here in the UK. Well you do if you have £1m+
To build on the back of the garage as we are on a sloping site/split level I put out four tenders and all came back around £40,000!
So we went to a factory about 30 miles away who make various designs of garden buildings/conservatories etc. So I chose one about the same size of room I wanted, in double width logs, in the sale it was, with electrics,insulation, all nuts, bolts, screws, hinges, flooring, roof shingles and double glazing (standard on all buildings) £2,400! Slightly less than a brick built room. It took me and my wife one evening to put it together, one day to paint it with the oil based stain supplied and one day to fit and hang the doors and windows. Two hours for an electrician friend to hook up the electrics to the house in armoured cable (so I don't electricute myself digging the garden) and hey presto ready to go.
-
Well I'm back from the cabin, in our small back garden........
That was six years ago just after we finished building it!
And the outcome was the final decals...........................
So another build finished!
-
That's it for now, I just off out into my cabin to finish off the decals!
-
Oops!
PE filler cap.
And more.....................
-
And a few more...................
The vented rear screen...........
And, yes a few more...............
Just a few more.................
-
And more...............
And more...............
-
OK Joe The Build up!
And more...............................
-
Thanks guys, wow I didn't think it would cause a stir.
Rex there are side scoops in the kit, but as you say they may not have been a factory fitment, but still look good in place.
Carl, after 50 years of building, I've started foiling. I think I realised that my attempts at painting around windows were pretty rubbish and the plumbers tape comes in handy! It's slightly thicker but stronger than BMF.
Joe I'll try and put some build pics on.
-
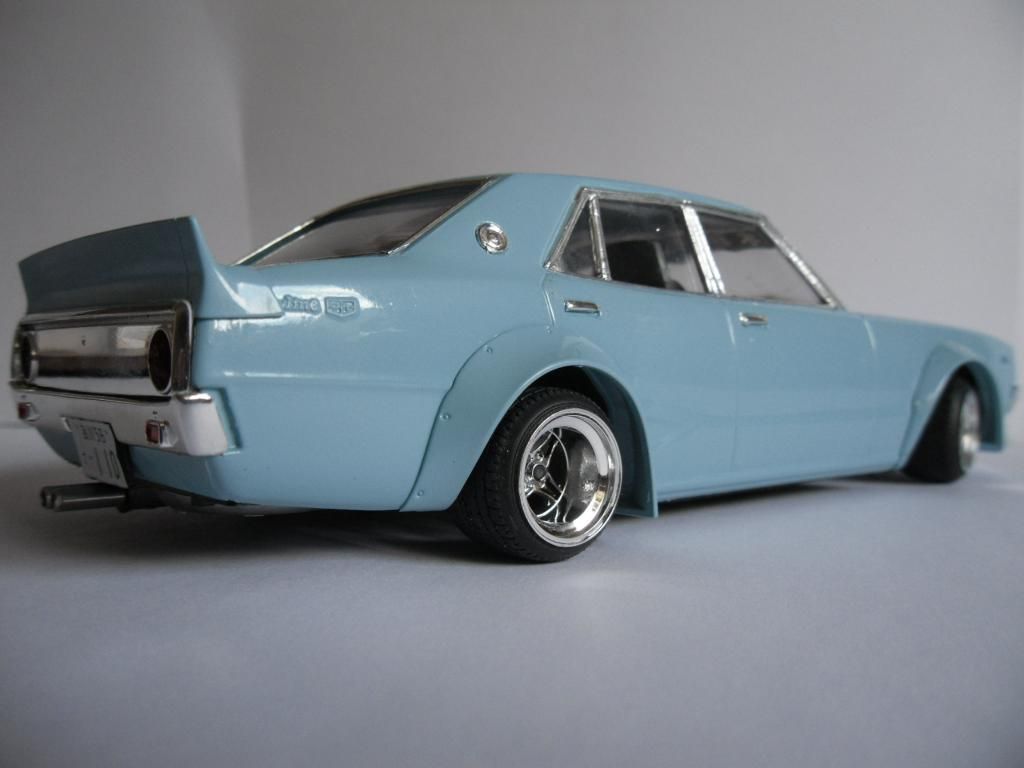
I started this a few days ago after finishing an '89 Grand Champion and waiting to go on hols.
An easy build, I've added engine wiring, foiling and alloy exhaust tips.
The decals are on heavy backing paper and reluctant to come away in warm water. Also I fitted a PE filler cap and the instructions ought to mention fitting this after decalling the body stripes! So I'll wait for them to dry and trim around the filler.
1st pic shows body just fitted........................
Door handles foiled................And the first decals laid up.................
I hope to get the parts sponsors, tyres and number decals on tomorrow to finish.
-
Cheers Jonathan. I'm half way through a Monogram Shelby 350 GT350R, and hope to finish that soon.
-
Thanks Clayton, nice kit and thanks also for the info on changing the header.
-
That's OK Derek, no probs.
No one seems to have spotted my deliberate mistake on the header of this thread..............................I've put the vehicle as an '86 when it's an '89!!
I've tried to change the heading but don't know how?
-
Cheers Leslie.
-
Yes Danno your so right!
-
Just brilliant!
-
Hi Derek I've been out to the cabin this morning and sorted the front side markers. I foiled them first and then painted them with Humbrol Clear Orange, although in the photo below it might look red it's orange!..............................
Now I can start on a Monogram Shelby 350 GT Mustang.
-
Thanks guys. Yes Derek, I left those on, the kit instructions suggest you take those off. I was going to paint them orange just as marker lights, or foil them but forgot both!
I must now try to foil the scripts, that's my next target.
-
And here they are..................
Now over to the shelves to look for the next build.


Aoshima C110 KenMeri Grand Champion '86
in Model Cars
Posted
Yes Joe, the BMF is way too thin for me, so I tried something else! And it's way cheaper too for a 5 metre roll.