
PatW
-
Posts
4,522 -
Joined
-
Last visited
Content Type
Profiles
Forums
Events
Gallery
Posts posted by PatW
-
-
And the last two..............................

And last but not least.........
-
And a few more...........
And just a couple more.................
-
This is my first venture into a roof chop.
I chose a modern car thinking that it would be a reasonably easy task!
It's not perfect by any means but we've all got to start somewhere.
The kit...........
The interior........................
And a few more..................
-
Well done sir! Superb paint in a superb colour.
-
Thanks Justin on how it looks. I personally don't use the word diecast. Because they are too heavy, too expensive and are already finished.
-
WOW! Shane what a fantastic job you've done here. I've got a Focus and bought the Colorado Decals to depict one of Ken's earlier cars.
-
Thanks guys, much appreciated.
-
That's a good idea jbwelda! I have a tube of bath seal that comes out soft and then hardens over an hour or so.
That's just right to try as you suggested, after putting a very thin piece of plasticard under the front, just enough to keep it off the ground!
-
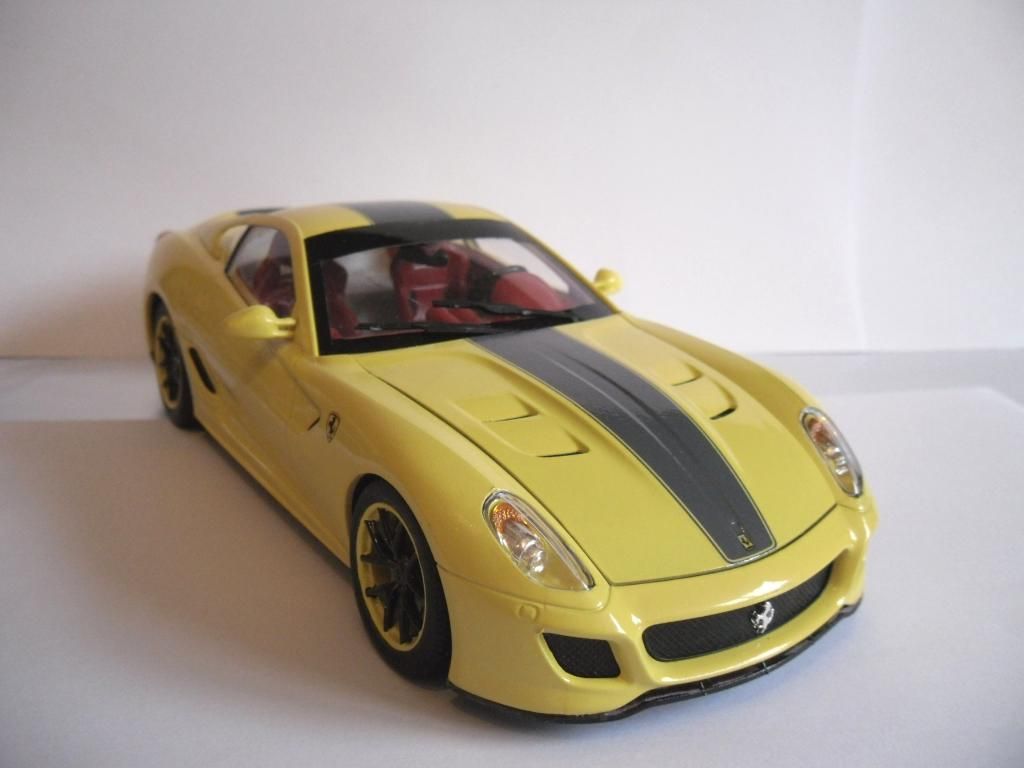
I live near the Silverstone race circuit in the UK and they have a few classic and later Ferrari models turning up at various meetings and most are in red, so I have always fancied a yellow one.
Yes the bonnet takes a bit of getting to close, but when you try and fit the wipers afterwards it's even worse, bending them this way and that to lay on the screen and shut the bonnet at the same time (one day)
Thanks for the comments they are well appreciated.
Yes beeRS it's one of the latest kits from Revell Germany.
-
This was a Christmas gift from my son Matt, so I thought it has to be one of the first builds of 2015............
Right now I must get on with my 'New' Mini roof chop!
-
Yes I certainly hope it does, there are a lot of box-art images that mis-lead the buyer. When you start to build you quickly realise that the stance is too high!
-
Finished this late last year, can't remember whether I put it on here!
-
I'm in the UK and bought various bits last year, with a very quick turnaround. Good quality as well.
-
Yes I've waited a few months for this, to me in the UK from HLJ.................
It's washed ready to build. After I finish my son's Christmas present to me, a Bright Yellow Ferrari 599 GTO!
-
I built an old Heller kit last year......................
-
Thanks to Paul & Bernard for great pics!
-
I went to our local DIY superstore and bought two different sizes of white plumbing plastic tubing. I'd already bought two plastic kitchen cutting boards from our supermarket to use on my model table.
I cut the larger diameter tube in two inch lengths for tools and brushes and shorter pieces of smaller diameter tube for glue bottles, tweezers, Microsol etc.
The taller tubes were stuck onto the long side of one the cutting board at the back and the shorter ones at the front, so that all tools could be seen and put back where they belong at the end of each day.
I also use womens nail boards for sanding and cotton swabs for various jobs.
-
Two above recently finished.
I'm presently doing a 'New' Mini build with a top chop.
-
I've been looking for sometime at aerosans, vehicles for crossing ice or snow with small four cylinder or radial aero engines with a propeller for forward thrust.....................
The Russians have been prime movers in building these since the 1920's onwards.
This is a model of one used during the second World War used on the Russian Front................
-
Having waited a few months this came from HLJ in Japan it came today.....................
I'll get to it once I've finished the kit my youngest son gave me for Christmas. A bright yellow Ferrari 599 GTO!
-
Superb colour! It's a great shame we can't get HOK or Testors paints in the UK.
-
Nice one, good to see a British WRC car on the site! Looks good well done. I built an earlier one with the blue Ford decals. Any others in the pipeline like the Mini WRC?
-
No probs lordairguitar and highway, they cleaned up very well, now washed and ready for paint and use.
-
Thanks guys, yes very enjoyable year. I've finished the Tamiya Mini Cooper 'S' circuit racer and I've got a Ferrari 599 GTO under paint at present. So nearly two for the new year!


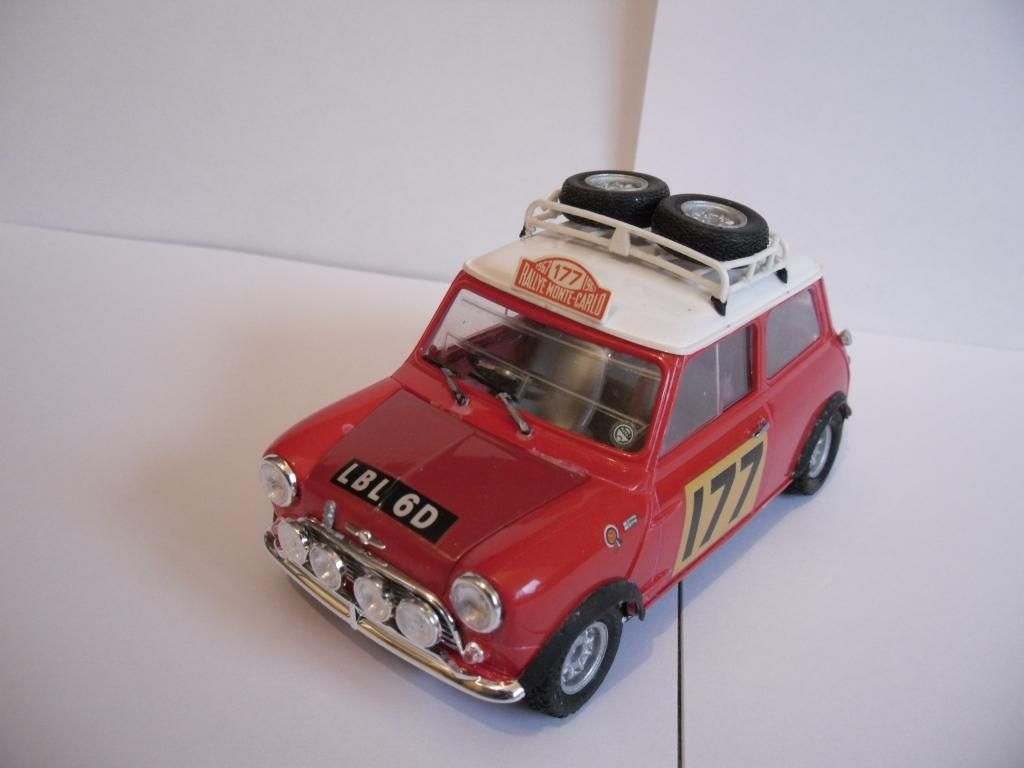


Revell Mini Cooper Top Chop
in Model Cars
Posted
Thanks Carl.