GoatGuy
-
Posts
1,483 -
Joined
-
Last visited
Content Type
Profiles
Forums
Events
Gallery
Everything posted by GoatGuy
-
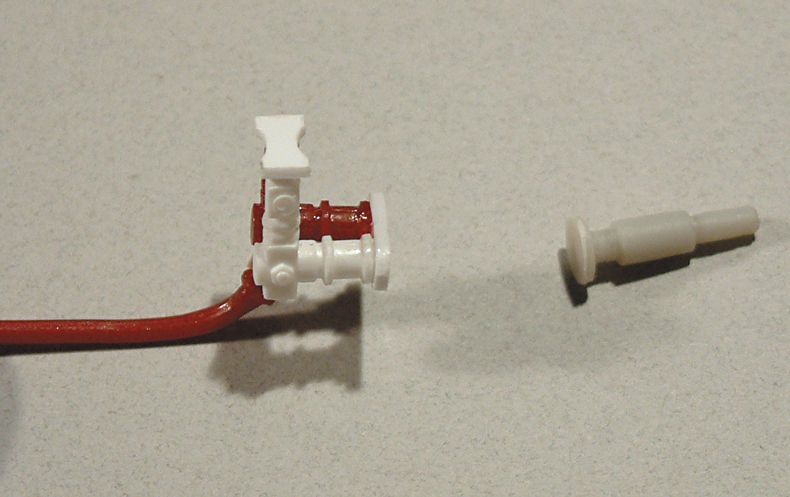
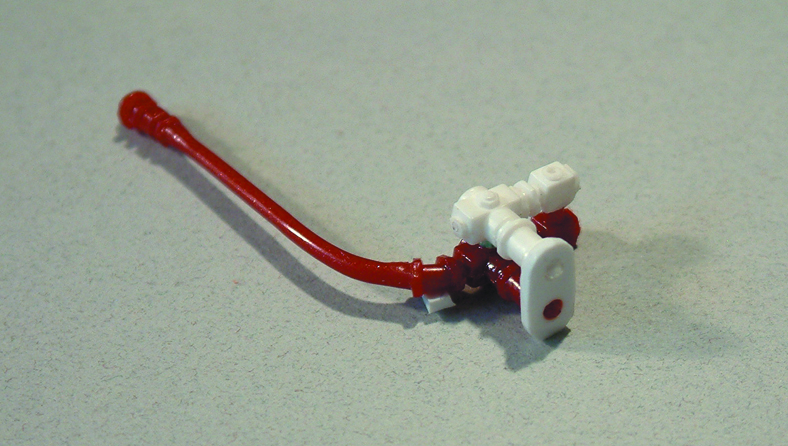
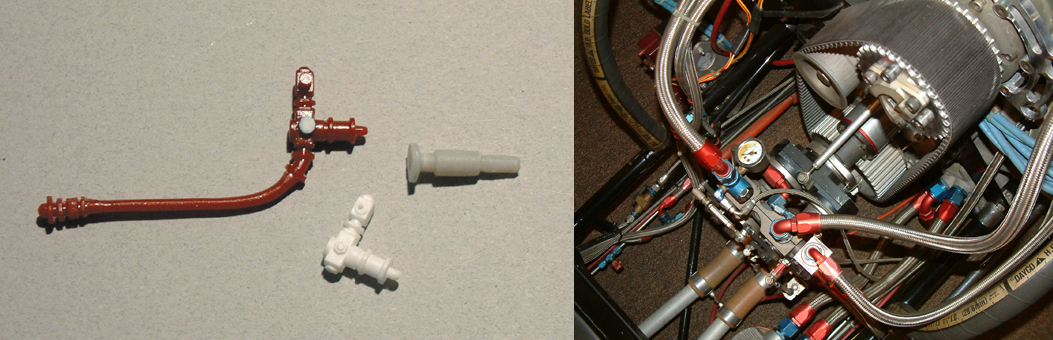
More progress made on the fuel pumps.

-
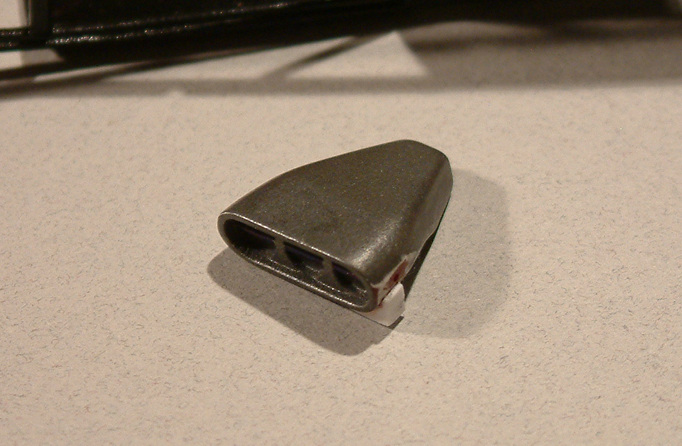
Here is the fuel pump bracket, for lack of a better word. It holds both fuel pumps. Only one pump came with the kit. I found another and will glue them together and add another line to the white one. The bracket was made from a piece of sprue turned on my "Kentucky lathe" - the ol' Black & Decker held in the vise.
-

1-8 scale 69 camaro pro mod (mike hill's car)
GoatGuy replied to comp1839's topic in WIP: Drag Racing Models
This is the sort of build that should be on video from day one. That's something I could watch over and over. Enjoy the days off. -
First Race Car 55 Chevy Pro Sportsman
GoatGuy replied to SteelyEd's topic in WIP: Drag Racing Models
Excellent job. Excellent detail. I agree with Chris- Charlie has the best. -
1/16 Scale Army Vega Funny Car - Finished 10/14/2018
GoatGuy replied to Mooneyzs's topic in WIP: Drag Racing Models
Chris, is that stuff a type of acid that oxidizes the brass? Maybe there is something else in the metal besides brass that is making it react with the results you're getting. I've never used it. Just guessing. -
John it looks GREAT. I'm disappointed that it will be done soon. Wish I could see it in person.
-
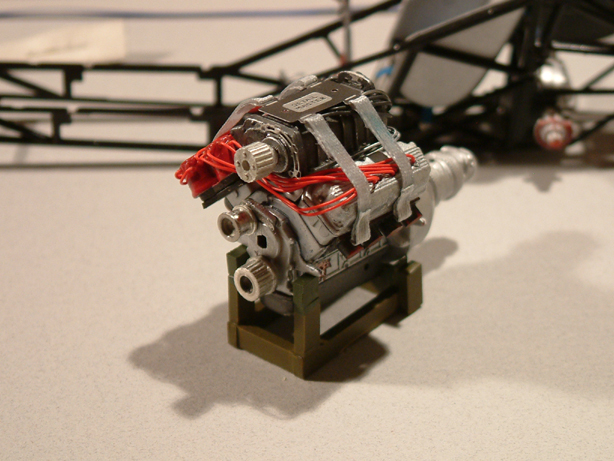
Richard that's good to know. Makes me feel better. Dave- thanks, coming from one of the Masters. I should have some more pics by this weekend. I put boltheads on the access panel of the bell housing and lost one already. I should have put them on at the end, after all of the handling was done. Live and learn. I showed this motor to Bruce Larson the last time I was there and pointed out the photoetch starter bracket above the top pulley. He took the motor out to the Sentry Olds and had a big smile on his face. Said it looked really good. Made me feel good. Hopefully the barrel valve and fuel lines will turn out ok. Thanks for the encouragement.
-
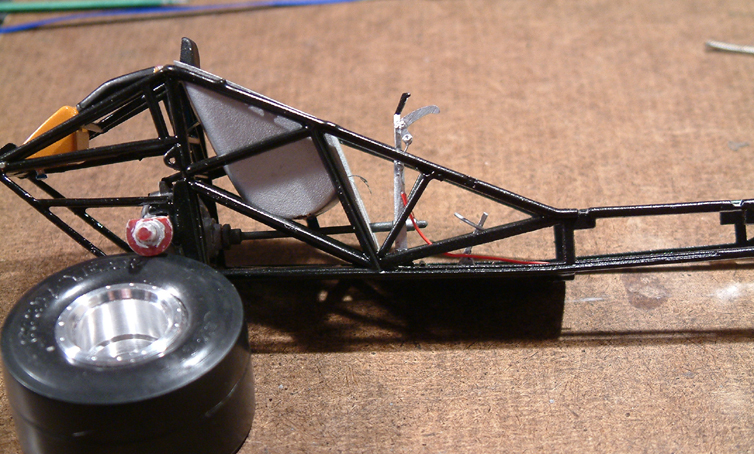
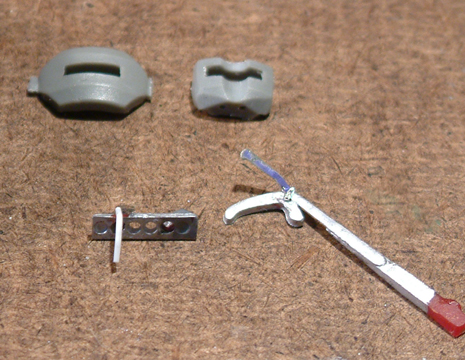
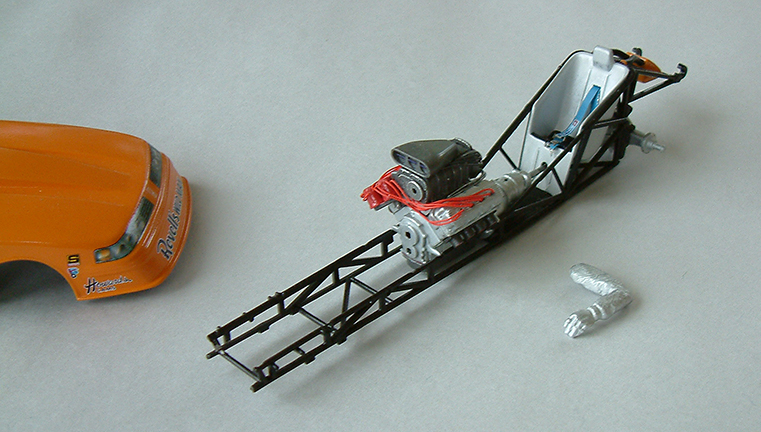
Here is one of the brake lever attached with a cable for the extinguisher that I will add to later so the cable reaches the front of the chassis. Also rear wheels from Micro Nitro. I'm using the kit front wheels because I already had the center section "whittled" out to fit the rotors. The rest of the harness will be added this week. It is obvious that it is not there yet in this pic.
-
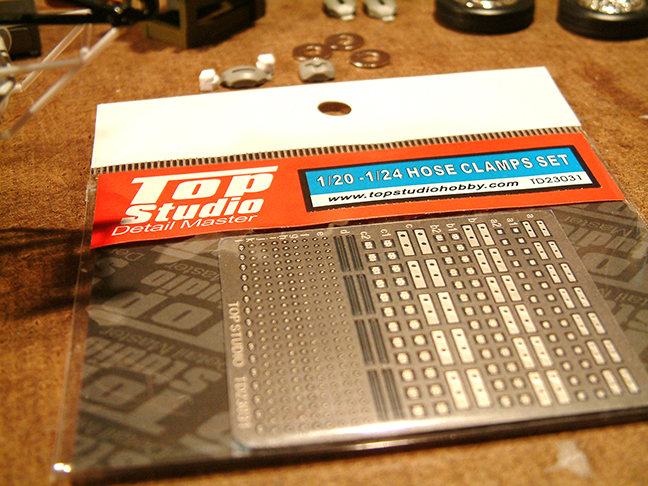
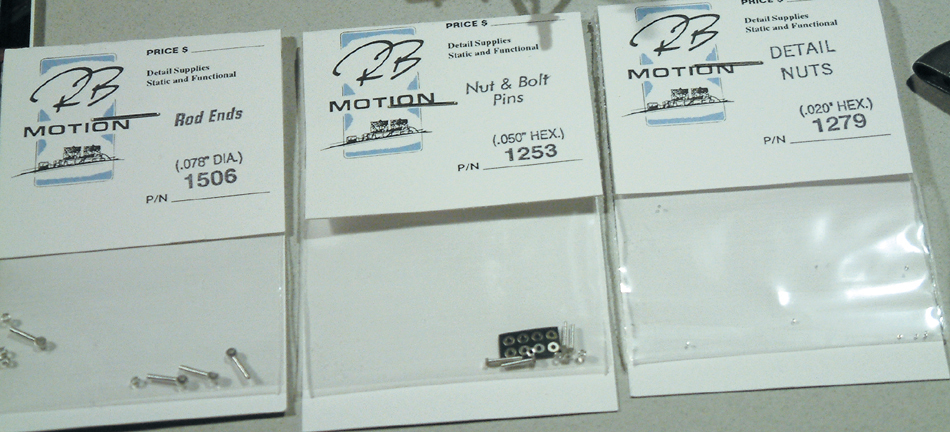
I have parts from RB Motion for the wheelie bar, levers from futurattraction, and hose clamps. Here you can see the bracket added to the rearend for the parachute lines, and detail added to the brake lever before final painting and attaching.
-
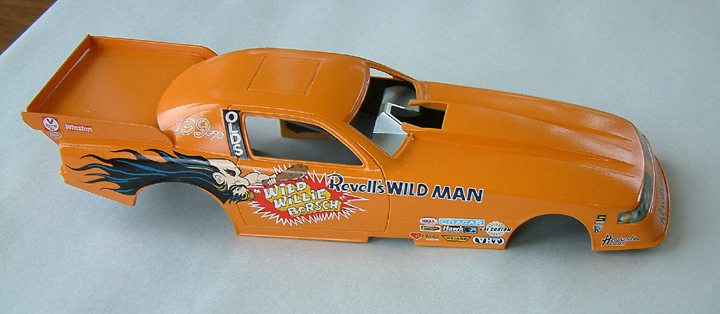
Thanks John. The paint is Model Master Grabber Orange lacquer.
-
http://www.flickr.com/photos/studio_782/7270820462/ http://www.flickr.com/photos/studio_782/7464270910/ The brake calipers from Strada that I filed down, painted, and attached to washers from the hardware store that were a great match for the solid rotors used on the '89 cars. Not sure why the image doesn't show up. Just the link. Thanks for looking.
-
A few more........ http://www.flickr.co...782/7270838006/ http://www.flickr.co...782/7270821666/ http://www.flickr.co...782/7270840684/ I already had the frame painted and then added to the rear part of it after seeing the Sentry Olds car in person. I took a piece of 2x8, drilled a hole in it for the axle to rest in, and added the frame. You can also see the drain plug in the puke tank. Also a pic of the fuel tank with the hold-down strap made from a soda can.
-
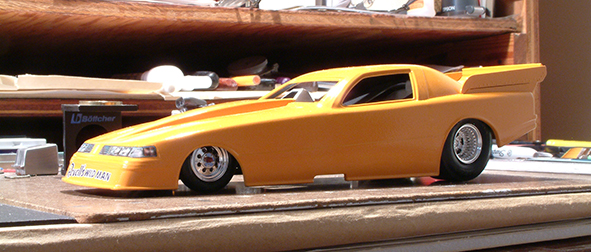
http://www.flickr.com/photos/studio_782/7359206176/I started this build at least a year ago, starting with a Bruce Larson Sentry Olds kit. It is a fictitous build of what Wild Willie might have driven in 1989. My inspiration started with an article in Drag Racing USA Oct '73. There is an article in there about Willie's Charger funny car. I emailed the photographer that took the pics and he said he did not have any more color photos of the car. Just what was in the magazine. I do not have the experience or talent that many of you have, so I'm learning as I go and especially learning from this forum of people like John Teresi, Romell, Tyrone, Rickart, Comp 1839, Clay Kemp, etc. This is a WIP. I know, I know, I failed to fill in the door line before painting. Thanks for looking.
-
John is working from photos that I took of the real car. There are pics posted in the 1:1 section. John- are you sure you didn't just sneak into Bruce's barn and take photos of his wheelie bars? Ha. I was wrong. The pics I posted are here in the Drag Racing Models forum.
-
More, more.................looks great.
-
Terrific work Charlie. The lighting in your photos really shows the gloss.
-
That's a great video Scott. I could watch it over and over.
-
Looks great John. The 1:1 car will be at the GM Natls in Carlisle, PA tomorrow and Saturday where Bruce will start it 2 or 3 times a day for the CackleFest. Keep up the awesome work John.
-
Fantastic. Your Dad's going to love it. I am honored that I could have a small part in your masterwork. Dave
-
........yes, what Comp said.
-
again, WOW.
-
1-8 scale 69 camaro pro mod (mike hill's car)
GoatGuy replied to comp1839's topic in WIP: Drag Racing Models
Hey Dave, any progress lately? Would love to see it. -
Where do you guys find the info/reference for all the details on how the 1:1 Pro Mods are built? I assume some of you have access to the real cars under construction?
-
California Charger F.E.D. update
GoatGuy replied to vintagedragfan's topic in WIP: Drag Racing Models
Stupendous, amazing...........all of our words can't express what we see you have done. Sorry Romell, I already gave him my address. Ha. Imagine the UPS man showing up at your door with this piece of art boxed up for you !!! -
Lookin' good. One of my favorite 1:1 cars.