Merkur XR4Ti
-
Posts
618 -
Joined
-
Last visited
Content Type
Profiles
Forums
Events
Gallery
Everything posted by Merkur XR4Ti
-
Right, they have Nascar licensing so they can use the "3" and the associated decals for Goodwrench, but IIRC the "Dale Earnhardt" trademark is owned by Theresa and would require additional licensing to acquire. And given how....challenging she can be in regards to business, going this way makes a lot of sense for Salvino's. I can scare up an Earnhardt name decal elsewhere, I'm sure.
-
Revell 1971 Boss 351 Mustang
Merkur XR4Ti replied to Justin Porter's topic in Car Kit News & Reviews
I looked at the decal sheet last night and there's a definite metallic appearance on the graphics so AS-12 won't work. I will experiment with TS-17 Aluminum and TS-76 Mica Silver to see if either one of those matches. -
Revell 1971 Boss 351 Mustang
Merkur XR4Ti replied to Justin Porter's topic in Car Kit News & Reviews
Thanks, Tim, that's a huge help. -
Revell 1971 Boss 351 Mustang
Merkur XR4Ti replied to Justin Porter's topic in Car Kit News & Reviews
Is the silver on the hood for the cars with silver accents flat or semi-gloss? It's very hard to tell from pictures. I think it's flat (was going to use Tamiya AS-12 Bare metal for it) but I am not sure. -
That model looks like the real thing and you called it a "palate cleanser." May all our palate cleansers be so stunning. Great work!! I love those little MGBs.
-
Does anyone know of a resin caster or printer doing the louvered hood for the '71 442? The ram air hood in the kit is very well done but I'm thinking of something a little bit different. Also, these decals seemed to be unique to the non-W-30 version of the car.
-
This is an old Jo-Han promo-style kit I bought as a built-up. I stripped it down and repainted and reassembled it. I also added wipers, mirrors, and ariels and houndstooth decals.

-
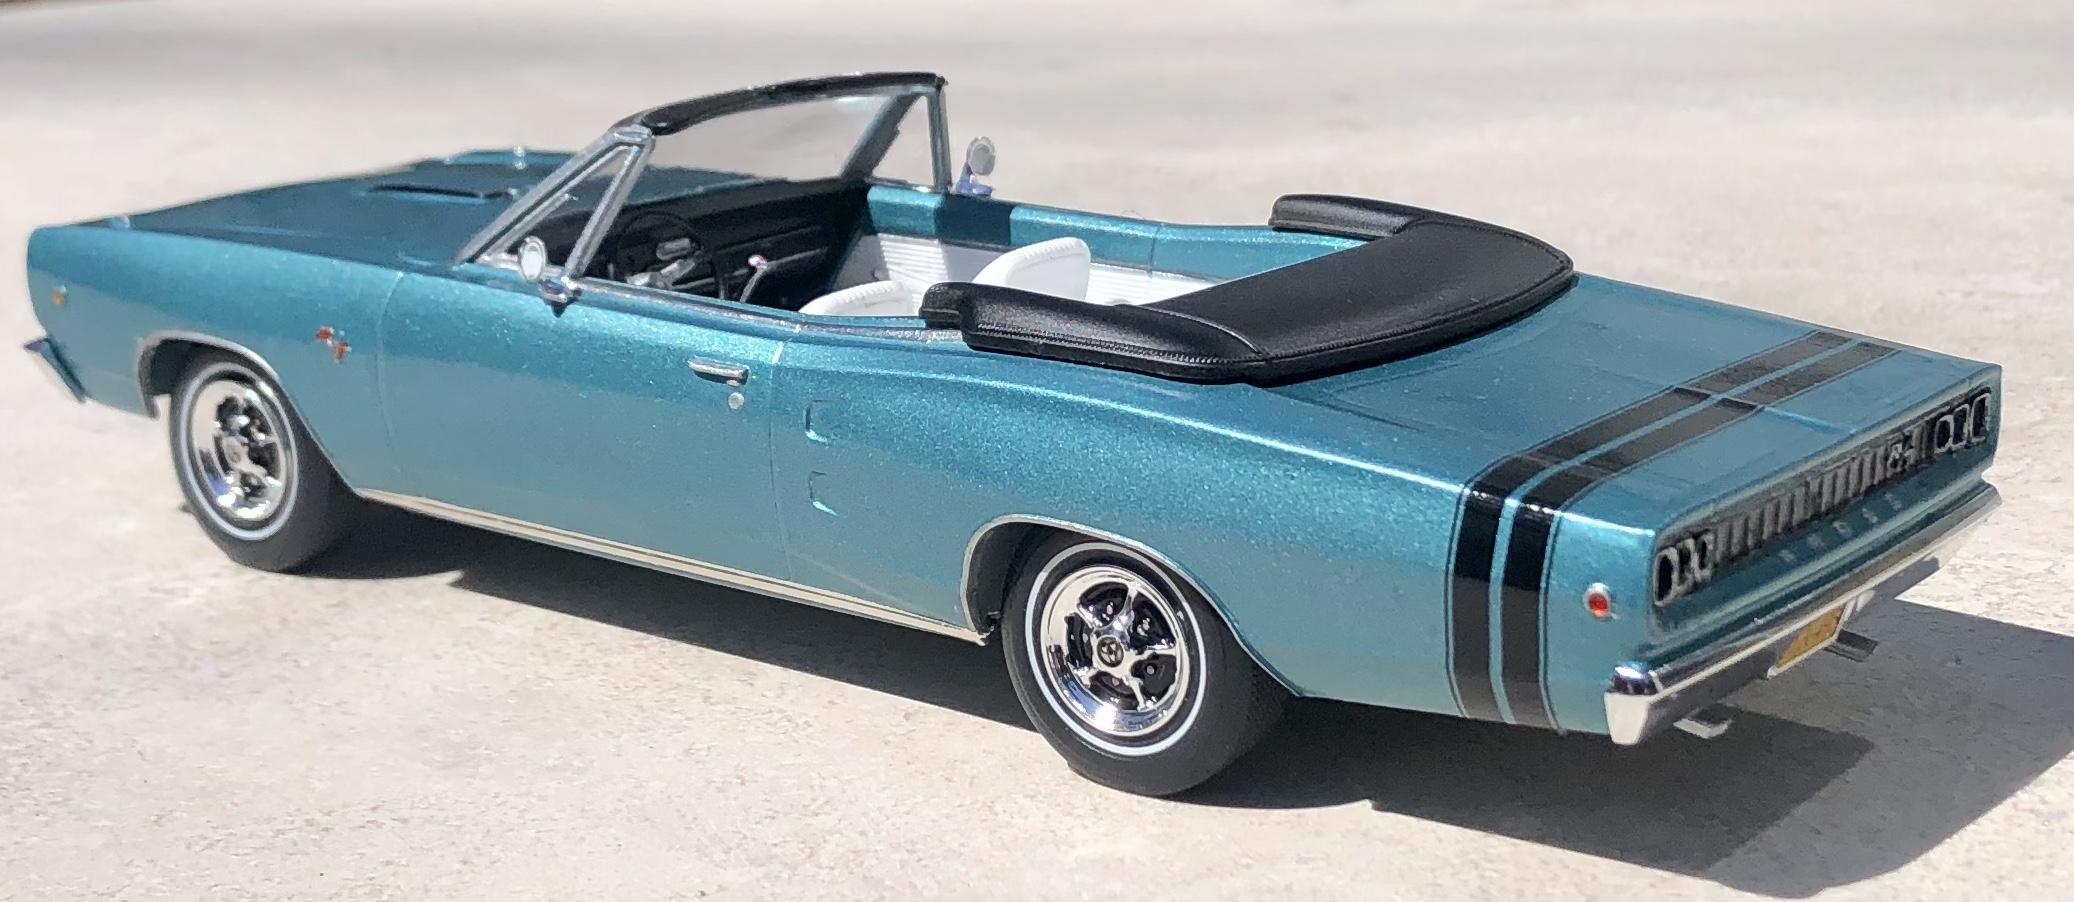
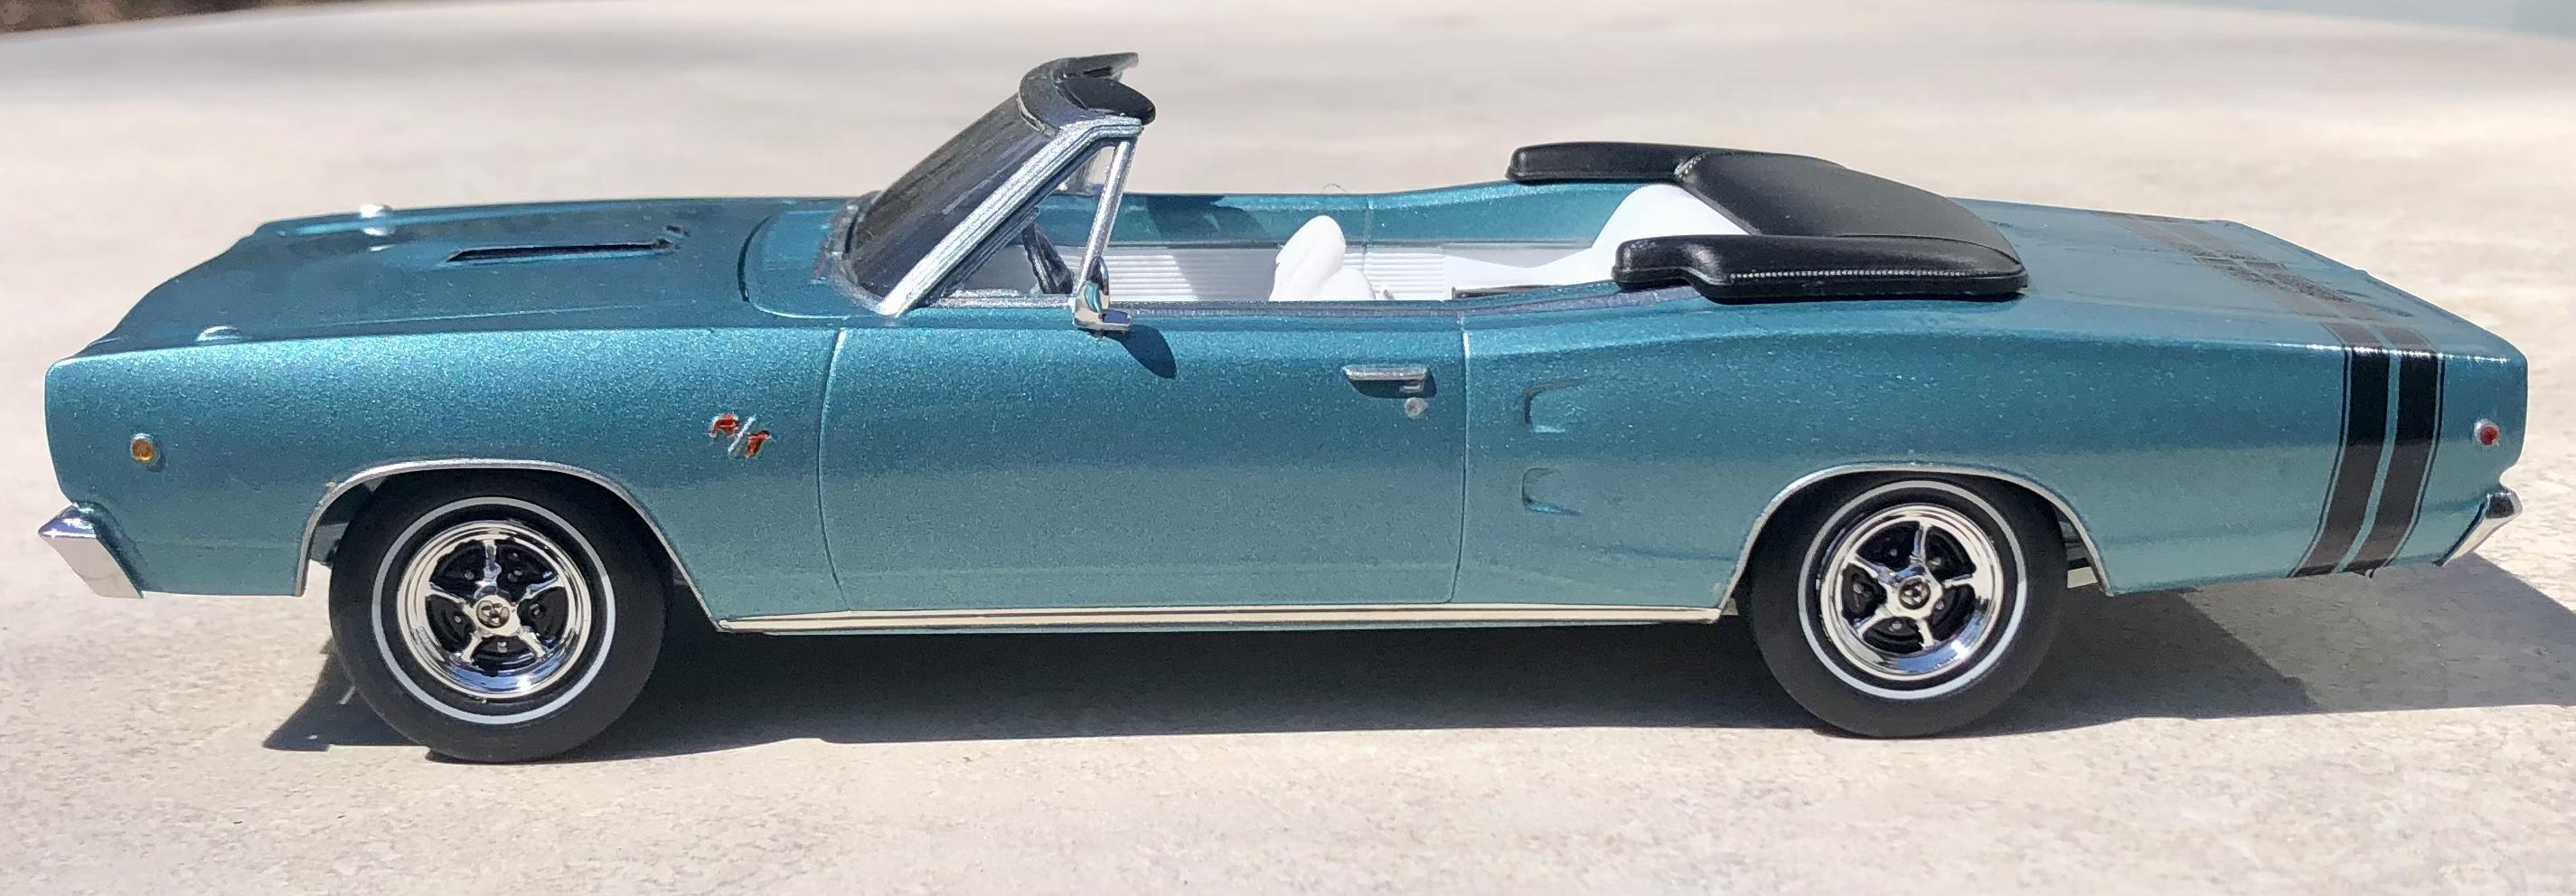
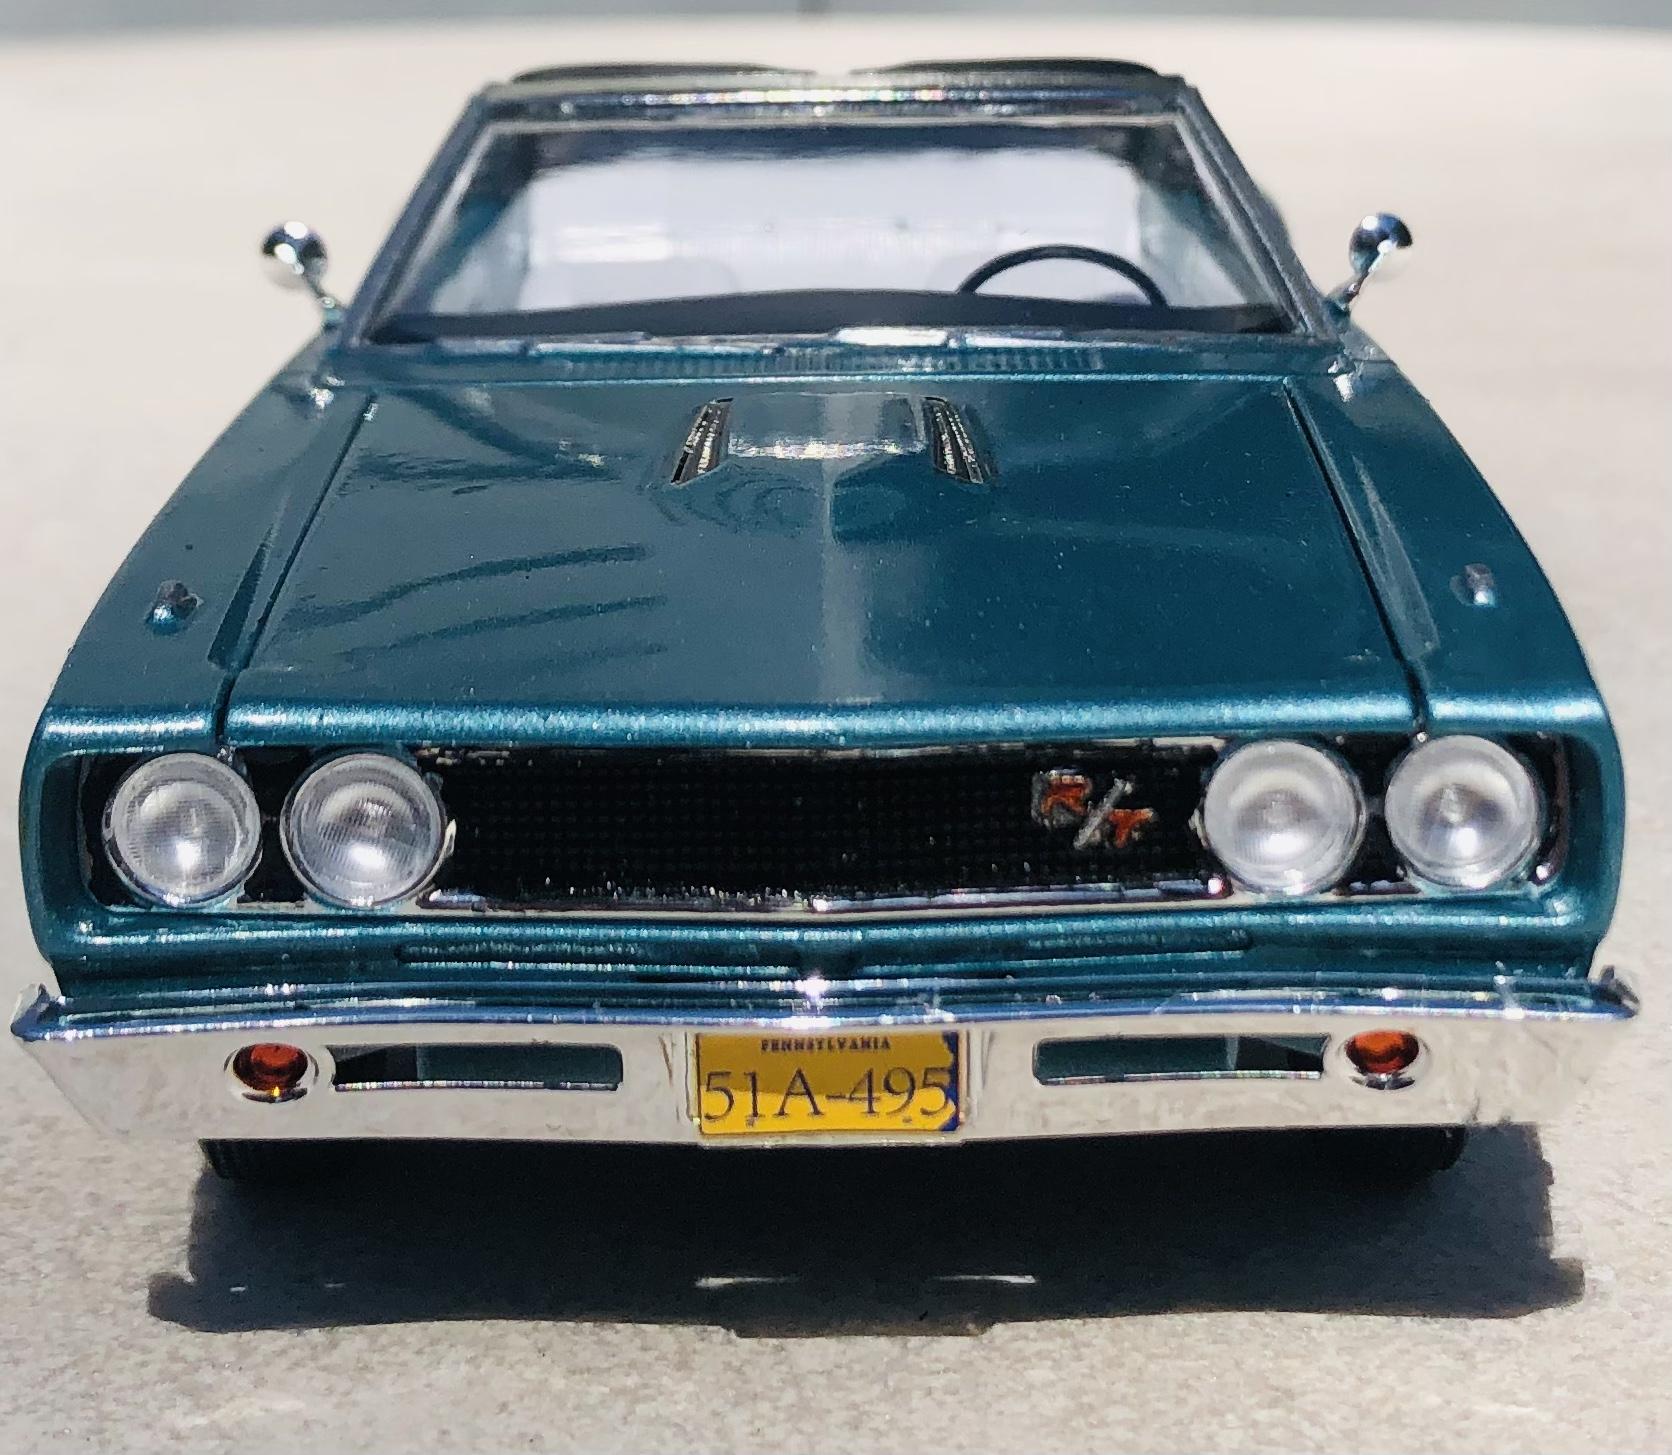
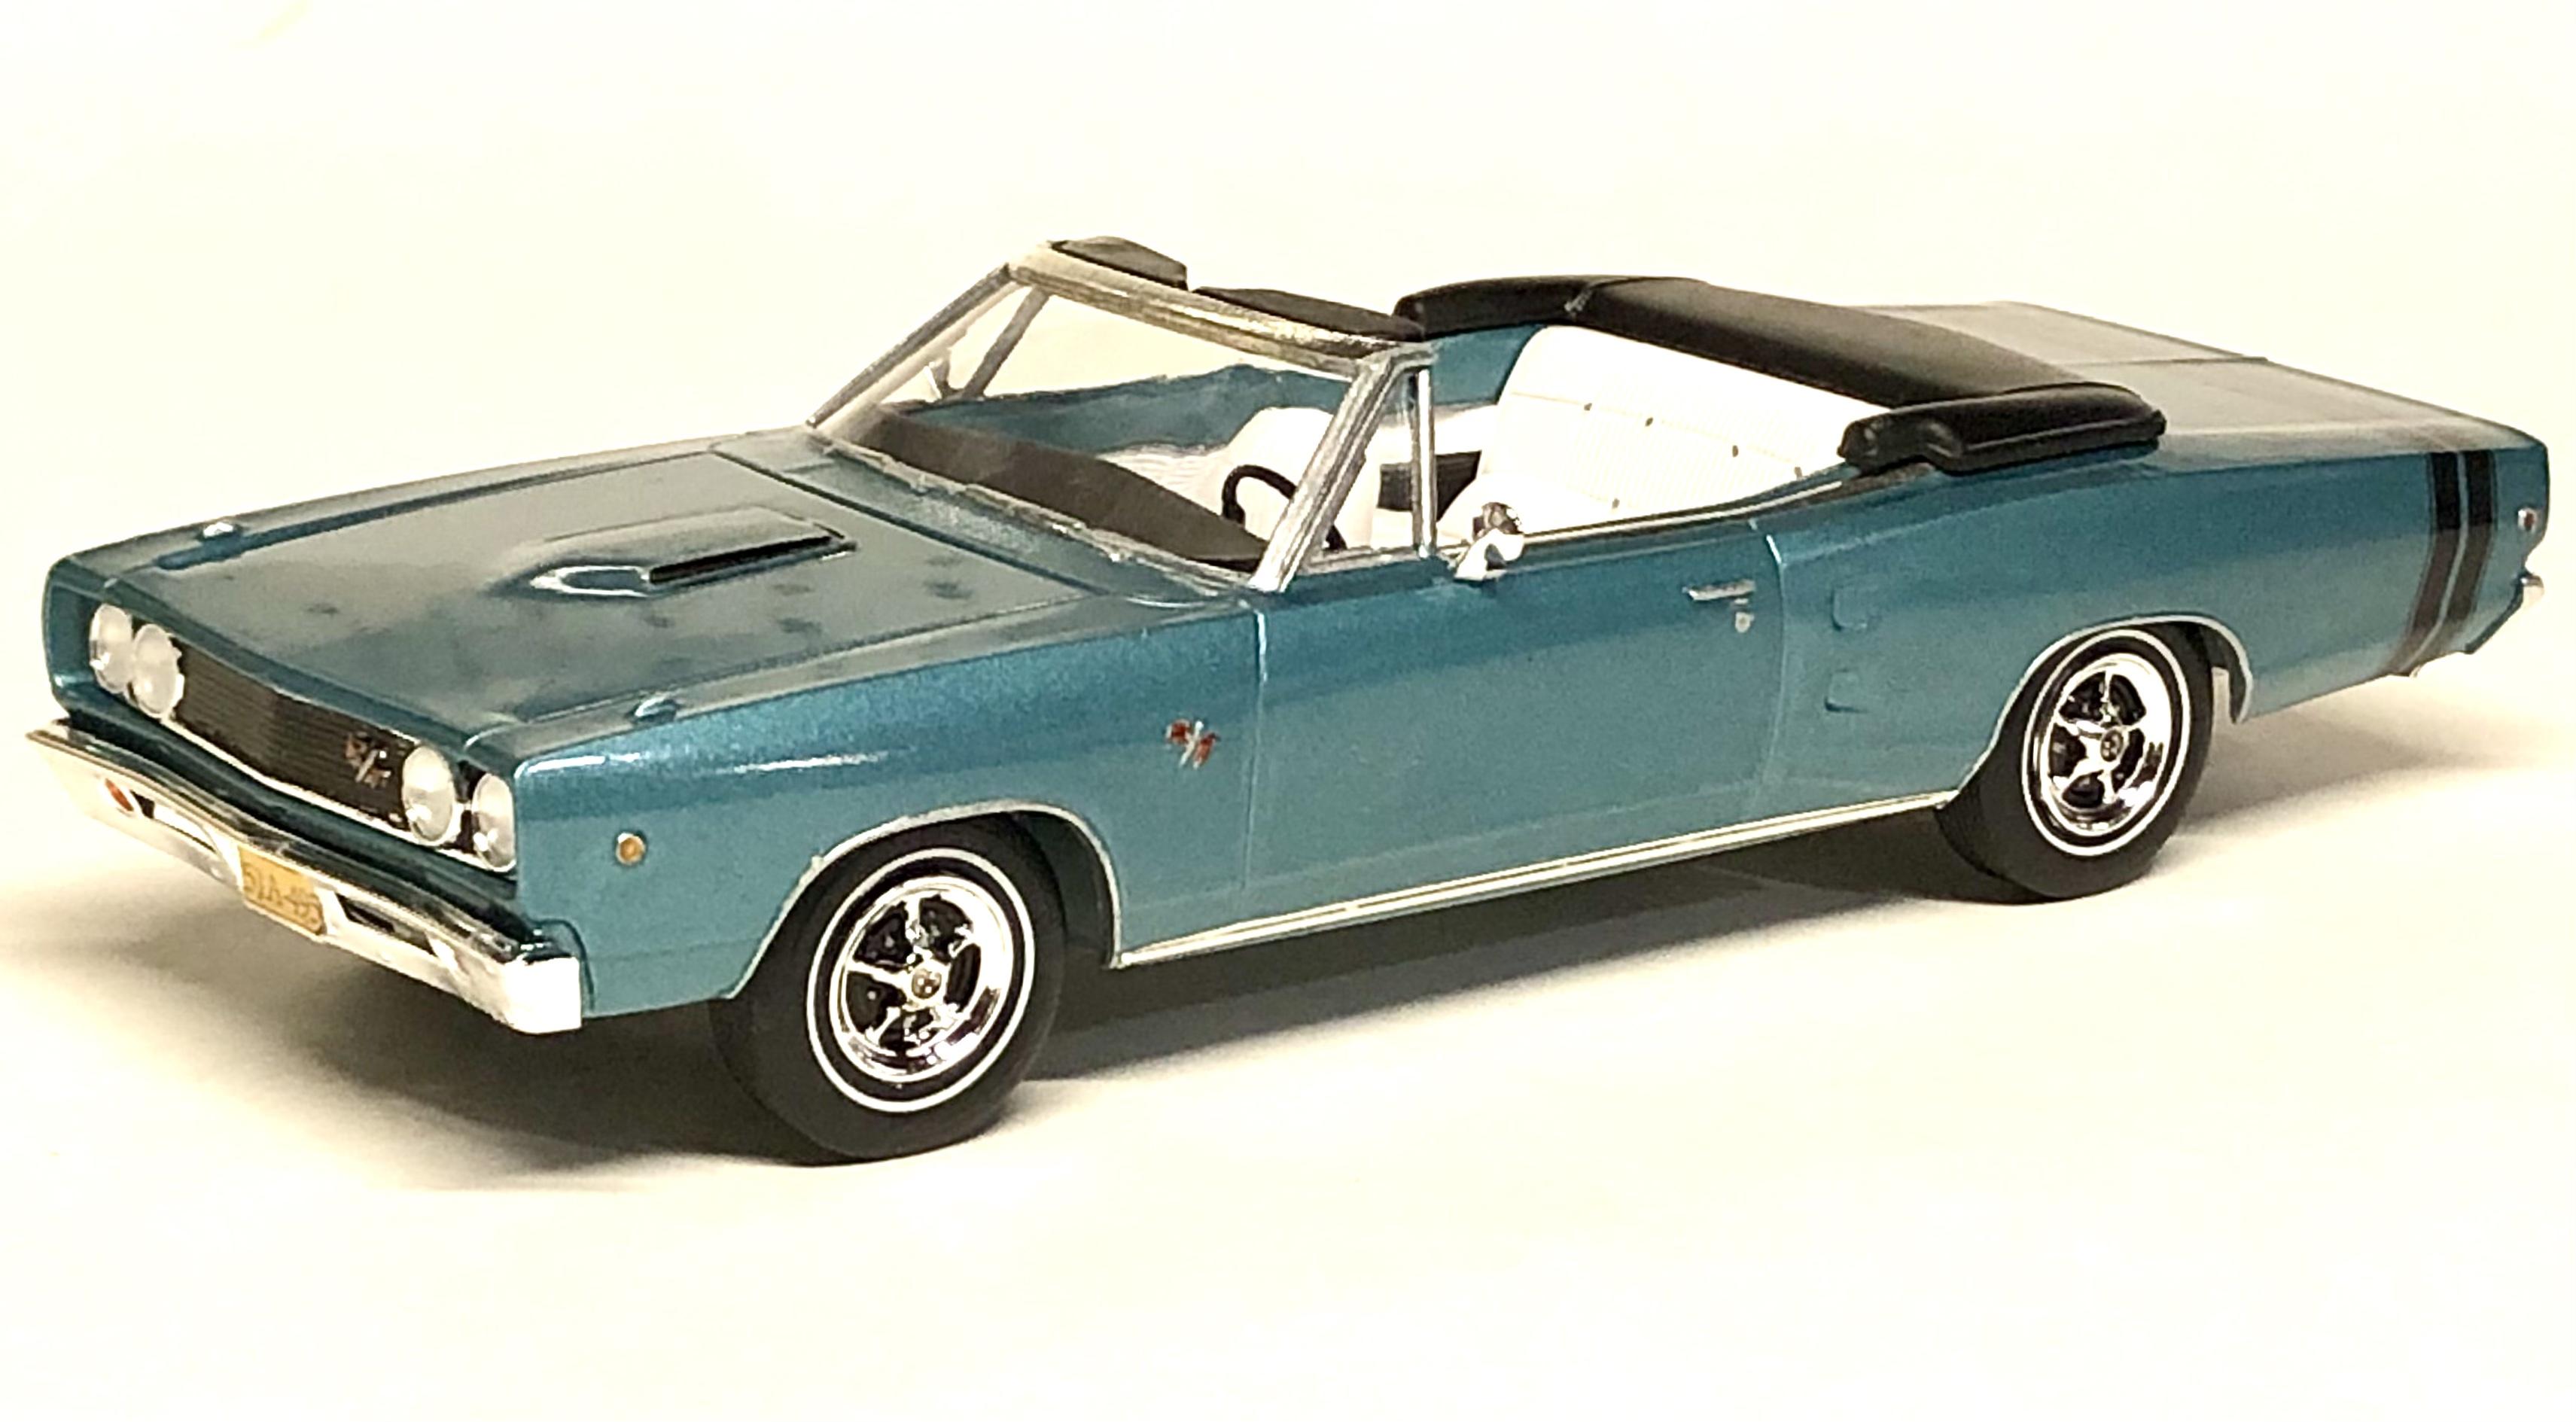
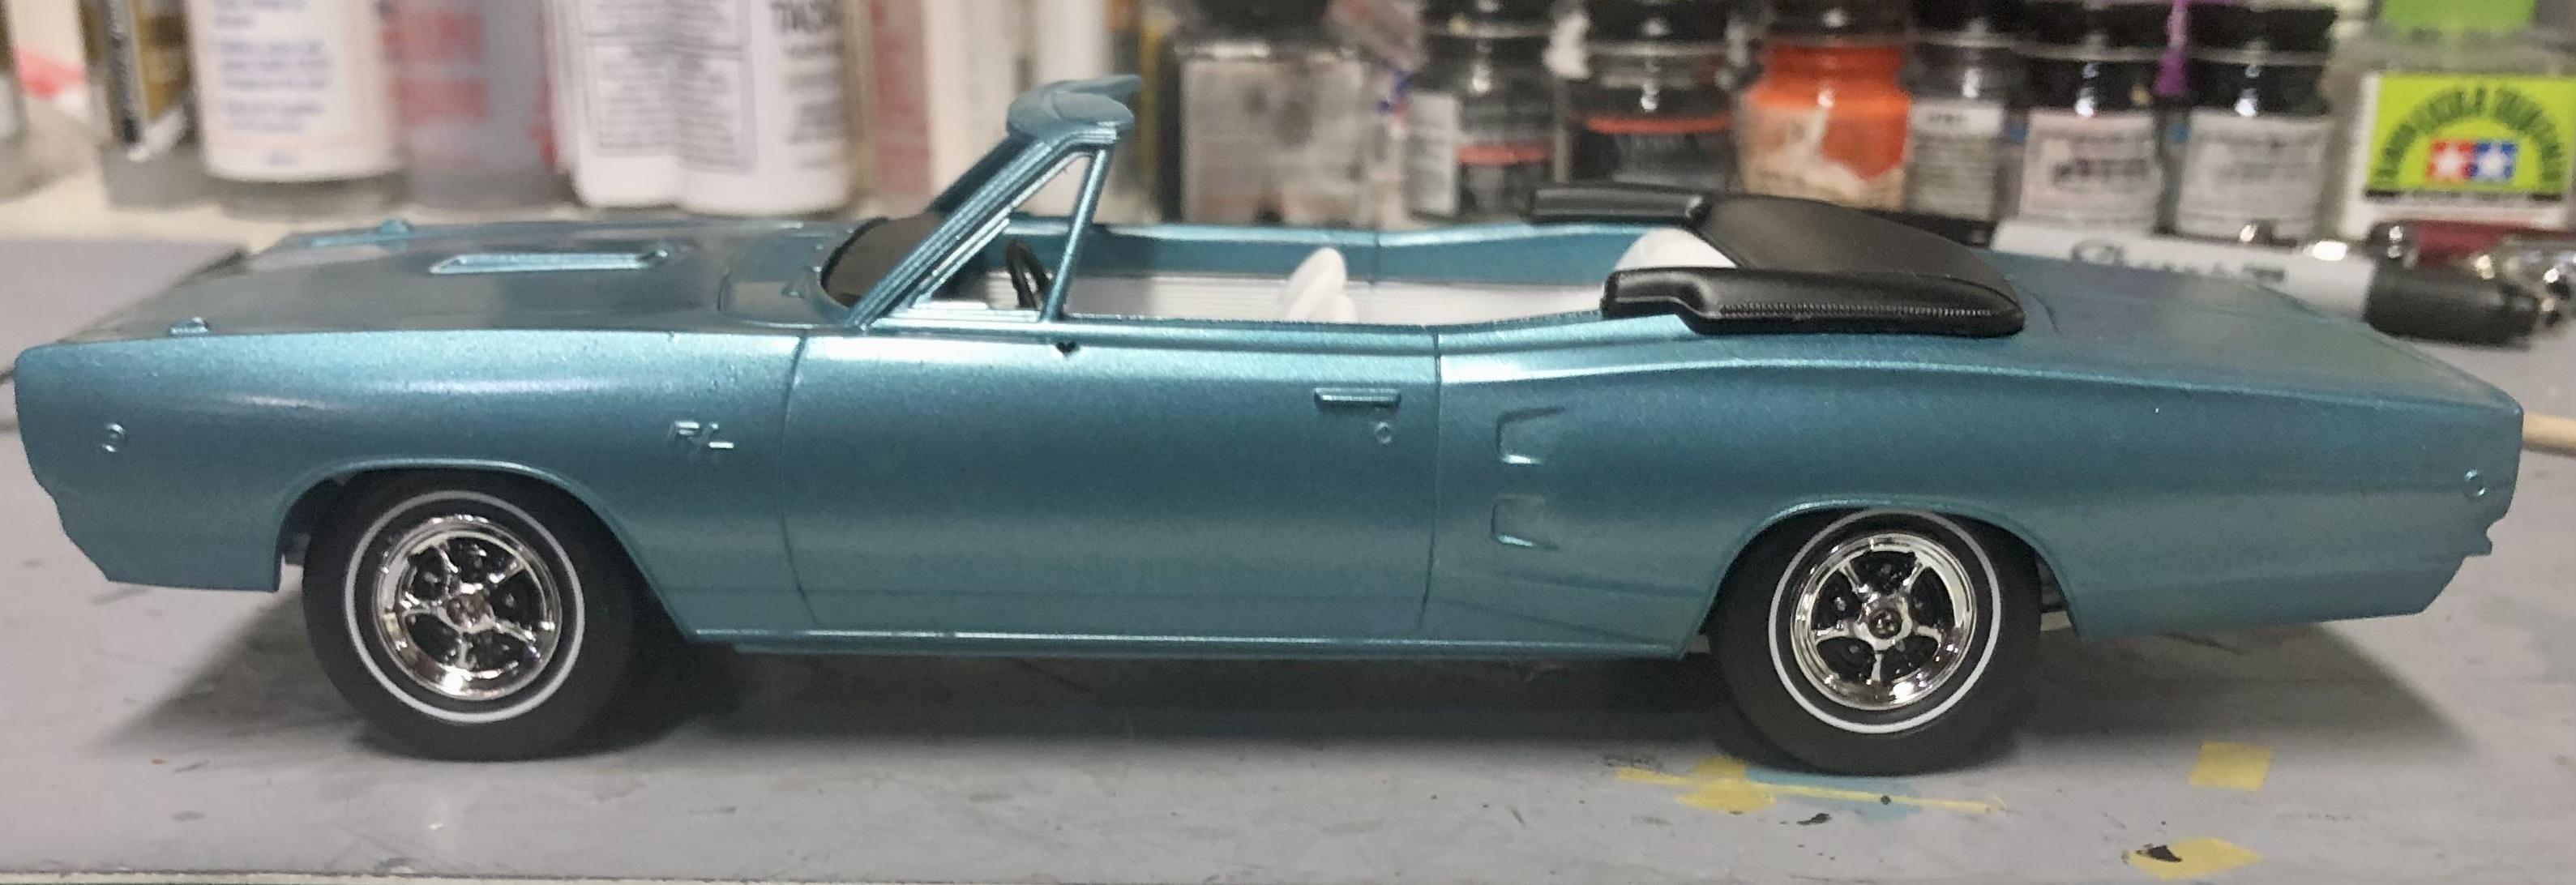
Got some better pics of the Coronet this morning. I’m very happy with the way this turned out.
-
This one is compete and in the Under Glass section.
-
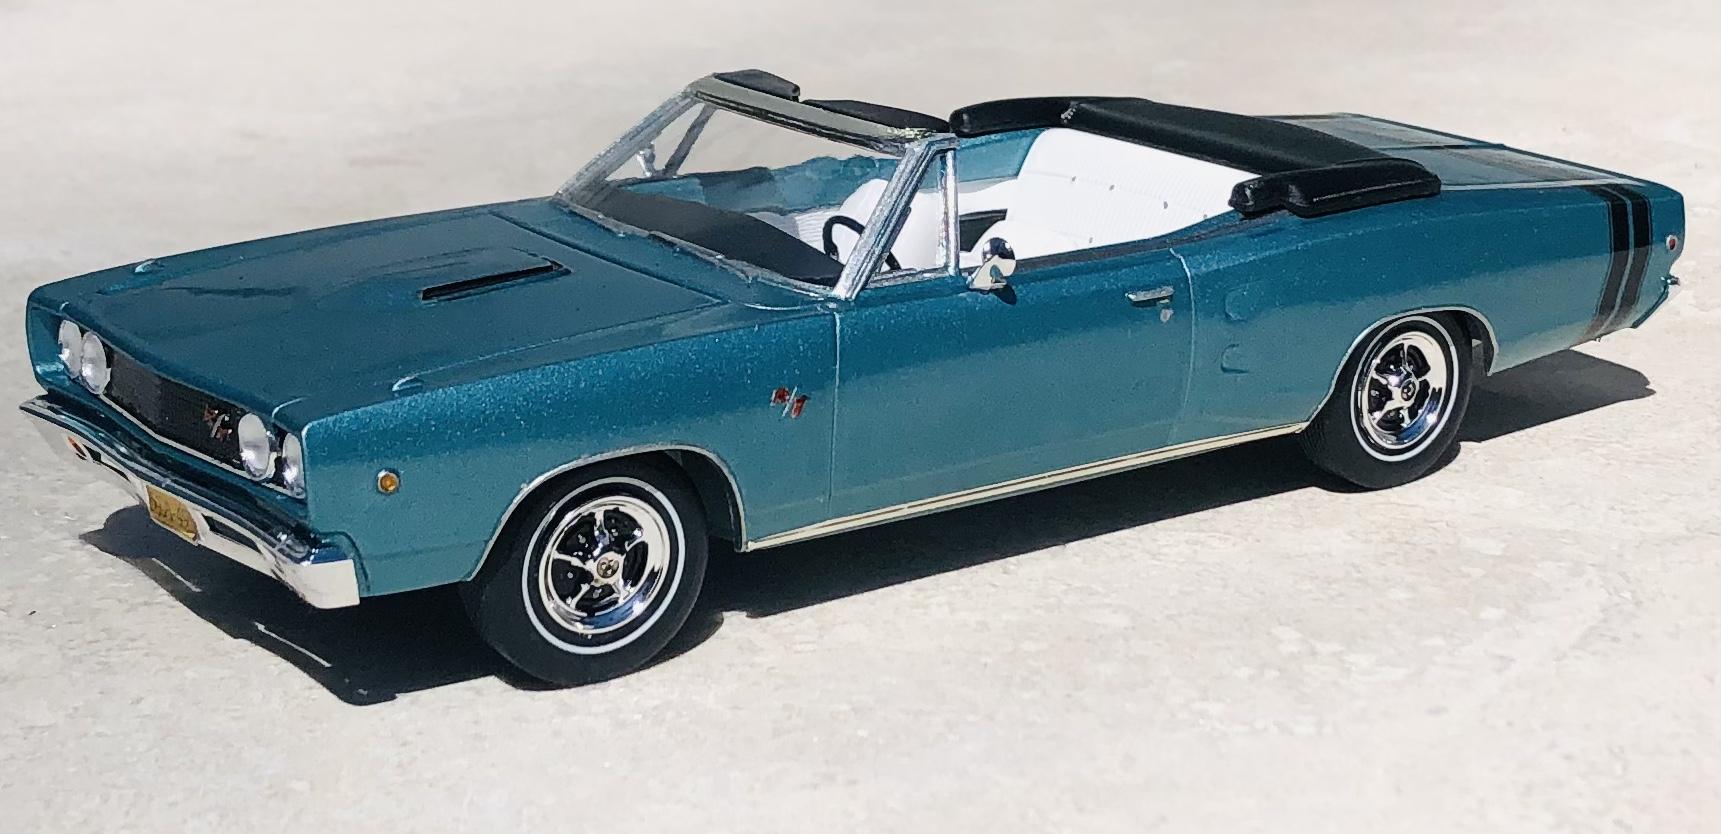
This is the new AMT/MPC kit in Seafoam Turquoise Metallic. The kit goes together beautifully. This one is box stock. More pictures when the weather here improves.
-
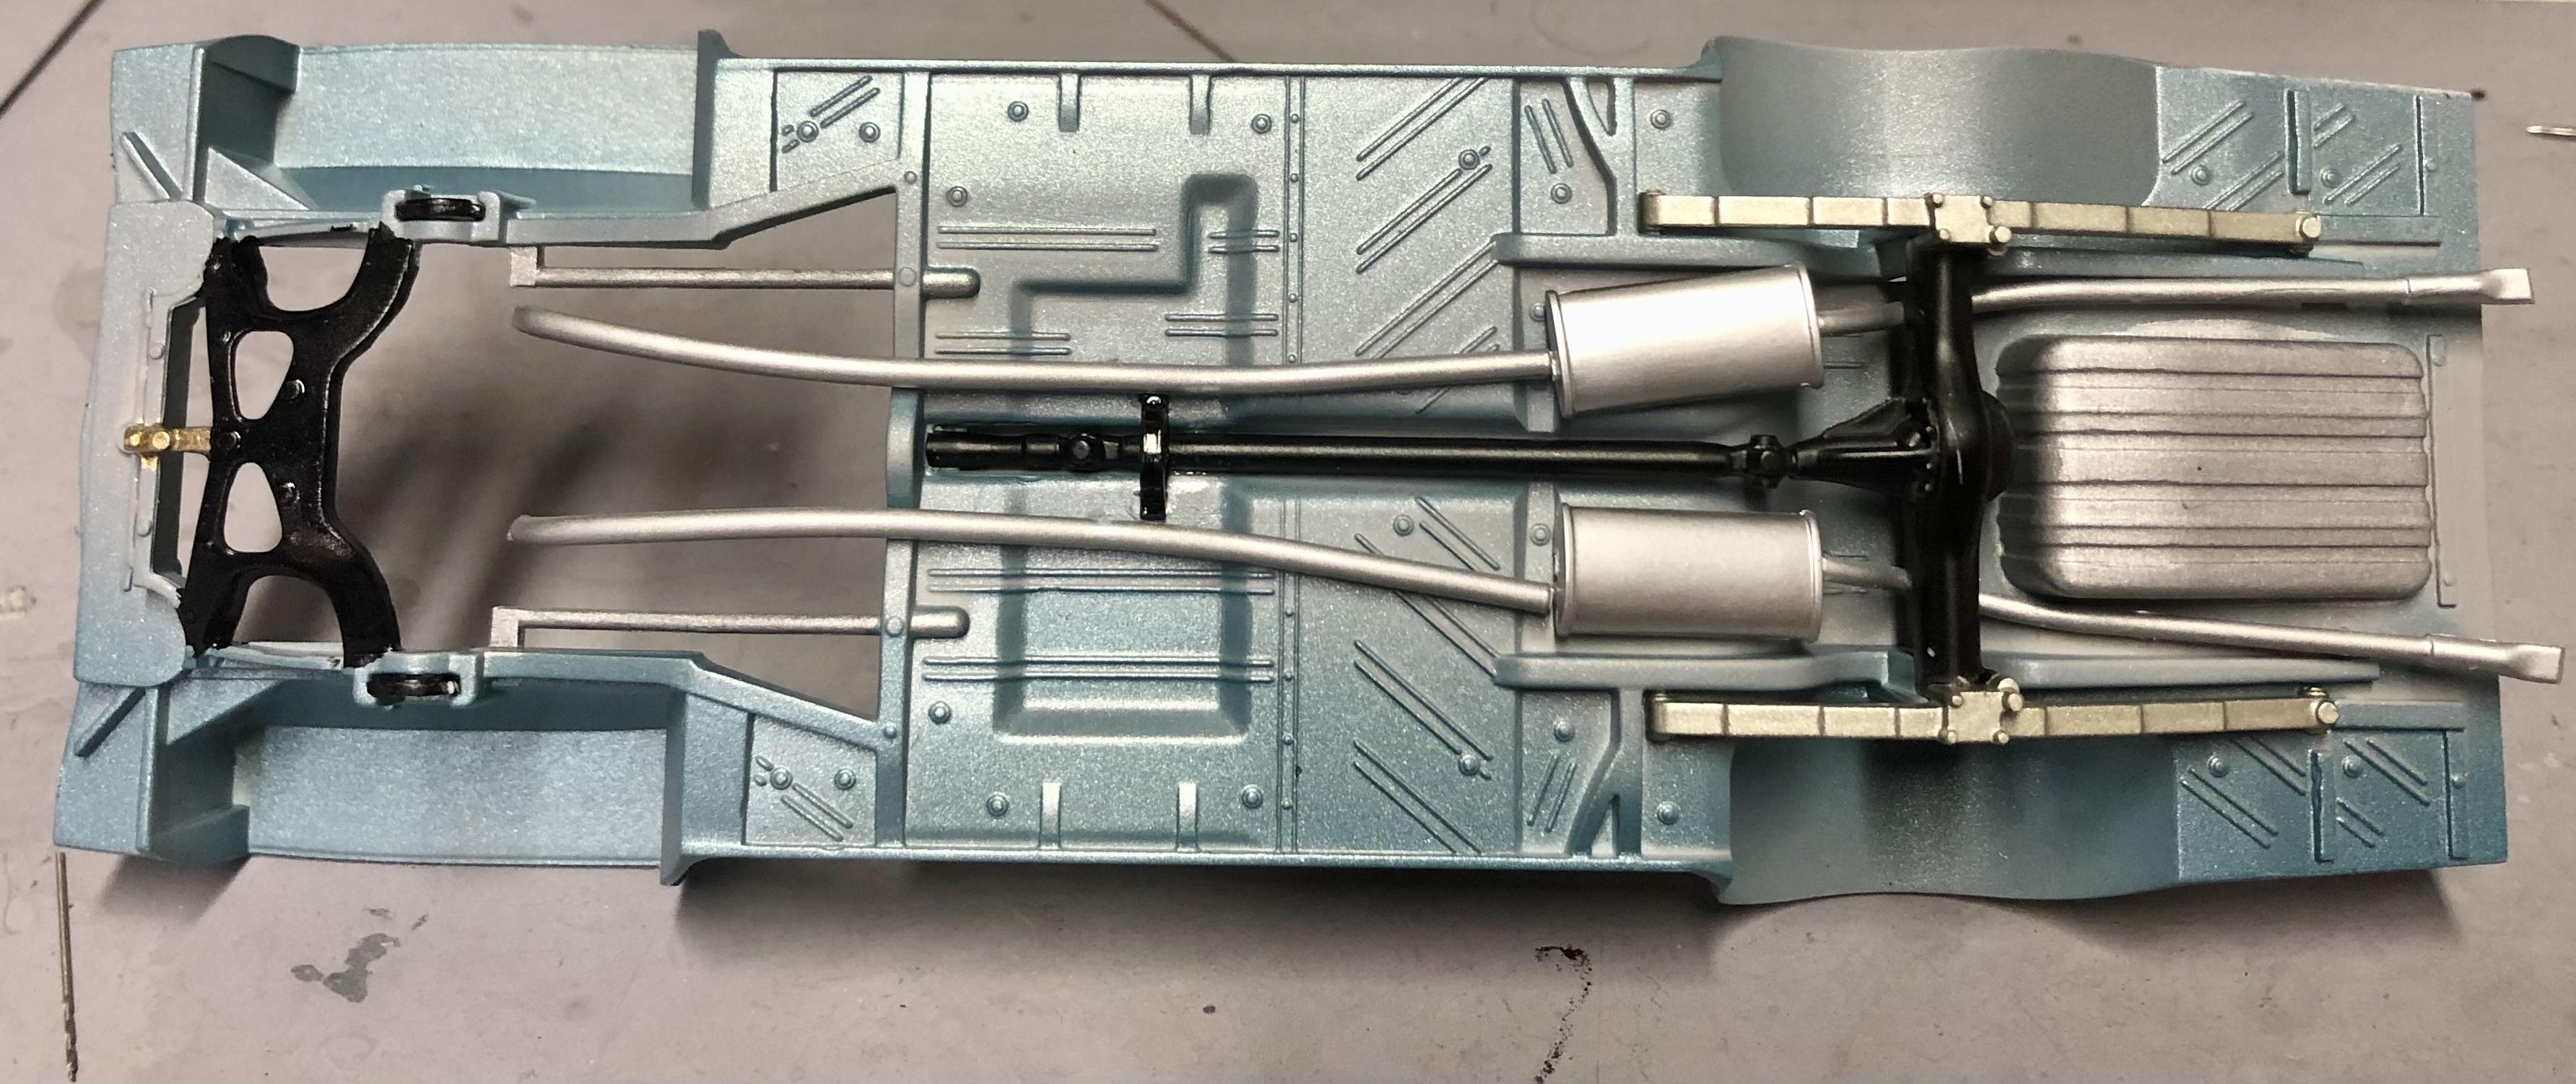
I did a quick mock-up to check progress, she sits a little high in the front but I suspect that can easily be adjusted in final assembly.
-
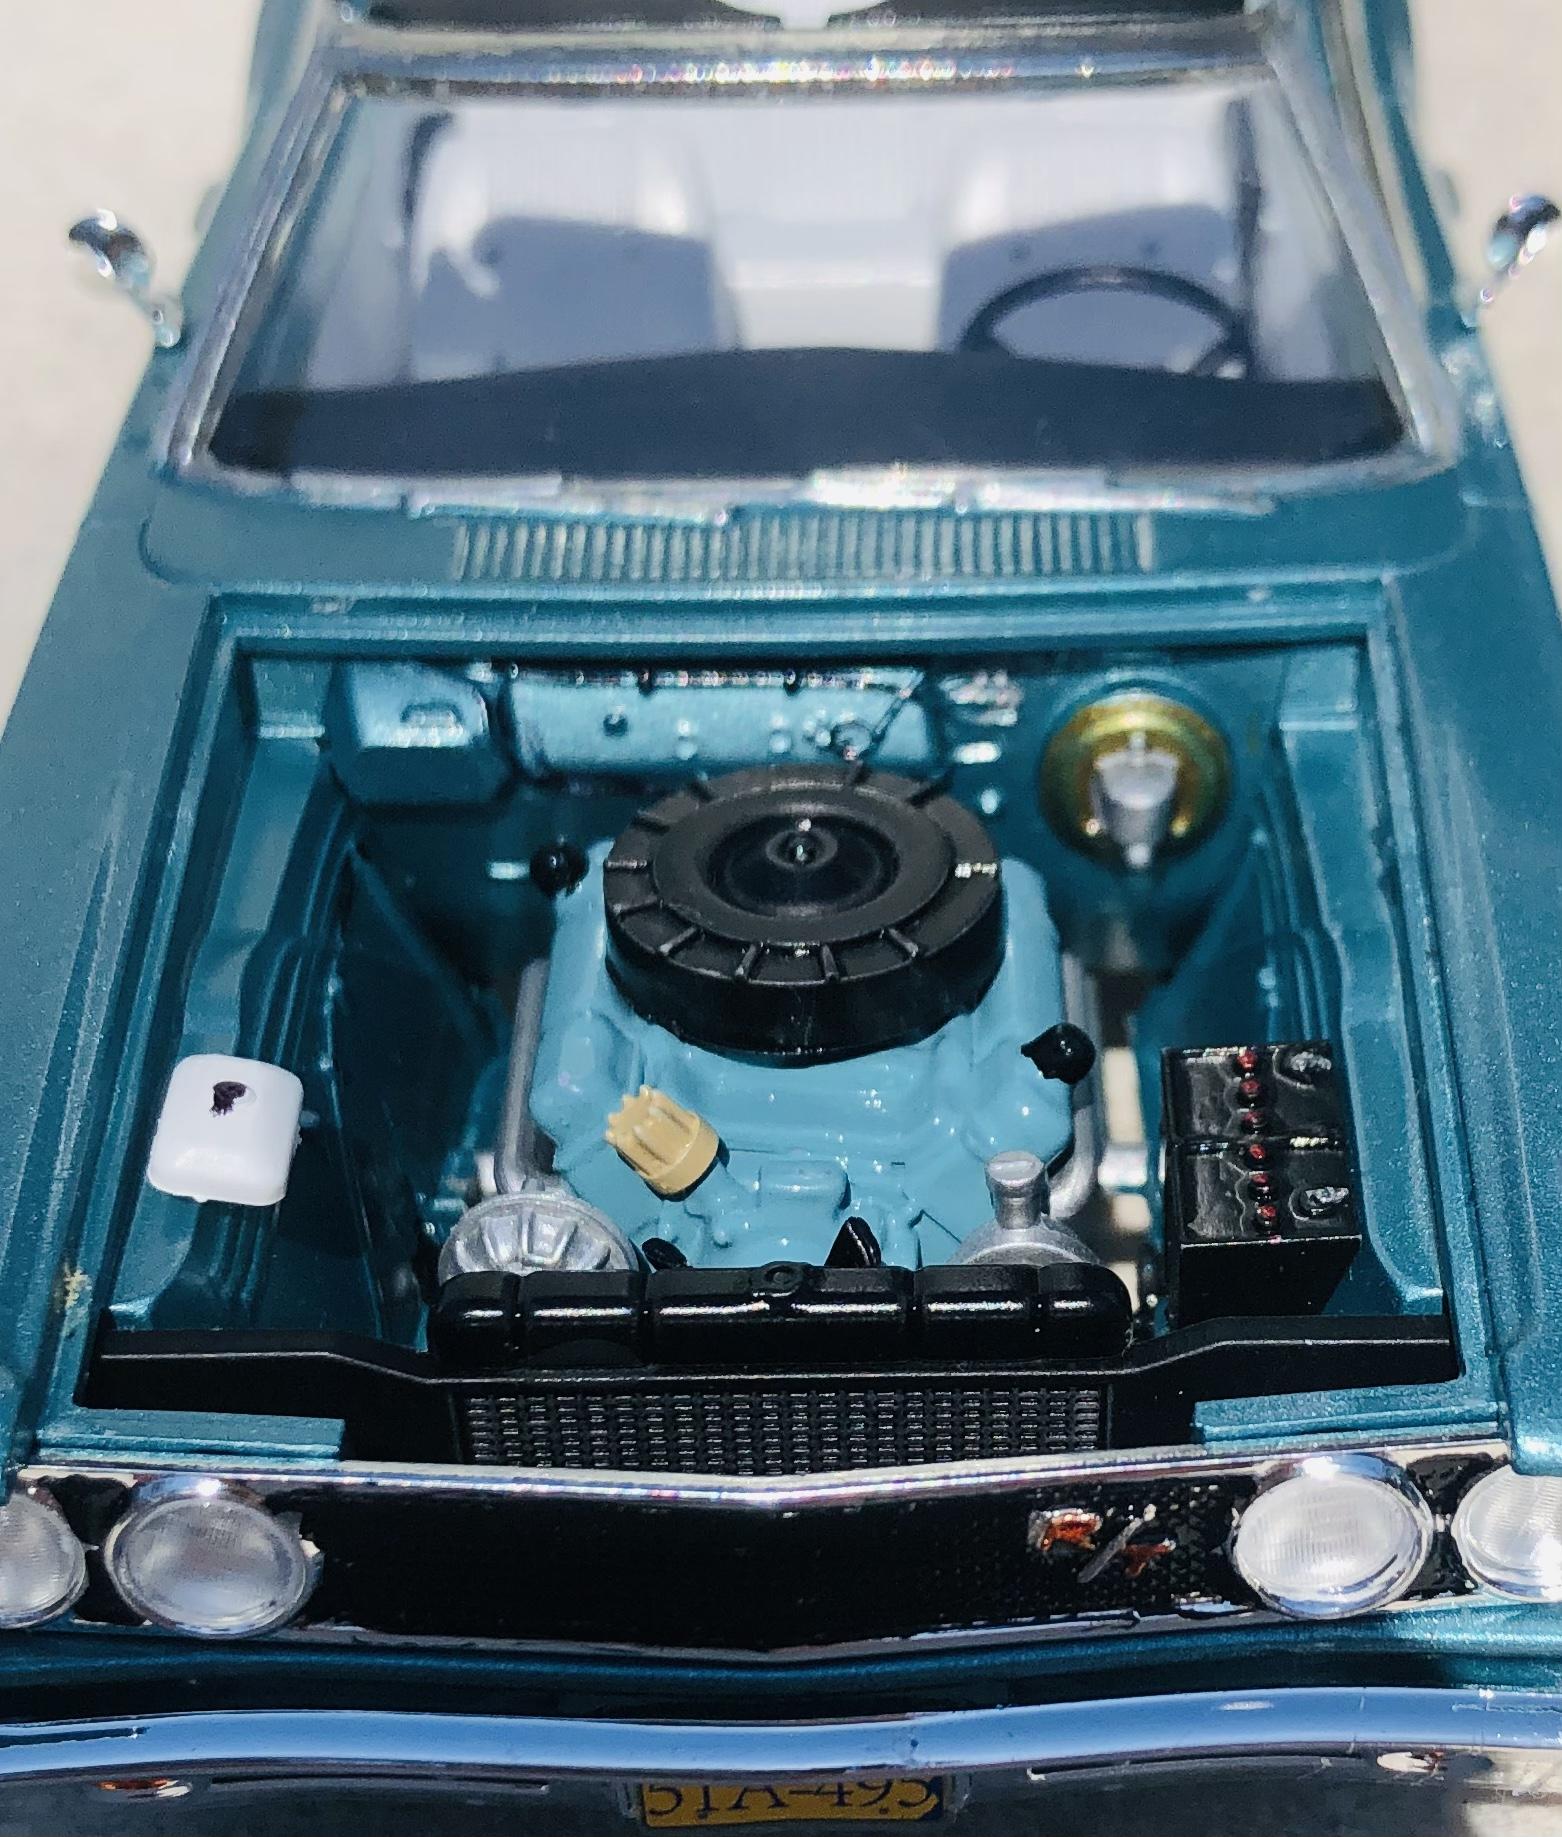
Chassis is done. The instructions aren’t clear on this; make sure to install the exhausts before the rear suspension. I did not, and had to do some careful manipulation to get them in.
-
I have started on the new '68 Coronet kit. I'm very impressed with the engineering put into the assembly of the kit so far. I'd love to see more of these style of kits come out. Just some early progress here. Everything will be box stock, I don't have time to add lots of detail parts or kitbash. I like the challenge of making something look good right out of the box. Engine is together, painted Chrysler engine turquoise (don't know if that's entirely accurate, but I like the way it looks). I messed up painting the body so no pics of that yet, it will be a Seafoam Turquoise Metallic (a '69 color but I like it on this). Black and white interior with turquoise surrounds.
-
I am struggling with MCW enamels lately and am wondering why. I have a Paasche Millennium double action with a side feed, and I usually don't have trouble with lacquers or Tamiya paints using it. But with these MCW enamels I can't seem to get them thinned enough to flow smoothly through the airbrush. Either I thin it 25-30% and it comes out dry, or I thin it 40-50% and it comes out far too thin. And with metallics I can't seen to keep the metallic particles suspended properly. Is there an airbrush you guys might suggest instead? Should I spend the $$$ and get a Grex trigger action airbrush?
-
I hope they've updated the decal sheet. The original sheet lacked the Cyclone 390 graphics and the "GT" in the stripes.
-
I got it yesterday, thanks Steve!
-
I used Tamiya AS-21 Green. It goes on semi-flat, but I was able to gloss it up using Tamiya polishing compounds.
-
LOL I think I bought one of them from you. EDIT: Yup, I sure did. Seller in Dracut.
-
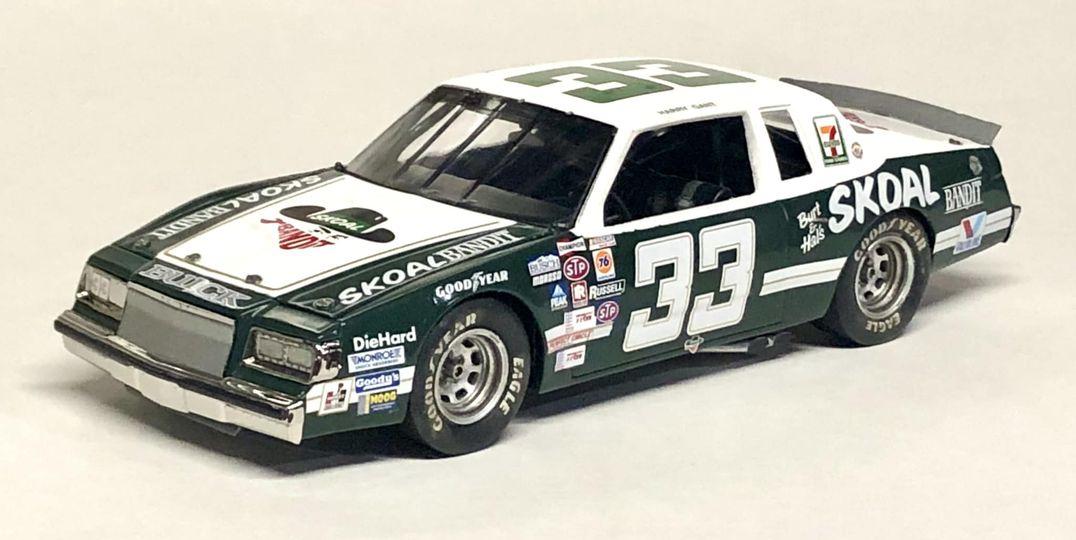
Built upon a commission from a friend. Salvino's Buick kit, Powerslide decals, Tamiya paints.
-
Congrats again Mark, it's a beautiful model and you worked your way through it with gusto.
-
Of course, I didn't mean to imply that they did. The bodies are all new.
-
That body looks really excellent in primer. I'm very impressed. Salvino's also fixed the roof rail on the driver's side. I believe Jay is using one of his built chassis to display these bodies, Salvino's has said the Camry kits will have a full dash pad included in the kit.
-
I chatted with a producer of 3D printed resin bodies and he said he could print up 2022 hoods for the Camry when it is released, so it will hopefully be easy enough to backdate.
-
All that work paid off! Fantastic job!
-
Great job! I can't wait to get mine!