Ace-Garageguy
-
Posts
38,173 -
Joined
-
Last visited
Content Type
Profiles
Forums
Events
Gallery
Everything posted by Ace-Garageguy
-

Aftermarket Racing Style Bucket Seats in Kits
Ace-Garageguy replied to Casey's topic in Model Building Questions and Answers
More than a few chair shells like these made it into race cars in the '50s and '60s too. Note the similarity to several of the designs of kit seats you have lined up above. -
What Did You Get Today? (Not Model Related)
Ace-Garageguy replied to LOBBS's topic in The Off-Topic Lounge
Yes, it was actually. -
Pretty cool. Thanks for the link.
-
2020 Family Truckster !
Ace-Garageguy replied to 1972coronet's topic in General Automotive Talk (Trucks and Cars)
It went 200,000 miles with no issues other than a fuel cap, and front balljoints...because they were designed to be "sealed for life" and couldn't be greased. It's getting a new engine because the now-owner wants a Hemi. The engine that came out of it was easily repairable. Far as "replacing engines" to make something run forever, actually, if you replace the normal wear parts like rings, bearings and seals within the engine BEFORE anything breaks, replacement of the entire engine just isn't often necessary. And nothing on the planet or anywhere else will run forever with no parts replacement as things wear. I have a Geo Metro that is widely known by internet experts to be an unreliable, short lived POS. It has a tiny, highly-stressed engine that really has to scream to make any power. Interestingly, a friend bought it new, also on my recommendation. I maintained it from day one, again not obsessively. At 160,000 miles, it burned an exhaust valve, which I replaced (along with the other two, and rebuilt the head). I replaced the clutch at the same time, though it really didn't need it yet. It never missed a beat for years afterwards, and I bought the salvage from the insurance company after it was declared an "economic total" for $800 worth of body damage. At 250,000 miles, I replaced the rod bearings which were just barely worn out; they lasted...and when I had the head off, there was no measurable "ridge"...because we used high-quality synthetic oil from new. It just goes and goes and goes, all the while happily returning 40MPG. It will also probably run forever, because by the time I die, there will most likely be so few left that whoever gets the thing will continue to treat it with the care and respect that ANY machine deserves, but that very few actually enjoy. -
Aftermarket Racing Style Bucket Seats in Kits
Ace-Garageguy replied to Casey's topic in Model Building Questions and Answers
1963 Revell parts pack bodies included a seat almost identical to what's shown above. And trust me, they'd been around a while already. -
2020 Family Truckster !
Ace-Garageguy replied to 1972coronet's topic in General Automotive Talk (Trucks and Cars)
Good frienda mines bought one a doze wit jus a few thousand miles on it (on my recommendation, as I'd worked on a few and was very much impressed with how remarkably intelligently several major things were designed on it..easy to service and repair). He maintained it well but not obsessively. It went to over 200,000 miles before it started making expensive sounding internal engine noises, but it still looked new. No cracked dash or split seats or dings everywhere. Just a nice, clean truck. He sold it to another friend who is building a new engine for it, and who appreciates how well designed it is (like me). It'll probably run forever. -
Aftermarket Racing Style Bucket Seats in Kits
Ace-Garageguy replied to Casey's topic in Model Building Questions and Answers
Resin-infused molded fiberglass parts came into fairly widespread use on military aircraft in the early 1940s. After the end of the war, the technology spread rapidly throughout the consumer goods sector You'd possibly be surprised, but some of the very early fiberglass bucket seats were low-end furniture adapted to race car use because of their very light weight. These most often show up on old amateur-built rail dragsters. Mid 1950s would be my best guess for purpose-built f'glass racing seats being marketed. -
2020 Family Truckster !
Ace-Garageguy replied to 1972coronet's topic in General Automotive Talk (Trucks and Cars)
Agreed, and by a wide margin. I could probably actually lust after the silver one Mr. Guthmiller posted...if you got rid of the waffle-cut french fries looking grille insert. It's still way too huge for the job it really does, but considering the alternatives... -
2020 Family Truckster !
Ace-Garageguy replied to 1972coronet's topic in General Automotive Talk (Trucks and Cars)
Russell C's illustration above looks OK, proportion-wise. Unfortunately, the real thing looks like this. Get that nose any higher, you'll need a periscope to drive it. -
Amen, brothers.
-
2020 Family Truckster !
Ace-Garageguy replied to 1972coronet's topic in General Automotive Talk (Trucks and Cars)
All I see is a company run by a woman who apparently doesn't have a clue, that just announced cutting 14.000 jobs in North America (not too long after one of the biggest financial bailouts in the history of the known universe) dumping another over-styled, overly-complex, and unnecessarily HUGE POS on the market, in hopes of attracting some of the buyers who don't want their cars anymore. Good job, Mary Barra. You sure earn your $22 MILLION DOLLAR yearly pay. PS: You do NOT get so deep in a hole of this magnitude overnight, and wake up one morning to find your company is on the rocks. It takes YEARS of a too-little, too-late management style, and following the market rather than leading it. https://www.fool.com/investing/2018/11/29/why-gm-decided-to-cut-14000-jobs.aspx -
Several companies make round-hole photoetch in various sizes. Google is your friend.
-
The future of offroading?
Ace-Garageguy replied to iamsuperdan's topic in General Automotive Talk (Trucks and Cars)
So...where exactly do you charge these things when you're out in the middle of nowhere, and you've drained your battery getting unstuck? Carrying jerrycans works for IC engines, but with a little solar charger, you're gonna be there for days. -
Die-cast body work?
Ace-Garageguy replied to Pat Minarick's topic in Model Building Questions and Answers
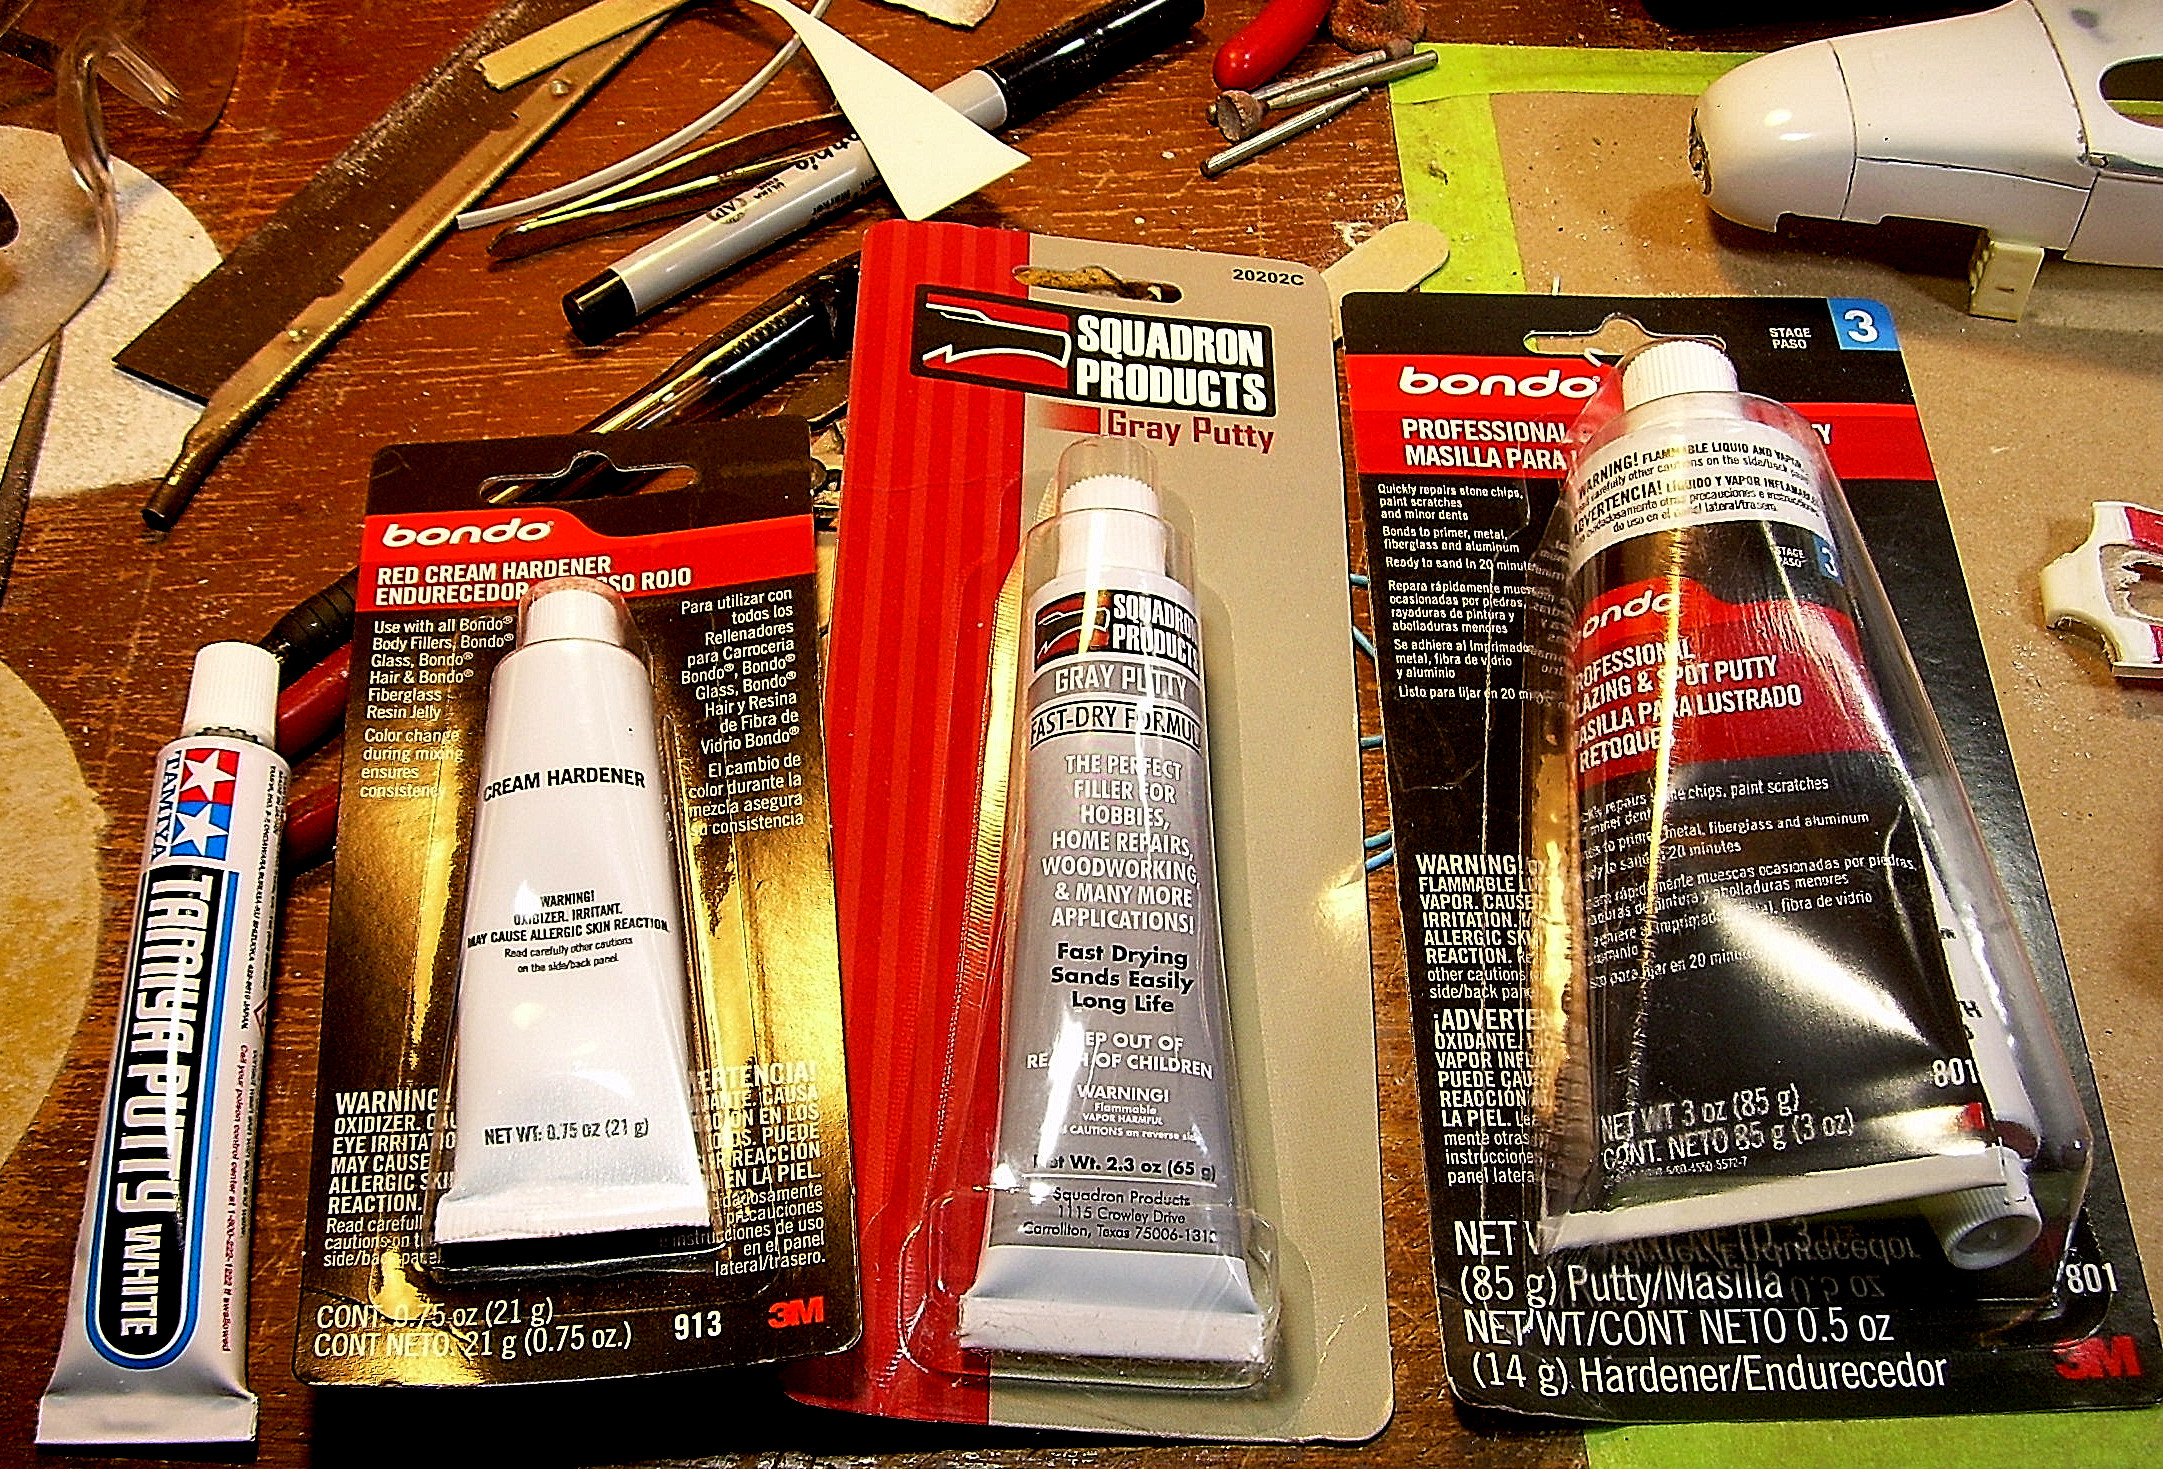
You're probably going to get a lot of different answers here. I make a lot of things, and have a lot of experience with a wide array of fillers and adhesives. For filling or altering the edges of panels, I'd really recommend a high-quality epoxy product, thickened with microballoon. In general, adhesion to many die-cast materials isn't great, so for working on edges where you have very little bonding area anyway, a GOOD quality epoxy will tend to flake and chip less than some 5-minute goo. By high-quality, I mean an epoxy that takes at least 1/2 hour to set up. In general, the longer any epoxy takes to set, the stronger it will be. The stuff I use, which works great (but is prohibitively expensive for most modelers) takes several hours to gel, and a 24 hour cure before it's ready to handle. Still, you might want to experiment with the slow-setting JB Weld. Some people do seem to get decent results with it. AND...for general filling and reshaping, this Bondo product works just fine. Just be certain you get the two-part "Professional" stuff. -
That would bite.
-
Thanks Tim. As with most of what I build, this one became lots more involved than I'd originally intended, but sitting back and taking stock of what it needs to get to completion, it's not all that much. Just the somewhat repetitive "work" parts of any build I have to discipline myself to get through.
-
Glad to be of some help, Bernard. Thanks for the comment. Thank you sir. Glad you think so. And thank you. sir.
-
Thanks. I haven't been working on models for a while, and really started to miss it. There's a lot of two-steps-forward, one-step-back inherent with this particular project, and it can get frustrating because it feels lie having to do everything twice sometimes. But as with everything else in life, one small part at a time, it will eventually get done.
-
And it makes a great dessert topping.
-
I have no idea what's going on. I did a reverse image search on several of those pix, and Google is seeing them and tracks them back to the correct MCM thread. Anybody else not seeing photos on pages 1 & 2?
-
Weird thing is that though I was just flat whipped last night, I felt great today (other than the old standby lower back pain). Looking back, I think I just got dehydrated. I was sweating like a pig, but didn't drink much water because it was cool. I also remember offloading some dark yellow exhaust liquid, so that kinda has to be it. At the end of summer, I did some pretty heavy work for several days out in AZ., and it didn't bother me at all...BUT...I'm very conscientious about staying hydrated in the desert.
-
From my end, they appear to be. All the shots I posted on this one are on the MCM server.
-
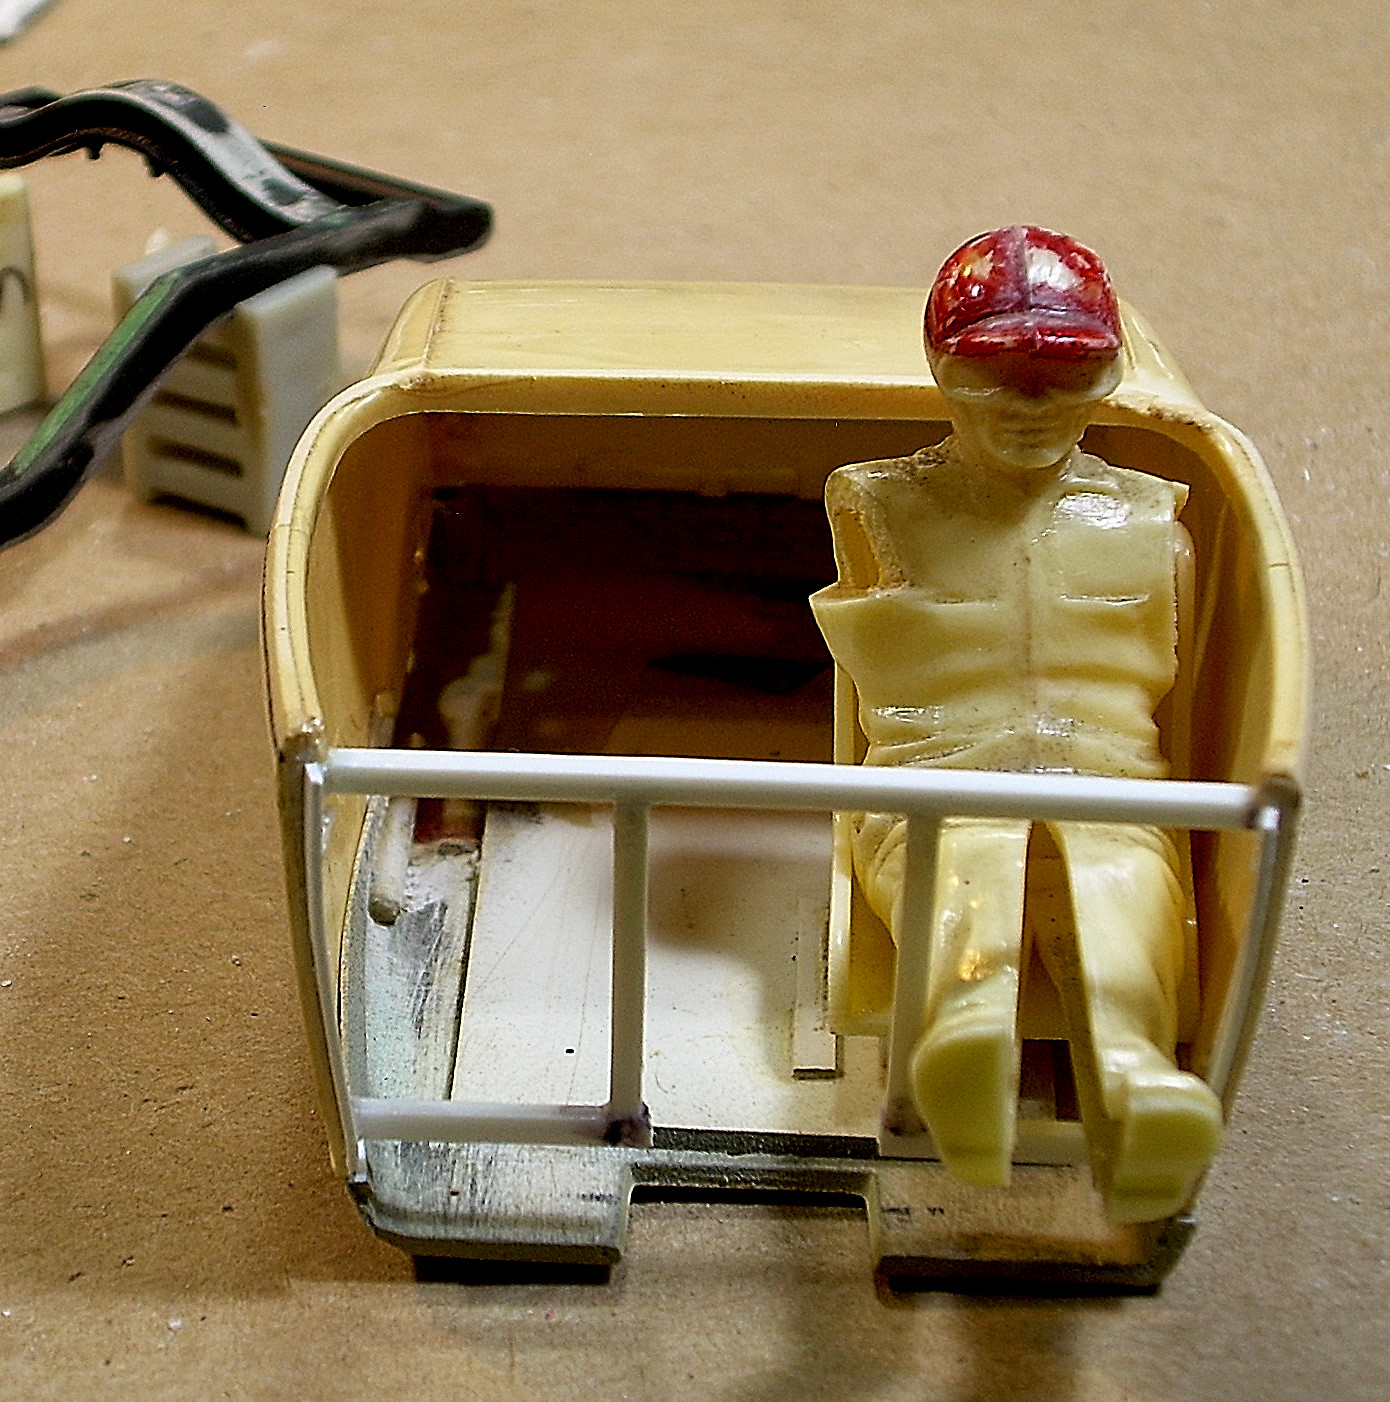
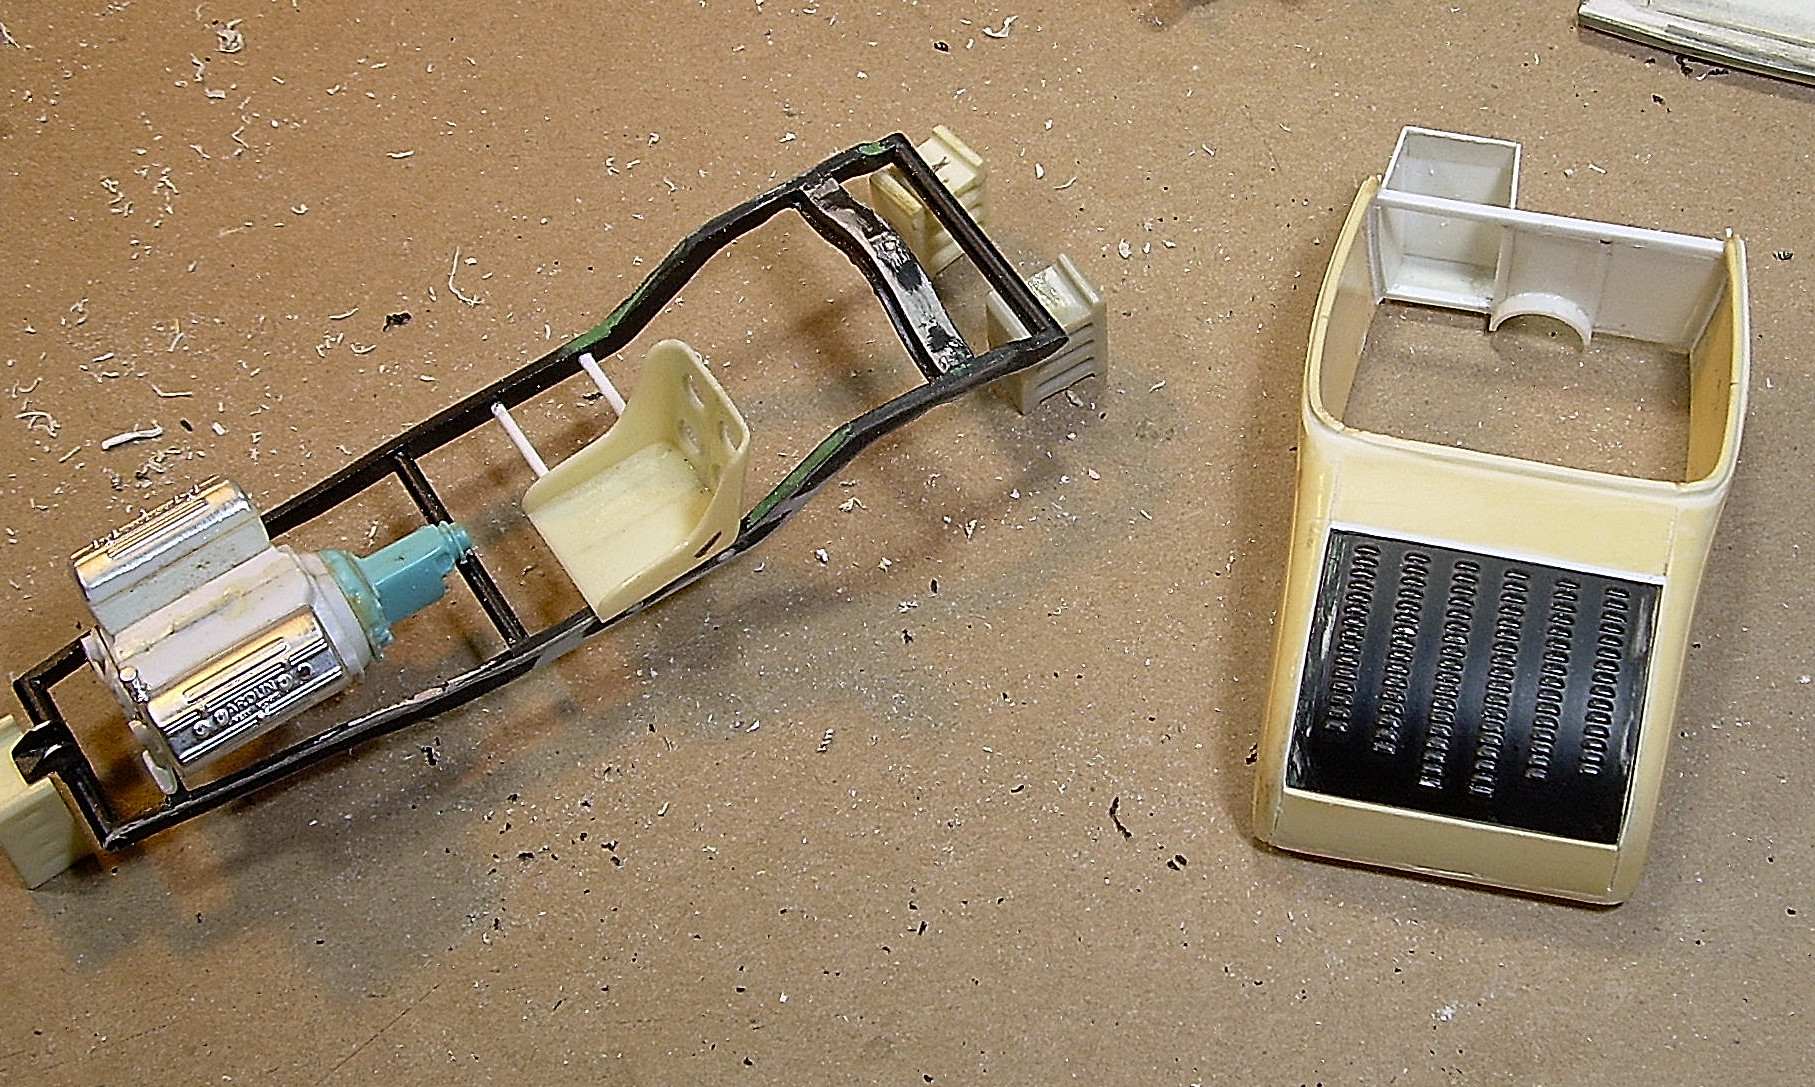
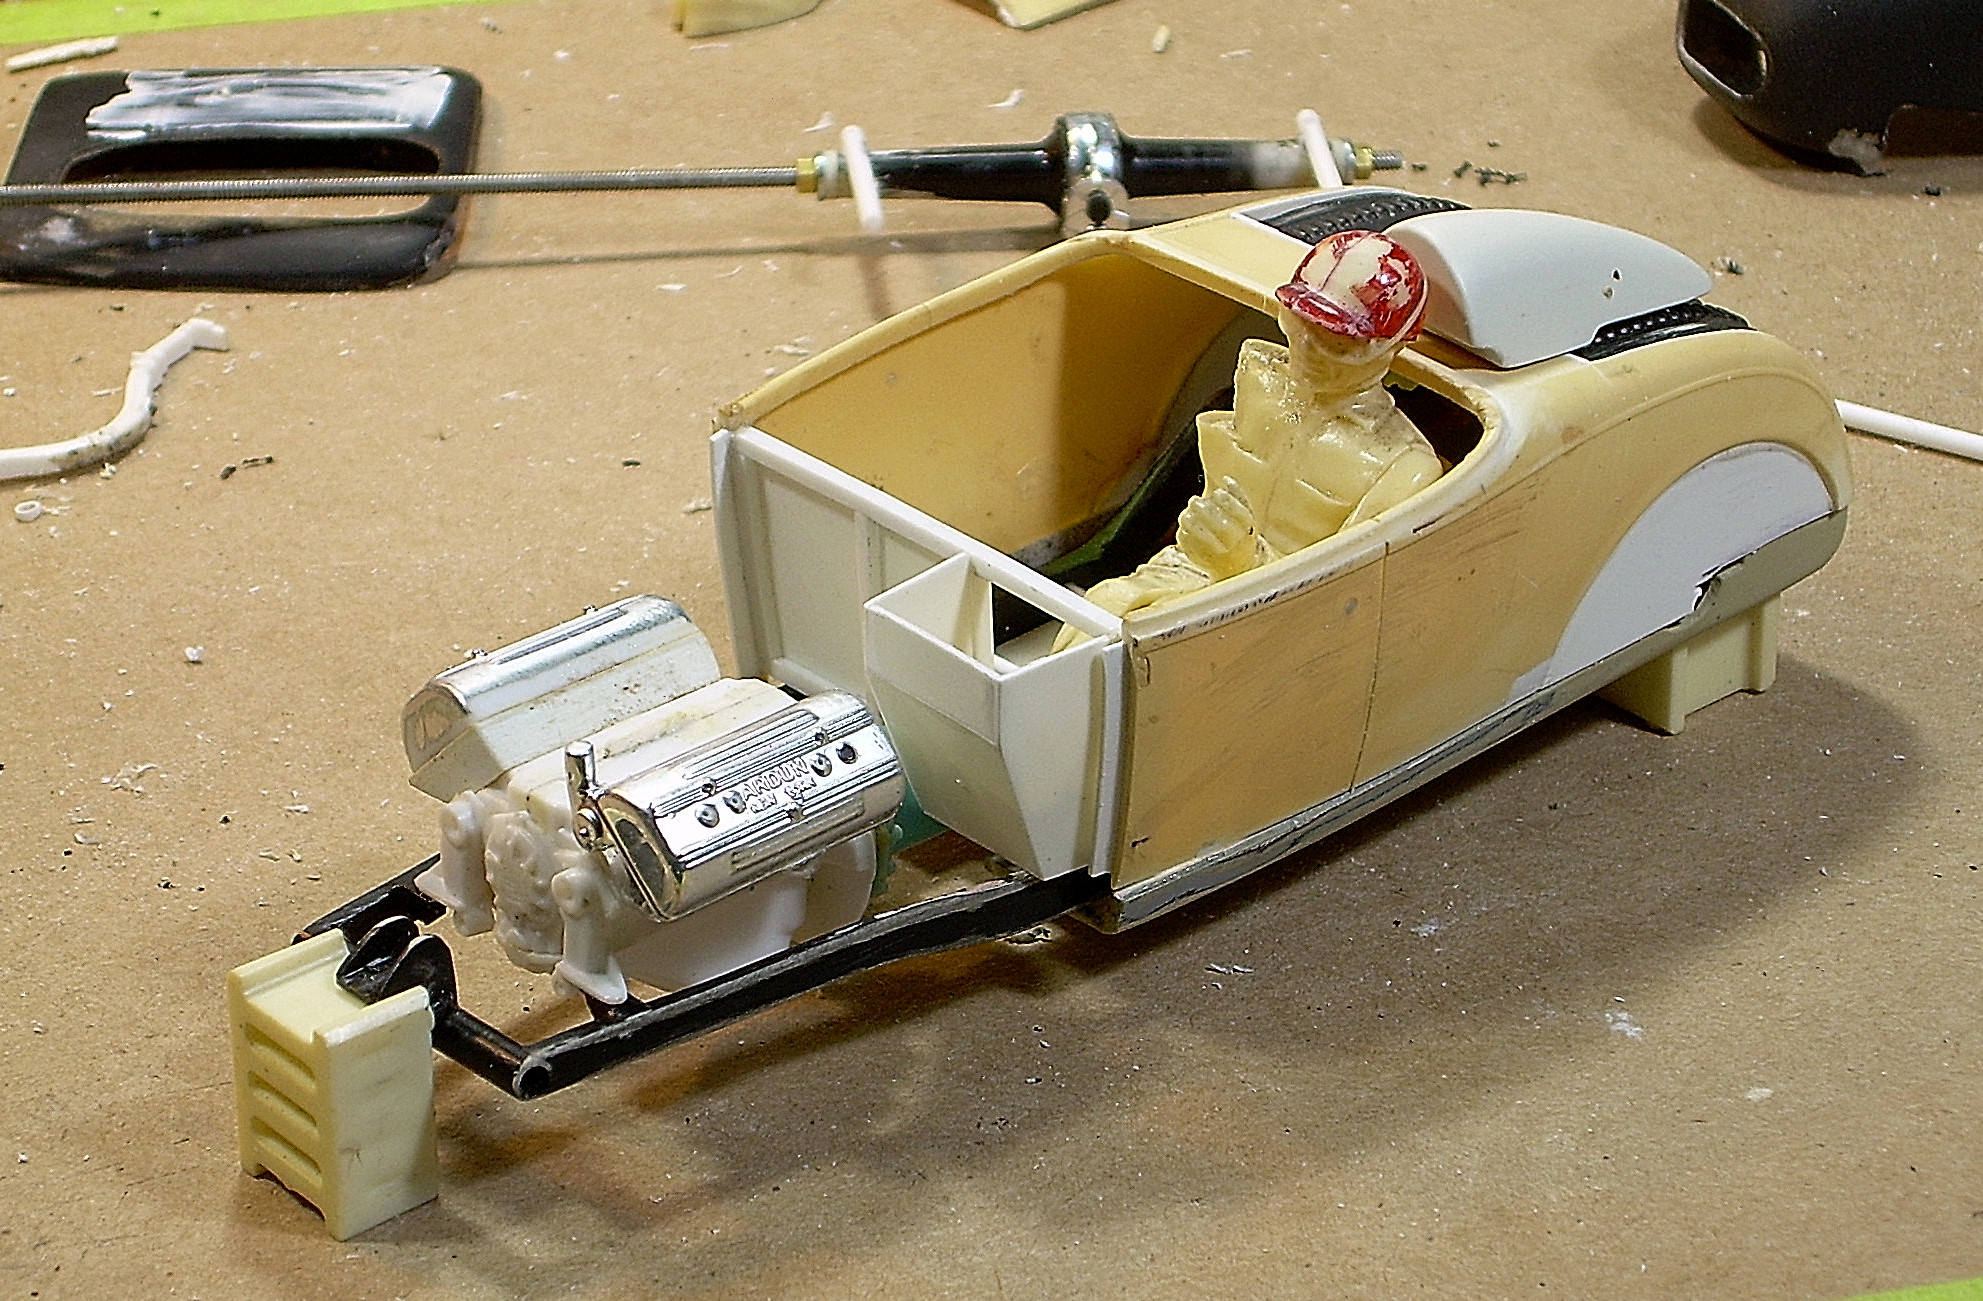
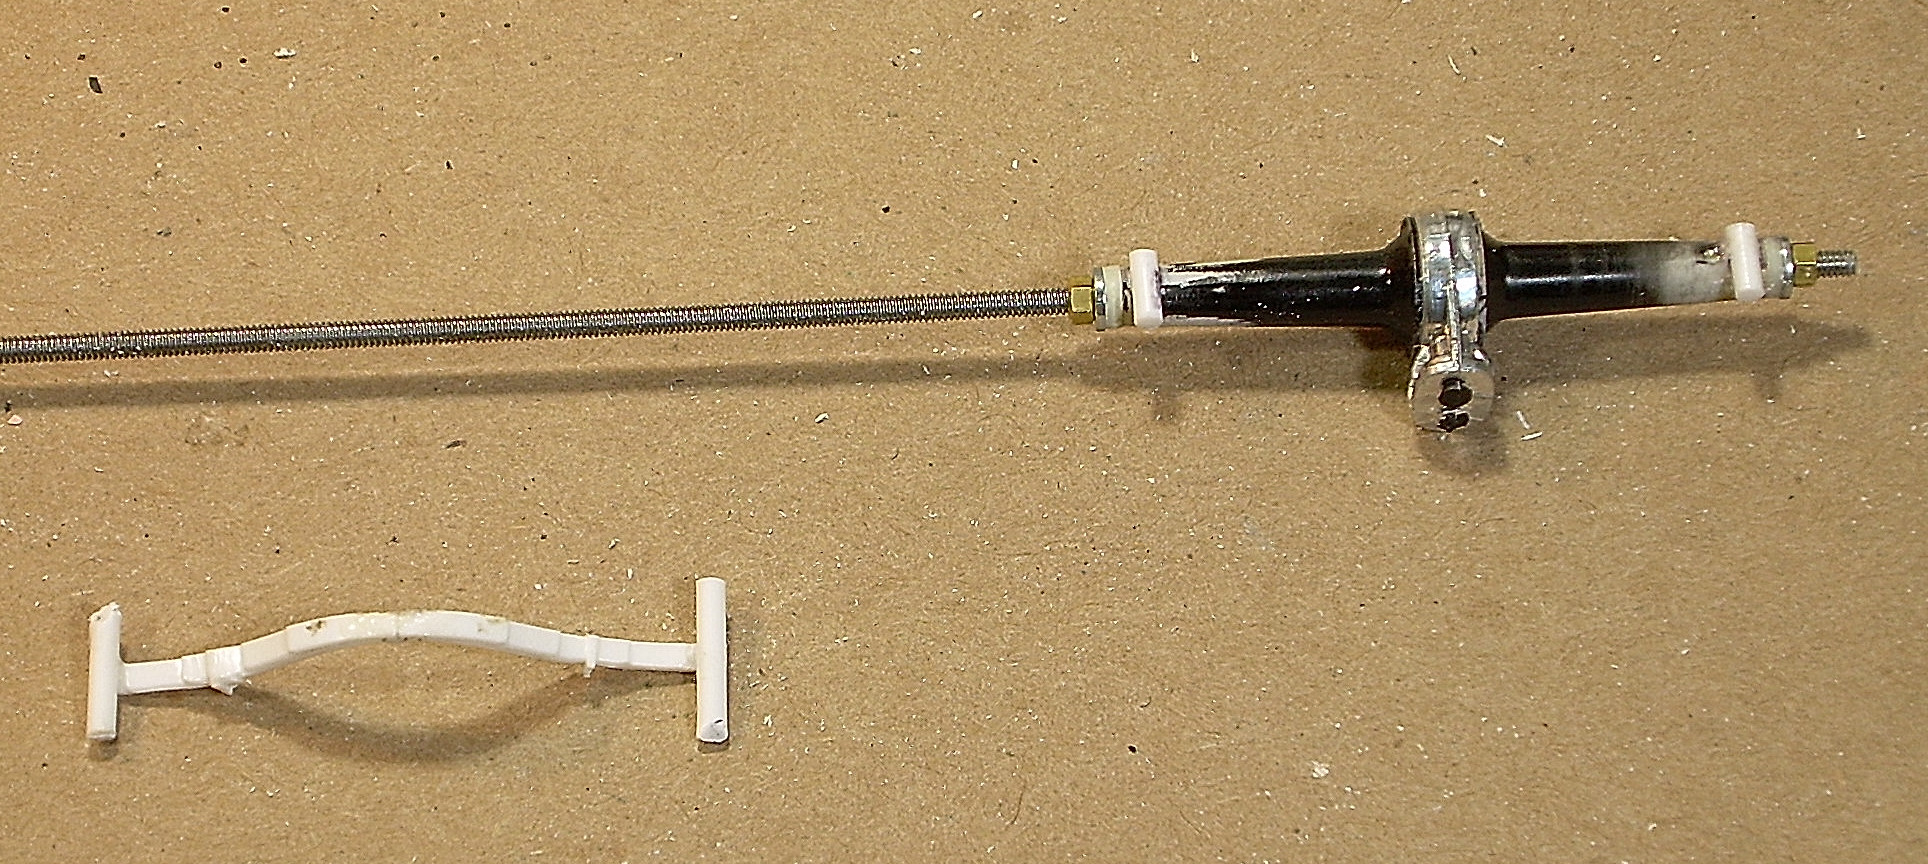
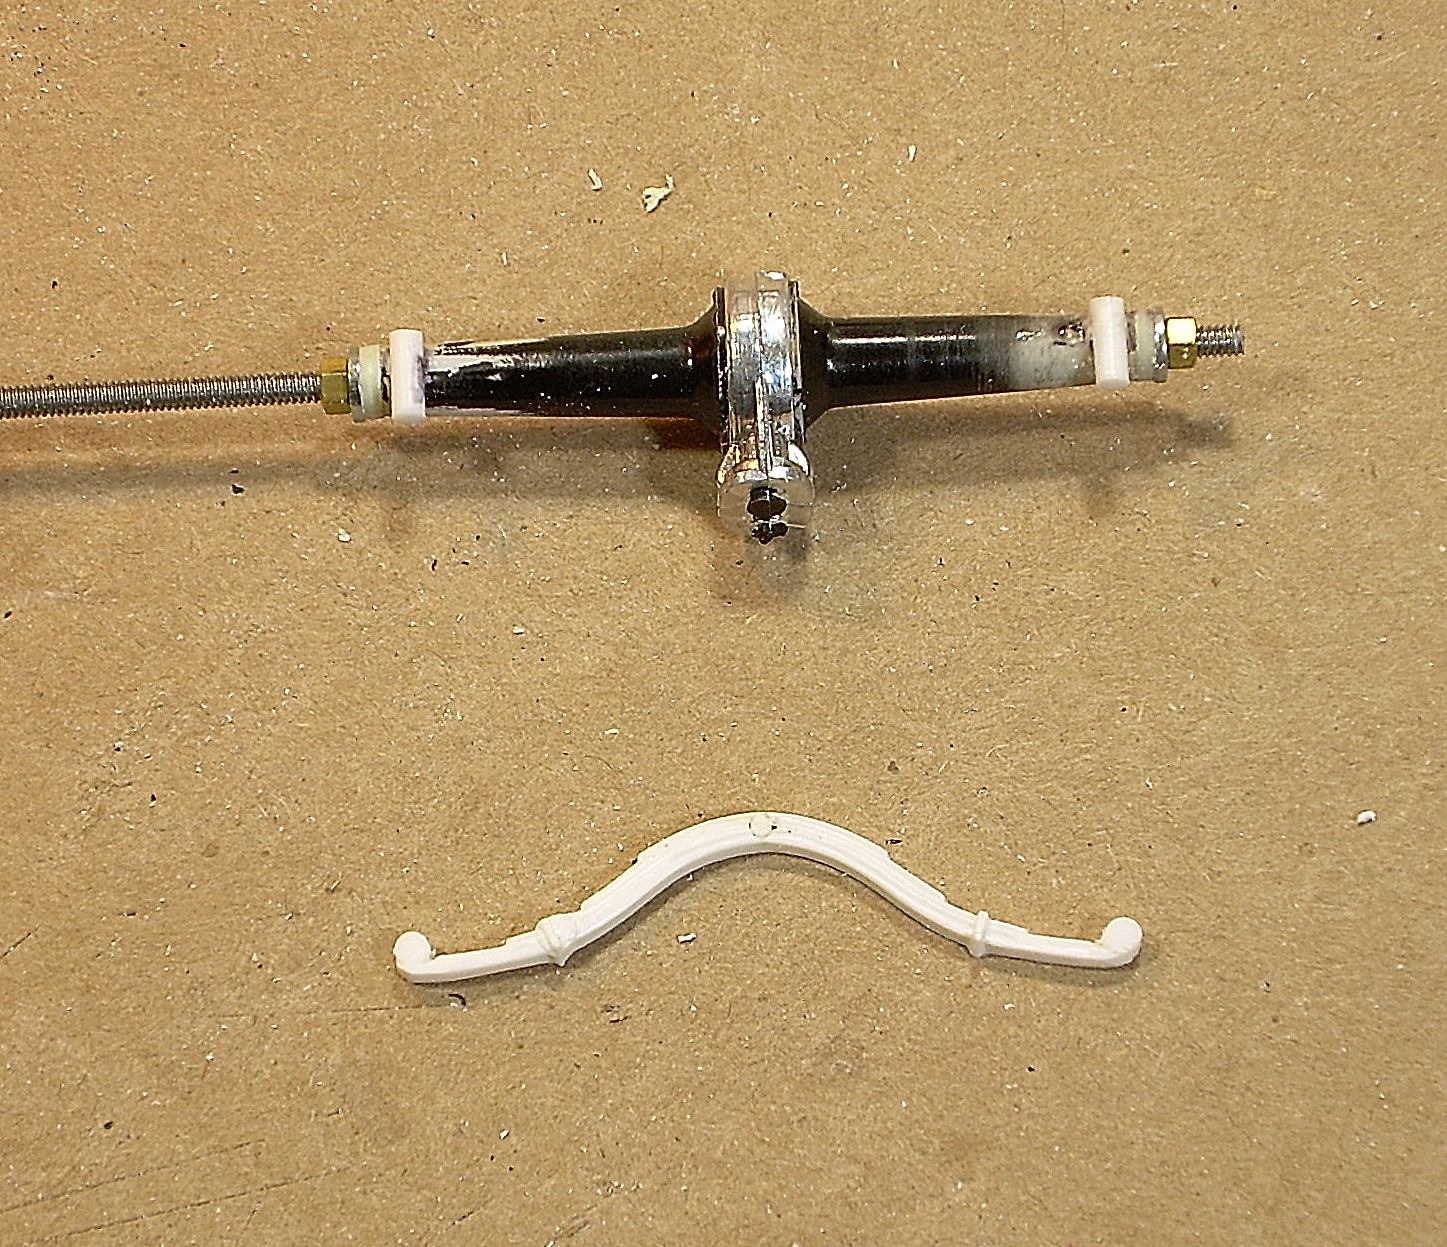
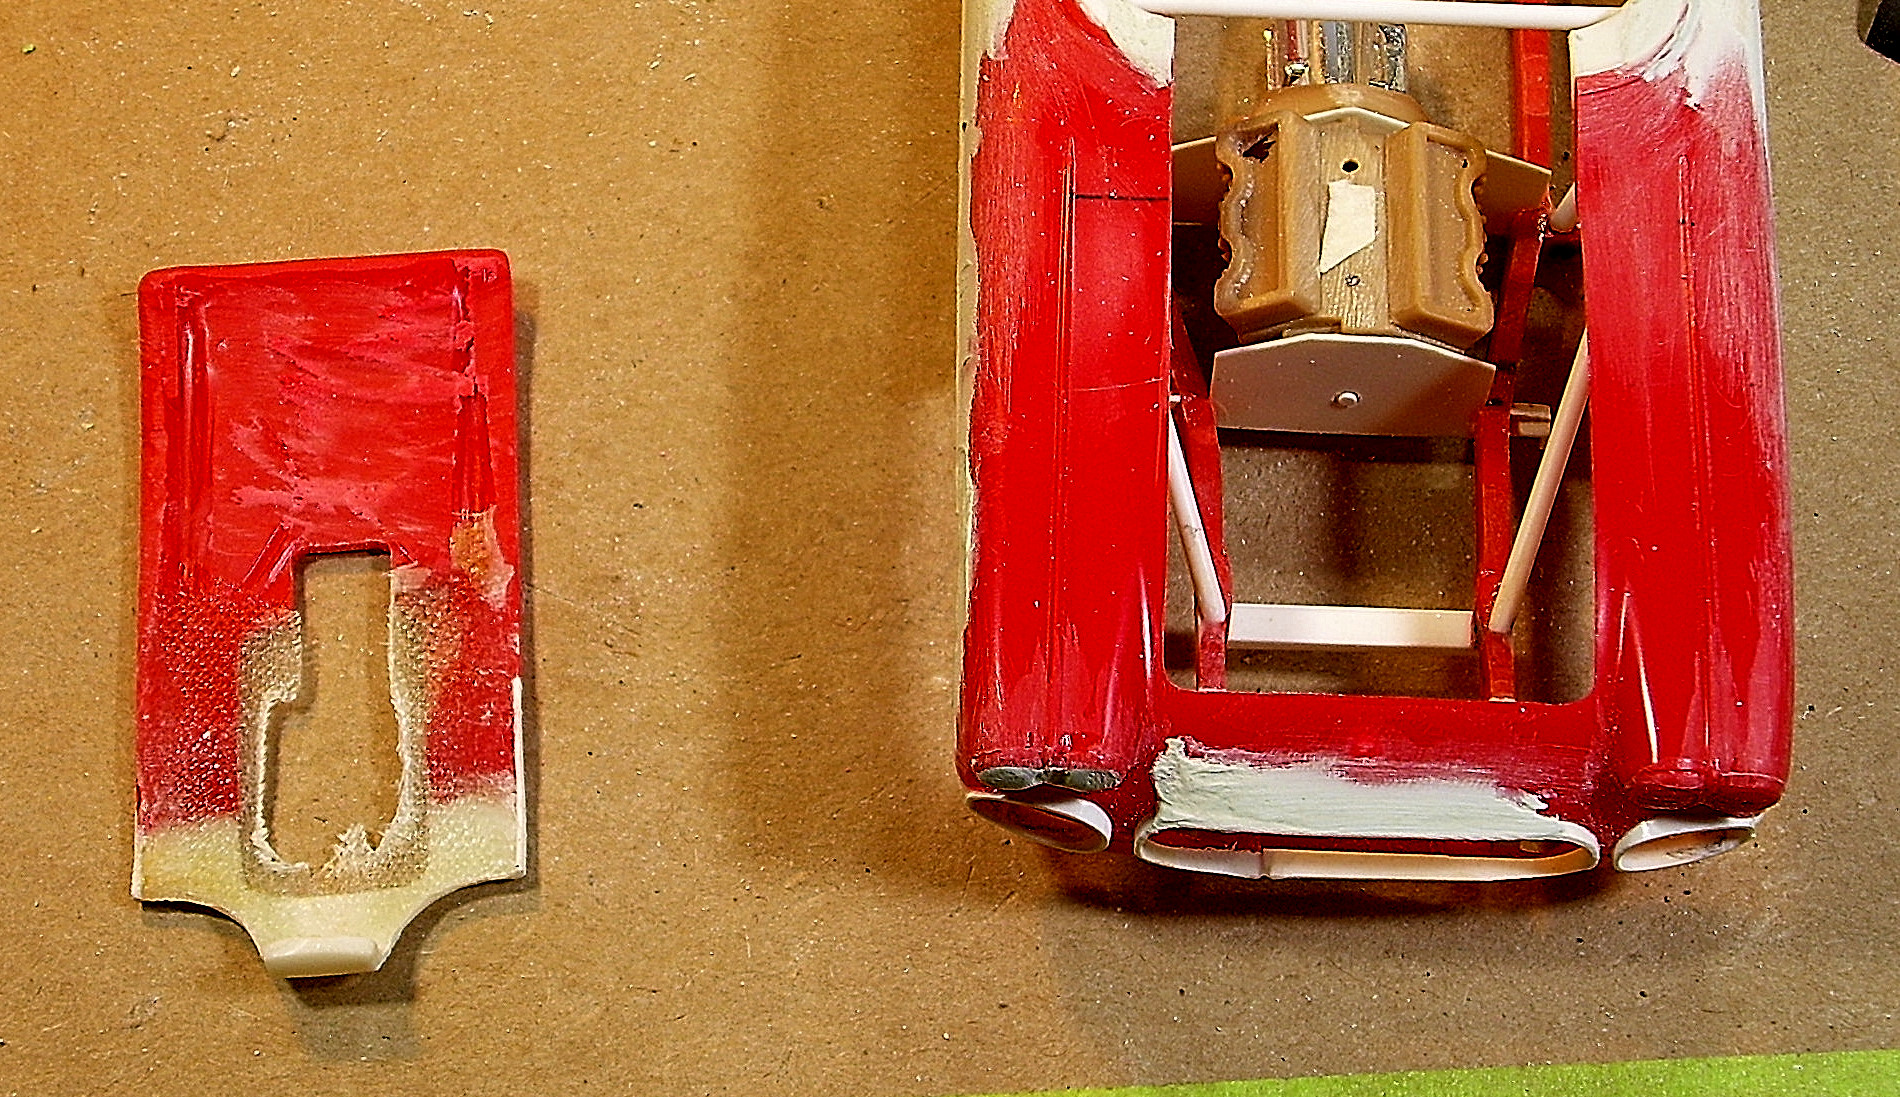
I built some structure in the front of the new shell. It will form the front body mount, as well as support the firewall and footbox for the driver. The flanges on the body sides will positively locate the hood side panels. Lefty still has infinite patience when it comes to helping fit parts so a real driver could actually operate things. One of my goals with most models is to make them represent reality close enough so that they could be scaled up and built 1:1 pretty much as-is. That framework isn't actually wonky, by the way. It's an optical illusion. New seat supports on frame, firewall and footbox, and decklid fitted to new shell. Fabbed some new wheel opening fillers too, made to fit the previously built-up plug for the rear bellypan. The bellypan assembly had warped a little over time since I worked on it last, owing to the very slow evaporative drying of liquid "cement" trapped between layers of plastic. I also found that there is an inherent slight twist in these AMT '29 Ford body shells. Looking like it's supposed to (though the helmet fairing is shown too far to the rear; it's been corrected). The rear axle was mocked up previously with a spring and spacers to simulate hangers and shackles. Below, the axle is getting mount tubes for the shackles. The threaded rod and nuts hold the axle bells in correct alignment without glue, while I build the spring mounts. It all has to be taken apart again to be painted. The inboard ends of the axle bells have been thinned to better represent reality than the way-overly-thick usual kit parts. Below, the tubes the shackles bolt to have been trimmed to length, and spring "eyes" are being formed on the spring ends using styrene rod. One more shot for tonight: the spring eyes are done. Now they just have to be drilled, and the rest of the shackles made up and attached.

-
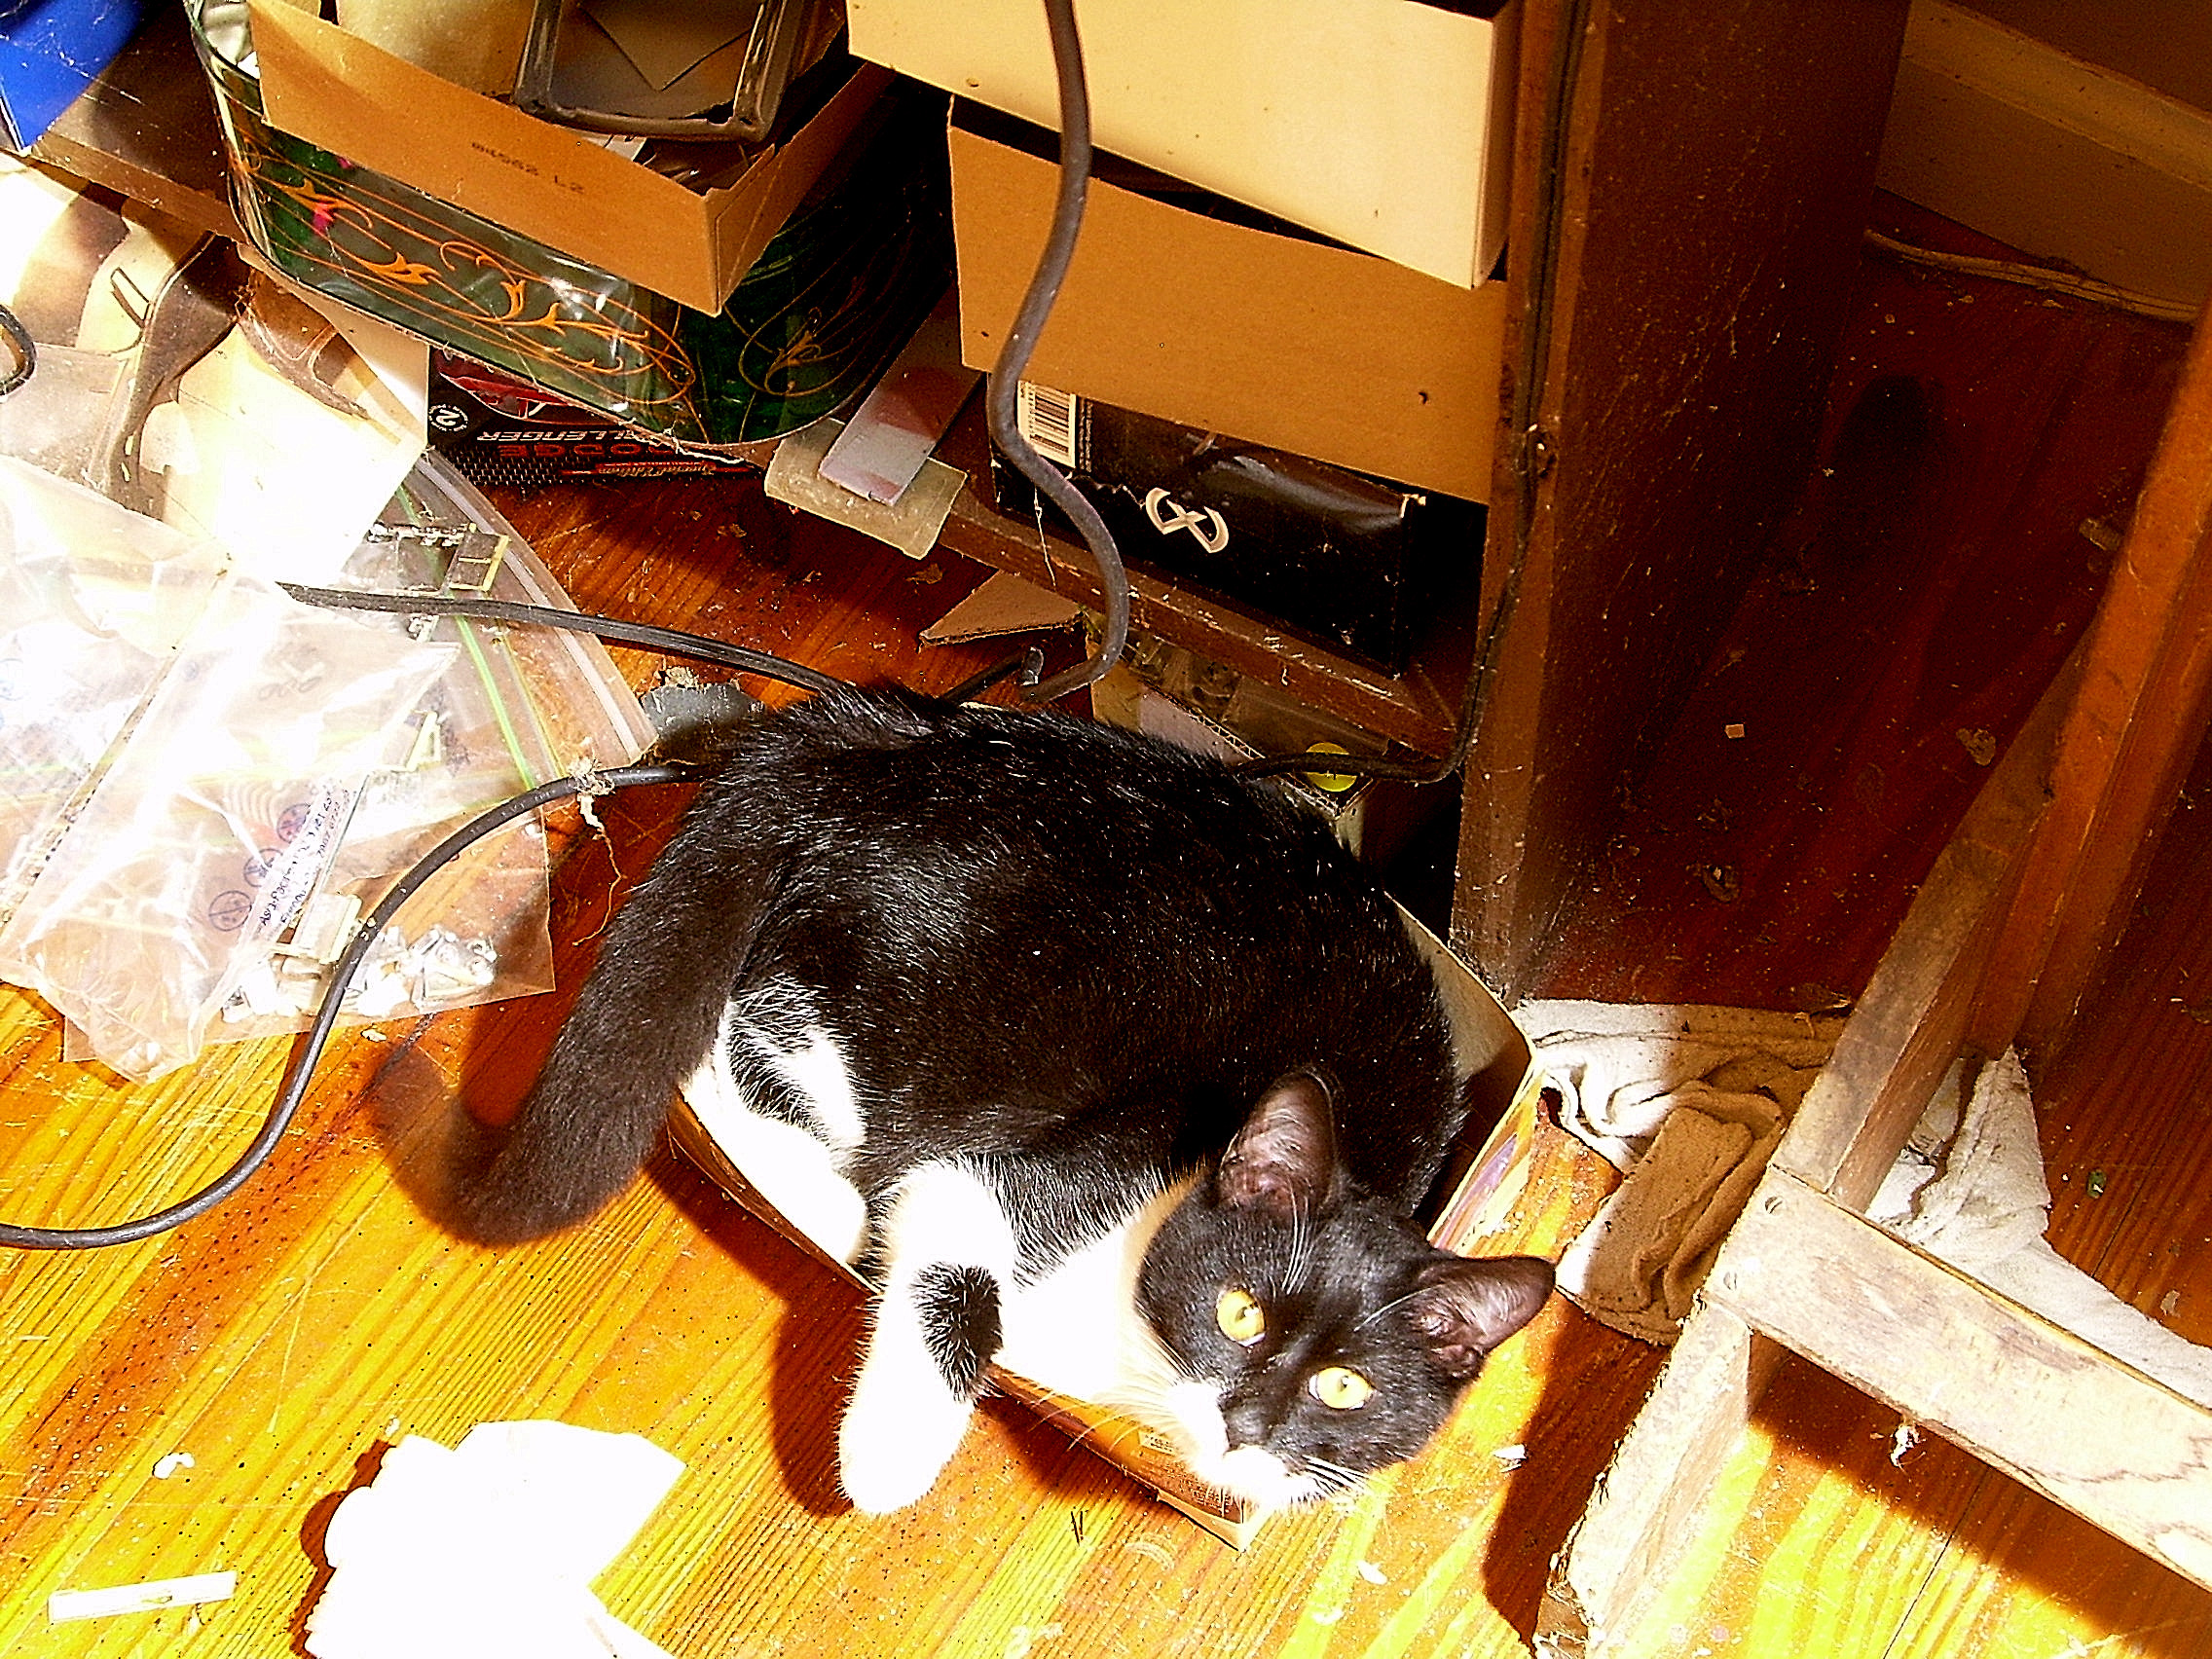
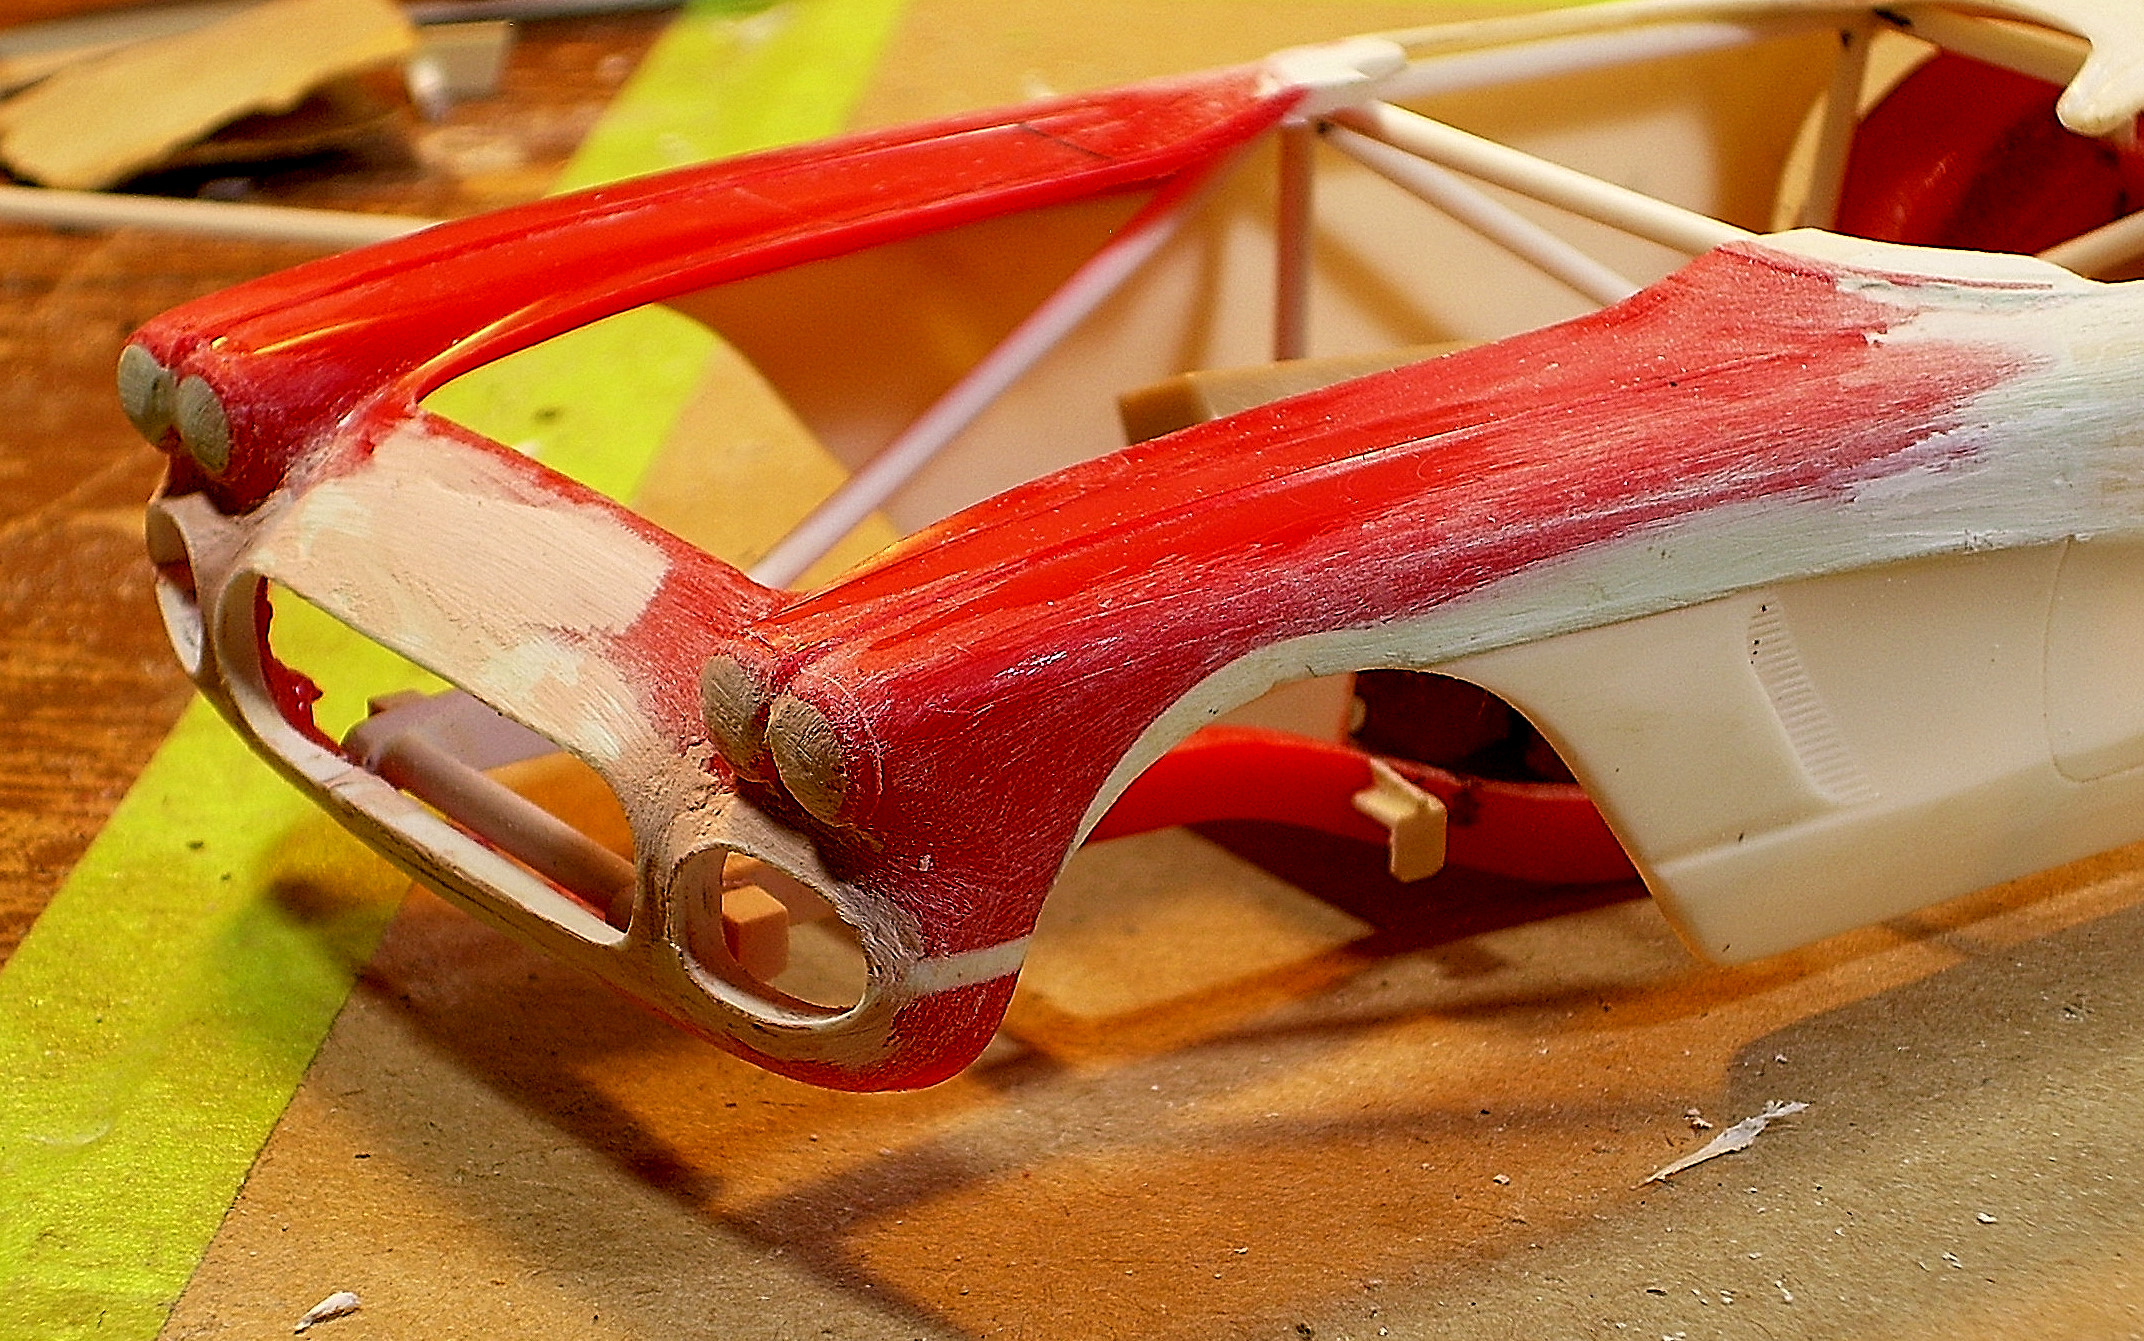
I glassed the two sections of the hood panel together, as it's going to be the plug for a near-scale-thickness panel, and needs to be stout at the join. I also straightened out the edges of the old hood and opening with strip stock filed flat. This is my ace number one assistant, chief parts chaser, and occasional foot warmer. He doesn't seem to notice (or care if he does) he's now way too big for the box. Progress on curing the flat-face appearance the AMT 4-eyed Corvettes of this generation seem to me to have. The grille openings have been extended with .010" styrene strip, as shown earlier, and will be filled. We're getting there. The door lines are also being filled, as this is supposed to be a lightweight one-piece body (pre-funnycar, but moving towards that idea).
-
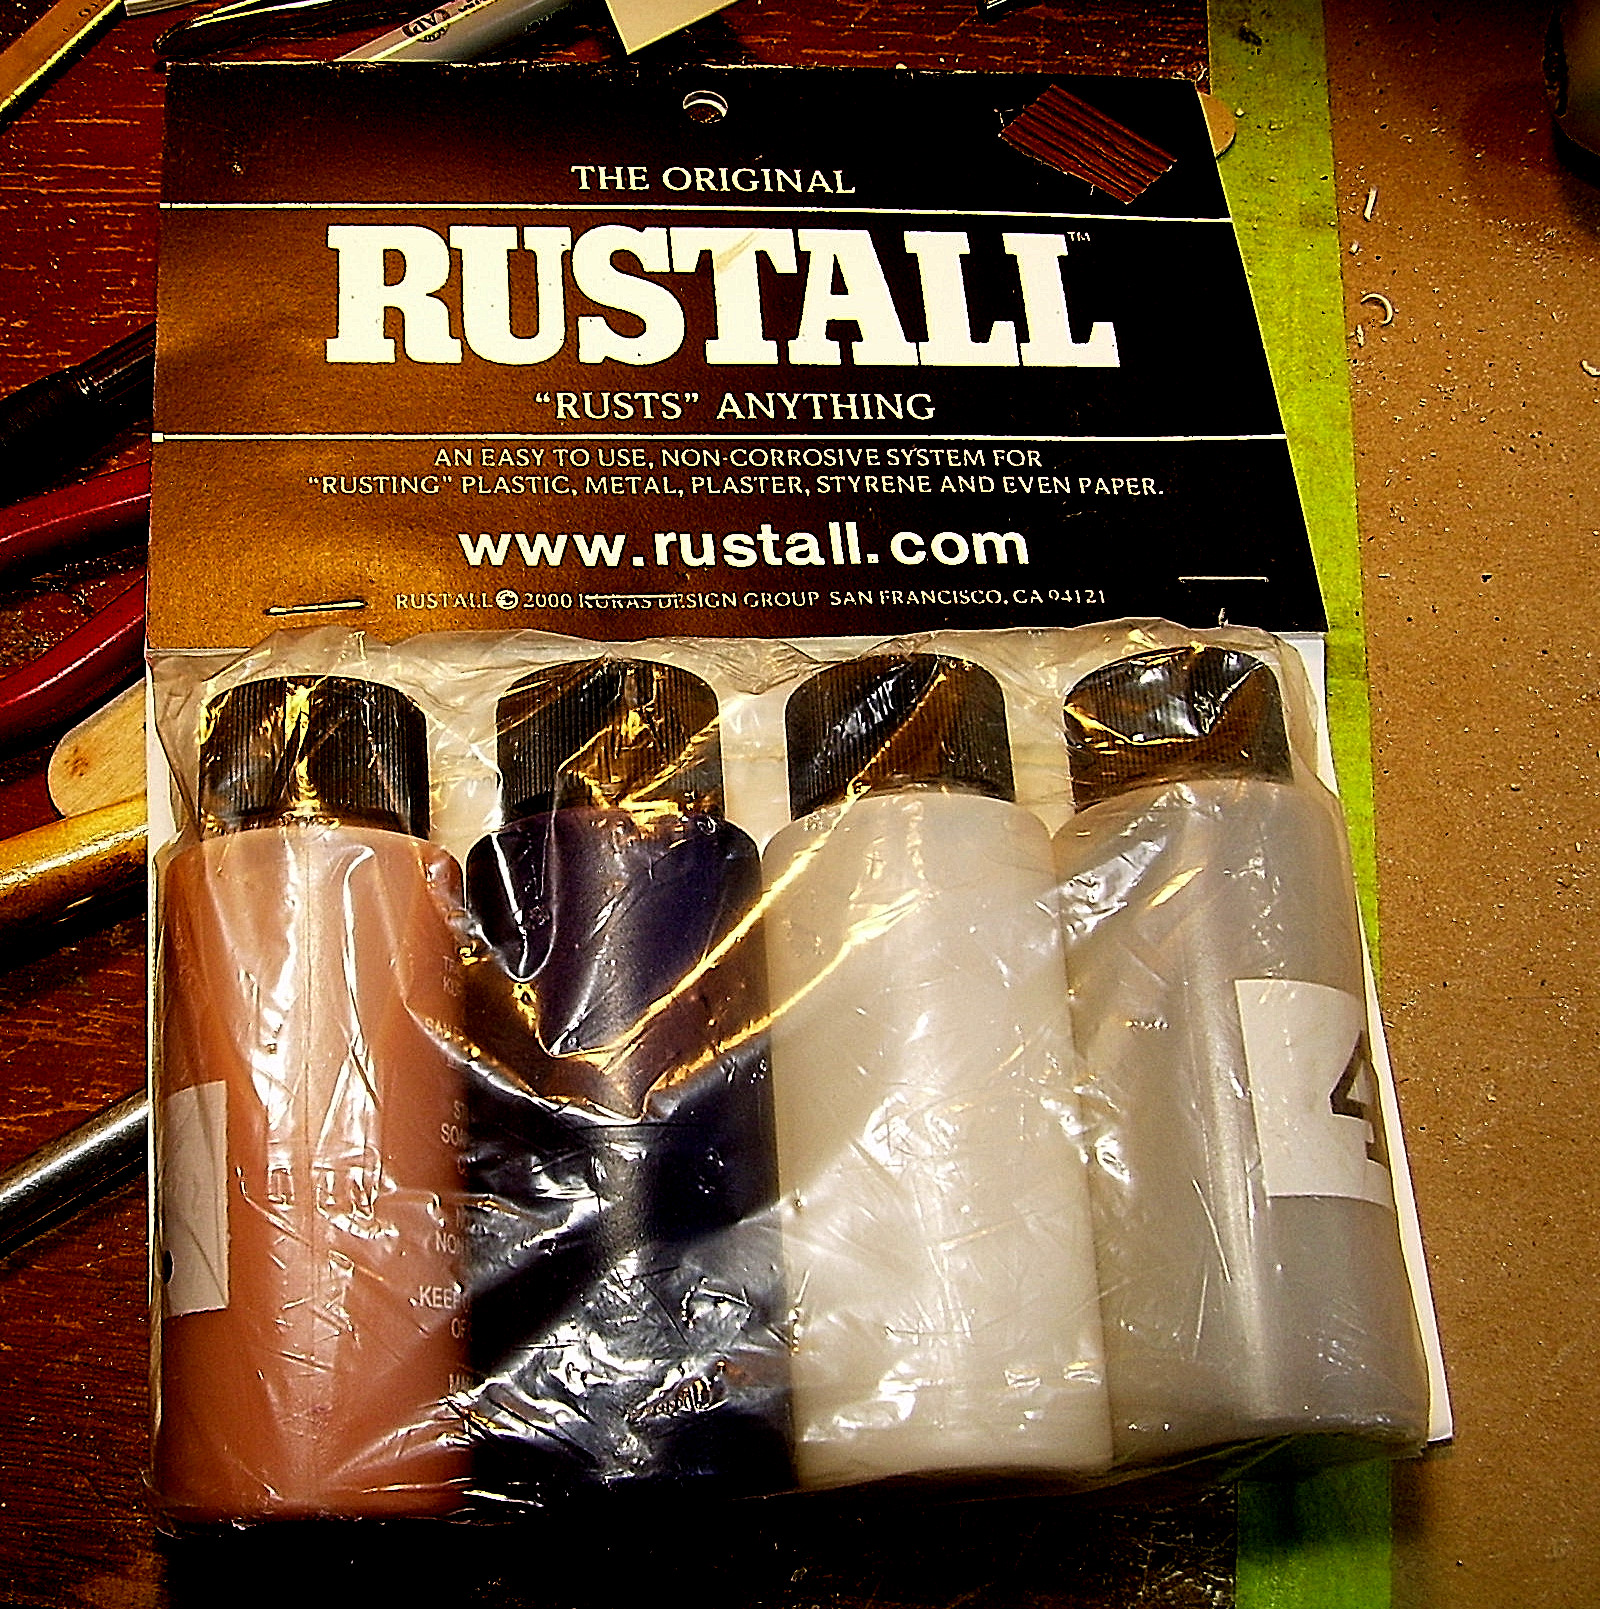
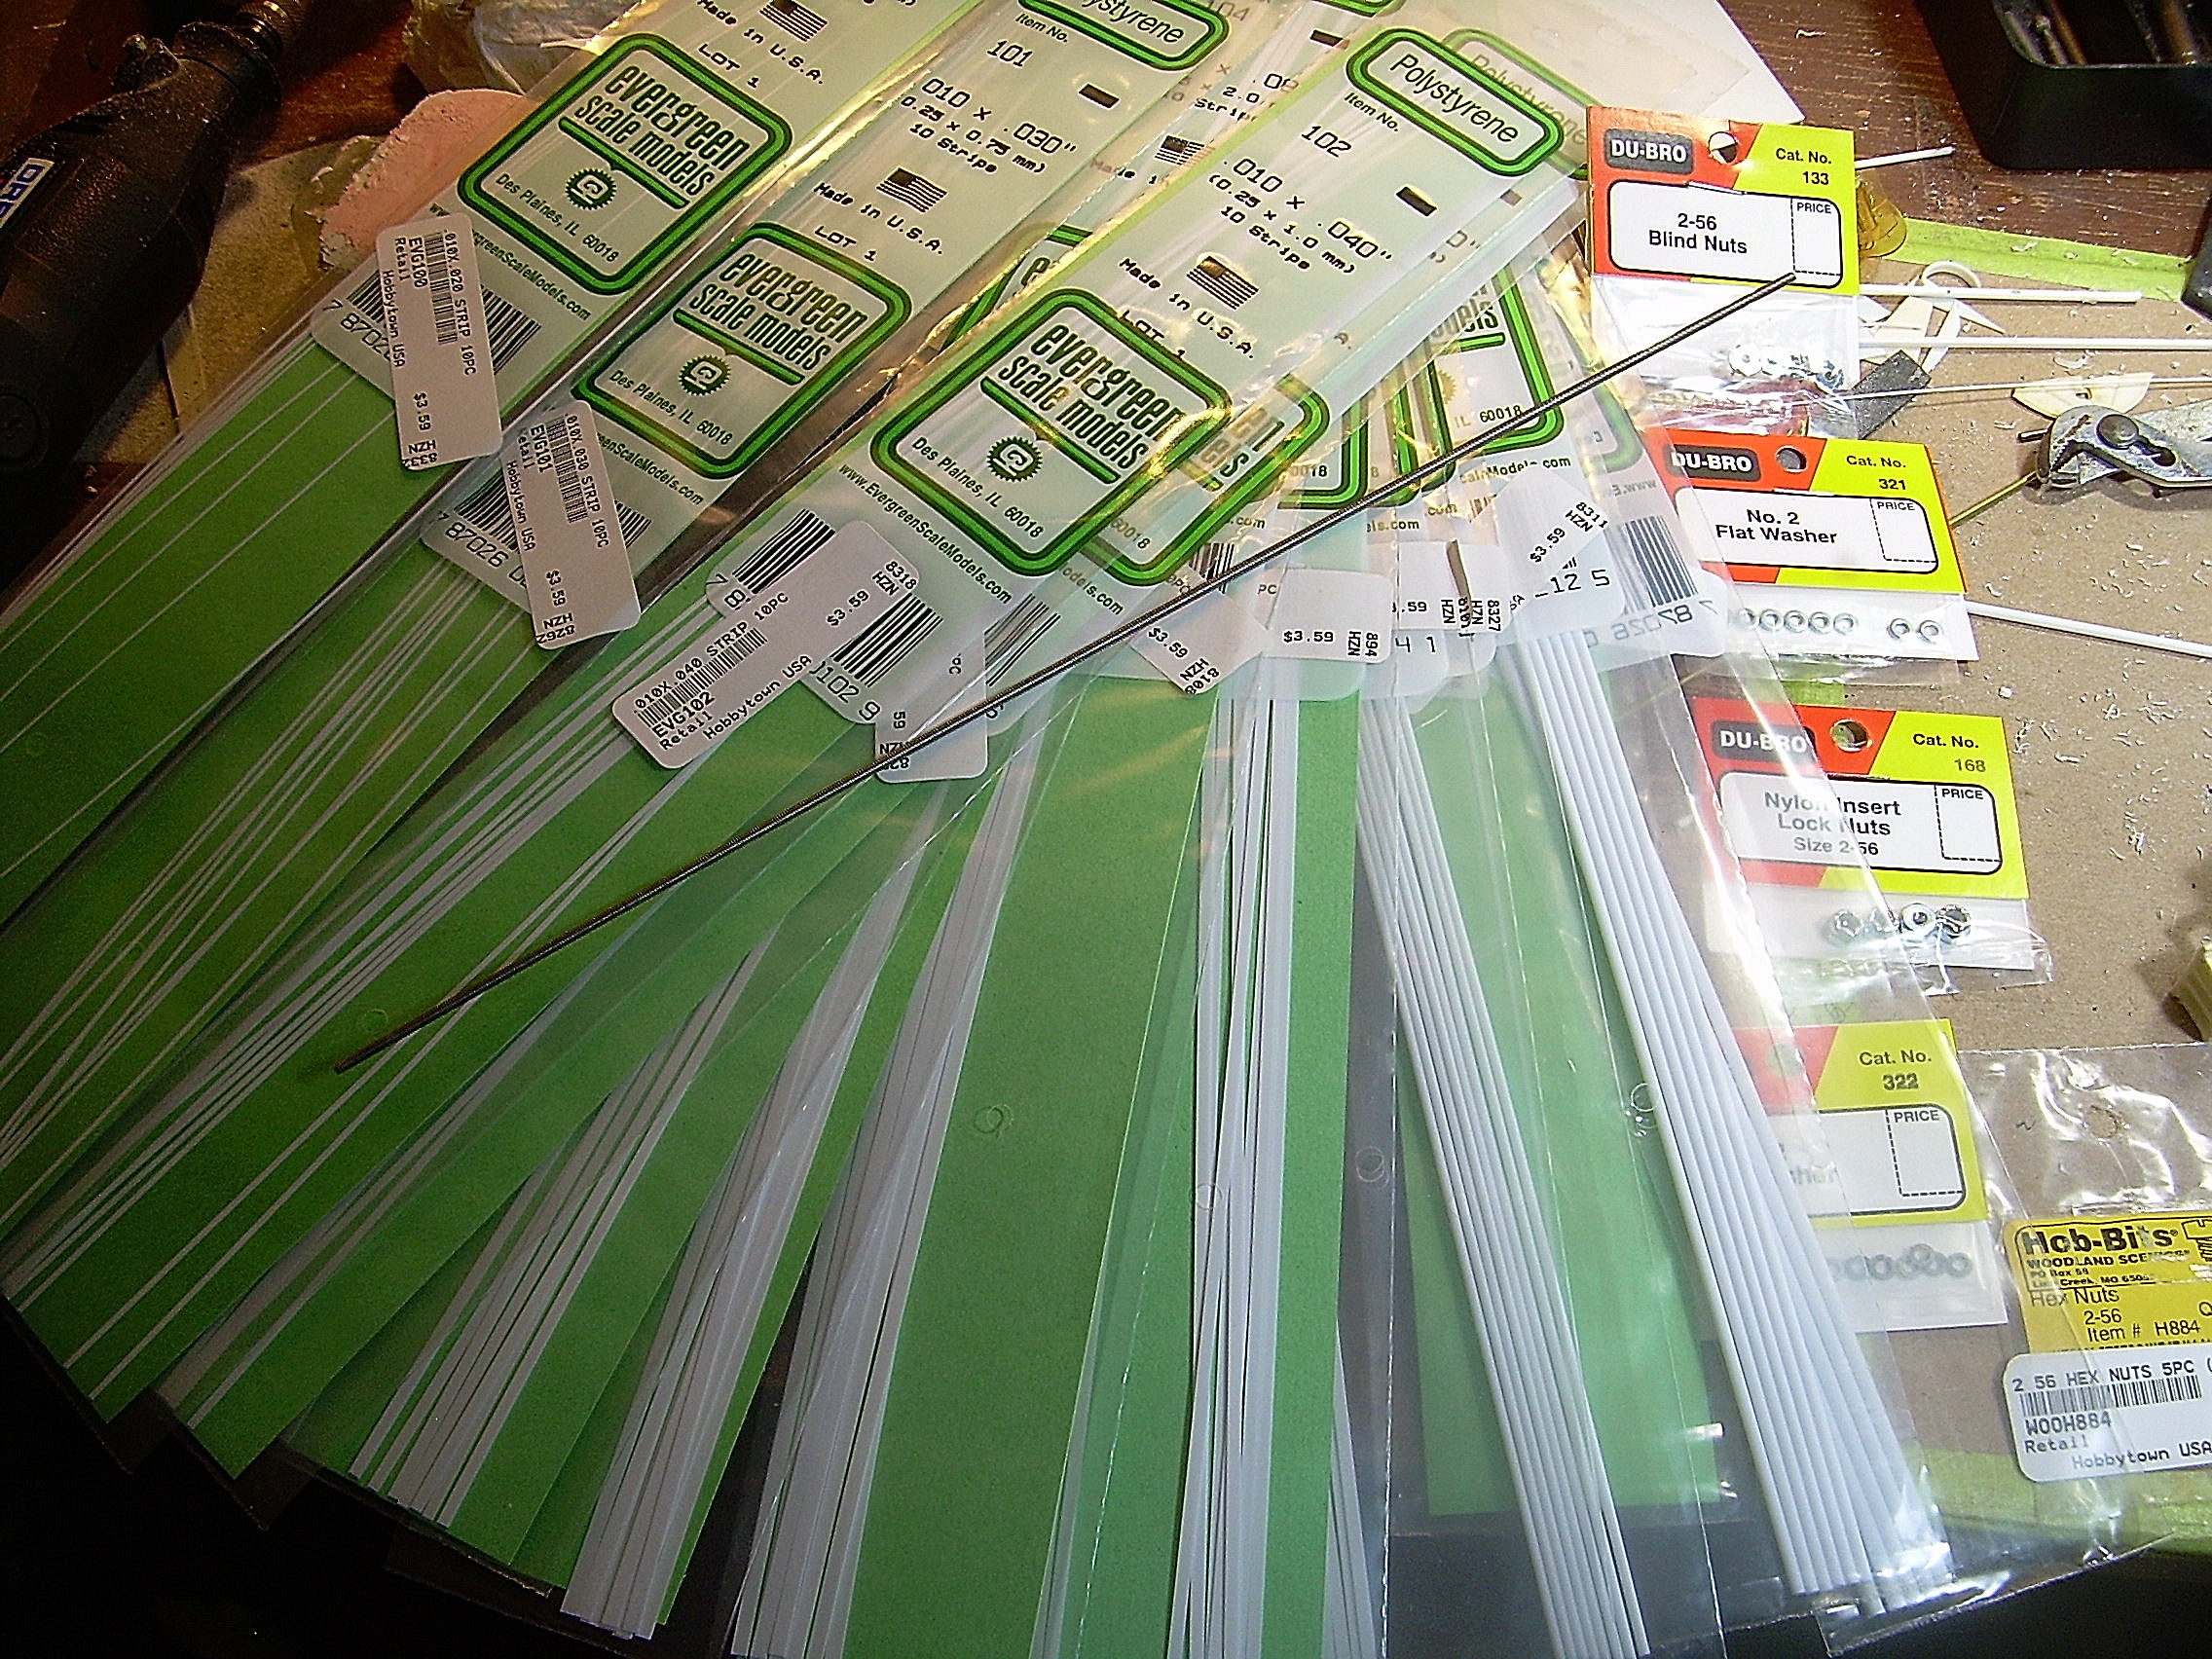
Stuff and things. Lotsa styrene strip and shape stock, 2-56 threaded rod and nuts, and some goo. The Rustall had been sitting on the shelf at the LHS, all alone and sad, for years. Should be interesting to see how well it works. I'm hoping it's easily removable, as I want to "rust" and heavily weather some vintage HO scale locomotives to populate the waiting area outside a rebuild facility, and to be able to remove it during the actual upgrades/rebuilds. And man-oh-man. That fine white Tamiya putty is something really special for very small fills and pinholes (so far).