Ace-Garageguy
-
Posts
38,182 -
Joined
-
Last visited
Content Type
Profiles
Forums
Events
Gallery
Everything posted by Ace-Garageguy
-
Hmmmm...first thing that comes to mind in 1/25 is one of these... I'm pretty sure the T phaeton kit derived from this still has the quad lights on stands. Probably wouldn't be too rough to remove one light from each. >>>>>>> I don't remember exactly what this kit has, but I'll have a look.

-
Thanks for the great source info in that post, Pete. Very helpful. The breakage thing is why I recommended at least a drill-press or a variable-speed Dremel setup on a drill stand. Like you say, snapping those little bits can get expensive, no matter how well set up you are, or how careful you are.
-
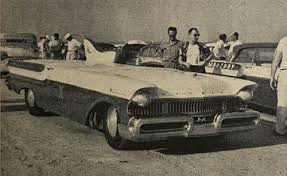
They are, I believe, a chrome panel from a Mercedes 540K kit. I black-washed the faces, then covered them with clear PVA canopy glue to simulate glass. It worked well for about a year, and then the "glass" and wash just fell off. Still working out a permanent solution. That model represents something that could have been built in SoCal by a rodder with some money, in the early to late 1950s. At that time, there were still some high-end 1930s European cars in junkyards, so the Merc panel isn't too far-fetched.
-
Thank you, sir. They're two different models. The upper one is 1/25. The lower one is 1/8. The headlight stands are from either the Monogram Big T, or one of the Lindberg 1/8 T kits. All the large-scale stuff is packed, so I can't dig anything out to look.
-
When I moved here back in the '80s, it was pretty far removed from the hustle of downtown Atlanta, though I could be in the city in half an hour. It had a quiet, small town atmosphere, and seemed more like a country town than a suburb. I had the best of both worlds. Since then the growth has been astronomical...the latest big-deal being the construction of the new stadium. I really don't understand why people want to live on top of each other, or why they all seem to go the same place at the same time. Anyway, I'll be leaving within 6 months...back to a smallish town, but in the desert this time.
-
 Really enjoying seeing this come together. Still looking great. I believe Mr. Scot would approve.
-
galaxie limited chevrolet cars 1948/1947
Ace-Garageguy replied to youpey's topic in General Automotive Talk (Trucks and Cars)
Yeah, it's pretty bad, but scratchbuilding the whole thing isn't necessary. Most of what you need is already there. -
galaxie limited chevrolet cars 1948/1947
Ace-Garageguy replied to youpey's topic in General Automotive Talk (Trucks and Cars)
The "ridge" is the convex fold at the bottom of the door/quarter panel. It should be a little lower, almost at the bottom door cut-line. The hoods fit pretty well, but not perfectly. They were vague on the real cars too, actually. A little careful file work will snuggle 'em right in. If you want to be real persnickety, the top of the fender extension that bolts to the door skin should actually be a little LOWER than the rear of the front of the fender. This is necessary to allow it to swing UNDER the fender when the door is opened; I've fitted a few of this style GM body together. You can just barely see it in these shots. -
Now Here's an Idea
Ace-Garageguy replied to Olderisbetter's topic in General Automotive Talk (Trucks and Cars)
I agree. Coupla things I wooda done diffrently, but I like it just fine as-is. -
Funny. The new Braves stadium, SunTrust Park, is a few miles from my house. One of the most annoying sounds to me these days is ANYTHING while stopped dead in traffic, trying to get anywhere in the vicinity, or past it on US-41, I-75 or I-285, 2 hours before until 2 hours after any game.
-
Back in the Spring of 1962, I was quite literally awestruck by the color photos of a layout built by noted nature-artist Francis Lee Jacques. I was so deeply affected, it stuck with me all these years, and I recently found an old copy of the magazine I saw it in; it's just as powerful today as it was 56 years ago. Here's a link to his work http://thesciencenotebookblog.blogspot.com/2015/10/lets-talk-about-dioramas.html but the photos of his layout (preserved and moved after his death) just don't do it justice. He used colored lighting to vary the mood and temperature of his scenes, and the effect is beyond imagining. If you really appreciate seeing the true art of model trains, seek out the May 1962 issue of Model Railroader. Again, the photos below do NOT do his layout justice. You have to see the magazine article to get the full impact.
-
galaxie limited chevrolet cars 1948/1947
Ace-Garageguy replied to youpey's topic in General Automotive Talk (Trucks and Cars)
It's on all of the Galaxie kits, but it's not going to bother a lot of people. You'll notice that too-high crease shows on Nick's great looking model too. The real car has it, but slightly lower, and it's always more noticeable when you don't use the rocker trim. Again, IF IT BOTHERS YOU, it's easy to file and sand the area just enough to drop the crease a little lower, or just round it off a bit so it LOOKS like it occurs lower. The convex crease should be almost level with the door cut-line, just a tick above it. -
galaxie limited chevrolet cars 1948/1947
Ace-Garageguy replied to youpey's topic in General Automotive Talk (Trucks and Cars)
Yes, there is that, and getting a good glossy paint job tends to make it stand out. You can see the problem in Dennis' fine looking black model immediately above this post. HOWEVER (and I just checked a kit to verify this), a less intense way (than what fumi describes) to visually correct the initial appearance is to simply soften the convex "roll" as the lower panel turns down. Easily done with files and sandpaper. There is sufficient meat at that location to achieve a worthwhile improvement in the appearance. -
Last one for a while, probably: Testors die-cast early Porsche 356. Probably pull some molds off it, make thin f'glass parts, and fab a reasonable chassis and VW-derived engine. This one plugs the last hole in the list of Porsche models I really want.
-
That's one of the more challenging bodies to chop. VERY nice.
-
Kookies Tee in a plastic kit ?
Ace-Garageguy replied to Greg Myers's topic in General Automotive Talk (Trucks and Cars)
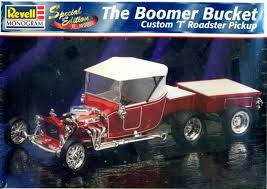
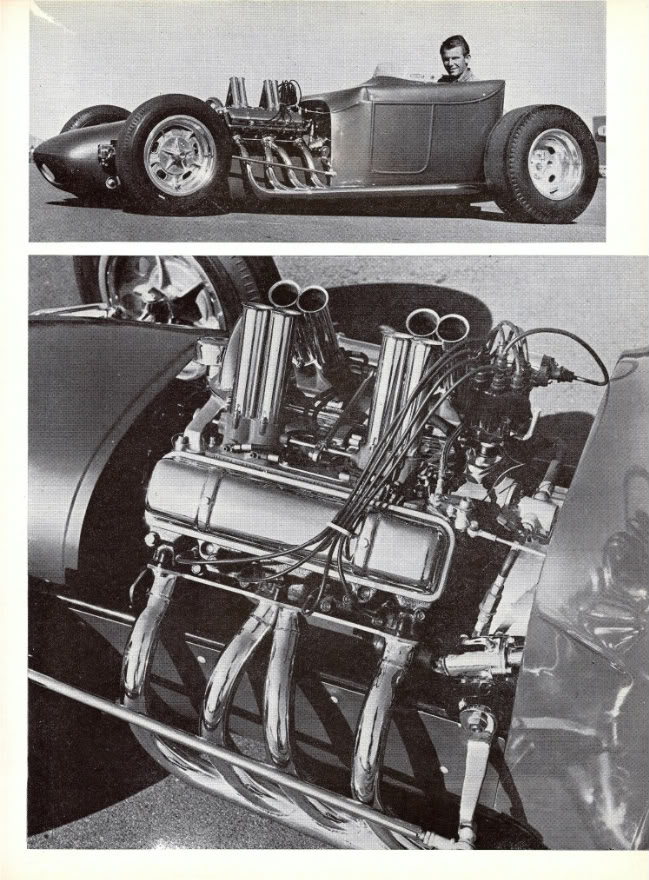
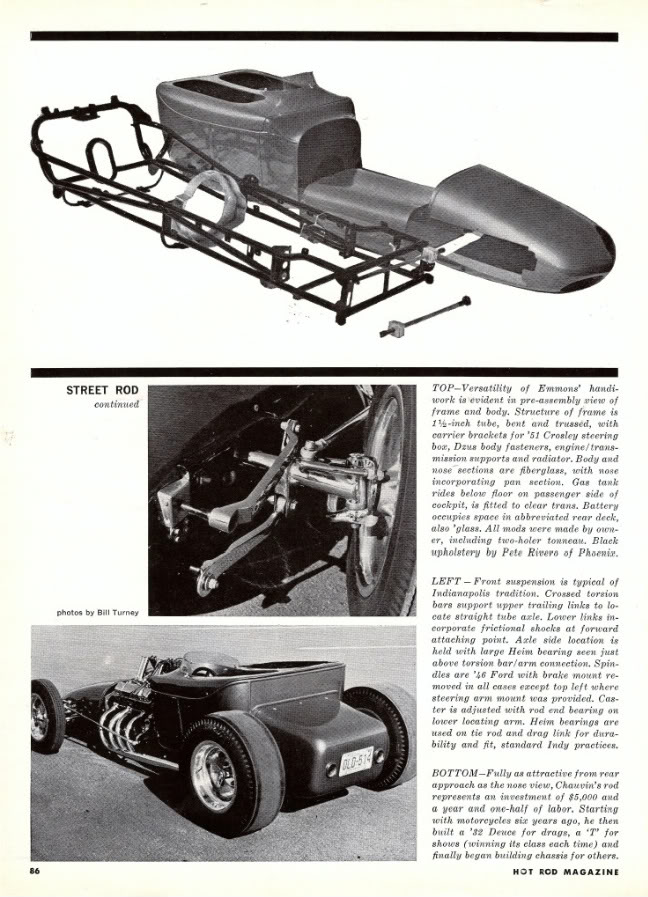
Not to pull this thread off-topic, but two of my favorite radical T-rods (Greg already posted pix of both), and definitely worth modeling, are Danny Eichstedt's "Leg Show" T, and Chauvin Emmon's Indy-roadster-inspired T. Though I'm not a huge fan of no-go showboats in general, the Leg Show is just flat cool. And it was actually a driver at times in its career. Emmons' car was at the other end of the T-bucket spectrum, with a tube-chassis, a Watson nose, and trick torsion-bar front suspension.
-
As bizarre as the Caddy mashup is, I kinda like it. The dually Goat, not so much.
-
Ford Engine comparison
Ace-Garageguy replied to slusher's topic in Model Building Questions and Answers
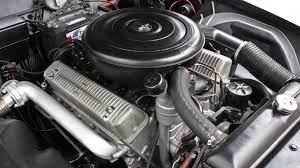
No, it is NOT a Lincoln Y-block. The only Y-block thing about it is the valve covers. It's NOT an MEL either. It's an inaccurate-for-anything mashup. It's all covered in the thread I linked to above: -
galaxie limited chevrolet cars 1948/1947
Ace-Garageguy replied to youpey's topic in General Automotive Talk (Trucks and Cars)
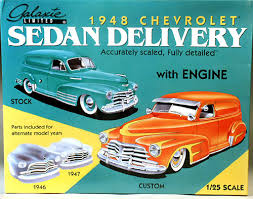
It's a great kit. I have several. The "woody" version is the same as the original, as you suspect, with the addition of separate "wood" overlays. The only notable glaring inaccuracy is that the front lower corners of the front fenders (under the headlights) are too square. This can easily be fixed with a little file work, as there's enough plastic there to round them out nicely. The ride-height is a little low if you're doing stock, too. Again, easily fixed. The quality is on a par with anything out there...which is not to say they're perfect. There's also an out-of-production sedan delivery.
-
-
Ford Engine comparison
Ace-Garageguy replied to slusher's topic in Model Building Questions and Answers
Hey man, don't feel bad. That engine has been mis-identified so many times (as either a Y-block or an MEL, and it's neither) and the bad info repeated so many times, it's one of those things that's been accepted as truth. I never would have known if I hadn't started out researching the Lincoln Y-block in the Holman-Moody prepped Mercury Mermaid. A forum member directed me to the old AMT kit as a source, and one thing led to another.
-
Ford Engine comparison
Ace-Garageguy replied to slusher's topic in Model Building Questions and Answers
That engine has been discussed at length, here and on other forums, though there's still a lot of misinformation floating around. -
Ford Engine comparison
Ace-Garageguy replied to slusher's topic in Model Building Questions and Answers
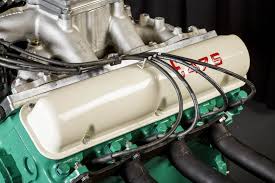
BUT...the valve covers in that kit are factory for the 368 Y-block Lincoln that came in the MkII Continental. The two-hole configuration will not physically bolt to an MEL engine. You'll have to use other valve covers to get a correct-appearing MEL. Continental 368 Y-block: MEL:
-
Now THAT is cool.
-
Yup. That's what I said up above...