slownlow
-
Posts
242 -
Joined
-
Last visited
Content Type
Profiles
Forums
Events
Gallery
Everything posted by slownlow
-
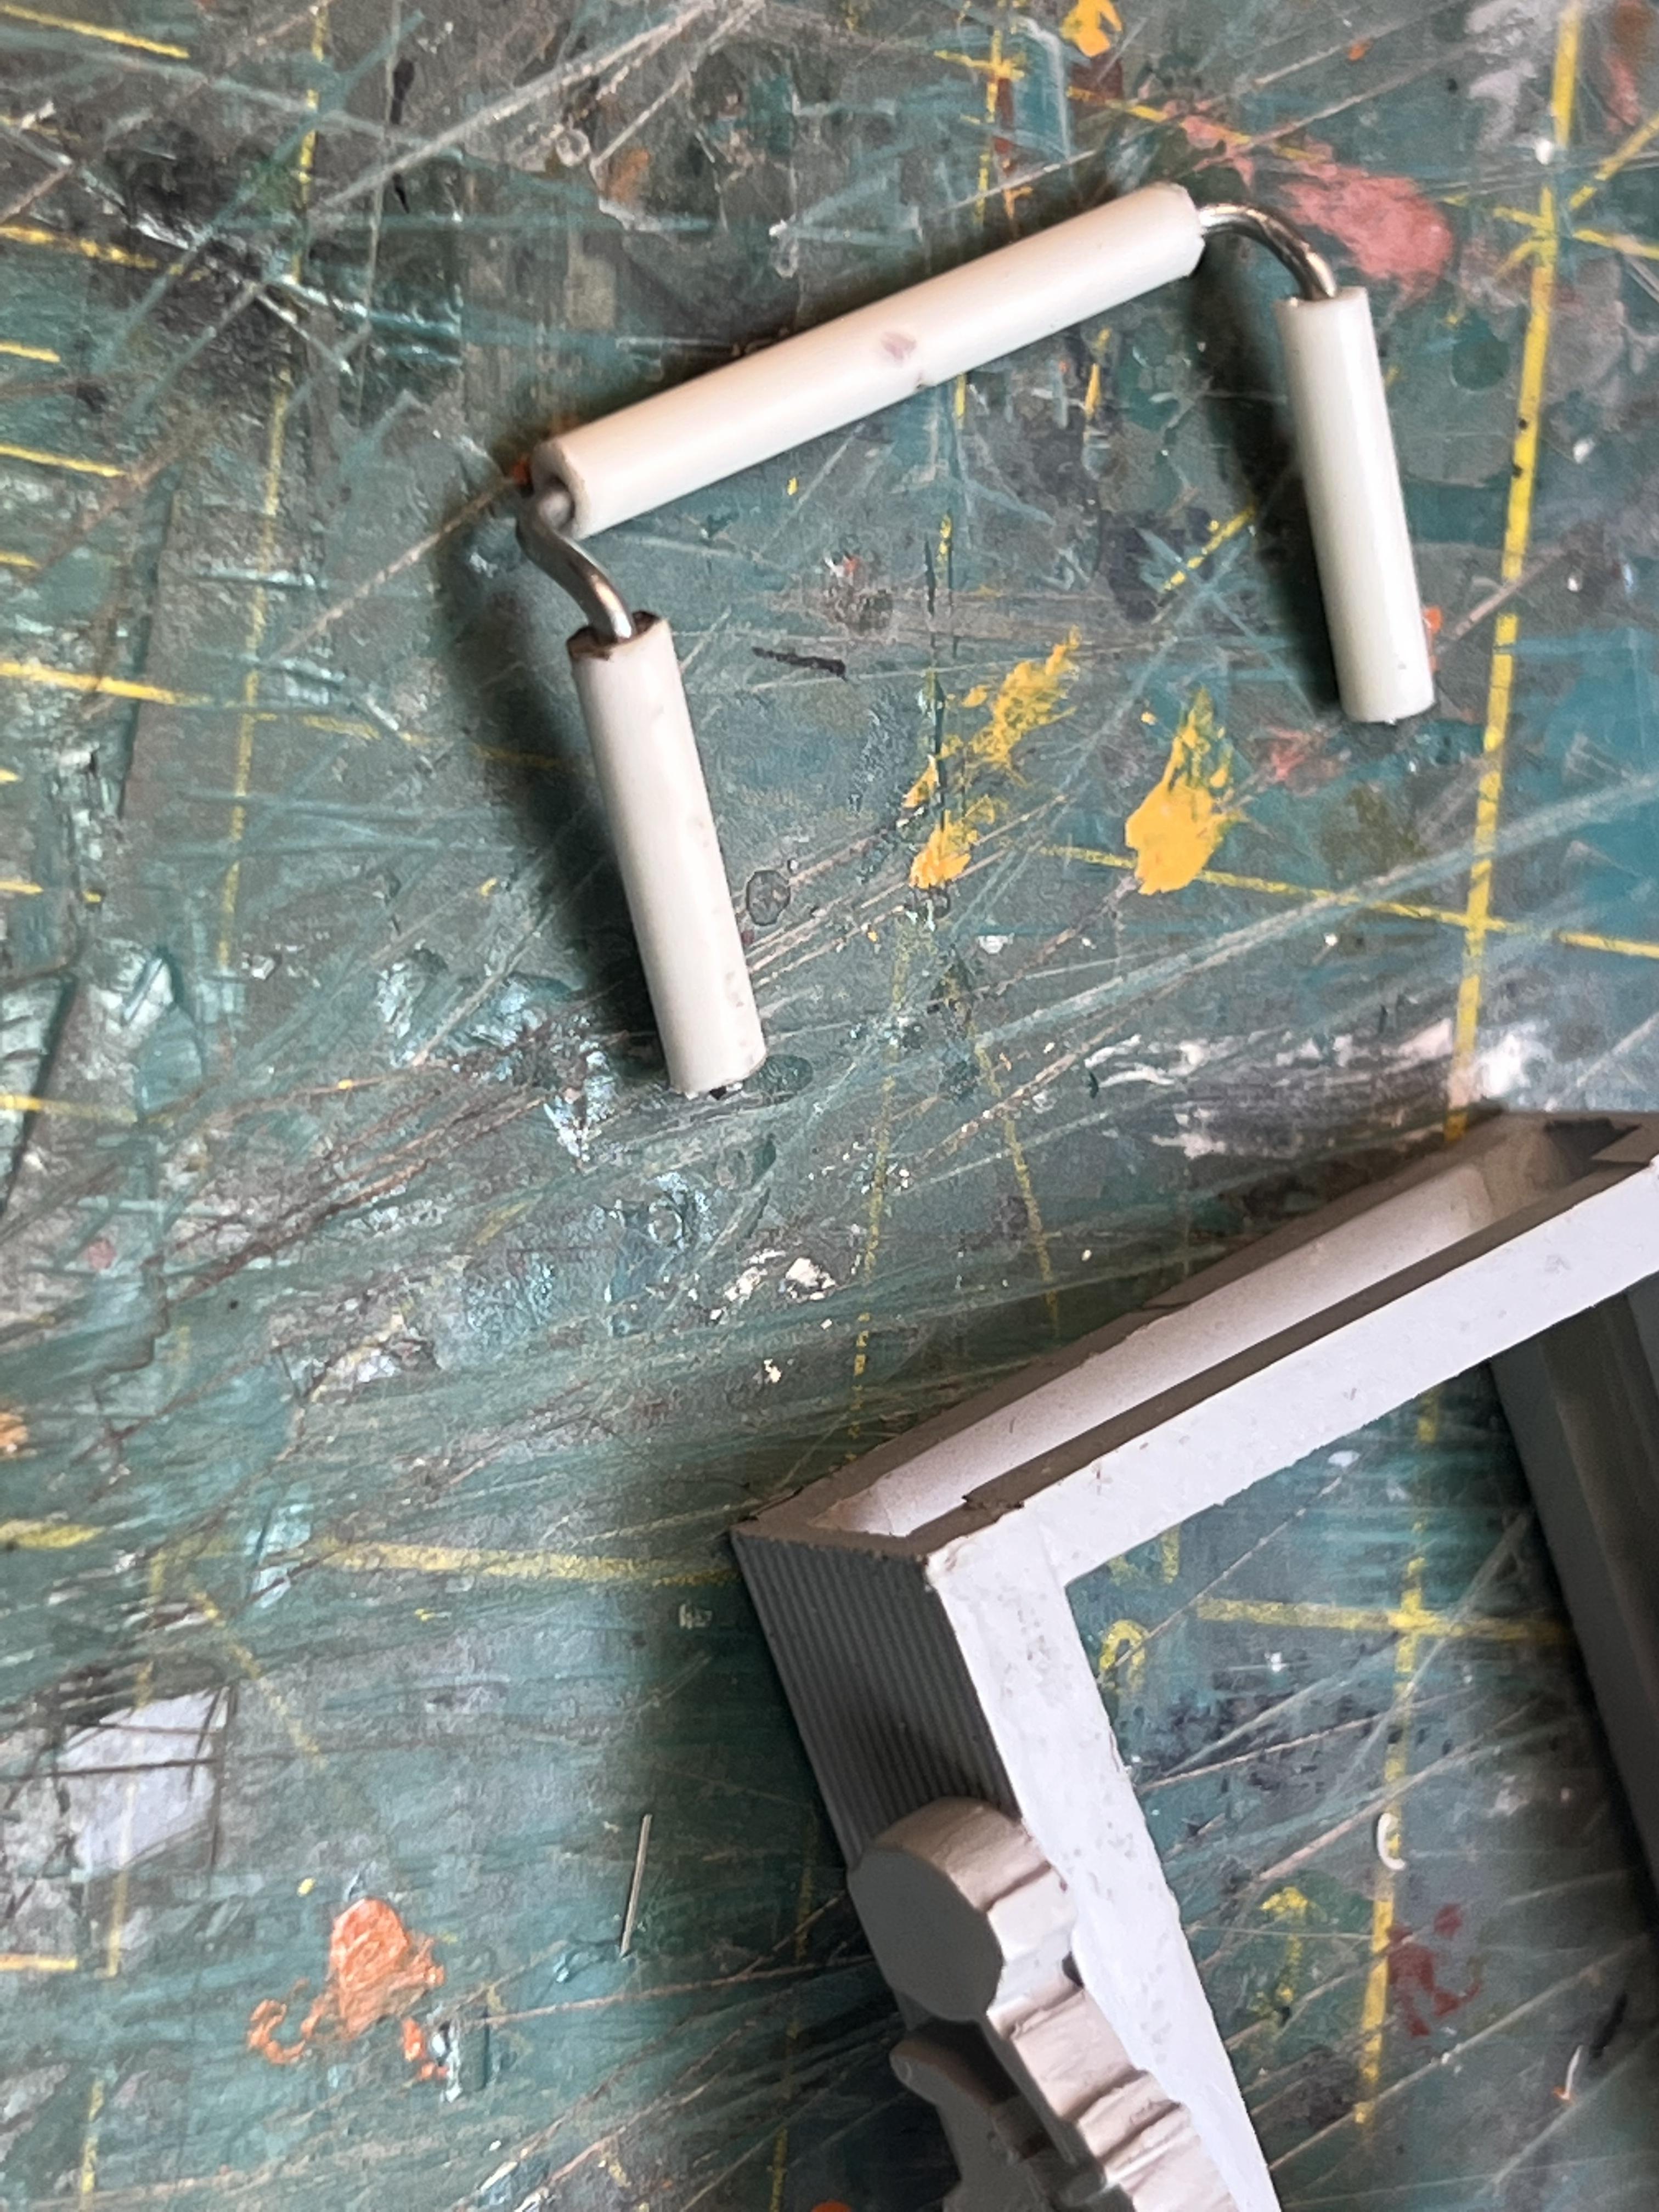
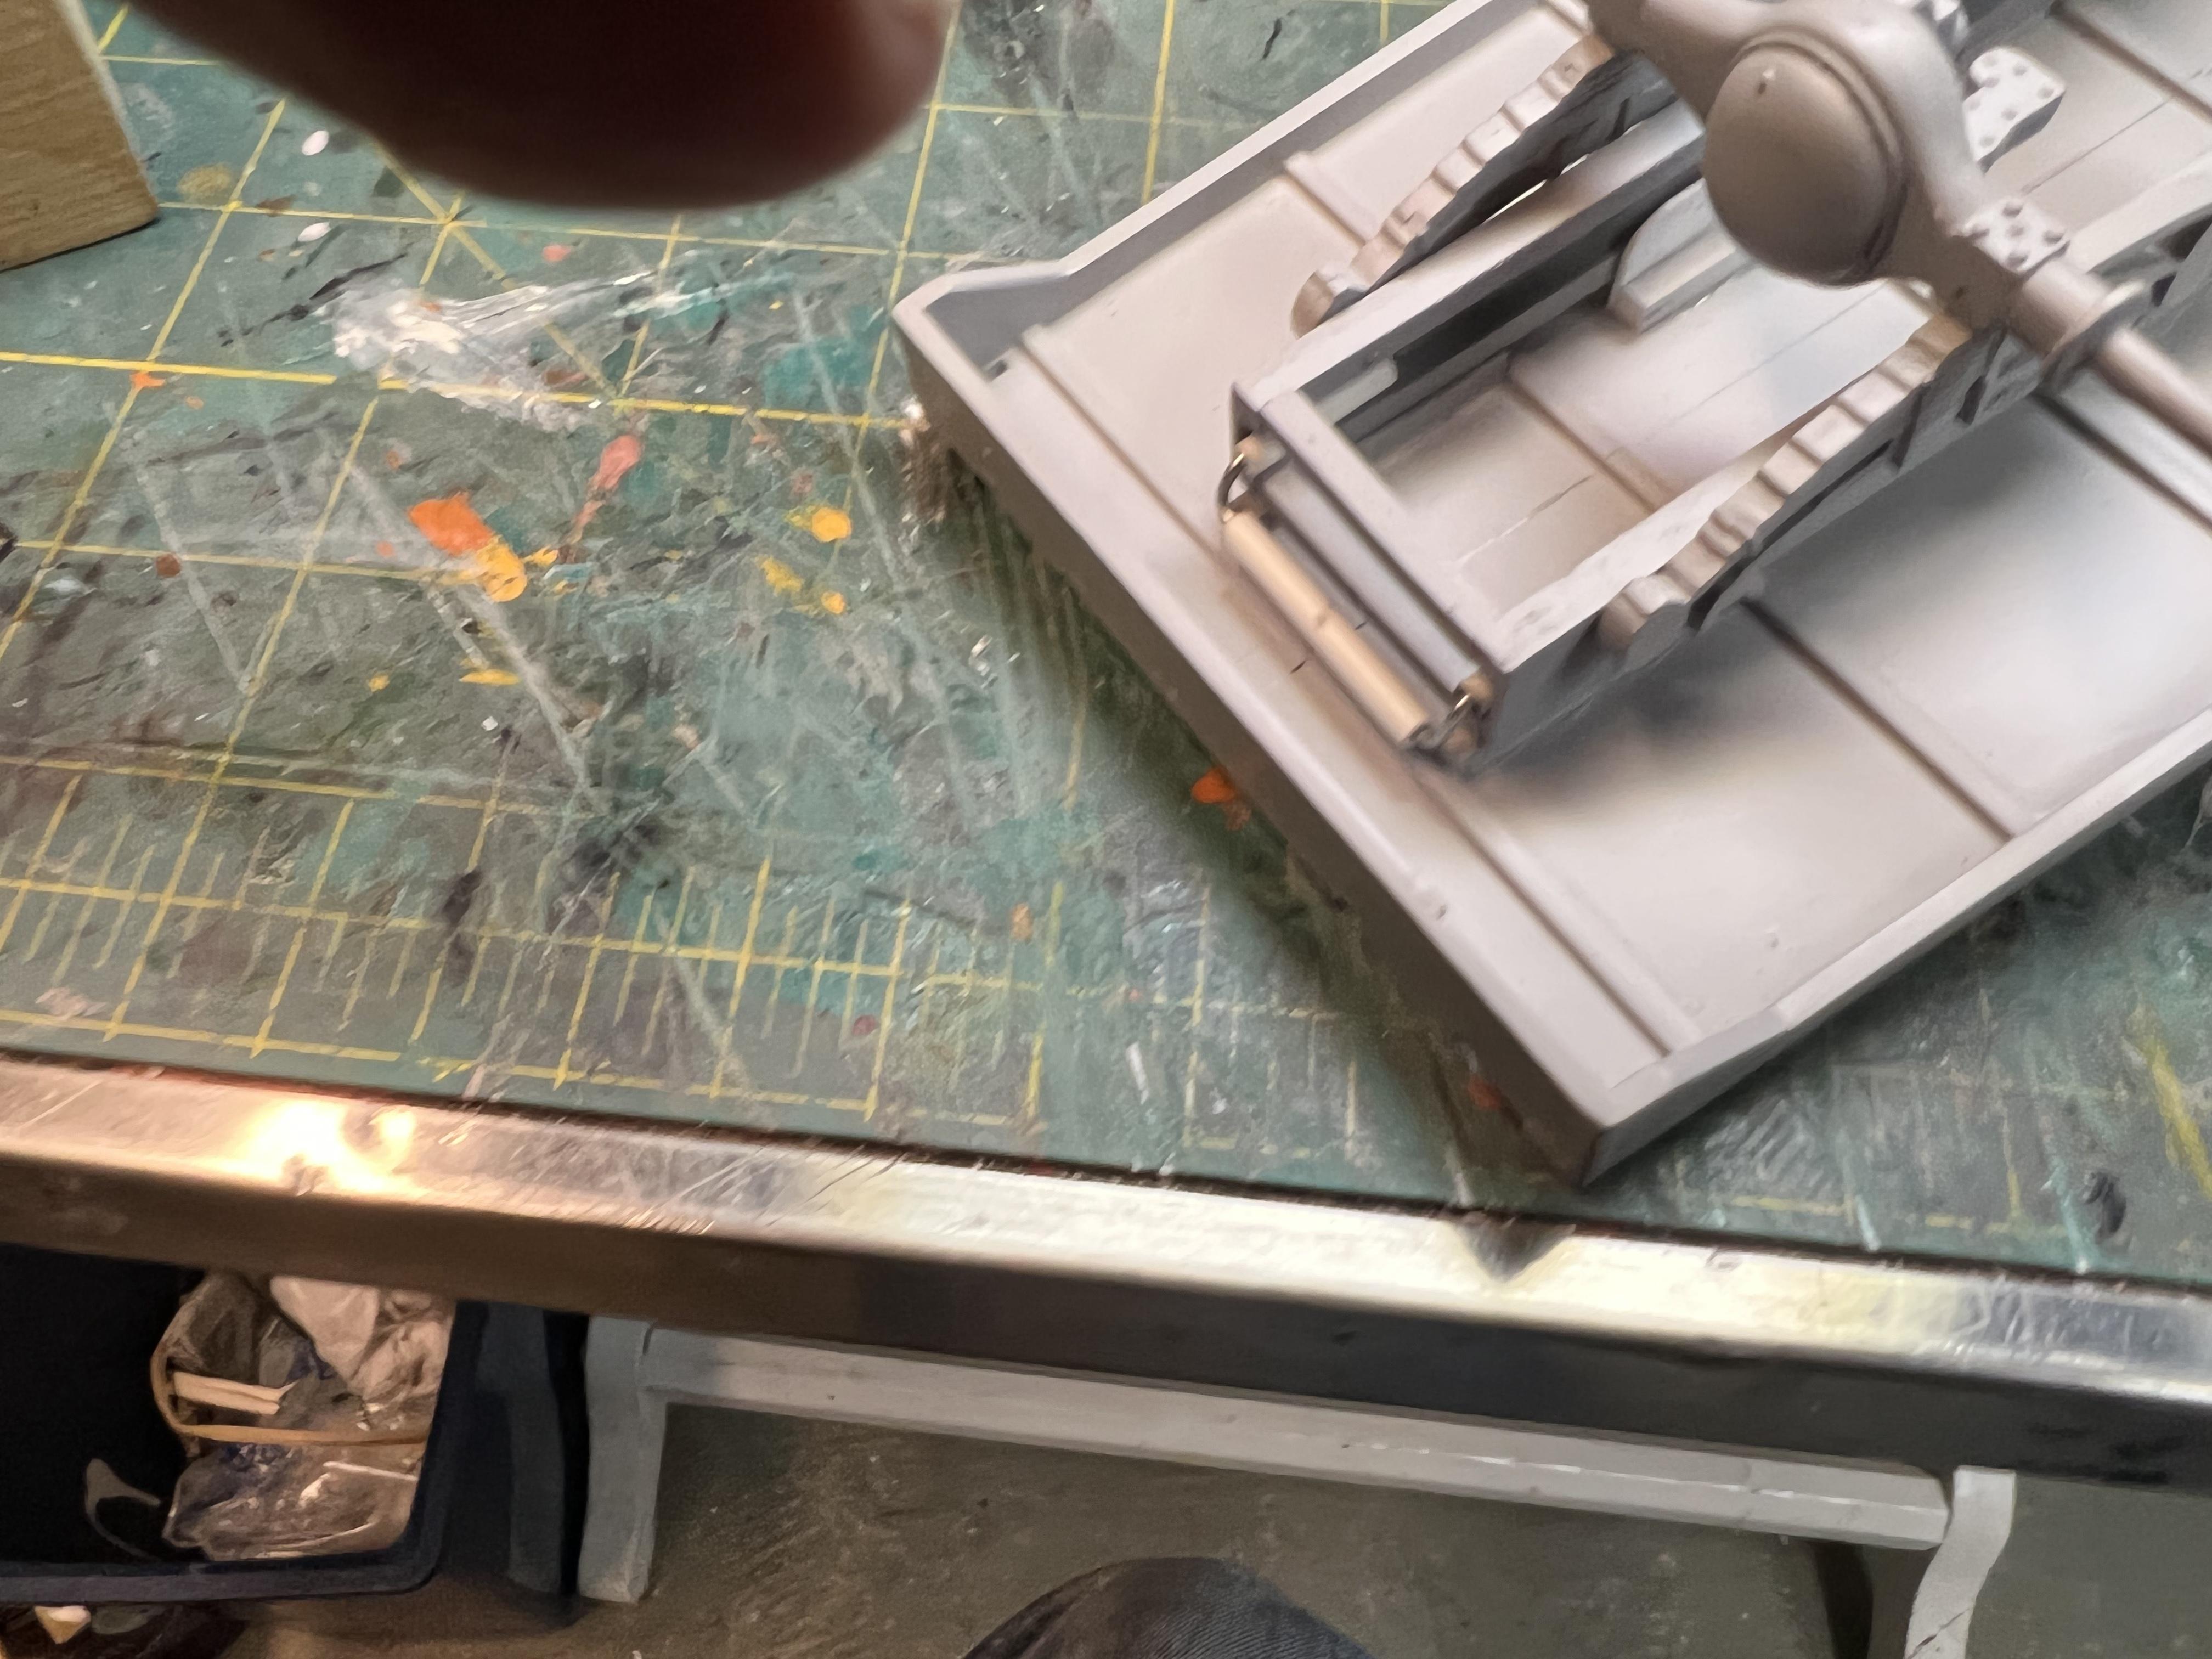
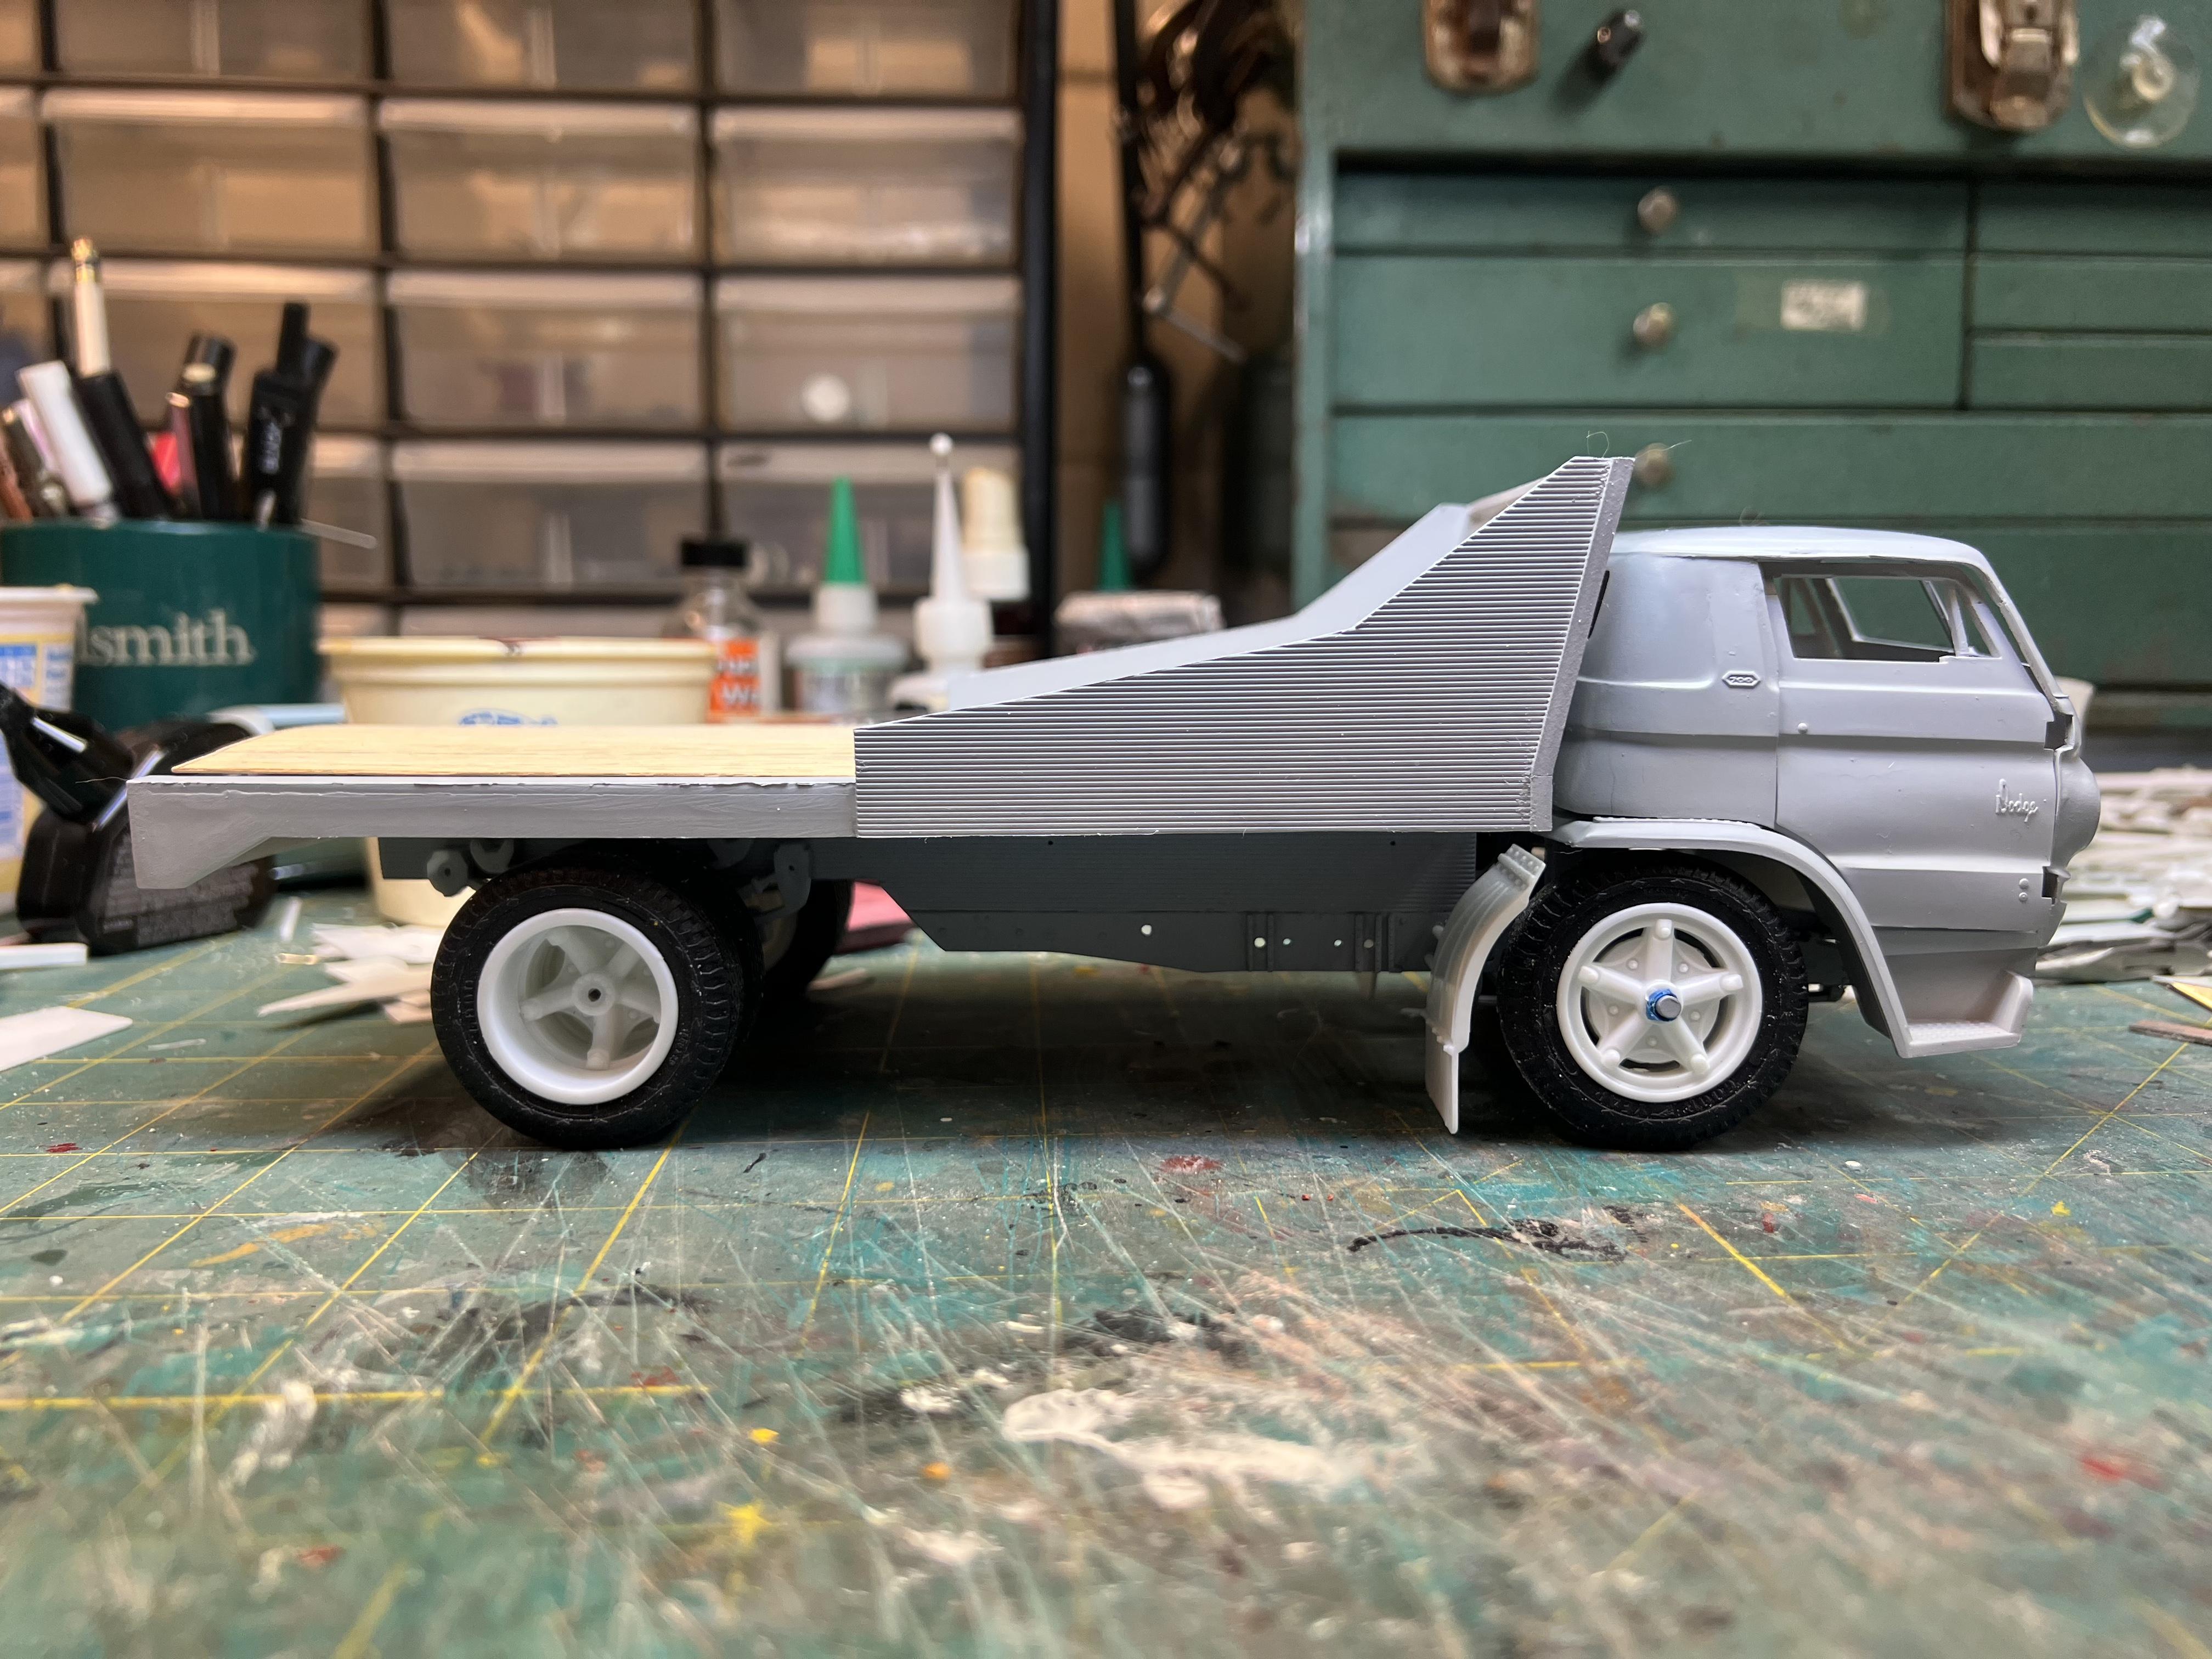
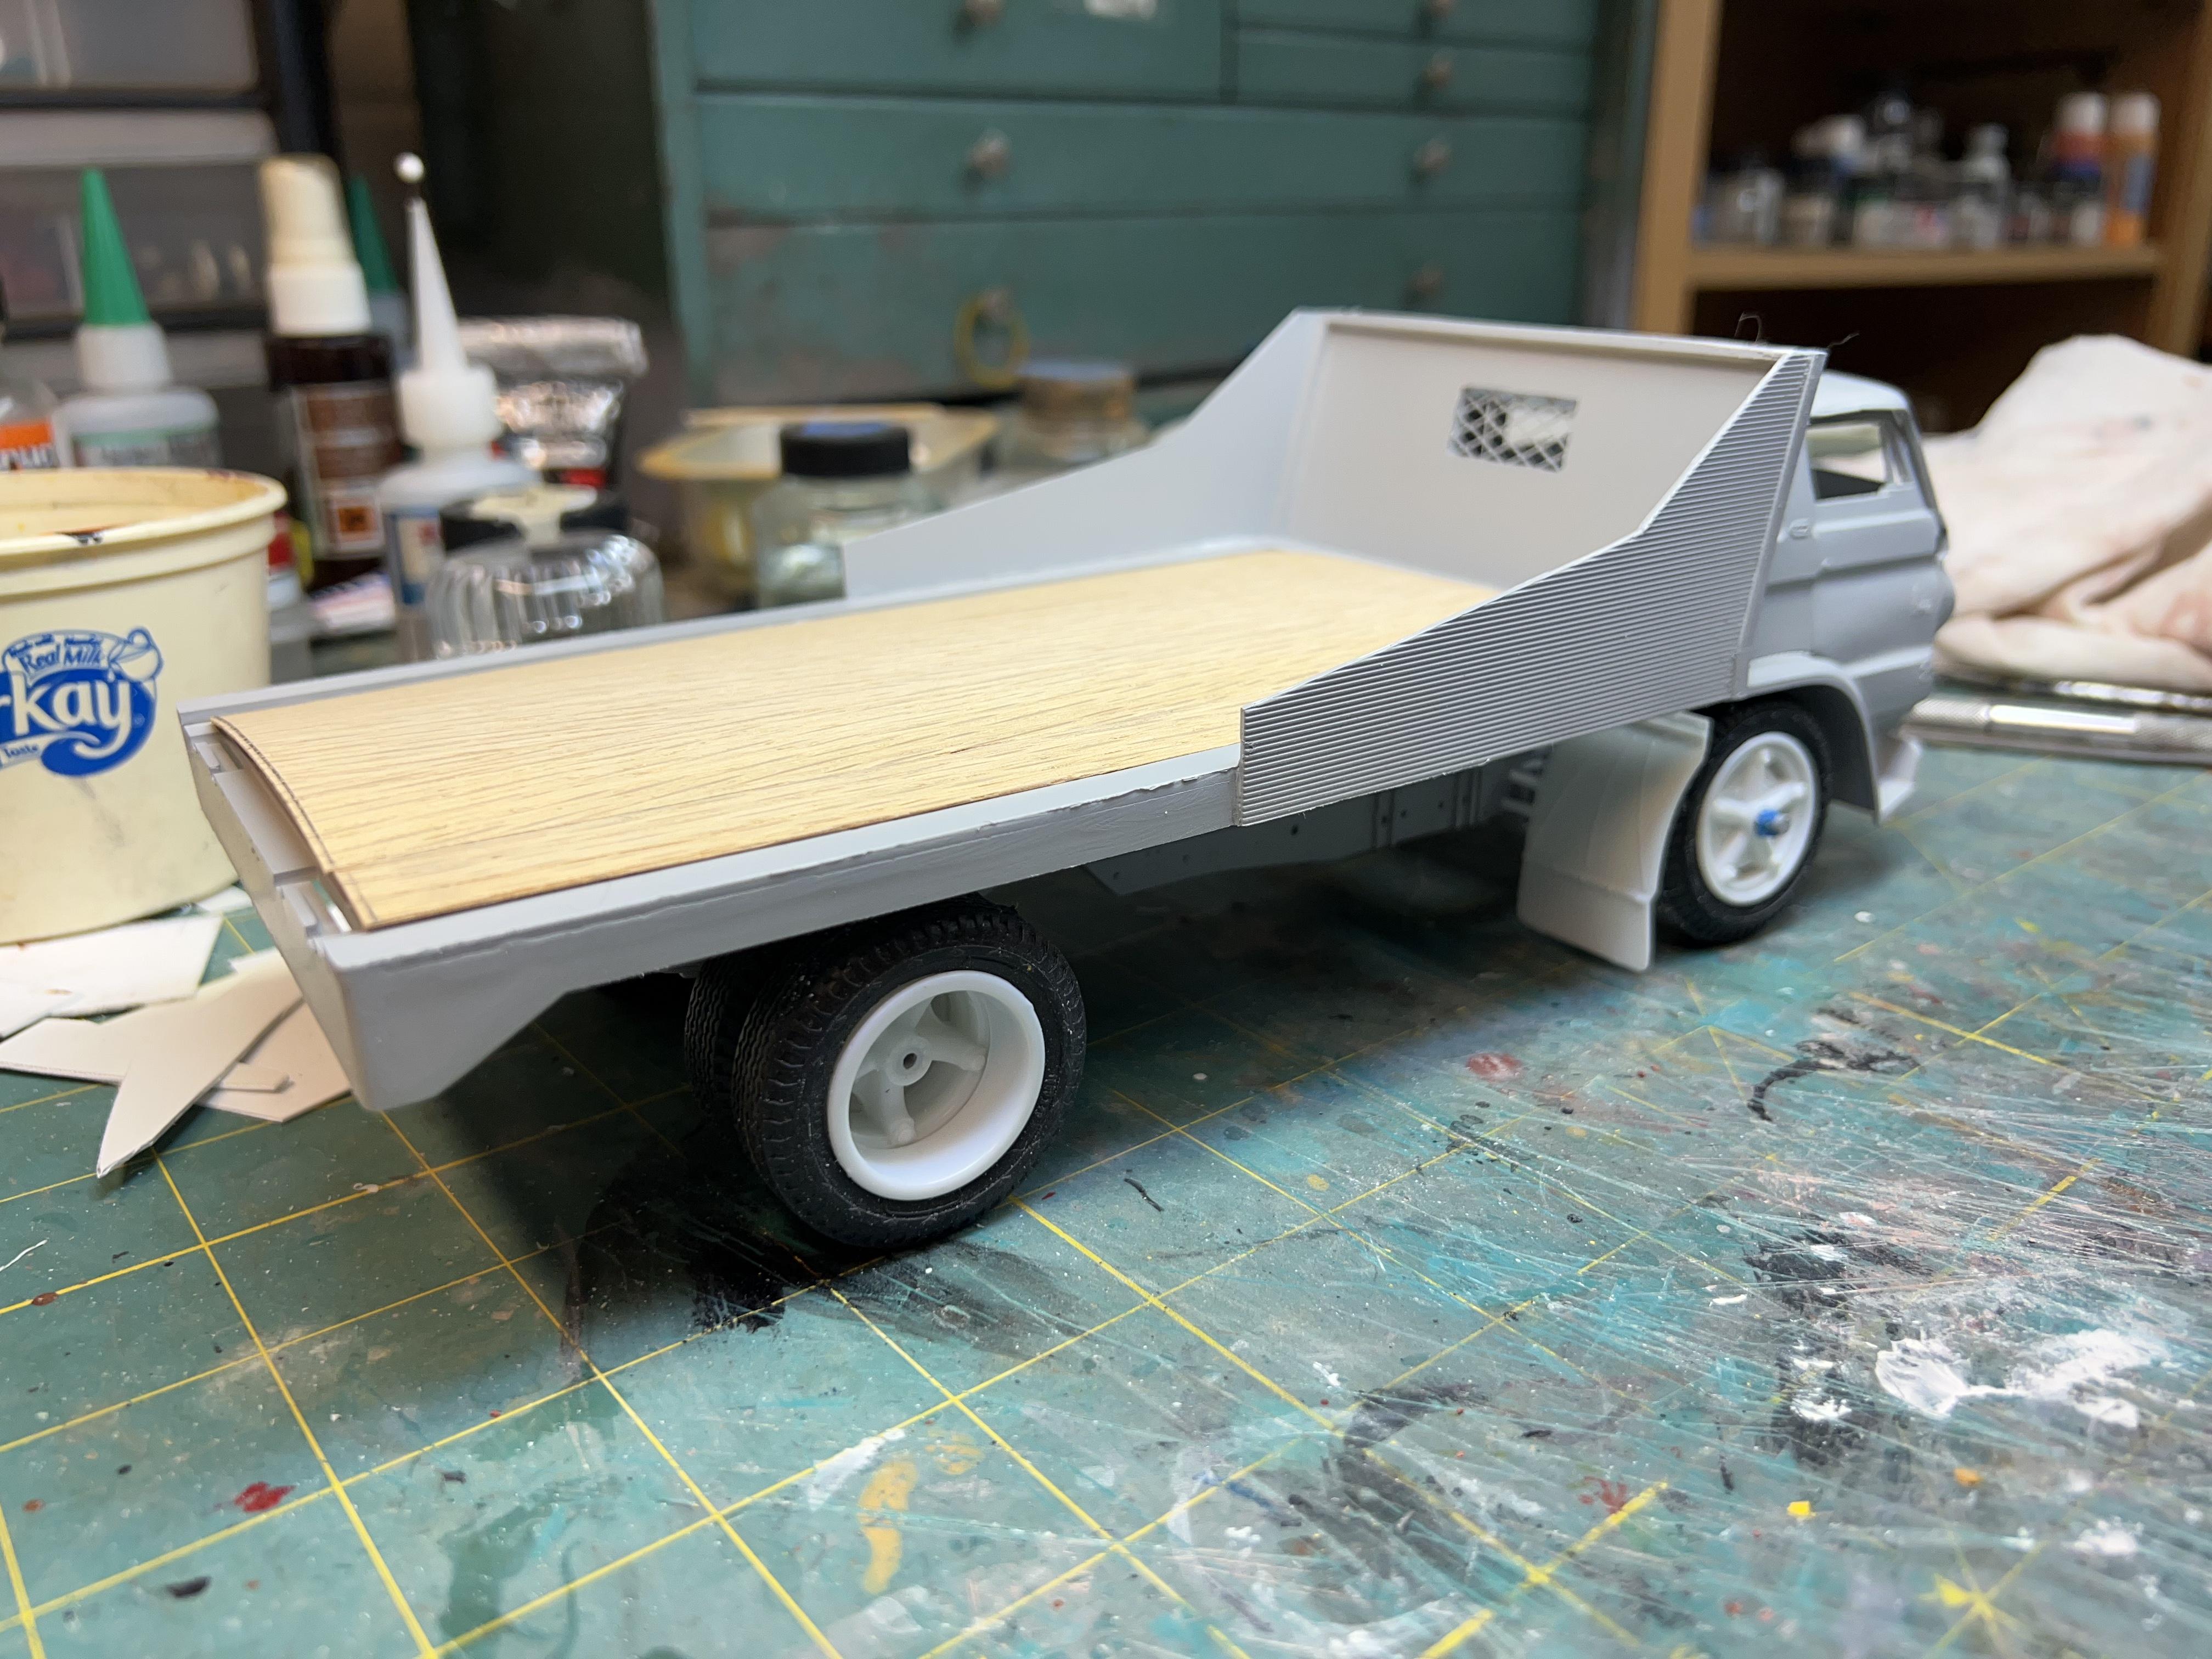
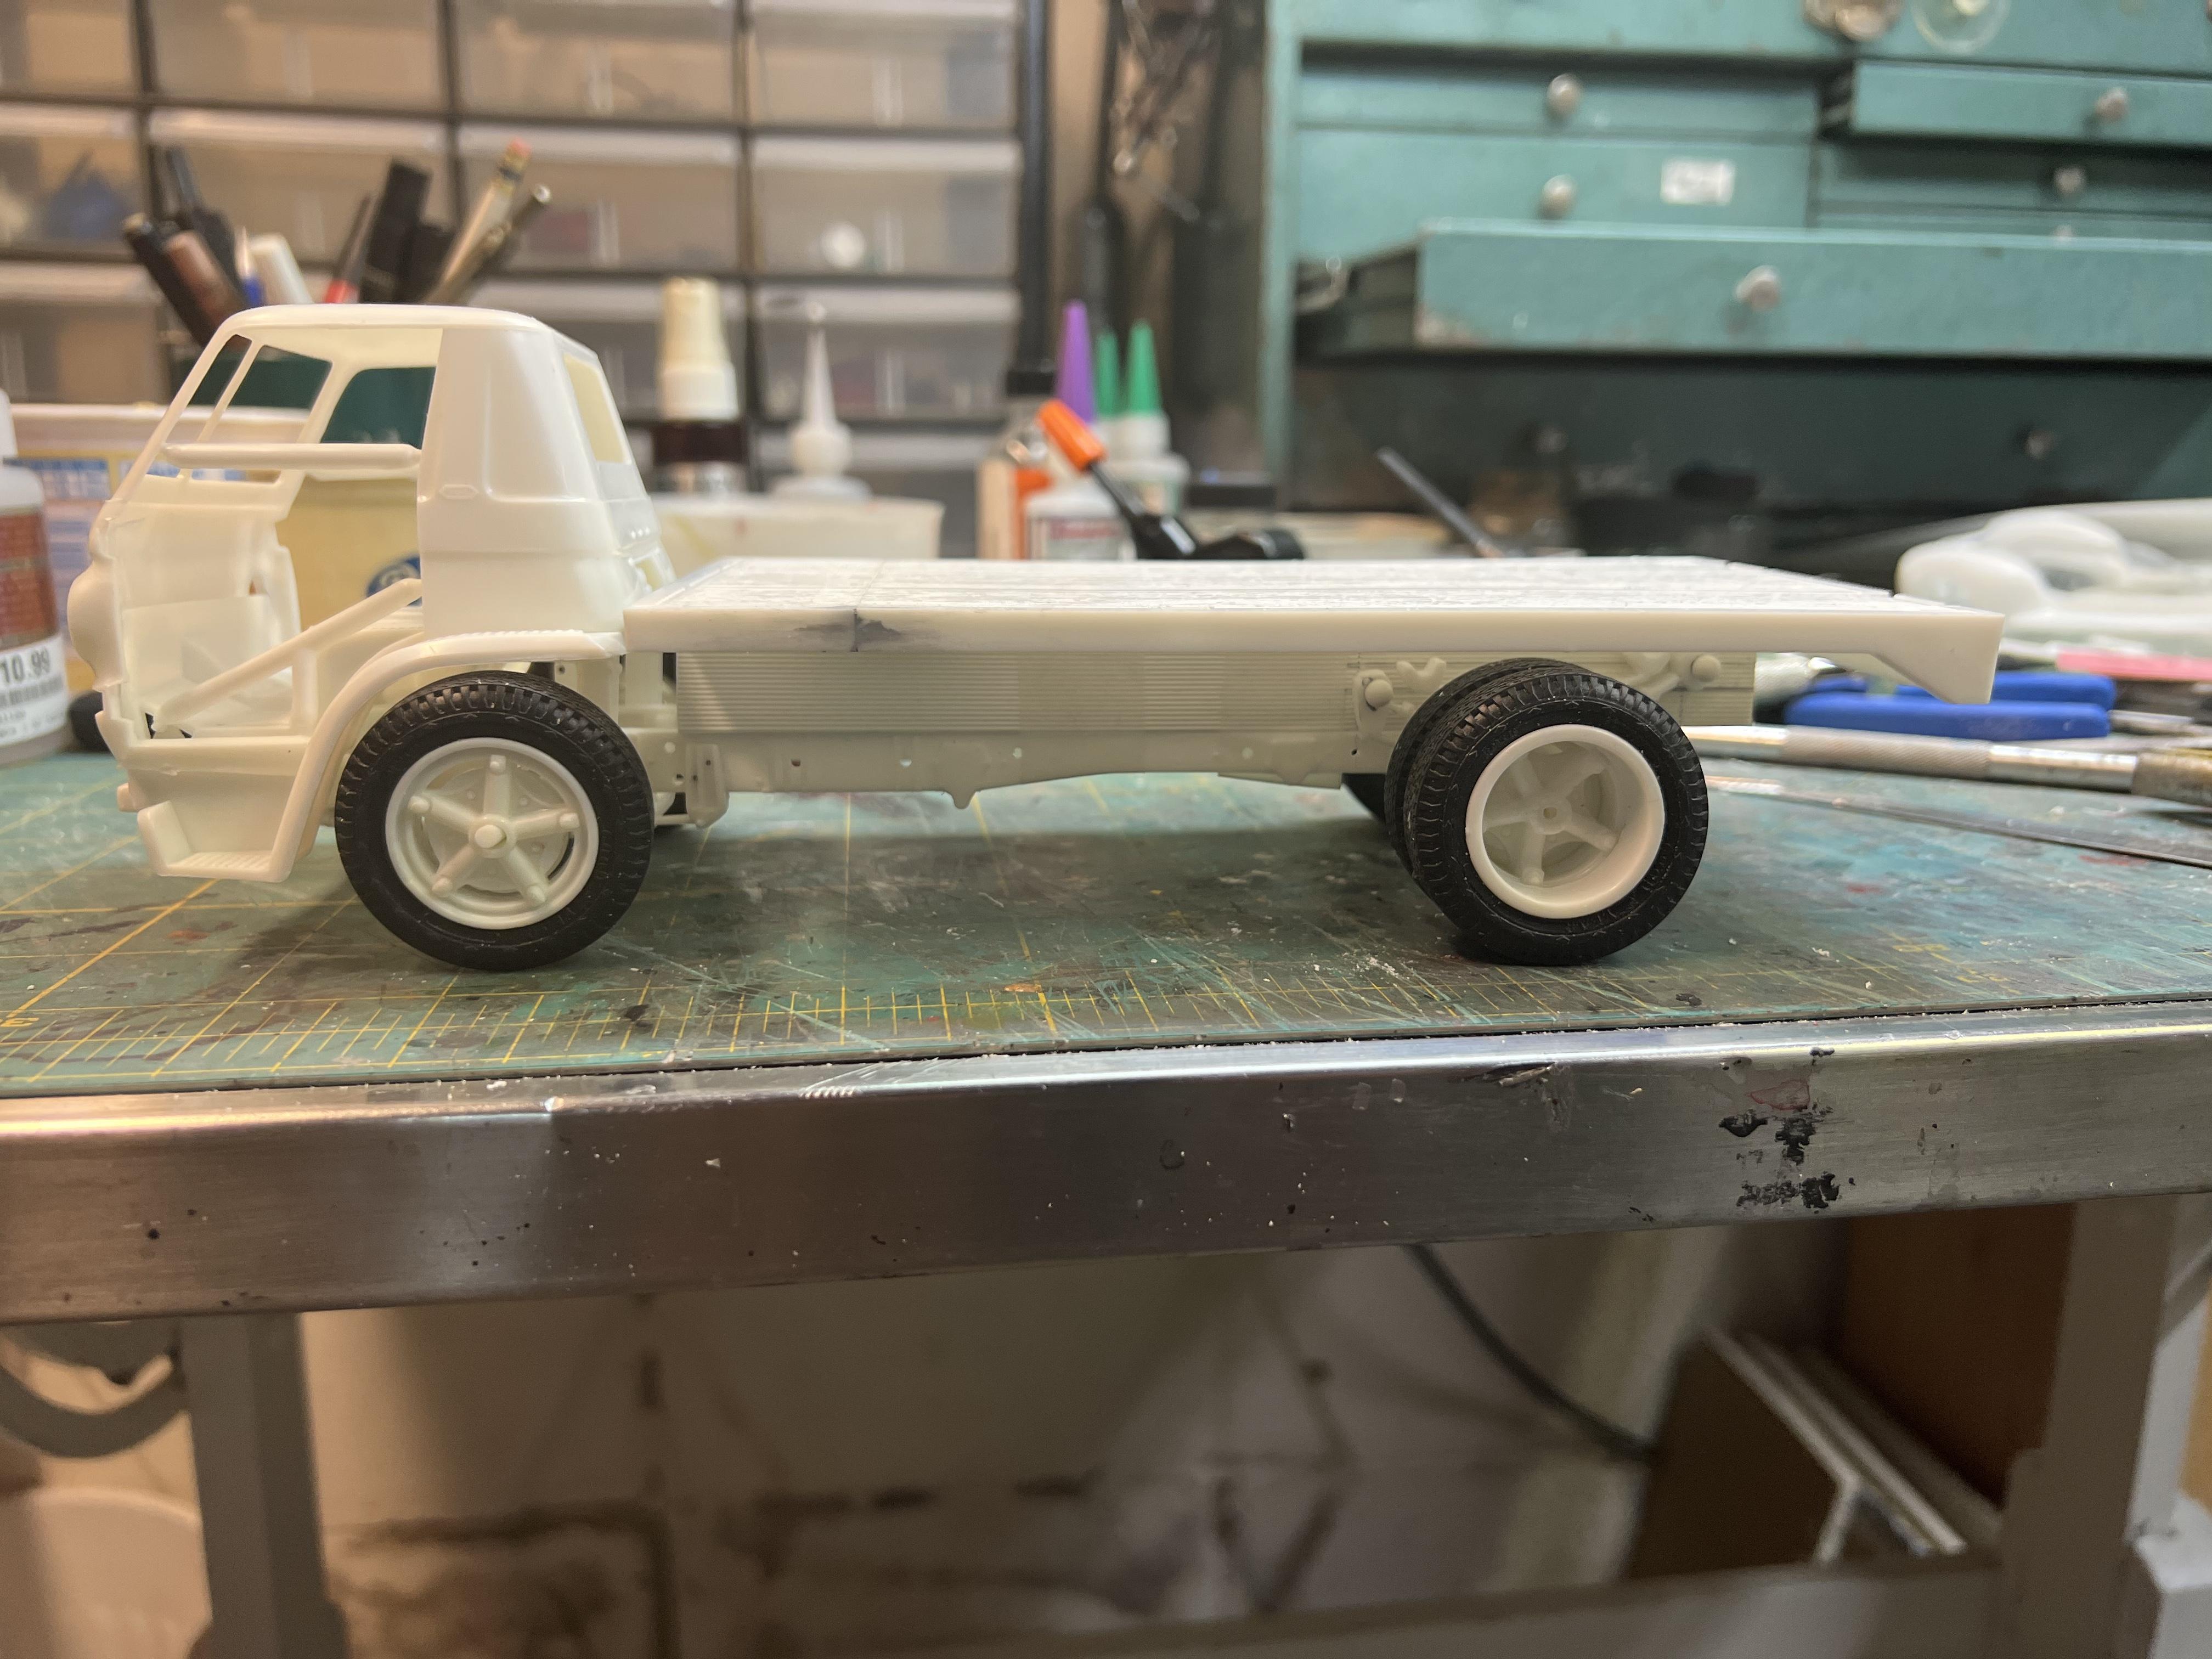
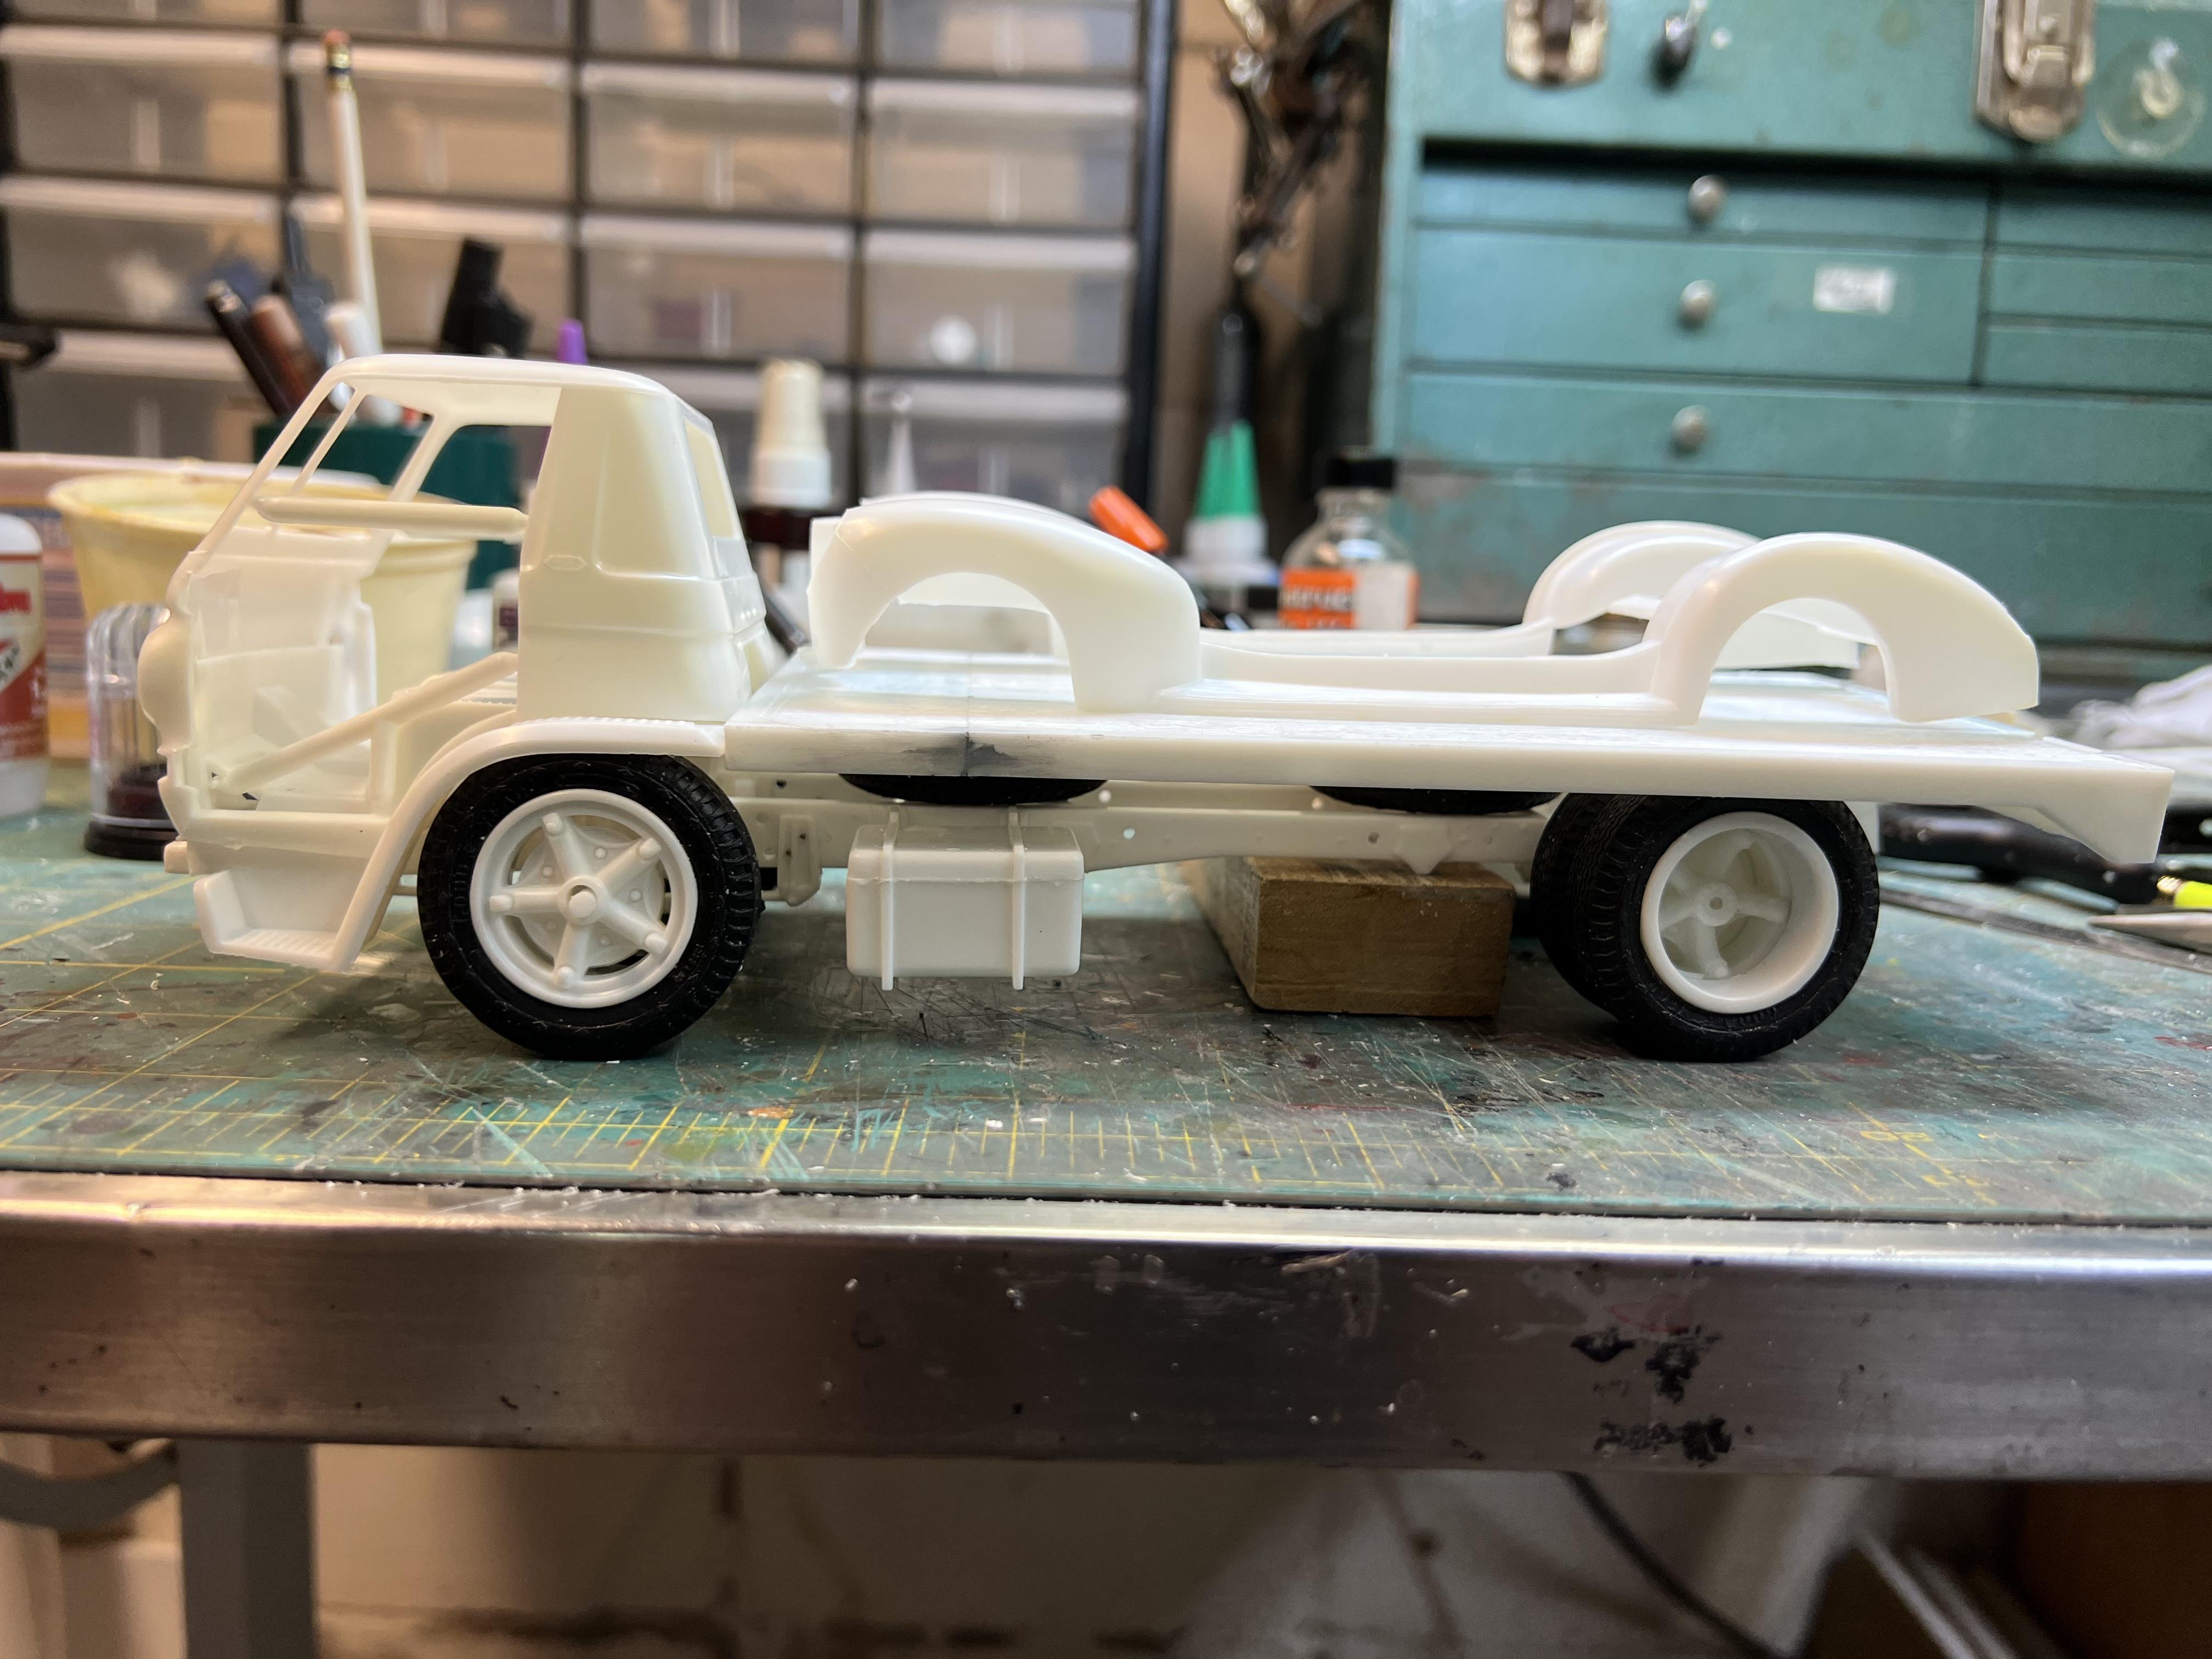
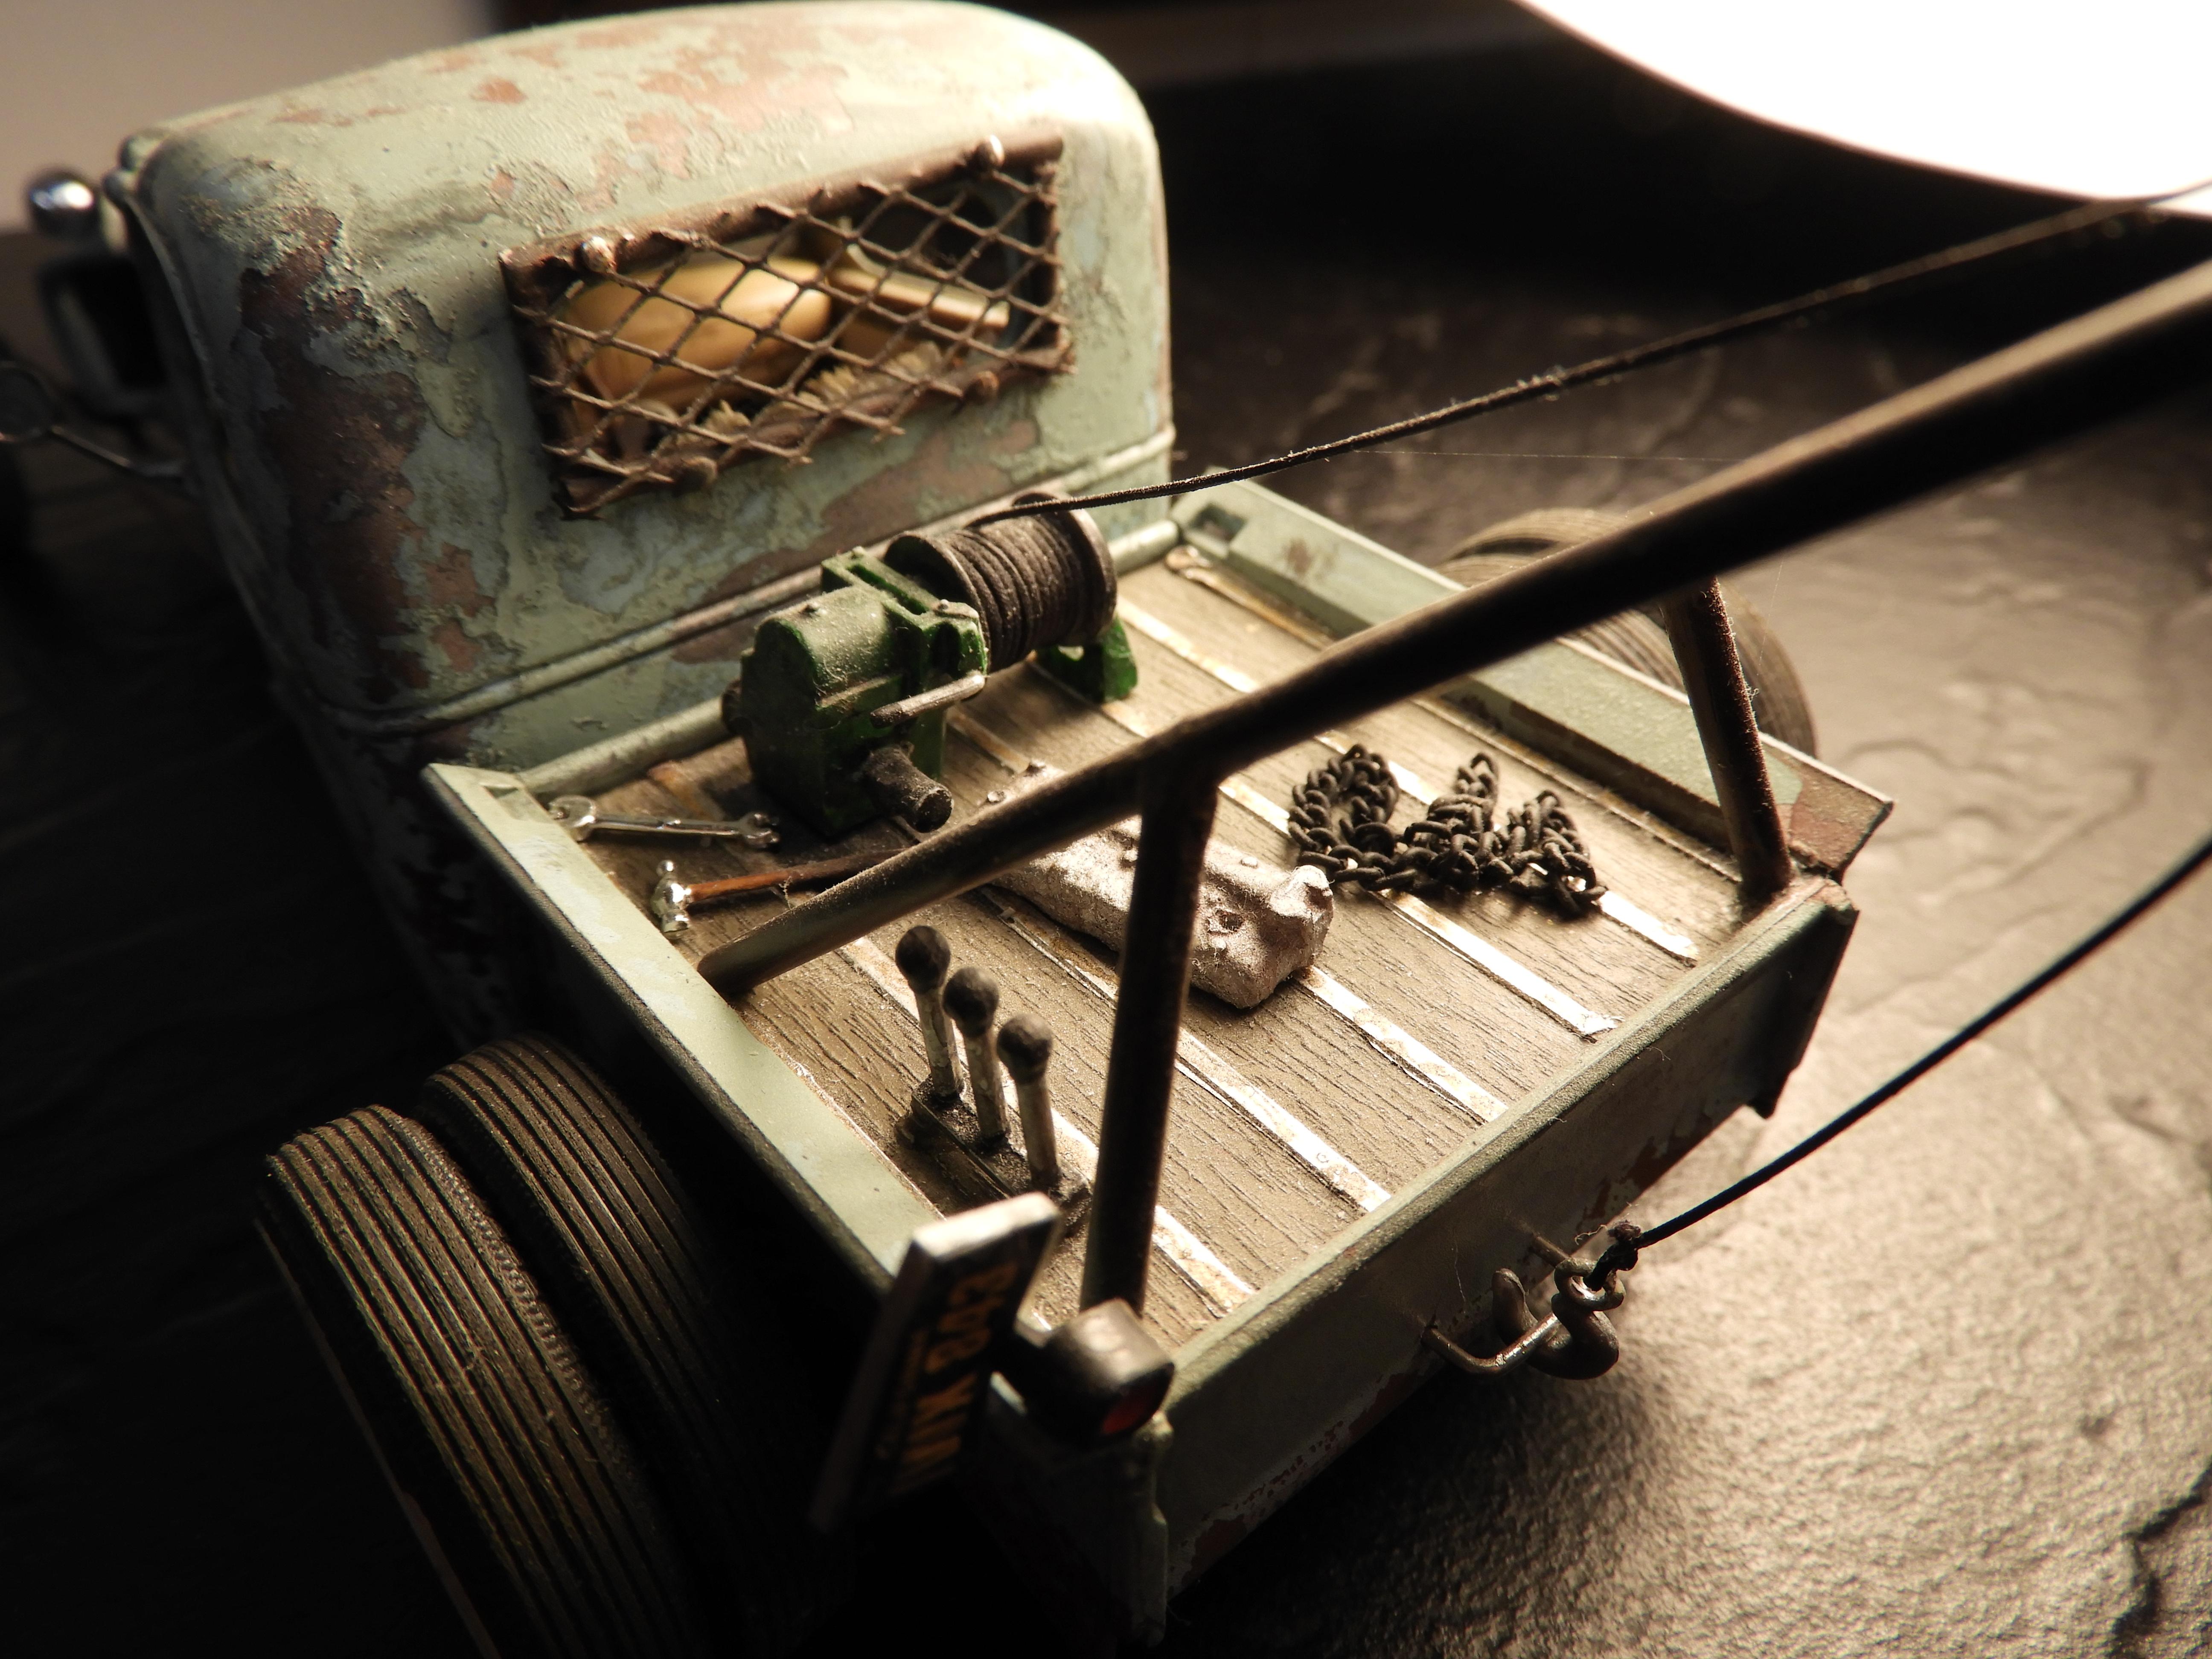
The ramps that came with the kit are going to cause any car loaded to high center so the bed will need to tilt. As I wracked my brain for a hinge the door system came to mind. Pretty simple the hardest part is getting the left and right bends the same. Guides are also needed to keep the bed centered on the frame. Now to work out piston(s) to raise and lower. A couple of storage bins for the operator to stash stuff are added too.

-
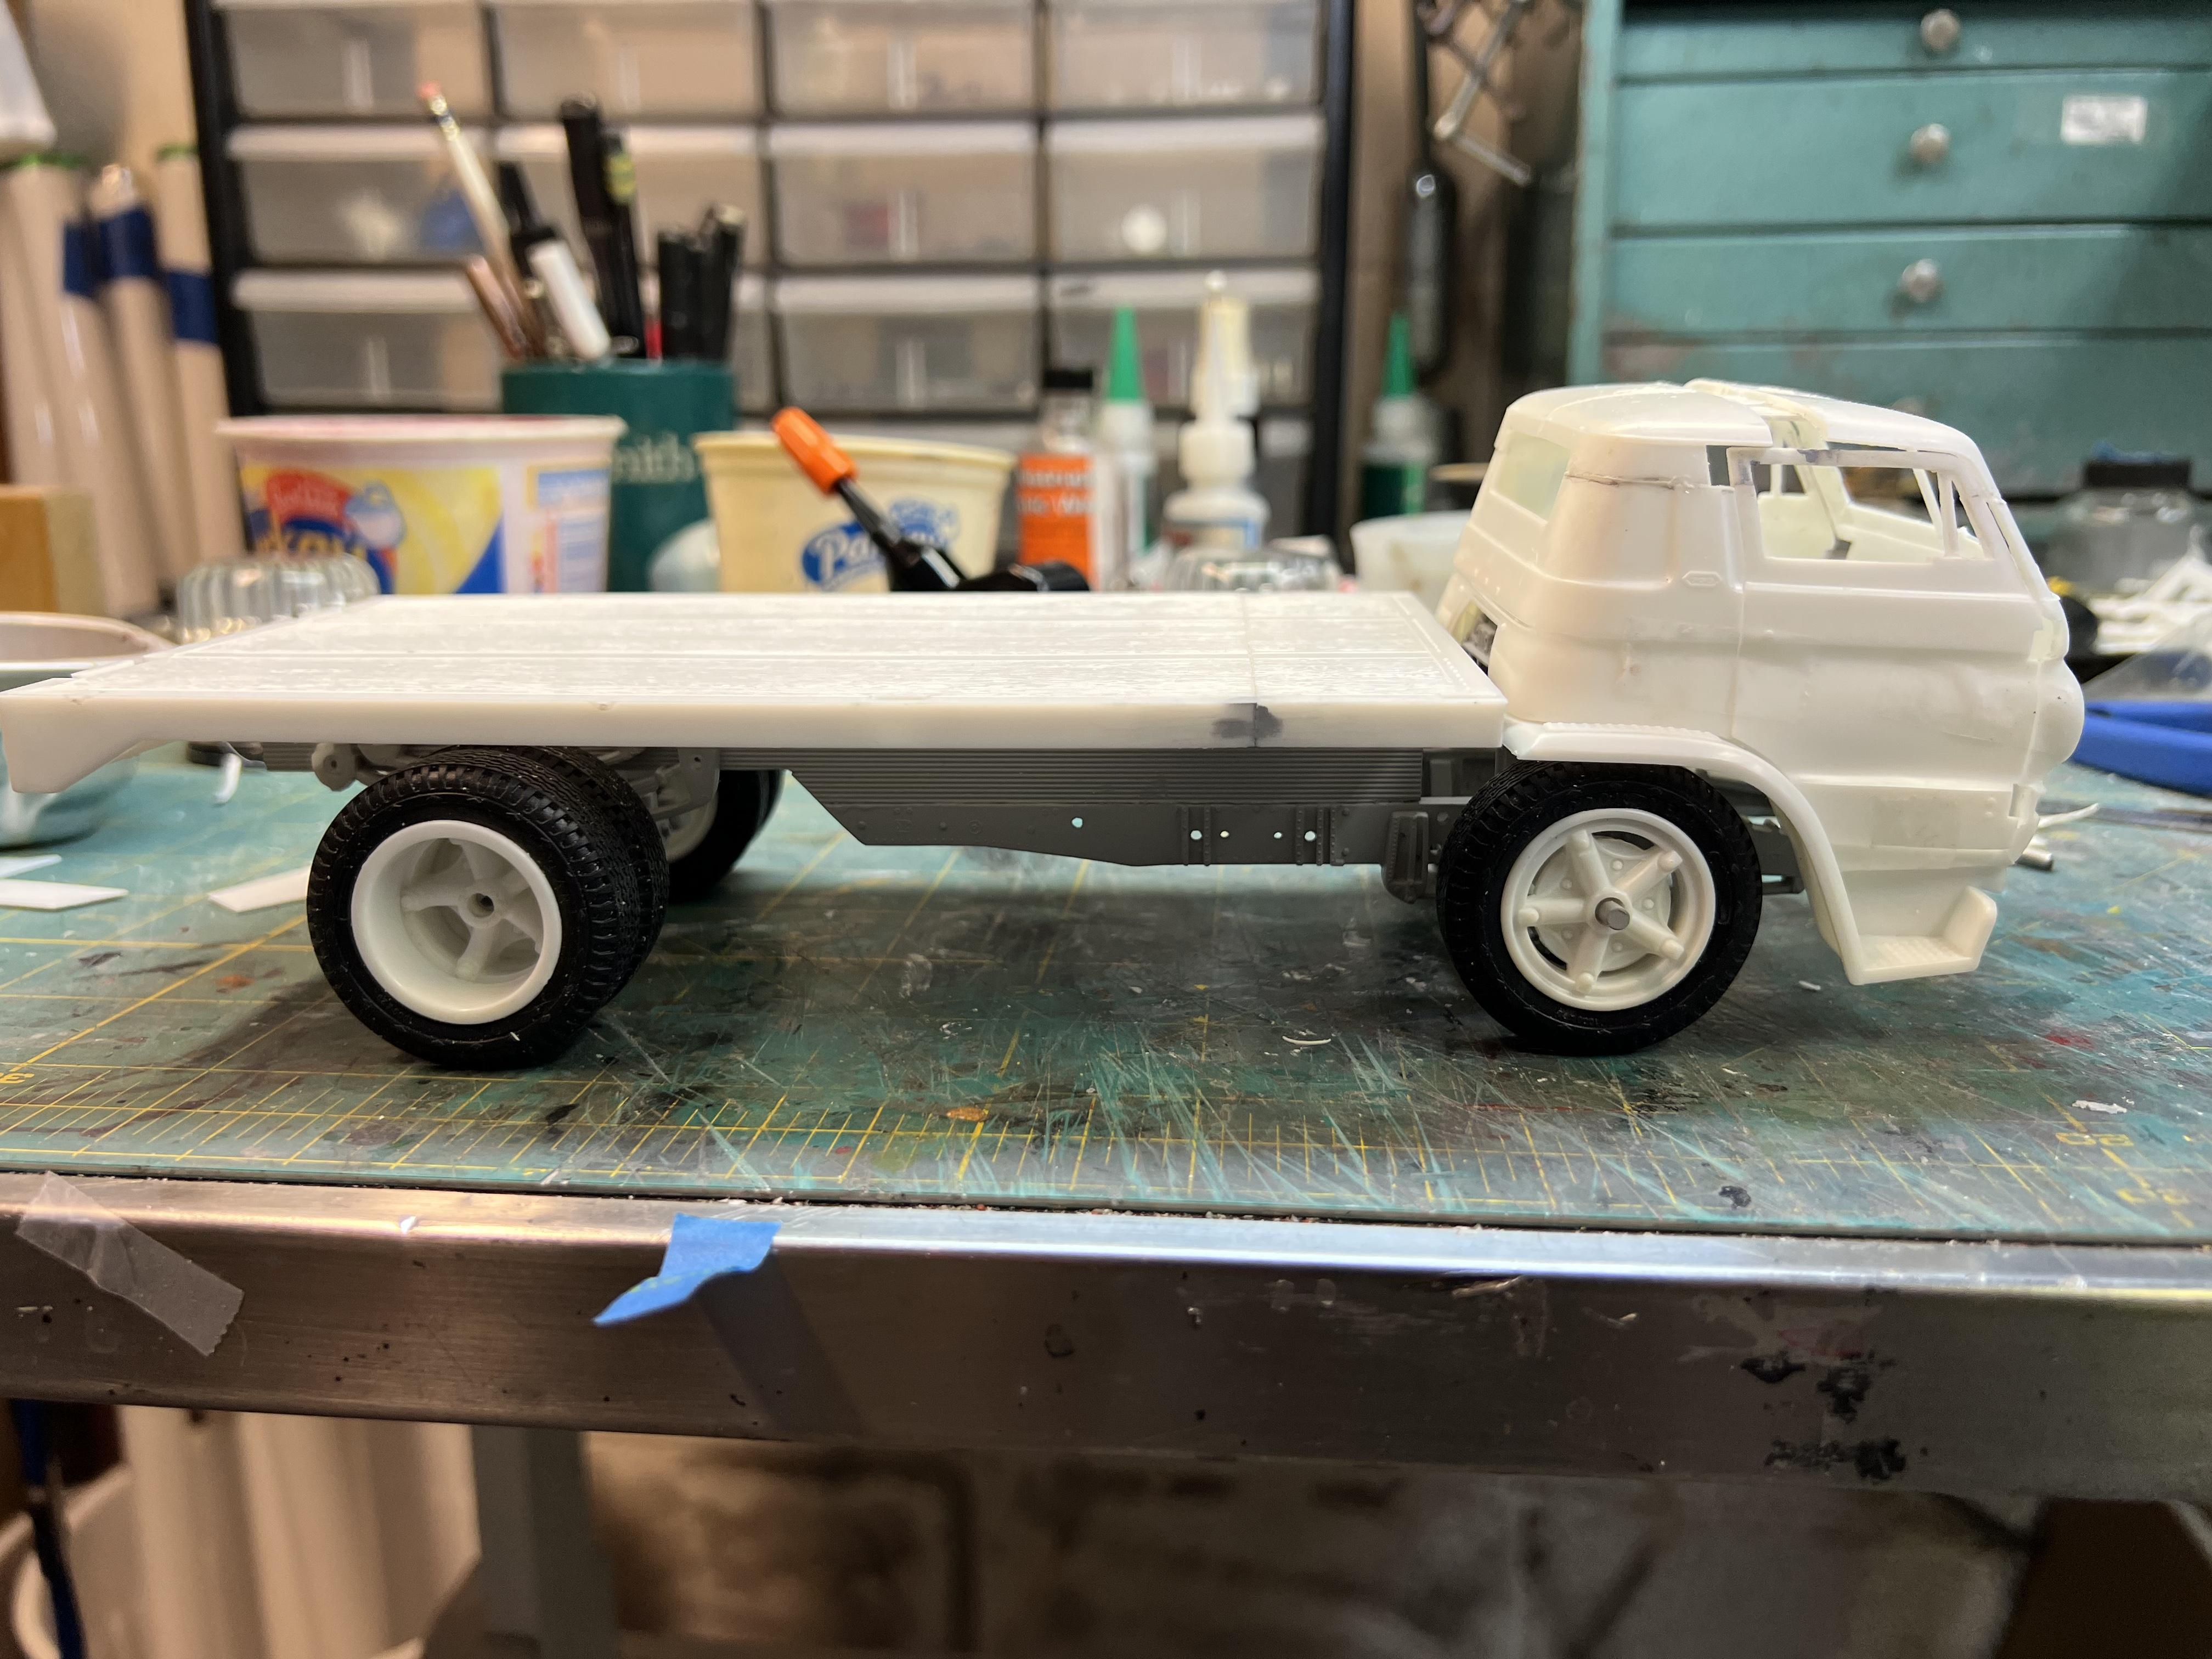
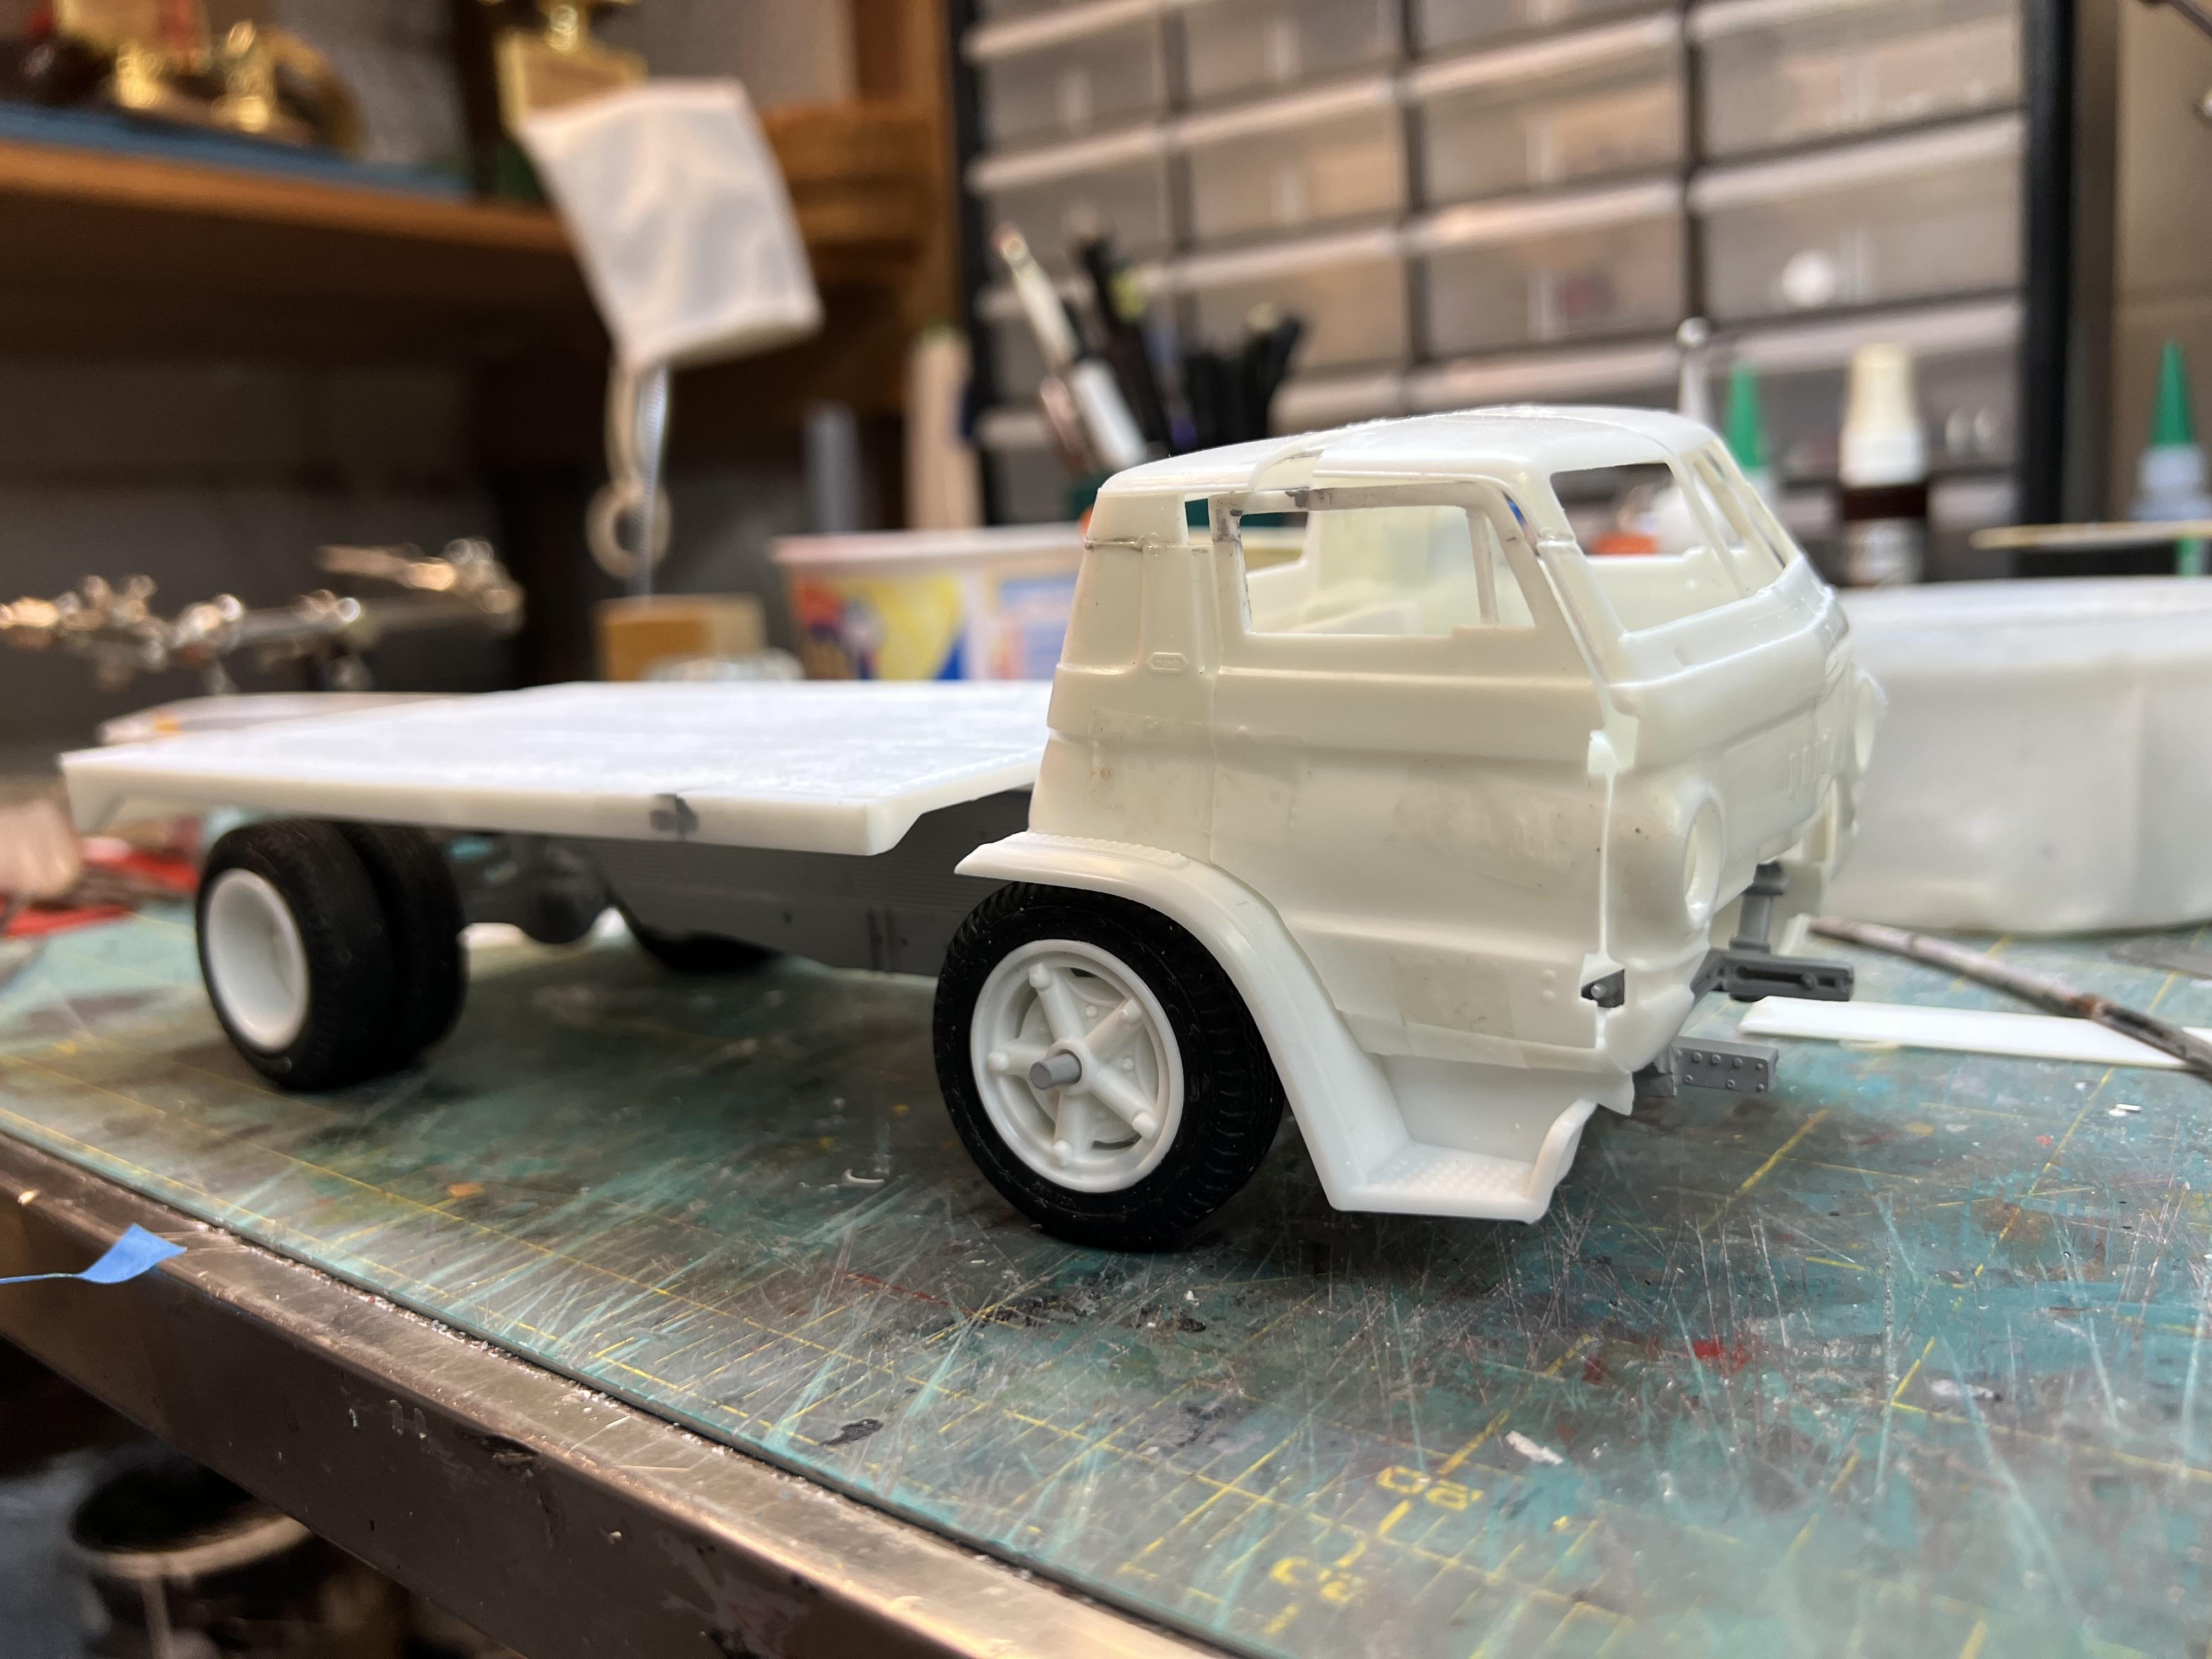
We’ll the cab has reached the “fill, sand, prime, repeat “ stage. I do like the overall look of it and am debating adding some sort of sun visor. The front wheel mud flaps did need to be moved back a bit but they still clear the fuel tanks when they are set in. Now onto drive train and more flat bed work.
-
I’ve made some good progress on the chop. It’s 3/16” which is about 4” 1:1 I was able to cheat the front half of the roof by cutting a relief at the base of the A pillars and then just making a cut at the center and wedging it open a bit. The doors added some complications and I’m thinking about glueing them in place. I’d like to leave them operable but the big windscreen will offer a good view of it inside.
-
Stitchedup, I’d like to see some images of this technique in action if you have some. Sounds interesting.
-
I think I have the frame and axels pretty well figured out. Now to decide on how to do the chop. I think there will need to be 2 left to right cuts. One for the door and the other for the slope at the rear. I should get by with just one cut front to back. There will also need to be a vertical cut where the side curves to the back.
-
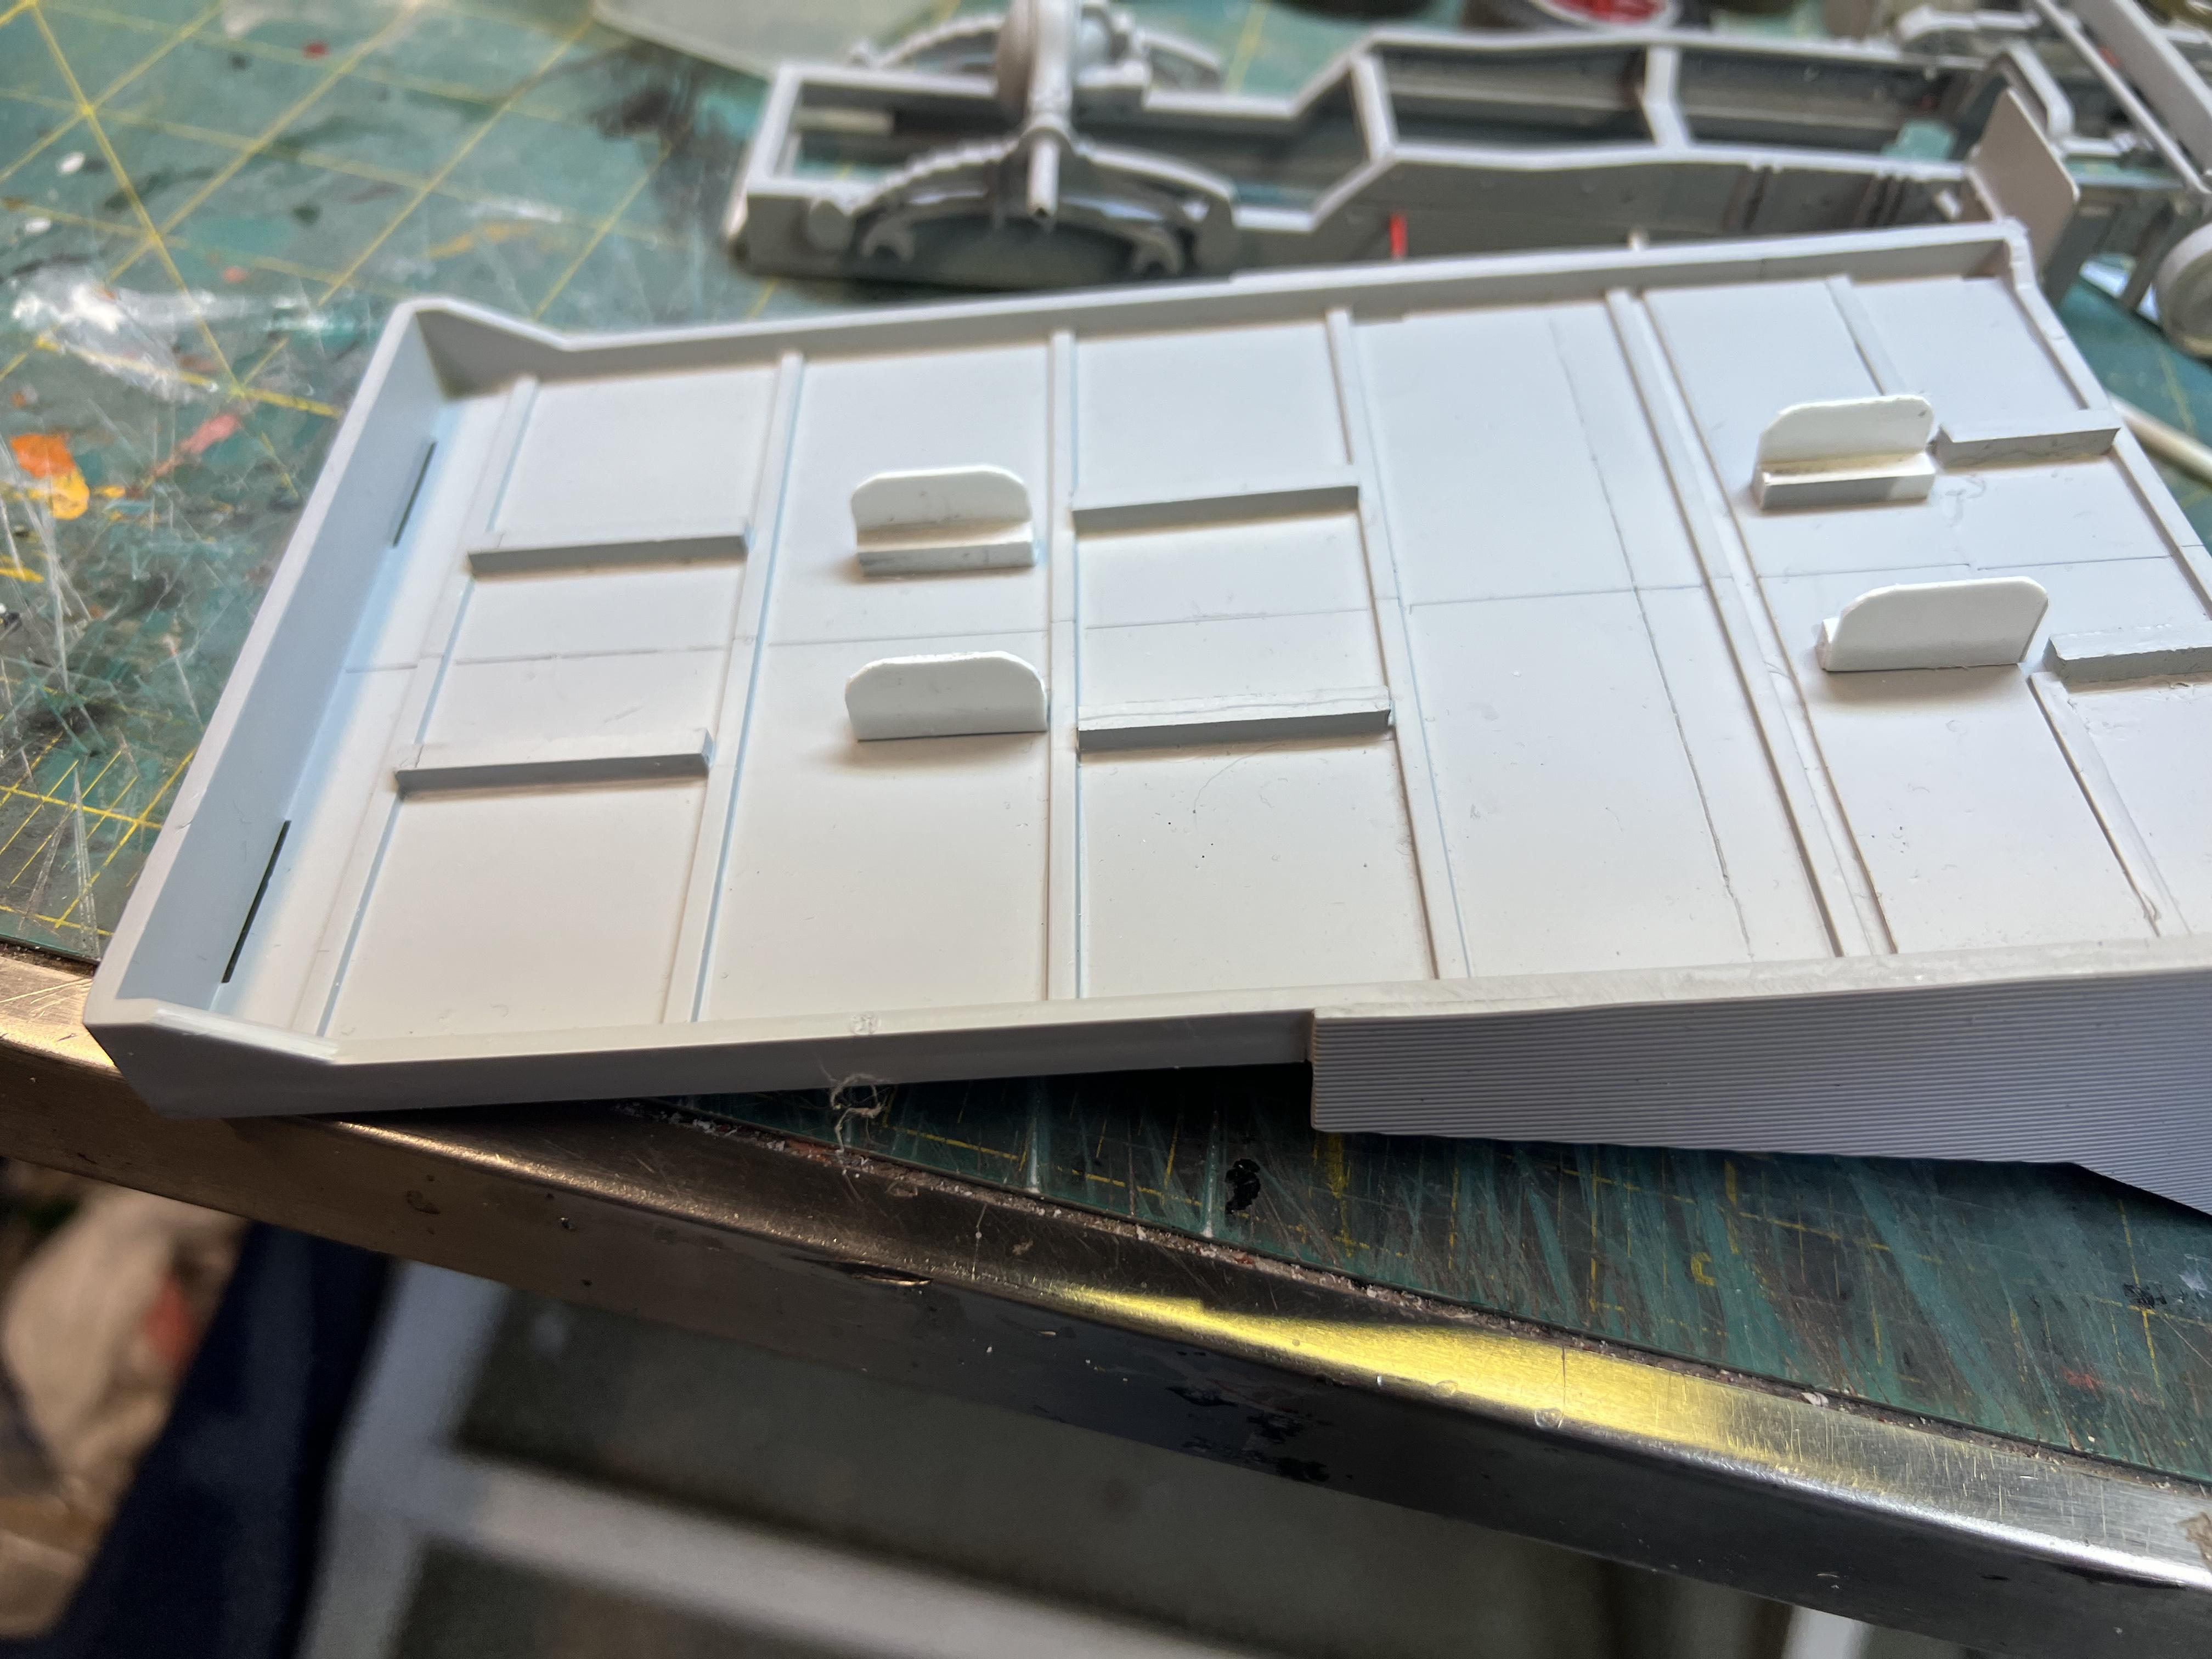
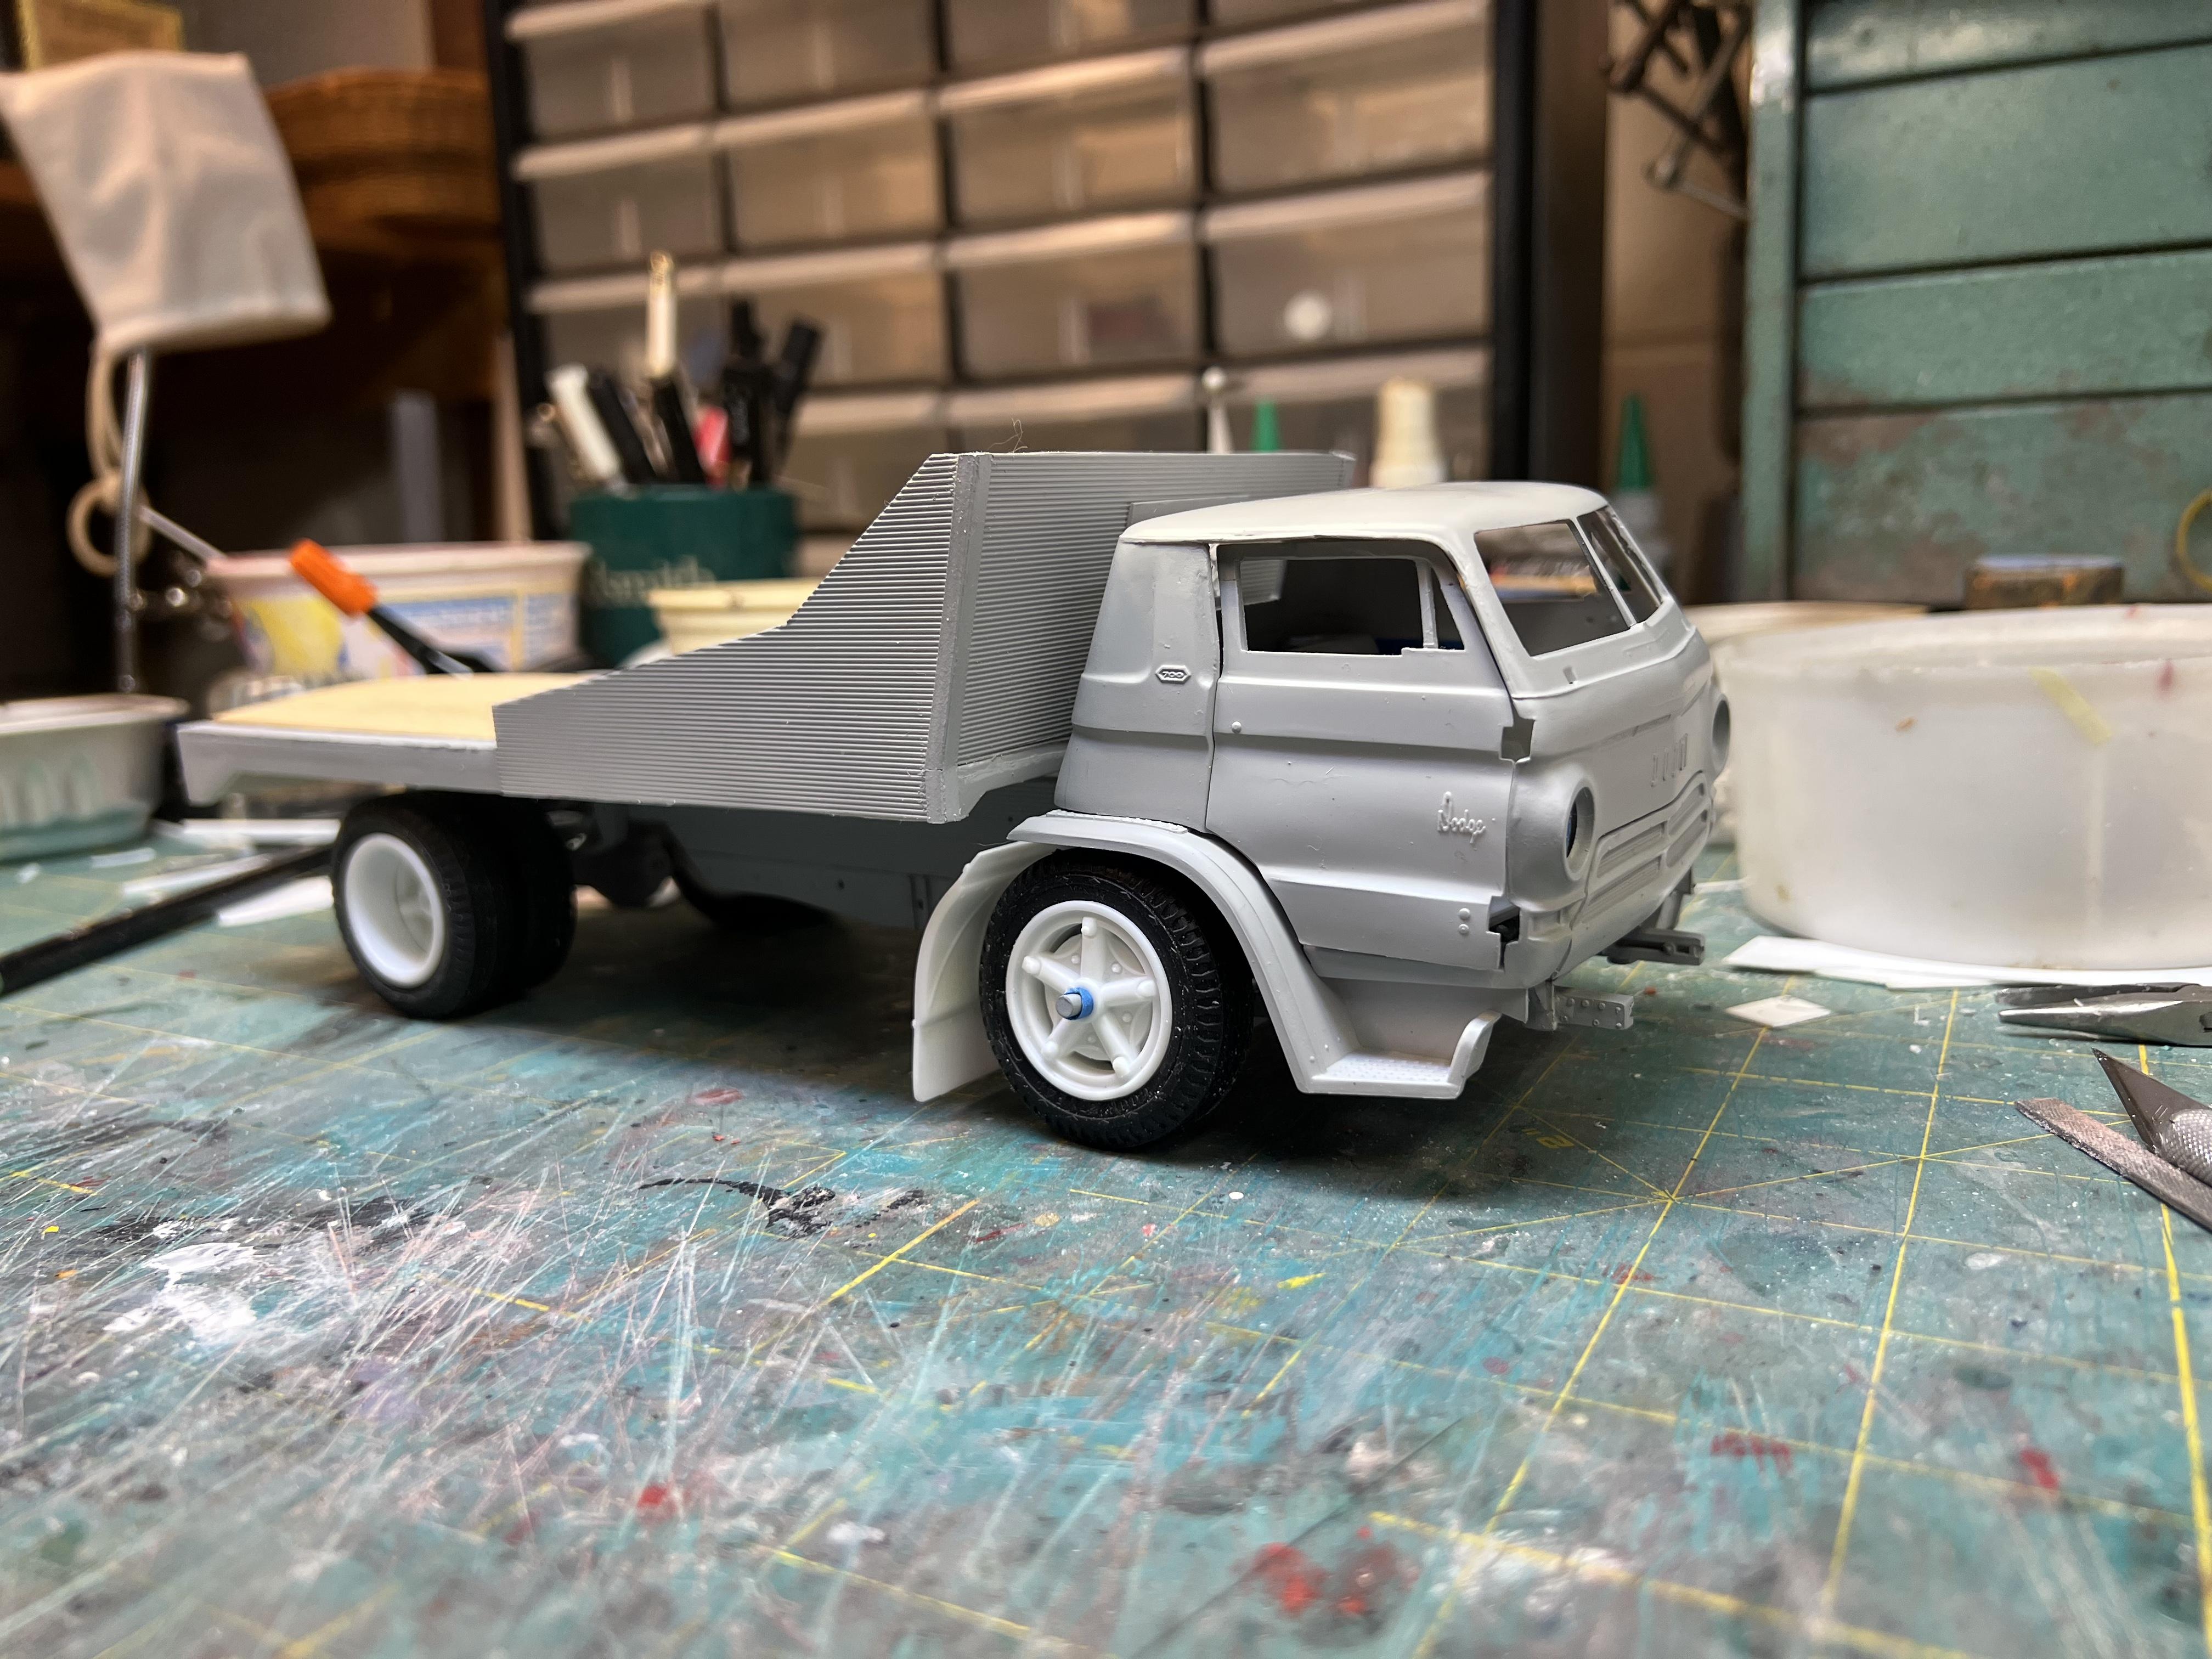
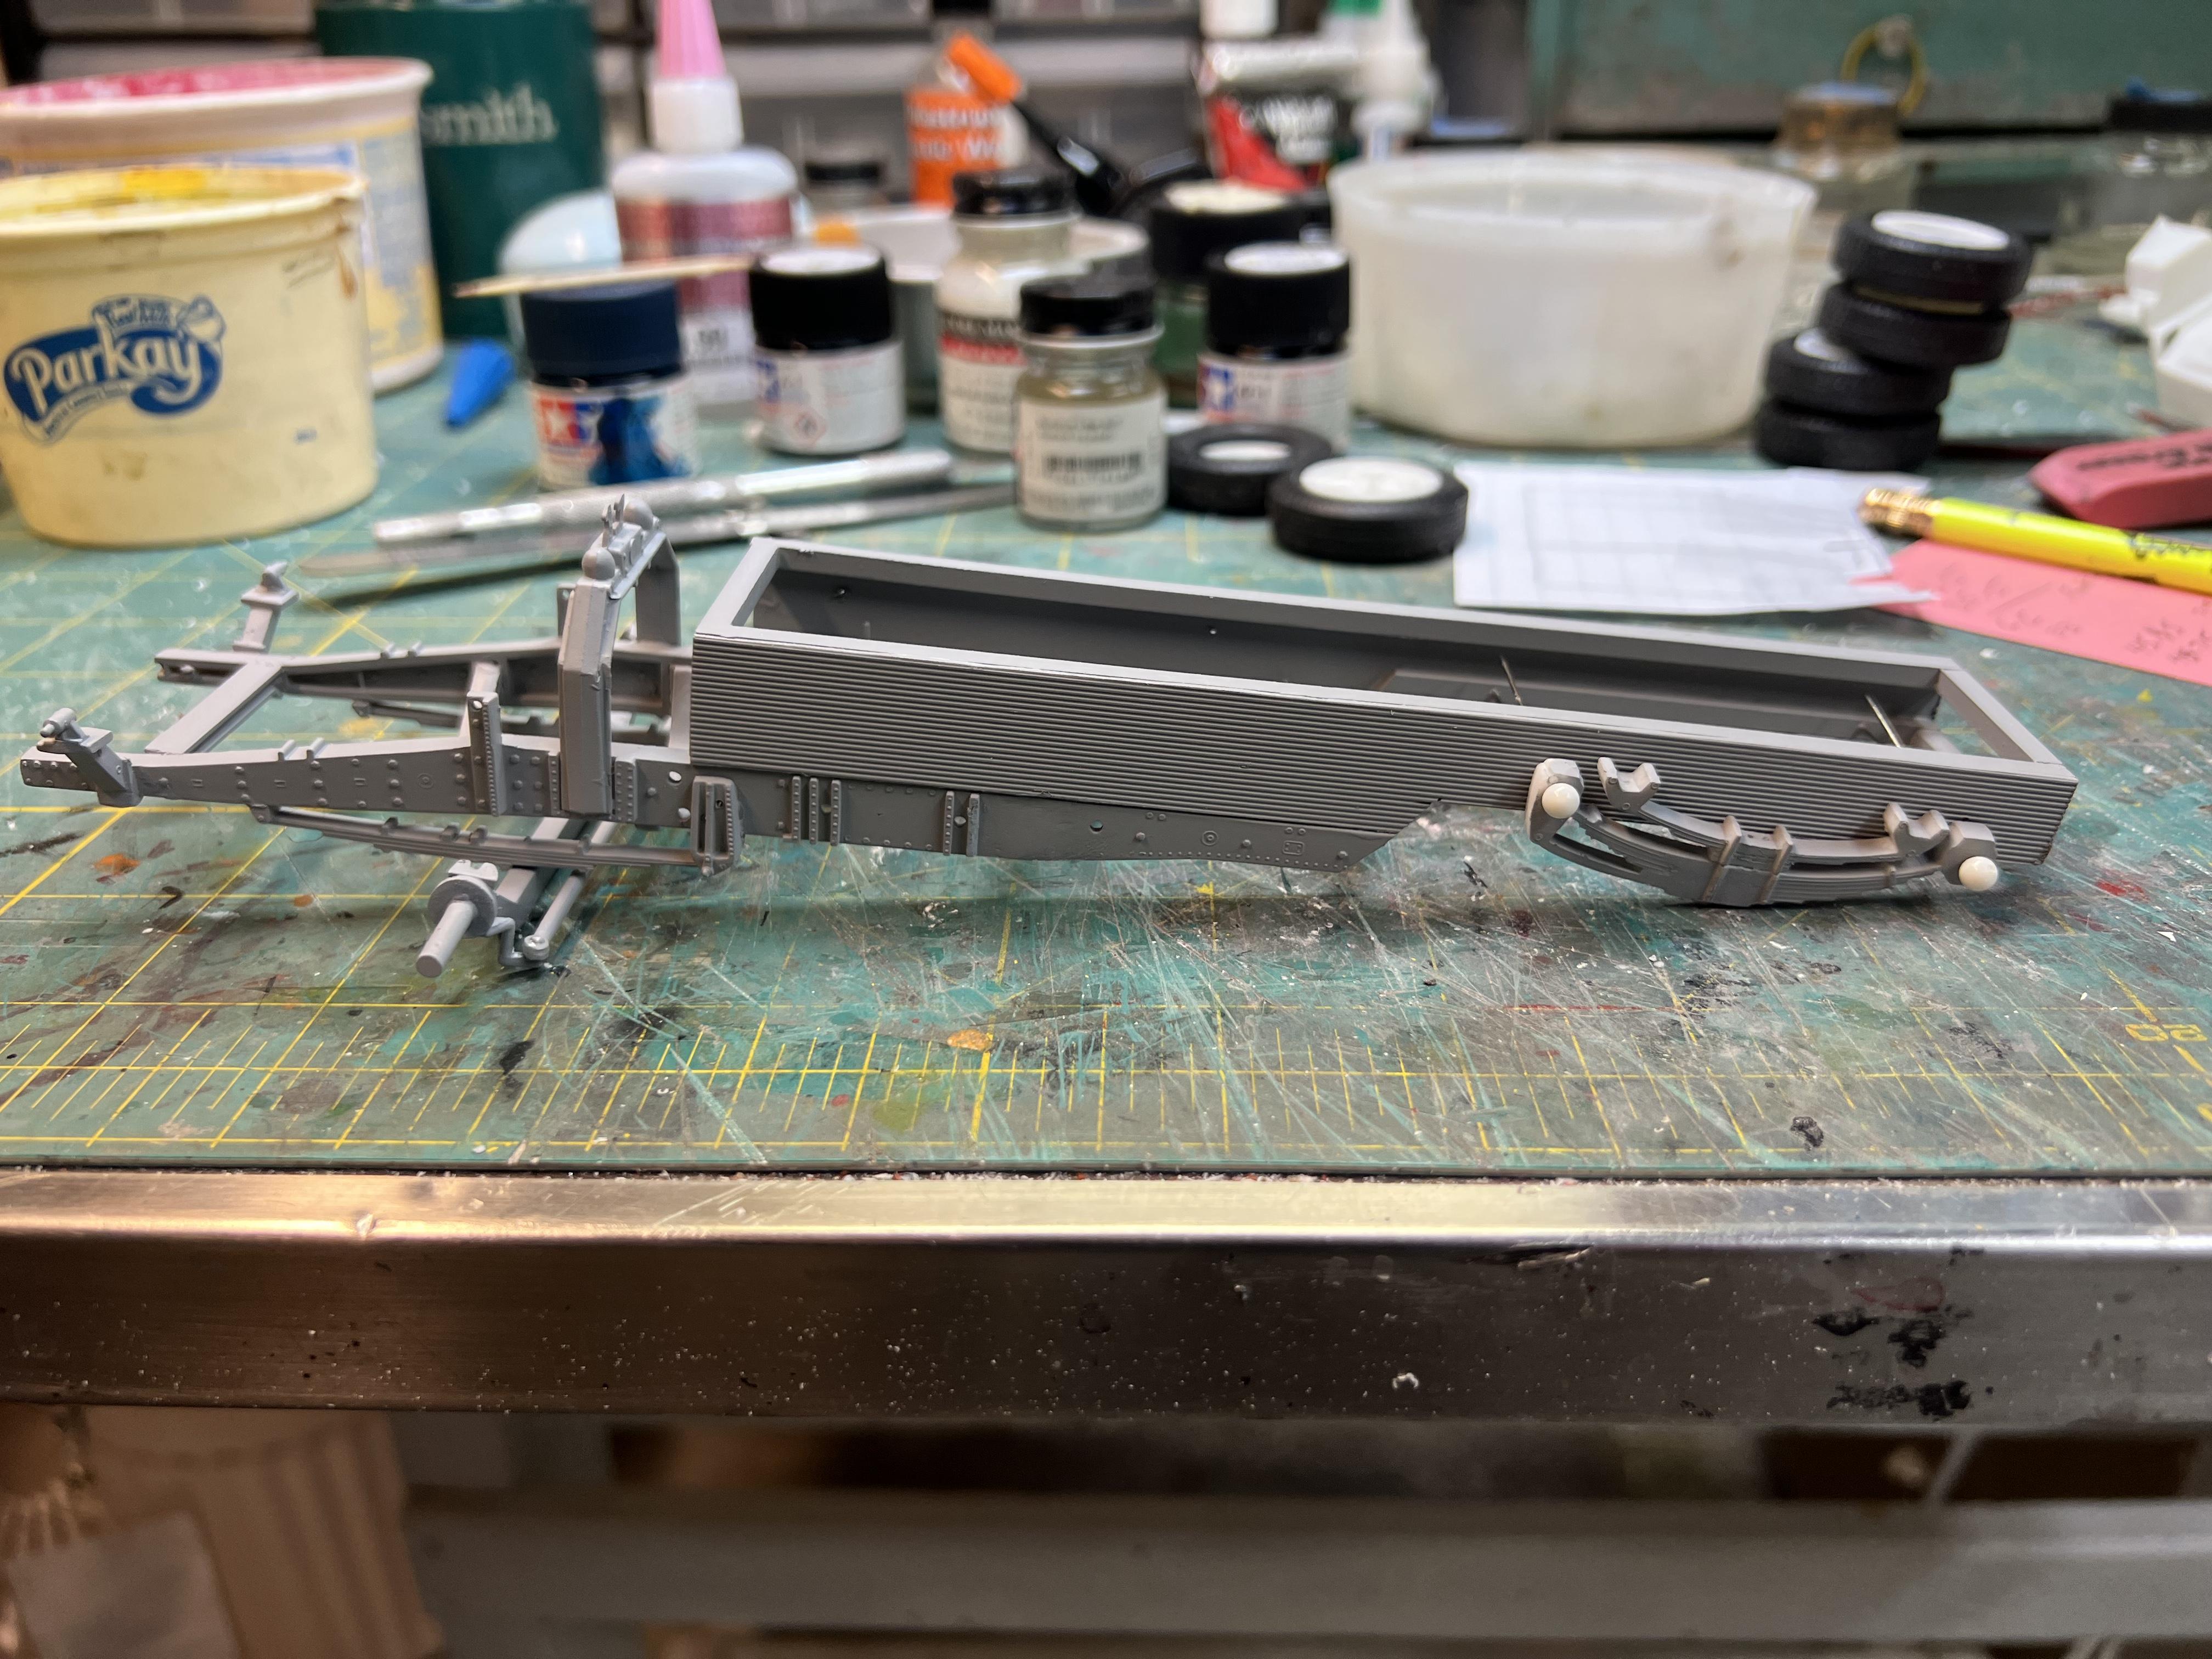
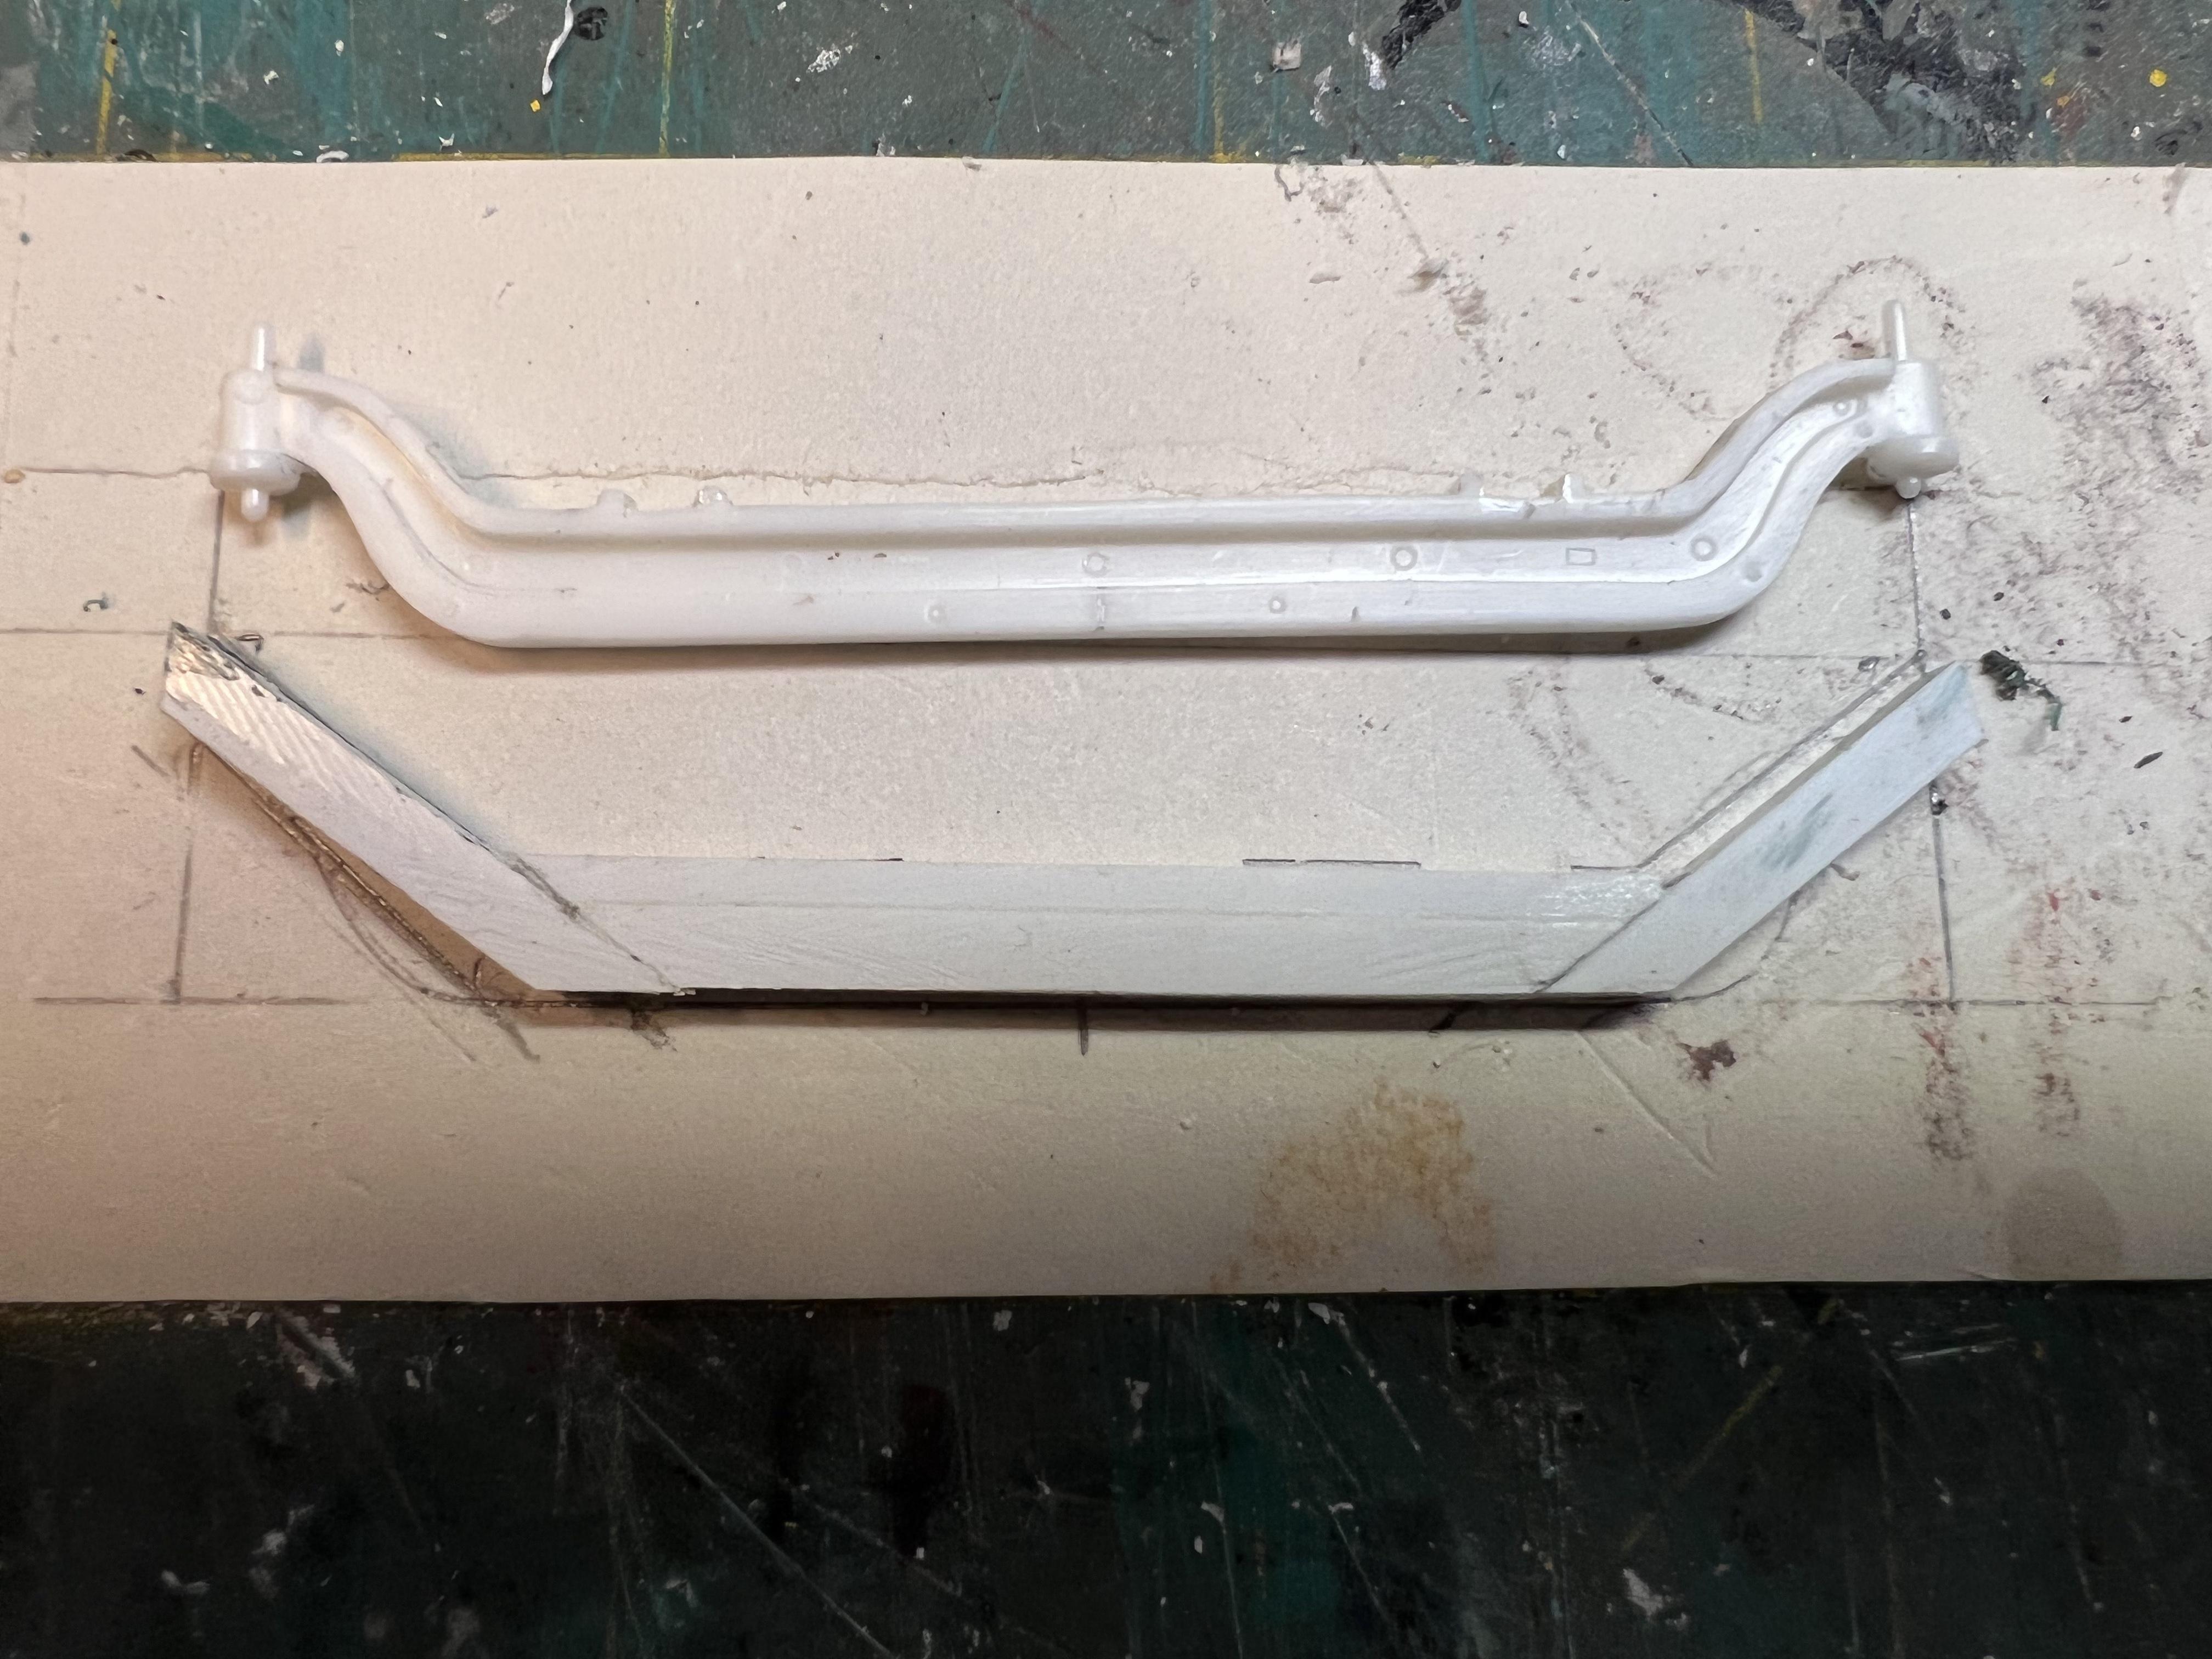
Made some progress. I’d be further along but as you can see from the fuel tank a lot of time is spent filling and sanding.The kit’s flatbed comes in two sections and I shortened the rear one by 1 1/2” to be what cars would need. The rear duels are loose to see how much the frame needs to be extended. I’m thinking about 2 1/4”. It will also need to be Zd to allow suspension. For the front axel the spring perches we’re reduced a scale 1” and with the new axel it’s as low as can be done without extensive work. I’m a big fan of pinning parts together. Nothing to fancy just straight pins cut to length.
-
I’ve started a topic in the Trucks etc category for this
-
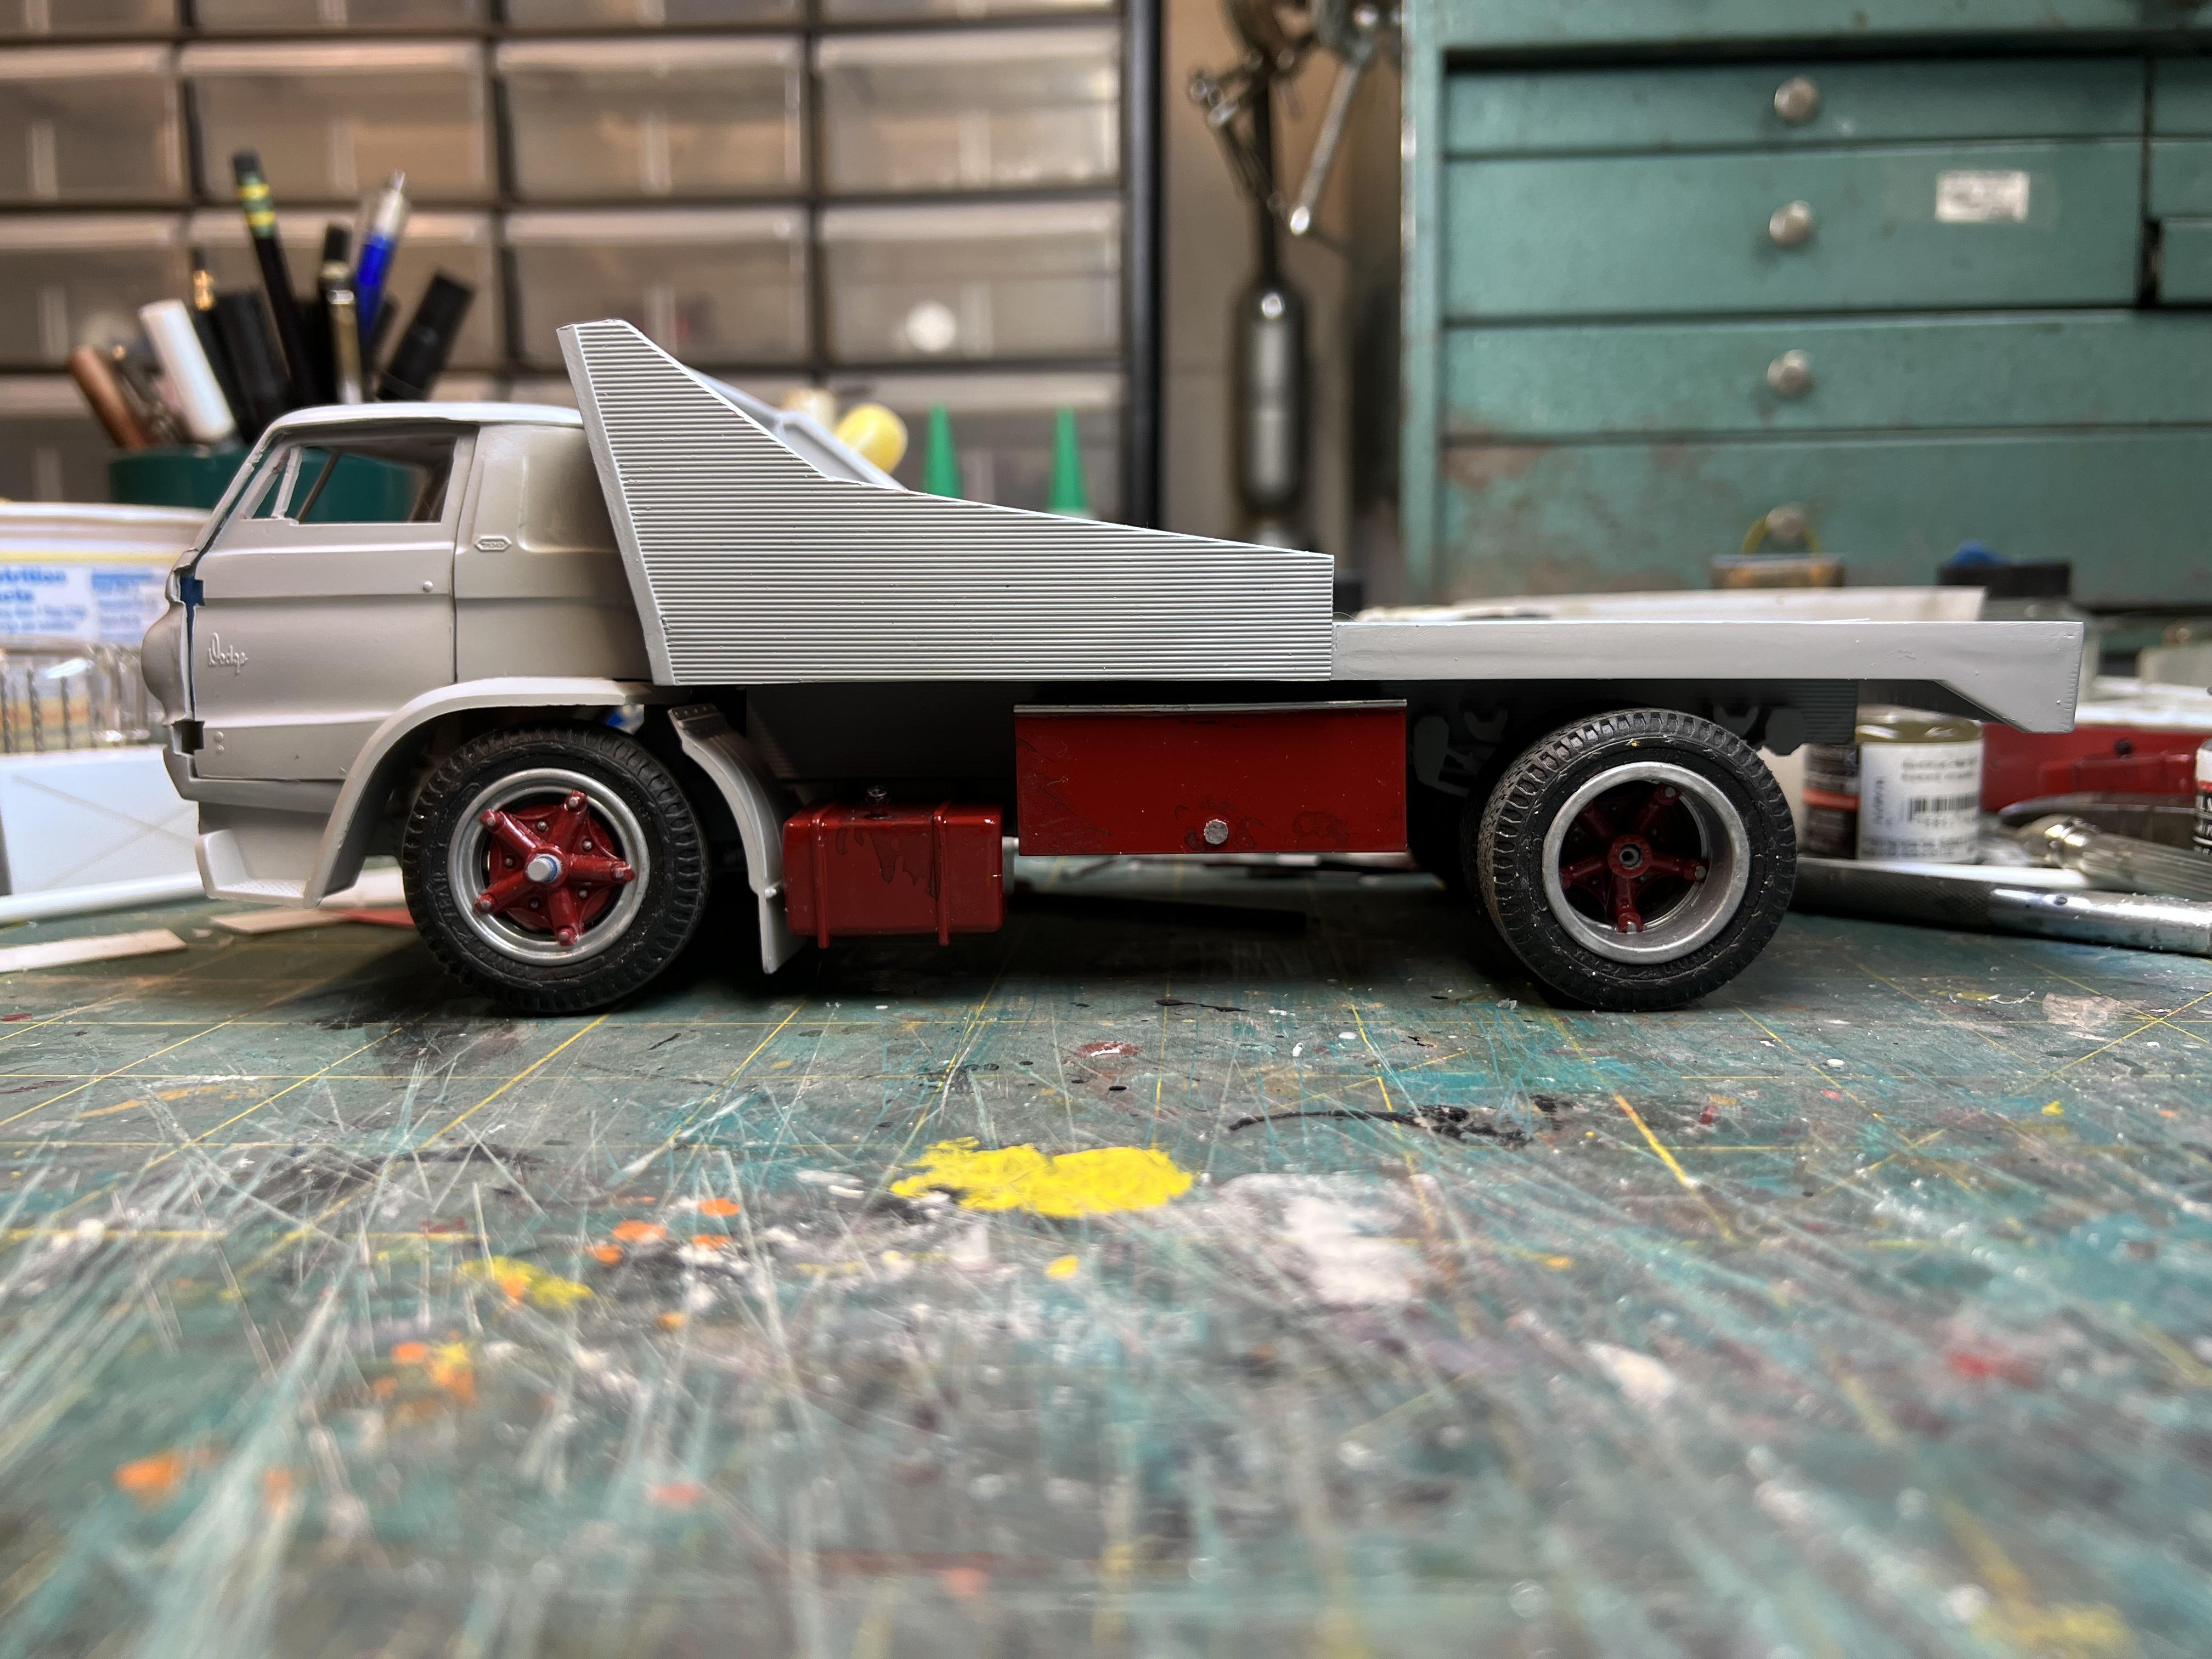
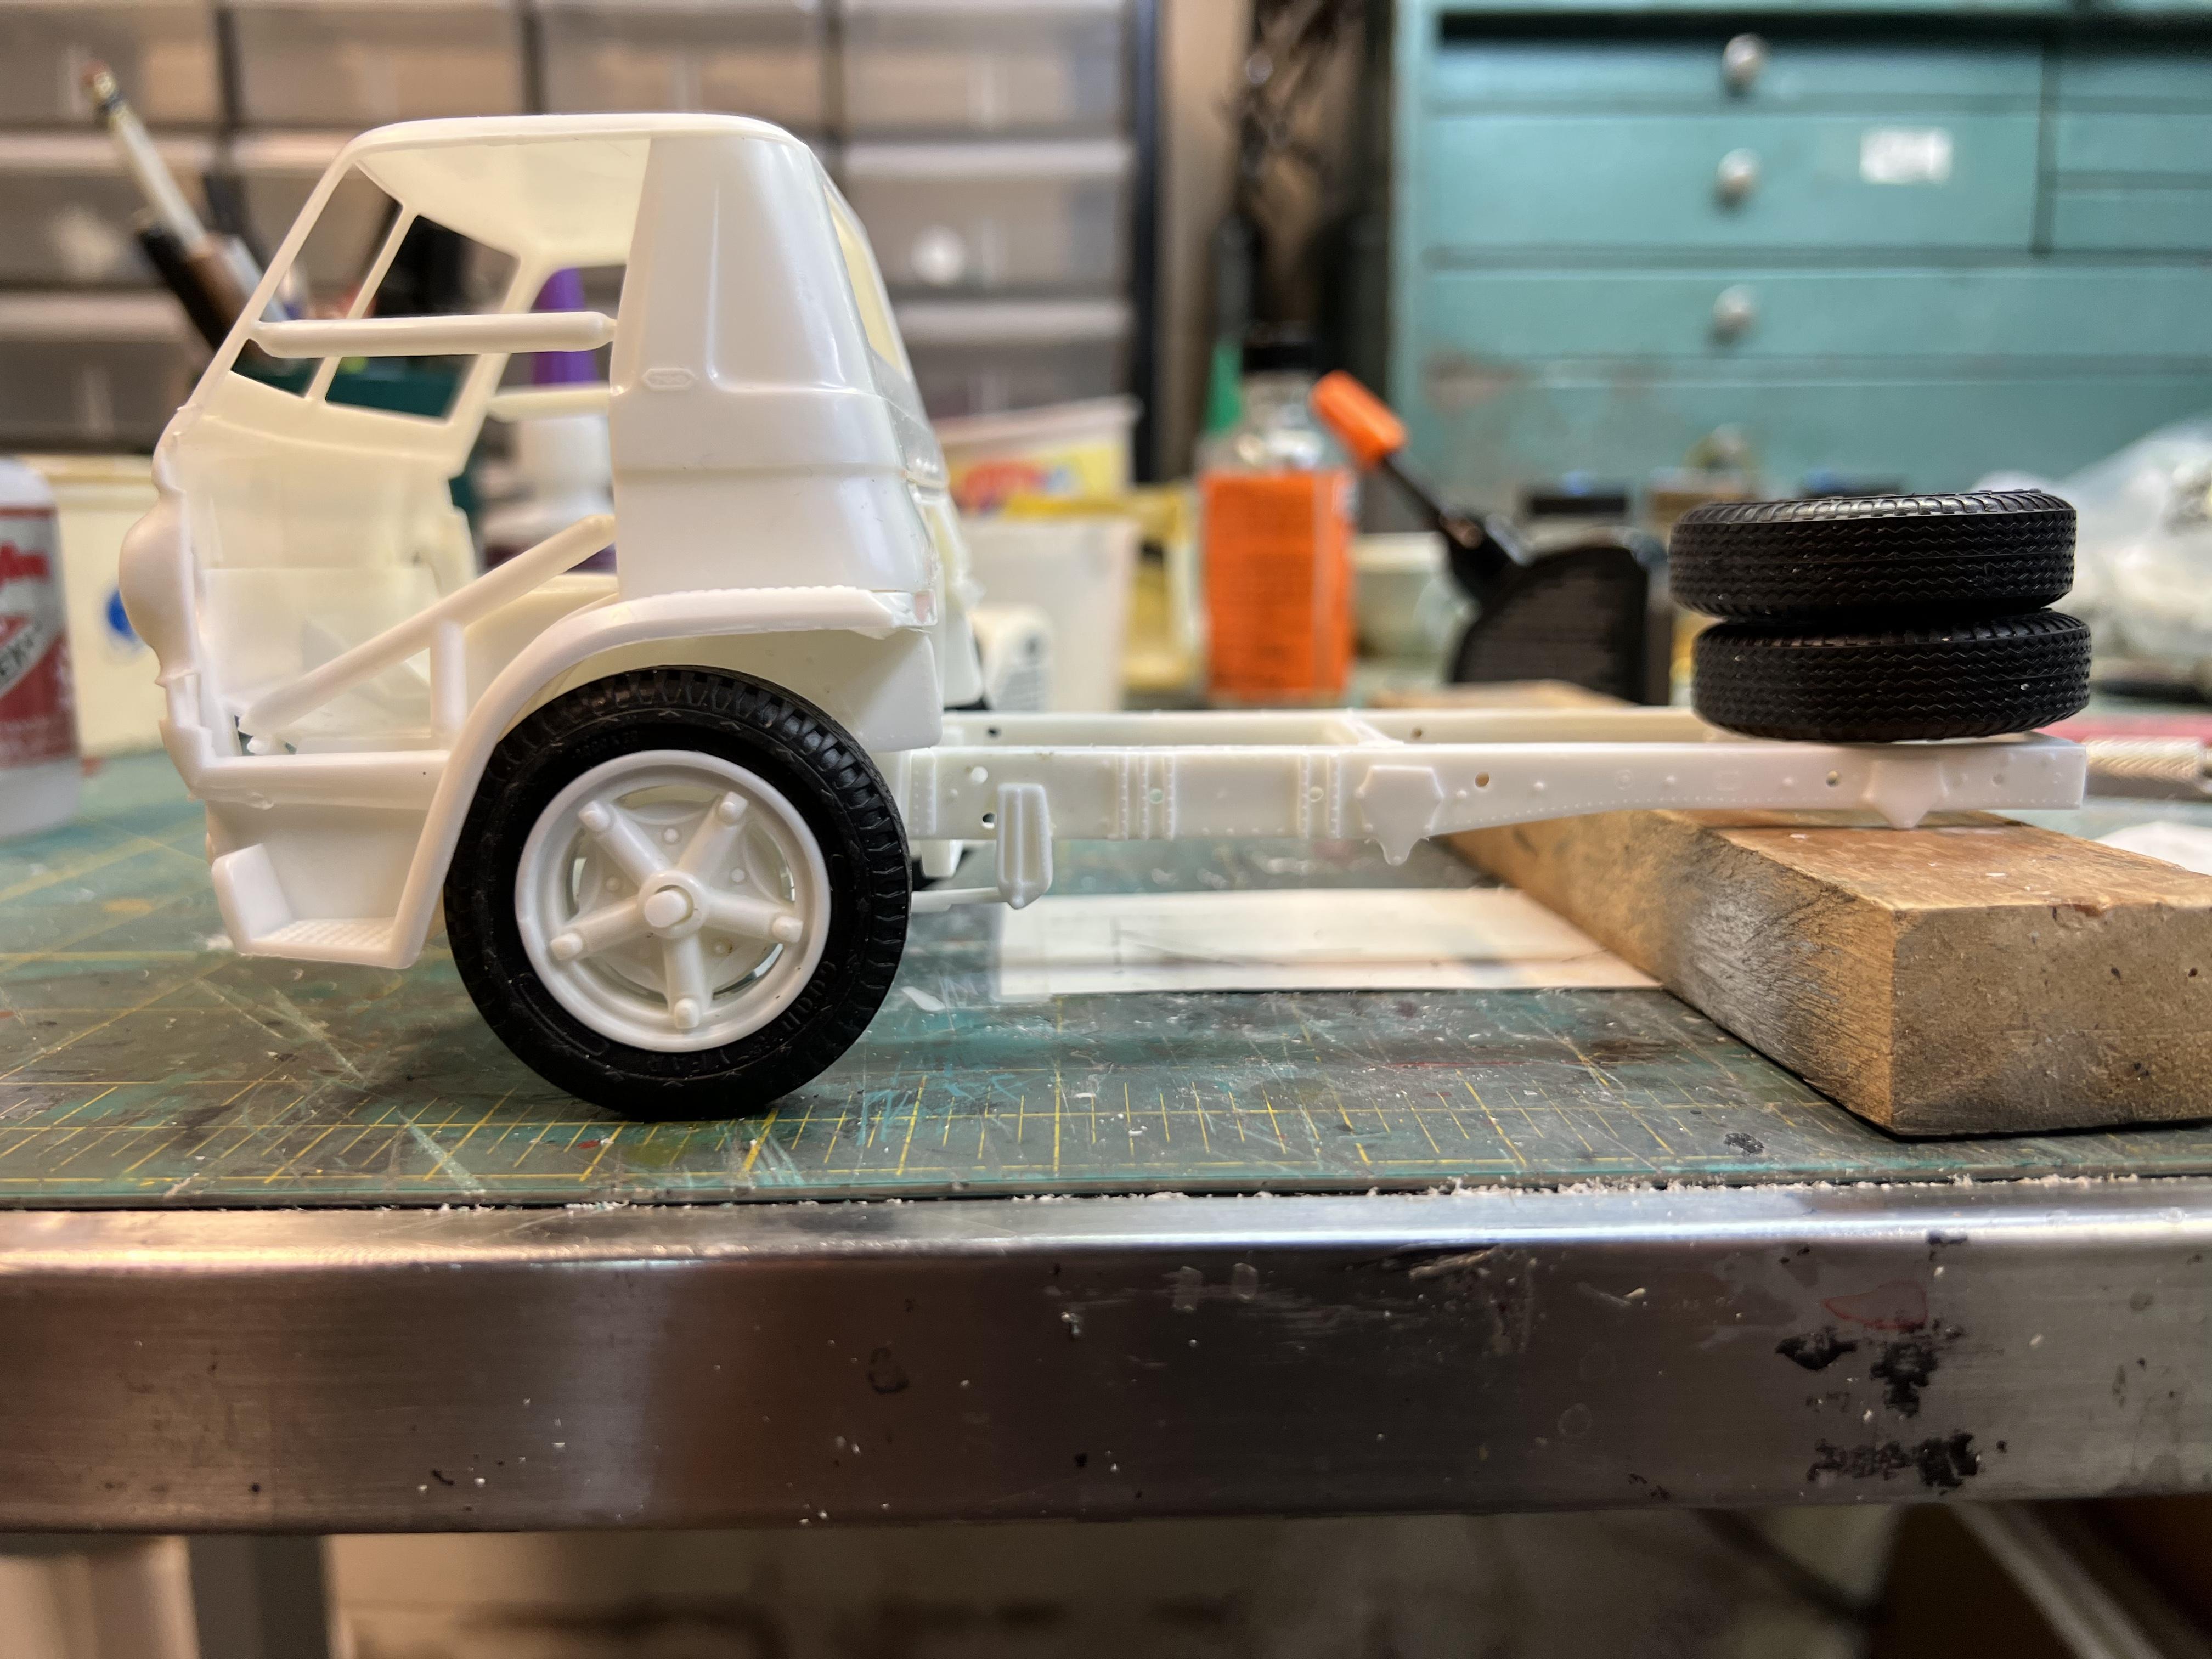
To my mind the L-700 is a funky enough looking that it would be good as a customized car hauler. The directions for this kit are terrible. The parts trees have no numbers for the parts. The other way I’ve seen this done is a picture of each tree is used and the parts numbered there. Maybe the original release was better. But now it’s search through all to find what you need. To lower the stance a 3” drop axel was made.l worried about clearance but it seems to be Okay, promise not to hit any big bumps. I think I can get it a little lower by shaving the spring perches but may have to move the axel back by it’s own width. To accommodate a car bed the frame needs some stretching. That will be my next step. The kit is 1:25 so I’ll eventually build the 40 Ford that came with the kit as my built kits are all 1:24. Anyway I’m beginning to start to proceed.
-
Thanks for the suggestions. I’m thinking of a ramp type hauler. To get her a low as I’d like I think I’ll have to make some major wheel well modifications and also some body adjustments to accommodate the new wheel wells.
-
Thanks, I understand the various ways to adjust suspensions to lower a stance. My concern is in the past when I lowered something the tires moved “up” in the wheel wells. However the L-700 doesn’t have much clearance for the fronts.
-
I am thinking of turning a Dodge L-700 into a car hauler. Has anyone successfully lowered this kit?
-
I found this expanded metal from a sheetrock patch kit at my local Home Depot.
-

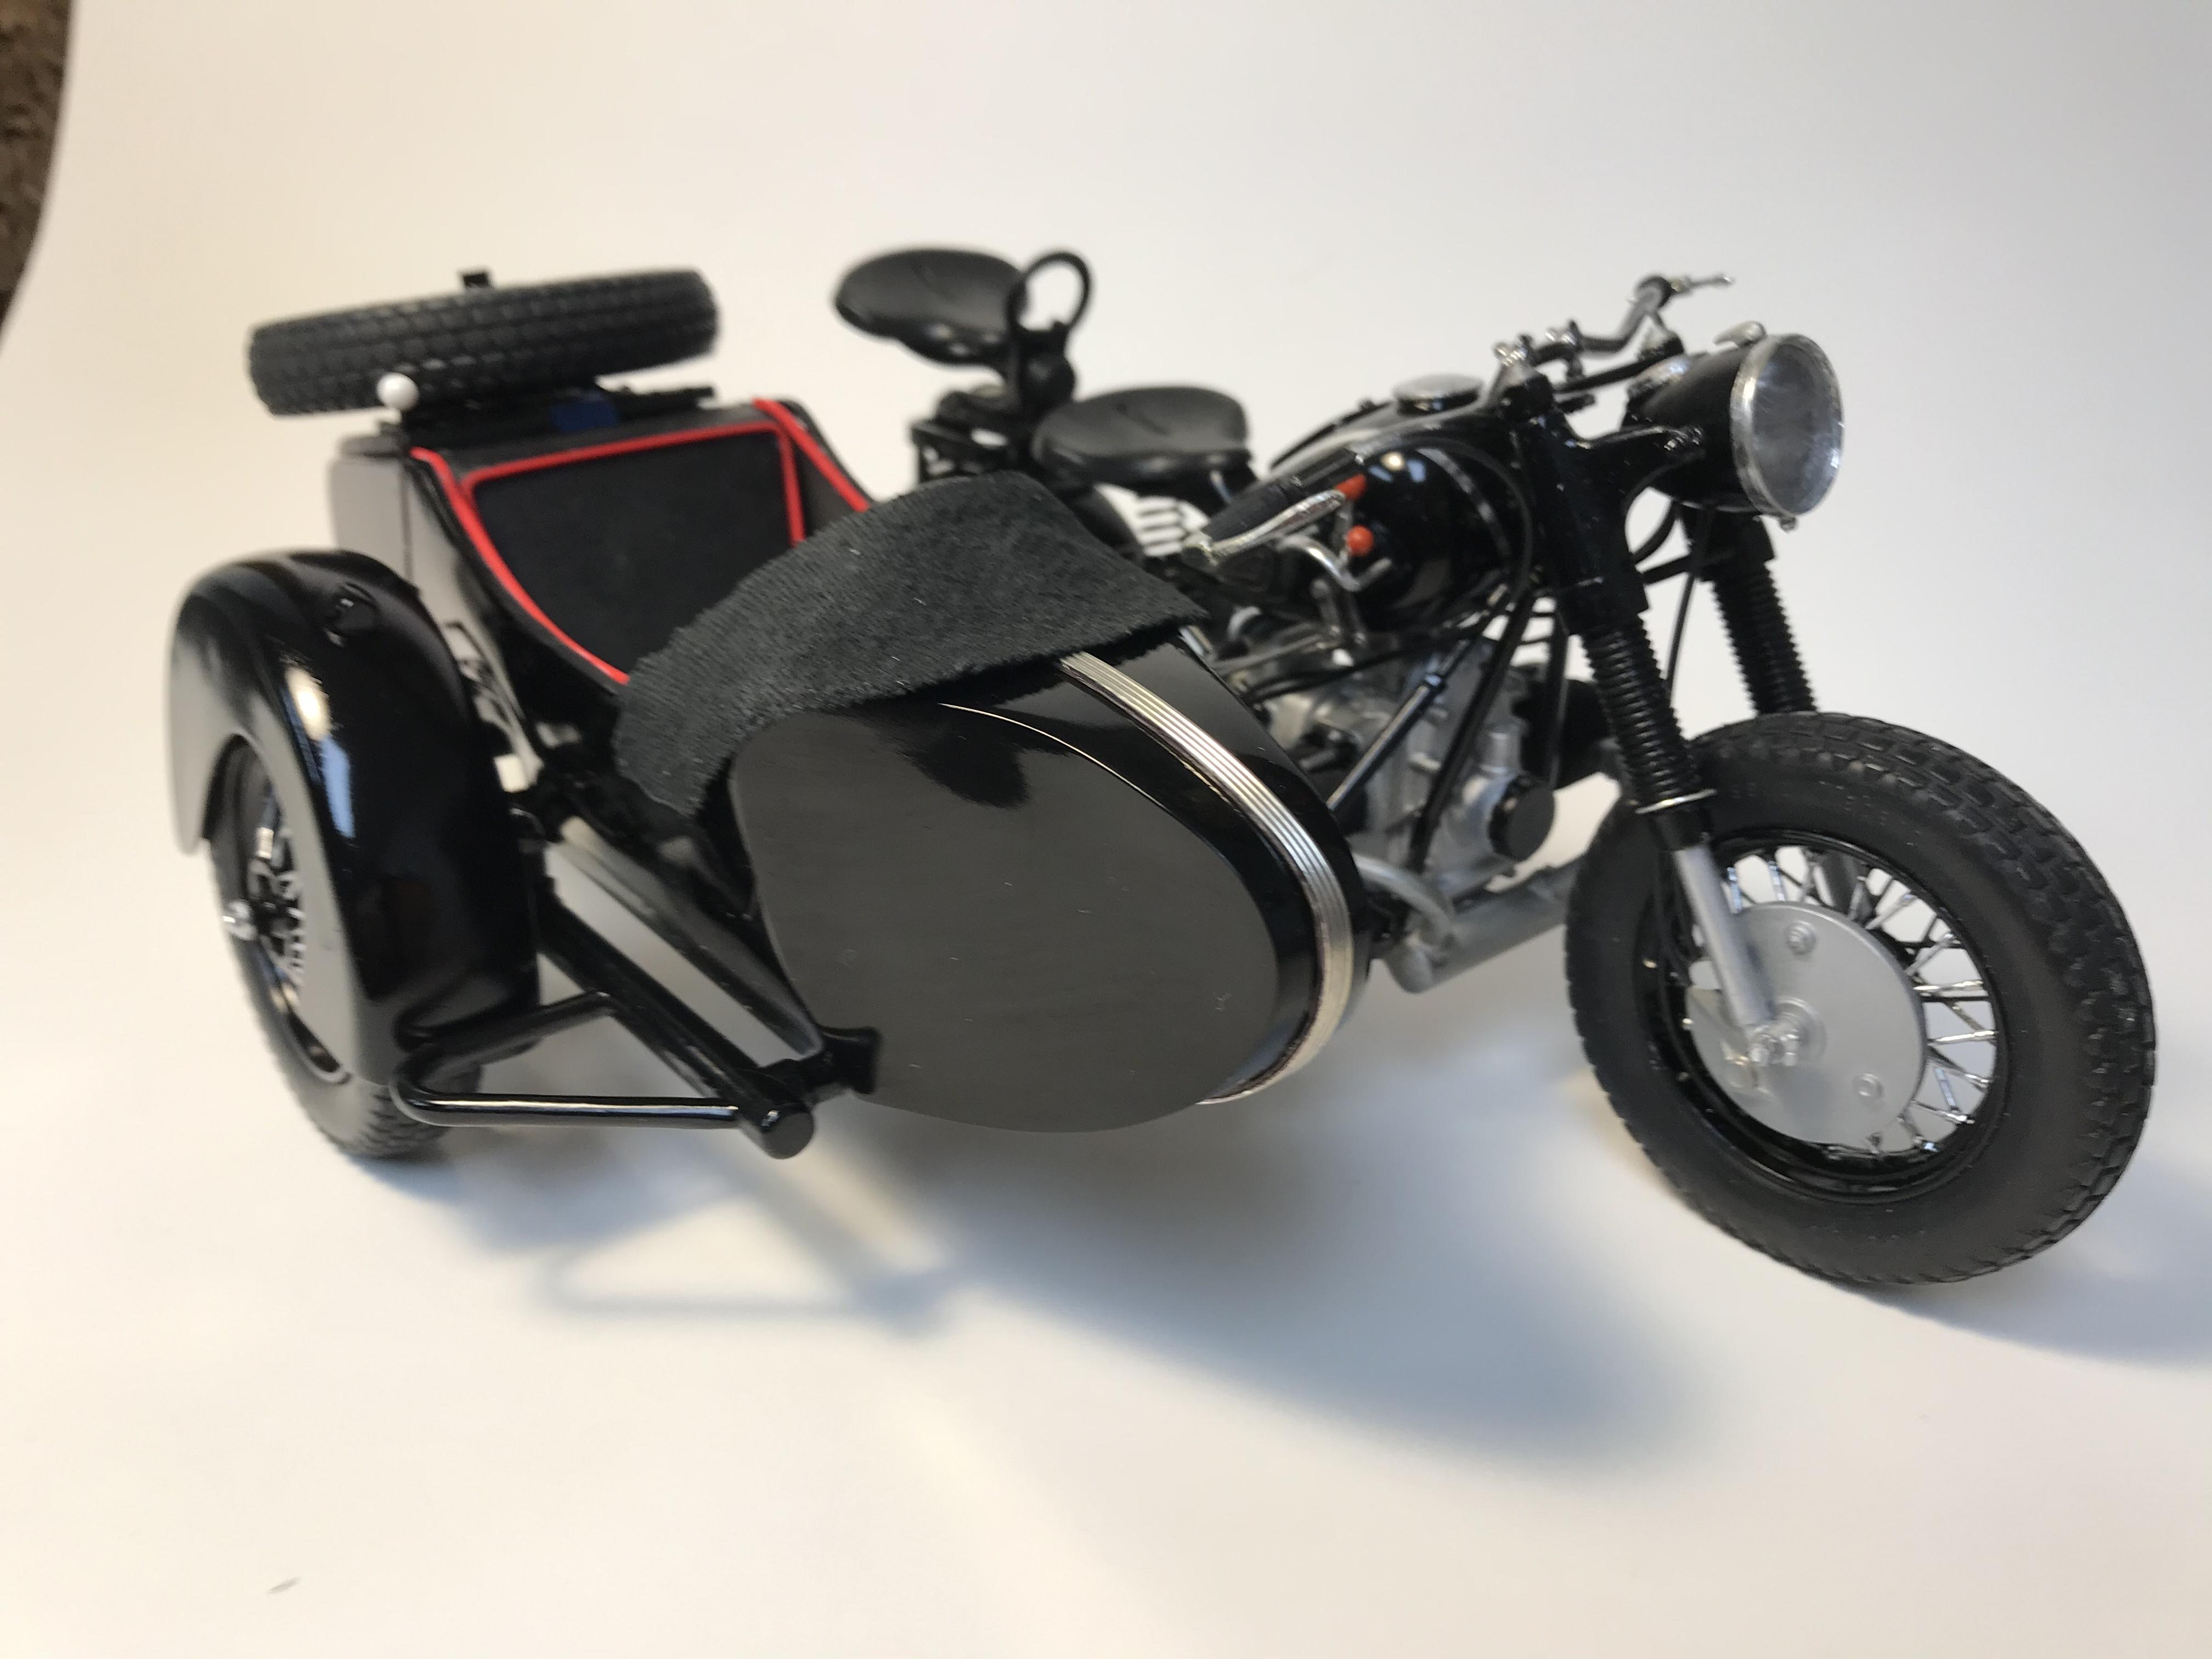
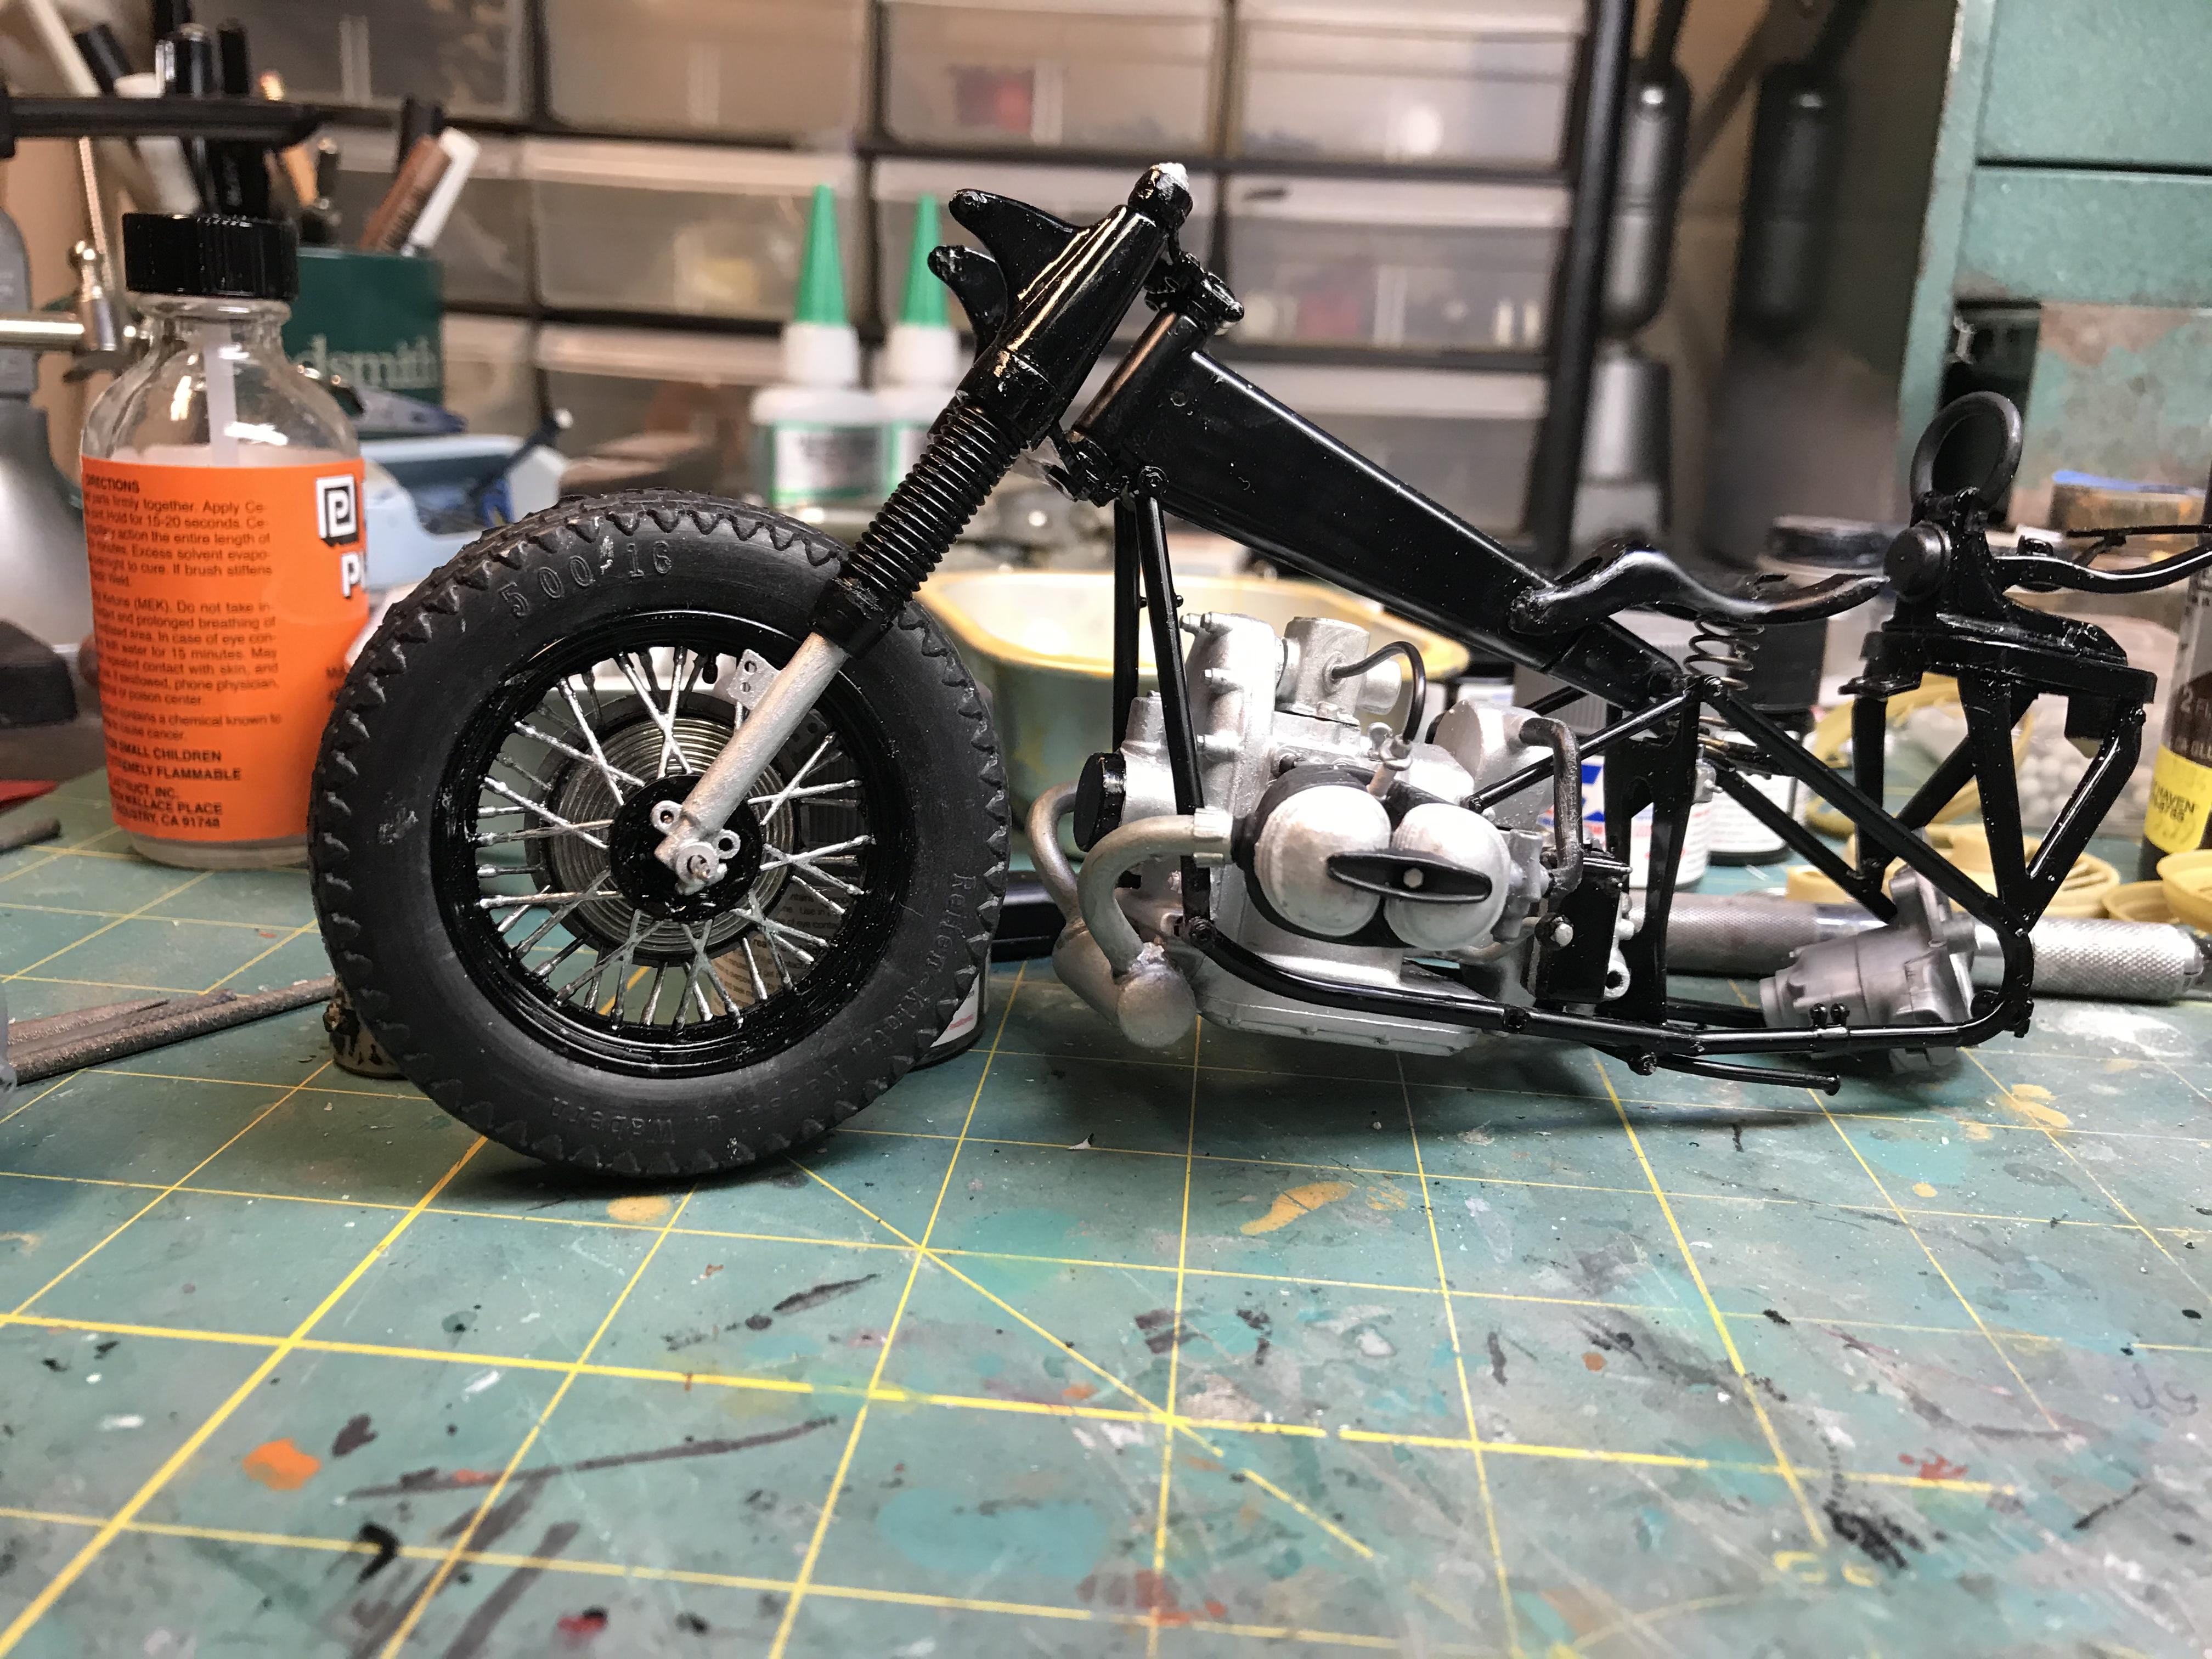
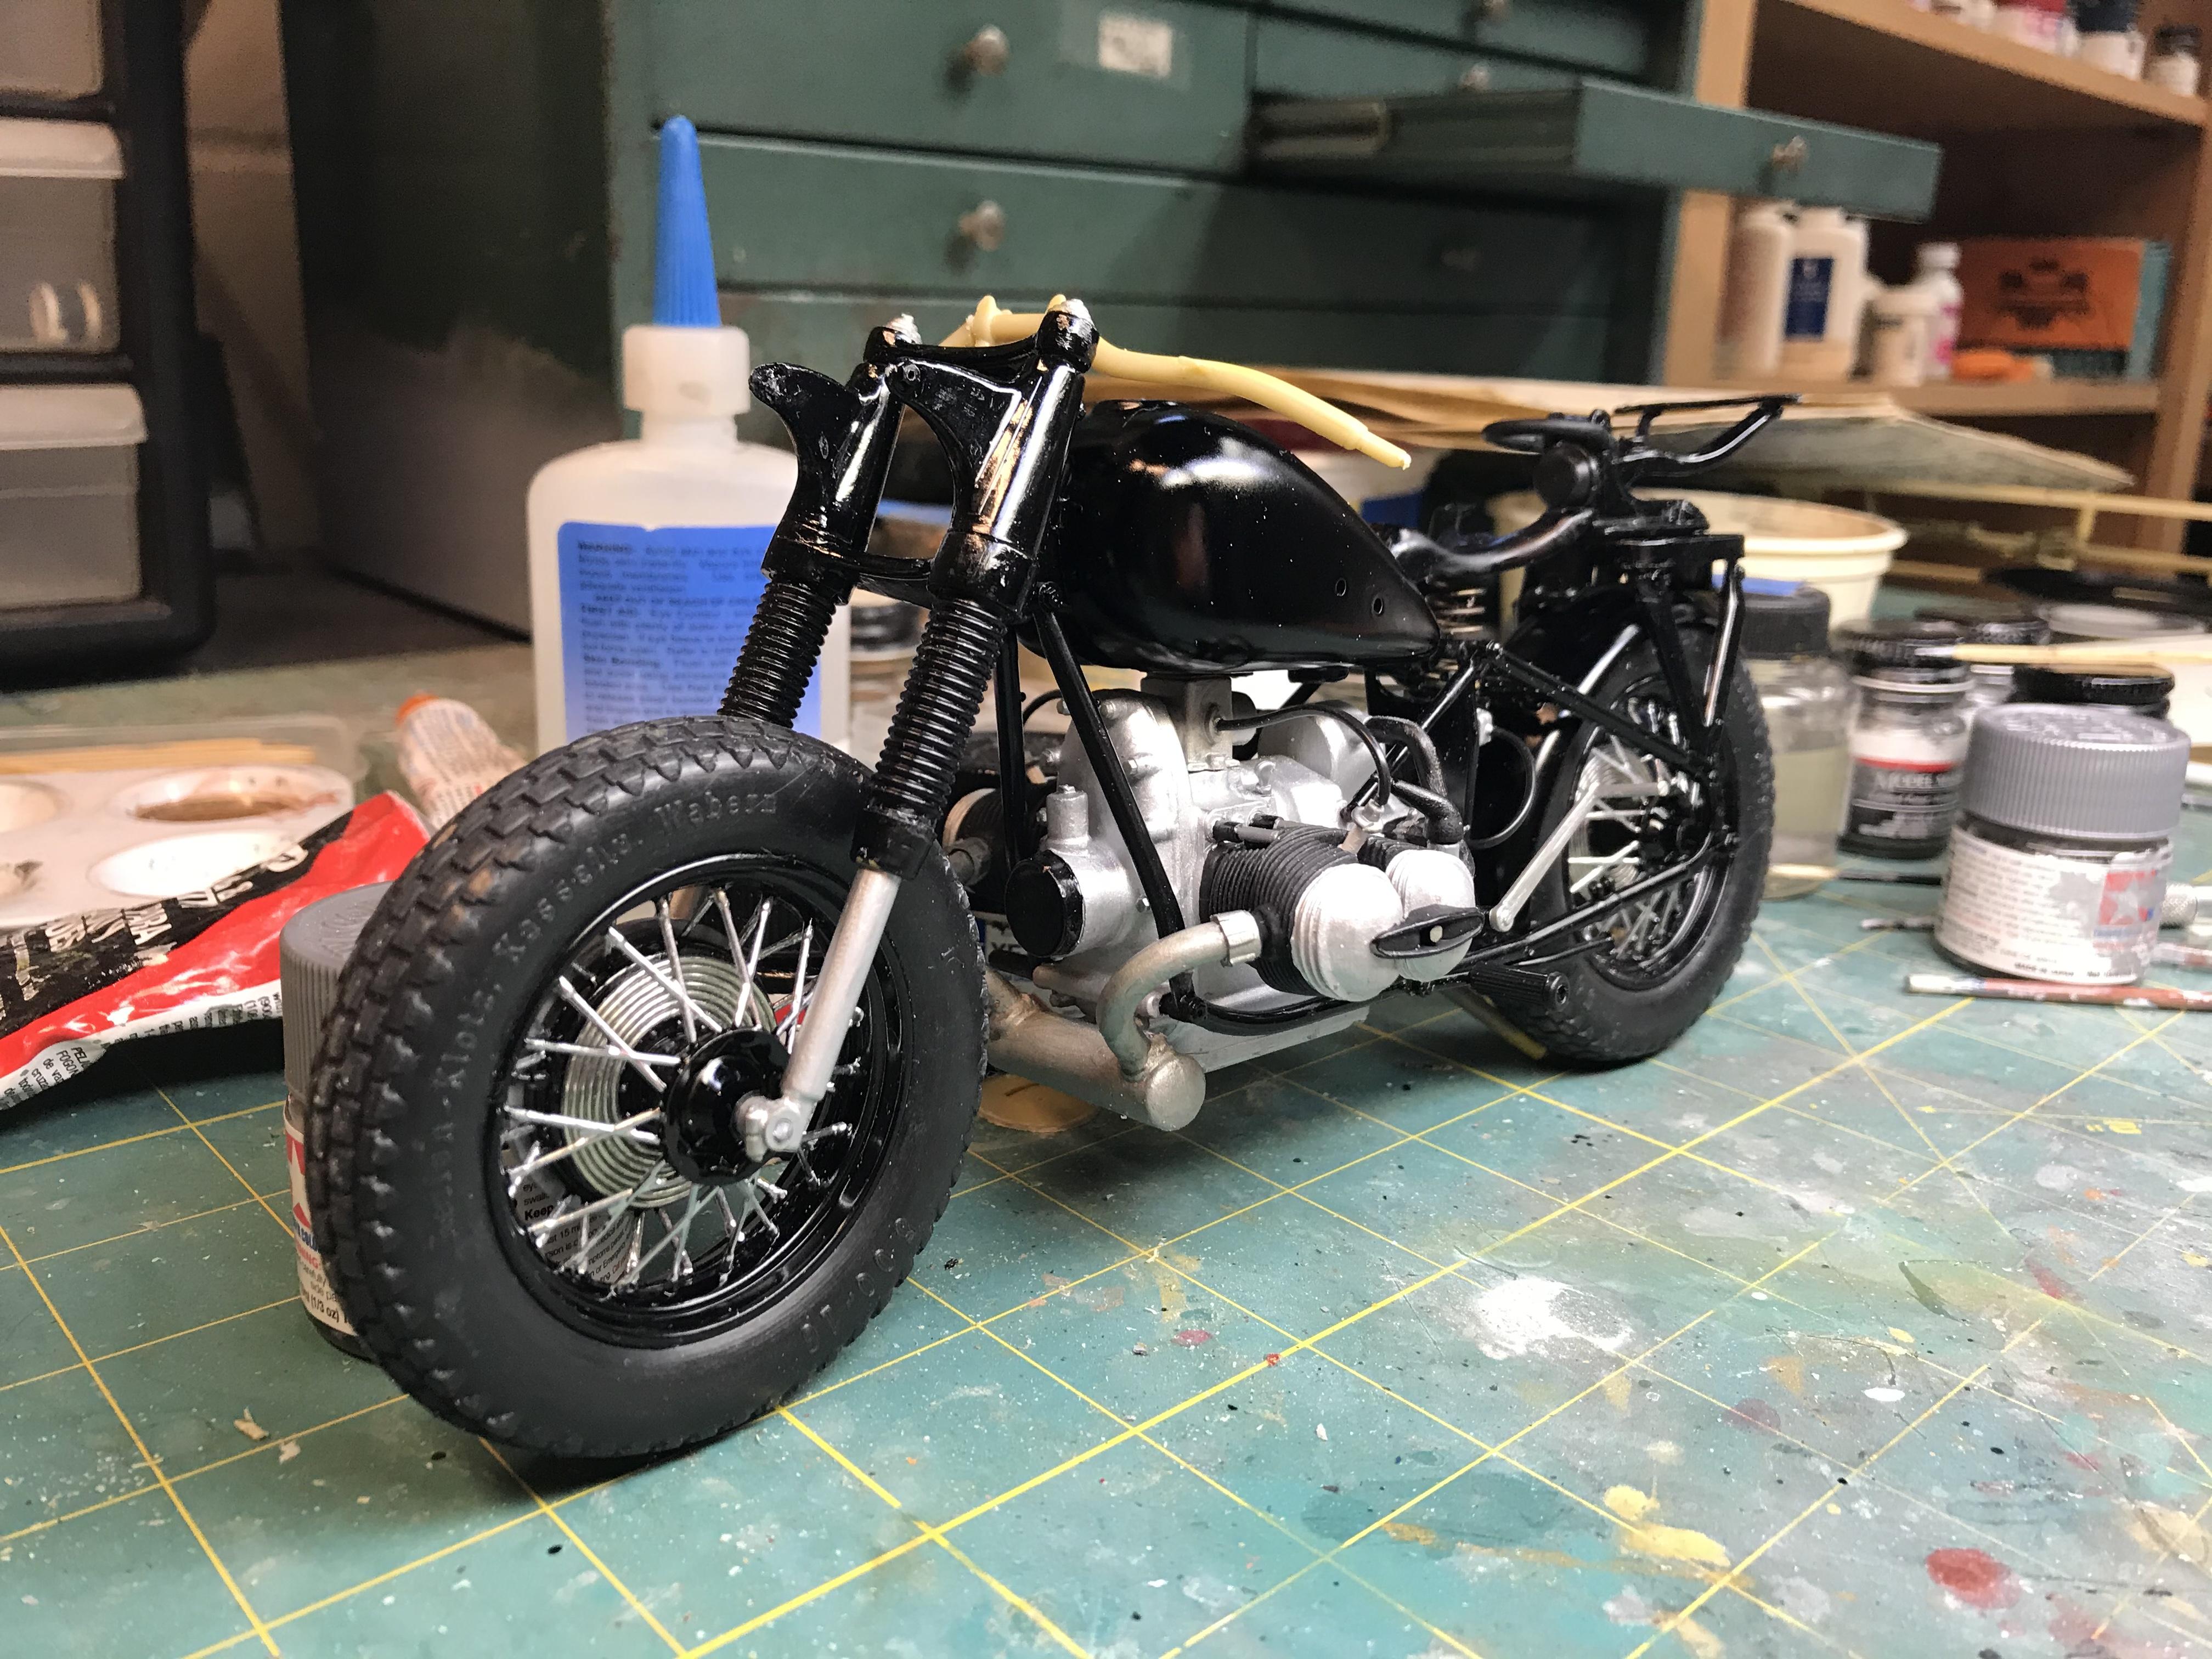
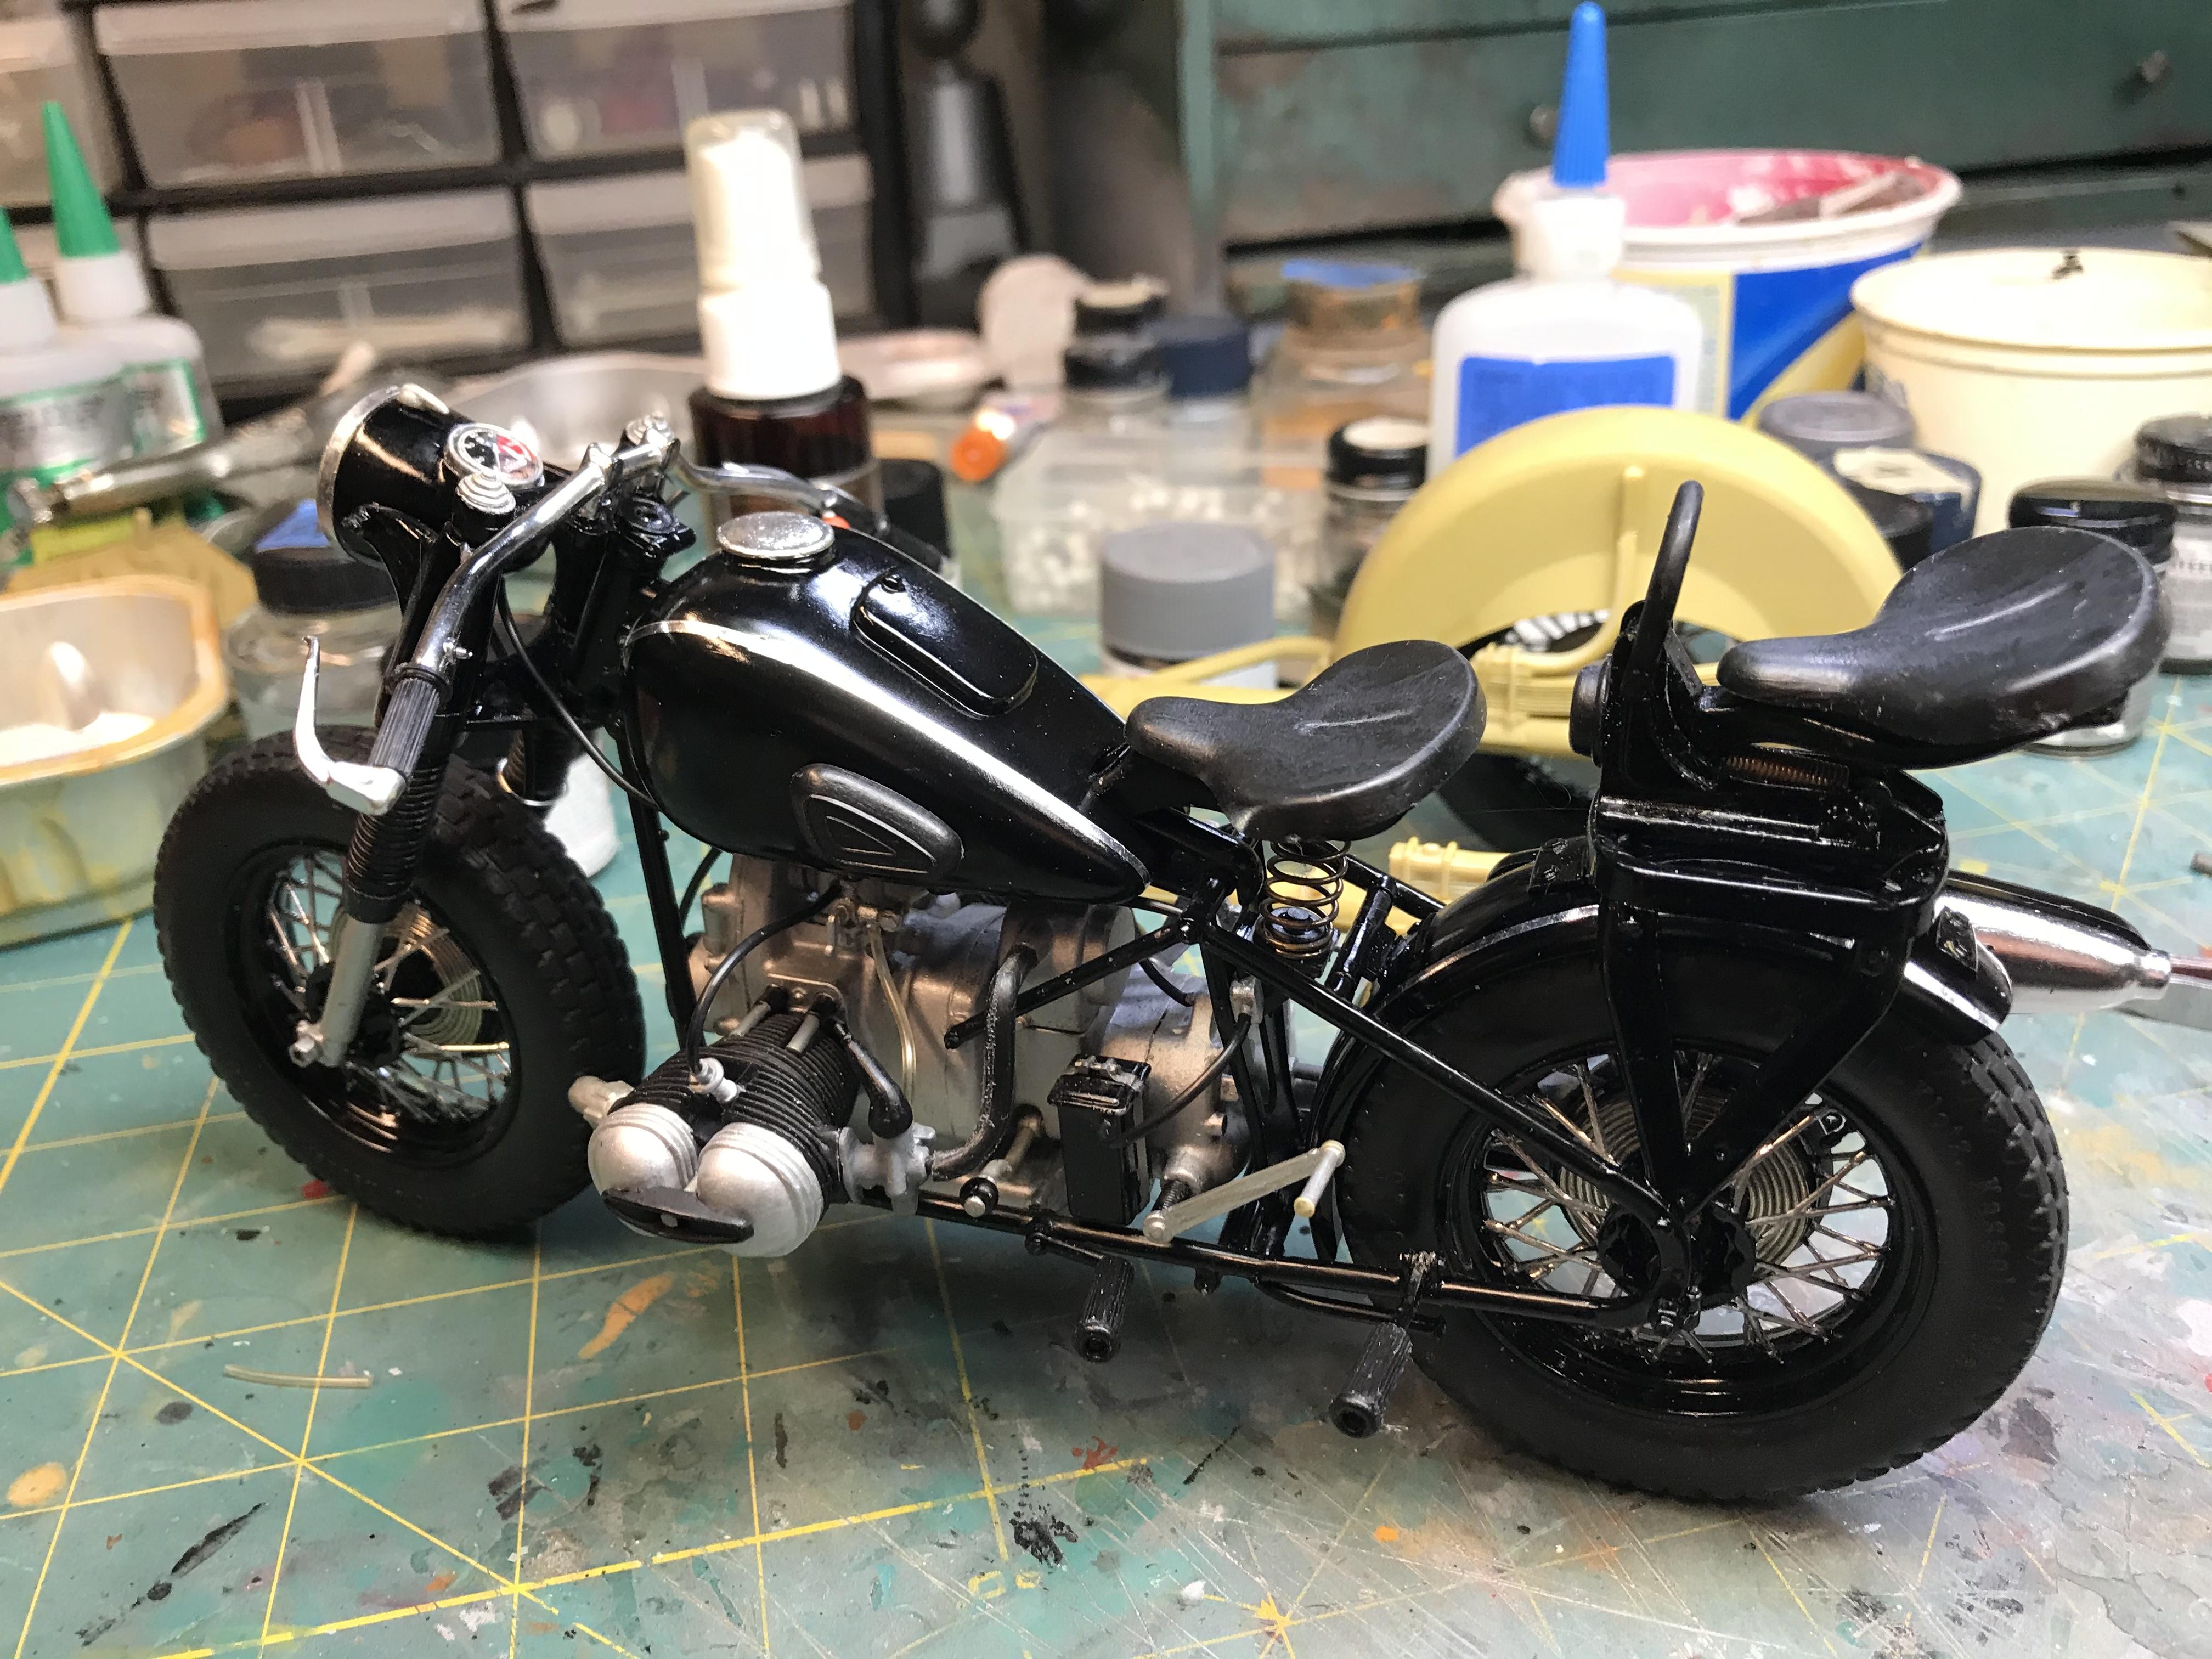
WWII BMW R 75
slownlow replied to slownlow's topic in WIP: All The Rest: Motorcycles, Aviation, Military, Sci-Fi, Figures
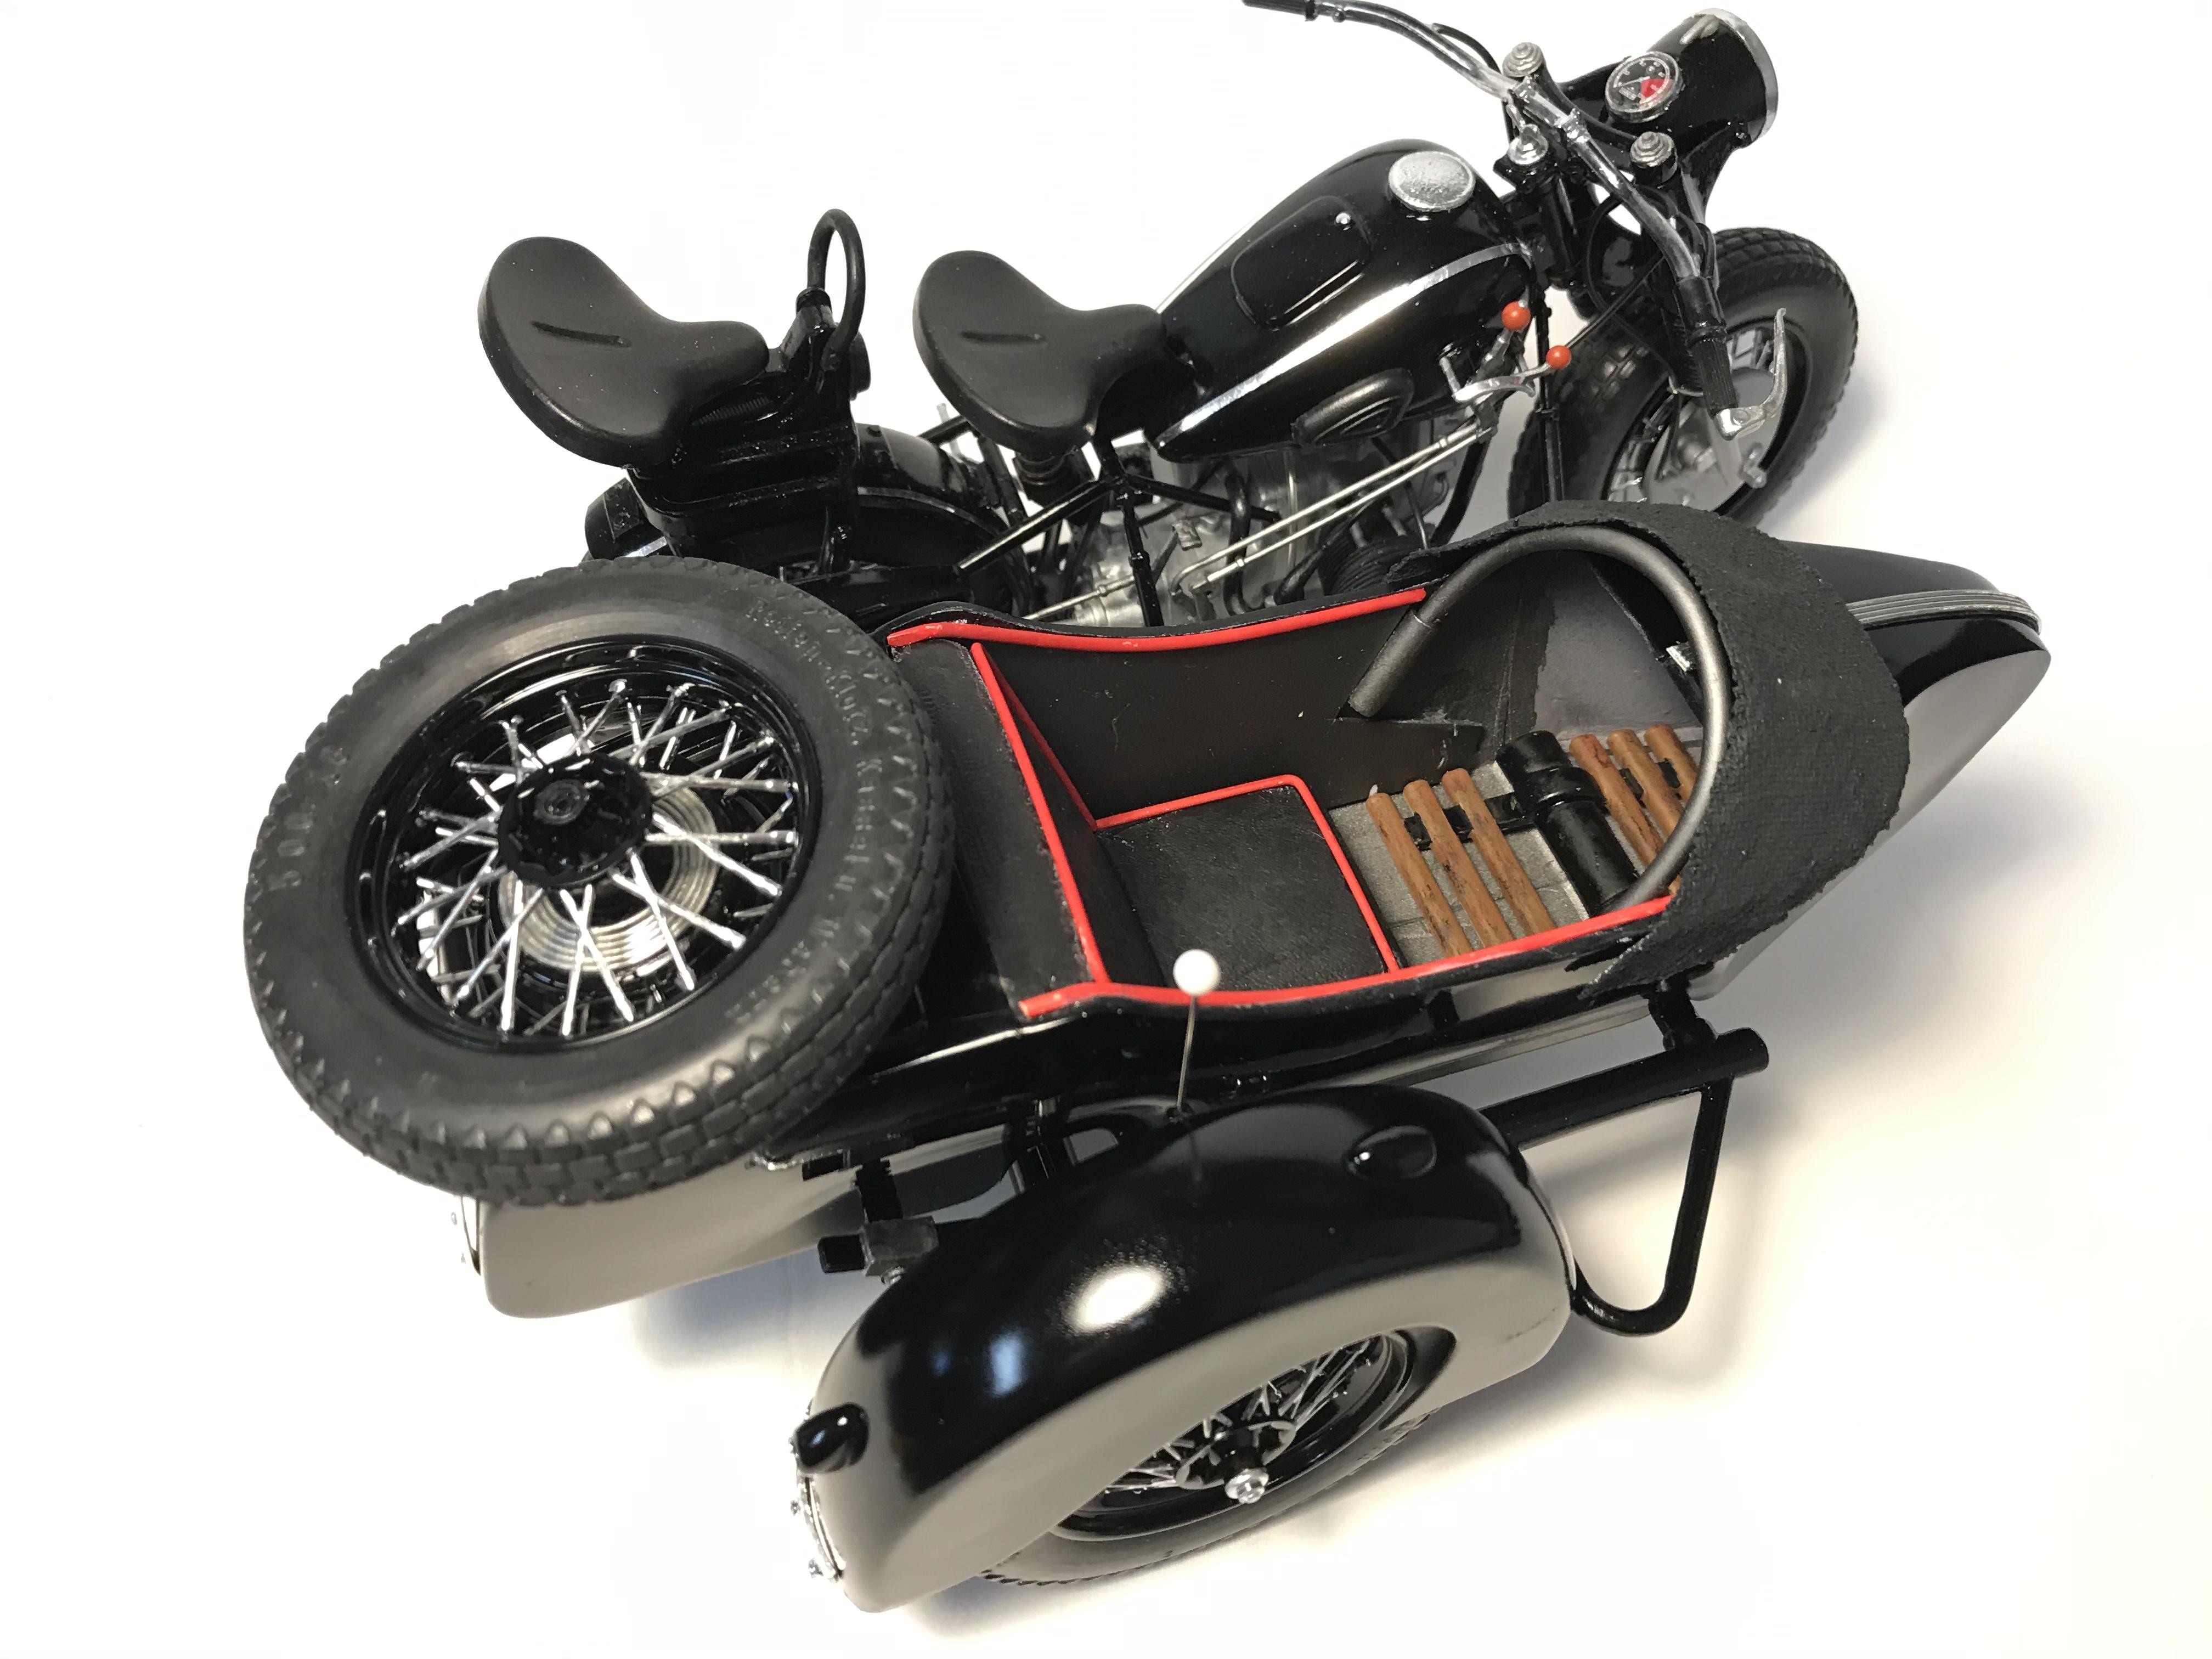
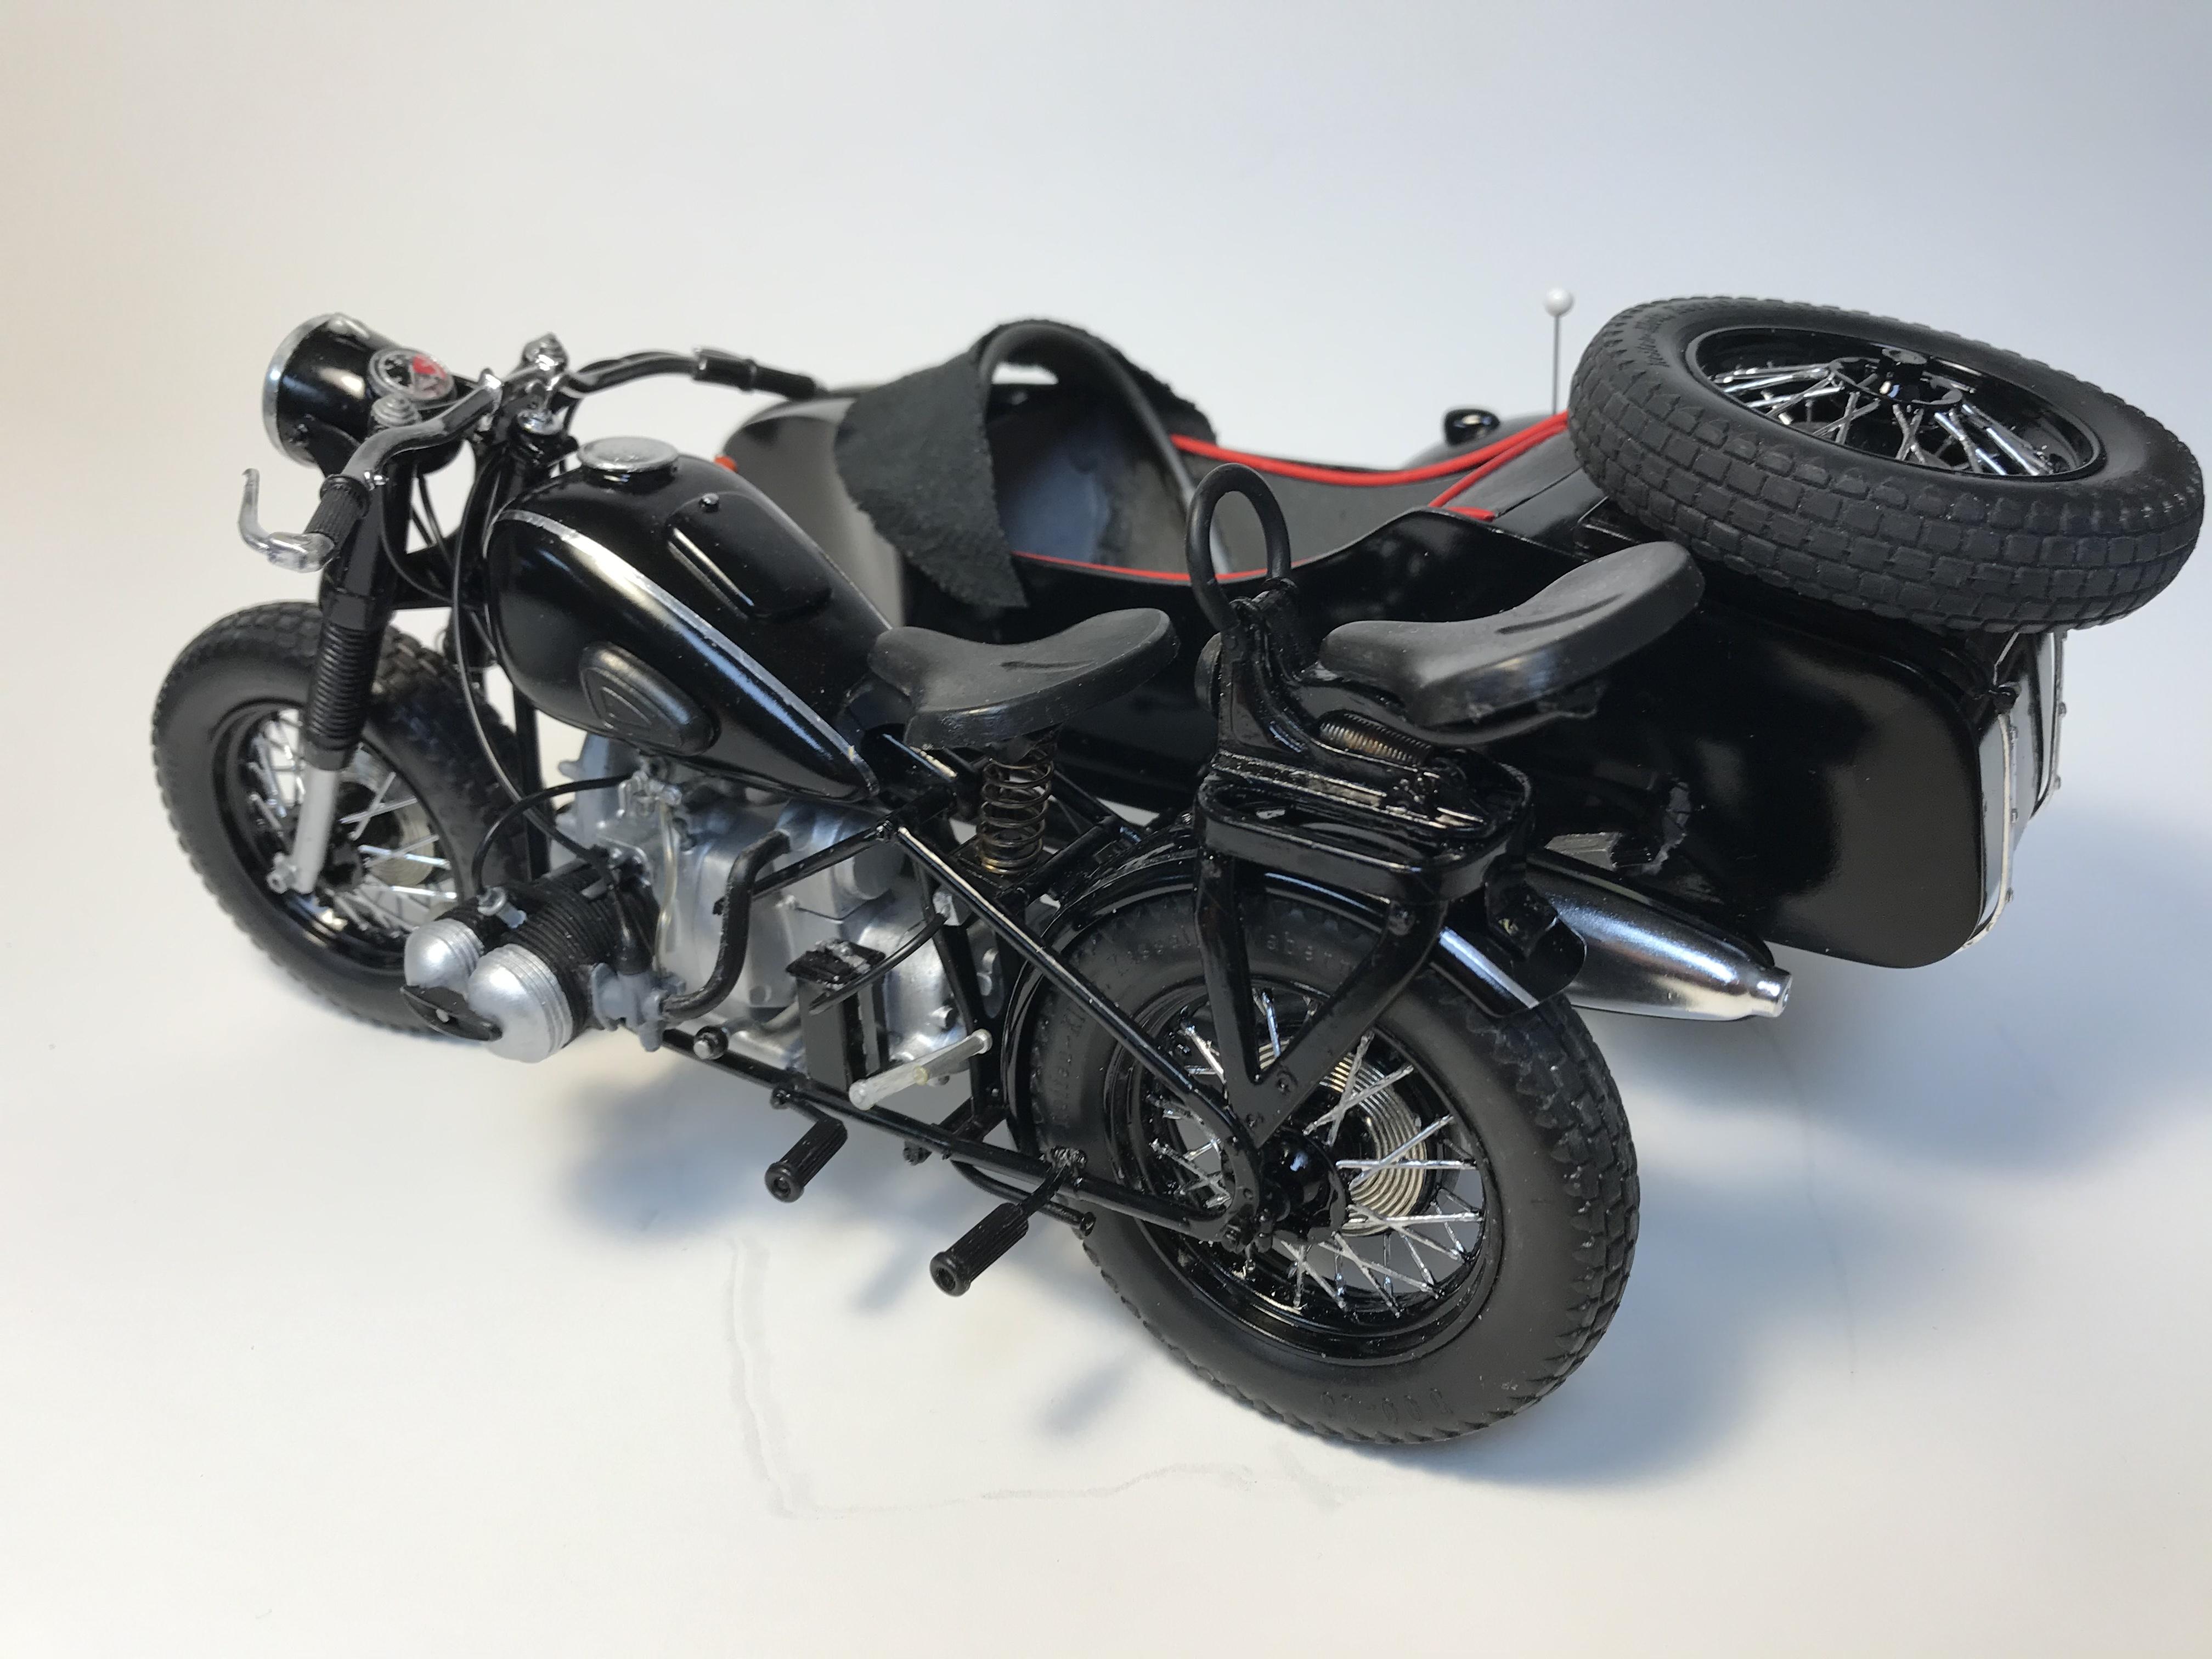
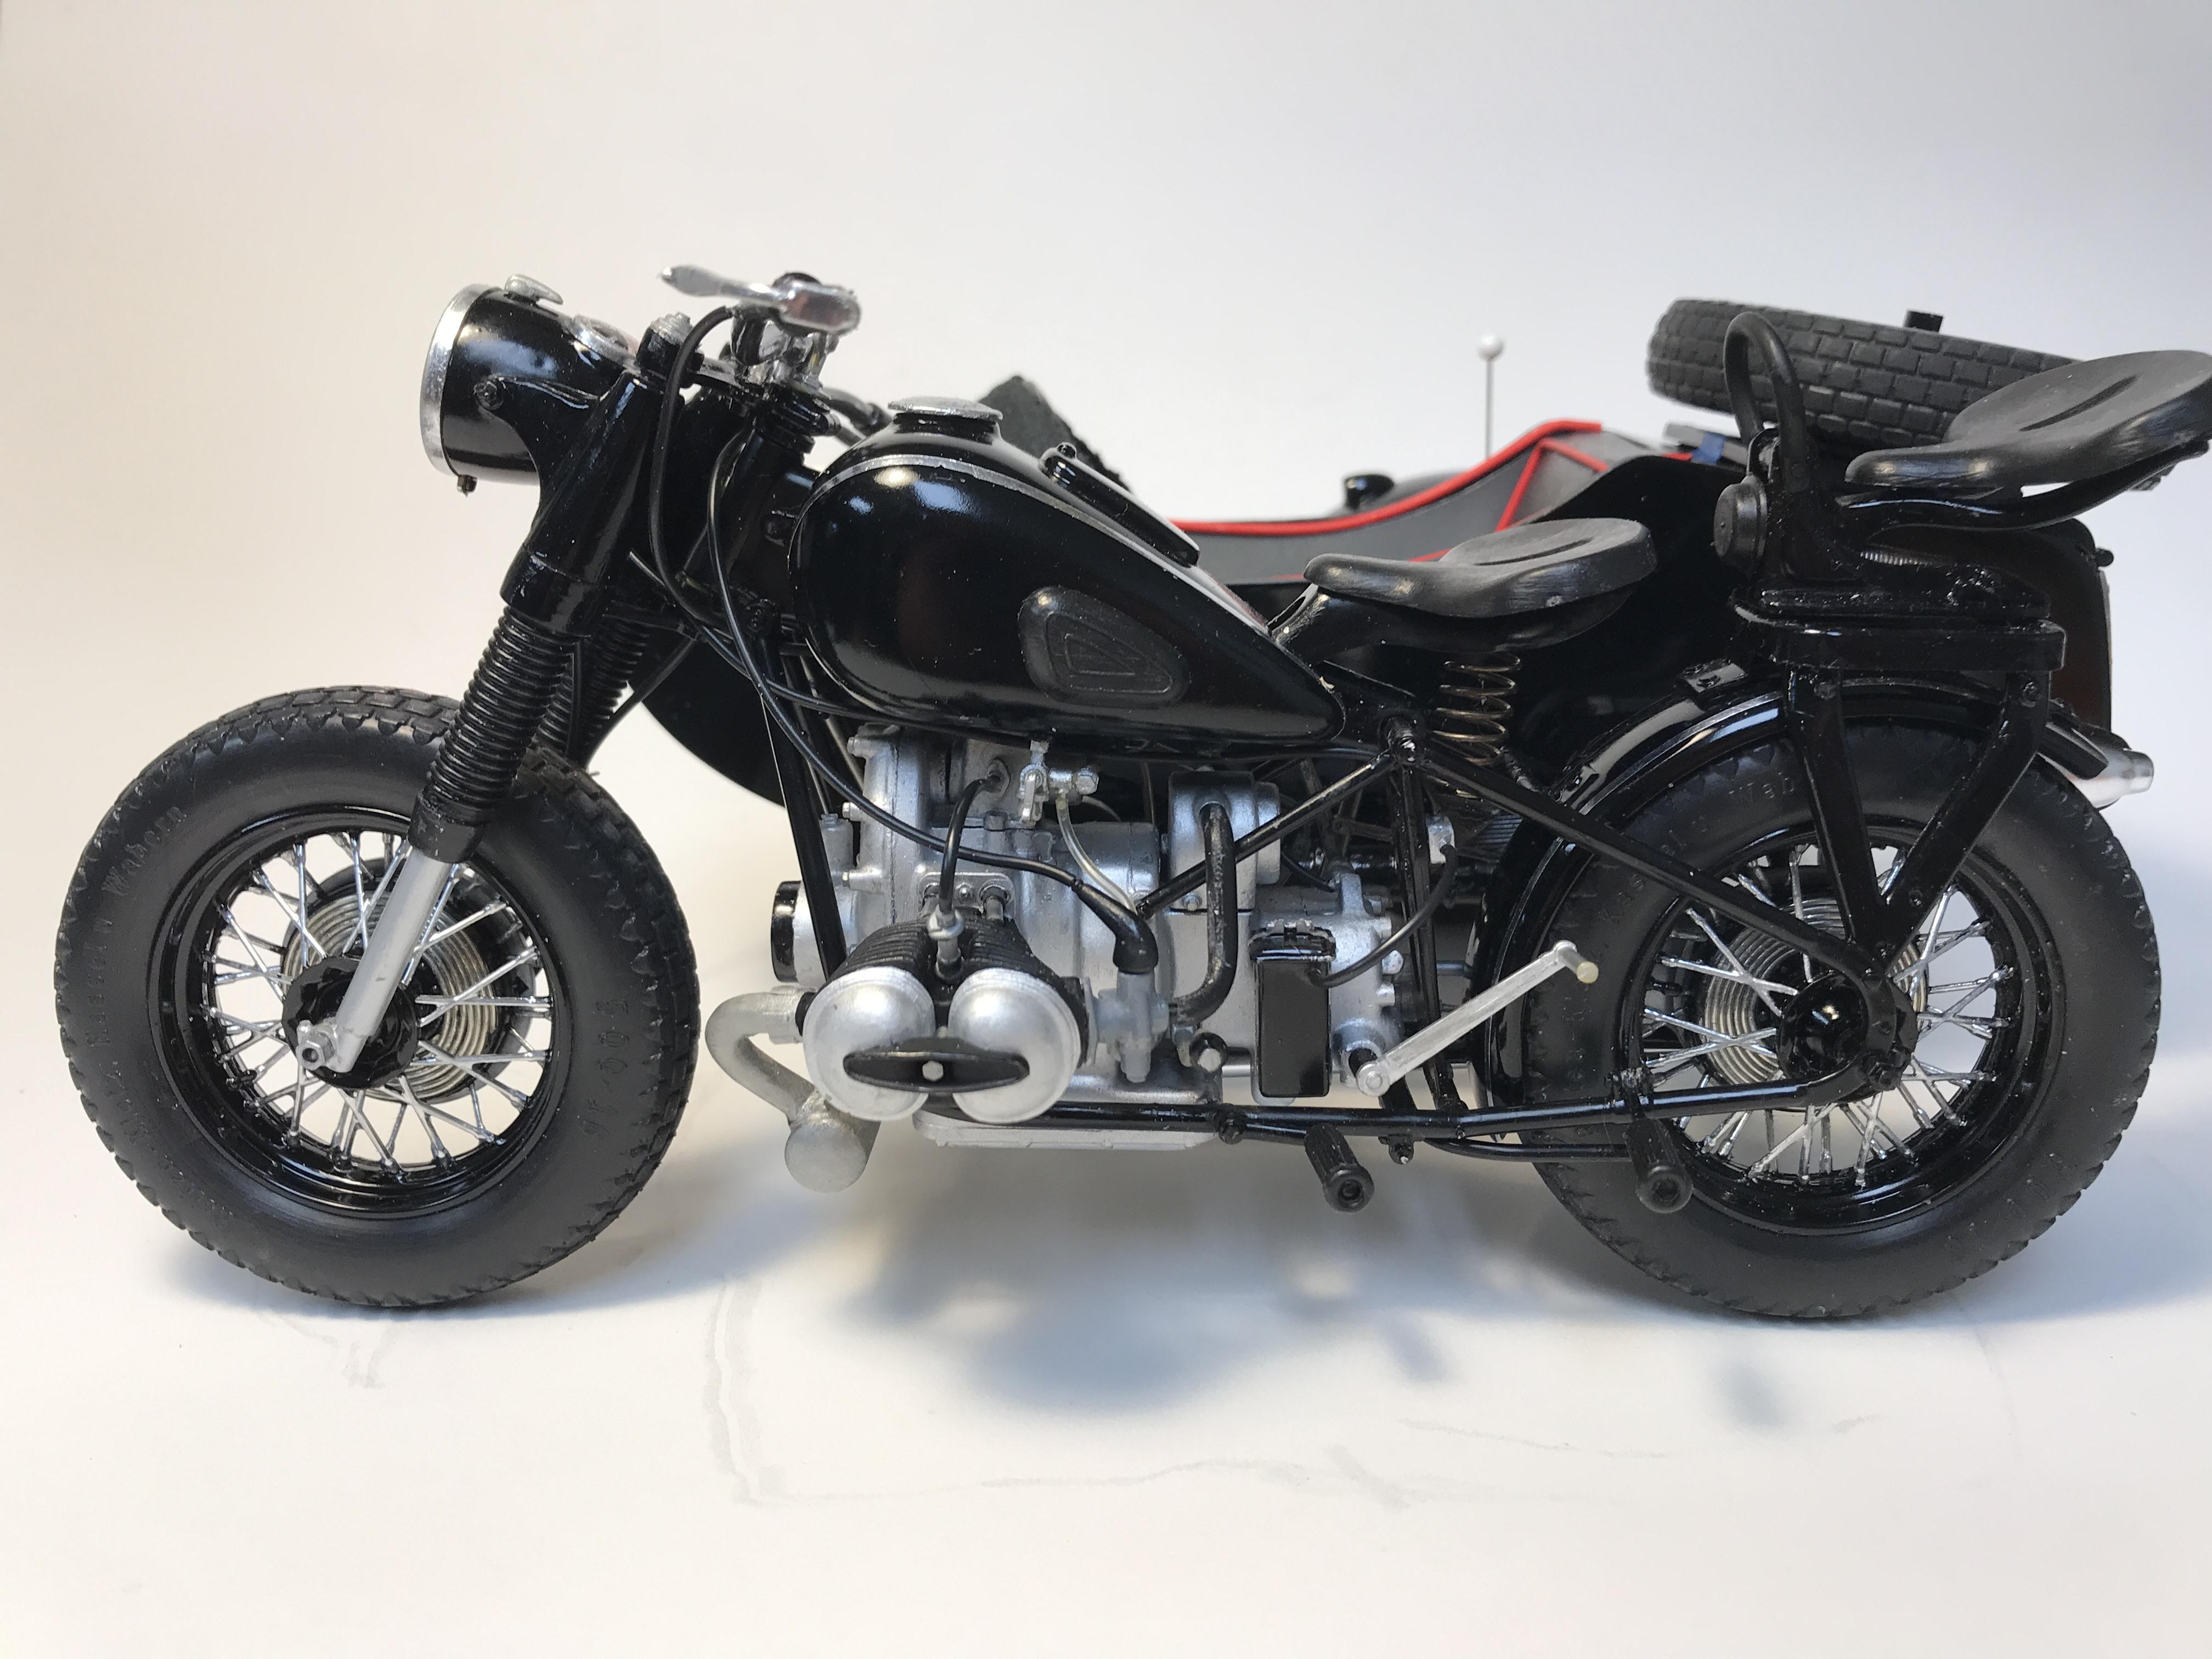
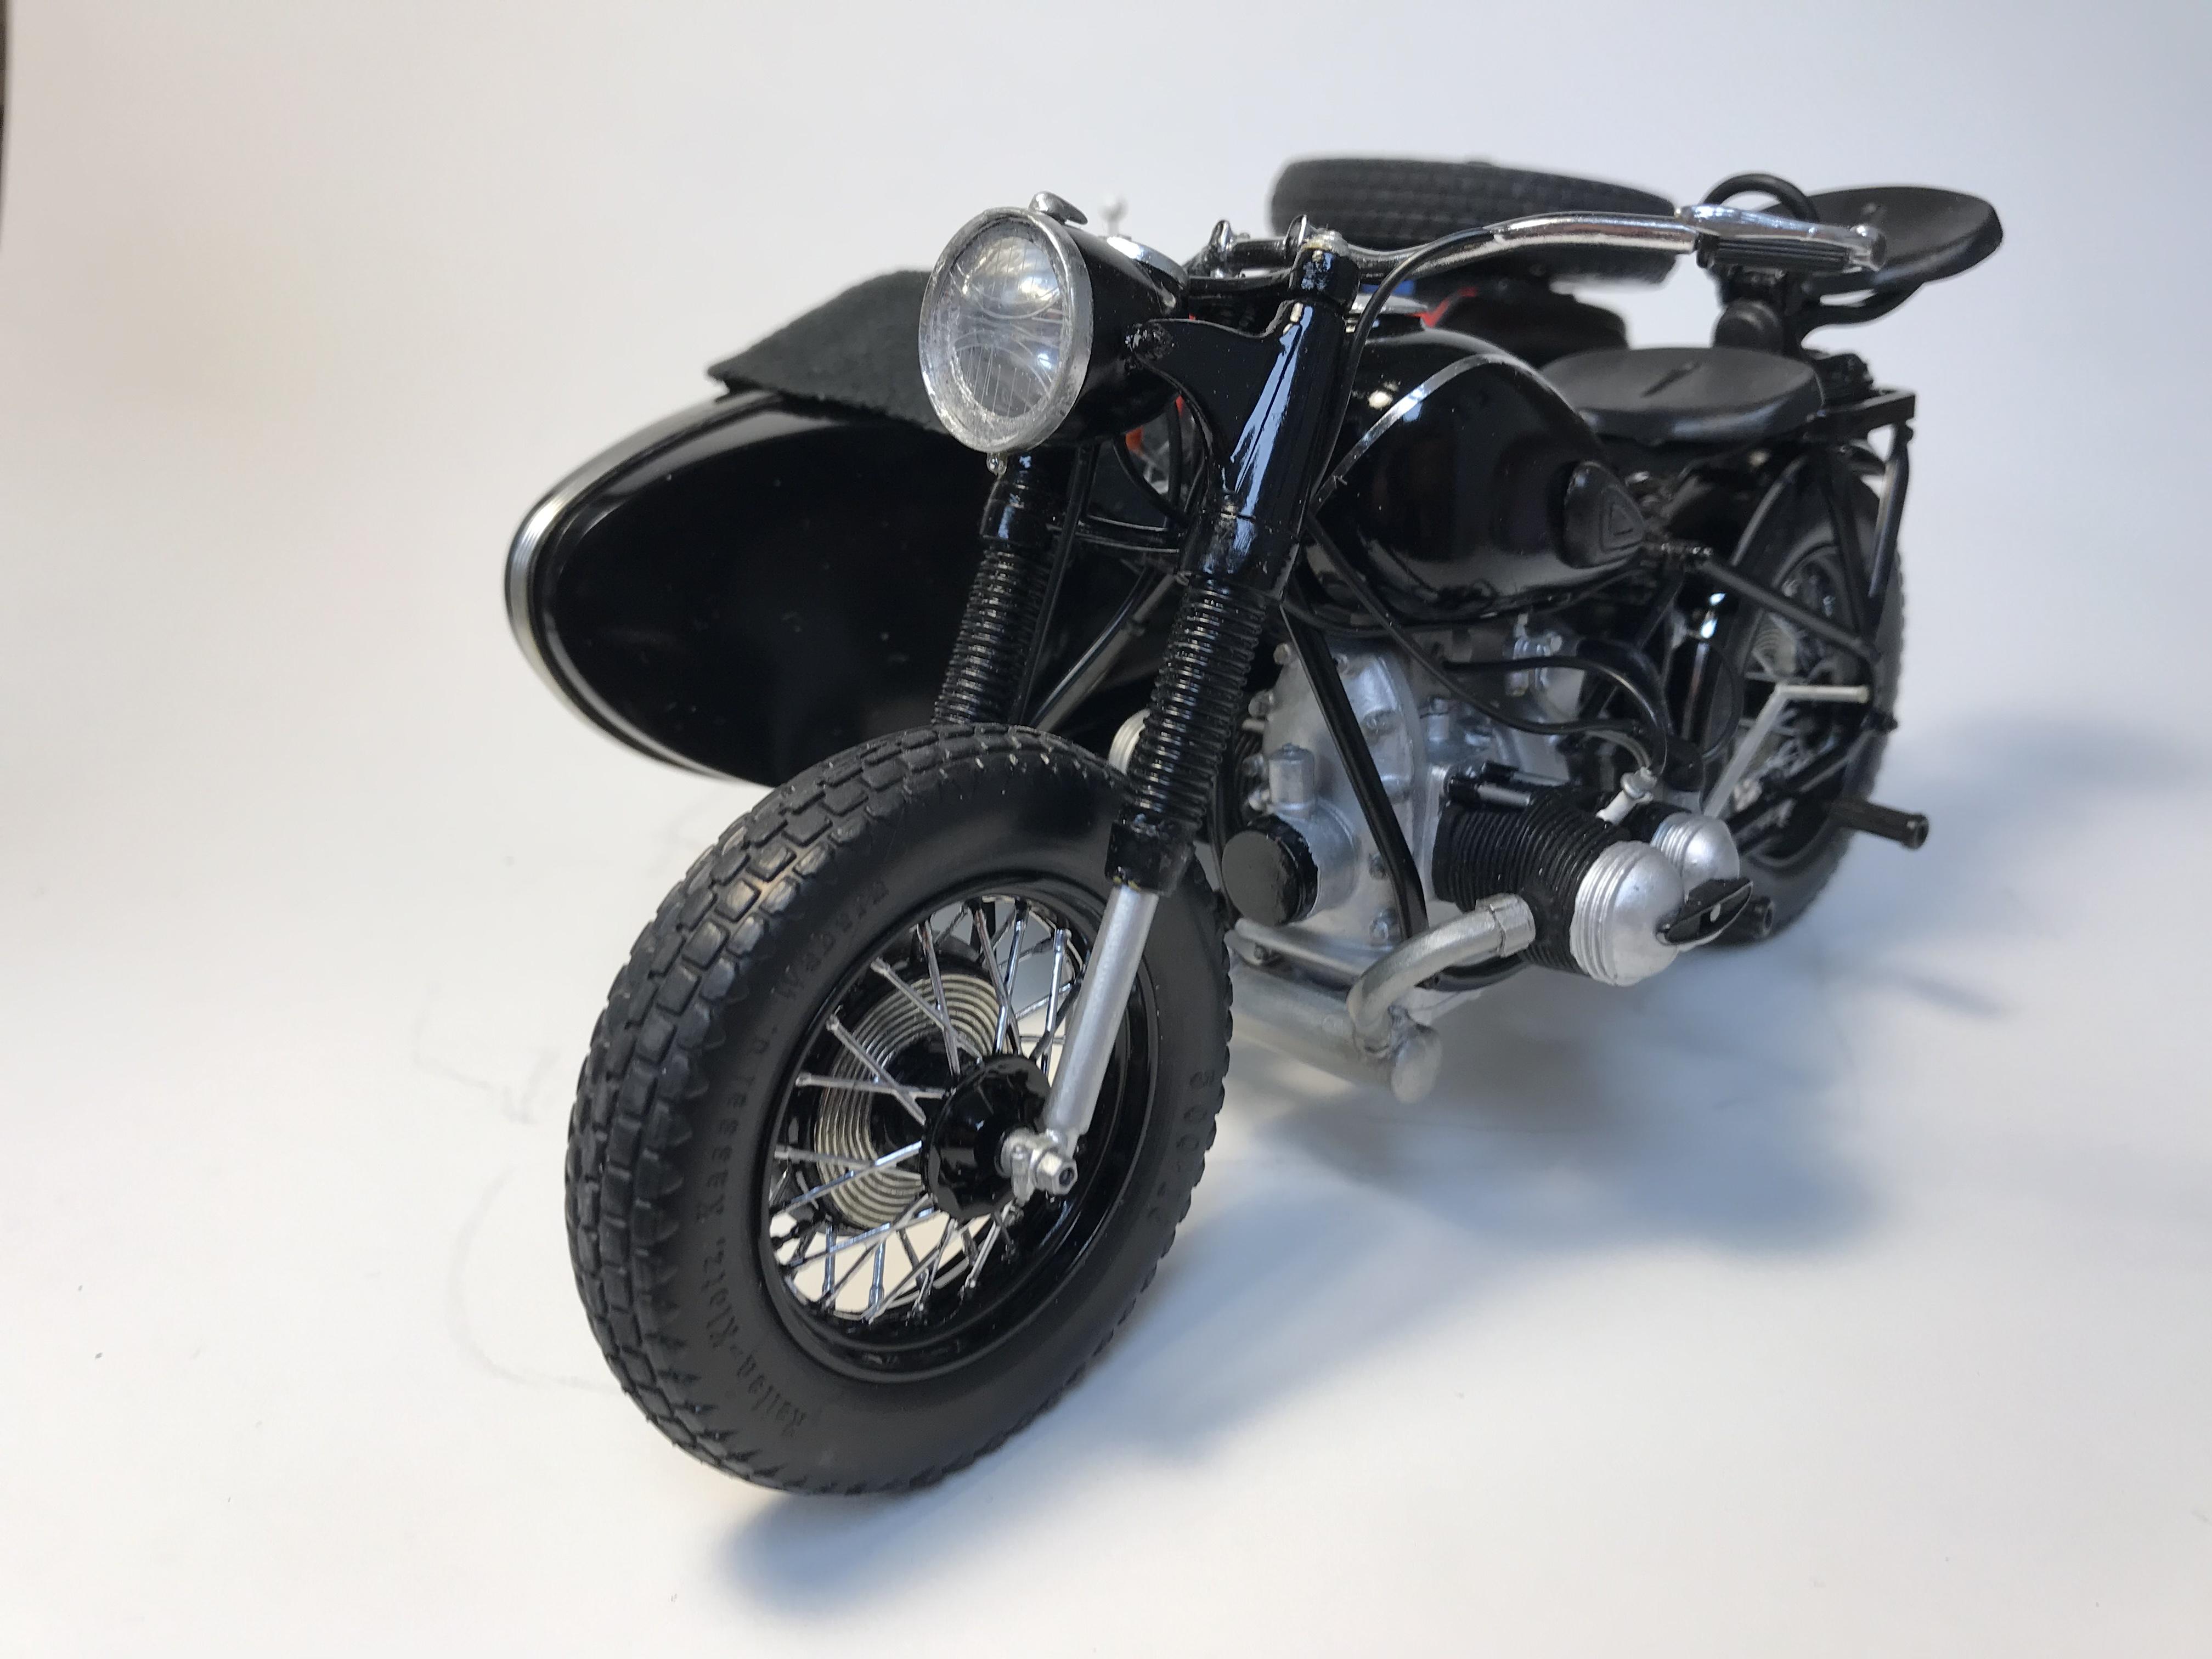
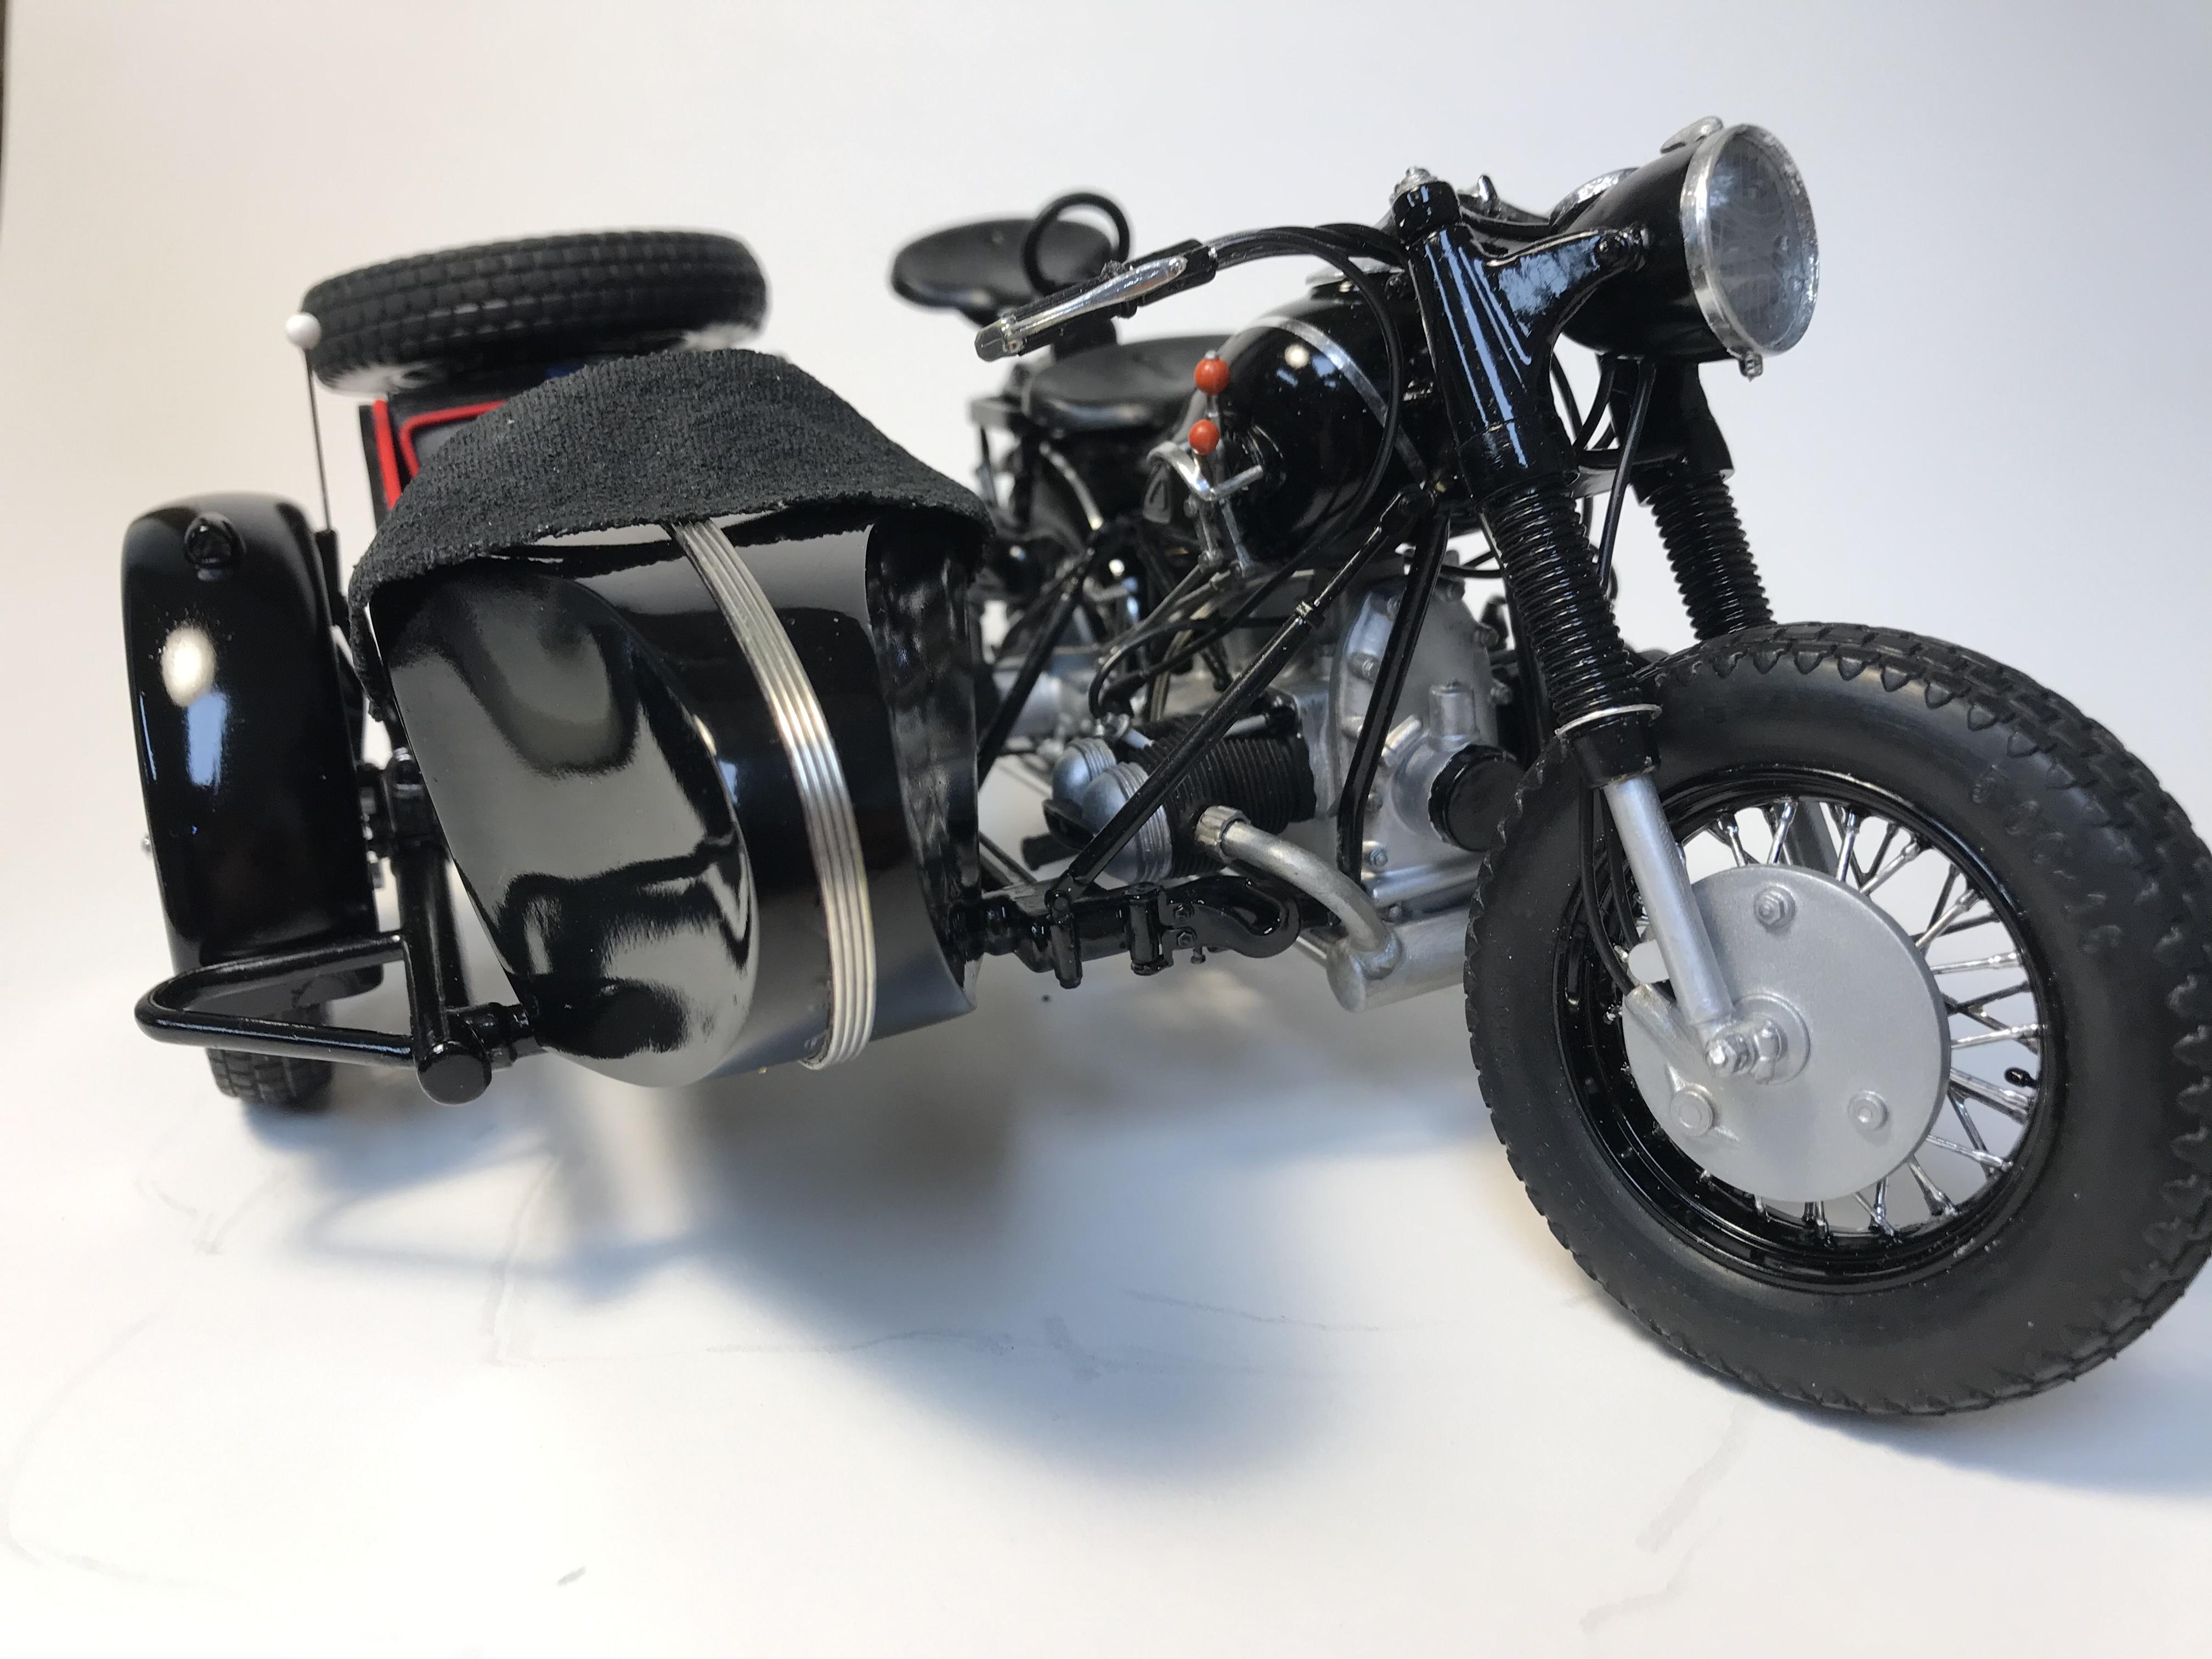
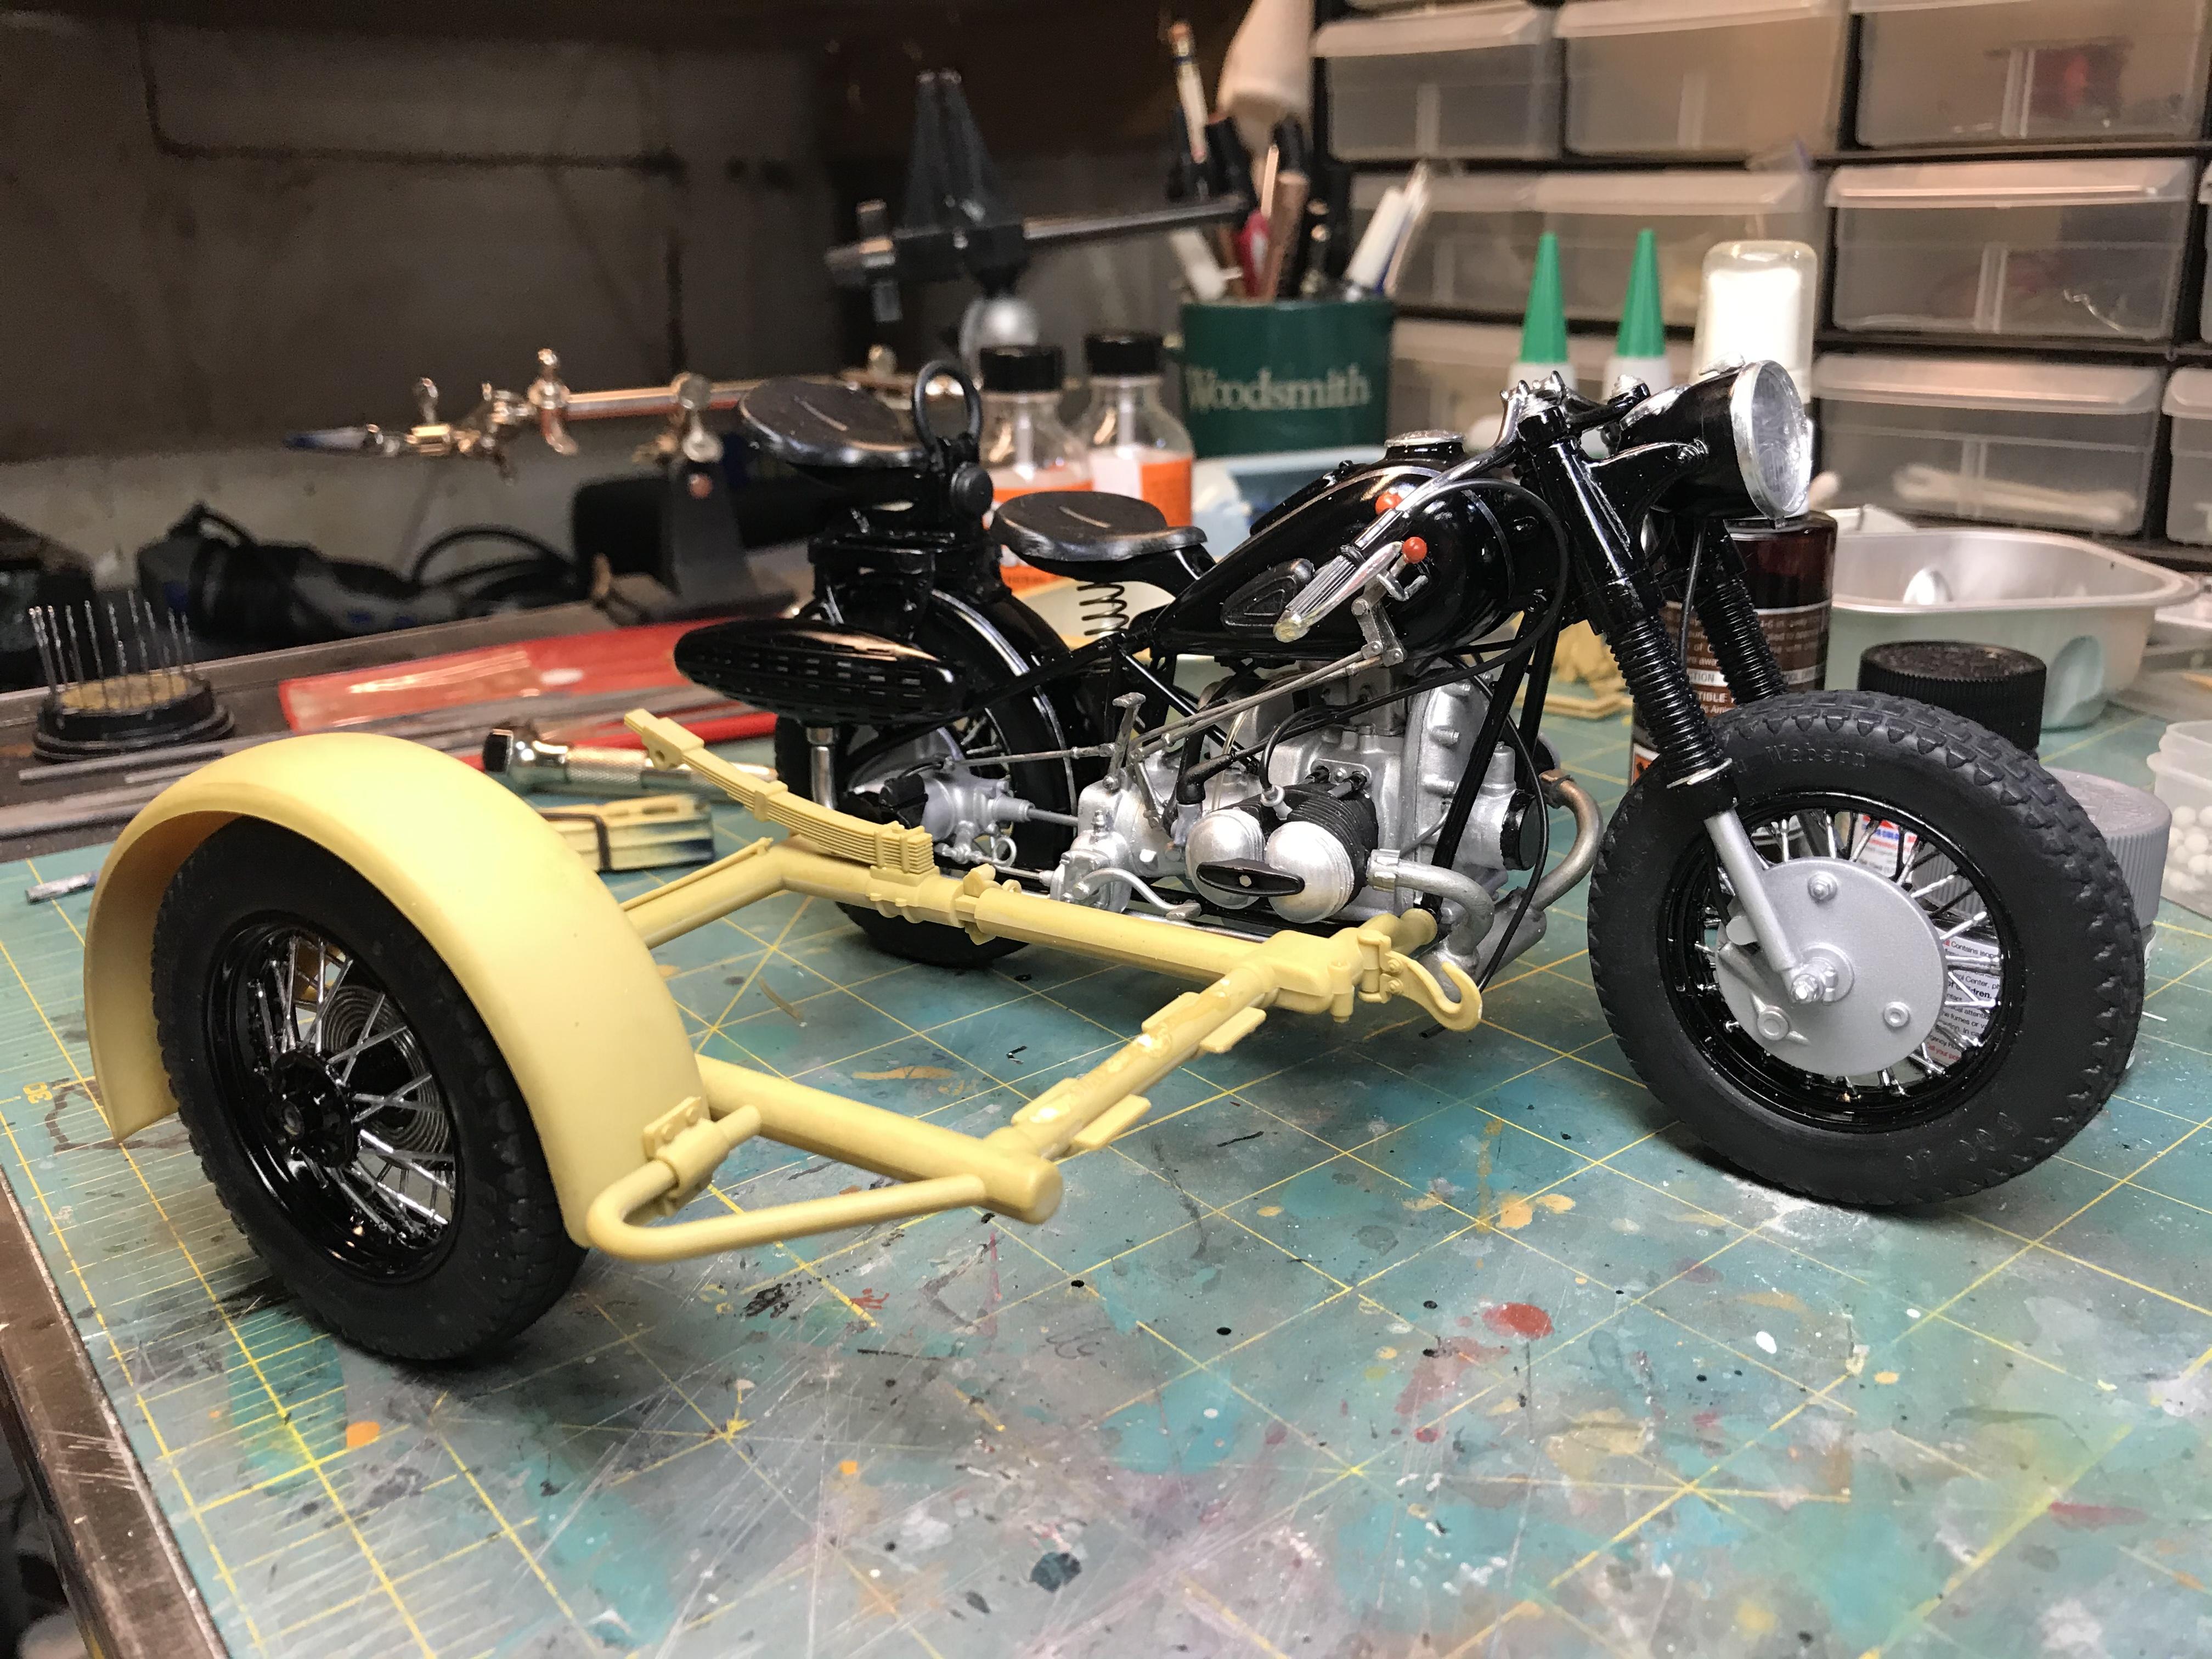
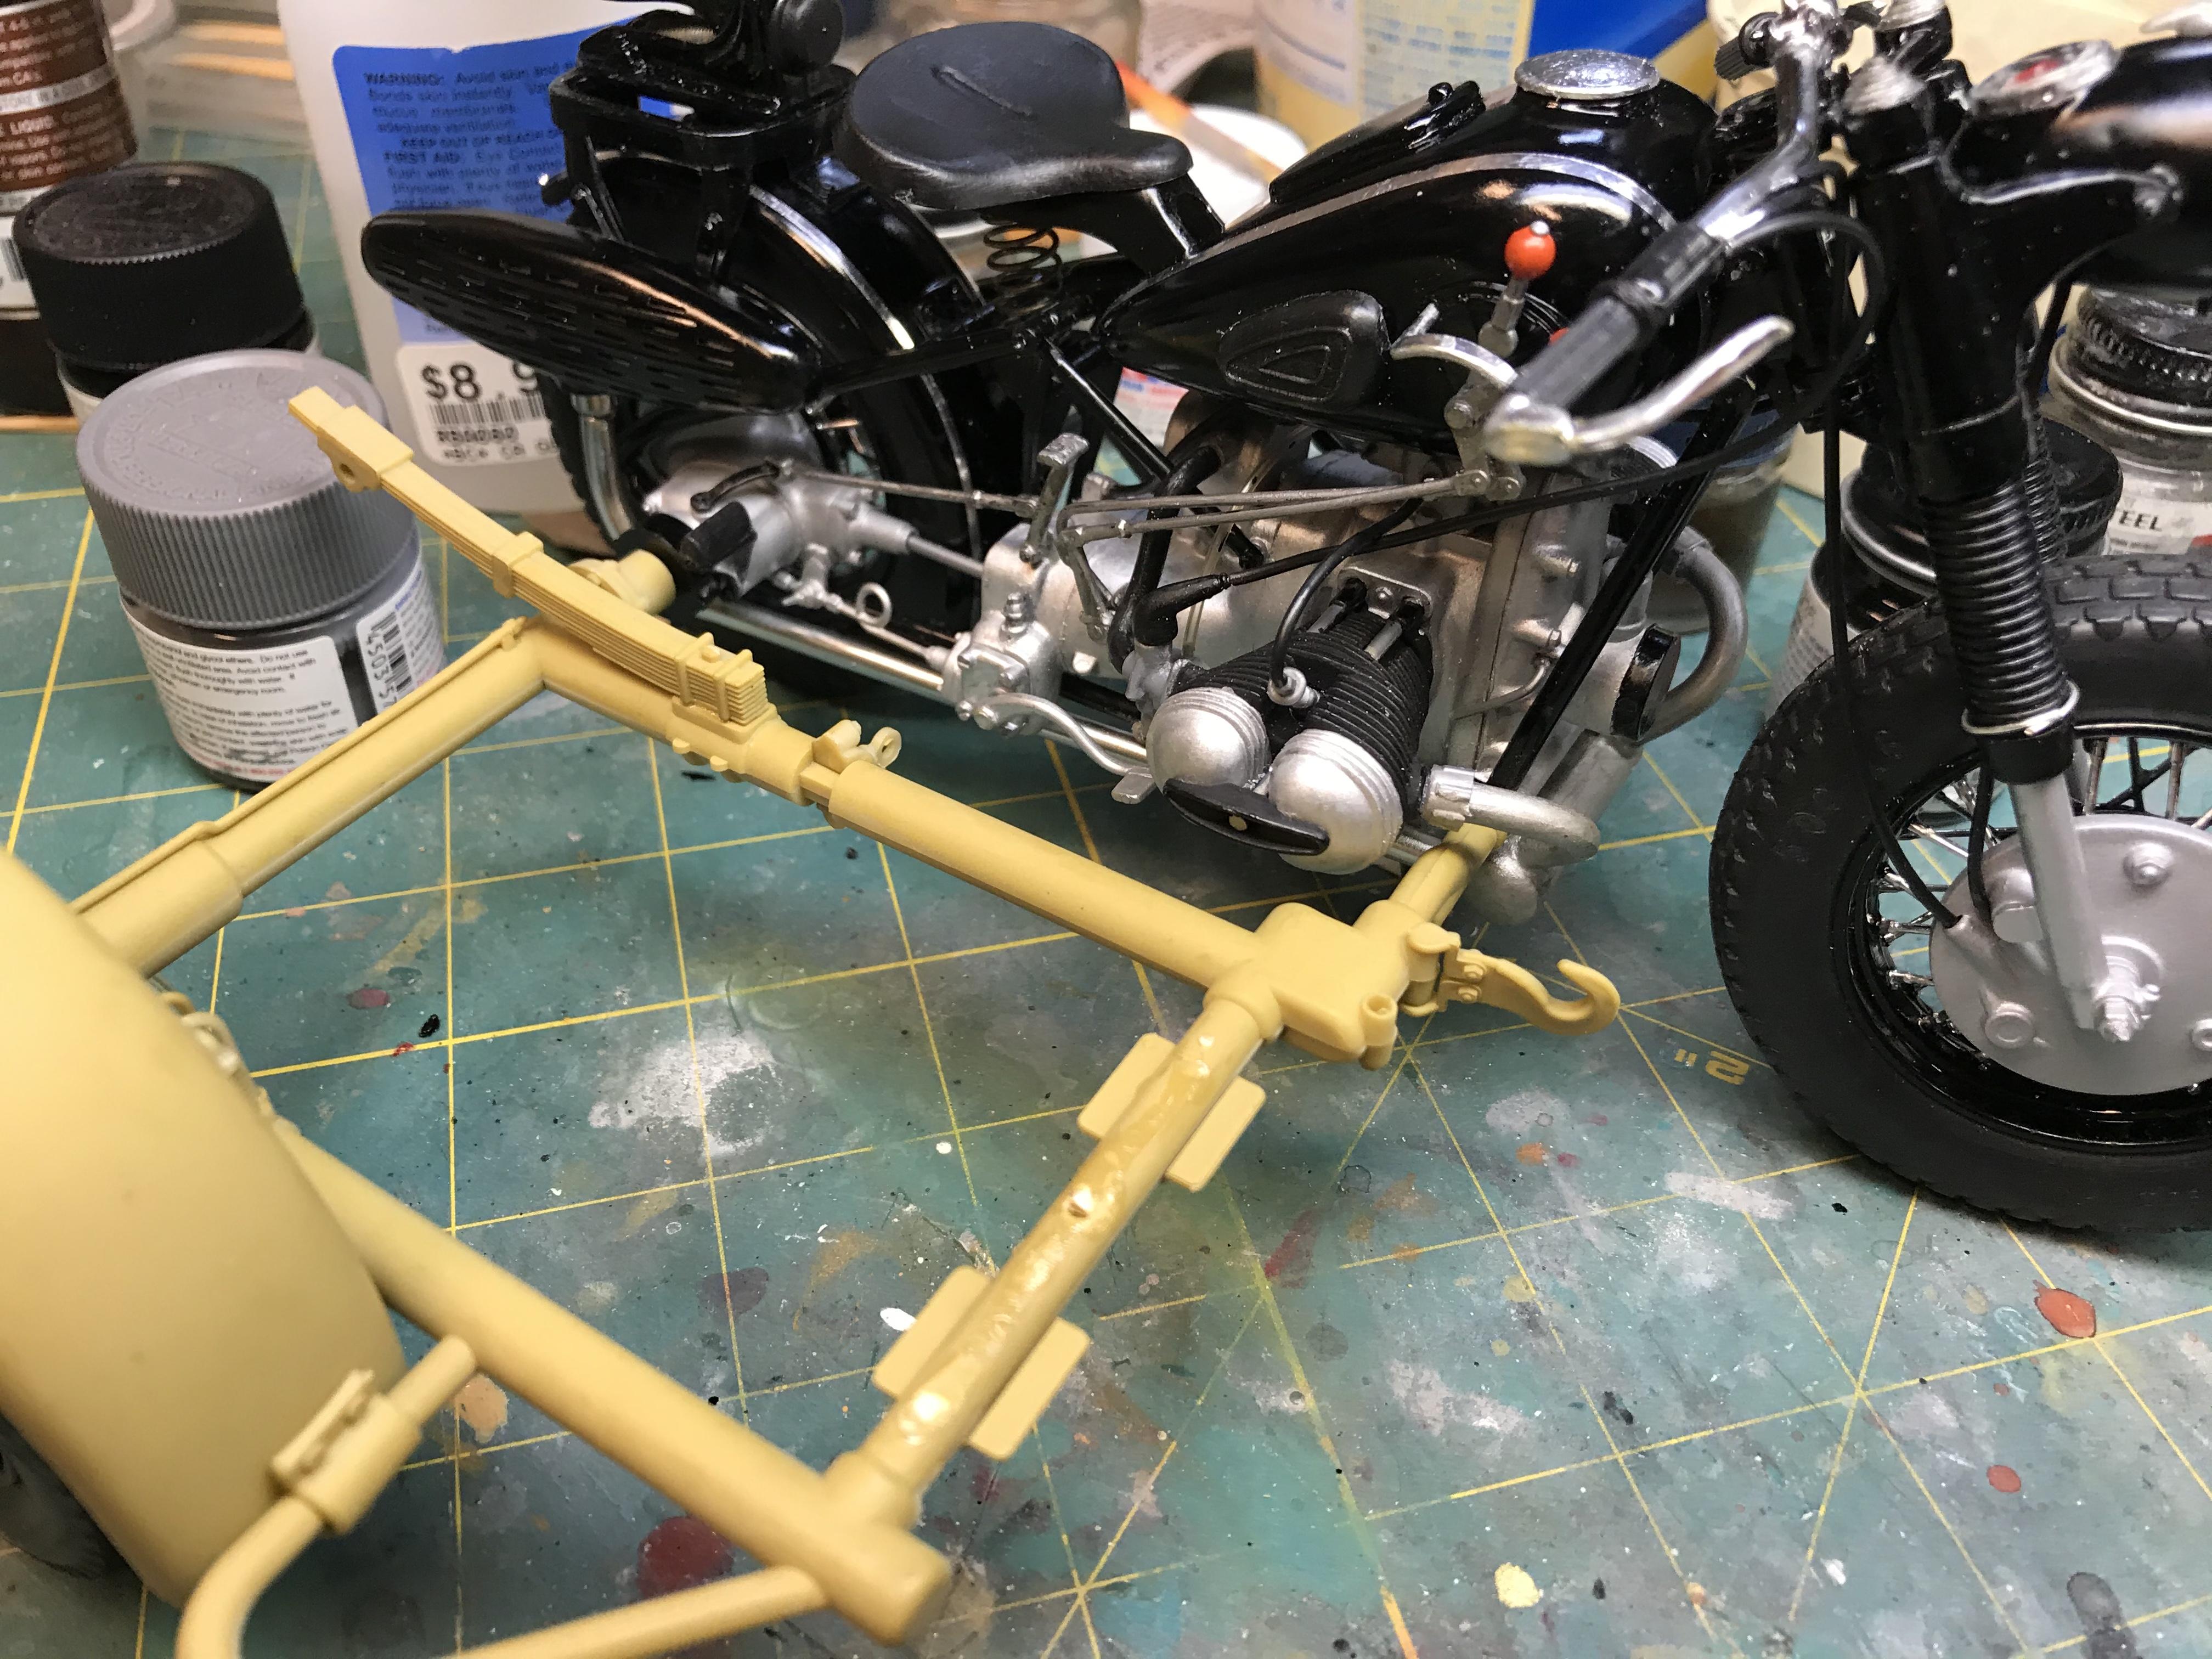
She’s getting so close to being done it’s scary
-
WWII BMW R 75
slownlow replied to slownlow's topic in WIP: All The Rest: Motorcycles, Aviation, Military, Sci-Fi, Figures
I’m making slow progress on the car but so far so good. The fender skirt is similar to what Steib uses on there 1:1 hacks but I’m not sure if I want to use it.
-
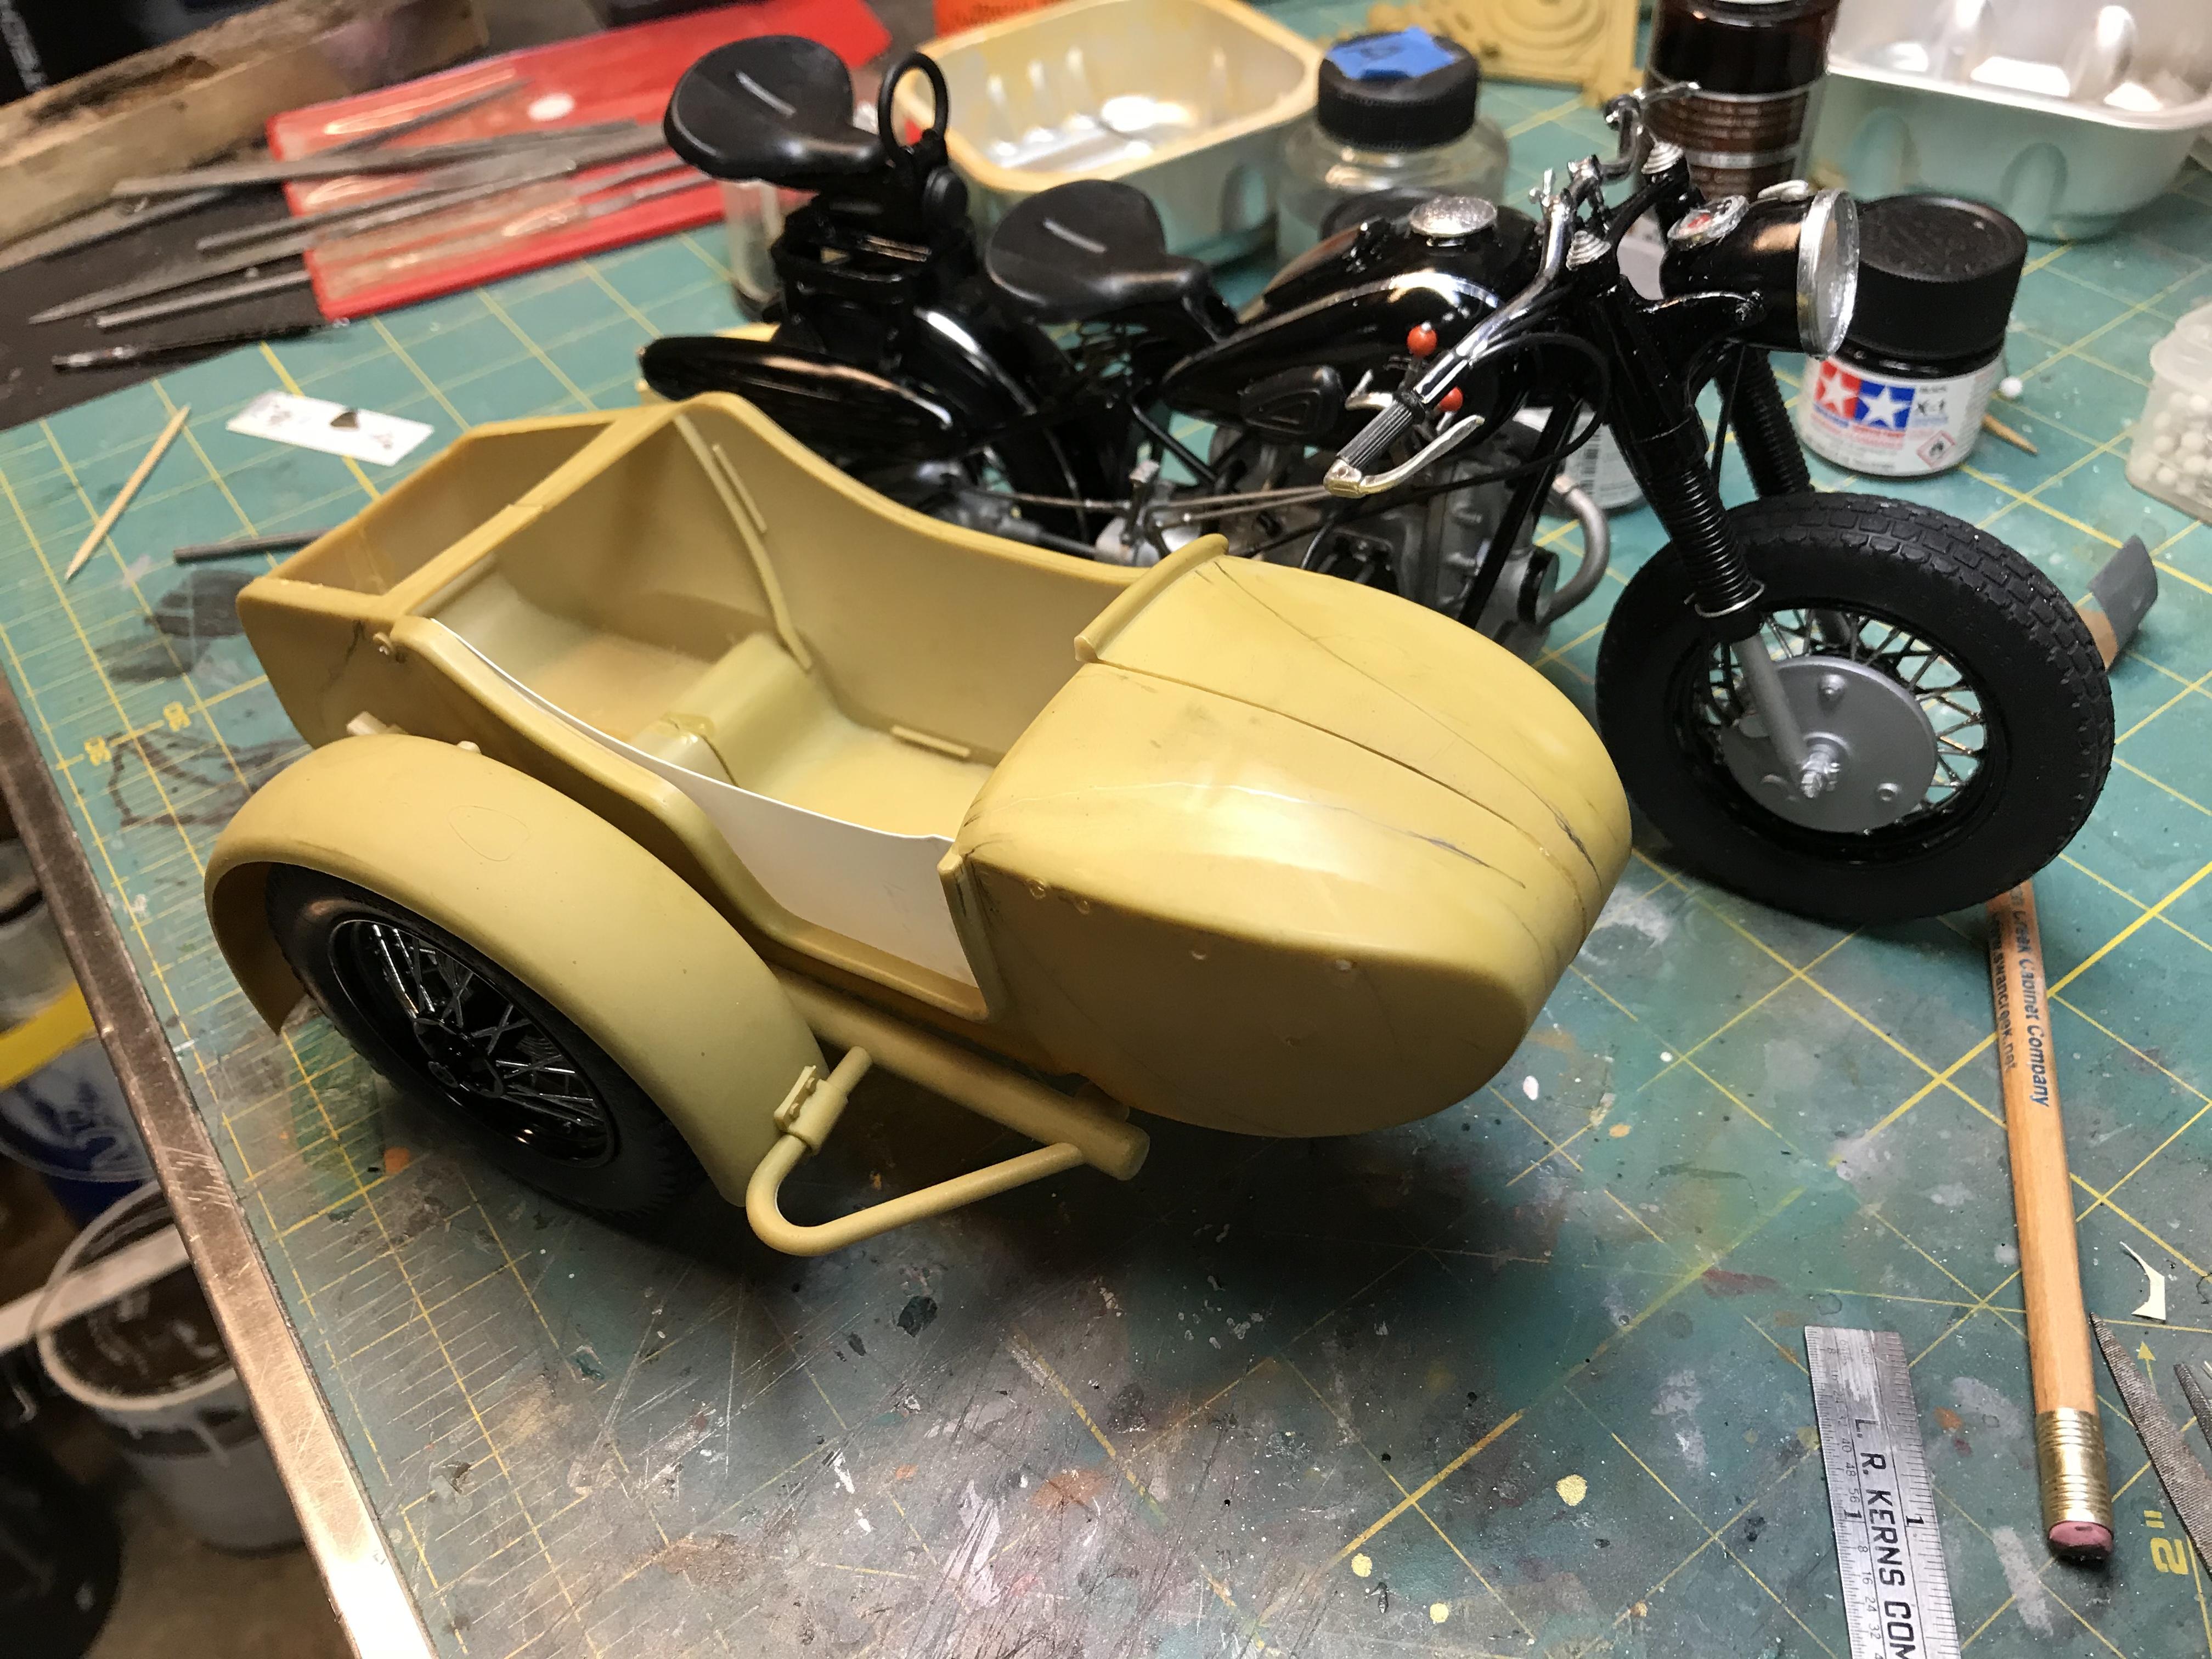
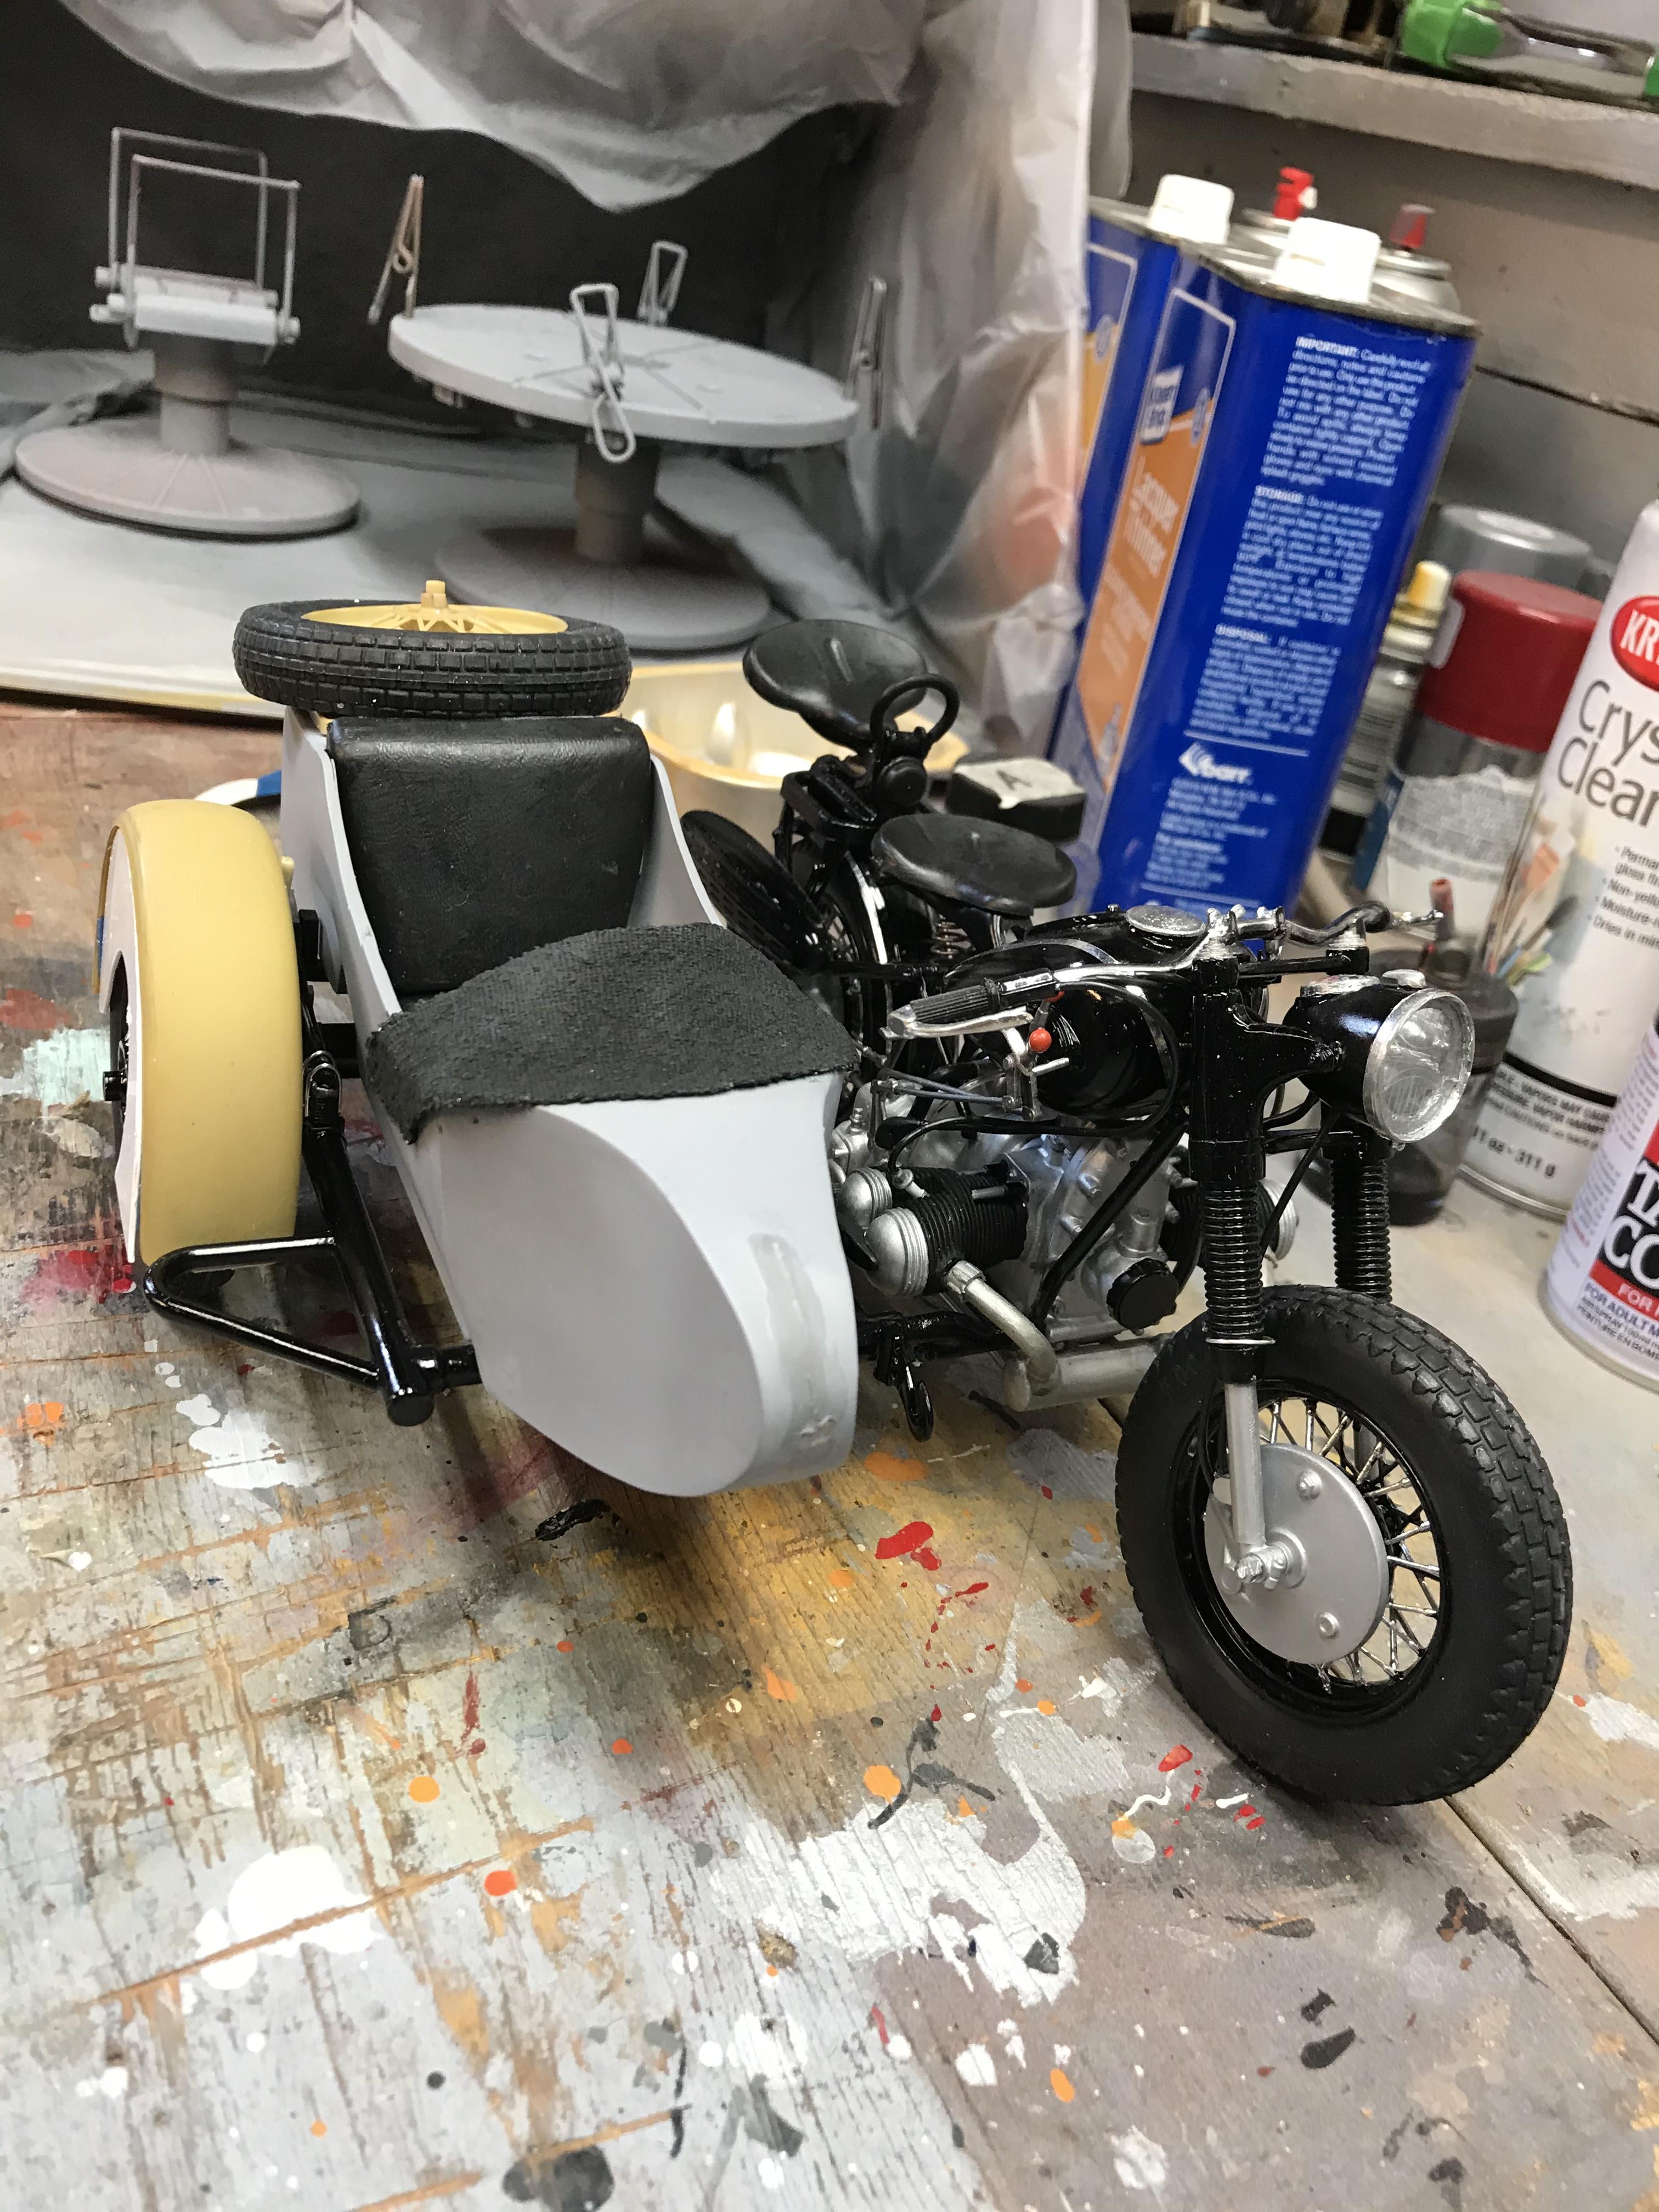
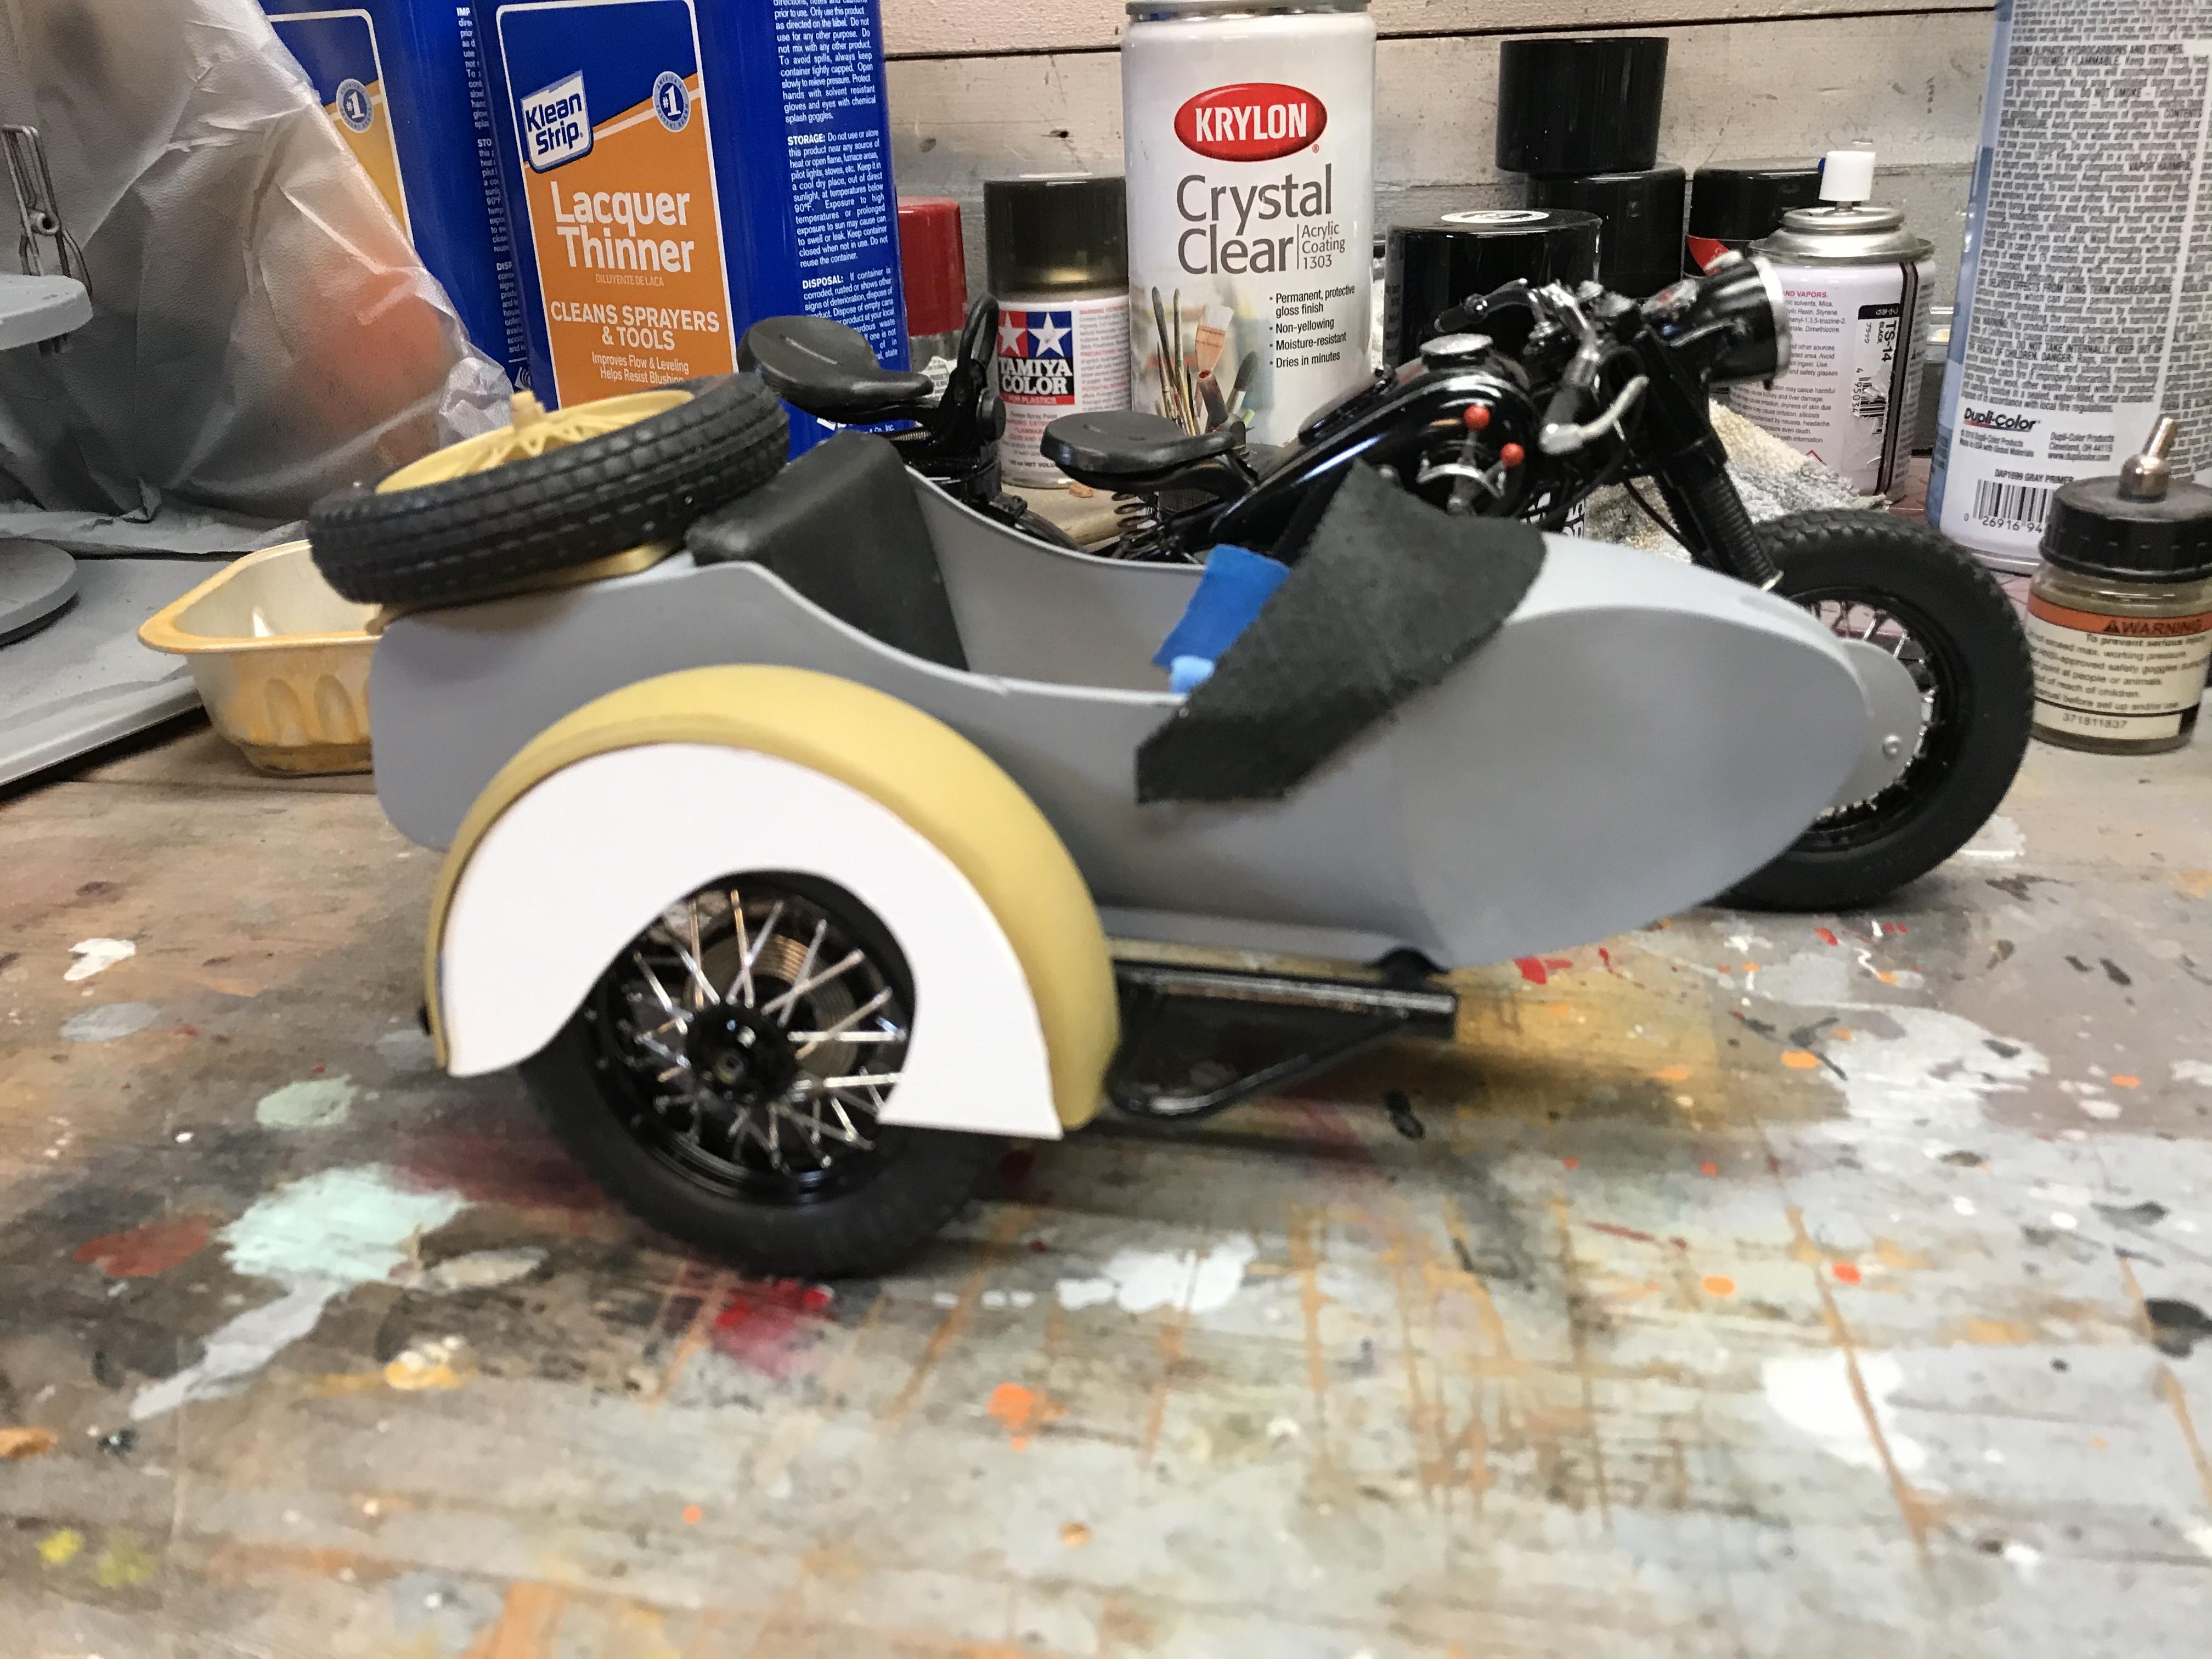
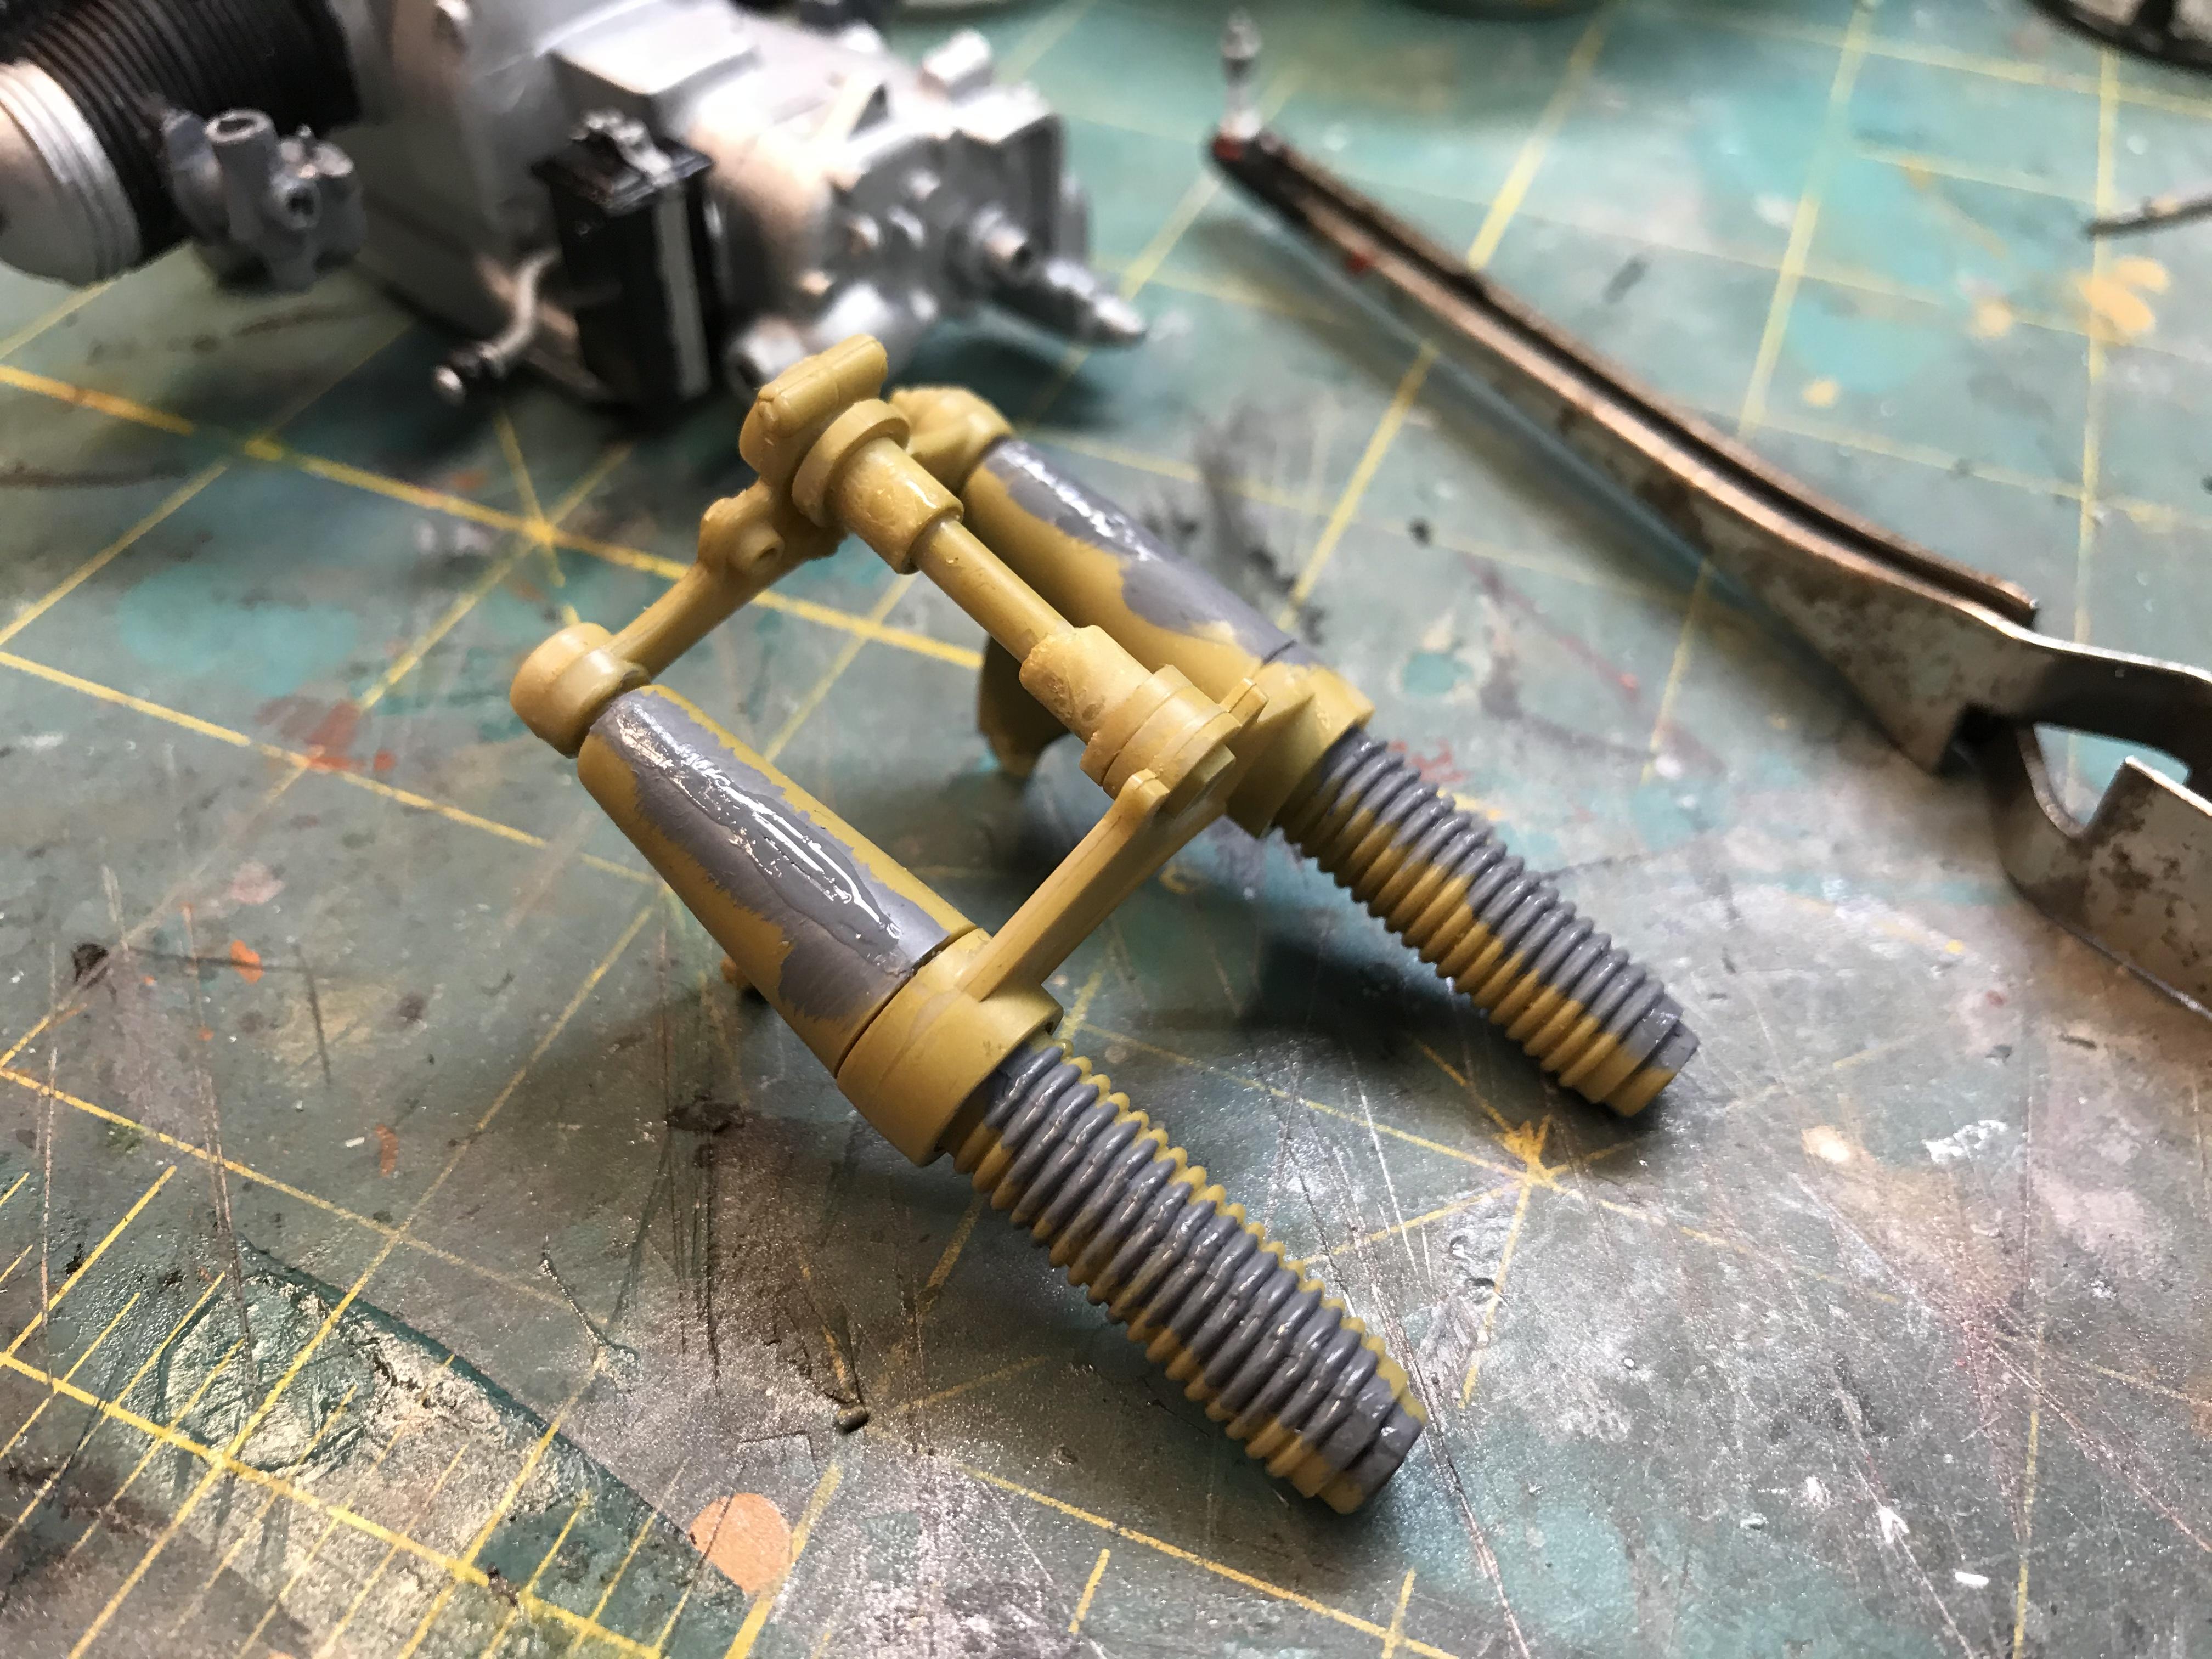
A friend at the local club gave me this partially assembled kit. There were some parts missing and some glaring seams showing so I opted to take it apart and reassemble with my own twist. To take it apart I used the get it wet and freezing trick which worked with partial success. I think the glue is probably 40+ years old. For the purists out there he also gave me an unstarted kit which I’ll do as the box art suggests. As yo can see some of the seams were in tough locationsBefore disassembly I was smart enough to drill joints to receive pinsHere it’s beginning to look like what I have in mind. To change the bars to a downsweep I cut a wedge out underneath next to the risers. Here is the bike, all but done, now onto the car
-
I’ve finally finished this after working on her since spring. The inspiration came from a pair of shoes my son owns, calls them his devil shoes, go figure.
-
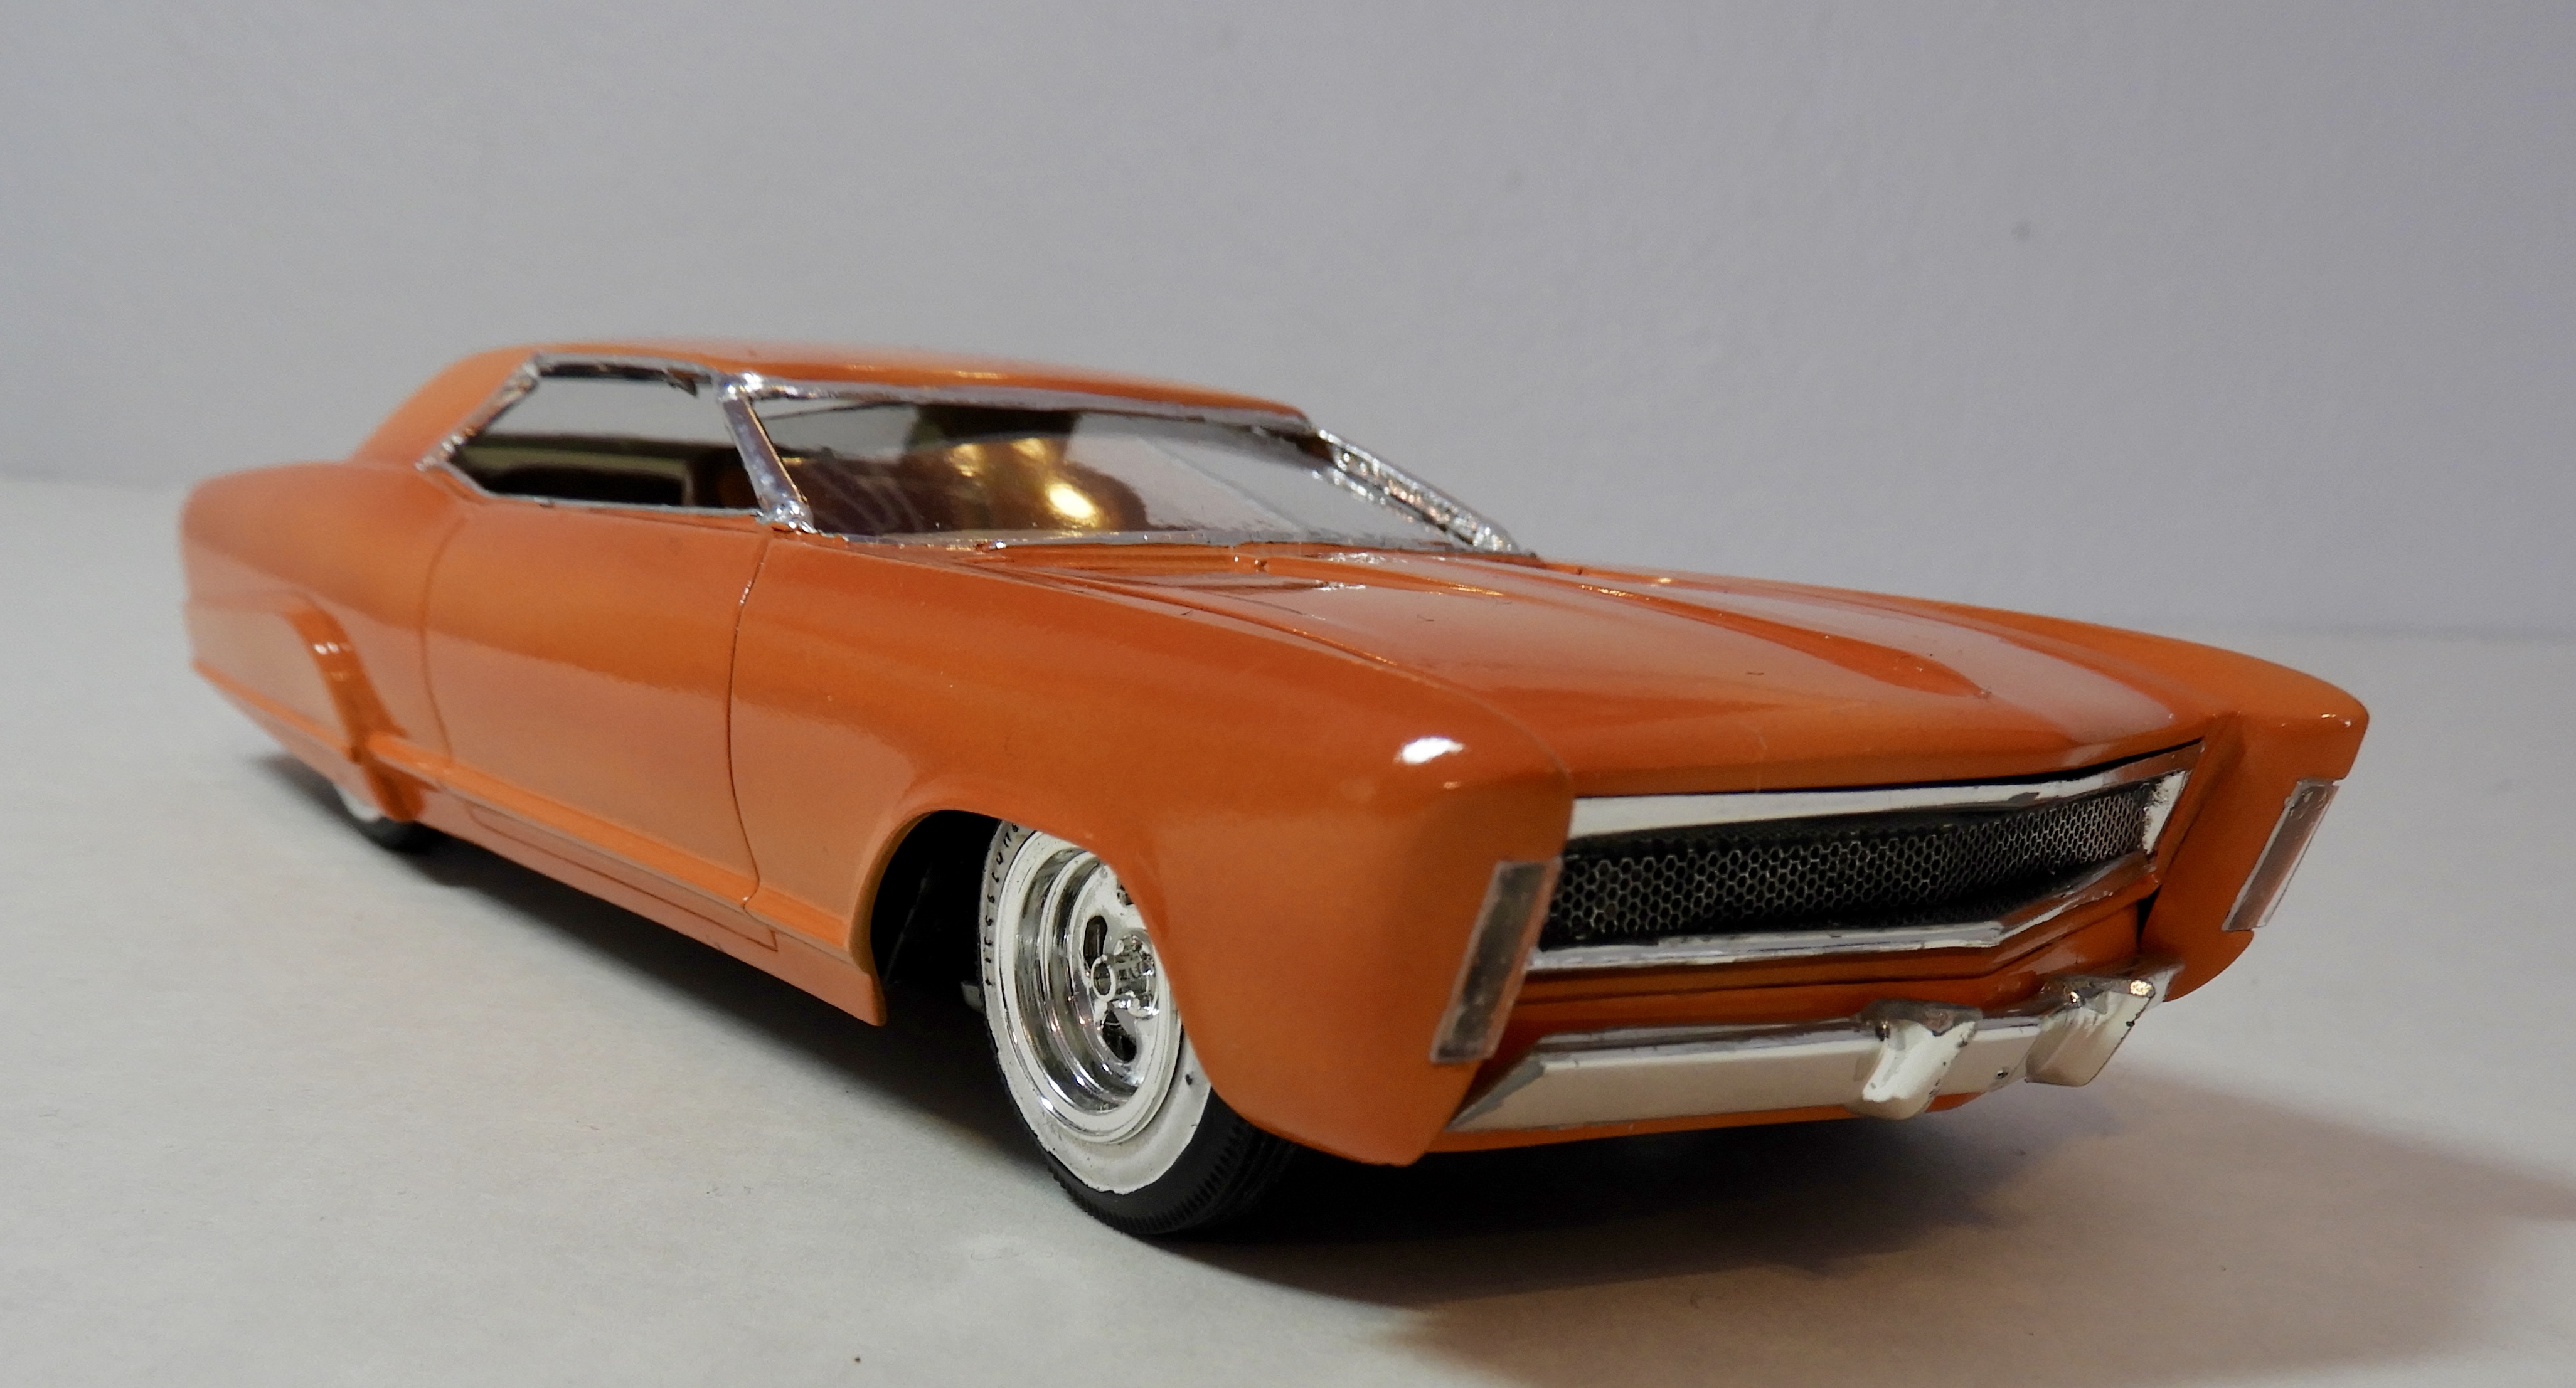
Just finished this. The darker color is Go Mango and the lighter is self mixed.
-
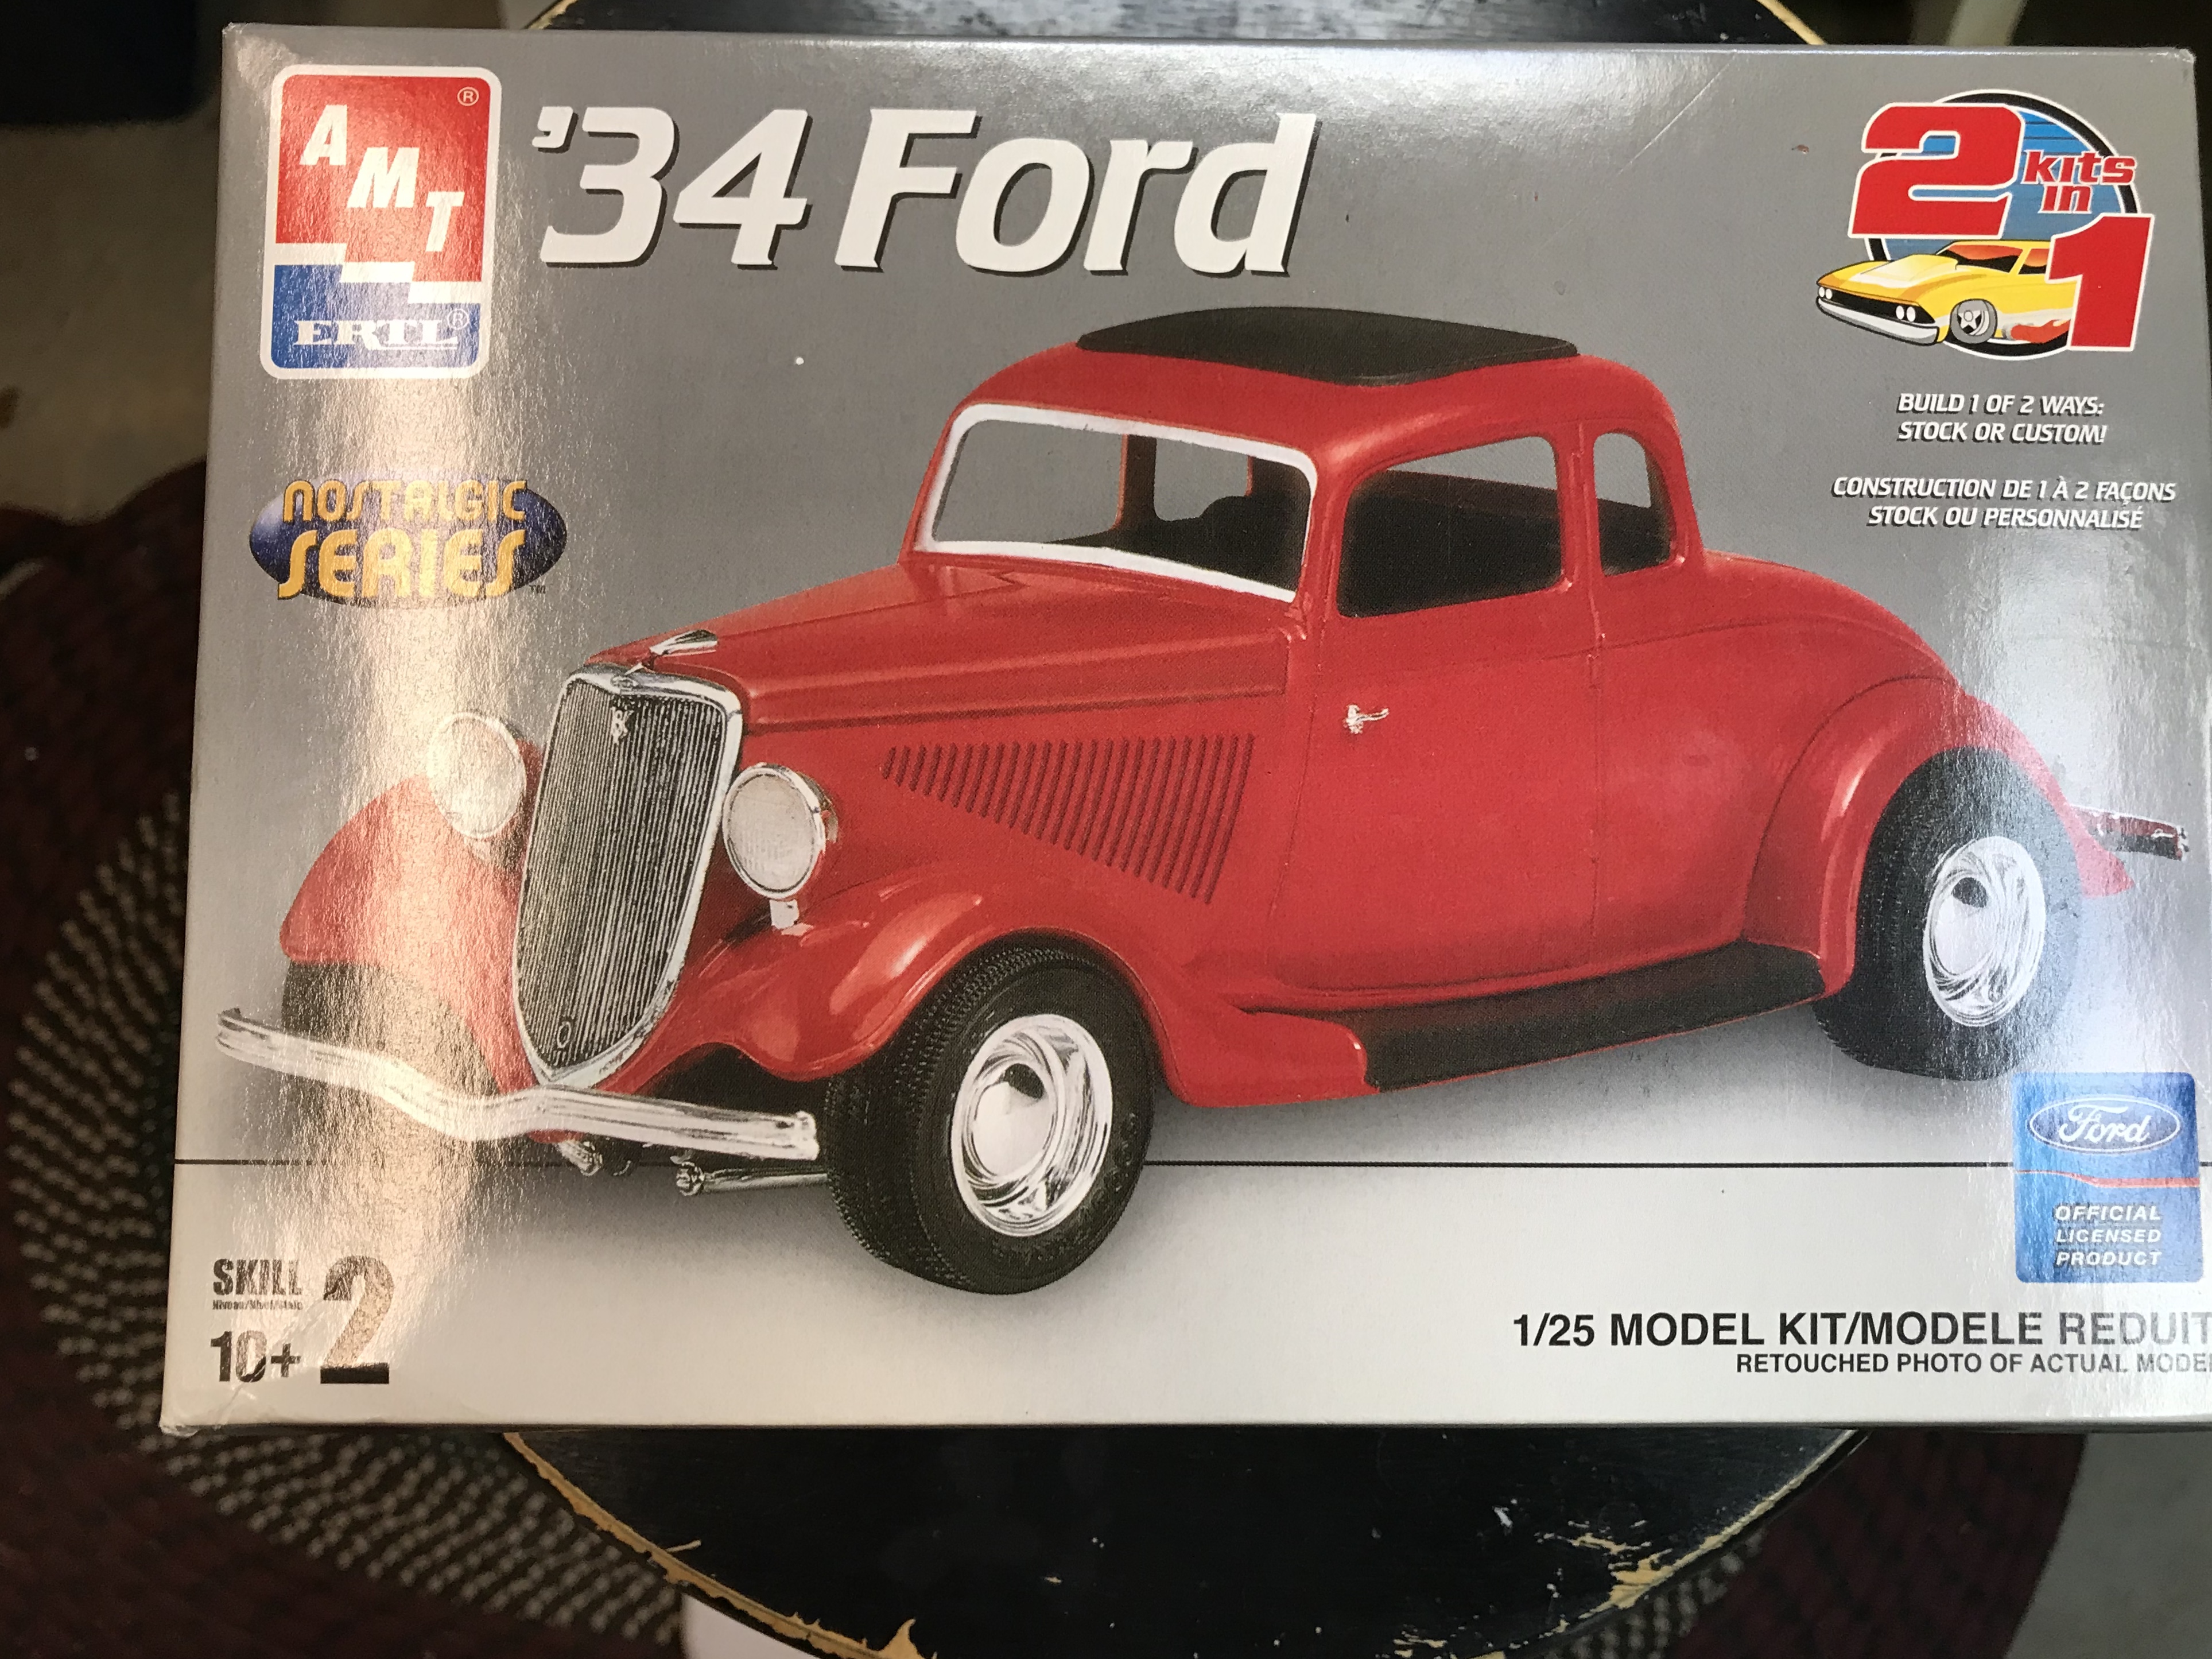
Thanks. It’s the AMT 2in1 kit with the red car an the box.
-
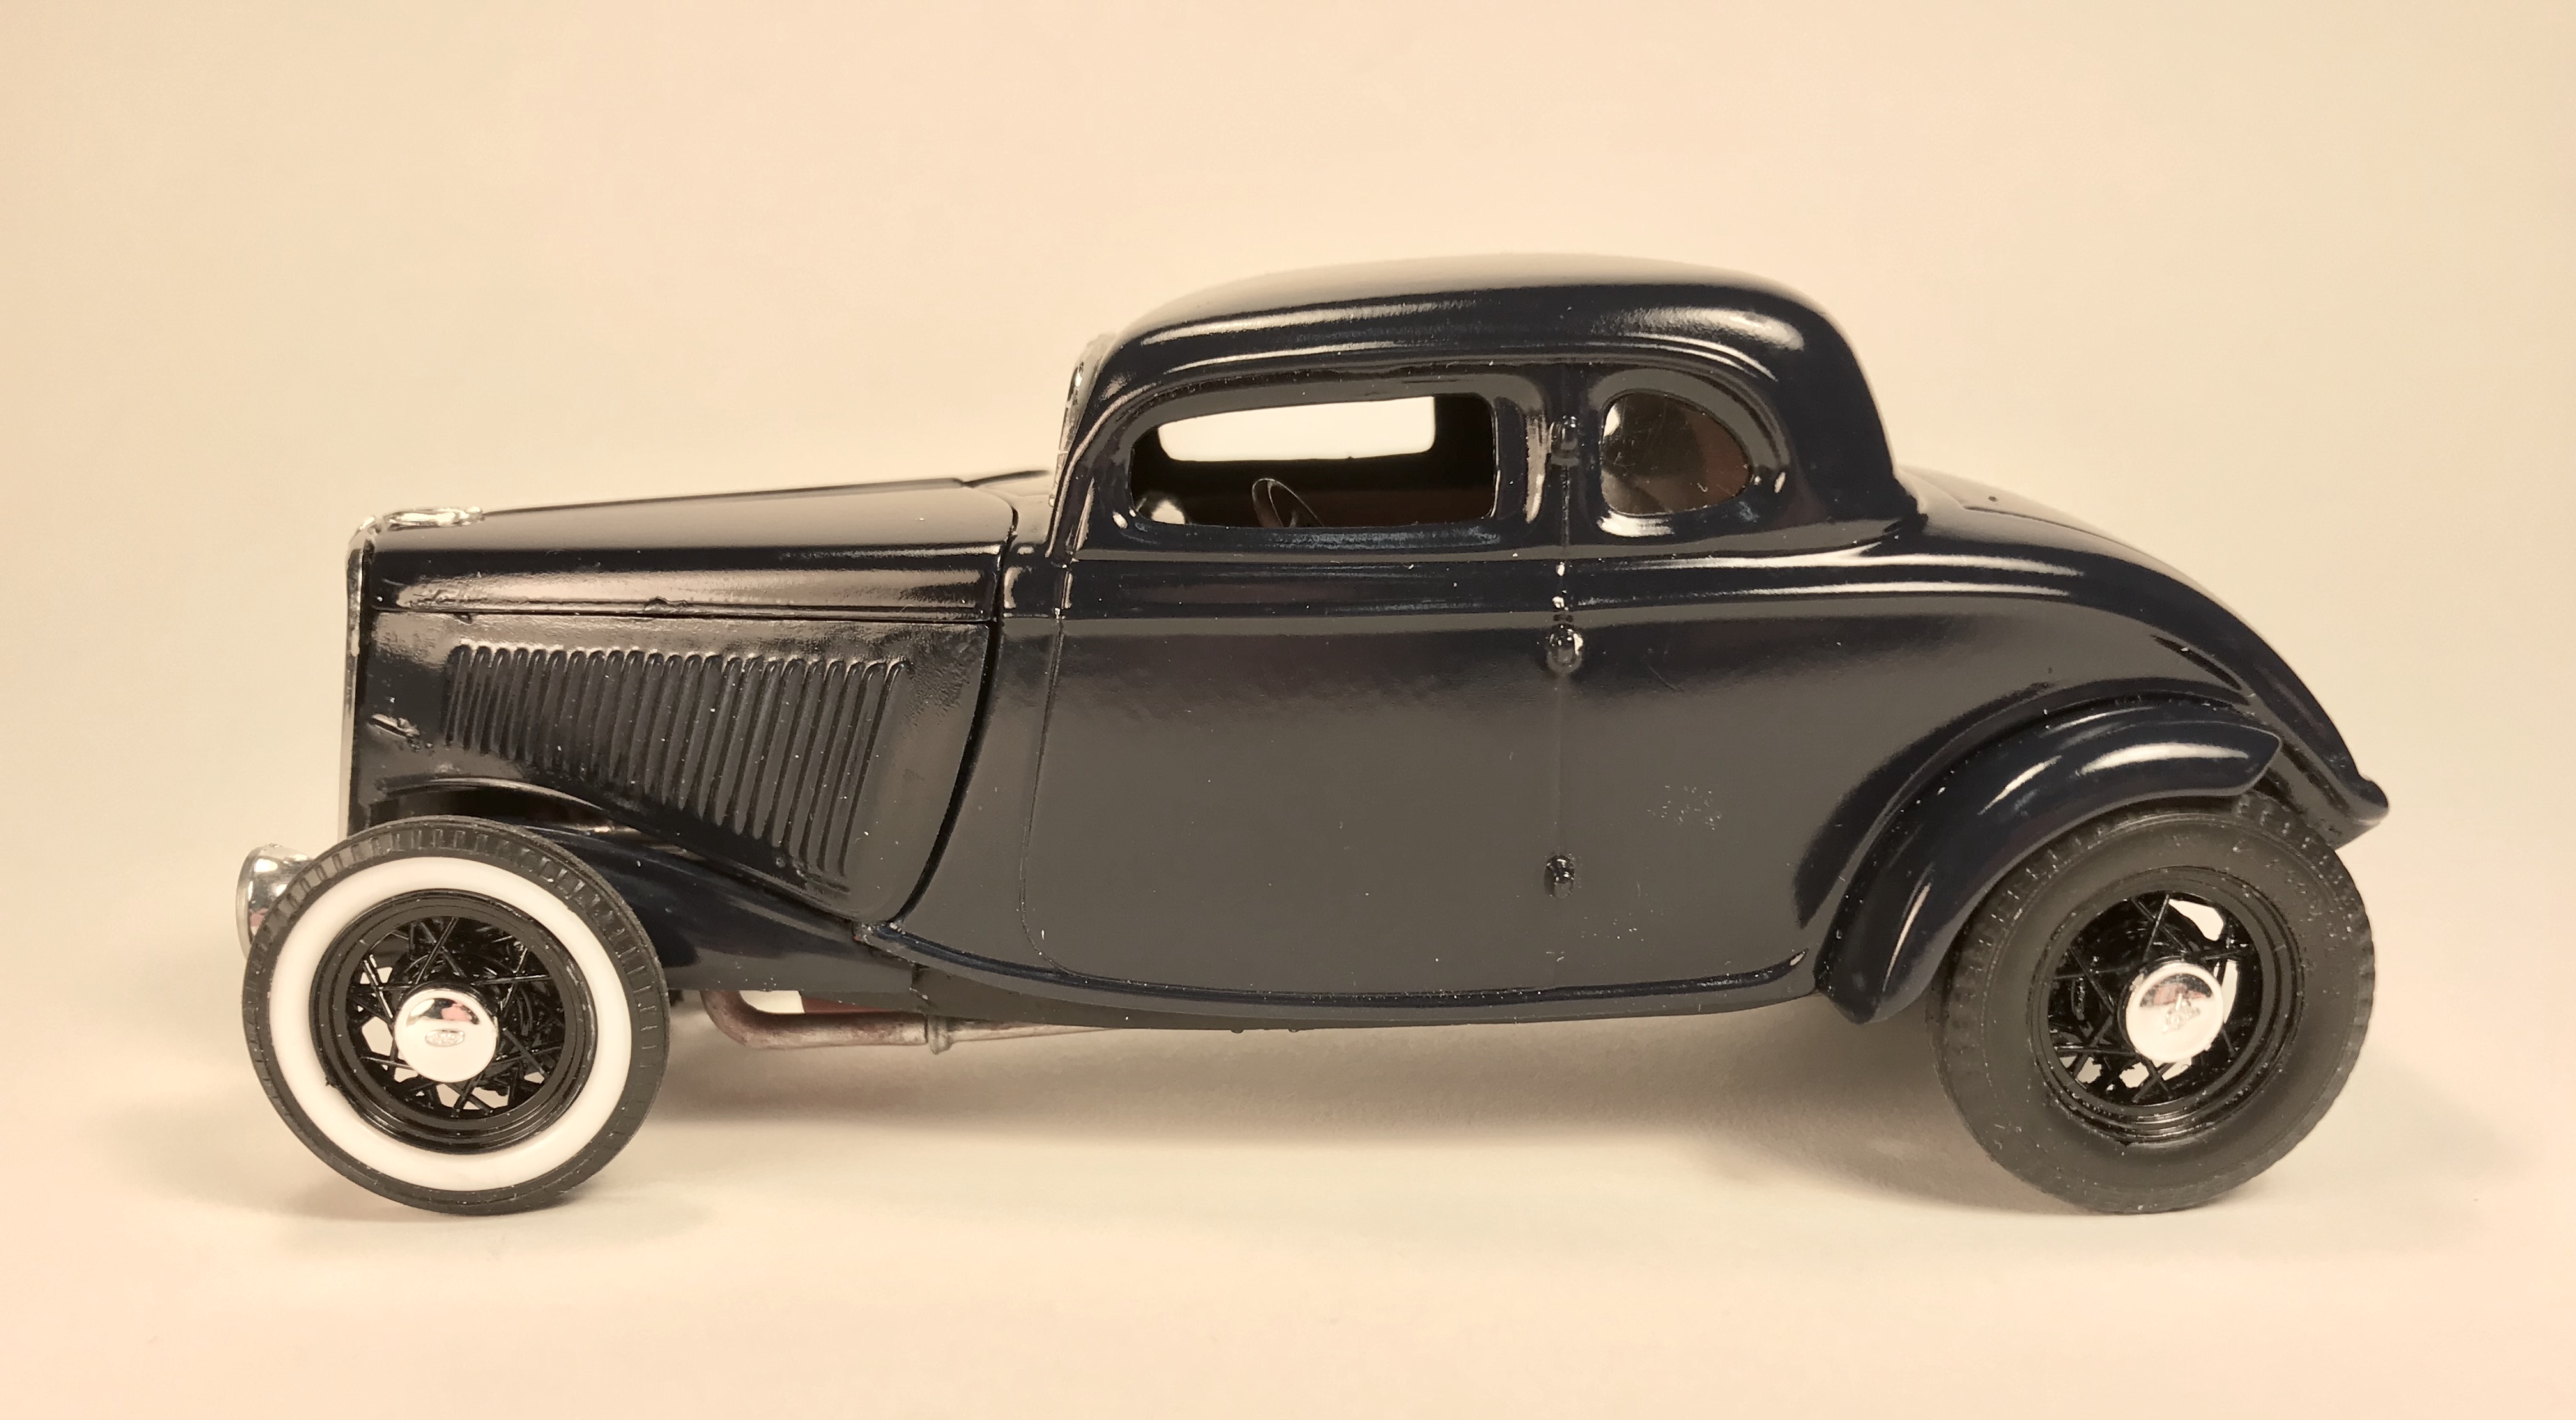
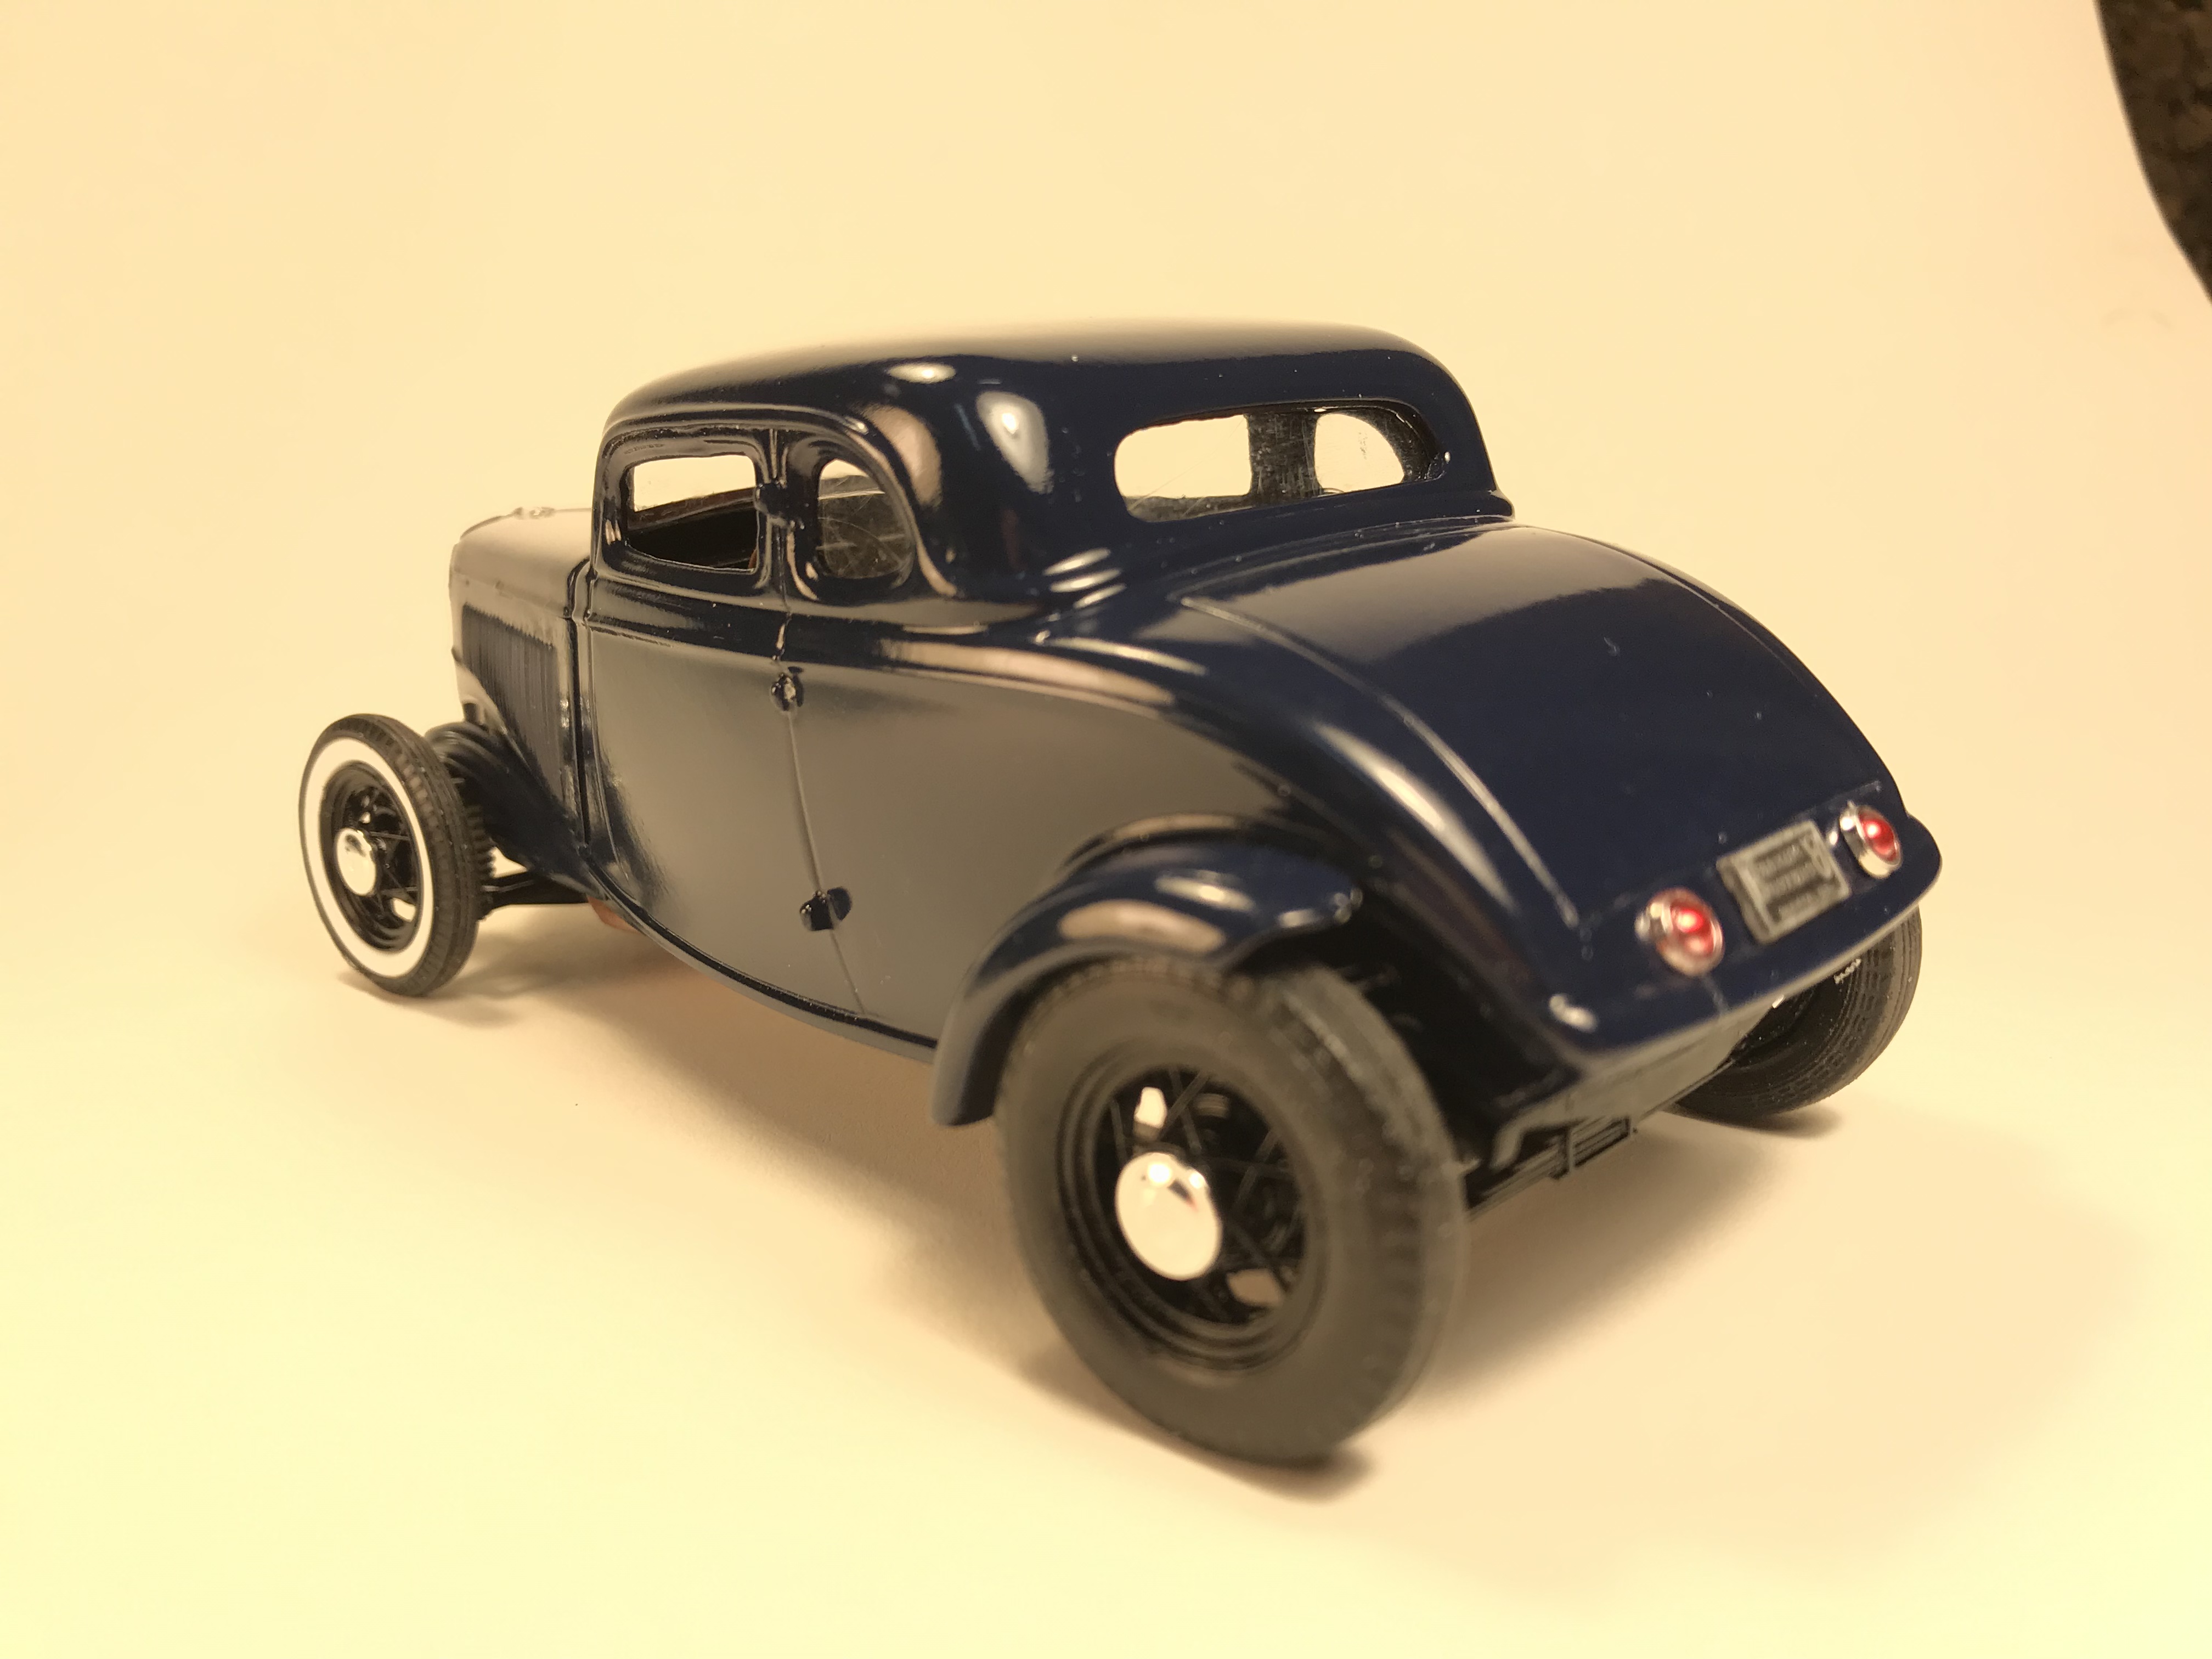
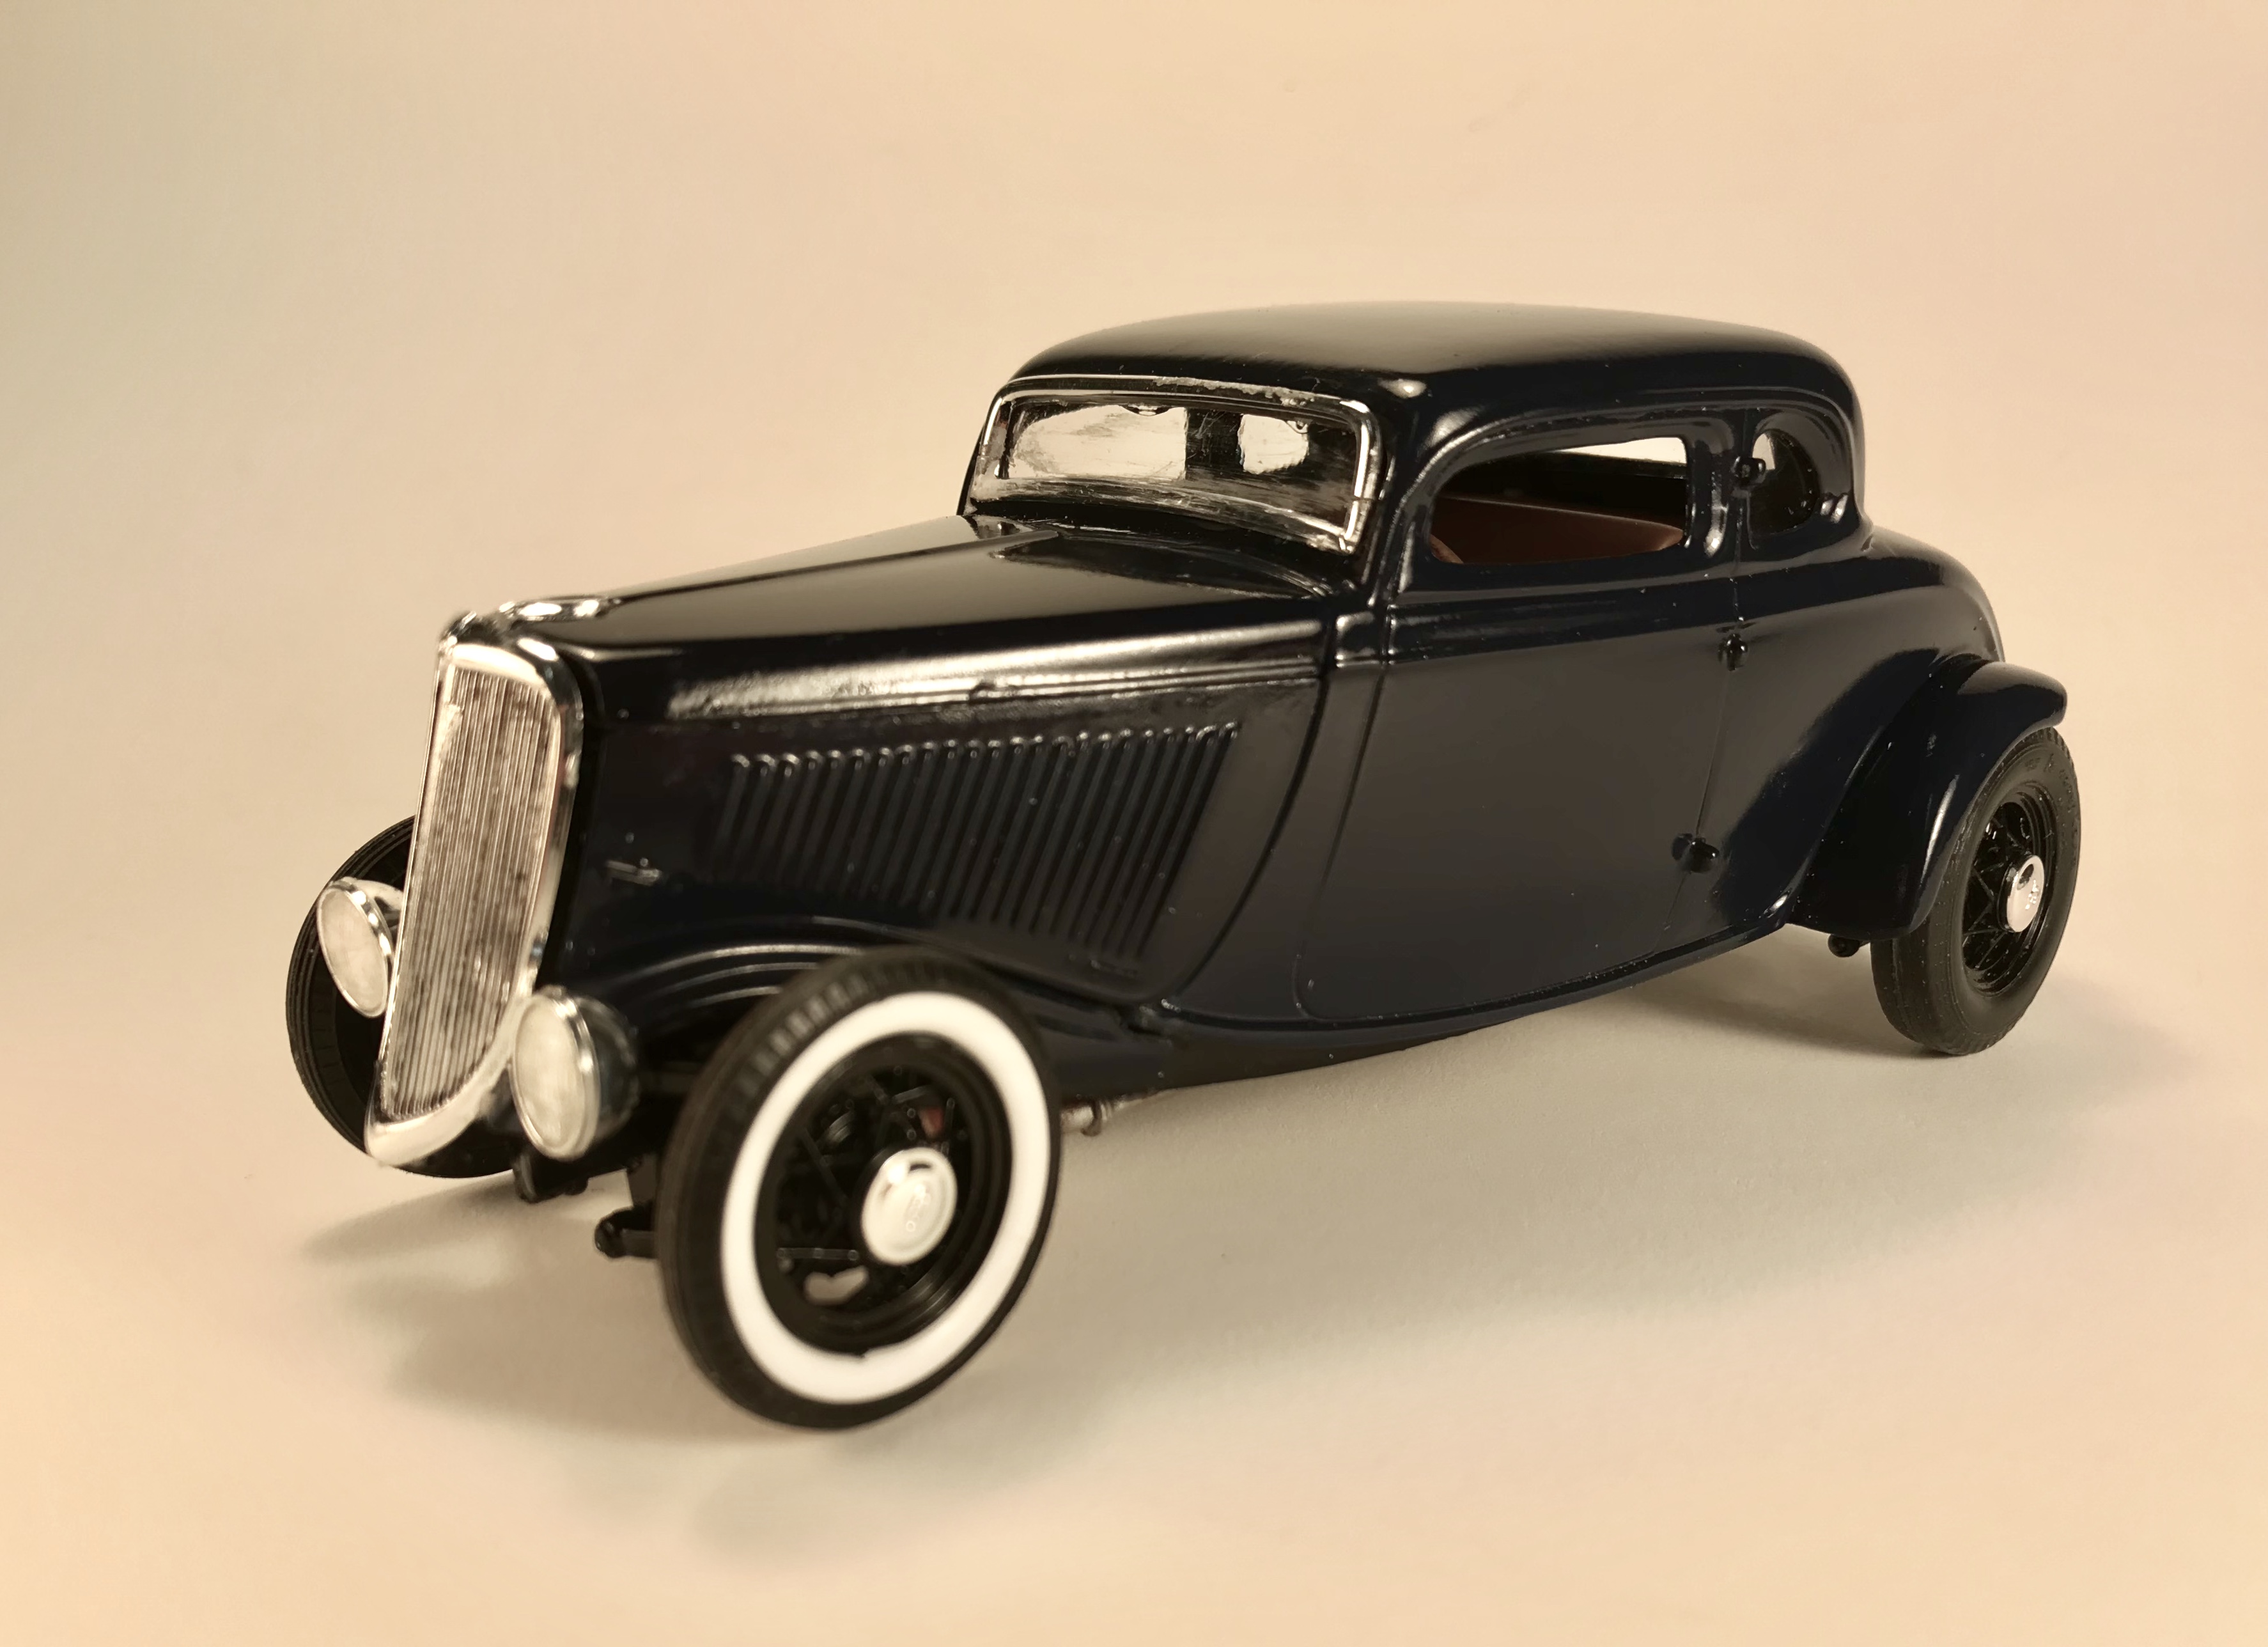
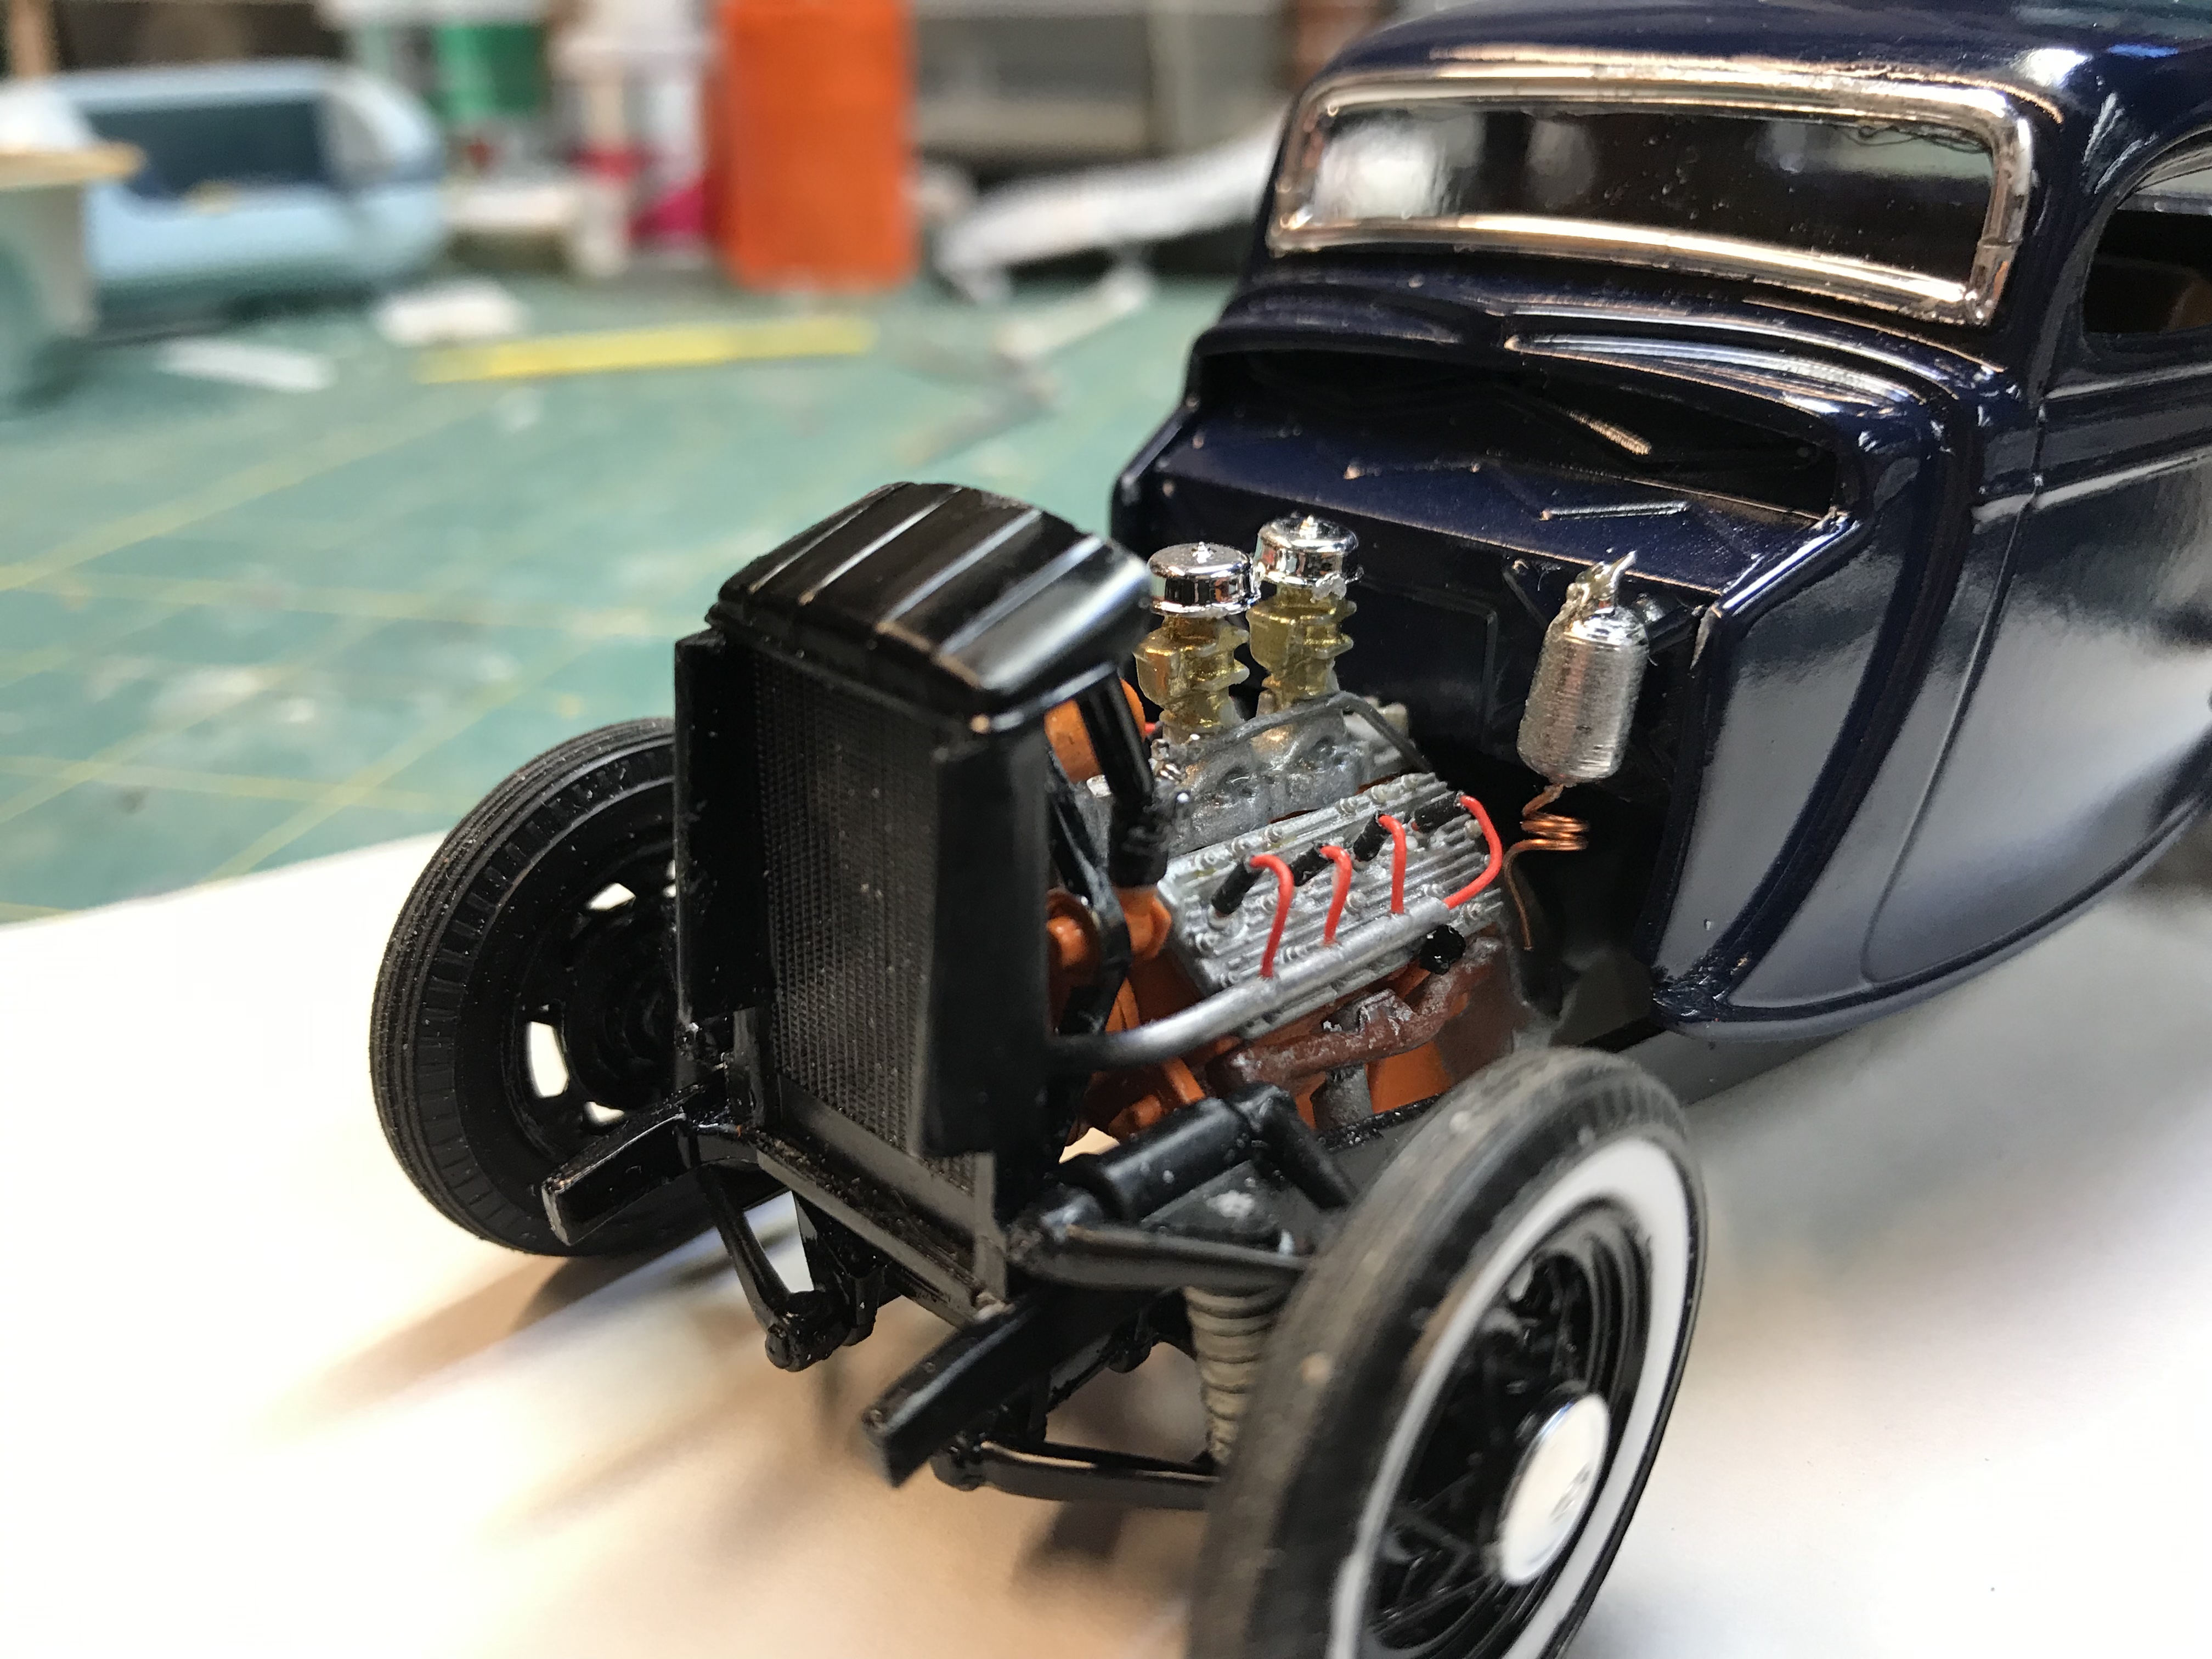
The 34 Ford is complete. It blends the modern running gear with spoke wheels and the flathead. I wanted something to look like early lake runners. This is the AMT 2in1 kit and they give you a ton of parts.
-
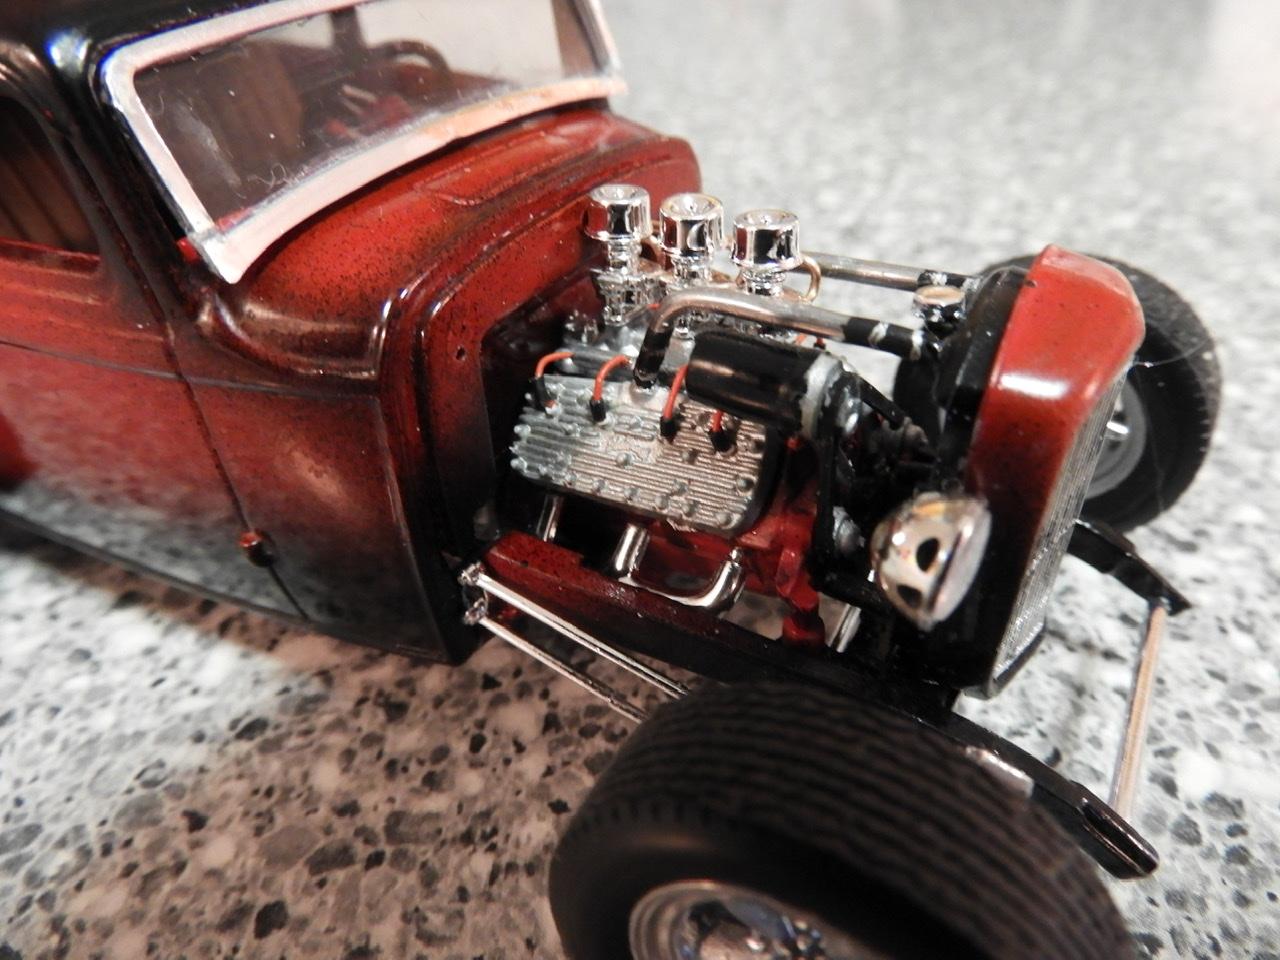
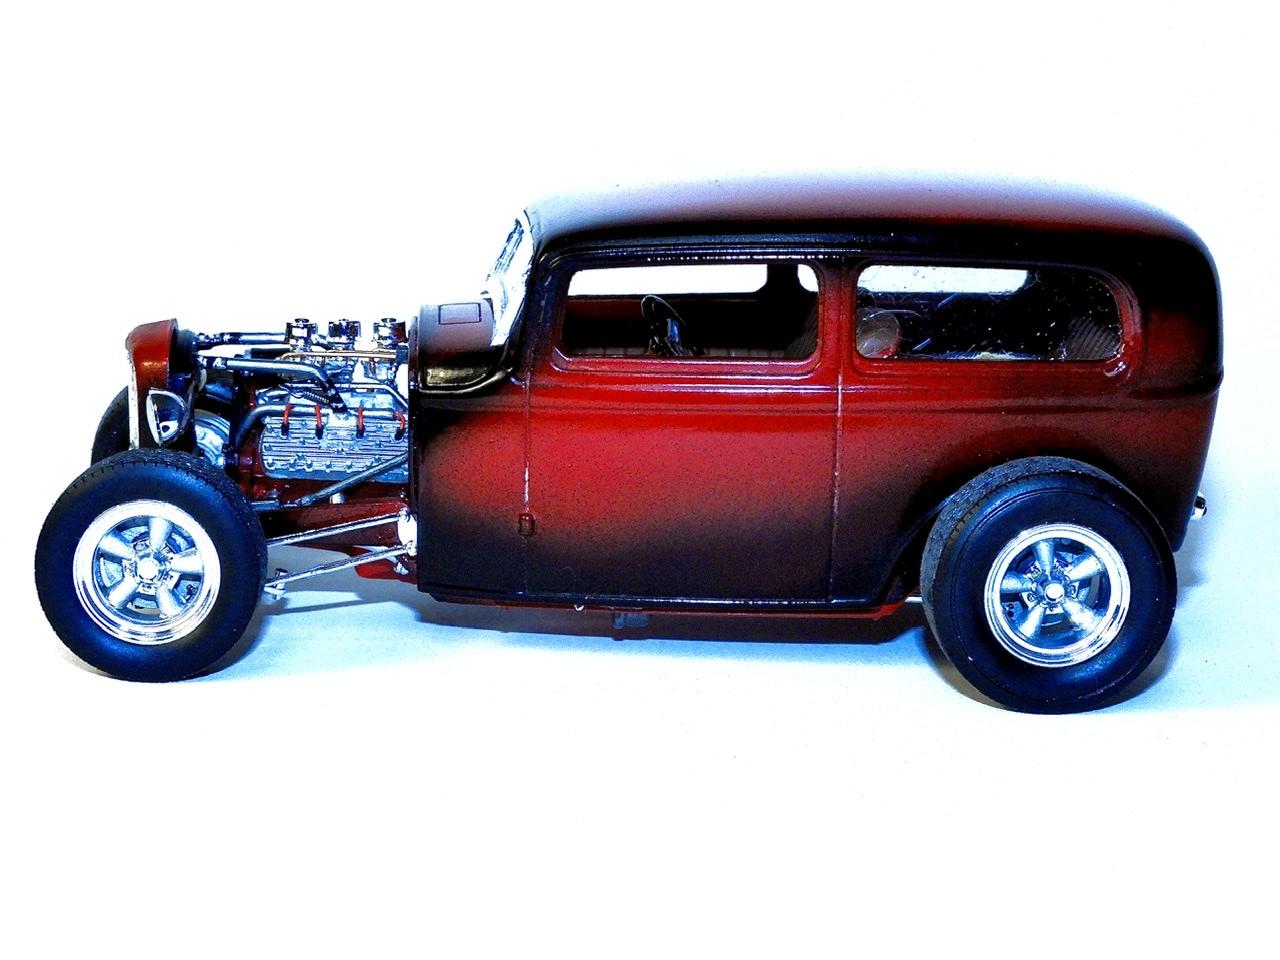
This is outside my normal comfort zone. Usually I build 30’s thru 50’s cars but wanted to stretch myself a little. The chop is as described in that other magazine and it moves the leading edge of the roof back. If I do another I’ll do it differently but this has it’s own charm. The kit supplied rear had 6 round holes for tail lights and I felt that was counter to the straight lines of the body so I fabricated slots and the frenched license plate. The kit custom options for the front were kind of heavy handed so I continued the slot theme for the headlights and used a portion of the stock bumper. Turnpike skirts were fabricated and I quite like the affect.
-
If they’re not going to be seen, like the top of the tranny, don’t bother. The rest of the joint lines can be sanded out or if they have a gap then fill them. Fillers can be bondo, thin styrene, thick body superglue with a dash of baking powder after application (it gets hard real quick) or.....There could be a whole category about fillers.
-
At this point the only thing done to the rear deck is changing the trunk from the rumble seat to the standard. The kit comes with a continental kit but I’m not sure it adds to the over all look. Thoughts?
-
Thanks for the kind comments. The hubcaps are from Replicas & Miniatures.
-
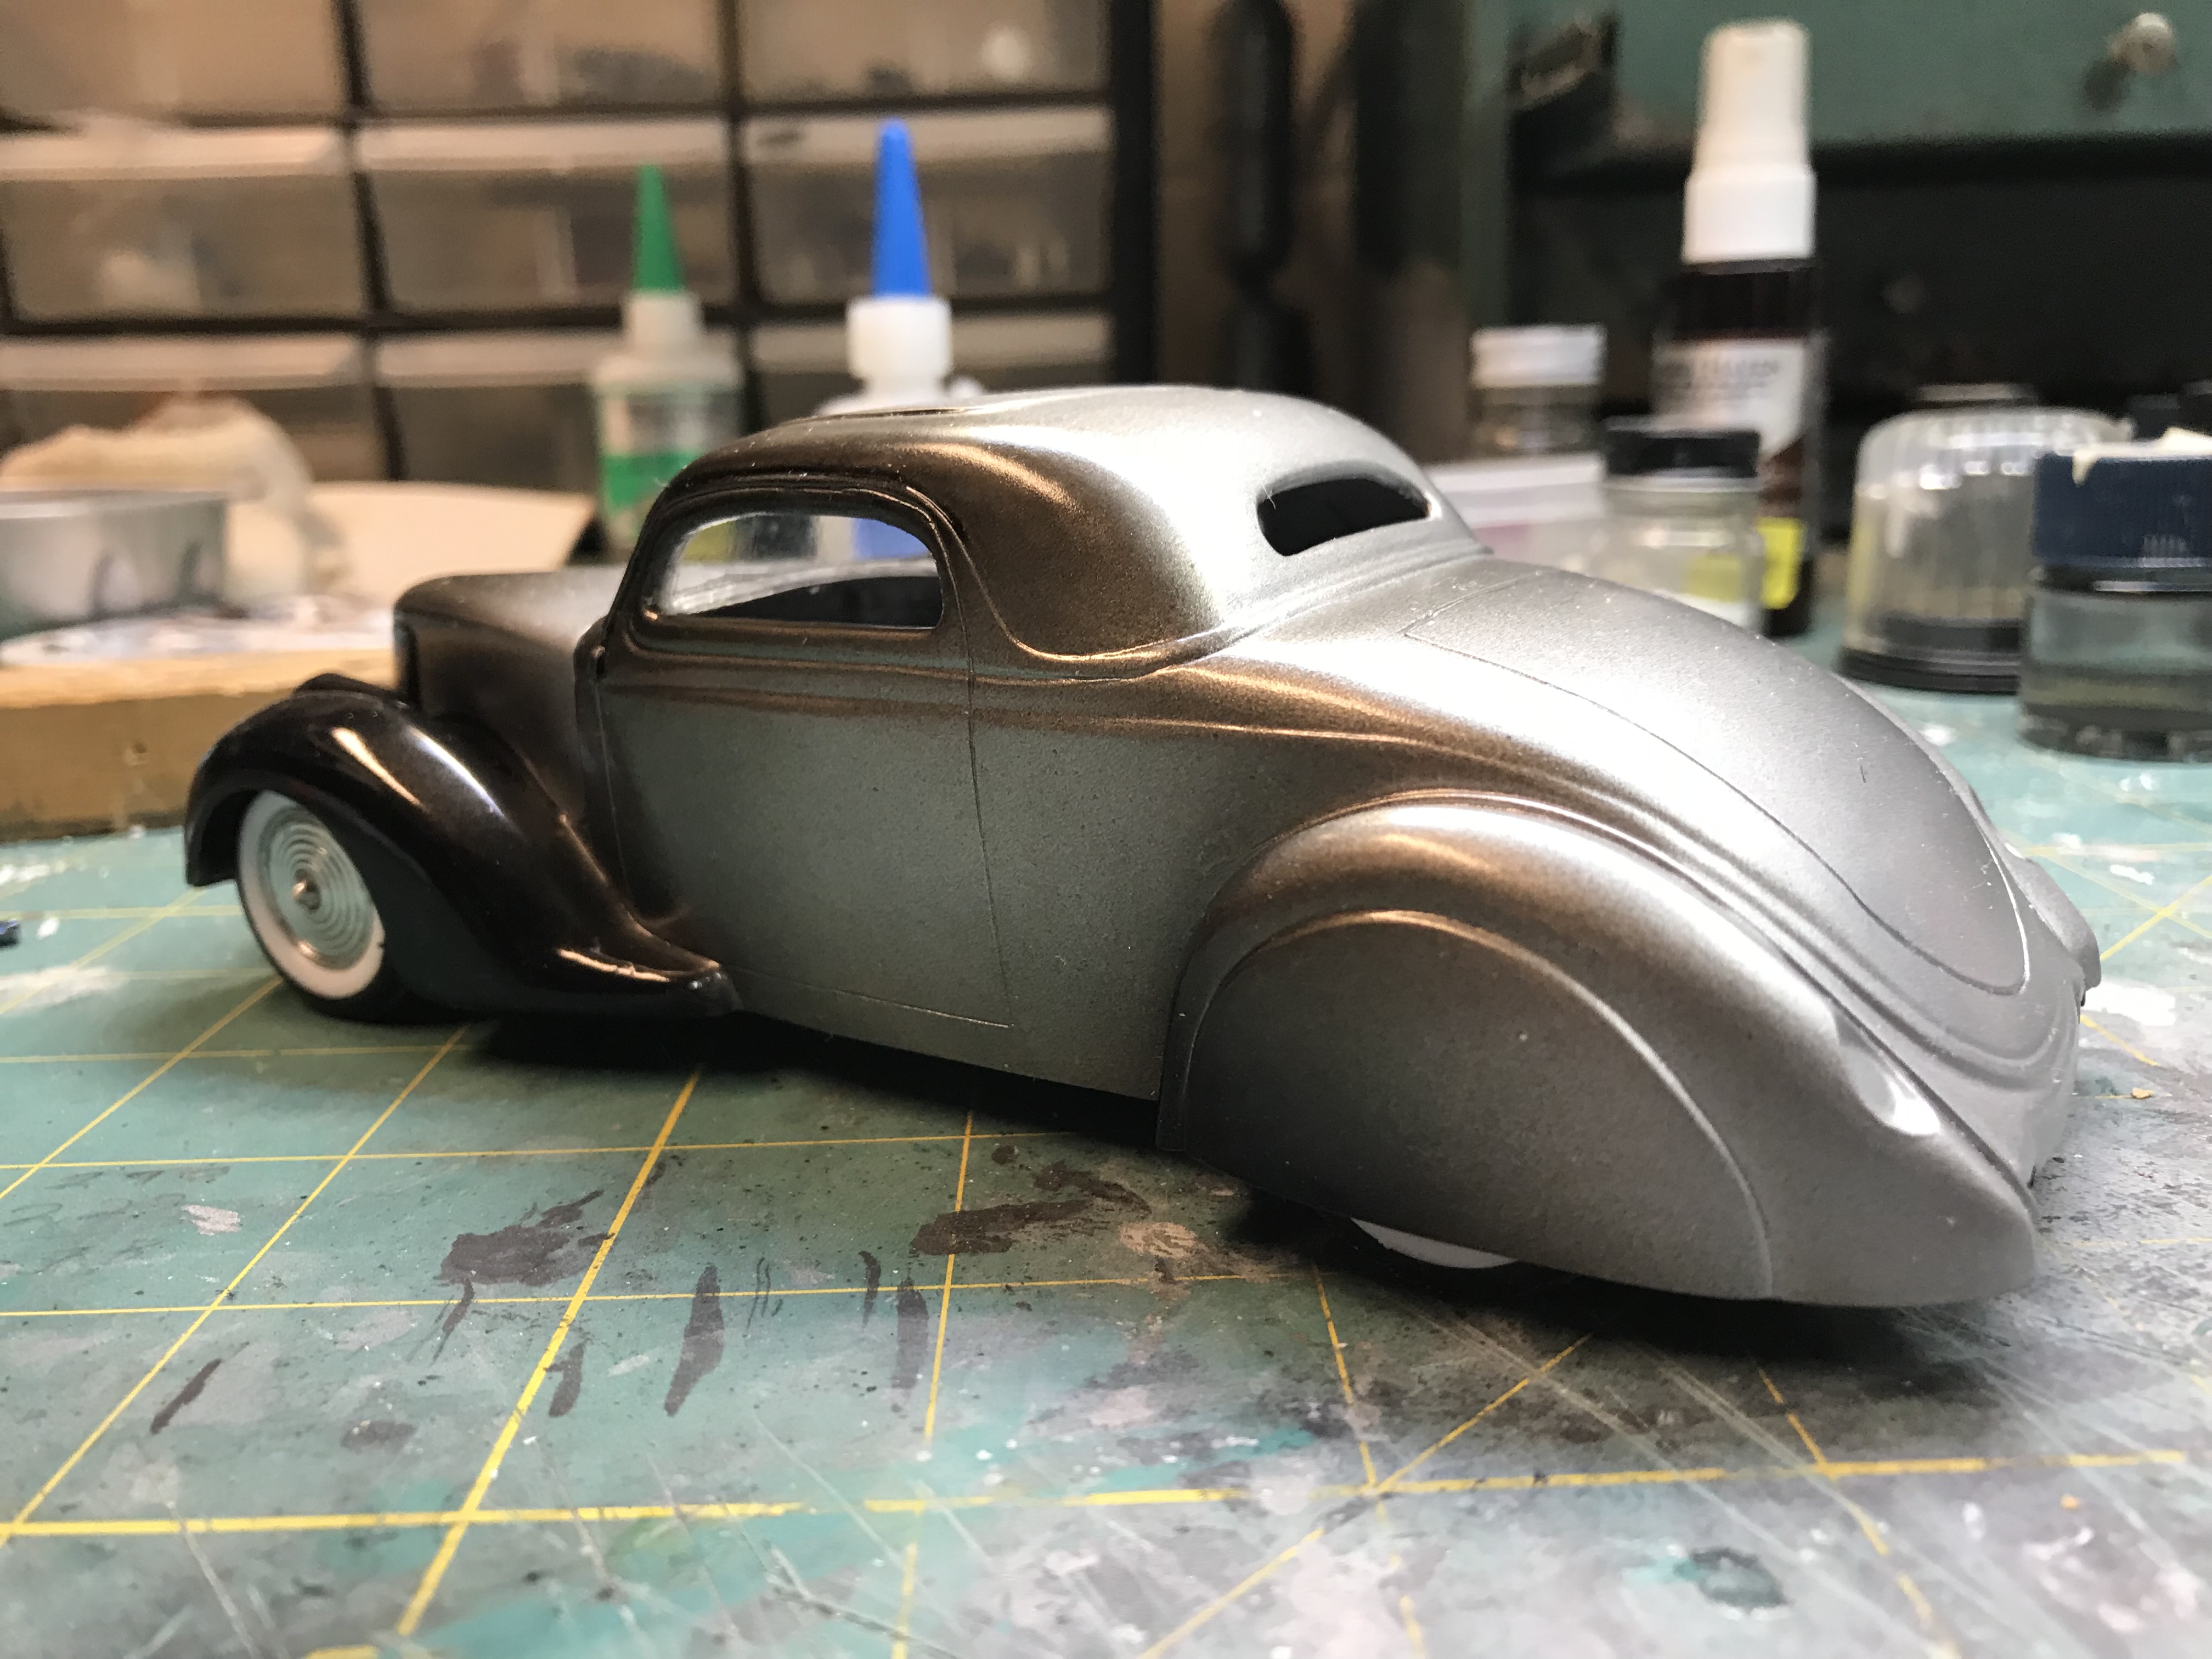
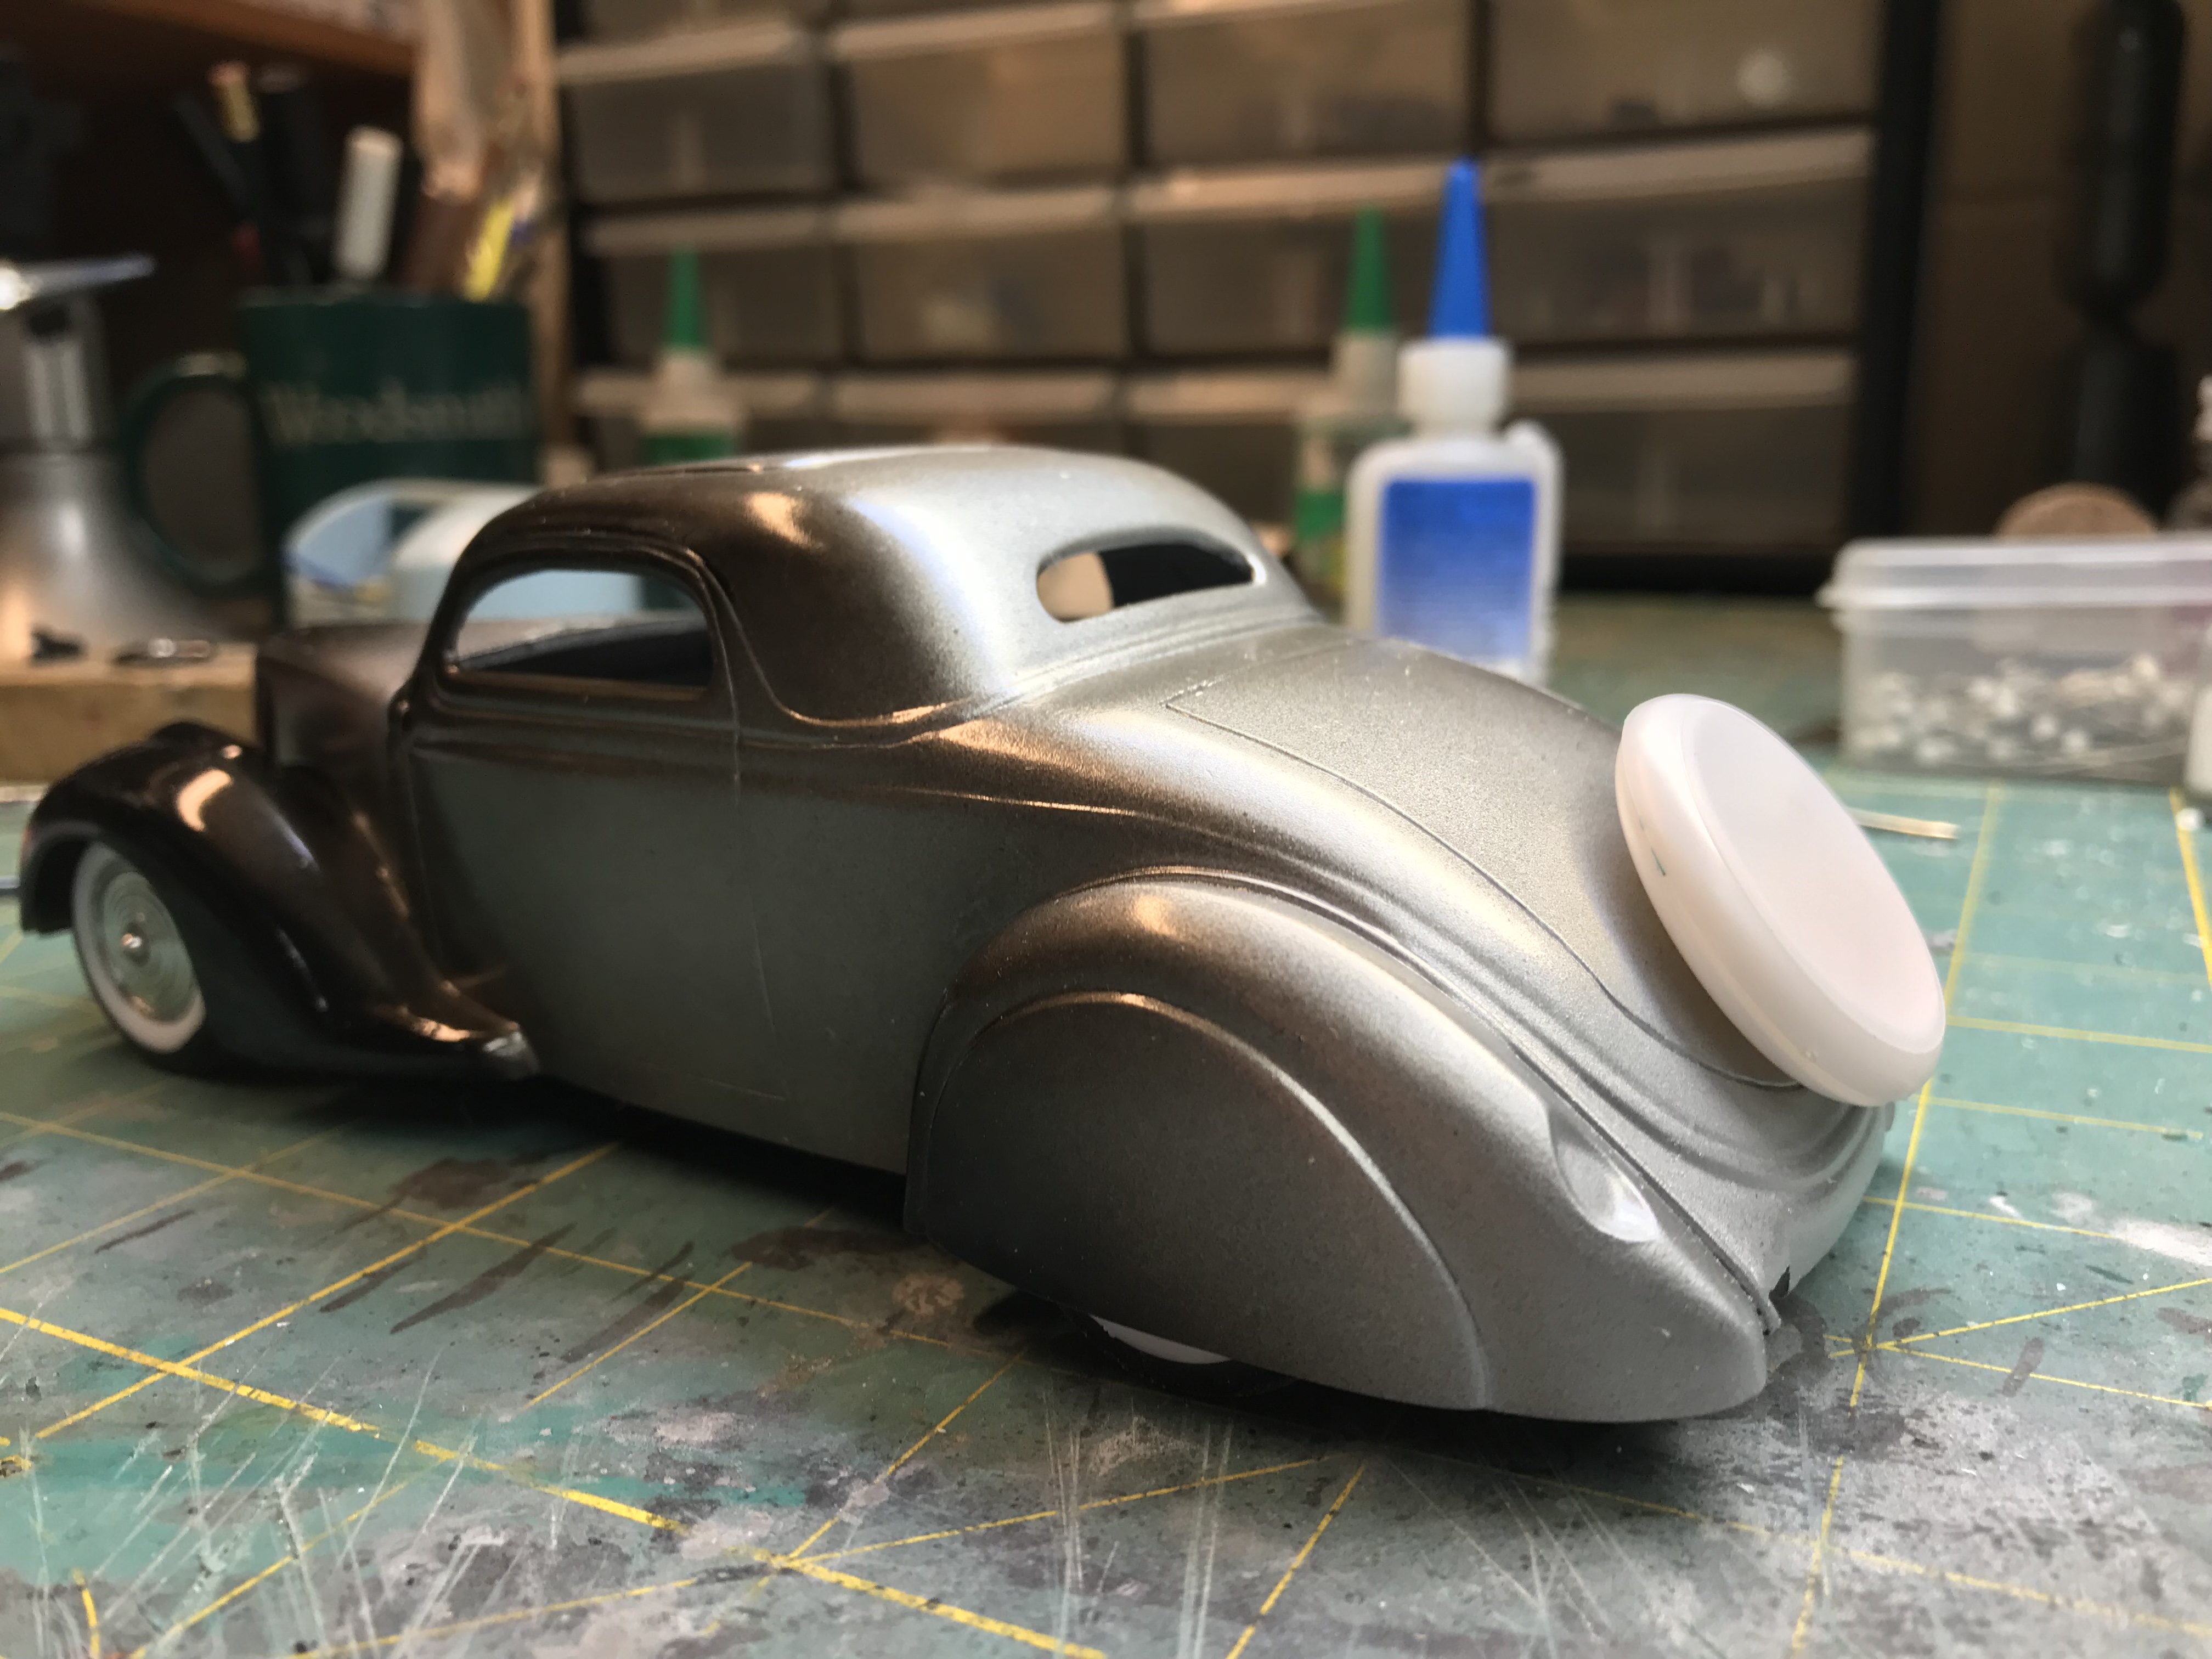
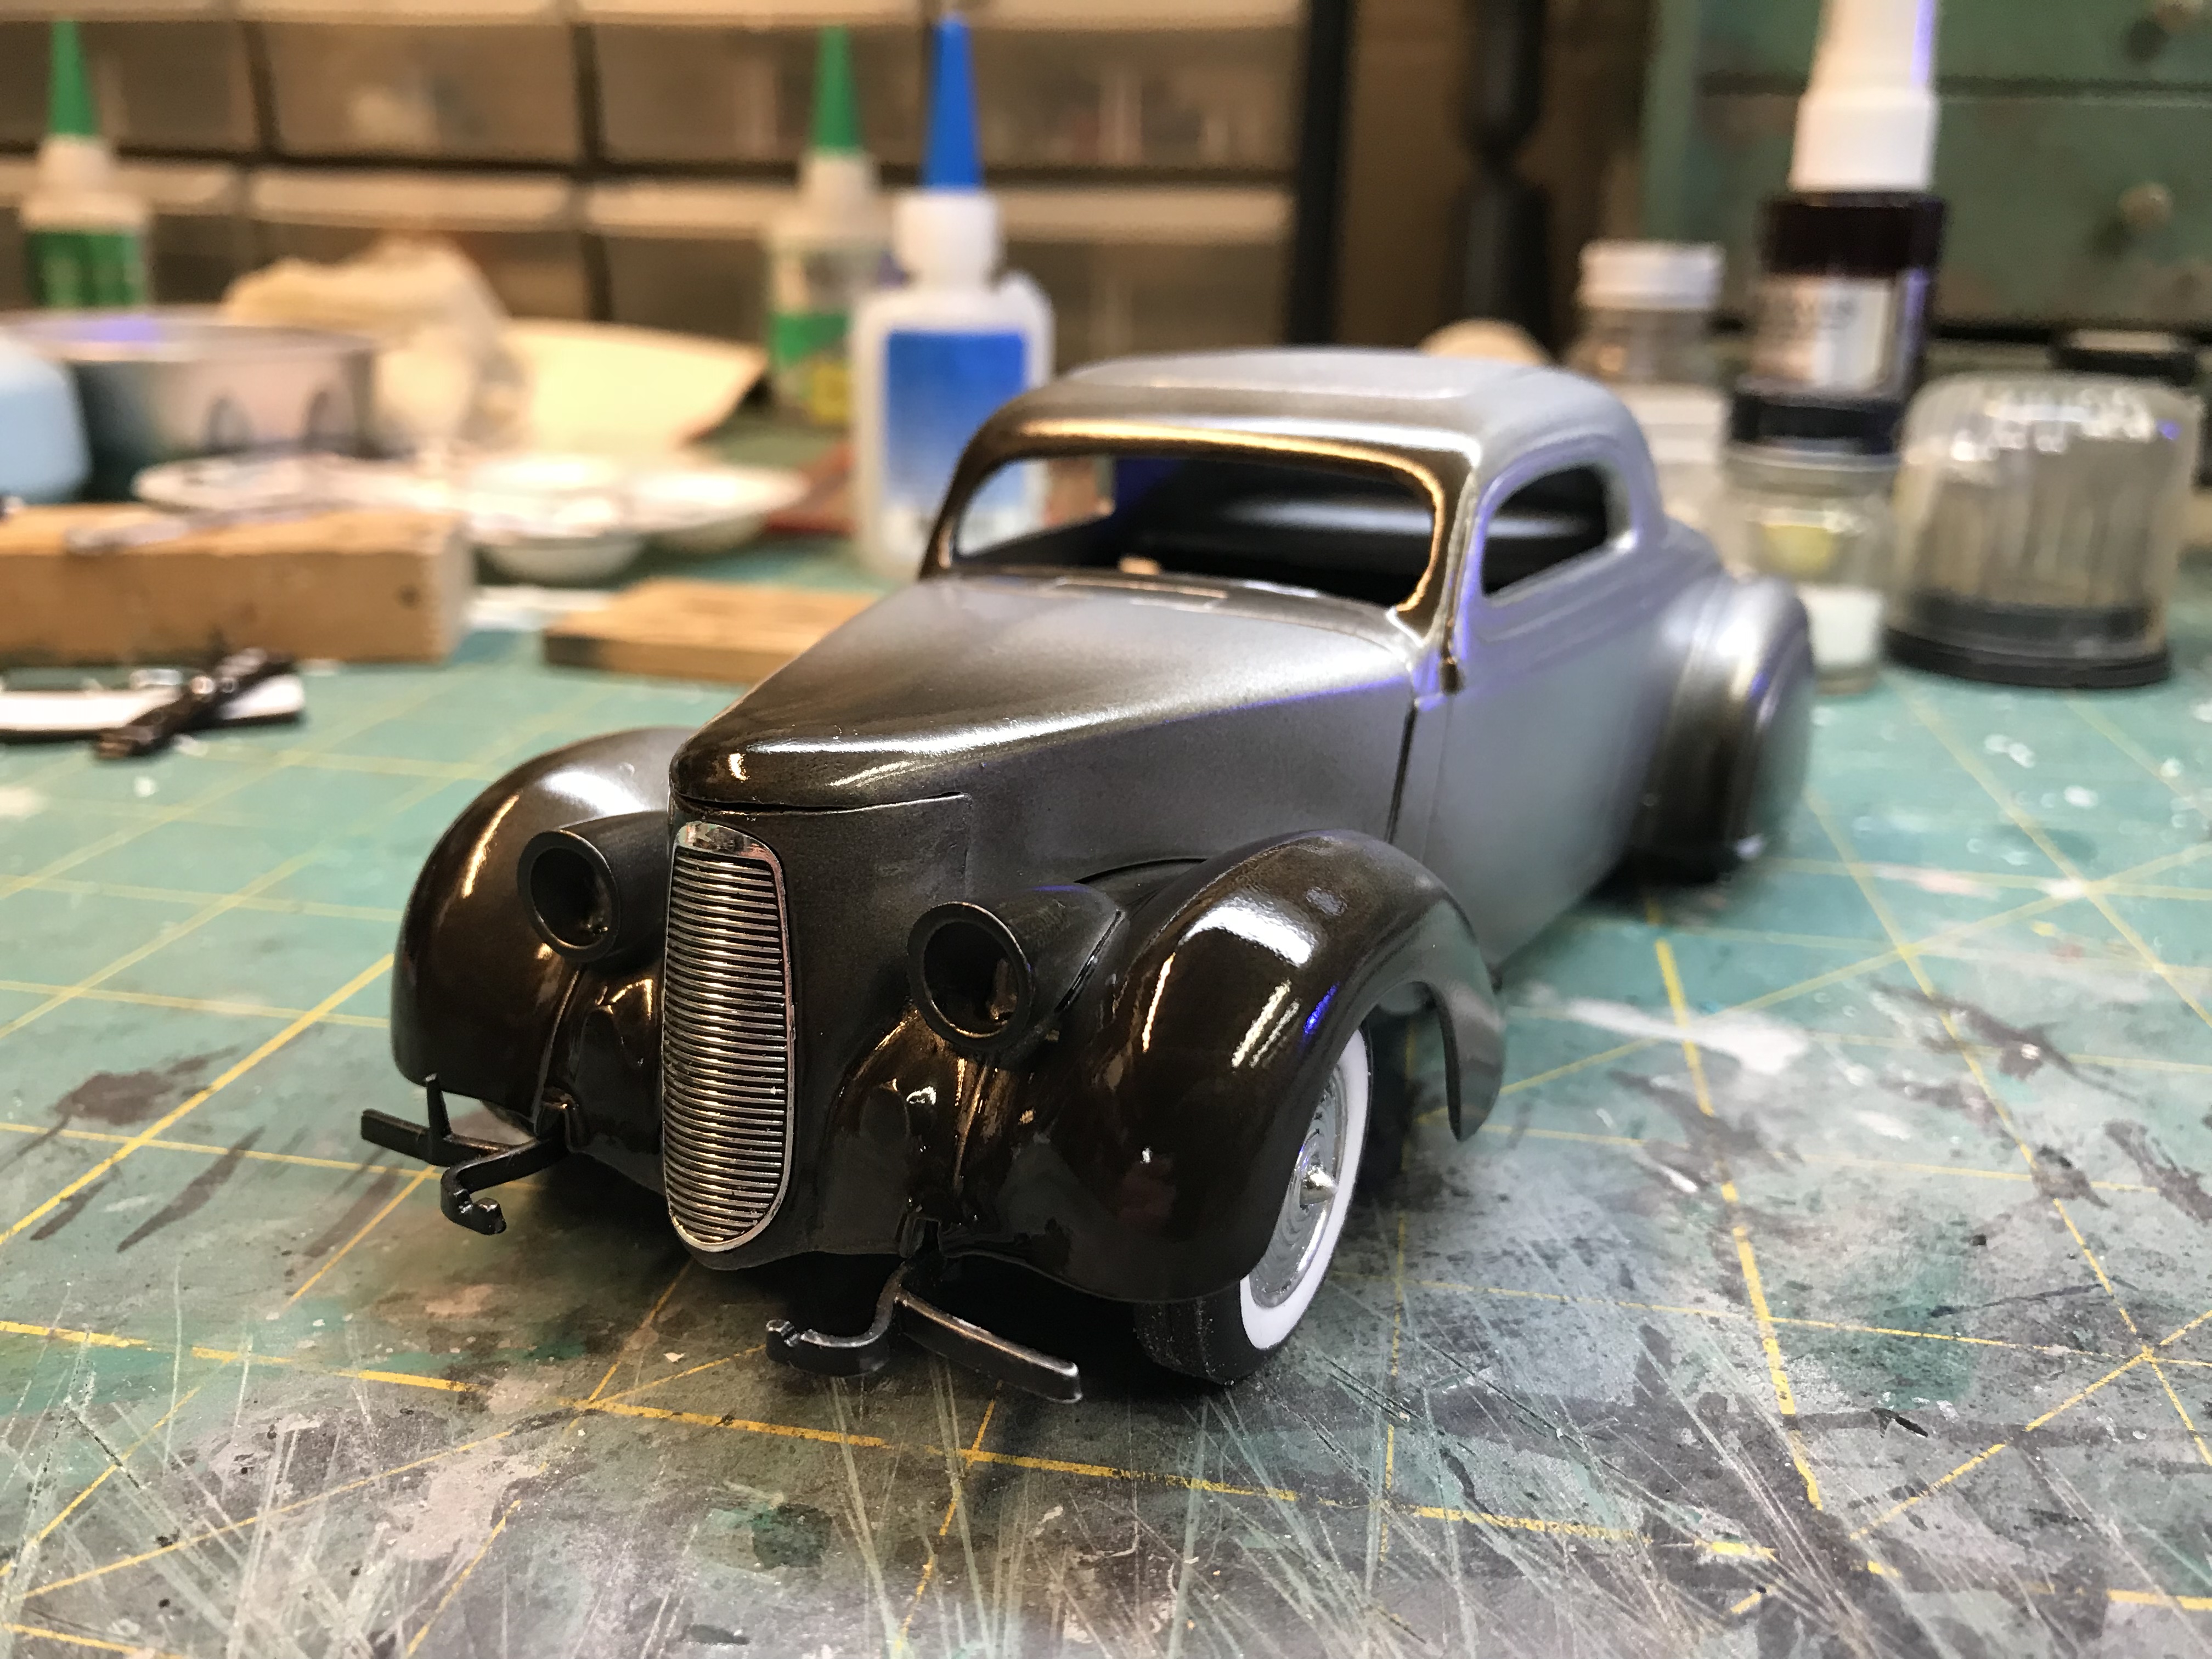
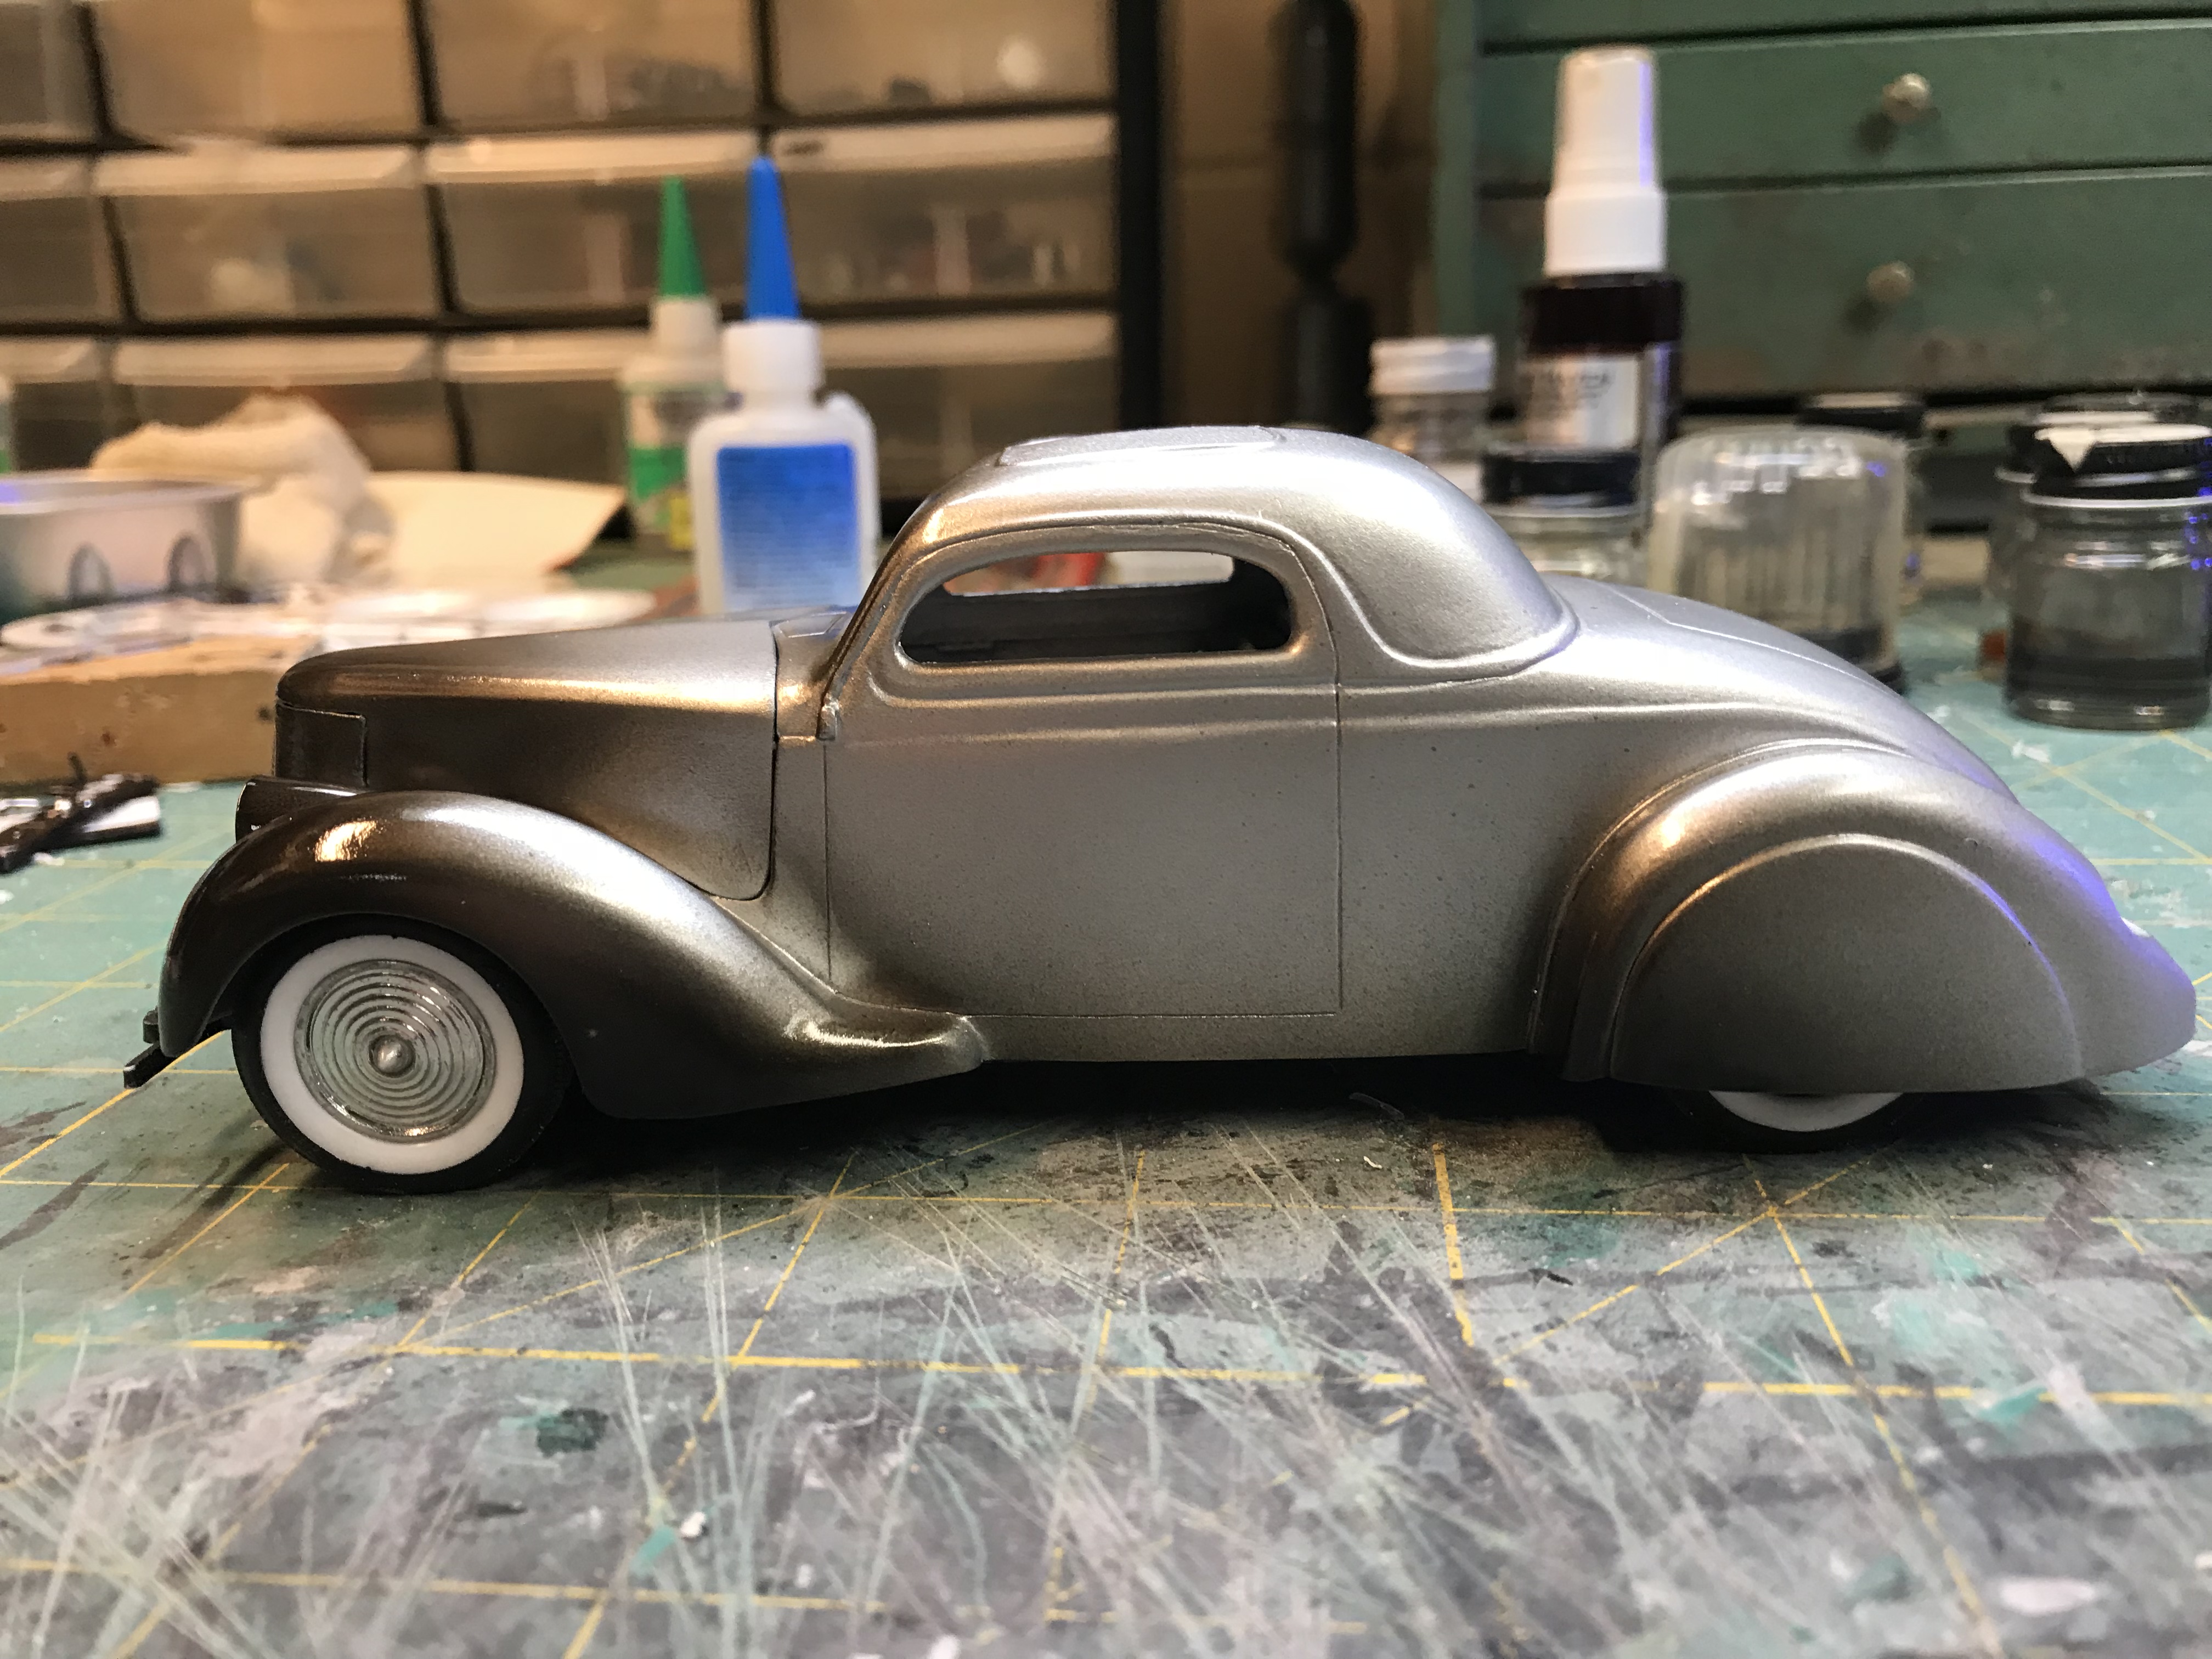
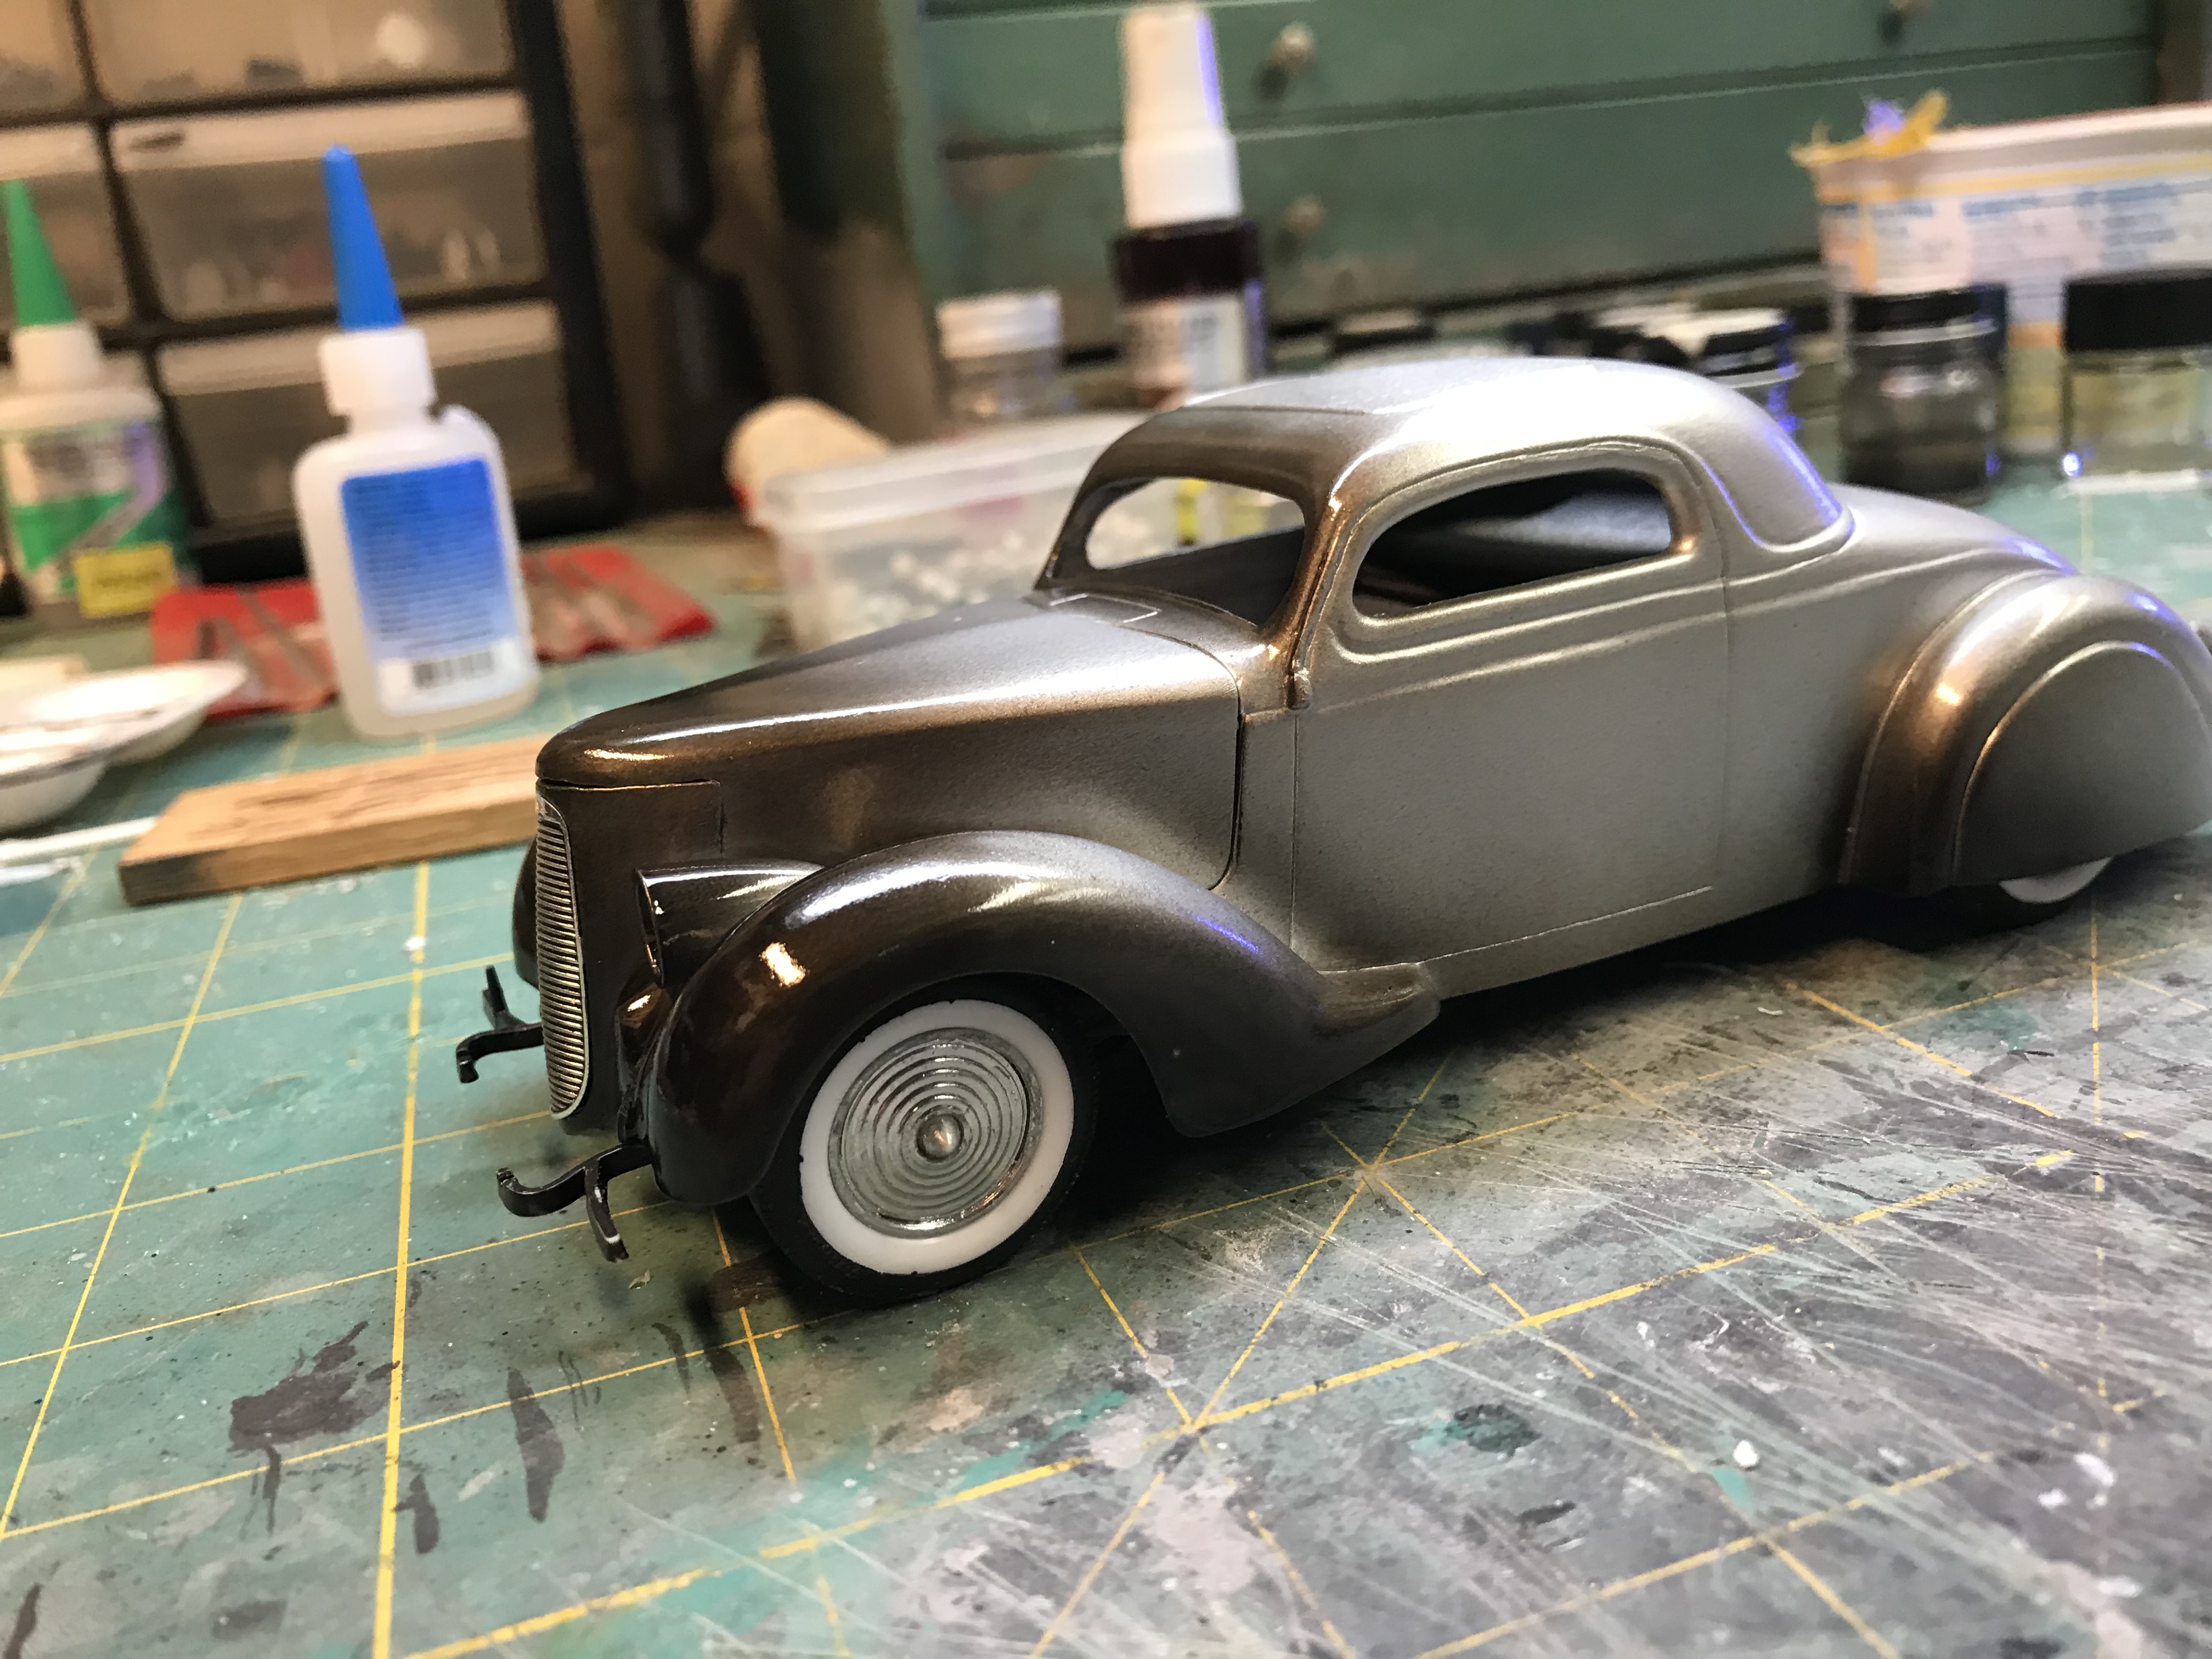
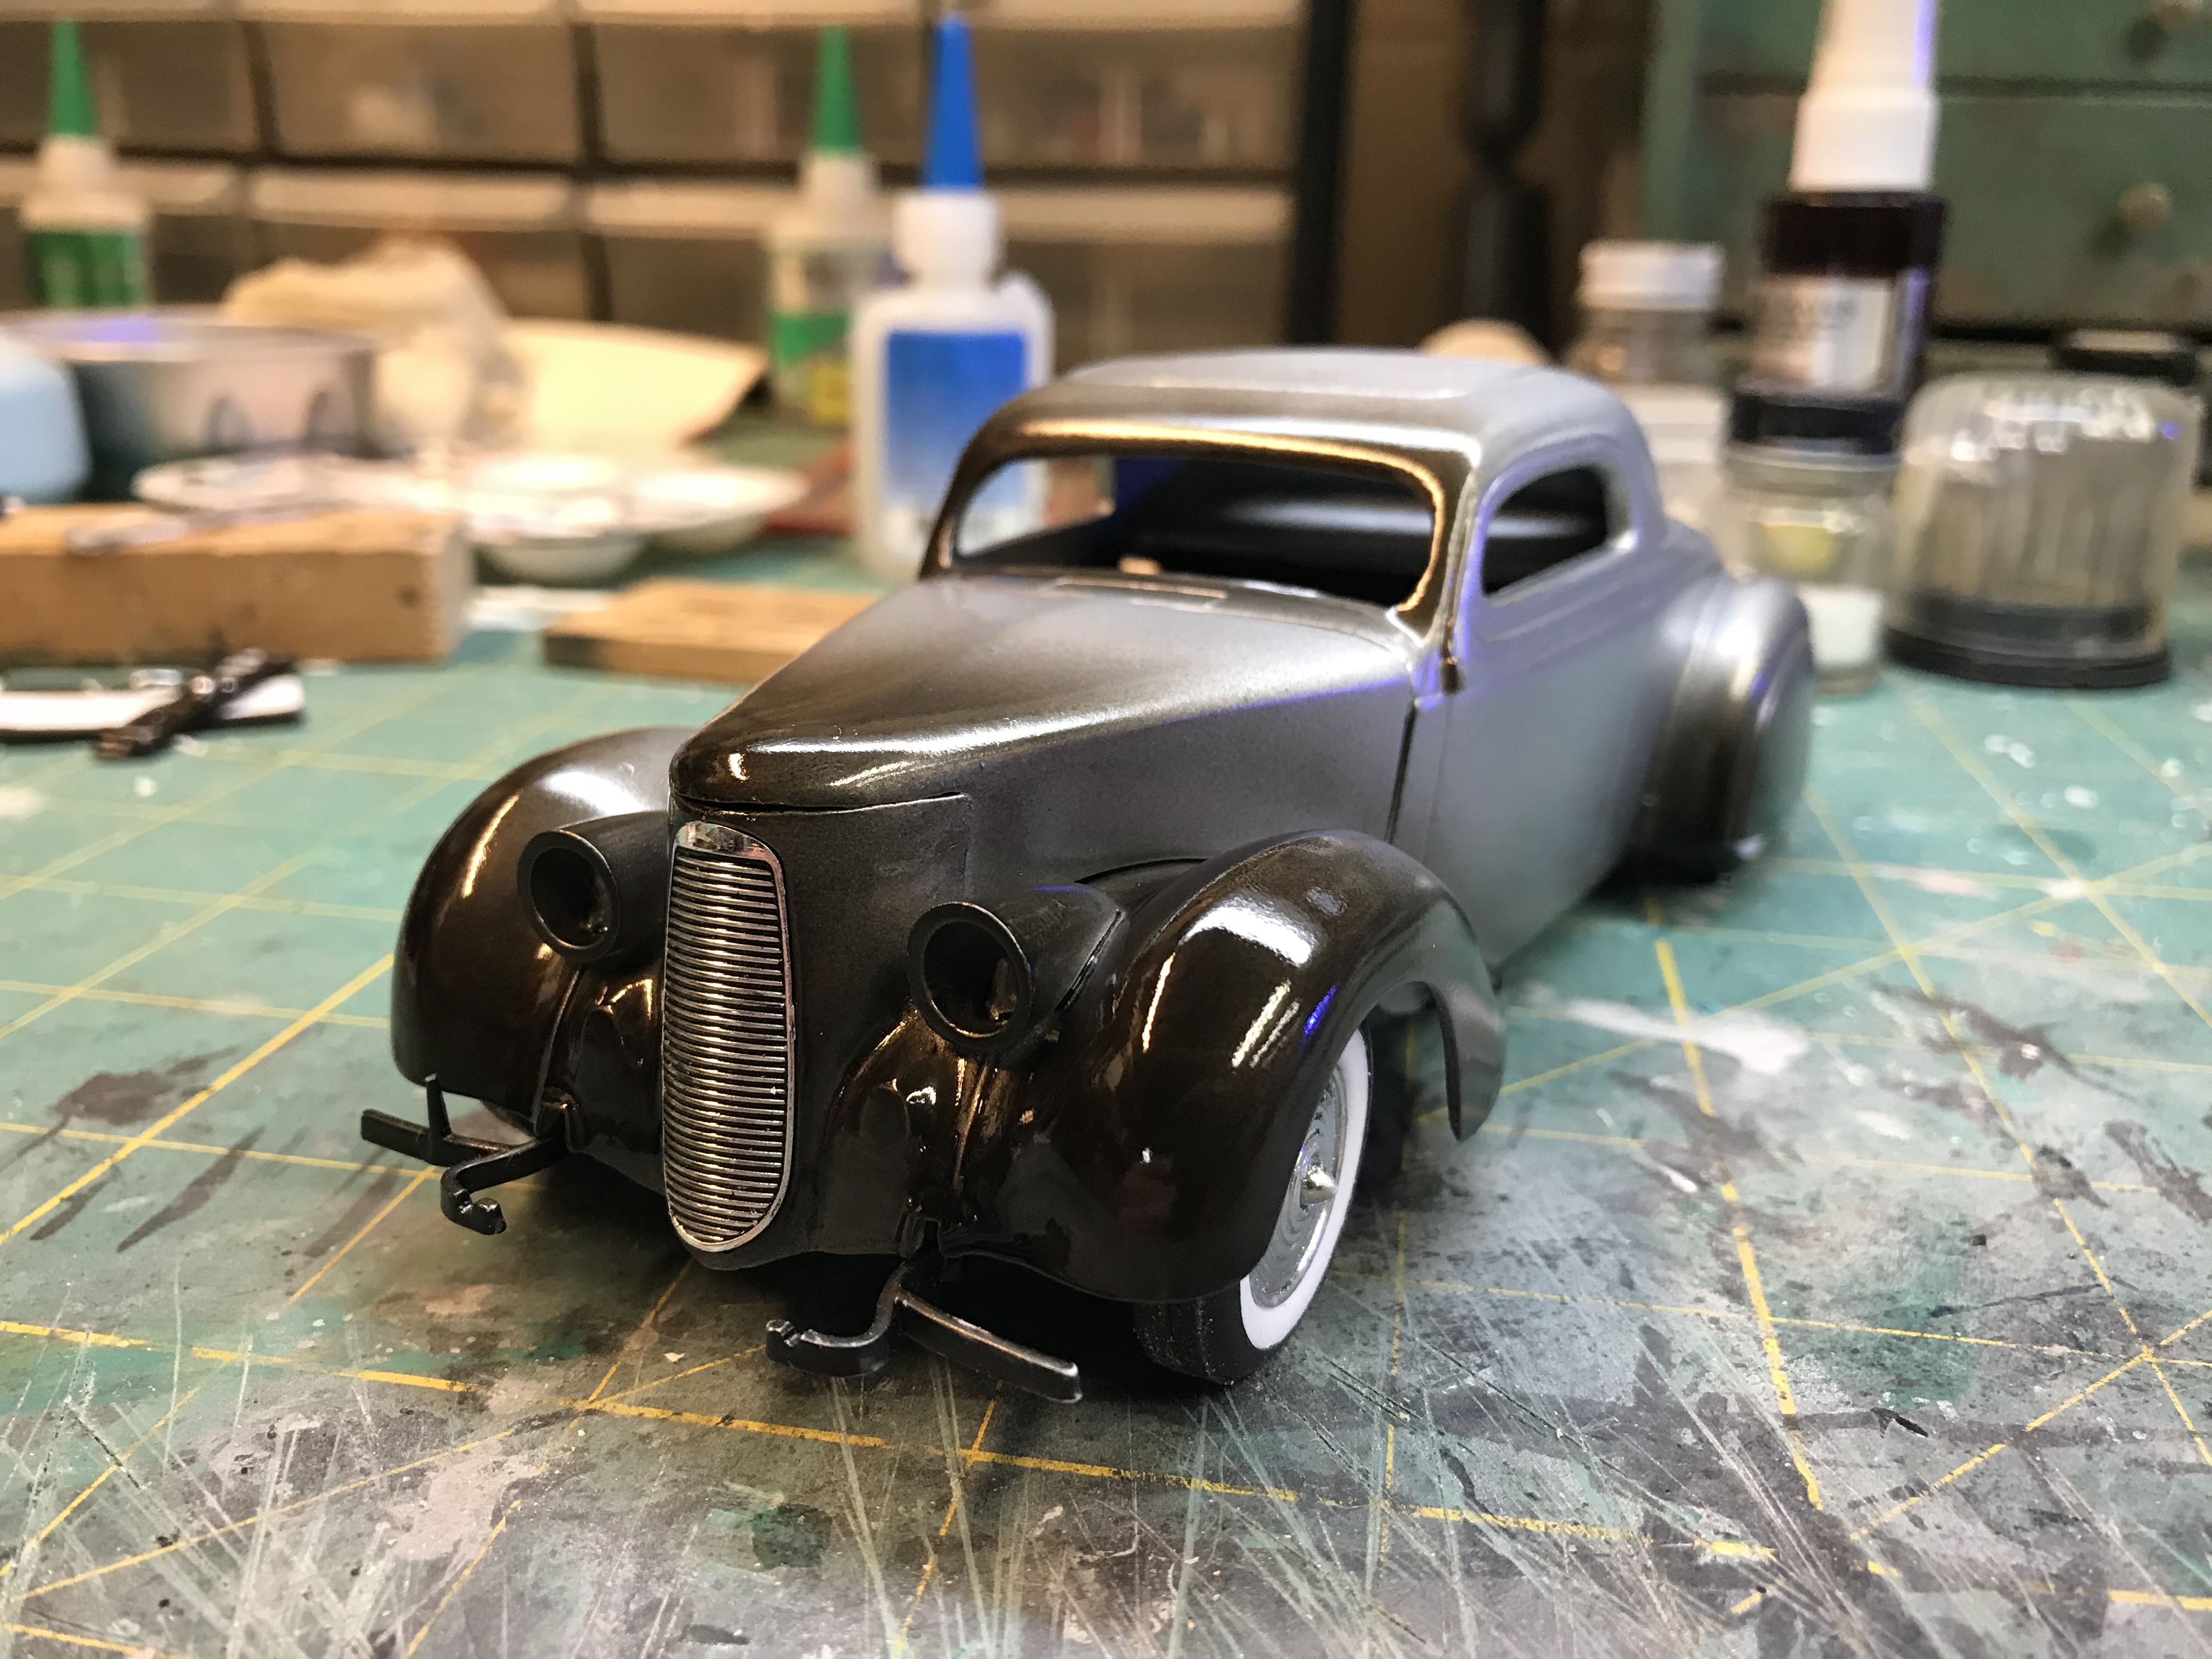
Finally making some good progress on the 36. I’ve got a bike that has color fade like this so thought to try it out here. The silver is Tamiya’s TS Mica Silver and the black is Tamiya’s TS Smoke.
-
Finally making some good progress on the 36. I’ve got a bike that has color fade like this so thought to try it out here. The silver is Tamiya’s TS Mica Silver and the black is Tamiya’s TS Smoke.