slownlow
-
Posts
242 -
Joined
-
Last visited
Content Type
Profiles
Forums
Events
Gallery
Everything posted by slownlow
-
The only thing I would add to the above suggestions is using a razor saw. It worked quite well for keeping the lines straight on a Studebaker I did a while ago. The first several passes should be done with almost no pressure. As my old pa used to say "Let the saw do the work" For square corners start at the corner and draw away from it.

-
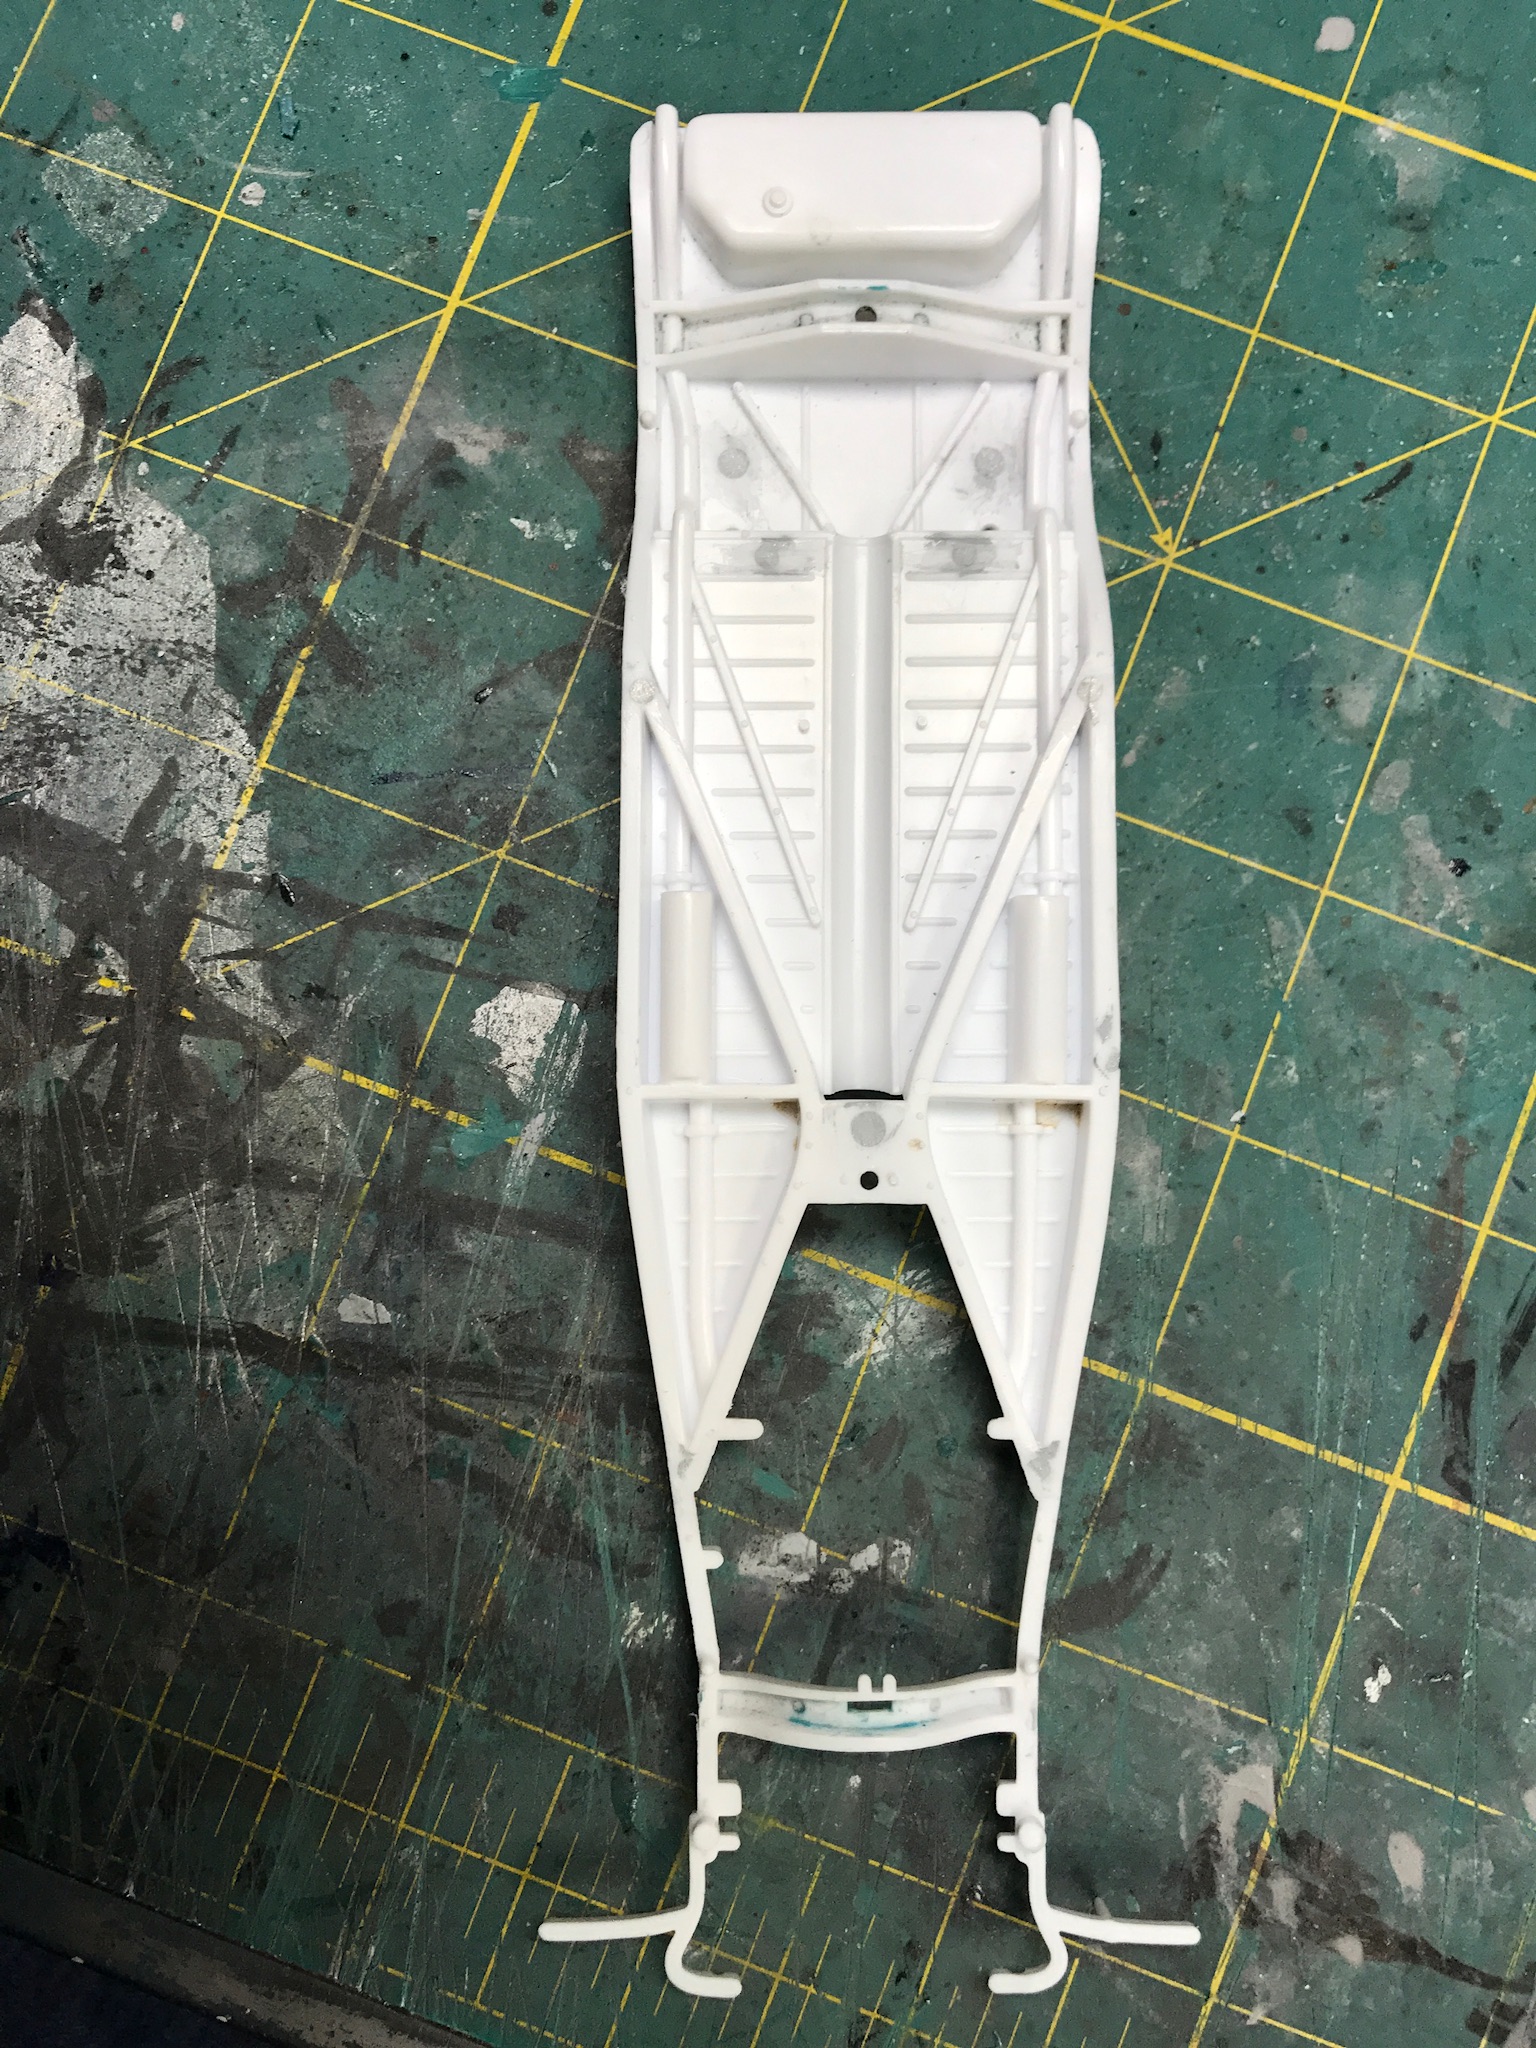
Here's where my insanity transpires. The table is an old wooden draftsman model that's been with me since high school (that's a looong time). The machinest chest holds the small tools, tape, BMF, sandpaper sheets, paintbrushes, other misc. stuff. The drawer unit is somewhat organized for some small parts by type( wheels, engine bits, carbs, etc), and stuff like fine wire, solder, clear twist ties, milliput..... the shelving on the right has paint, epoxy, styrene and whatnots. I've found that lighting is really important, you can never have too much.
-
-
 Here's an old favorite. Done with the Revell kit
-
What techniques are used to paint exhausts, fuel tanks,brake lines,etc.? Or is it easier to cut the floor pan loose from the frame and scratch build that stuff?
-
'35 Mercedes Benz Hot Rod - "Mad'am"- Update 01/10/18 Page 4
slownlow replied to Joca's topic in WIP: Model Cars
Like where this is going. The old Rommel's Rod also uses the 35 Mercedes. To lower the stance i Zed the front and not sure what you call the rear mod but with wheels in back you could Z there also. Keep on keep'n on.
-
Nice, good paint too
-
Thanks all for the kind comments
-
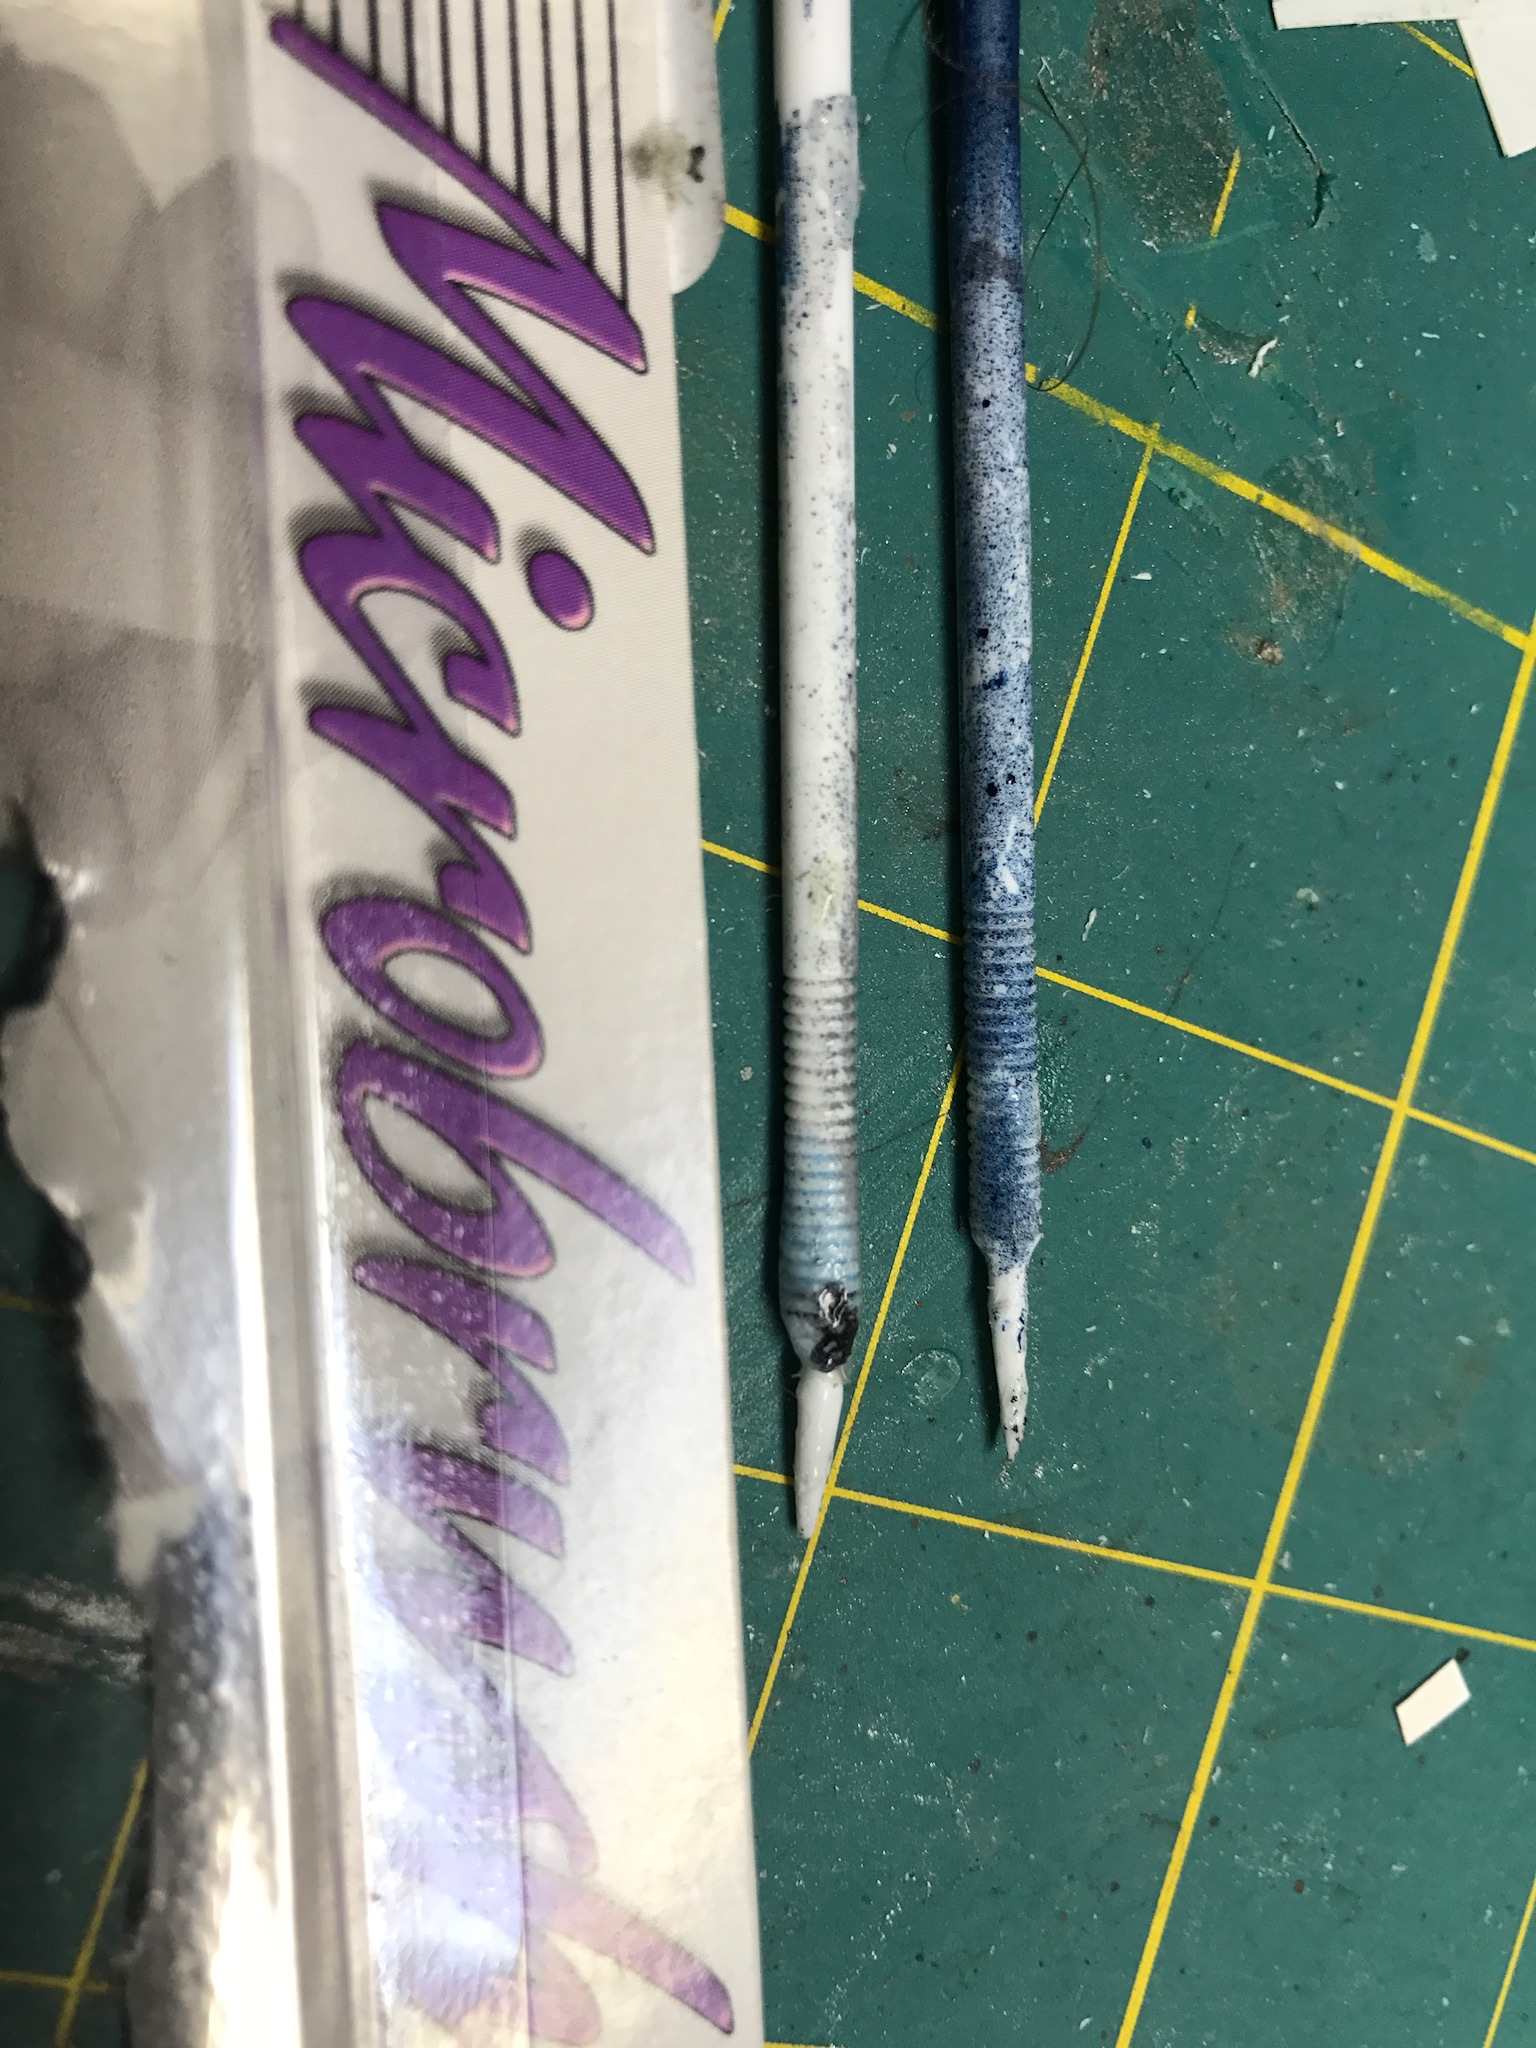
I currently don't have an unused microbrush to photo but hopefully you can visualize one from the 2 used ones in the pic. When new they have a small tuft at the tip for small paint or glue application. They are made of plastic and I use only the serrated section, bent the curve and pinn the ends by way of short lengths of straight pin to the engine and body.
-
One of the things that stumped me for a while was fabricating flexible ducts for engine air intake on my last project. I finally tumbled onto this solution after using these applicators many times for their intended use.
-
Well she's close enough to be called done. My thanks to all those making suggestions adding detail and depth to this effort.
-
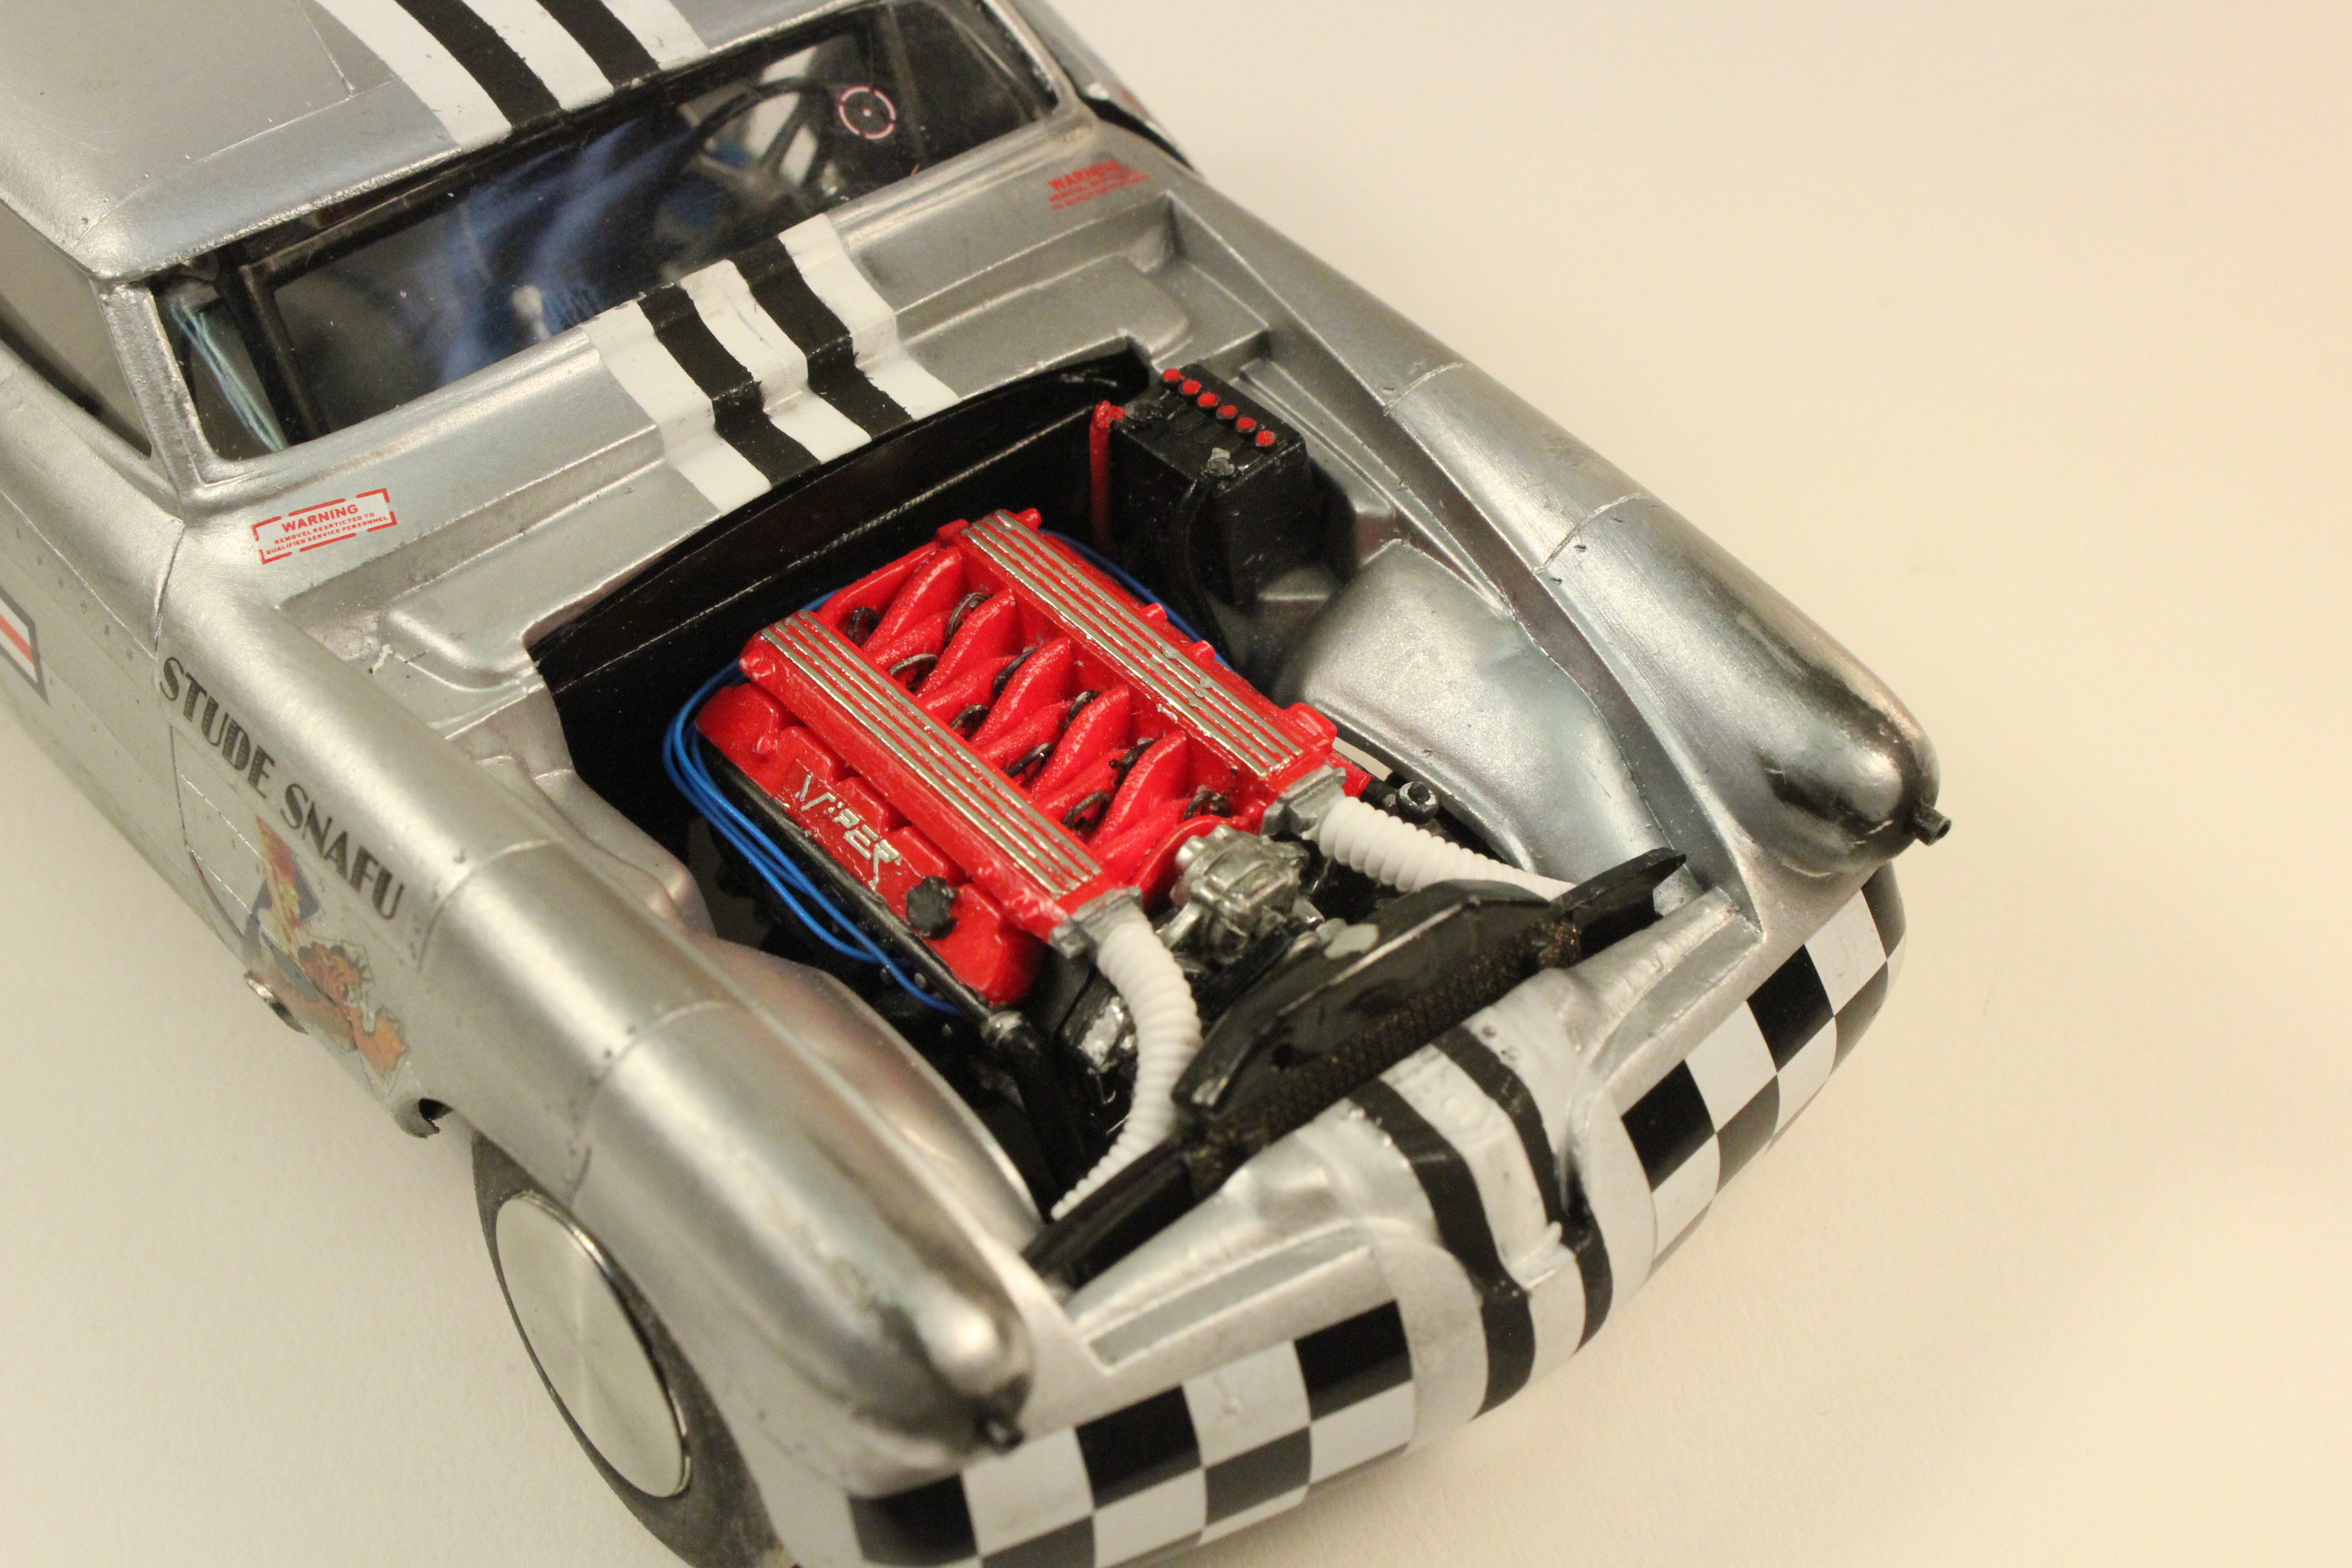
I'm thinking for nose art doing something with SNAFU'D STUDE and instead of swastikas denoting kills using blue ovals and bow ties. Also playing with the idea of a gun sticking out the headlight bulges. The Dzus fasteners would be cool. If I sharpen the inside my glue needle to make a small circle and a little scribe bisecting the circle it would look about right.
-
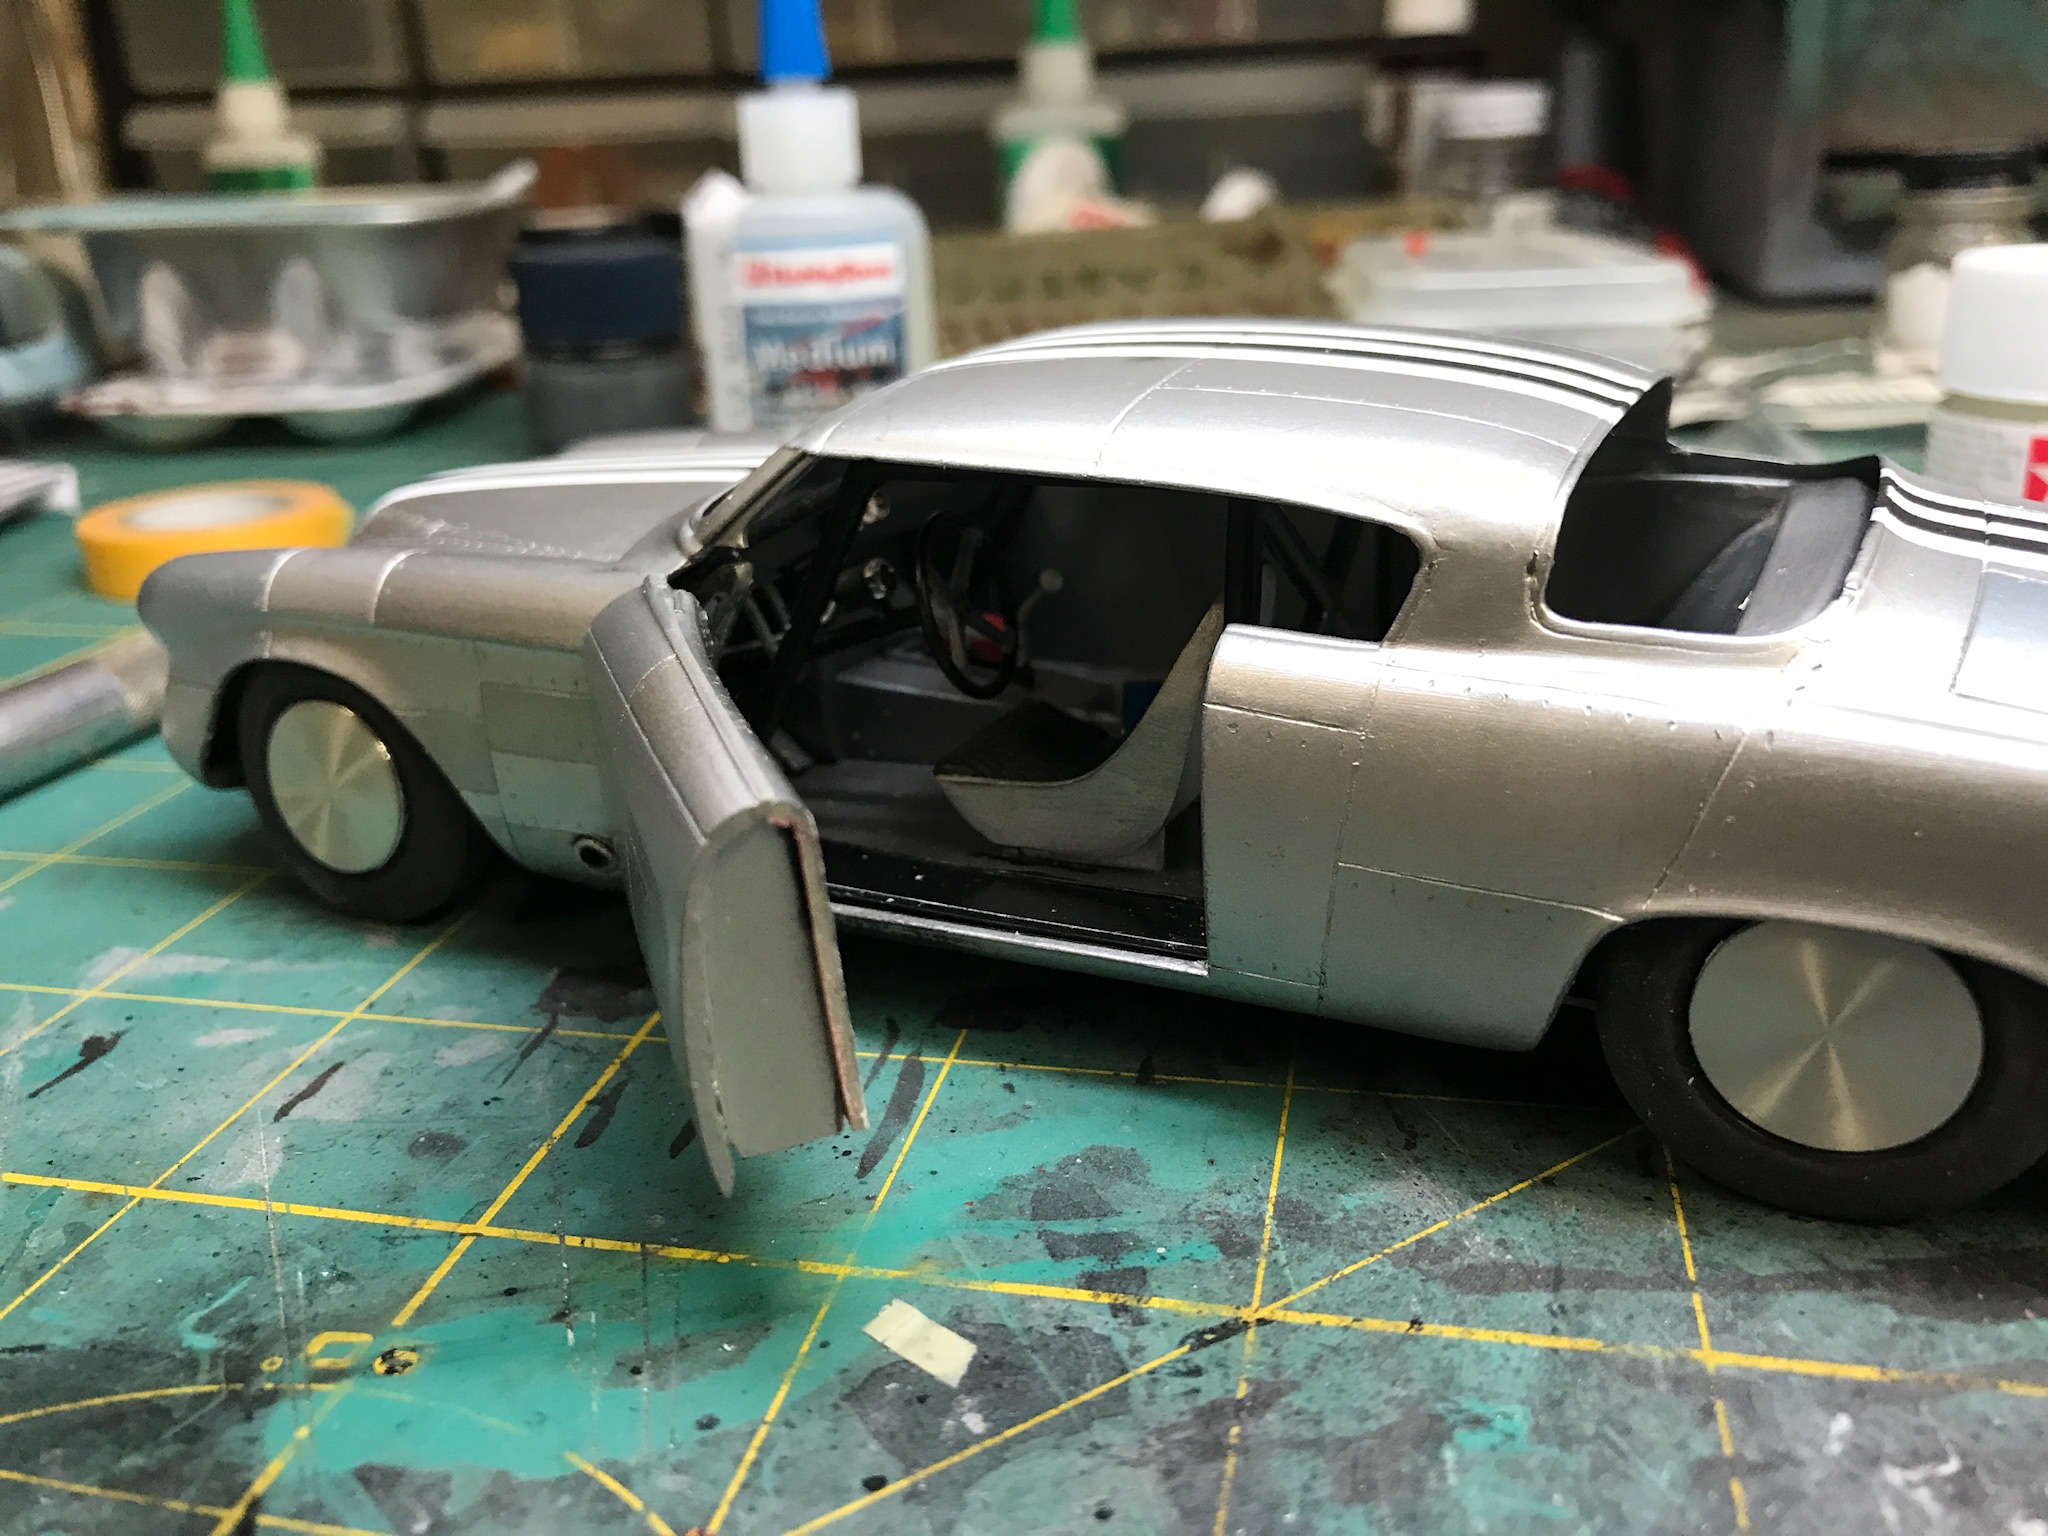
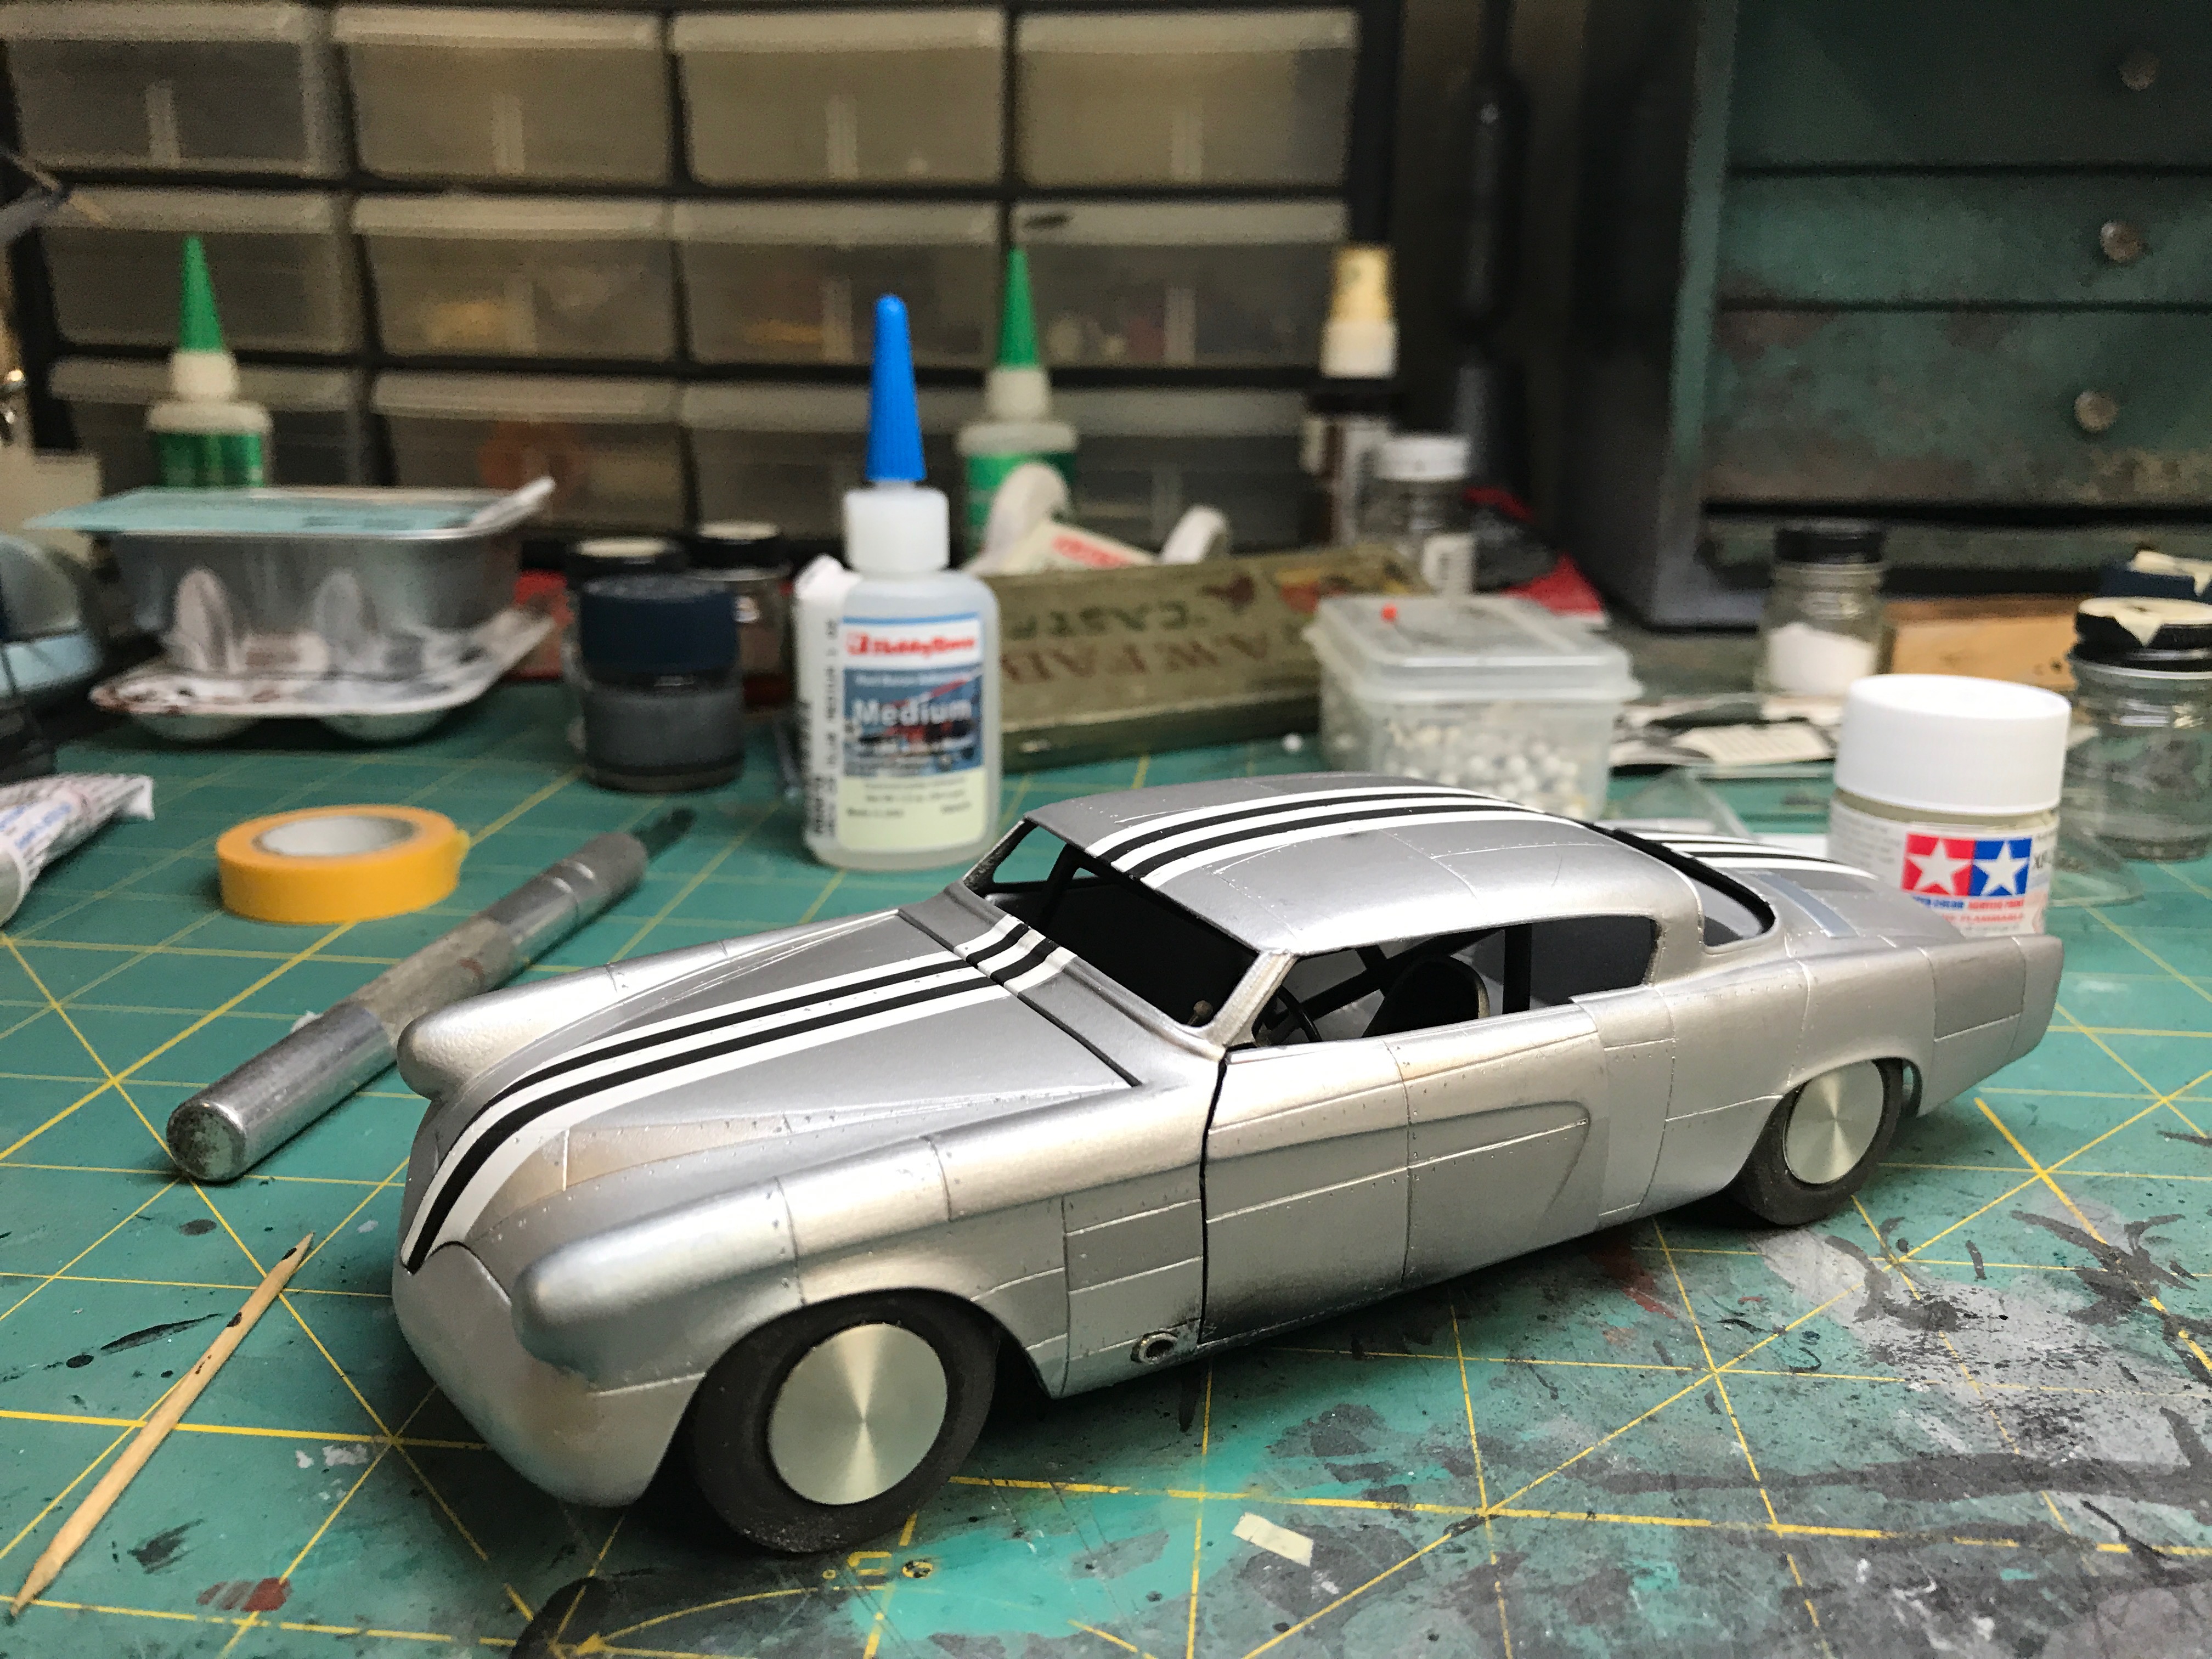
More progress. Painted the D Day racing stripe and think I'll extend it down on the front bumper. Also hung the door and it's working smooth.
-
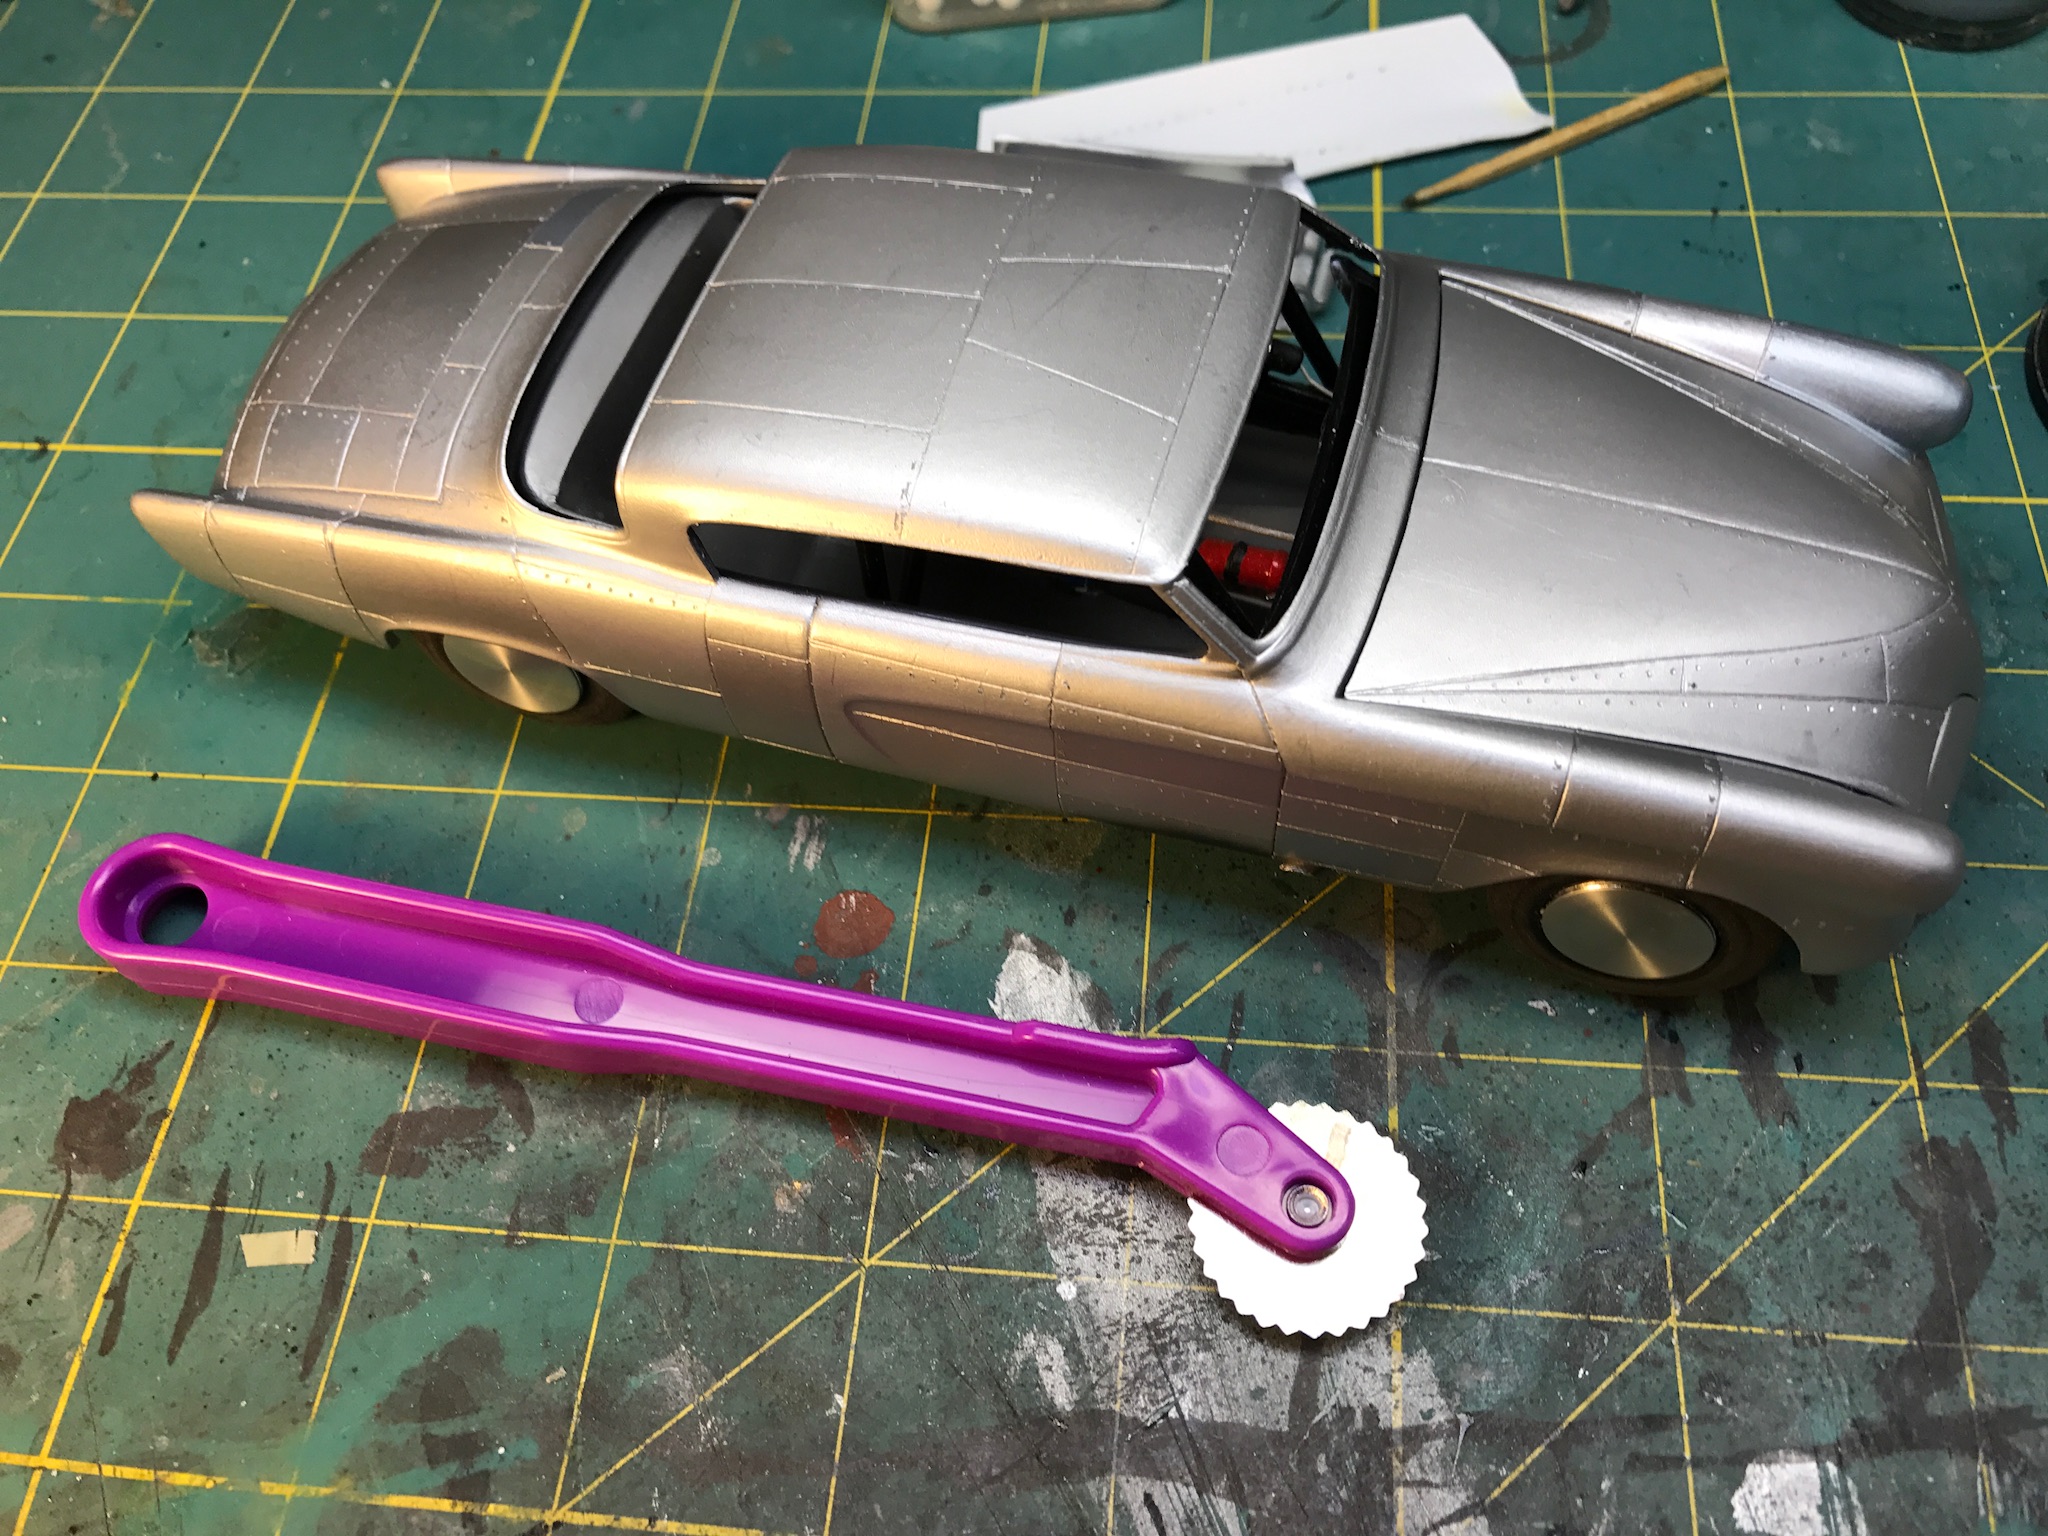
Here's more progress. The panel seams got "rivets". It seems to add a lot to,the overall look and the tool I used is a seamstress marking wheel. The teeth are sharpened to leave a crisper mark
-
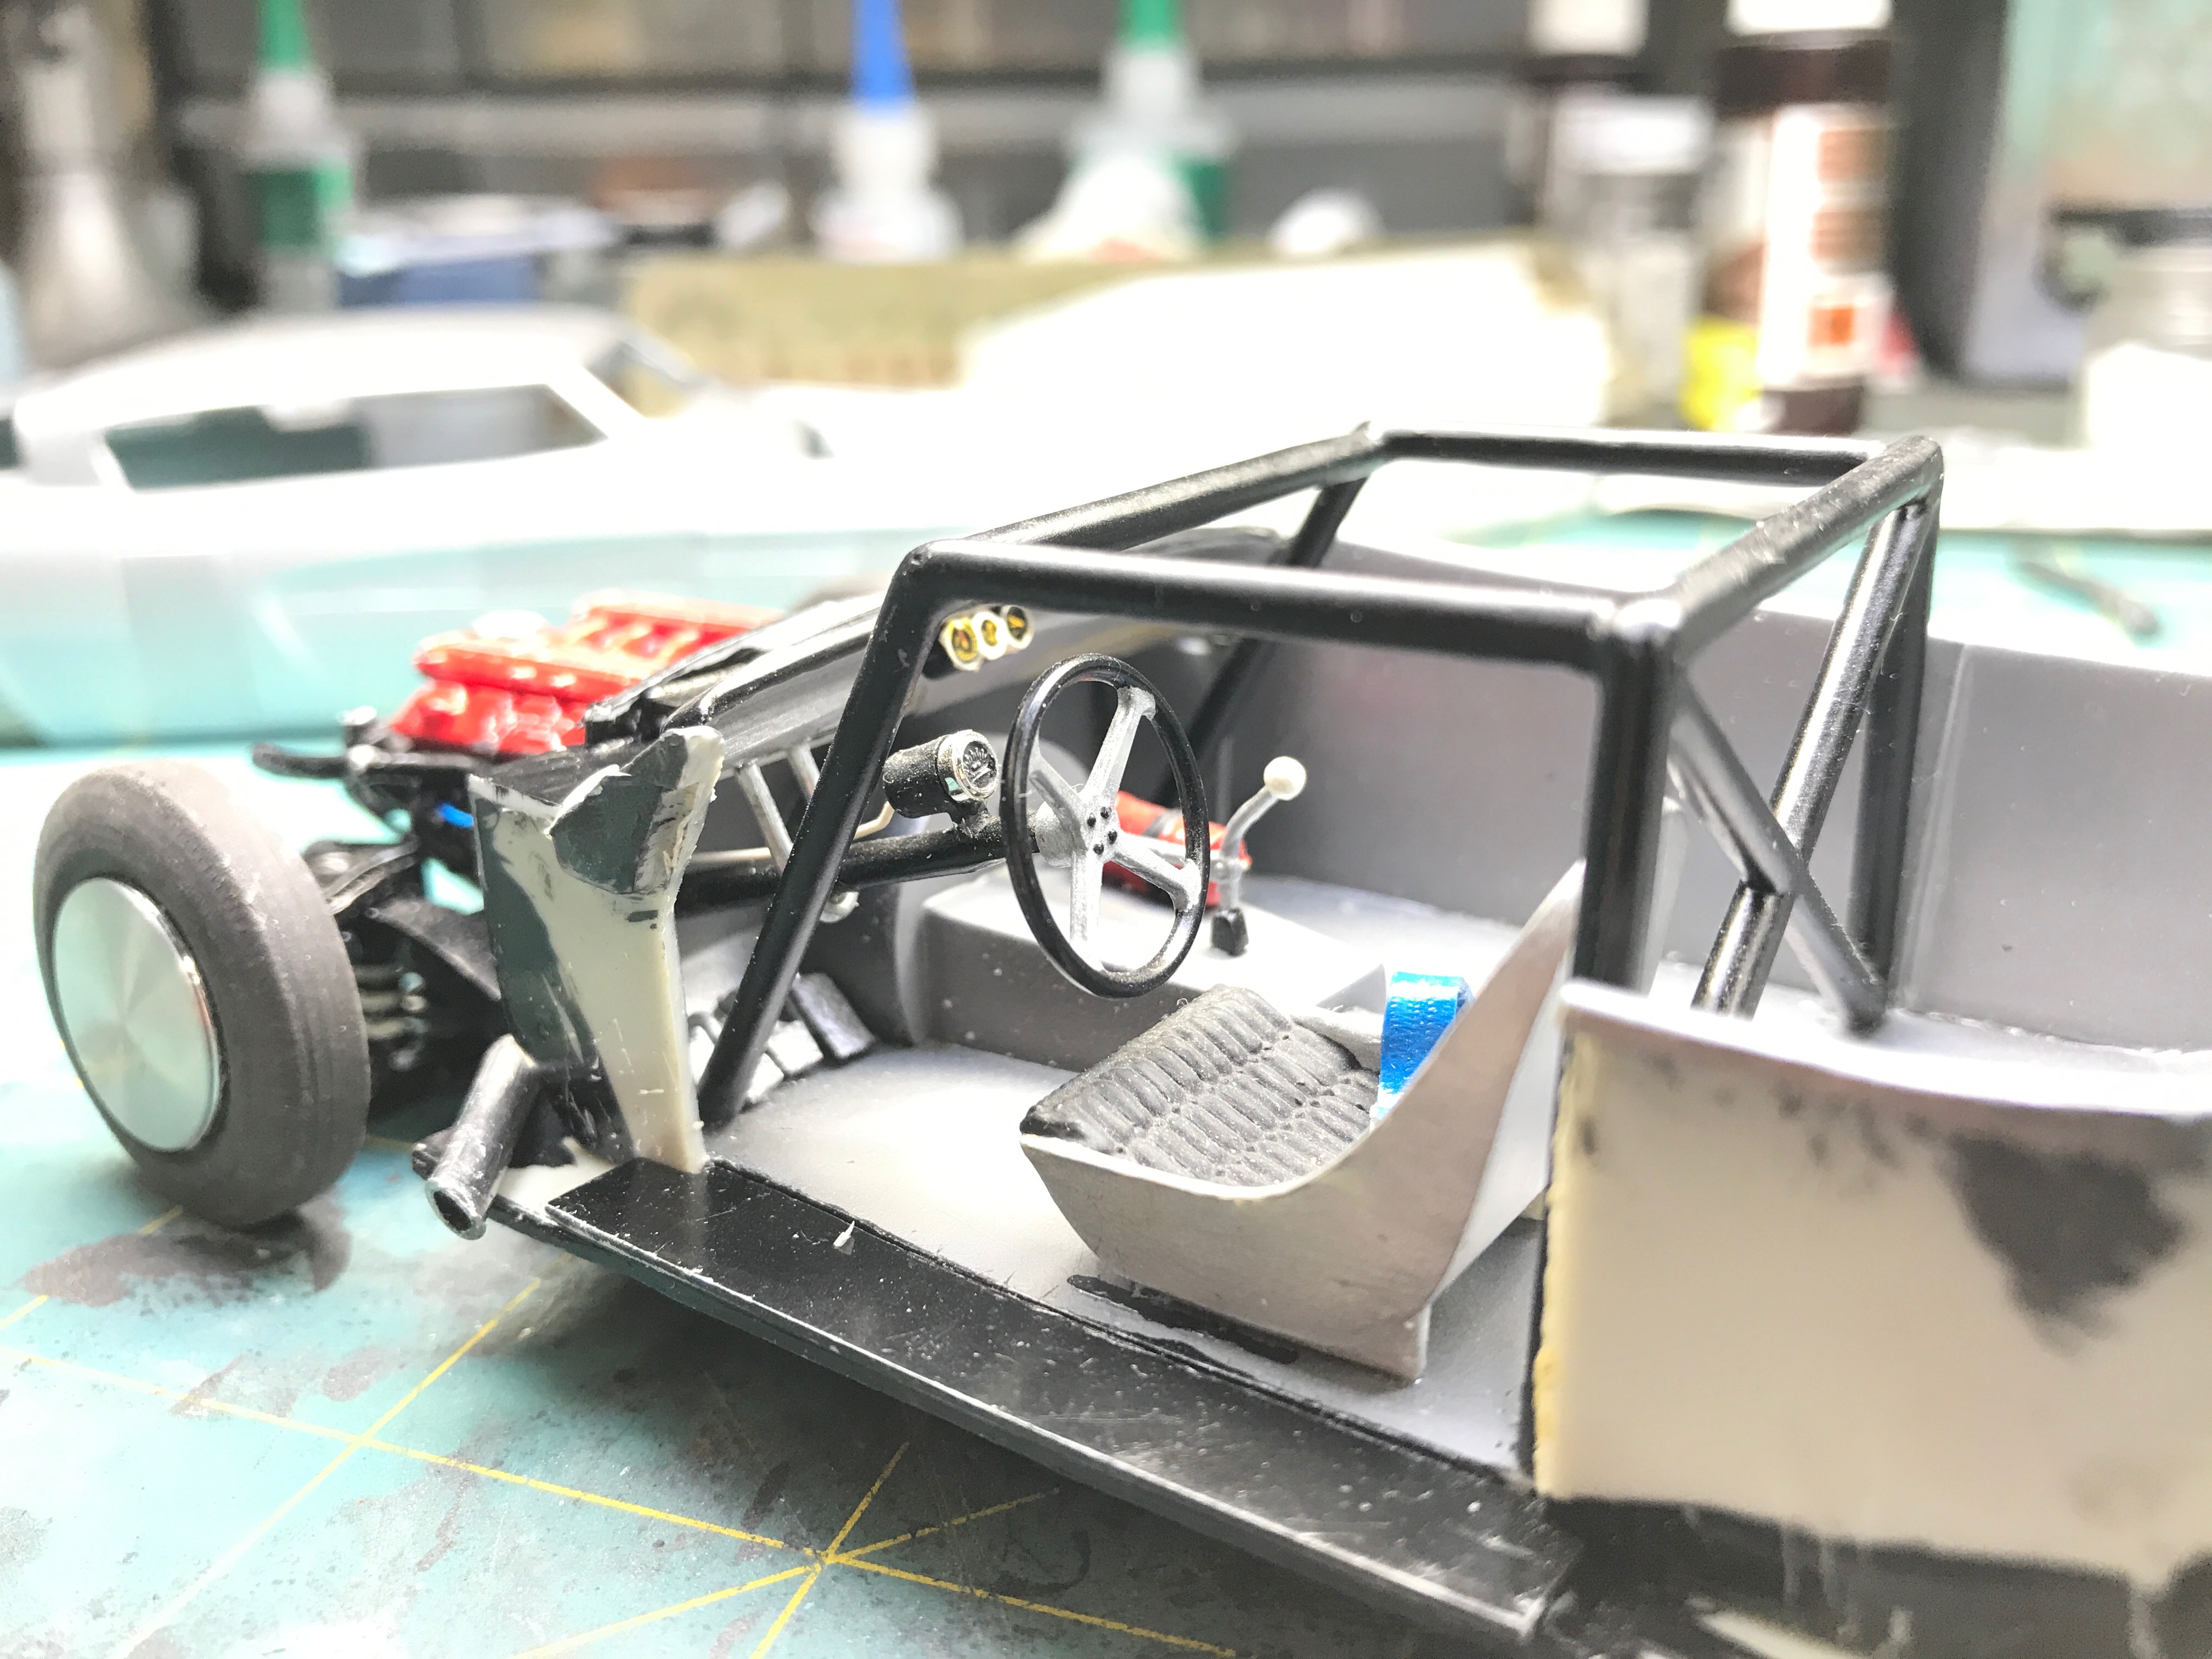
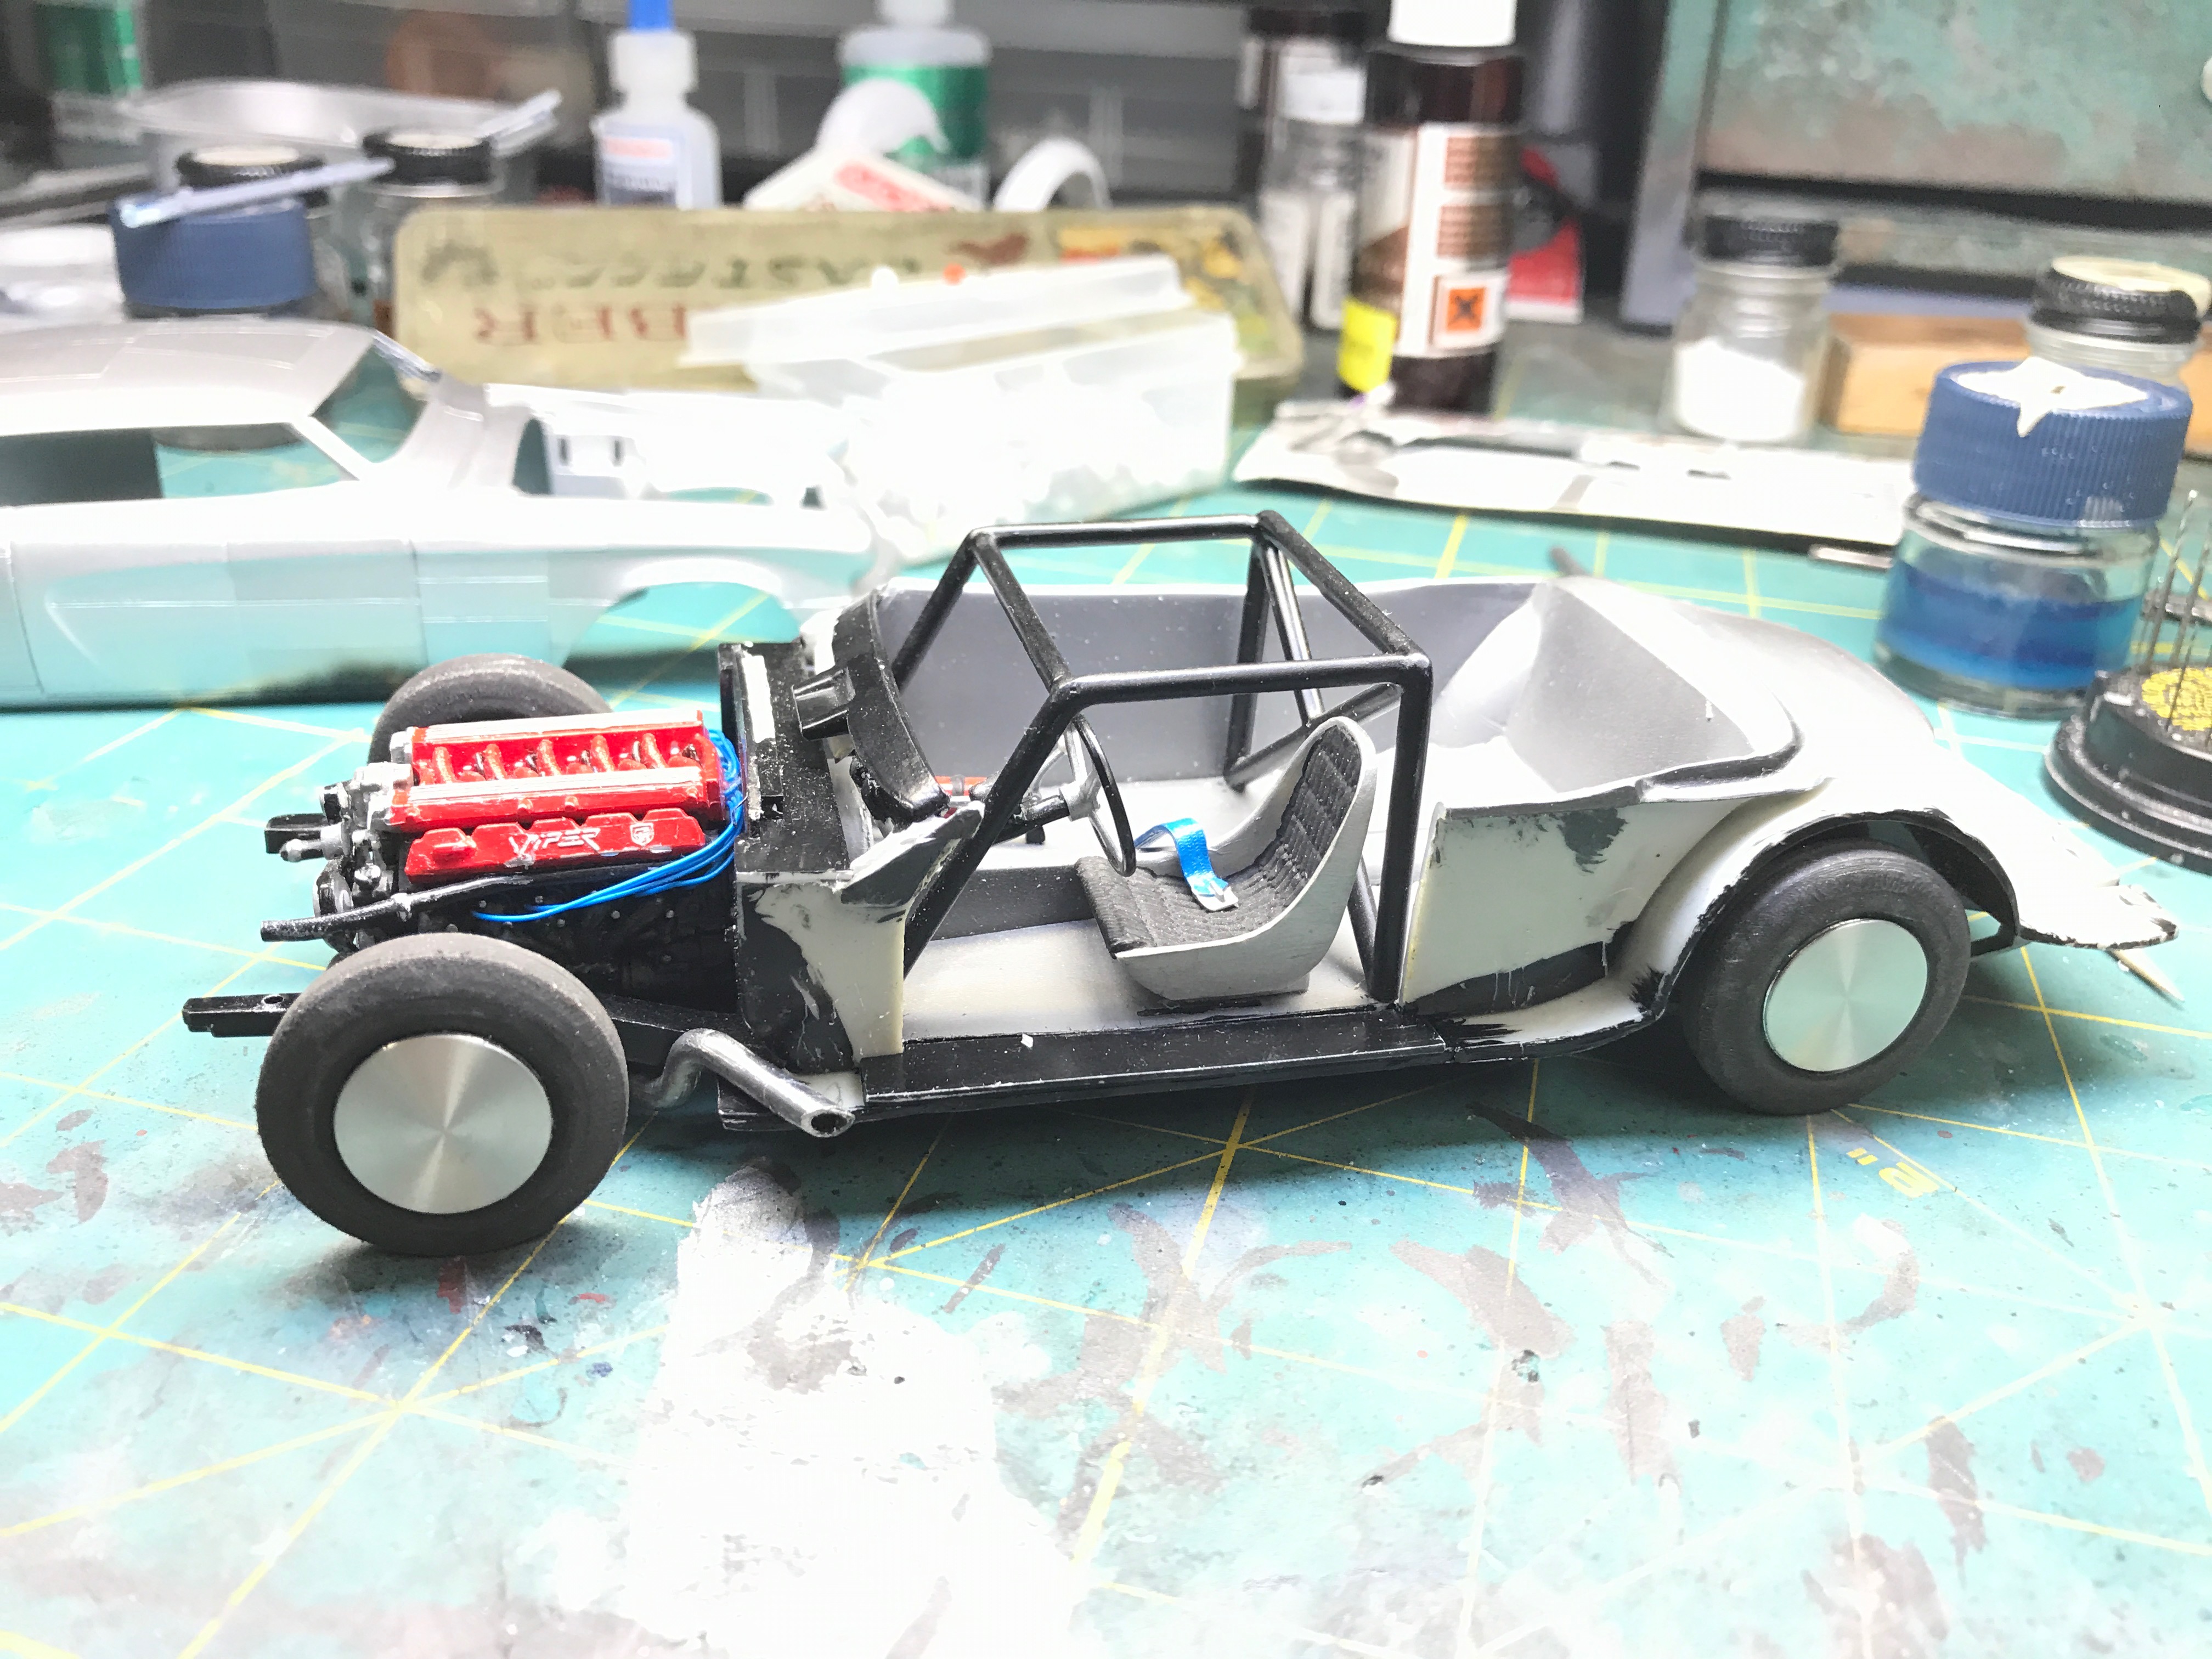
Thanks for the comments. This is intended to be a lakes car destined for Nevada , El Mirage, or .... that's why I sanded down the tires to a smaller contact patch. In regards to the roll cage it's kit supplied and I'm not too concerned about reality with this project, more into the looks and feel of the car. Tom Woodruff what are you referring to as aircraft fasteners? Rivets or some kind of screw locking system or .....? It sounds interesting.
-
I like the direction this is going. Did something similar to your chop a while back but your giving the whole car a nice direction. Keep up posted
-
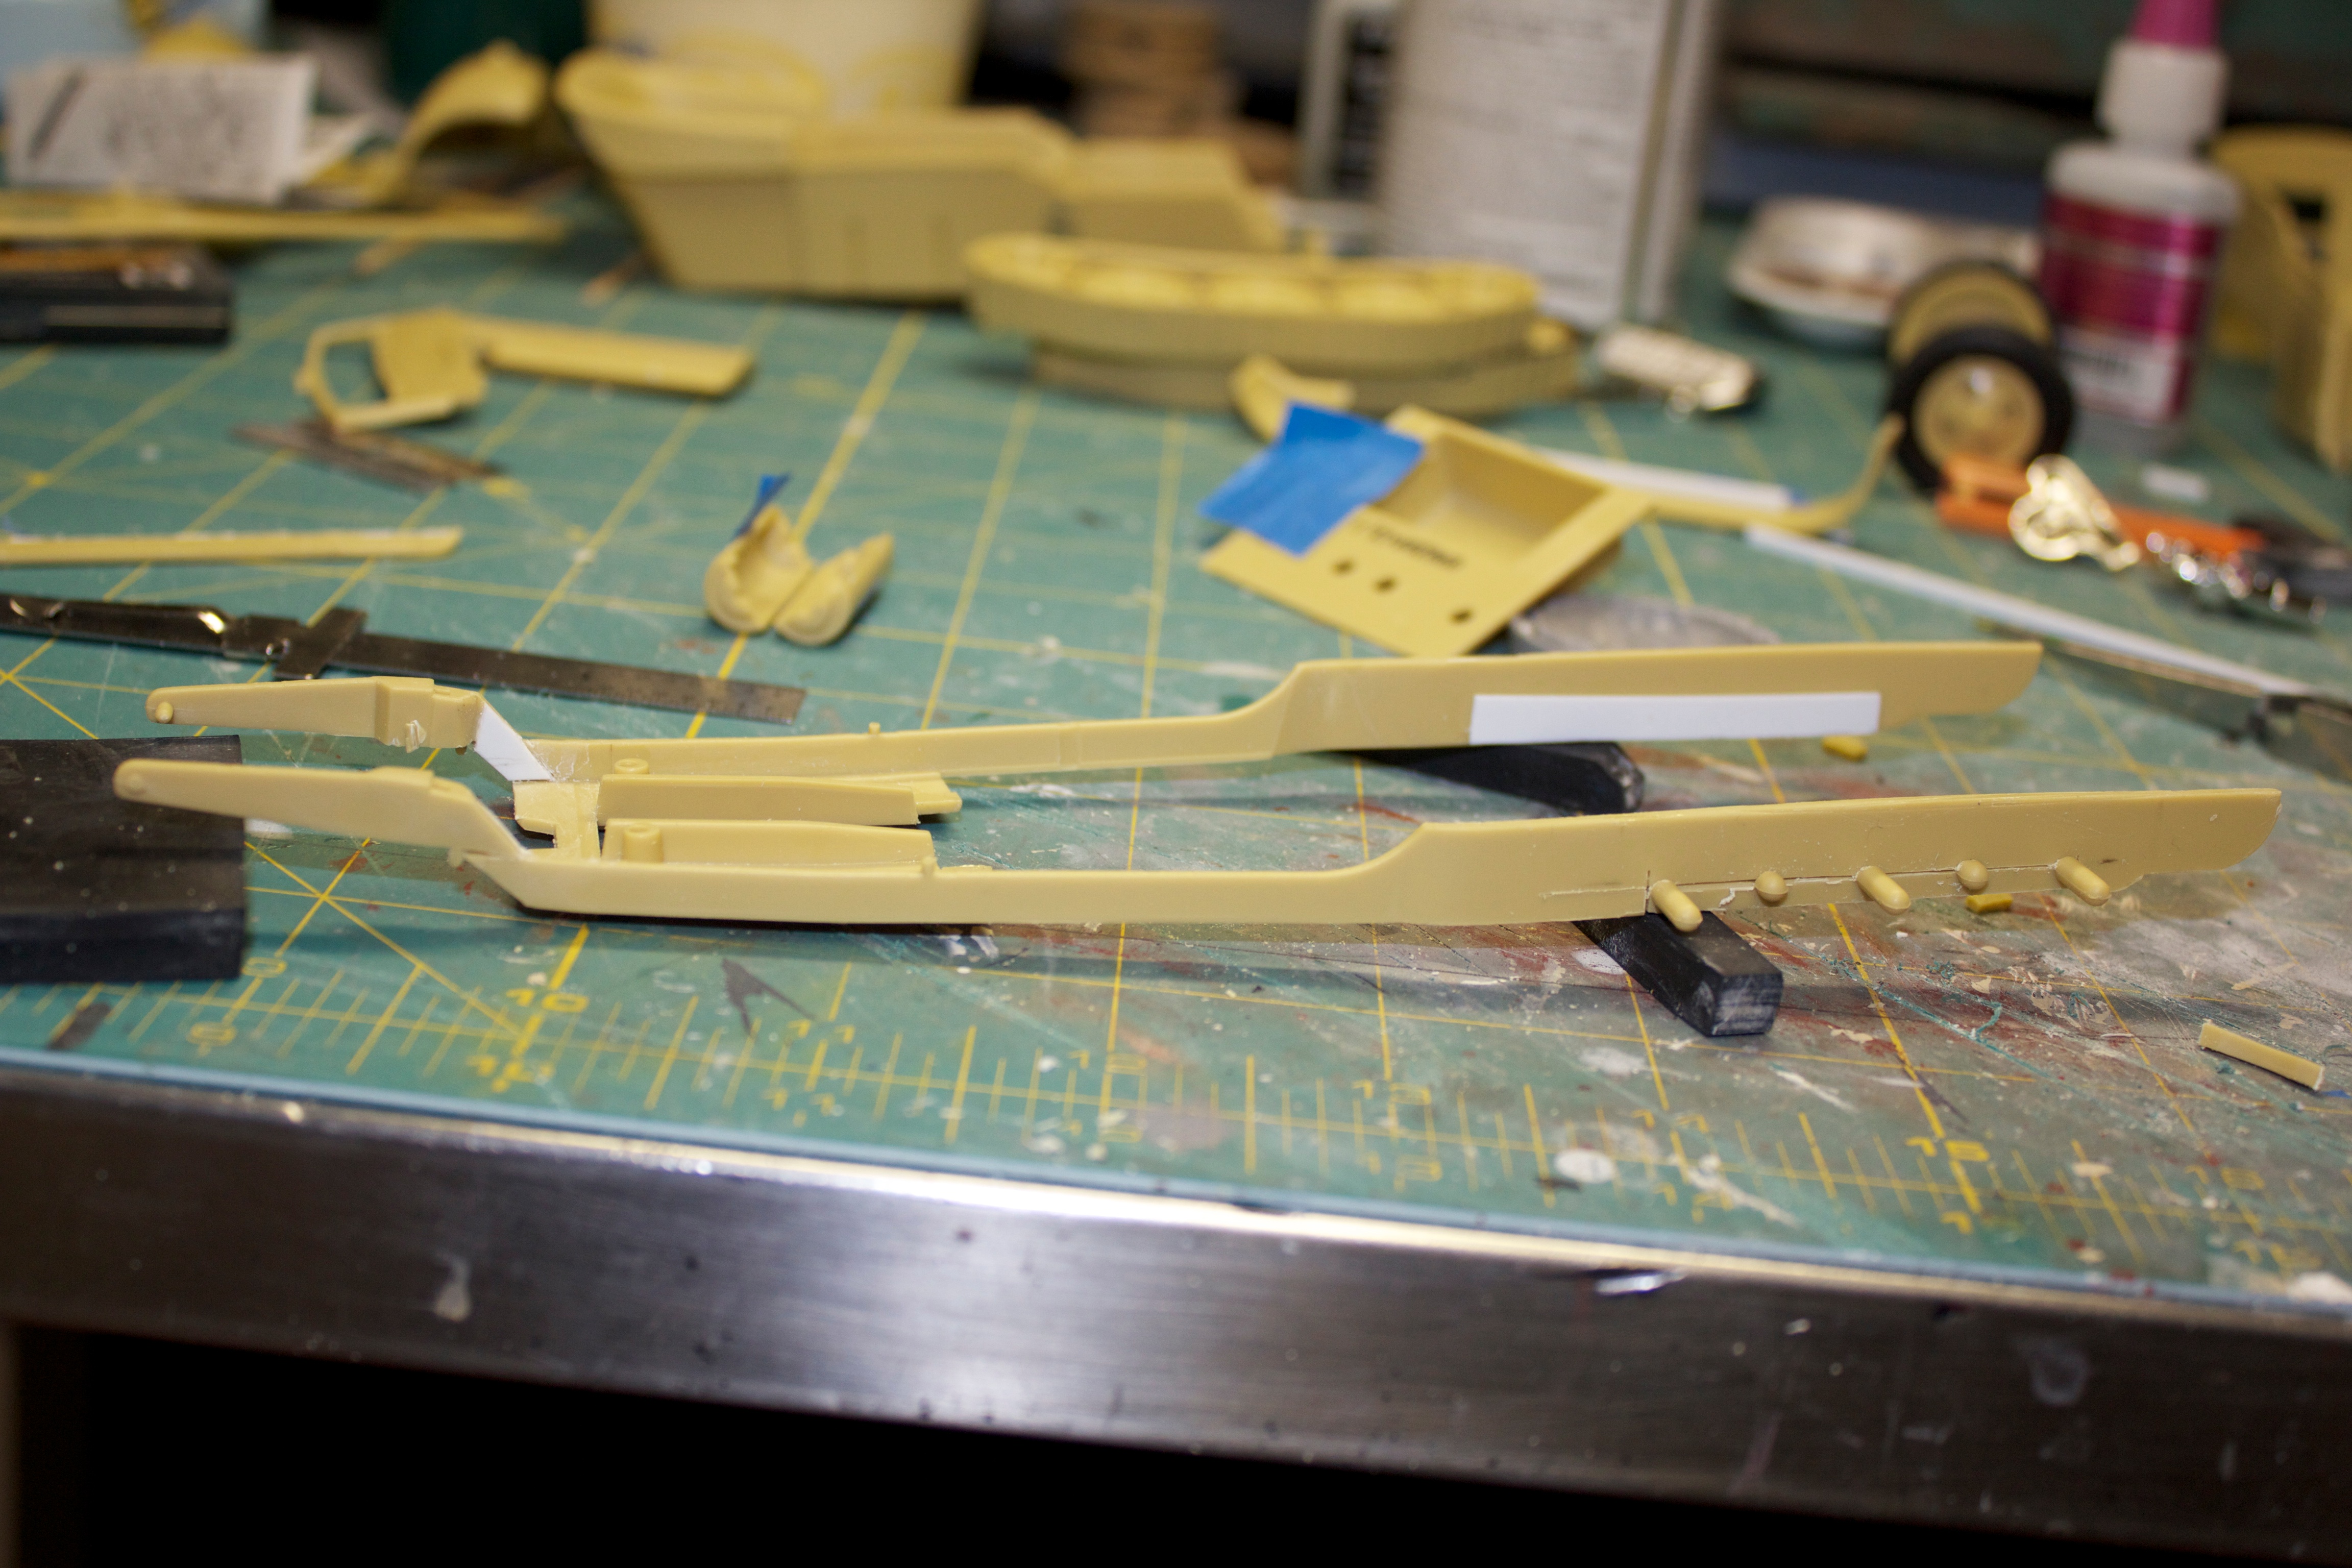
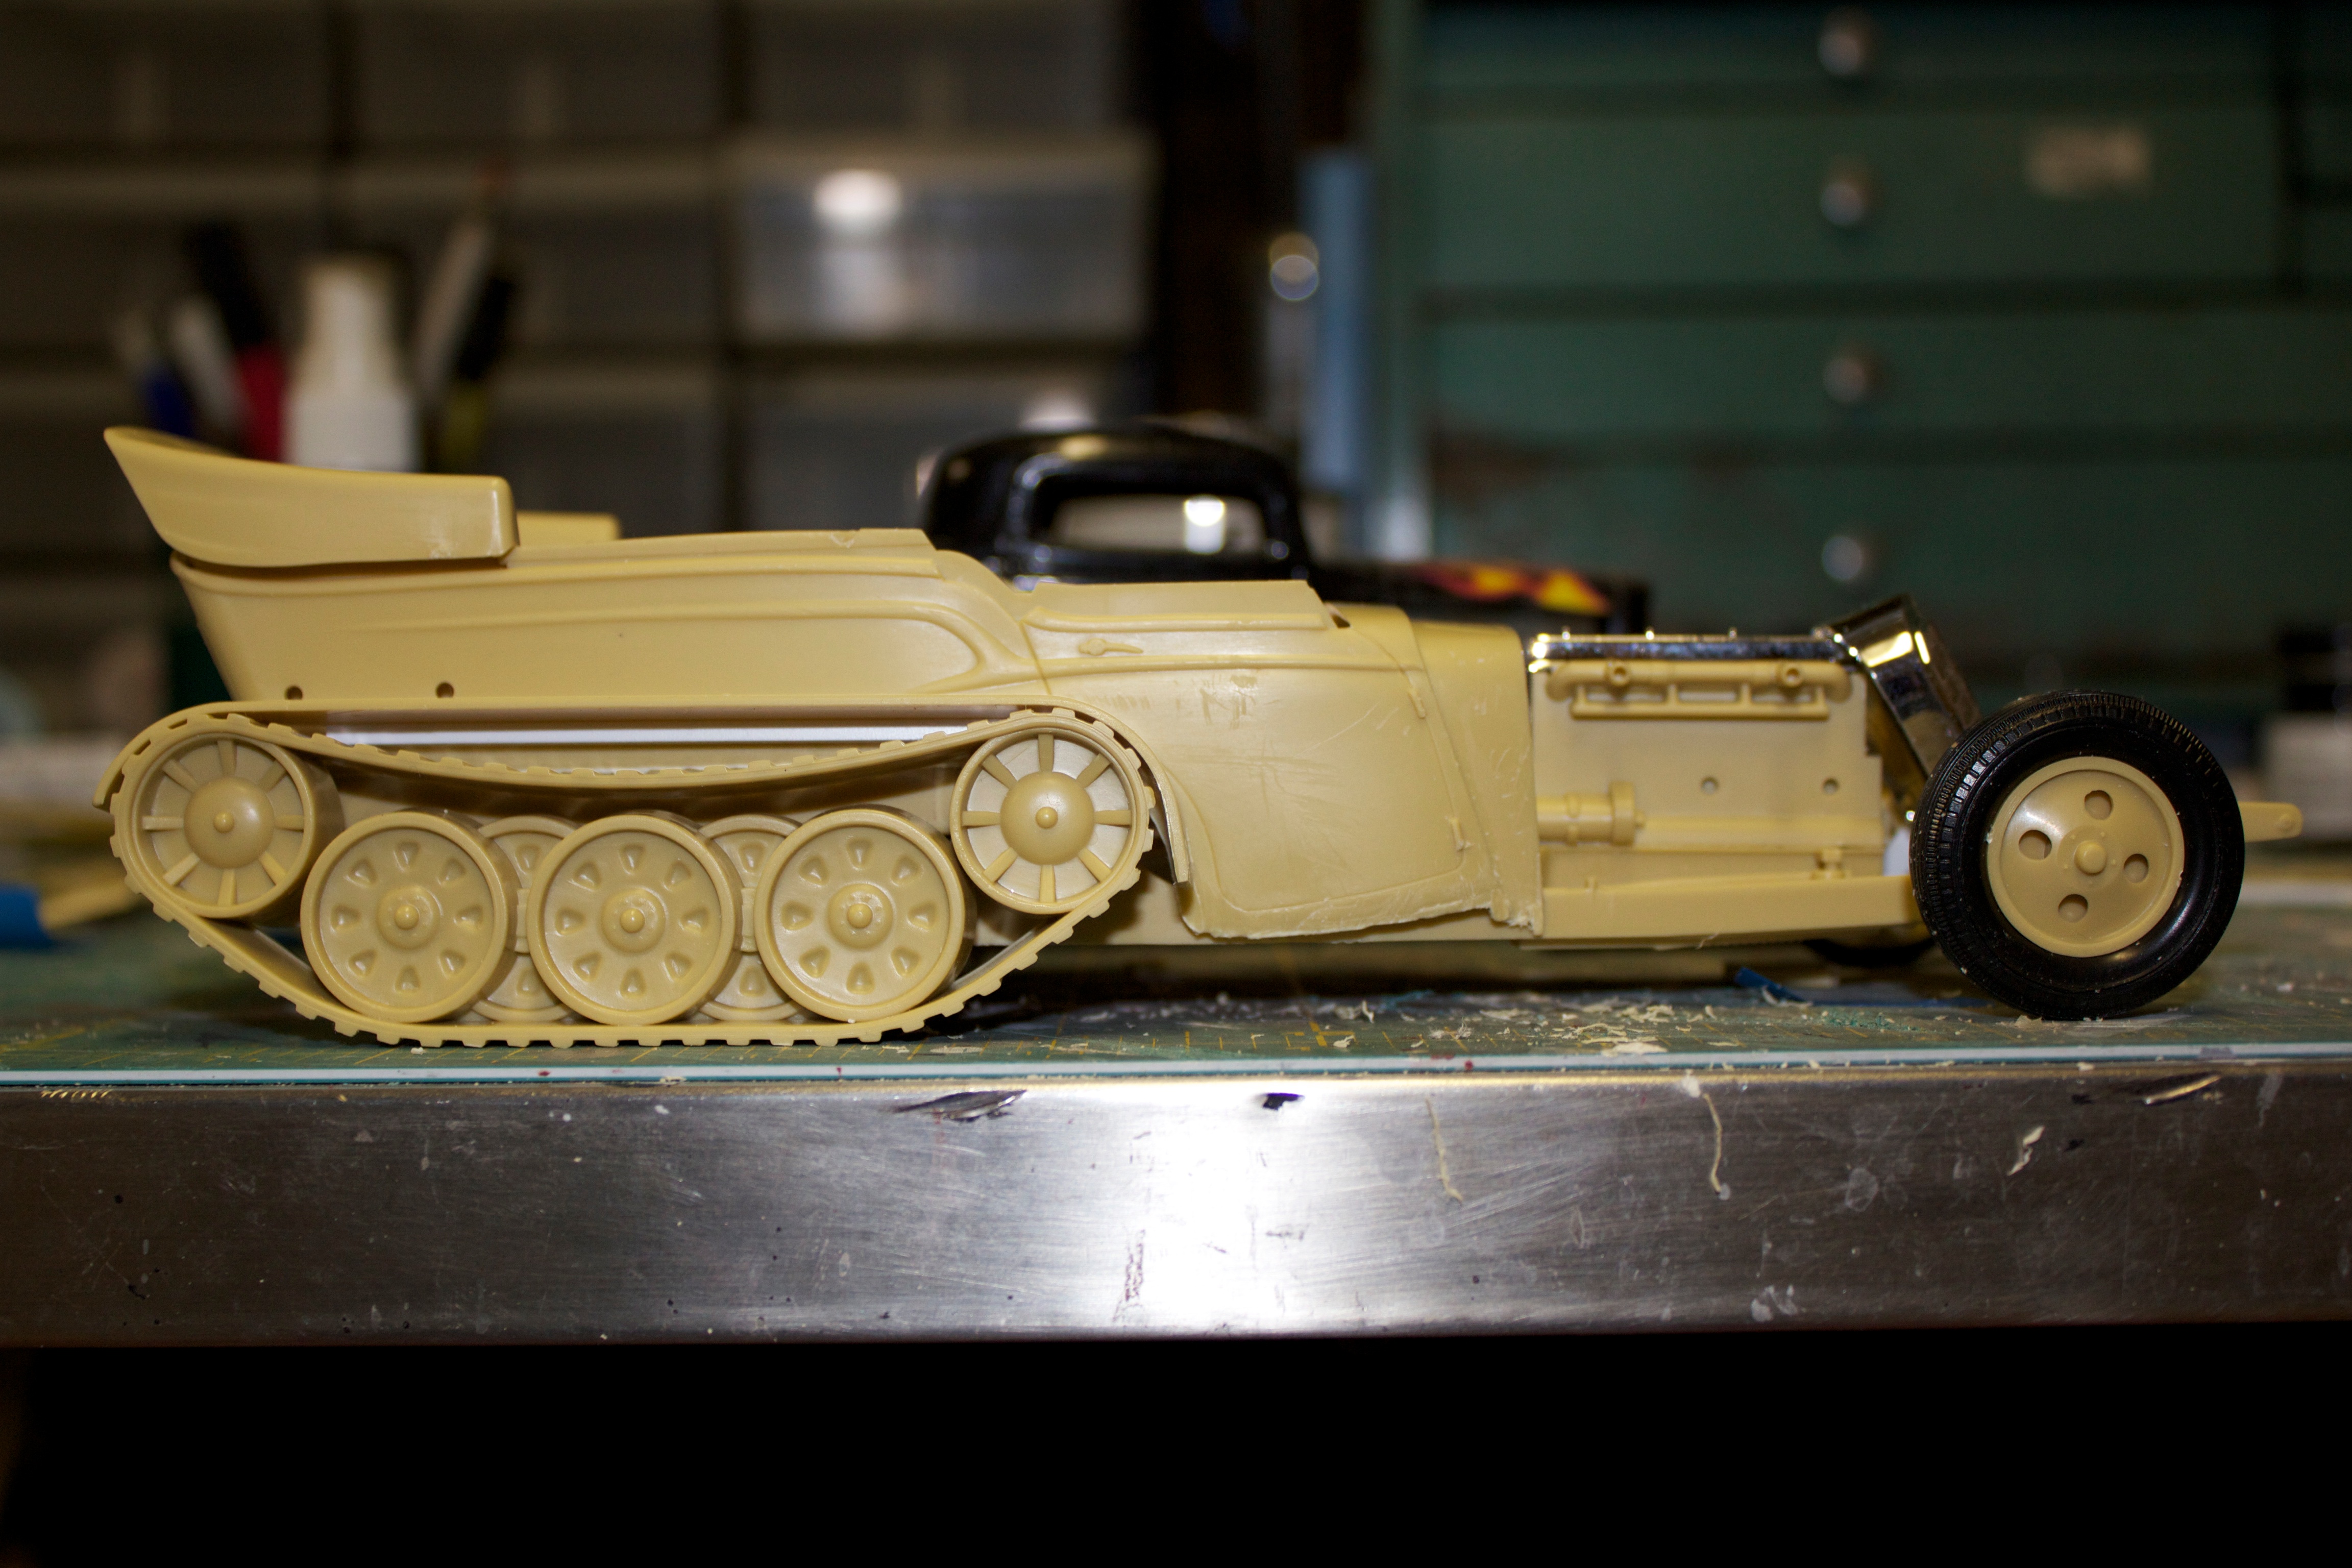
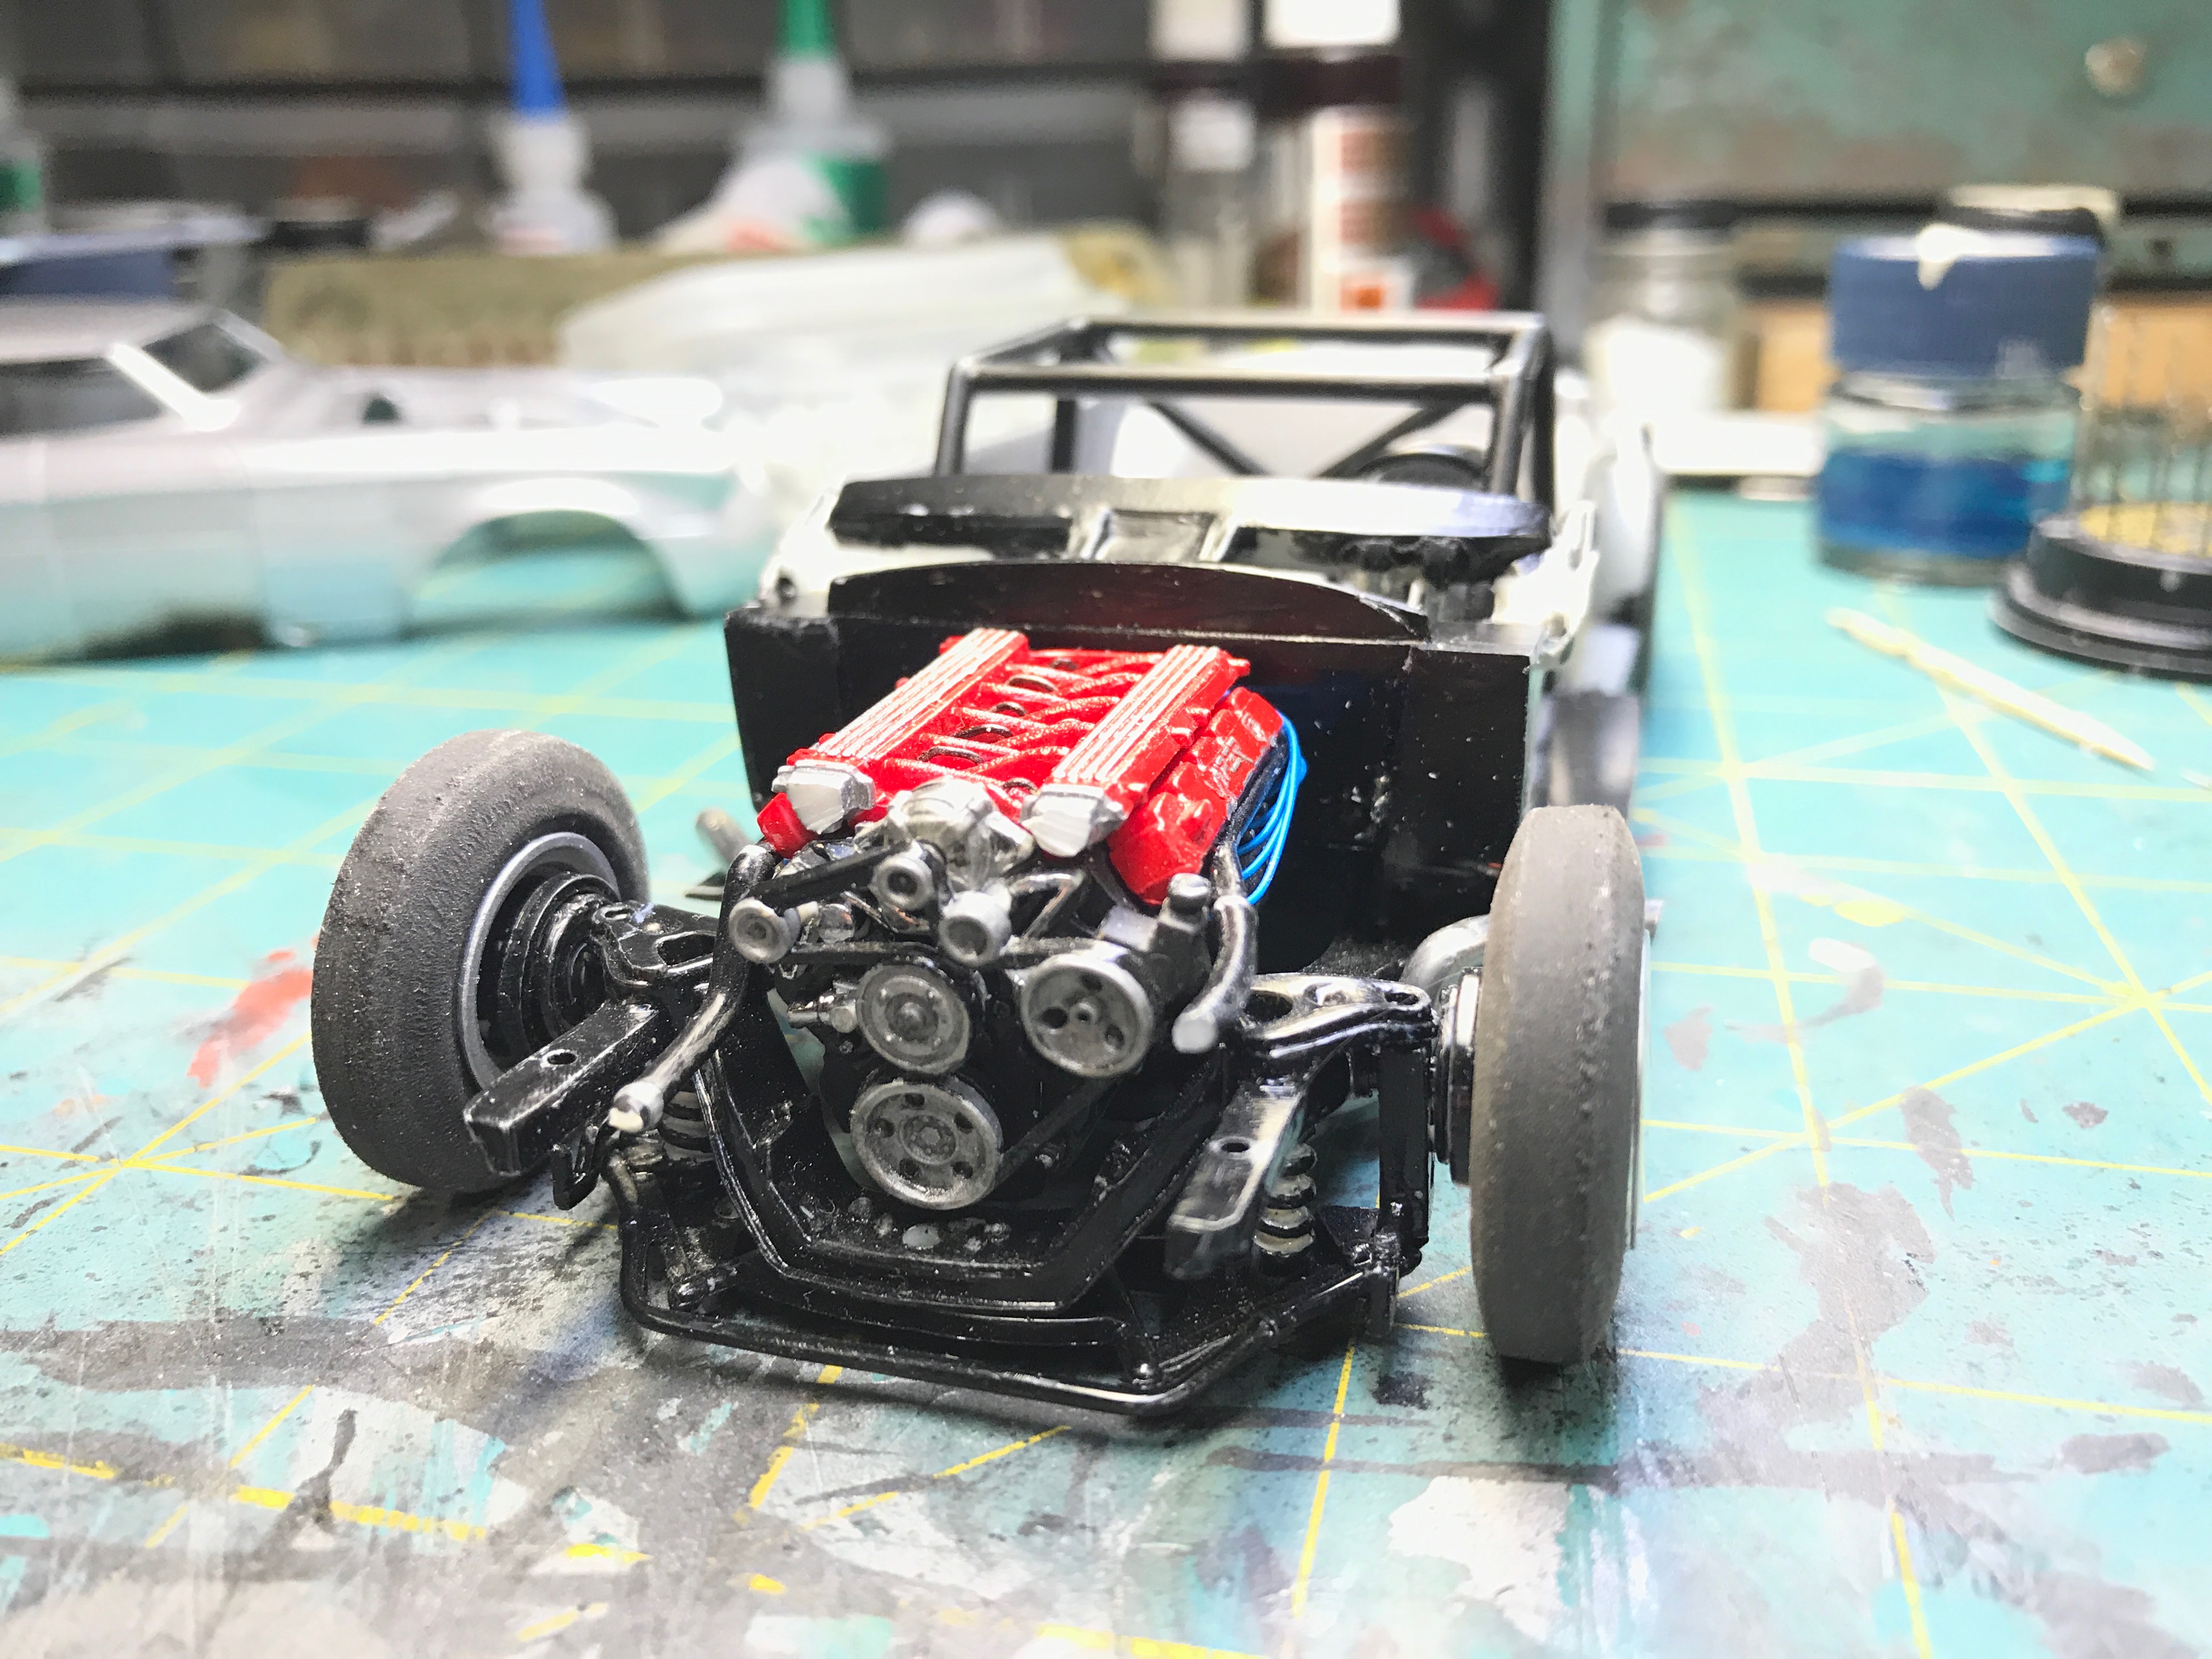
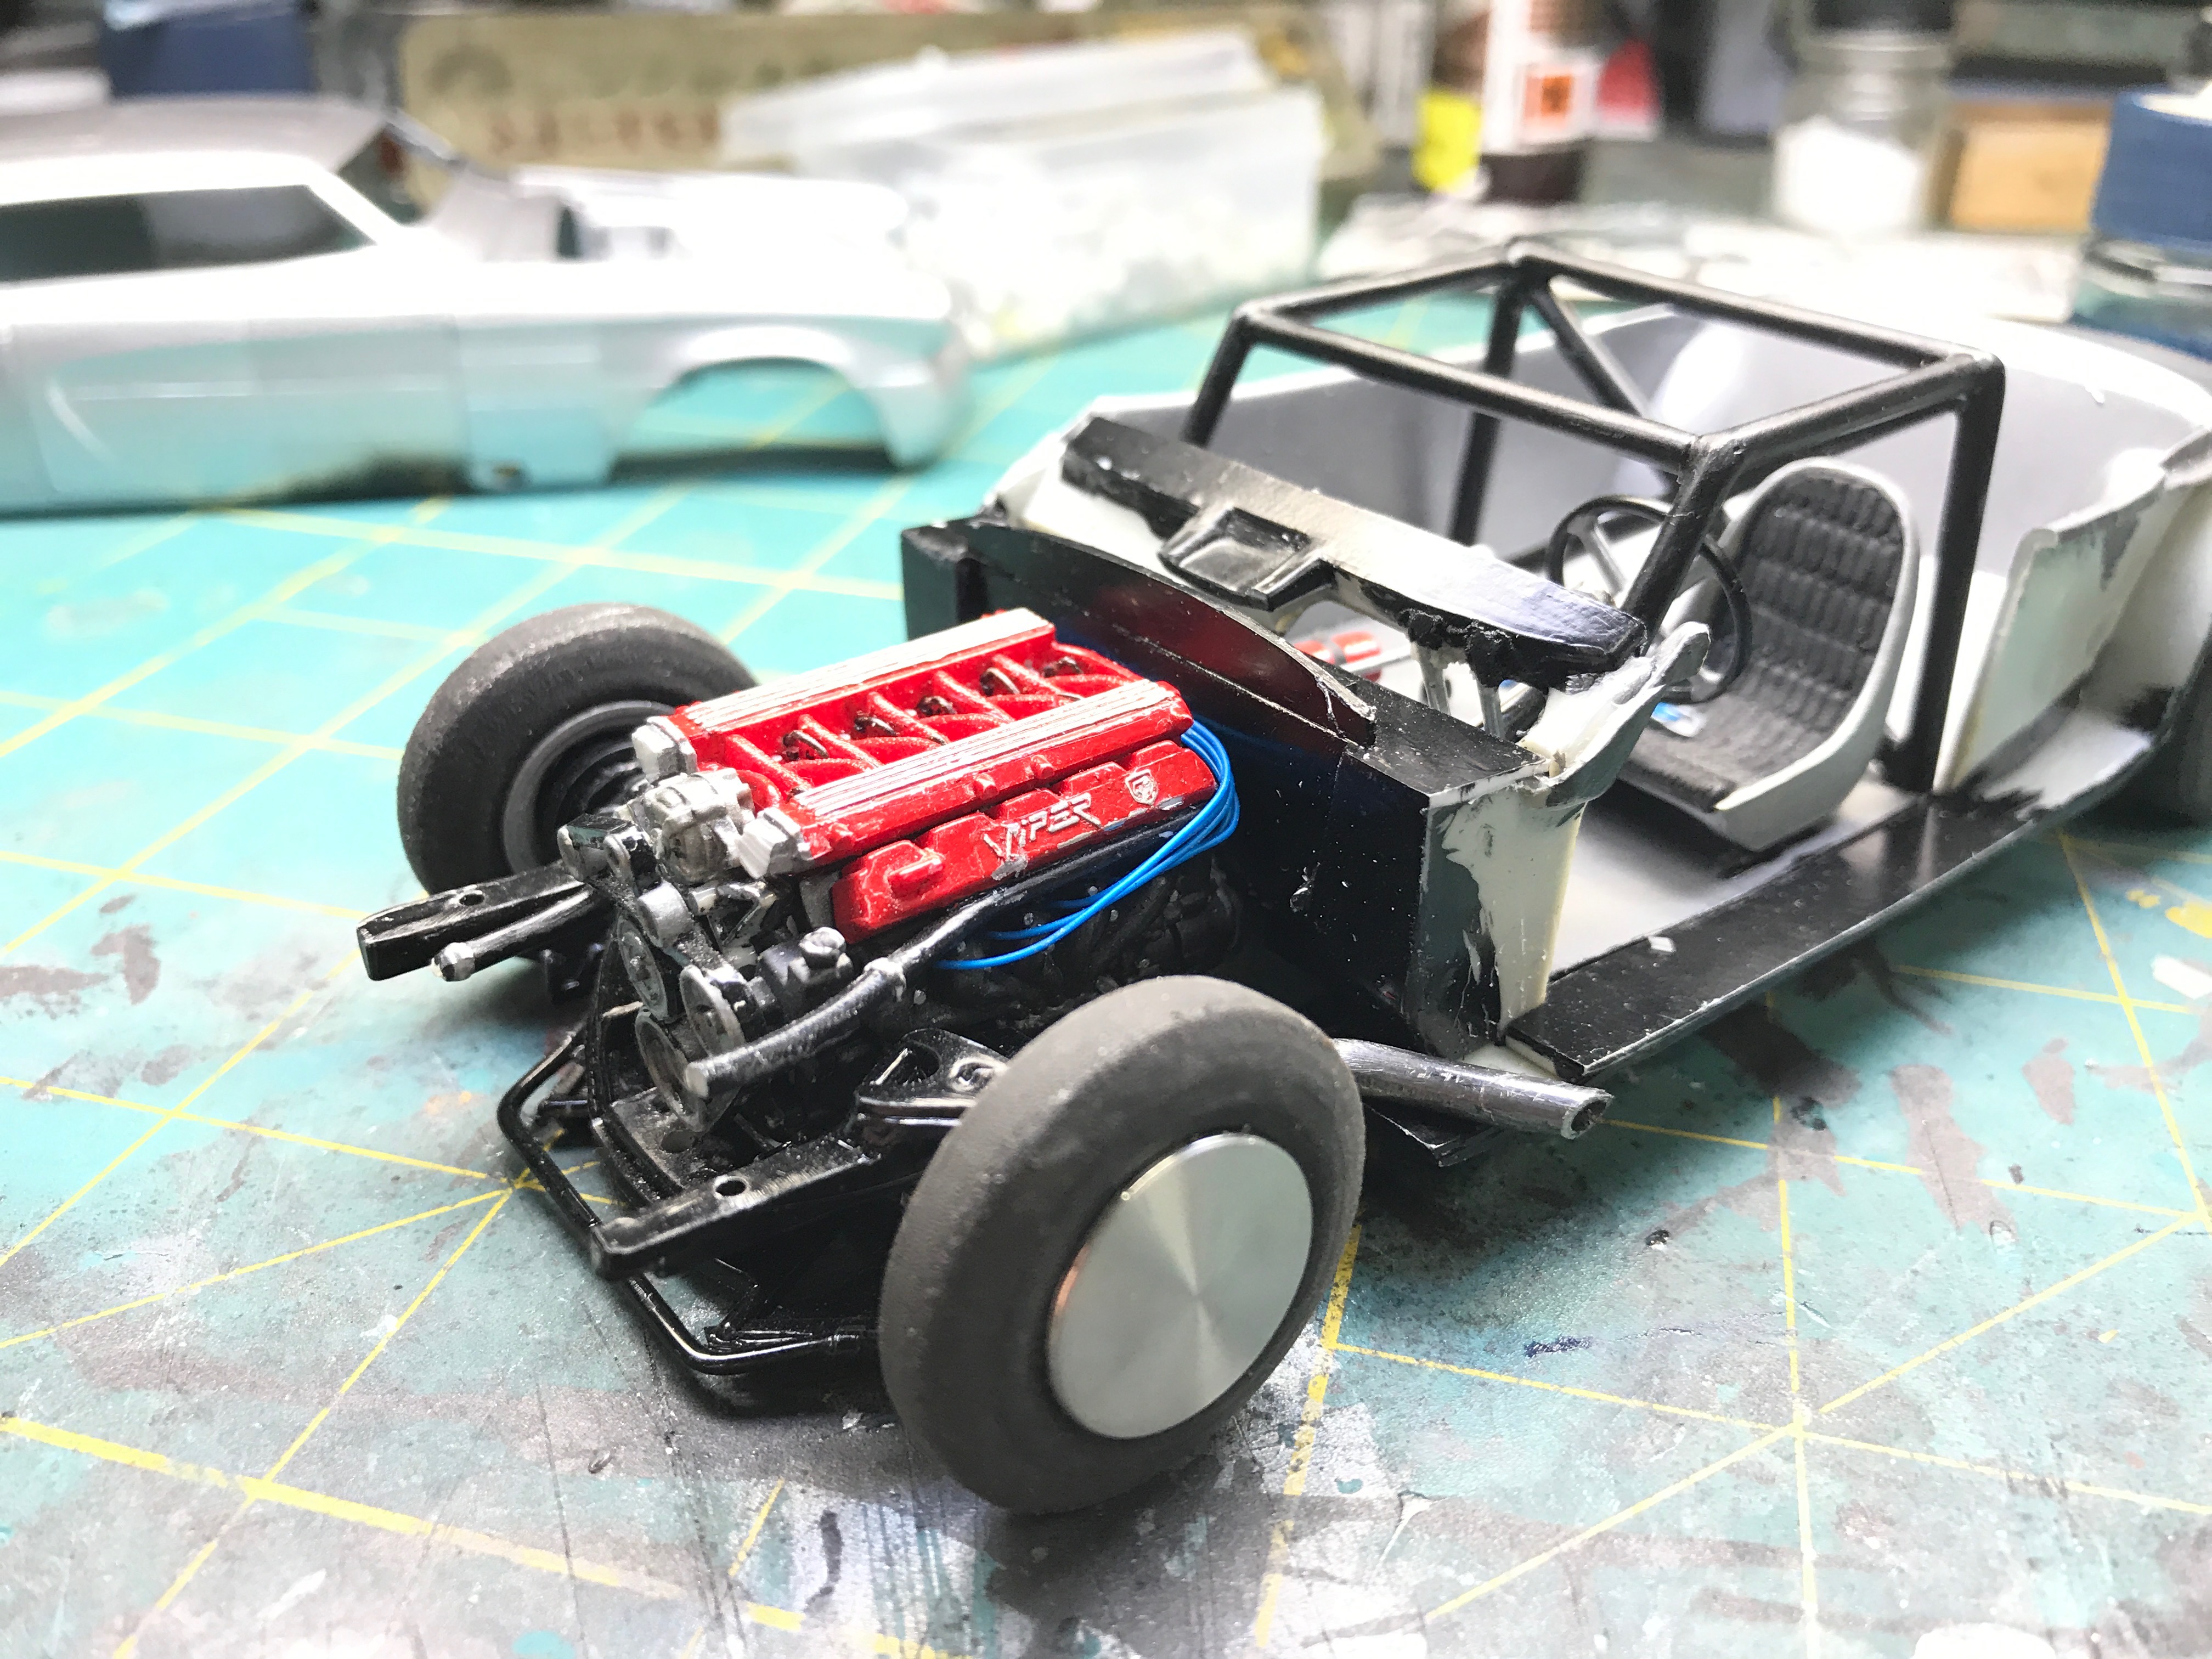
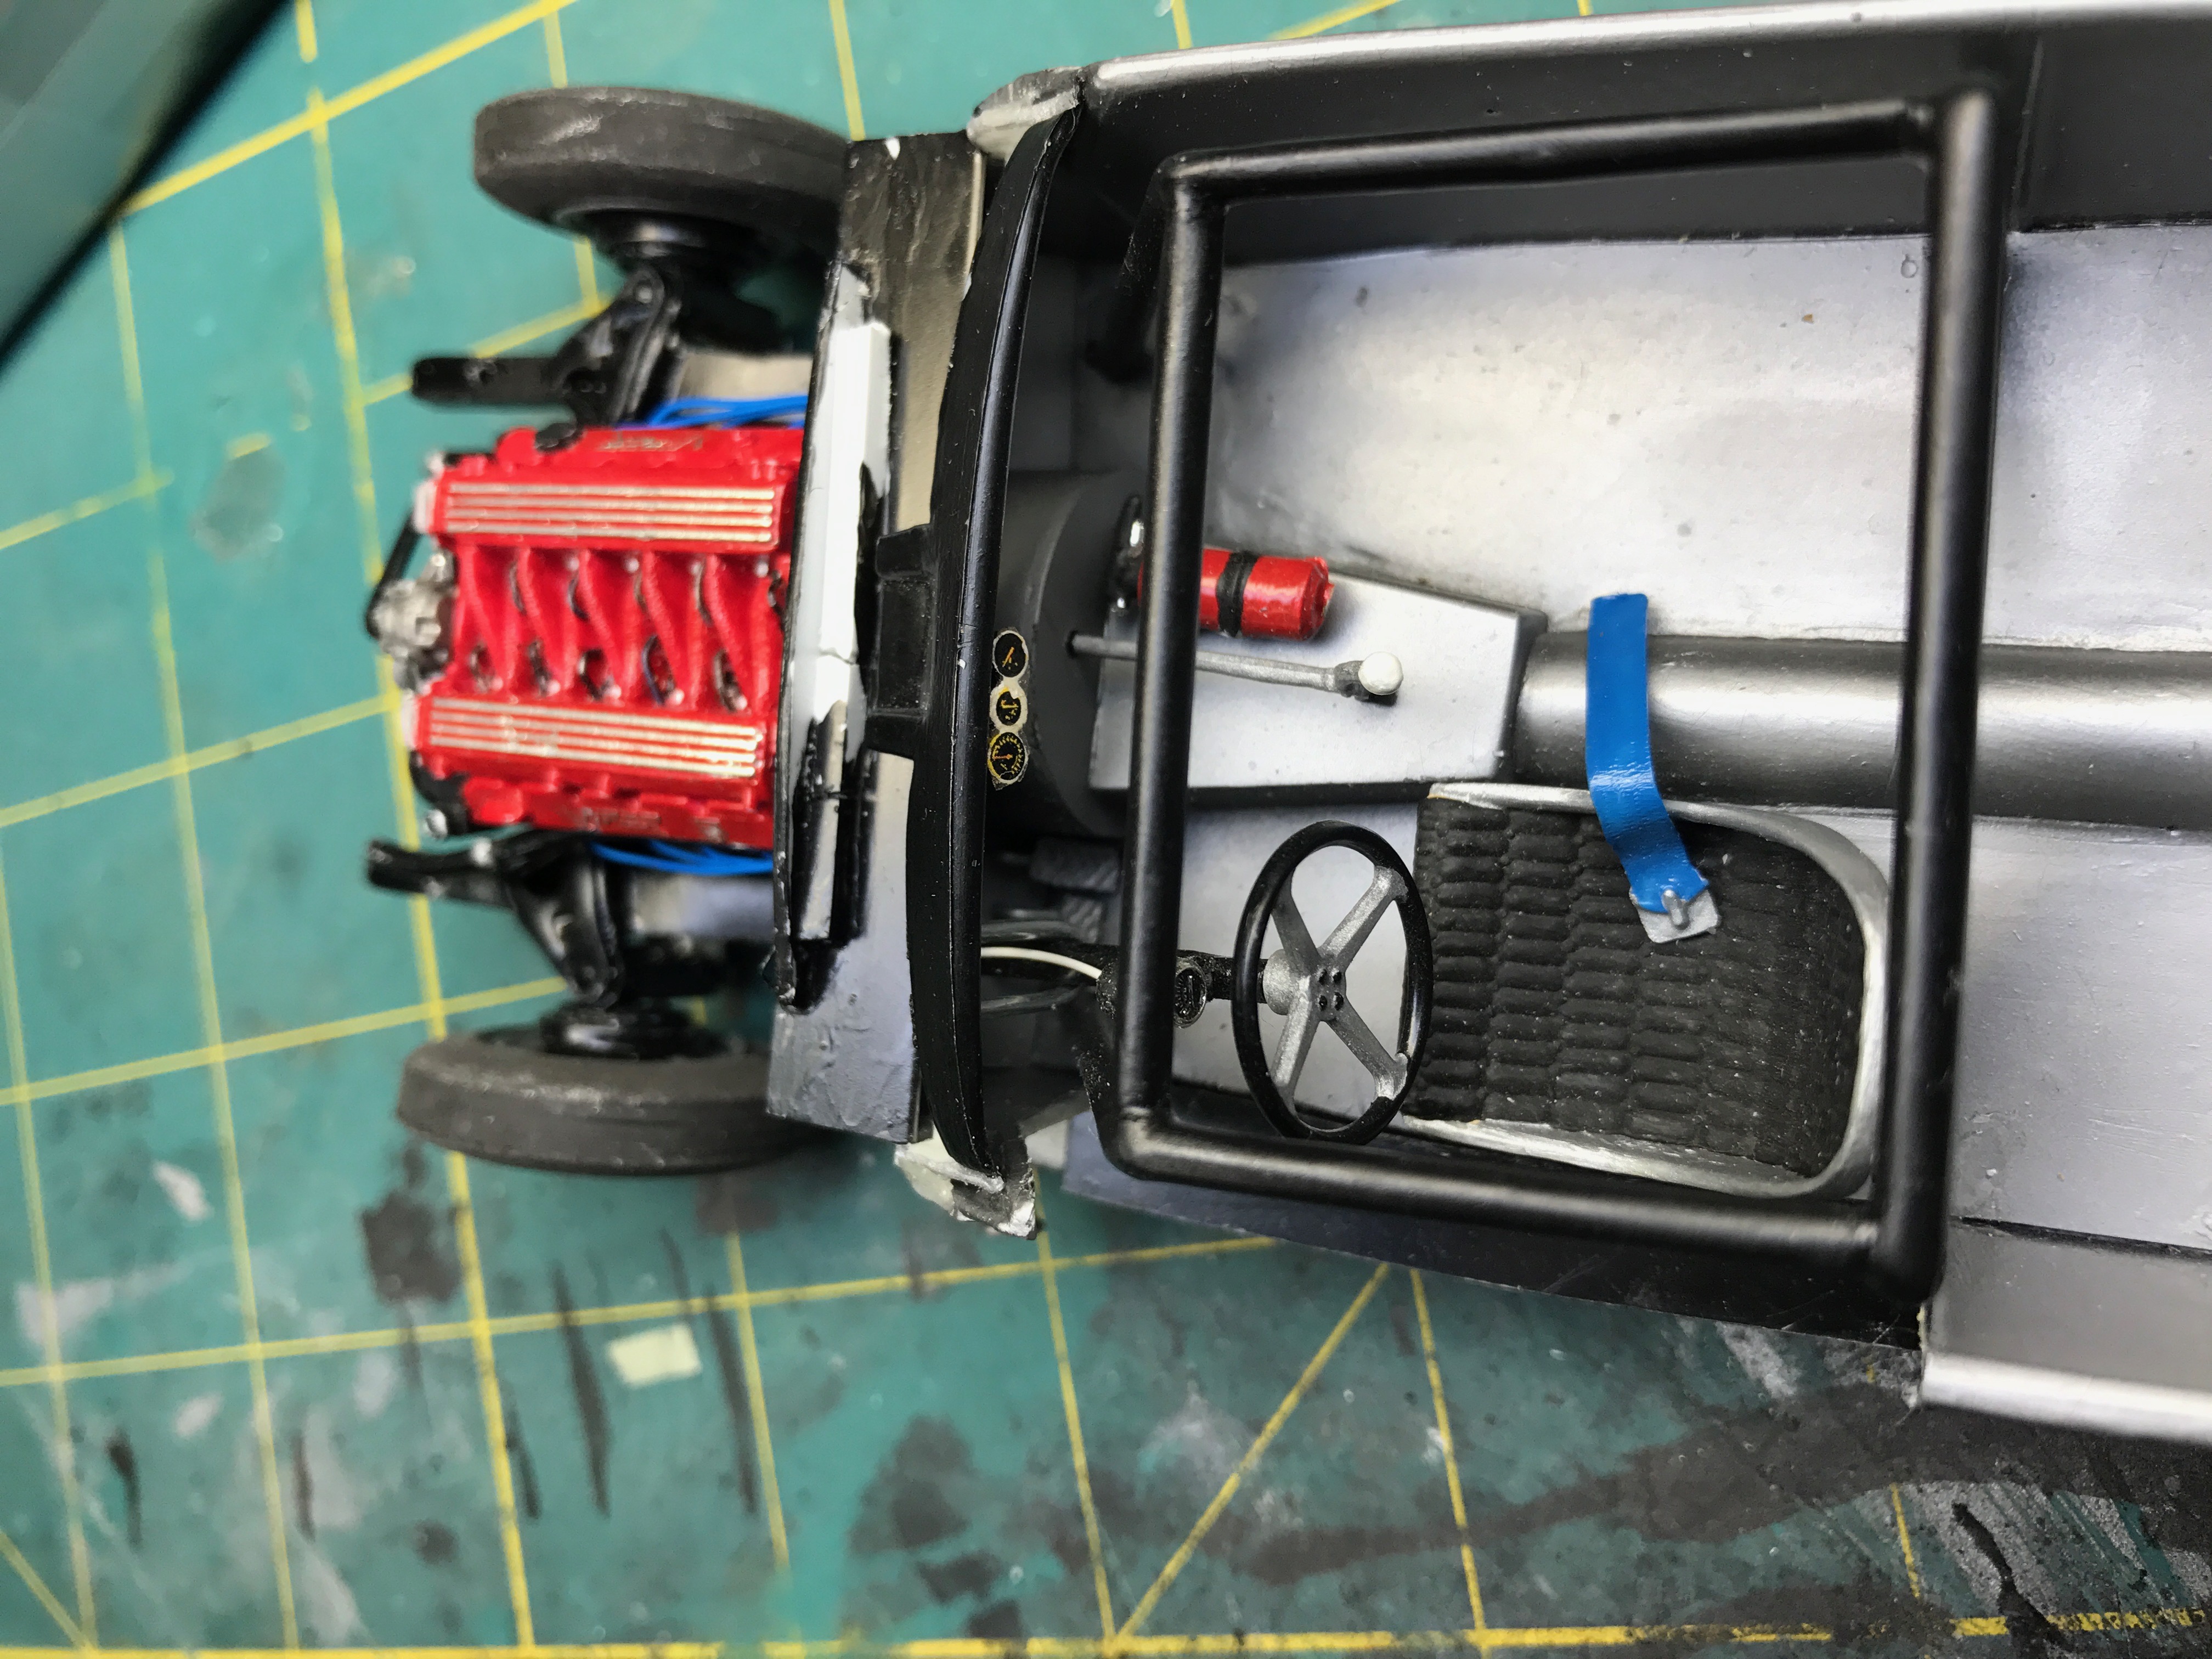
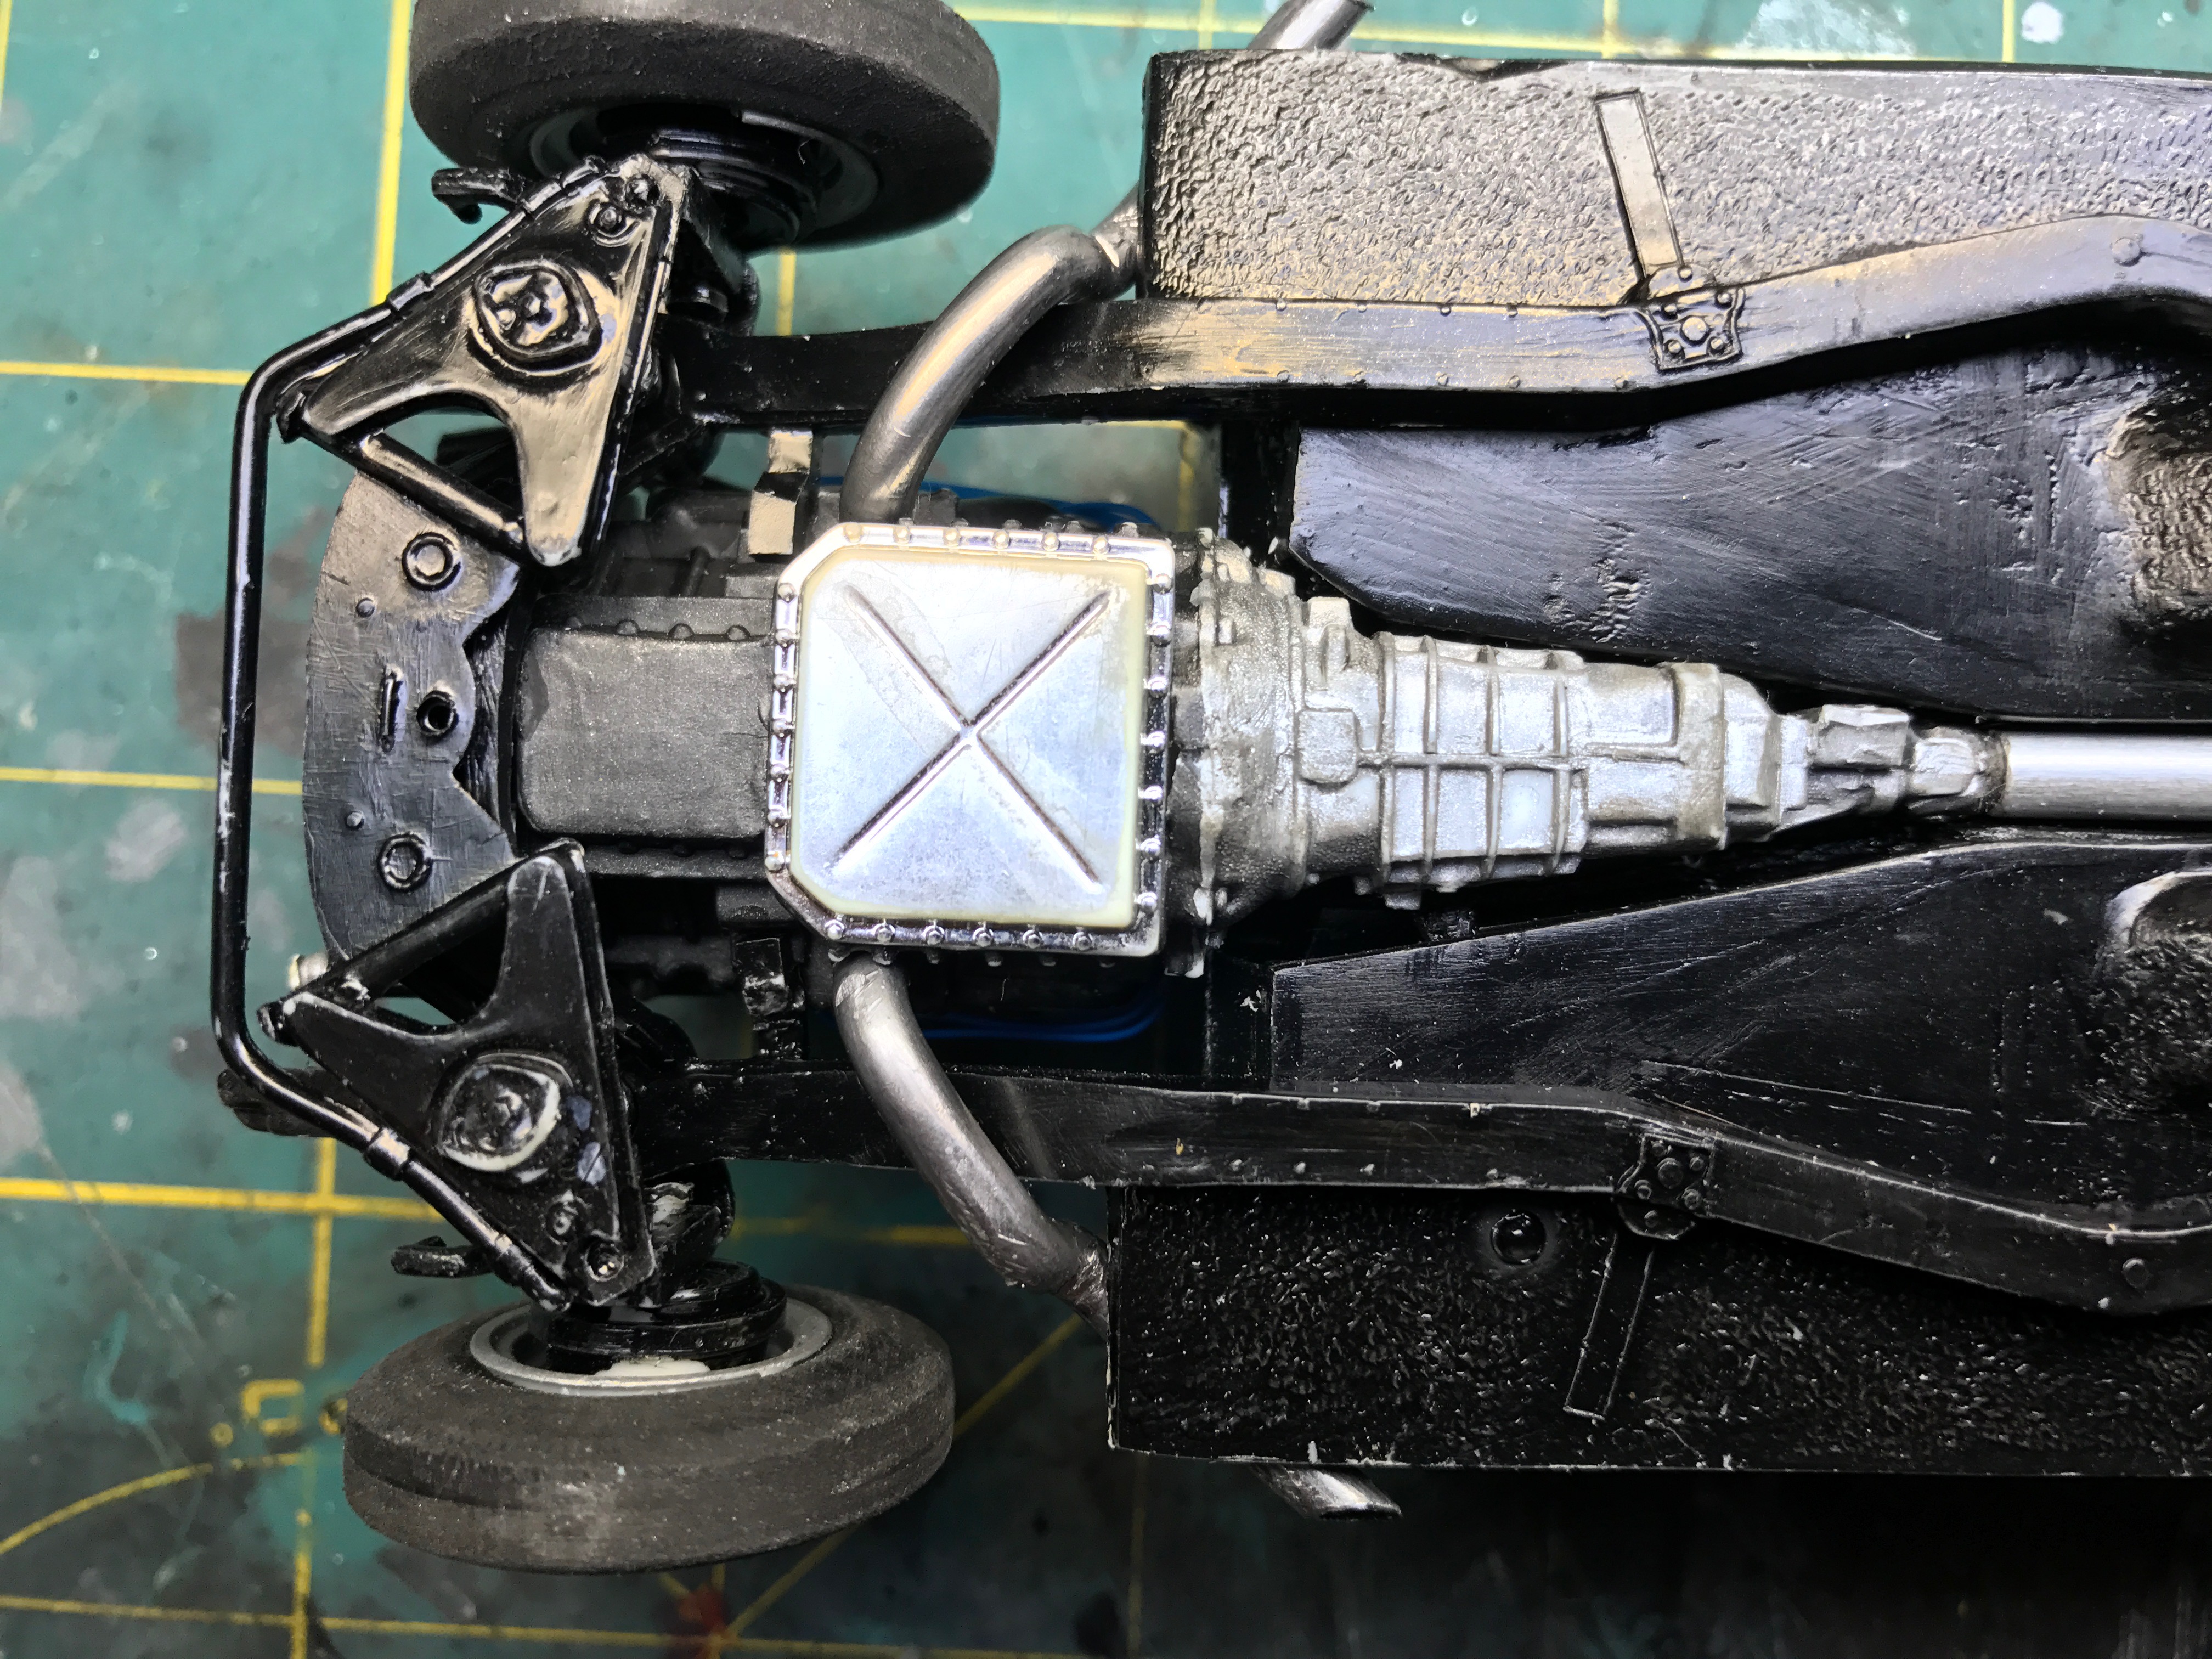
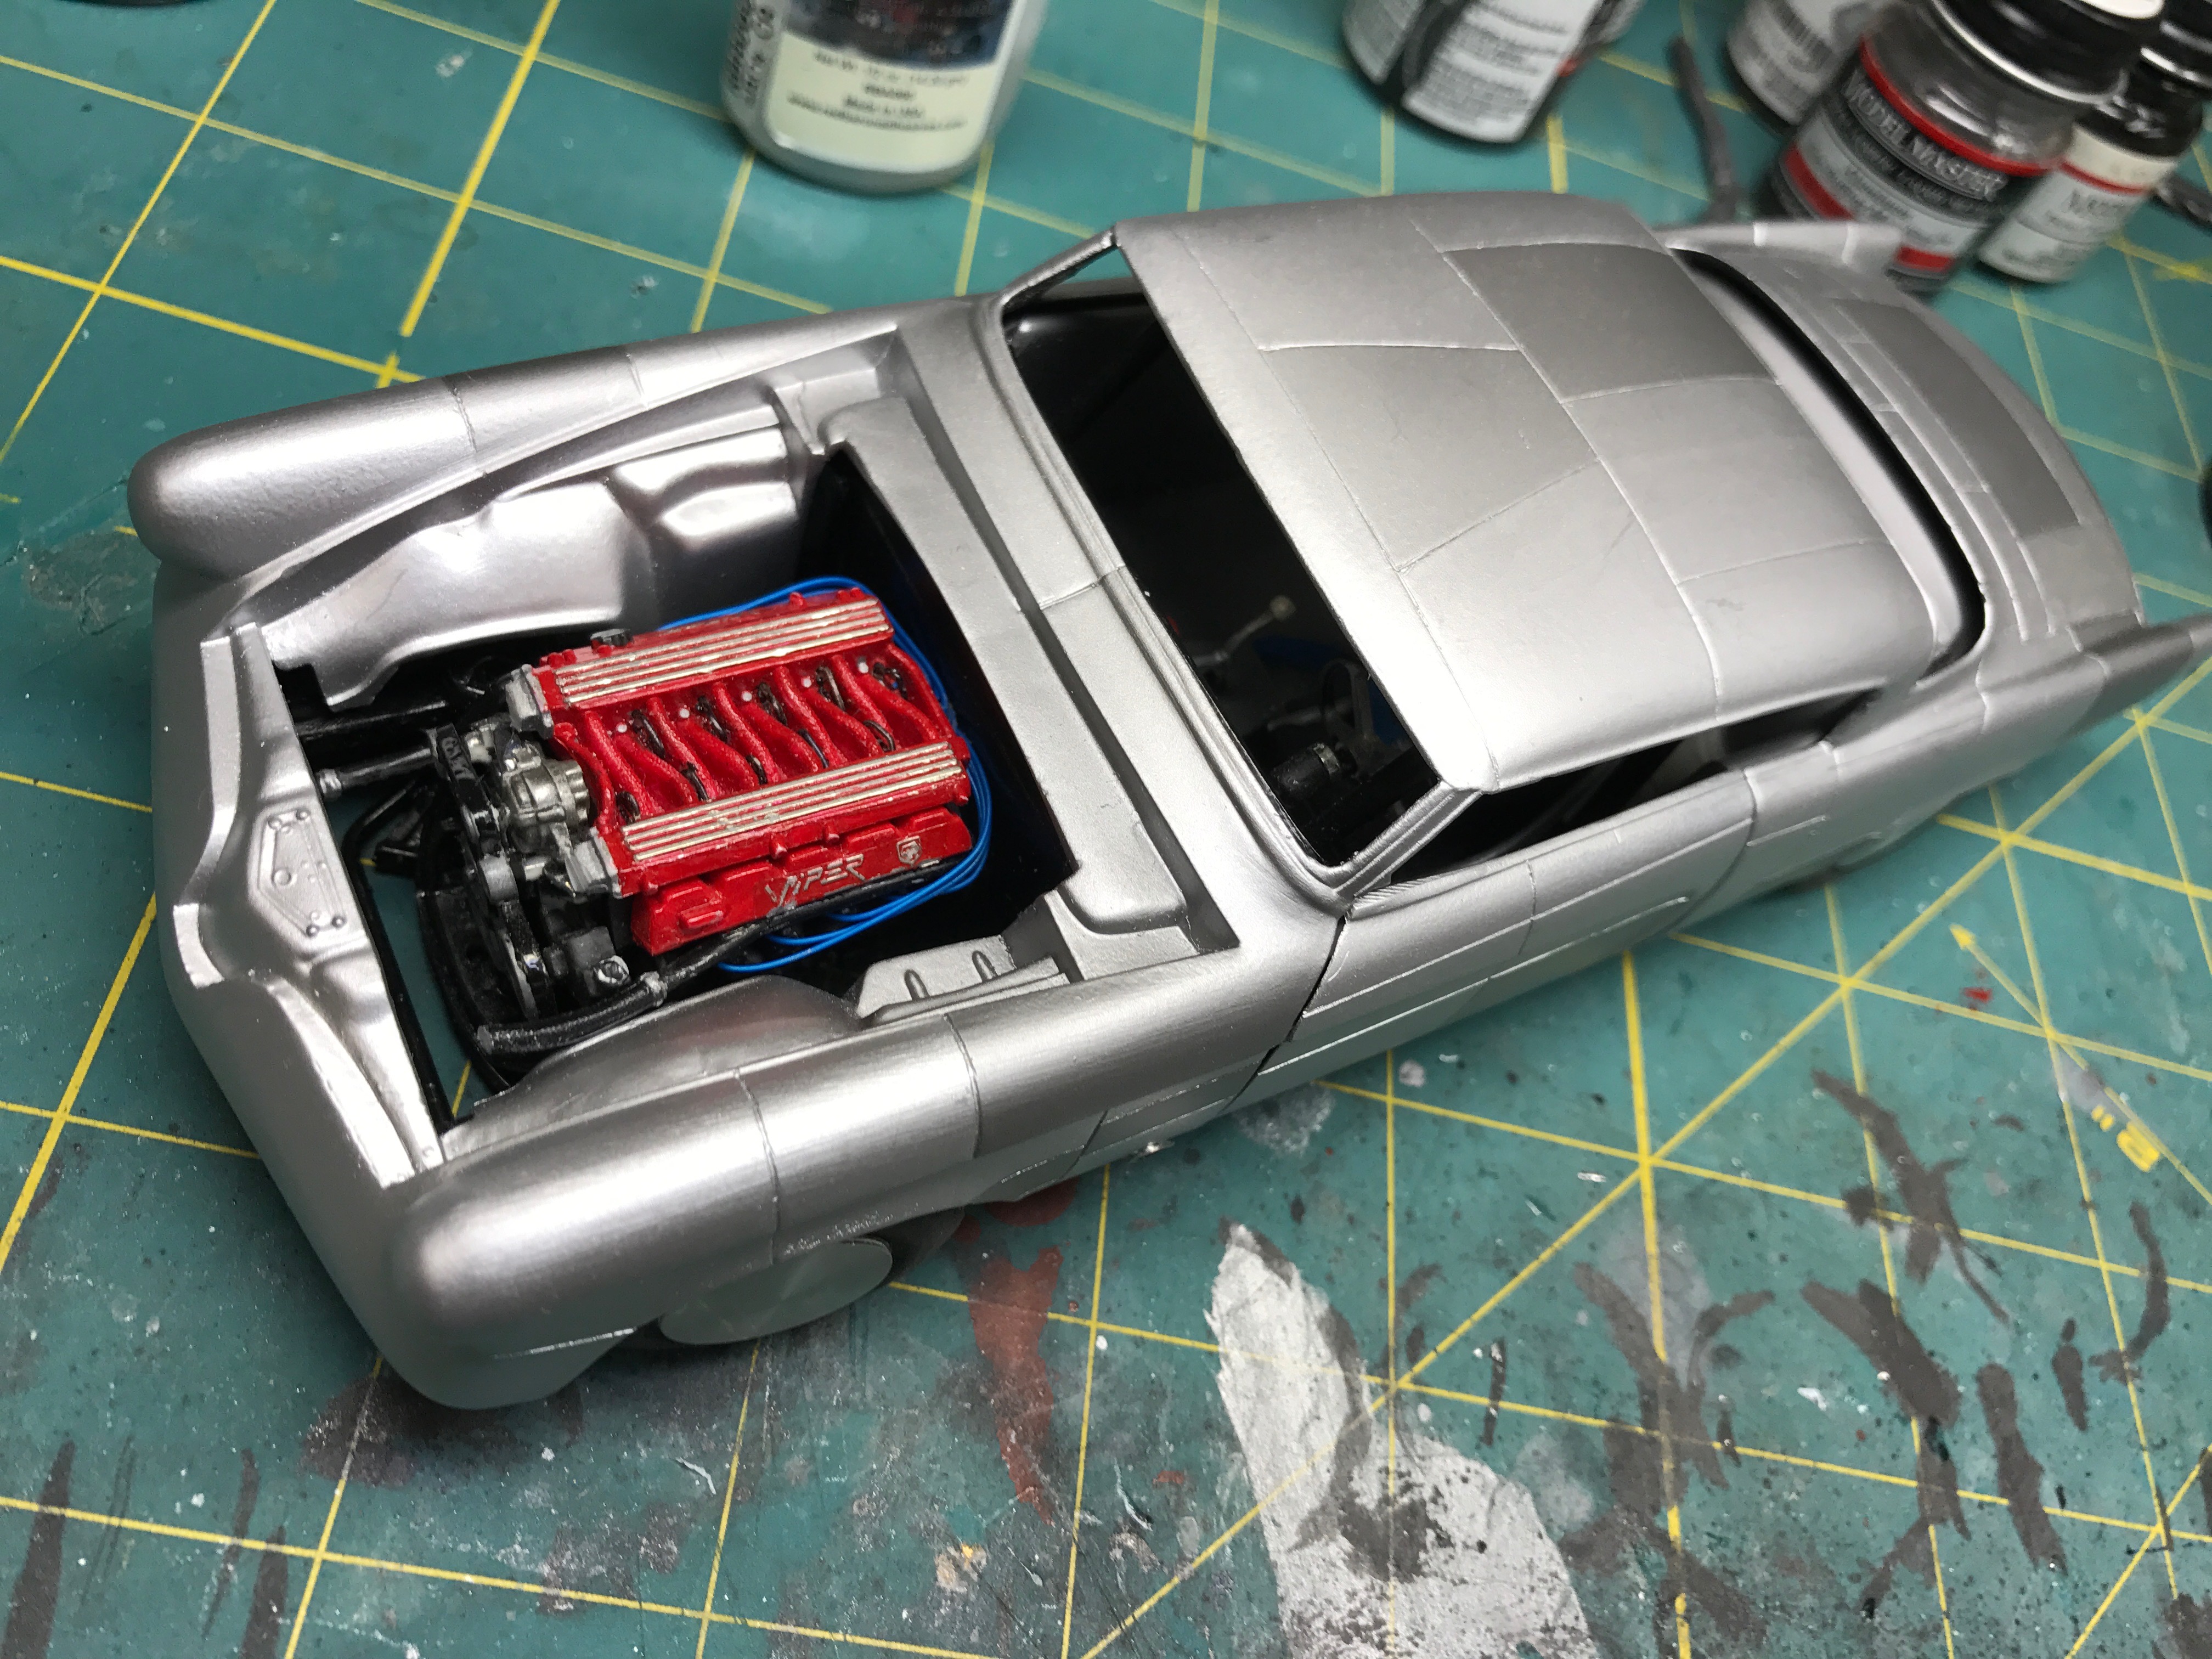
I plan to run thin black and white D day stripes across the trunk area maybe some nose art on the front fenders and maybe some small bombs and swastikas. Fitting the Viper took some doing, New motor mounts, new drive shaft from 1/8" alum tube,bump back the firewall a tad, fabricate new tranny and drive shaft hump, and exhaust. The suspension is lowered with blocks spliced atrearsprings, and kit supplied kingpin position in front. The dashboard has been eliminated and 3 gauges hung from remaining arch, a tax added to steering column which is hung in a cradle from under side of dash arch.
-
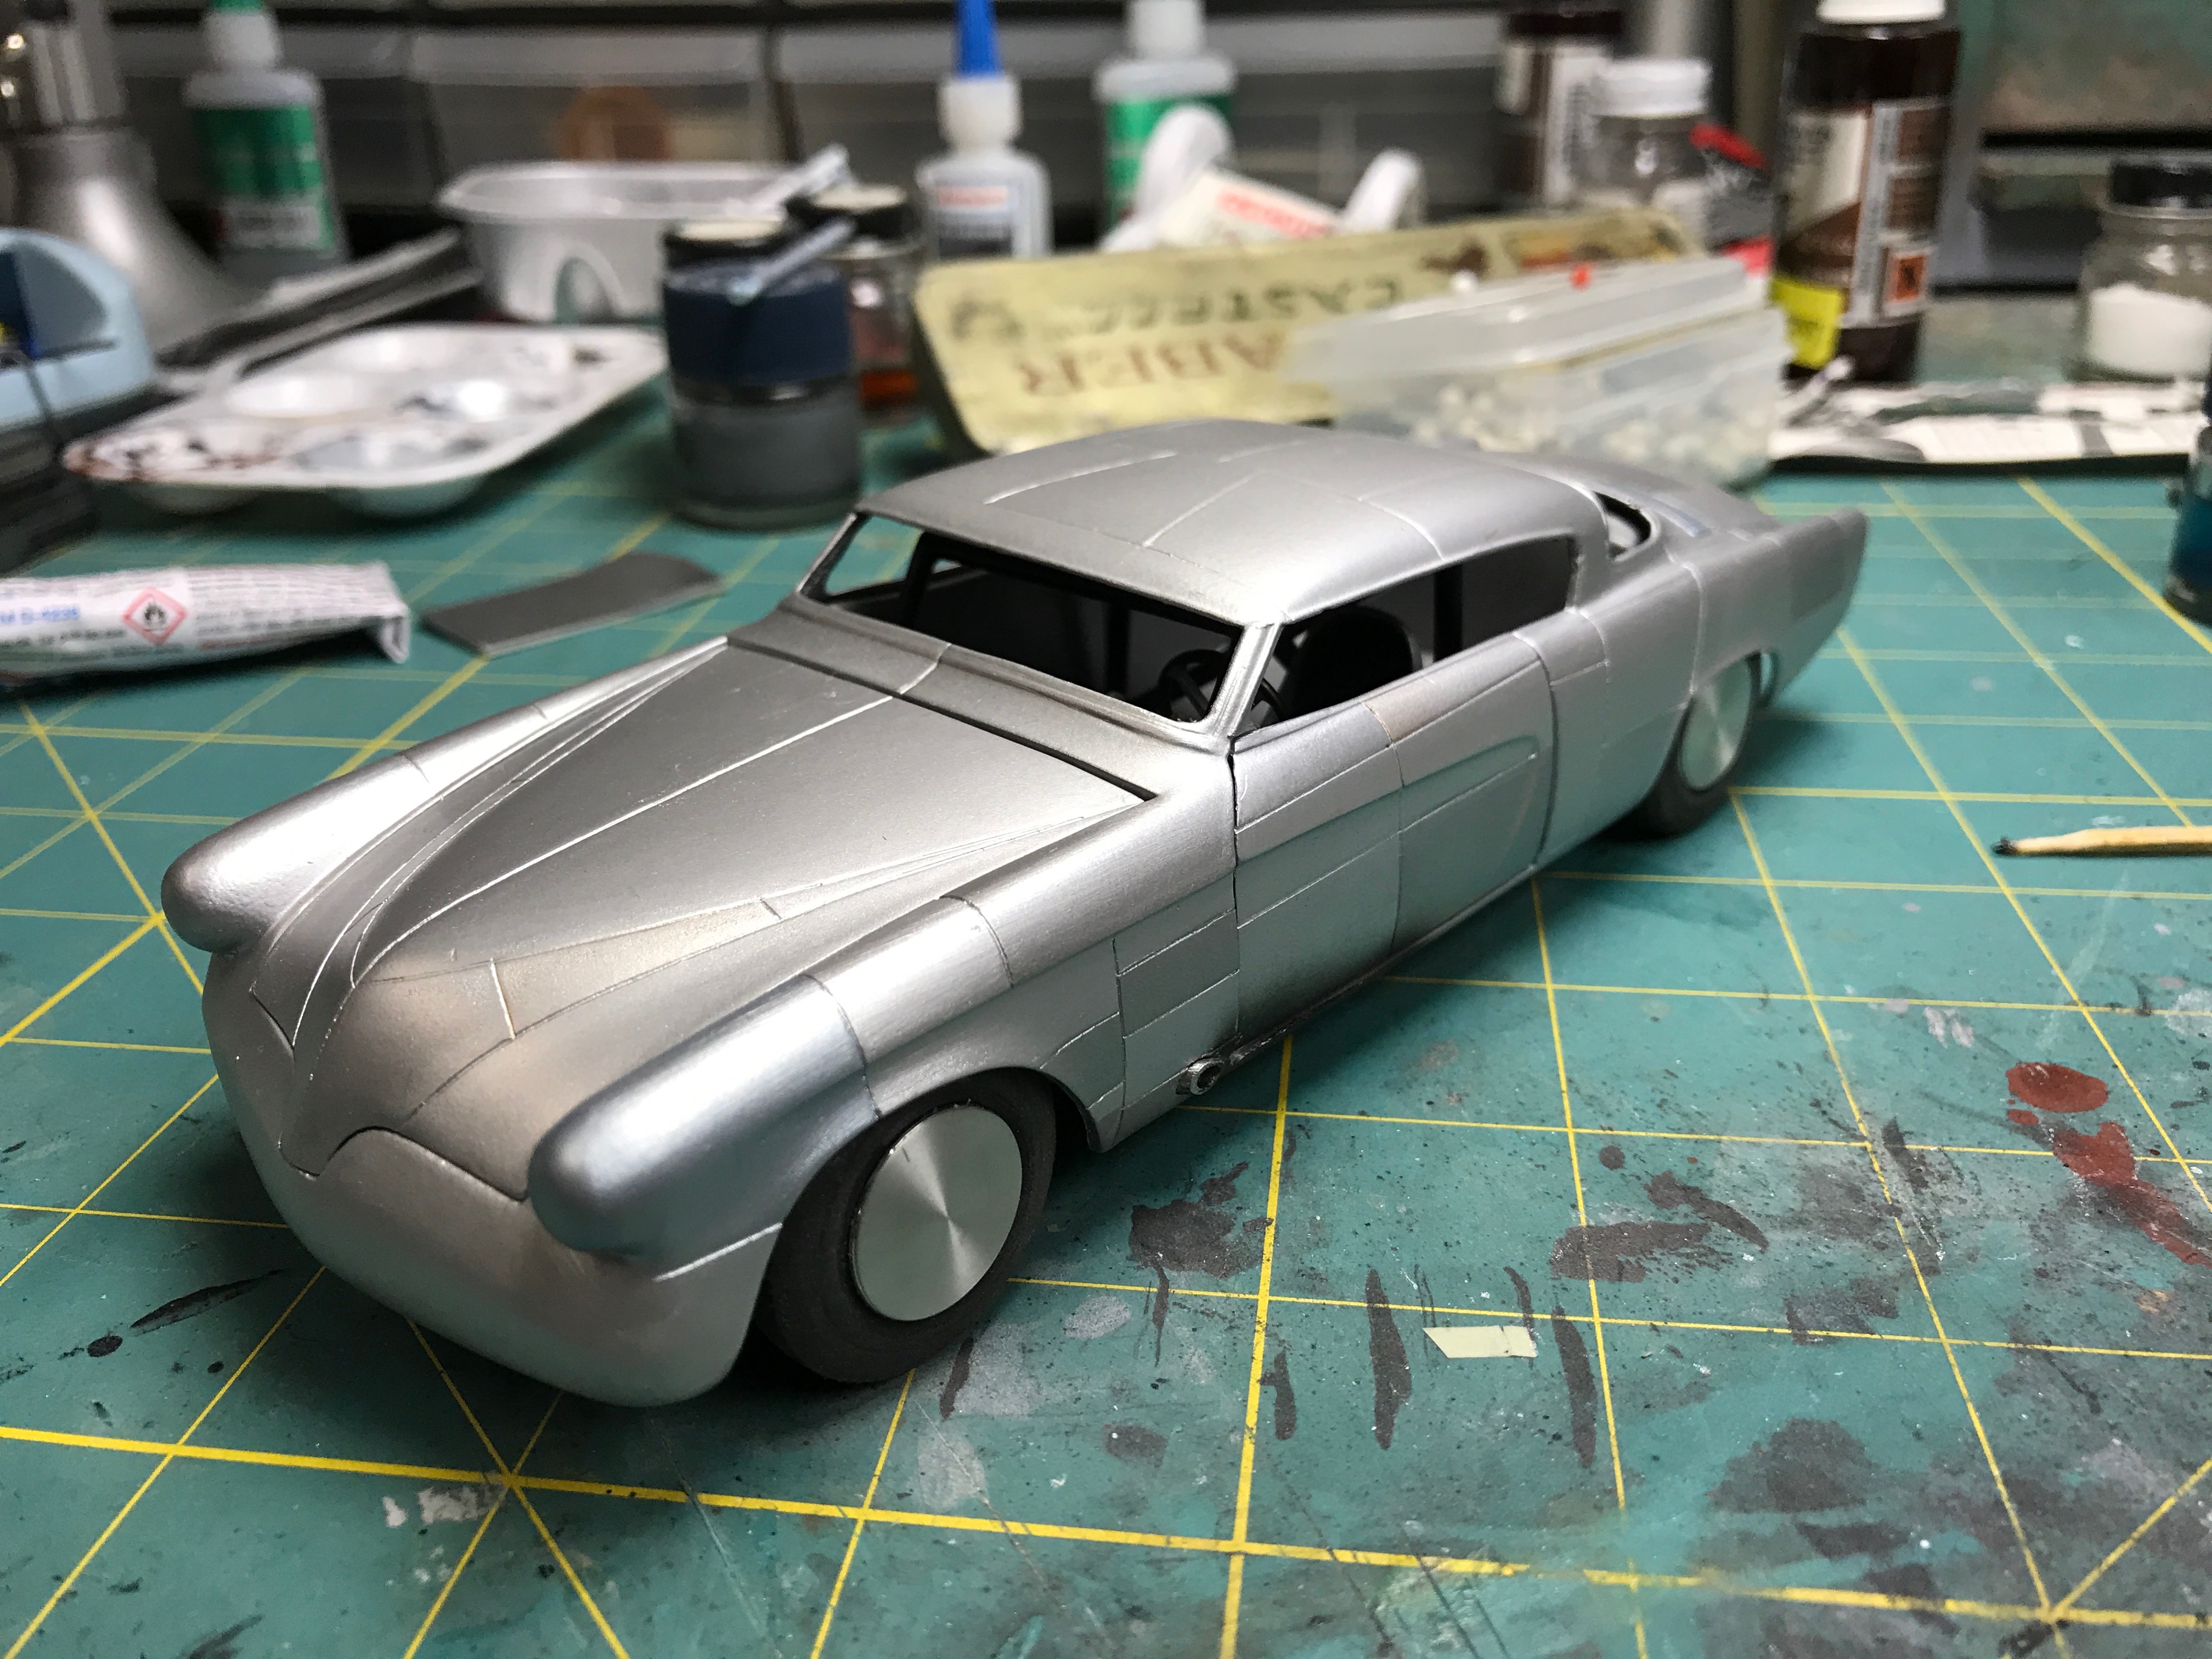
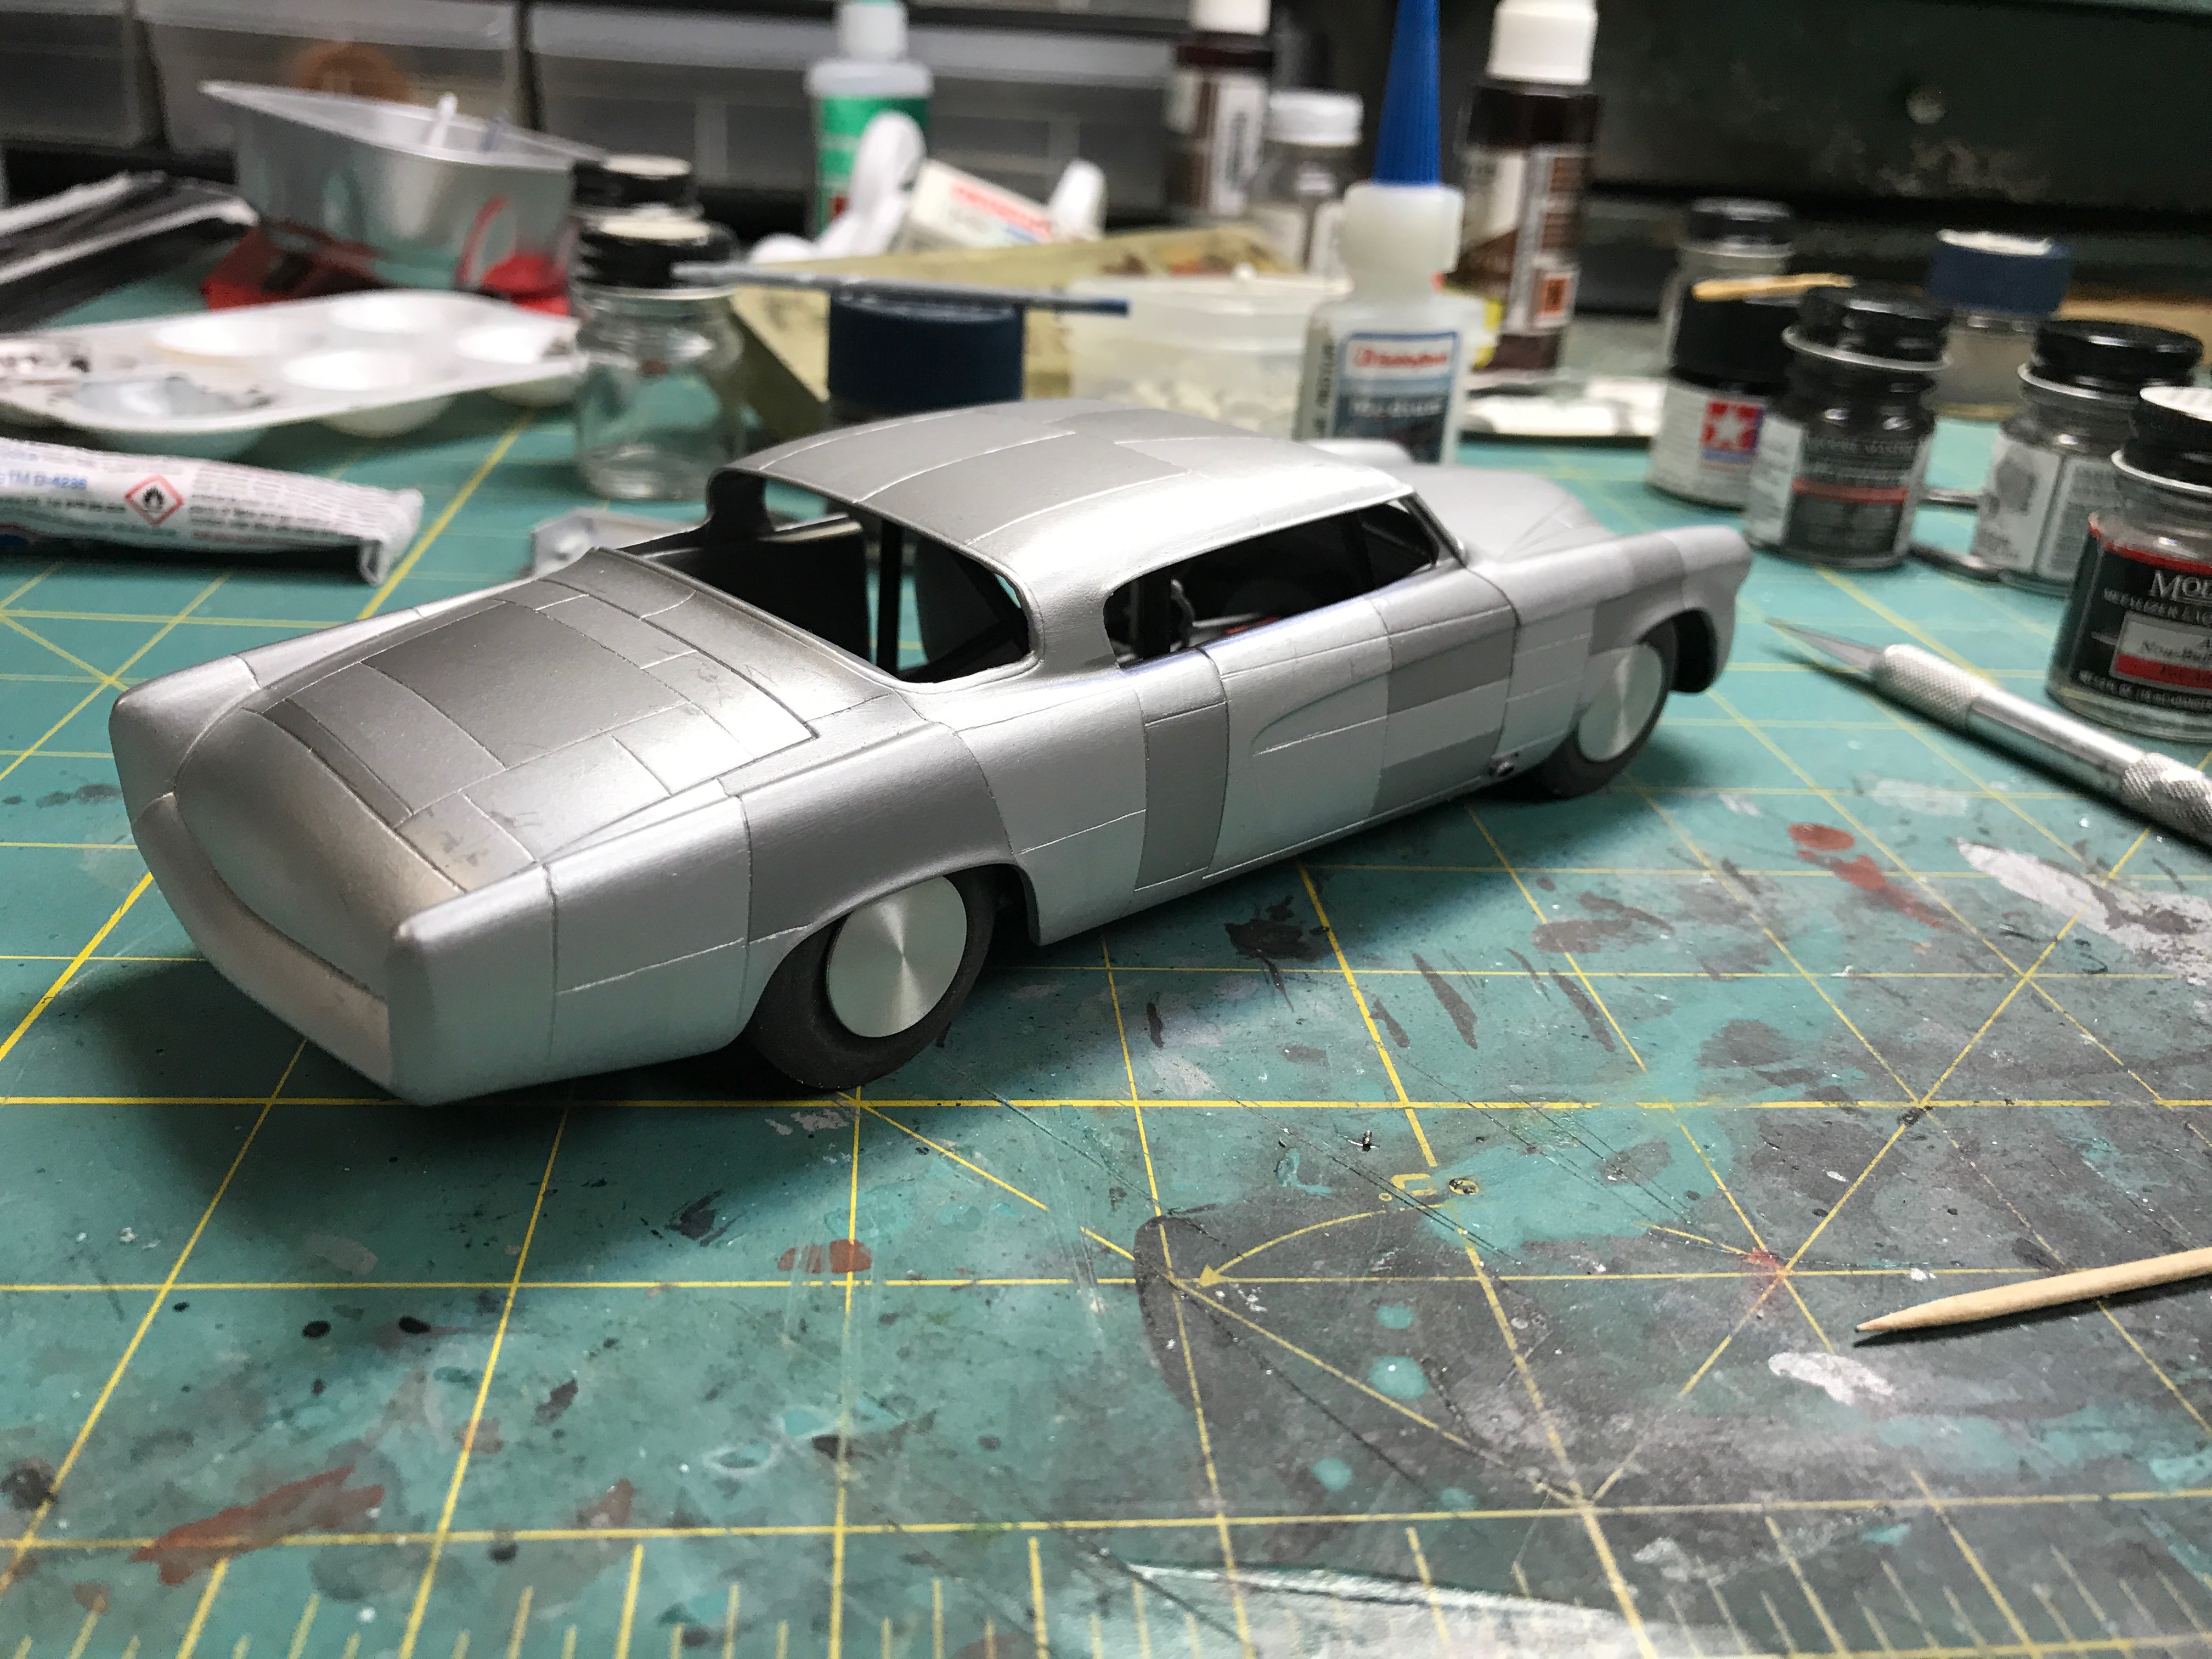
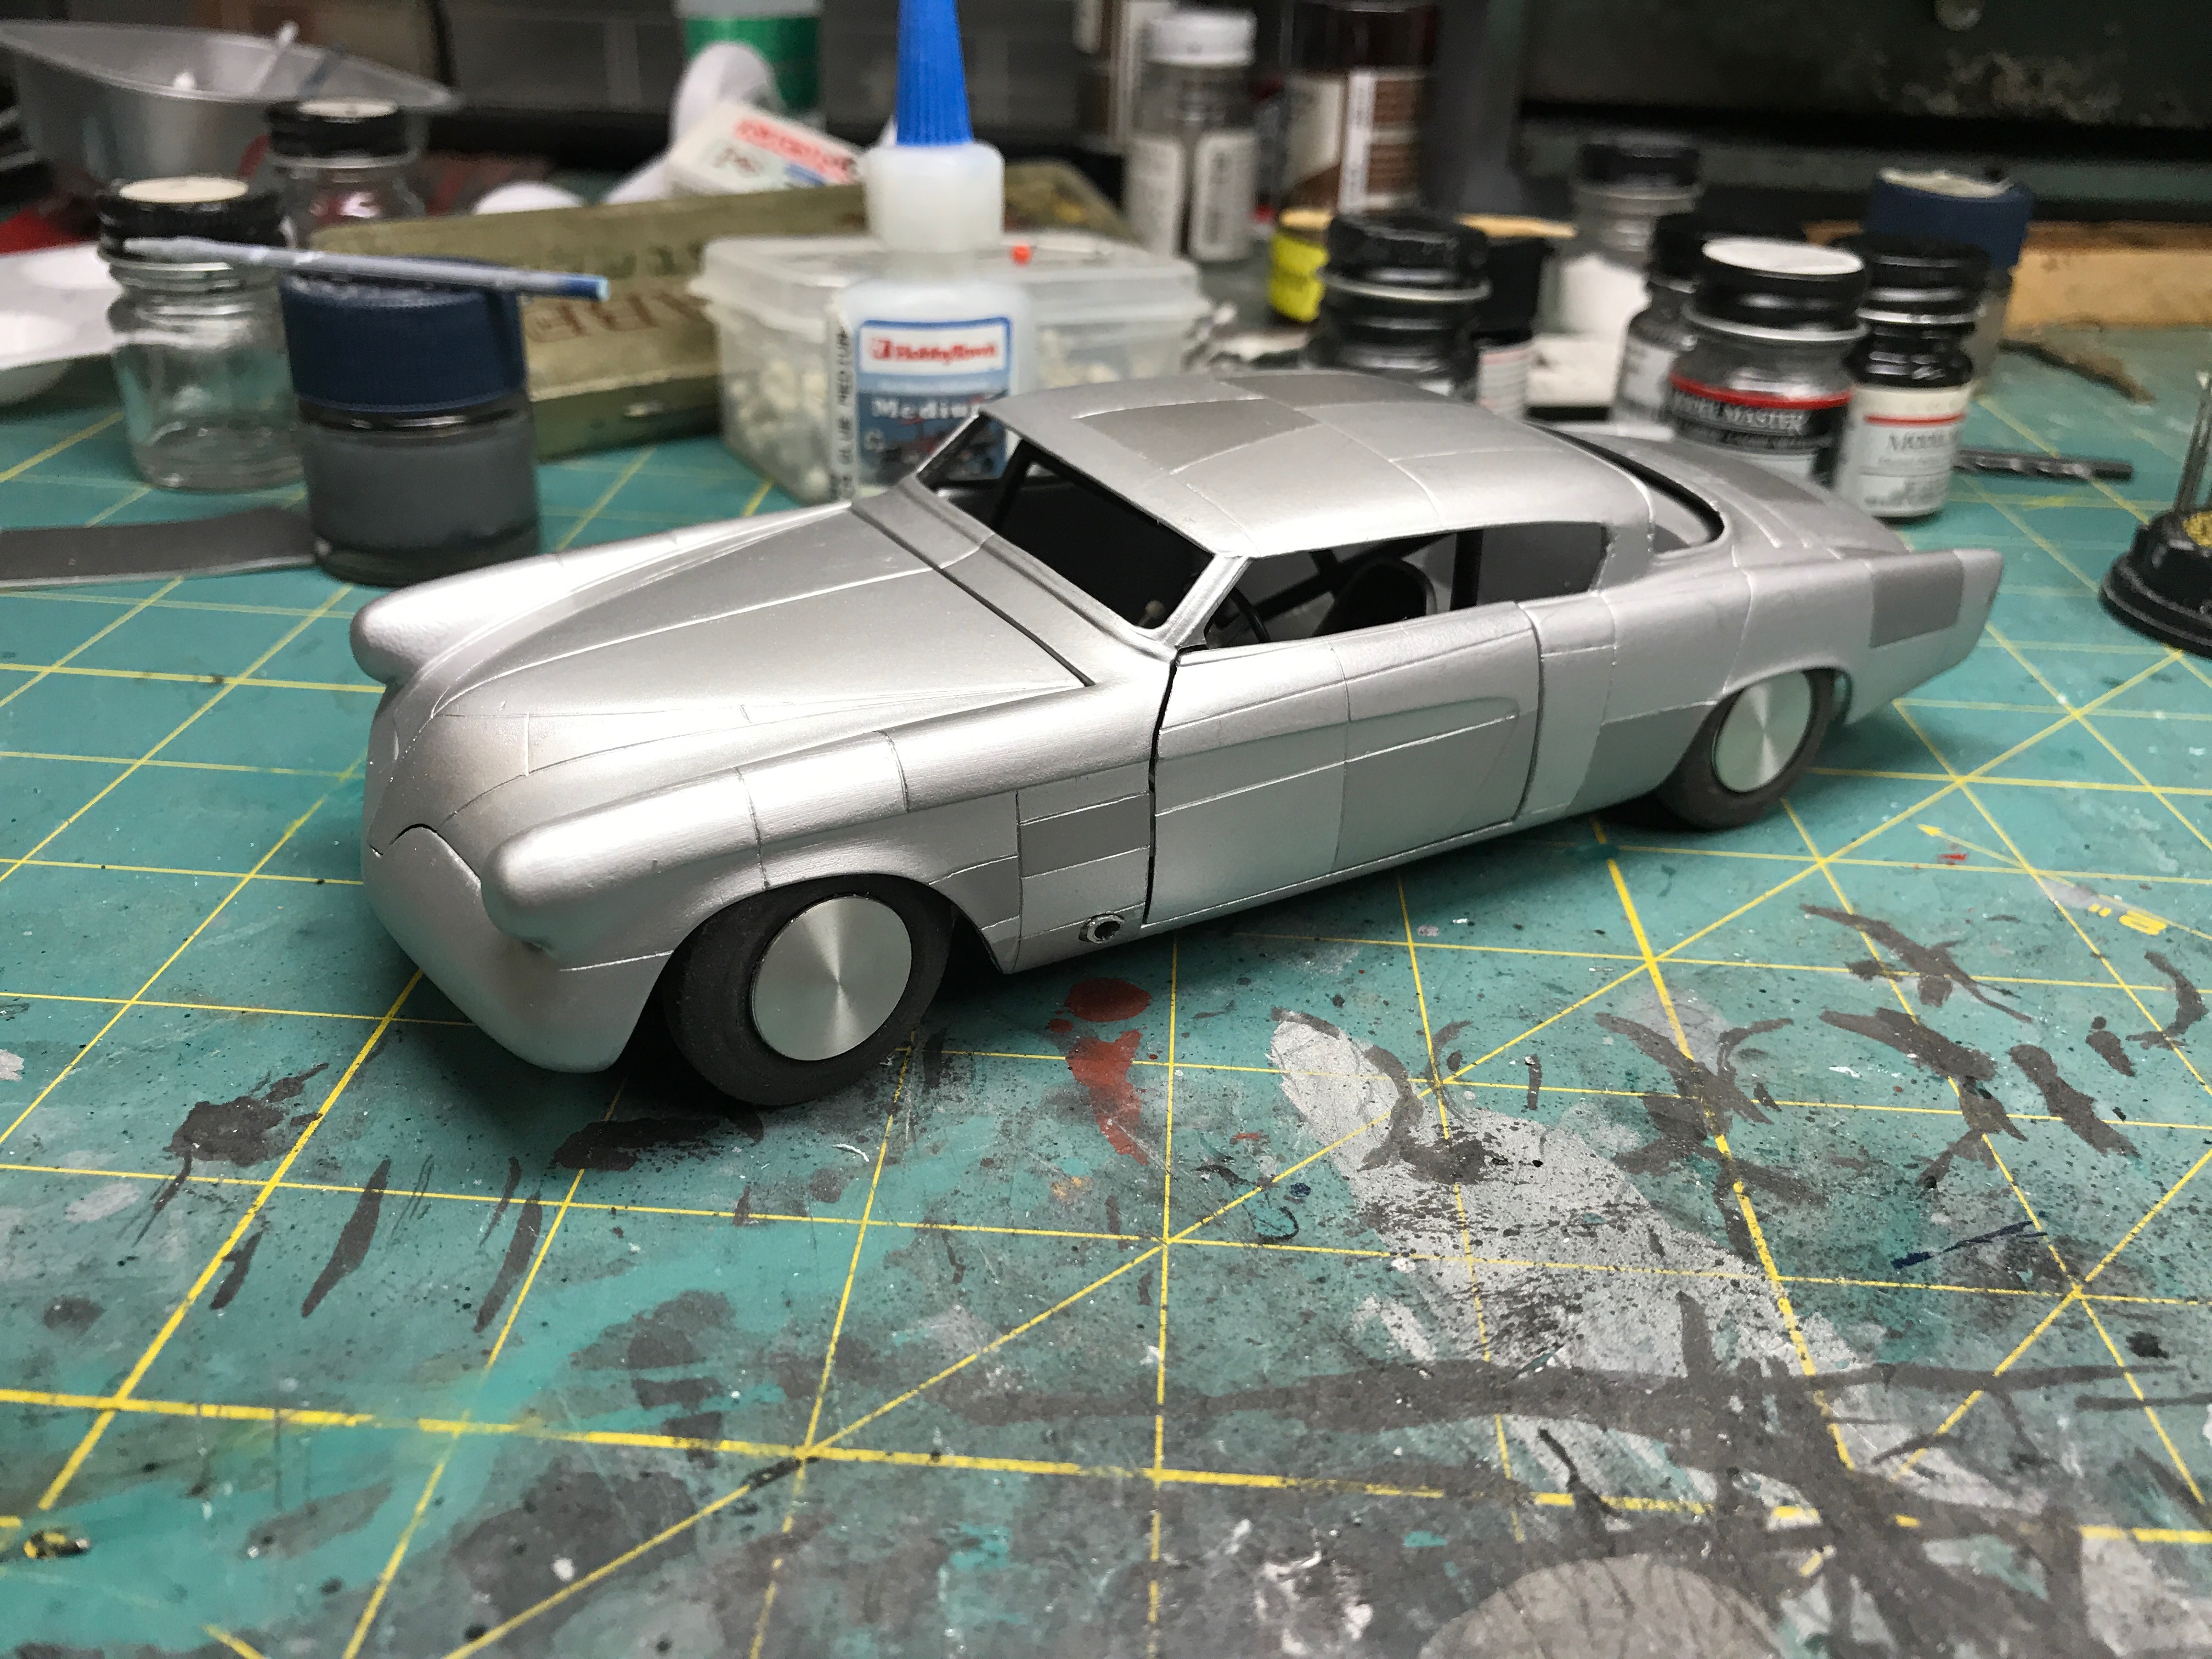
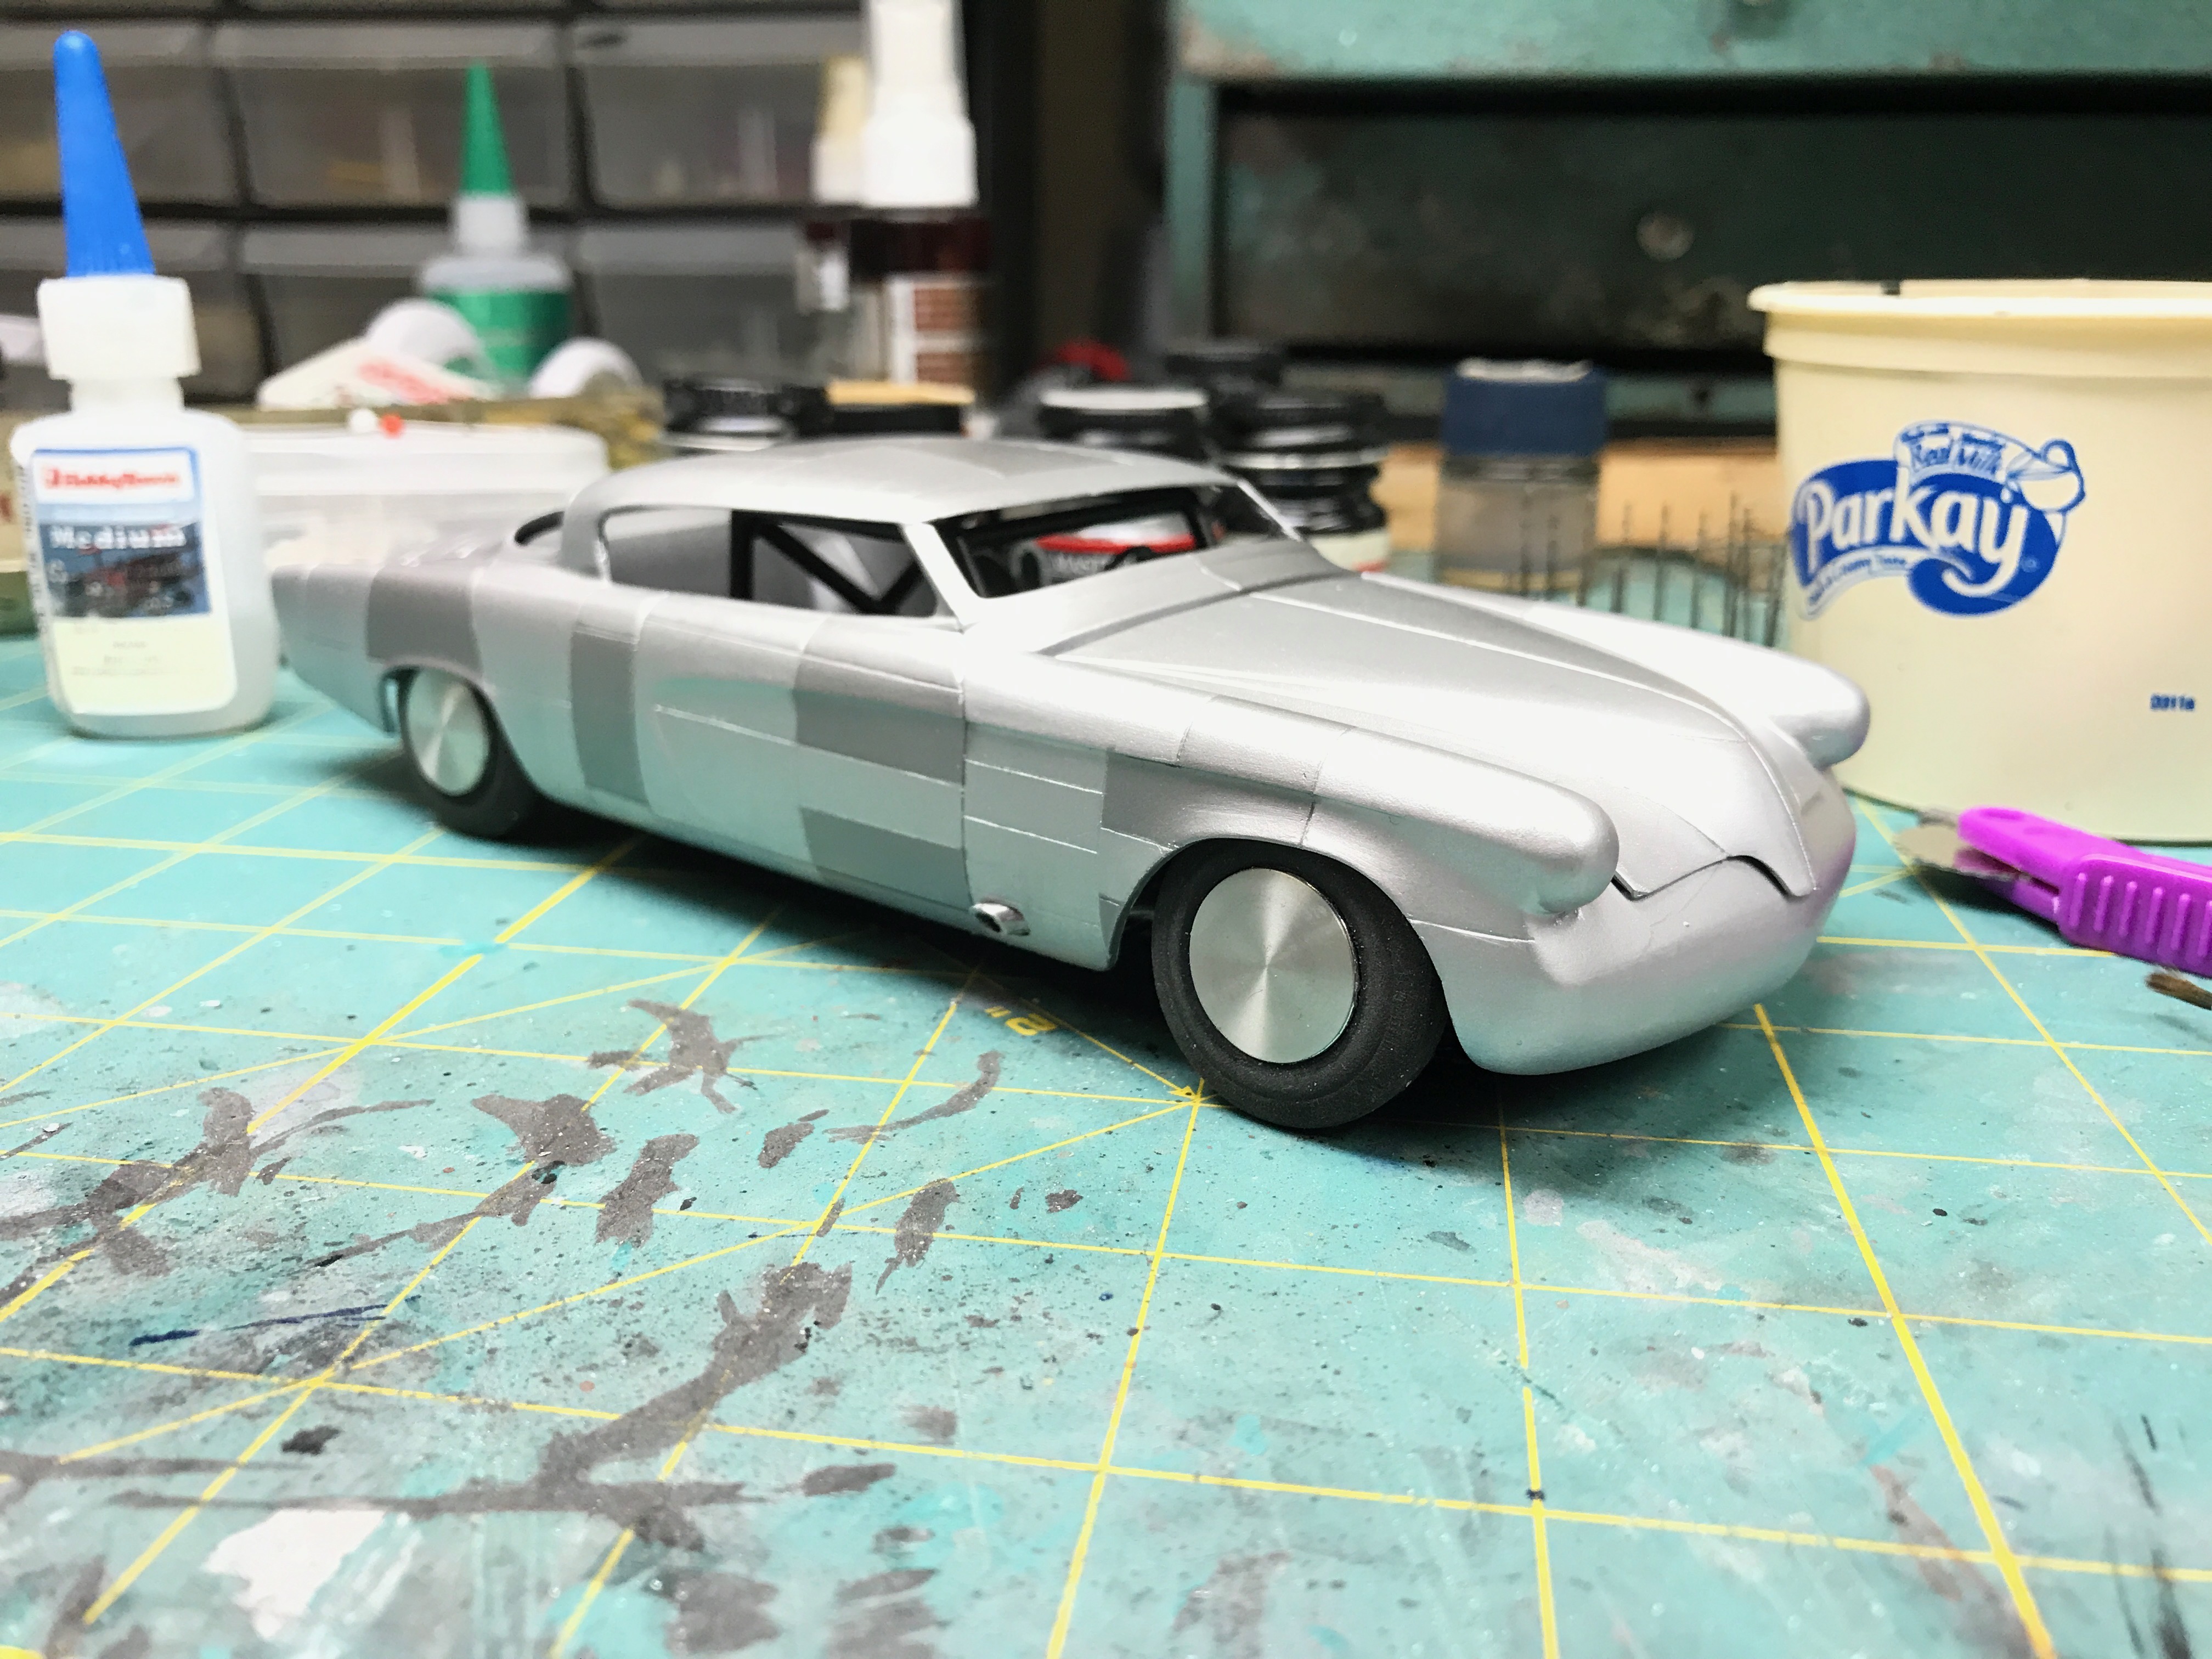
There's been a little more work done on the car. The initial shaded panels have been toned down, other panels shaded different hues, and smoke smudges added at the exhausts. All comments welcome.
-
Very nice!
-
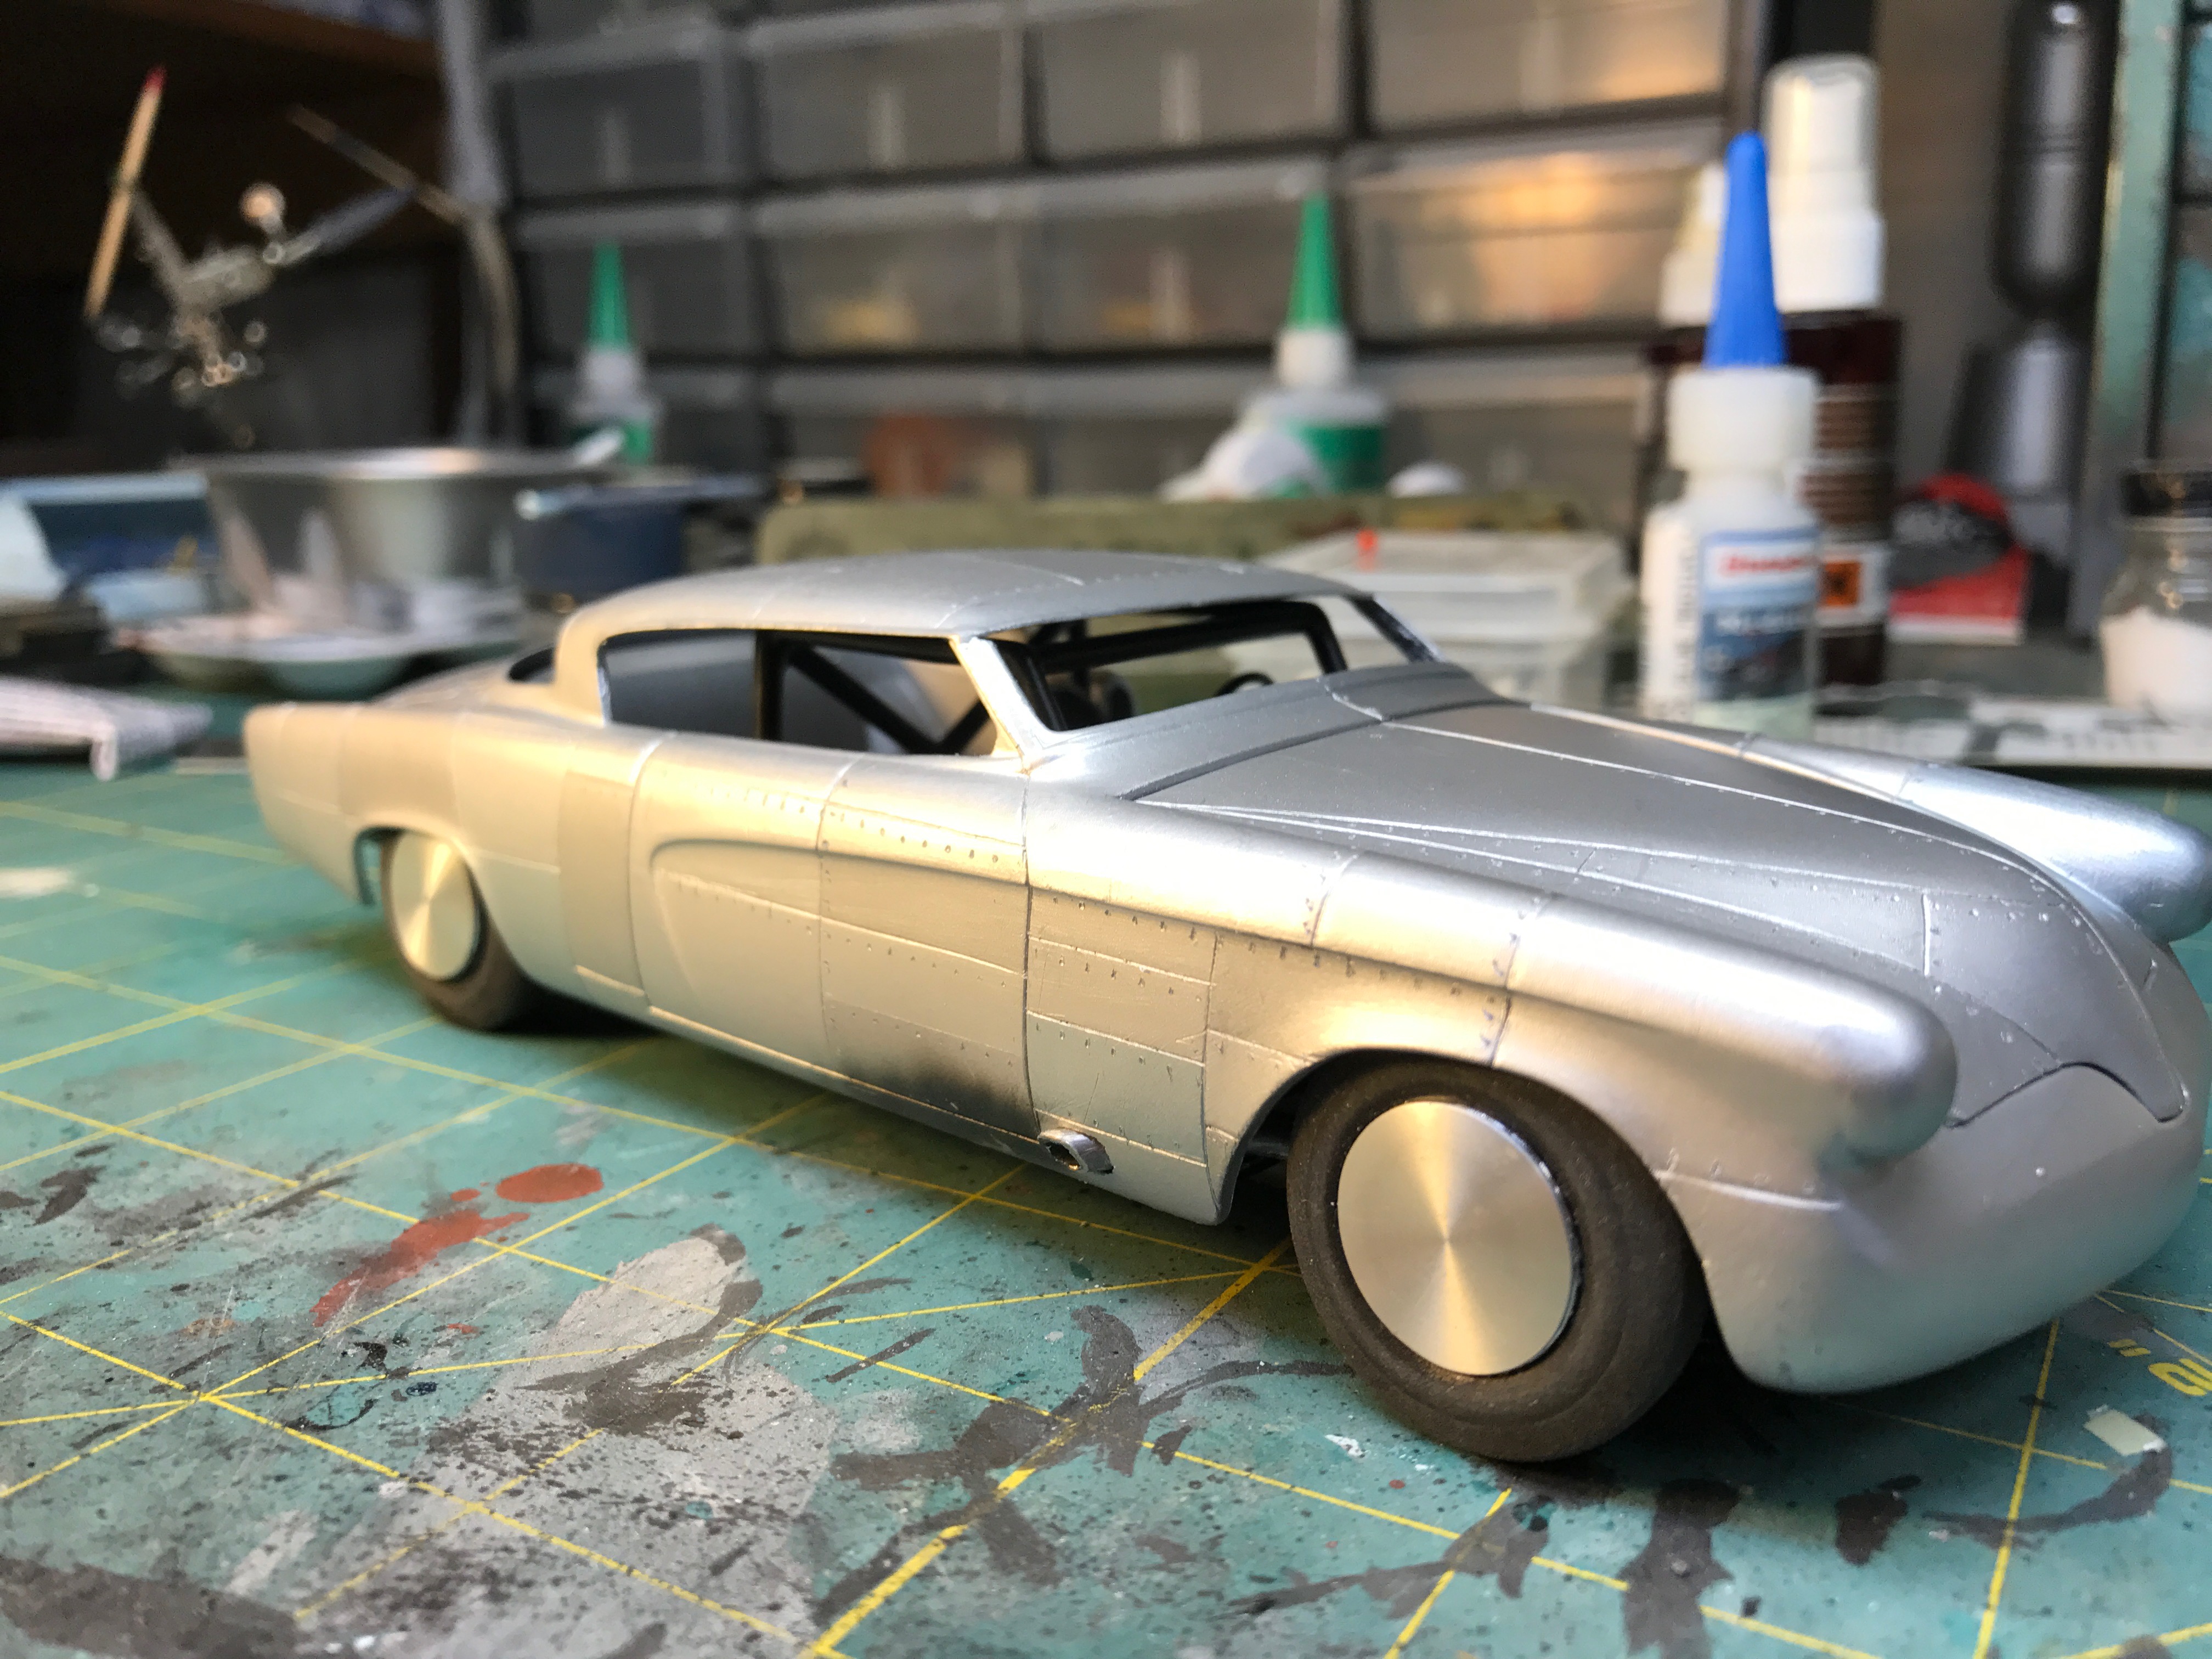
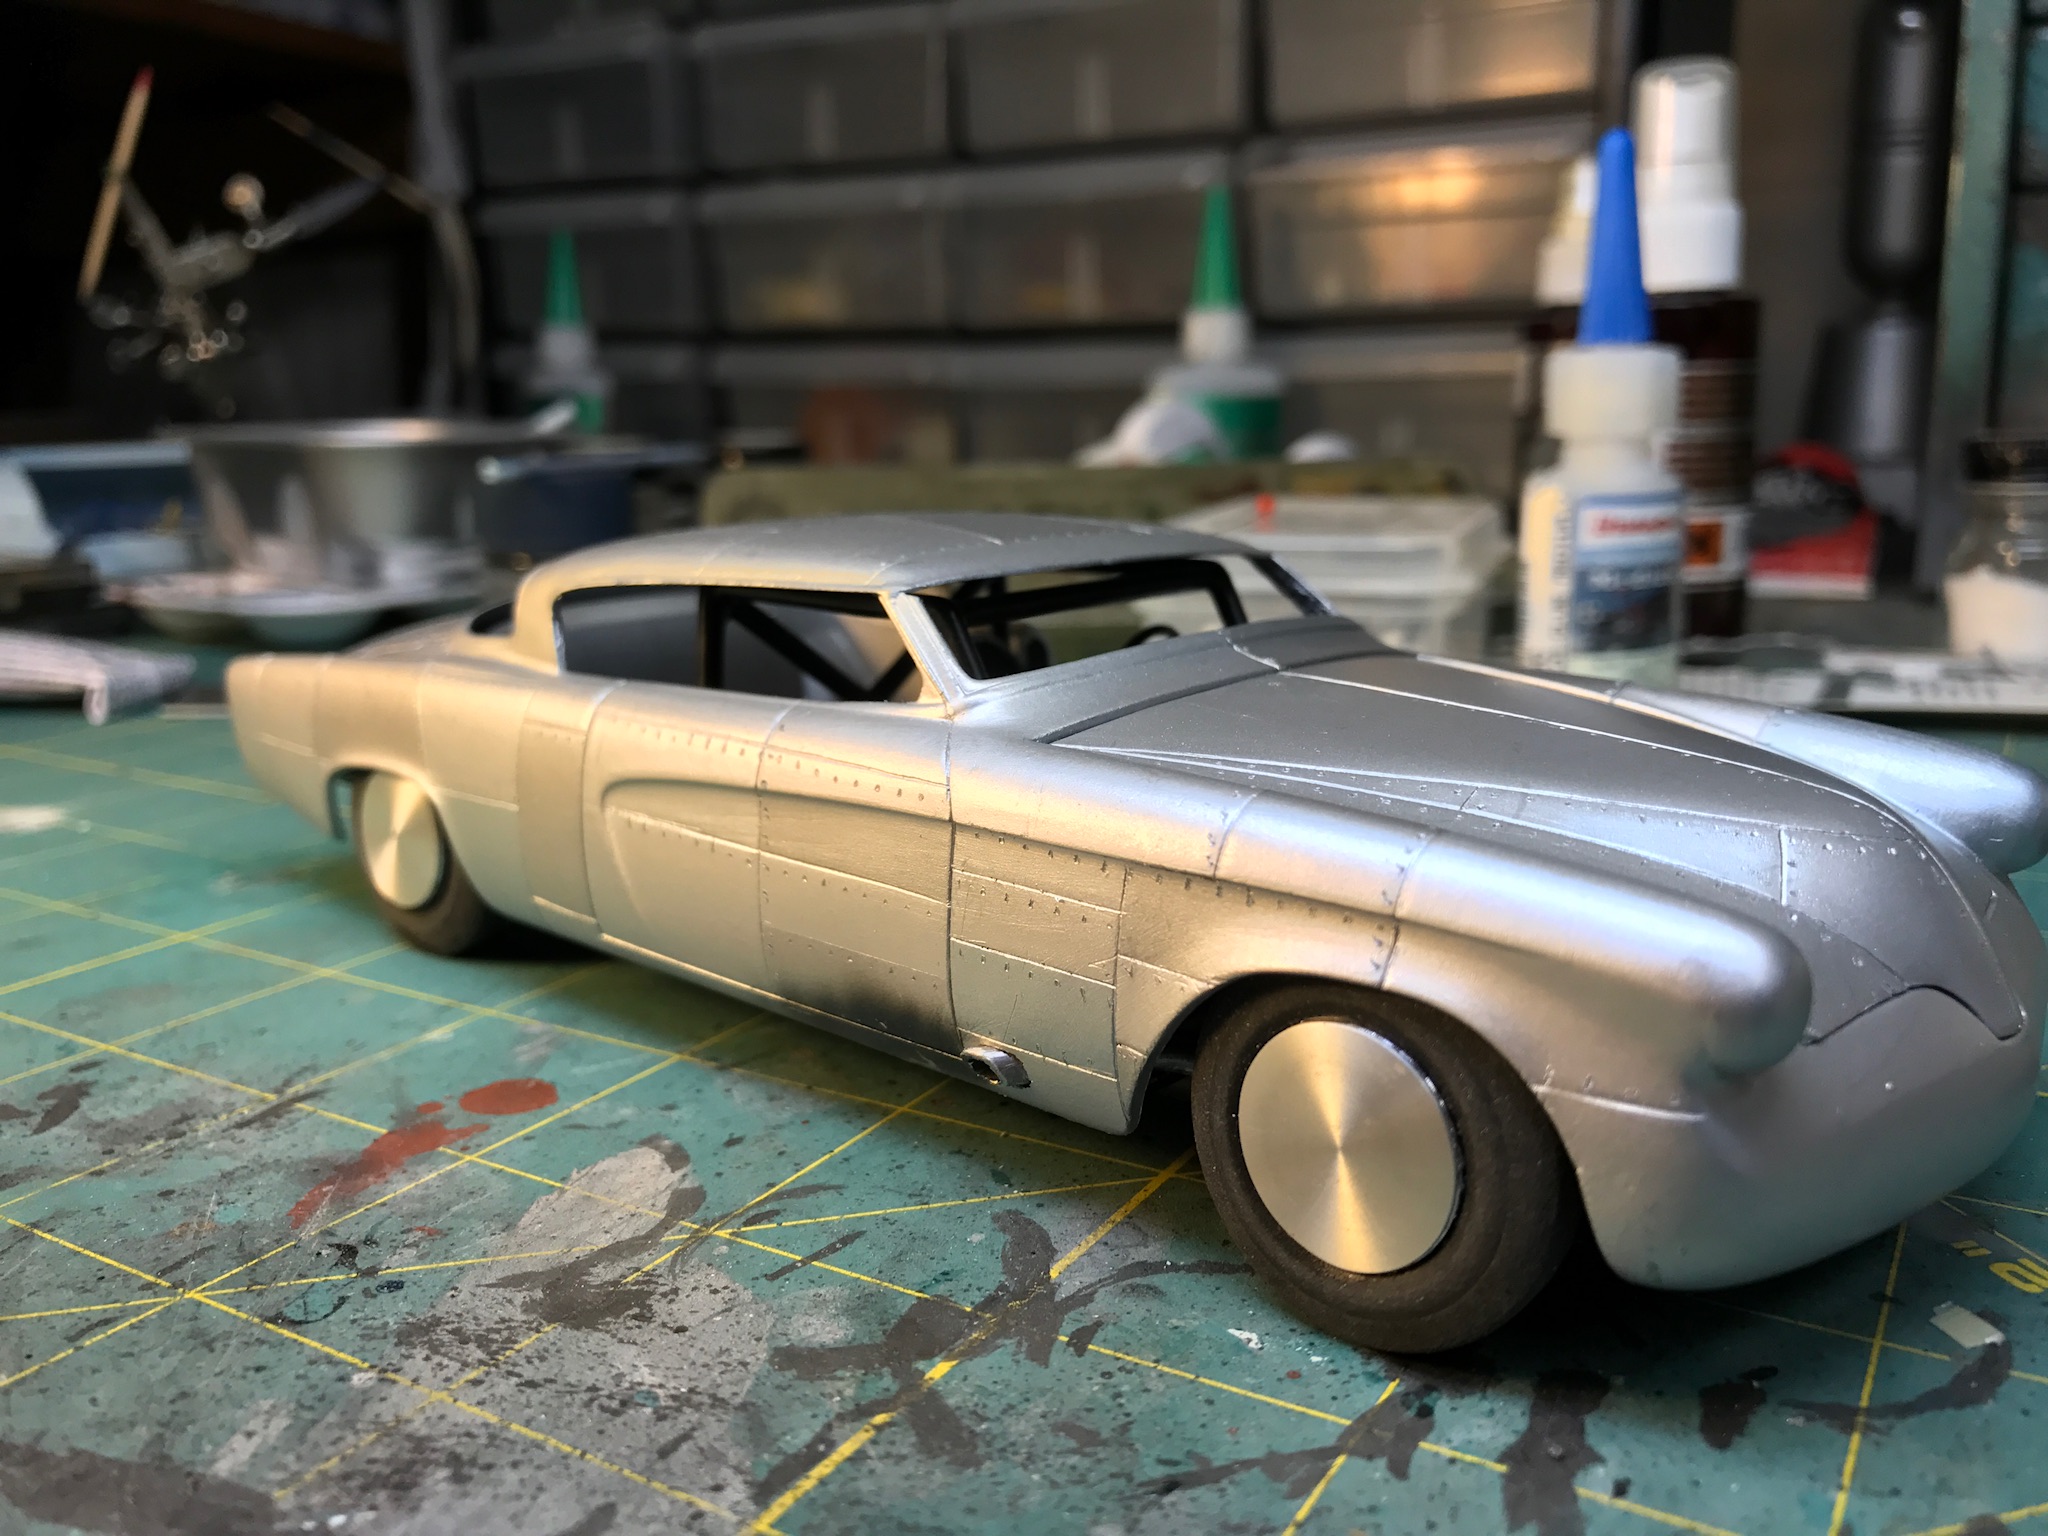
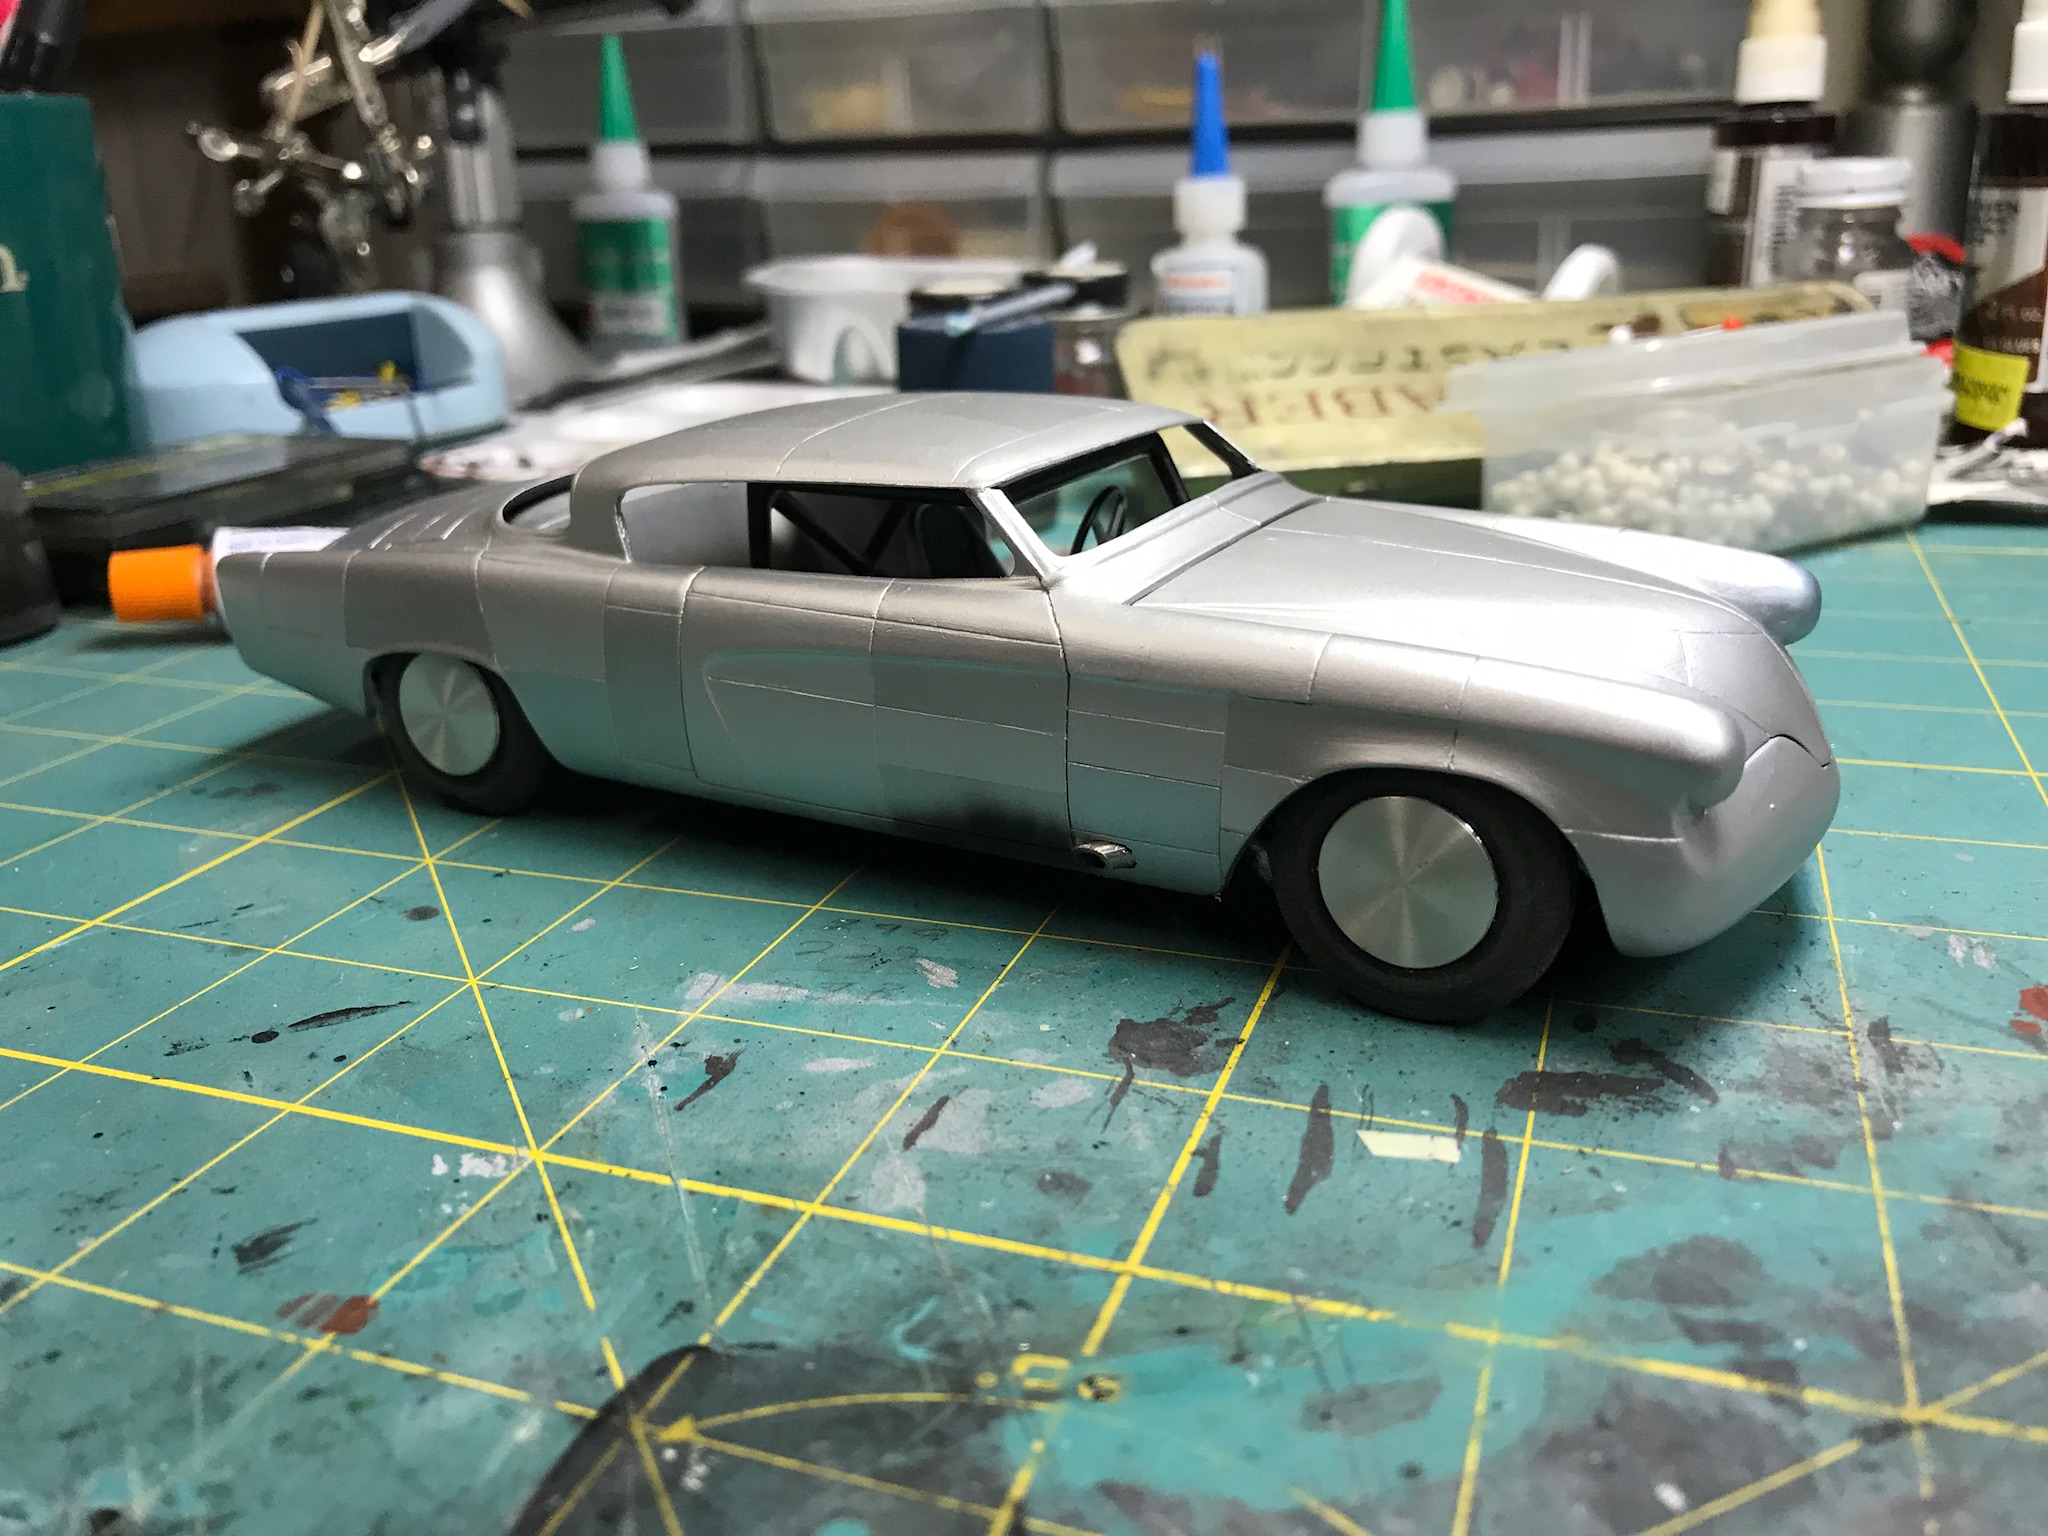
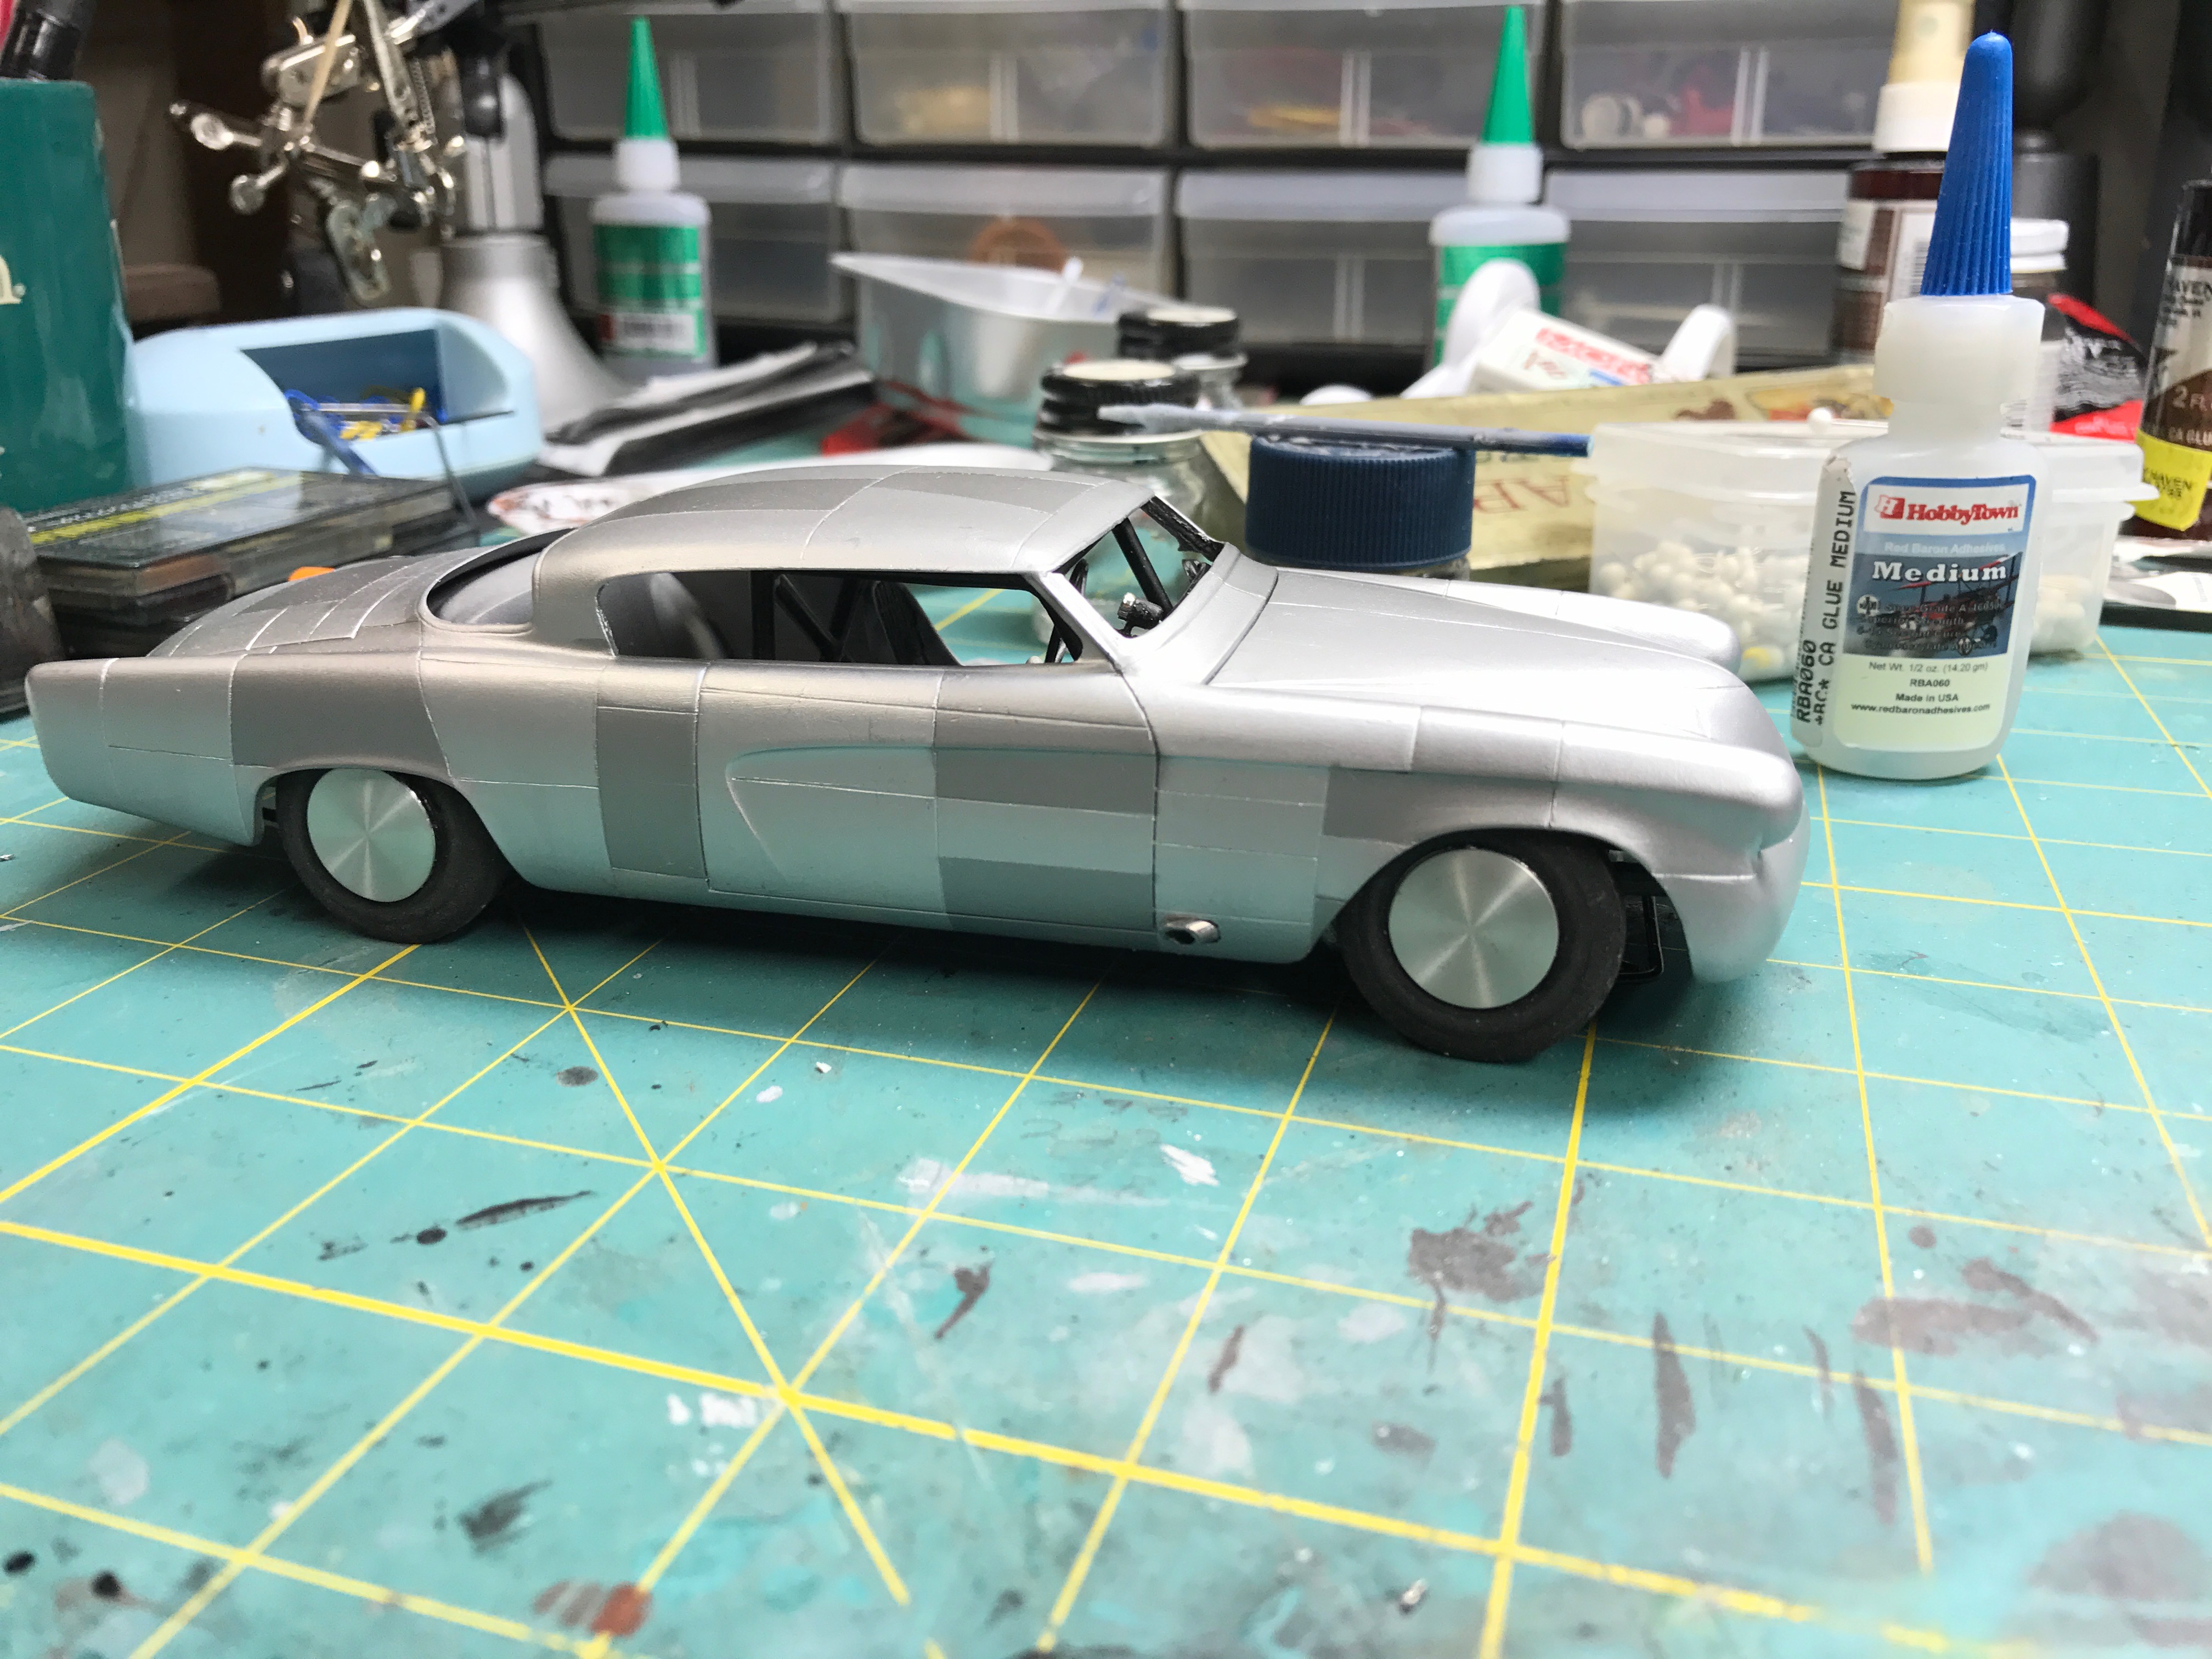
I've been messing with girl forever. The inspiration is a band name from the 60s, "Quicksilver Messenger Service". The color was always planed to be silver but I've been hanging around with some guys on the dark side (military modelers) and thought it would look good with panel lines. So hours later with my trusty razor saw here's where we're at now. The panels have no rhyme or reason, I'm sure if this body was done with panels they would be quite different but who the h.... would build this body out of panels anyway. As I researched images of planes I noticed the panels were often slightly different colors for no apparent reason, different mills, different allloys,?.... So here it is after a couple different shades of Model Masters Aluminum nonbuffing Metalizer. I'll add more shades but keep the shade variation more subtle.
-
Nice work!
-
It just keeps getting better
-
Very nice. Good job on the fades.
-
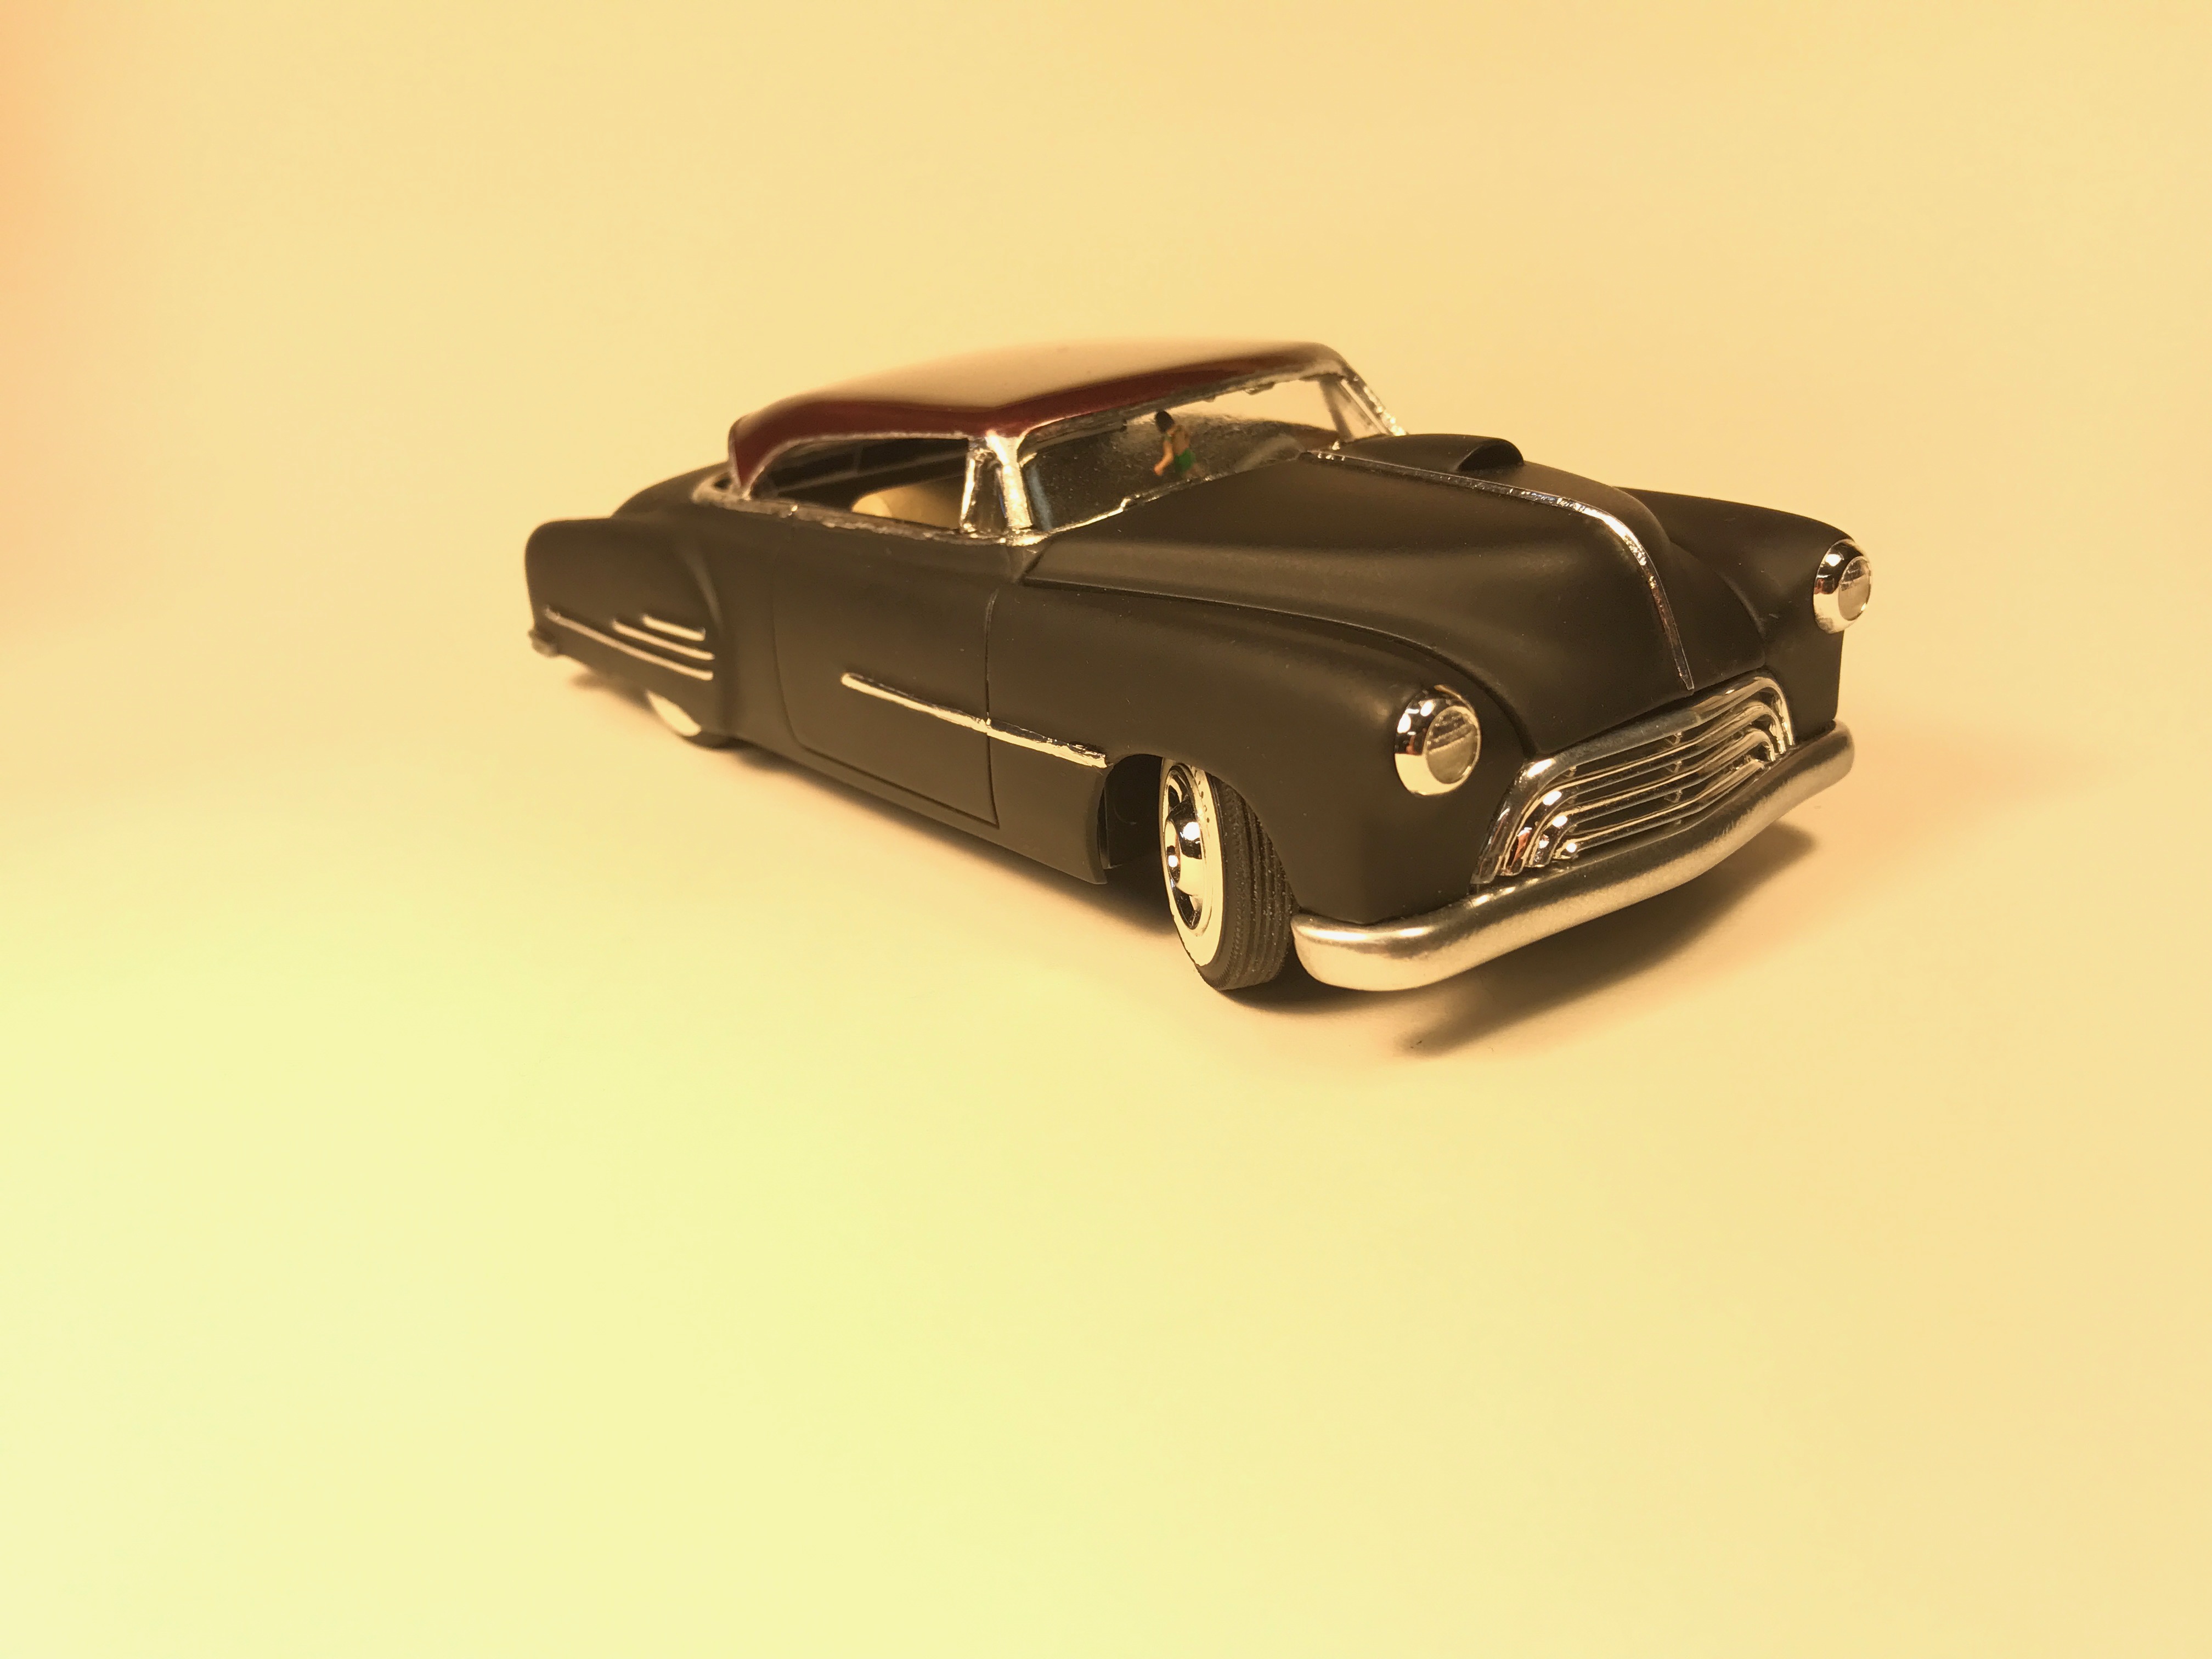
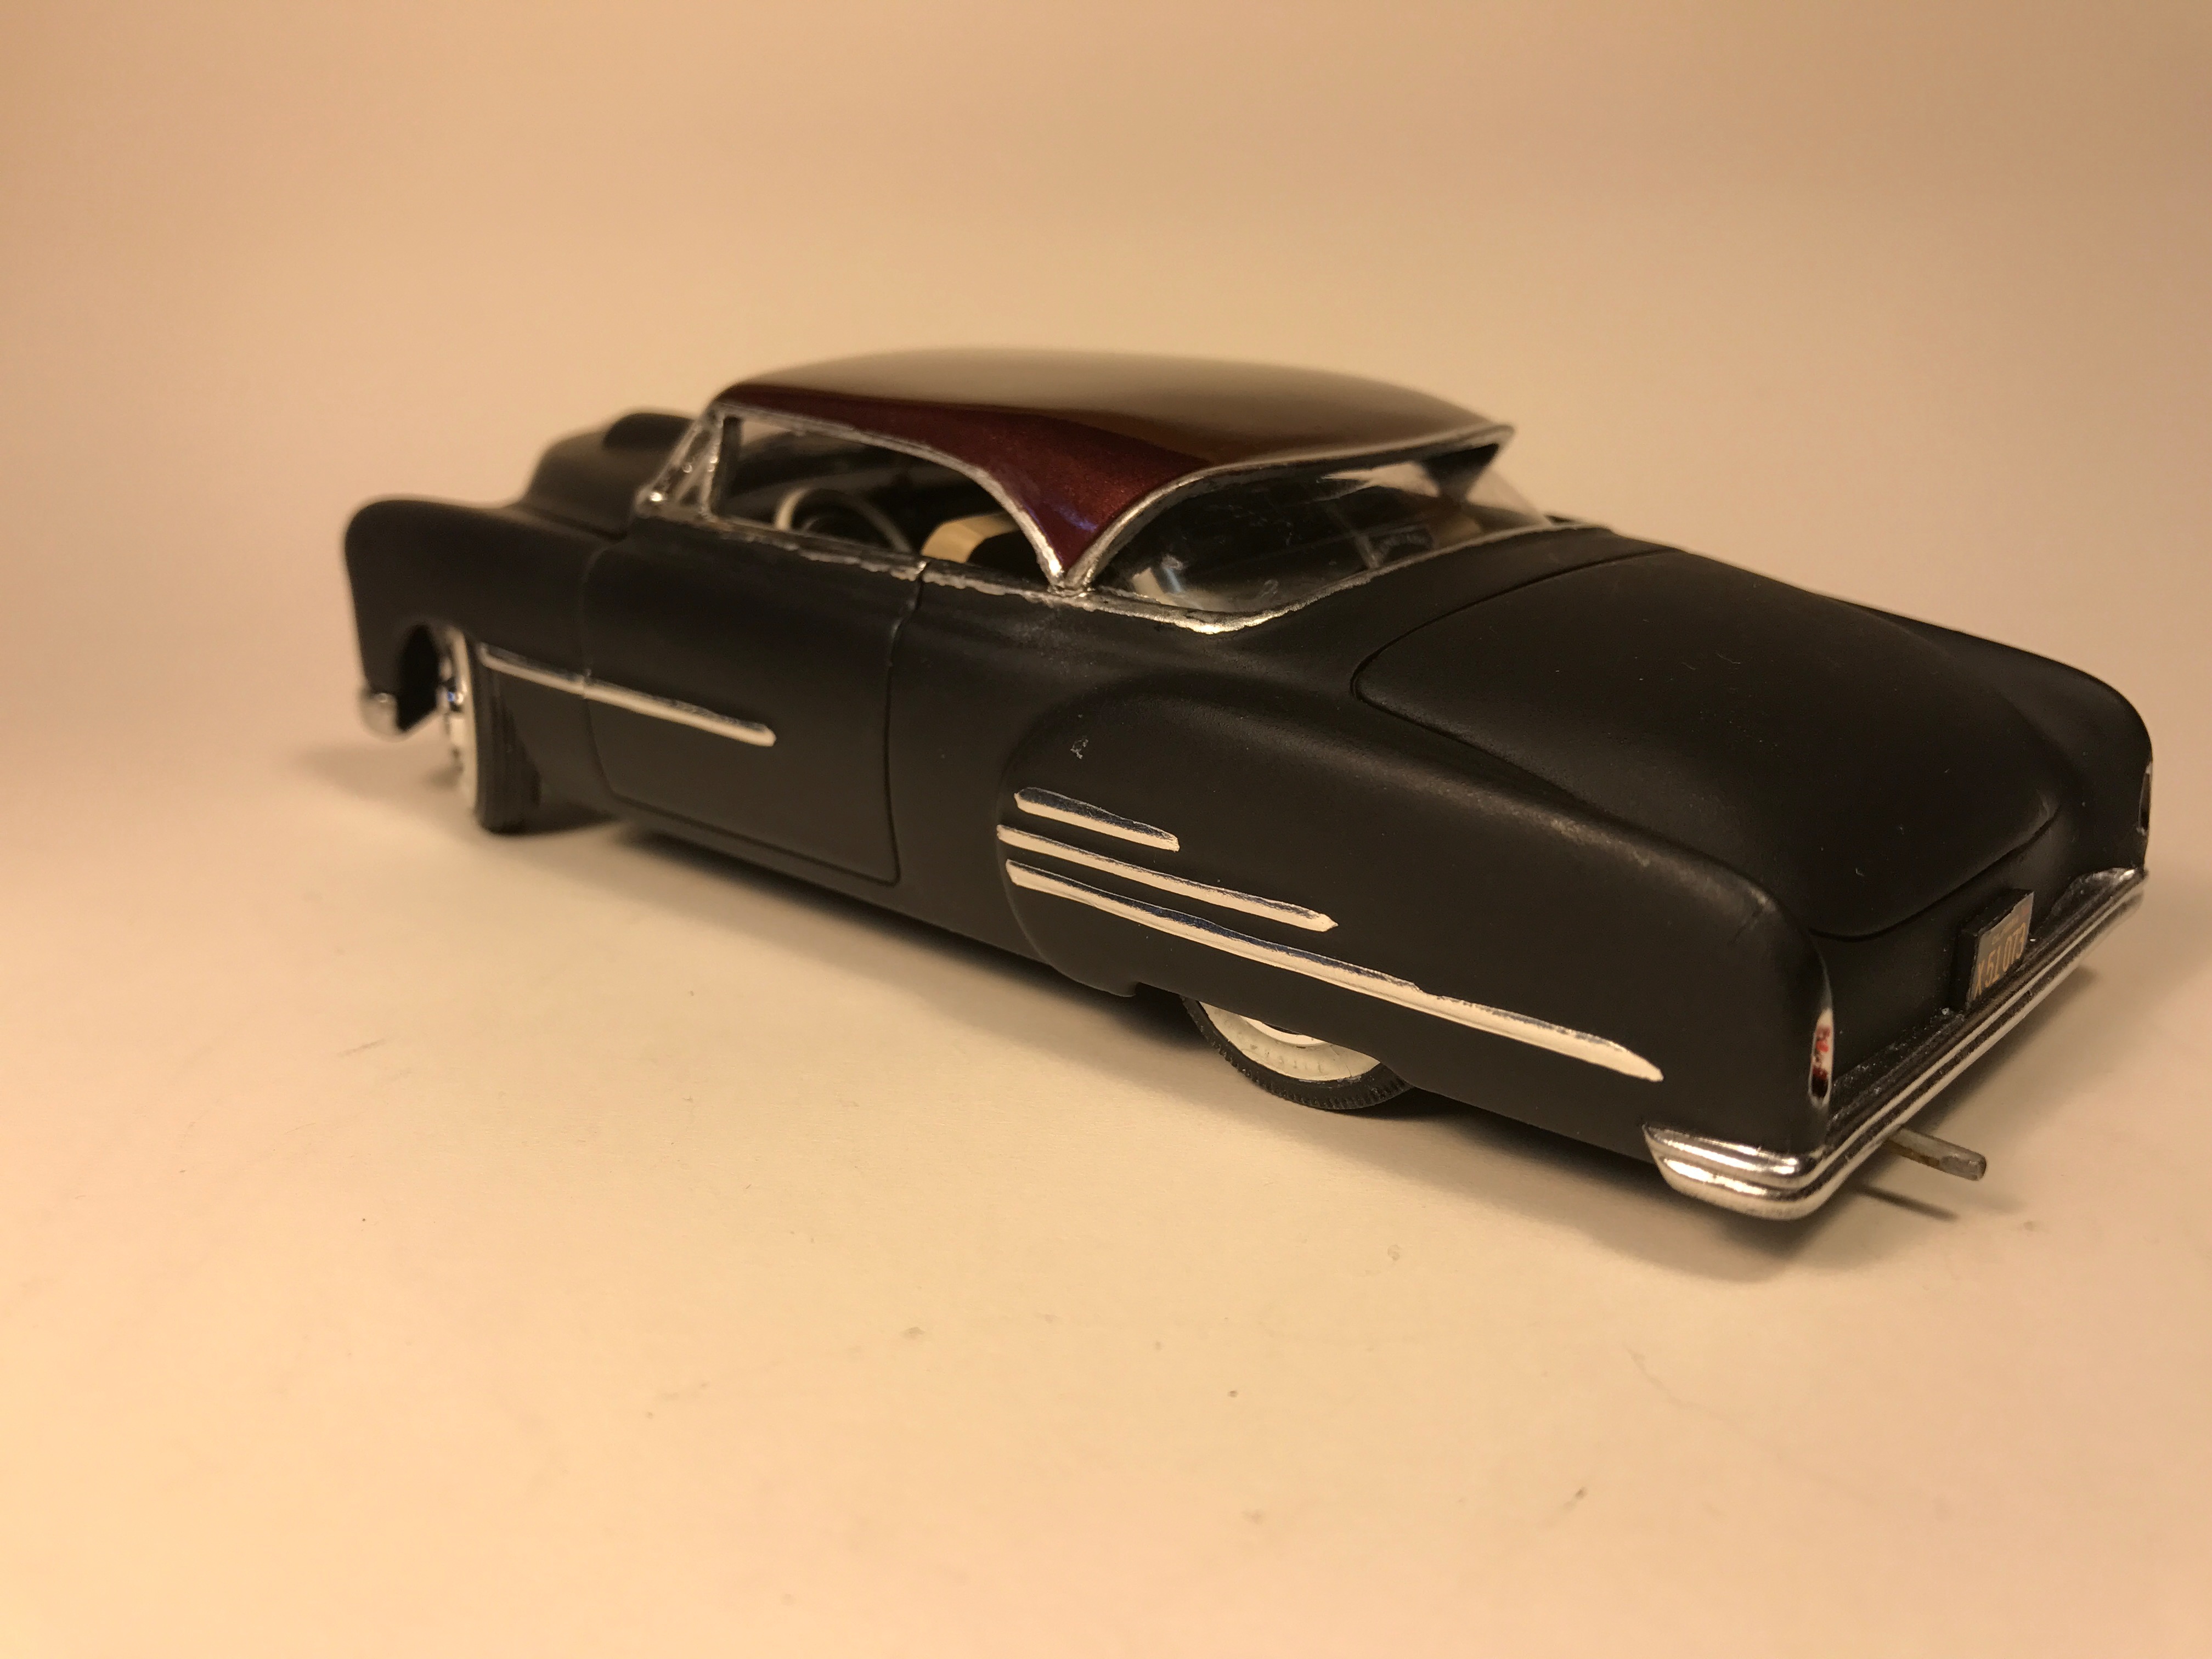
We'll she's been a long time coming but I'm calling her done. She started several years ago as a tribute to daily driver projects in the 50's and at that point I called it done. But not being one to leave well enough alone I decided to finish her. Along the way I learned BMF doesn't like flat finishes, then I learned to love Molotow's liquid chrome pen. Any way enjoy
-
Nice work as usual Doc. Can't wait