slownlow
-
Posts
242 -
Joined
-
Last visited
Content Type
Profiles
Forums
Events
Gallery
Everything posted by slownlow
-
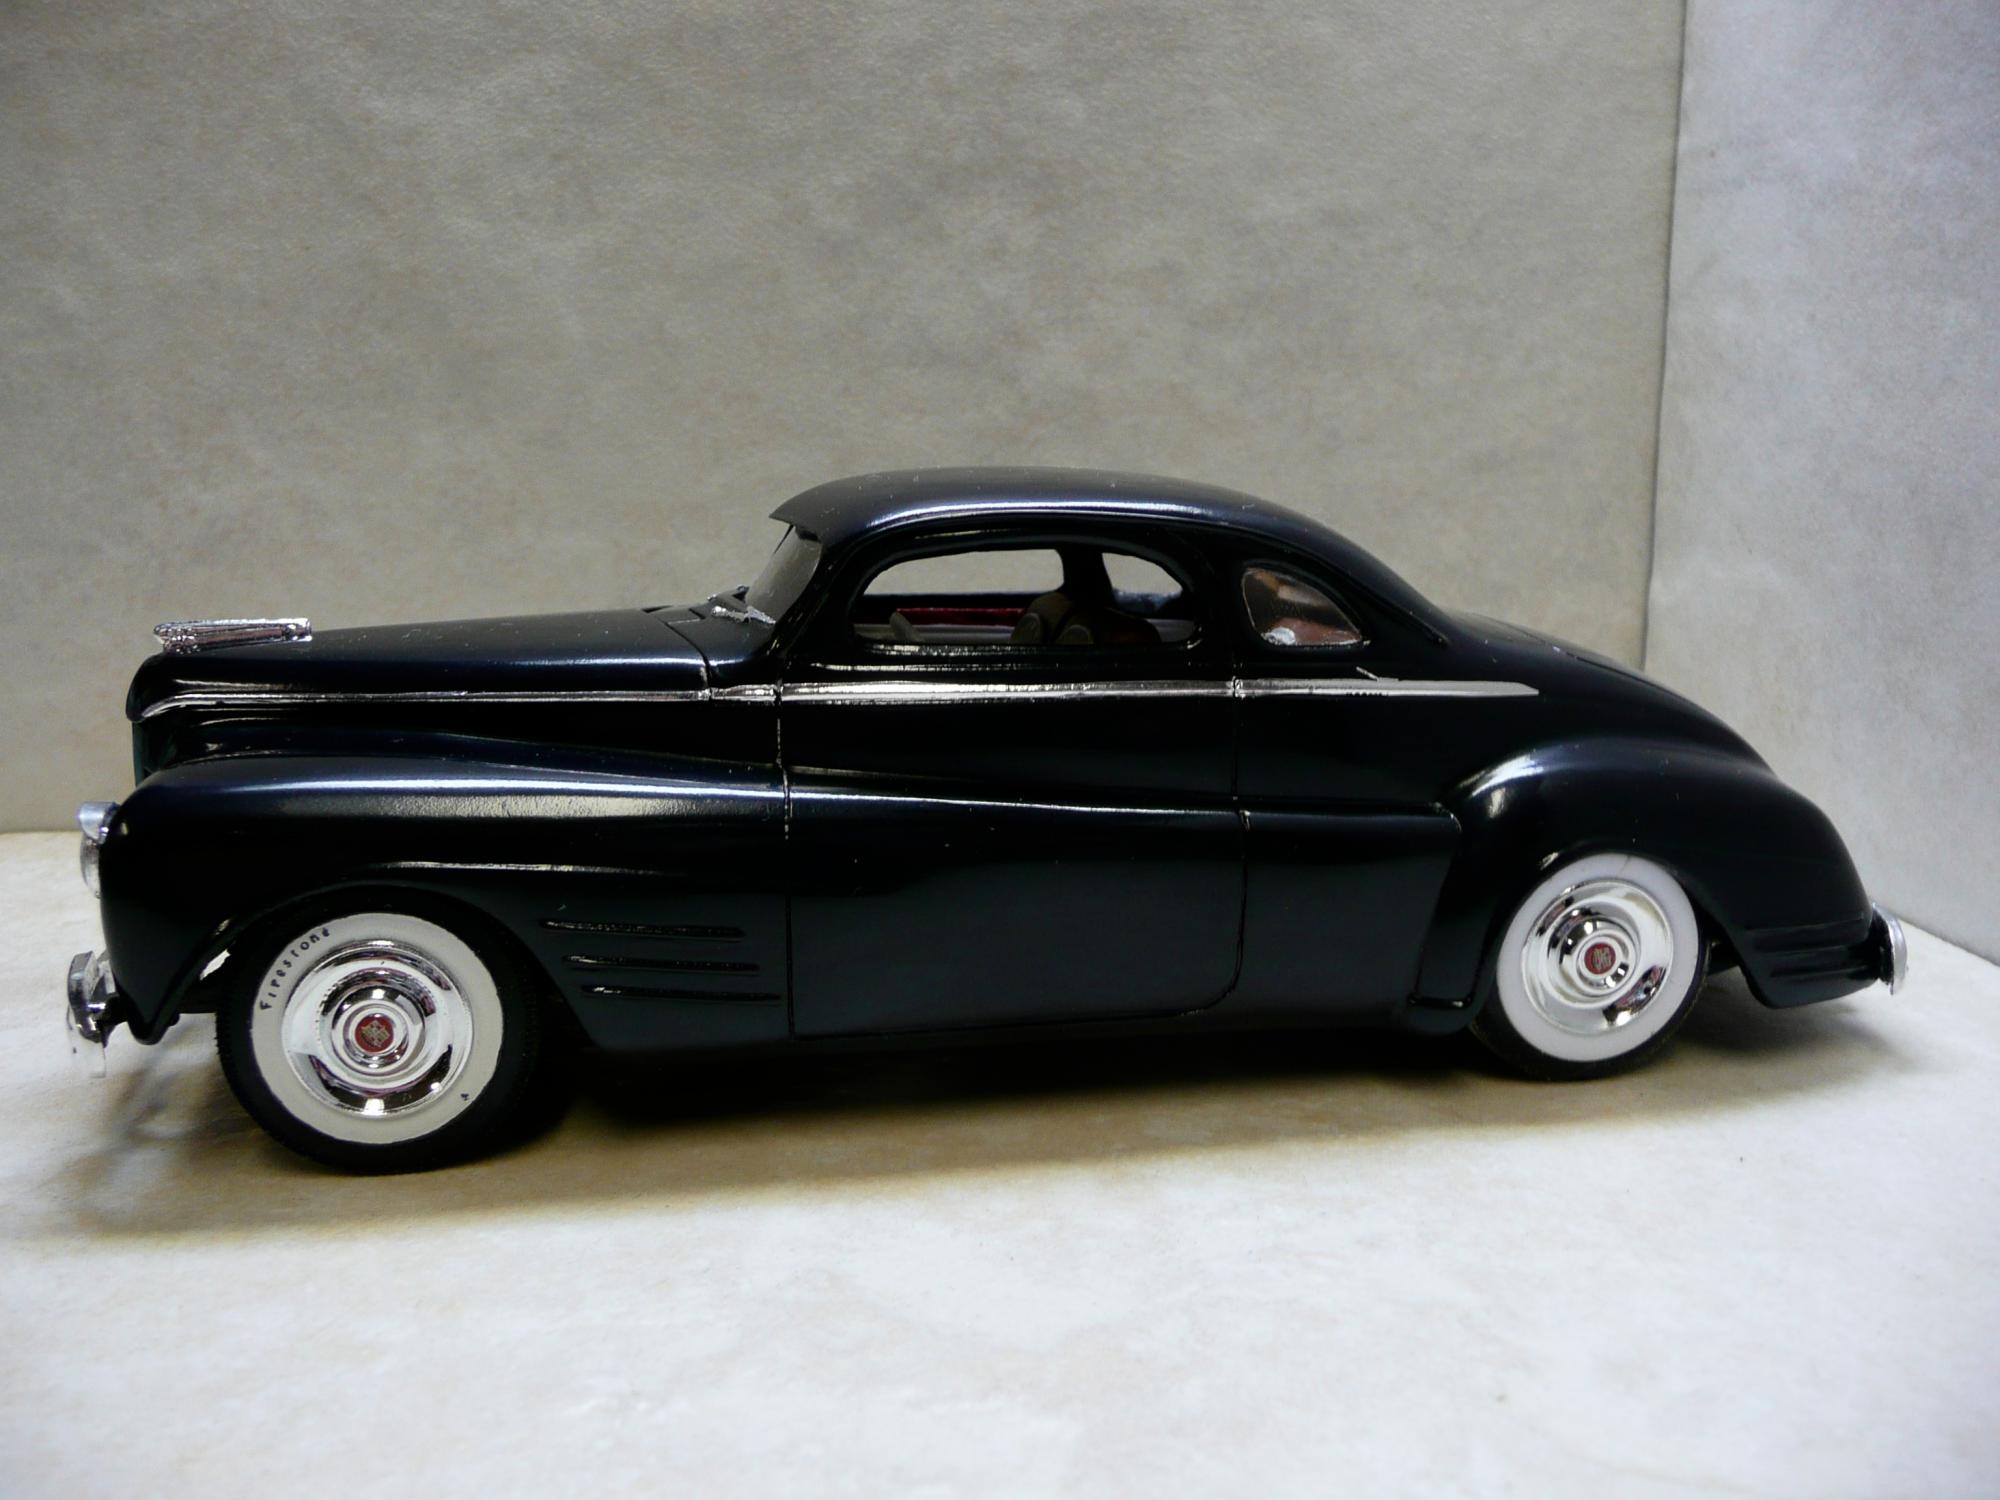
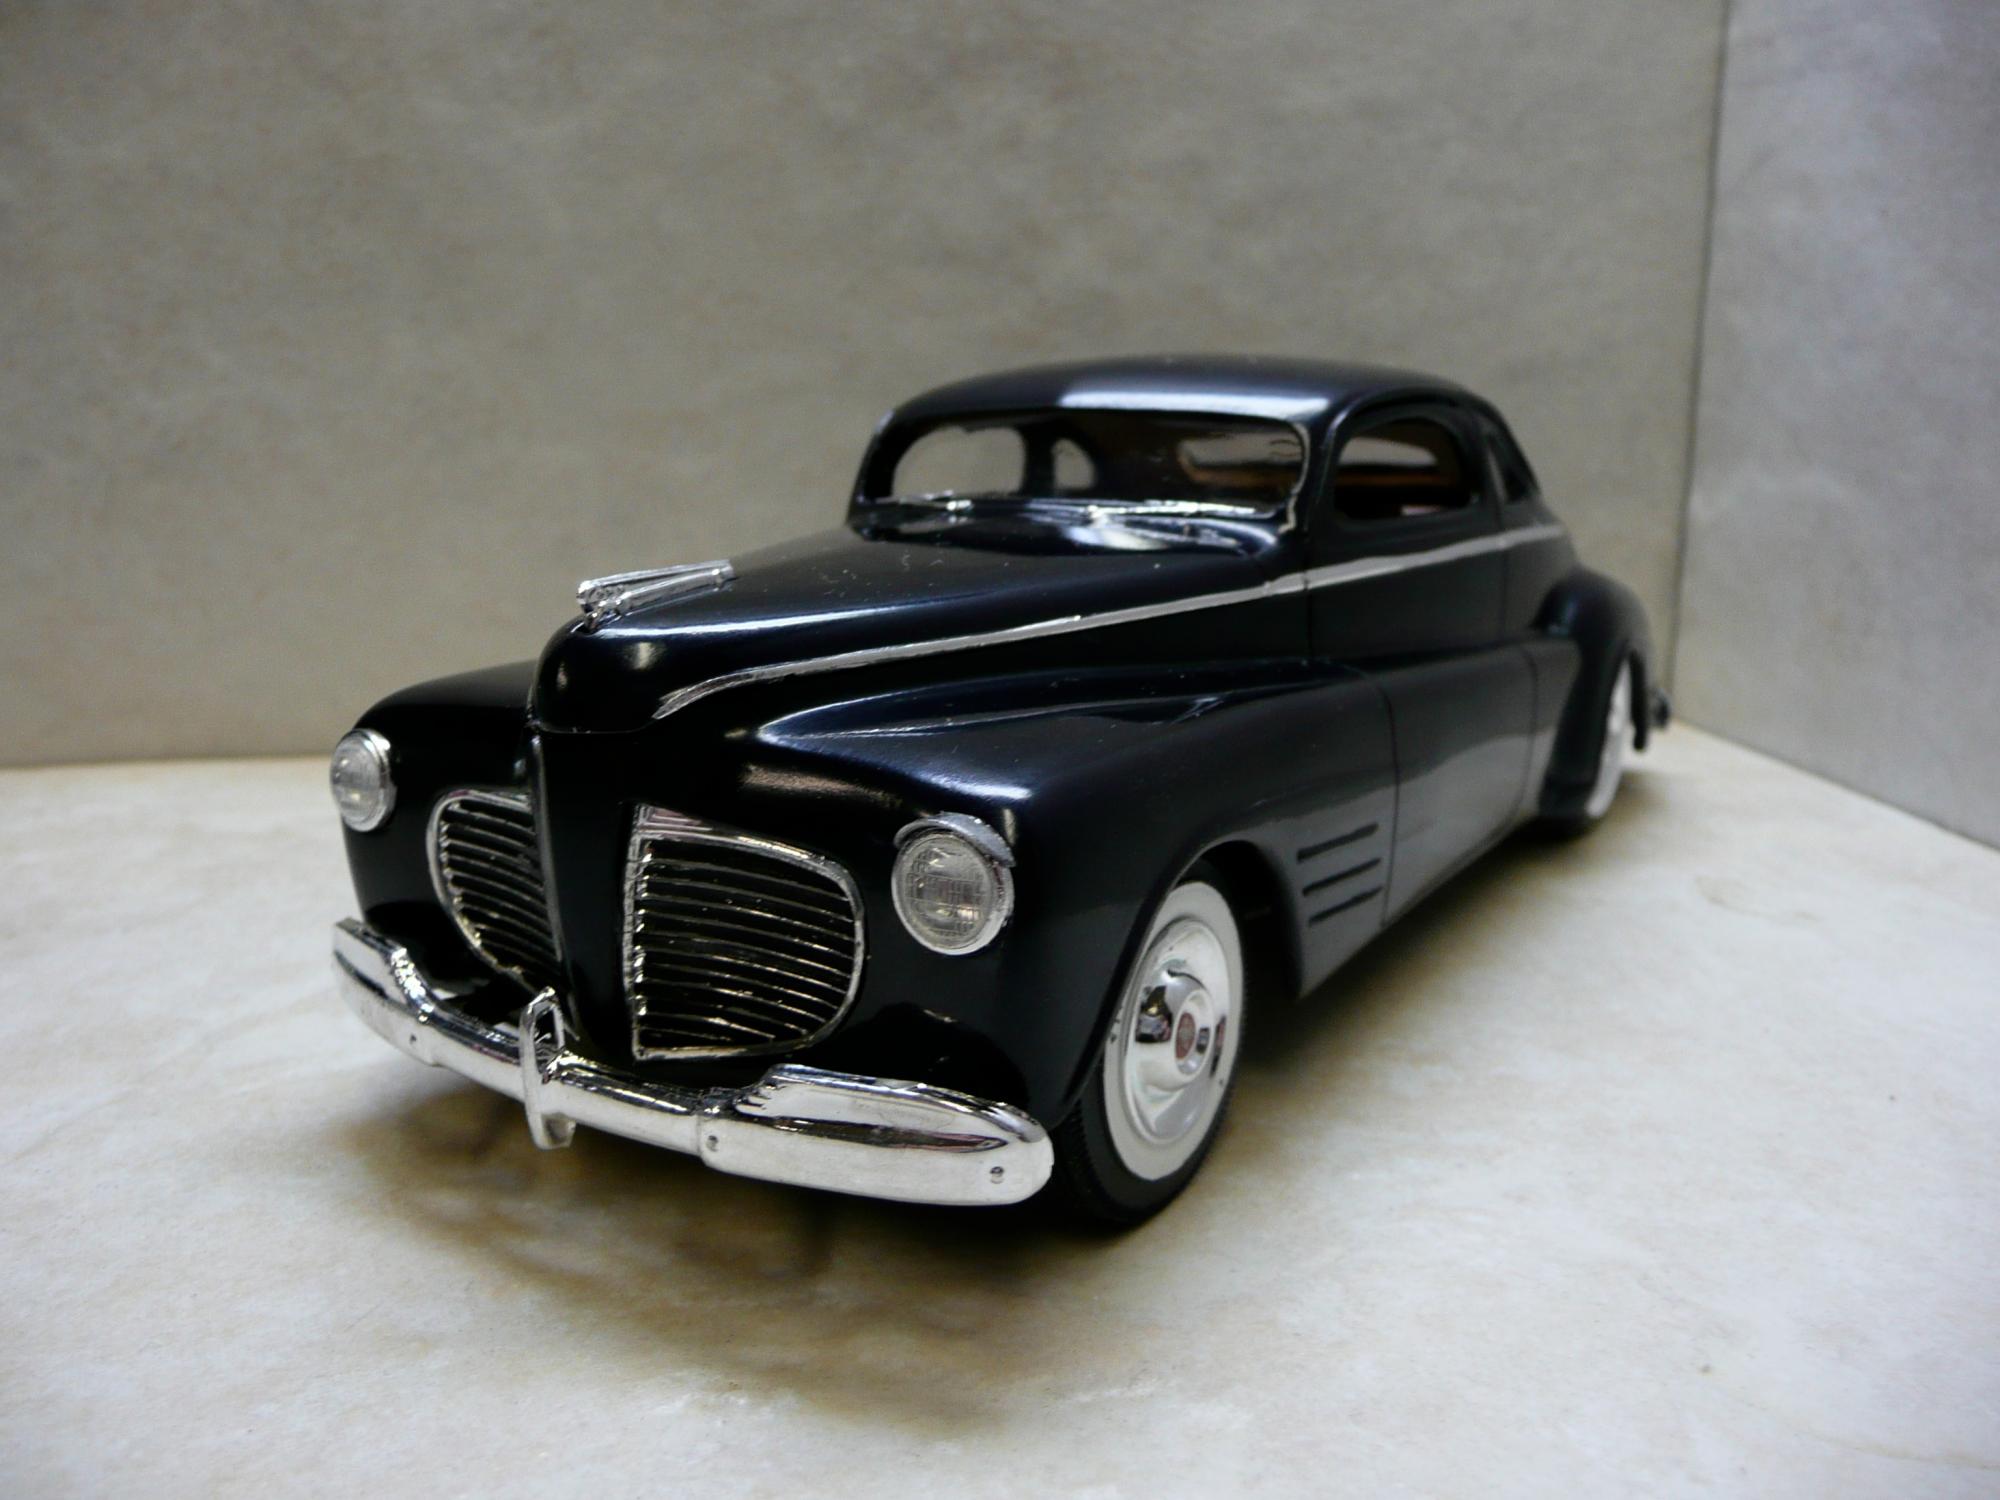
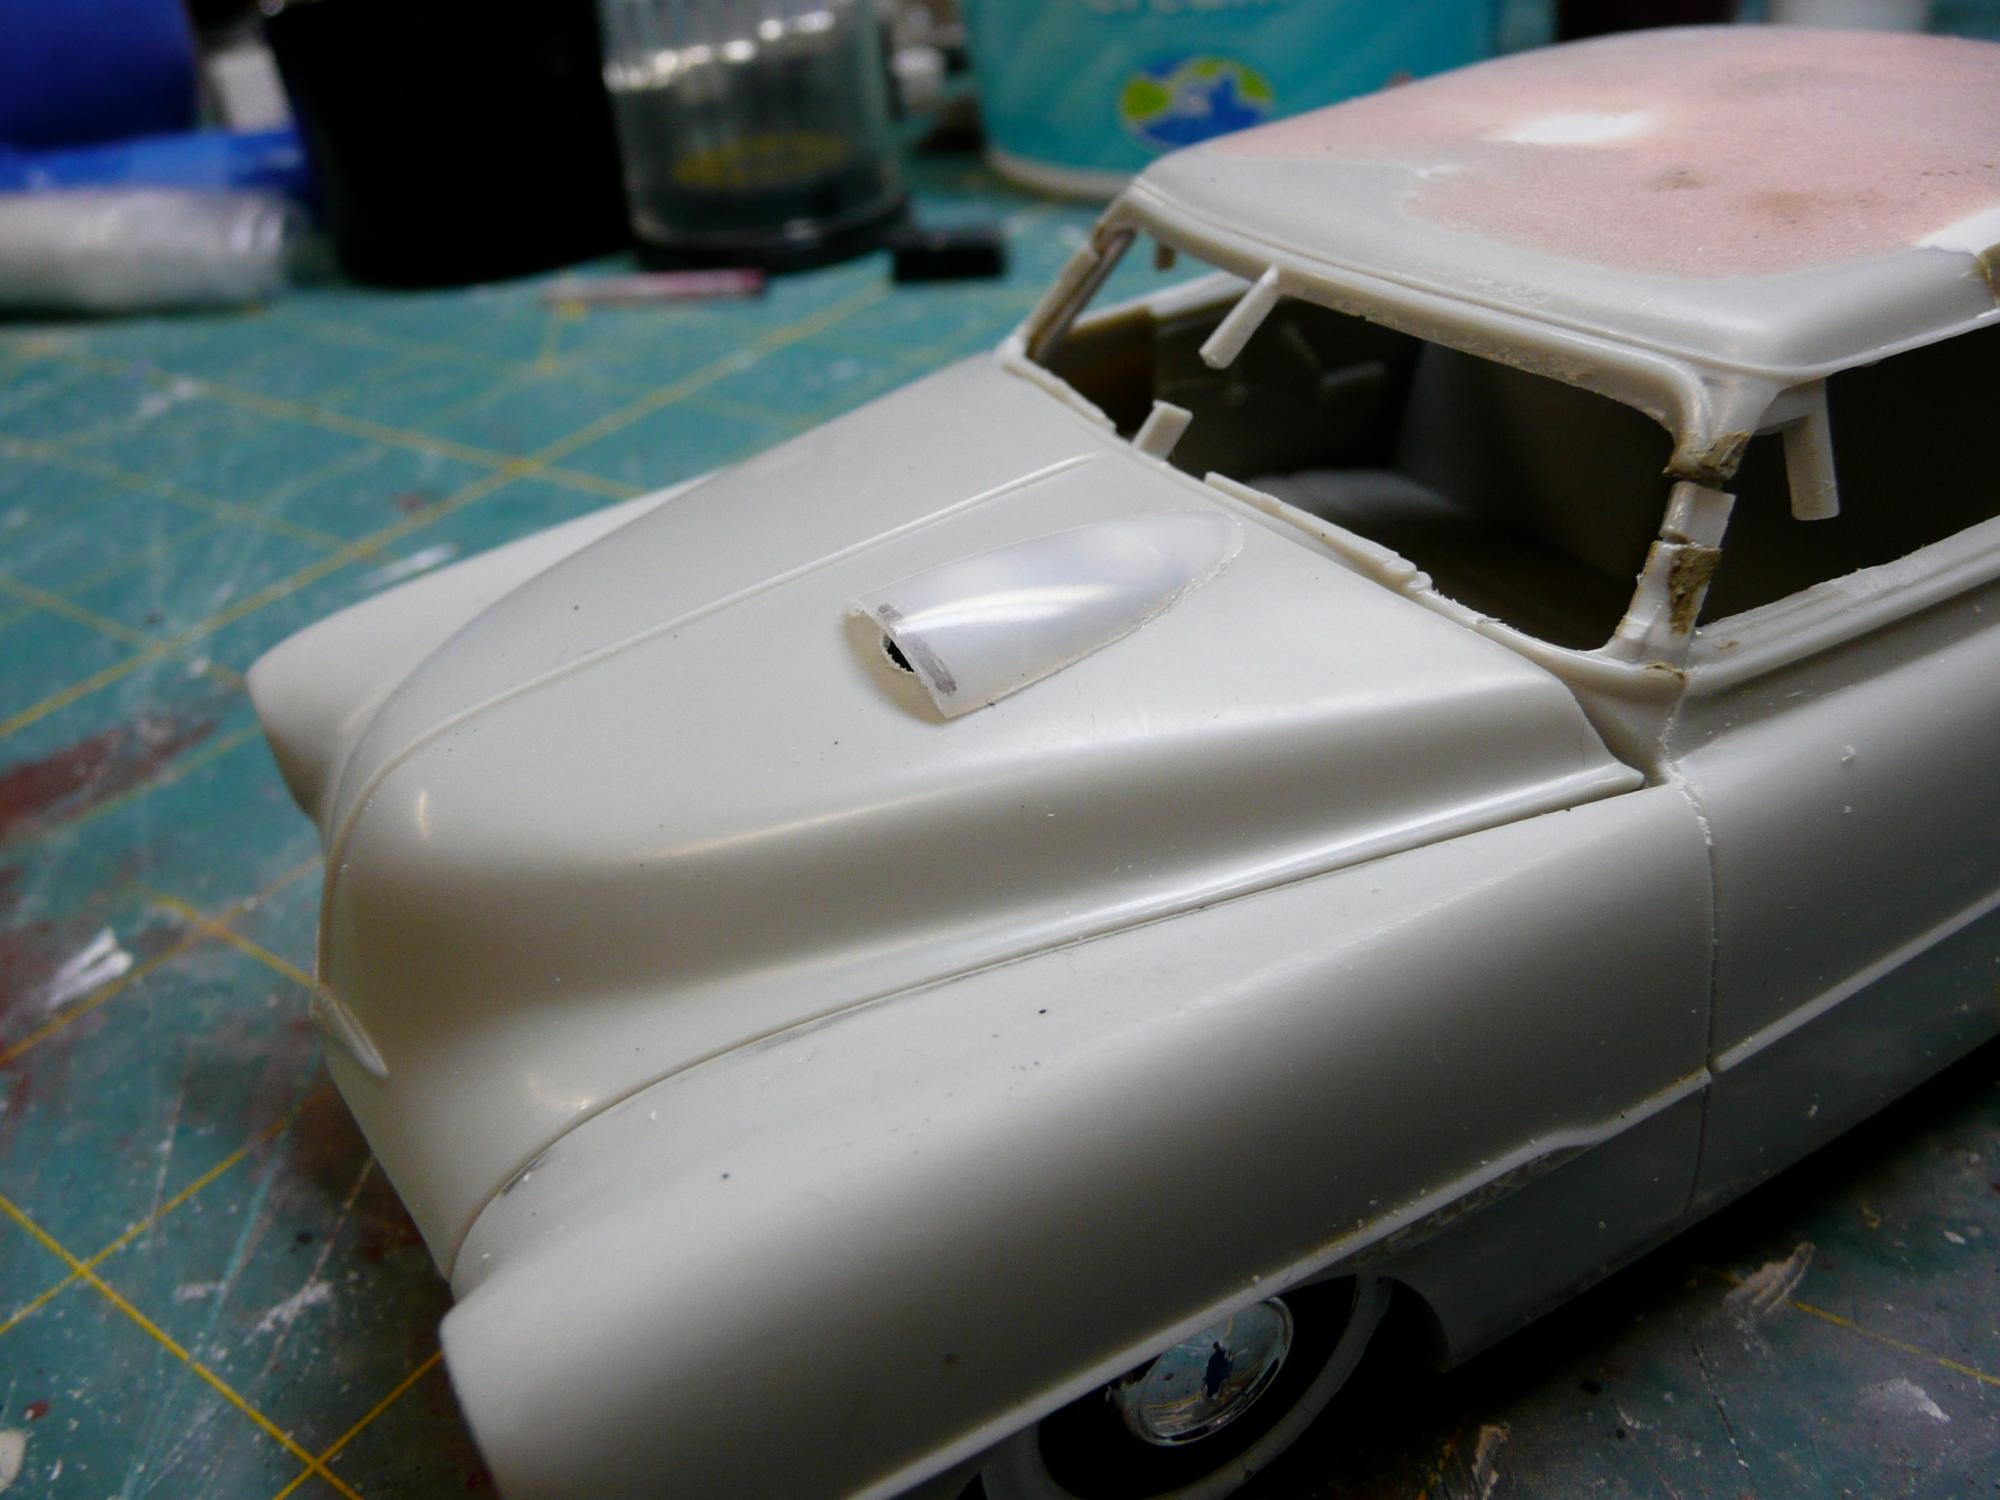
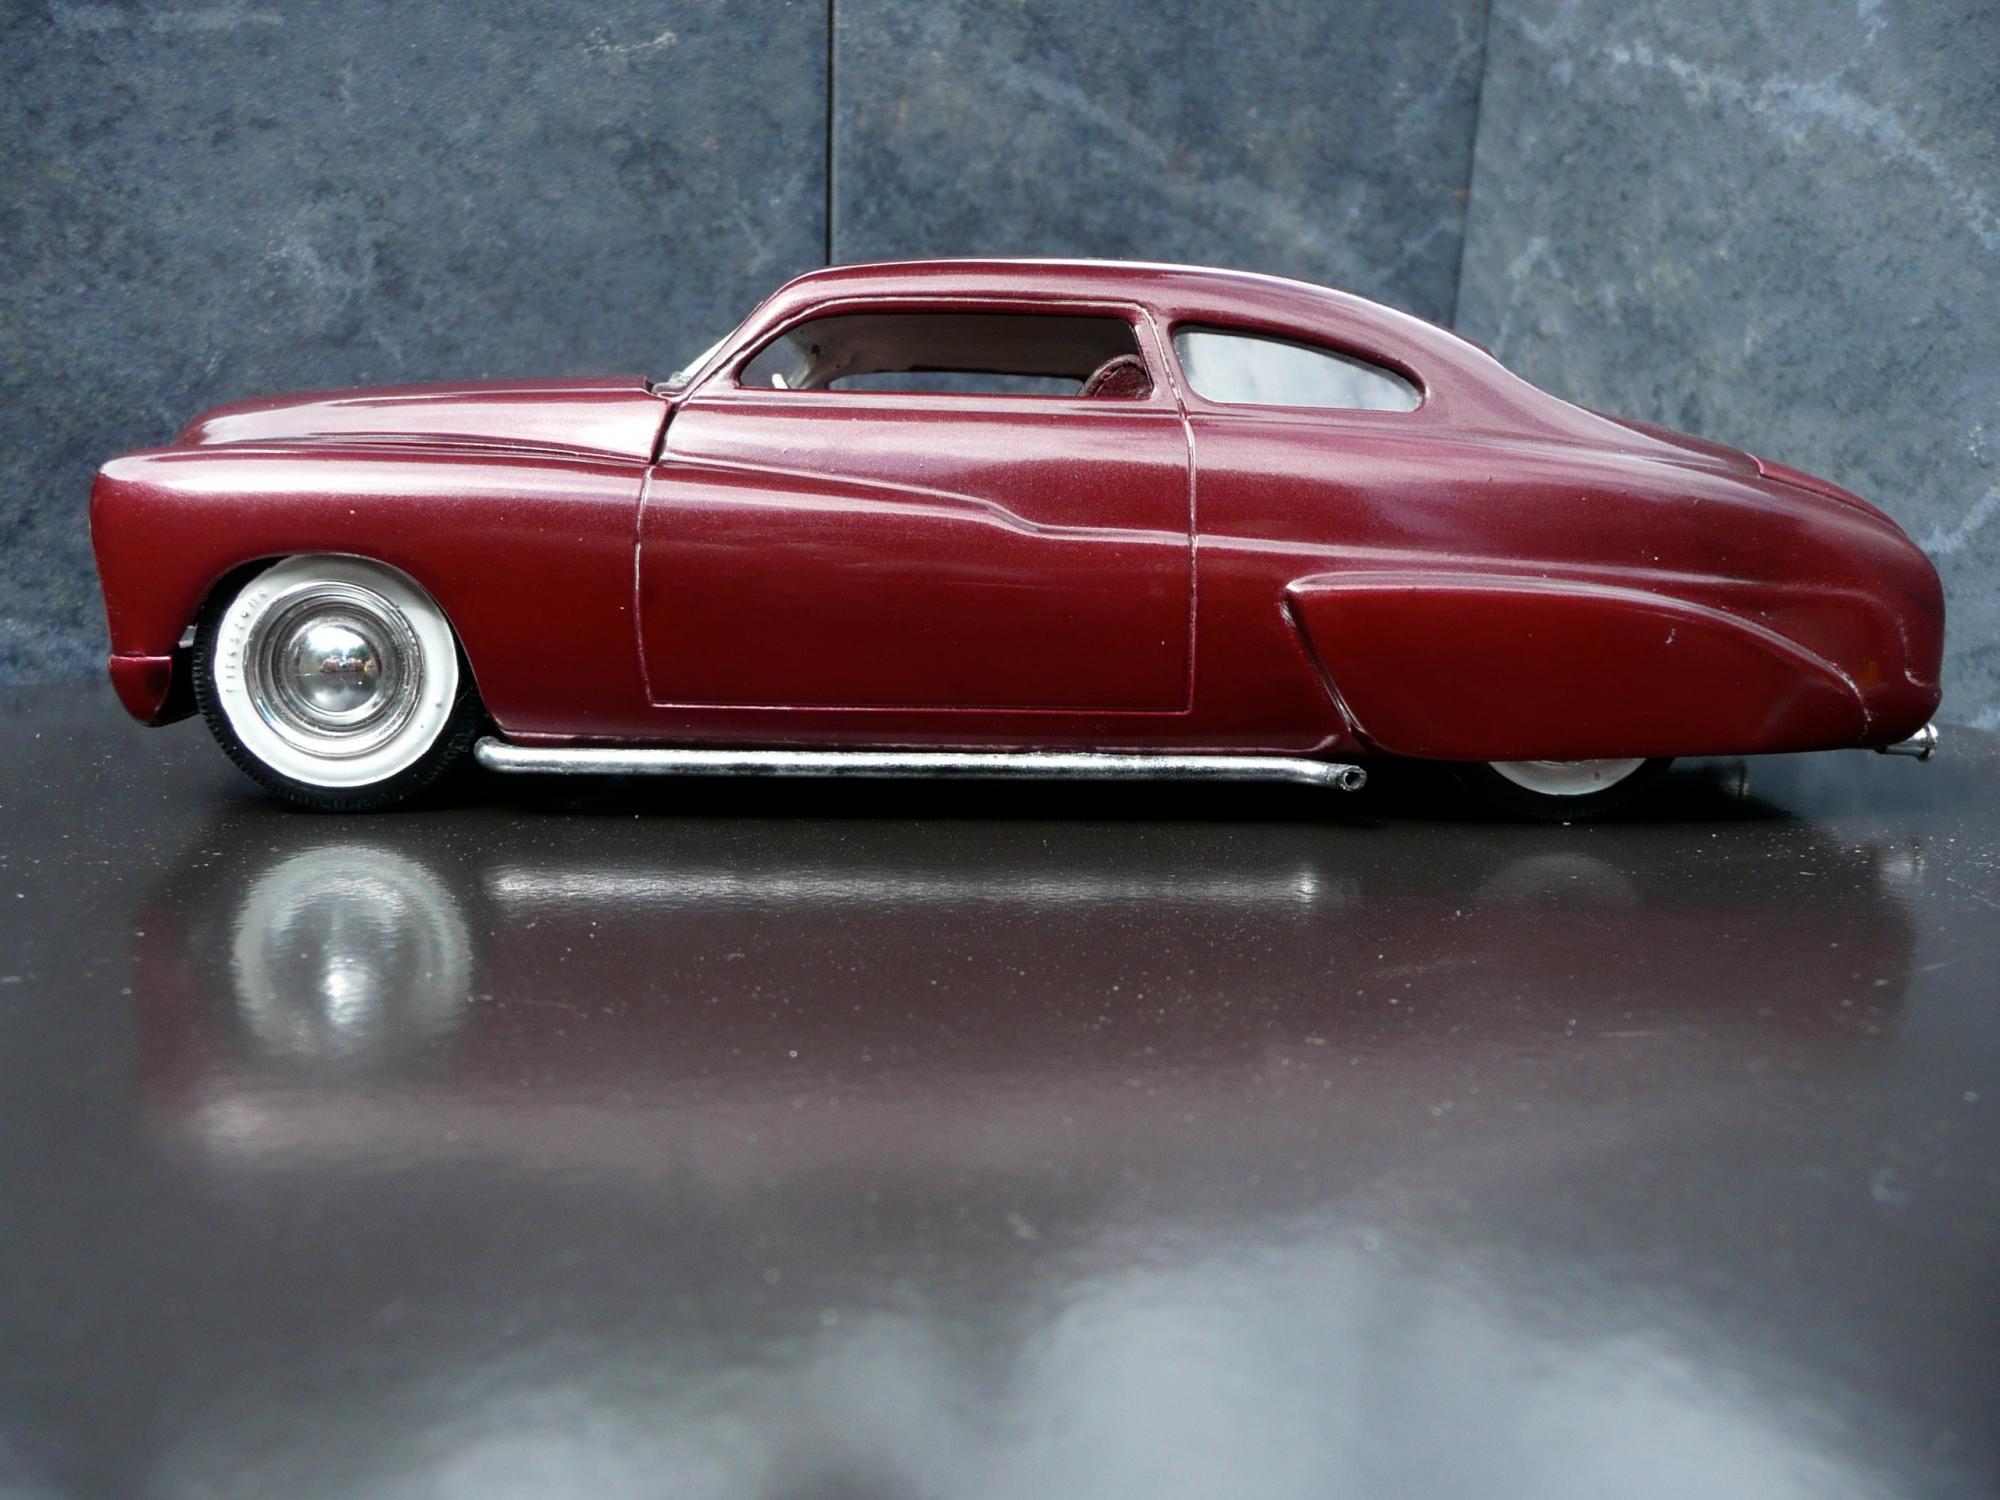
Here's one I did a few years ago. I did have it on my Fokti site but I quit them when they started charging. The top is chopped a 3", the curve of the trunk area is softened with a transverse pie section and fender fades were added. Also for s*** and giggles I did a tuck and roll interior. There are a lot of interesting stylistic features originally on these old Plymouths and I'm not sure why they didn't combine to make a more pleasing car. Any way this is my attempt to make it more better.

-
I agree Epso that has bothered me too. The car as it is now looks like it's "broke" in the middle, sloping from the grill to the cowl and from the rear to the cowl. Some careful measurements were made and the hood is actually flat relative to the ground. I think your solution is a good one. How much did you trim.
-
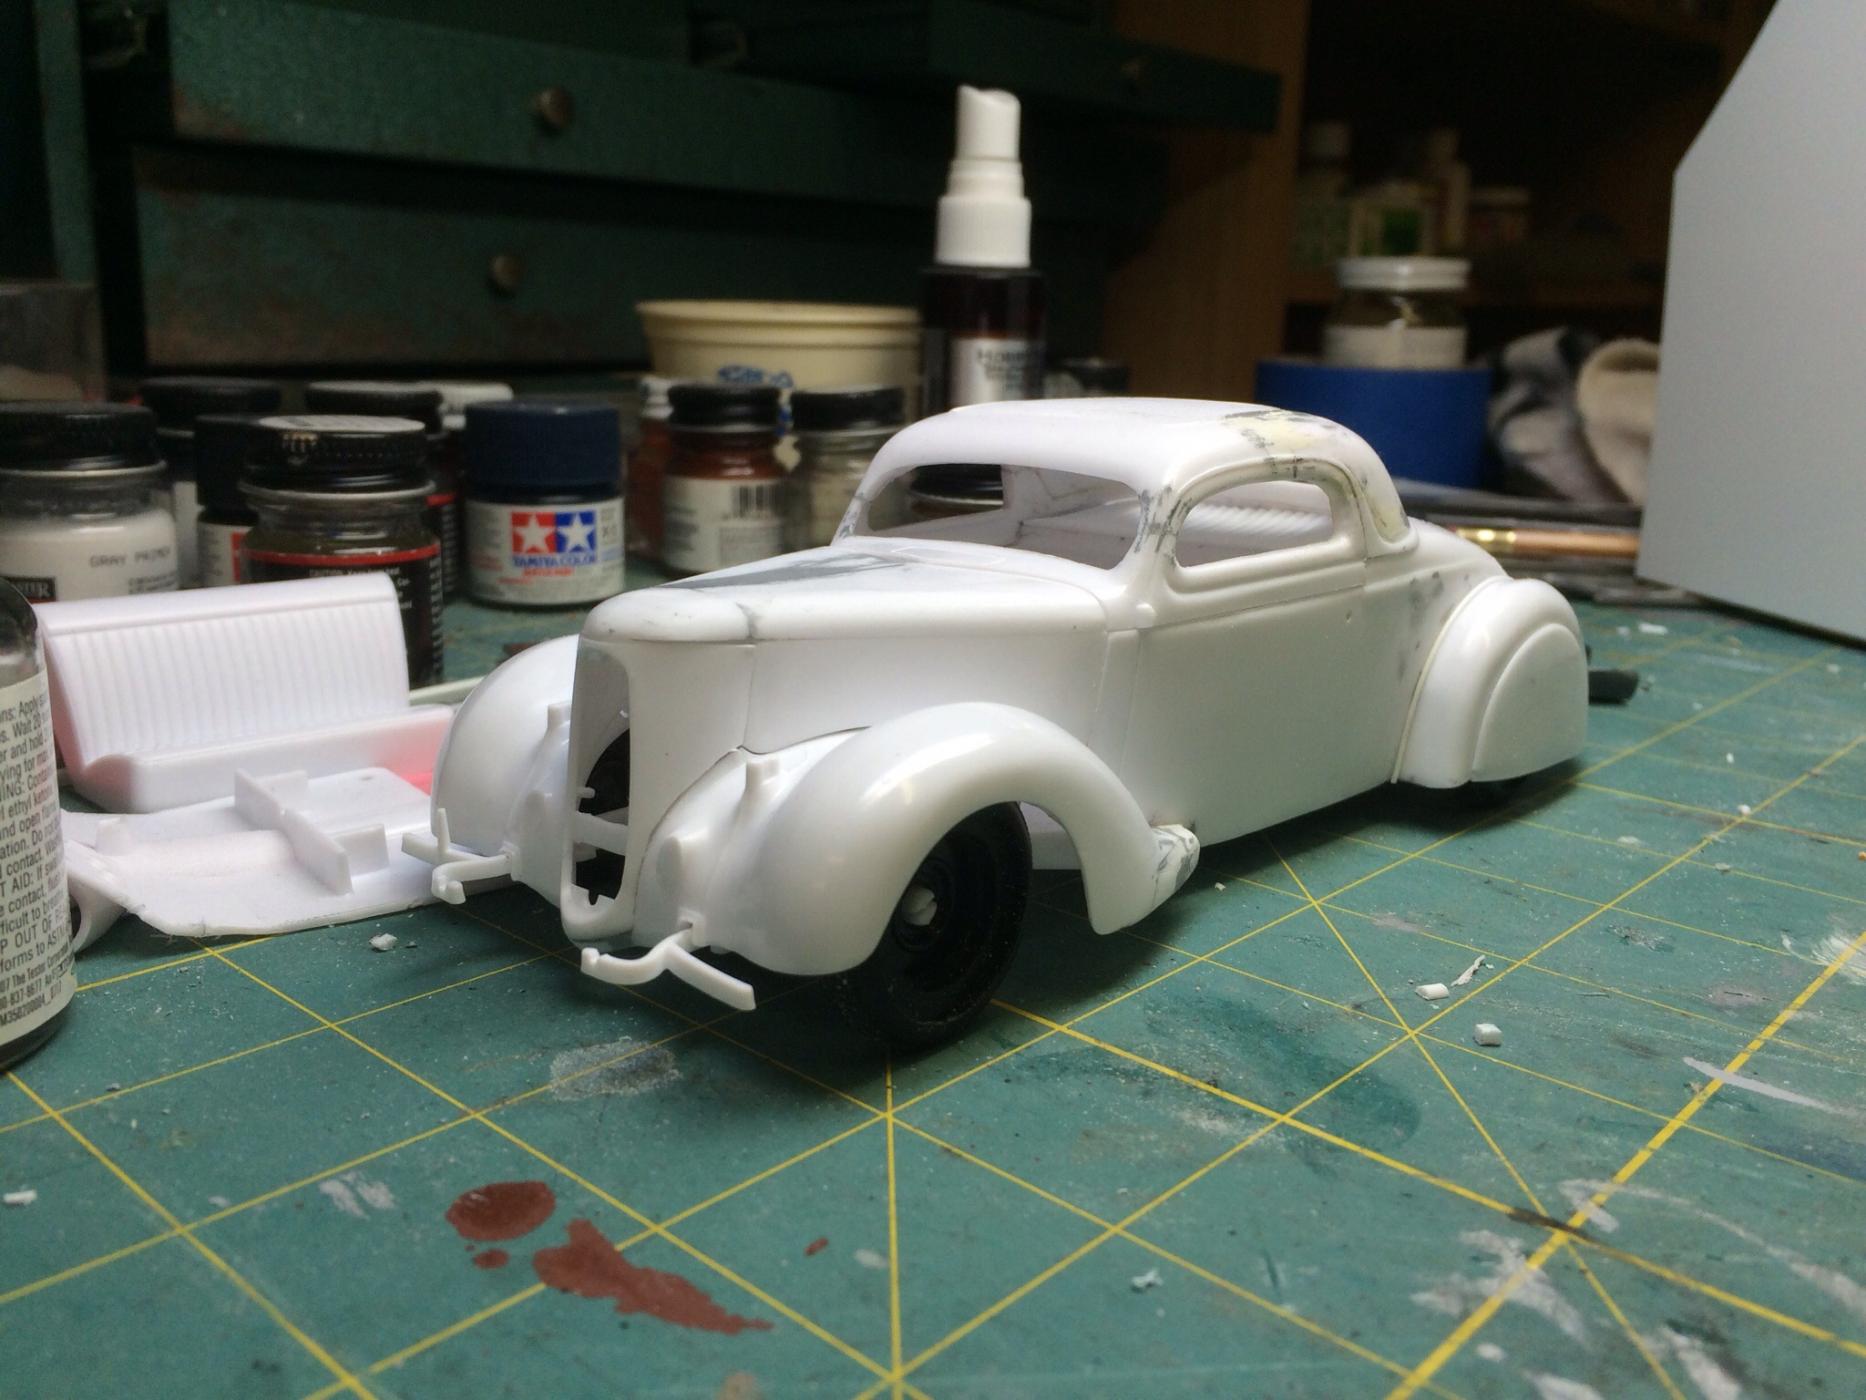
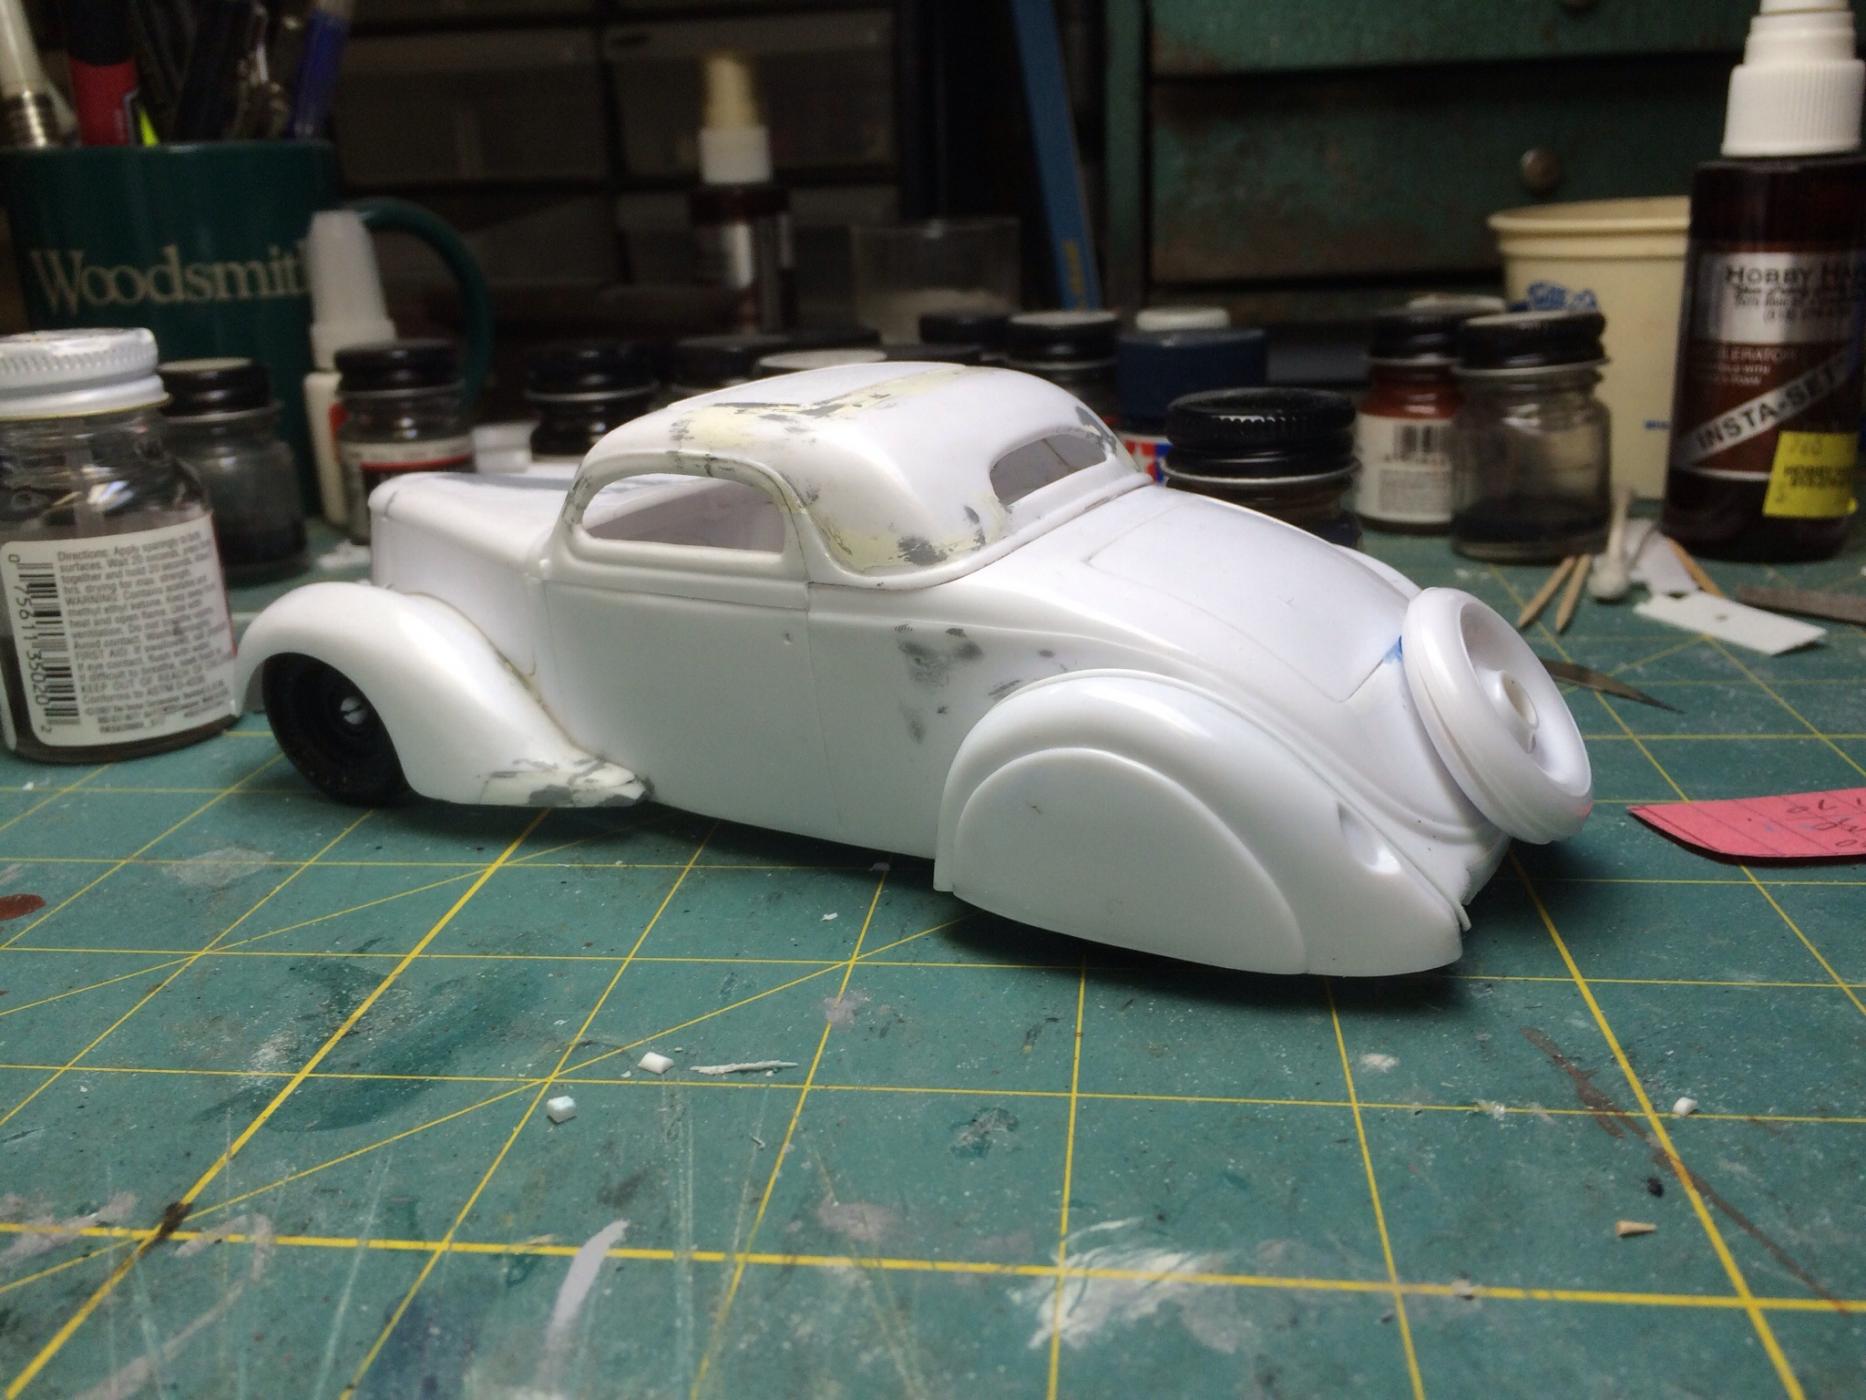
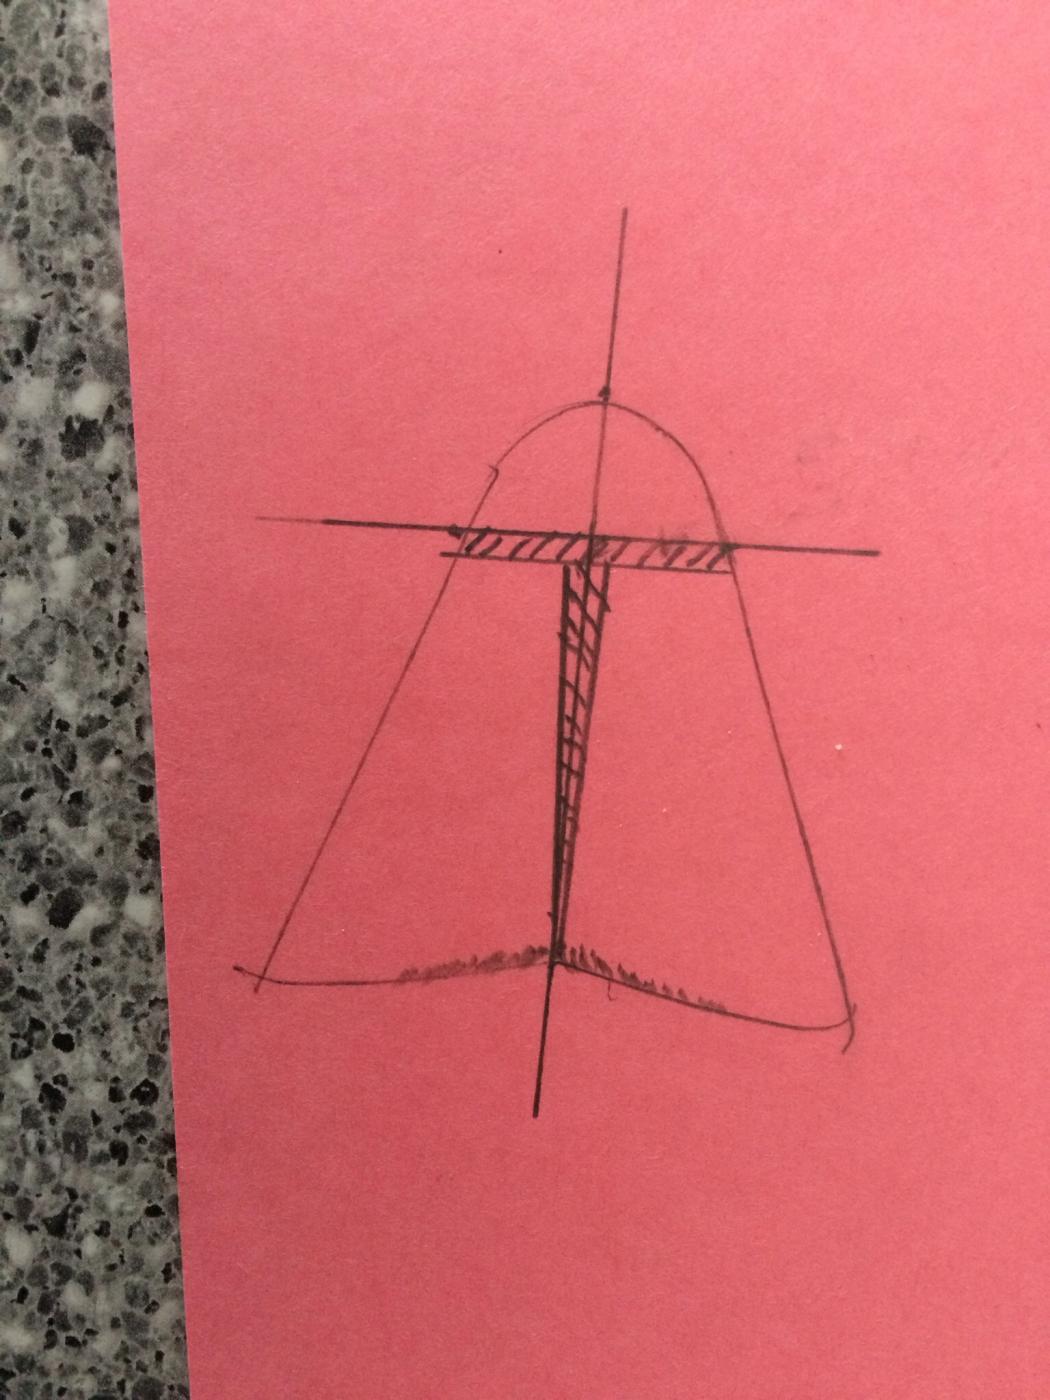
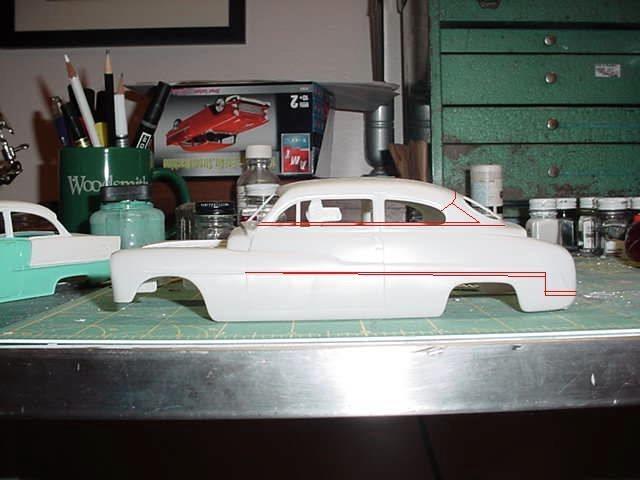
Its been a while since I posted so here's an update. I've got the chop done (buy the AMT version) and have the fenders repositioned on the body. After a lot of head scratching over the geometry of the hood. By moving the front fenders "up" the hood had to be shortened about 1/16". So where to cut it and how to make the sides blend was the question. I made the cut behind where the hood contacts the radiator shroud and then removed a pie section out of the middle of the rear half. That let the two pieces blend. Then a small mount of filing so the back of the hood matched the cowl. I made a paper template to make sure my geometry worked. To get the front low enough to suit me I made a rediculously dropped axel. If this was real you probably couldn't drive over a peanut. This is a very fussy model. The assembly sequence needs the interior to be attached to the body before the top is installed. This prevents correcting that annoying alignment problem of the moldings of the top and the moldings of the body so steps are being taken to allow the top to be attached prior to painting. The wheel covers will be the concentric ring style. No thought yet about colors.
-
The advantage of........
slownlow replied to TedD's topic in General Automotive Talk (Trucks and Cars)
Save those false fingernails too. They make great hood scoops.
-
What would the results be? {body modification}
slownlow replied to CountryJoe's topic in Model Building Questions and Answers
Here are a couple of pics of a 49 Merc with a pie section cut. As the cut widens it ultimately ended up a scale 3".
-
-
Here's a Guillows P-40 I did several years ago. As kids we built these all the time. The bi-planes are hard to get the wing orientation right and imagine a Foker tri-plane. I was able to find dope a my LHS. I think some RC planes use it. The only problem I had was using alcohol to shrink the tissue paper rather than water, it didn't shrink as much.
-
What did you see on the road today?
slownlow replied to Harry P.'s topic in General Automotive Talk (Trucks and Cars)
I saw this heading east on I 80 in Des Moines, IA. Looks like some one has a winter project.
-
Parking Fun , You know it makes you mad.
slownlow replied to Greg Myers's topic in The Off-Topic Lounge
I got this from a KKIM member a few years ago. I printed up a bunch on orange card stock and love passing them out. -
No Rules (Opel Blitz Rat Rod)
slownlow replied to mikey's topic in Model Trucks: Pickups, Vans, SUVs, Light Commercial
Very nice!!! -
how to get the look of wood
slownlow replied to CHEVY2MUCH's topic in Model Building Questions and Answers
Bob, This is one time brush marks are a good thing. To achieve a wood look with paint I use a "dry brush" technique, using a brush that is almost empty of paint. The brush I prefer is a stiff, short bristle, flat,square tip style. My favorite brush is about 1/4" wide. To achieve a "dry brush" I dip the brush in the color and brush it almost dry on a scrap of plastic or paper and then brush on the model. For colors I start with a base of testors wood color. Then start dry brushing. The colors you use depend on what your final look is to be. I do a lot of test runs on scrap to get the balance I'm looking for. For a well maintained or new car look I use burnt umber, reds, yellow greens. I mix in more grays and blacks for a more weathered look. Doing research of 1:1 images is very helpful. In the following pics if I had done my research better on the 48 ford the structural pieces would have been more yellow and with less grain. Hope this helps -
Mike, I remember one of the enthusiast mags had an article about Nettesheim. He's got way more money than I have but excellent taste. Sorry to hear about that lordairguitar. Bikes are beemers and cars are bimmers. Sounds like that guy was more into the image than the machine. Here's a pic of the 67 when I brought her home. The engine is under the orange plastic on the bench and the rest is in the wheel barrow.
-
Too cold to ride today, 1 degree this morn, so here's dream'n of warmer weather. 1967 BMW r60/2 1976 BMW R90S
-
1968 Mr. Norm's Dodge Dart GSS (was The Engine Room)
slownlow replied to ApexSpeed's topic in WIP: Model Cars
Doug, Welcome to the forum and also Ankeny. Looks like we'll be take'n over the city soon, all both of us. Like your work and hope you keep at it. I've been in a slump for a while but this is a great hobby for Iowa winters. Again welcome. -
Back in the day I worked for a farmer that had used horses. He was of mixed emotions about tractors cause they could go all day and night. He said after 10 hours horses were played out and so was he.
-
revell VW hippy van,
slownlow replied to booboo60's topic in Model Trucks: Pickups, Vans, SUVs, Light Commercial
Far out man. All it needs are a bunch of greatful dead stickers in the rear window. -
'31 model a tudor (chopped and channeled)
slownlow replied to crazyrichard's topic in WIP: Model Cars
Very nice! Proof god is in the details -
faux leather contact vinyl
slownlow replied to Jeepgirl's topic in General Automotive Talk (Trucks and Cars)
I've had good success using real leather. I find some that I like from old billfold, check book, glove, purse, or? Then scrape it "wafer thin" with a dull knife or coarse sandpaper or both. Then cut to general shape, glue using Elmer's white glue and then trim after glue is dry. Sorry the pic is only fair but Fotki in their infinite wisdom is moving my images to Elbonia or is it Estonia so my better pics must still be on a container ship in the North Atlantic. Bob Maloy -
Rich, I vote for opening doors. Your interior is so good it'll be easier to see.
-
Weird, Lets try that address again. http://jbwid.com/scalcalc.htm Now it seems to work
-
For scale conversion here is a handy website that helps out IMMENSELY. http://jbwid.com/scalcalc.htm I have it bookmarked and use it alot.
-
Trying to find words to describe this. Elegant is all I can come up with.
-
Fabulous work Kenneth, Here's a pic of a 1939 shown 2 years ago at a local concourse. She was a little gem.
-
Looking good! Soon you'll really test that optivisor with the BMF.
-
This is a dandy!