slownlow
-
Posts
242 -
Joined
-
Last visited
Content Type
Profiles
Forums
Events
Gallery
Everything posted by slownlow
-
This is probably not something modelers have on hand but as a carpenter I use contact cement. This is the stuff you apply to both surfaces, allow to get tacky, and then put the pieces together. Alignment is critical because there is no positioning after contact. Dry fit first. Align one edge first and then lay the piece down. A handy trick for aligning after the glue is applied place long narrow “dead men” down between the two surfaces and slide them out one at a time.

-
Great job. You brought out the beauty of the stock 41 beast
-

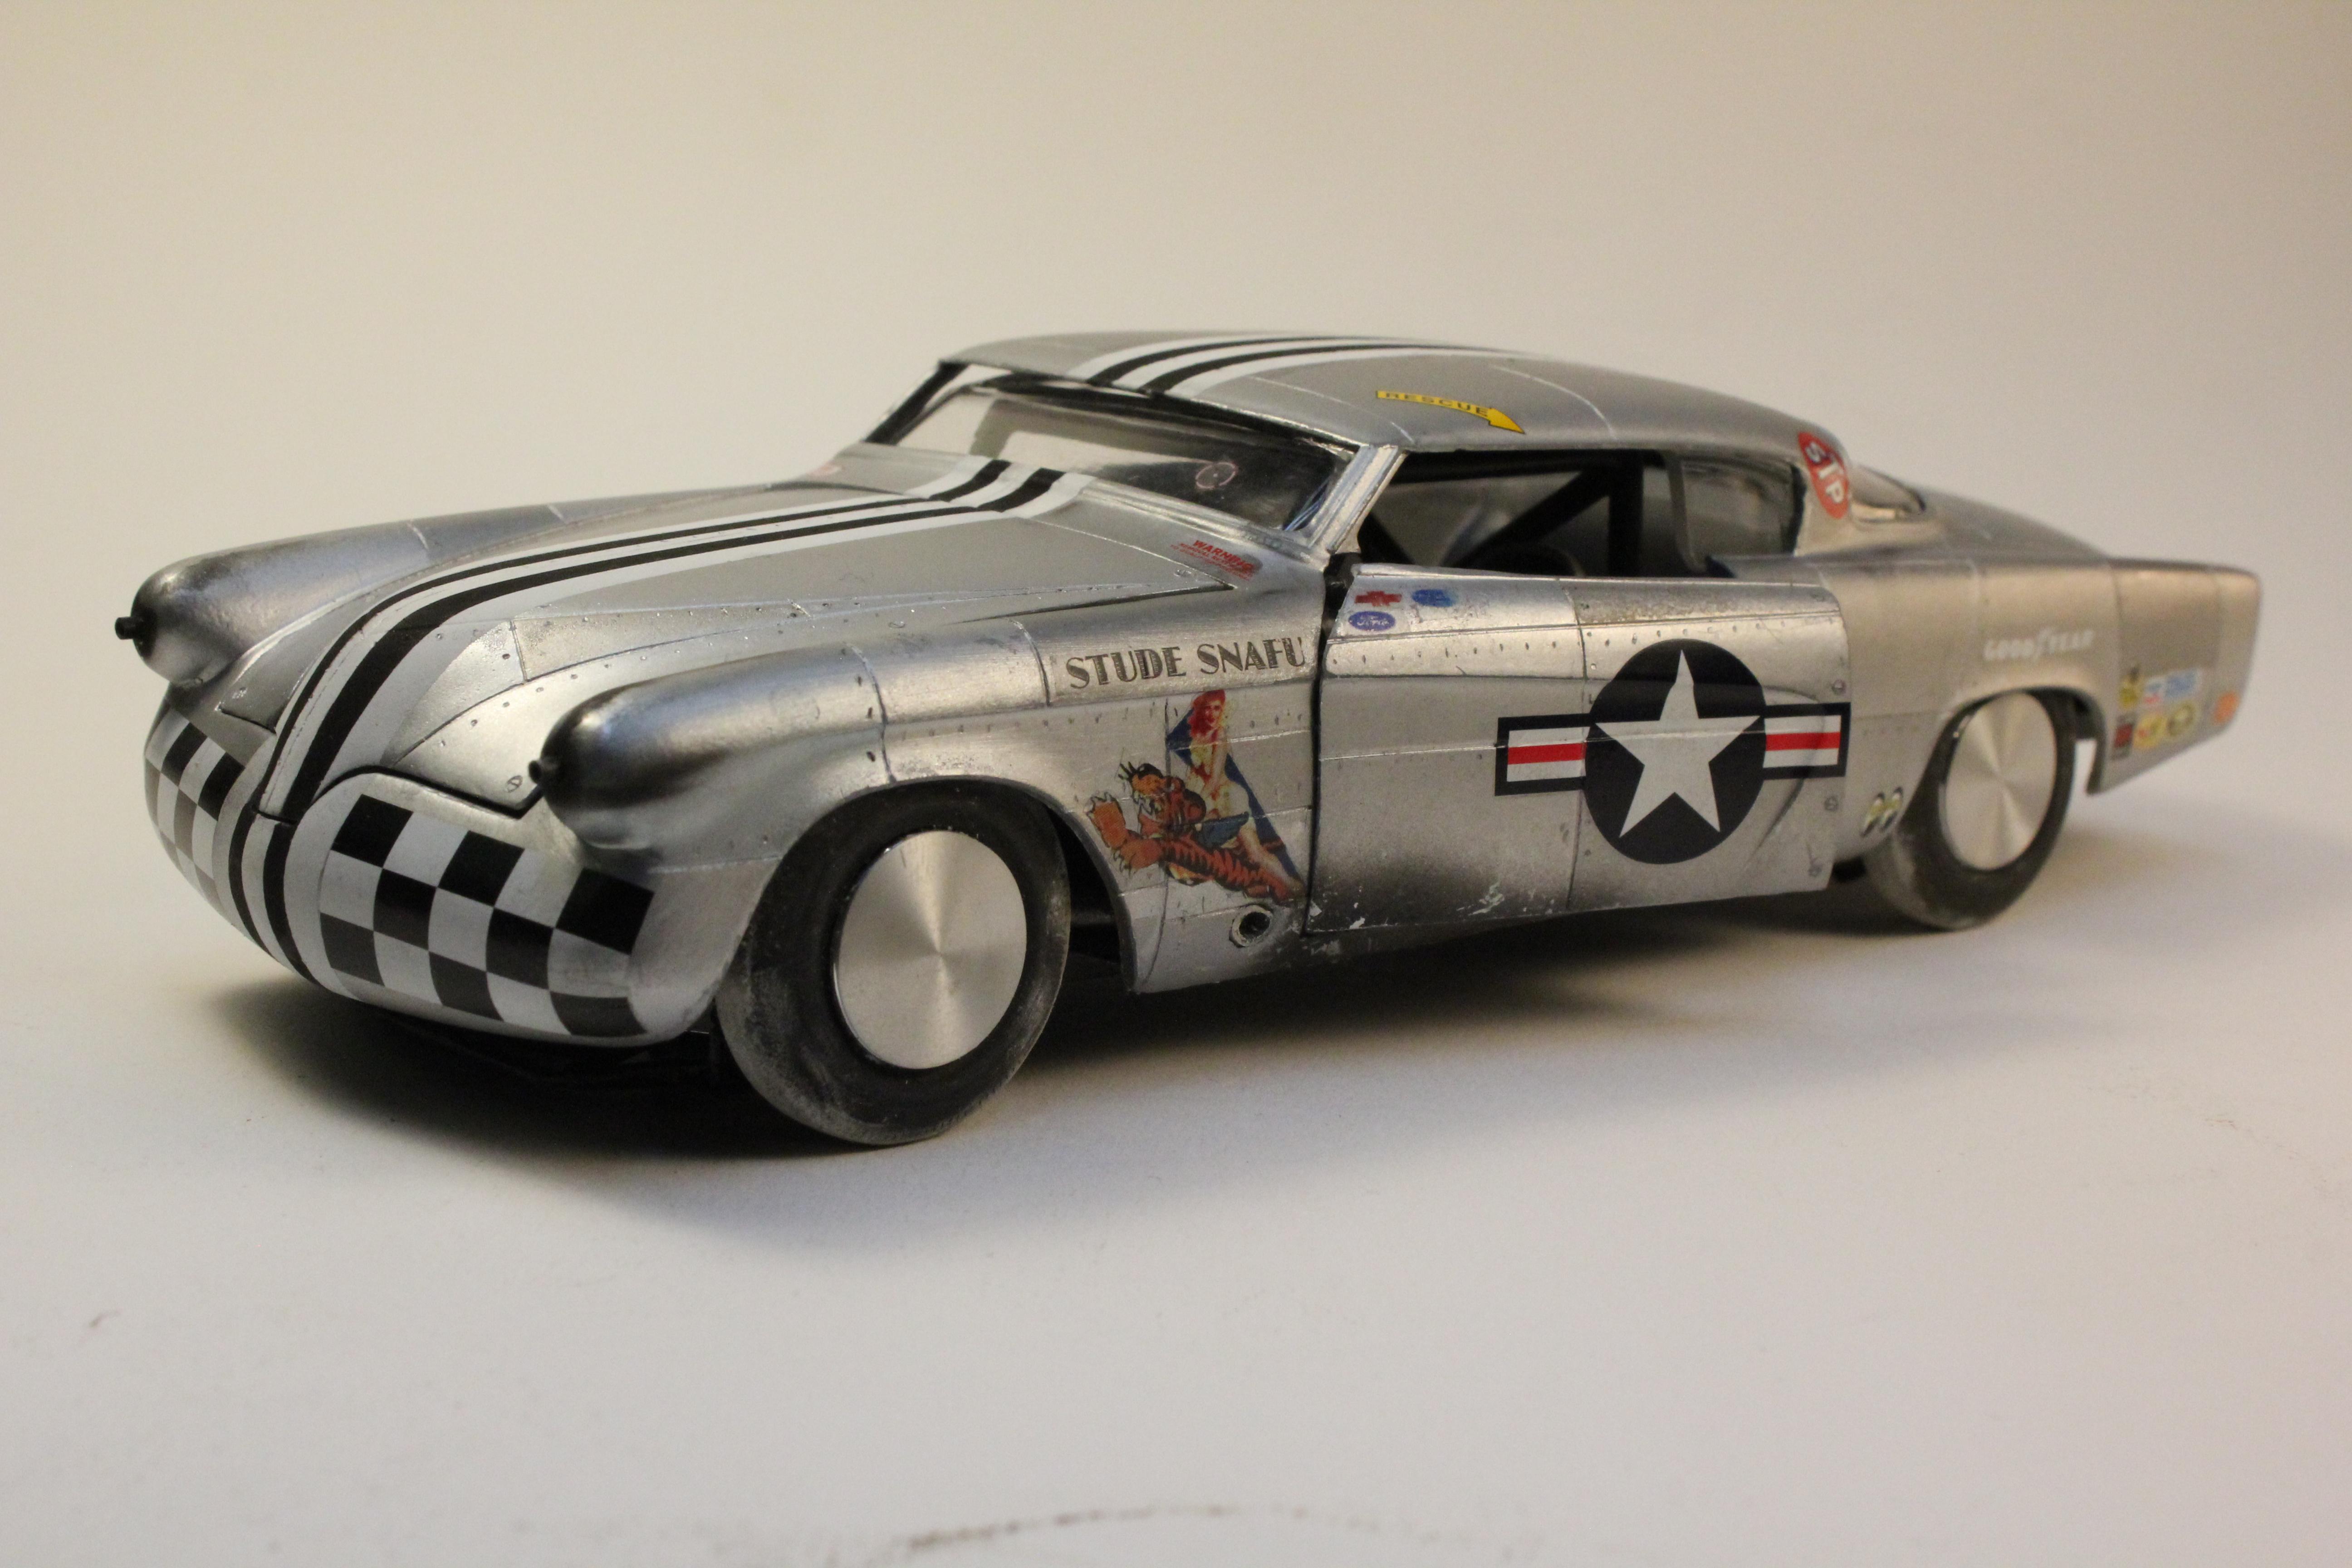
Aircraft rod
slownlow replied to Earl Marischal's topic in General Automotive Talk (Trucks and Cars)
Here’s my take for an aircraft inspired car
-
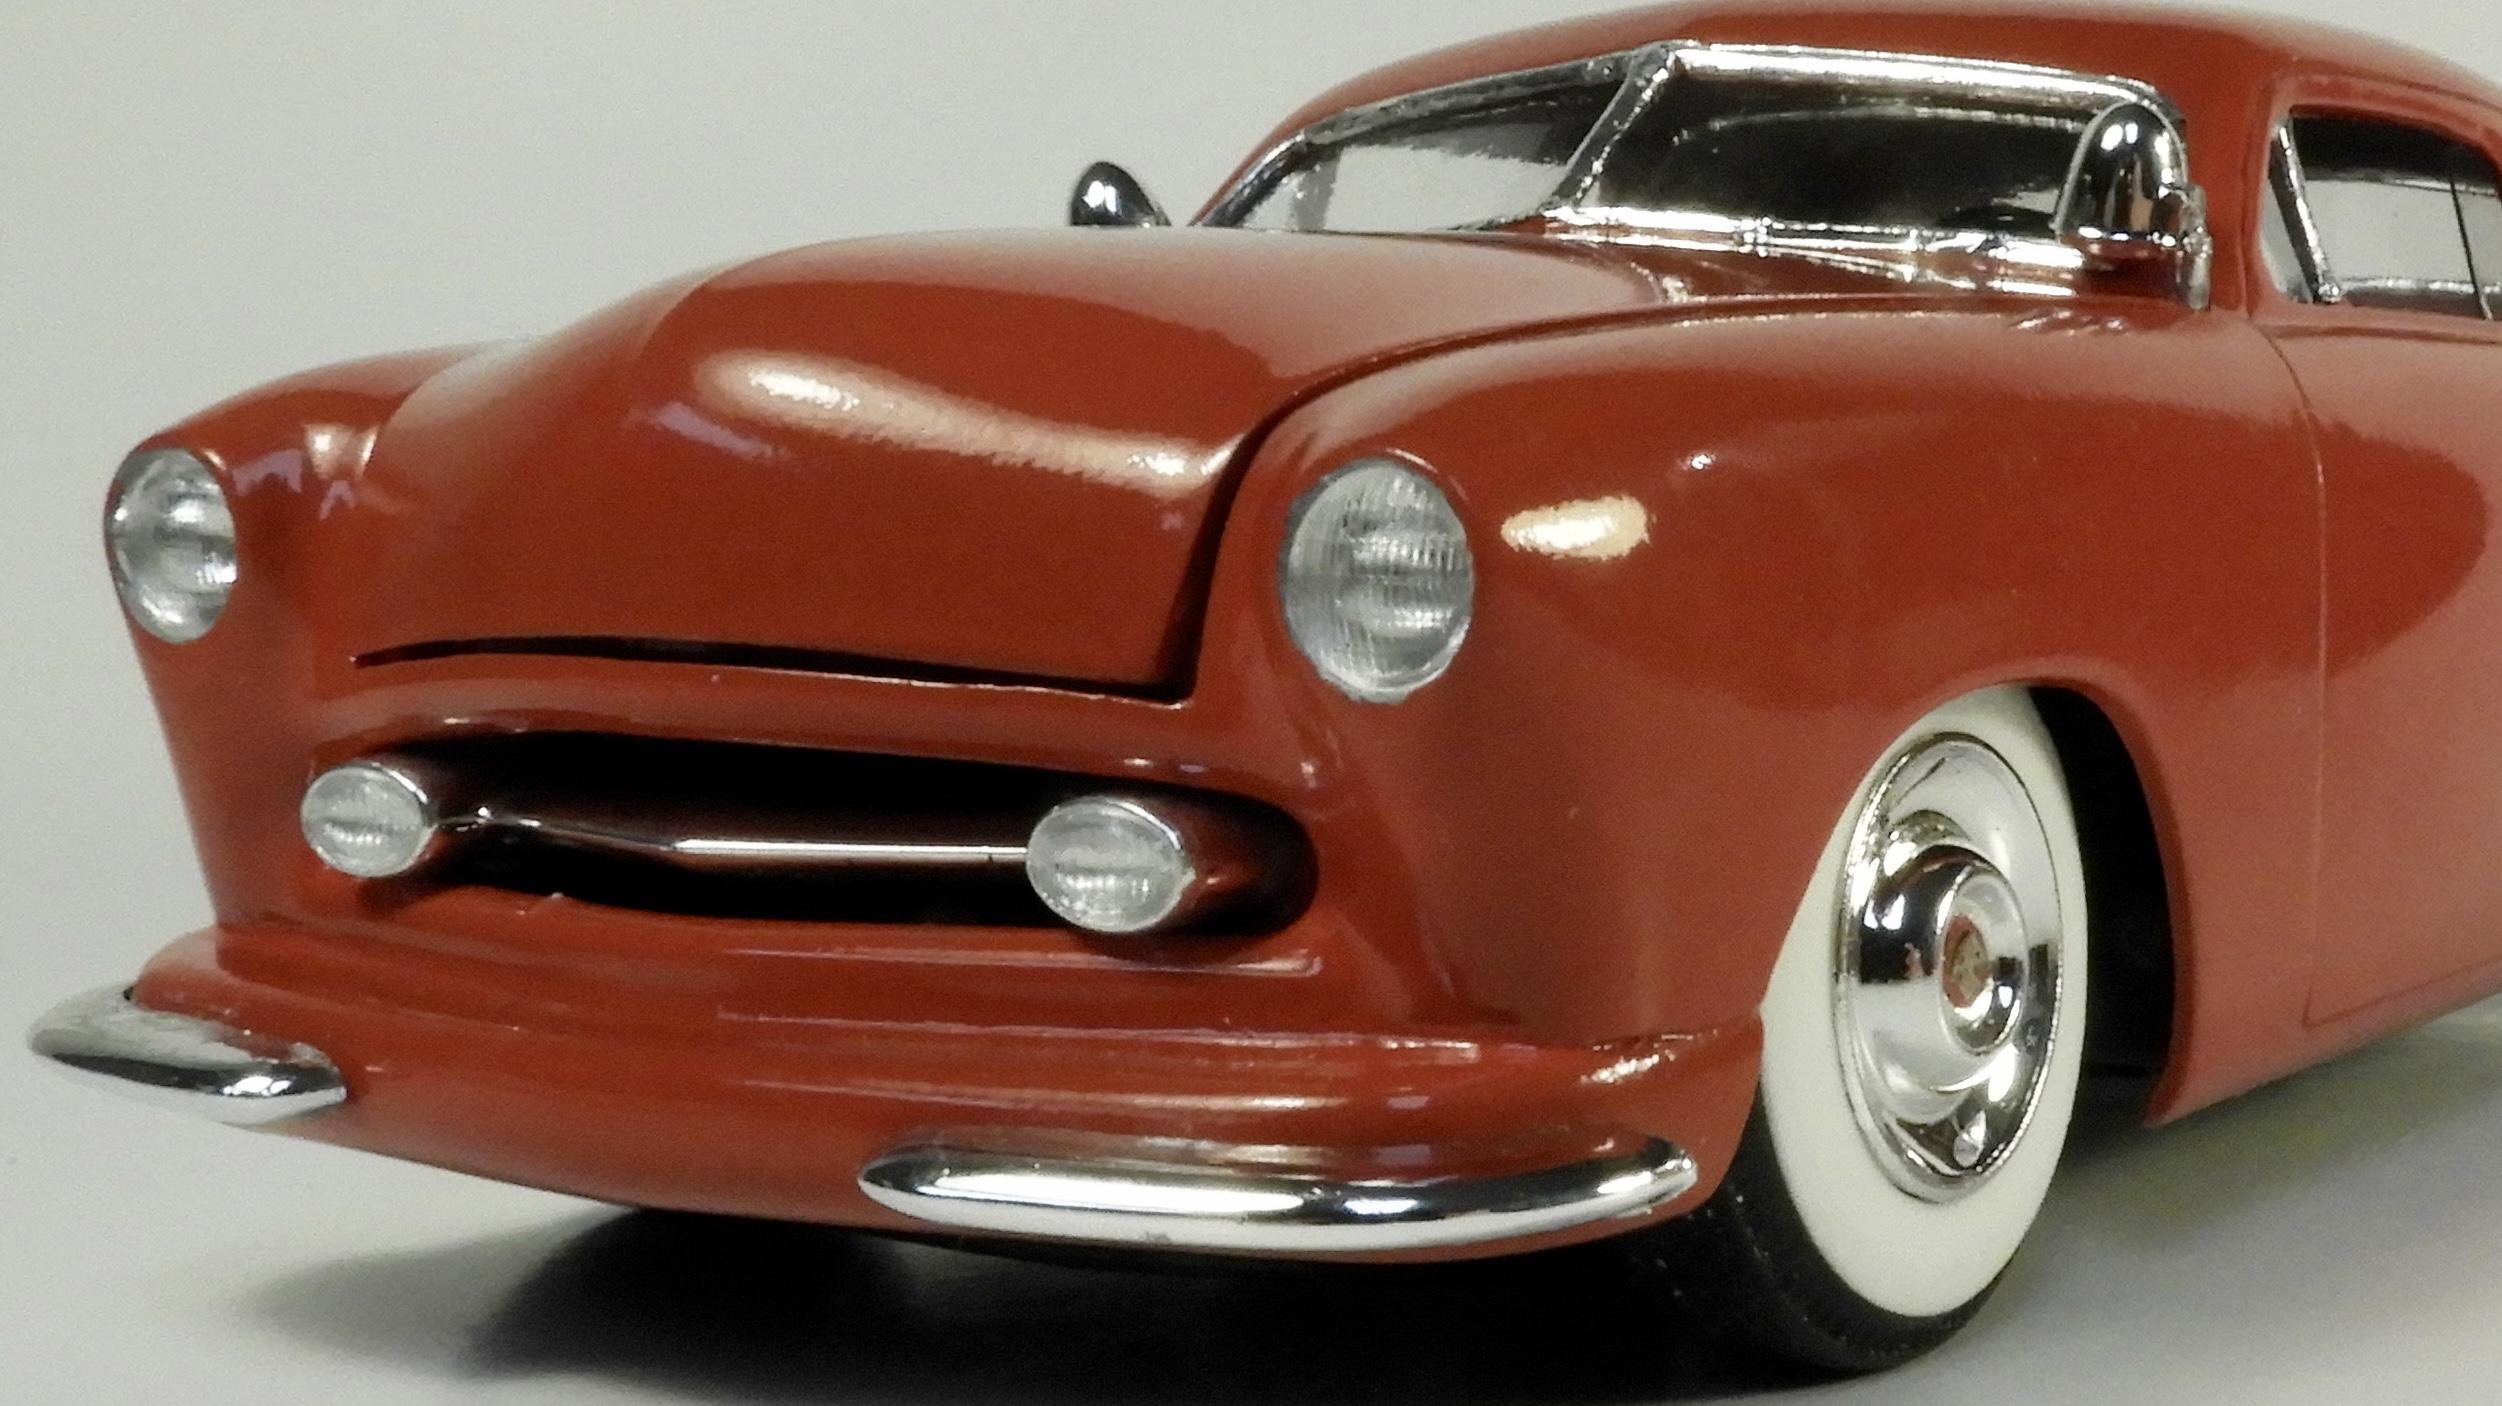
Sources for clear 1/25 headlight lenses?
slownlow replied to Monty's topic in Model Building Questions and Answers
The parking lights here just have a drop of 5 minute epoxy over the chrome lights. I think it turned out very well and with much less work.
-
WWII BMW R75
slownlow replied to slownlow's topic in All The Rest: Motorcycles, Aviation, Military, Sci-Fi, Figures
Ya Dragline, you have to build at least 2. One for African campain and one for the European fronts. -
Build-A-Bimmer Werkshop..... All things Bavarian.
slownlow replied to JollySipper's topic in Community Builds
Thanks Gary. This is what I used. Kind of pricy for what it is. Tamiya offers a variety of weathering chalks but you could probably get artists chalk with more color choices for a better bargain.
-
Build-A-Bimmer Werkshop..... All things Bavarian.
slownlow replied to JollySipper's topic in Community Builds
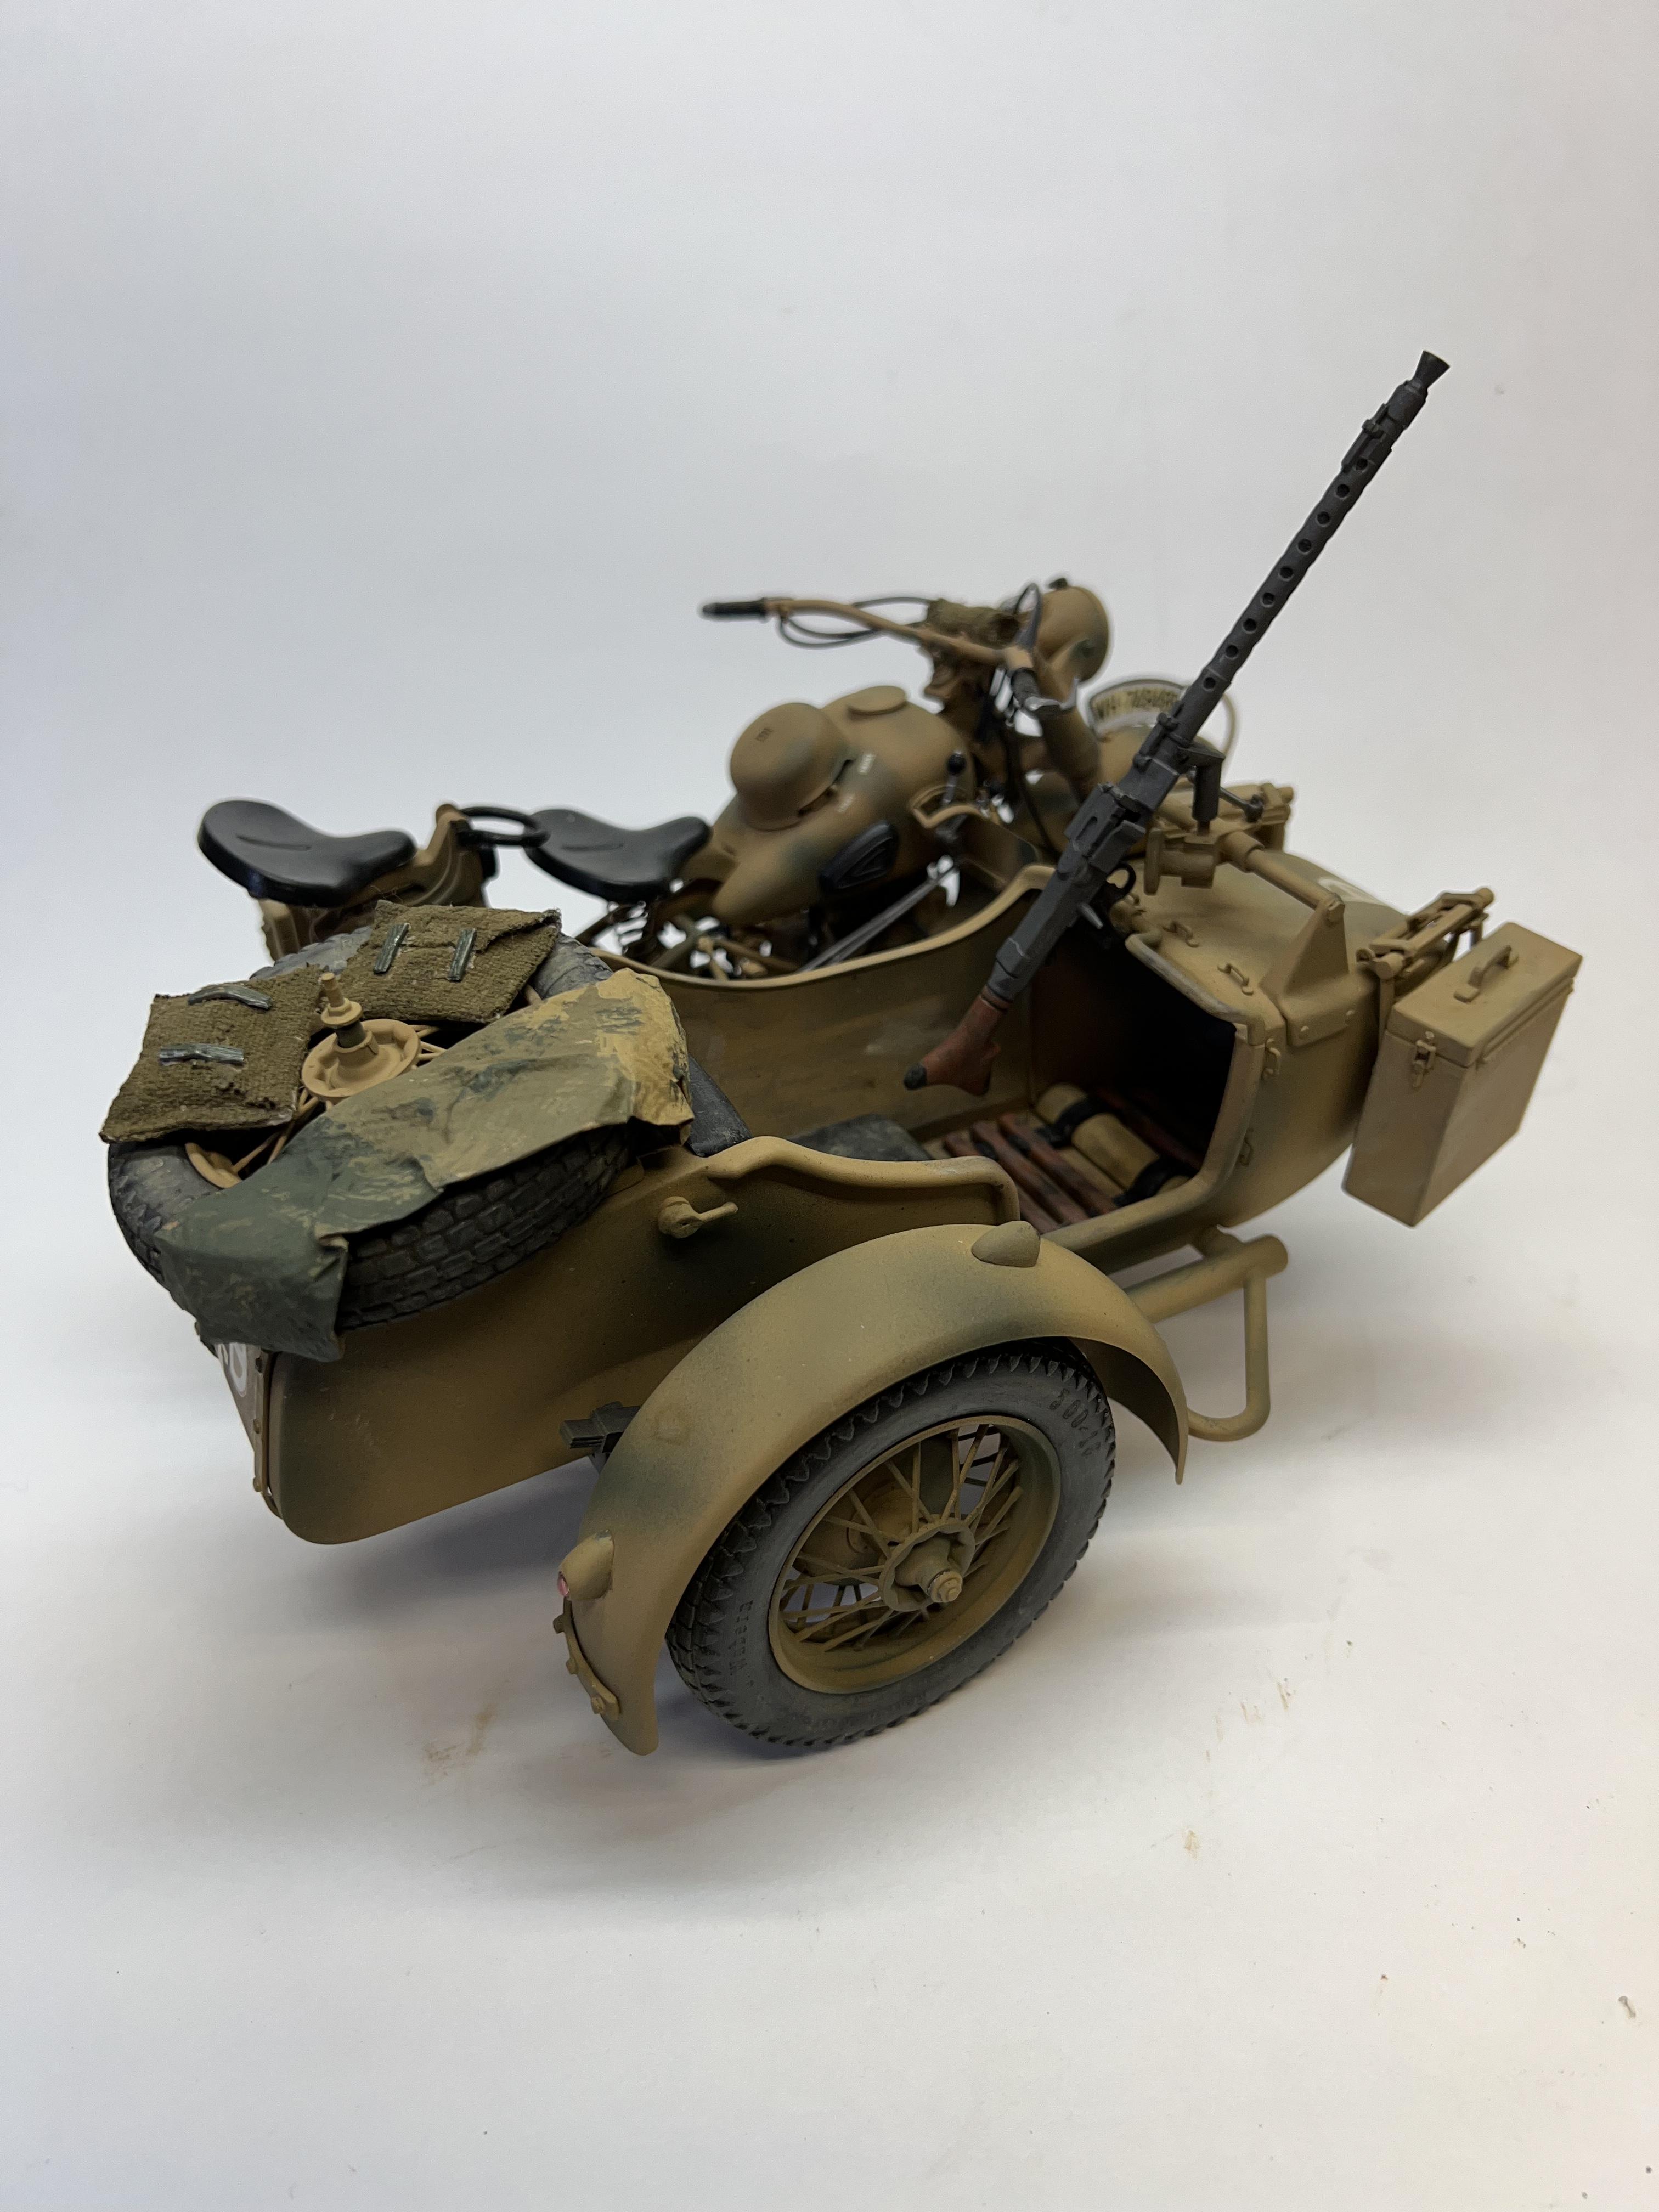
Posted April 16 She’s done. I added some personal gear and various chalks to give it a used look. The decals were definitely showing their age but micro set and micro sol settled them down.
-
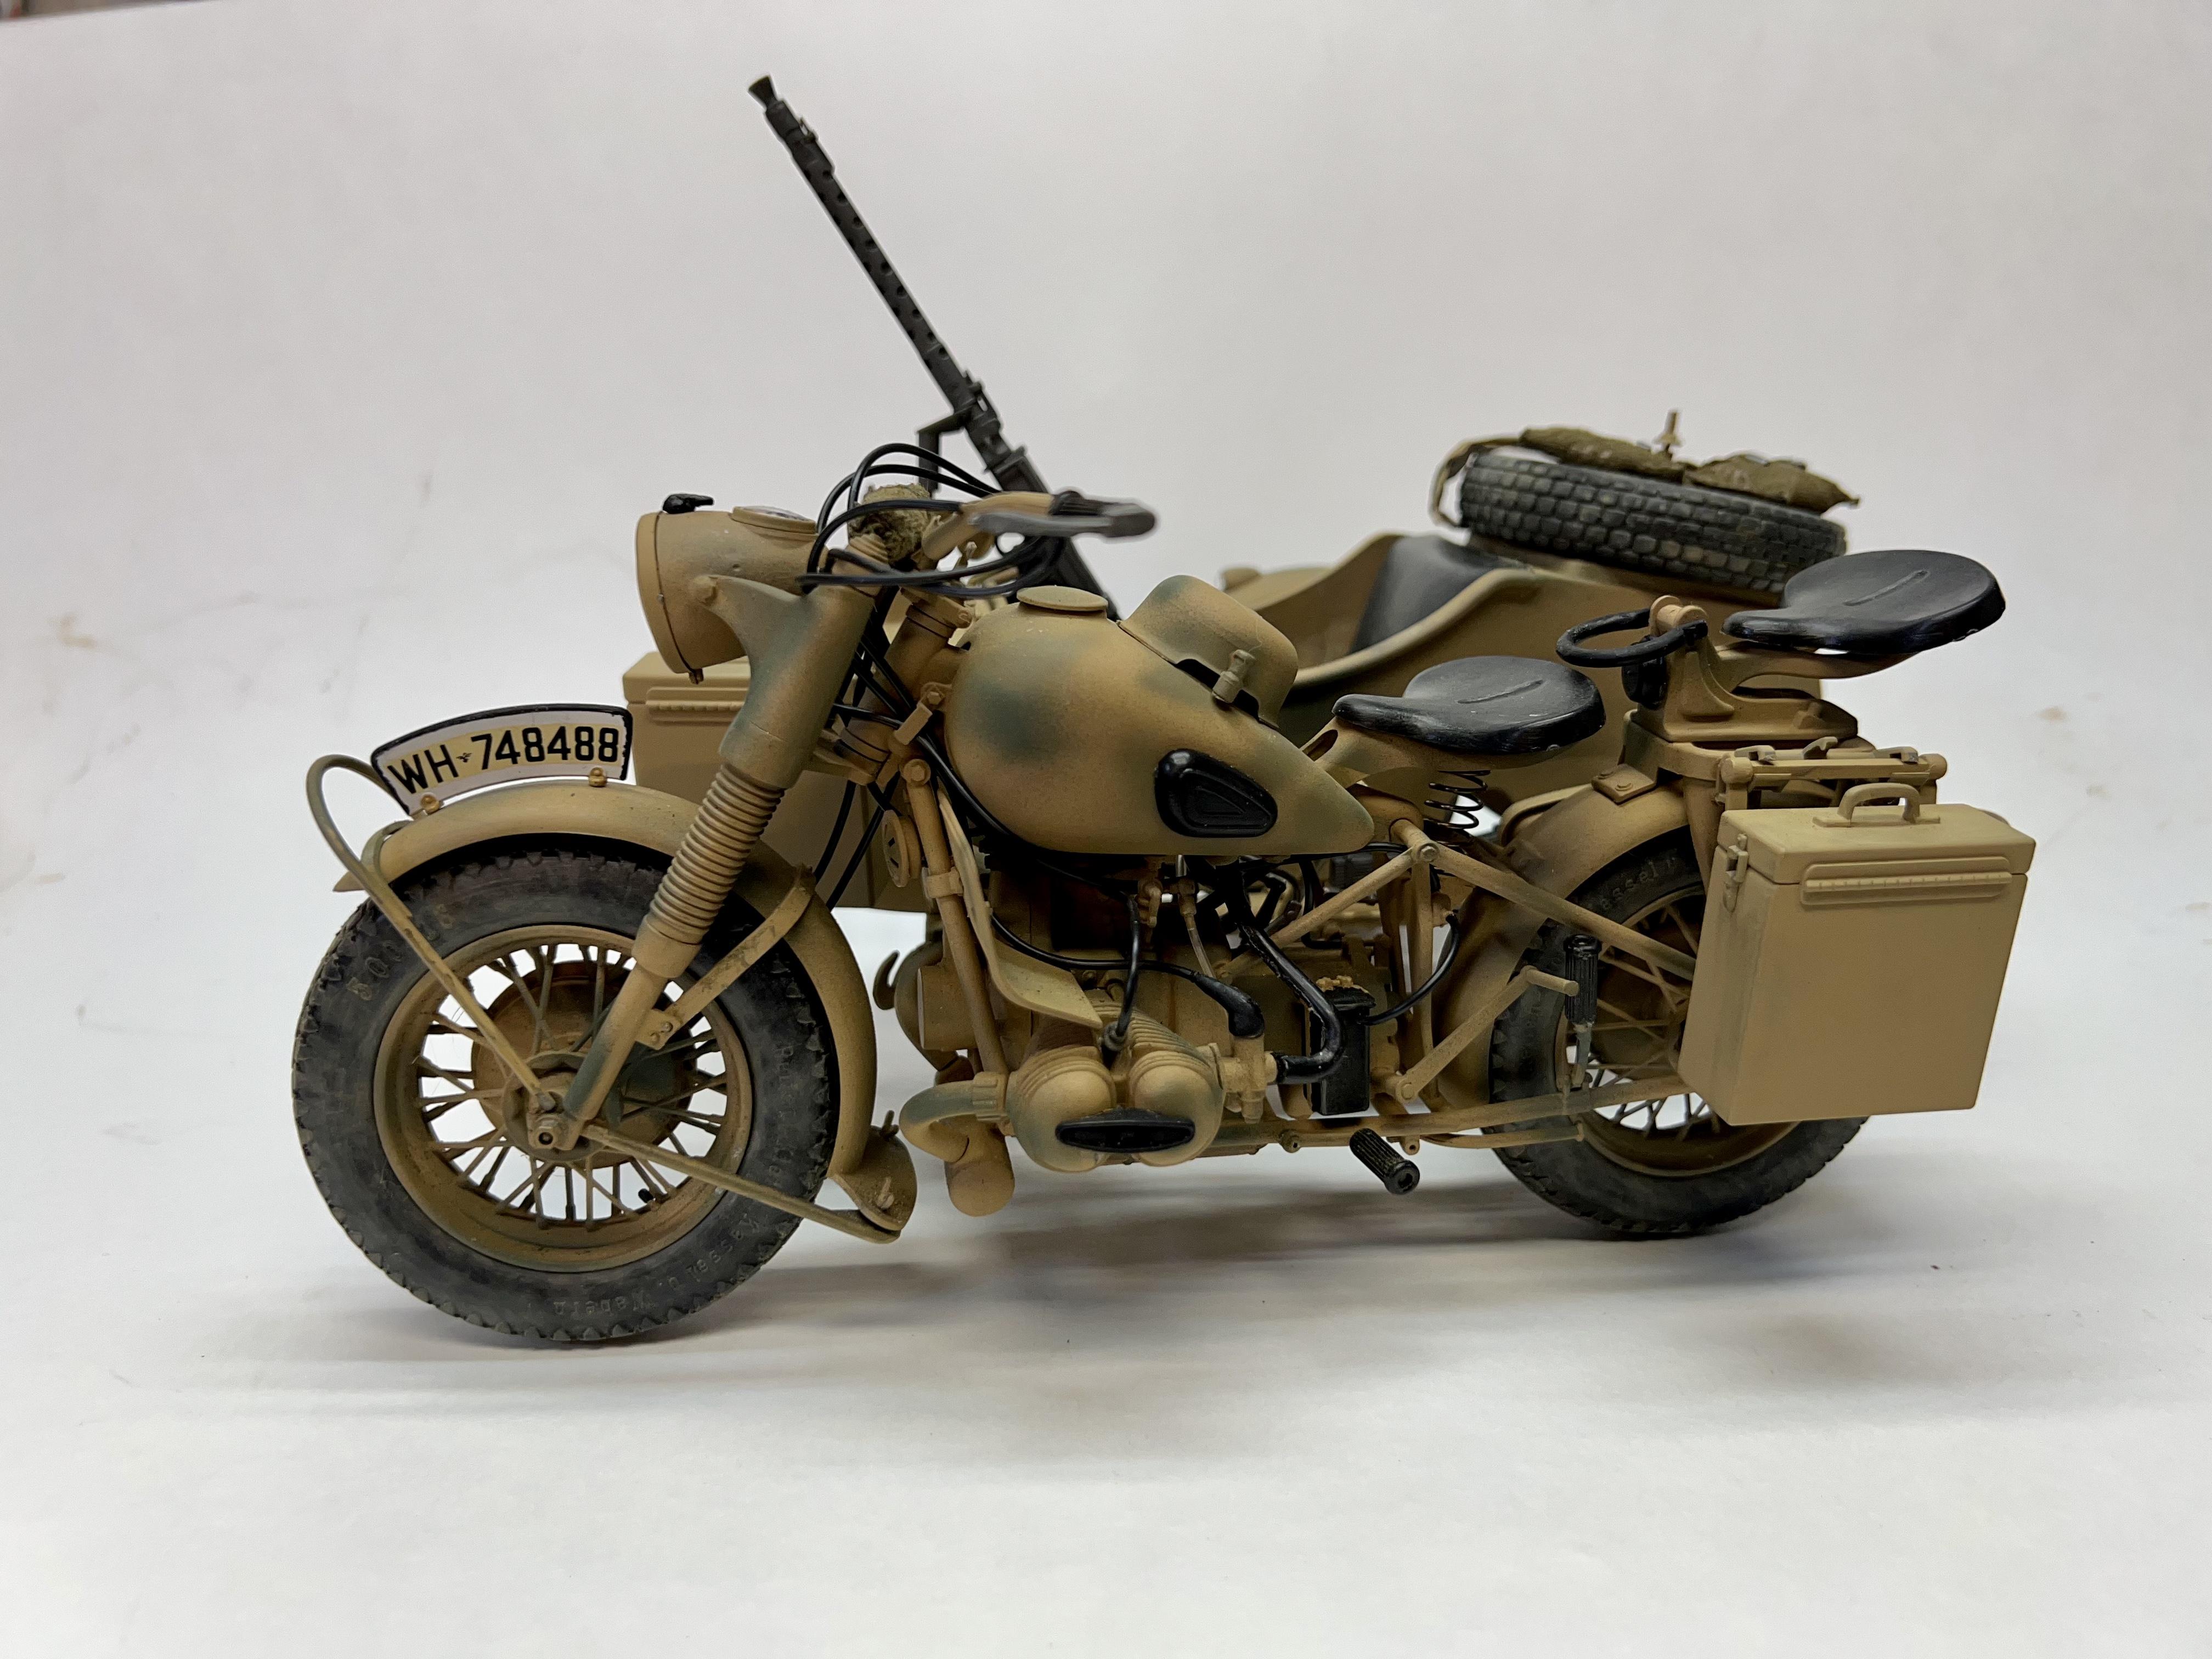
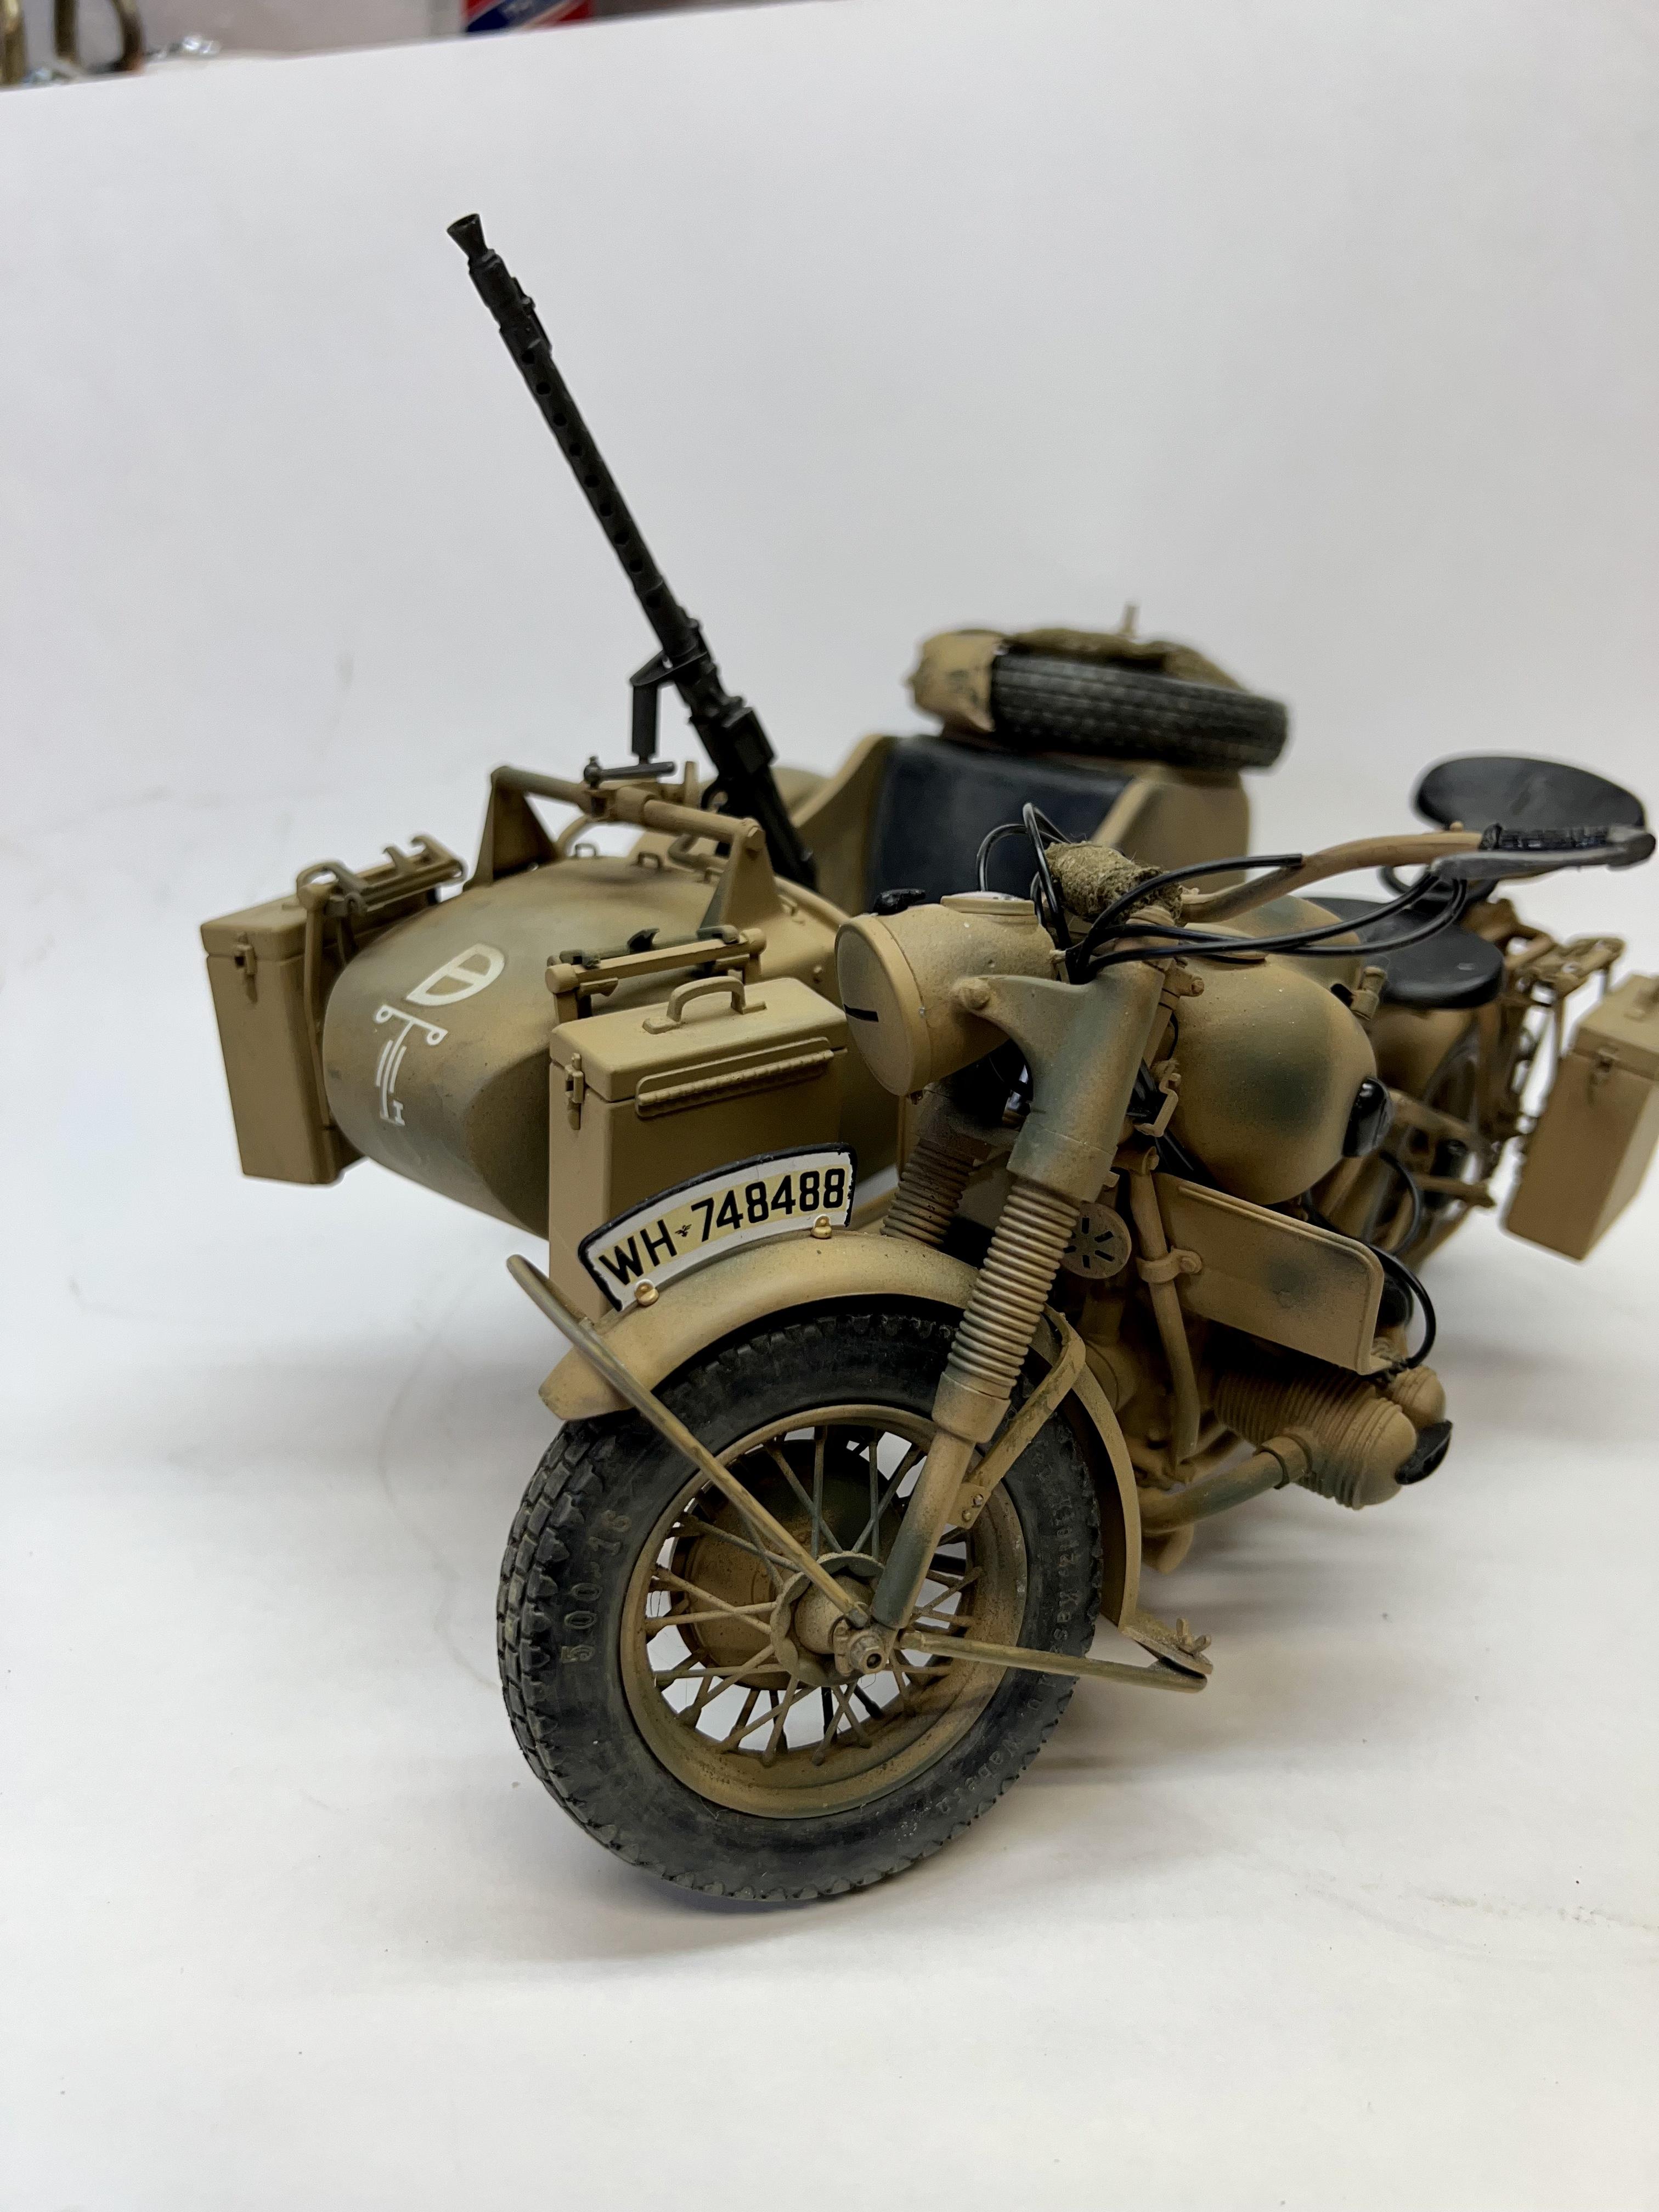
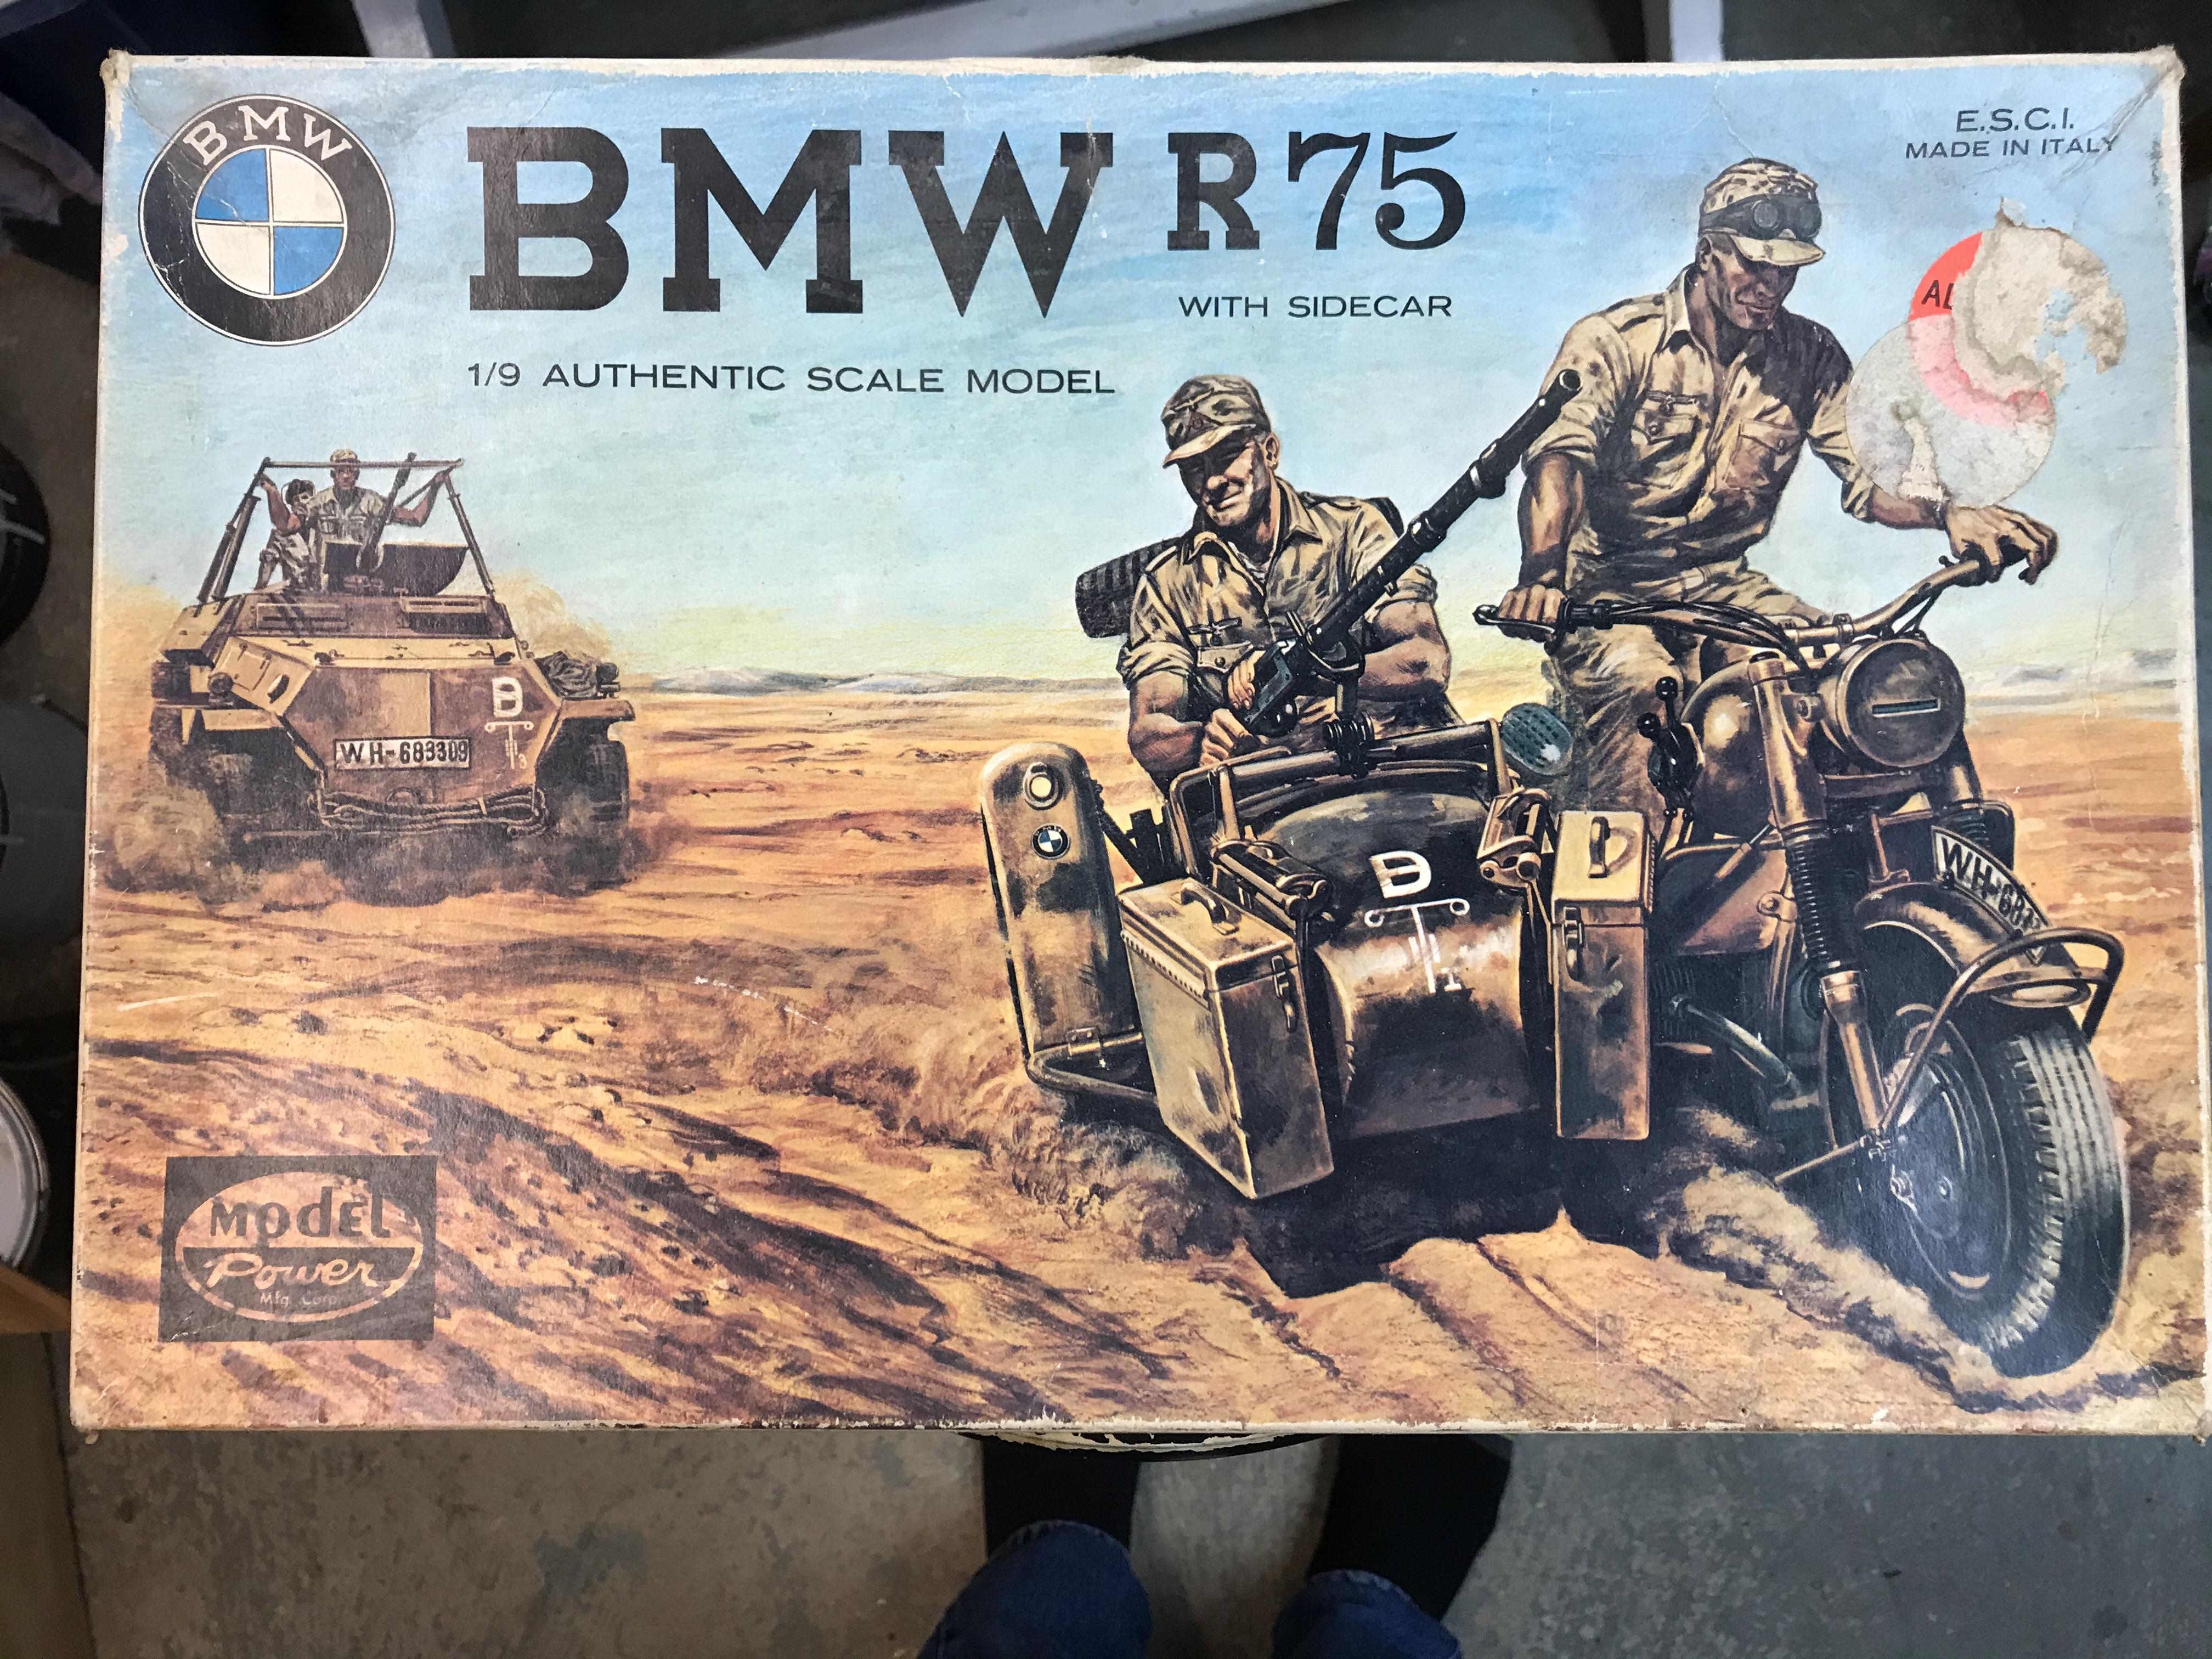
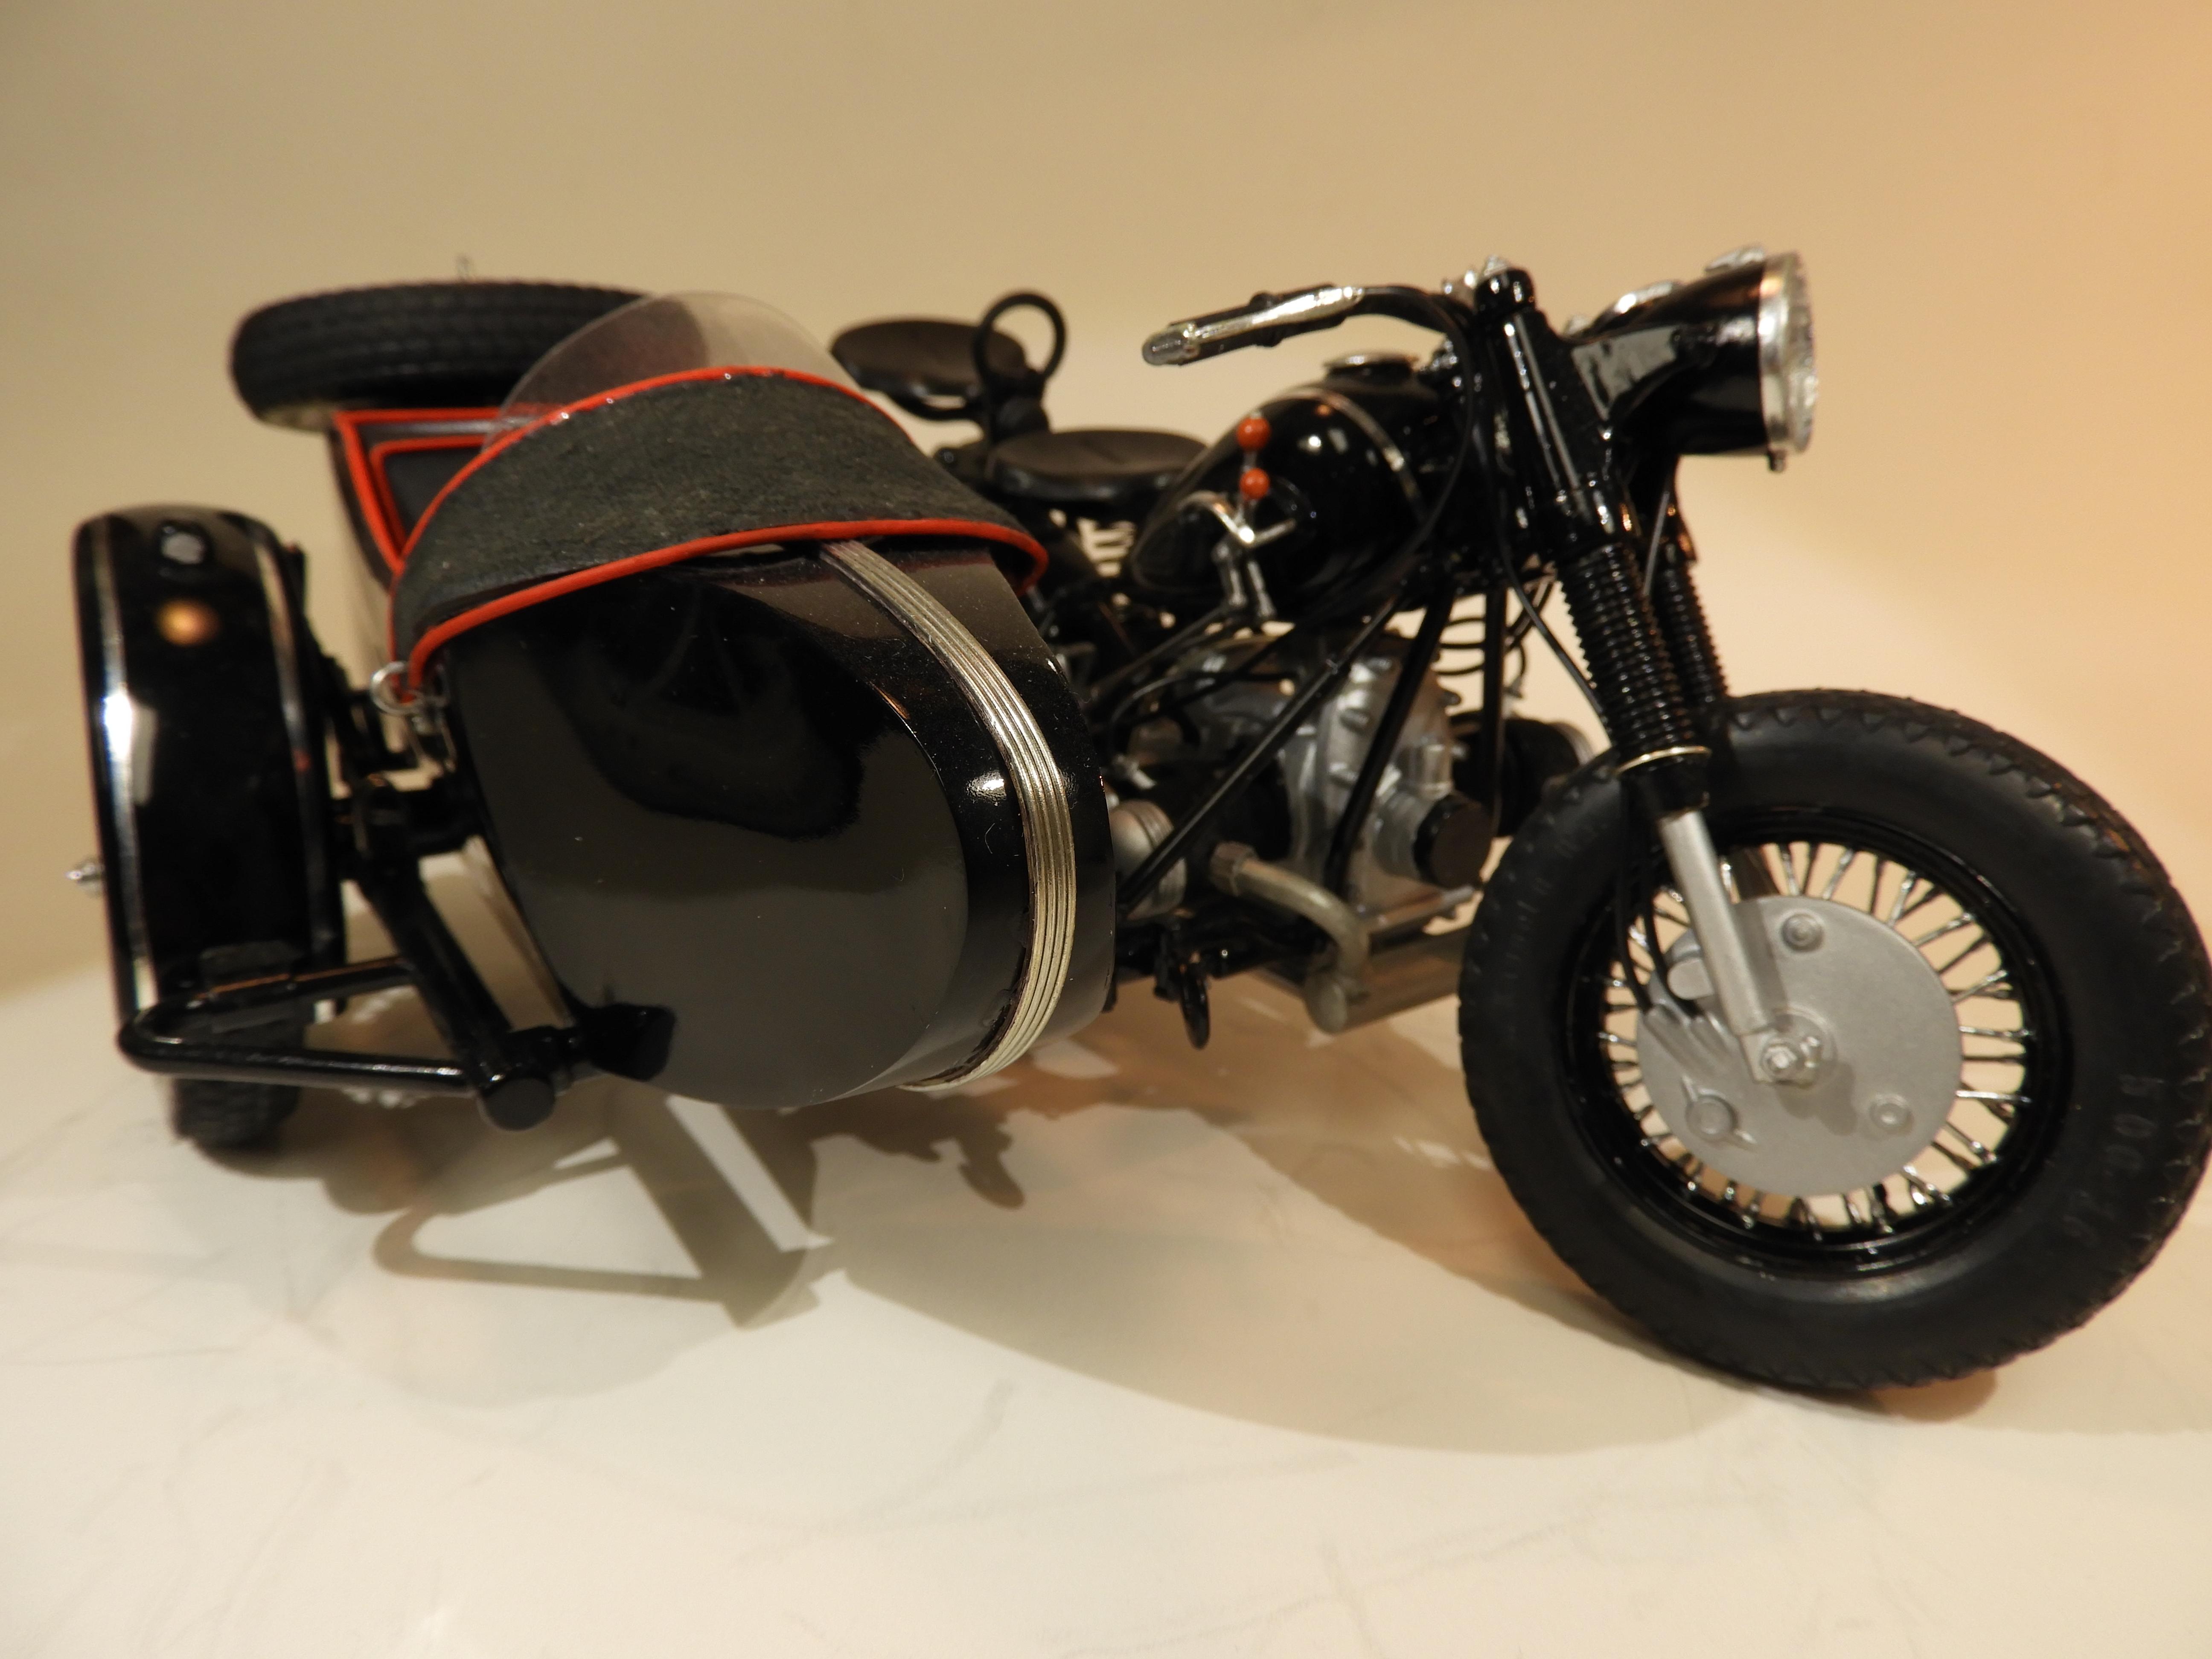
The rig is finally done. It’s the 1/9th ESCI kit. I’m not sure how old it is but the decals were showing their age. There has been some personnel gear added and some chalk to give a used look. About 17000 of these were produced and incorporated the classic BMW features, drive shaft and horizontally opposed cylinders. The car’s wheel could also be powered. With 3 possible occupants, the gun, amo, and any other gear a lot was asked of the 750 cc engine. This is the second time I’ve built this kit. Previously I redid one started by some one else and took it in a different direction.
-
Build-A-Bimmer Werkshop..... All things Bavarian.
slownlow replied to JollySipper's topic in Community Builds
I’m trying the quote thing out. The trick will be remembering it. I can tell you about stuff I did in 1957 but not what I had for lunch yesterday. -
Build-A-Bimmer Werkshop..... All things Bavarian.
slownlow replied to JollySipper's topic in Community Builds
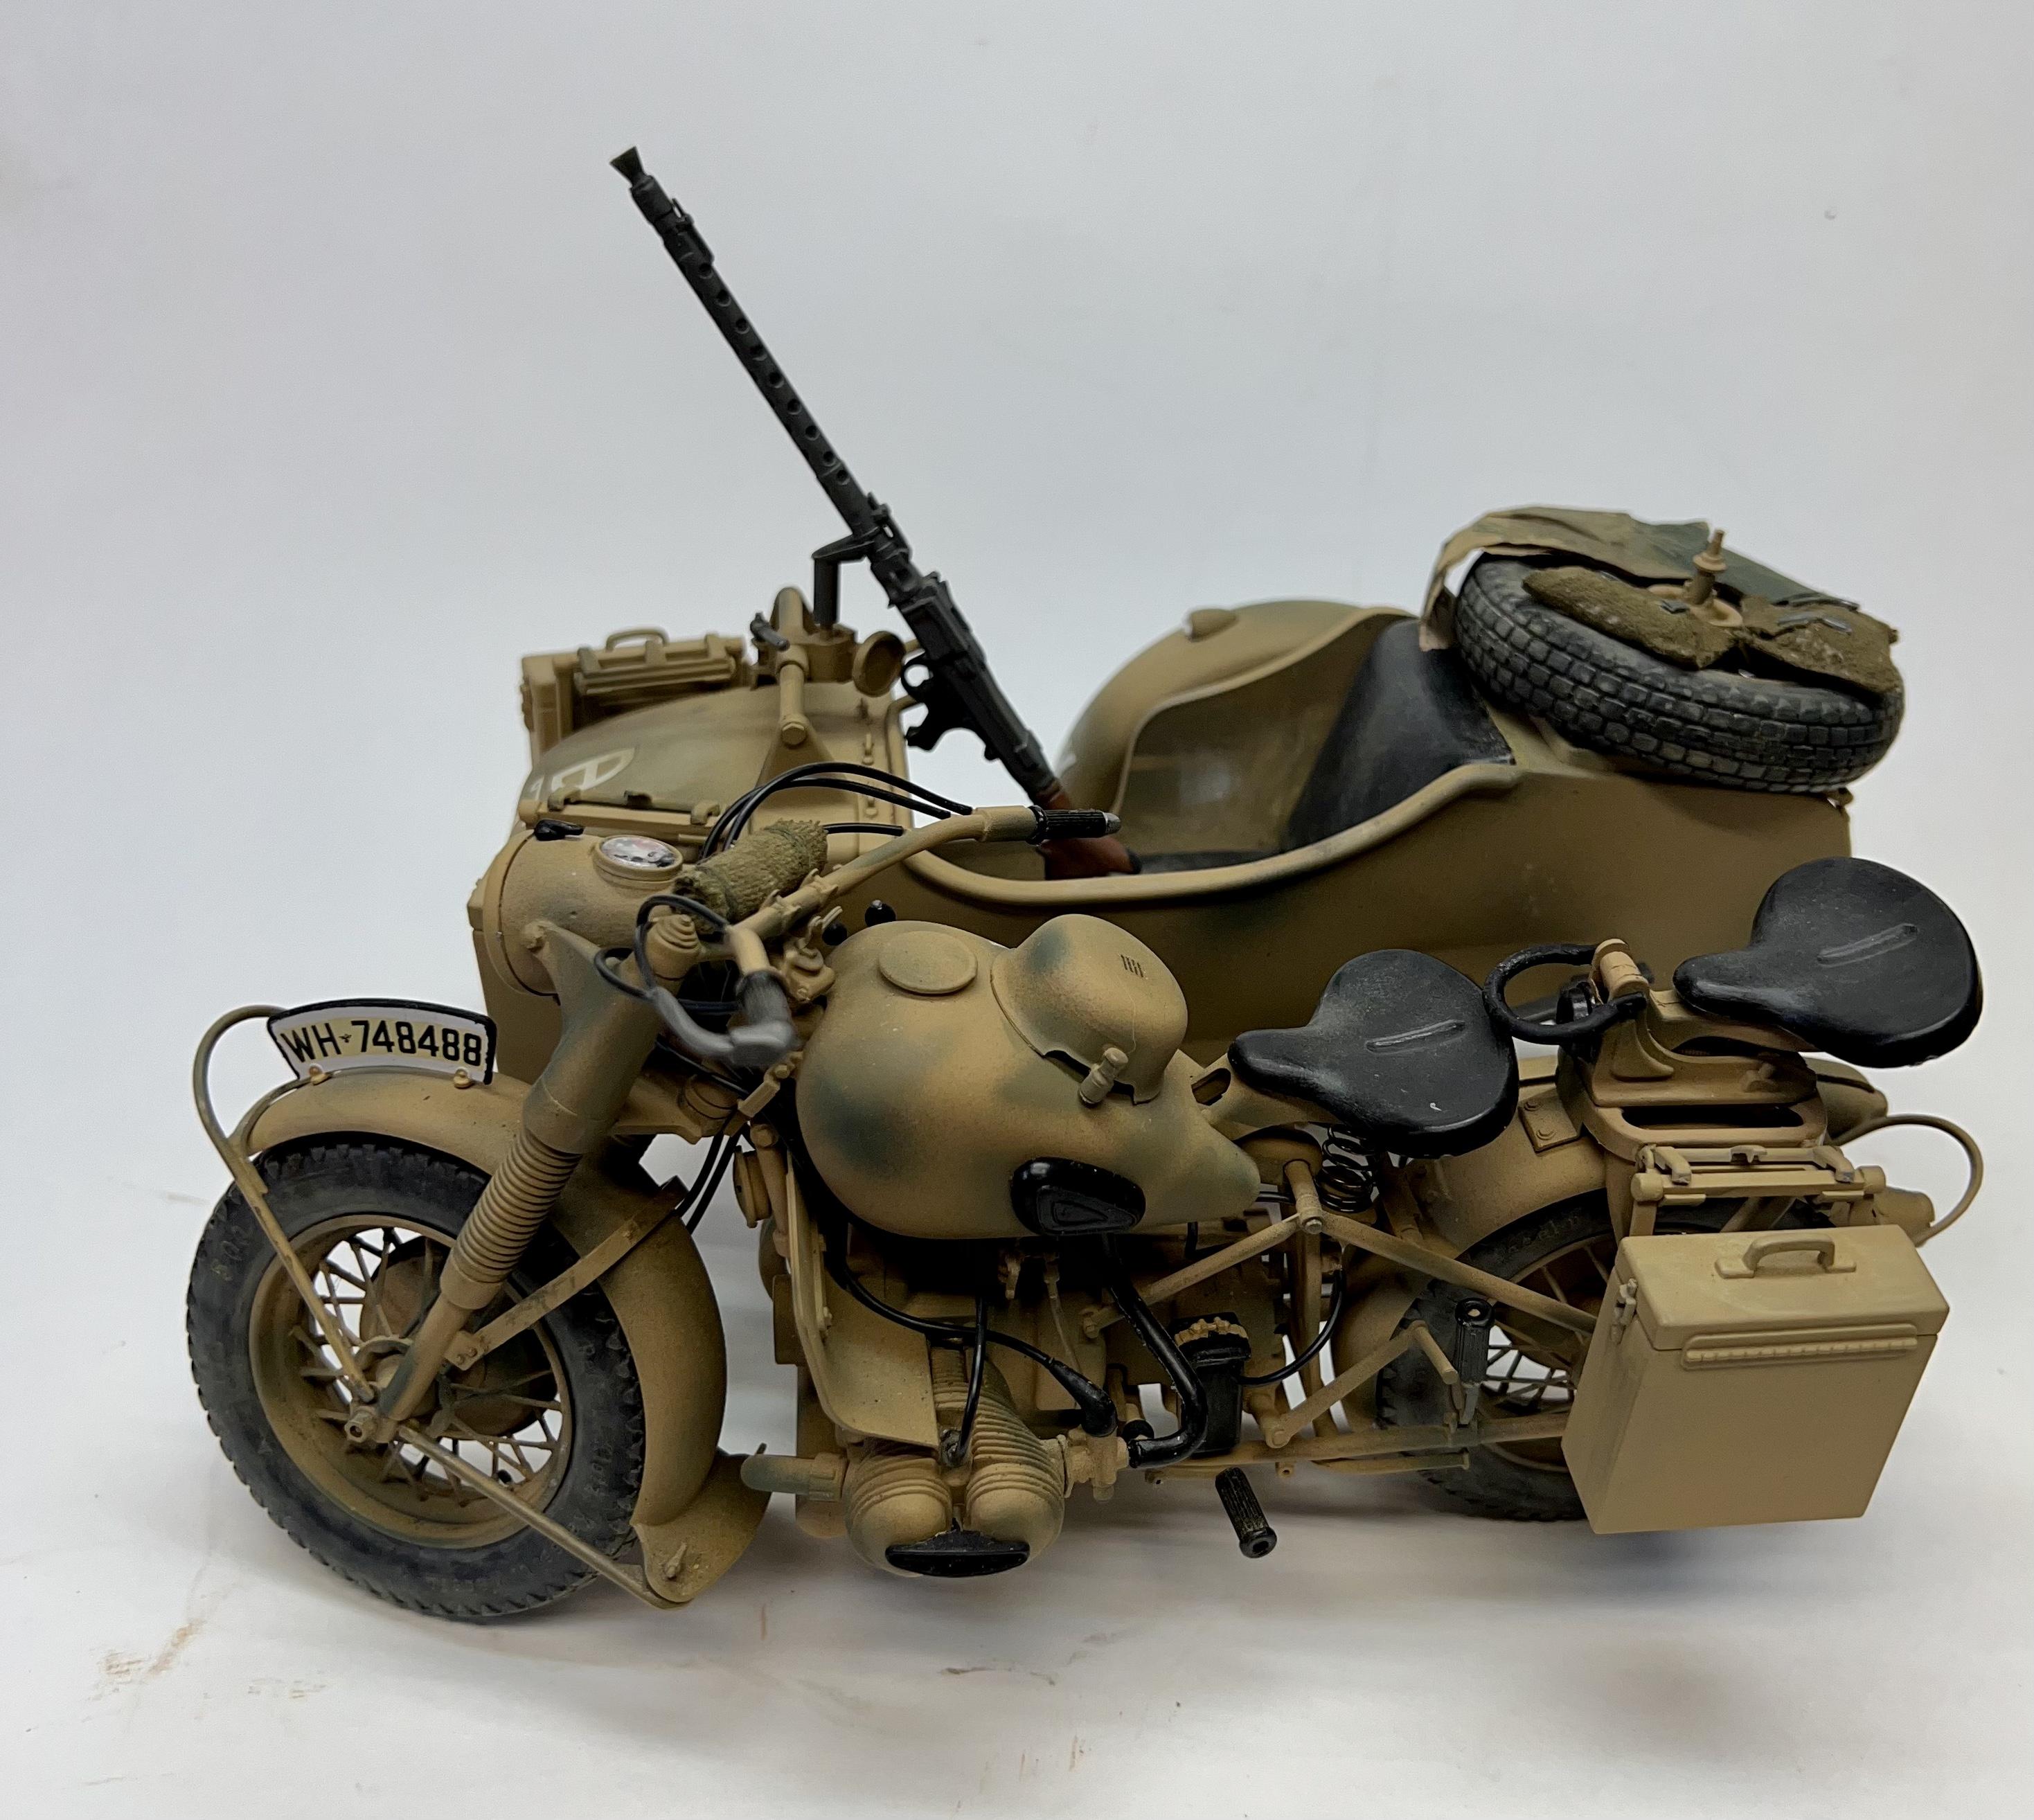
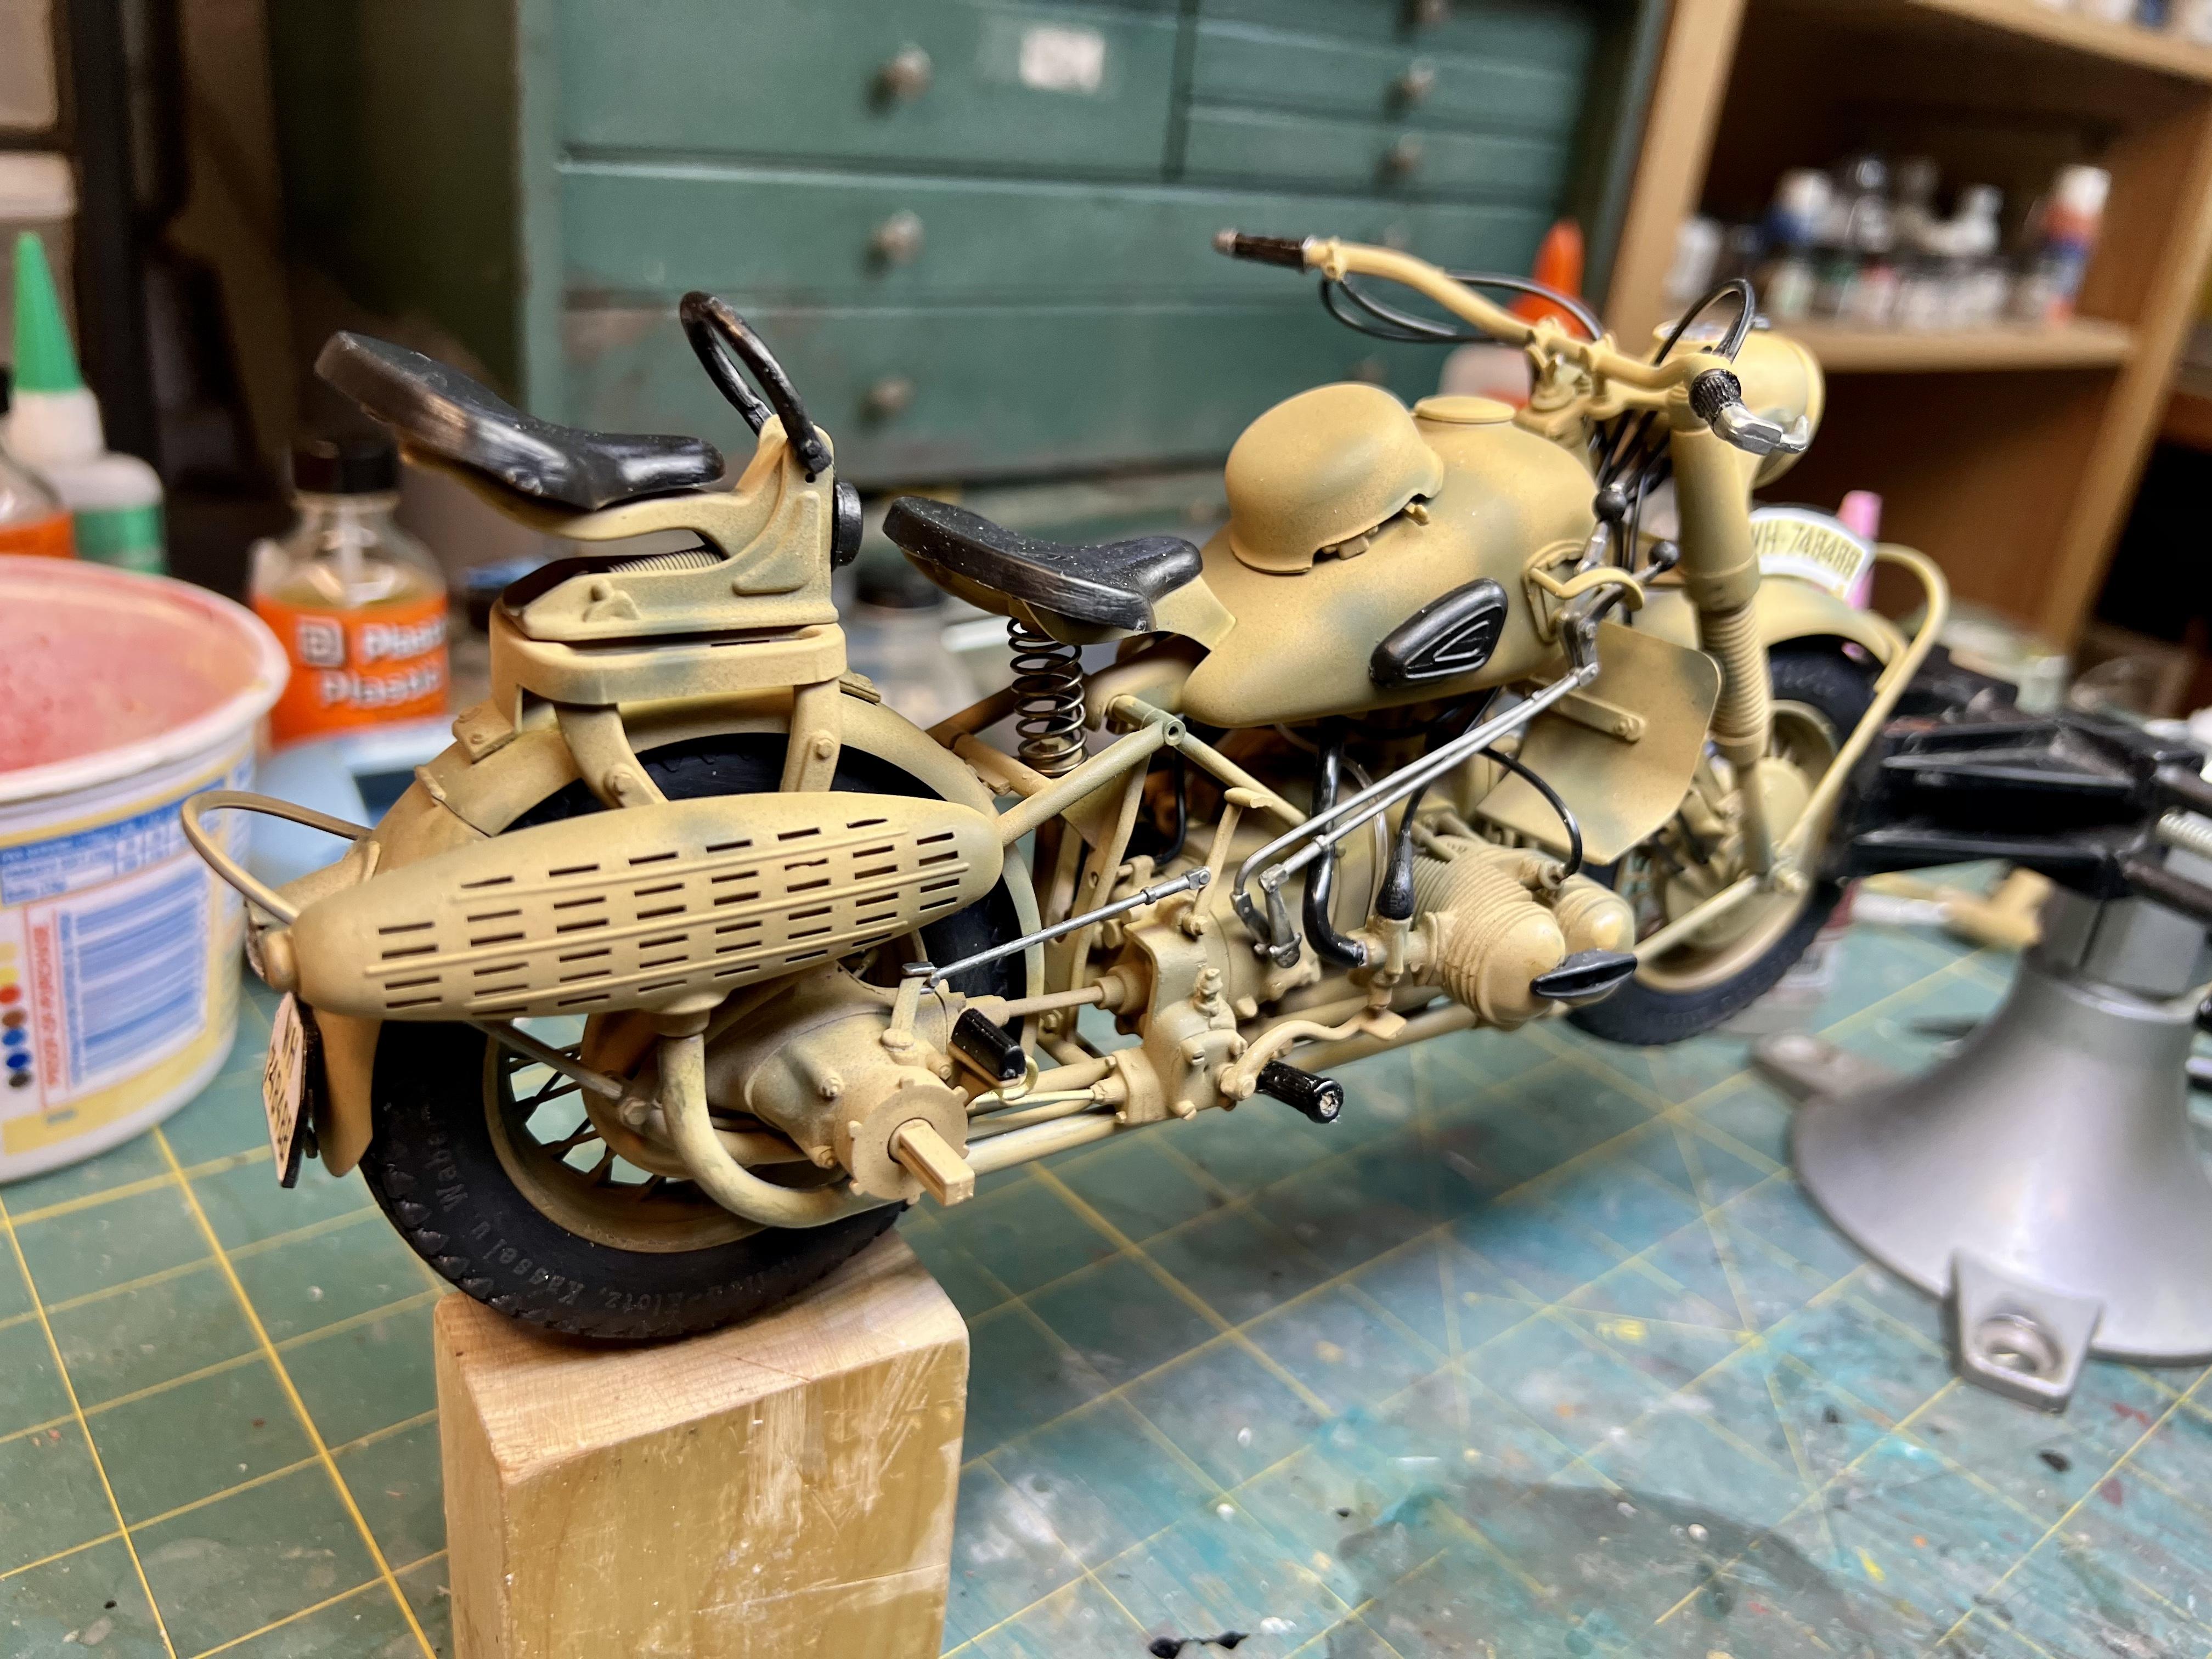
TJ, in reply to your question about the levers on the side of the tank. One is to move from high to low range, like a split axel in a truck. The other is to change regular gears. This also had a reverse. There is a foot shifter like bikes have now on the left side. BMW kept both hand and foot options until the mid 50s. Not sure why. There is also a lever just below the seat and I believe that is to engage or disengage the car wheel. I wish I knew how to keep replies aligned with their original topic. -
BMW R75 revisited
slownlow replied to slownlow's topic in WIP: All The Rest: Motorcycles, Aviation, Military, Sci-Fi, Figures
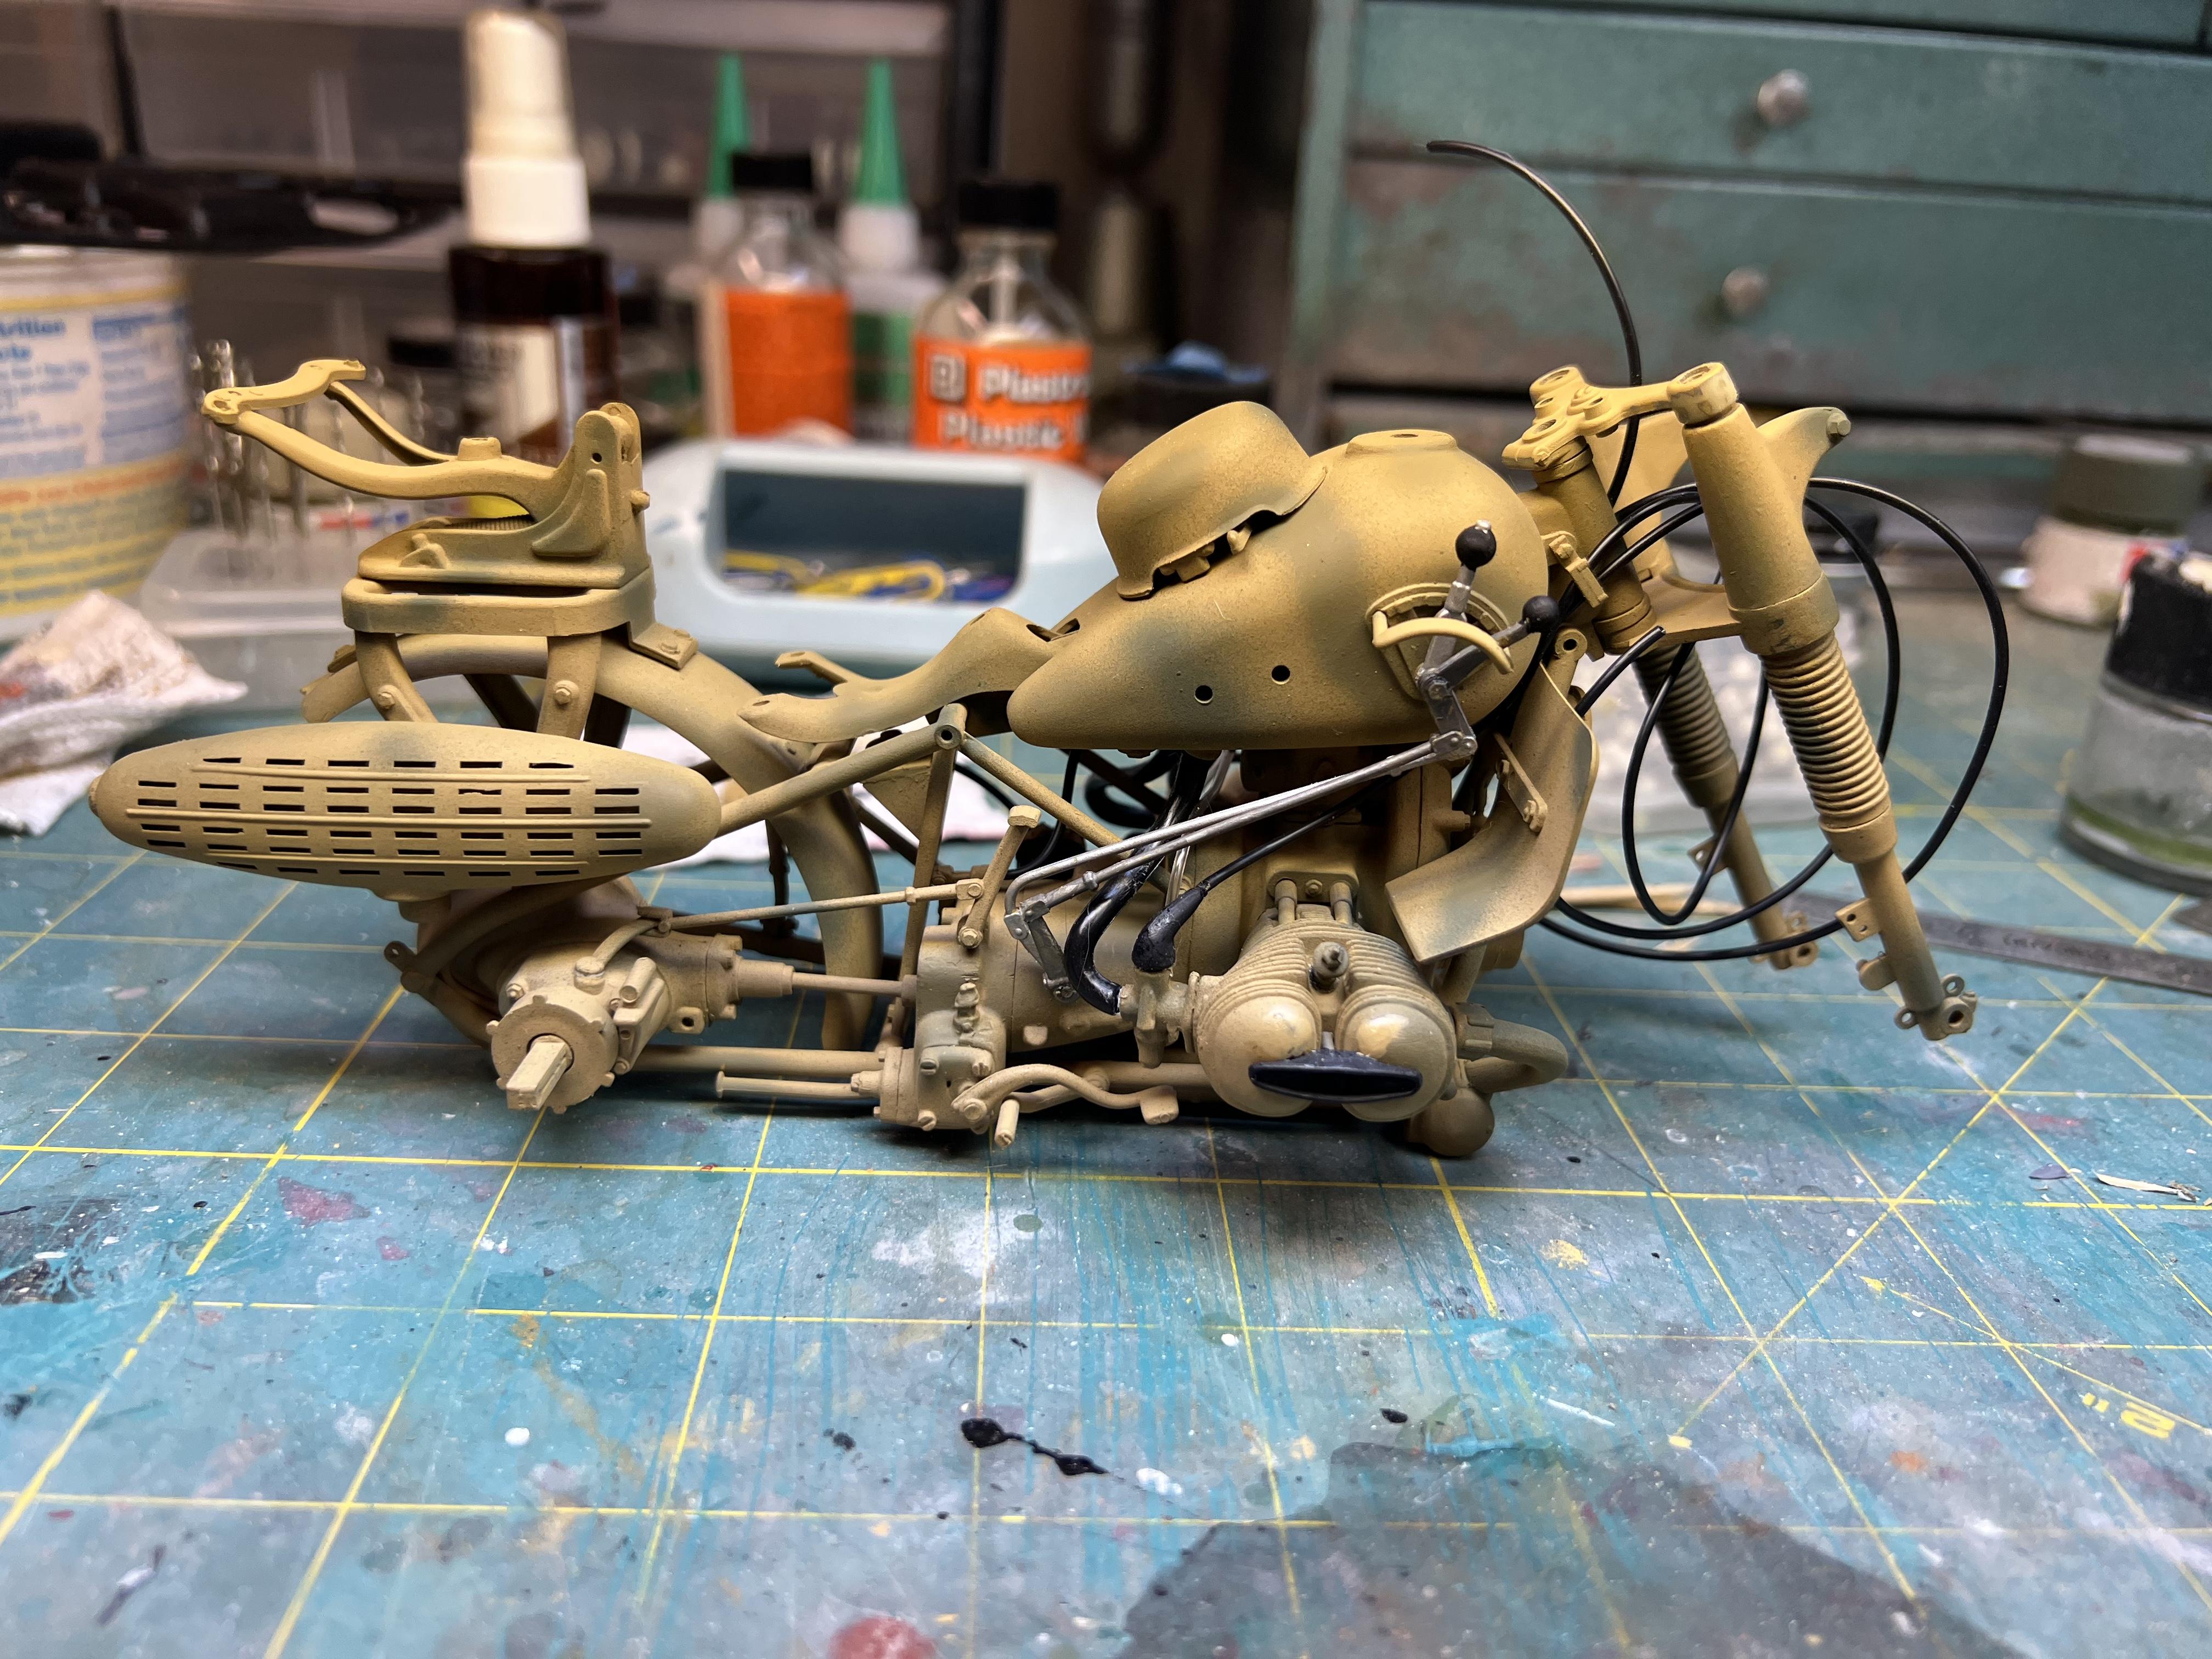
Thanks Bruce. For paint I started by covering every thing with Tamiya Desert Yellow (XF 59). Then used their Field Gray (XF 65) that’s the sort of green blue. And finally a dash of Khaki (XF 49). The kit is so big I had to get the big bottle of the Desert Yellow -
Build-A-Bimmer Werkshop..... All things Bavarian.
slownlow replied to JollySipper's topic in Community Builds
We’ll the bike is done, now onto the car. Along the way I found a way to hold it while adding fidley bits. The square peg at the rear wheel it to power the sidecar. They sure asked a lot of the 750cc engine.
-
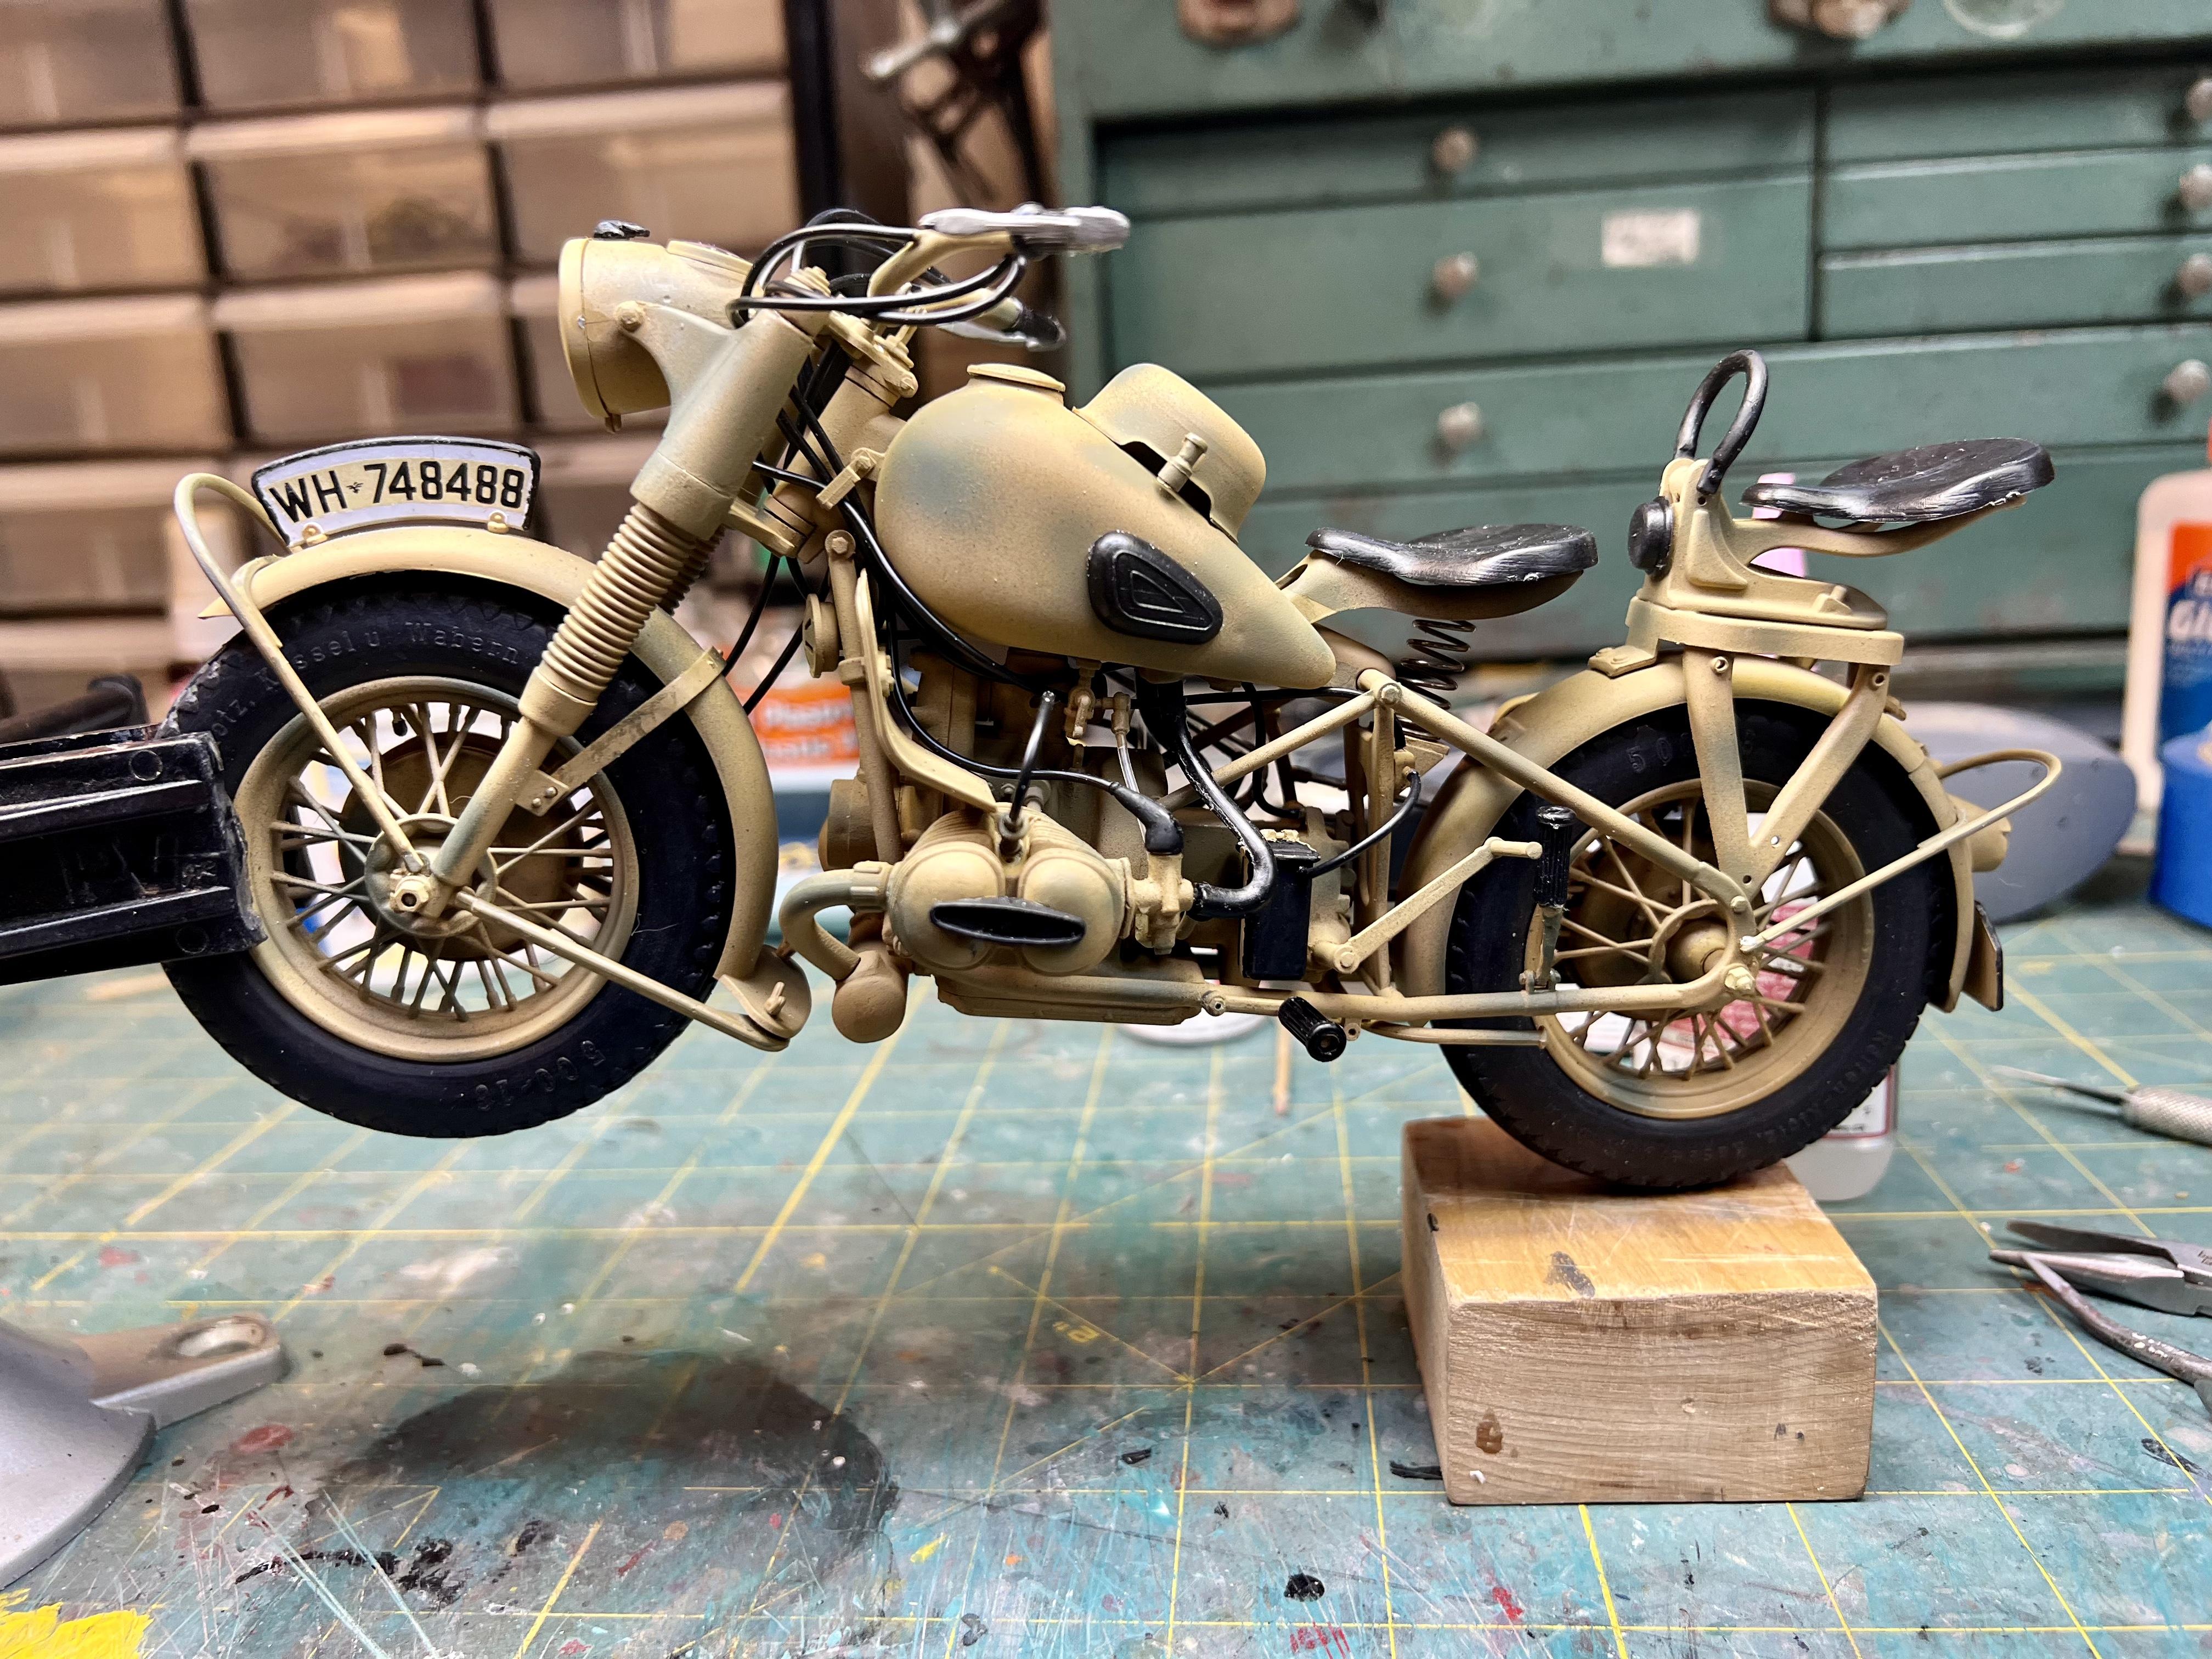
BMW R75 revisited
slownlow replied to slownlow's topic in WIP: All The Rest: Motorcycles, Aviation, Military, Sci-Fi, Figures
Well, the bike is all but done. Now onto the car Along the way I found a way to hold the bike as I was adding fiddley bits. The square peg coming from the rear wheel allows the side car wheel to also have power. They were asking a lot of the 750 cc engine, especially if the rig was fully loaded and on soft ground.
-
Build-A-Bimmer Werkshop..... All things Bavarian.
slownlow replied to JollySipper's topic in Community Builds
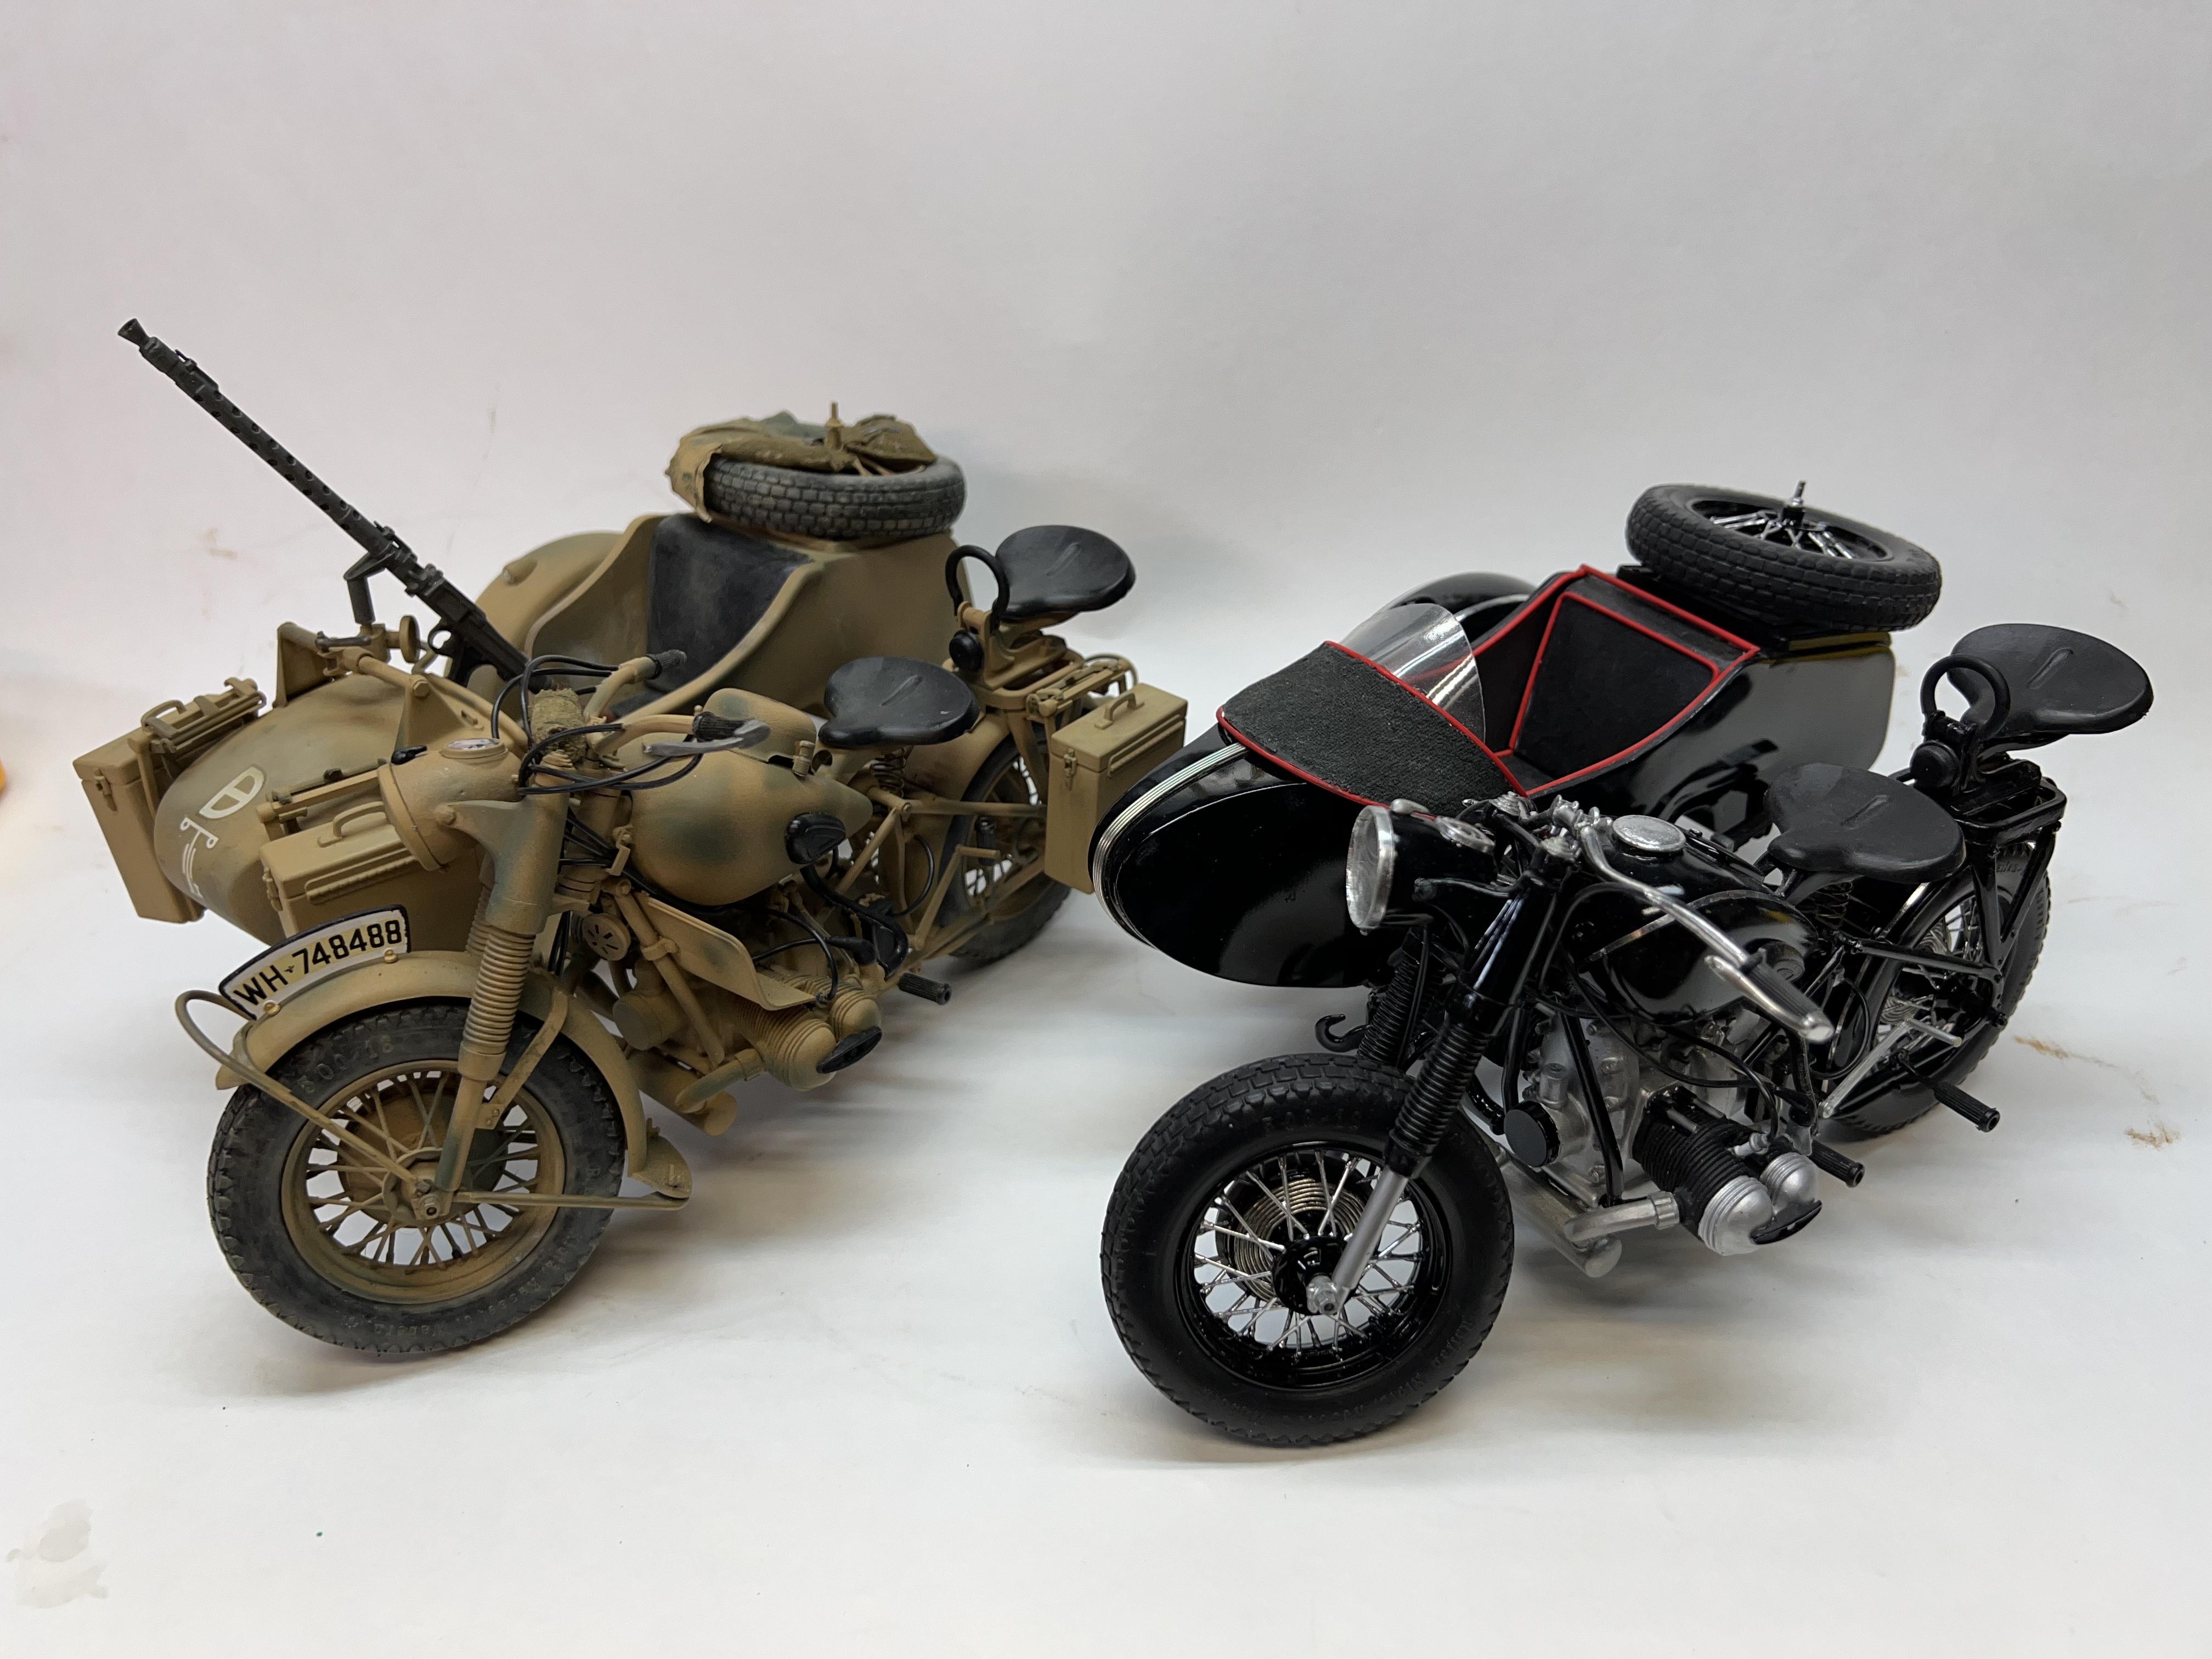
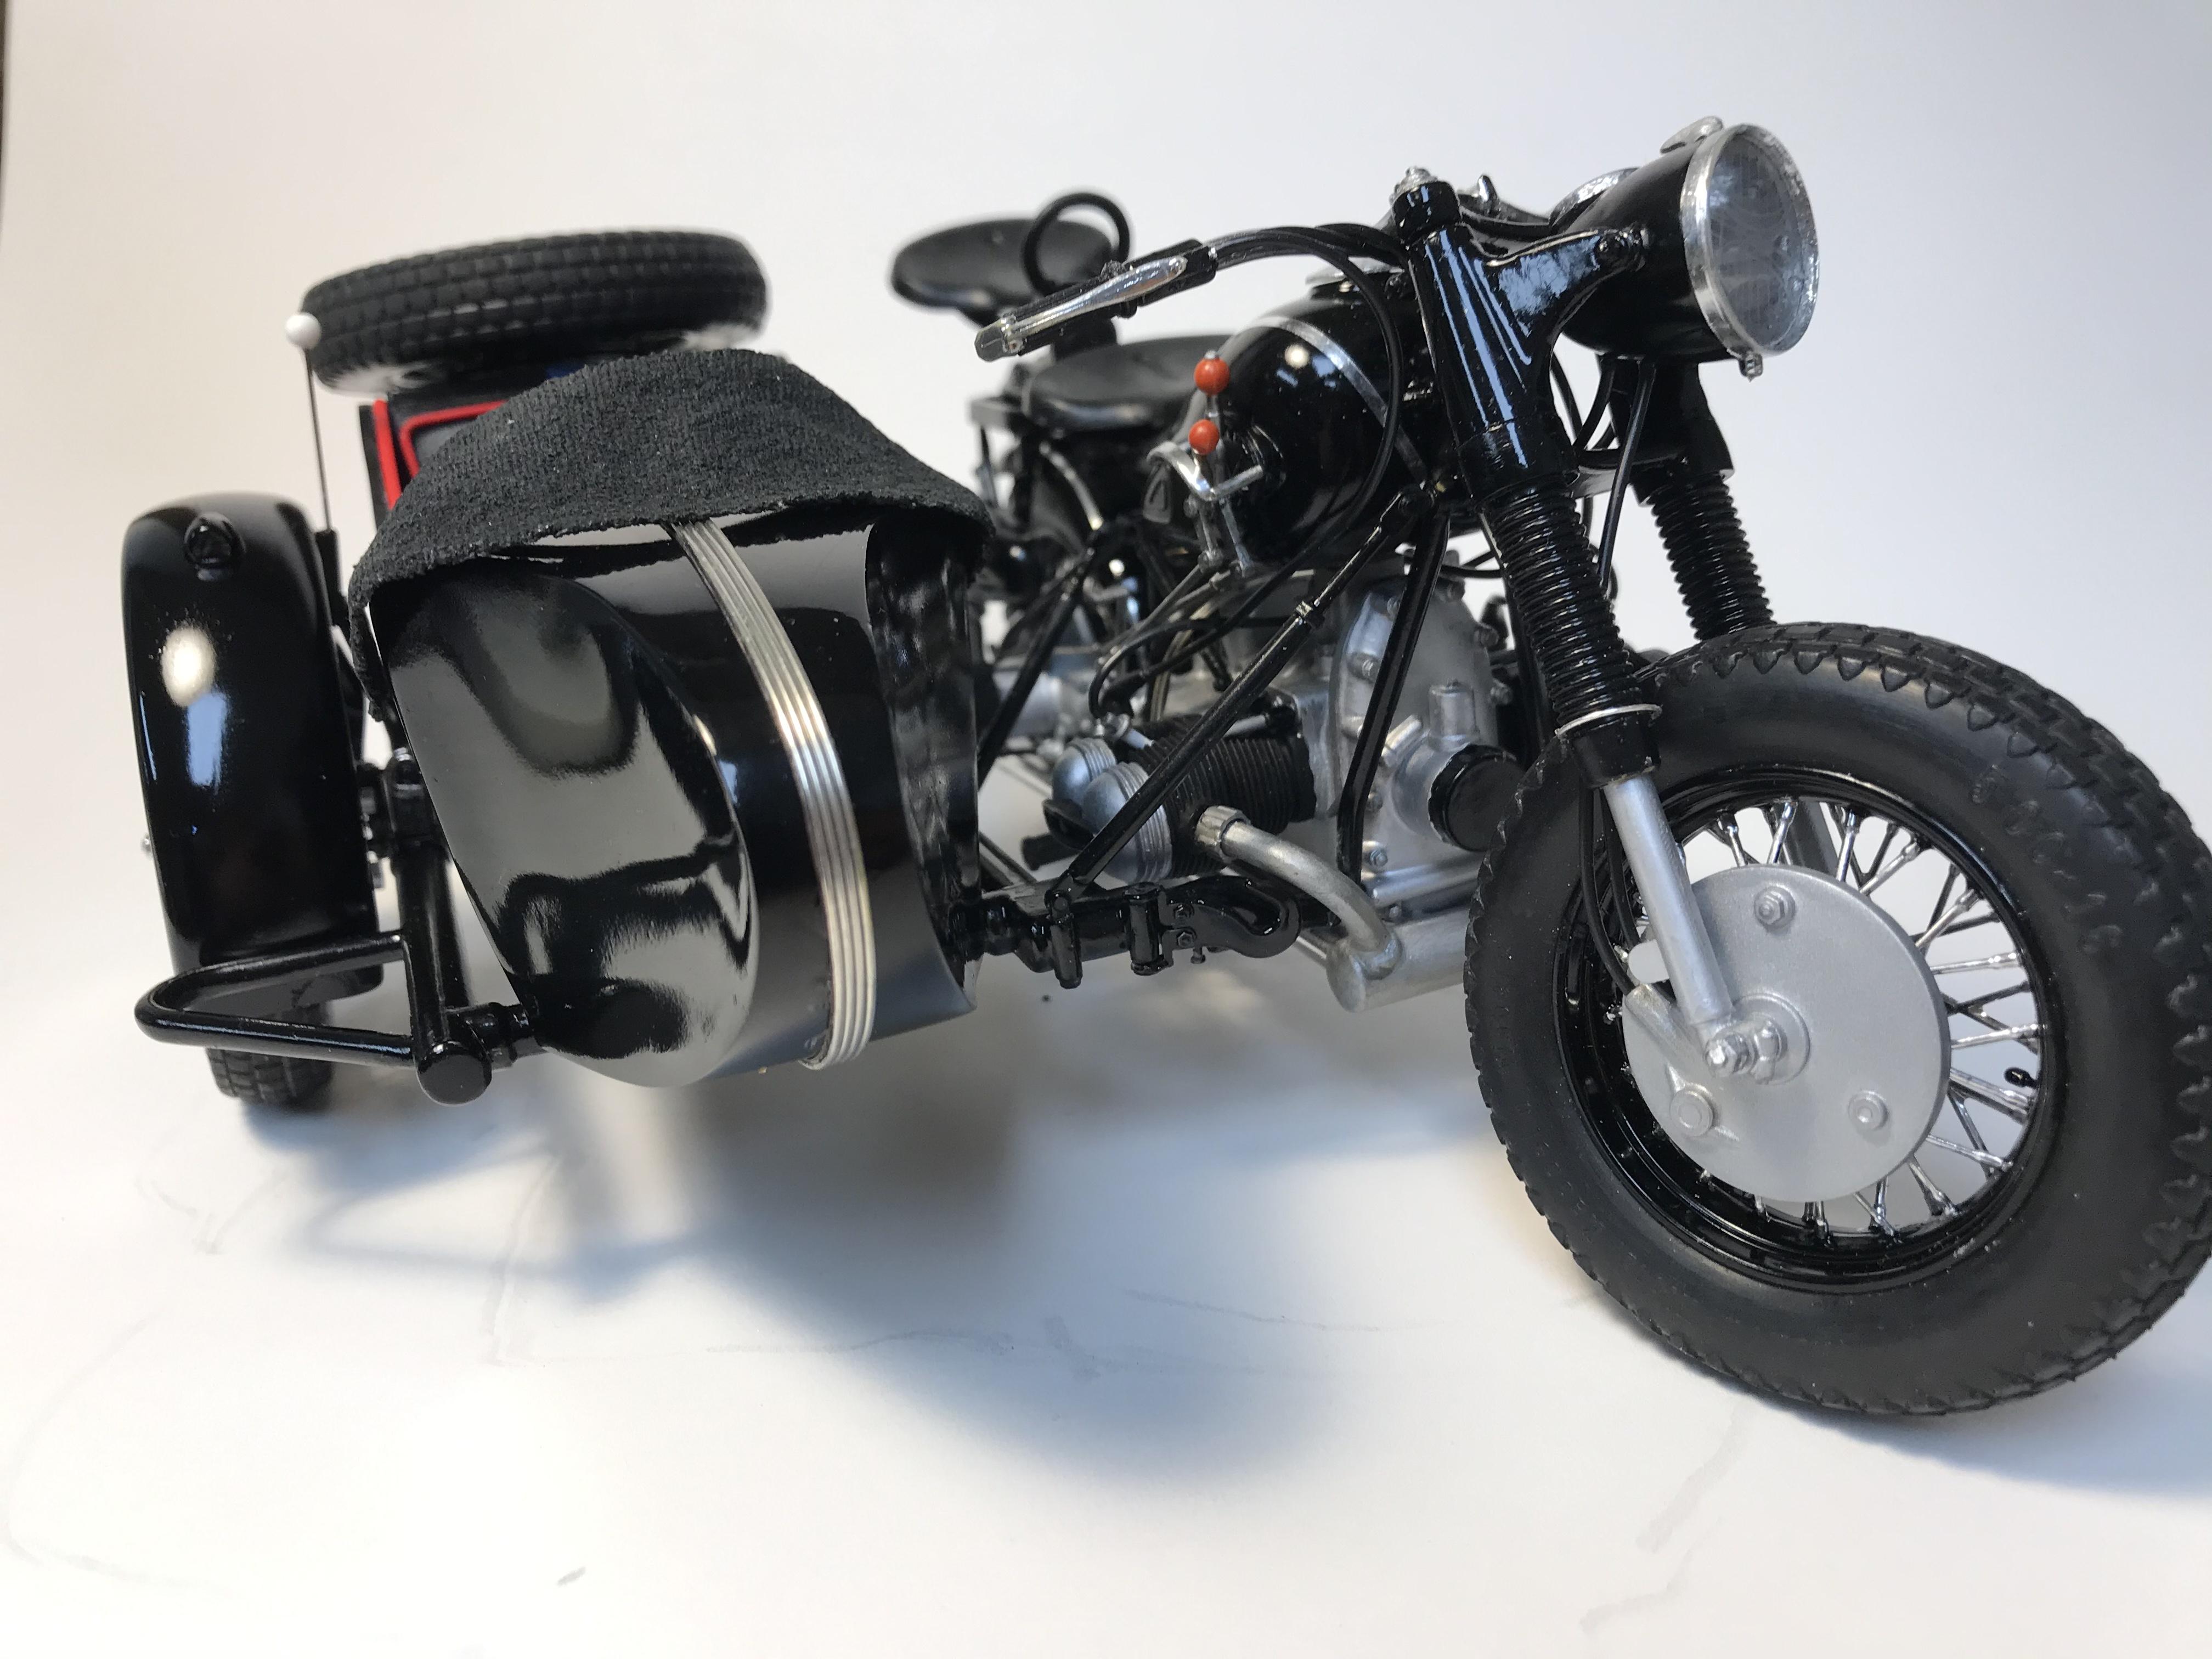
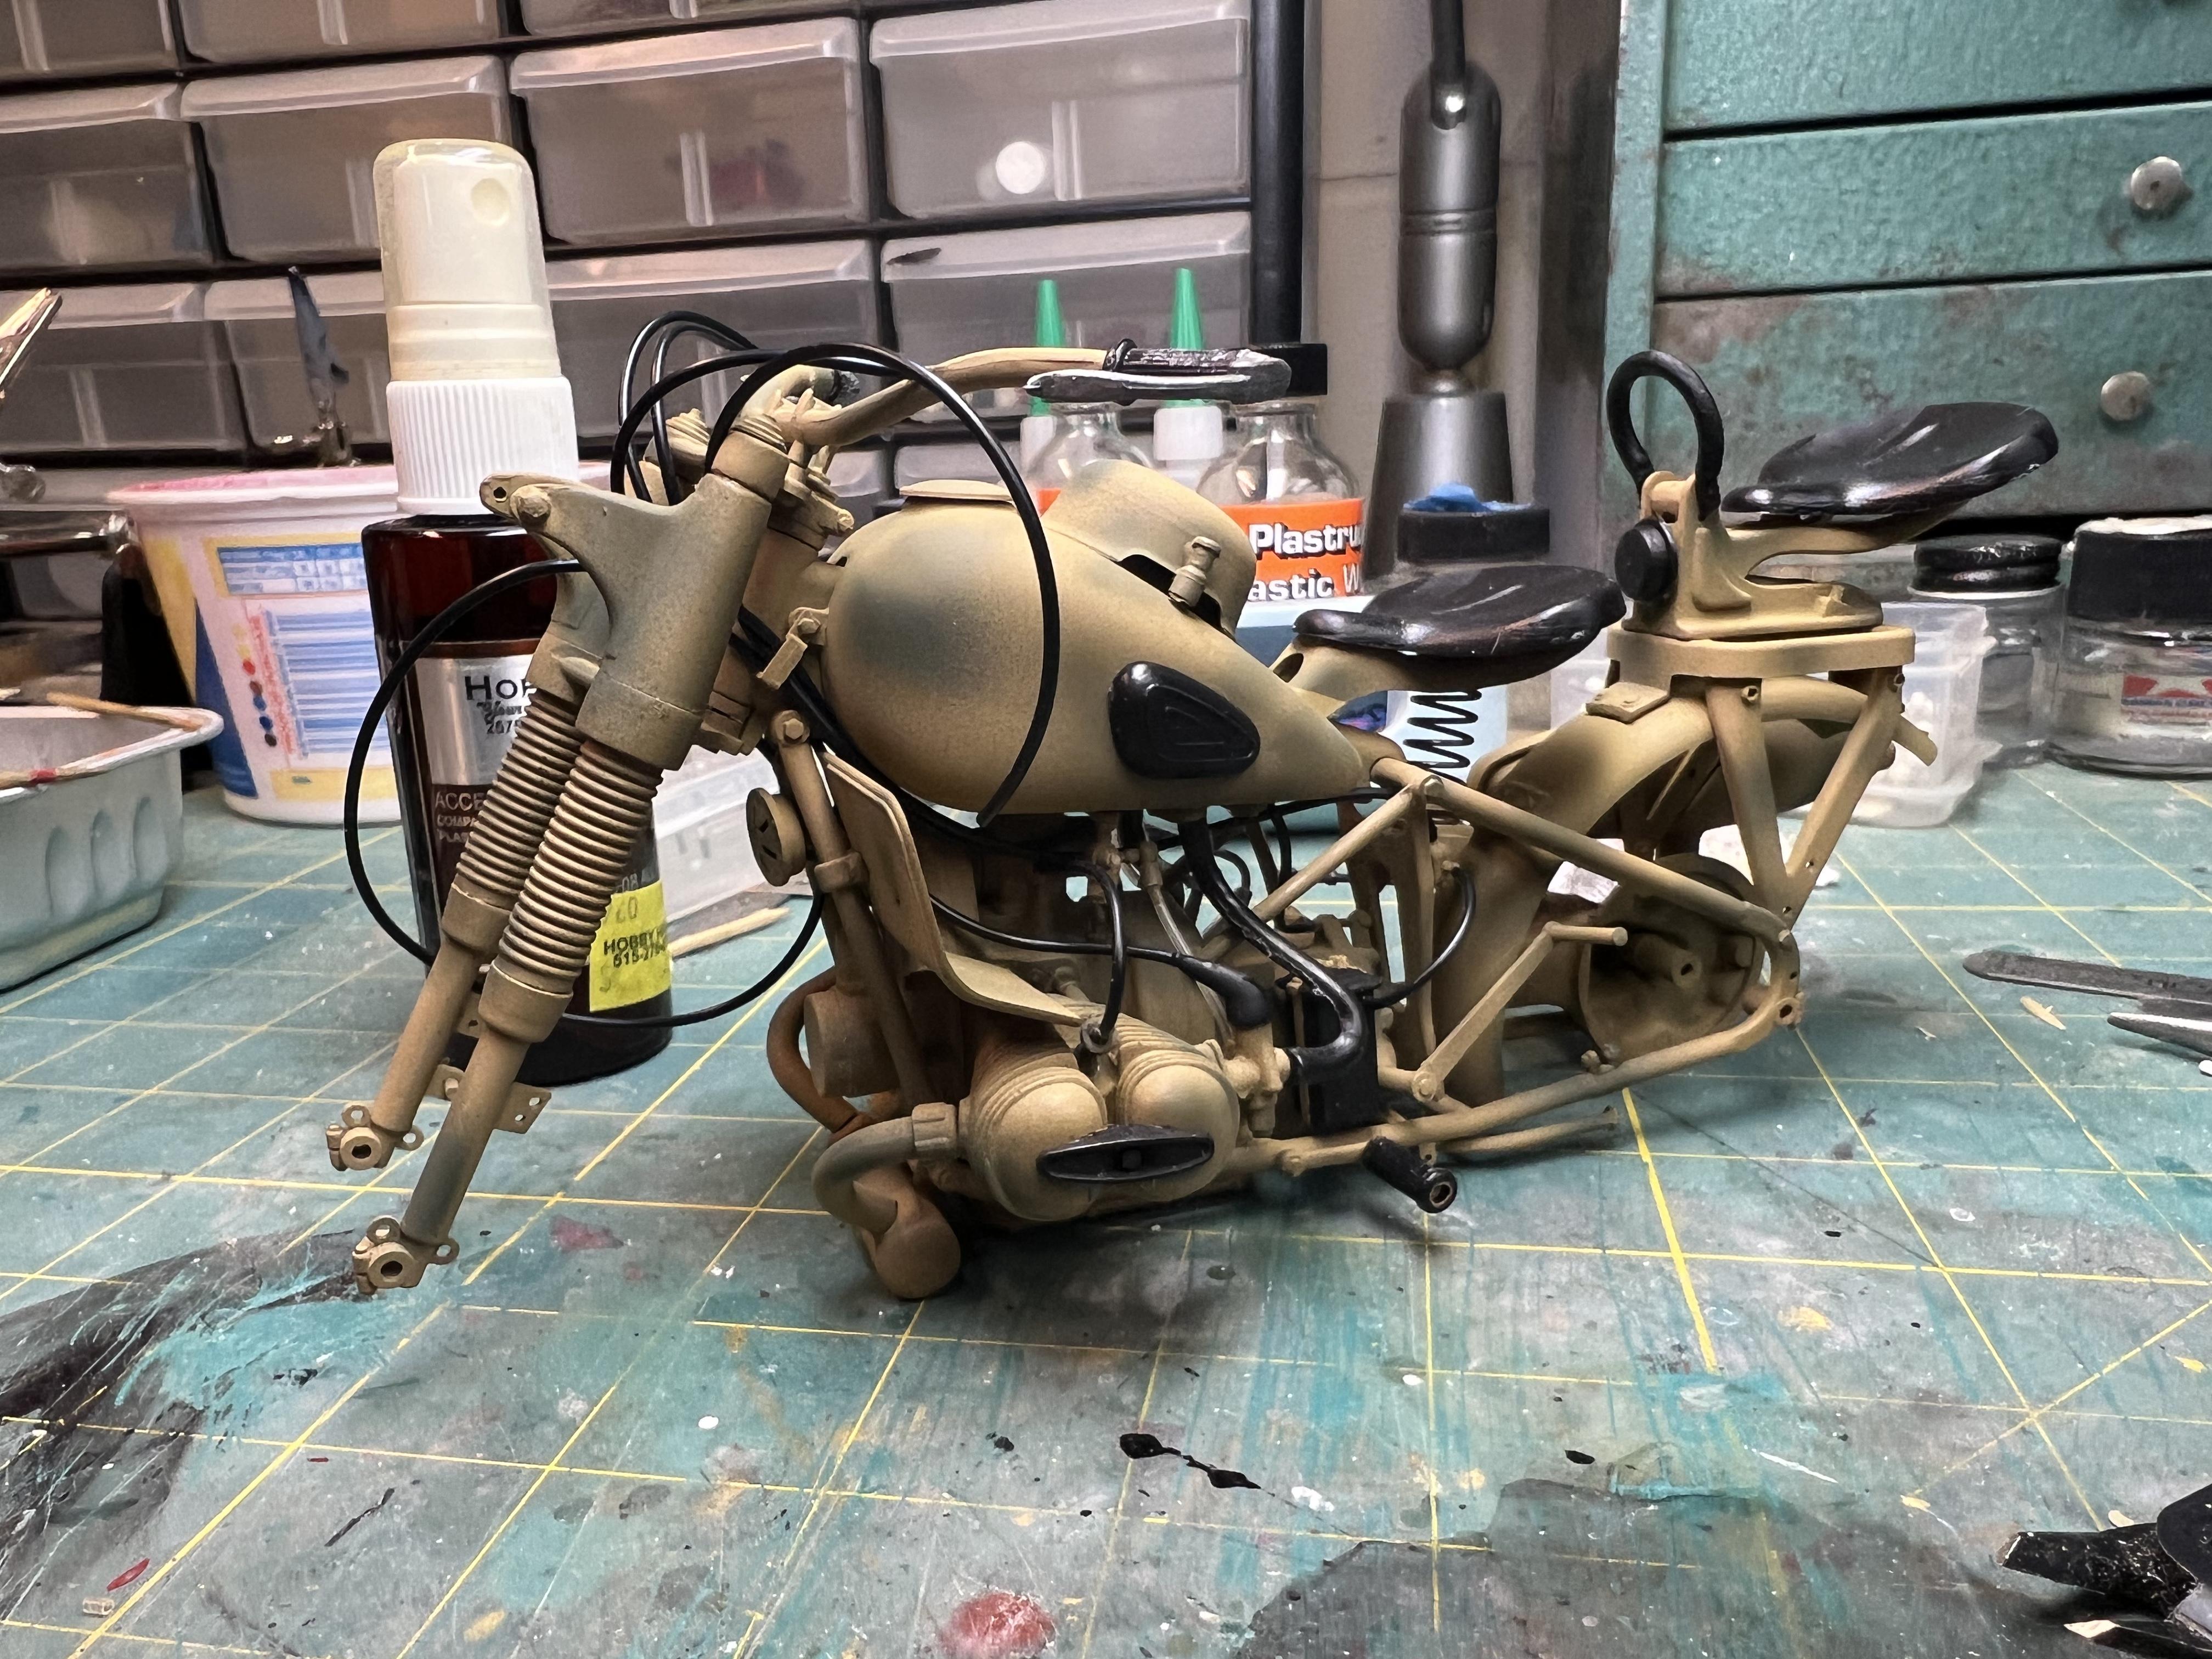
Thanks for the heads up about this thread TJ. A friend gave me 2 ESCI models of the iconic WWll BMW R75. One was started but had a few bits missing. So rather than do a military build I went more in the bobber direction. The kits are 1/9th scale so there is lots of opportunity for detail. To disassemble the started kit I used the wet then freeze technique with modest success. Thinking this might be the case I predrilled most of the contact points to receive a pin on assembly. Major body work was done to the front of the car and moderate changes on the bike. Now I’ve started the military version and this is the progress so far. Because of the size of the kit there are a few fun factors incorporated. The forks compress, the seats are sprung and of course the wheels go round and round. Anyway that’s the progress so far.
-
BMW R75 revisited
slownlow replied to slownlow's topic in WIP: All The Rest: Motorcycles, Aviation, Military, Sci-Fi, Figures
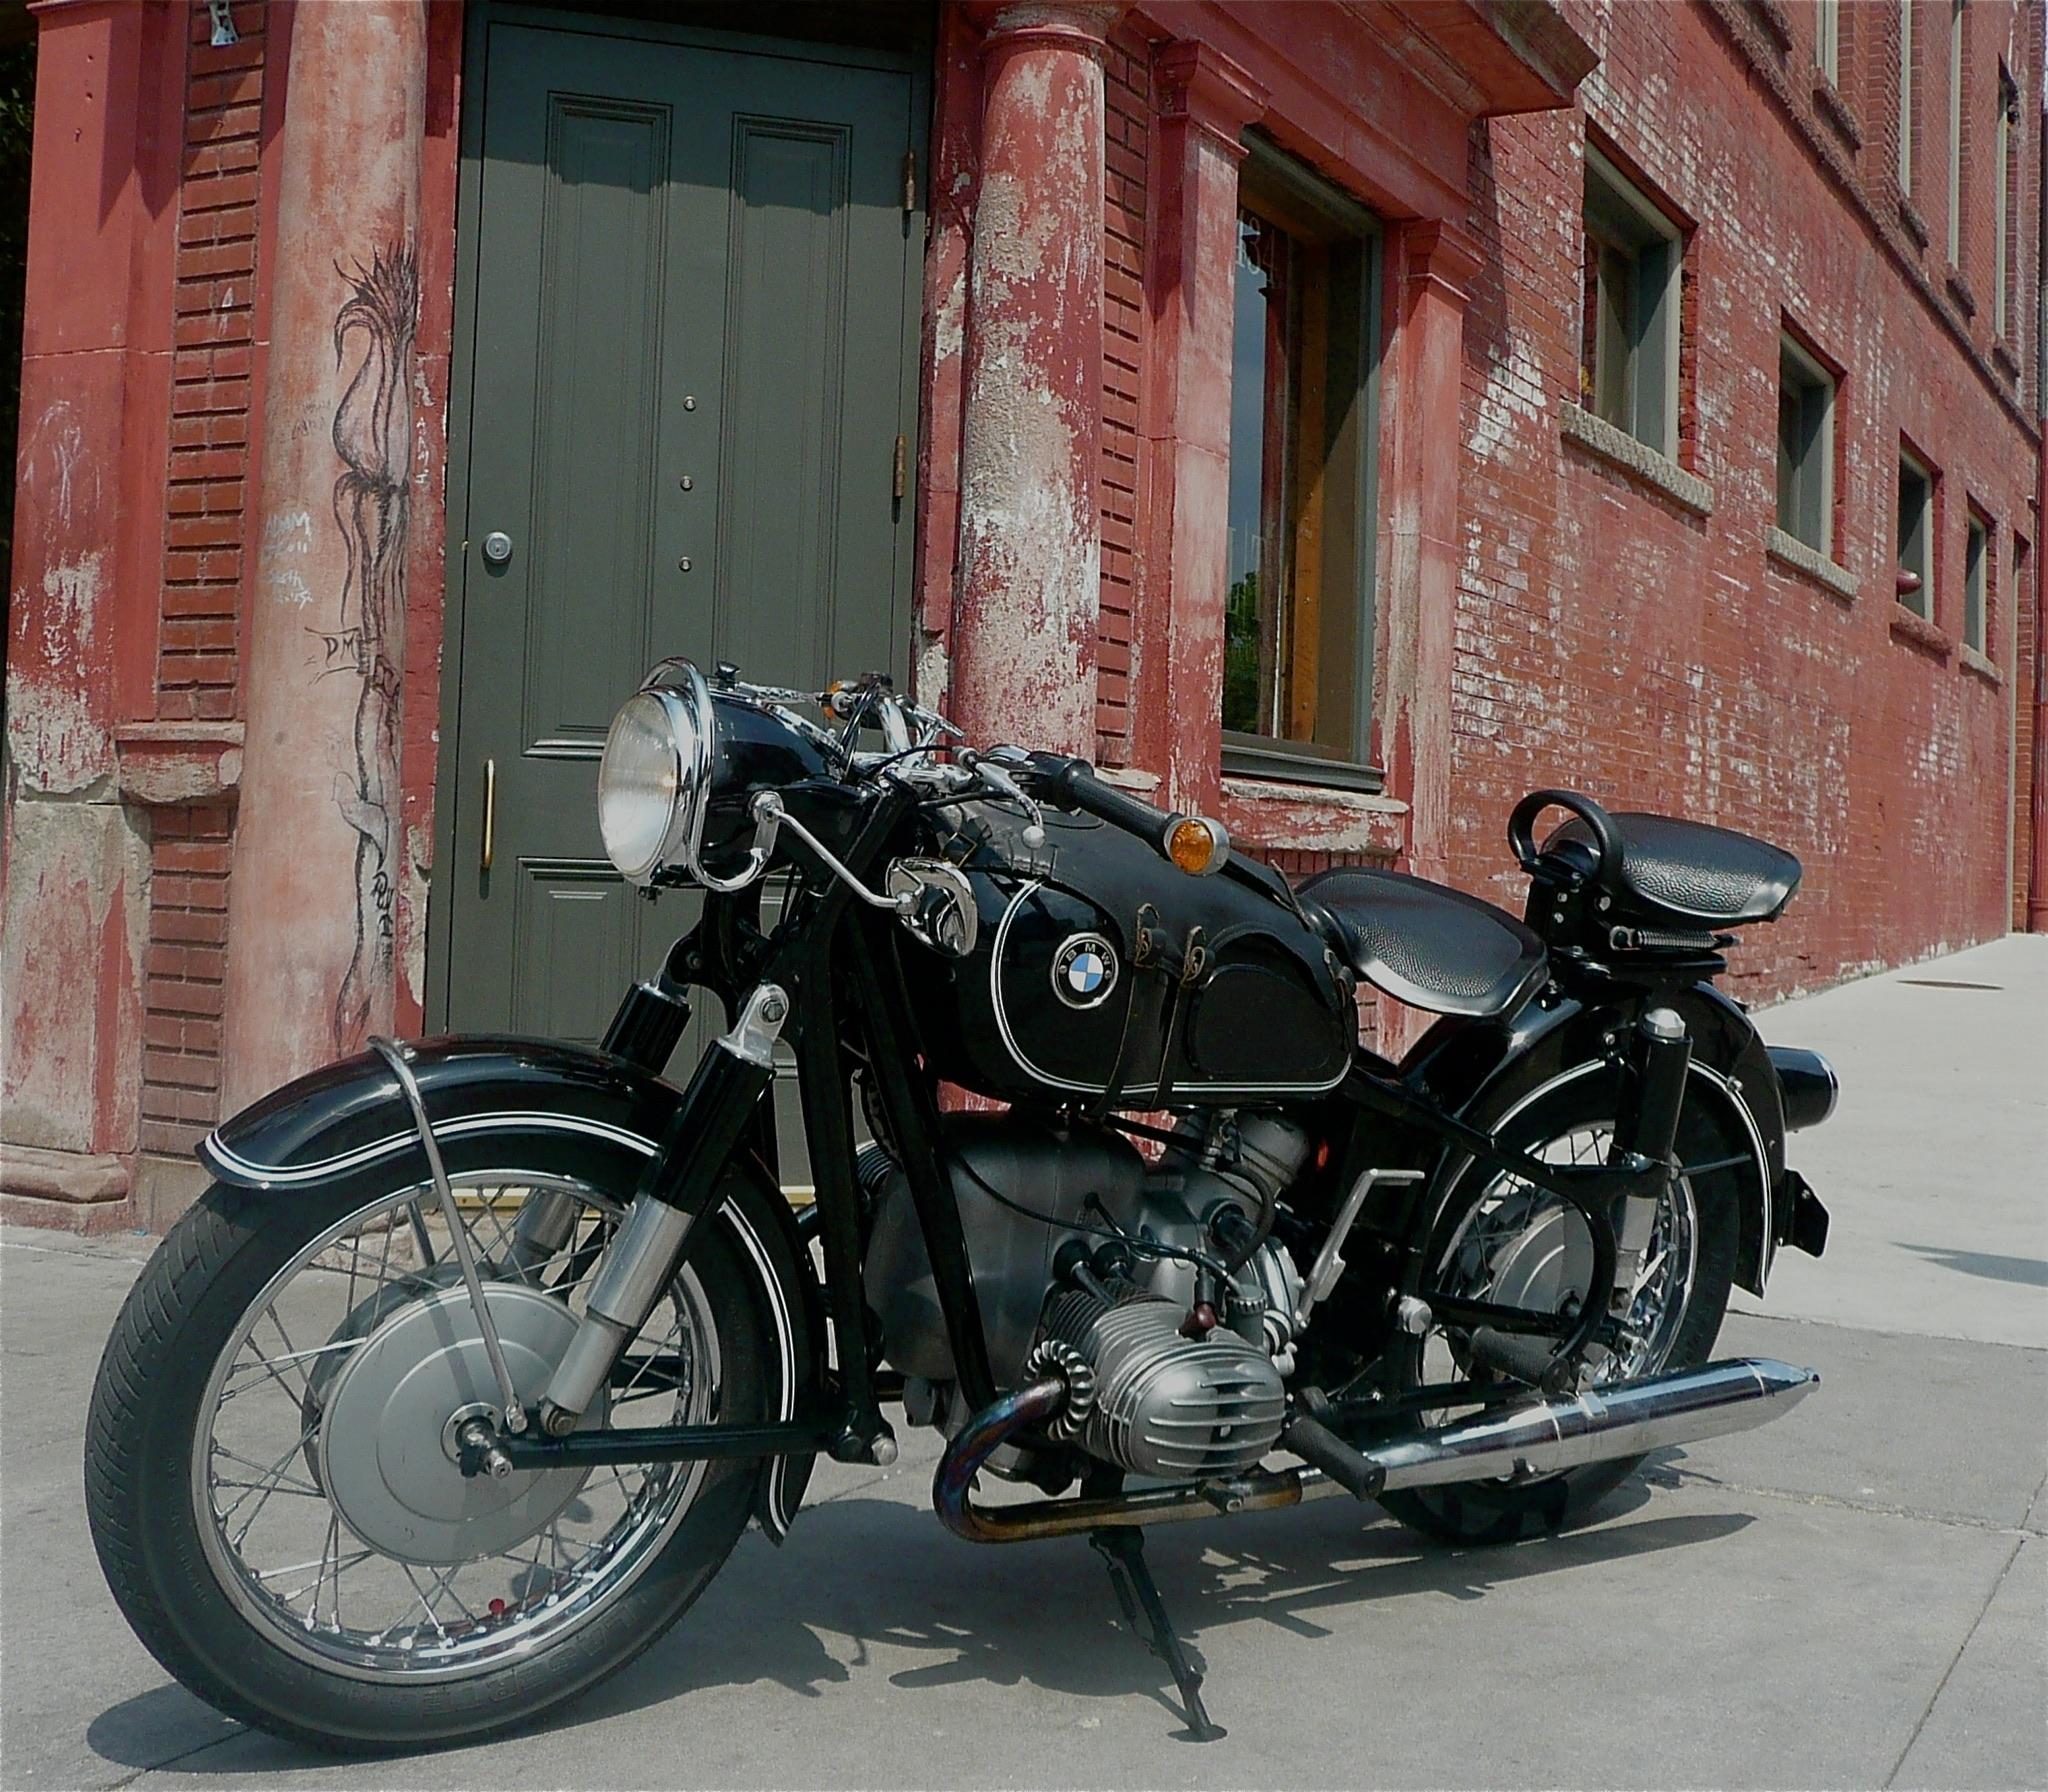
Thanks Joe. Working with the larger scale does offer more detail but that demands more effort. I’ve always loved old BMW’s too. In fact I had a 67 until I passed it on to my son a year ago.
-
BMW R75 revisited
slownlow replied to slownlow's topic in WIP: All The Rest: Motorcycles, Aviation, Military, Sci-Fi, Figures
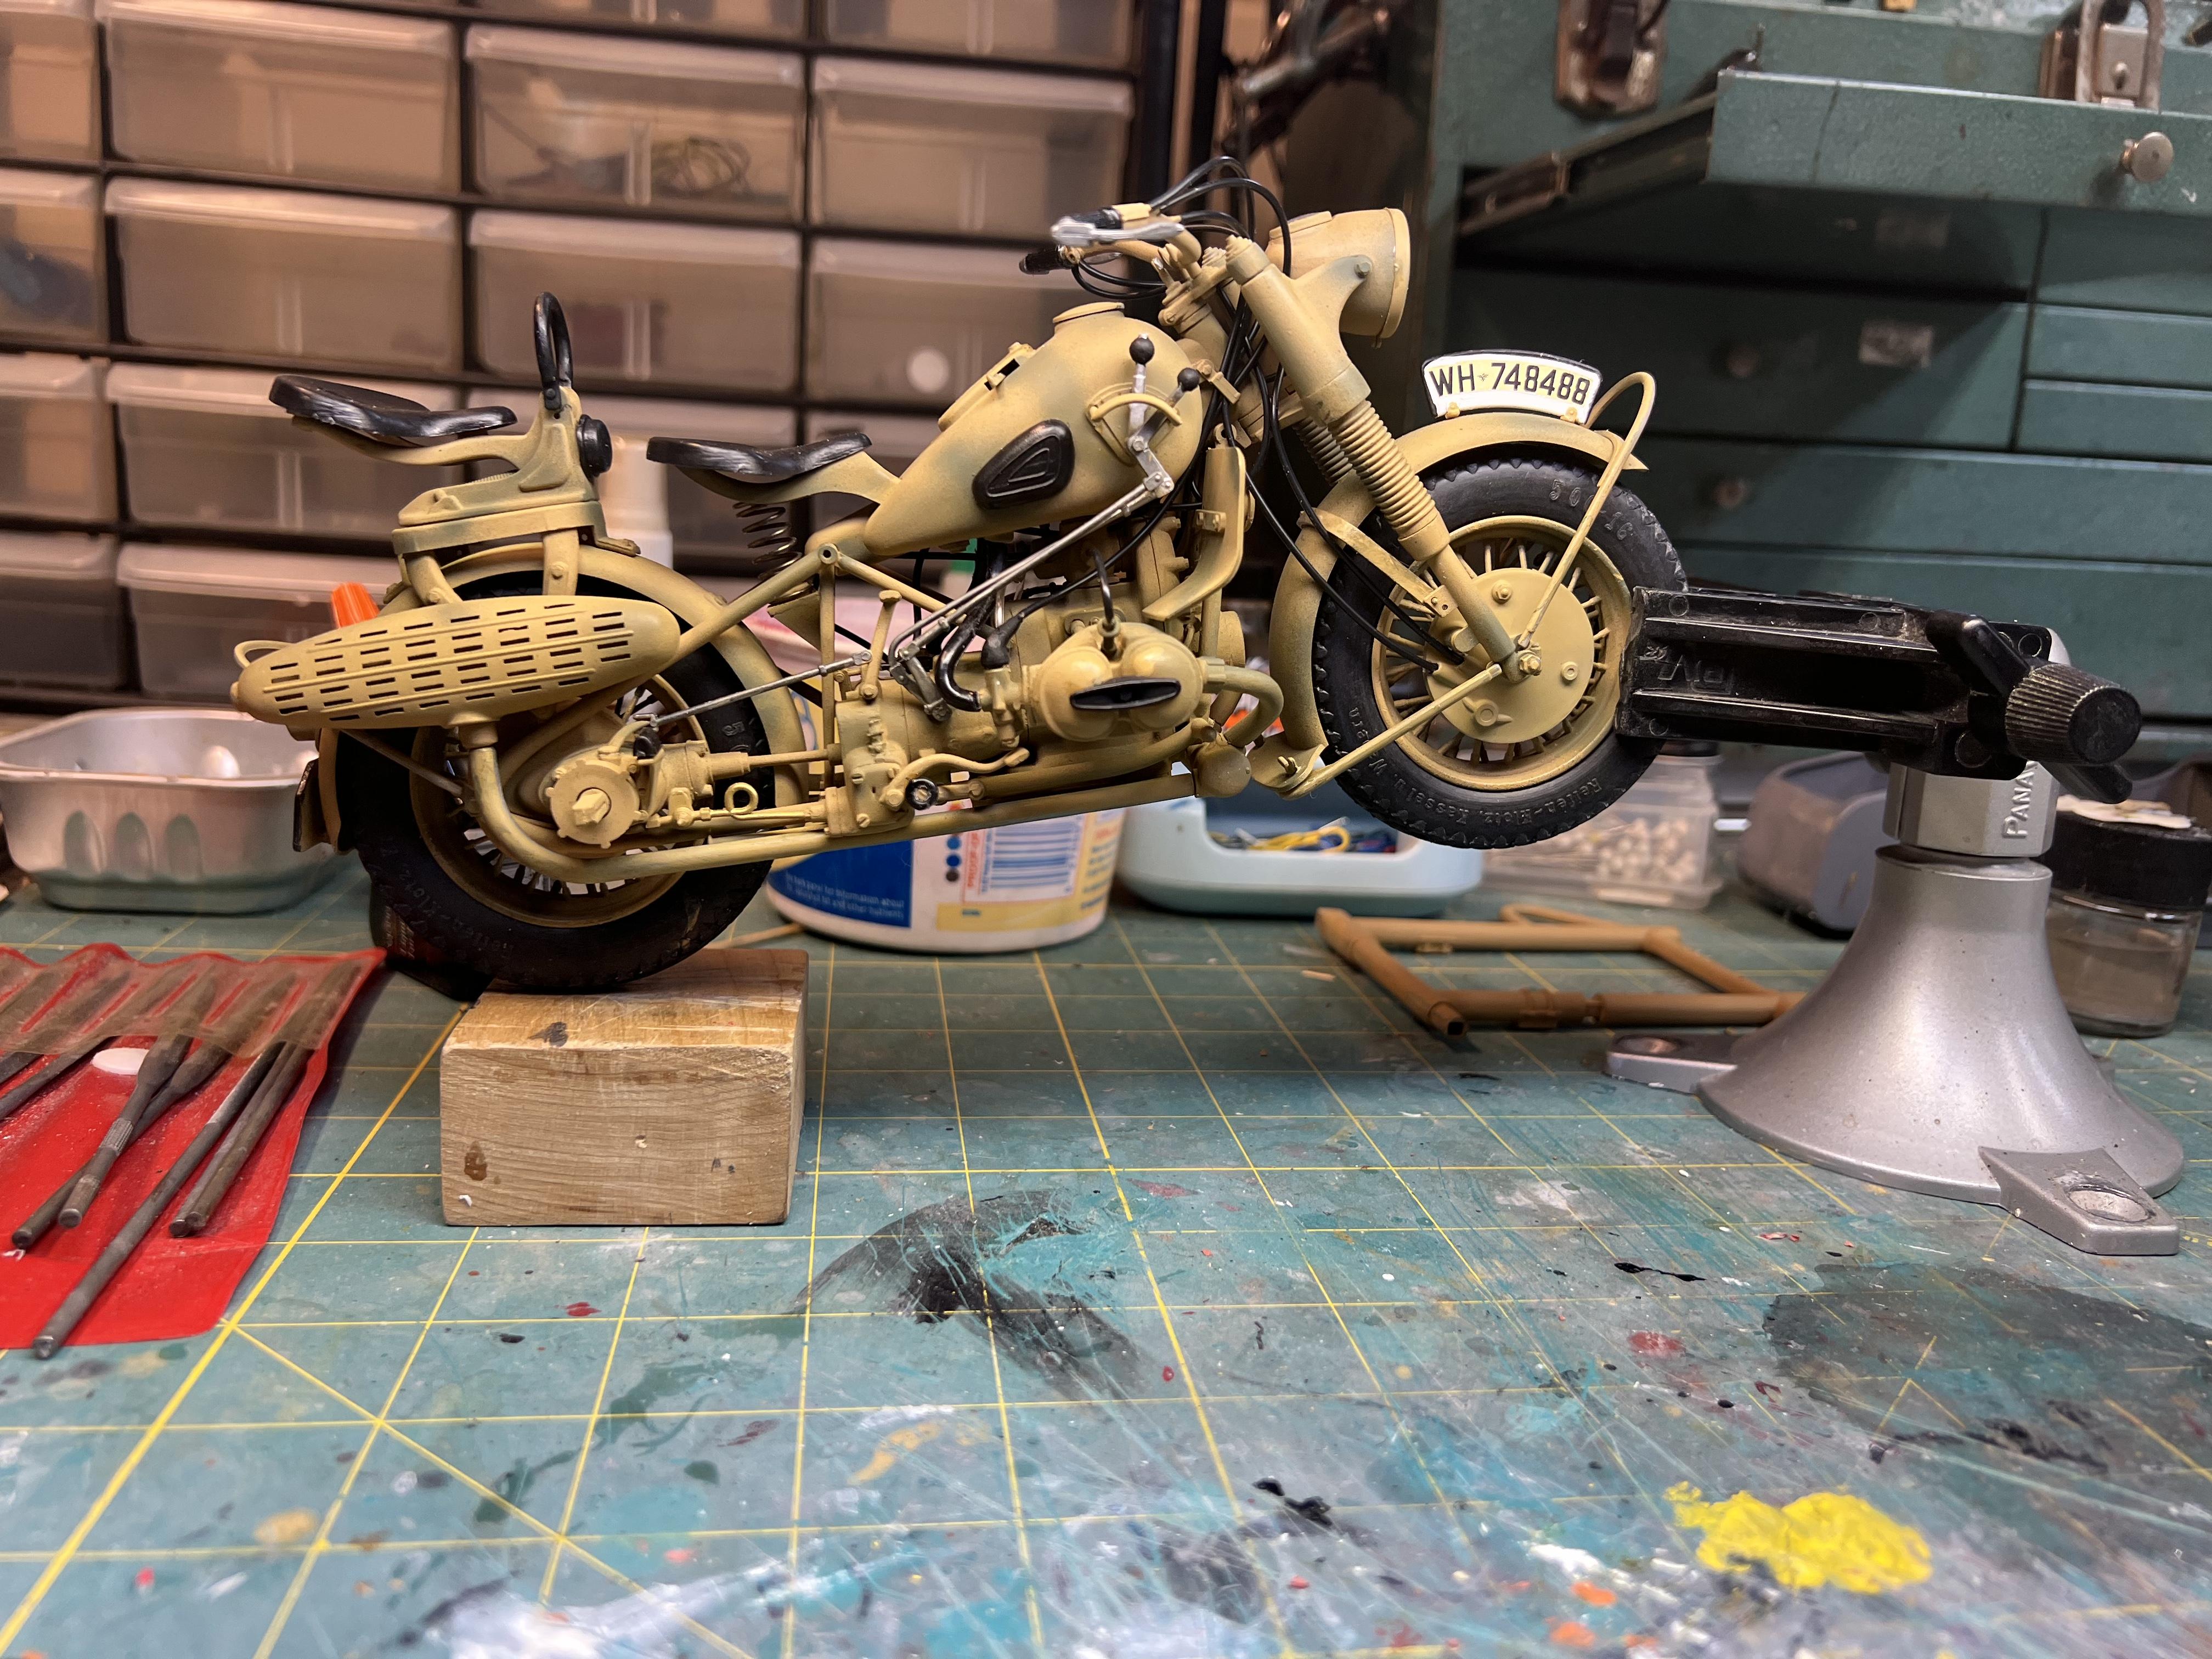
Thanks for the kind words. The molding and alignment are good. The only issues I see are the usual seams where the mold halves join. So far as comparing with Protar I haven’t built any of their kits but this one is nice. Here are a couple of pics of my current progresss
-
I was lucky enough to score two of this kit. One was started and had a few parts missing. That one I turned into a bobber and posted it some time ago. Now I’ve started the second one and will give it military livery for the desert campain. That is not a helmet on the fuel tank it’s the air intake positioned to avoid dust and such.
-
I raid the kitchen drawers and use Press and Seal. You can even cover the lights and it comes off easily when too dirty.
-
Hood Scoop for American Graffiti 1955 Chev
slownlow replied to mopargreg's topic in Model Building Questions and Answers
Here’s a fake fingernail I used for a scoop. They come in a variety of sizes and this is one of the larger.
-
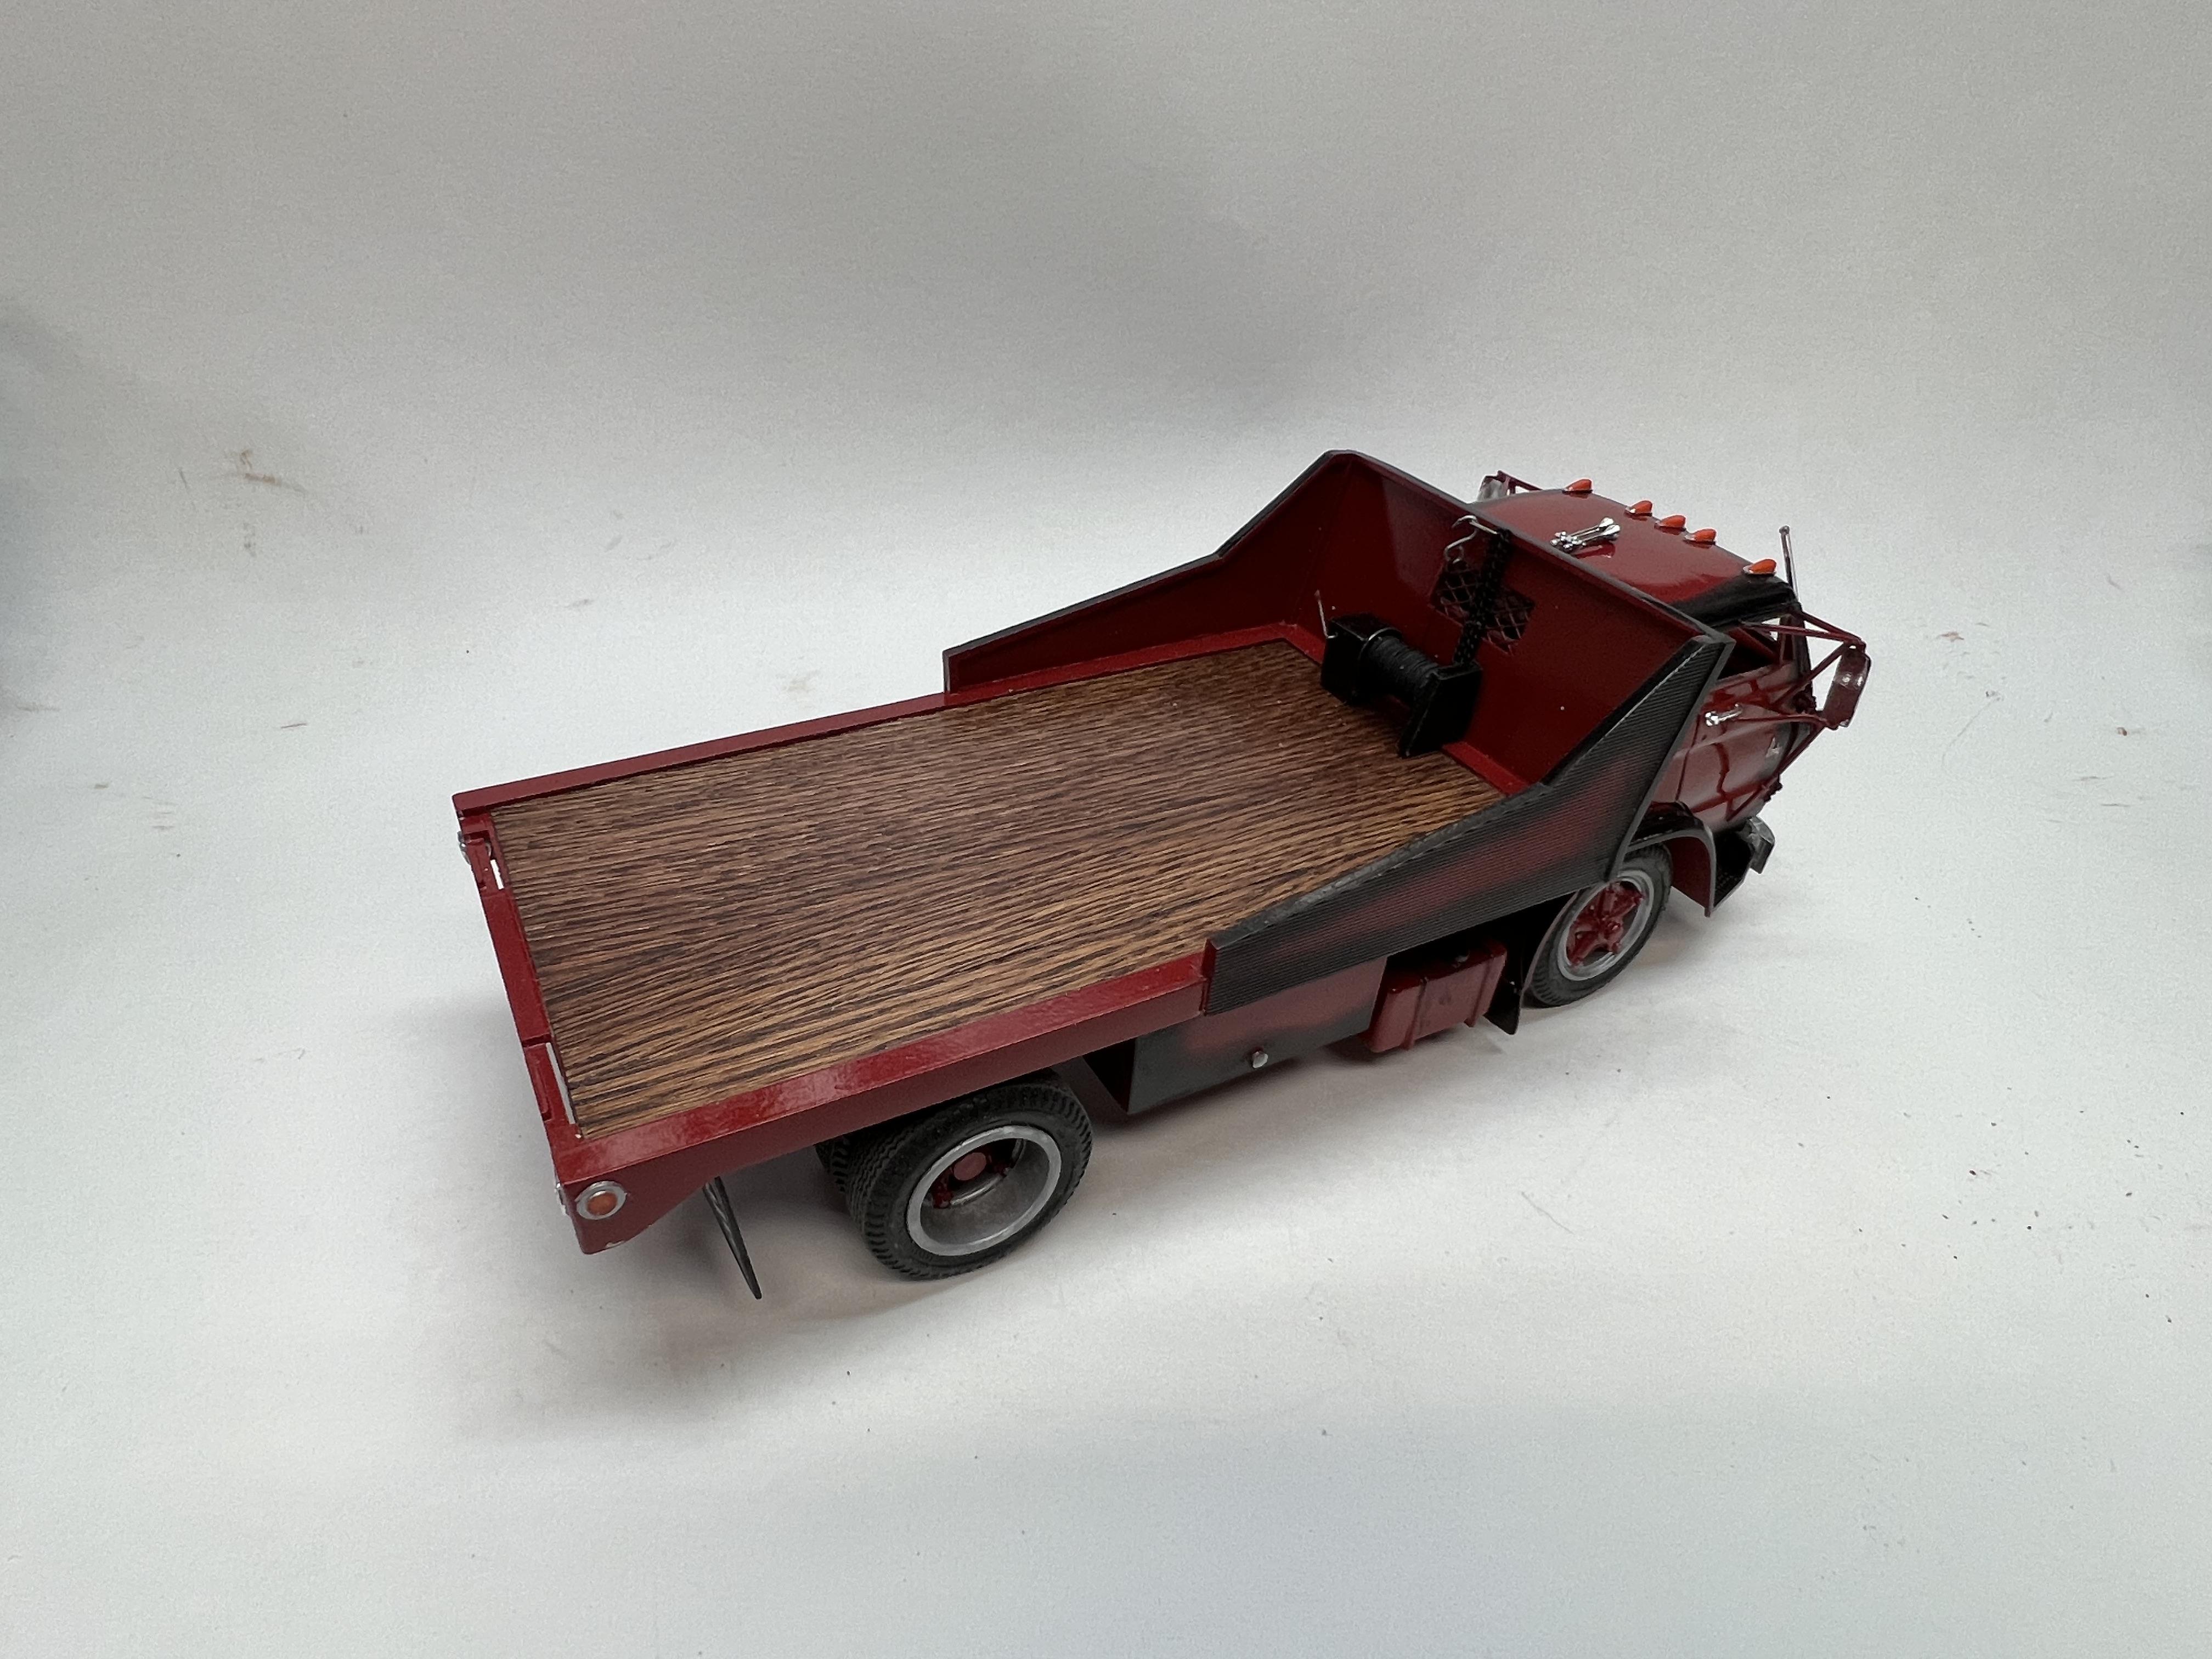
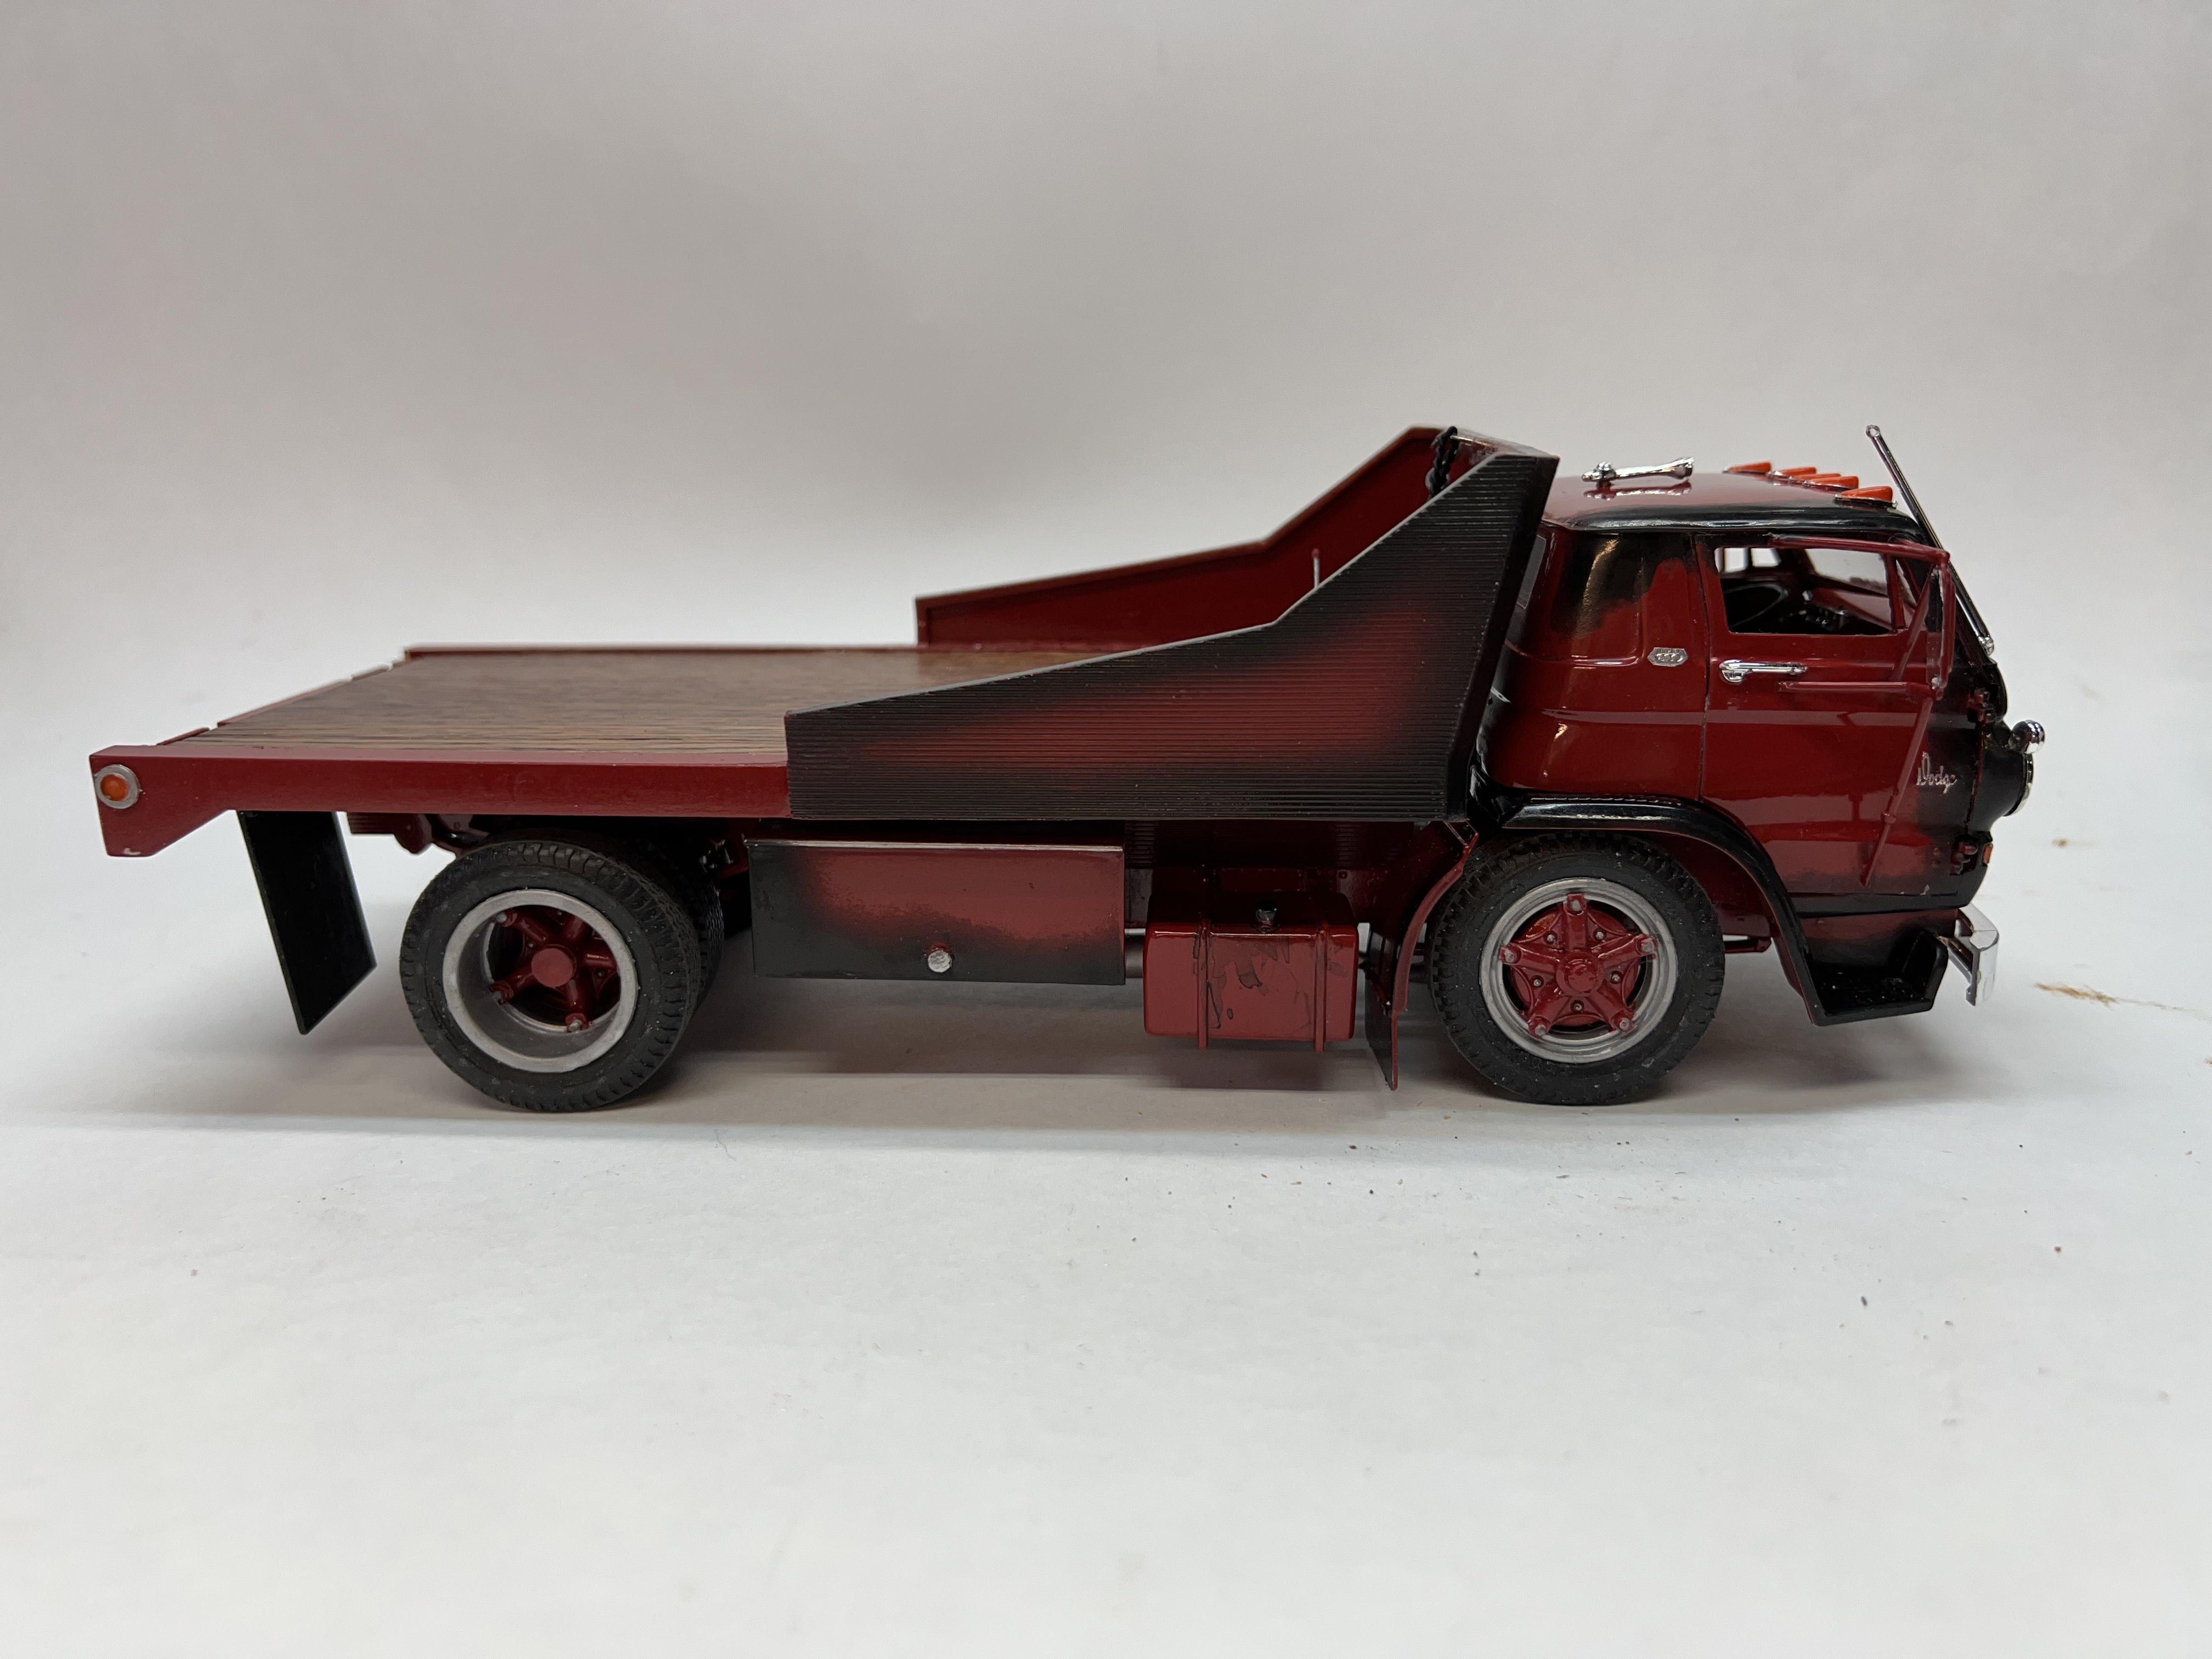
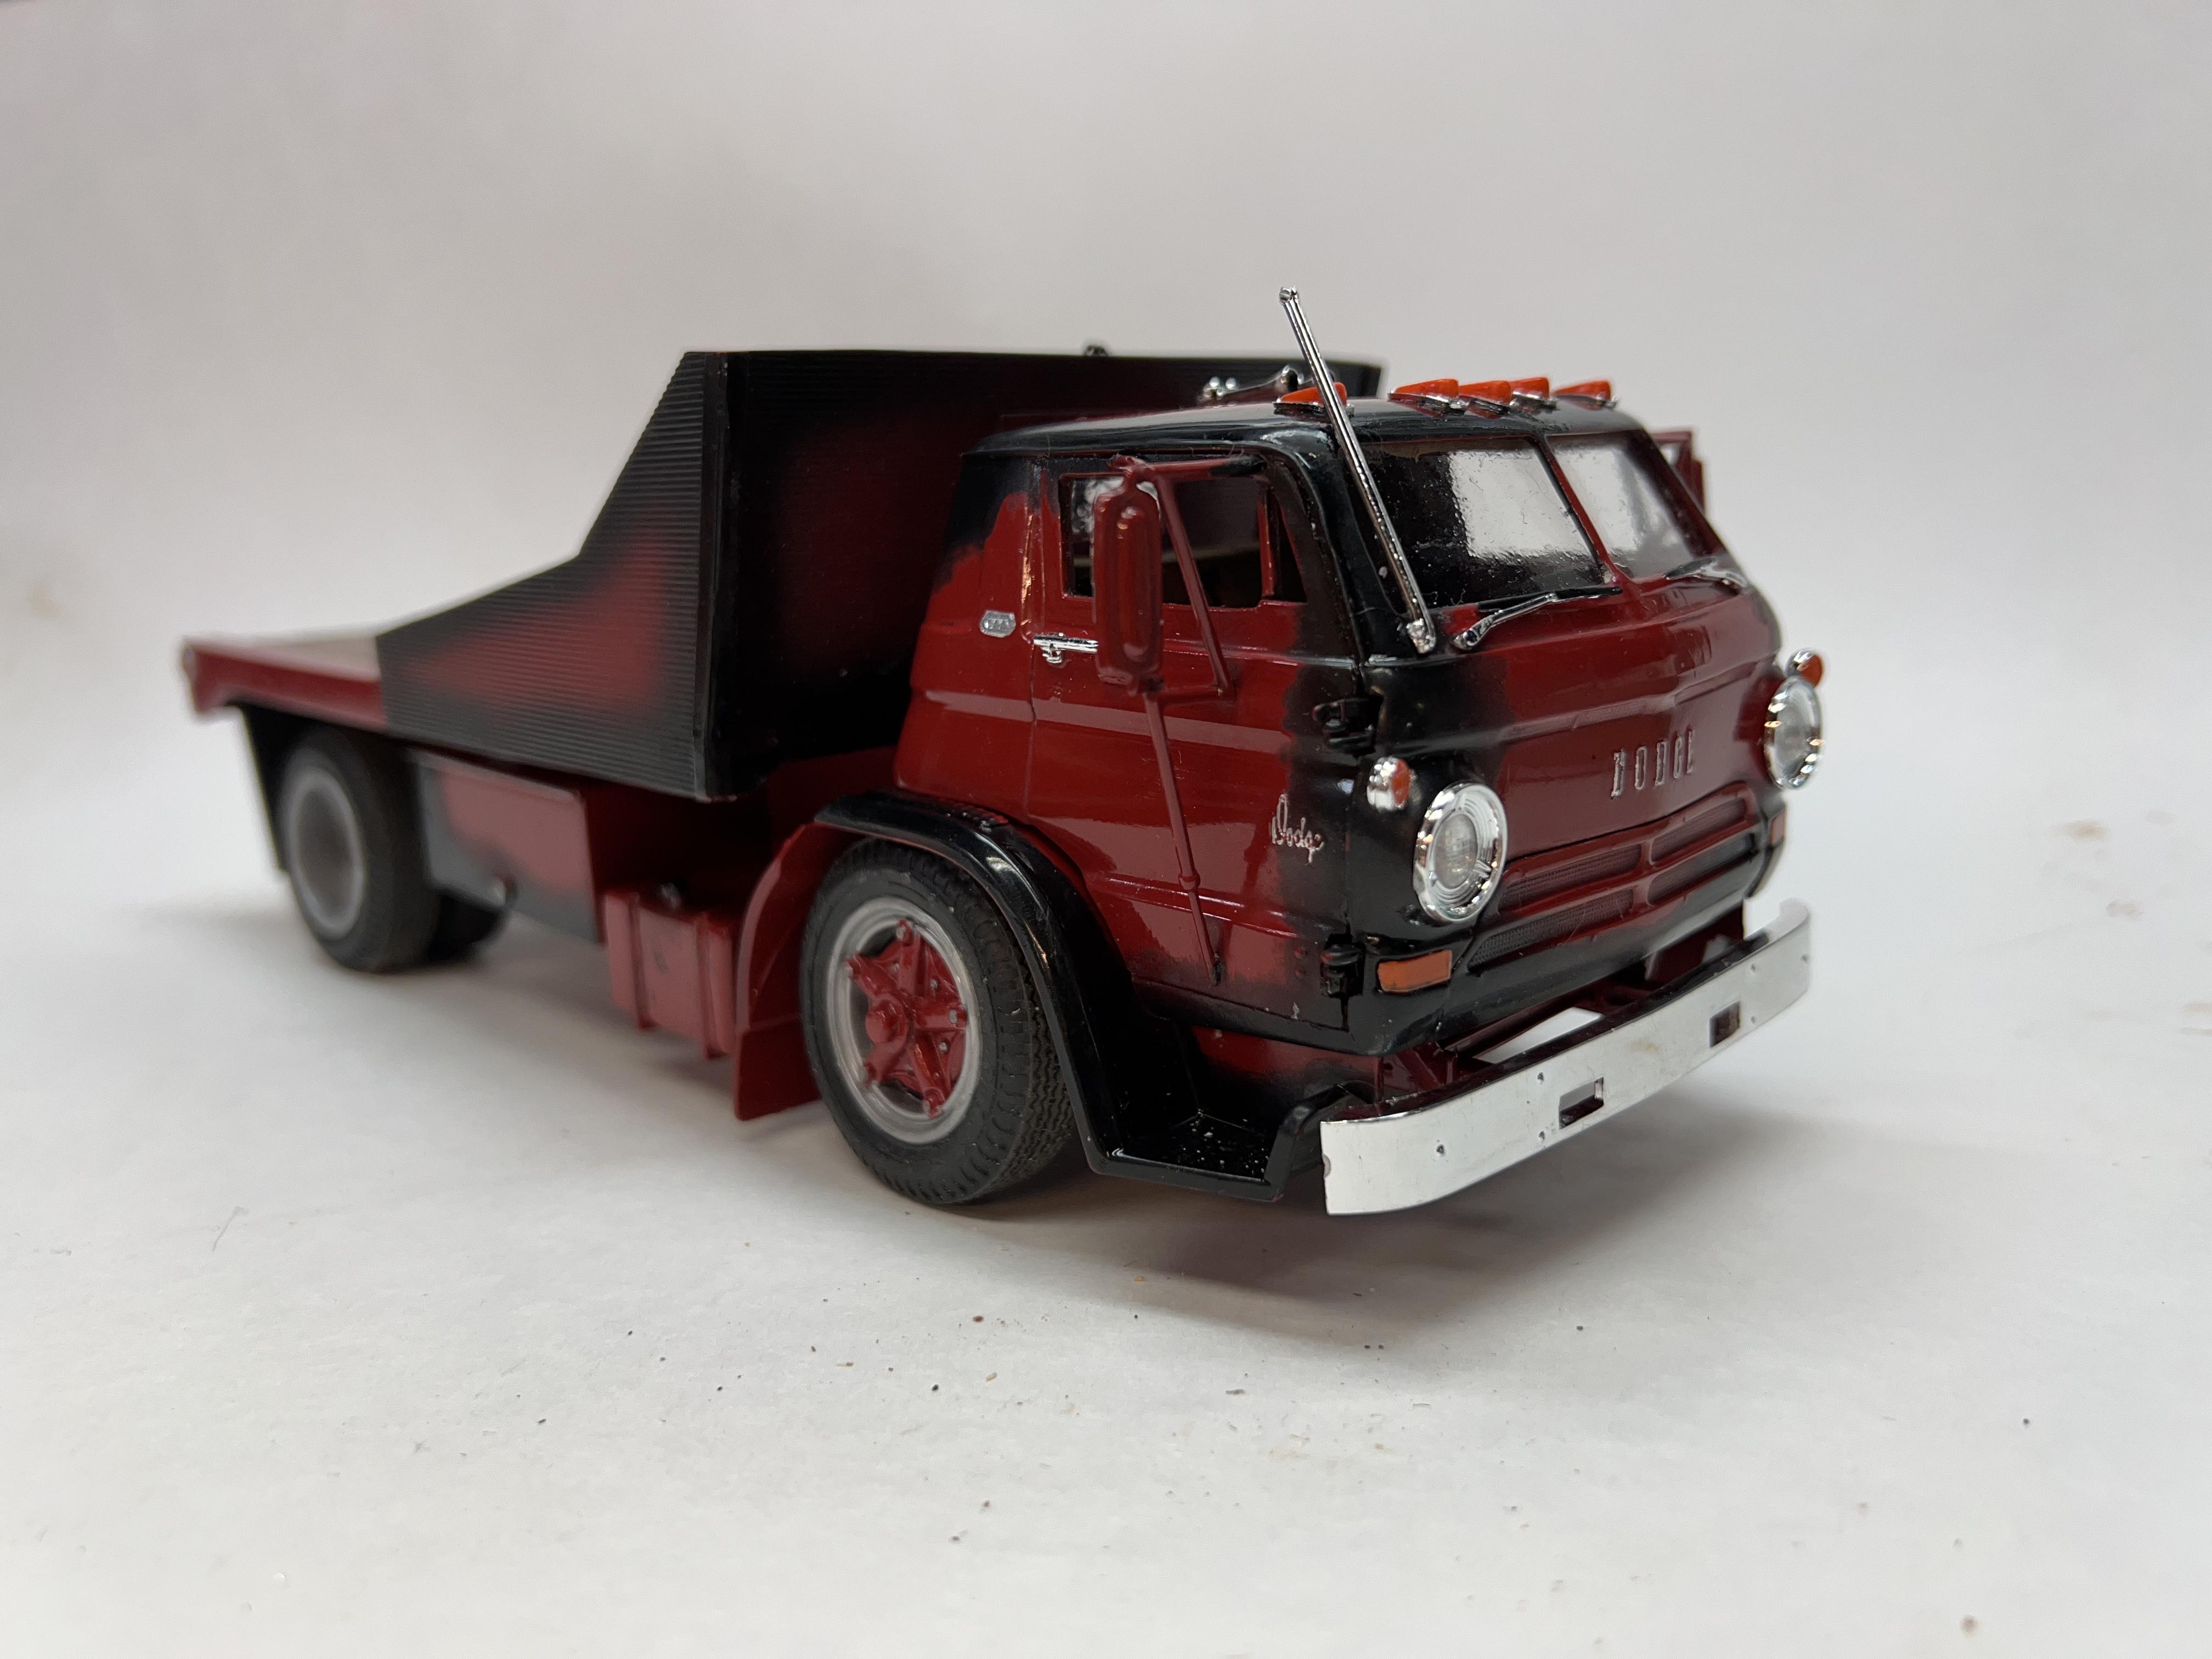
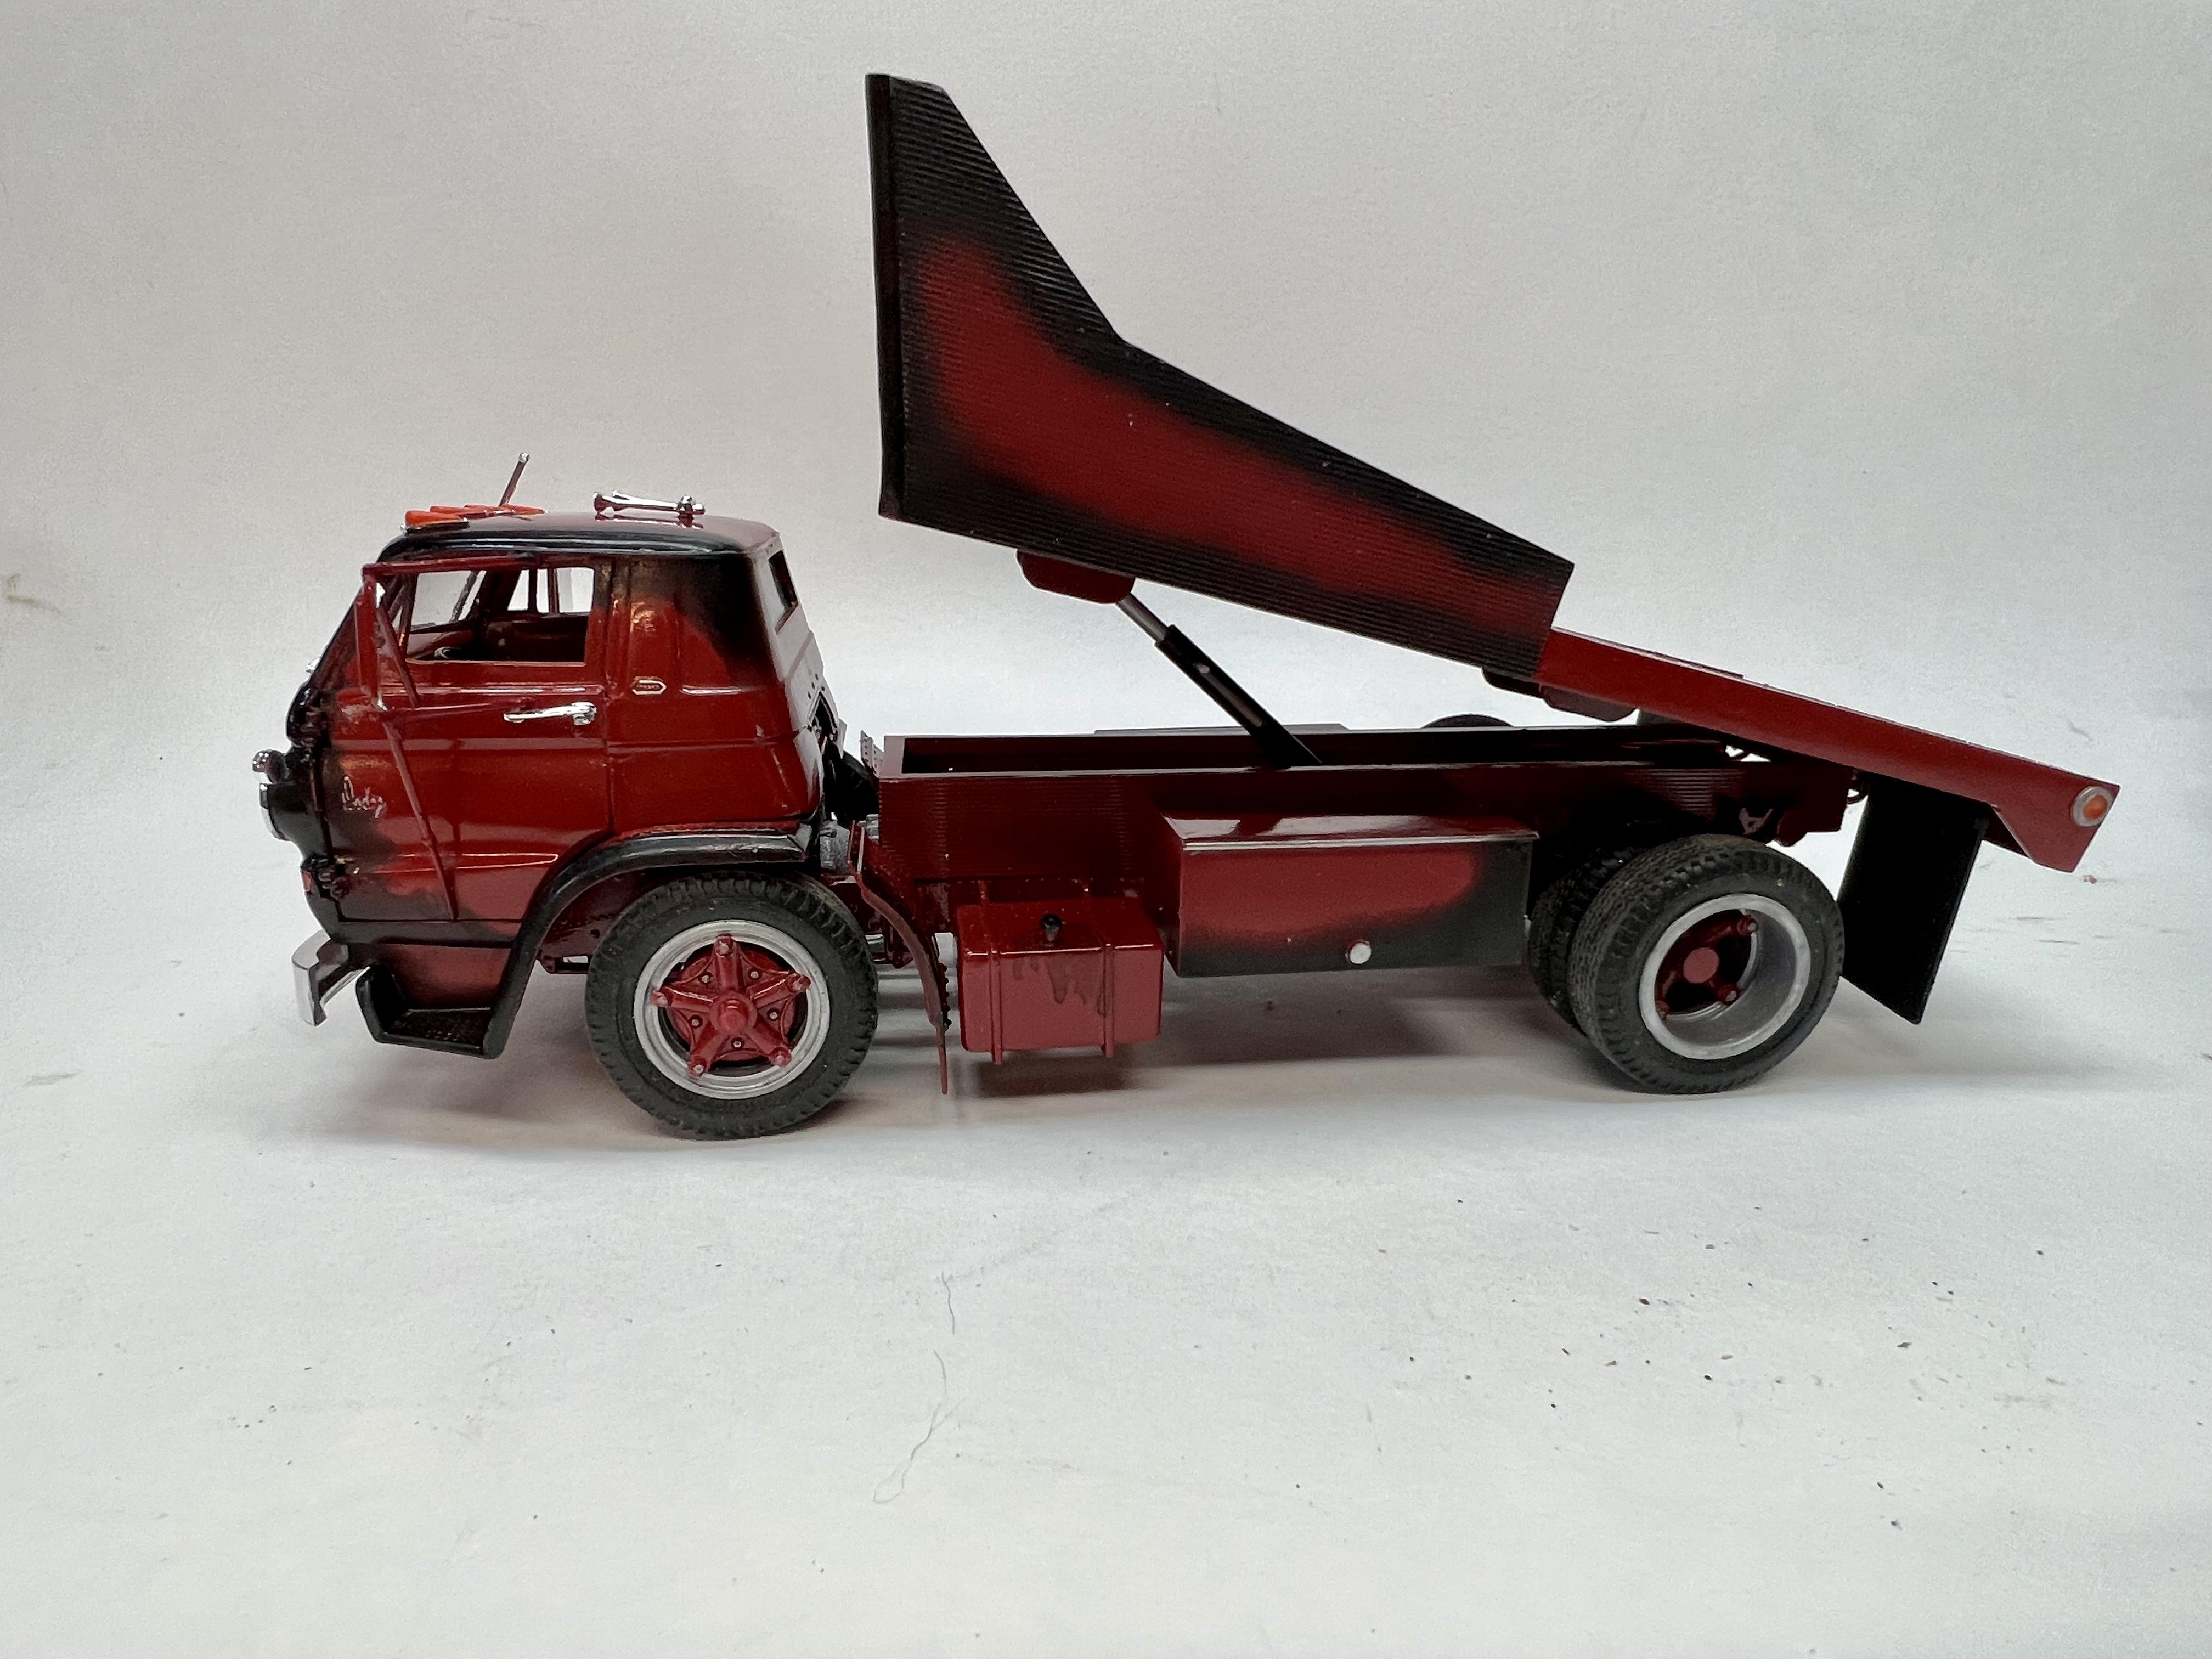
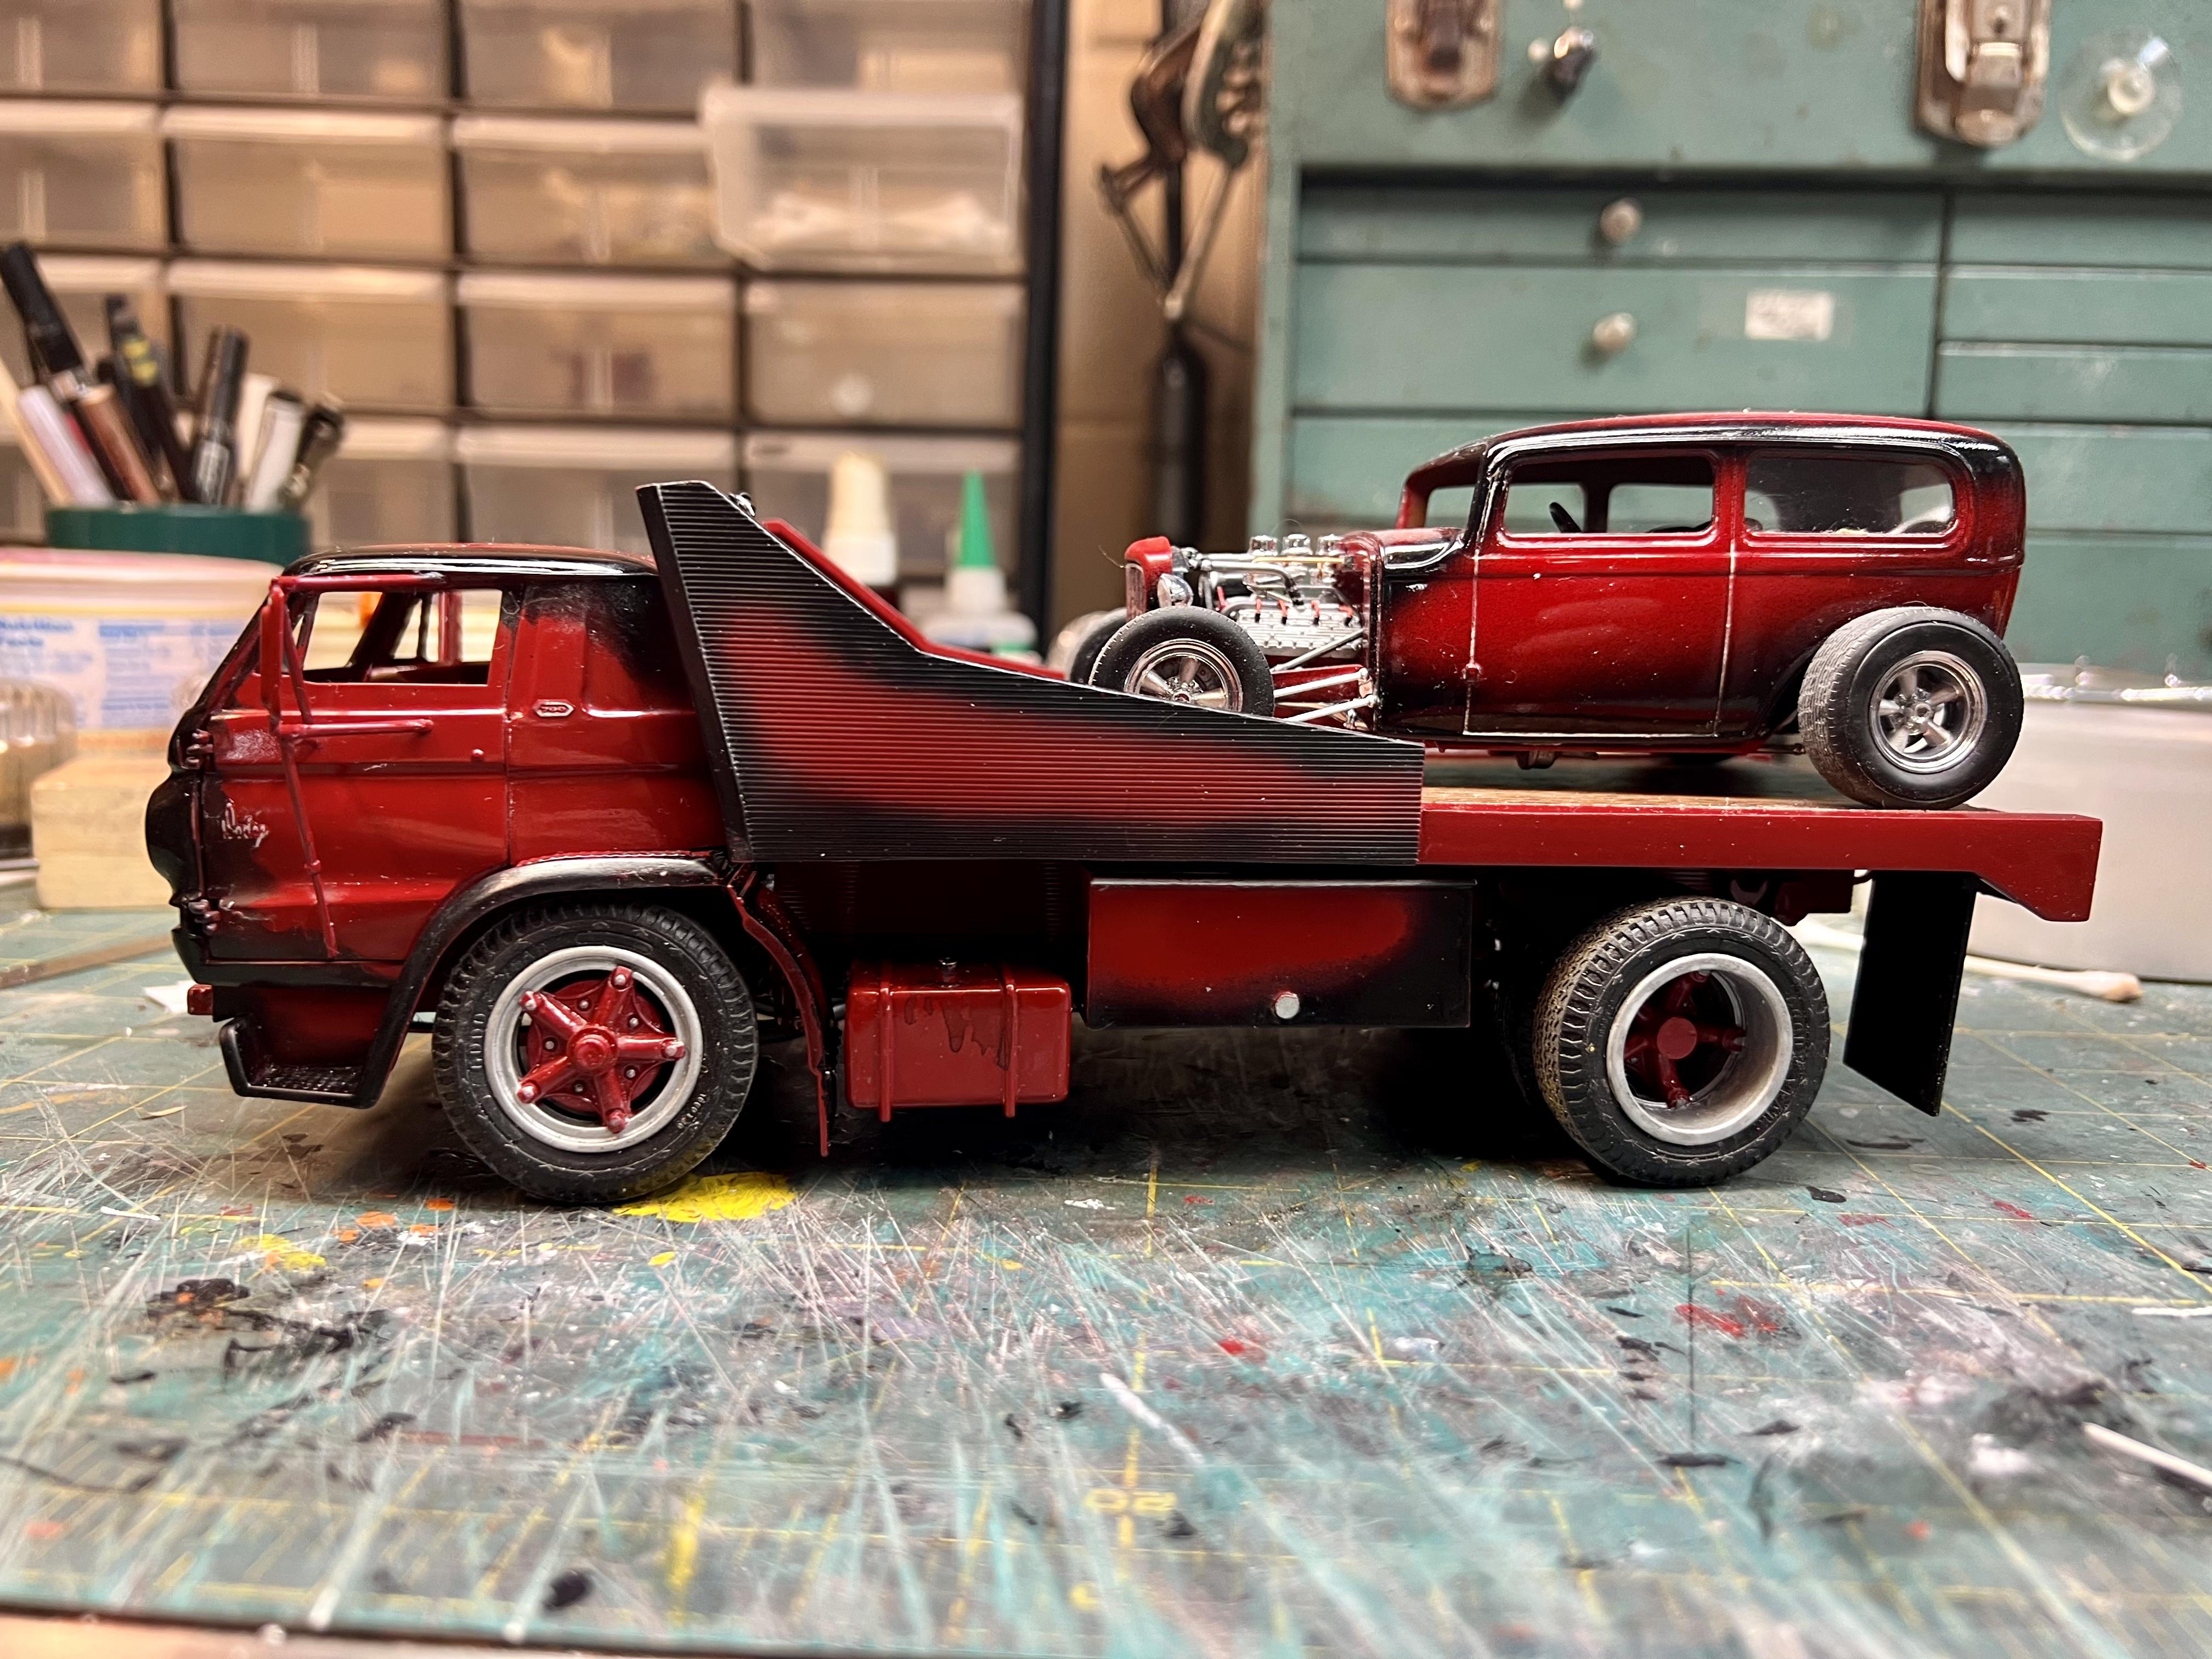
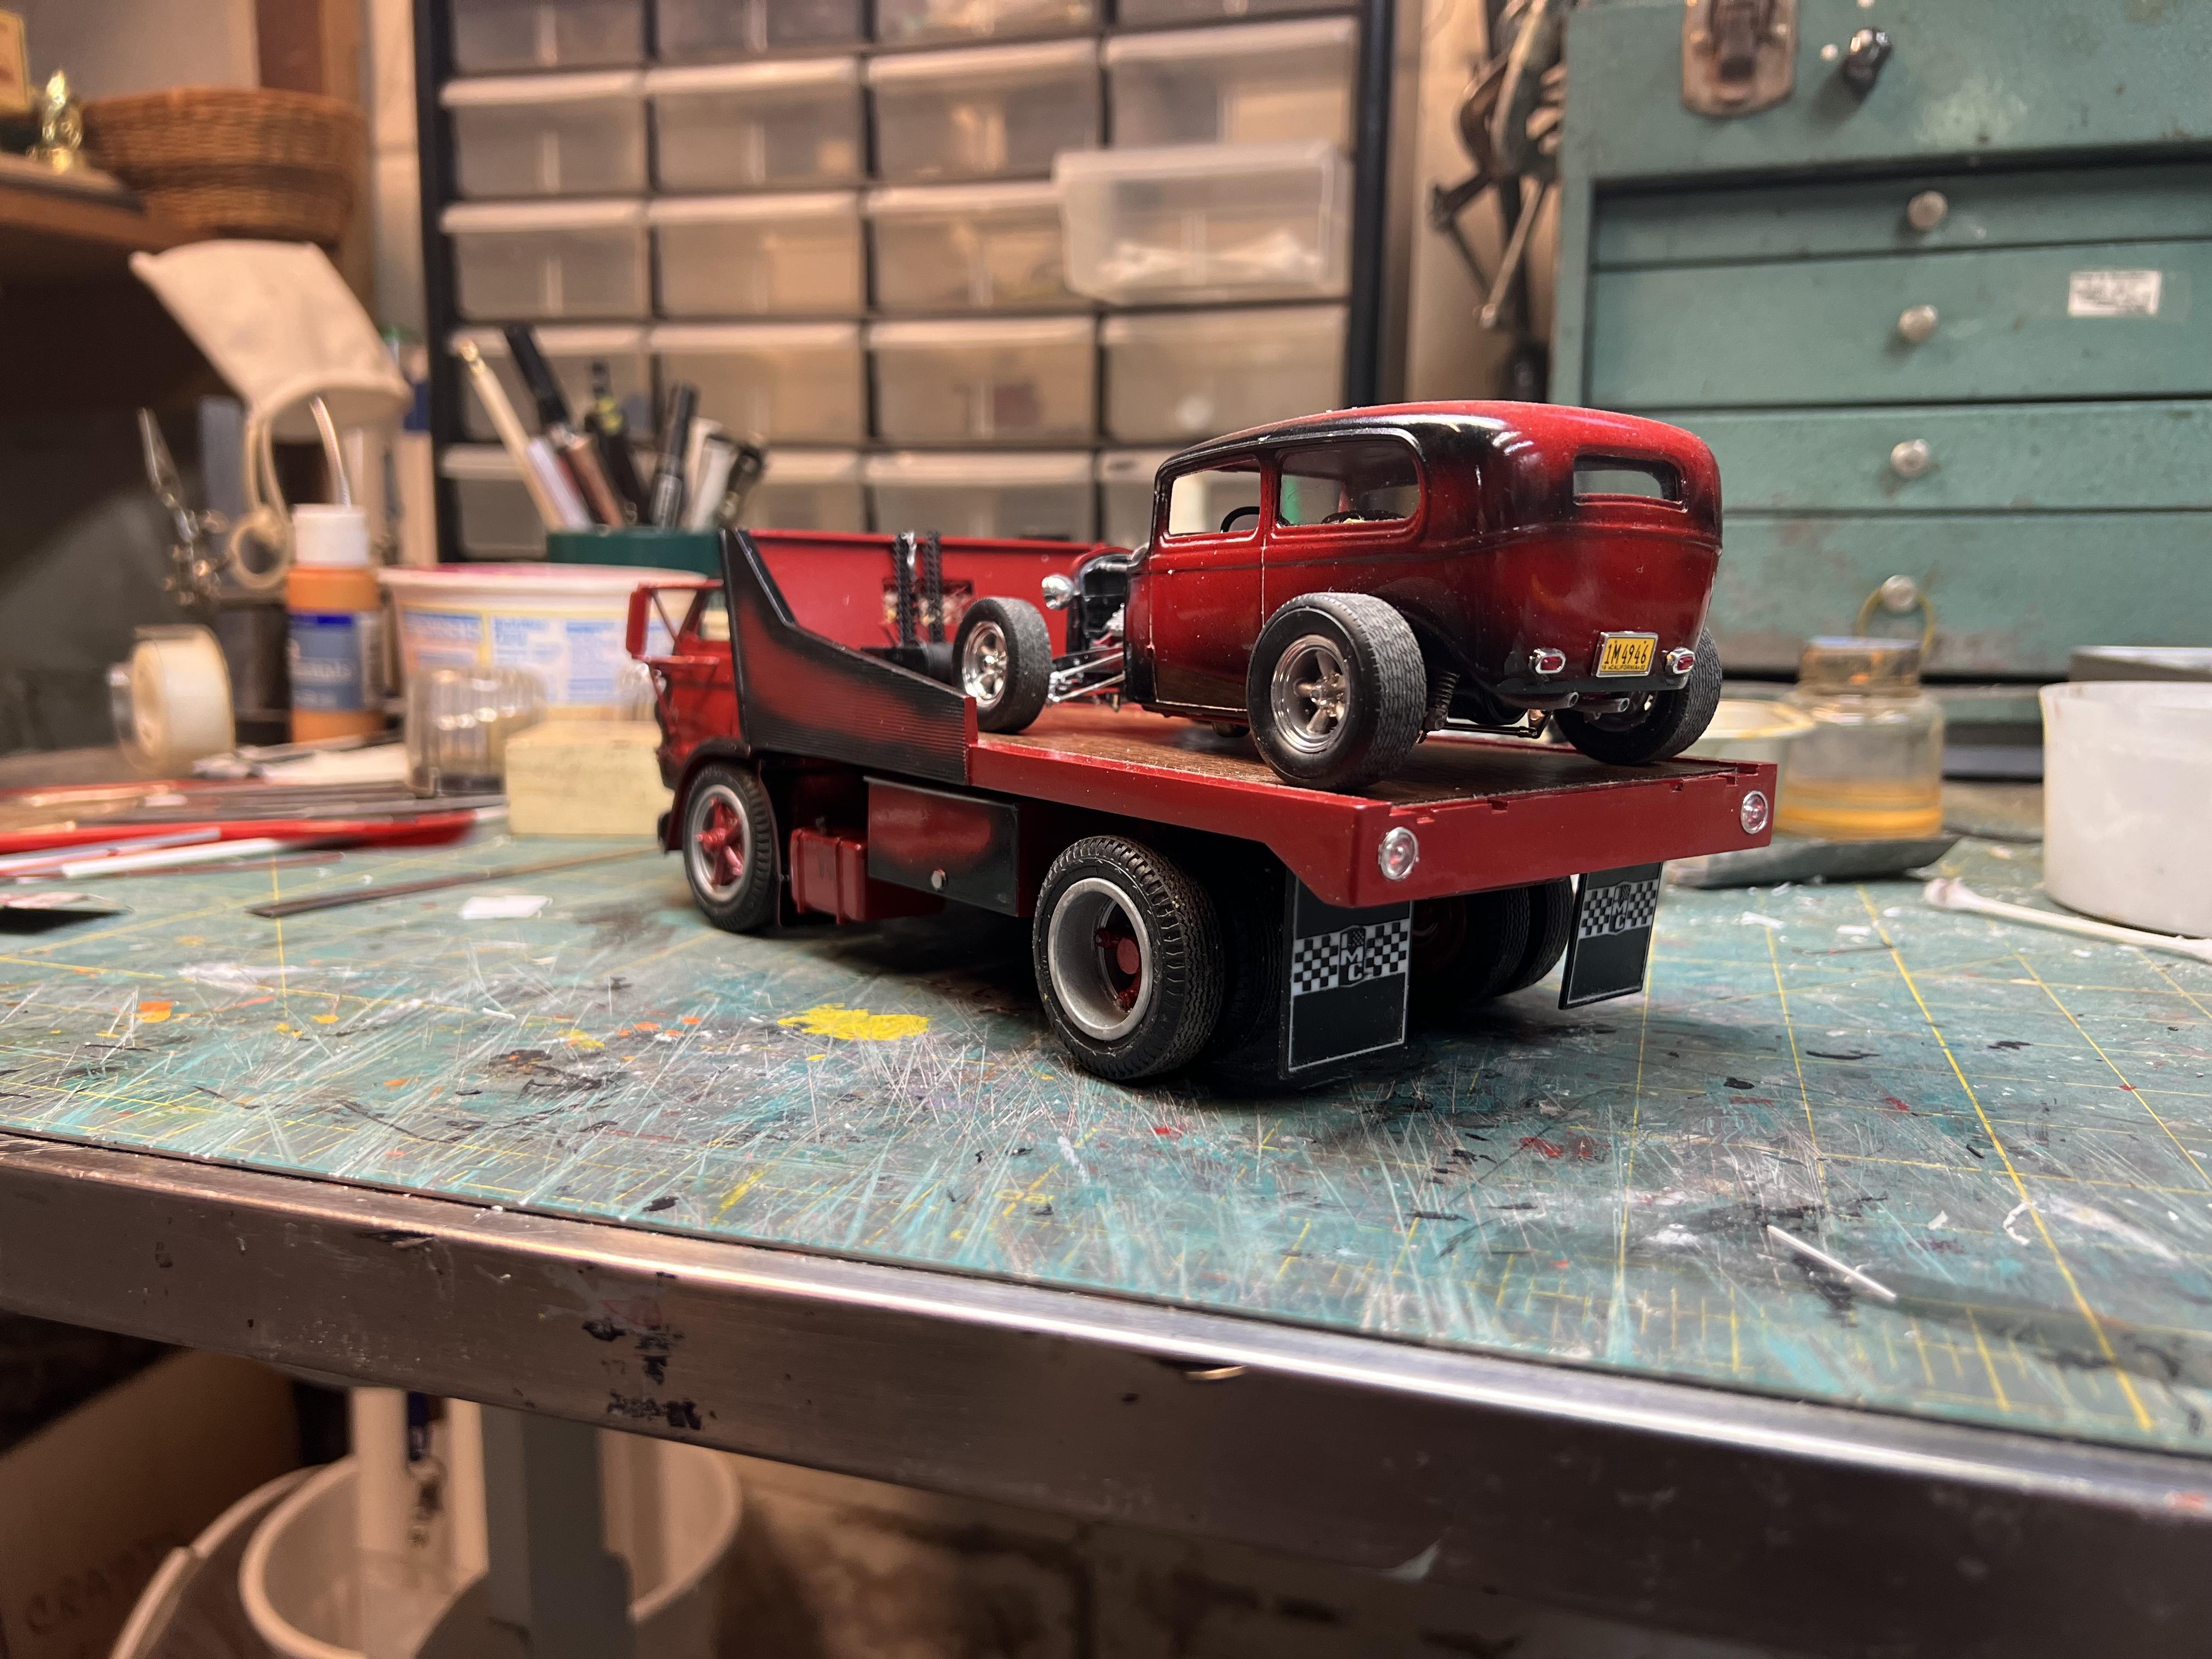
Dodge L-700 Custom Hauler
slownlow replied to slownlow's topic in Model Trucks: Big Rigs and Heavy Equipment
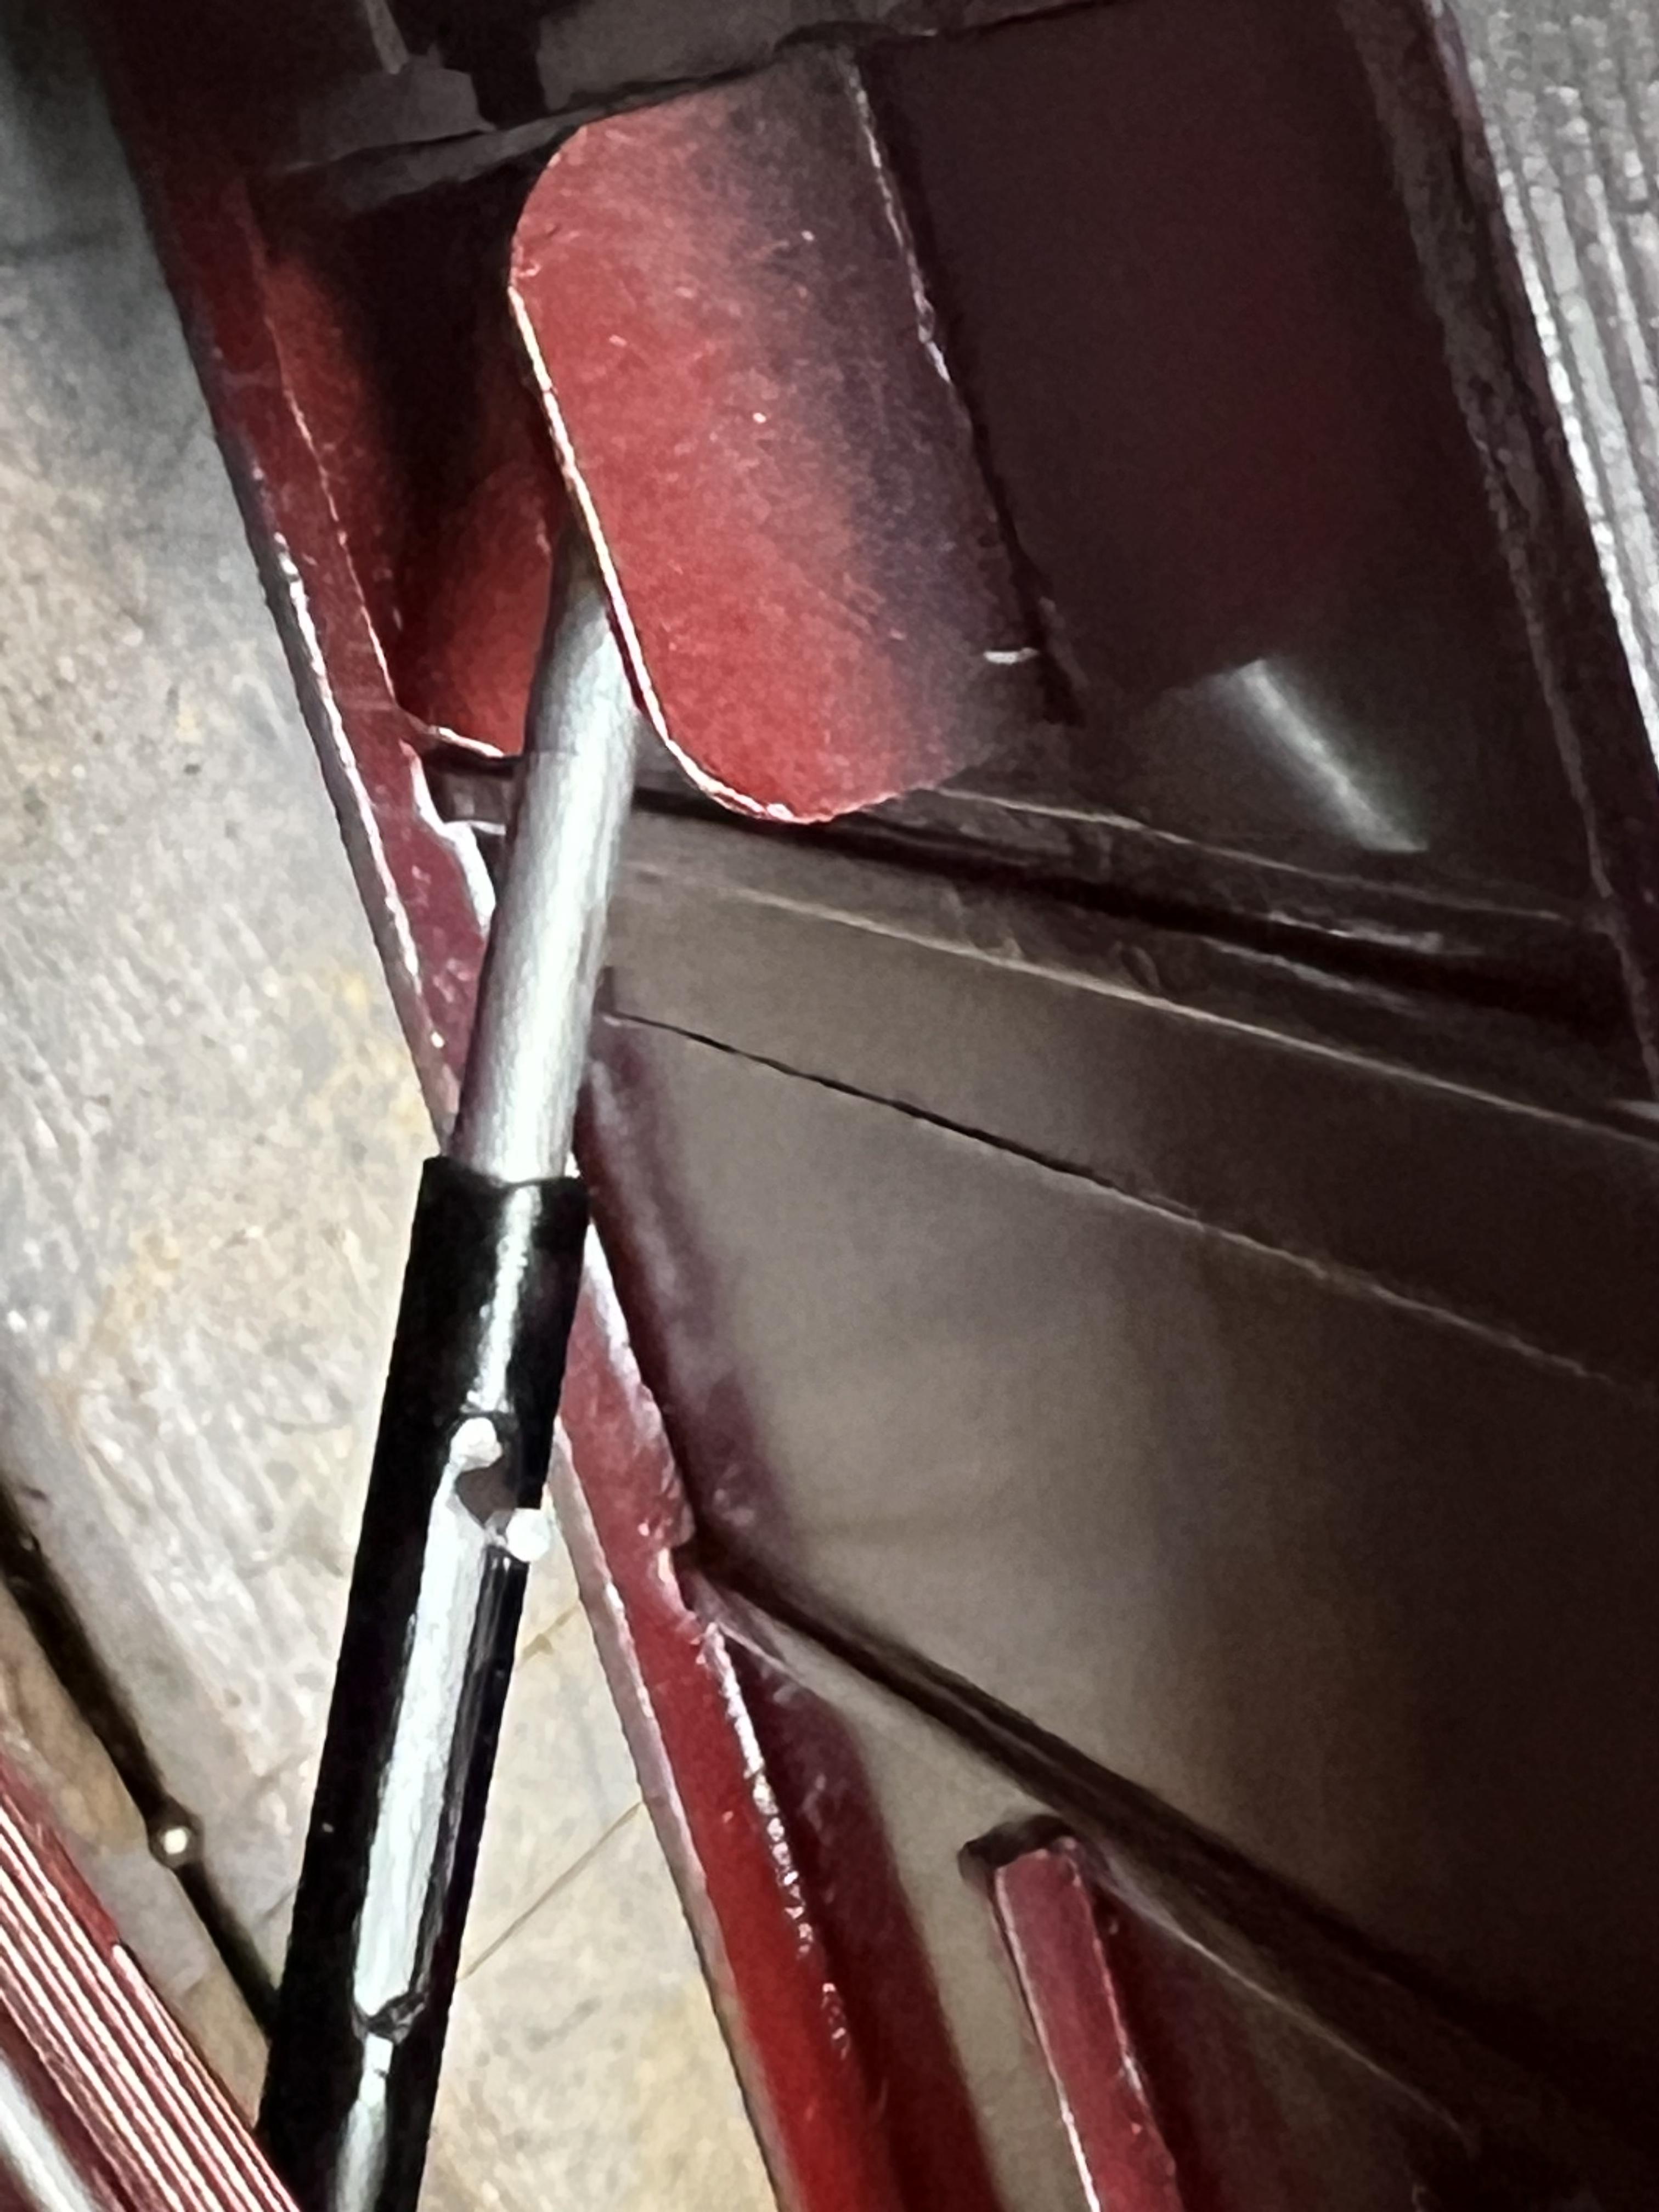
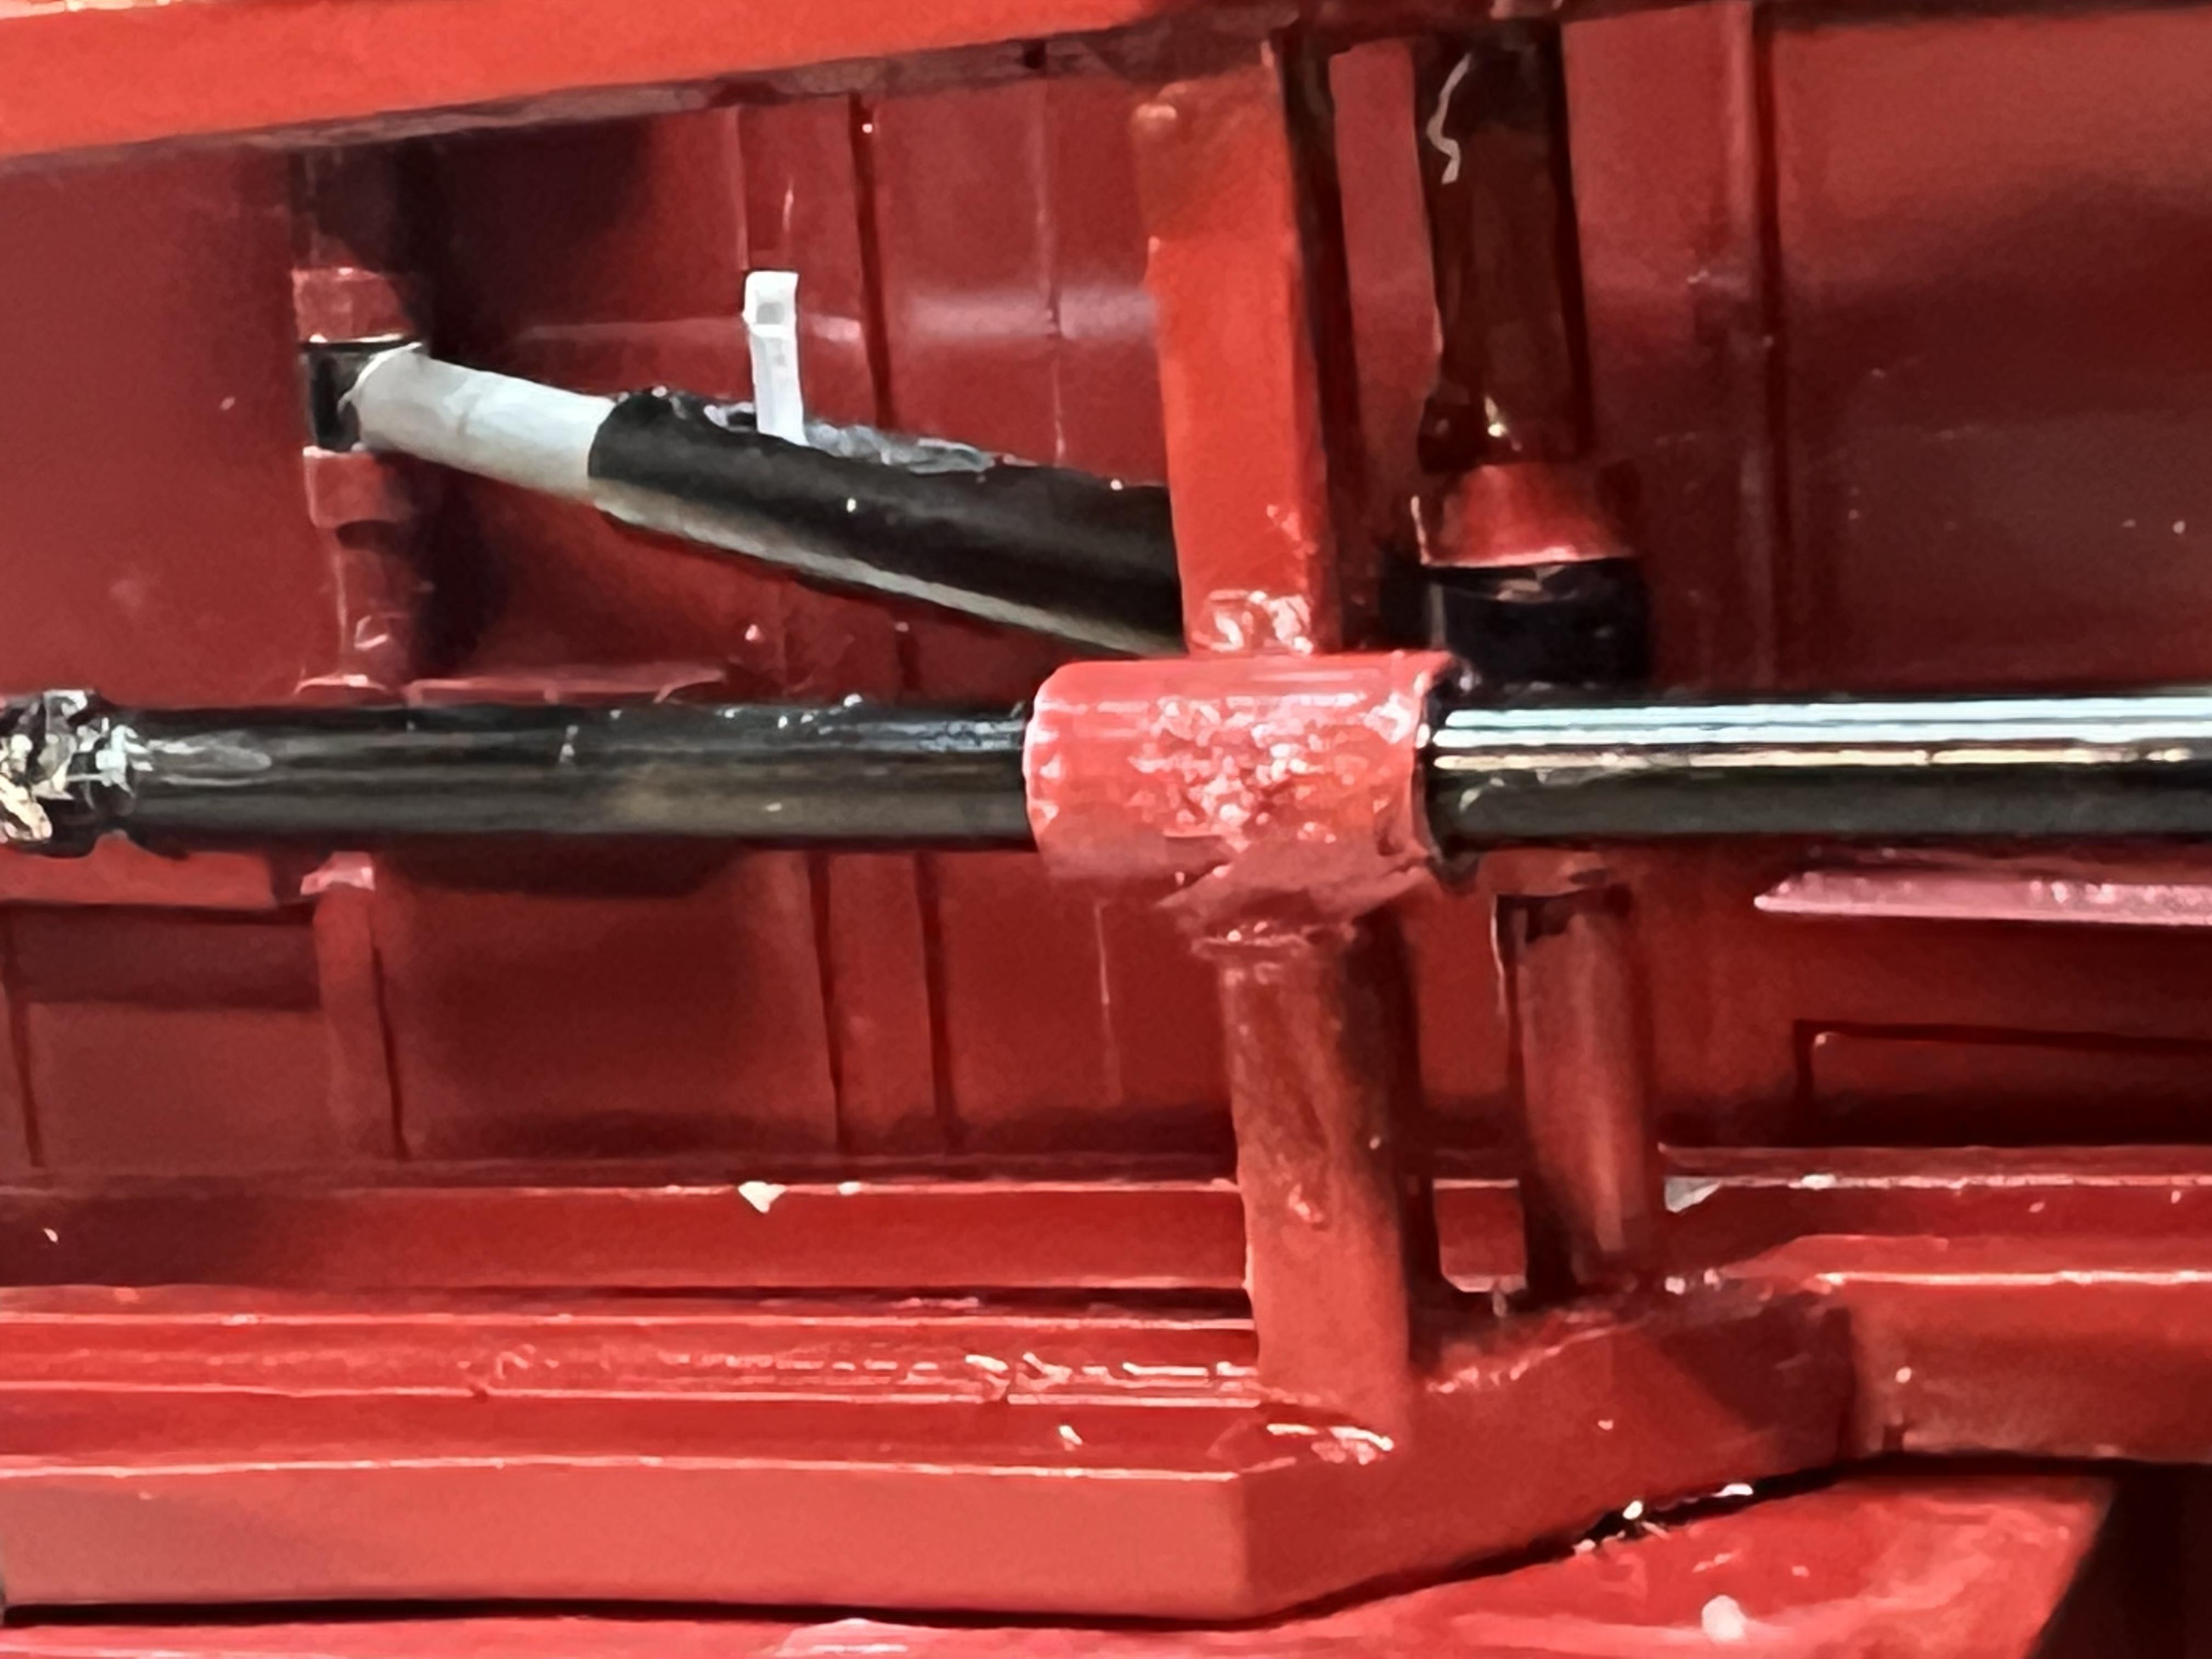
Here are three pics i I started with a 3/16 tube and a 1/8” rod.Then two narrow (1/16) sections of the tube were cut. One mounted 90 degrees to the end of the tube and on to the end of the rod creating “eyes” I could pass rod through going from side to side of the frame and the bed. To limit the extent of the rod travel inside the hydraulic tube to prevent it from coming out I made a slot in the tube and drilled a peg into the rod. I hope these help
-
Let’s see your Santa rides. This is an old standby of mine
-
Dodge L-700 Custom Hauler
slownlow replied to slownlow's topic in Model Trucks: Big Rigs and Heavy Equipment
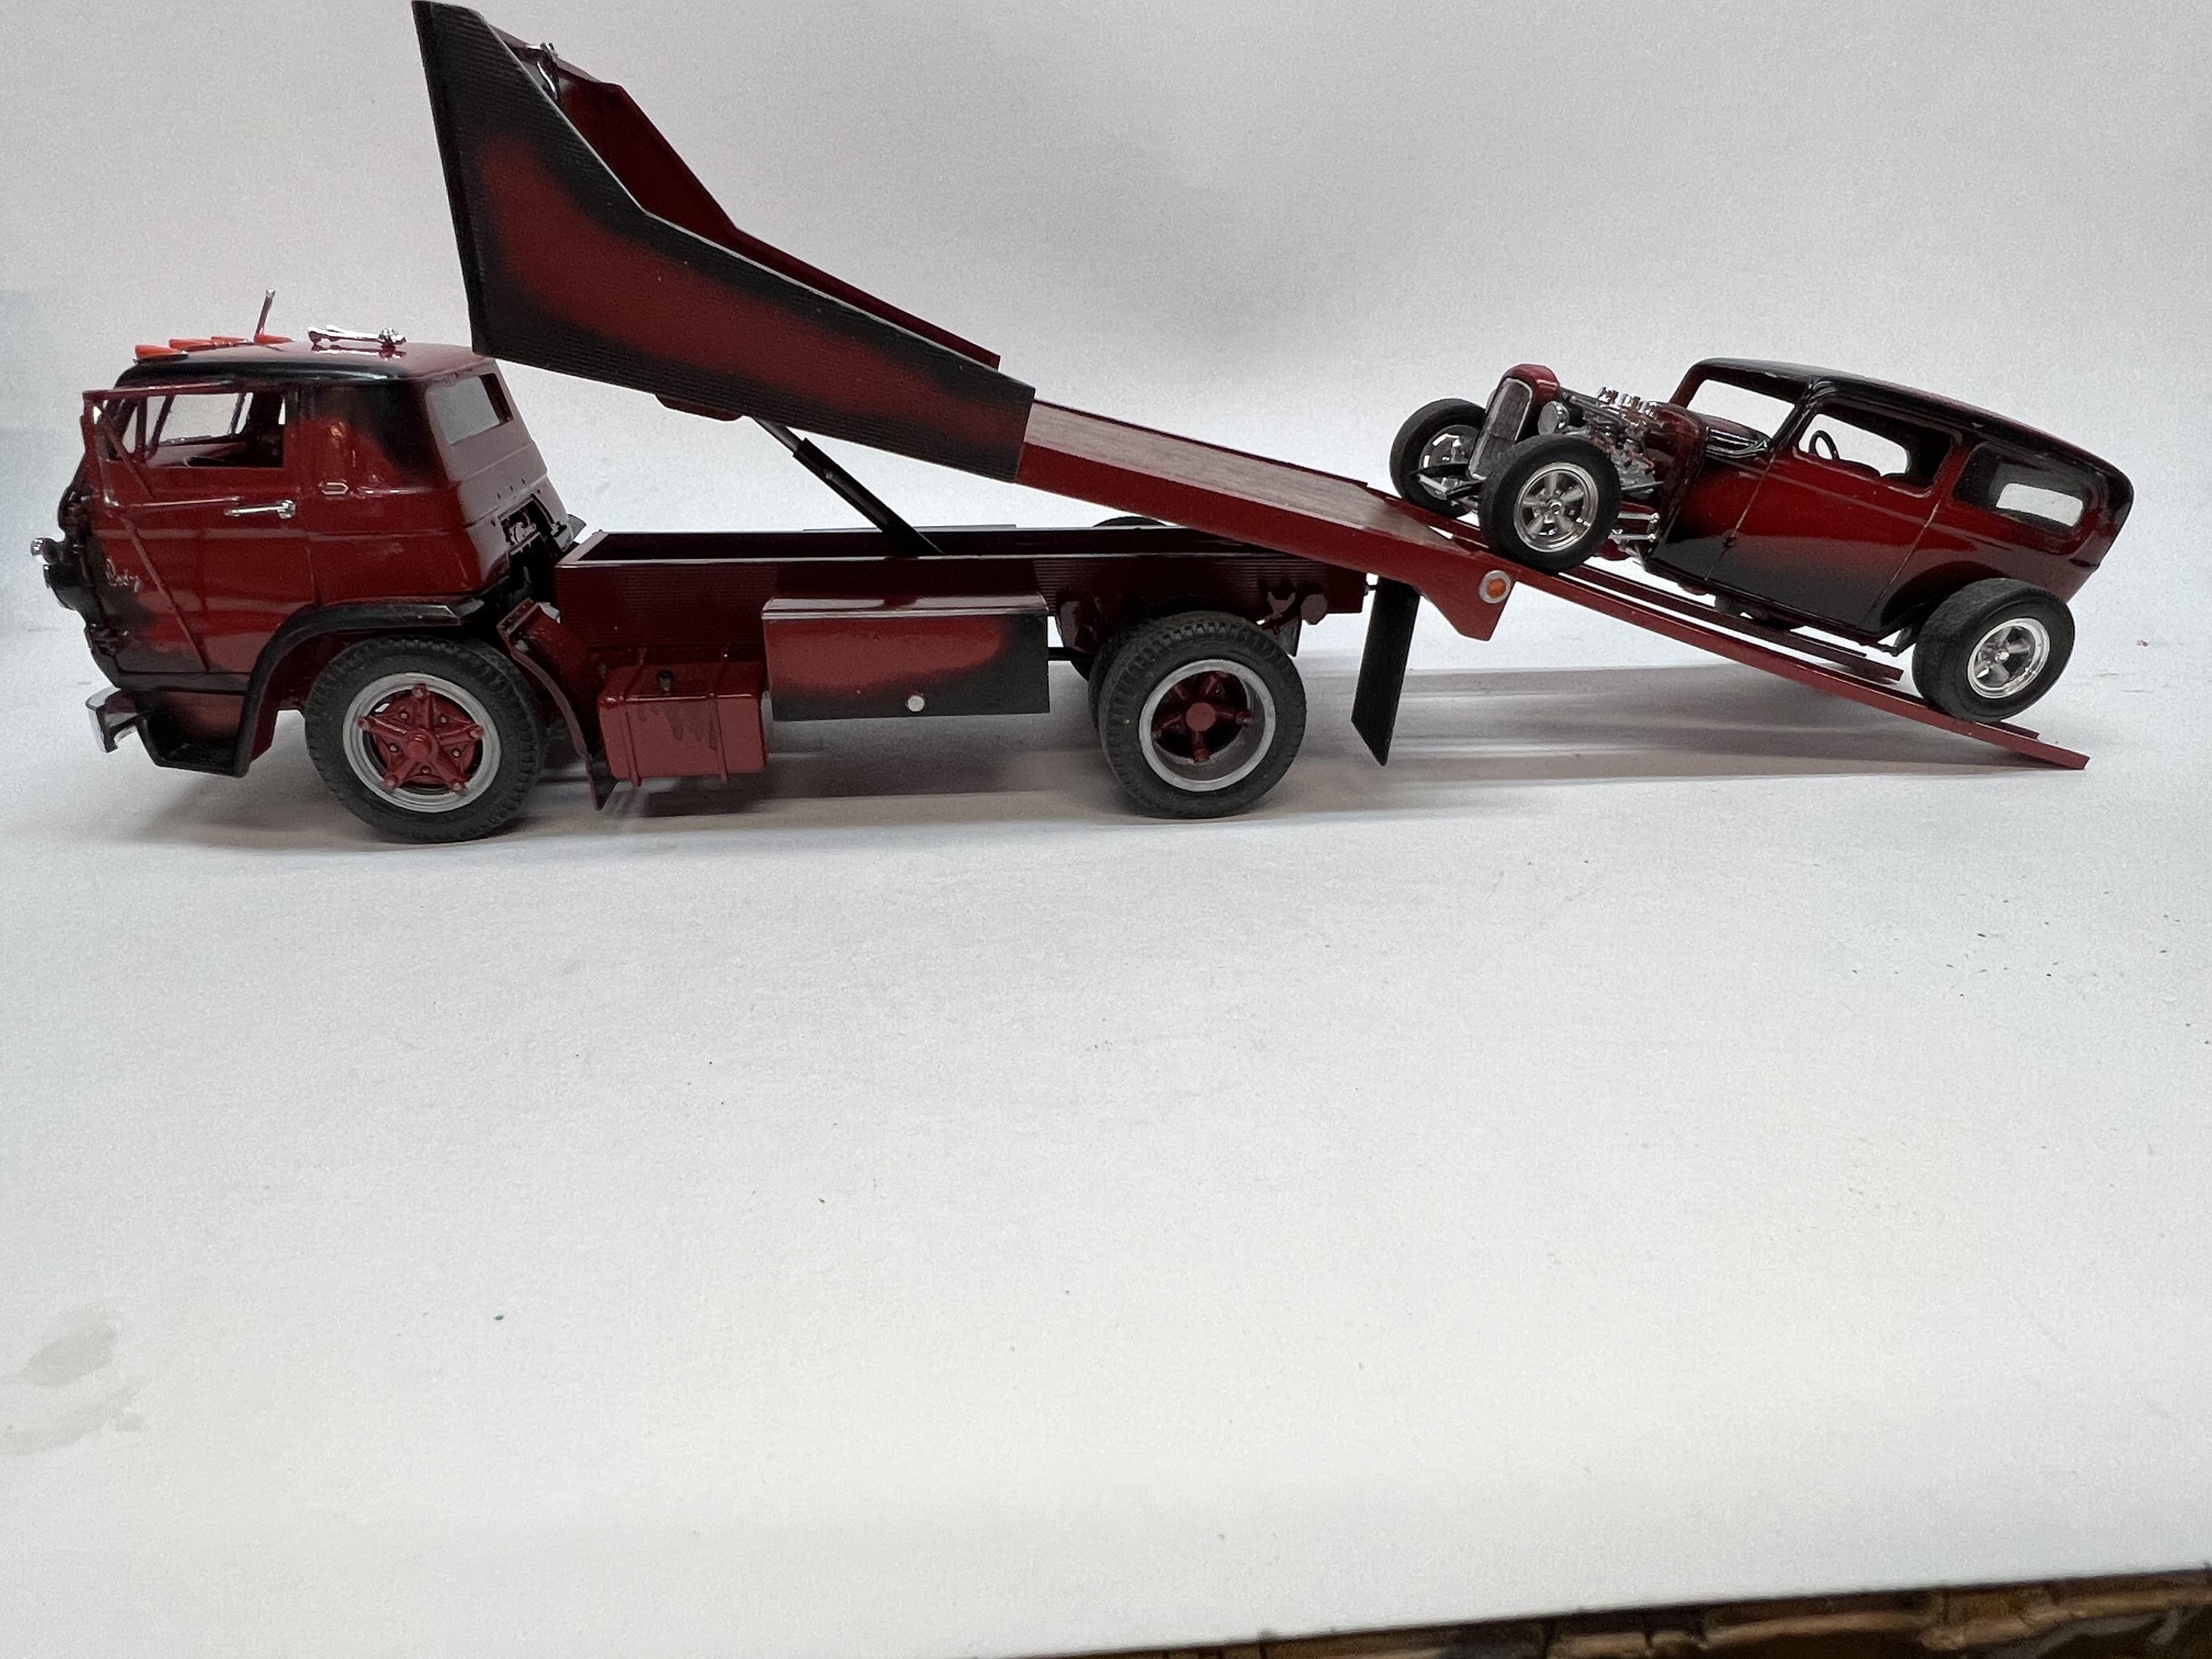
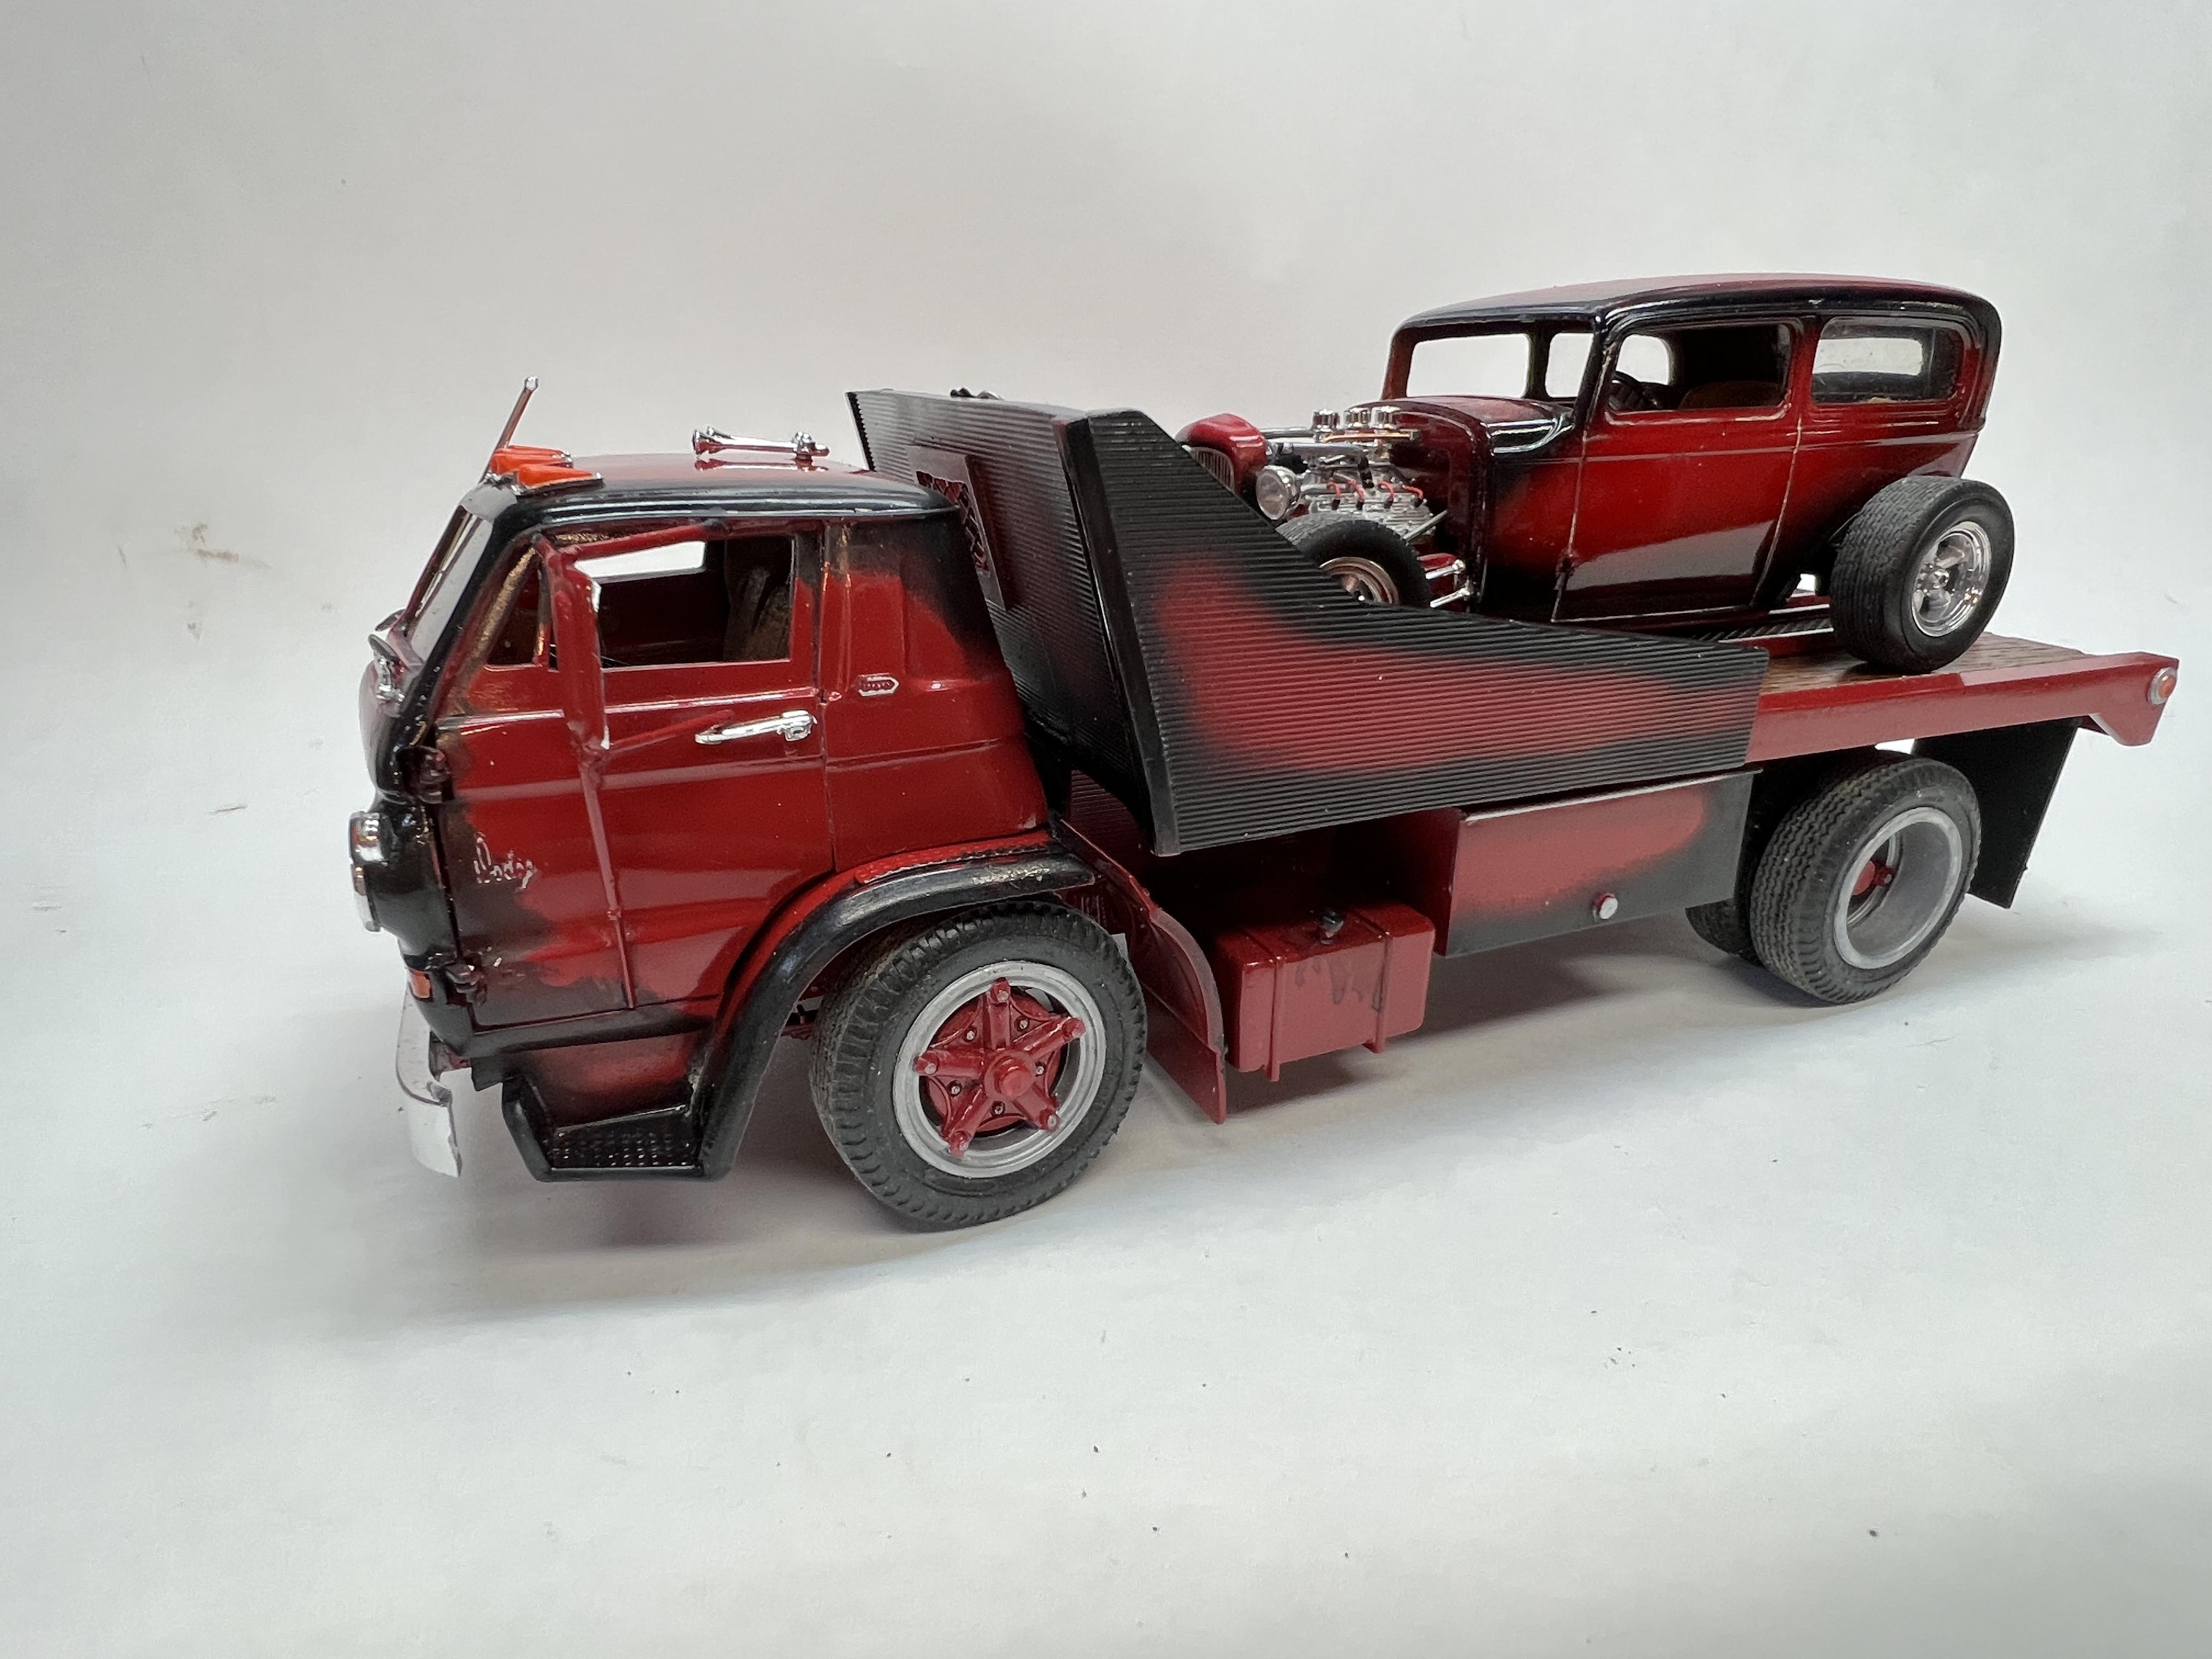
Thanks, strangely enough the 32 and then the truck were inspired by a pair of my sons shoes. One can find inspiration in the strangest places. -
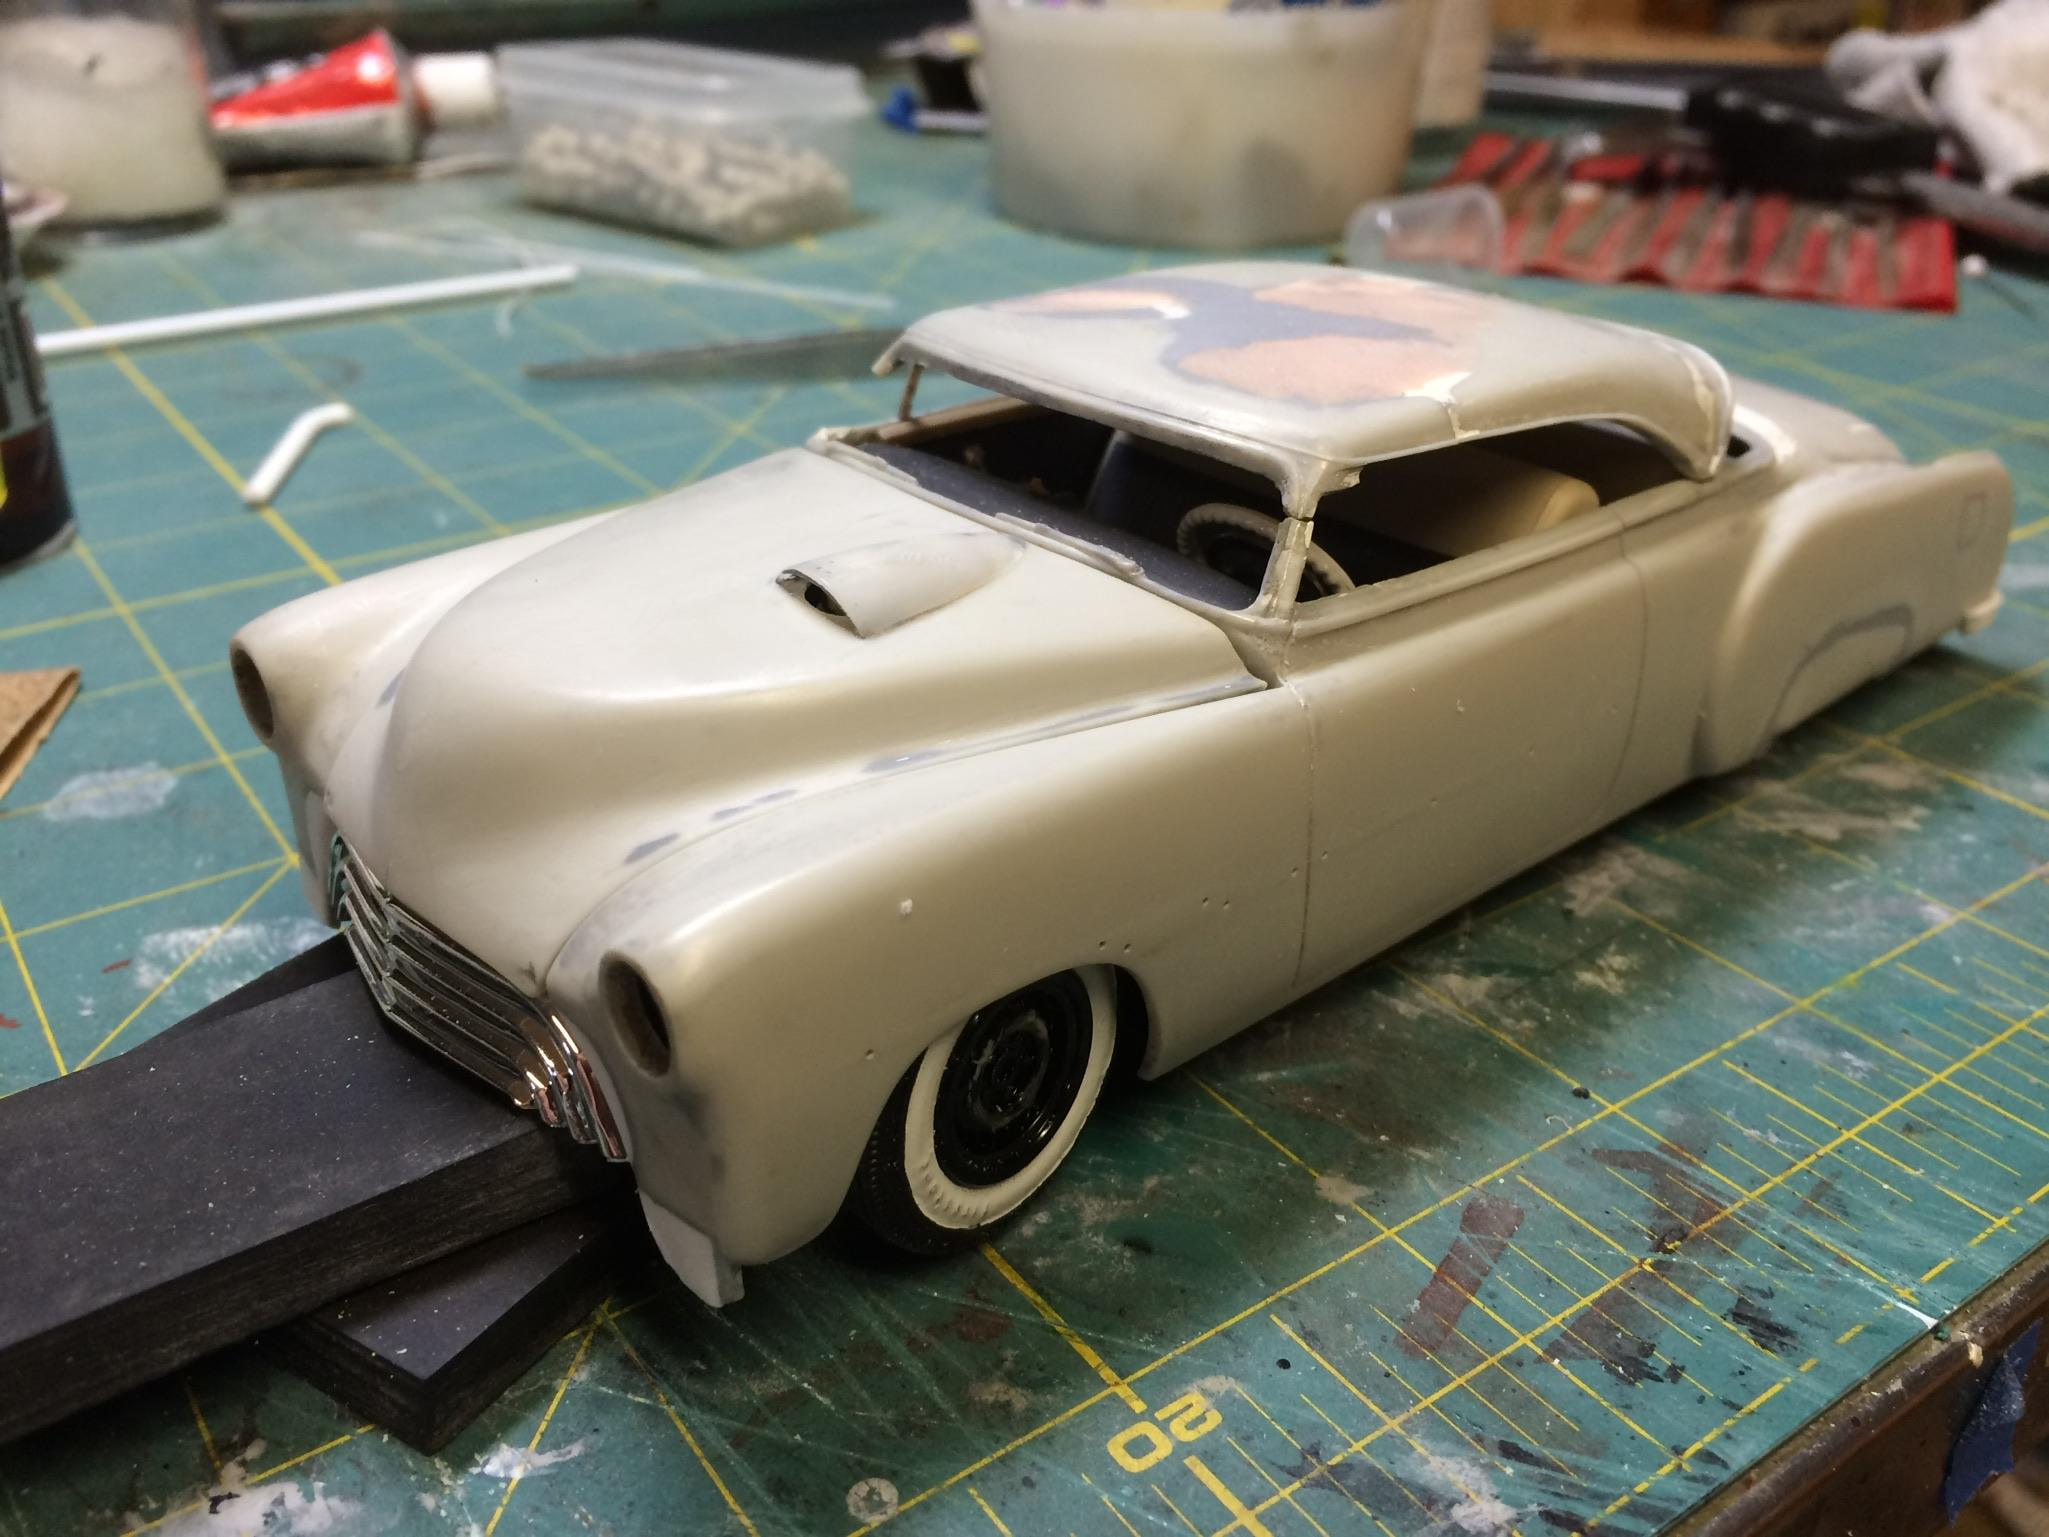
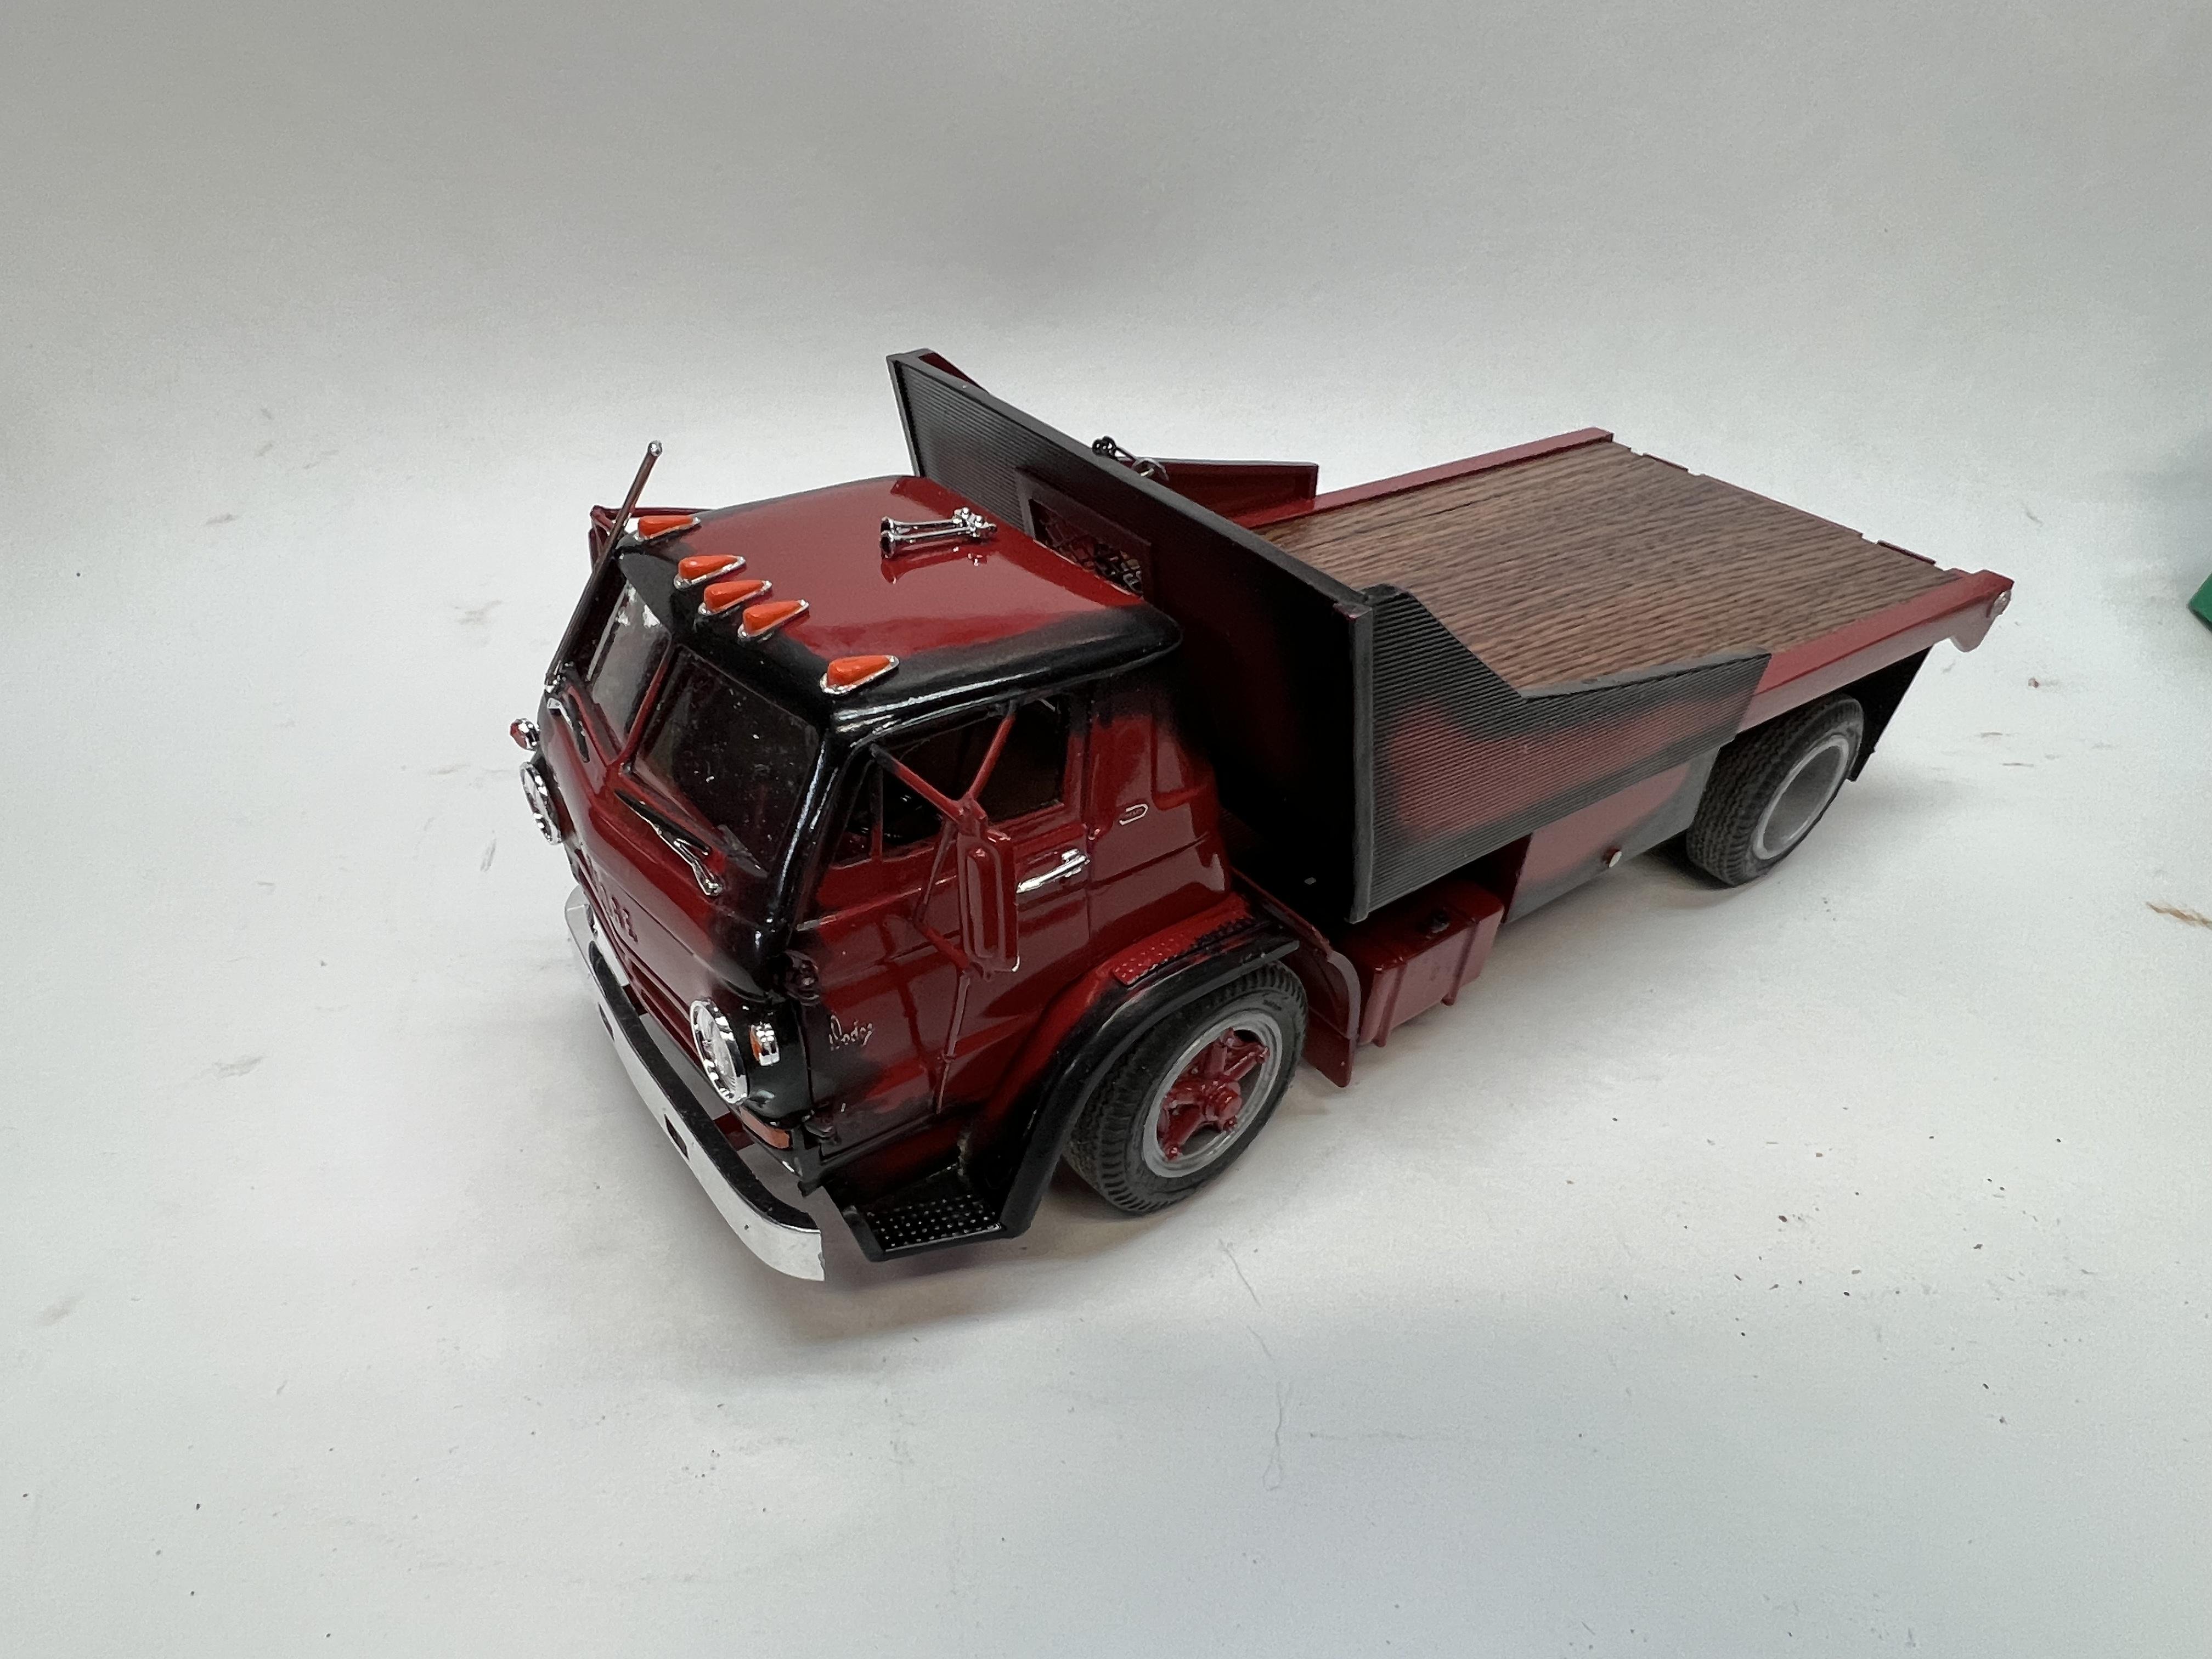
We’ll, stick a fork in ‘er she’s done. She’s built from the Lindberg semi kit and one of the more miserable kits I have worked on. Anyway I still had a lot of fun. The top is chopped 3/16” which is about 4” 1:1. The flatbed is the trailer shortened and resting on a lengthened frame. A new front axel was made to lower the front end. As I was working on it I grabbed a 32 sedan from my shelf and liked the look so well I decided to make them a pair. If your interested in all the details the build is posted in the WIP section.
-
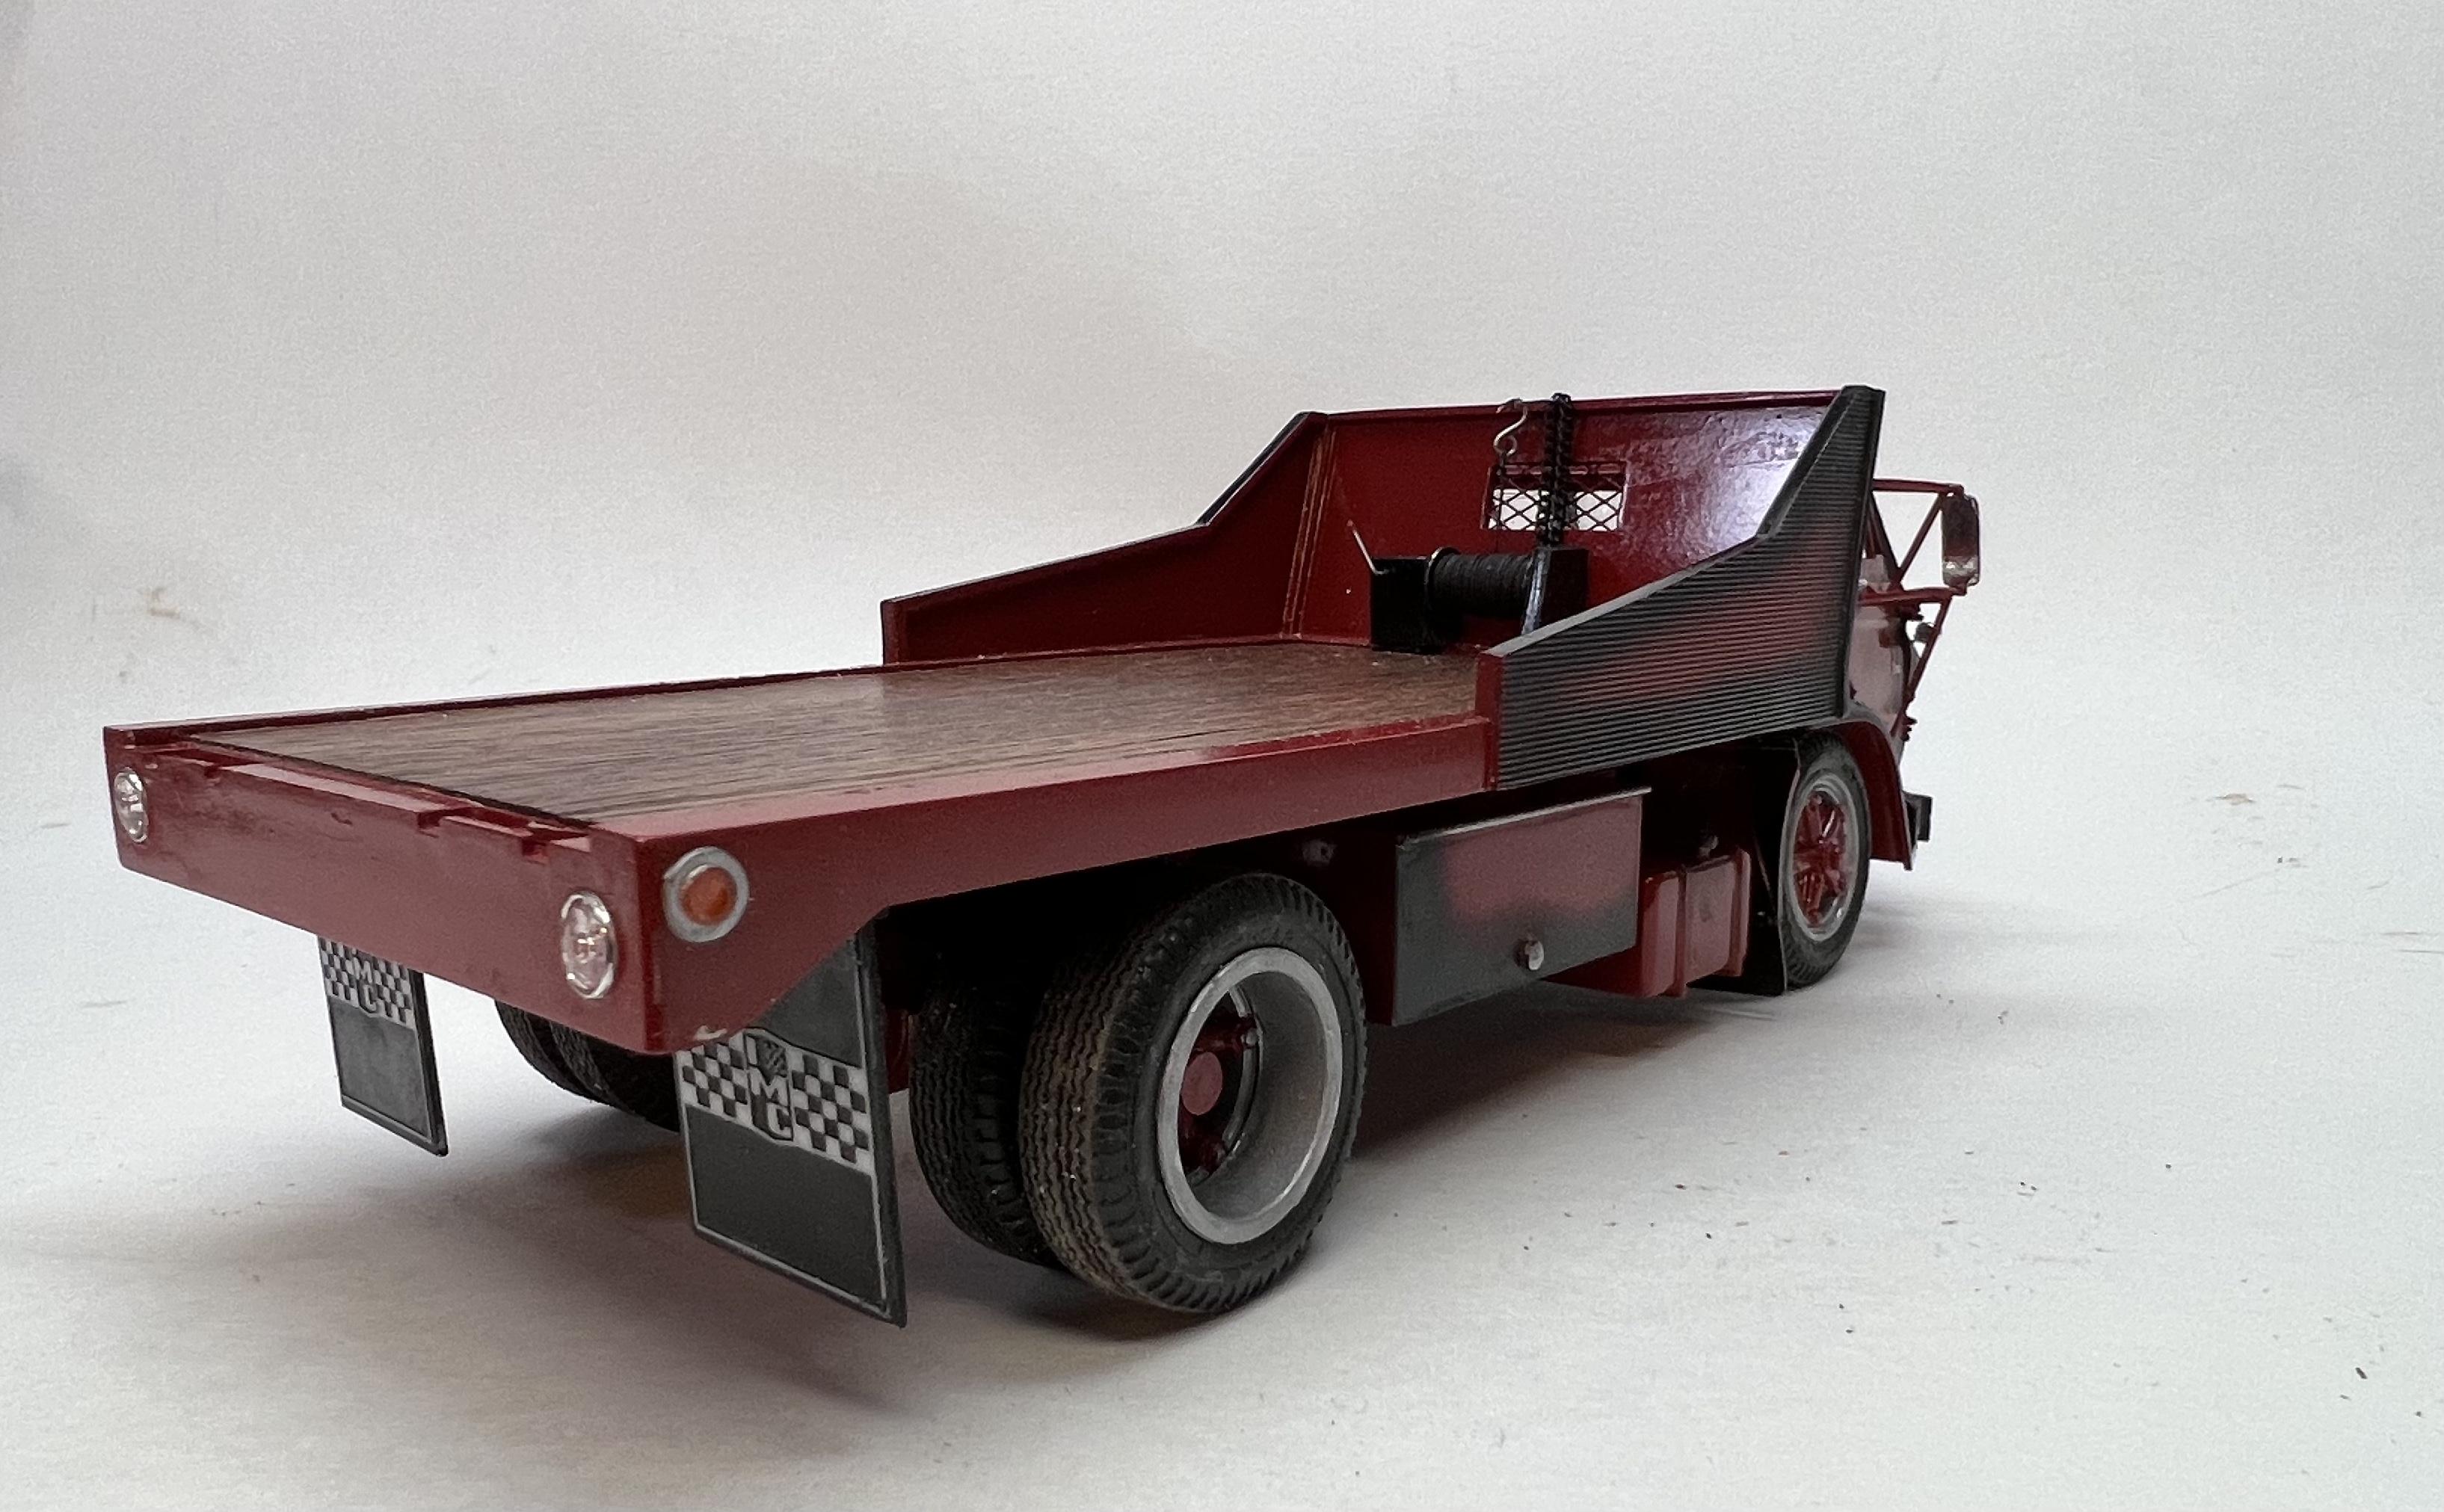
Logging Truck Project
slownlow replied to PHPaul's topic in WIP: Model Trucks: Big Rigs and Heavy Equipment
Nice work -
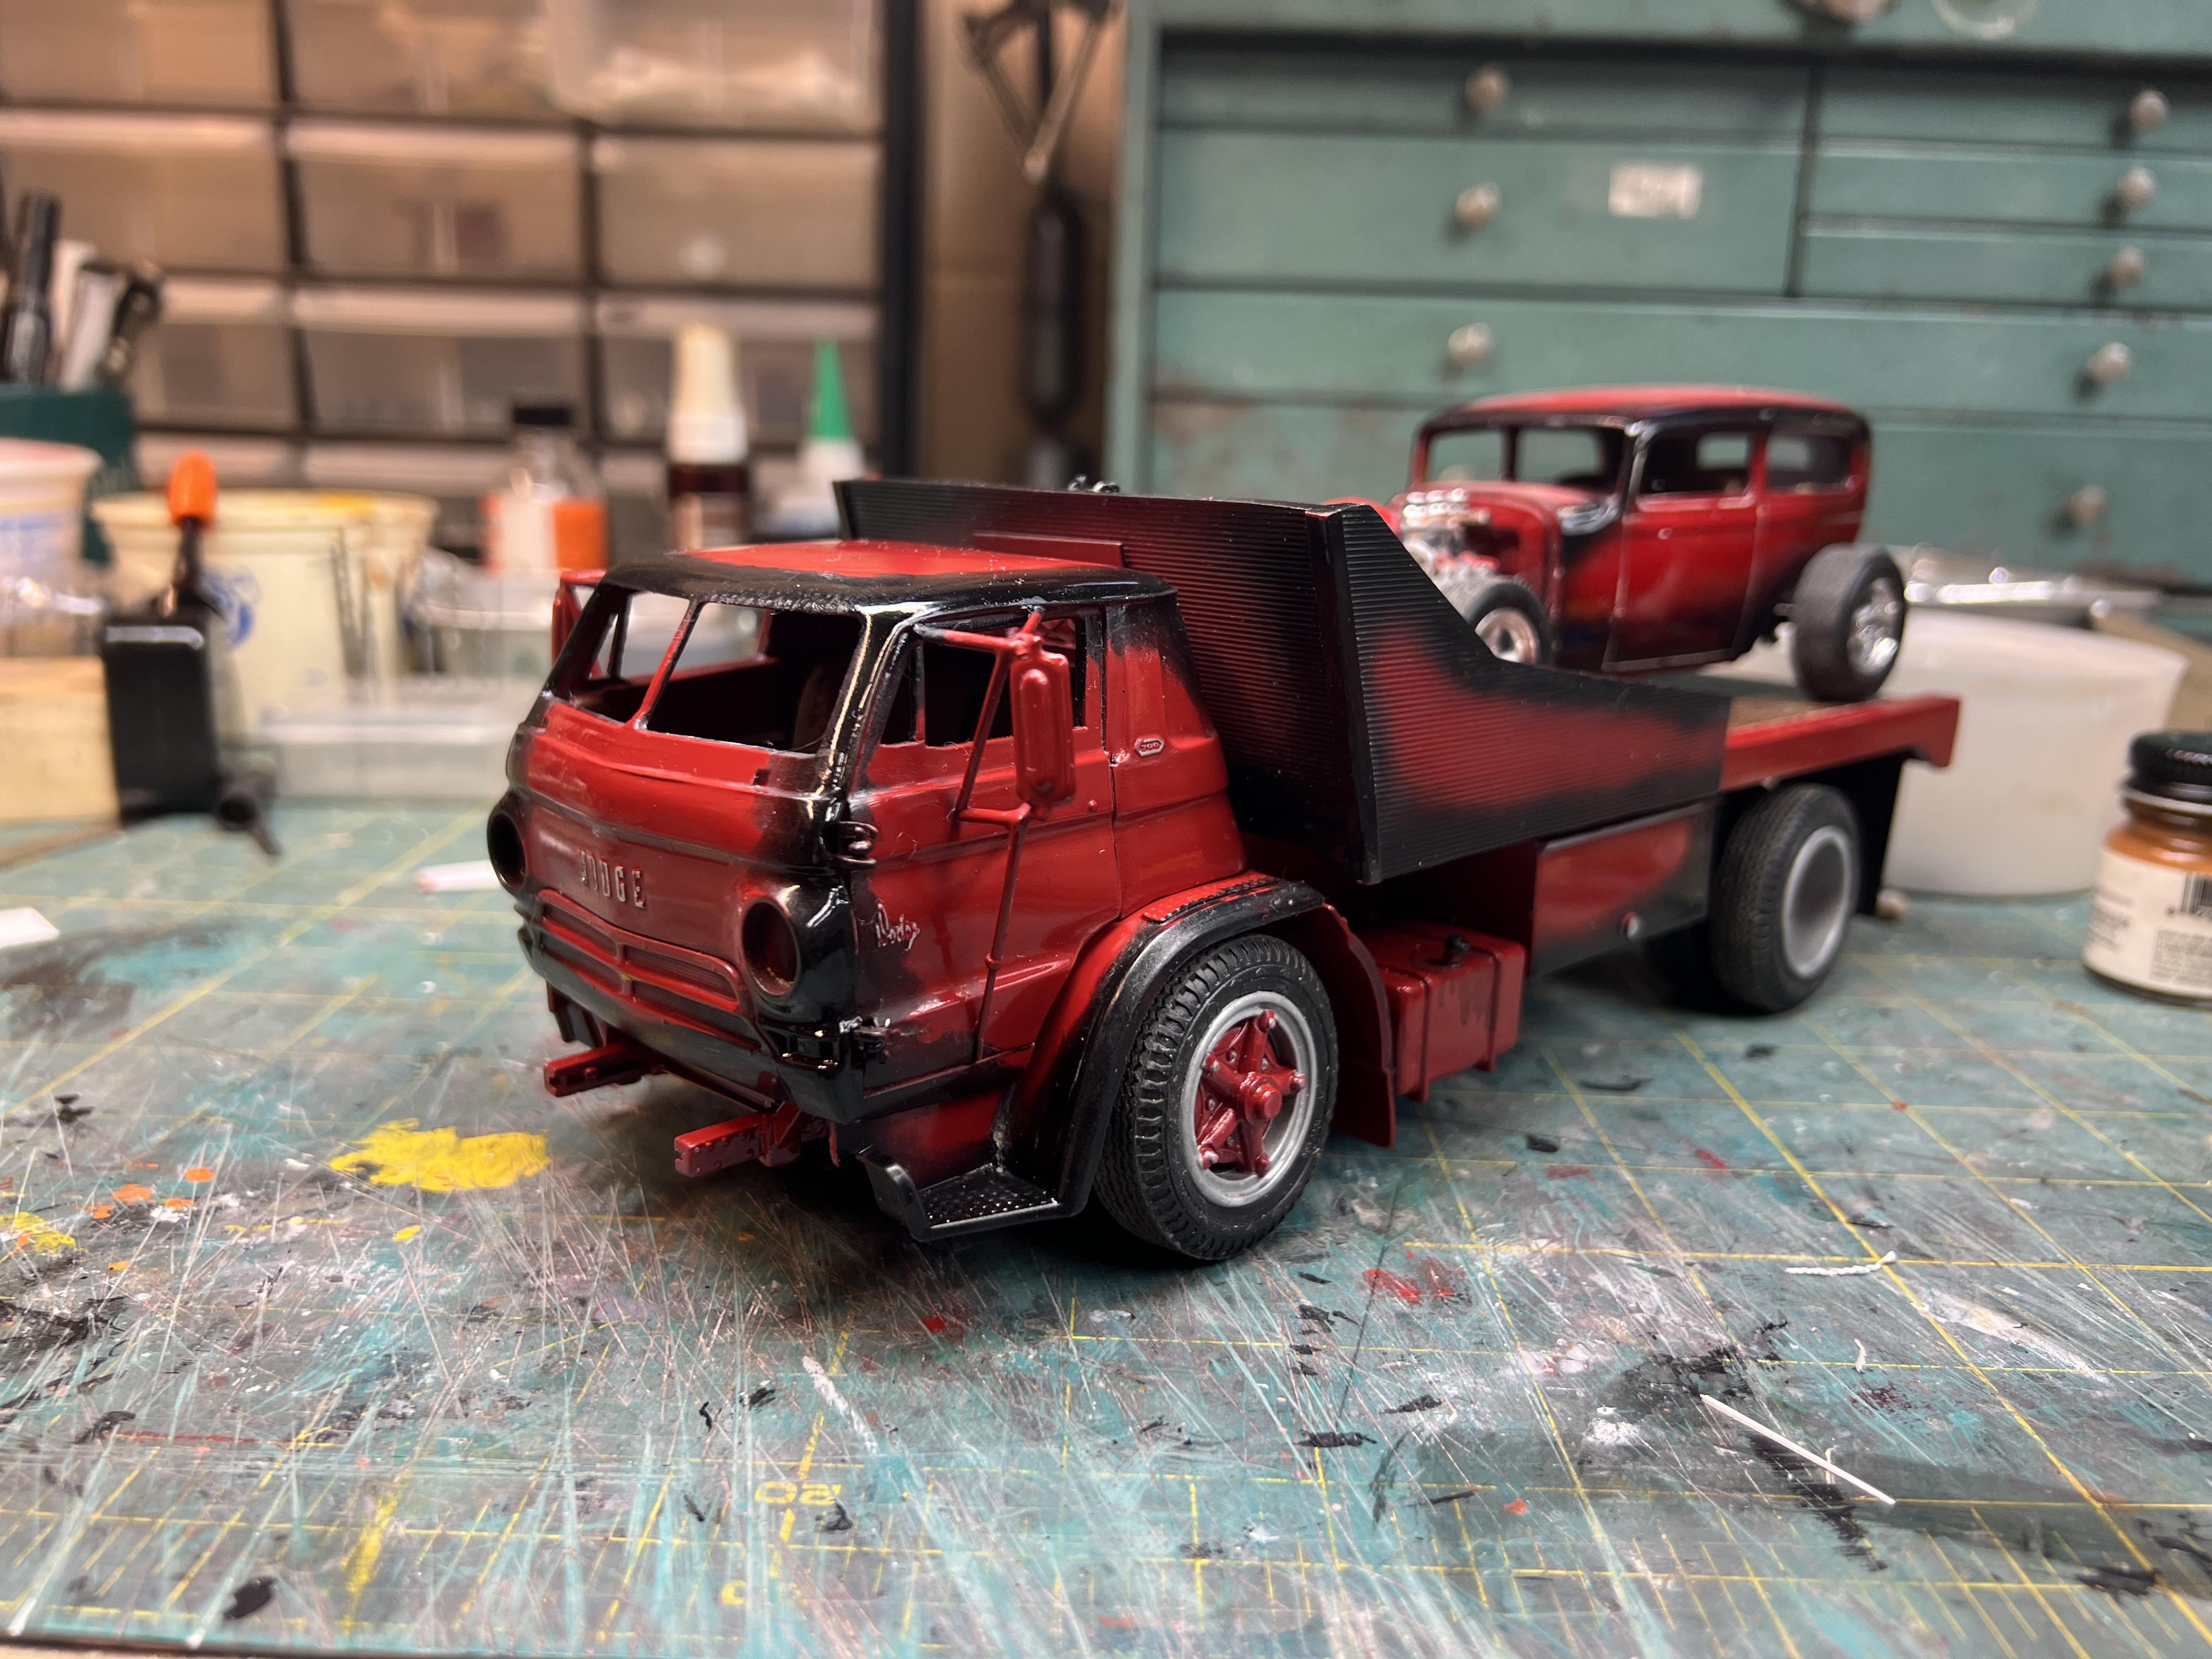
Making some good progress. Got the wood laid down on the back. I found good old contact cement like used on Formica counter tops worked great. Then a winch was imagineered using the barrel of a pall point pen, some old fishing line and a hook made from a straight pin. The hydraulic piston is 3/16 hollow tube with a 1/8 rod inside. Not sure how other folks do it but to limit the travel I cut a slot in the tube and drilled a pin in the rod. As I was working things out the back I grabbed an old 32 sedan hot rod I did several years ago. I liked the look so well I decided to duplicate the paint scheme and make them a pair. The kit’s doors were such a horrible fit I just glued them shut. Normally on a customs I like to deck them, no handles, script, ornaments. But this truck is just too iconic to remove that stuff. The mirrors were the biggest challenge because of the chop and all the braces neede to be pinned. Anyway, it’s just getting down to adding the shiny bits