slownlow
-
Posts
242 -
Joined
-
Last visited
Content Type
Profiles
Forums
Events
Gallery
Everything posted by slownlow
-
Service station Jeep
slownlow replied to slownlow's topic in Model Trucks: Pickups, Vans, SUVs, Light Commercial
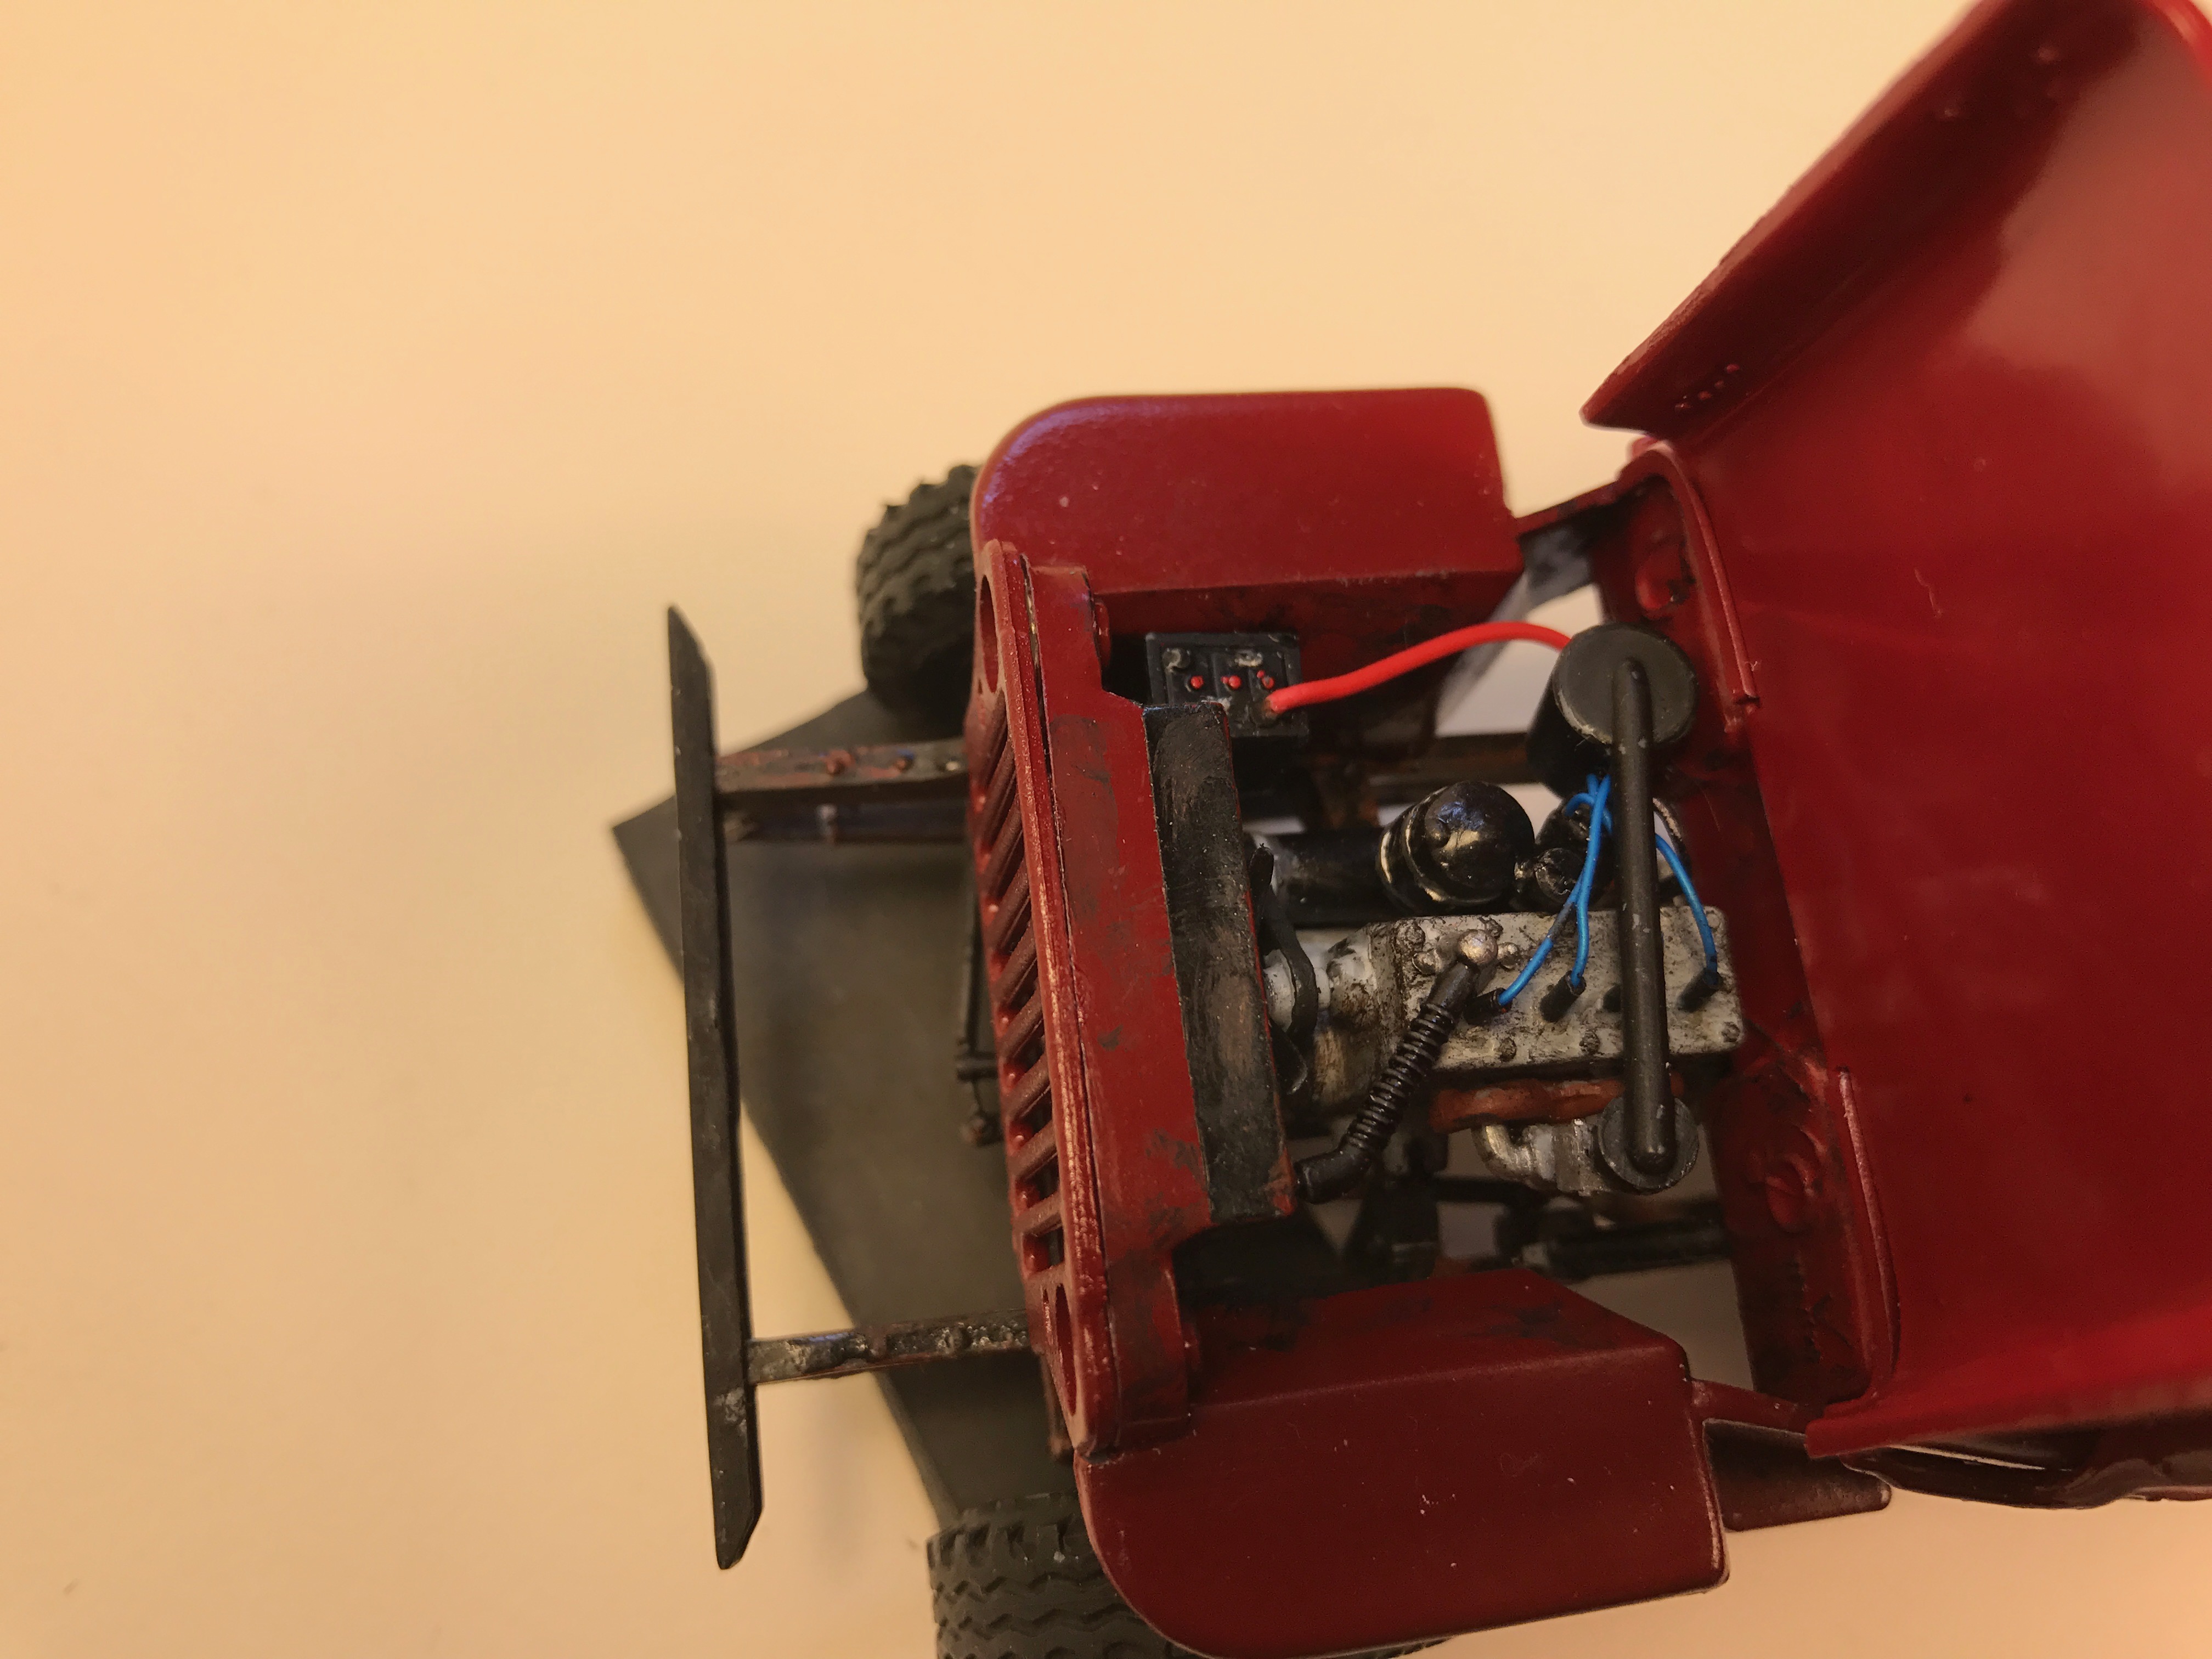
OK, I couldn't leave well enough alone. I imagineerd a gas powered charging unit and threw in a few tools. Now I'm done, really, no really.
-
Service station Jeep
slownlow replied to slownlow's topic in Model Trucks: Pickups, Vans, SUVs, Light Commercial
Thanks all fore the kind comments. -
Service station Jeep
slownlow replied to slownlow's topic in Model Trucks: Pickups, Vans, SUVs, Light Commercial
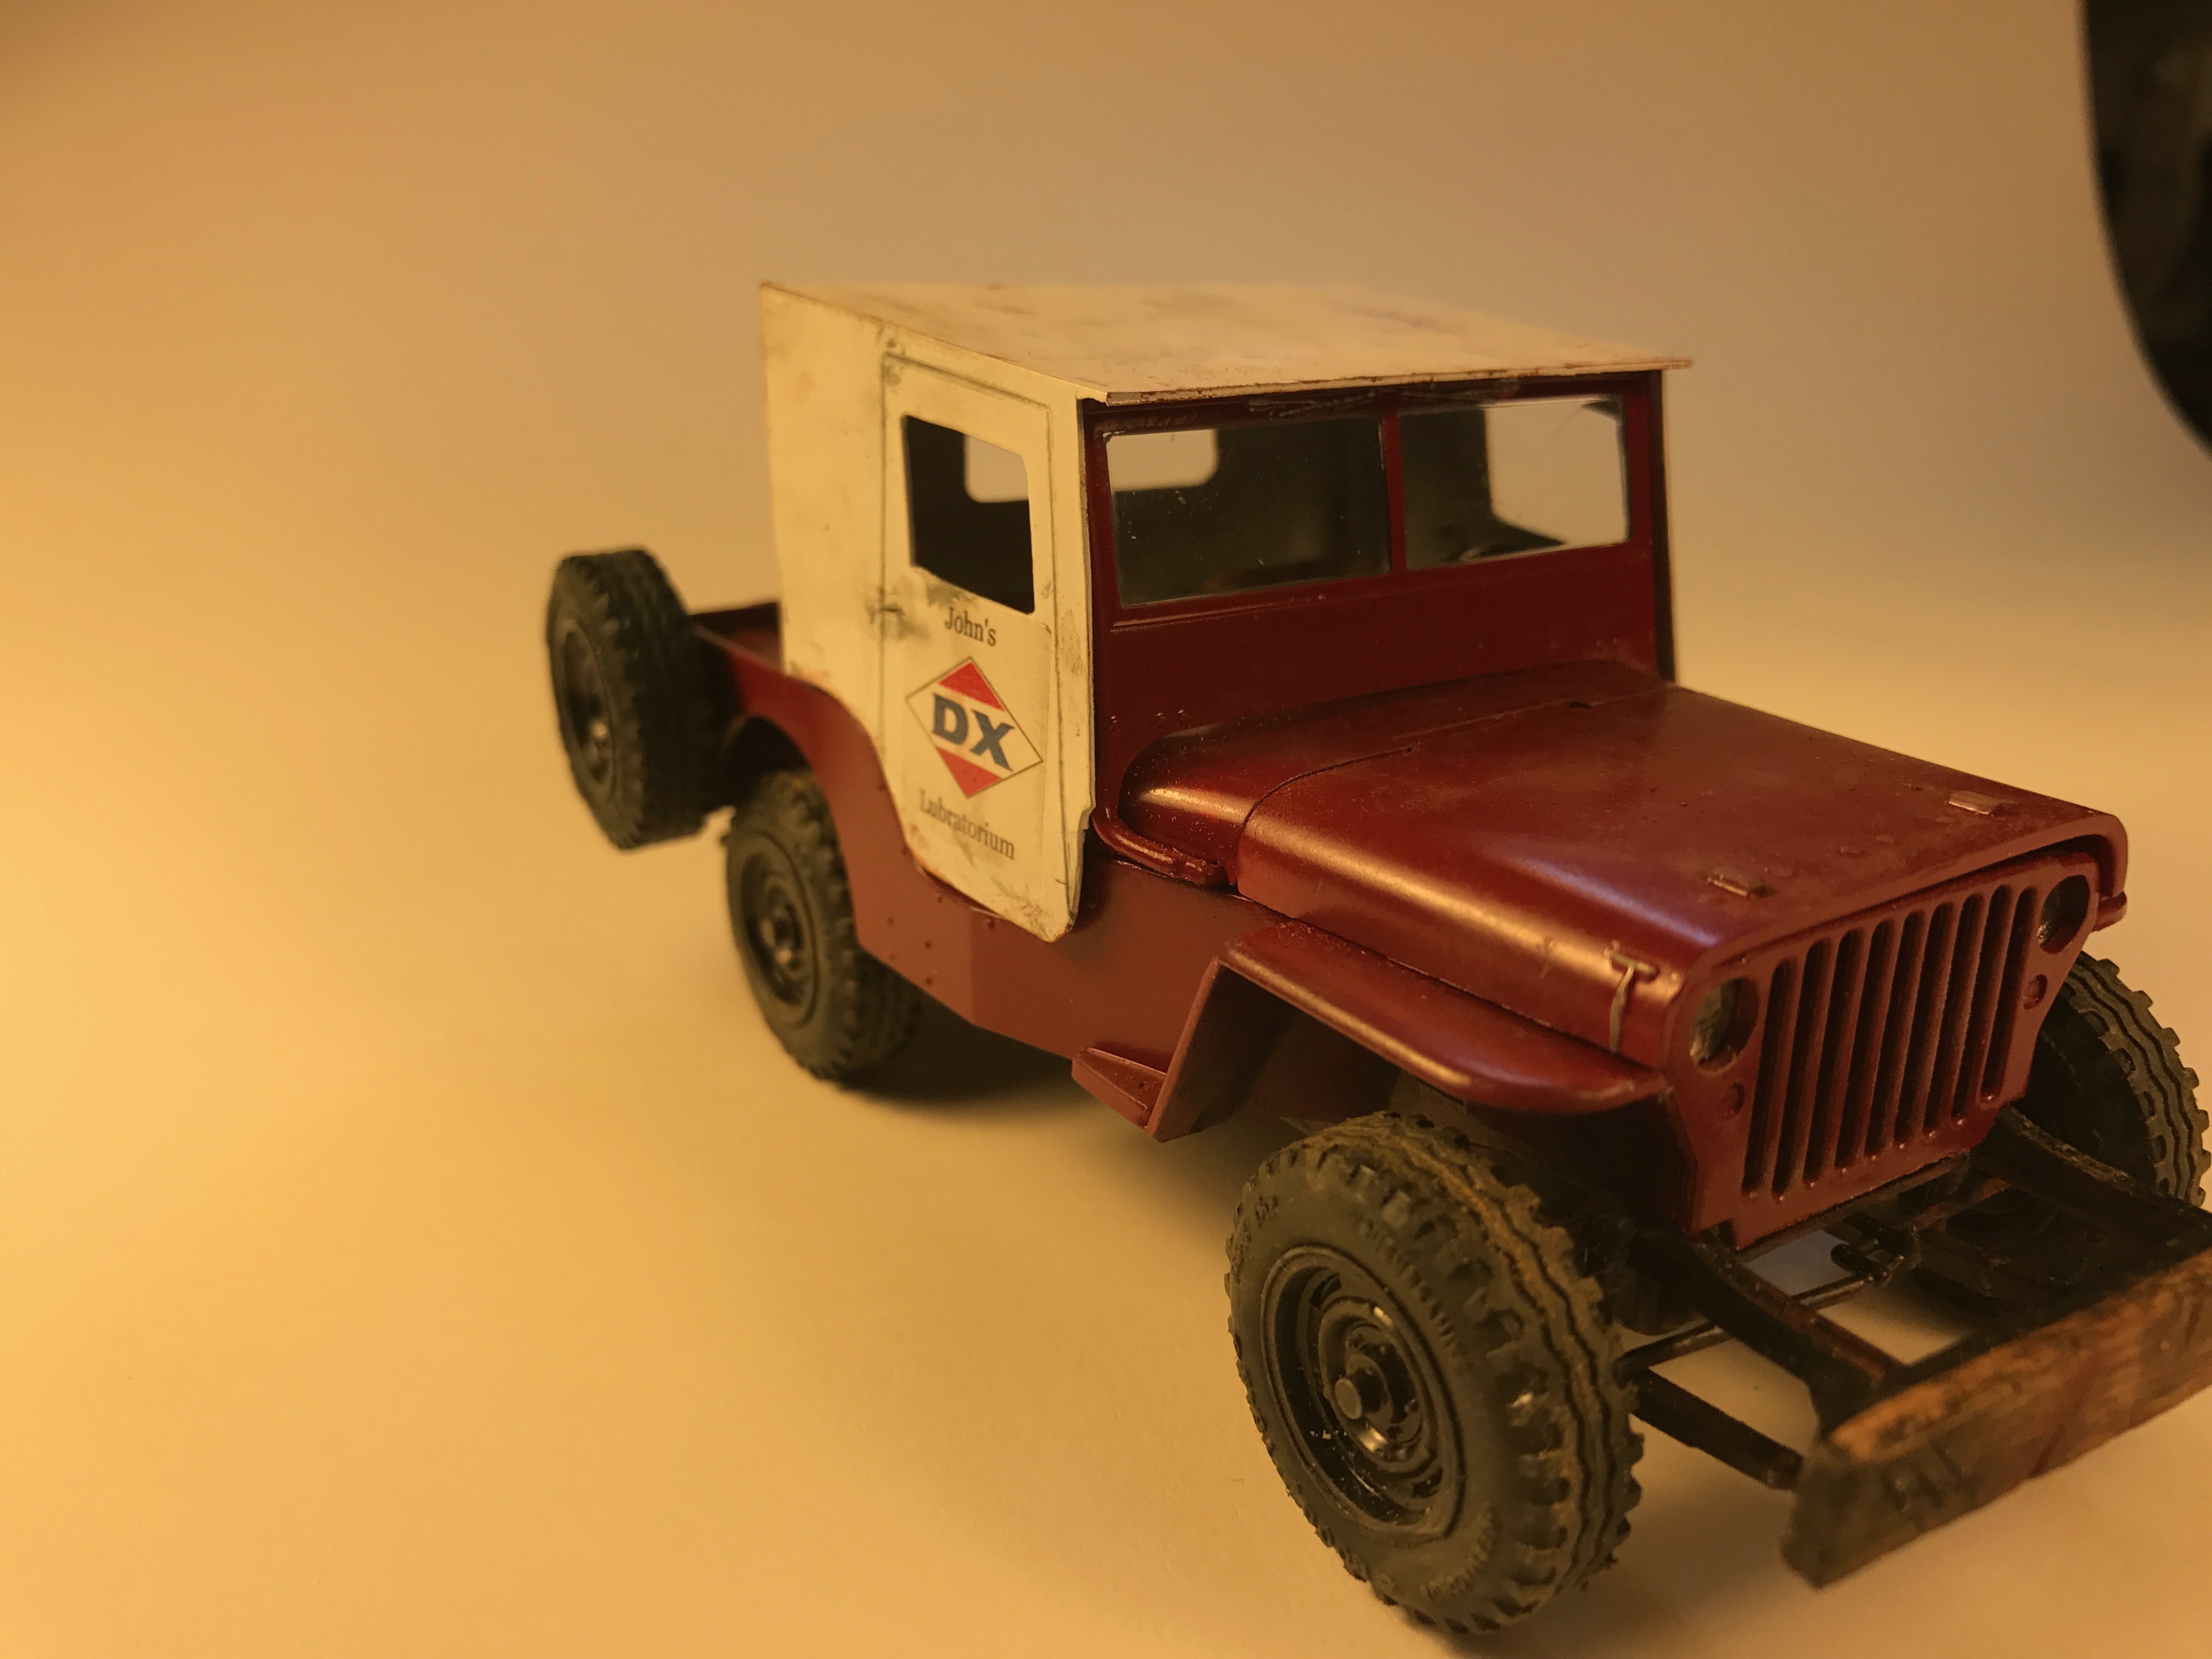
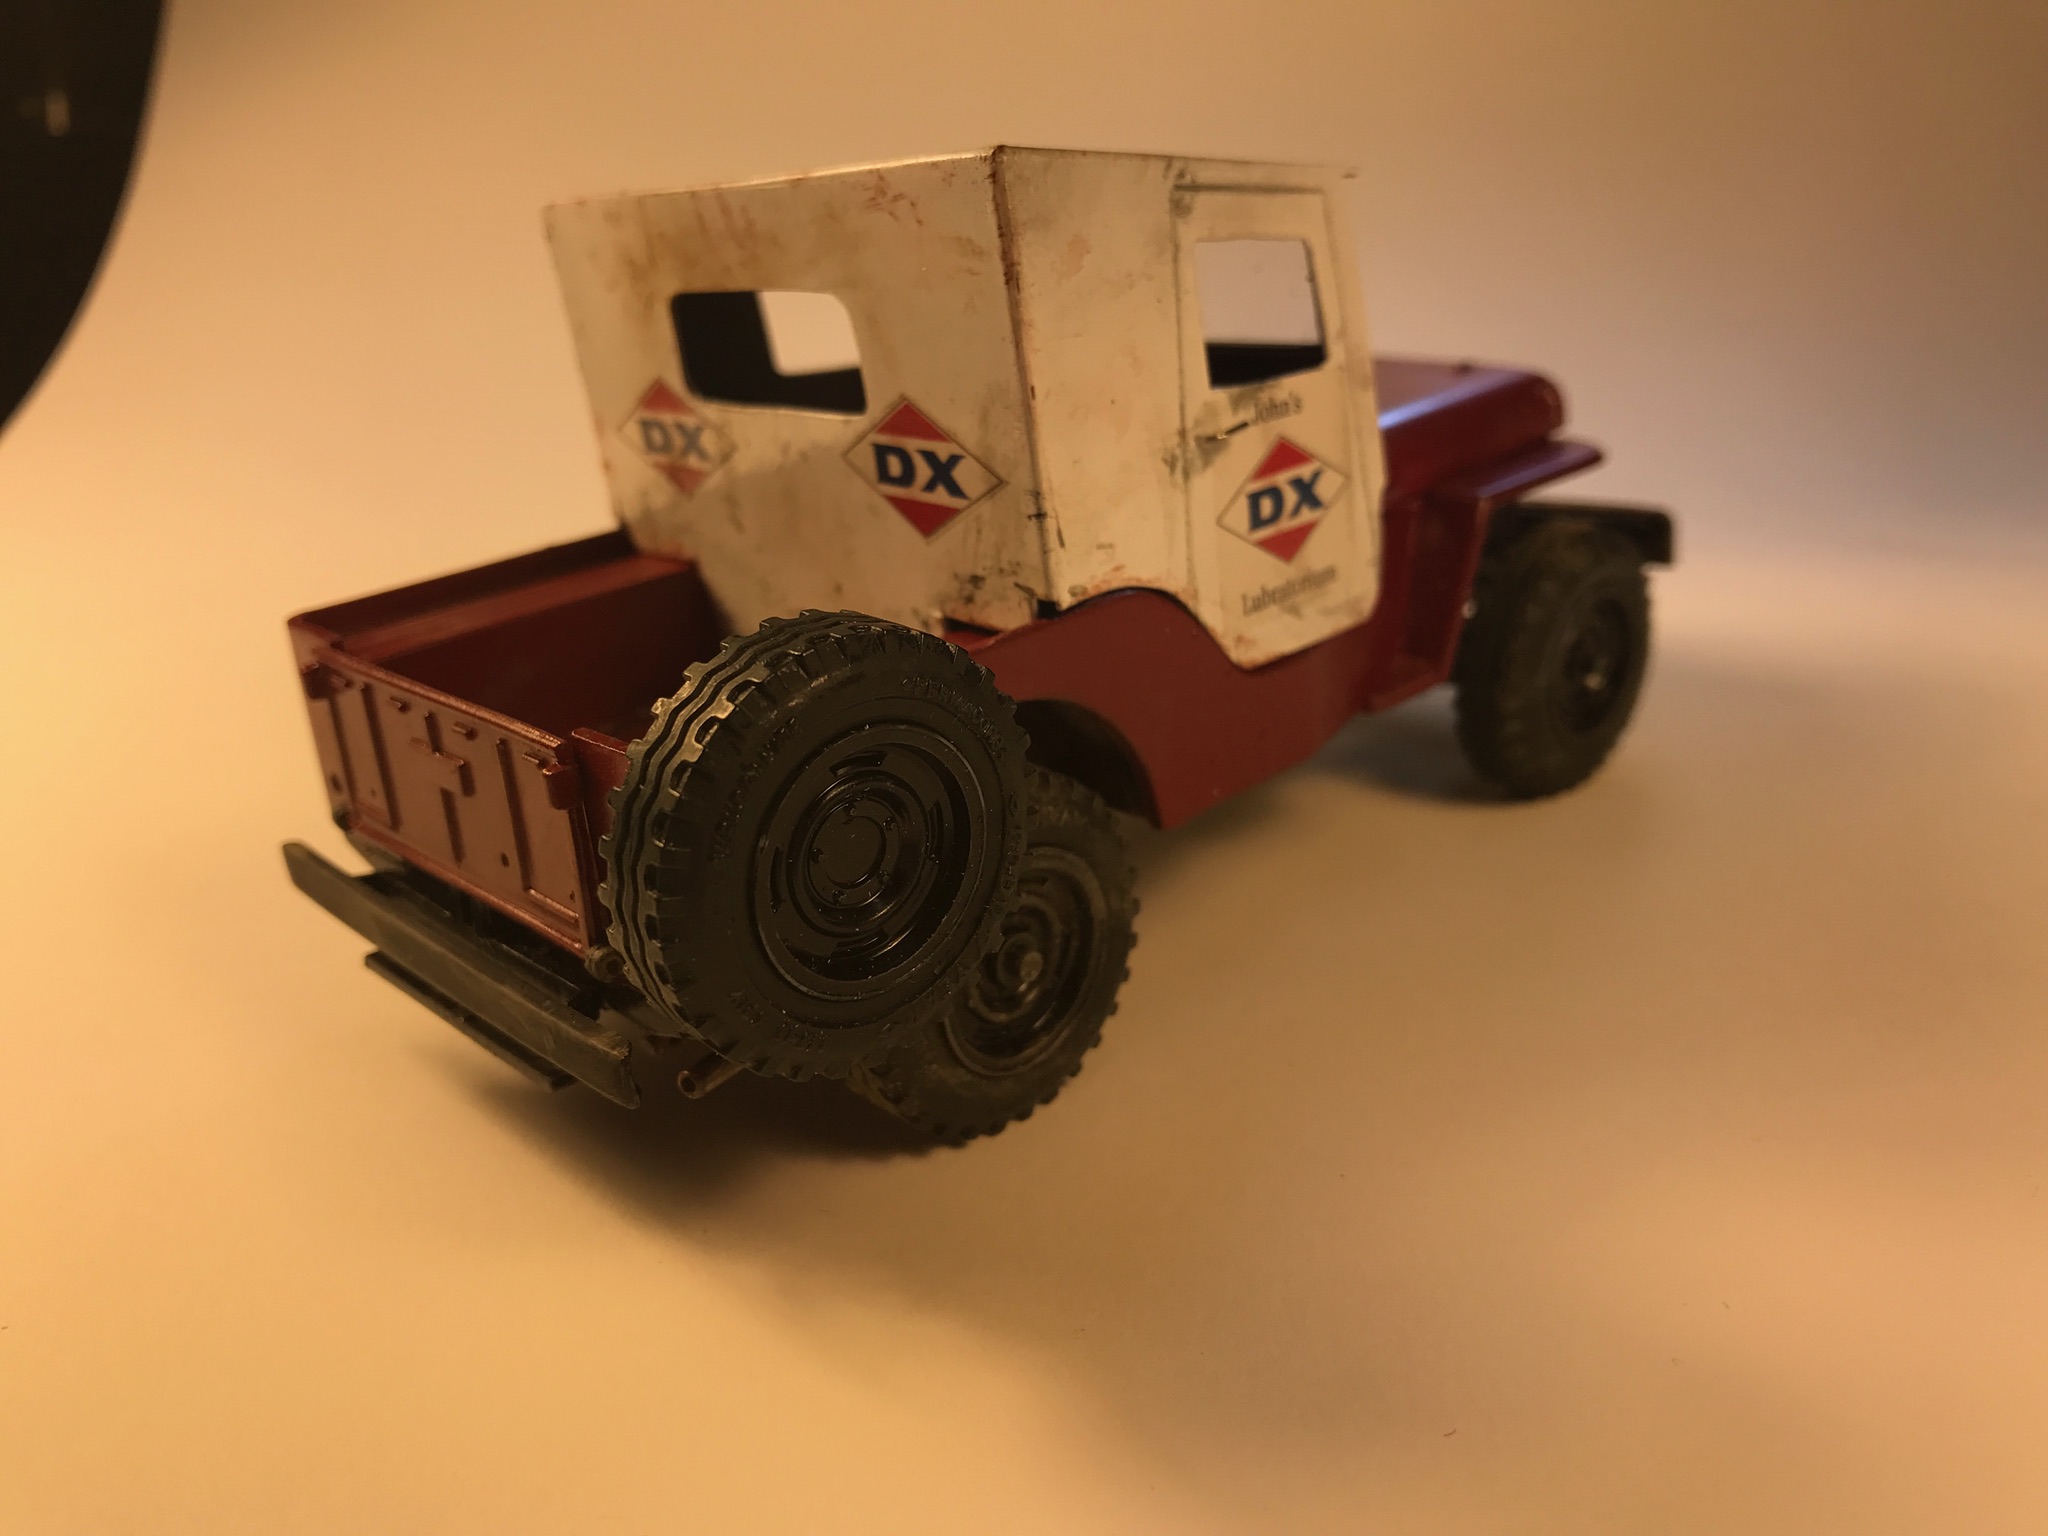
This is the MPC WWII 1/25 Jeep kit and the tires came in the kit. The tooling of the mold must be getting old as there was some ruffness to the smaller parts though not much flash. Also the plastic is rather soft and the frame had a twist. I fabricated the cab out of sheet plastic and made the DX decals. Because it is a civilian rendition the military goodies, Thompson machine gun, carbine rifle, 50cal machine gun and a 105 recoilles are in my stash. All in all it was a fun kit to do. -
Here is a Jeep like one I had in the 60's. Sure had a lot of fun with this old gal. Not much good for road trips but great for exploring Midwest river valleys. She had the metal 1/2 cab like this when I got her but soon replaced it with a full soft top.
-
This is a Jeep I had in the late 60's though my version was a CJ (civilian) rather than this military version. The kit is the MPC version in 1/24. Because the kit is military it has some fun accessories, Thompson machine gun, carbine rifle, 50 cal machine gun and 105 recoilless rifle. Because this represents a service station vehicle those items are left off though they might be handy in traffic. When I got the Jeep it had a metal 1/2 cab which made dating interesting. While 4wheeling in the woods one day I found out why the spare is usually mounted in back. For this girl I figure I needn't worry about how close the trees are together. Someone may be molding a cab like this but it's pretty easy to fabricate. It would be in the finished category but I plan on making a battery charging unit and decals reading "John's DX service & lubritorium".
-
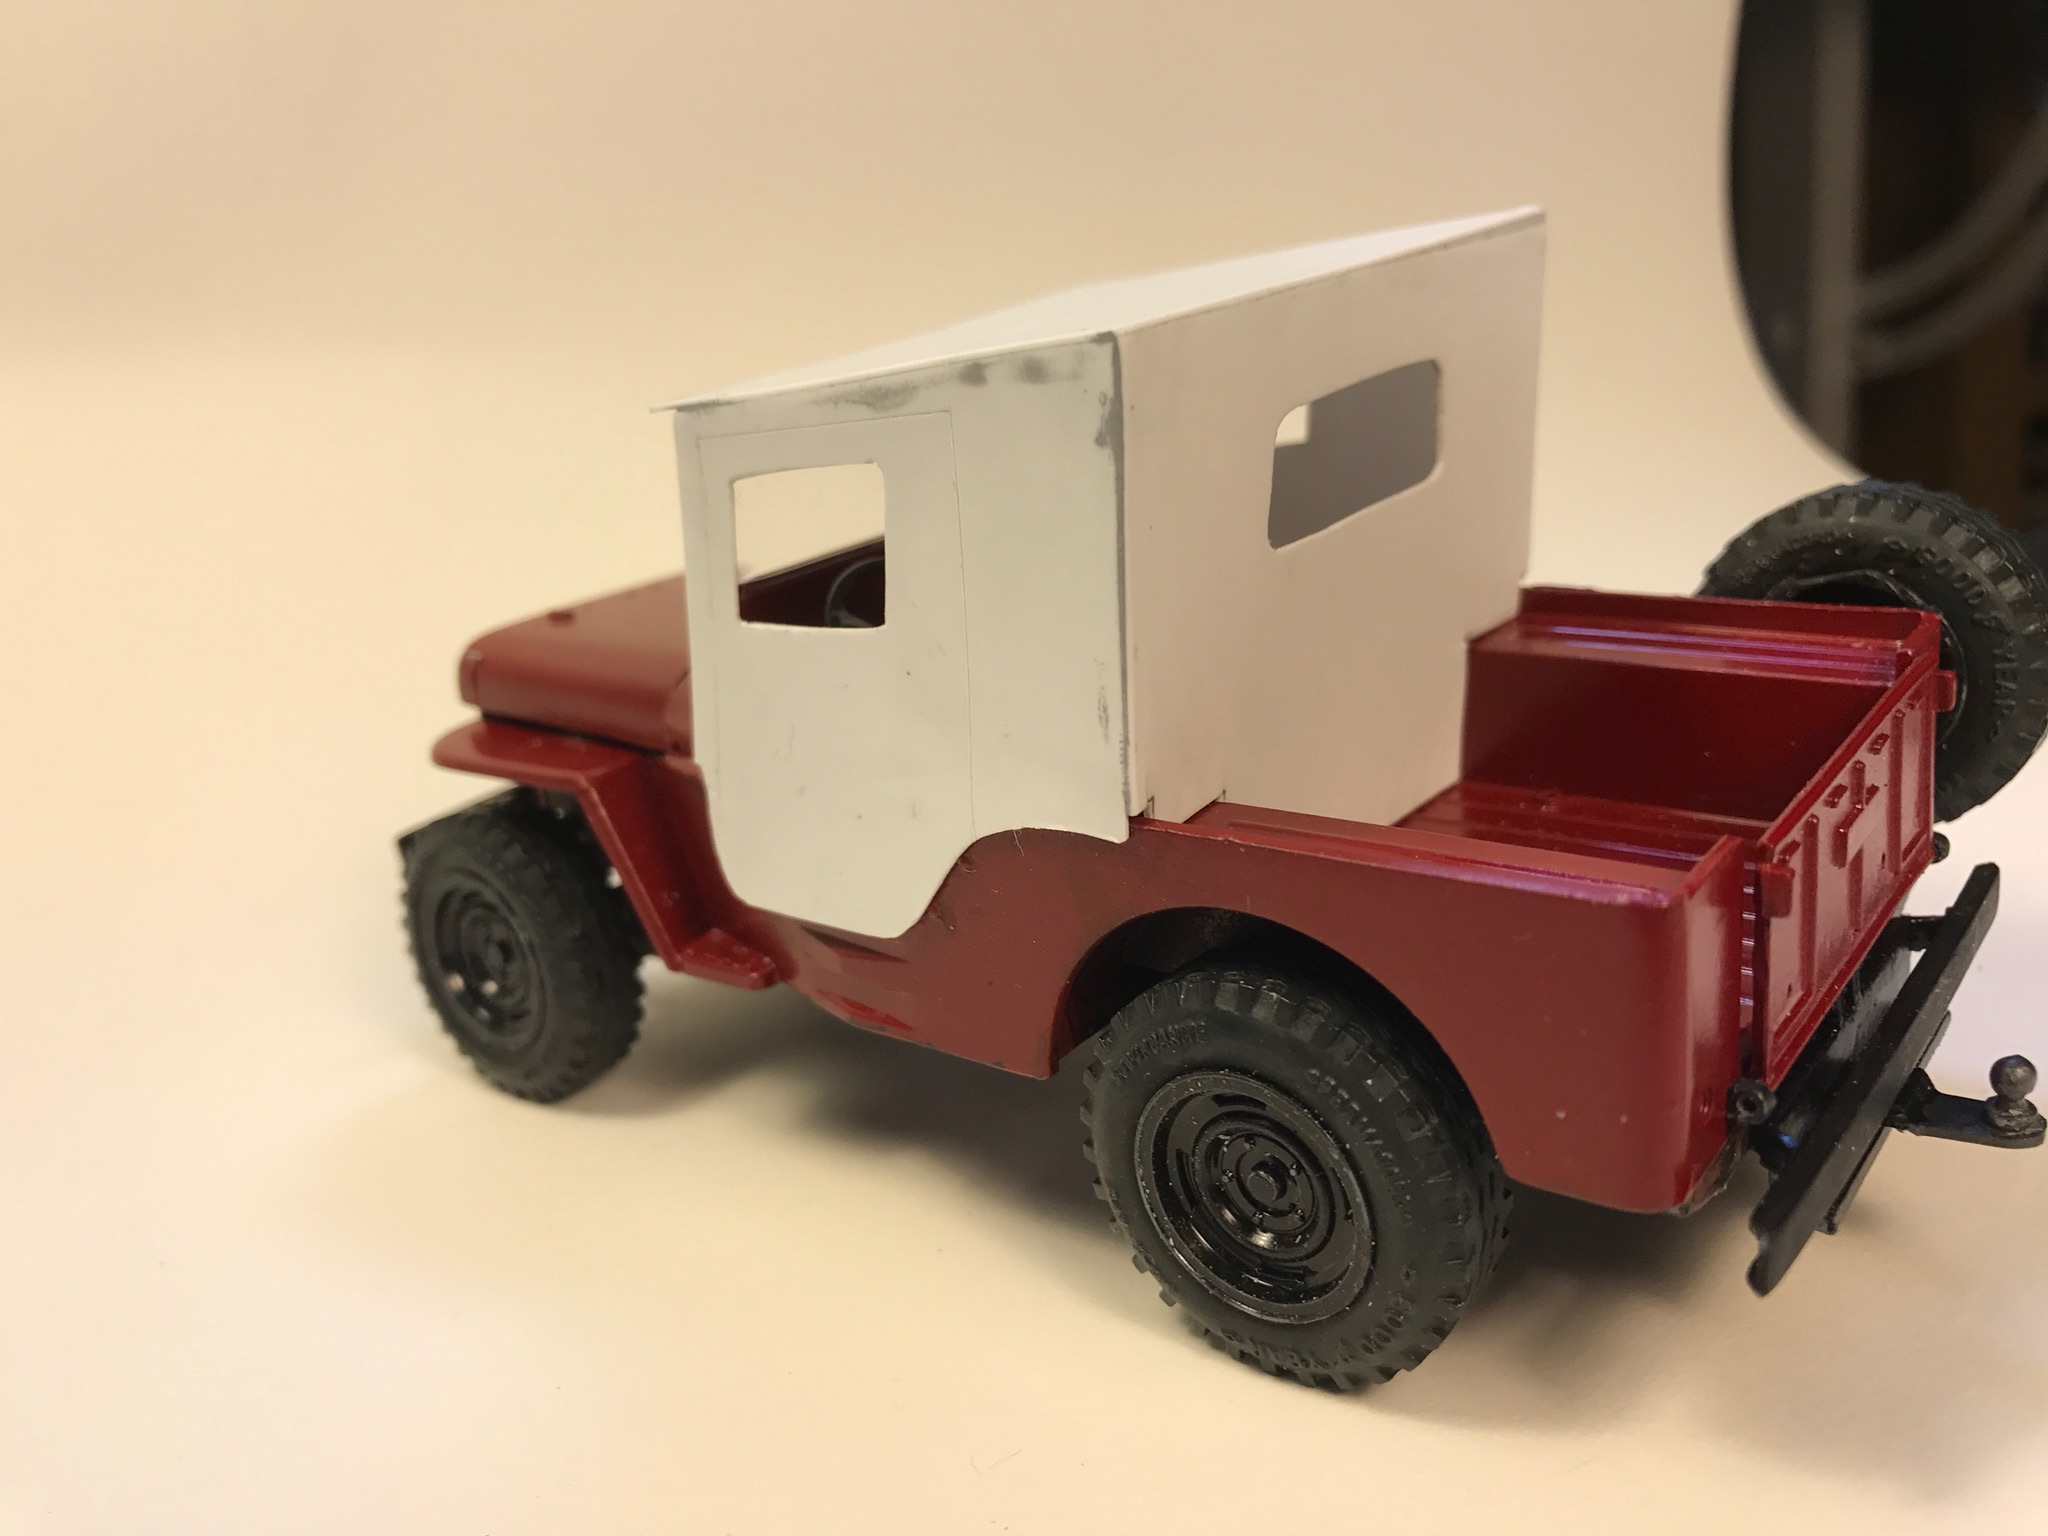
Finally making some good progress. I kind of feel like that Ancient Greek who had to roll the boulder up the mountain only to have it roll back down just short of the peak. Anyway here she is so far
-
What did you see on the road today?
slownlow replied to Harry P.'s topic in General Automotive Talk (Trucks and Cars)
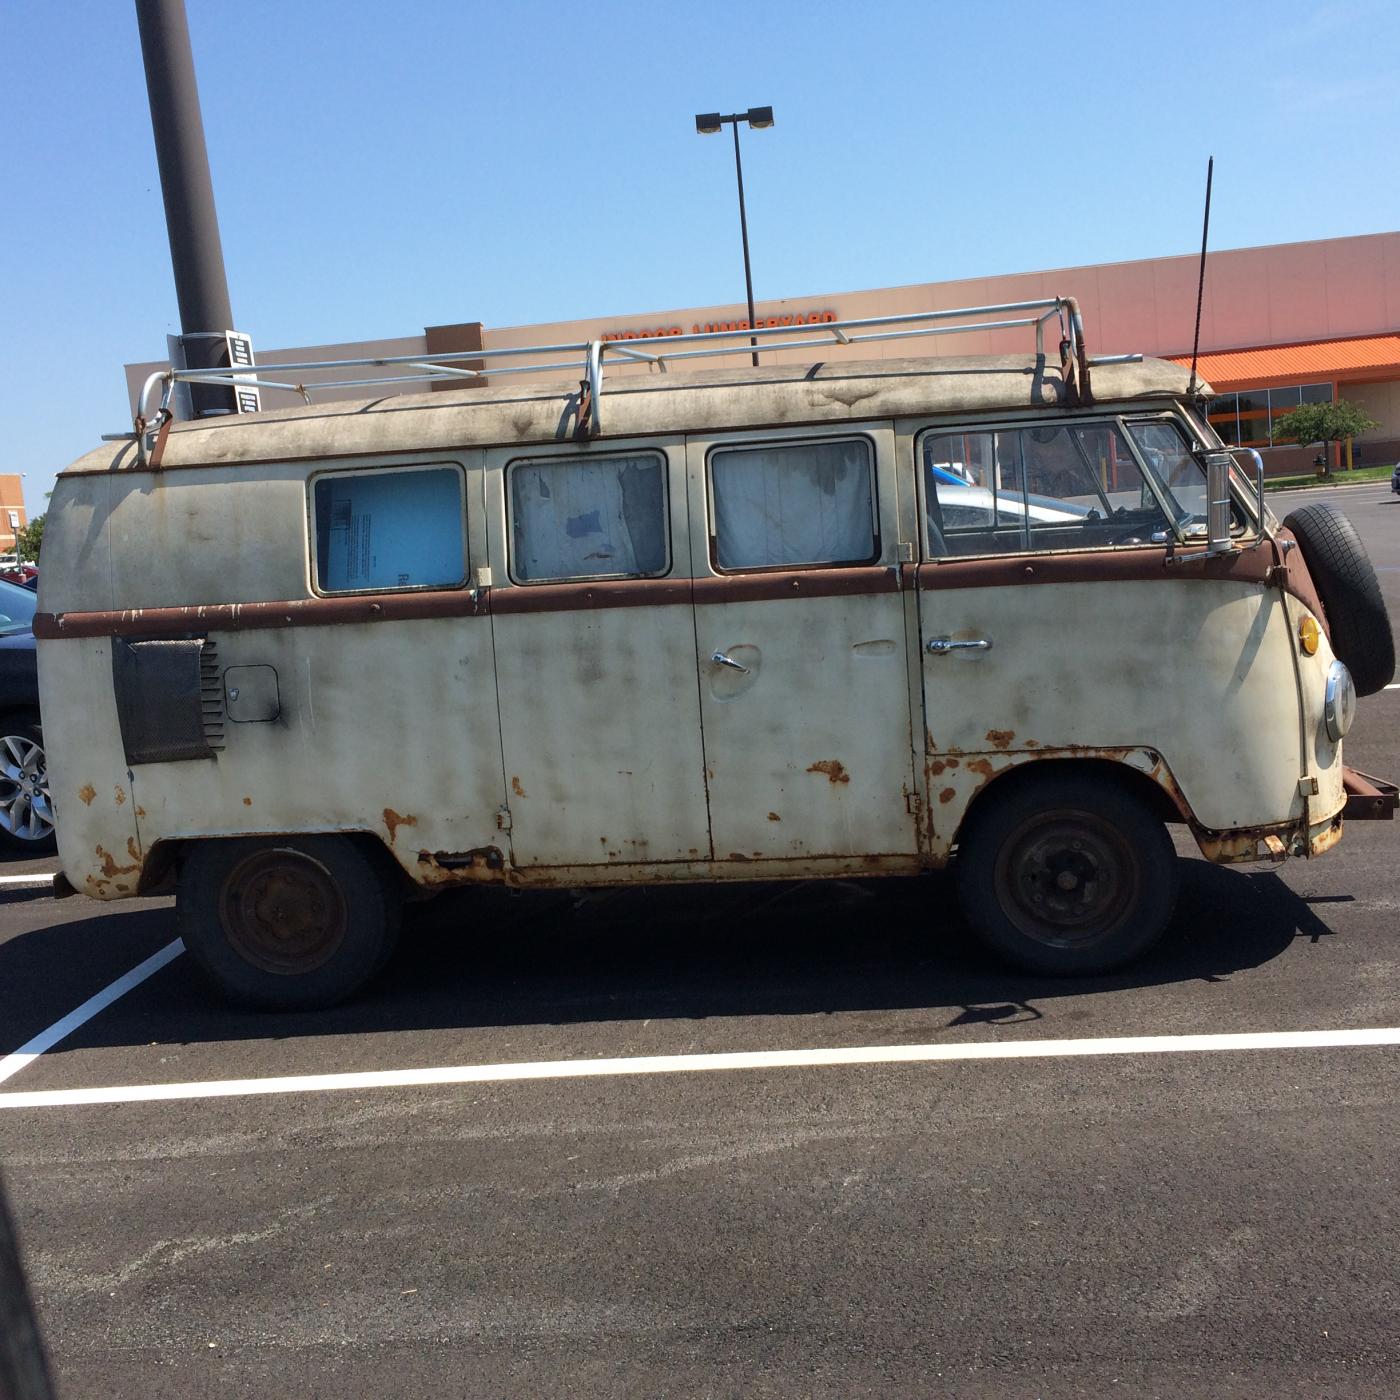
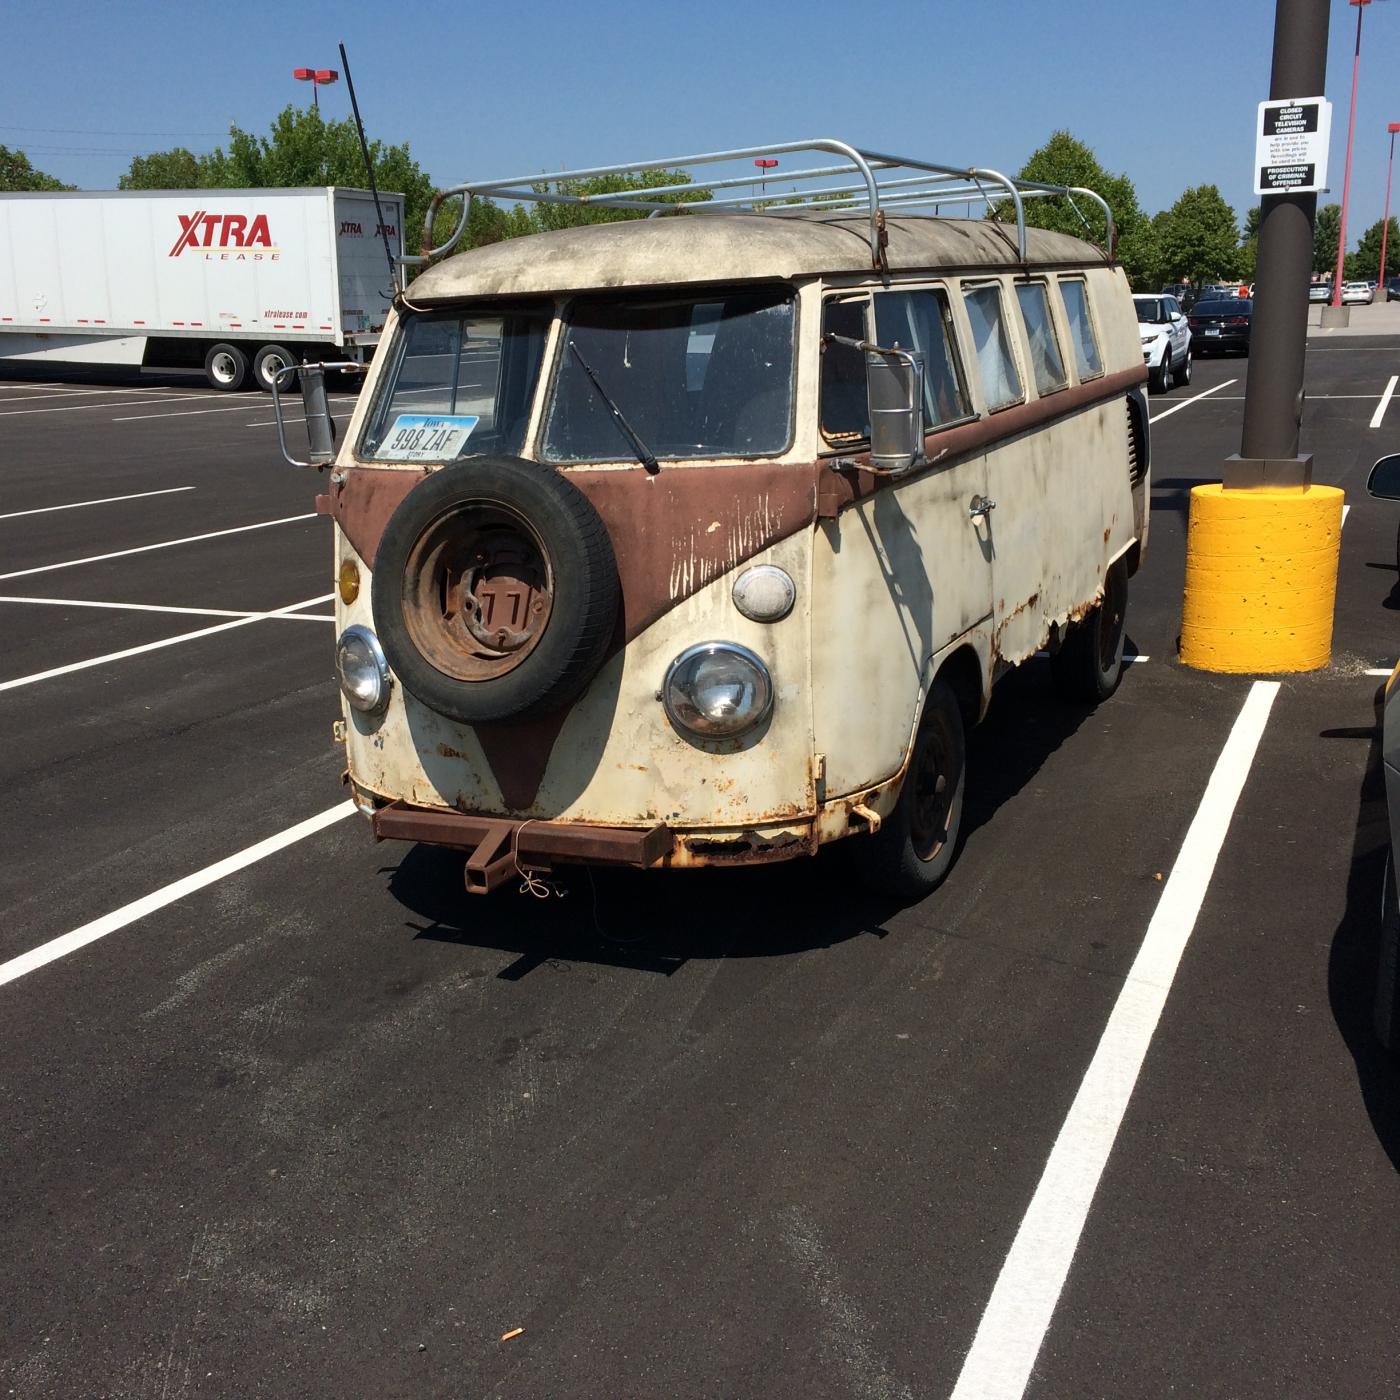
I saw this old friend in the parking lot of our local Home Depot. Turned out the owner was the clerk that waited on me. Said it had been in the family since 1972. The only thing she's missing is a Greatful Dead sticker in the rear window.
-
Another Monza build in the mix??? New pics 8-4-18
slownlow replied to DrKerry's topic in WIP: Model Cars
Keep on keep'n on! -
Besides the moldings I'm considering going this direction. God love photoshop.
-
Here's a little more mocking up of moldings
-
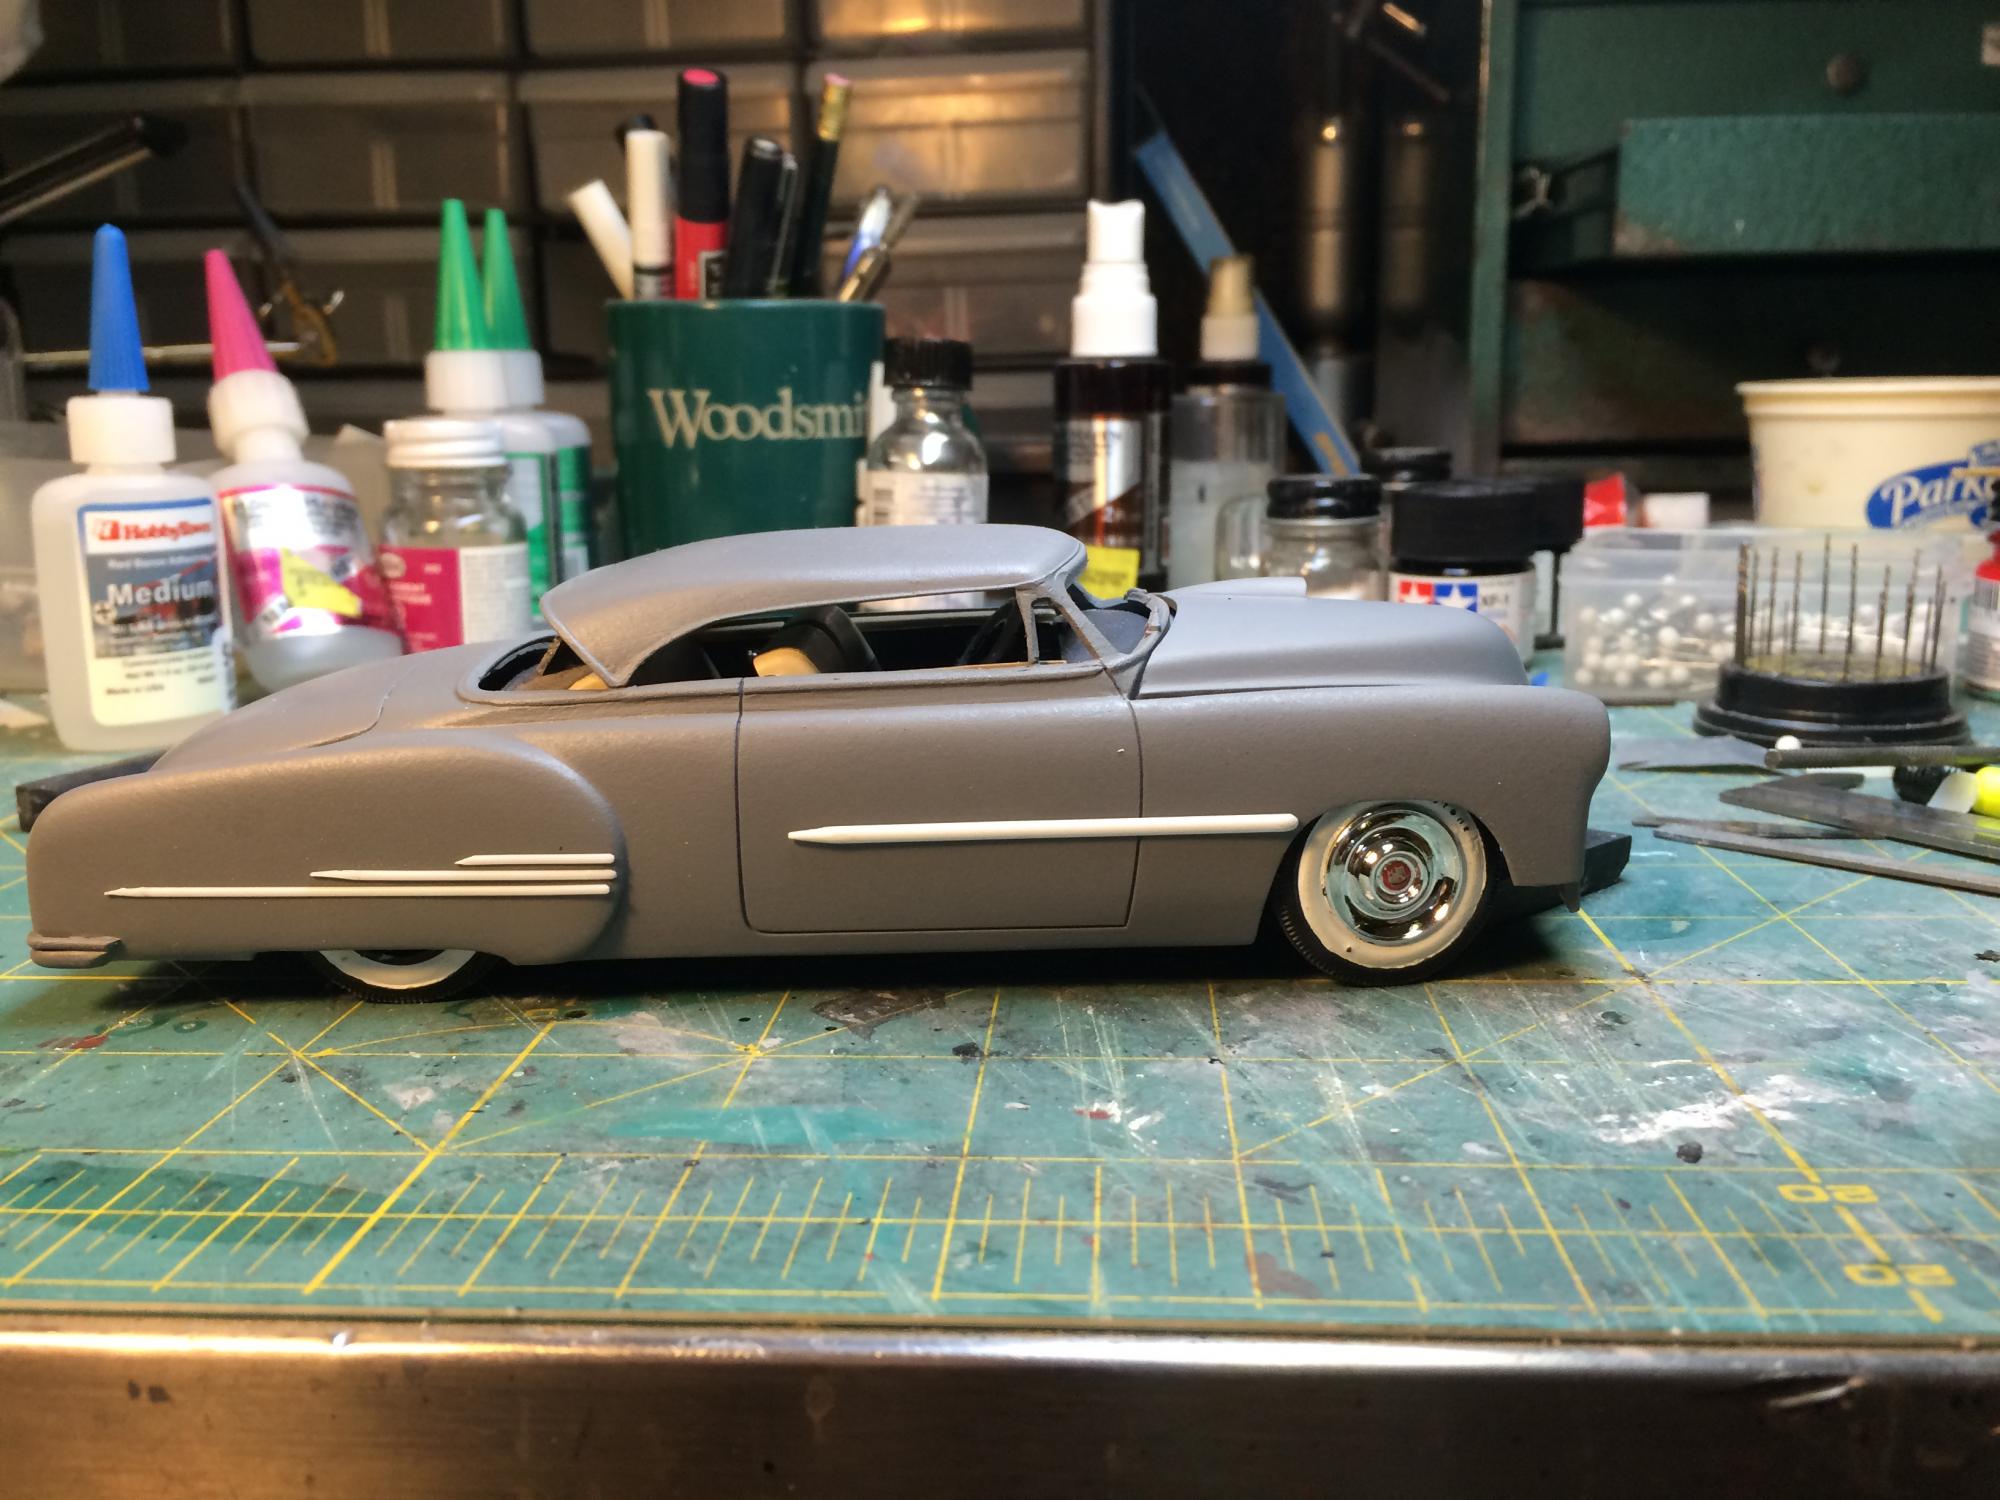
As I look at this after prime coat it seemed kind of plain so I'm playing with the idea of some moldings. Here's my first idea. Thoughts and comments welcome.
-
Adding detail, firing order
slownlow replied to Greg Myers's topic in General Automotive Talk (Trucks and Cars)
I don't worry too much about the order but I do make sure the battery is always negative grounded -
Chopped/sectioned 39 Ford(update:primer mock up!))
slownlow replied to Ferbz's topic in WIP: Model Cars
Your work is very clean and I like this a lot. The only other thing you might concider is adding the drip rail. I feel it accents the smooth swoop of the chopped roof in a subtle way and connects it with the body lines.But hay, your the one you gotta please. Keep on keep' on. -
Thanks to all for the suggestions. I did have successs in removing the decal without damage to model or decal. I wet a Q tip and kept the decal damp for about 3-4 minuets. Then was able to slowly work a #11 exacto under a corner and then moistened the underside as well as the upper. After a few minuets it was free. I've now reapplied it with the point of the star in the right direction.
-
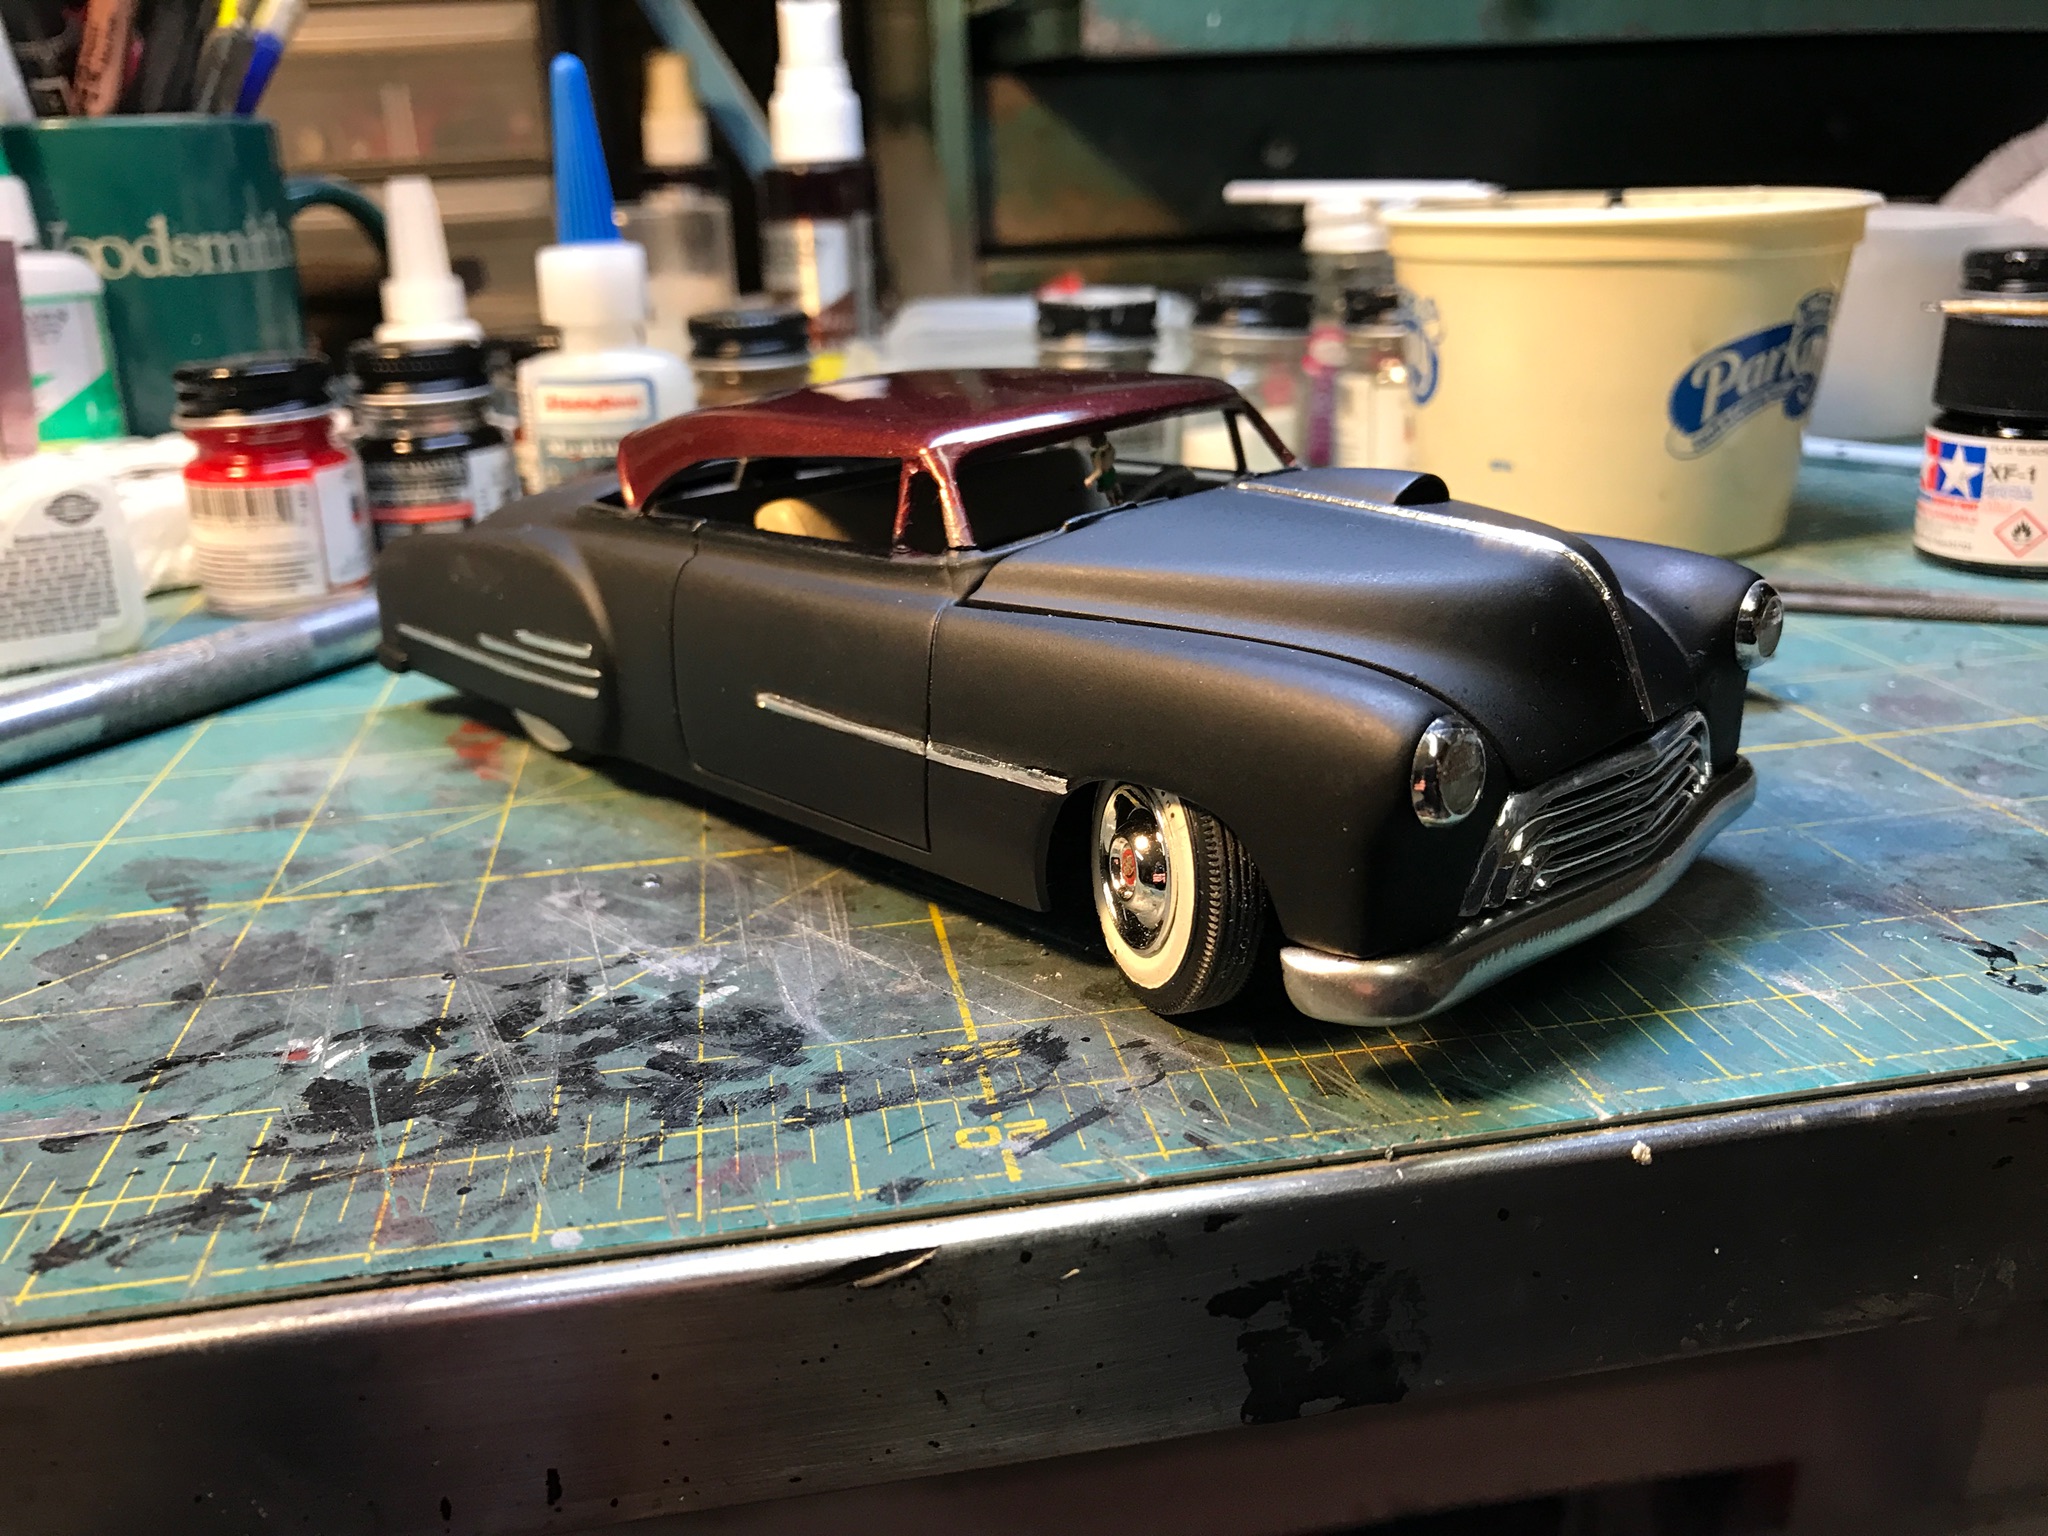
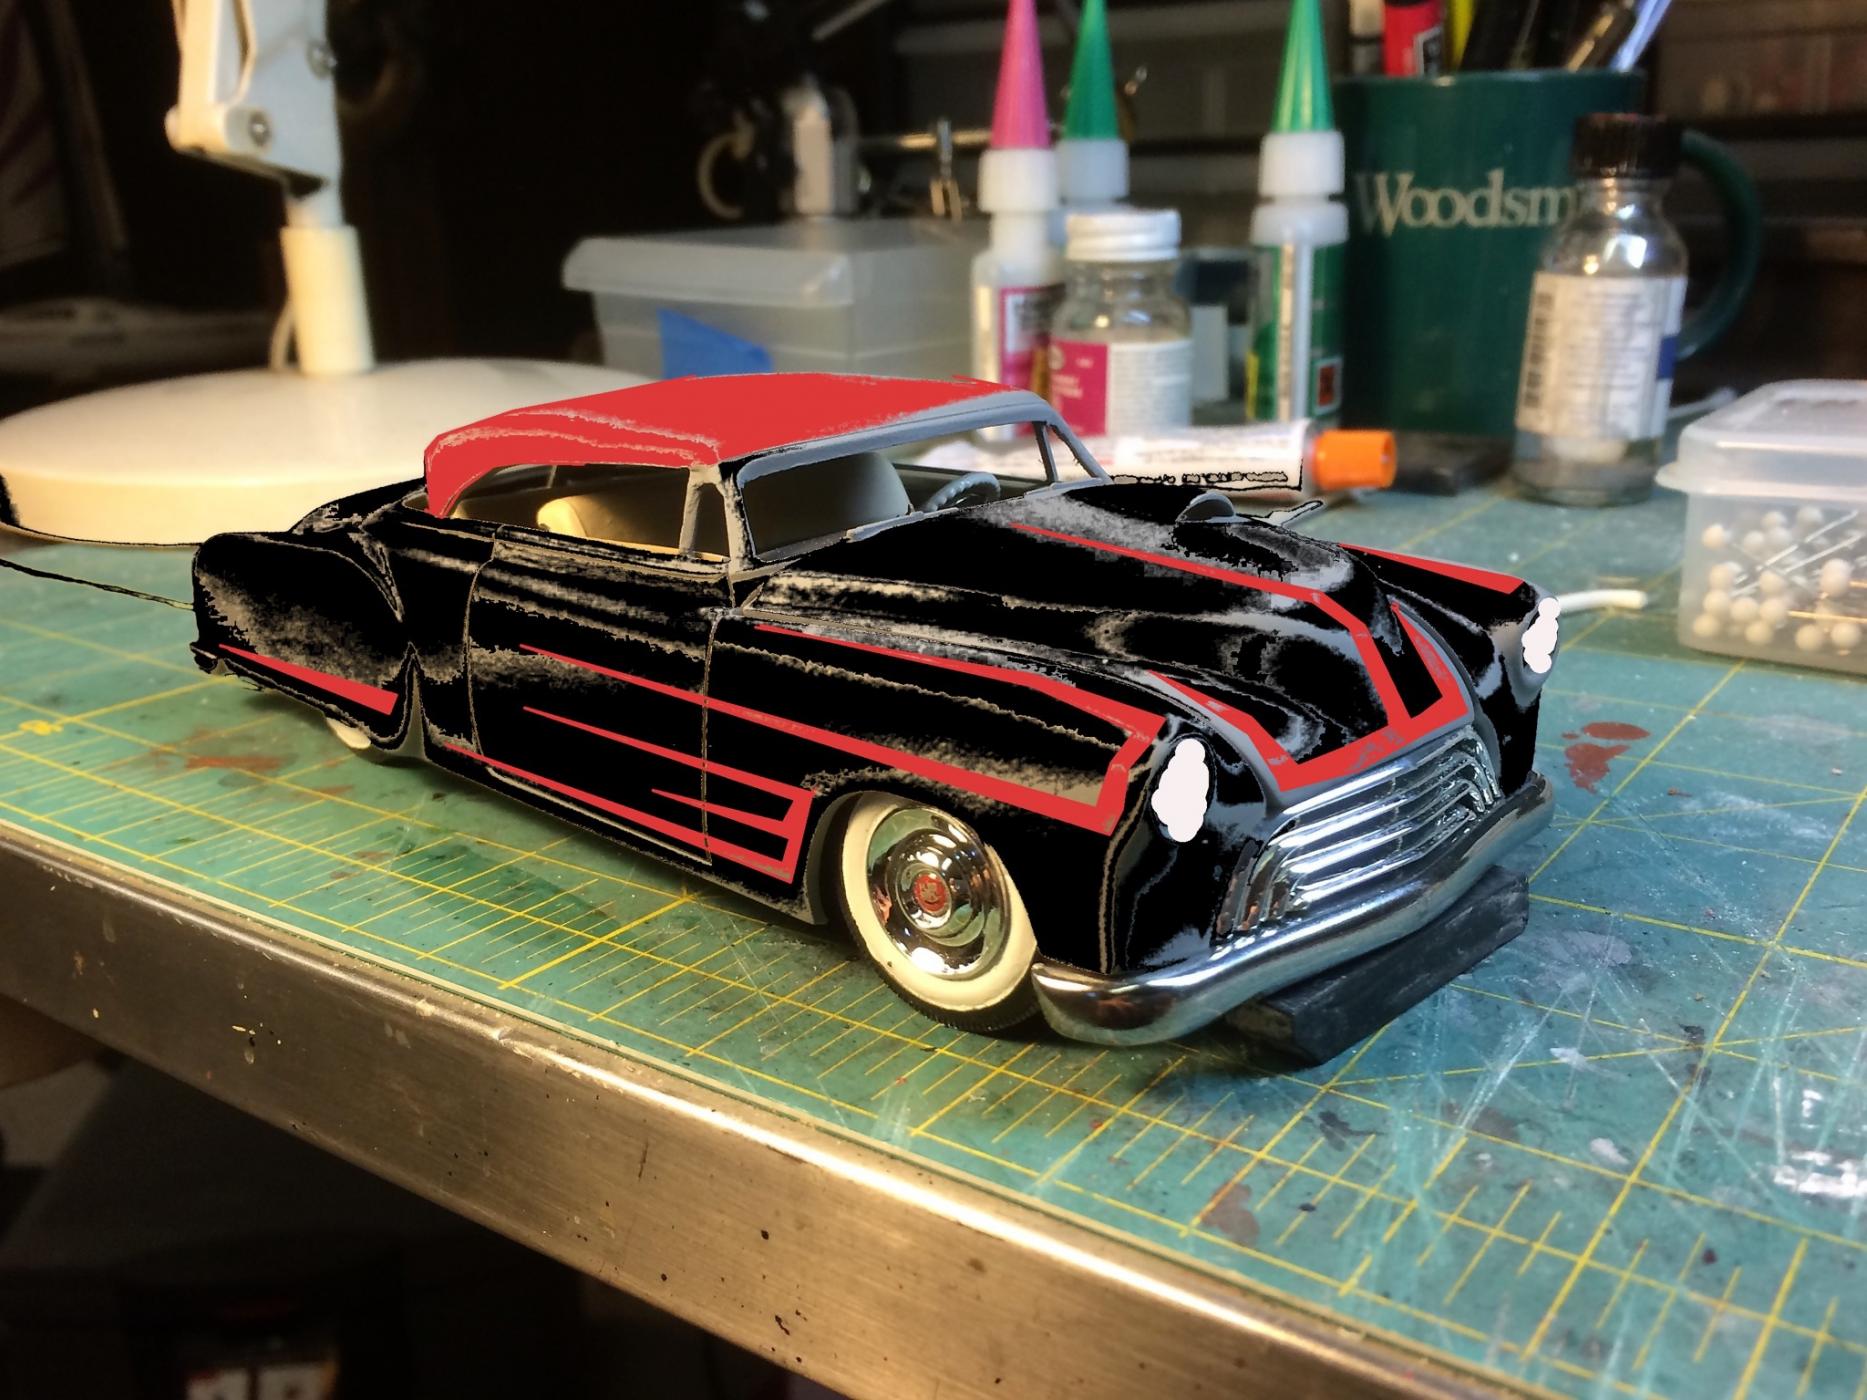
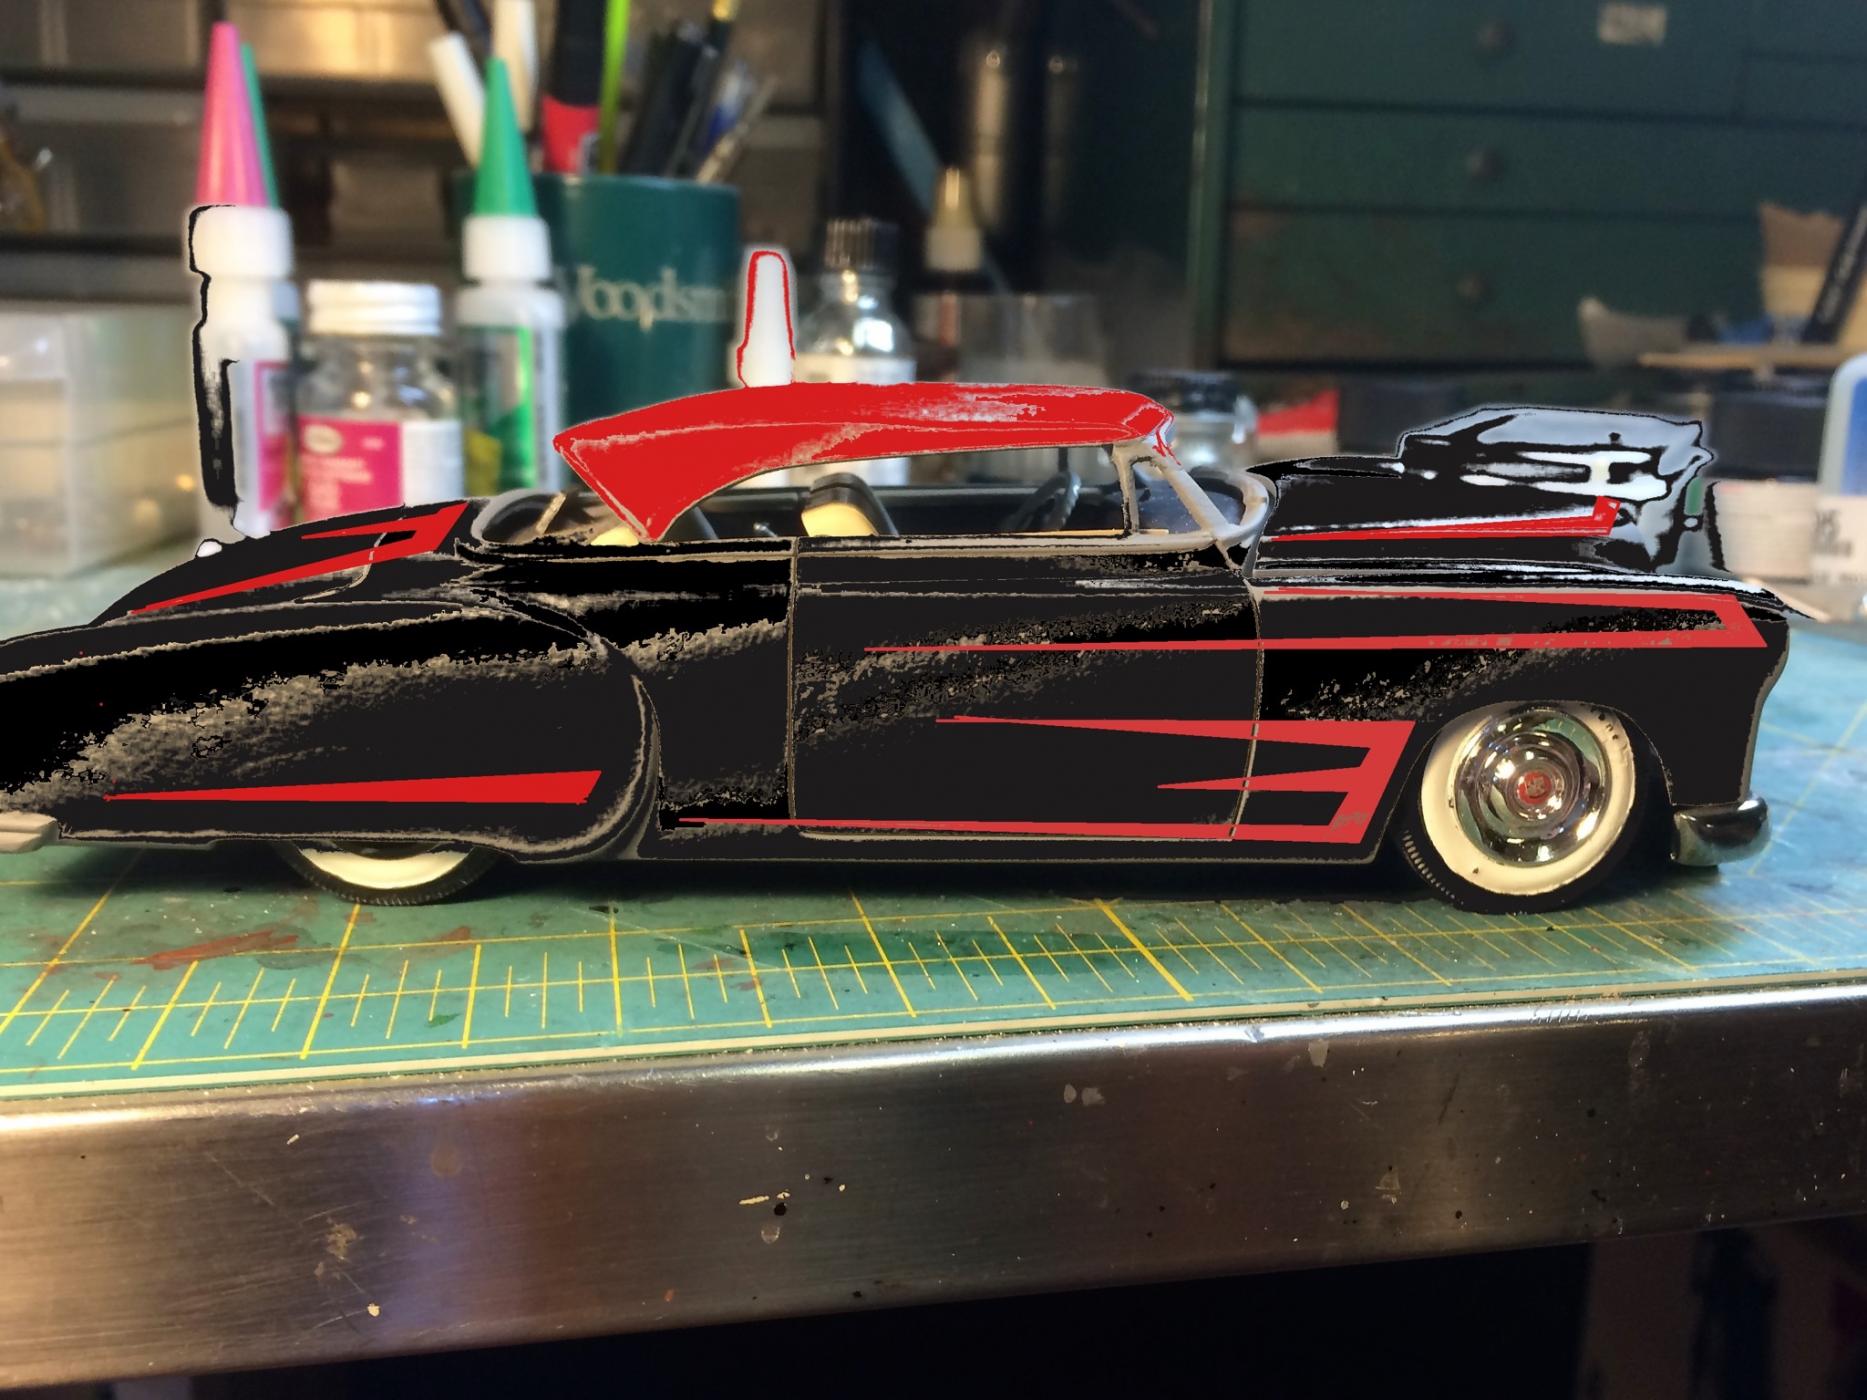
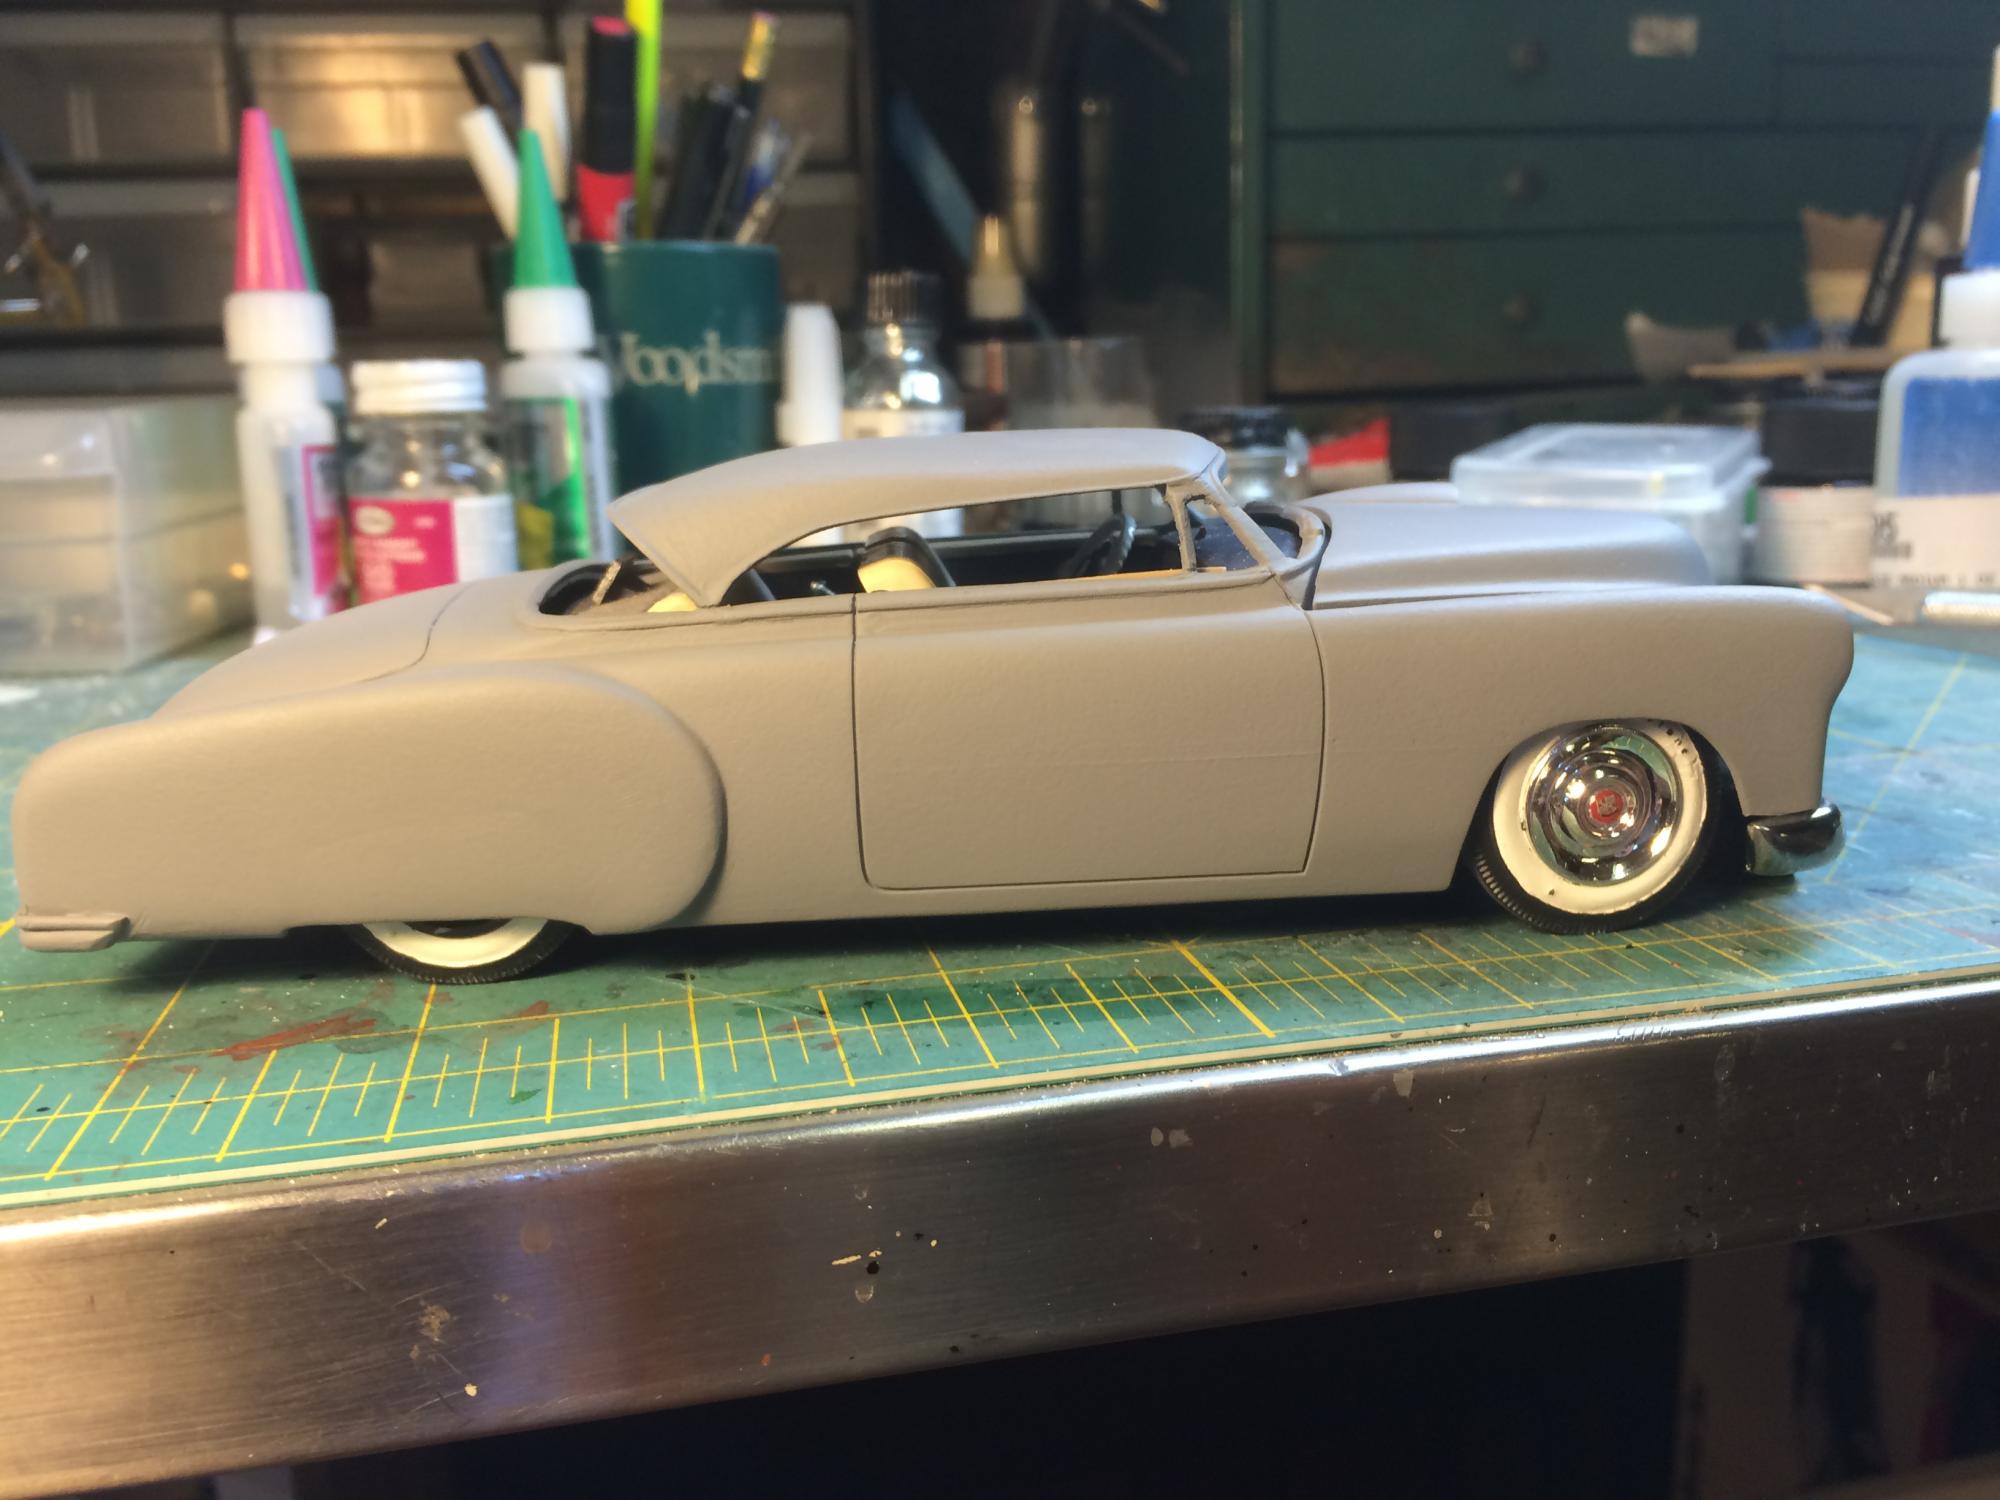
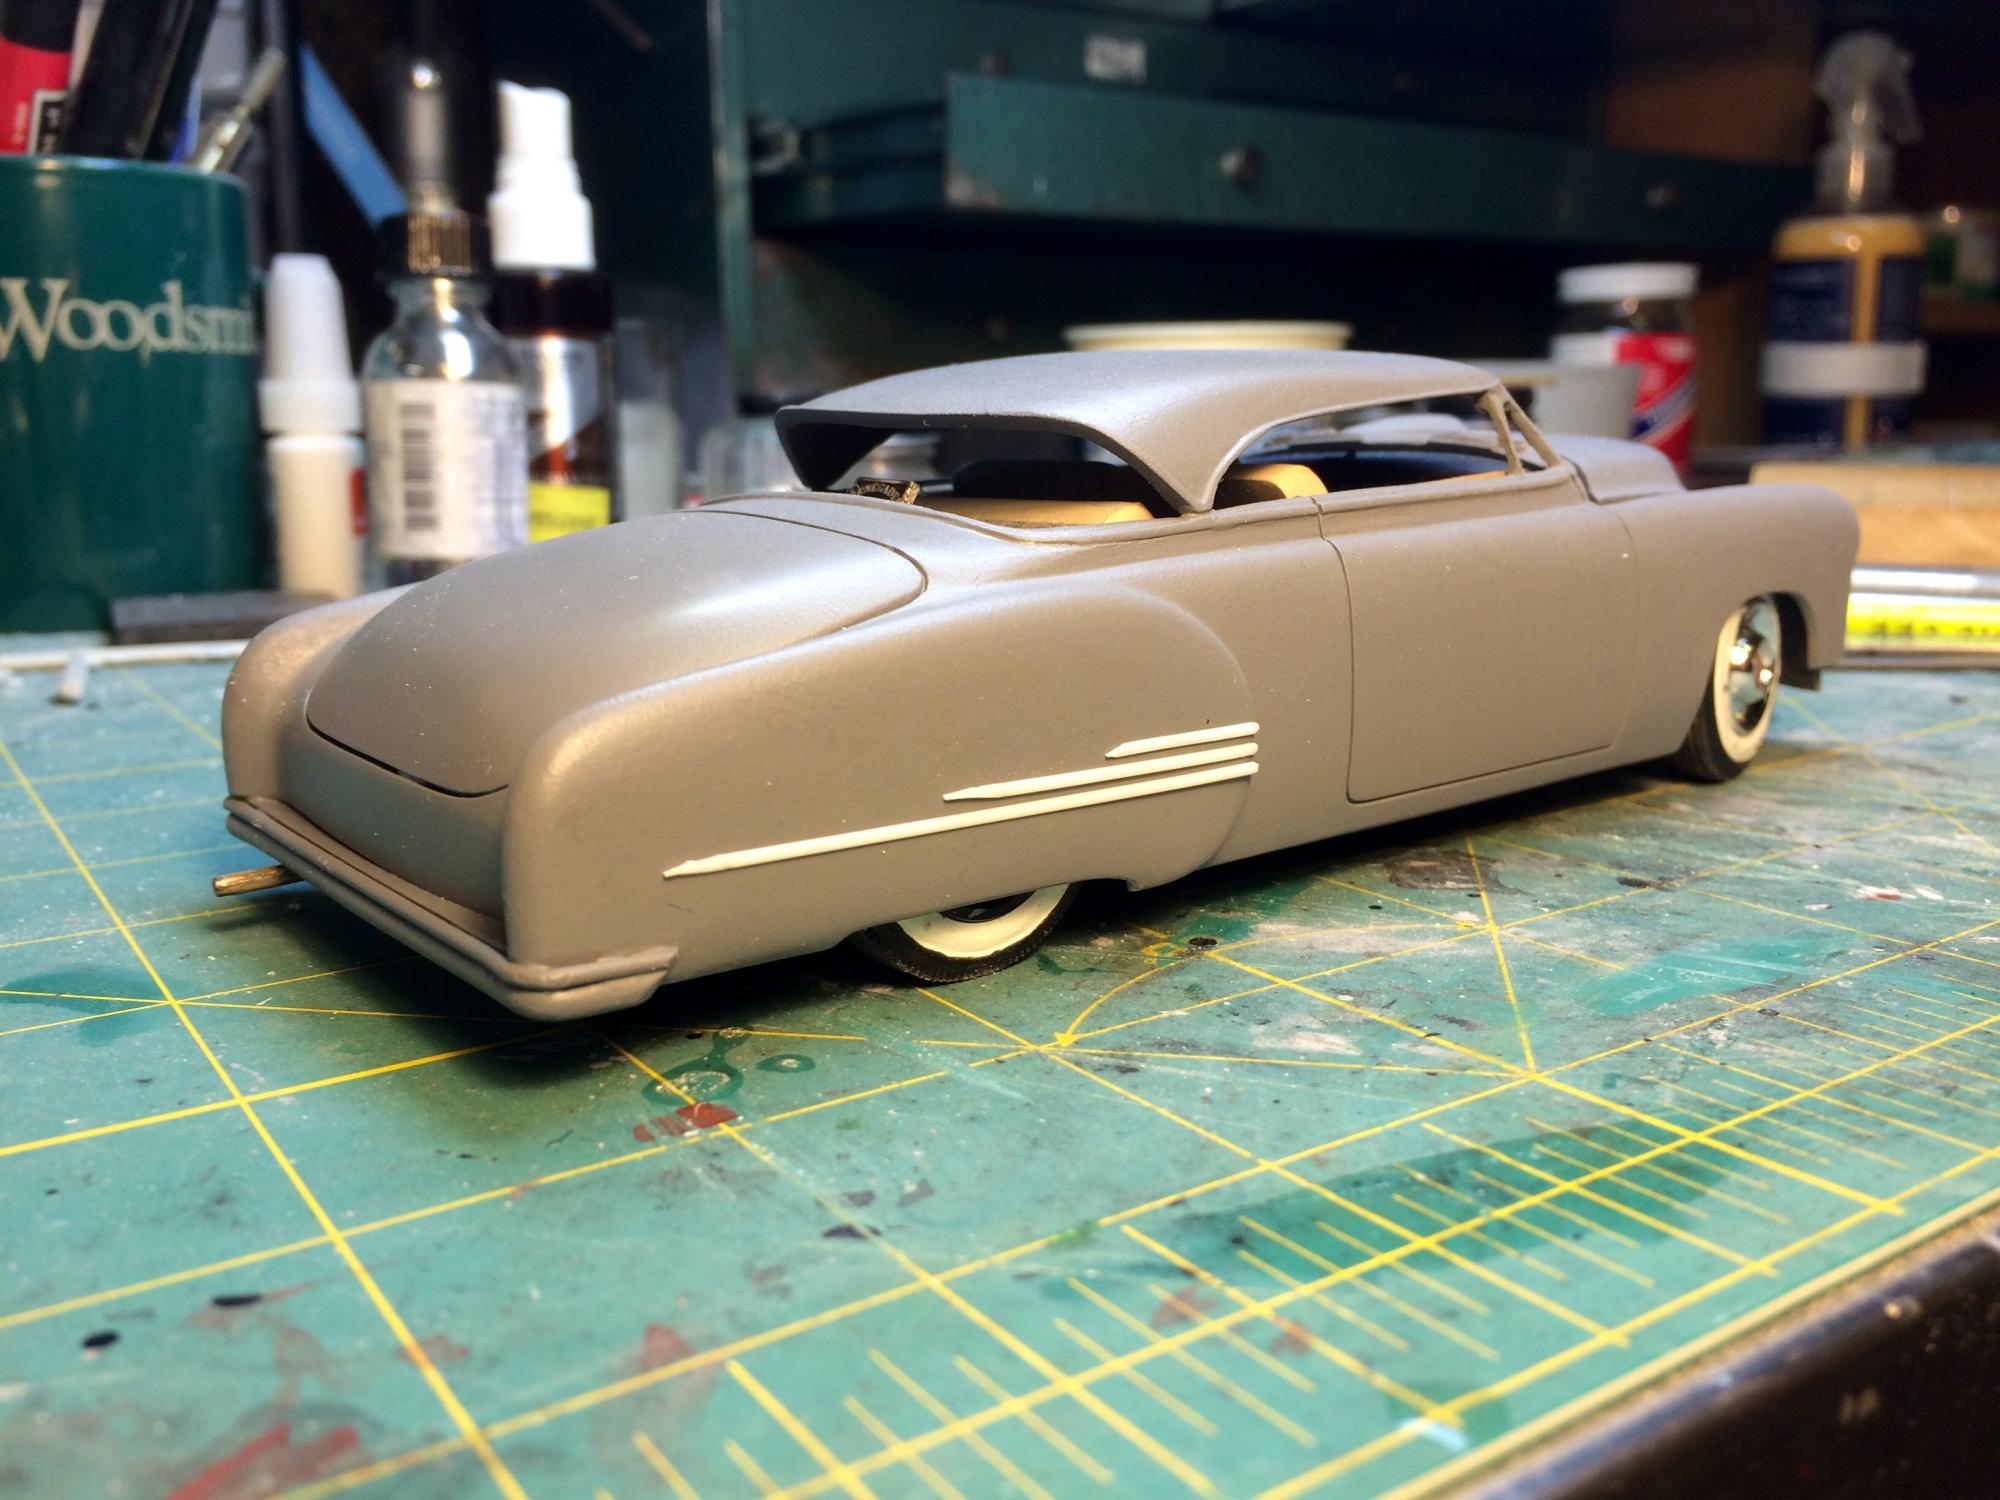
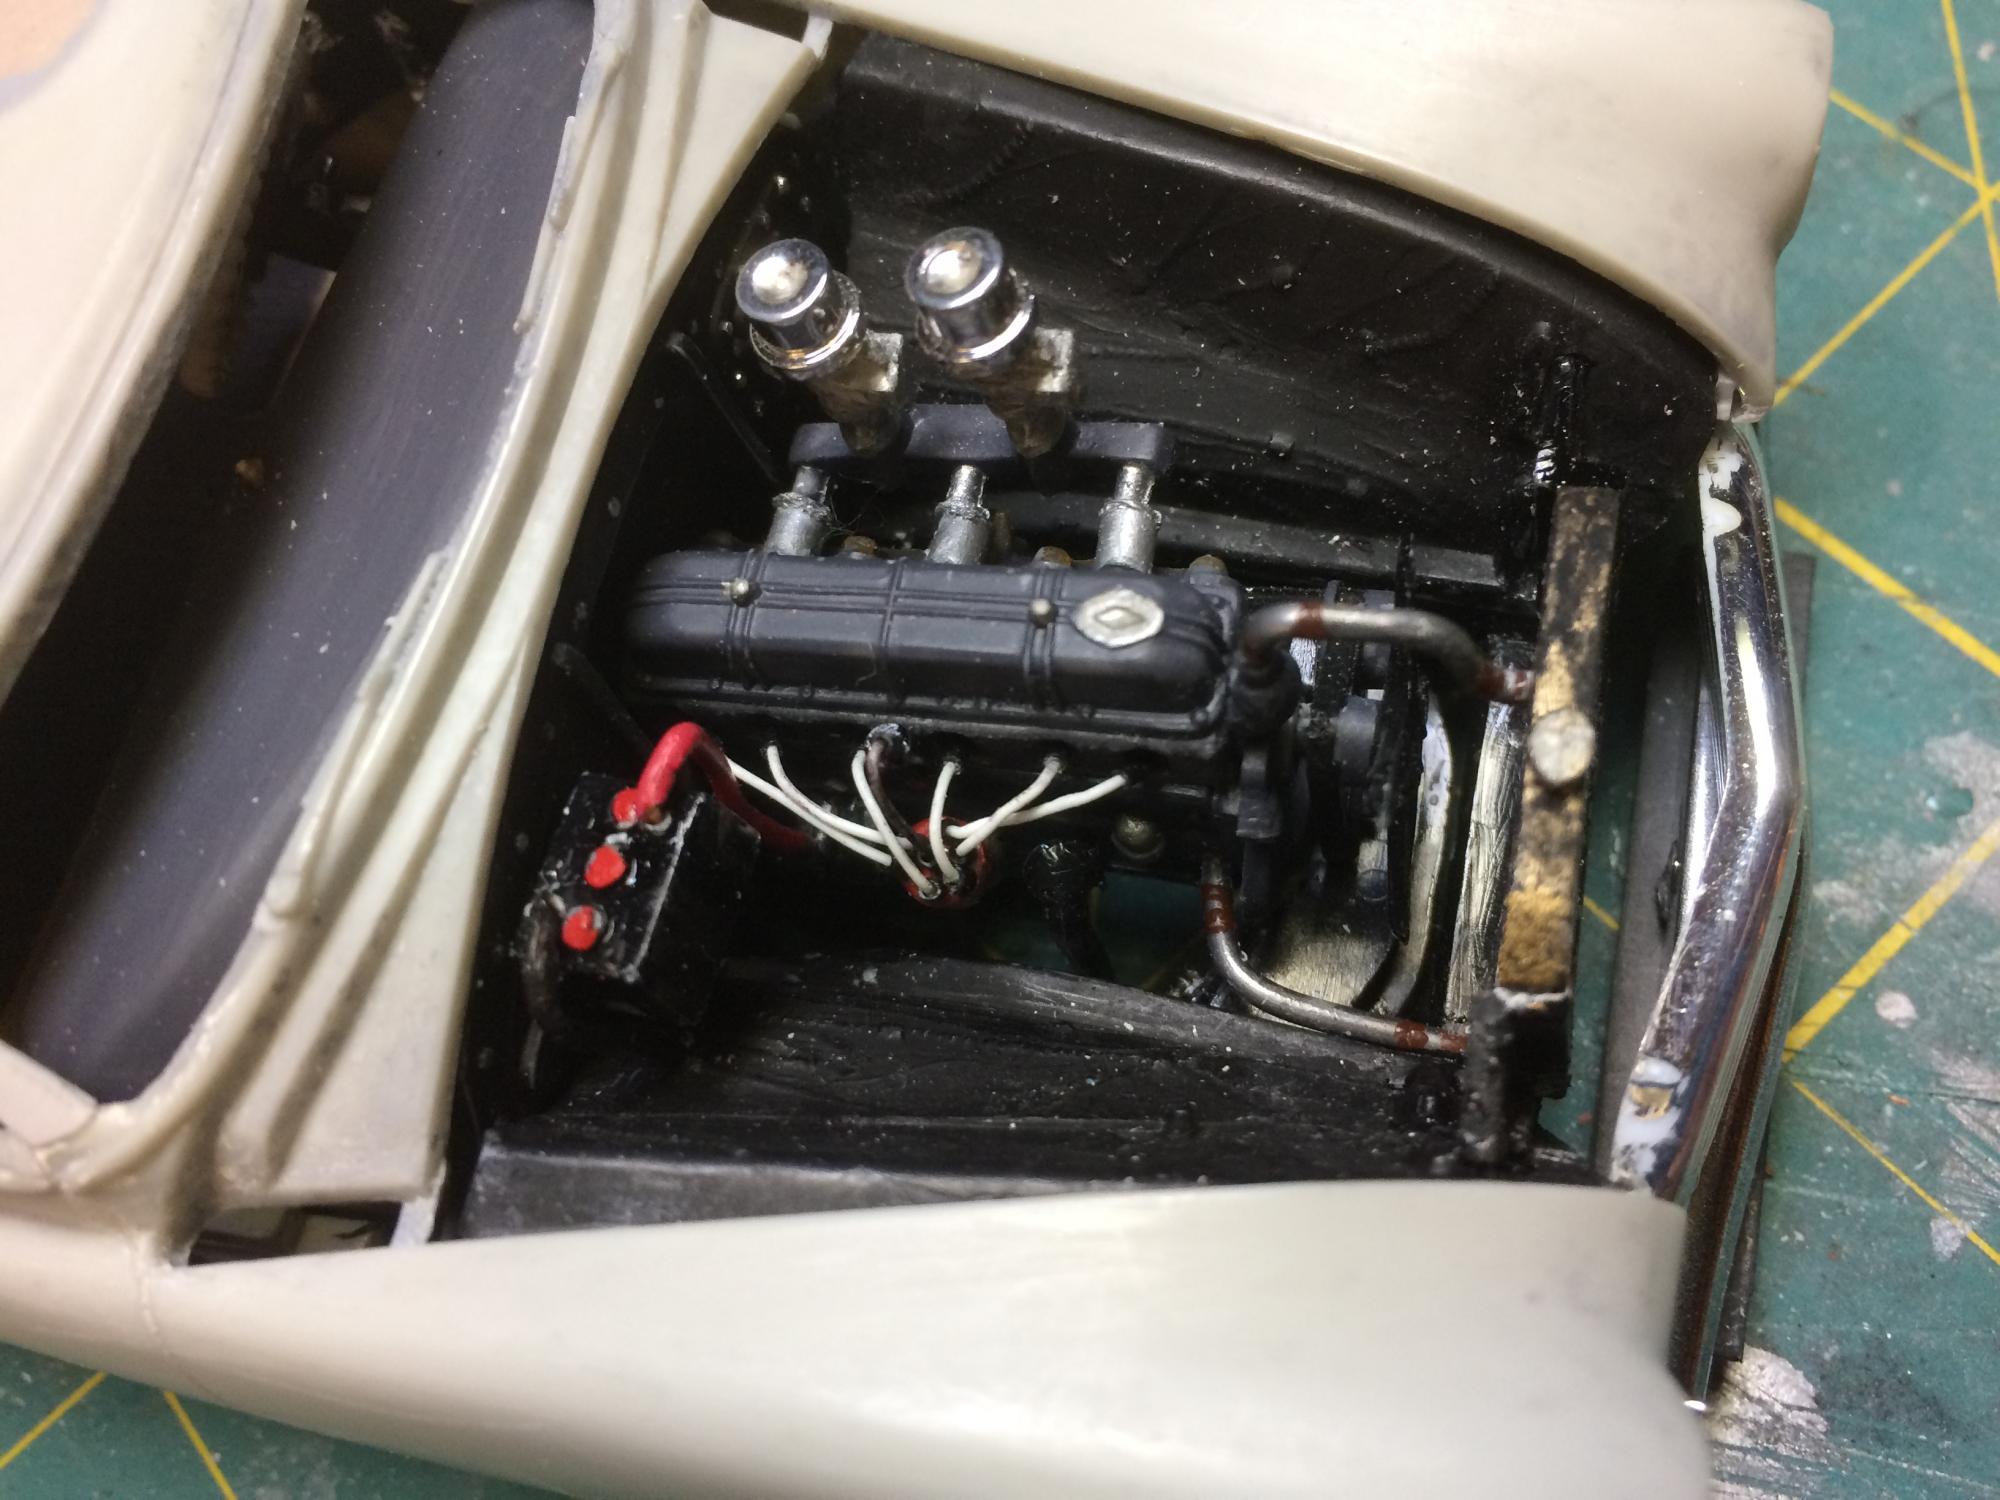
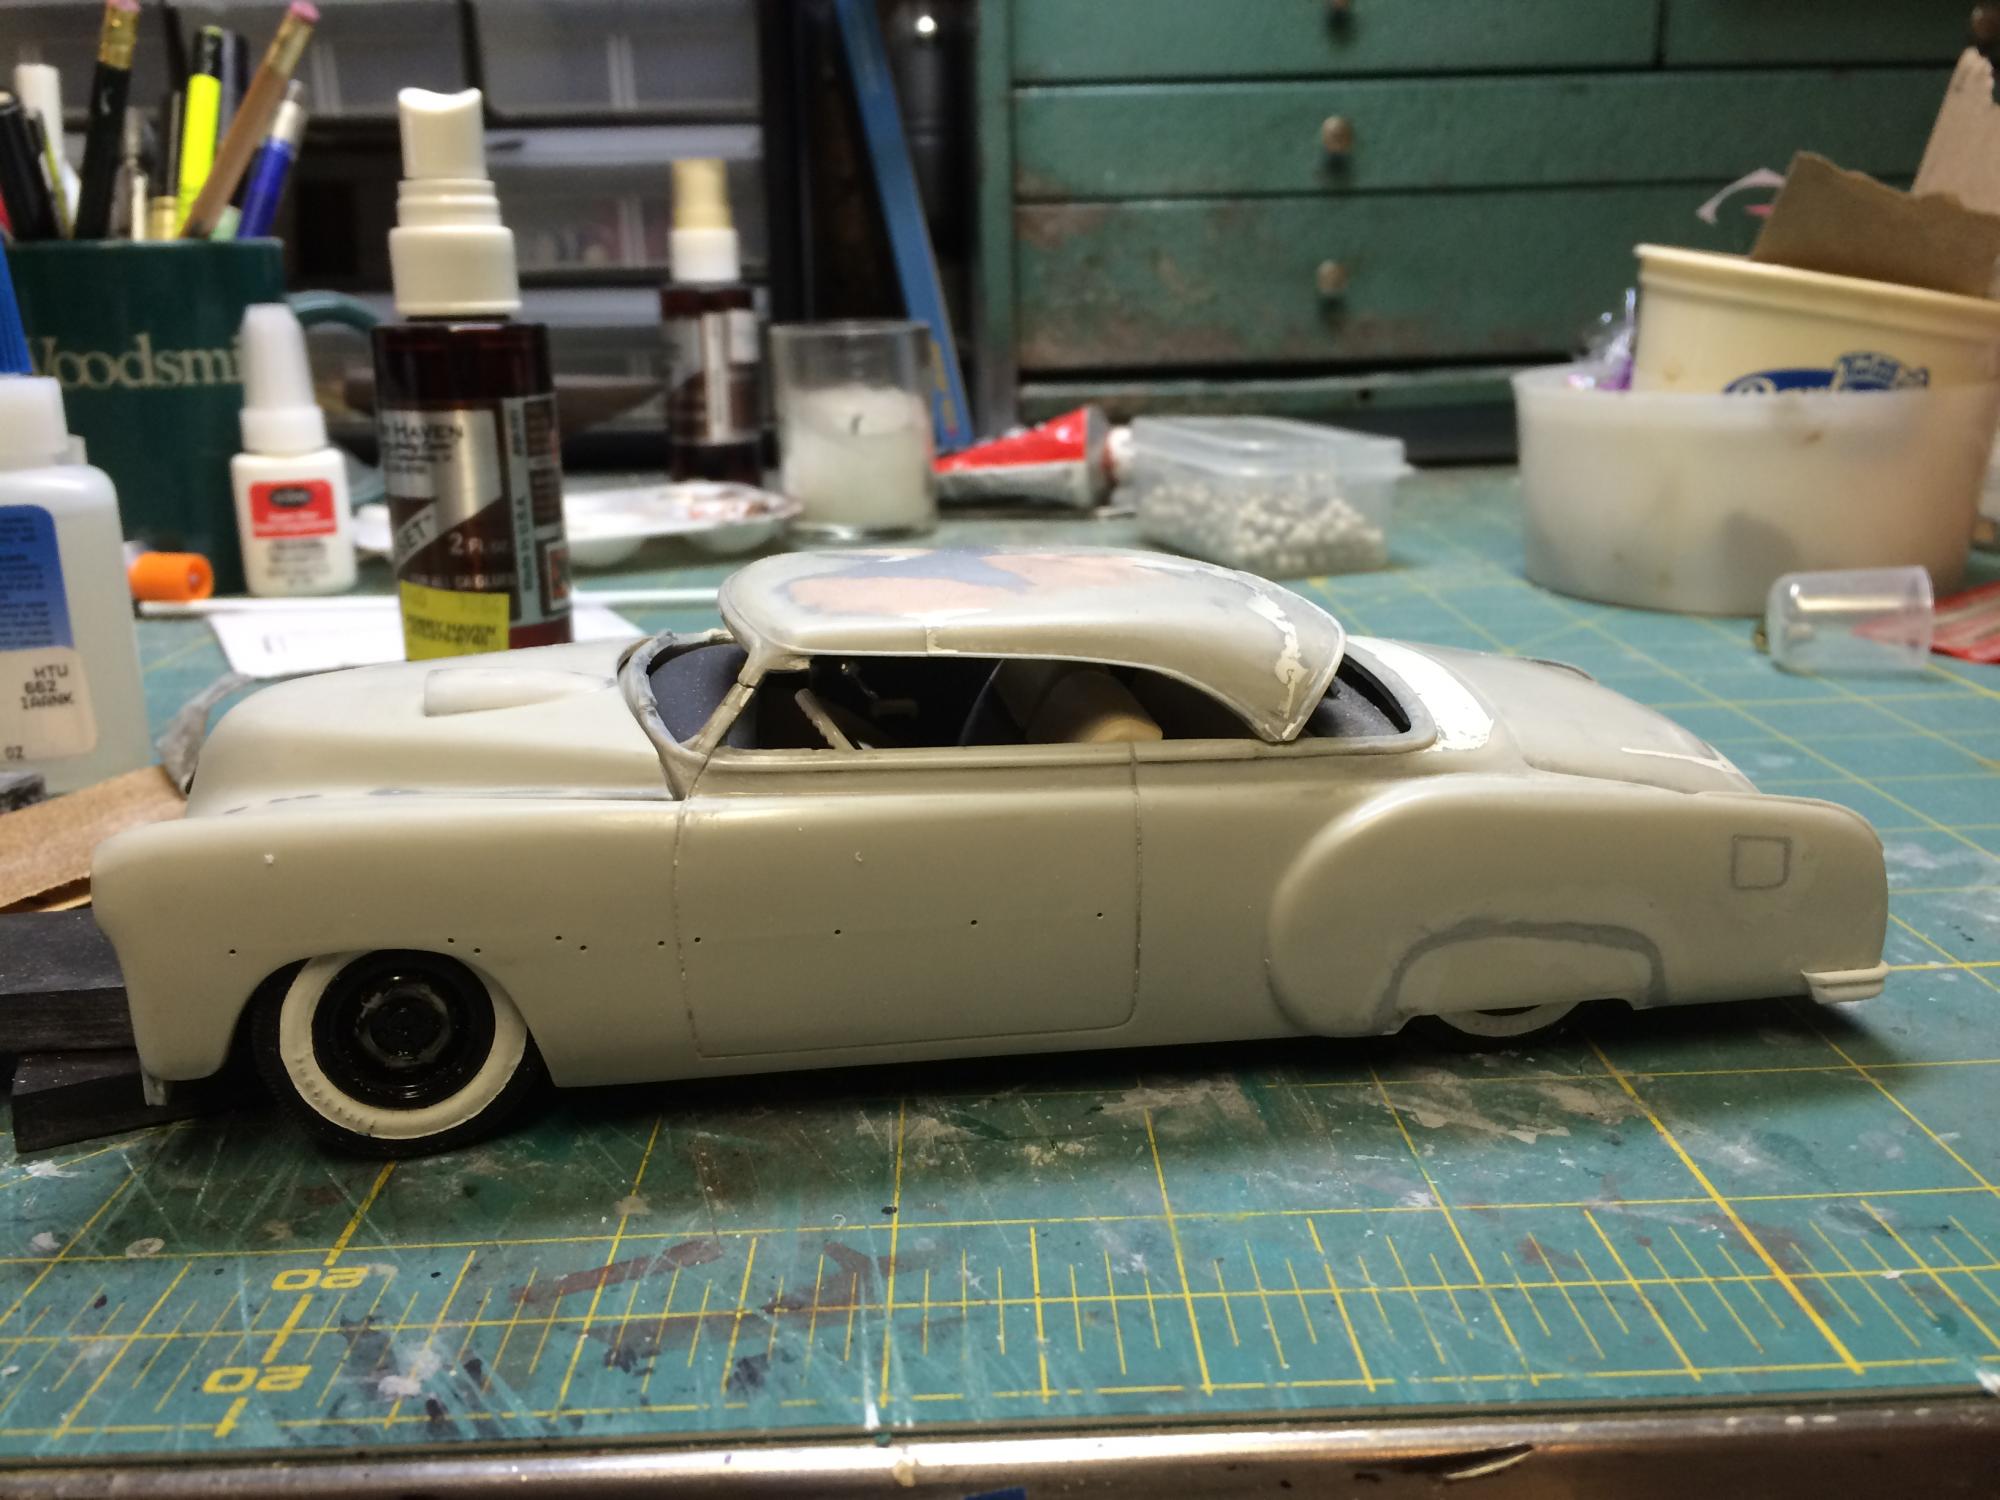
Thanks for the kind comments. I've been pecking away. I decided to wire the engine but the firing order is probably wrong, I'm pretty sure the battery is wired with - ground though. Got the front bumper in Alcad. The pins showing are just alignment devices and will be hidden when done. The Dagmars still need some attention (see earlier pic). To me they need more bulk and after the headlights are in they may be too much, we'll see. At this point I'm liking the Sombreros but flippers are in the running.
-
I need to remove a decal from a tissue and balsa wood airplane. The model was painted with dope before acrylic paints were applied, then the decals were applied. Any ideas will be greatly appreciated.
-
Nice!!!
-
Love it. Looks like your getting lots of tips
-
What did you see on the road today?
slownlow replied to Harry P.'s topic in General Automotive Talk (Trucks and Cars)
Not exactly on the road but I'll bet it soon will be.
-
I'm beginning to play with Dagmar ideas and kind of like this setup. Any ideas, comments?
-
Doing well but you know how it is. As you reach 70 it's seems to be just patch, patch, patch. How's everything going with you and the gang at KKIM?
-
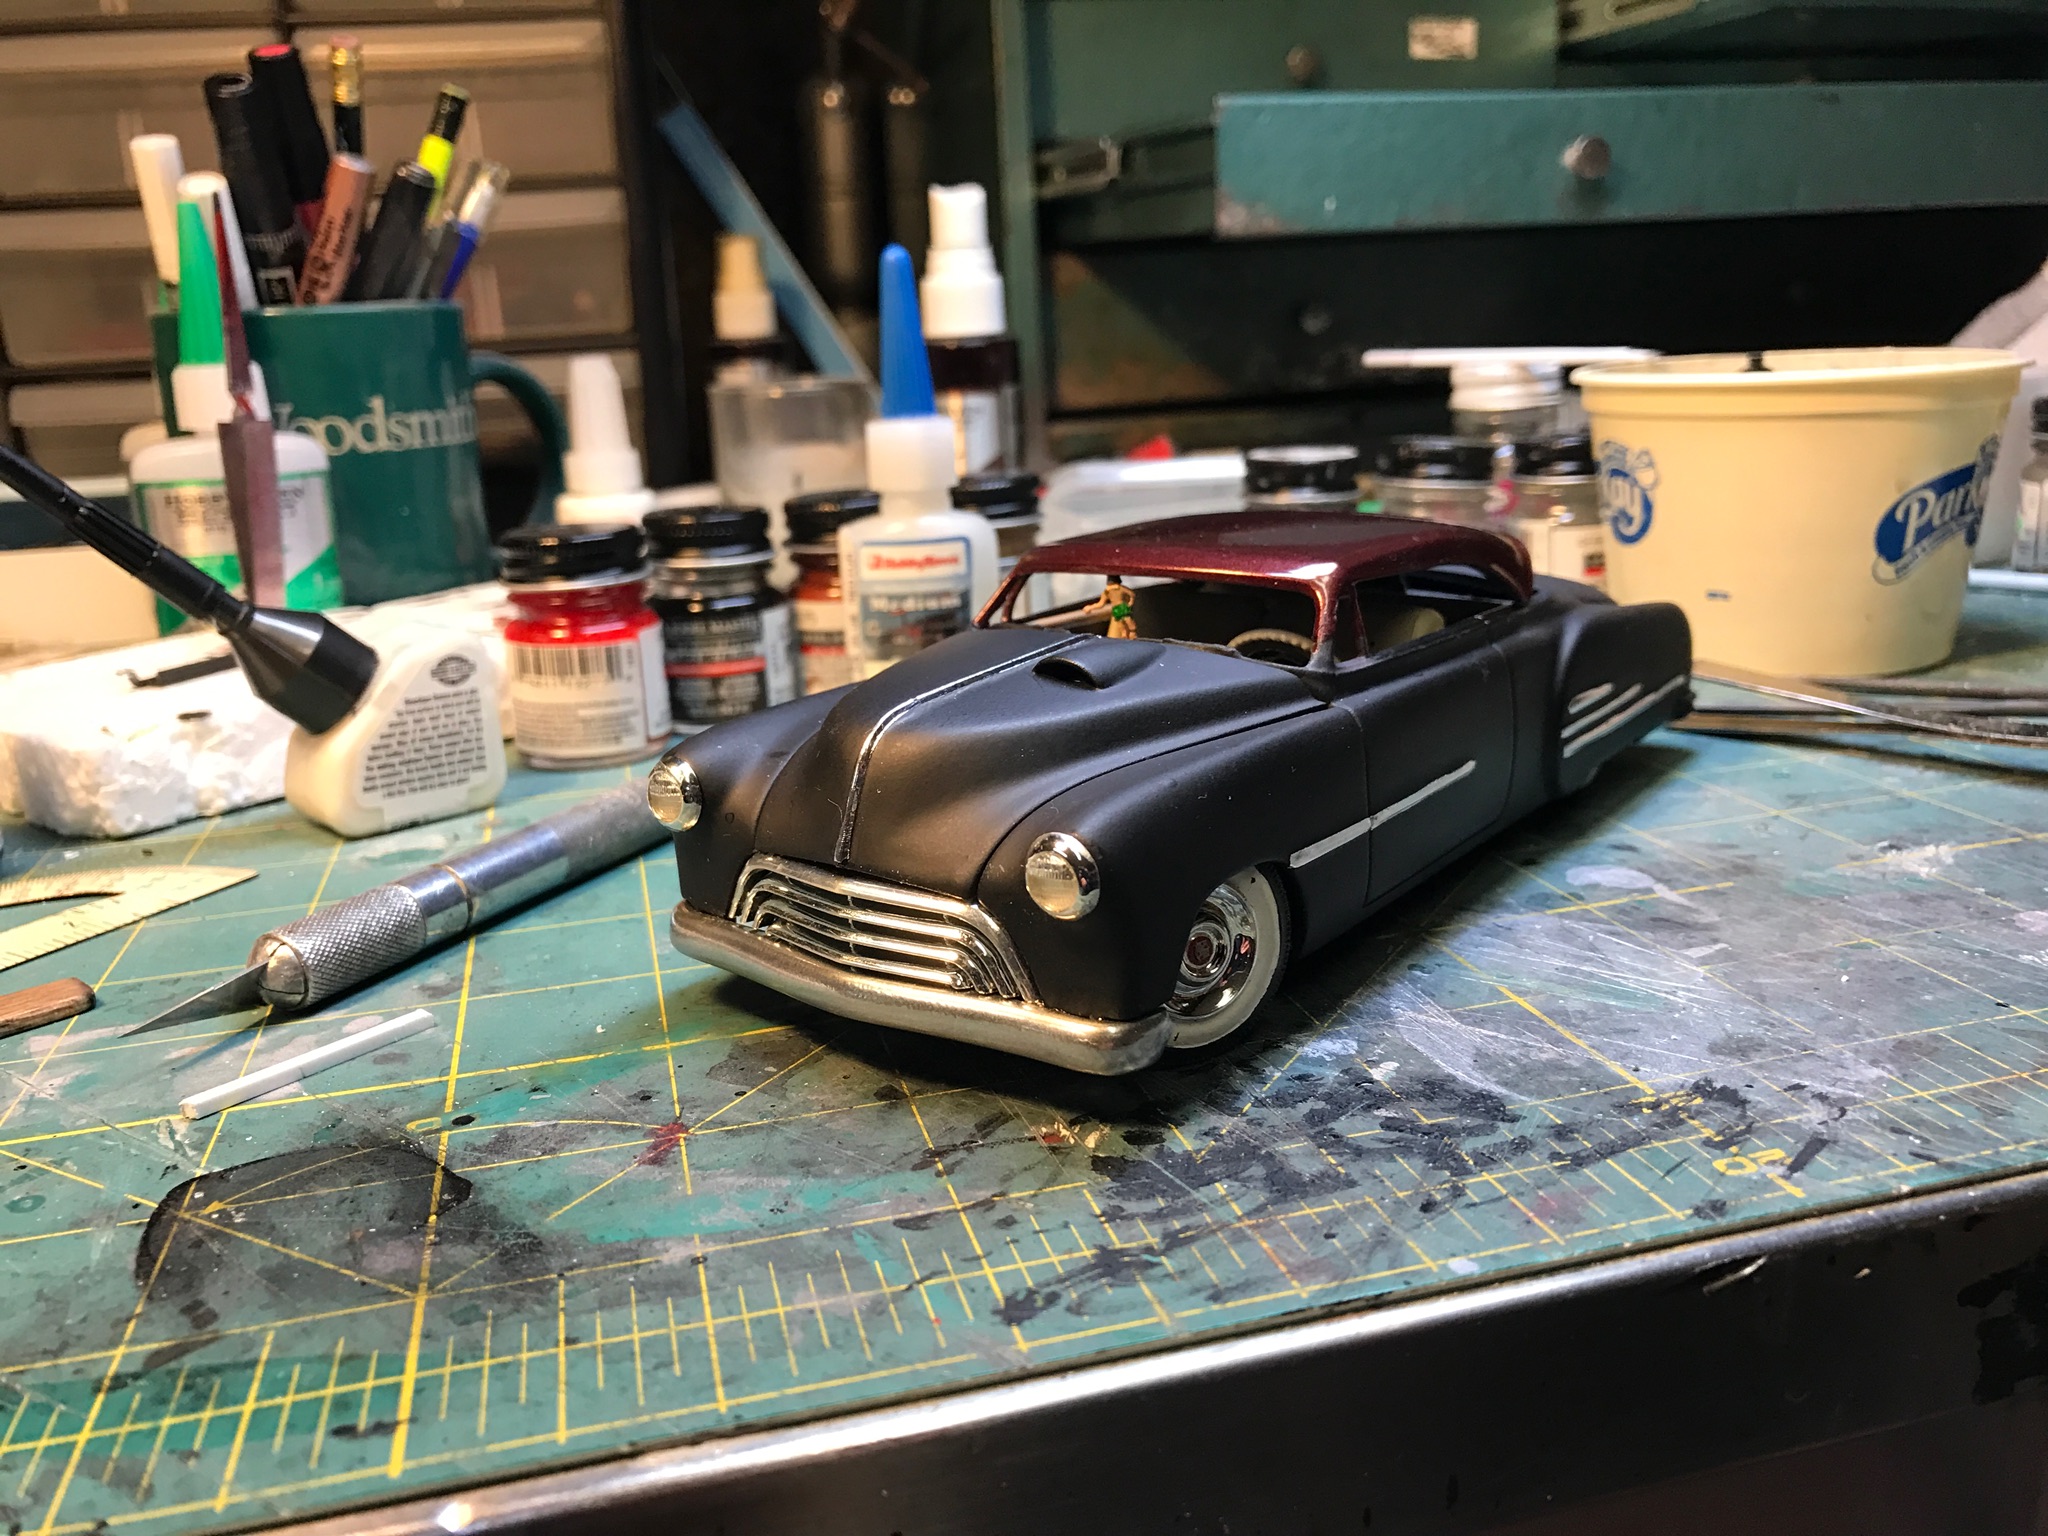
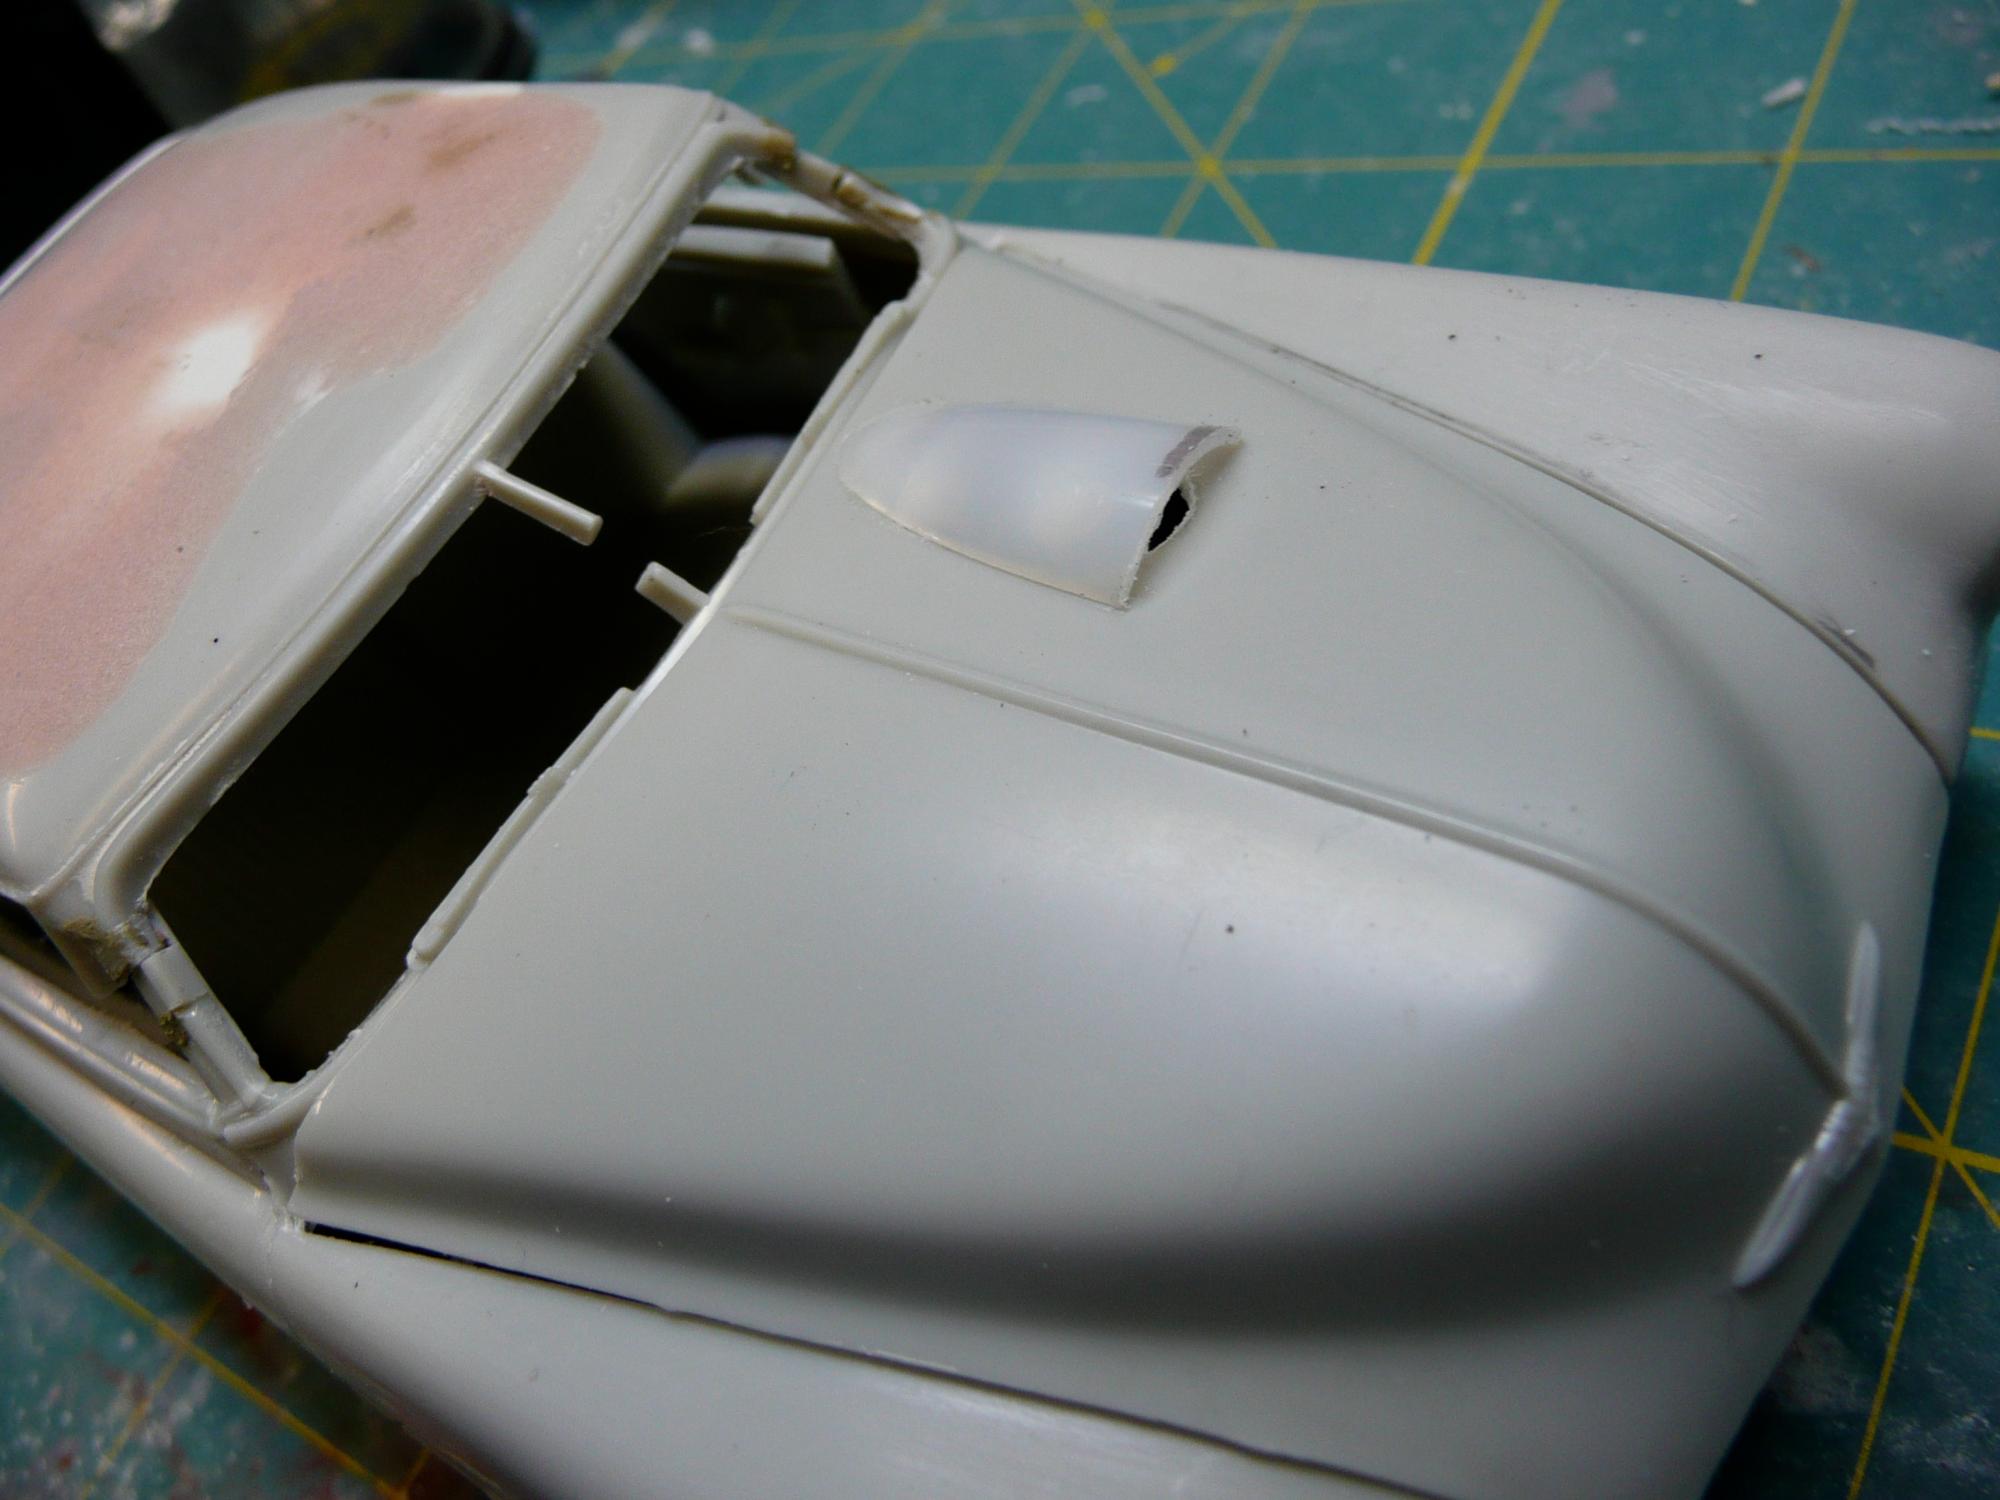
This is the start of the front bumper. It's 4 pieces of 1/8 square stock shaped and bent. Still lots of sanding and polishing.
-
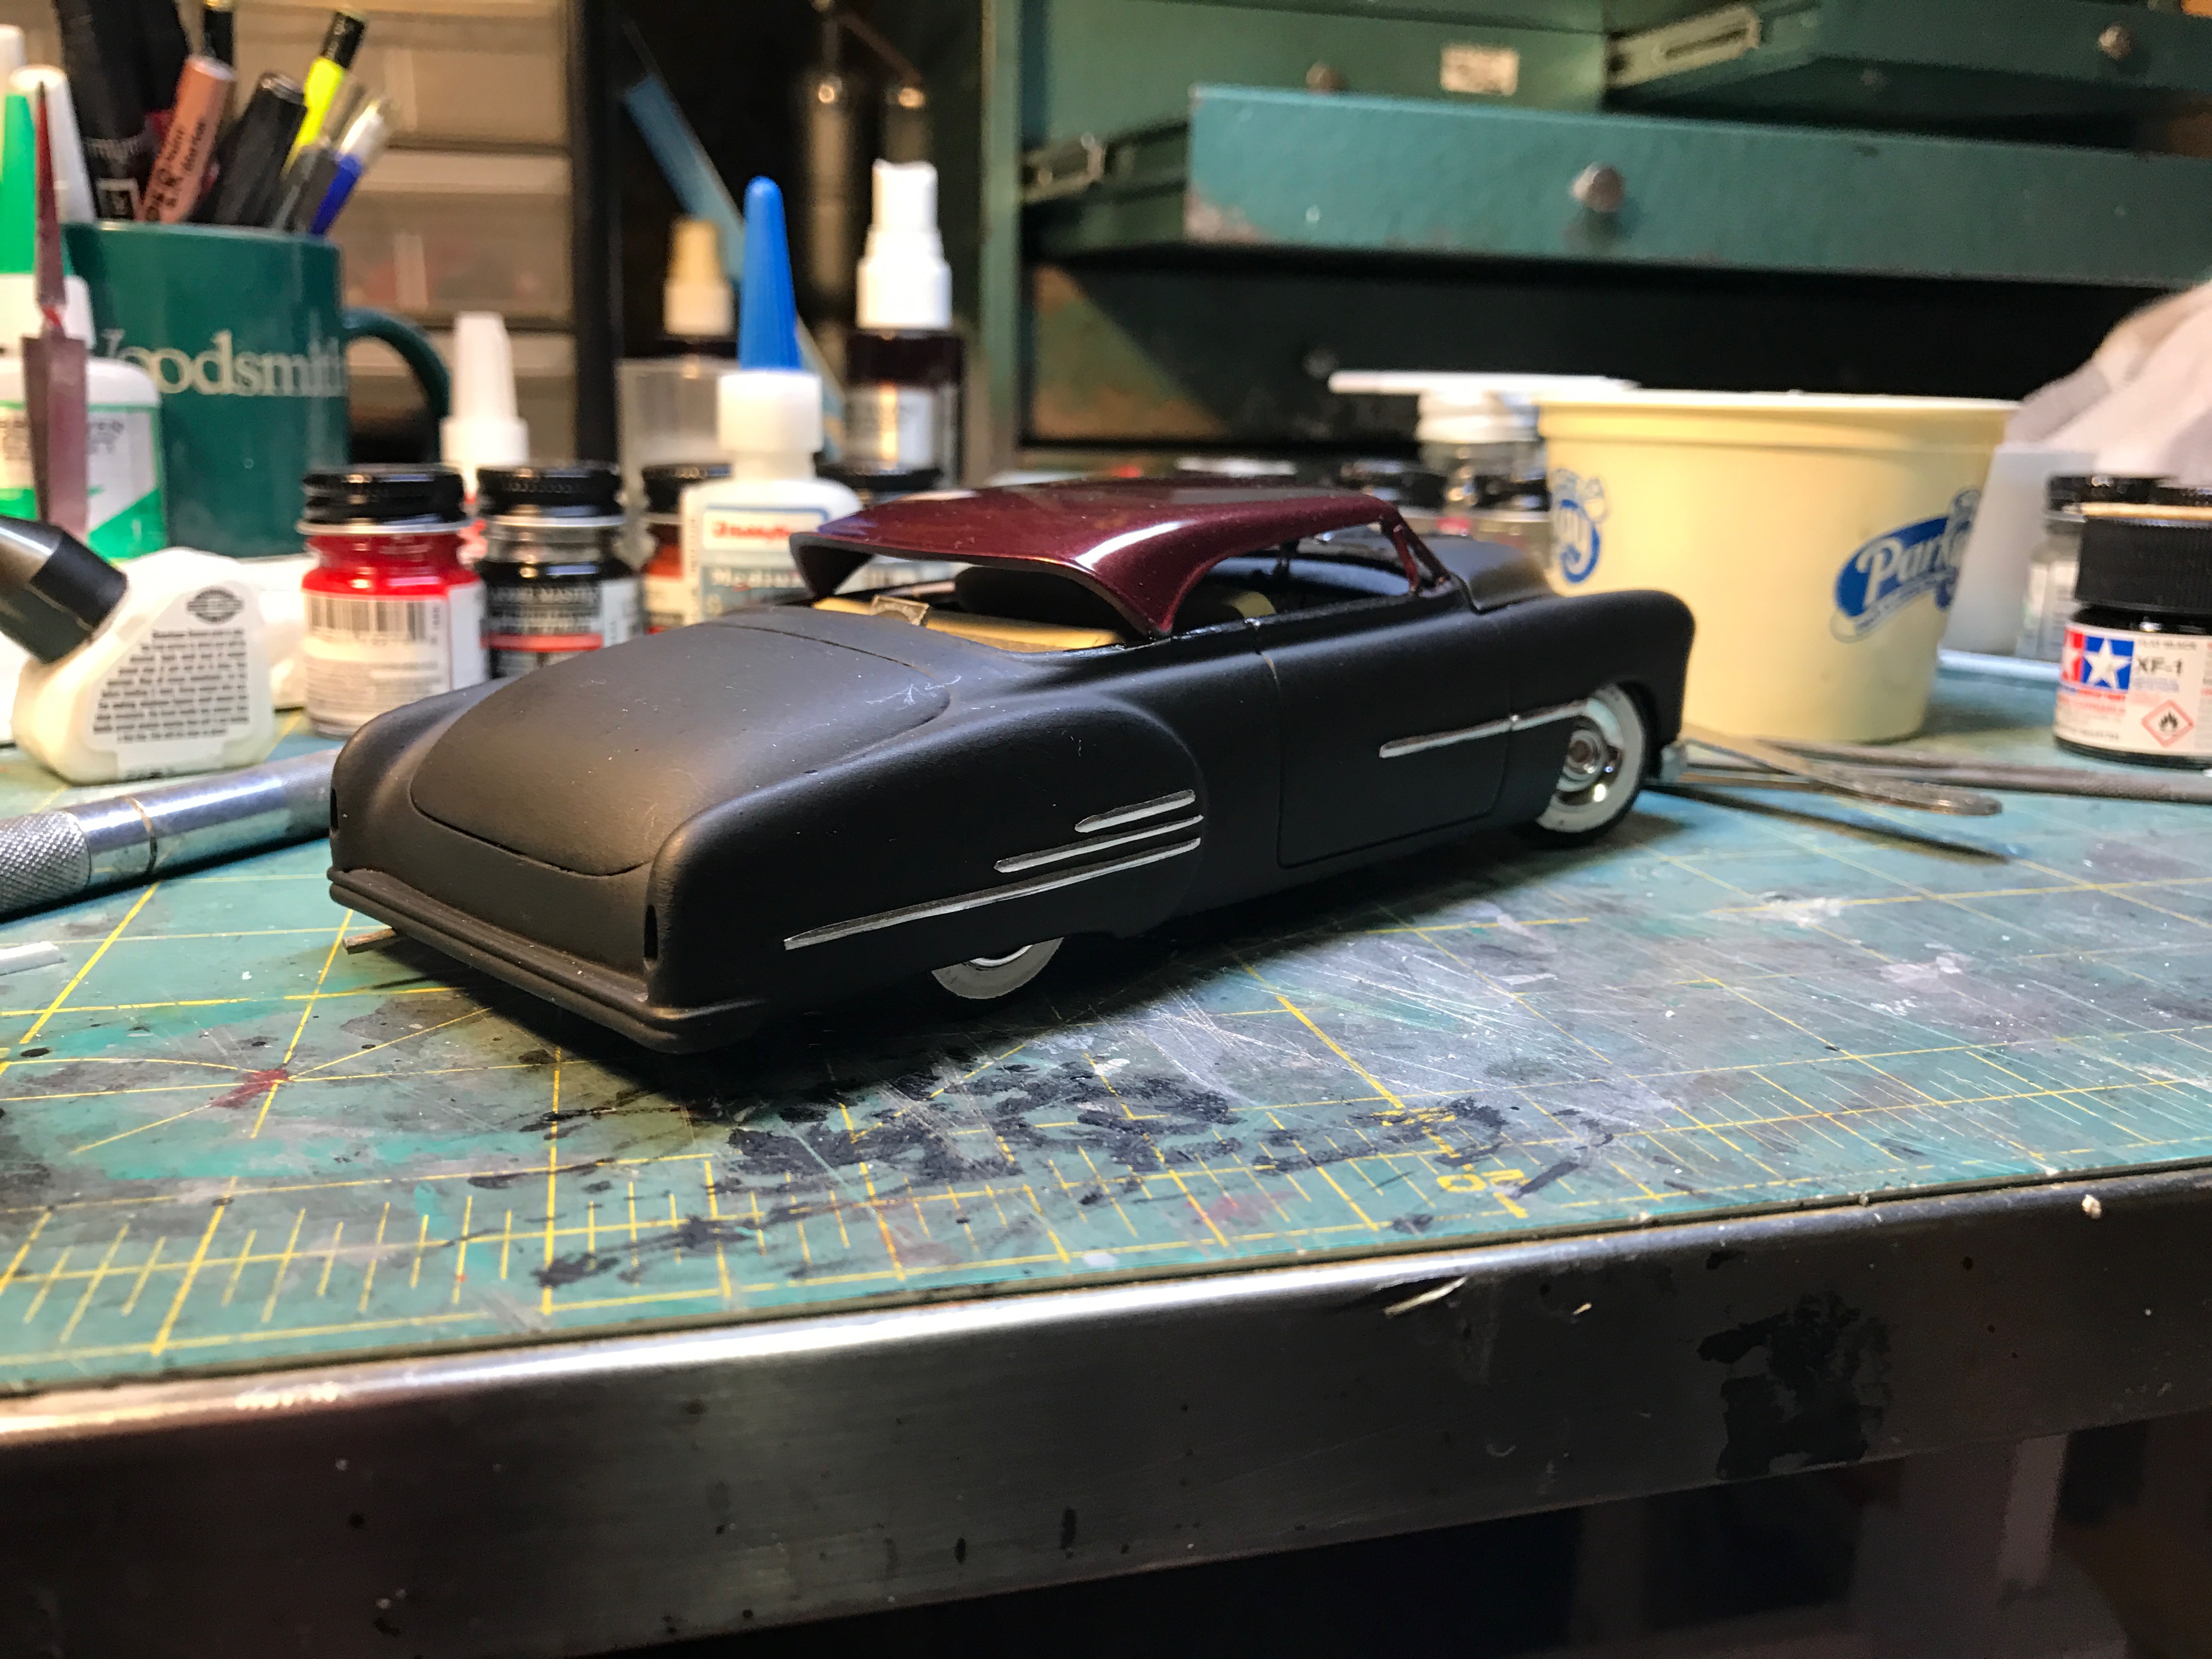
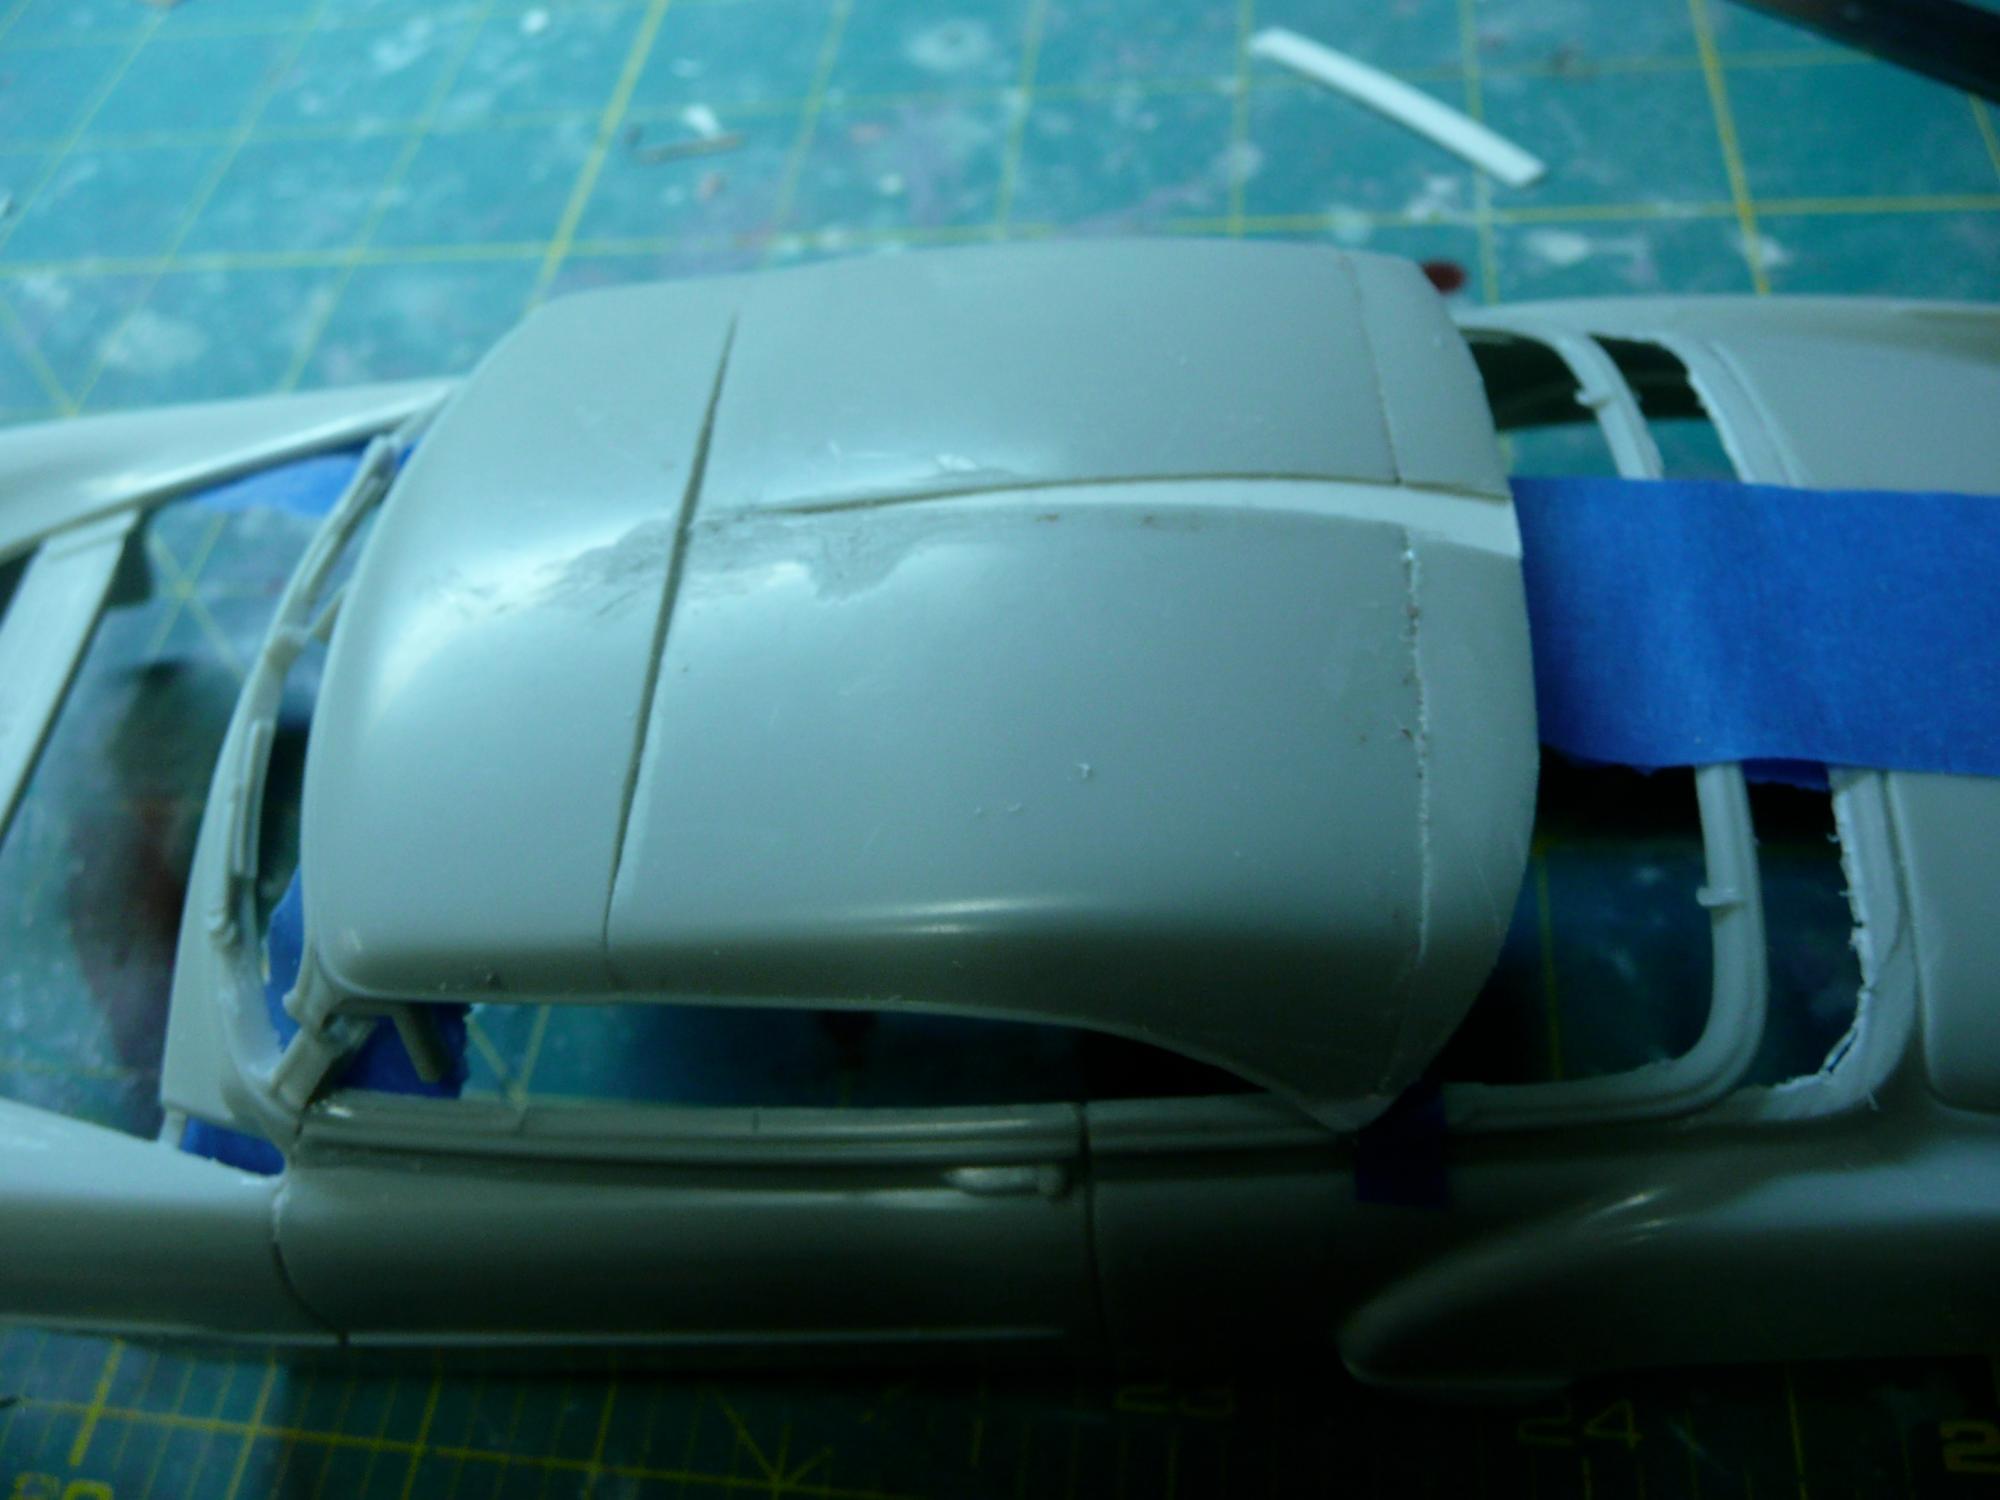
Tom here are a couple of pics of the rear of the roof. I'm not seeing a difference but then it may be time to recalibrate my eyes. The curve apparent in the top down photo may be creating an illusion when viewed at an angle.
-
Here's a little history on what was done before. The top was chopped but shortened to give a more coupish look. The interior tub was shortened the same amount making the area between the trunk and the rear window longer. The trunk was pancaked softening the hump and making the fenders more prominent. The body was channeled so the front inner fender wells were sectioned, the fire wall and radiator shortend, and a scoop for the carb breathers fabricated from a false fingernail.
-
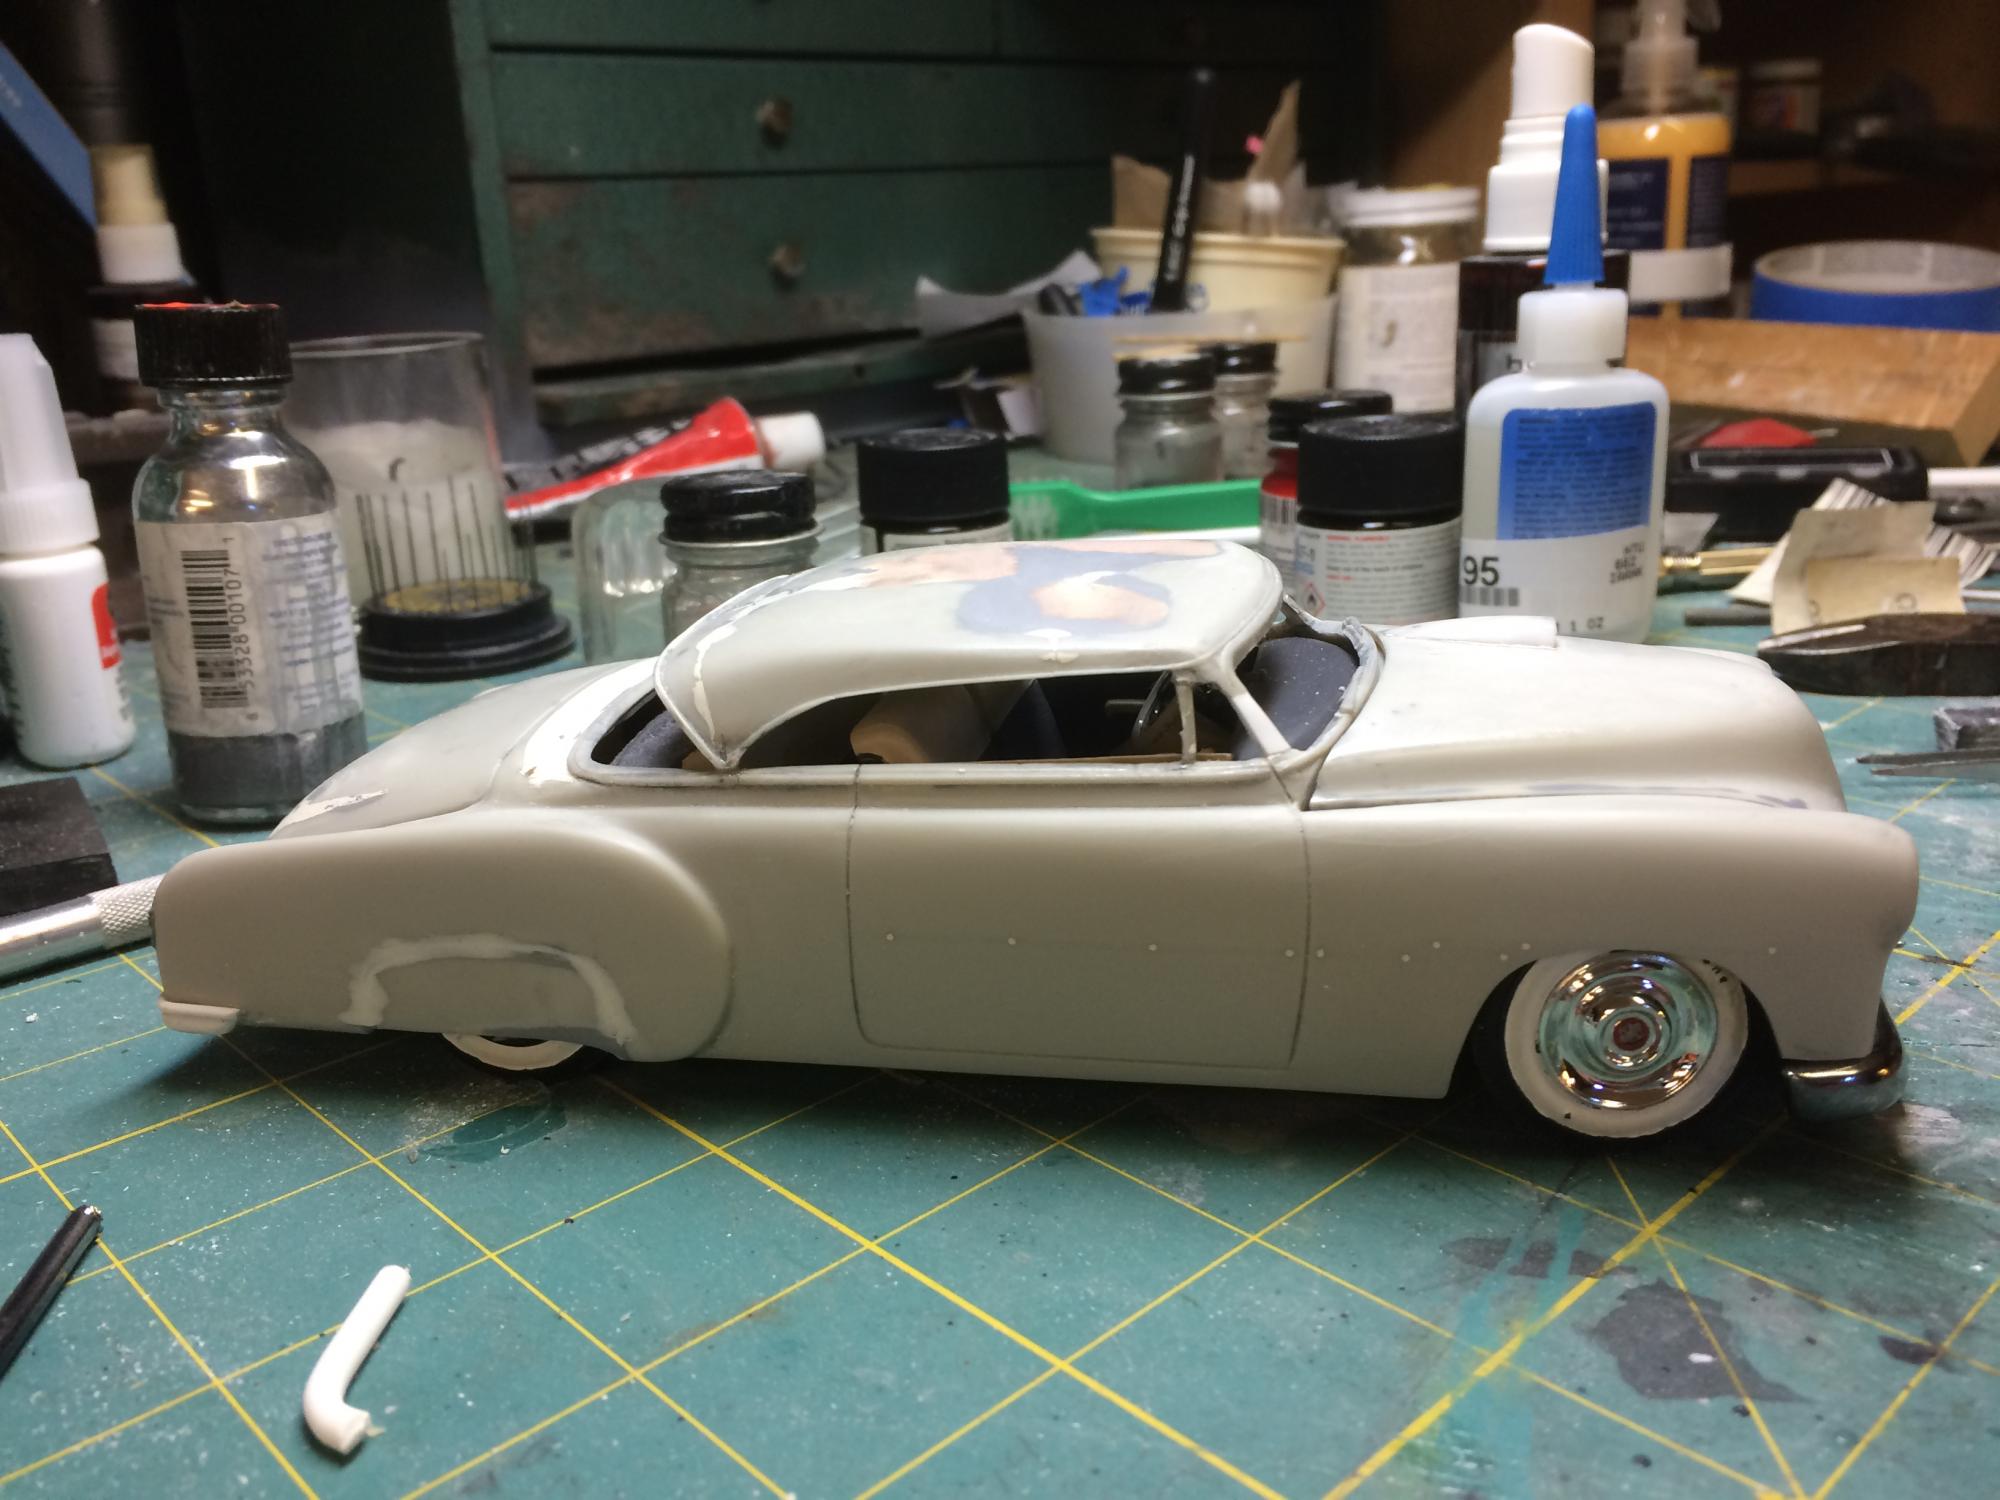
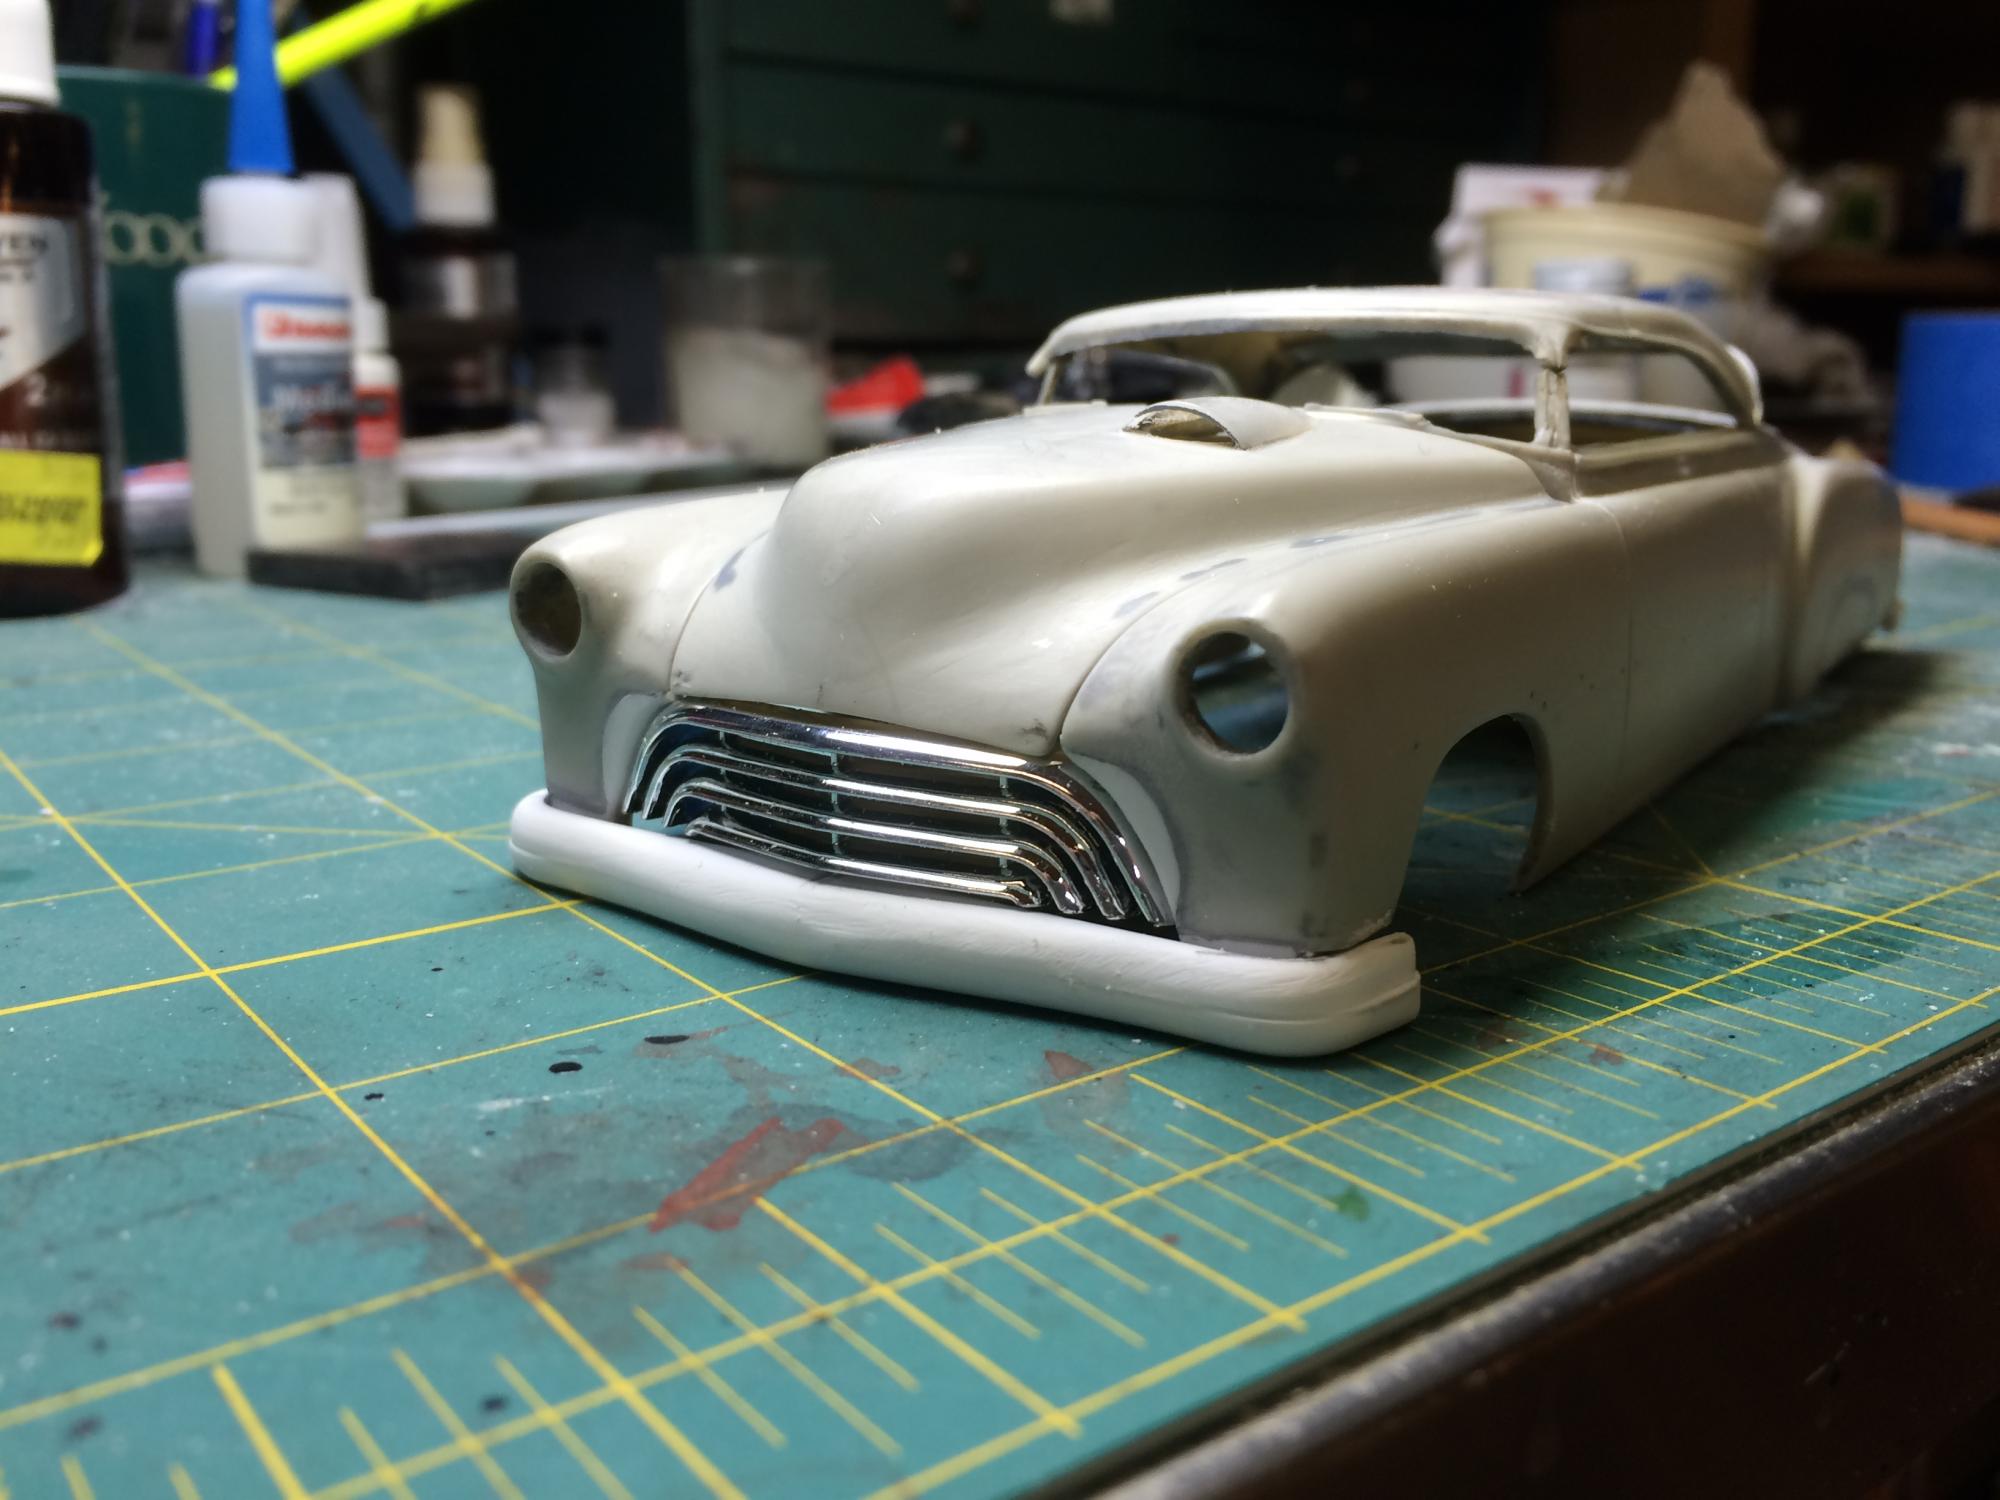
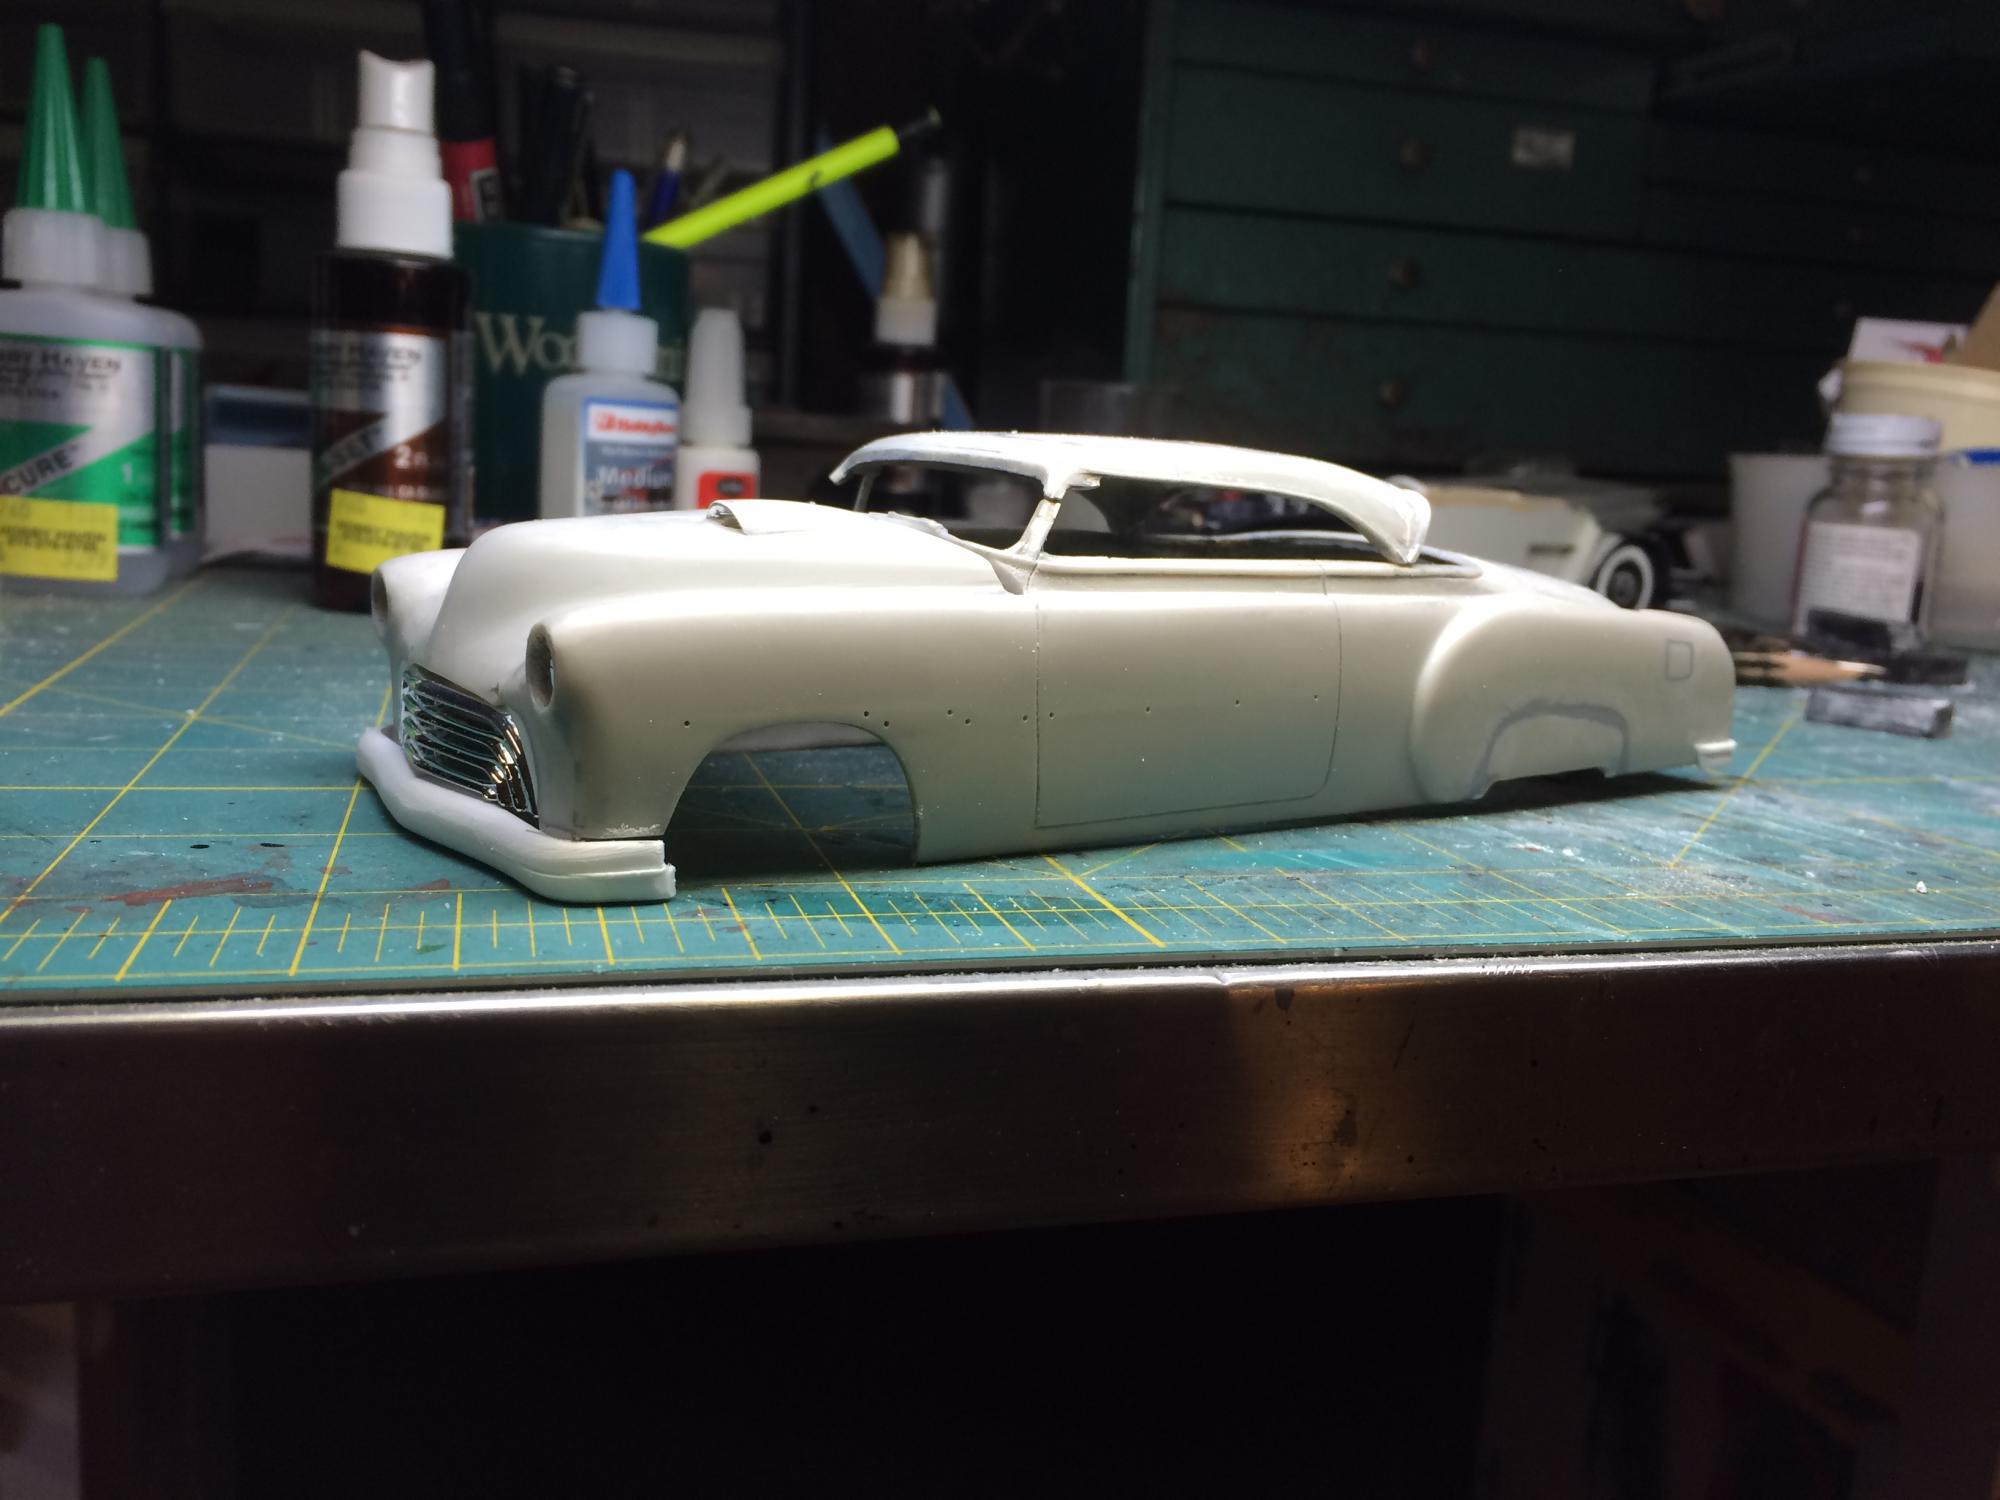
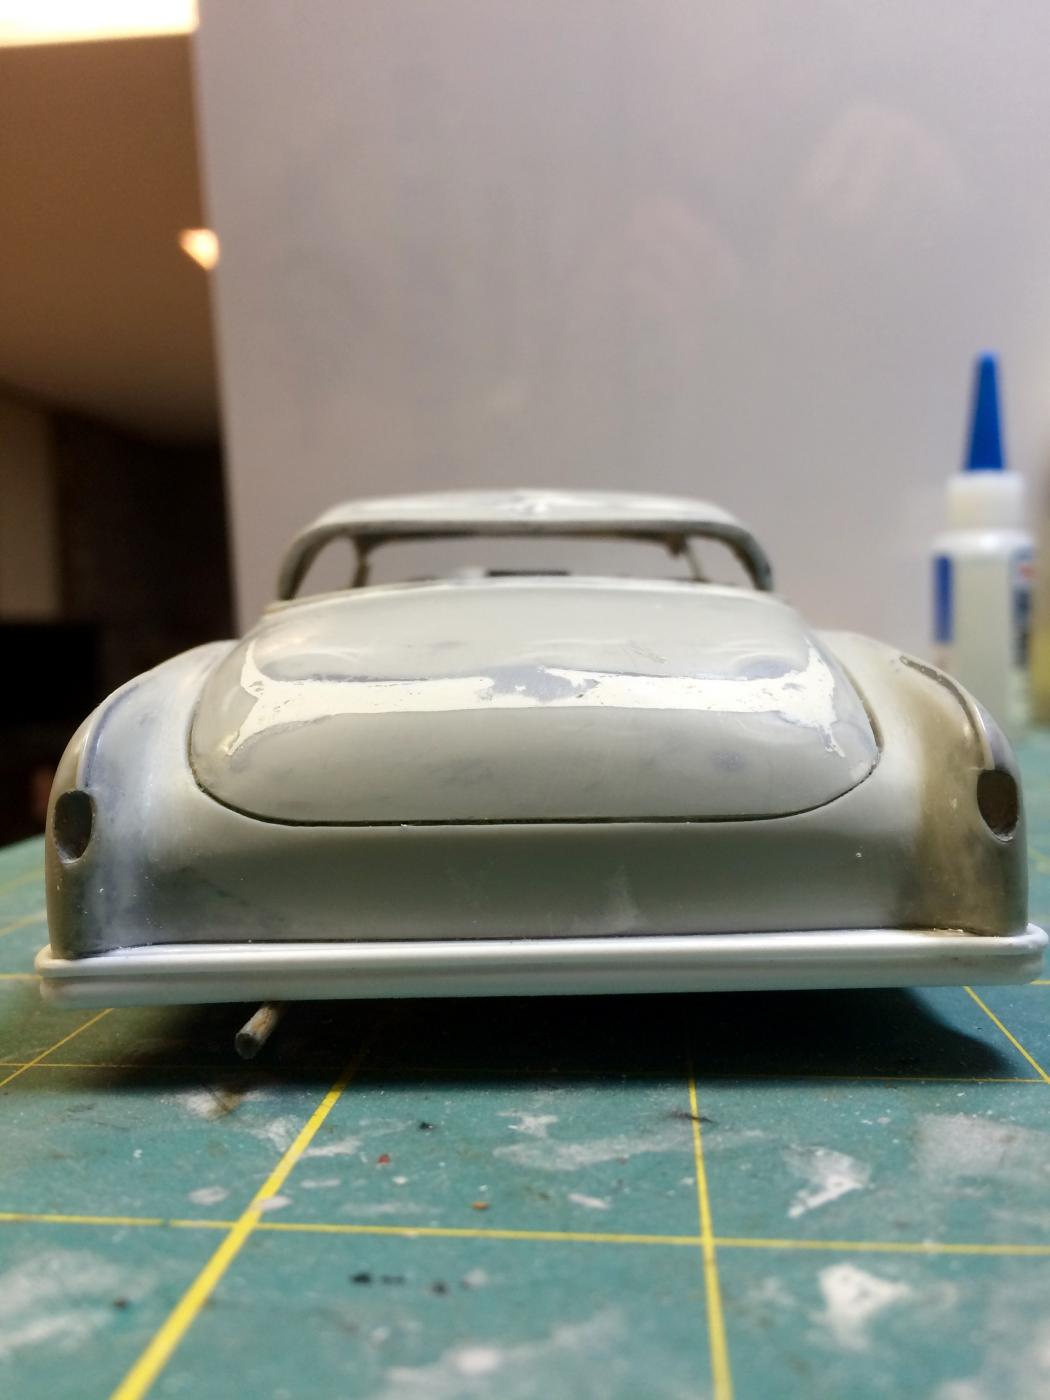
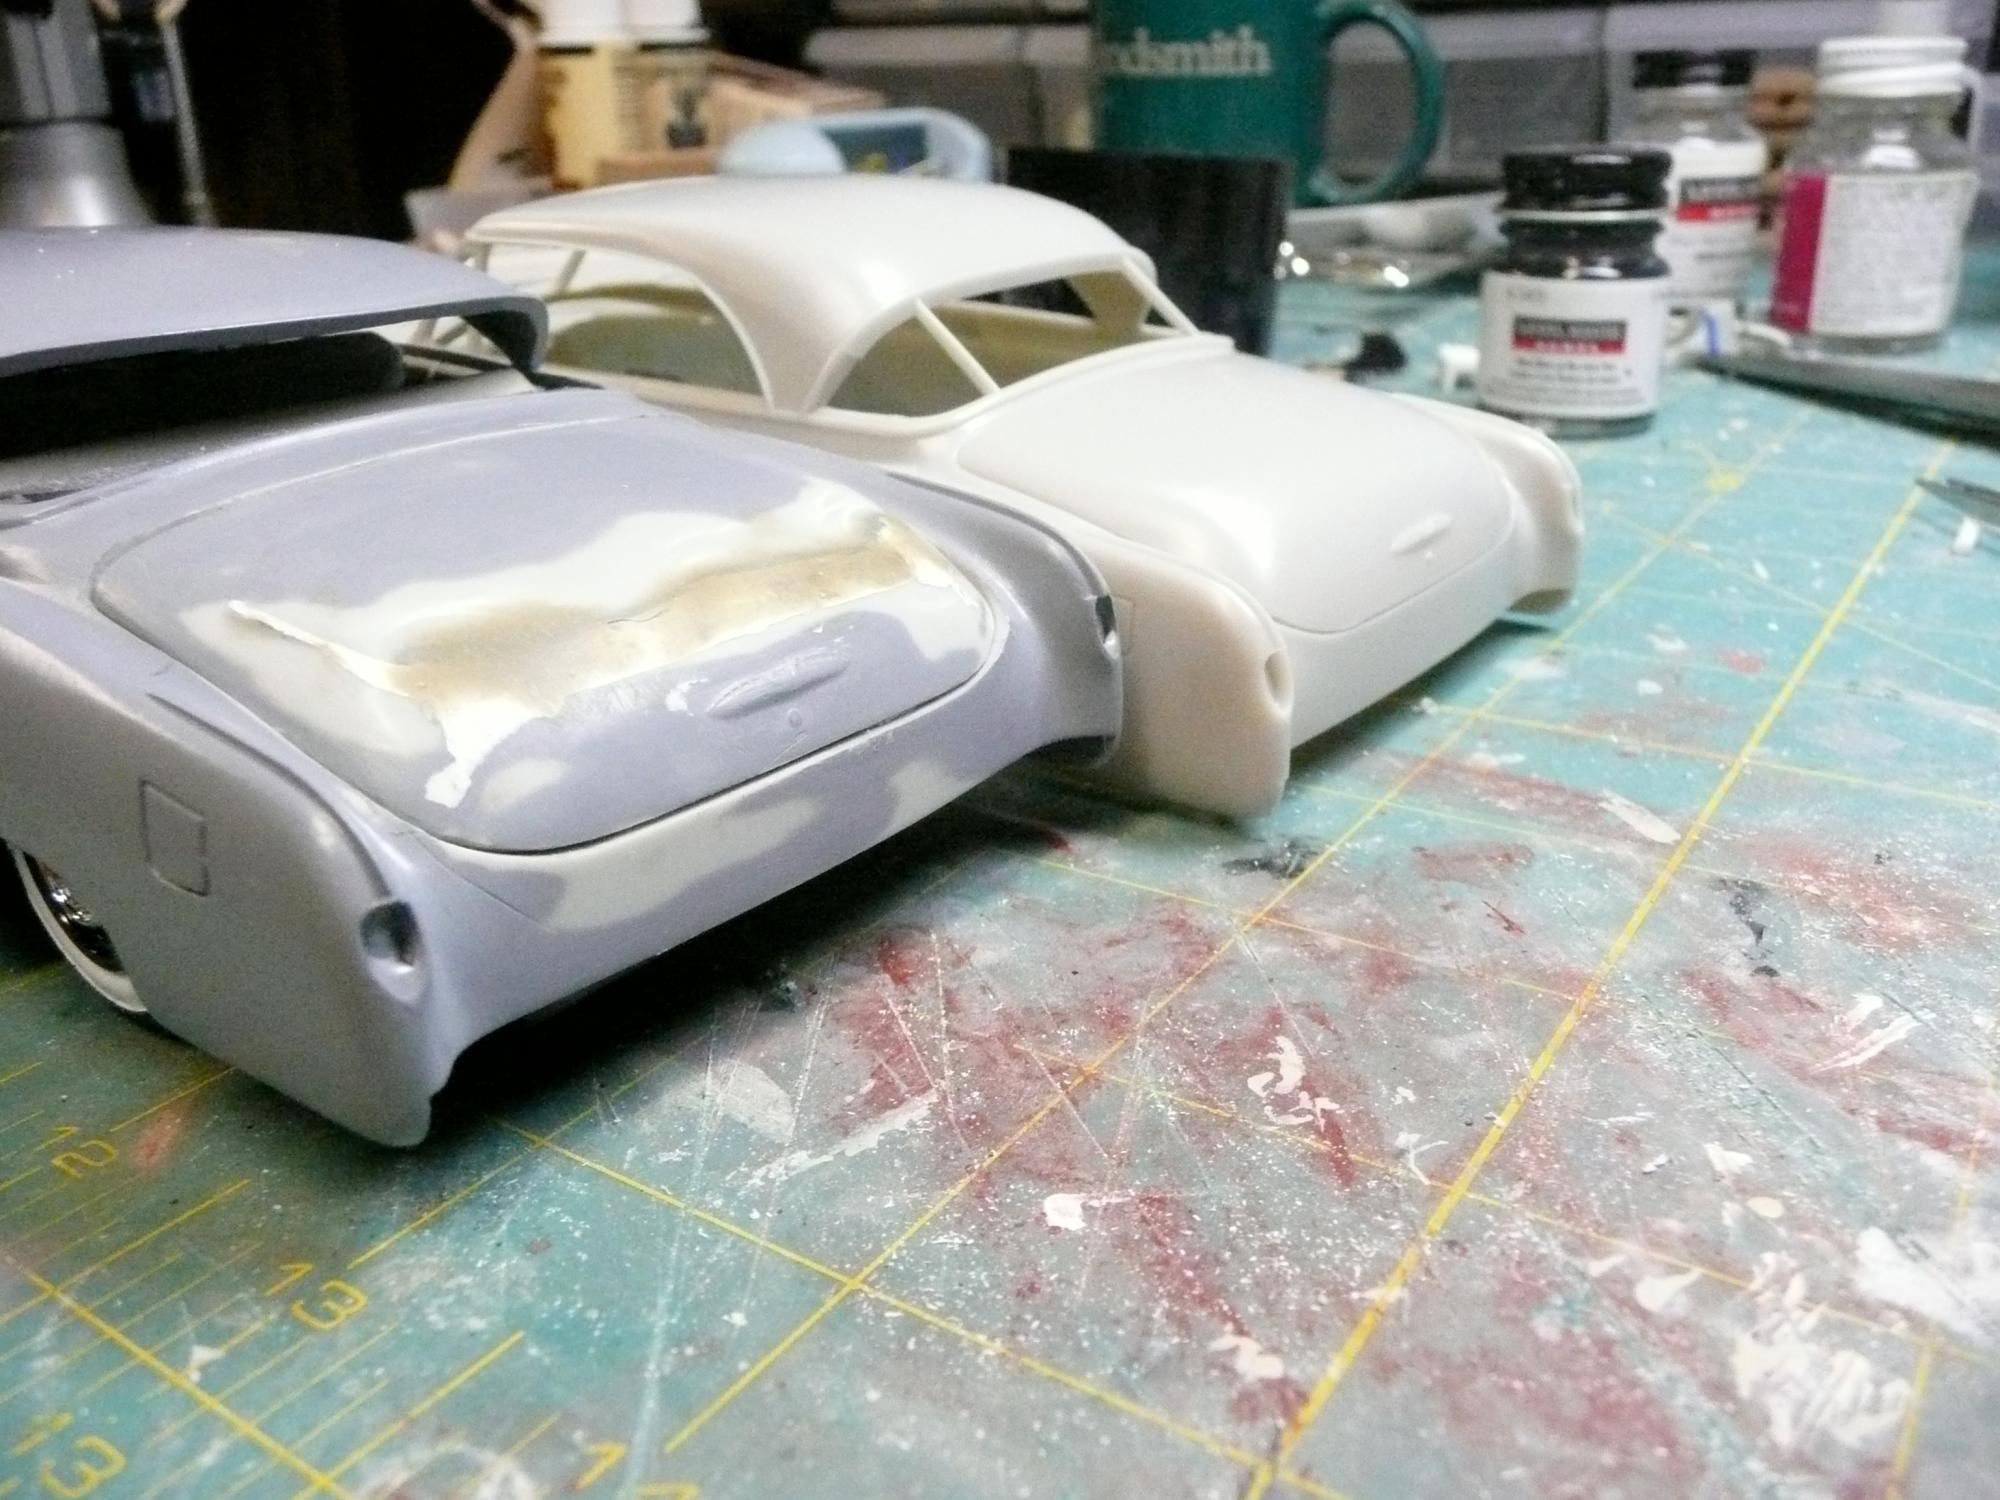
I'm redoing a 51 Chevy that was done several years ago. Originally I built it to represent the daily driver WIPs that abounded when I was a kid. Now the intent is to finish it. So far fender skirts have been added but I'm not fond of the way they fit so the panel line has been filled so they appear to be part of the fender. The tube grill from the 48 Ford kit has been fitted and a custom rear bumper fabricated. Next up will be the front bumper. I'de like to ad Dagmars to it but we'll have to see how it works out.