gtx6970 Posted March 30, 2016 Posted March 30, 2016 (edited) I've decided this one has sat in the unfinished pile for to long. Time to dig in and getrdone . While trying to figure out how to assemble the body and still be able to install the interior proved to not gonna happen, (thus the time its sat in a box for the past 5 or more years started ) So yesterday morning I dry fit the interior and fully assembled the body taping it up to hold everything square and secure till glue dried. Then cut the chassis pan out of it with a razor saw. My plan is detail the interior and put it in from the bottom like any other model. I've already added some stryene strips to the body give it a ledge to glue the chassis pan to . Next up is fix all the sink marks on the body to get her ready for paint. My idea for exterior paint is ( hopefully someones done this before and I'm right) Paint the body white, then top coat that with Testors white lightning to give it the pearl effect. Then either A- use a clear blue top coat over that then clear the whole thing Or B - dig out the air brush and mix some blue in the clear my 1st choice is plan A ,unless someone tells me its not going to work ( might dig out and do some spoon tests to ck my idea) comments good and bad always welcome and encouraged Edited March 30, 2016 by gtx6970
JTalmage Posted March 30, 2016 Posted March 30, 2016 I see what you're getting at now.... makes my gears turn for the one I still have left to build....
Richard Bartrop Posted March 30, 2016 Posted March 30, 2016 I have one of those, and you're making me want to take another stab at it.The latest Polar Lights kit of the Batmobile has an engine and chassis. Has anyone tried mating it with the Revell Futura?
showrods Posted March 30, 2016 Posted March 30, 2016 It would look good in red, aqua or pearl white...
Bob Ellis Posted March 30, 2016 Posted March 30, 2016 I M NOT AFRAID OF MULTI-PIECE KITS. sometimes THE SHAPE IS BETTER. LIKE TRAVELLING BACK IN TIME TO TH 50S.
gtx6970 Posted March 31, 2016 Author Posted March 31, 2016 (edited) I managed a little modeling time this morning. Once I primed the interior ,,i noticed the moldings in the door panels were almost non existent . So I dug out some .010 x .010 stryene strips and made my own . Once cleaned up and re-primed, they should be much easier to see and foil . Also mixed up some filler to fill all the little sink marks on the body,,,and there were a lot of them . Edited April 1, 2016 by gtx6970
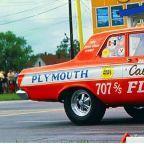
Dogfish_7 Posted March 31, 2016 Posted March 31, 2016 Looks like a nice build. It would be also nice to see a shot of the top of the car. There are allot of us, who haven't seen this car. Keep up the great work!
gtx6970 Posted March 31, 2016 Author Posted March 31, 2016 Looks like a nice build. It would be also nice to see a shot of the top of the car. There are allot of us, who haven't seen this car. Keep up the great work! Like this ?
sjordan2 Posted April 1, 2016 Posted April 1, 2016 A little additional reference material.http://www.conceptcarz.com/vehicle/z1727/Lincoln-Futura-Concept.aspxhttps://theinvisibleagent.wordpress.com/2010/01/23/the-lincoln-futura-concept-car-1955/
gtx6970 Posted April 1, 2016 Author Posted April 1, 2016 Thanks, I have about every one of the pics there.I 'think' I may have enough pictures and info to replicate this car. Problem is ,,most of them are black and white. SO it leaves some colors up to your imagination.
Belugawrx Posted April 1, 2016 Posted April 1, 2016 Definitely spoons first, and Man, that plastic looks 6 scale" thick ,..dudnit ?! Nice job so far Bill,..I love cars that have those art deco, boat details..no really I do,. FINS RULE Am following this Cheers
gtx6970 Posted April 2, 2016 Author Posted April 2, 2016 Thanks.Seems the more i sand on the body to straighten it out...I find more sink marks which means more filler mixed up.
robertw Posted April 2, 2016 Posted April 2, 2016 I have one of those, and you're making me want to take another stab at it.The latest Polar Lights kit of the Batmobile has an engine and chassis. Has anyone tried mating it with the Revell Futura?Scales are different the old Revell kit is about 1/27 and the Polar Lights is 1/25. Sit them side by side and the difference is obvious.
robertw Posted April 2, 2016 Posted April 2, 2016 Built the Revell kit a couple of years ago as the red one from the movie It Started With a Kiss, Isn't an easy kit to build but with patience you'll be pleased with the result. The difference in scale from what we usually build is the biggest pain. Here are a few of the problems I encountered :-the interior and especially the inner door sidewalls, I cut out the recesses then tried to create a smooth transition between the edges of the cove and the piece of plastic I glued to the outside of the inner door. In the end wasn't really satisfied and for a future build I think I'd totally cut out the inner door panels scratch build them and repair the sides of the seats.-to fit the interior in I completely finished it glued iit in place within the upper body then taped it over until I'd finished my exterior paint. I like the idea of cutting out the center of the chassis as suggested here. I remember thinking about doing it that way but for some reason I didn't.-I built the top and bottom of the body separately so that I could ensure that they would sit flat before glueing them together. There was also a lot of putty and sanding to get the multiple body pieces to fit together well.-fitting the two bumpers without gaps between them and the body required extra work. The side body moldings were slightly warped and had difficult sprue gates to clean up. I finally filled sanded and did them in Alclad.-the canopy does not fit well on the top of the body leaving several thin cracks. For several days I applied thin layers of putty set the windshield on top then sanded and finally got a very tight fit. I also used a heavier foil (a cheap Chinese made chrome duct tape). Normal bmf just proved to thin to lay down and stay down.Sorry don't have a photo host so can't show pics of the final result but I look forward to seeing how your build goes..rob w
gtx6970 Posted April 2, 2016 Author Posted April 2, 2016 Thanks for the build tips.I'm not after 1000% accuracy,,just a nice display model for my case. My daughter built a snap kit of the Batmobile so I want them in the same case,,,maybe just not side by side So far I think I have all the waves and sink marks fixed in the body . I put it in ( i hope ) its final coat of primer this morning. I'll let that set for a day or so then prep it for paint .. I did a lot of sanding on the back end of the body to get the rear bumper to fit as best I can. The front one actually fits pretty good out of the box,,,go figure. The top bubble will be ok I think. I haven't decided if I'll glue it on or leave it loose so it can be removed to see the interior better or notI was at my LHS yesterday and I think I now have some colors for the interior . So I'll do some color tests on spoons this weekend to ck colors . So hopefully I'll be painting the interior maybe the 1st of the week
JTalmage Posted April 4, 2016 Posted April 4, 2016 I'll definitely be keeping an eye on this one and may bug you for what paint you end up using as I'd like to recreate the original color scheme too... can't wait to see some paint laid down!
gtx6970 Posted April 4, 2016 Author Posted April 4, 2016 Thanks,,,, I did paint several spoons this morning.I have maybe 5 or 6 different spray outs . Gonna pick up some Tamiya pure white tomorrow and see how it compares to my samples so far. .So far the winner is a Duplicolor with a Testors White lightening top coat. But I used the Tamiya as a base color on another build and I really like that look
gtx6970 Posted April 6, 2016 Author Posted April 6, 2016 Well, I did it. Its Tamiya pure white base, Testors white lightning top coat with Testors wet look clear to finish it off. I took multiple pictures both indoors and out , with and without a flash ( flash just drowns the picture ) and I cant get the pearl effect to show up at all , trust me,,its there. Interior is also painted, Testors aluminum for the seats and door inserts and flat black for the rest. I'll detail the steering column / wheel and instrument panel this week while the body gasses out . Then do a light rubbing out of the body before starting assembly.
High octane Posted April 6, 2016 Posted April 6, 2016 Lookin' real good Bill. I had finished the Batmobile and I have a Futura kit in my stash. I just don't know when I'll get to it.
gtx6970 Posted April 7, 2016 Author Posted April 7, 2016 What ya think, glue the glass on , or leave it loose to see the interior ? So far I think it looks pretty good ( maybe not 100% accurate but close enough for my case ). Interior is almost done. I need to come up with some round decals to replica what I think is the speedometer and a compass on top of the instrument panel. Then a dab of clear Elmers glue to top them off.
RancheroSteve Posted April 7, 2016 Posted April 7, 2016 What ya think, glue the glass on , or leave it loose to see the interior ? So far I think it looks pretty good ( maybe not 100% accurate but close enough for my case ).Its not too difficult to carefully separate the center section of the canopy, then only attach the front and rear sections. The thickness of the "glass" makes it pretty difficult to hinge prototypically, but you can leave it loose for removal.
Recommended Posts
Create an account or sign in to comment
You need to be a member in order to leave a comment
Create an account
Sign up for a new account in our community. It's easy!
Register a new accountSign in
Already have an account? Sign in here.
Sign In Now