Quicksilver Posted January 7, 2017 Share Posted January 7, 2017 Hi everyone, after many years of being away from from building kits, I have had a renewed interest in seeing what I can do. I had this Revell 54 55 57 Chevy triple "Hot Rod" kit laying around for years and figured I would start with the 54. I have always wanted a 1/1 gasser for on the street, so I am going to build the 54 as I would want a 1/1..Being into MoPars I will put a blown 426 Jo Han Hemi in it. I debated for a couple days if I wanted to leave the body side chrome trim on or not, knowing I will radius the rear wheel wells, the decision was made to remove the trim and work out all the sharp casting lines. Plans for now are to finish it in Primer Gray Quote Link to comment Share on other sites More sharing options...
MeatMan Posted January 7, 2017 Share Posted January 7, 2017 Hey Larry, fellow Buckeye!I've been interested in getting one of the early 50's Chevys. I'll keep my eye on this one! Quote Link to comment Share on other sites More sharing options...
mustang1989 Posted January 7, 2017 Share Posted January 7, 2017 (edited) First off , welcome to the forum Larry. It's great to have you here. Good lookin' project you've got yourself going here. . I will say that you're in for a wild ride with this build. I just got through with the panel wagon/ sedan delivery version of this kit and it has no headlamp or tail lamp bezels. I managed to pick up an AMT 51 Chevy to rob the headlamp bezels from and ended up Frenching those into the body. Here's the kit I used: What I started with: I block sanded it from the front and made the opening larger so I could insert some headlight buckets/ bezels into the cavity to have a mostly flush mount between body and bezel. Here's the openings after I got through block sanding them down: and after I test fitted a bucket / bezel in: NOTE: This is a perfect shot of those nasty hood hinge openings too which I filled in with black sheet stock from Evergreen shown in the pic above Here's a pic of the headlight bucket openings and the now filled in hood hinge openings. A little bit of sanding later and you could never tell they were there................ Hope this'll help you out some. Edited January 7, 2017 by mustang1989 Quote Link to comment Share on other sites More sharing options...
Quicksilver Posted January 8, 2017 Author Share Posted January 8, 2017 (edited) Thanks Dennis and Joe, and for the heads up on the headlight trim! I have a pretty big junkyard of old parts and kits, so I was digging around for some pieces and ran across this 392 Chrysler Fire Power HEMI so change of plans and adding a little more nostalgia will tear down the 392 and rebuild it with wiring and fuel lines and see if I can scare up a Lakewood blow proof bell housing and bolt a Hemi 4 speed box to it, found 1 header that may work and a gas pedal. I must have started this 57 Chevy kit somewhere along the line and figure why not work on it as well. Back in 73 when I was 18 I bought a 56 210 Sedan off a neighbor, it was an Ex Gasser and had the engine set back thru the firewall, Tilt glass front end and a 3/4 ton Chevy rear axle with 5:38 gears(when I got it it needed a lot of work and a drive train) but the body was rust free. Another neighbor a block over had a 33 Ply Coupe with a 92 Hemi in it and sold the motor to me, but it never made it into the 56(put a 301 small block in it).(392 and 440 parts in trunk) Edited January 8, 2017 by Quicksilver Quote Link to comment Share on other sites More sharing options...
modelfink Posted January 9, 2017 Share Posted January 9, 2017 That's a wild looking induction set up. Any details on what it is? Those carbs look funky Quote Link to comment Share on other sites More sharing options...
Lunajammer Posted January 9, 2017 Share Posted January 9, 2017 A lot of ill-will for these 54s but I love these car and I've got two I've been dabbling with (and a 1:1 '53 in the shed). The side trim is not strongly defined so grinding 'em off is no great loss. Looking forward to more. Quote Link to comment Share on other sites More sharing options...
Sledsel Posted January 9, 2017 Share Posted January 9, 2017 That's a wild looking induction set up. Any details on what it is? Those carbs look funky Those carbs can be found in the 63 Corvette kit and probably others. Webers Quote Link to comment Share on other sites More sharing options...
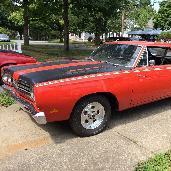
Quicksilver Posted January 9, 2017 Author Share Posted January 9, 2017 A lot of ill-will for these 54s but I love these car and I've got two I've been dabbling with (and a 1:1 '53 in the shed). The side trim is not strongly defined so grinding 'em off is no great loss. Looking forward to more. No ill-will here I really like all the 50-67 Chevy's, There is a guy here in town who has had a 53-54 since the 70's called "Belphegor" Street Gasser in Candy Red with a straight axle. I may be able to stop by and get some pics of it. Here is another 54. Quote Link to comment Share on other sites More sharing options...
Quicksilver Posted January 9, 2017 Author Share Posted January 9, 2017 Those carbs can be found in the 63 Corvette kit and probably others. Webers If memory serves me well I think the 392 Hemi came out of the AMT 62 Buick Special Wagon kit and was a display engine with multiple induction options? Great Pic Thanks! Quote Link to comment Share on other sites More sharing options...
Quicksilver Posted January 9, 2017 Author Share Posted January 9, 2017 Ok so I have been away from building models for many years and with a renewed interest I need to ask some questions here, since I am sure many things have changed from the day of small glass bottles of Testor enamel paint. I would like to get a good set of modelers tools,(brushes, files, saws, sandpapers glue(s) etc.) and what types of primers and paints etc to use, how best to strip paint off parts and bodies. I have looked around on ebay etc at different things but feel asking all of you out here who have the best experience and what is good and what to stay away from? Quote Link to comment Share on other sites More sharing options...
mustang1989 Posted January 11, 2017 Share Posted January 11, 2017 (edited) You're gonna get a lot of answers with those questions but here's how I do things.. A lot of the basic stuff can be bought at Hobby Lobby. You know, the knives , files, saws, and basic sanding papers and pads. Flexi files are good for sanding but have to be ordered online. I like Tamiya thin cement and IDN about your Hobby Lobby but I can pick that stuff up here. I tend to like Tamiya rattle can gray or white primer depending on what color I want to end up with. As far as stripping paint off of plastic parts and bodies , I use brake fluid to soak all the parts in but I've seen folks use Purple Power cleaner/ degreaser to strip paint as well. Paint..........................I was using spray cans at first , then went to dispensing canned paint into airbrush cups and shooting it through the airbrush and now I'm using automotive body shop paints here and there. Pay attention to the use of solvent based paints mixed with lacquer based clear coats. Enamels / solvent based paints can be sprayed over lacquer but NOT the other way 'round. The results are disastrous as I found out. That's all I've got for now given my experience. Hope this helps. Edited January 11, 2017 by mustang1989 Quote Link to comment Share on other sites More sharing options...
Quicksilver Posted January 12, 2017 Author Share Posted January 12, 2017 Thanks Joe I will head down to Hobby Lobby tomorrow and start gathering up stuff. I went digging thru my junkyard and found a few more pieces for this build. A pair of good old Firestone Deluxe Champion slick and a pair of tall bias ply skinny fronts, plus the 5 spoke mags for front(Americans?) and 5 slot mags for rear(Ansens?) will strip and refinish rims, and a blow proof bell housing, and 1 half of a Hemi 4 speed. While digging around this motor caught my eye with the Chrysler long rams intake(loose imitations)no plans for it yet...maybe use the intake on another project There is a lotta strange stuff in the junkyard from over the years of picking stuff up at garage sales etc. Quote Link to comment Share on other sites More sharing options...
mustang1989 Posted January 12, 2017 Share Posted January 12, 2017 That engine is out of the Monogram Paddy Wagon kit. Quote Link to comment Share on other sites More sharing options...
espo Posted January 12, 2017 Share Posted January 12, 2017 Thanks Joe I will head down to Hobby Lobby tomorrow and start gathering up stuff. I went digging thru my junkyard and found a few more pieces for this build. A pair of good old Firestone Deluxe Champion slick and a pair of tall bias ply skinny fronts, plus the 5 spoke mags for front(Americans?) and 5 slot mags for rear(Ansens?) will strip and refinish rims, and a blow proof bell housing, and 1 half of a Hemi 4 speed. While digging around this motor caught my eye with the Chrysler long rams intake(loose imitations)no plans for it yet...maybe use the intake on another project There is a lotta strange stuff in the junkyard from over the years of picking stuff up at garage sales etc. I like the Cross Ram induction set up. Another source of an induction set up is in the reissue of the AMT '53 Ford pick-up. I just got one for another project, but the optional engine is an early Hemi with the option of eight two's on a ram log manifold or port fuel injection with eight injector tubes. The engine has a nice finned aluminum valley cover a magneto and chrome valve covers. The engine has a manual transmission on it and has sort of stock looking exhaust manifolds, a separate front water pump/front cover and belt and alternator. Have to agree these were great looking cars, the kit can be a bit of a challenge thou. Quote Link to comment Share on other sites More sharing options...
Quicksilver Posted January 20, 2017 Author Share Posted January 20, 2017 Had some time to get back to the 54 project, still digging around the junkyard finding bits. Found a pretty beefy rear axle that looks pretty close to a dana 60(robbed from a 56 Ford F100 kit) and test fits up pretty well and even has perches to mount the the ladder bars to. Found some more rims that may end up on it, had chrome fade pretty bad and after reading the forums on stripping chrome, success!!! bleach works GREAT...so much so that now there is a bowl full of old parts floating around in it now.. I need to find a little more self control at planning and starting other project builds and focus on one...maybe 2 Quote Link to comment Share on other sites More sharing options...
espo Posted January 20, 2017 Share Posted January 20, 2017 Great find on the differential. I was wondering if your going to tub the rear end or have the slicks extending past the body sides? The diff. looks to have two mounting pads from the picture. The diff. also looks to be upside down. In the donor pick-up the diff. would have been mounted under the leaf springs and you're mounting it on top, which is fine but the pinion angle looks wrong. Just a thought, not trying to tell you how to do this. What if you moved the leaf spring hanger/mount inboard of the chassis. This would get the springs out of the way and the mount pads on the diff. will be very close to lining up with the pads. The diff. could be narrowed as needed to keep the slicks mostly inside the body line. The small area on the inside of the wheel tub could be moved inboard as needed. The Ansen wheels look perfect and are very deep, another reason to think about the rear end changes. Quote Link to comment Share on other sites More sharing options...
Sledsel Posted January 21, 2017 Share Posted January 21, 2017 I love digging thru old parts!!! Always think "wow, I forgot about this" You are doing a great job on this kit I agree with espo, the rear looks upside down to me also Quote Link to comment Share on other sites More sharing options...
geetee66 Posted January 21, 2017 Share Posted January 21, 2017 (edited) This build is awesome!I love what you're doing with it.If I could make any tool/equipment recommendations, my tip would be to avoid cheap tools, especially brushes. Windsor &Newton watercolour sable, are my favourites. Never drop bristles. Had 'em for years.My other tip would be to browse jewellery tool suppliers catalogs. I was a goldsmith for several years and most of my old tools are now used for models. In particular, good quality stainless steel tweezers. Very pointed and stiff. They hold photoetch parts really well. Get two pairs and spark plug wiring is much easier.Side cutters, too. Good ones, like Larsson (0.35 - 1.25mm copper wire) . They cut really cleanly. Much better than hobby shop sprue cutters. And my favourite of all... Swann-Morton surgical scalpel with #11 blade. I hope this helps Edited January 21, 2017 by geetee66 Quote Link to comment Share on other sites More sharing options...
Quicksilver Posted January 24, 2017 Author Share Posted January 24, 2017 Great find on the differential. I was wondering if your going to tub the rear end or have the slicks extending past the body sides? The diff. looks to have two mounting pads from the picture. The diff. also looks to be upside down. In the donor pick-up the diff. would have been mounted under the leaf springs and you're mounting it on top, which is fine but the pinion angle looks wrong. Just a thought, not trying to tell you how to do this. What if you moved the leaf spring hanger/mount inboard of the chassis. This would get the springs out of the way and the mount pads on the diff. will be very close to lining up with the pads. The diff. could be narrowed as needed to keep the slicks mostly inside the body line. The small area on the inside of the wheel tub could be moved inboard as needed. The Ansen wheels look perfect and are very deep, another reason to think about the rear end changes. Nope no tubbing, Yep the rear end was upside down, but was just sizing it up, I plan on using the Inner perches to mount the long ladder bars...I have decided to challenge myself with this build and add fuel lines including a old school bendix fuel pump and fram filter, brake fluid lines, e-brake cables, wiring and plumbing the engine, and oh yeah shifter and linkage attached to the Hemi Box...I also am building a Revell 56 Chevy with a Tilt Glass front end and still retain the opening doors hopefully... Quote Link to comment Share on other sites More sharing options...
espo Posted January 24, 2017 Share Posted January 24, 2017 You do like a challenge. The door openings and inner jams look great. Quote Link to comment Share on other sites More sharing options...
Recommended Posts
Join the conversation
You can post now and register later. If you have an account, sign in now to post with your account.
Note: Your post will require moderator approval before it will be visible.