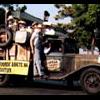
chepp Posted March 7, 2017 Share Posted March 7, 2017 Russell C retired from the yellow 3-wheeled running gag for the "Group" category at the GSL since he snagged the Ed Roth award for his last '56 Victoria. So, I thought that it would be interesting to make my own version of a yellow 3-wheeled Ford to enter at the 2017 GSL in April. It will be my first time going there. Here's a pic of the unfinished underside. Quote Link to comment Share on other sites More sharing options...
espo Posted March 8, 2017 Share Posted March 8, 2017 That looks interesting, turn it over so we can see the top side. Quote Link to comment Share on other sites More sharing options...
chepp Posted March 8, 2017 Author Share Posted March 8, 2017 (edited) Here's a photo of my first build of it as a curbside in 2011 along with some in-process shots of some of the bodywork. I'm making some styling improvements to the sides but I don't have a mock-up photo to show. Except for color, the photo of the blue car is about how the new yellow version should look from this angle. The interior and bubble top are from Roth's Beatnik Bandit. Edited March 21, 2017 by chepp Quote Link to comment Share on other sites More sharing options...
Russell C Posted March 8, 2017 Share Posted March 8, 2017 Now, that's wild right there. My restrictions were always to the GSL-chosen model kits for the "Group" category, but there's really no limit to what can be done with other vehicles. Let the creativity fly! Quote Link to comment Share on other sites More sharing options...
mr68gts Posted March 8, 2017 Share Posted March 8, 2017 (edited) Always admired Russel's 3 wheeled creations! Nice to see someone else carry on the tradition! The group model this year is the corvette I believe? I couldn't imagine that as a 3 wheeled thing, but then again....PaulScratch that! It's the 67 Camaro Edited March 8, 2017 by mr68gts added info Quote Link to comment Share on other sites More sharing options...
simonr Posted March 8, 2017 Share Posted March 8, 2017 Looks great, hope to see it in person there! Simón Quote Link to comment Share on other sites More sharing options...
misterNNL Posted March 8, 2017 Share Posted March 8, 2017 I have to admire your design work on this project.Extended the bumper lines into those enclosed front wheel wells works perfectly.Thanks for sharing. Quote Link to comment Share on other sites More sharing options...
chepp Posted March 8, 2017 Author Share Posted March 8, 2017 (edited) Thanks. I forgot to mention earlier that comments, rotten tomatoes, suggestions, about the model are welcome. The Group model for 2017 is as follows (copied from the GSL downloads):"For GSL-XXVI, the “Group” kit is the 1969 Chevy Corvair. Entries may be built from any original or reissue release of the Round 2/AMT kit, in any style, with the skills and craftsmanship you have today, but using only parts, materials and supplies (except current putties, adhesives and paints) available 35 years ago (1982 or earlier). Entrants may use the newly re-issued Round 2 Corvair engine kit (AMTPP010) if desired. There are just three additional limitations: no one-off machined or photo-etched parts not fabricated entirely by the entrant; no aftermarket products not available in 1982 or earlier; and no resin bodies or resin body parts (regardless of who made these resin parts). Bare Metal Foil may be used." I bought a Corvair kit (at a good price since it was missing some parts) just in case I had time to do something with it. However, my glacier-like pace on the other two entries isn't likely to speed up enough for a third. Edited March 8, 2017 by chepp Quote Link to comment Share on other sites More sharing options...
mr68gts Posted March 9, 2017 Share Posted March 9, 2017 The Group model for 2017 is as follows (copied from the GSL downloads):"For GSL-XXVI, the “Group” kit is the 1969 Chevy Corvair.Sorry, I was thinking common kit. I forgot about the group 17 thing. Quote Link to comment Share on other sites More sharing options...
chepp Posted March 14, 2017 Author Share Posted March 14, 2017 Here's the rough body. It will have a hinged hood (not made yet). Feel free to leave comments (positive, negative, recommendations, etc.). Quote Link to comment Share on other sites More sharing options...
1930fordpickup Posted March 14, 2017 Share Posted March 14, 2017 This is looking very nice. Quote Link to comment Share on other sites More sharing options...
chepp Posted March 21, 2017 Author Share Posted March 21, 2017 The side wing-fins will have an exhaust pipe exiting from the rear. I've filled in door lines scribed when I thought that I wanted them. Now, the driver and passenger will have to hop in "sports car style" as on the original blue model. Here's an engine stand built from sheet plastic, brass tubing (with notches at the top to fit the engine mount "ears") and some steel wire extending into the rear of the trans. The taped-together engine was needed to locate the frame to the body. Still to be done will be to use the mock-up to locate a hole in the yet-to-be-made hood. There's five weeks left to finish this model. This one is behind because I spent too much time working on a second radical custom I was hoping to finish. I've stopped work on the second one until this one gets close to being completed. Is anybody else building GSL entries? Post what you're doing so we can see and learn. Quote Link to comment Share on other sites More sharing options...
chepp Posted March 25, 2017 Author Share Posted March 25, 2017 I'm making lots of progress but very little of it shows. Here are the floor pans (front and rear are needed for assembly reasons) test-fitted into the body. Each pan is made of dozens of pieces plus more as reinforcements on the unseen top side. It's really a job to fill and smooth the joints. There is still more to do. Lots of other work has been done, too, but it isn't very interesting at this stage. For example, smoothing the engine* seam and giving it a coat of white primer; spraying under colors on spoons for body colors, smoothing frame joints... and on and on. There's plenty of time to philosophize while doing repetitive tasks: How good is "good enough"? Is "done" with some boo-boos better than nearly perfect, so far, but uncompleted? Why am I doing this? The model was just supposed to be a curbside with a dramatic customized body. It's not an award contender and won't have details like brake lines and hose clamps. Still, it shouldn't look unfinished but I never expected to spend so much time on things that will probably never be seen by 99% of people who will look at the finished model (see philosophy numbers 1 and 2 above — is this circular reasoning?). *and remembering too late that the '60 Ford kit has a manual transmission but to operate with the Beatnik Bandit joystick control (no steering wheel, shift lever or pedals) it would have to be an automatic. Quote Link to comment Share on other sites More sharing options...
chepp Posted March 26, 2017 Author Share Posted March 26, 2017 (edited) Two-piece fuel tank balloons to seven when minimized! Because of the narrowed frame, the stock tank needed to be modified to fit. The two tank parts were cemented. Since there is detail along the centerline that meant making four parallel cuts and discarding the resulting extra sections. That makes six parts. An extended fuel filler made from .080 styrene rod makes it seven. If I were to add straps, not likely, between the tank and the floor pan the count would be up to eleven. Edited March 28, 2017 by chepp Quote Link to comment Share on other sites More sharing options...
chepp Posted March 28, 2017 Author Share Posted March 28, 2017 (edited) Spoon tests. Scroll down to see the colors that were used. Some close-ups of two: 1. Clear spoonTamiya Fine Surface Primer (L) White 87044Model Master German Silver 2914Tamiya X-24 Clear Yellow, diluted, 30 psi Badger 150Testors One-Coat Clear Lacquer 1834 2. Clear spoonTamiya Fine Surface Primer (L) White 87044Model Master German Silver 2914Createx Pearl White 5310, from bottle, 40 psi Badger 150Tamiya X-24 Clear Yellow, diluted, 30 psi Badger 150Testors One-Coat Clear Lacquer 1834 3. Clear spoonTamiya Fine Surface Primer (L) White 87044Model Master German Silver 2914Silver flake in clear gloss, 40 psi Badger 150Tamiya X-24 Clear Yellow, diluted, 30 psi Badger 150Testors One-Coat Clear Lacquer 1834 8. White spoon Testors 1214 Gloss Yellow 1214Model Master German Silver 2914Tamiya X-24 Clear Yellow, diluted, 30 psi Badger 150Testors One-Coat Clear Lacquer 1834 9. Clear spoonTamiya Fine Surface Primer (L) White 87044Testors 1214 Gloss Yellow 1214Left 1/2 of spoon: Createx Pearl White 5310, from bottle, 40 psi Badger 150Right 1/2 of spoon: Silver flake in clear gloss, 40 psi Badger 150Tamiya X-24 Clear Yellow, diluted, 30 psi Badger 150Testors One-Coat Clear Lacquer 1834 Here are some with faux plating. The powder is rubbed into the surface then lightly polished with a cloth pad. Here's a link to the manufacturer: http://www.c1-models.com/c1-metalizer/ . These are my first attempts at using it. It's a nice "black chrome" finish. Their website shows it as a more natural chrome when used over a brighter blue base coat. This photo was shot outdoors at mid-day. The white card in the background is vertical and is reflected in the spoons. 5. Clear spoon Tamiya Fine Surface Primer (L) White 87044Model Master Gloss Black 1947Upper 2/3 of spoon: C1 Metalizer 7. White spoon Model Master Blue Angel Blue 1972Testors One-Coat Clear Lacquer 1834Upper 2/3 of spoon: C1 Metalizer Edited March 28, 2017 by chepp Quote Link to comment Share on other sites More sharing options...
chepp Posted April 4, 2017 Author Share Posted April 4, 2017 It's starting to look like a car (presuming a 3-wheeler is considered a car). The hood will be cemented in place. So, the model won't have any engine parts that can't be seen from underneath. The block was painted Model Master Ford Engine Red while the trans is Model Master German Silver + Dull Cote. The stock 1960 Ford engine would have been black but that would have been too dull. The front suspension was built using a Beatnik Bandit front wheel and brake plate, a spindle and bits of A-arms from the AMT '60 Ford kit and swingarms made from pieces cut from a Revell '68 Charger kit roll cage. The coil spring source is unknown and the shock is from the AMT '53 Ford pickup. At the rear, the wheels are from an AMT '39/'40 Ford sedan kit and the tires are from an AMT '66 Riviera with the whitewall inserts painted flat black and turned inward. Quote Link to comment Share on other sites More sharing options...
Russell C Posted April 4, 2017 Share Posted April 4, 2017 ... (presuming a 3-wheeler is considered a car). ...Motorcycle. =) Quote Link to comment Share on other sites More sharing options...
chepp Posted April 20, 2017 Author Share Posted April 20, 2017 Here's the latest. I let myself get distracted by a "quick" Corvair build for the Group 17 class that took a week and a day. Once the floorboards are in place and the body is on, the chassis will only be visible from below. Yes, I know the exhaust manifolds are on the wrong heads and upside down — they will feed into the side exhausts. The model will not have an opening hood. There's only a week left. My wife came down with the flu tonight — hope I don't get it! Quote Link to comment Share on other sites More sharing options...
Lordmodelbuilder Posted April 20, 2017 Share Posted April 20, 2017 That 3-wheeled car/trike is looking good. There's really no curbside class at the model championship unless you are just going to display it on the display table. Do all you can to it. One week is a long time and you can always finish it in your hotel room. Does not have to be on the tables till Saturday. Quote Link to comment Share on other sites More sharing options...
cpspoogie Posted April 21, 2017 Share Posted April 21, 2017 Amazing piece of work! I REALLY like this! Quote Link to comment Share on other sites More sharing options...
chepp Posted April 21, 2017 Author Share Posted April 21, 2017 (edited) That 3-wheeled car/trike is looking good. There's really no curbside class at the model championship unless you are just going to display it on the display table. Do all you can to it. One week is a long time and you can always finish it in your hotel room. Does not have to be on the tables till Saturday. Thanks. I have no aspirations for this to be an award contender. Originally it was just a shell with minimal plastic pieces to attach wheels for an informal online photo model contest that didn't show the underside. Since it had three wheels and was a Ford I figured that I could repaint it yellow and put a believable chassis under it as a tribute to Russell C's oft-mentioned winner. Little did I know that the chassis would be such a struggle. To add some visual interest in featureless floor areas I made some 10mm long .040" half-round pieces to simulate pressed-in stiffeners. They're hard to see here but show up in the photo below. To avoid having to smoothly fill the pieced-together wheel houses I spread filler on with my finger. As it set up I played around with it to make a rough finish that simulates a sprayed-on sound deadener. Time is getting short. I'm finished with fitting, filling, sanding and primering the floor pans despite their shortcomings. Edited April 21, 2017 by chepp Quote Link to comment Share on other sites More sharing options...
Russell C Posted April 22, 2017 Share Posted April 22, 2017 (edited) ... Originally it was just a shell with minimal plastic pieces to attach wheels for an informal online photo model contest that didn't show the underside. Since it had three wheels and was a Ford I figured that I could repaint it yellow and put a believable chassis under it as a tribute to Russell C's oft-mentioned winner. .....I cheated quite a bit, since my running gag 3-wheel entries over the years were put in the non-judged people's choice "Group" category. But that didn't stop judge Randy Derr from picking up my '56 Victoria Ed Roth tribute to see what was underneath. If it works right, the Youtube link I have here will start the video at the 10:22 point, https://www.youtube.com/watch?v=TJqqHSmMo7c#t=622 where right afterward is Randy's reaction. While I had a usable chassis at the back, the front had minimal prong-looking suspension for the wheel and otherwise very unrealistic plastic scrap holding the structure together. What I wrote in marker pen on the floorplan was "Nothing to see under here." Edited April 22, 2017 by Russell C Quote Link to comment Share on other sites More sharing options...
Modelbuilder Mark Posted April 22, 2017 Share Posted April 22, 2017 I am very impressed by the effort you are putting into this project Quote Link to comment Share on other sites More sharing options...
chepp Posted April 22, 2017 Author Share Posted April 22, 2017 ...While I had a usable chassis at the back, the front had minimal prong-looking suspension for the wheel and otherwise very unrealistic plastic scrap holding the structure together... Maybe great minds think alike. Here's what my early-version frame looked like. Thanks for the video link. It worked fine. Quote Link to comment Share on other sites More sharing options...
chepp Posted April 24, 2017 Author Share Posted April 24, 2017 What, me worry? There are still a couple of more days... So far, the paint is: white primer — Tamiya Fine, spray can solid yellow base — Testors 1214 Gloss Yellow (with "baking" overnight), spray can pearl — Createx Pearlized, airbrush silver flakes in clear (body sides only) — unknown brands (probably Pegasus flakes and MM Acryl clear gloss), airbrush Paint is not finished yet. See the spoon tests earlier in this thread to see what I was testing. This will probably be my last post in this thread. The completed model should appear with the same subject line in the "Under Glass" forum in a day or two. Quote Link to comment Share on other sites More sharing options...
Recommended Posts
Join the conversation
You can post now and register later. If you have an account, sign in now to post with your account.
Note: Your post will require moderator approval before it will be visible.