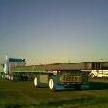
SpreadAxle Posted January 30, 2019 Posted January 30, 2019 (edited) Stripping it years ago is all I ever did. That is standard practice for me, though. Built-ups that I buy go into the "purple bath" upon arrival.Otherwise, it's untouched. I'm building it as a dressed down company truck. It will have spoke wheels, a wind fairing, narrowed bumper, and other things to give it that "company truck" look. This is the likely trailer. I buy these transporters to build as moving vans. I do plan to one day build a shop diorama with the tools and other things that come with these trailers. If I don't use this, it may be an exterior post van, but this is most likely what it will pull. I still have some decisions to make. The kit's long frame would be good for a drom box. I'm just not sure if I want to add that weight to this broken frame or not. Edited February 6, 2019 by SpreadAxle
tbill Posted January 31, 2019 Posted January 31, 2019 I think these are my favorite COE, just great looking lines on such a big cab. Look forward to the rebirth of this rig.
DRIPTROIT 71 Posted February 2, 2019 Posted February 2, 2019 The 4070A and B kits are the best ever! Looking forward to more progress! Welcome to the Build Off!
SpreadAxle Posted February 4, 2019 Author Posted February 4, 2019 Thanks fellas. I will be starting soon. I'm still examining what I have so I can see what needs to be done.
Sam I Am Posted February 4, 2019 Posted February 4, 2019 Love COEs and am looking forward to following this build.
SpreadAxle Posted February 5, 2019 Author Posted February 5, 2019 (edited) Here are my first progress pix. Let's start with the cab. There are 2 running lights molded onto the front of the kit's cab that were optional. I sanded those away. Basic trailer body assembly done. I am converting the tail light panel to be able to accept 2 round tail lights rather than the single rectangular lights as per the kit. The air ride suspension lends itself well to an easy conversion into a single drive tractor. These single axle cabovers with sleepers were once pretty popular with the household movers. Both fleets and owner operators bought this type pf tractor at that time.My mistake was not cutting it about 2 or 3 scale feet ahead of where I did. I do have plenty of frame rail to add to get the length right. Edited February 8, 2019 by SpreadAxle
SpreadAxle Posted February 5, 2019 Author Posted February 5, 2019 (edited) As a side note, I've discovered I'm missing key chrome pieces. If any one has the handles that go below the windshield, or the handrails on the sides of the cab, or the door handle/steps for the cab doors please let me know. I only have one of the handrails(there should be 4), and neither of the 2 handles below the windshield. Thanks Edited February 5, 2019 by SpreadAxle
Rusty92 Posted February 5, 2019 Posted February 5, 2019 These are a beautiful truck. I like where this is headed!
SpreadAxle Posted February 21, 2019 Author Posted February 21, 2019 I've done a few things to it since my last post. I've shortened the wheelbase to a single axle. Here is the basic frame. I swapped out the kit's 5th wheel for a slider from amt. I shortened the slide plate to fit the frame. I pirated the 8v92 engine from a GMC General kit and I chopped it down to a 6V92. The alternator is cut from the engine of an International cabover kit. The white valve cover is resin. I had to cast one because I lost the other original valve cover. I'm happy to get some basics handled on this build.
Sam I Am Posted February 21, 2019 Posted February 21, 2019 On 1/30/2019 at 1:31 PM, SpreadAxle said: This is the likely trailer. I buy these transporters to build as moving vans. Can I ask just what you do to make them into a moving van? I have a few of these myself and only plan on building one of them into a race hauler. Thanks
SpreadAxle Posted February 22, 2019 Author Posted February 22, 2019 3 hours ago, Sam I Am said: Can I ask just what you do to make them into a moving van? I have a few of these myself and only plan on building one of them into a race hauler. Thanks That's easy. It already is a Trailmobile moving van. Literally all you need is different decals. These trailers are the same kit as the Allied, Mayflower, and north American trailers released during the 1970s. Set aside everything that is meant for the interior like the tools and any racing equipment, as well as the wheel covers that come with these trailers. Add some moving company decals and you have your moving van. My Allied van shown here is an ebay rebuild. It was the Bill Elliott/Coors transporter.The KW and Allied van have been stripped and are being rebuilt because the paint job and decals(1970s decals with another set applied on top of them) were awful and it always bothered me. I have to get some more of these Allied decals. I have some decals from modeltruckin.com for Neptune Van Lines that will be going on this unit.
Sam I Am Posted February 22, 2019 Posted February 22, 2019 1 hour ago, SpreadAxle said: That's easy. It already is a Trailmobile moving van. Literally all you need is different decals. These trailers are the same kit as the Allied, Mayflower, and north American trailers released during the 1970s. Set aside everything that is meant for the interior like the tools and any racing equipment, as well as the wheel covers that come with these trailers. Add some moving company decals and you have your moving van. My Allied van shown here is an ebay rebuild. It was the Bill Elliott/Coors transporter.The KW and Allied van have been stripped and are being rebuilt because the paint job and decals(1970s decals with another set applied on top of them) were awful and it always bothered me. I have to get some more of these Allied decals. I have some decals from modeltruckin.com for Neptune Van Lines that will be going on this unit. I did not know that about the hauler. Thanks for the info. I see a couple of mine being turned into moving vans.
Oldmopars Posted February 22, 2019 Posted February 22, 2019 (edited) When I was a kid a family friend worked for Lyon Van lines, moving and storage company. He gave me a truck like the one in the picture. I wish I still had it. I would like to build one like it someday so this is good info. Anyone happen to may these decals? Edited February 22, 2019 by Oldmopars
SpreadAxle Posted February 28, 2019 Author Posted February 28, 2019 Check with Jerry at modeltruckin.com. What he doesn't have he will often make.
SpreadAxle Posted March 1, 2019 Author Posted March 1, 2019 There's not much to report as progress has been slow. Searching for parts and having to cast my own parts has taken up some of the time. Thankfully, I have a complete Transtar 2 kit to copy some of the key parts. For example, the bracket just ahead of the stack on the passenger side, was missing, so I cast a copy of it. When the cab is down, it rests on this bracket. The battery box cover I scratch built using the one from the fresh kit as a guide.
tbill Posted March 1, 2019 Posted March 1, 2019 A little here, a little there, before you know it you’re done. Good looking progress.
SpreadAxle Posted March 2, 2019 Author Posted March 2, 2019 I was never crazy about the kit tail lights, so I went with round lights. I cut the tail light sections from an old amt Fruehauf flat bed and grafted them in. I just need to putty and sand them and they will be done.
SpreadAxle Posted March 18, 2019 Author Posted March 18, 2019 (edited) Not much of an update since a recent wind storm has forced me to do some repairs at home, but at least I was at the bench for a little while today. I cleaned up the tail light area a little with some putty work and sanding. Edited March 18, 2019 by SpreadAxle
SpreadAxle Posted March 28, 2019 Author Posted March 28, 2019 (edited) I finally have a day off, so hopefully I can work uninterrupted. I'm creating more of my own parts on this one. I wanted to eliminate the clunky appearance of the kit stack, so I cut it apart. I am going use K and S aluminum tube for the air cleaner stack. If I can get the upper part of the air cleaner stack bent properly without denting, then I will do that. If not, I do have that upper portion saved and its seam basically eliminated to attach to the top of the air cleaner stack. The muffler was cut away, puttied and sanded. It will be incorporated into the new part I'm making. The cut down parts as compared to an assembled kit part. The lower braces were left on the frame. Another part I had to copy are the door handles. They just need to be trimmed and cleaned up. Here are the clamps I made after modifying and copying the kit part shown with the tubes intended for the intake and exhaust stacks. Edited March 28, 2019 by SpreadAxle
gotnitro? Posted March 28, 2019 Posted March 28, 2019 Awesome work ! Separating the muffler is a great idea. If ya cant bend the pipe without kinking, see if the kit sprue is Similar diameter , and use that for your exhaust stack..I've used it for several parts when running low on supplies. Drill out the end when done no one will notice lol
SpreadAxle Posted April 5, 2019 Author Posted April 5, 2019 (edited) A wind fairing has been installed. I scratch built some new mounts for it. Edited April 5, 2019 by SpreadAxle
Recommended Posts
Create an account or sign in to comment
You need to be a member in order to leave a comment
Create an account
Sign up for a new account in our community. It's easy!
Register a new accountSign in
Already have an account? Sign in here.
Sign In Now