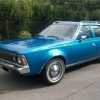
Sportabout Posted November 17, 2019 Posted November 17, 2019 This is my first rod. I like most '33 models and Revell ZZ Top Eliminator was a good starting point. The kit is quite simple so I used only body, interior and front suspension. Engine, transmission and rear suspension are unusable. I wanted same size white wall and tread to front and rear tires. AMT tire pack has nice narrow tires with medium size white wall. My friend said that vinyl tires can't be cut accurately so I sanded them and glued parts together. Rear tires needed wider rims. Front tires got narrow rims. Stock rear end was too weak and Dana 60 replaced it. 392 Hemi is from Revell '41 Willys Street Rod. Engine didn't fit to the chassis and interior and some modifications had to be made. The cab roof required a lot of work before it fit into place but this is situation now.
Claude Thibodeau Posted November 19, 2019 Posted November 19, 2019 Hi! Nice clean work, looks promising. It seems the stance will be dead on, circa 1960's... CT
Koellefornia Kid Posted November 19, 2019 Posted November 19, 2019 I like this project (for the ´33 Ford is one of my all-time favourite rod)! Nice engine choice!
Mr. Metallic Posted November 19, 2019 Posted November 19, 2019 Nice work so far, especially with the body, which can be tricky on this kit. Good job backdating and improving the running gear as well.
mrm Posted November 20, 2019 Posted November 20, 2019 Good looking hot rod so far. 20 hours ago, Claude Thibodeau said: Hi! Nice clean work, looks promising. It seems the stance will be dead on, circa 1960's... CT I dig the ‘60s stance, but imagine if salt flats hot rodders had Brembos like that back in the ‘60s! ?
Sportabout Posted November 24, 2019 Author Posted November 24, 2019 (edited) Big engine requires powerful brakes ?. Drums are for small blocks. I would like to buy a big block '33-'34 rod but in Finland you can only put a standard chevy small block on an old rod. Big block or Hemi engines can't get street legal. Stupid law. Edited November 24, 2019 by Sportabout
Sportabout Posted February 23, 2020 Author Posted February 23, 2020 Most parts are painted now. A fast mock-up to test the stance. Steering and rear suspension have caused problems but I have found solutions to them.
Lowlife ! ! Posted February 25, 2020 Posted February 25, 2020 Looking very nice, I do like a fenderless 33 , I have one on order now ! If I remember right, your supposed to add the interior first, then the roof ? Is there any problems fitting the roof and then adding the interior in afterwards ? Looking forward to more on this !
Sportabout Posted February 25, 2020 Author Posted February 25, 2020 5 hours ago, Lowlife ! ! said: Looking very nice, I do like a fenderless 33 , I have one on order now ! If I remember right, your supposed to add the interior first, then the roof ? Is there any problems fitting the roof and then adding the interior in afterwards ? Looking forward to more on this ! Installing the interior was pretty easy from below, even though the roof was glued to the body. However, the door panels required some adjustments before they fit into place. The rear window was a bit tricky to add because the parcel shelf hindered the installation. The steering wheel required an aluminum tube to stay in place.
Sportabout Posted April 26, 2020 Author Posted April 26, 2020 (edited) Little progress on this project. To get the wheels straight I made a jig with my calipers. 5 minute epoxy is best glue to this. I build a rack with plastic bars to hold the front end part in place. It had to be glued as a separate part to the frame. The front end must be in place before I can install the radiator. There is not much space in the front of the engine. The exhaust system is from Eliminator but parted to two pieces and painted with TS-83. Front pipe is made from soldering wire. The rear suspension is made of Pro Spotsman's front springs. Test fitting parts again. Grille, headlights and air cleaner are not glued yet. Designing the license plate. Edited April 26, 2020 by Sportabout
Recommended Posts
Create an account or sign in to comment
You need to be a member in order to leave a comment
Create an account
Sign up for a new account in our community. It's easy!
Register a new accountSign in
Already have an account? Sign in here.
Sign In Now