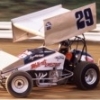
Kmidd65 Posted August 21, 2021 Posted August 21, 2021 Bought this AMT Olds kit at a swap meet 10 years back and started to build it out of the box for a Nascar group challenge. Did not realize the problems I would encounter so lost interest and it had set unfinished on the shelf since that time. Was at a recent contest where somebody had finished one of the Lumina kits of this same vintage. Was inspired to give my Olds a go one more time and here it is! Mostly box stock, kit decals with some extras from Powerslide and other Nascar kits. Paint is CraftSmart Acrylic Neon Yellow with Rustoleum 2k Clear and a finish coat of Pledge (Future) to protect the decals. Build has some flaws but I am happy with how it finished out!
Nacho Z Posted August 21, 2021 Posted August 21, 2021 Looks like a nice, clean build to me! Glad you stuck with it. It is definitely an eye catcher!
yellowsportwagon Posted August 22, 2021 Posted August 22, 2021 Yeah dude that’s a sharp build. The last Oldsmobile style to race.
jchrisf Posted August 22, 2021 Posted August 22, 2021 Hey, that looks great! I've never seen a craft paint job come out so well. Did you mean you cleared with Rustoleum 2X instead of 2K? Also, what were the problems you encountered? I'm thinking about getting one of these kits.
Kmidd65 Posted August 22, 2021 Author Posted August 22, 2021 (edited) 6 hours ago, jchrisf said: Hey, that looks great! I've never seen a craft paint job come out so well. Did you mean you cleared with Rustoleum 2X instead of 2K? Also, what were the problems you encountered? I'm thinking about getting one of these kits. Appreciate the feedback everybody! It was definitely one of those perseverance kits! You are correct Chris, Rustoleum 2X on this one, I would like to try a 2k clear some day. Yes, craft acrylics work with some practice. This is my second Nascar model using them (check out my Winn Dixie car back end of last year for a two-tone craft paint job). The biggest hurdle on this one was getting the body to snug down over the chassis and get the wheels tucked into the body. This seems to be common with the AMT Olds and Lumina kits. I snipped off the front axle pegs and got rid of the metal axle (rear) and epoxied the wheel backs straight to the disc brake pieces. I should have ground down the front wheel backs some to get a better tuck to my eye. I also had to grind the chassis pieces some to help get the body to fit better (attached picture). The other pain point (for me) was getting the back glass to fit. I sanded my first piece too much where I snipped it from the sprue and had a large gap! Thankfully I had a spare kit to try again. The other problem with that piece is there is a lip along the bottom edge that sits inside the trunk, under the lid. That lip would not allow my trunk lid to sit level so if you study the pic where I have the fuel cell, you will see where I removed it on my build. The kit was a challenge but was impressed with the kit decals for the most part. If I was to build another, I would omit the 76 decals on the front fenders. They do not fit well and detract from all the filling I did (front end) and custom decals to mimic the look of Bobby's real car. Give it a try, they come together with some extra work and attention. Edited August 23, 2021 by Kmidd65 Mispelled Name
jchrisf Posted August 22, 2021 Posted August 22, 2021 41 minutes ago, Kmidd65 said: Appreciate the feedback everybody! It was definitely one of those perseverance kits! You are correct Chris, Rustoleum 2X on this one, I would like to try a 2k clear some day. Yes, craft acrylics work with some practice. This is my second Nascar model using them (check out my Winn Dixie car back end of last year for a two-tone craft paint job). The biggest hurdle on this one was getting the body to snug down over the chassis and get the wheels tucked into the body. This seems to be common with the AMT Olds and Lumina kits. I snipped off the front axle pegs and got rid of the metal axle (rear) and epoxied the wheel backs straight to the disc brake pieces. I should have ground down the front wheel backs some to get a better tuck to my eye. I also had to grind the chassis pieces some to help get the body to fit better (attached picture). The other pain point (for me) was getting the back glass to fit. I sanded my first piece too much where I snipped it from the sprue and had a large gap! Thankfully I had a spare kit to try again. The other problem with that piece is there is a lip along the bottom edge that sits inside the trunk, under the lid. That lip would not allow my trunk lid to sit level so if you study the pic where I have the fuel cell, you will see where I removed it on my build. The kit was a challenge but was impressed with the kit decals for the most part. If I was to build another, I would omit the 76 decals on the front fenders. They do not fit well and detract from all the filling I did (front end) and custom decals to mimic the look of Booby's real car. Give it a try, they come together with some extra work and attention. Thanks for the info Kirk. I just ordered the Kodak Olds kit off eBay to see how these build up since yours looks so good. I never would have thought the Rustoleum enamel would have been able to go over the craft paint. I would think it would eat right through it. I've used Craft Acrylics and I like the way they go down but don't like how fragile they are.. The paint comes off to easy when I handle them and other paints/solvents harm them too easily. How'd you safely get the enamel over the craft paint?
Kmidd65 Posted August 22, 2021 Author Posted August 22, 2021 1 hour ago, jchrisf said: How'd you safely get the enamel over the craft paint? It took some testing with plastic spoons but here is what I do. I sand and prime the plastic surface with 600 grit and prime, same as I would for any other enamel or lacquer paint job. For the craft paint, I use the Rustoleum 2x primer with no issues. I have even used the Walmart Colorplace flat white and black enamels (if you can find them) as a base for the craft paint. I prepare my craft paints using a custom made reducer (Denatured alcohol 10%, Eagle One clear window cleaner (clear) 10%, Distilled water 80%, and some glycerin drops (Walmart Pharmacy area). I also add some of the Pledge Floor Finish (Future) to the craft paint mix to promote adhesion. I then spray multiple color coats and dry with a hair dryer (heat off) between coats to the desired color consistency I am after. I usually airbrush with a Paasche H (medium or heavy tip) or Iwata Neo gravity feed. I then let the paint fully cure about a day before I clear coat (right out of the spray can). This method produces stable results in that I can wet sand before more clear coats (few days drying time before sanding) or mask for any secondary paint coats. I have also been able to clear coat these craft paints with automotive grade acrylic lacquers with no issues! Actually for this Olds, the rims were all shot with craft paint. The red went down first as explained above and then sealed with a couple coats of the Acrylic Lacquer. I then shot a couple light coats of Apple Barrel black craft acrylic paint (Walmart) but thinned it with Auto windshield washer fluid (Blue) instead of the custom reducer. This paint is more delicate so that I could gently scrape the redline outline on each wheel. The finish to seal all of this was Testor Gloss Clear Lacquer so that it would not react with the vinyl tires over time. 1
jchrisf Posted August 23, 2021 Posted August 23, 2021 13 hours ago, Kmidd65 said: It took some testing with plastic spoons but here is what I do. I sand and prime the plastic surface with 600 grit and prime, same as I would for any other enamel or lacquer paint job. For the craft paint, I use the Rustoleum 2x primer with no issues. I have even used the Walmart Colorplace flat white and black enamels (if you can find them) as a base for the craft paint. I prepare my craft paints using a custom made reducer (Denatured alcohol 10%, Eagle One clear window cleaner (clear) 10%, Distilled water 80%, and some glycerin drops (Walmart Pharmacy area). I also add some of the Pledge Floor Finish (Future) to the craft paint mix to promote adhesion. I then spray multiple color coats and dry with a hair dryer (heat off) between coats to the desired color consistency I am after. I usually airbrush with a Paasche H (medium or heavy tip) or Iwata Neo gravity feed. I then let the paint fully cure about a day before I clear coat (right out of the spray can). This method produces stable results in that I can wet sand before more clear coats (few days drying time before sanding) or mask for any secondary paint coats. I have also been able to clear coat these craft paints with automotive grade acrylic lacquers with no issues! Actually for this Olds, the rims were all shot with craft paint. The red went down first as explained above and then sealed with a couple coats of the Acrylic Lacquer. I then shot a couple light coats of Apple Barrel black craft acrylic paint (Walmart) but thinned it with Auto windshield washer fluid (Blue) instead of the custom reducer. This paint is more delicate so that I could gently scrape the redline outline on each wheel. The finish to seal all of this was Testor Gloss Clear Lacquer so that it would not react with the vinyl tires over time. That's awesome.. thanks for the detailed explanation... I'm going to give it a try and it should open up a whole lot more color options for me. I love how flat and smooth the craft paints go down.
67malibu Posted August 23, 2021 Posted August 23, 2021 One fine looking model, Great attention to detail, Jeff Marsh.
CRANMAN1 Posted August 24, 2021 Posted August 24, 2021 Looks good man thought about doing that car and the fords he had that hot pink too.
Recommended Posts
Create an account or sign in to comment
You need to be a member in order to leave a comment
Create an account
Sign up for a new account in our community. It's easy!
Register a new accountSign in
Already have an account? Sign in here.
Sign In Now