Mike C. Posted December 15, 2021 Author Posted December 15, 2021 I know I don't have the patience for that.
Zippi Posted December 15, 2021 Posted December 15, 2021 3 hours ago, Mike C. said: I don't think they make solder that small in diameter. I was thinking of using some round wound guitar string and then paint it black but it would probably keep springing back to straight. 0.01in (0.3mm) is the smallest sold.
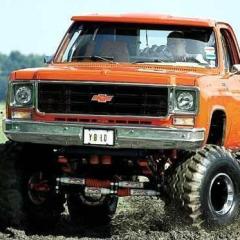
Mike C. Posted December 16, 2021 Author Posted December 16, 2021 (edited) I thought I should go back and change the title of the thread now that this project is officially under way. Got undercarriage painted still need to do a little detailing on engine. Does it look a little dark to anybody? Might have to go back and mix a little white in to look like blue oval blue. Gotta go order my paint and flocking. Might be on hold until after Christmas. Edited December 16, 2021 by Mike C.
Casey Posted December 16, 2021 Posted December 16, 2021 It does look a bit dark, but not horrible. I would suggest flattening the sheen a bit, and repainting the exhaust manifold closer to a cast iron (either new or oxidized/light rust), too. Otherwise, you're off to a good start. Here's a pic I saved a while back, though it looks like the blue bits have been recently repainted. Doesn't take long for any paint on the exhaust manifolds to be burned off:
Mike C. Posted December 16, 2021 Author Posted December 16, 2021 4 minutes ago, Casey said: It does look a bit dark, but not horrible. I would suggest flattening the sheen a bit, and repainting the exhaust manifold closer to a cast iron (either new or oxidized/light rust), too. Otherwise, you're off to a good start. Here's a pic I saved a while back, though it looks like the blue bits have been recently repainted. Doesn't take long for any paint on the exhaust manifolds to be burned off: Thanks Casey. I was thinking of mixing in some flat white. Maybe that will knock the sheen down a little. Gotta make a big bottle of ford blue. Have alot of fords coming up with the wild hoss coming next year. I've been mening to getting around to the exhaust manifolds and trans.
Mike C. Posted December 16, 2021 Author Posted December 16, 2021 This thing has no bumpers to speak of so I went and scratch built a front tube bumper using some 6mm tubing I got from a sprue that holds the quarters on the Firestone f150. I had to open a 2nd kit for the rear bumper but found the same piece to be a little rough. I heated it and tried to make it work but it looks like I'm going to have to get some of the evergreen stuff they make it in 6.3mm. I can even use the brush guard that comes with it.
Metalmad Posted December 18, 2021 Posted December 18, 2021 Looking good and nice add ons with the drink holder and console for the cb. I bought the reissue of this kit a few years back and hopefully I'll get it on the bench some time in the future which I'm contemplating on scratch building linked suspension for the front and rear.
Mike C. Posted December 21, 2021 Author Posted December 21, 2021 Well while I'm waiting for my paint and flocking to arrive I went and picked up some 6mm styrene tubing and fabricated some tube bumpers. Drying now. Waiting for paint.
Mike C. Posted December 21, 2021 Author Posted December 21, 2021 The bed in these kits are a little short if you wanted to actually sleep in one of these so I cut one an inch and a half longer to be more realistic. The marker line is the old bed.
Mike C. Posted December 21, 2021 Author Posted December 21, 2021 Still test fitting things. Gonna be a wile waiting for my paint and flocking to get here in the thick of the Christmas shipping season.
Casey Posted December 22, 2021 Posted December 22, 2021 I'm liking the tube bumpers. Make sure you test fit the "glass" semi-soonish, as there appear to be a funky thing happening at the upper right corner of the windshield opening. Maybe a mold misalignment?
Mike C. Posted December 22, 2021 Author Posted December 22, 2021 I can see that now that you say that. I'm hopping that can be fixed with an emery board. Already test fitted the windshield several times with this overhead console. This time I ordered some of that glue specifically for clear parts. I may have over extended the bed. I might go back and shorten that a bit.
Mike C. Posted December 22, 2021 Author Posted December 22, 2021 After shortening down the bed a bit, it looks like I'm going to be able to use that sink. Maybe even that period correct wedge tube TV.
Painted Black Posted December 22, 2021 Posted December 22, 2021 Looking real good. like the stance picture.
Mike C. Posted December 24, 2021 Author Posted December 24, 2021 Paint arrived earlier. Got some color on it.
Oldcarfan27 Posted December 27, 2021 Posted December 27, 2021 On 12/21/2021 at 8:39 AM, Mike C. said: The bed in these kits are a little short if you wanted to actually sleep in one of these so I cut one an inch and a half longer to be more realistic. The marker line is the old bed. Did they actually SLEEP in them in the 70s? Good call not using the brown carpet - scales too big! However, I question blue terry with orange paint scheme, maybe a brown towel? Do you or Casey have any idea where those wheels came from? I'd like to use a set like them on my van. Perfect 70s era!
Mike C. Posted December 27, 2021 Author Posted December 27, 2021 7 hours ago, Oldcarfan27 said: Did they actually SLEEP in them in the 70s? Good call not using the brown carpet - scales too big! However, I question blue terry with orange paint scheme, maybe a brown towel? Do you or Casey have any idea where those wheels came from? I'd like to use a set like them on my van. Perfect 70s era! I already have the blue flocking now waiting for the color matched adhesive to arrive. It's on back order. The wheels are made by Casey. I'm currently waiting for him to make 3 more sets for me to fit some extra larger Formula Desert Dogs that I for got I had.
Mike C. Posted December 27, 2021 Author Posted December 27, 2021 Got the clear coat on all the body parts are done. I put the hinges on a piece of masksking tape and taped the whole thing to a hanger for painting.
Mike C. Posted December 28, 2021 Author Posted December 28, 2021 Just opened the color matched adhesive. It's red instead of the royal blue we ordered. Way to go Flock it. Now I get to wait until some time in January to do my flocking. I should have sold this kit when I had the chance. ?
Casey Posted December 28, 2021 Posted December 28, 2021 Eh, keep going, minor setback. ? Gives you plenty of time for detailing, fitting up other parts and sub assemblies, and applying BMF, too.
Mike C. Posted December 28, 2021 Author Posted December 28, 2021 1 hour ago, Casey said: Eh, keep going, minor setback. ? Gives you plenty of time for detailing, fitting up other parts and sub assemblies, and applying BMF, too. I gotta order some brown for the cabinetry and that rifle and over under shotgun is too nice not to throw in there. Although our rifles were always in nice cases like you would put a guitar in . As for the BMF, my research (pics on google) shows very little stainless work on this era of Econoline. Windshield seems to be one of those type that is held in by black rubber weather stripping. Still plenty to do.
Mike C. Posted January 11, 2022 Author Posted January 11, 2022 Well, look what finally came in the mail today. Now I'll have to run out and get some chepo brushes and I can finally start my flocking.
Mike C. Posted January 18, 2022 Author Posted January 18, 2022 Ok. I think that's all the flocking for now. I gotta tell ya, this is some seriously messy stuff and I think I bought way too much flocking material. Hopefully, everything will work out in the end.
Recommended Posts
Create an account or sign in to comment
You need to be a member in order to leave a comment
Create an account
Sign up for a new account in our community. It's easy!
Register a new accountSign in
Already have an account? Sign in here.
Sign In Now