Tarkmucker Posted December 2, 2022 Posted December 2, 2022 Thanks to @CabDriver I have another build started on my bench. My chopper beetle got back burnered a while back and I’ve started 6 other projects since then. Here’s another one. The body and chassis are left over after I robbed everything else from the kit for a few other builds. The blue engine is from a 53 Stude that I got about 20 years ago (using for mock-up) the other engine is the same thing but not globbed with paint and glue. Hood and sides are from a 37 Ford truck. The grill shell is a vacuum formed piece I made as a sample piece at work. Rearend is from a 70 Coronet. Front axle is from a 56 Ford. Can’t remember what everything else is from. I didn't plan on doing anything like this so I had no idea where to start. Figured I’d try to loosen up a bit on this one, I knew I had at least one model a body and a slew of parts so here we are. All I need now is to find two matching blowers for the engine that I’ll actually use. And yes, my workbench is a disaster right now. I know. ?? 2
Tarkmucker Posted December 3, 2022 Author Posted December 3, 2022 Made very minimal progress last night. Got a few things glued together, cut some stuff apart, found more parts, changed a few ideas. 1% progress is better than no progress though. Pics to follow later
rickcaps55 Posted December 3, 2022 Posted December 3, 2022 Ho hell Ya now that's looking good I like that Gona be watching this one.!!! 1
OldNYJim Posted December 4, 2022 Posted December 4, 2022 Oh wow, thats bananas! ? ?? Looks like a good start! Love the engine! 1
Tarkmucker Posted December 4, 2022 Author Posted December 4, 2022 (edited) 13 hours ago, rickcaps55 said: Ho hell Ya now that's looking good I like that Gona be watching this one.!!! 1 hour ago, CabDriver said: Oh wow, thats bananas! ? ?? Looks like a good start! Love the engine! Thank you guys. I appreciate that. I made more progress tonight. Looks more like a fresh start than anything after going back and forth about what parts I wanted to actually use and some stuff just not looking the part. I’m using RMCM Firestone dirt track tires for the rear with some wheels that I robbed from a stalled project. Trying to decide on a final seat between the two in the picture. (If anyone knows what the seat on the right is from let me know. Tia.) Started making a very minimal cage for the cockpit, I didn’t get more than the main hoop done tonight. The blue engine was just for mock up and the actual engine is sitting behind the car. I made a flat firewall that the radiator will be mounted behind. I’ll add scoops or something underneath to divert air up from the ground to flow through the radiator. Solid mounted the Dana 60 above the rails and the existing crossmember in front of the axle will act as the new transmission crossmember. The Model A kit transmission crossmember was modified to be used as a motor mount. (still needs some shaping and trimming) The ‘37 hood sides were trimmed and filed to fit. Still needs some fine tuning to fit properly. I found a gauge panel that I like that also fits between the hood sides. Found a smaller battery, a gas pedal, two tanks, two steering wheels, and decided to use a tube axle from a ‘32 Ford instead of the one from the ‘56. I think I like the smaller steering wheel better. As far as the gas tanks go, I might skip either of those all together and make something to fit in a tight space on the car somewhere. Tomorrow’s another day. Also, does anyone have any info on the fuel pump and water pump on these engines? It’s from the AMT 53 Studebaker. It has a cam driven attachment with the fuel pump on one side and the water pump on the other side. Edited December 4, 2022 by Tarkmucker Forgot words 2
Ace-Garageguy Posted December 4, 2022 Posted December 4, 2022 (edited) Cool project. Just like building a drag or lakes car from mostly boneyard parts back when dinosaurs roamed the Earth. Edited December 4, 2022 by Ace-Garageguy CLARITY 1
rickcaps55 Posted December 4, 2022 Posted December 4, 2022 Nice it's going to have a nice shape to the body i see your using the gages from the AMT 57 chevy kit i wish someone would make them in resin i had a few of them they are perfect for 30's and 40's Hot Rot set ups.!!! Have you thought about a color yet. 1
Tarkmucker Posted December 4, 2022 Author Posted December 4, 2022 12 hours ago, Ace-Garageguy said: Cool project. Just like building a drag or lakes car from mostly boneyard parts back when dinosaurs roamed the Earth. Thanks, that’s exactly where I originally was drawing inspiration. Between Fred Carillo’s ‘27 and Ray Brown’s ‘27, a bunch of sixties drag stuff, and Roth’s builds. 3 hours ago, rickcaps55 said: Nice it's going to have a nice shape to the body i see your using the gages from the AMT 57 chevy kit i wish someone would make them in resin i had a few of them they are perfect for 30's and 40's Hot Rot set ups.!!! Have you thought about a color yet. Thank you. I have maybe three sets of those gauges and had no idea where they came from. One is globbed up with paint but I was thinking about making some in resin so I can use them on more projects. I’ll keep you in mind when I make some. As far as color, I’m back and forth between a few pinks, CheZoom teal, purple-licious, or Spanish Moss with a gloss coat. Still not sure though. I took a break from moving motorcycles around to make room for two more and came down to tinker with this for a bit. Got the trunk opened up and the frame filled where all the notches were for attaching various parts. If anyone was wondering, the louvered deck lid from the ‘32 five window fits perfectly on the Model A without trimming or reshaping. Back to moving motorcycles. 1
rickcaps55 Posted December 4, 2022 Posted December 4, 2022 1 hour ago, Tarkmucker said: Thanks, that’s exactly where I originally was drawing inspiration. Between Fred Carillo’s ‘27 and Ray Brown’s ‘27, a bunch of sixties drag stuff, and Roth’s builds. Thank you. I have maybe three sets of those gauges and had no idea where they came from. One is globbed up with paint but I was thinking about making some in resin so I can use them on more projects. I’ll keep you in mind when I make some. As far as color, I’m back and forth between a few pinks, CheZoom teal, purple-licious, or Spanish Moss with a gloss coat. Still not sure though. I took a break from moving motorcycles around to make room for two more and came down to tinker with this for a bit. Got the trunk opened up and the frame filled where all the notches were for attaching various parts. If anyone was wondering, the louvered deck lid from the ‘32 five window fits perfectly on the Model A without trimming or reshaping. Back to moving motorcycles. Cool thanks they really look like there from that time i have done a few 32 or 34 hot rods and the make the dash fix the build and as far as i know they have put them in every 57 chevy kit but one it was the one with blue 57 on the box when someone at AMT took every thing out of the kit and it was bear bones stock they said having to many parts would confuse the kid building it what can i say. You have a great list of colors good luck to me that is the hardest thing is getting that perfect color to see your idea come to life. 1
Tarkmucker Posted December 6, 2022 Author Posted December 6, 2022 On 12/4/2022 at 3:35 PM, rickcaps55 said: Cool thanks they really look like there from that time i have done a few 32 or 34 hot rods and the make the dash fix the build and as far as i know they have put them in every 57 chevy kit but one it was the one with blue 57 on the box when someone at AMT took every thing out of the kit and it was bear bones stock they said having to many parts would confuse the kid building it what can i say. You have a great list of colors good luck to me that is the hardest thing is getting that perfect color to see your idea come to life. I was absolutely bamboozled when I grabbed one of the blue 57s recently. I unknowingly lied to another guy at hobby lobby. He was looking for a first kit for his kid and I pointed out the Revell snap 57 and he was going on about how much he loved the 57. I told him about all the great custom parts in it and everything, the spare engine, bumpers/grill, interior, all of it. He was all excited about it. I grab one a few days later…..LAAAAMMMMEEEE. 9 hours ago, slusher said: Neat unique project! Thanks, Carl. More to come soon. 1
Tarkmucker Posted December 8, 2022 Author Posted December 8, 2022 (edited) I’ve been busy the last couple days with household things so I haven’t had much bench time. However I did manage to get a few things done. Tonight I was able to lay down some paint on a couple items. I used Alclad chrome on the valve covers and the pop-off valve, Alclad polished aluminum on the scoops and timing chain cover, and Metalizer magnesium on the superchargers. I got the metalizer about 10 years ago and it was already way old so I wasn’t sure how it’d come out but I’m happy with the result. I painted the motor with Testors root beer brown lacquer. Bad lighting but it’s brown. I made a small shift lever and attached it to the trans the other night. Along with the shifter I made/altered a few bits. reshaped a short shifter, made a link for the side of it. Reshaped/trimmed some brake and clutch pedals and shaved/shaped the back of the gas pedal. Made a fuel distribution block (there are five holes, two on each side and one in the end) and made a T for the rear brake lines. Added a shaft to the bottom of a modified steering box from a 32 Ford kit. I added a plunger rod/ mounting bracket to the master cylinder which will be mounted to the floor in front of the seat. I made a few mounting tabs for the pedals and one for the shifter. I had some short pieces of guitar string so I’ll be using those for brake lines and shifter cable. There will be another for the “hydraulic clutch”. I don’t know if the trans would actually be able to accept a hydraulic clutch in 1:1 but it does now. There are some things that I can’t just make up and really need to know the proper way to build, for example… The cam driven fuel pump and water pump on this engine. I have a pretty good idea on how to route the fuel lines but I can’t find ANY information on the water pump. Does anyone know anything about it? The engine is from the AMT 53 Studebaker. Edited December 8, 2022 by Tarkmucker 1
cjshaffer25 Posted December 9, 2022 Posted December 9, 2022 This looks awesome so far, I may have missed this but what material did you use for the new floor board up front under the seat. 1
Tarkmucker Posted December 11, 2022 Author Posted December 11, 2022 On 12/9/2022 at 5:27 PM, cjshaffer25 said: This looks awesome so far, I may have missed this but what material did you use for the new floor board up front under the seat. You didn’t miss it, I forgot to mention that part. I used .010” styrene sheet. Glued it to the bottom of the frame rails and butted it up the the front crossmember. I used the same material to make the plate under where the clutch/brake pedals will be.
Tarkmucker Posted December 17, 2022 Author Posted December 17, 2022 Progress update: I’ve been sick for about a week now and haven’t had much bench time. In the meantime my phone camera has also decided not to work properly anymore. I’ve made door panels, narrowed/trimmed the hood and glued it to the hood sides, made trunk hinges, decided to use a 39 Chevy grill then my cat stole it as soon as I stripped the chrome off it so I found one from a 37 Ford coupe, trimmed that grill and need to shape the hood sides slightly. Most of the motor is assembled. Radiator mounts are made. Made a coolant crossover tube with a thermostat/water neck. Need to make exhaust still, mount the battery and gas tank, make a bracket for shift linkage, and need a tube across the cage in the front to mount the steering column. Enough rambling. Hopefully I can get some pics tomorrow. 1
Tarkmucker Posted December 21, 2022 Author Posted December 21, 2022 (edited) Finally got some pictures. Most of the plumbing is done/close to being done. Need to mount the mag and attach the plug wires. I used orange detail wire from detail master (I think) and a few other sizes of random wire I had in a drawer. I despise when plug boots are too tall and very out of scale looking so I tried a new approach. I drilled out the plug holes on the valve covers then I dabbed black craft paint into the holes and stuck the wires through. One it acts as an adhesive for the wires and two it looks more like hemi plug boots. Radiator, gas tank, magneto, shift linkage, and pedals all got Alclad polished aluminum. I cut two sets of door panels and made them taller to fill from the bottom of the body to the top. I made trunk hinges from .010” sheet and two pins that I cut down. I glued in a piece of aluminum tube where the hinges will attach to the body. Cut the center of the dashboard away and used the top “sill” of the dash to fill the void and tie in the sides. And I cut notches in the inner wheel wells to fit the axle. the front end is still about the same. Still need to fab a couple brackets. I trimmed the hood sides and narrowed the hood from a ‘37 Ford truck. My cat stole the grill I was going to use but I found another that I liked better anyway. It was on a built ‘37 coupe I got on eBay years ago that’s been sitting on the shelf in pieces. I trimmed it down to about half the height and used the bottoms section, slightly bent the sides inward to fit the narrowed hood better. I made a filler piece to fit in the gap in the first picture of the hood. It still needs to be trimmed and repeated for the other side. There’s notches in the hood sides to slip over the axle/spring. It’s not in the pictures but I trimmed the tip of the nose off the hood of a Willys to fill the gap at the front of the hood where it meets the grill. Hopefully I can get everything else in primer tomorrow and shoot some color on this before the weekend. Speaking of color… These are the colors I’m playing around with right now. I don’t have a 100% solid plan yet but I have an idea. At least I’ve narrowed it down from the 48 options I had before lol. I already painted the engine root beer brown so I can’t really go back to the gross pink I was thinking about using. Wouldn’t sit right with me. We’ll see how the next few days go, still need to get caught up on Christmas stuff since being sick really put me out. Anyway, that’s all for now. Thanks for looking. Edited December 21, 2022 by Tarkmucker 4
OldNYJim Posted December 30, 2022 Posted December 30, 2022 I love that 37 nose on there - looks killer! That would work well on a more 'traditional' Deuce build too! Way cool! 1
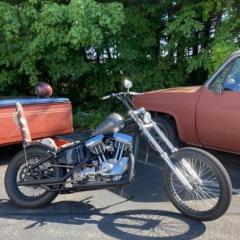
Tarkmucker Posted January 5, 2023 Author Posted January 5, 2023 On 12/30/2022 at 12:50 PM, CabDriver said: I love that 37 nose on there - looks killer! That would work well on a more 'traditional' Deuce build too! Way cool! Thanks man, I was thinking the same thing and already have plans for one down the road. I missed the December deadline but….it’s still December somewhere…right? I haven’t had much bench time, if any, for the last few weeks. I snapped a few pics while I was down there looking for something earlier. Here’s where I left off Hopefully I’ll have some time to finish this week. 2
Rocking Rodney Rat Posted January 5, 2023 Posted January 5, 2023 Wow! I'm totally digging this! Looking forward to seeing more.... -RRR 1
Kit Karson Posted January 5, 2023 Posted January 5, 2023 Something that I would imaging coming from K&R Kustoms+Rods, right RRR?!. Really edgy, in an old-style rear engine way, where brakes matter! -KK 1
Bainford Posted January 5, 2023 Posted January 5, 2023 Your project is really shaping up well. It strongly evokes some of the crazy configurations that cropped up in the 50s/60s. The engine looks good with the variety of shades/textures used for the various components, and your plug boot solution looks great. Very cool project. On 12/21/2022 at 2:11 AM, Tarkmucker said: My cat stole the grill I was going to use but I found another that I liked better anyway. Cool! What's he building? Has he posted a build thread? 1 1
Rocking Rodney Rat Posted January 7, 2023 Posted January 7, 2023 On 1/5/2023 at 10:14 AM, Bainford said: Cool! What's he building? Has he posted a build thread? HA! Now, that did make me LOL.... -RRR 1
Tarkmucker Posted January 10, 2023 Author Posted January 10, 2023 On 1/5/2023 at 8:56 AM, Rocking Rodney Rat said: Wow! I'm totally digging this! Looking forward to seeing more.... -RRR On 1/5/2023 at 9:41 AM, Kit Karson said: Something that I would imaging coming from K&R Kustoms+Rods, right RRR?!. Really edgy, in an old-style rear engine way, where brakes matter! -KK On 1/5/2023 at 10:14 AM, Bainford said: Your project is really shaping up well. It strongly evokes some of the crazy configurations that cropped up in the 50s/60s. The engine looks good with the variety of shades/textures used for the various components, and your plug boot solution looks great. Very cool project. Cool! What's he building? Has he posted a build thread? Thanks guys, appreciate your feedback. I love old school race cars and hot rods so this build has been a blast. I’m still poking away at it when I have time, just been too busy. I think my cat has a thread, something about a rat trap rat rod something or other ?
Tarkmucker Posted January 10, 2023 Author Posted January 10, 2023 Also, while I’m here. I had a couple hours tonight to get some wiring and plumbing done. Plug wires, brake lines, fuel line, battery cables. I’m not overly impressed with my choice of red for the seatbelts. I figured it would tie in the magneto cap and battery cable though. I may change them before I chrome the buckles. Water lines still need to be finished. And after all the scratch building I never thought to make an actual mount or anything for the steering column. Anyway, here it is for now. Thanks for looking.
Tarkmucker Posted January 11, 2023 Author Posted January 11, 2023 No bench time tonight but I made wheels backs on the lathe today in between making parts for work. I started with a piece of 3/4” 6061 round bar. They’re not perfect but they’re close enough.
Recommended Posts
Create an account or sign in to comment
You need to be a member in order to leave a comment
Create an account
Sign up for a new account in our community. It's easy!
Register a new accountSign in
Already have an account? Sign in here.
Sign In Now