oldcarfan Posted March 7, 2024 Posted March 7, 2024 (edited) In an effort to improve my photo taking, I started a backdrop style diorama. It's a generic shop/factory floor but inspired by Magnus Walker's garage in Los Angeles. I used some printed brick bought off eBay along with a couple sheets of black foam board and some balsa left over from an old project. So far I'm only in to the project for the price of the brick sheets and the foam board. The gray strips are just painted balsa to represent concrete. I found some old photos online of a shop built like that. The base is 12 x 21 and I've backed the foam with more balsa strips on the underside. I'm hoping that will curb the foam board's tendency to warp. In scale, the brick walls would be around 16 feet if I measured right. The upper part is just plain black. I need to add some doors and windows and a decent floor, but it's a start. If anyone has tips, let me know. Edited March 7, 2024 by oldcarfan 6
MeatMan Posted March 7, 2024 Posted March 7, 2024 12 hours ago, oldcarfan said: In an effort to improve my photo taking, I started a backdrop style diorama. It's a generic shop/factory floor but inspired by Magnus Walker's garage in Los Angeles. I used some printed brick bought off eBay along with a couple sheets of black foam board and some balsa left over from an old project. So far I'm only in to the project for the price of the brick sheets and the foam board. The gray strips are just painted balsa to represent concrete. I found some old photos online of a shop built like that. The base is 12 x 21 and I've backed the foam with more balsa strips on the underside. I'm hoping that will curb the foam board's tendency to warp. In scale, the brick walls would be around 16 feet if I measured right. The upper part is just plain black. I need to add some doors and windows and a decent floor, but it's a start. If anyone has tips, let me know. Great idea and nice start! I've done a couple of simple ones but would really like to do something similar.
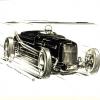
oldcarfan Posted May 6 Author Posted May 6 I can't find my in-progress pics, but here are a few of it in use. I built a dumpster, a couple of roll up doors, some tool boxes, a workbench, and some signs to go with it. My best idea so far was to embed those rare earth magnets in the walls every couple of inches and put little pieces of steel on the back of the toolboxes and the roll up doors. That way they stick to the walls and I can change up the looks pretty easy. 4
oldcarfan Posted May 9 Author Posted May 9 I've added some behind the scenes balsa bracing to the walls as the foam board has started warping a little. Nothing major, I'm guessing it's because of the temperature swings we've had. Last week it was in the low 90s with rain and this week it's been humid and mid-70s. Next week we're looking at close to 100. The wood bracing should stabilize it. I wanted to show something I tried that I think I'm going to like. I was trolling Hobby Lobby looking for ideas and came across the rare earth magnets. The ones I got are thin disks, about 3/8 inch in diameter. The idea is that things on the walls can be removed. The first picture isn't real clear, but I cut a slot in the back of the diorama leaving only the brick facing in place and spaced the magnets about an inch apart. If I want to put on the wall I just glue a thin piece of steel on the back and the magnet holds it firmly in place. For details, I built two roll up doors and various toolboxes so I can switch things up. The big wall size box is a model of my dream toolbox. the two smaller toolboxes came out of a parts box Monogram NASCAR kit and the green box is scratch built. I've started playing with Word and decal paper to make signs and the AREA 51 is one of my failures. I salvaged it by weathering it. lol The Red Ball Garage one was cut out on my wife's Cricut. It came out okay, but the machine doesn't do lettering smaller than about a 1/4 inch very well. Anyway that's where I stand on this backdrop. I just bought a string of battery powered 'fairy lights' and am thinking of ways to use them for lighting. If I had it to do over again I'd use a thin steel sign for the wall between the brick paper and the foam board. It would be a little heavier, but the magnets could then be on the doors and accessories which would probably work better. 4
Mattilacken Posted May 9 Posted May 9 Looks good! Like your garage door wen you took the effort to make it in profiles and not just a photo as I have
oldcarfan Posted July 19 Author Posted July 19 (edited) I tore out the walls and redid them. Probably been watching too many old house reno shows on HGTV. I liked the idea of using magnets to allow changing the scene but it didn't work as well as I hoped with the magnets in the walls. Also the 1/4 inch foam board warps a little with changes in temperature and humidity so they needed bracing. I added thin steel sheet to the walls and removed the magnets. Now I can embed magnets into the scenery pieces to allow positioning them anywhere on the diorama. Then I covered it with new brick paper. I'm thinking of using LED ribbon lights along the edges for lighting, has anyone tried that? With magnets on the back of the detail parts they can be moved or changed out as needed. Here's the roll up door with the magnets on it's back and a set of wooden doors I printed from a photo. Last but not least I started working on electric service to add some eye interest. I just put two tiny pellet magnets in the back and it'll fit flush to the wall. Not finished but it's coming along. Edited July 19 by oldcarfan 4
SpeedAndViolence Posted July 19 Posted July 19 Nice work so far! Very impressed with your scratch building skills. How did you execute the large metal overhead door?
oldcarfan Posted July 19 Author Posted July 19 I finished off the electric box and did HVAC ducting. Was going to do a longer run for the AC but I only had a small amount of square tubing. I think it should be okay photos. Both these pieces have small neo-dymium magnets holding them in place. They are easy to counter sink into the back of most things. These are the magnets, I used two per piece. I could've probably use one magnet per piece just as well. I also have some larger disc shaped ones I got from HL. The peel and stick magnet on a roll stuff works as well, but these have a better hold. You can get a much better price at Amazon and other vendors if there's not an HL near you. 1
oldcarfan Posted July 20 Author Posted July 20 6 hours ago, SpeedAndViolence said: Nice work so far! Very impressed with your scratch building skills. How did you execute the large metal overhead door? Thanks! The SMC Cartage door ended up being harder to imagine than it was to build. It's mostly Evergreen and Plastruct. The door part is Evergreen 2050 V-Groove which looks a lot like the rollup door on my old shop. The frame and the top is various plastic strip and halfround. It's finished out with gray primer that has some random decals and various colors of Vallejo washes. The second door is an interior version, using the same plan and materials. The main difference is in detailing. The interior door has a chain pull and different control box. The back side looks a bit rough, but it doesn't show anyway so that's okay. The wood stabilizes the door and keeps it from warping and at the top is a magnet so it sticks to the backdrop. 1 1
SpeedAndViolence Posted July 20 Posted July 20 Very very cool... Thank you very kindly for sharing that Gary! Off to look for some Evergreen sheet now. 😁 1
SpeedAndViolence Posted August 15 Posted August 15 Hey Gary! When you glued that sheet steel to the foamboard, what type of adhesive did you use? Any metal prep for it stick really well? Im having the same issue with warping as you had. 1
oldcarfan Posted August 16 Author Posted August 16 11 hours ago, SpeedAndViolence said: Hey Gary! When you glued that sheet steel to the foamboard, what type of adhesive did you use? Any metal prep for it stick really well? I'm having the same issue with warping as you had. I didn't do anything in particular to the metal since it was galvanized. It would probably work better if I'd scuffed it up a little. I tried 3M spray cement for part of it until I ran out and just super glued the rest. Both seem to work about equally. I did superglue some 1/8 x 3/8 basswood on the back side to help resist warping just in case. I also experimented with different kinds of magnets. The flexy magnet roll works okay but neodymium magnets seem to work the best.
SpeedAndViolence Posted August 16 Posted August 16 1 hour ago, oldcarfan said: I didn't do anything in particular to the metal since it was galvanized. It would probably work better if I'd scuffed it up a little. I tried 3M spray cement for part of it until I ran out and just super glued the rest. Both seem to work about equally. I did superglue some 1/8 x 3/8 basswood on the back side to help resist warping just in case. I also experimented with different kinds of magnets. The flexy magnet roll works okay but neodymium magnets seem to work the best. Thank you very much kind Sir! I shall follow suit. Much appri-she-ate-it! 😆 1
Spex84 Posted August 17 Posted August 17 I love the idea of using magnets to affix all of the props in a reconfigurable way!! 1
Recommended Posts
Create an account or sign in to comment
You need to be a member in order to leave a comment
Create an account
Sign up for a new account in our community. It's easy!
Register a new accountSign in
Already have an account? Sign in here.
Sign In Now