69*Goat Posted August 26, 2009 Share Posted August 26, 2009 Have any of you shot Clear Orange over a Pearl White? I am about to paint a Lamborghini Gallardo, and I want to try something different. How about Clear Yellow over Pearl White? Do any of you have pictures? Quote Link to comment Share on other sites More sharing options...
curt raitz Posted August 26, 2009 Share Posted August 26, 2009 perfect scenario for the "white plastic spoon" test test your ideas on a white plastic spoon to see if the results are what you are lookin' for... sure beats havin to strip the paint off of body... does sound interesting...clear orange o'er pearl white Quote Link to comment Share on other sites More sharing options...
69*Goat Posted August 26, 2009 Author Share Posted August 26, 2009 test your ideas on a white plastic spoon to see if the results are what you are lookin' for... sure beats havin to strip the paint off of body... does sound interesting...clear orange o'er pearl white I was going to try that tonight, I have already painted and striped this body twice now, because I tried the HOK line of paint that was sold at my LHS, and the silver base coat, wrinkled/crazed the plastic(even through Tamiya white primer). On attempt number two, I shot the body with TS-30(Silver Leaf), and let this dry for a week....it was nice and smooth, until I shot the HOK clear orange over it, and it wrinkled it again.......... Sooo, this time I was going to try Tamiya primer, Tamiya Pearl White, and then Tamiya Clear Orange. I might try Tamiya TS-30(Silver Leaf) and then Tamiya Clear Orange. We will see........ Quote Link to comment Share on other sites More sharing options...
Eshaver Posted August 26, 2009 Share Posted August 26, 2009 Russel, all I can visualize is the fact that you wont be able to dissern the depth of the orange as the pearl is and was a very small part of the paint make- up . I would certainly try the spoon test first . I also am aware of Krylon making a translucent orange in their Short Cut line . I have also seen a pearl coat as well. Even in the 1-1 world , Pearls in general have a charicter of their own and depending on airflow , humidity and how you kept the gun shook up, you might have a decent job. I also disliked pearls as they have to be shot rather thin and that led to orange peel. If you can how about showing us your test results first . I would hate for you to ruin a perfectly good model body. Ed Shaver Quote Link to comment Share on other sites More sharing options...
E St. Kruiser50 Posted August 26, 2009 Share Posted August 26, 2009 (edited) perfect scenario for the "white plastic spoon" test ABSOLUTELY 100% . I have used all types of paints for nearly 60 years including painting several real cars, mostly mine, and in that time you learn some things, when your painting models too . Solvents can penatrate through primers and attack plastic - HENCE THE WRINKLING . When I use URETHANE HOK I always seal the plastic with an automotive primer by DUPLICOLOR, then shoot catalyzed primer over that, so the HOK won' attack the plastic. THE HOK URETHANE PAINT SOLVENT WILL GO RIGHT THROUGH THE DUPLICOLOR PRIMER AND ATTACK THE PLASTIC. But I have to use the DupliColor primer because the catalized urethane primer will also attack the plastic . Basically to simplify things now that I confused you MORE, is that do samples with the spoons. AND REMEMBER - DIFFERENT TYPES AND BRANDS OF PAINTS CAN BE USED TOGETHER, BUT VERY CLOSLY TOGETHER. LETTING PAINTS DRY TOO LONG IS EVERYONES WORST ENEMY IMHO - . I HAVE PAINTED "HOT" LACQUERS OVER ENAMELS FOR YEARS WITH NO ILL AFFECTS - WHICH IS CONSIDERED IMPOSSIBLE - NOT . So, all that being said, get yourself a "GIANT" package of white plastic picnic spoons, and start shooting samples. THEN when your satisfied, SHOOT THE MODEL. Oh, and orange candy over pearl WORKS GREAT. GEORGE BARRIS - THE KING OF THE CUSTOMIZERS was the FIRST to shoot candy over white pearl about 50 years ago and IT'S STUNNING. JUST MAKE SURE YOU USE THE RIGHT COMBINATION OF PAINTS - HENCE THE SPOONS . Edited August 26, 2009 by Treehugger Dave Quote Link to comment Share on other sites More sharing options...
Zoom Zoom Posted August 26, 2009 Share Posted August 26, 2009 I was going to try that tonight, I have already painted and striped this body twice now, because I tried the HOK line of paint that was sold at my LHS, and the silver base coat, wrinkled/crazed the plastic(even through Tamiya white primer). On attempt number two, I shot the body with TS-30(Silver Leaf), and let this dry for a week....it was nice and smooth, until I shot the HOK clear orange over it, and it wrinkled it again.......... Sooo, this time I was going to try Tamiya primer, Tamiya Pearl White, and then Tamiya Clear Orange. I might try Tamiya TS-30(Silver Leaf) and then Tamiya Clear Orange. We will see........ The HOK line that was sold through hobby shops was the culprit, it's very bad stuff, caused a lot of problems like yours, and was unceremoniously discontinued. HOK paint sold to hobbyists through Black Gold, won't kill your paint jobs, if you use lacquer primer/base/clear. But you are on the right track, by using Tamiya sprays. Their pearl white isn't terribly "pearly", but it might show up better under the clear orange. I've had great results spraying the clear sprays decanted and run through the airbrush for much more control, though I haven't used it to do anything but change the tone of the base color, not as a pure candy. You can mix and match Tamiya sprays w/Testors One Coat lacquer sprays. I think they have a pearl white that has more "punch" (all Testors pearls/metallics in their lacquers have bigger/bolder pearls/metallics) that will probably look great as a base for the clear orange. Quote Link to comment Share on other sites More sharing options...
LDO Posted August 26, 2009 Share Posted August 26, 2009 Be aware that Tamiya clear w/pearl has some blue in it. Not tint, but in the pearl powder itself. I was not aware of that when I sprayed some on a candy red Mercedes. You could just get some pearl powder and mix it in some clear. Quote Link to comment Share on other sites More sharing options...
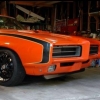
69*Goat Posted August 26, 2009 Author Share Posted August 26, 2009 Ok........ Here is what I did. On the far right, it is Tamiya X-26(Clear Orange) over TS-45(White Pearl) The center is Tamiya X-26(Clear Orange) over TS-30(Silver Leaf) The far left is Tamiya X-24(Clear Yellow) over TS-30(Silver Leaf) I'M going with the Center Color!!!!!!!!! Quote Link to comment Share on other sites More sharing options...
E St. Kruiser50 Posted August 26, 2009 Share Posted August 26, 2009 (edited) Ok........ Here is what I did. On the far right, it is Tamiya X-26(Clear Orange) over TS-45(White Pearl) The center is Tamiya X-26(Clear Orange) over TS-30(Silver Leaf) The far left is Tamiya X-24(Clear Yellow) over TS-30(Silver Leaf) I'M going with the Center Color!!!!!!!!! NICE Glad you took everyone's advise and did the "SPOON TEST" . IT ALWAYS TELLS YOU WHAT YOU NEED TO KNOW - CONGRATS . Another tip is, the more candy color you use the darker it get's, so don't be afraid to see how dark a color can get as you add more on your test spoons. GREAT JOB ON YOUR SAMPLES - dave Edited August 26, 2009 by Treehugger Dave Quote Link to comment Share on other sites More sharing options...
MikeMc Posted August 27, 2009 Share Posted August 27, 2009 NICE Glad you took everyone's advise and did the "SPOON TEST" . IT ALWAYS TELLS YOU WHAT YOU NEED TO KNOW - CONGRATS . Another tip is, the more candy color you use the darker it get's, so don't be afraid to see how dark a color can get as you add more on your test spoons. GREAT JOB ON YOUR SAMPLES - dave Dave hits another one!!!! And one small tip...mark your combination on the other side.. primer,color(s), clear, additives(pearl or flake or reducer etc...) you will not like this part but doing it will pay off when your drawer has 125 or so spoons painted!! Quote Link to comment Share on other sites More sharing options...
pharr7226 Posted August 27, 2009 Share Posted August 27, 2009 I was going to try that tonight, I have already painted and striped this body twice now, because I tried the HOK line of paint that was sold at my LHS, and the silver base coat, wrinkled/crazed the plastic(even through Tamiya white primer). On attempt number two, I shot the body with TS-30(Silver Leaf), and let this dry for a week....it was nice and smooth, until I shot the HOK clear orange over it, and it wrinkled it again.......... Sooo, this time I was going to try Tamiya primer, Tamiya Pearl White, and then Tamiya Clear Orange. I might try Tamiya TS-30(Silver Leaf) and then Tamiya Clear Orange. We will see........ The paint test colors are sweet. Great choice on middle one. For future reference, I've had some success using Kustom Kolor paint... at least on my spoon tests. I'm about to shoot some on a '64 Goat. Here are some of my results. I used Duplicolor Primer for all of the tests. I used MM Brass Metalizer, Duplicolor Silver, and KK Silver as base coats. The two tone samples are a custom mix of Kustom Kolors with Duplicolor Red for the separation line. All of the clears are Krylon Crystal Clear. The two on the far left are over 8 months old and have not wrinkled or cracked. You can make use of that Kustom Kolor paint on a future project. Quote Link to comment Share on other sites More sharing options...
E St. Kruiser50 Posted August 27, 2009 Share Posted August 27, 2009 The paint test colors are sweet. Great choice on middle one. For future reference, I've had some success using Kustom Kolor paint... at least on my spoon tests. I'm about to shoot some on a '64 Goat. Here are some of my results. I used Duplicolor Primer for all of the tests. I used MM Brass Metalizer, Duplicolor Silver, and KK Silver as base coats. The two tone samples are a custom mix of Kustom Kolors with Duplicolor Red for the separation line. All of the clears are Krylon Crystal Clear. The two on the far left are over 8 months old and have not wrinkled or cracked. You can make use of that Kustom Kolor paint on a future project. I AM PROUD OF YOU GUY'S YOU ARE SHOOTING SAMPLES FIRST - AND GETTING BEAUTIFUL RESULTS . THIS IS JUST THE BEST - I LOVE IT HERE - dave Quote Link to comment Share on other sites More sharing options...
pharr7226 Posted August 27, 2009 Share Posted August 27, 2009 Thanks Treehugger Dave. I'm glad that you and others on this site are willing to share your knowledge. I love it here also. Quote Link to comment Share on other sites More sharing options...
69*Goat Posted August 28, 2009 Author Share Posted August 28, 2009 (edited) Well.... It must be beginners luck. I have always done cars that are one color, nothing fancy like what I did tonight. I can make a single stage paint look like it is still wet after it's dry, but this one was a little more challenging. I should have used my Iwata, but the tip was soaking in lacquer thinner, so I used my Badger 360. Edited August 28, 2009 by 69*Goat Quote Link to comment Share on other sites More sharing options...
pharr7226 Posted August 28, 2009 Share Posted August 28, 2009 You hit a home run with that paint job. Great work!!! Quote Link to comment Share on other sites More sharing options...
sci-fifan Posted July 4, 2017 Share Posted July 4, 2017 Hey guys I need some advice....I'm an amateur model builder. I have clear blue and I want to paint CLEAR PLASTIC PARTS. the only problem is that when I mix the clear paint with thinners or water in the case of acrylic and I airbrush it onto the parts the paint withdraws from the sides. the specific part that I need to paint is CONVEX in shape. how do you airbrush clear plastic parts with clear paint so that everything is evenly coated????? Quote Link to comment Share on other sites More sharing options...
MrObsessive Posted July 4, 2017 Share Posted July 4, 2017 Timothy, the only advise I can give you in regards to clear color painting is that you have to work slowly and patiently. Meaning it'll take very light multiple coats to get the desired effect.Putting the clear paint on too quickly and too heavy causes the underlying coats to "run", and not allowing enough time for those underlying coats to dry is what's causing the "drawing away" problem. You might need to wait for a coupla three minutes between each coat to minimize the problem.I'd practice a bit on something scrap till you get the hang of it. Candy/clear paints can be tough to do, but with patience it can be done.Hope this helps! Quote Link to comment Share on other sites More sharing options...
Joe Handley Posted July 4, 2017 Share Posted July 4, 2017 Bill is right on the money here, especially if being shot out of a rattle can! I've shot a few r/c bodies with the candy lacquers in spray cans and they can have problems if the moreso if the weather isn't quite right (usually too humid) too. Quote Link to comment Share on other sites More sharing options...
Gt fan Posted July 5, 2017 Share Posted July 5, 2017 This is clear orange over gold. I had to work in light coats to build up the orange. I taped the body all together before painting it. On the Enzo in some spots you see the color on the backside ov the panelpanel Quote Link to comment Share on other sites More sharing options...
cwobeaman Posted October 26, 2018 Share Posted October 26, 2018 Interested to know what brand clear you used? Also, I’m struggling to find the right paint for the dash... Quote Link to comment Share on other sites More sharing options...
Recommended Posts
Join the conversation
You can post now and register later. If you have an account, sign in now to post with your account.
Note: Your post will require moderator approval before it will be visible.