Davewilly Posted February 6, 2014 Posted February 6, 2014 New project I am starting....This is my first FED to attempt. and because of that it wont be a super detailed attempt either. I might add a few little things like a pre-wired Mag and plug wires. I am de chroming some of the engine parts that are not chrome on the real thing. Here is where I am at so far...Cleaned all the flash off the frame rail and sub parts, Cleaned up the body parts and got them all in primer and started on the engine block. Thanks for looking!
gasser59 Posted February 6, 2014 Posted February 6, 2014 Looks mighty nice so far Dave. Hey - also see your Jeep in the background. That looks good too.
skymnky721 Posted February 6, 2014 Posted February 6, 2014 Lookin good so far,,fun kit to do thats for sure
brett Posted February 7, 2014 Posted February 7, 2014 you might want to stretch or replace the blower belt or at the very least wait it a few days after gluing the top pulley, it has a tendency of pulling the top pulley downwards otherwise
Davewilly Posted February 7, 2014 Author Posted February 7, 2014 Looks mighty nice so far Dave. Hey - also see your Jeep in the background. That looks good too. gasser59..Yeah I am also back working on it while starting the Dragster...Maybe I will have it for the DSC you might want to stretch or replace the blower belt or at the very least wait it a few days after gluing the top pulley, it has a tendency of pulling the top pulley downwards otherwise Thanks for the tip Brett! Thanks for all the comments guys...I will post some more as I go
Davewilly Posted February 10, 2014 Author Posted February 10, 2014 Weekend update....Didnt get a whole lot of bench time this weekend but I got the engine parts out of the purple pond and then in primer and I got the chassis parts and engine block painted black. Thanks for looking!
geetee66 Posted February 15, 2014 Posted February 15, 2014 Looking good! I fancy building one of these...so I'll be watching for updates Keep the pics comin' !
ApexSpeed Posted February 15, 2014 Posted February 15, 2014 Nice build so far! When you de-chromed, what did you use? I used Super Clean on my chrome parts, and found that after they were bare, there was a very odd orange "goo" for lack of a better term that was left behind. It was in the corners of every piece, and is sticky, almost like a bees wax. It can be scraped off with a blade, but it's been a mess so far. I would love to be able to soak it in something to get the rest of whatever that is off of the parts, but I wonder if I am the only one who has seen this on this kit.
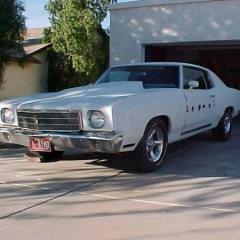
DrKerry Posted February 15, 2014 Posted February 15, 2014 Lookin good so far, like the Monza in the background too
Davewilly Posted February 17, 2014 Author Posted February 17, 2014 Nice build so far! When you de-chromed, what did you use? I used Super Clean on my chrome parts, and found that after they were bare, there was a very odd orange "goo" for lack of a better term that was left behind. It was in the corners of every piece, and is sticky, almost like a bees wax. It can be scraped off with a blade, but it's been a mess so far. I would love to be able to soak it in something to get the rest of whatever that is off of the parts, but I wonder if I am the only one who has seen this on this kit. I also use super clean and had the same goo. This is the first time I have had that happen though while stripping chrome ...so maybe its something they used when plating the parts...
Davewilly Posted February 17, 2014 Author Posted February 17, 2014 This weekends update....was out of town with family so didnt get much bench time in. But I painted the front wheels red like in the picture or two I have found on line and also on the box. I also painted the intake manifold and blower parts Aluminum which also shows on the box and one picture I have of the car in action...the other pictures I have seen of it its polished or chromed but they are also pictures of it on a show circuit. Here is what I have so far Thanks for all the comments and thanks for looking! lose up of the wheels
ApexSpeed Posted February 17, 2014 Posted February 17, 2014 I also use super clean and had the same goo. This is the first time I have had that happen though while stripping chrome ...so maybe its something they used when plating the parts... Good, I thought it was something I did. Must have been a base layer for the chrome. I have tried denatured alcohol, Super Clean, Simple Green and even Testors airbrush thinner and not one of them touched that stuff. Gak,
Davewilly Posted February 17, 2014 Author Posted February 17, 2014 Good, I thought it was something I did. Must have been a base layer for the chrome. I have tried denatured alcohol, Super Clean, Simple Green and even Testors airbrush thinner and not one of them touched that stuff. Gak, I just kind of scraped it off with a #11 Exacto blade...came off fairly easy and what I didn get you cant see with the primer over it...
Davewilly Posted March 3, 2014 Author Posted March 3, 2014 I was able to get back to my work bench a little bit this weekend. This is where I am at so far. Thanks for looking!
Davewilly Posted March 3, 2014 Author Posted March 3, 2014 I did notice after I took the pictures that the blower pulley wasnt straight so I did fix that already.
Davewilly Posted April 23, 2014 Author Posted April 23, 2014 While letting the belt stretch a bit to fit the pulleys without breaking off the blower pulley the rubber belt broke. I figured it might being there was a thin spot in the belt. Does any of the after market folks make blower belts? Or do you guys have any good materials you use to make them? Thanks in advance for any help.
John Pol Posted April 23, 2014 Posted April 23, 2014 Well you can use masking tape for your belt fold it over cut to the size you need paint it flat black and get the smallest strips you can find for the ribbing for inside of the belt
Davewilly Posted April 23, 2014 Author Posted April 23, 2014 Well you can use masking tape for your belt fold it over cut to the size you need paint it flat black and get the smallest strips you can find for the ribbing for inside of the belt thanks John, I think i have seen someone do something like that somewhere. But wasnt sure if it was masking tape or electrical tape they used. Electrical didnt seen like it was the right type of material to use
rustybill1960 Posted April 25, 2014 Posted April 25, 2014 Hey Dave This is one kit I hope to get for myself soon and is looking good but, I can't help but notice the monza in the back ground? You gonna post this build too? Thank You for sharing Later Russ
Recommended Posts
Create an account or sign in to comment
You need to be a member in order to leave a comment
Create an account
Sign up for a new account in our community. It's easy!
Register a new accountSign in
Already have an account? Sign in here.
Sign In Now