CRUSADER2
-
Posts
303 -
Joined
-
Last visited
Content Type
Profiles
Forums
Events
Gallery
Everything posted by CRUSADER2
-
1926 Mack AC Dump Truck
CRUSADER2 replied to Jim B's topic in Model Trucks: Big Rigs and Heavy Equipment
Nearly missed this one, a really excellent job, looks great. -
Aussie Kenworth K200
CRUSADER2 replied to ARTEMIS1759's topic in General Automotive Talk (Trucks and Cars)
Hi everybody, I am sure A&N Truck Models in Latvia already make a really detailed full resin kit of the K200 in 1/24th, I don't think they are very expensive either, around 120 euros, there are also photos of finished models on there gallery site, hope this is helpful. -
KENWORTH K100 AERODYNE
CRUSADER2 replied to CRUSADER2's topic in General Automotive Talk (Trucks and Cars)
Thanks guy's for your ideas, this site is a great source of information and help. Phil the L/h dash still might come in use full as all my builds are a mixture of American and Australian models supposedly running from Britain onto the continent, in theory they would spend more time driving on the right so a left hand drive would be more practical. Mike that's a great looking rig and proof that the AMT kit is a definite contender. Haken it seems like the Revell kit might be the better option of the two, the fact that the roof is separate is not a problem as I would have to cut this off any way to reduce the cab down to a standard length sleeper to fit the Australian version of the aerodyne roof, also the fact that it has a Cummins NTC 475 is another bonus as although all my trucks are on the edge of plausible for Europe I am trying to keep them in the realms of possible by assuming the transport company would try to standardise on engines/gearbox etc. Thanks again KJ and everybody for your help. -
Just out of curiosity, which of the two Kenworth k100 1/25th scale kits that are available is the better detailed, the Revell kit or the AMT Papa truck kit, I know there would probably be a little more work involved with the AMT version to build it as standard artic and I was wondering if all the chassis detail is modeled under the transporter bodywork. What I am really after building is the Australian Kenworth K125 so it will really only be as a base for that build, I might even be better off starting with the original AMT K123 kit as a base and buying the resin parts to convert that. Any thoughts on the subject will be much appreciated, thanks in advance, cheers all.
-
70's Swinging meat trailer
CRUSADER2 replied to KJ790's topic in Model Trucks: Big Rigs and Heavy Equipment
A really nice realistic and detailed piece of modeling, everything about it just looks the job, great work!!! -
1950 Ford F6 Tow Truck
CRUSADER2 replied to Michael Kröger's topic in Model Trucks: Big Rigs and Heavy Equipment
Looks great, a really lovely detailed and neat build, paint job, weathering and decals really make it. Excellent work !!! -
MARMON coe 86" cab
CRUSADER2 replied to CRUSADER2's topic in WIP: Model Trucks: Big Rigs and Heavy Equipment
Cheers for the nice comments folks, hi Hermann, I know it should have an ashtray on the passenger side of the dash board but I don't think I am going to bother with it, I am going to assume that it was taken off when the cab was refurbished and anyway the regular driver doesn't smoke ( that's my excuse anyway) also, the dash is not correct for this particular truck, model, year, I have mixed it with the later stile dash. I am not sure yet weather the resin/styrene mix will be a success when it comes to painting it, I considered using decals for the dash dials but as I didn't have enough spares of the same stile I had no other option, I will have to see how it comes out after painting, I need some new glasses as well! Anyway, happy modeling for now everybody. -
MARMON coe 86" cab
CRUSADER2 replied to CRUSADER2's topic in WIP: Model Trucks: Big Rigs and Heavy Equipment
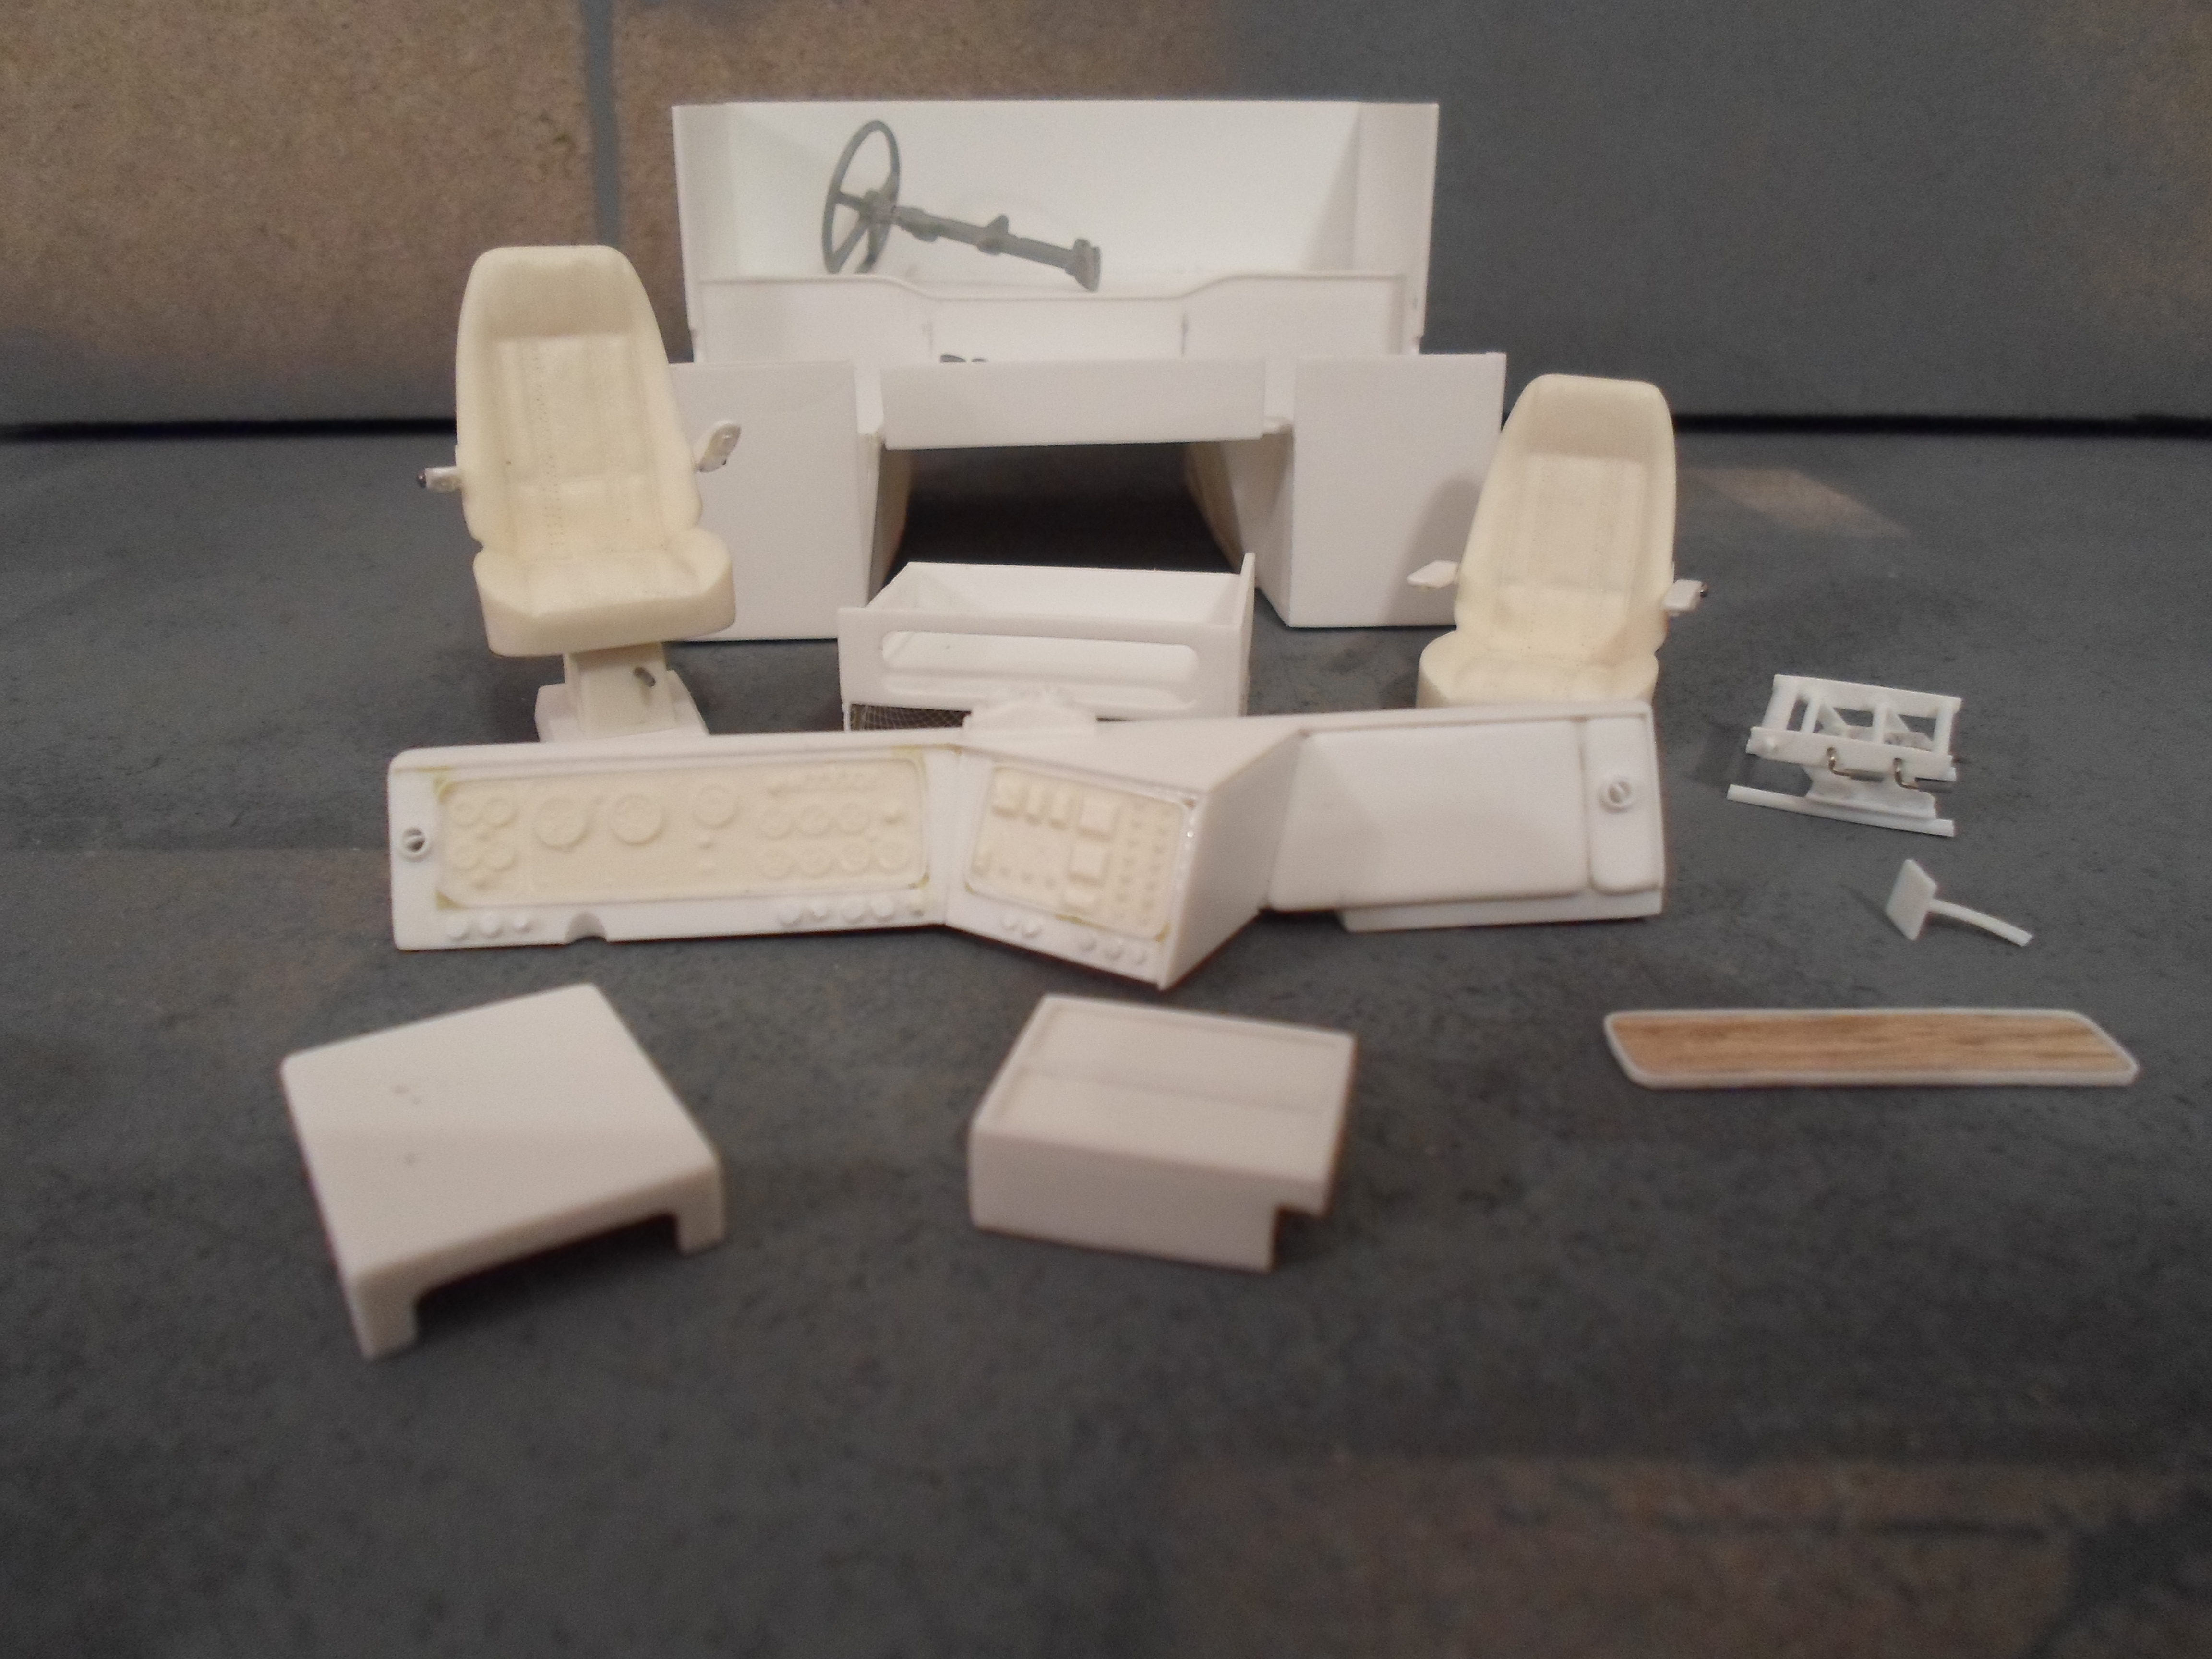
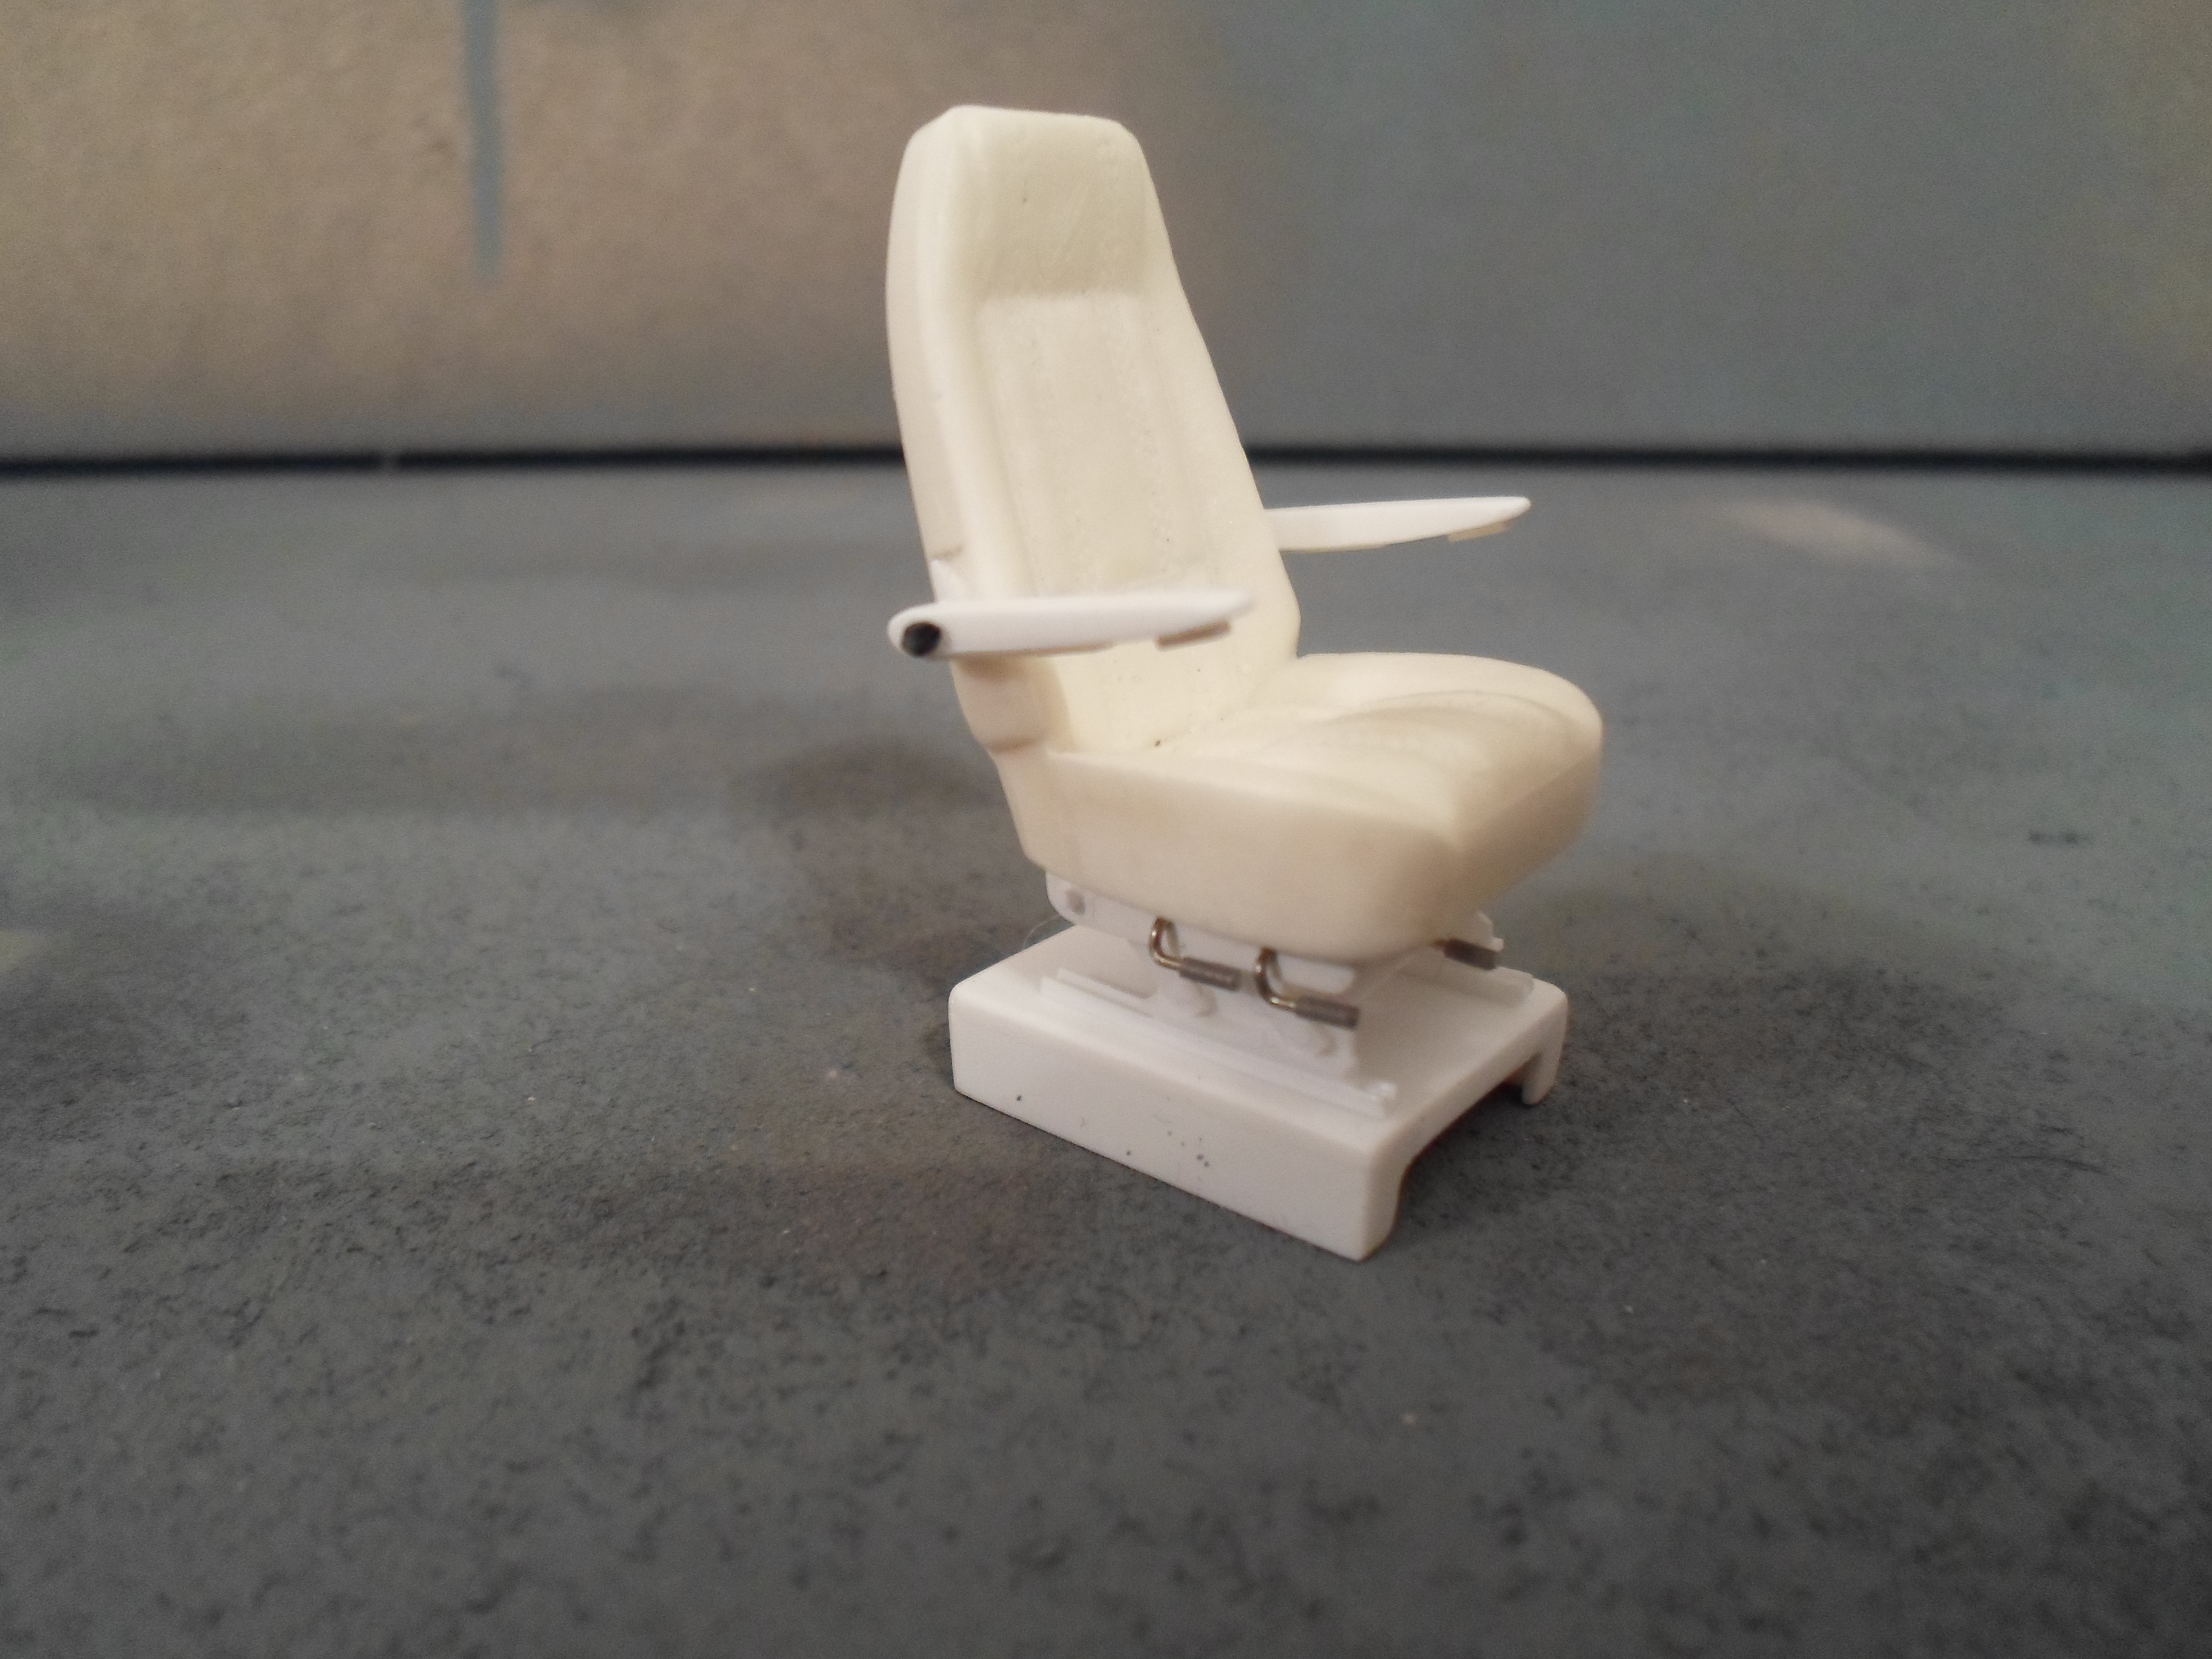
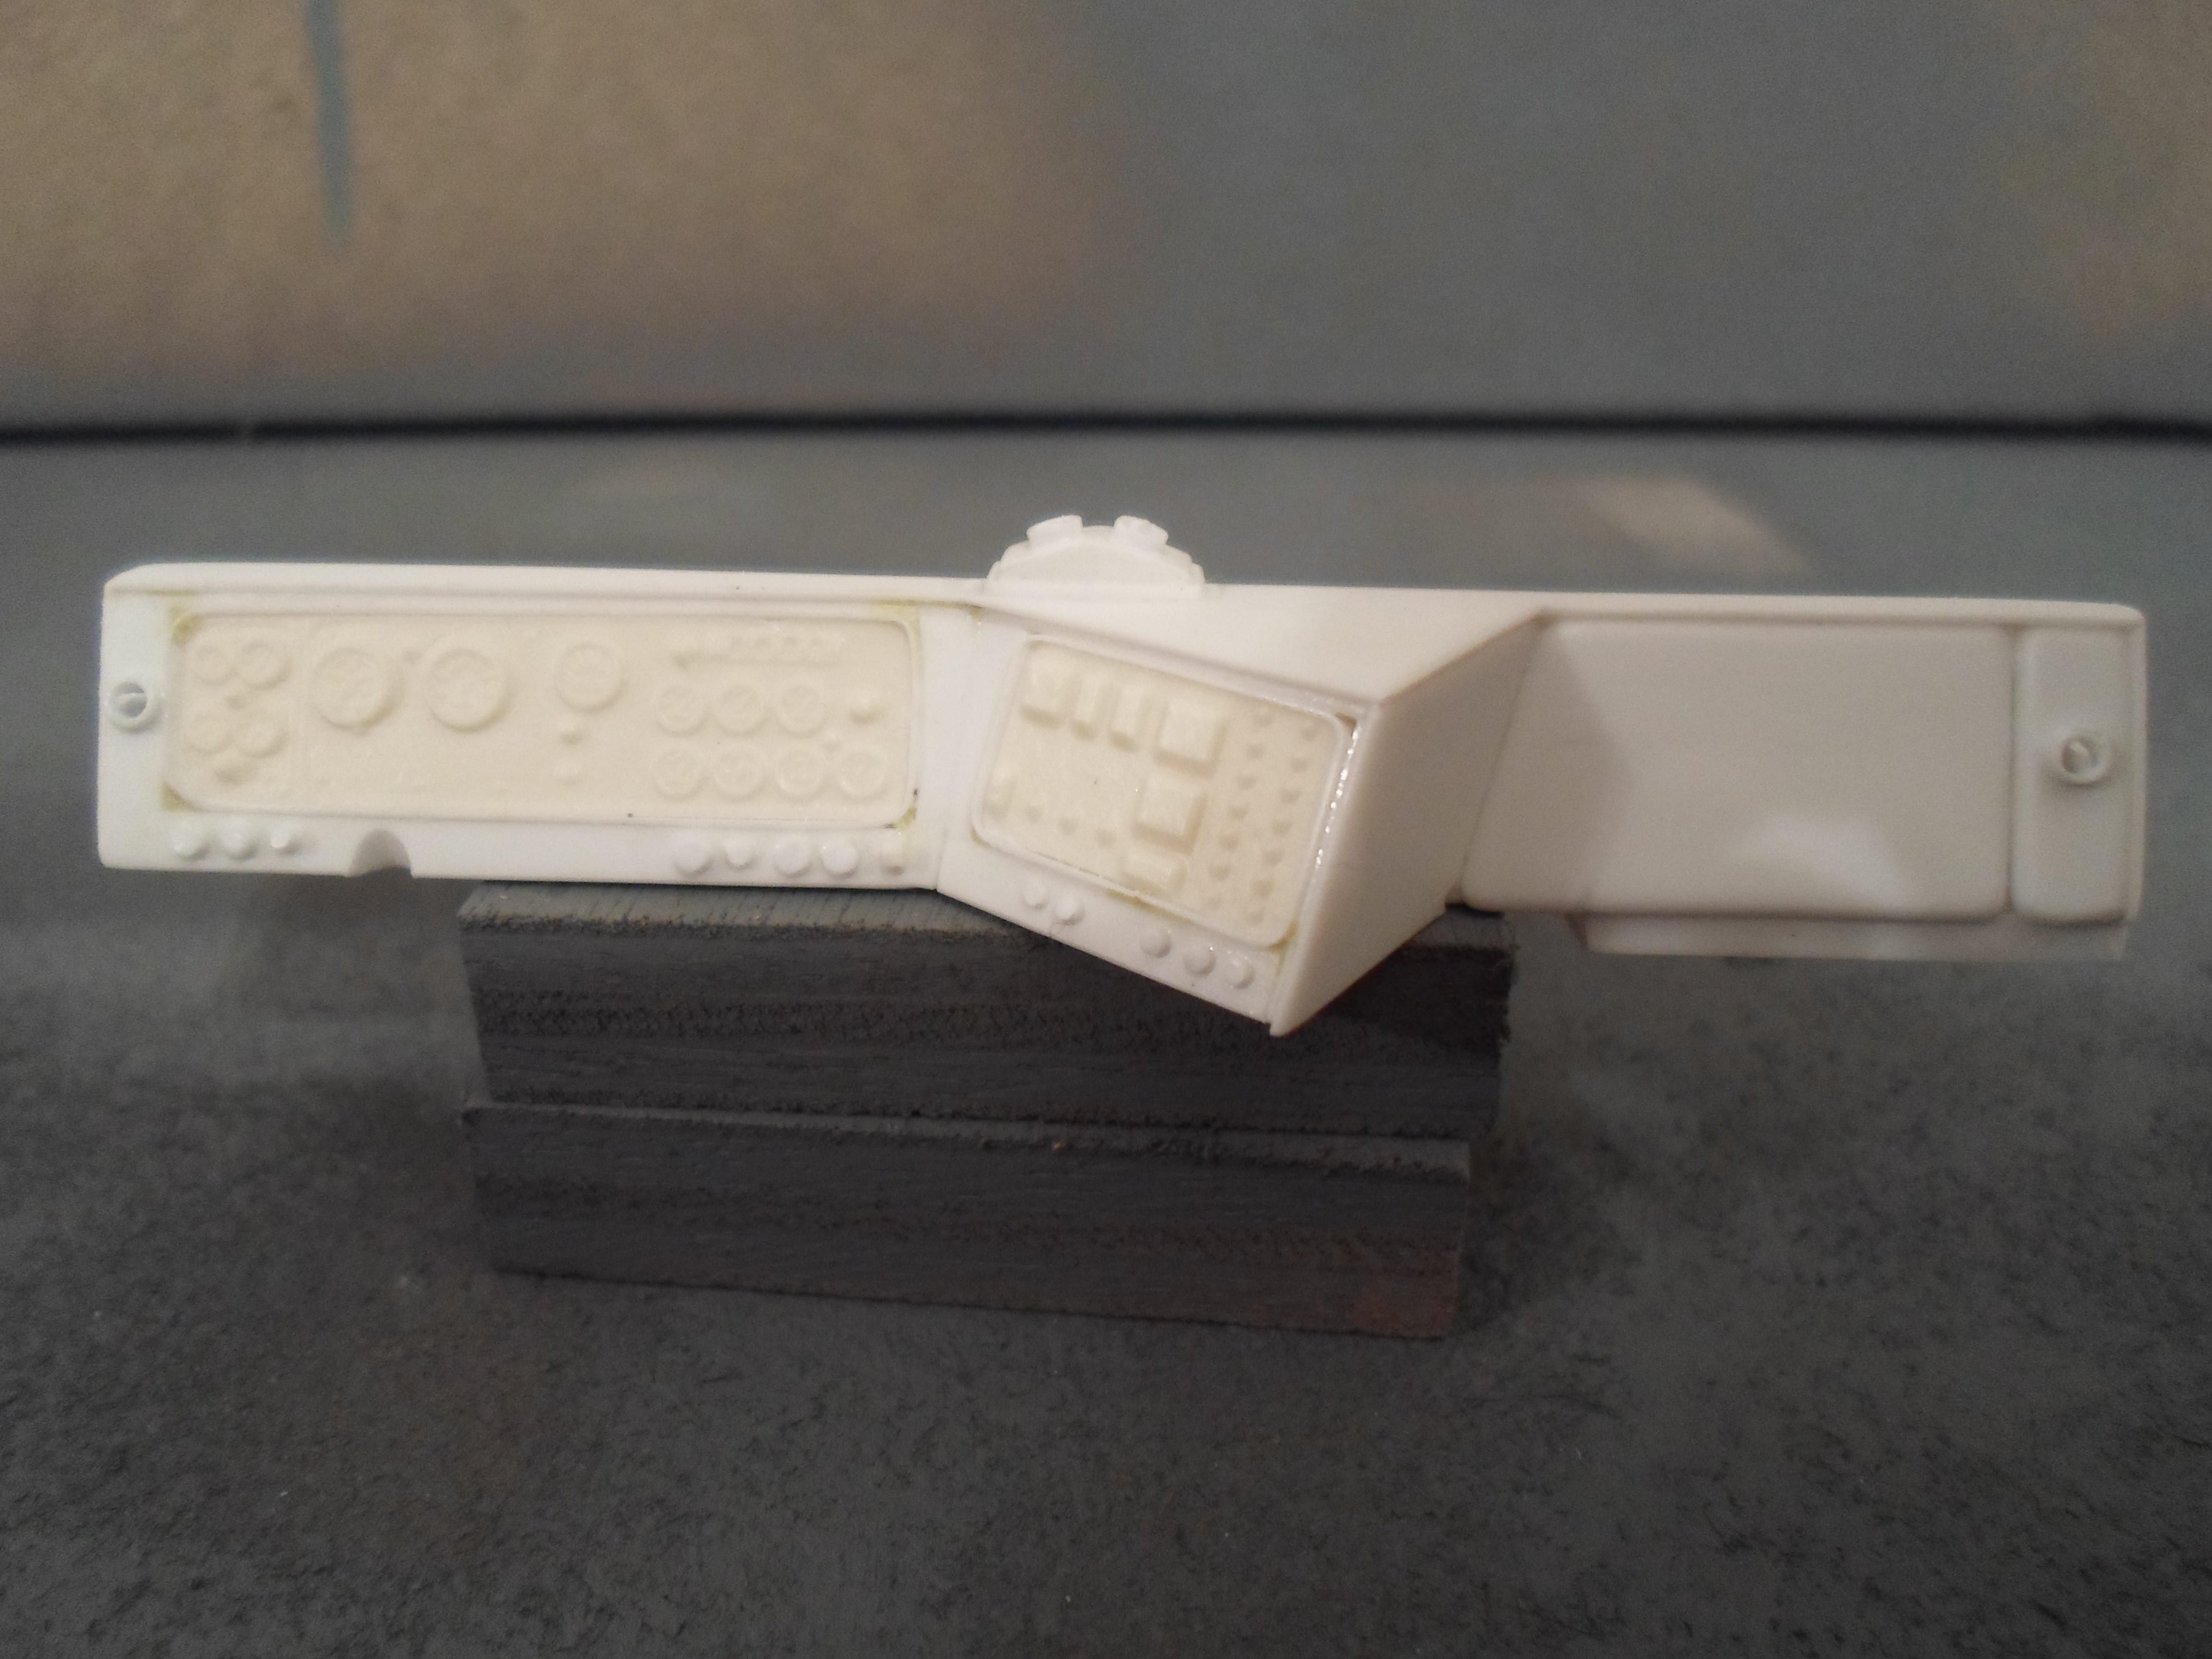
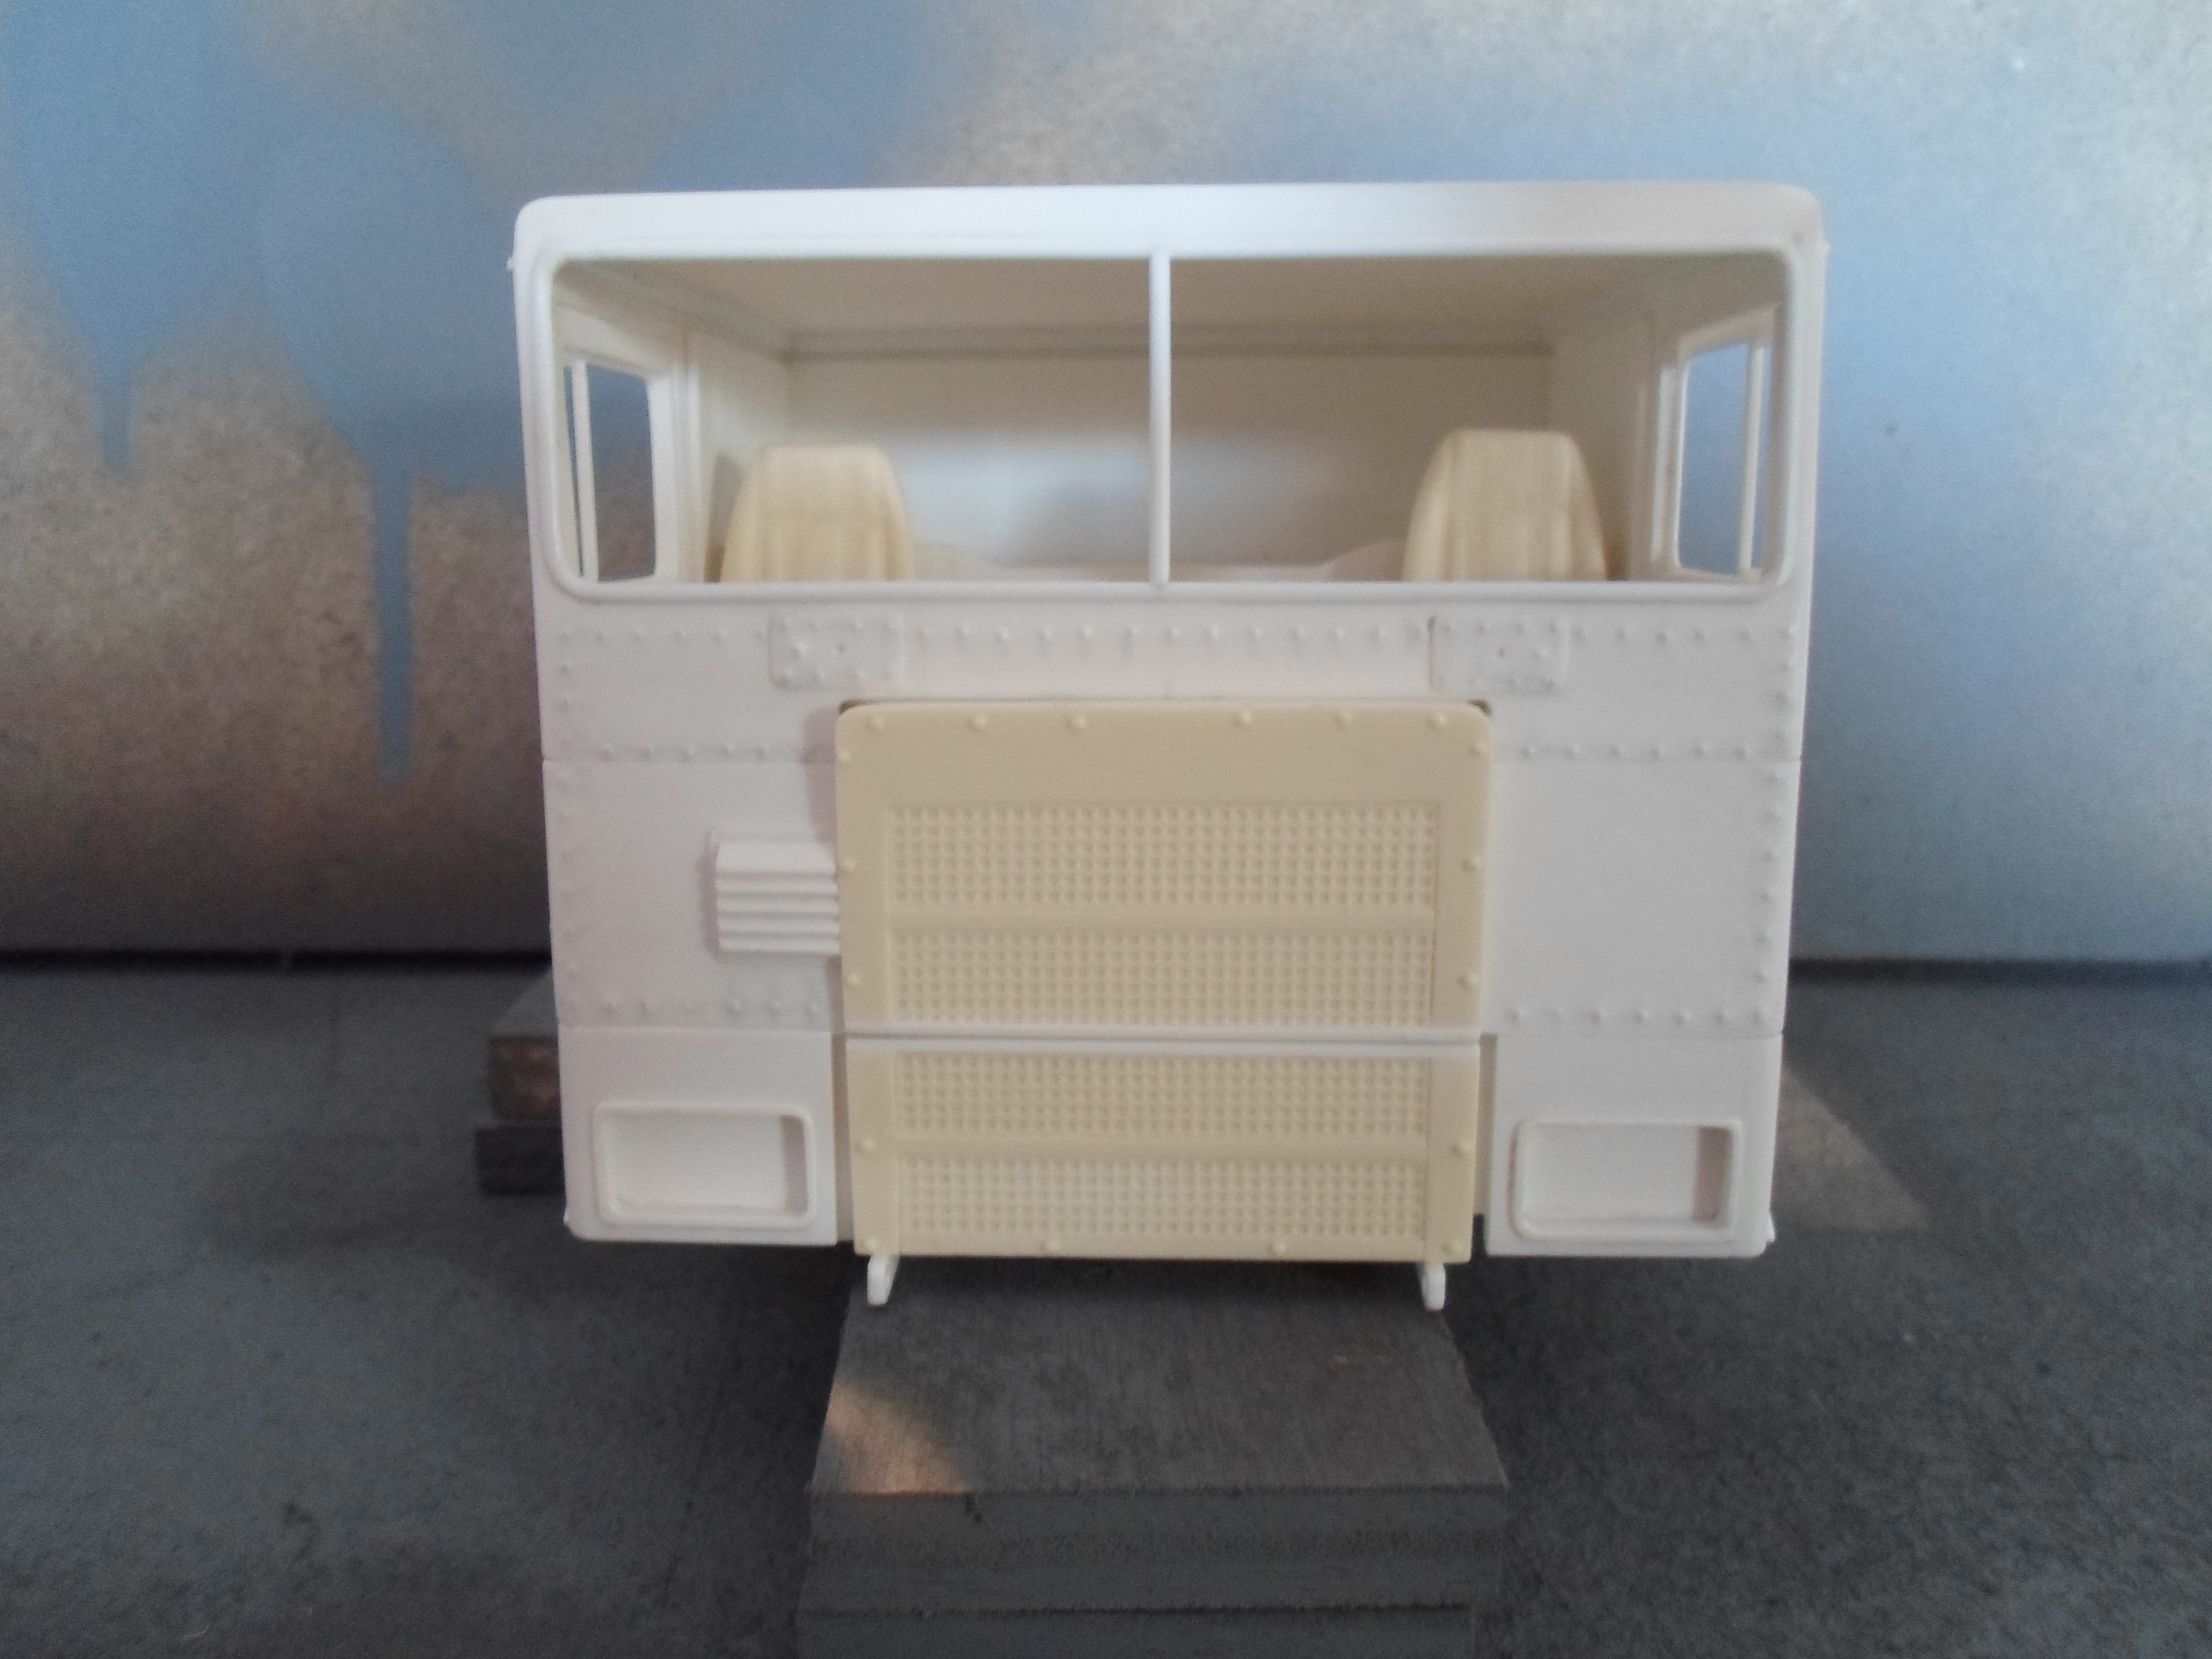
Found some more photos so here is a bit of an update, I used the seats from the resin kit as I am modeling a MARMON from circa 1977 and the ones in the MARMON/ PETERBILT Revell kit that I used for the donner chassis are a bit too modern, I have used the steering column from the Revell kit as it is a much cleaner moulding in plastic than the resin one. The dashboard is scratch built from plastic but incorporating the resin panels with the dials, there is still a little bit of filling to do around the two parts in the photos, the dashboard is not correct for the 1977 model but as I am modeling the period around 1995/2000 I figure it might have been updated a little in the company's own workshops ( modelers licence etc ) it would have been coming to the end of its working life by then I think, ( 20 plus years) in the photos there is a storage shelf with more storage underneath, the cab tub/bunk, heater unit box and a few other bits. Some of these items have now been painted and other bits completed for the cab interior, the roof lining with the curtain rails is made but the pod containing the radio, CB and air con vents is still to do before I can start on the detail on the outside of the cab, mirror brackets, cab tilt lock mech, sun visor, lights, indicators, antenna's, grab rails, wipers, air con unit etc, I think there is a good chance that I won't finish this until the end of the year as we will be altering the clocks to summer time in a few weeks and that will be the end of the dark evenings, no more excuses for not working in the garden, painting the house etc, ah well that's life.
-
MARMON coe 86" cab
CRUSADER2 replied to CRUSADER2's topic in WIP: Model Trucks: Big Rigs and Heavy Equipment
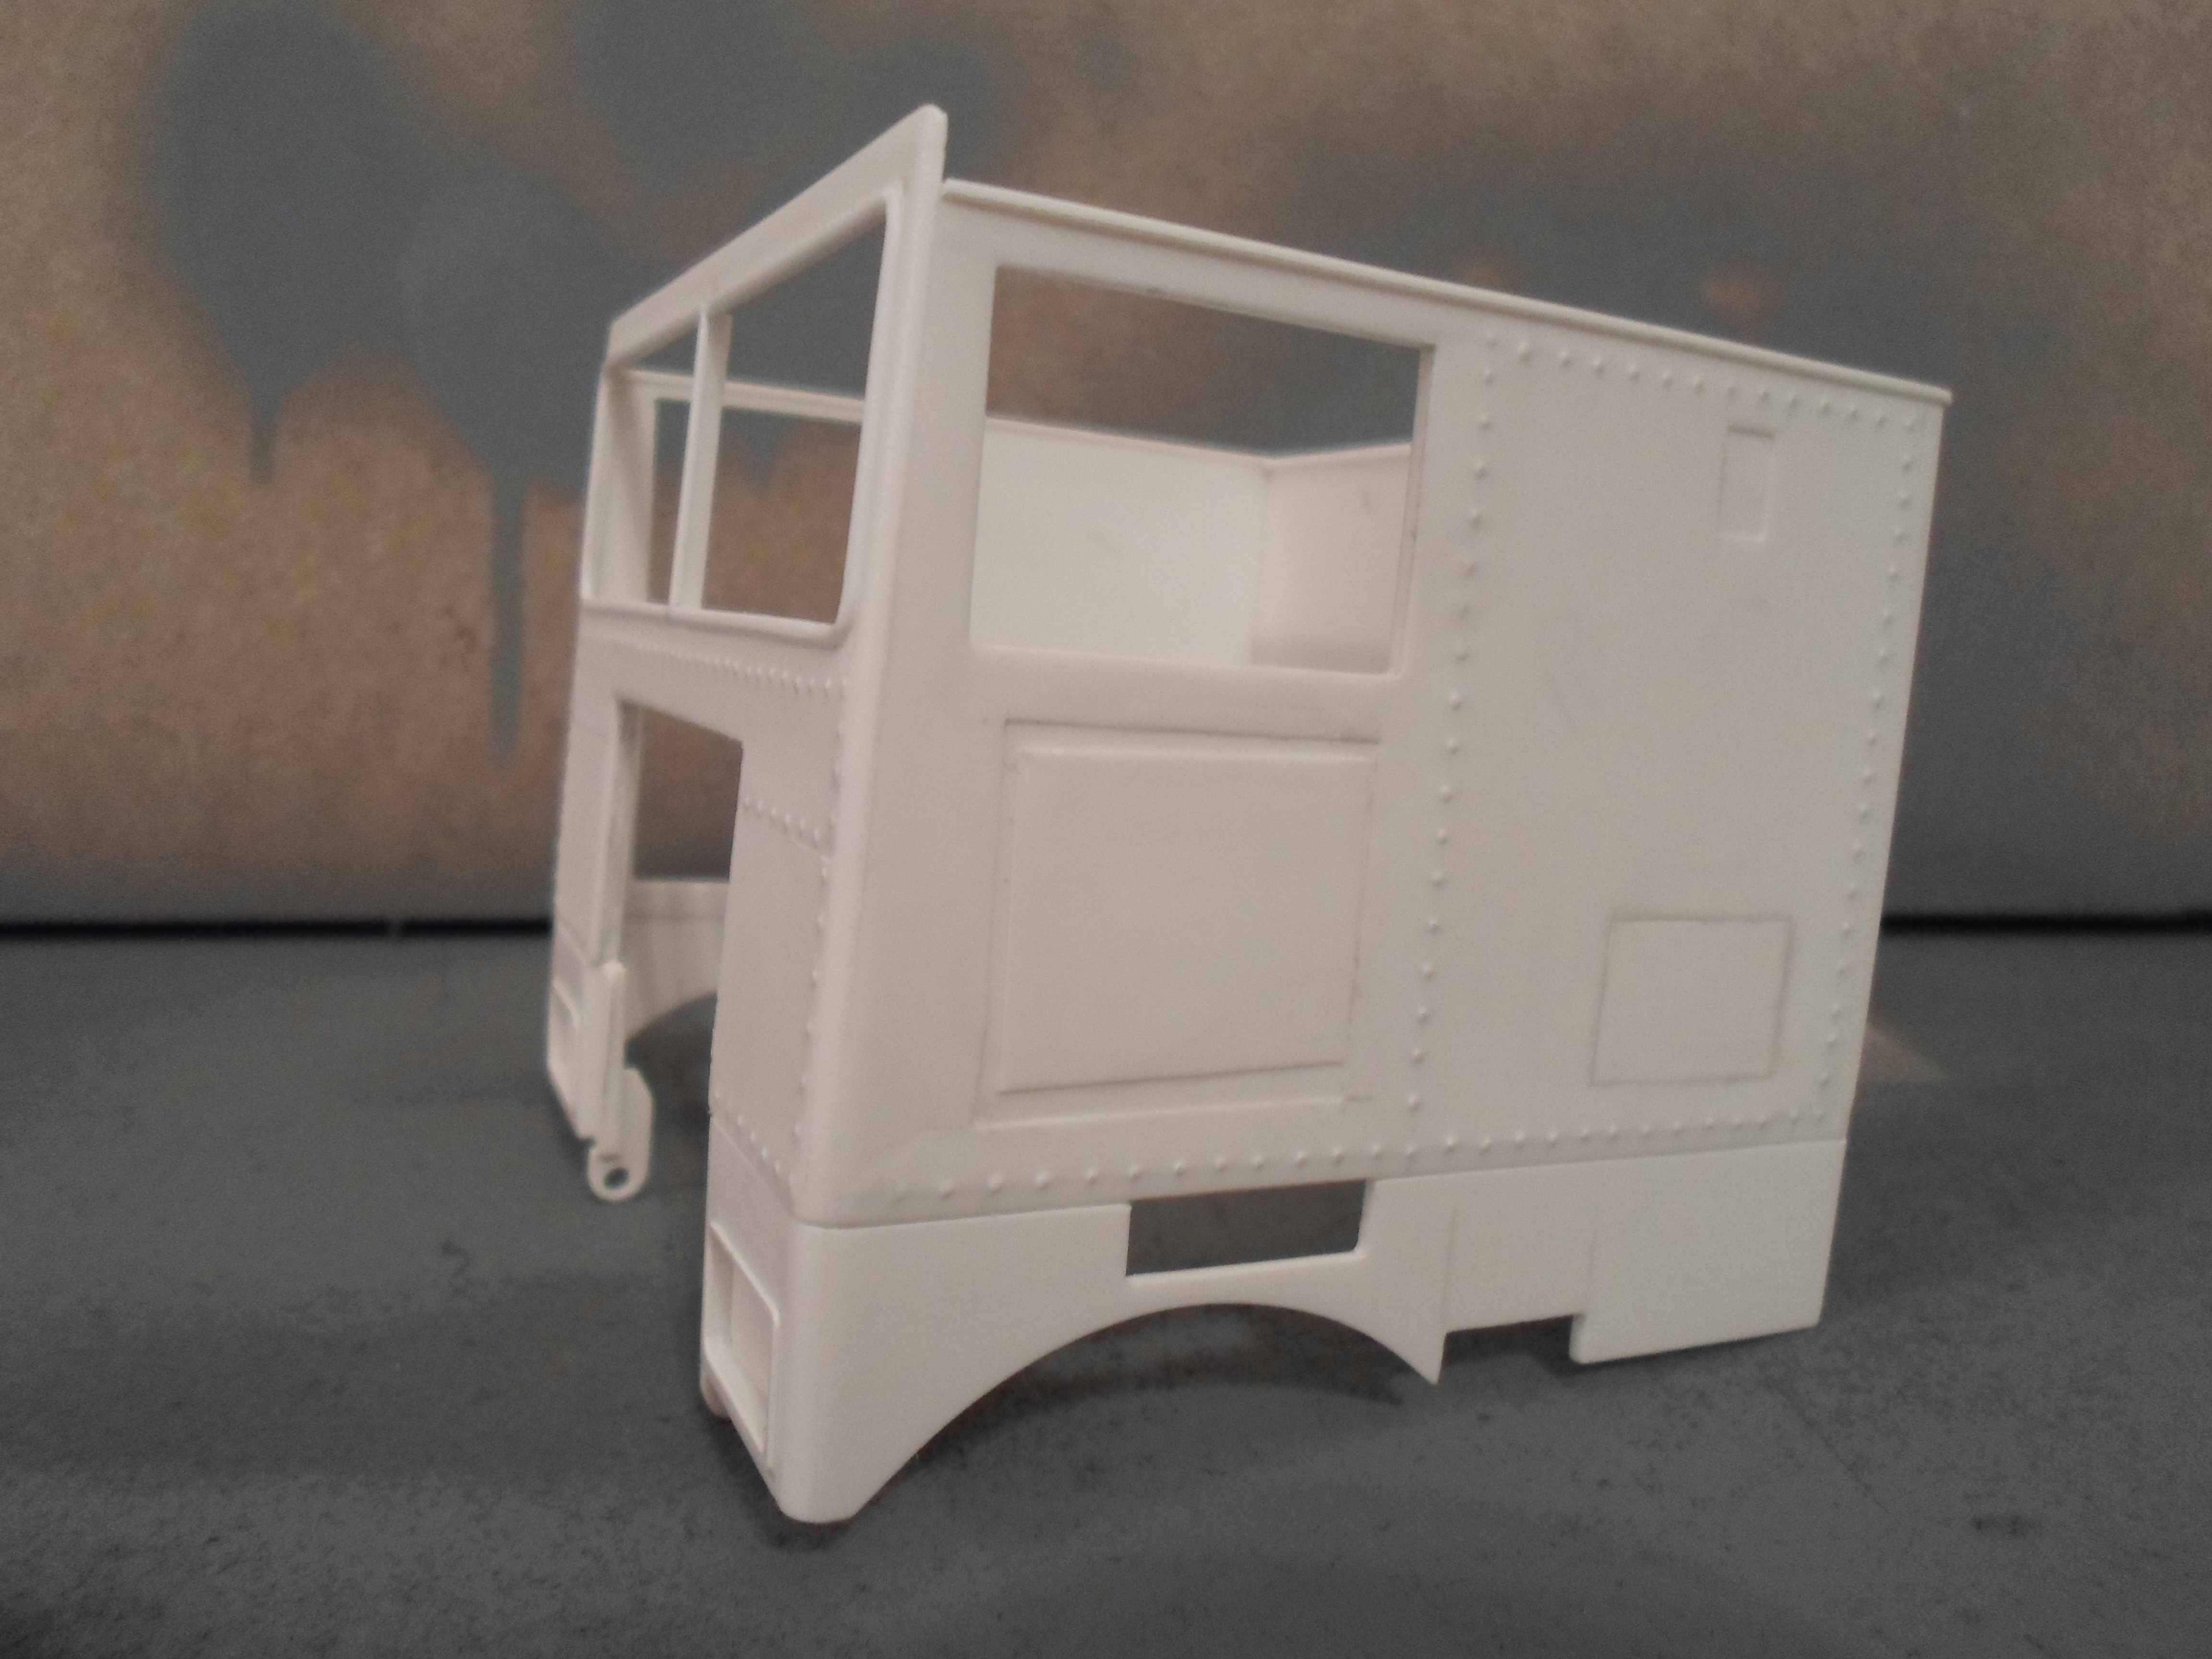
Yes its not much of a slope back, it probably could have done to have been a bit more but its too late now, I copied it off the AITM resin kit ( that's my excuse anyway) -
MARMON coe 86" cab
CRUSADER2 replied to CRUSADER2's topic in WIP: Model Trucks: Big Rigs and Heavy Equipment
Hi folks, sorry I havn't posted much lately , first time I have been on for a while, I have been working on the MARMON though but I havn't got any more recent photos to post, hi Vince in answer to your question, yes the front of the cab does slope back its probably the angle of the photos that don't show it too clear, thanks all for following the build, must get some more photos done.
-
1978 Overnight Mack U Model
CRUSADER2 replied to DRIPTROIT 71's topic in WIP: Model Trucks: Big Rigs and Heavy Equipment
Top job!!! really looks the part, those mirror support brackets really make a difference and the cab detail is excellent, a really great build all round, I really like the down to earth proper work horse trucks that you model, another excellent build!!! -
First time I have looked at this one, nearly missed it, really outstanding work, excellent detailing and finish, a really inspirational piece of work!!!
-
B.R.B.O. Western Star 4964 with flatbed
CRUSADER2 replied to tbill's topic in WIP: Model Trucks: Big Rigs and Heavy Equipment
Looks great, a really nice job!!! you could still top it out with one more though, as long as it is chained, or you could flip the top one and maybe get away with just straps ( I allways chained them as well as straps though just to be sure) anyway excellent work!!! -
A really fantastic job, detailing and finish perfect, and a really interesting subject to boot, excellent work!!!
-
MARMON coe 86" cab
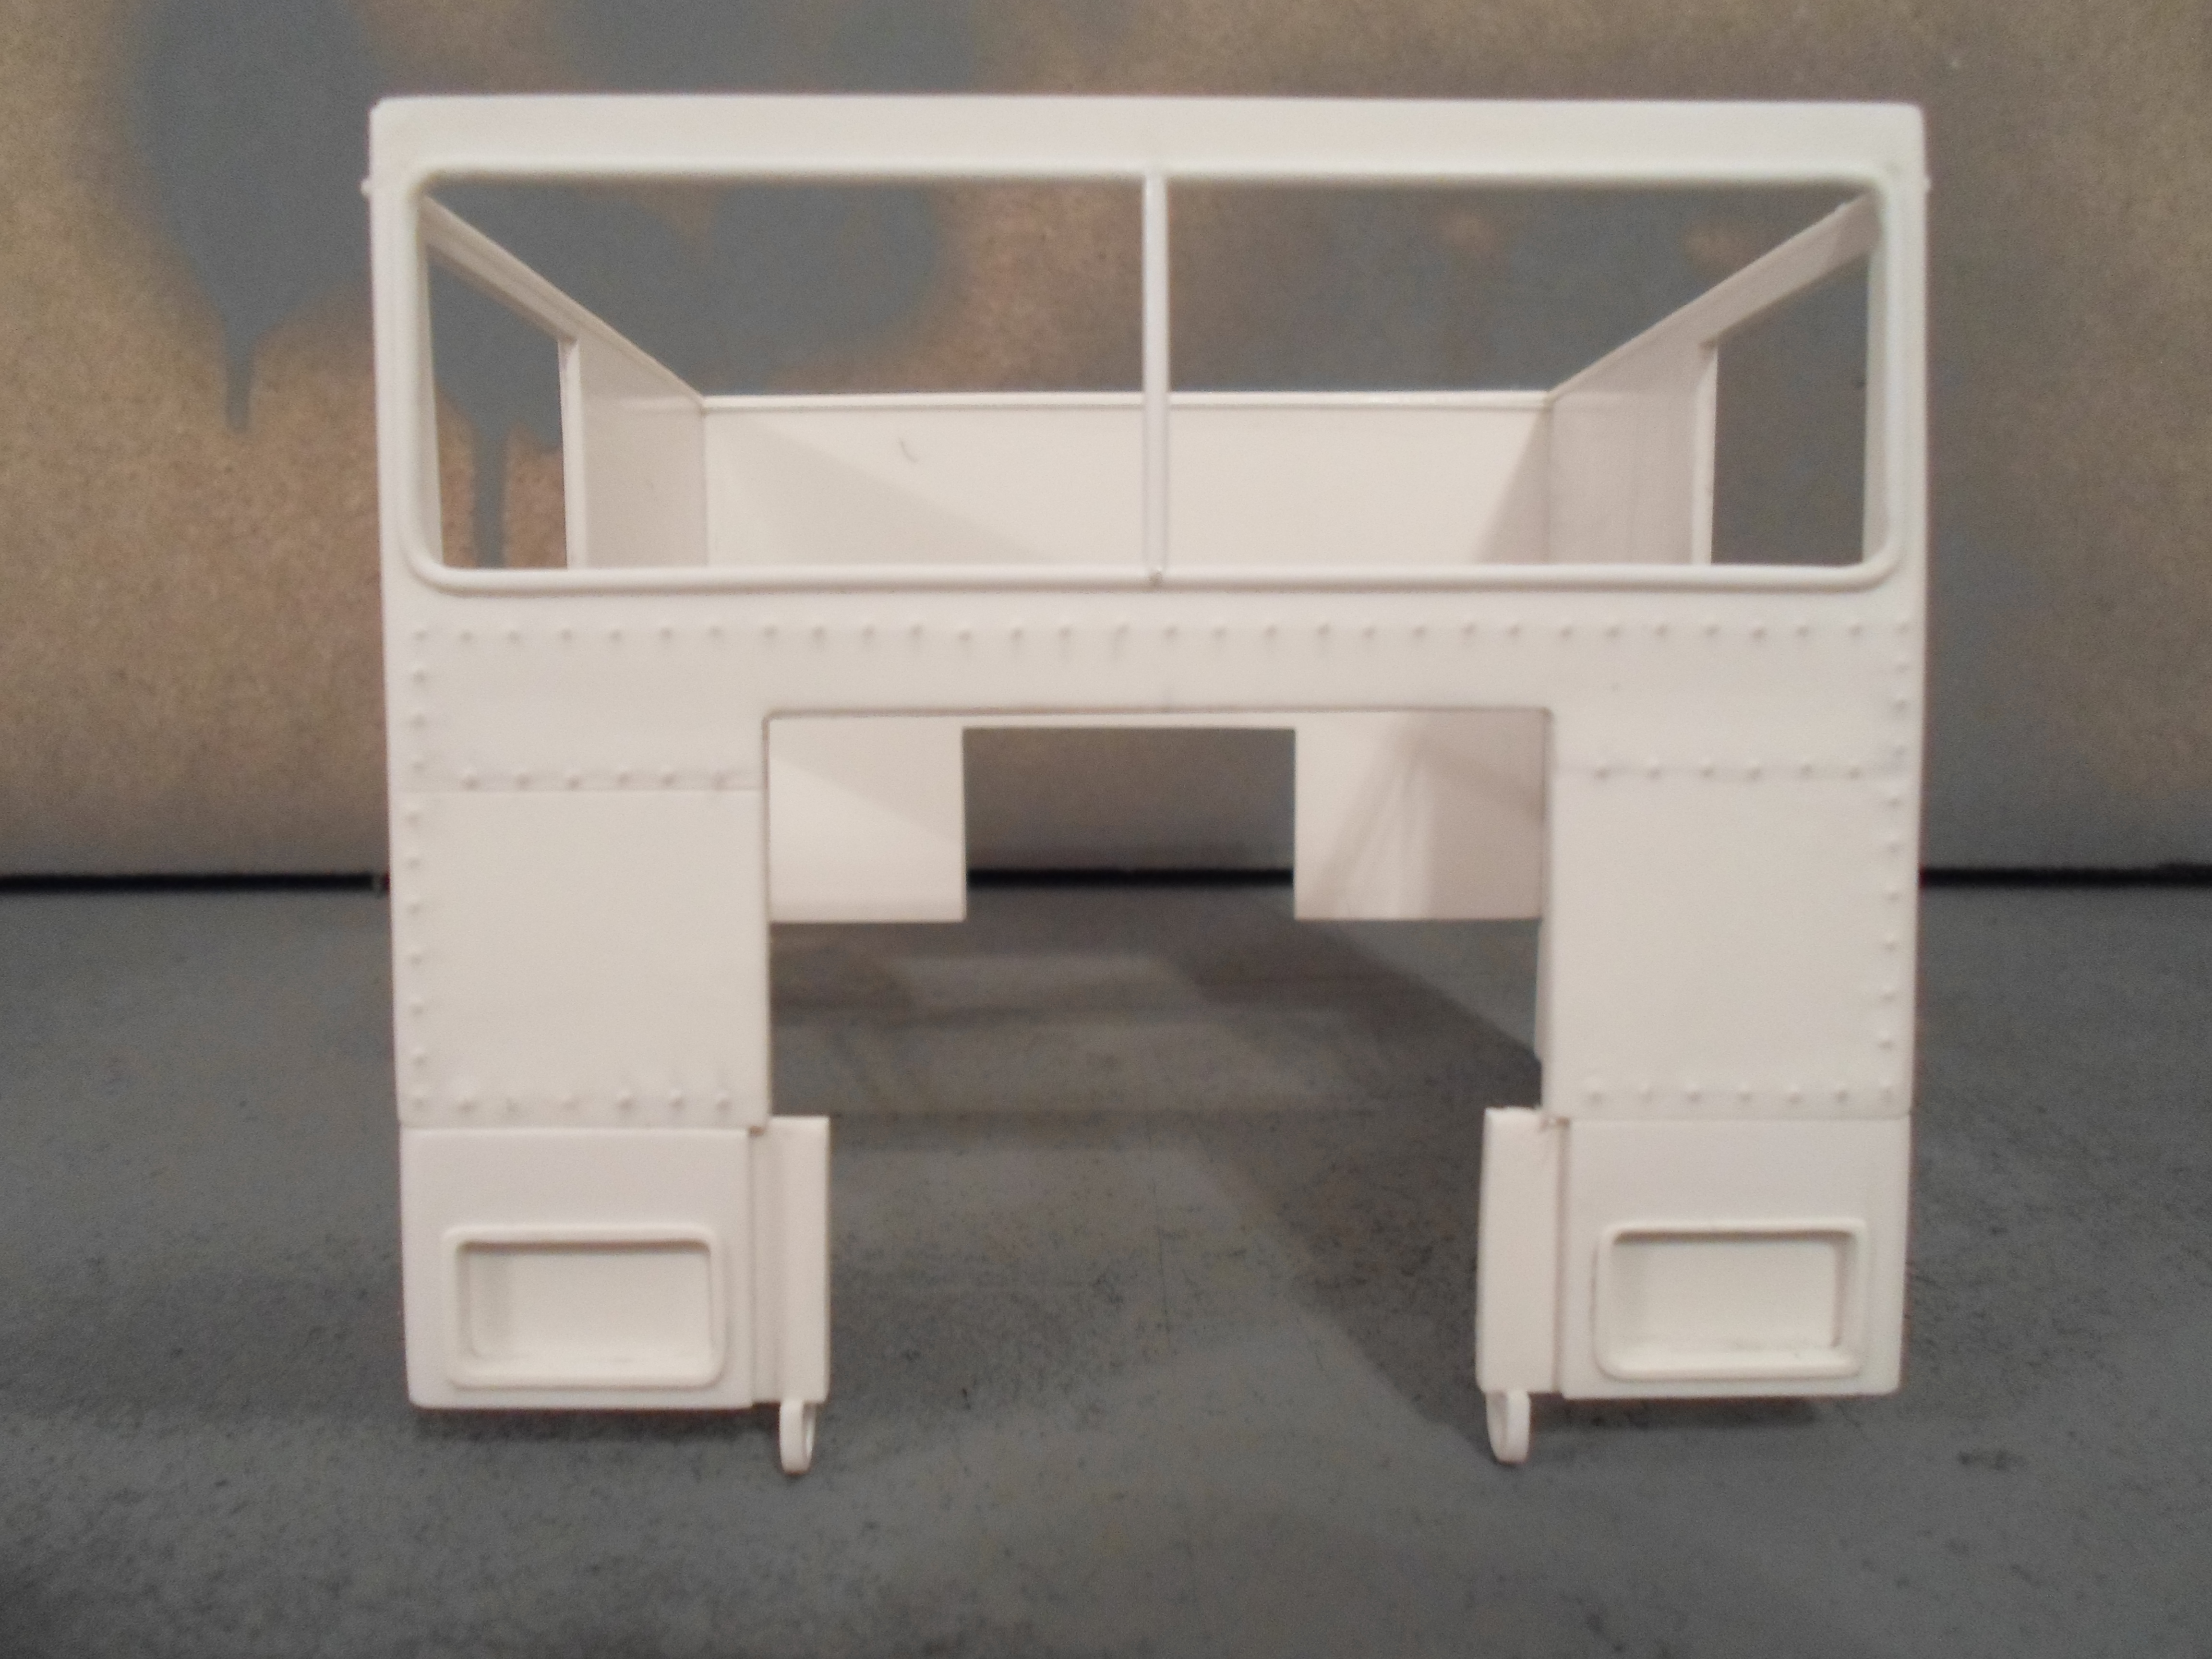
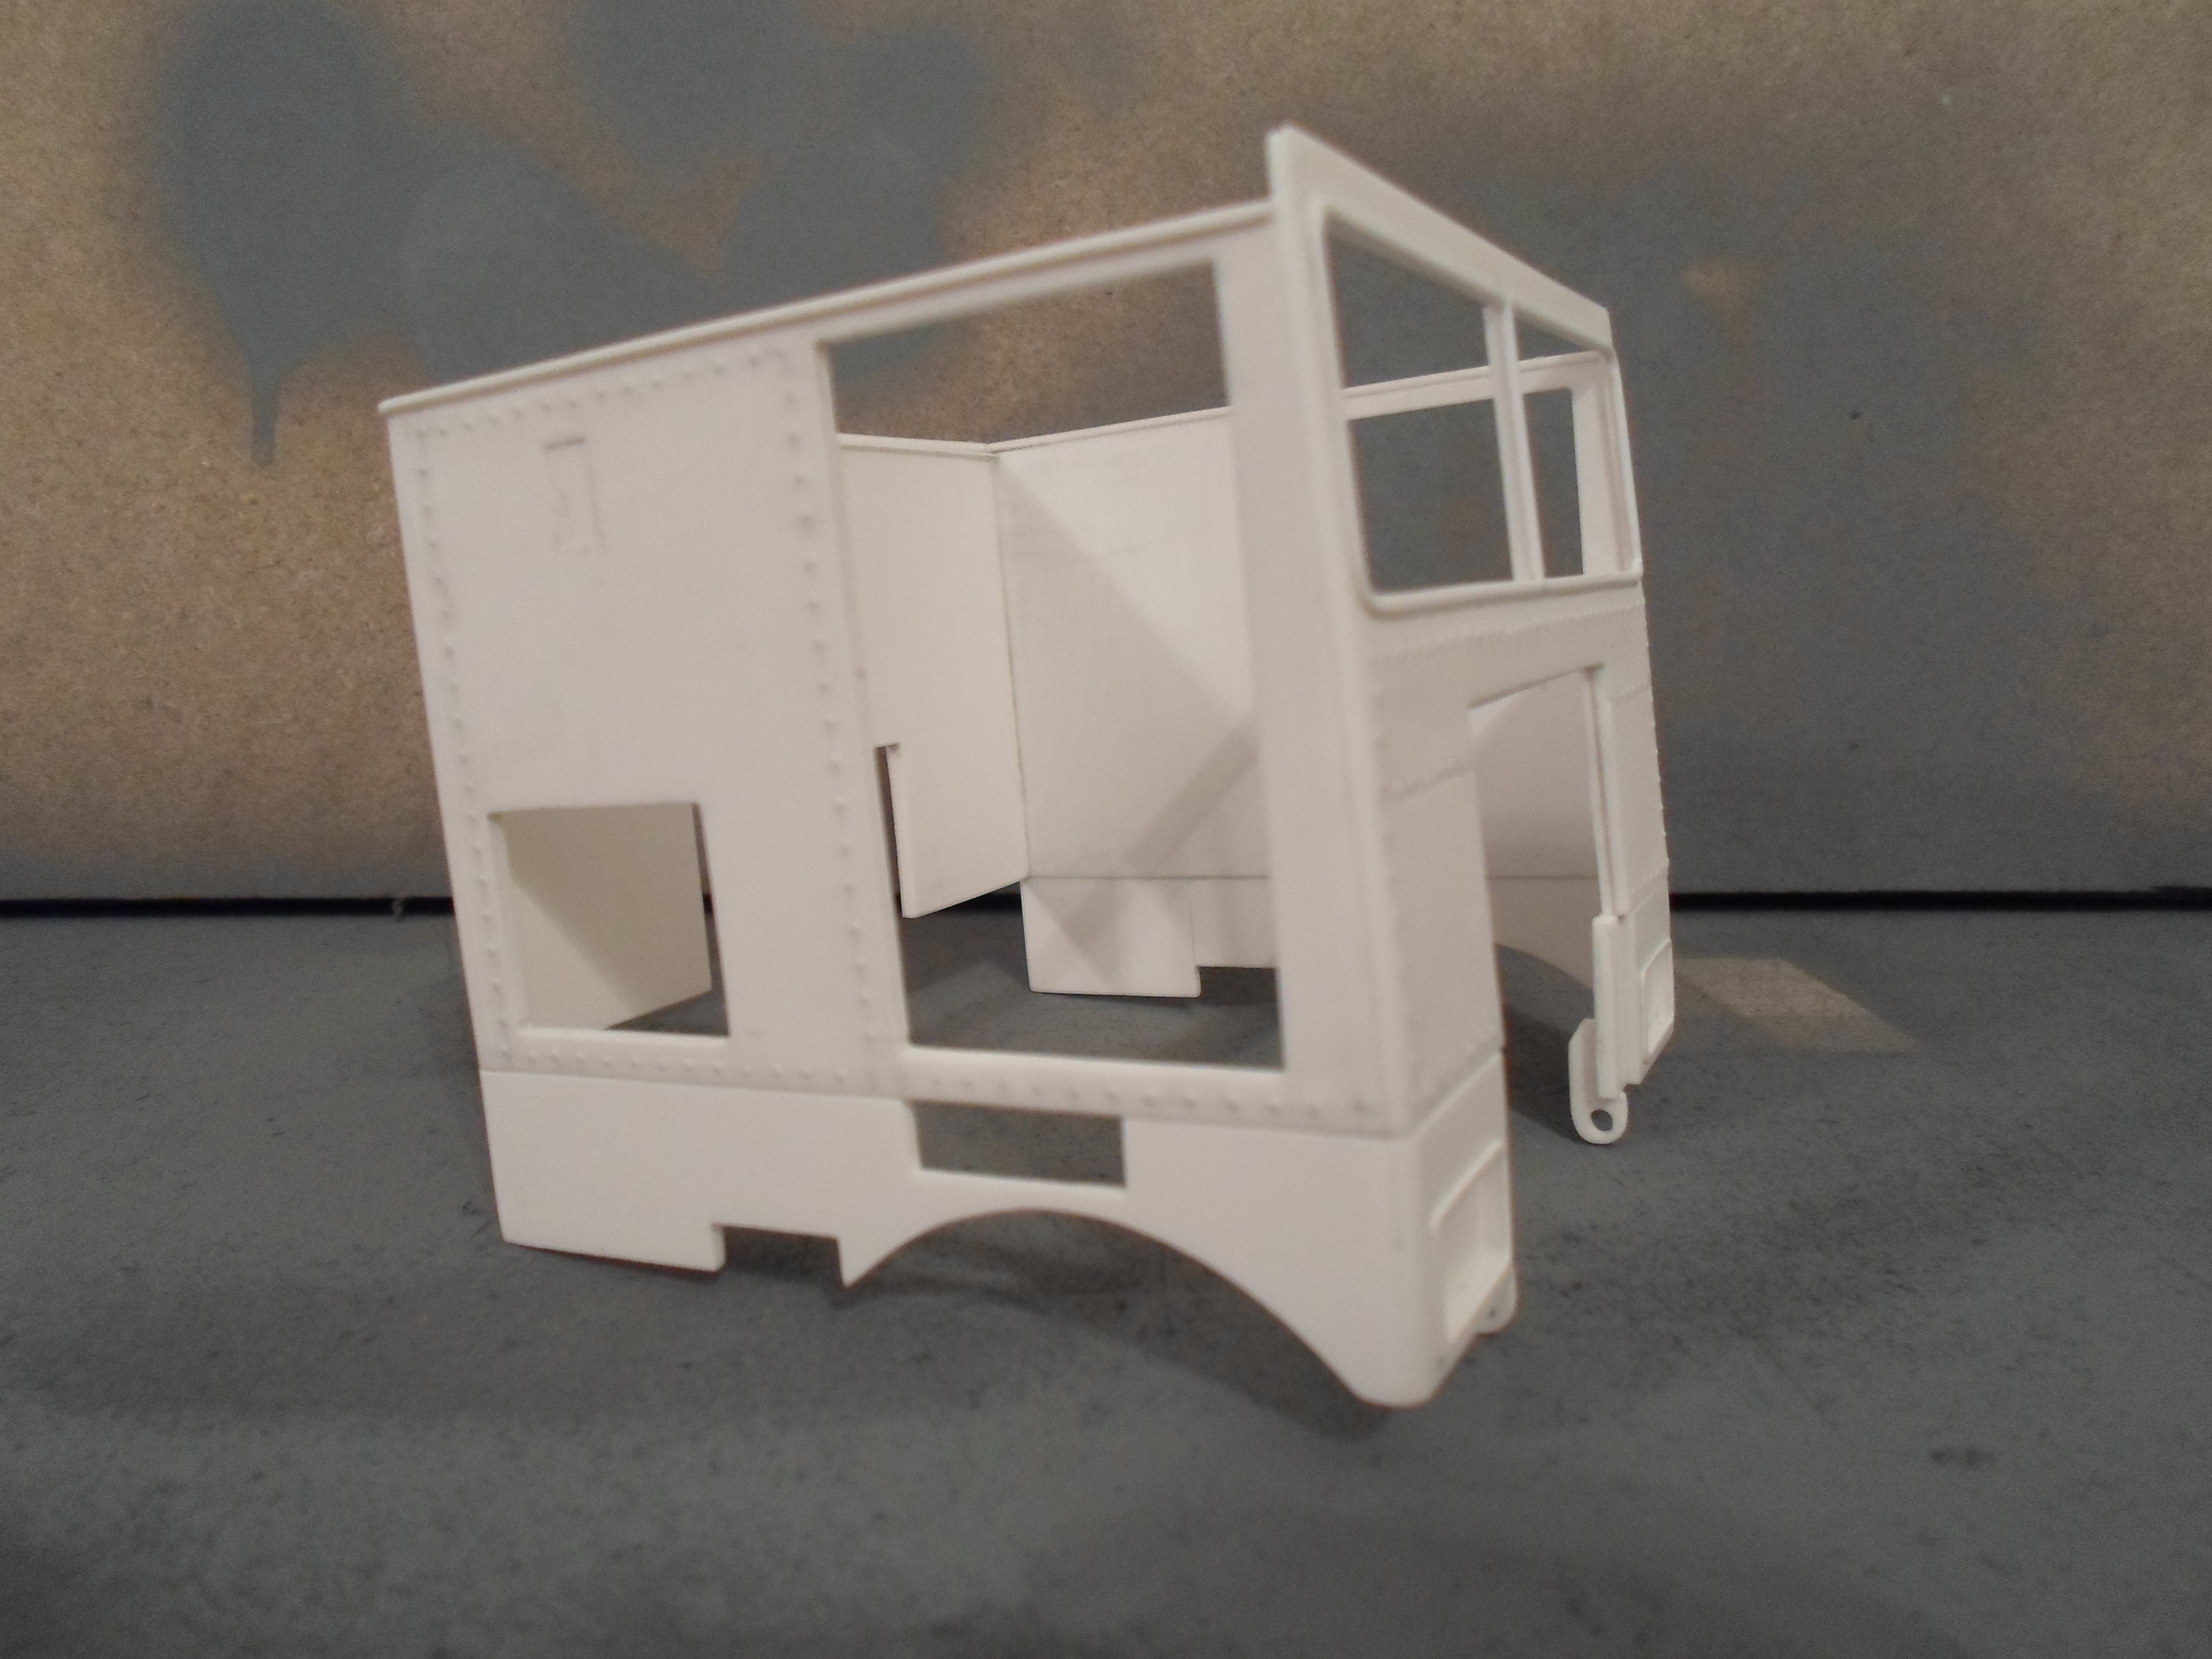
CRUSADER2 replied to CRUSADER2's topic in WIP: Model Trucks: Big Rigs and Heavy Equipment
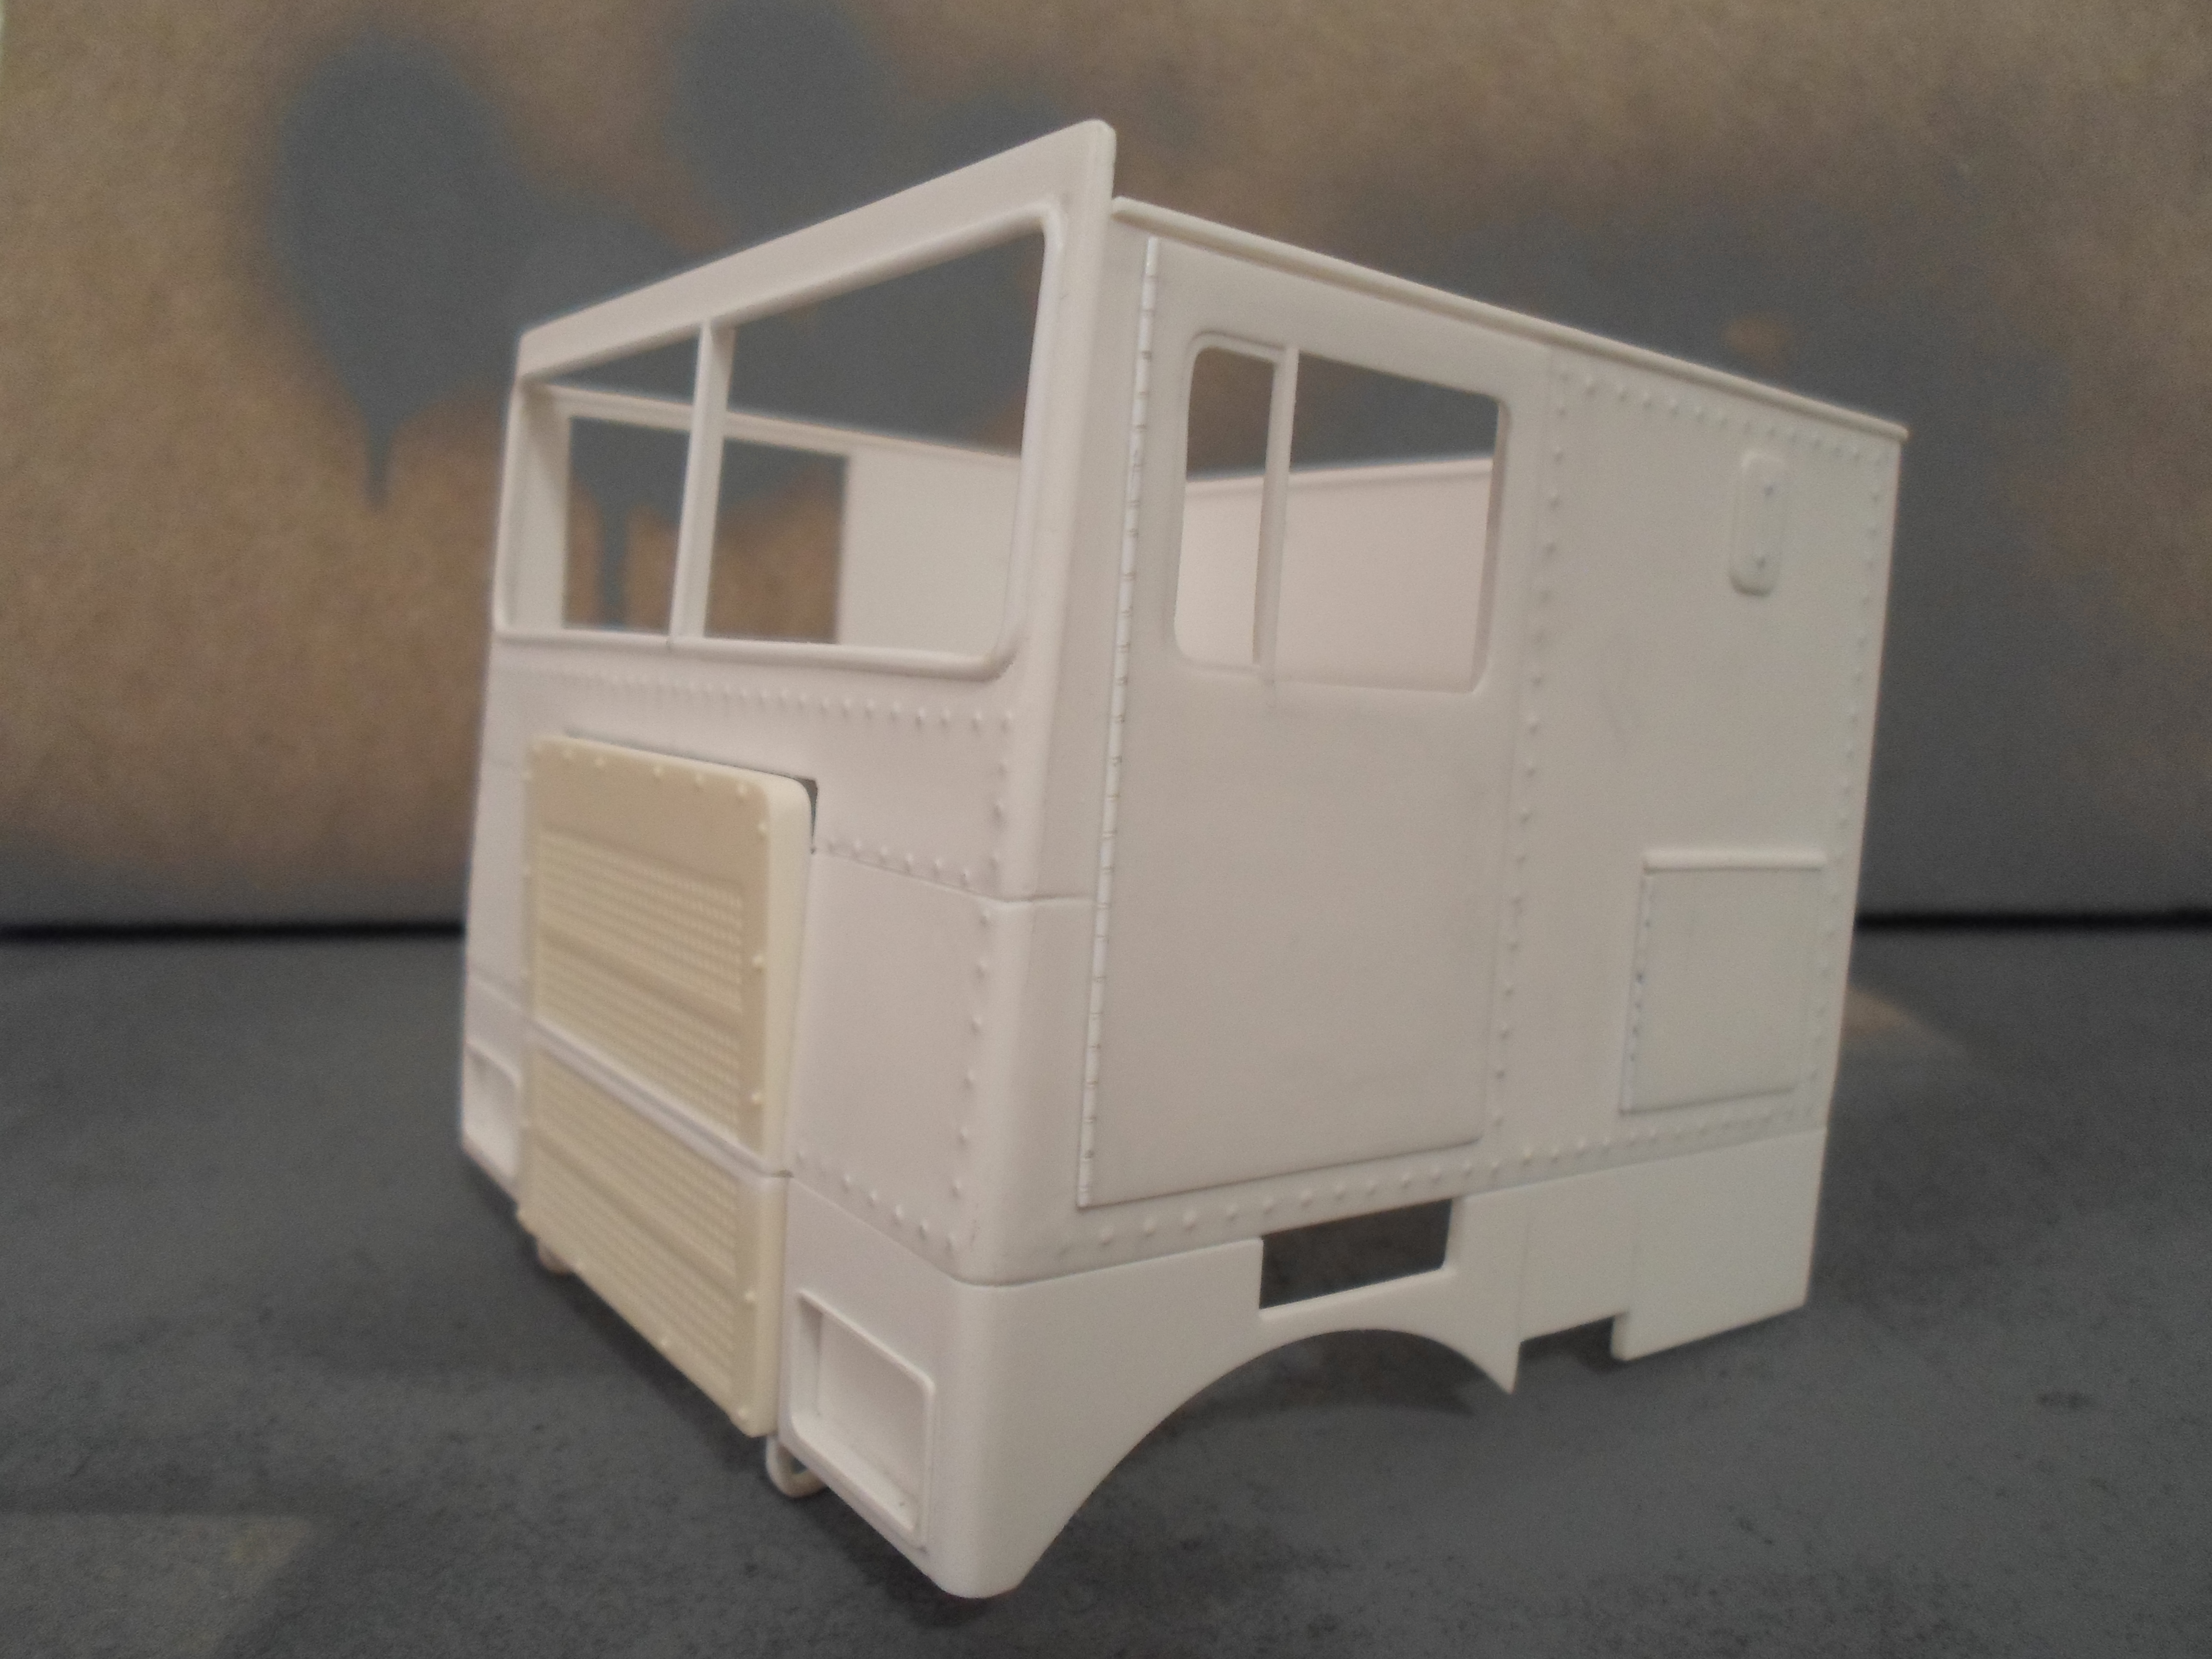
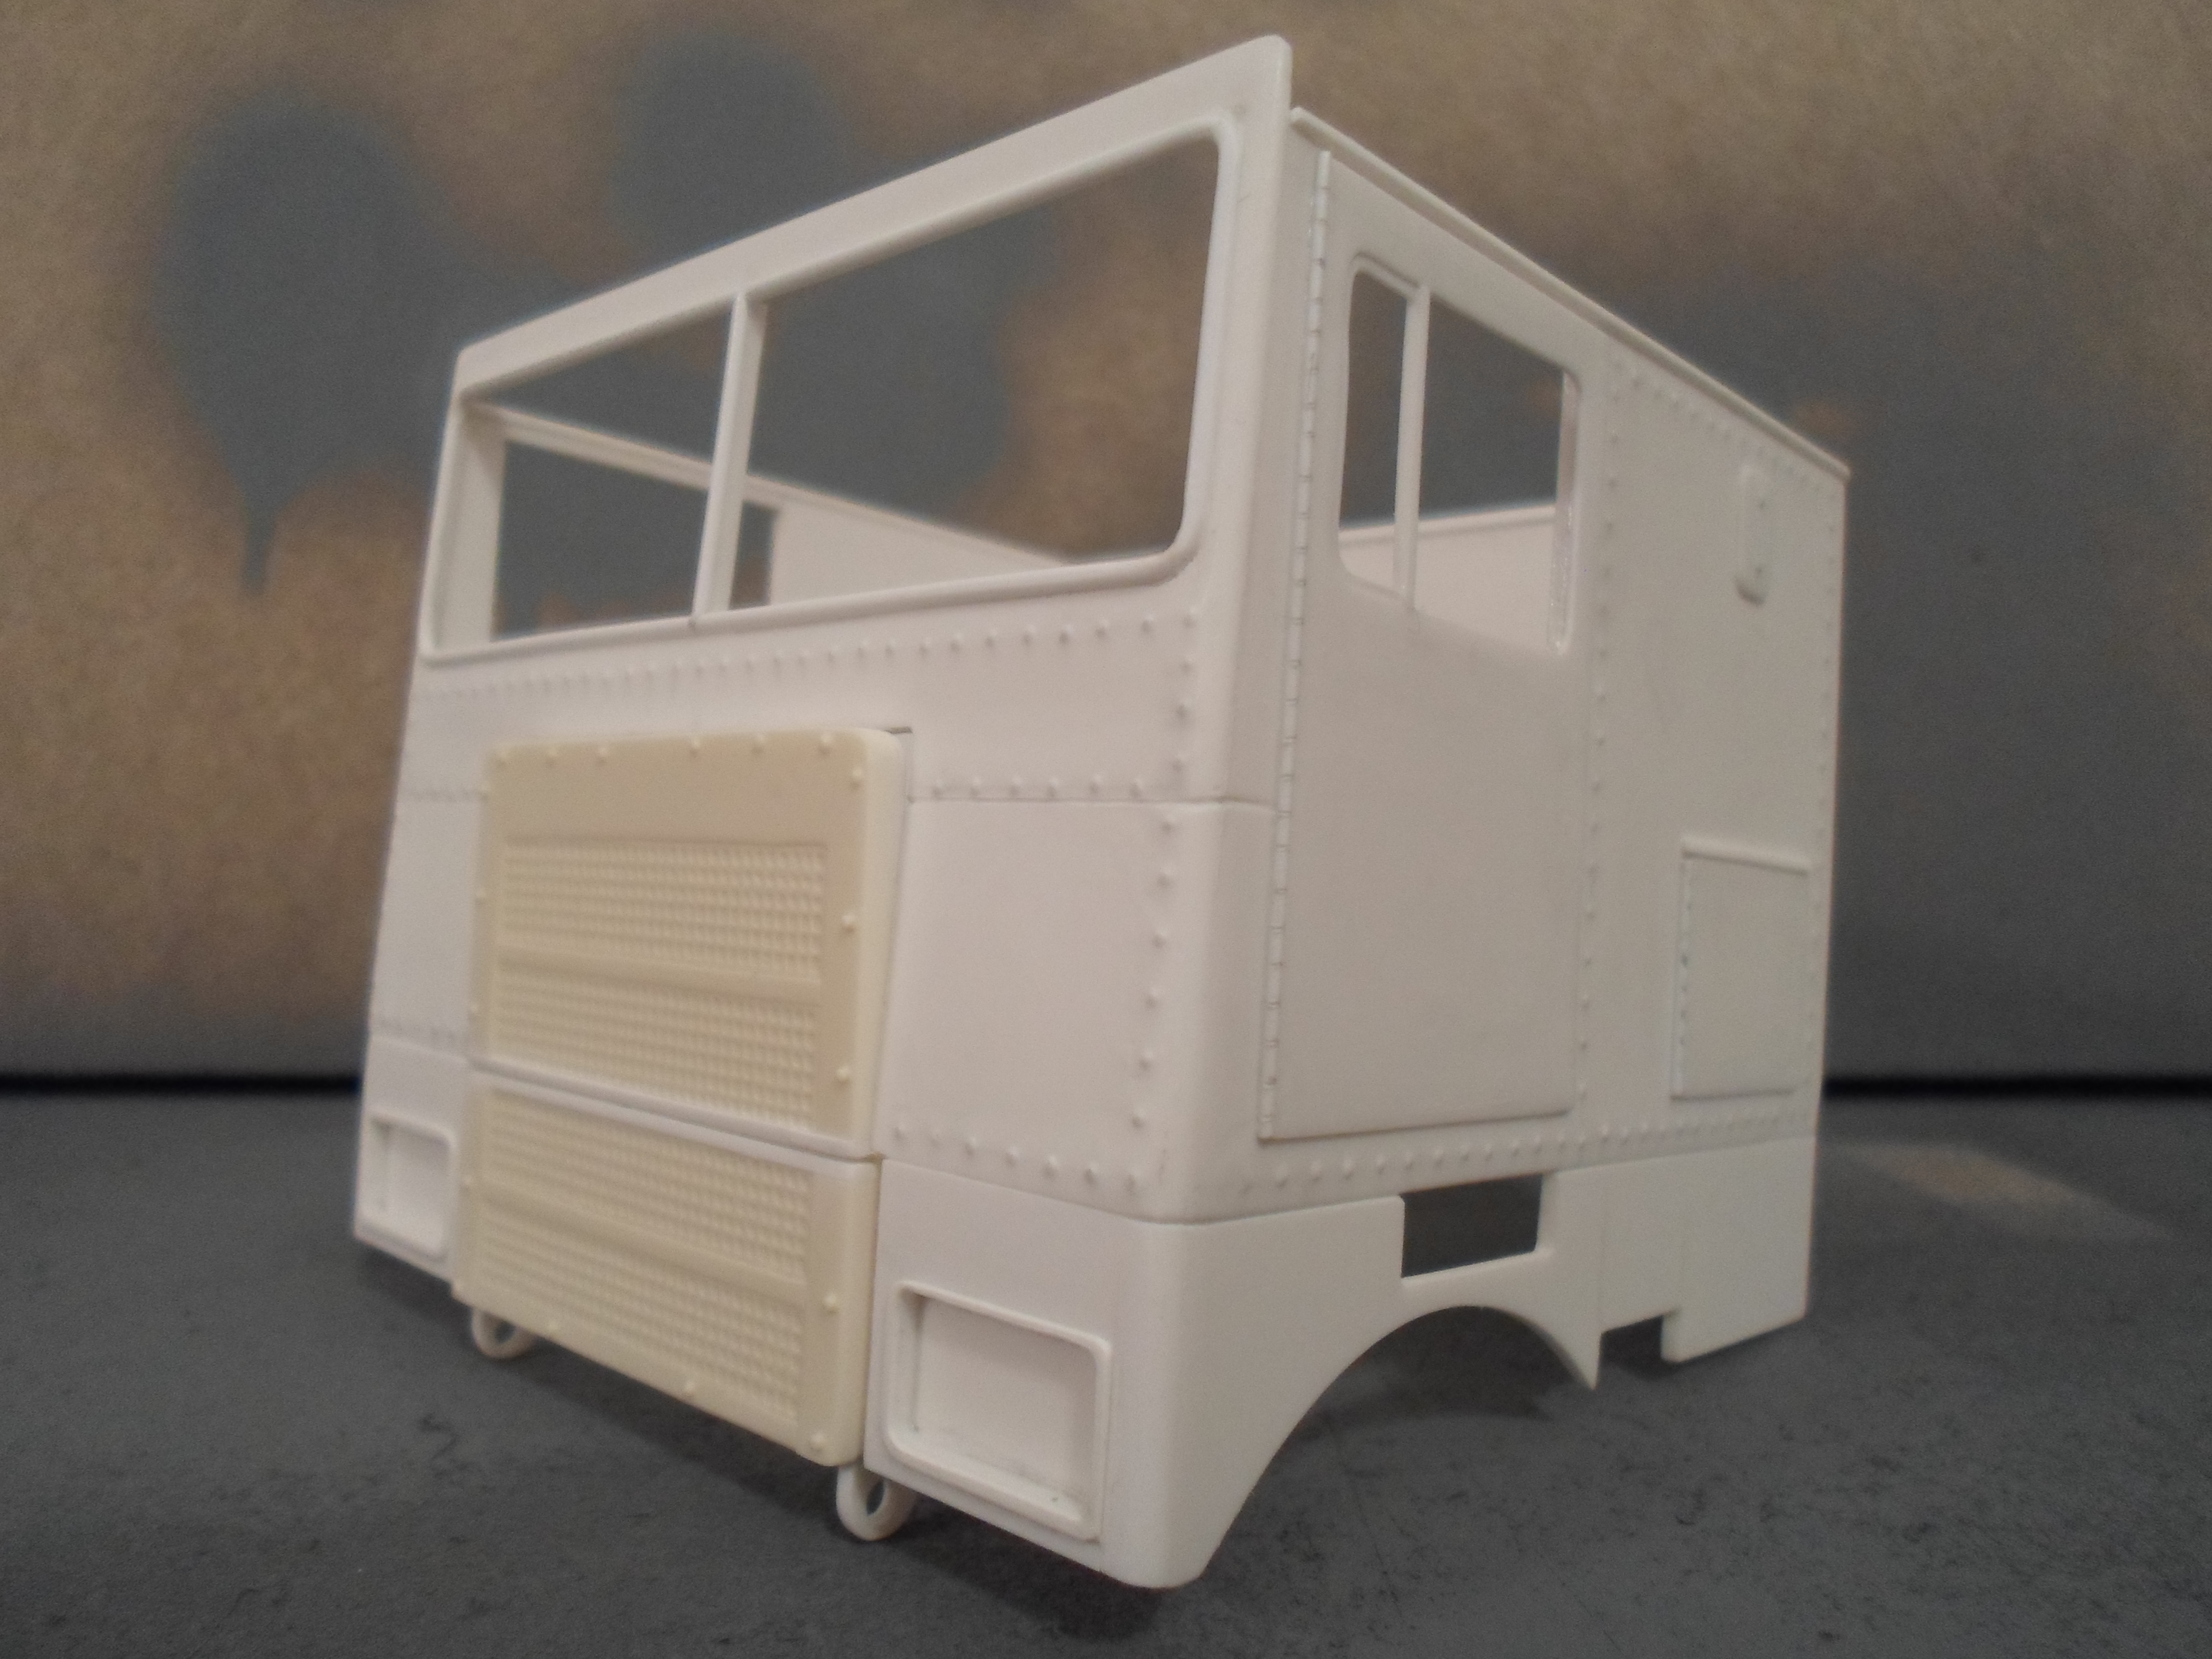
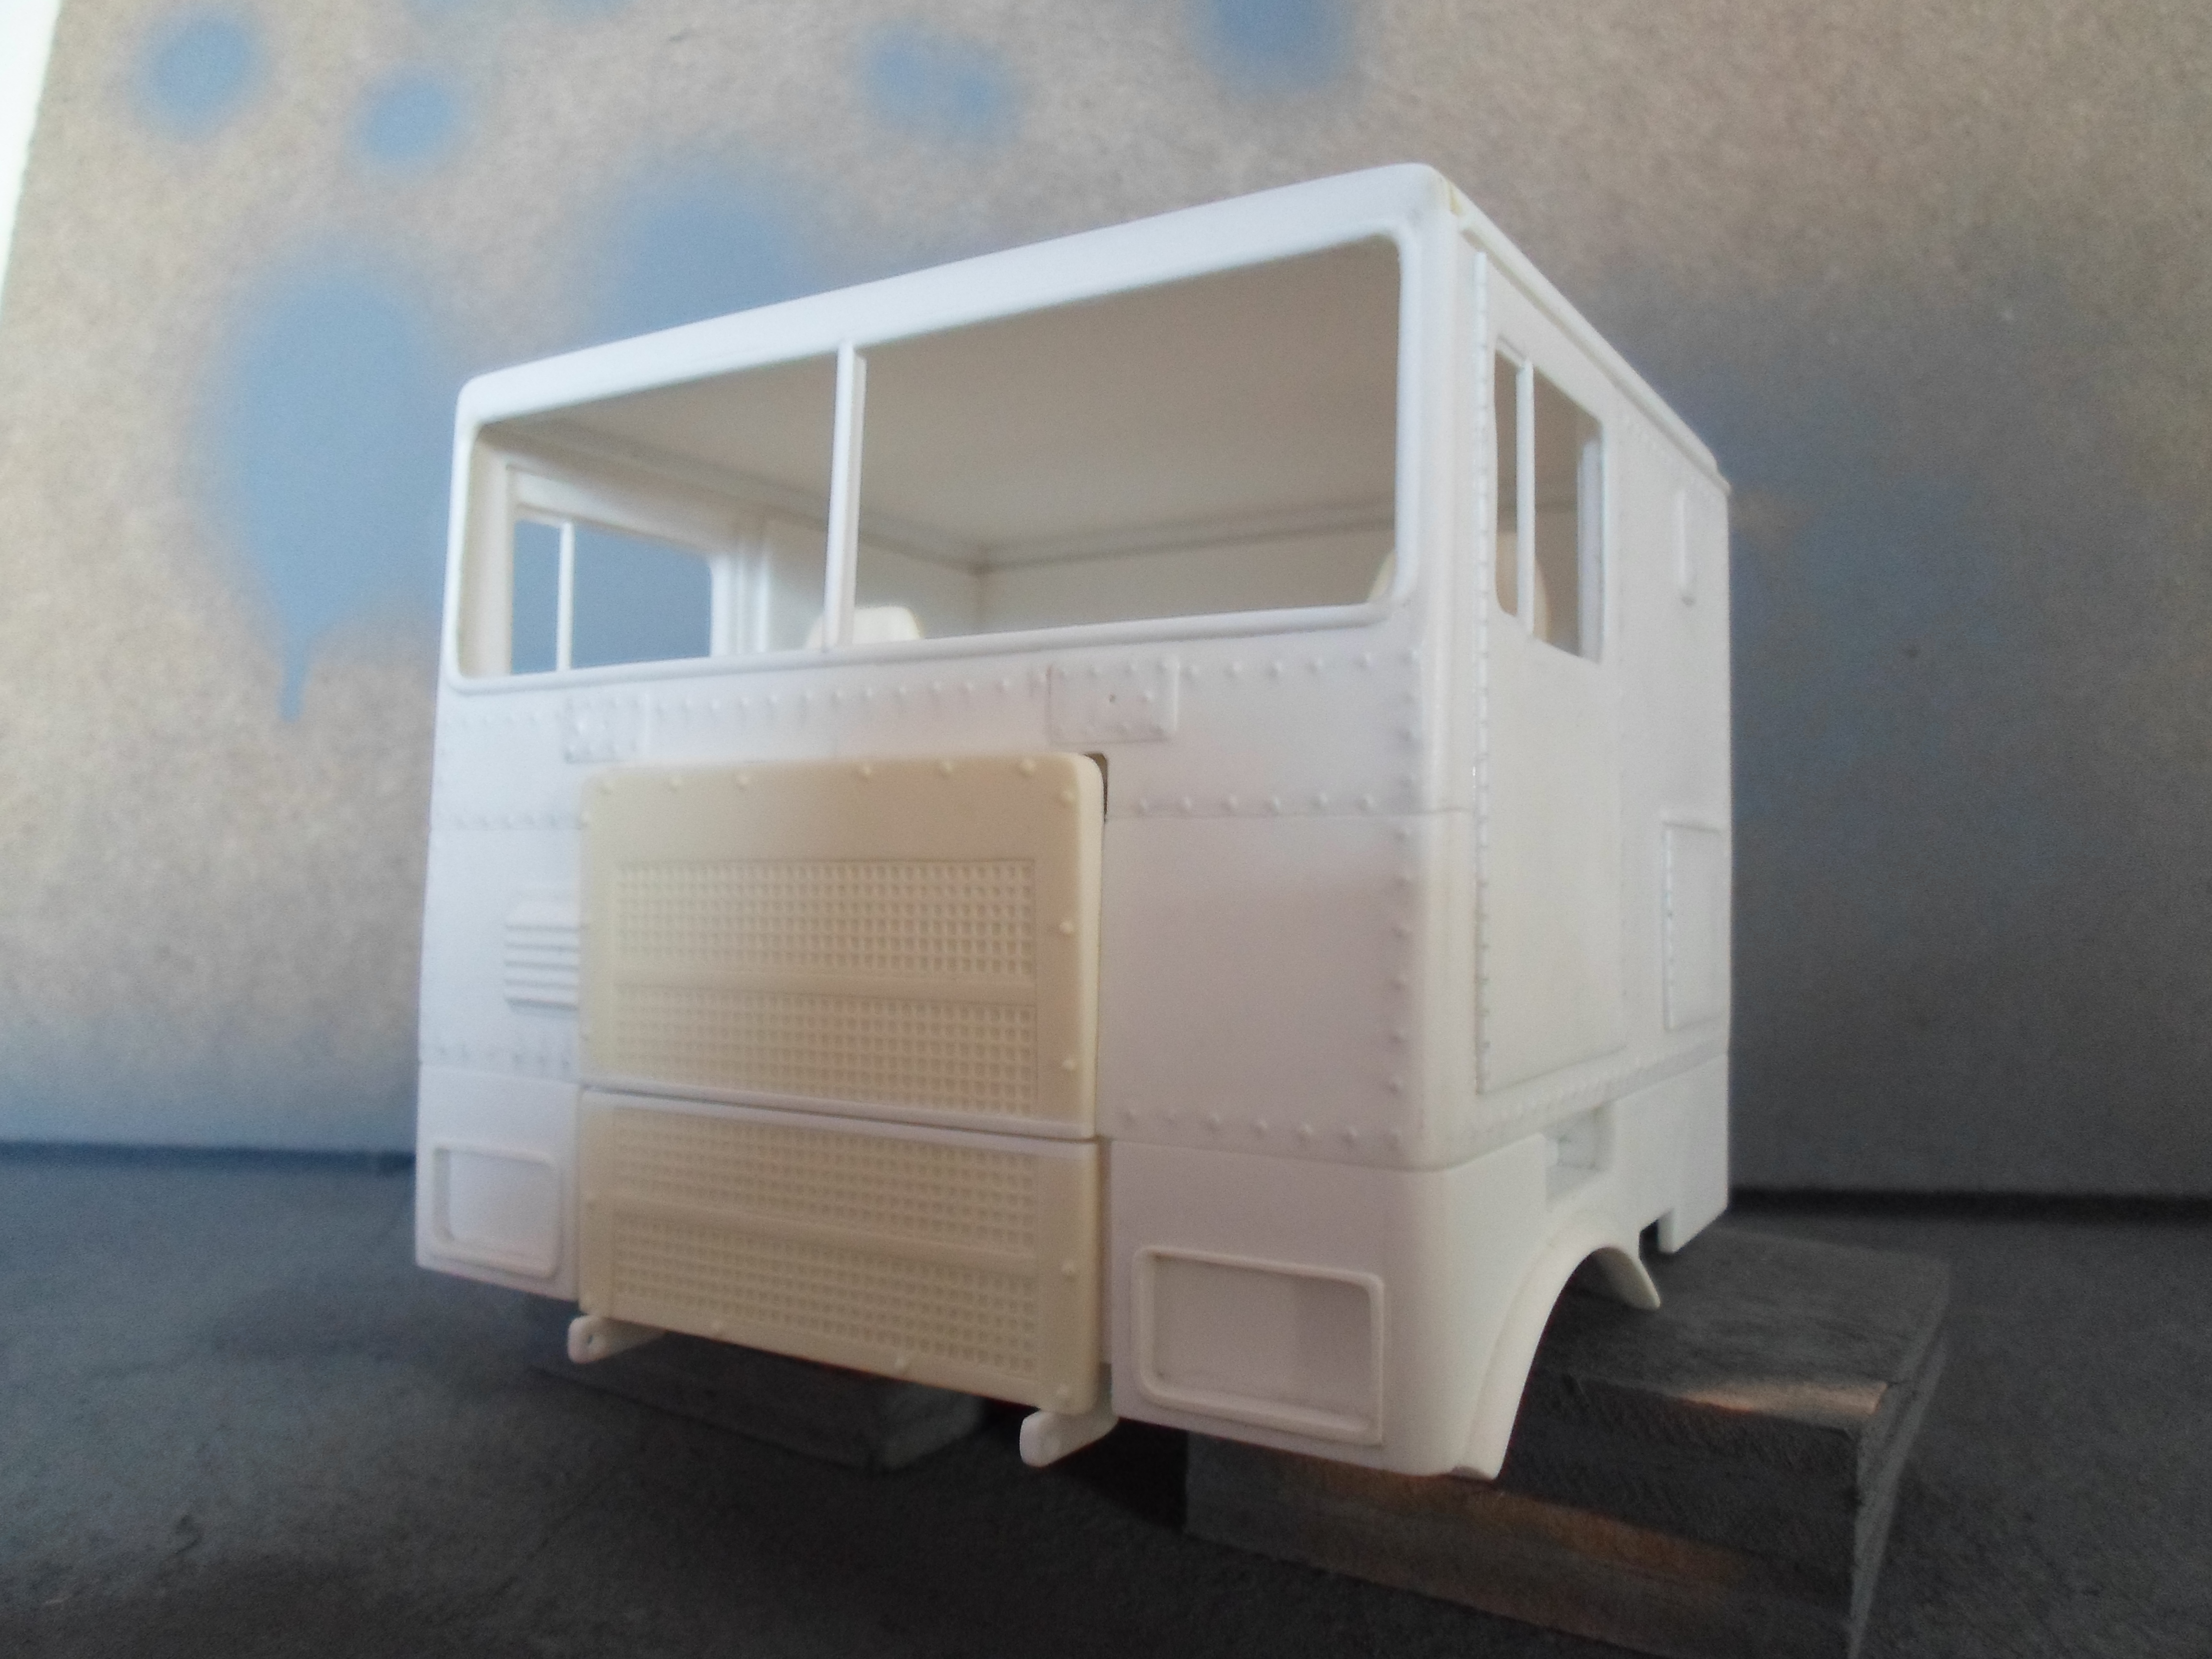
Cab construction moving forward a little this week, a few hiccups on the way but it is starting to look like a MARMON cab now, I had to make some different cab tilt brackets and a few other minor alterations along the way but on the whole its progressing slowly . There are a couple of things that I am not happy with though but it is too late to change them now, I think I got the windscreen a little too big(tall) but I will be able to disguise this with the sun visor later, the other thing is not so easy to hide, when I decided to make a new cab I decided to make the head light recesses a bit bigger to be able to change the light's up to 7 inch light's which hasn't left enough space to round off the bottom front corners of the cab to the right profile, also I put the rivets on the front panel too close to the corners adding to the problem, maybe the bull bar and paint scheme will hide this mistake a little, anyway a few photo's of progress so far.
-
Ford Transcontiental
CRUSADER2 replied to carsntrucks4you's topic in Model Trucks: Big Rigs and Heavy Equipment
Looks great, brings back memory's, we had one or two where I worked for a while, they were really high geared and you could easily get 80mph out of them without running into the red in the days before limiters and the 56mph/90km speed limits on trucks ( I think the limit is a good thing in most respects these days with the amount of traffic on the roads) it just makes overtaking difficult sometimes if every body is running at the same speed. Dave is right about the cab suspension, at a certain speed and engine revs the cab would start nodding and the only way to stop it was to slow down and change down, I was trying to remember which gearbox was in the transconti's where I worked, I think they were the Eaton twin splitter but it was such a long time ago, they also had one of the Berliet with the same cab, I am not sure how they compared. Love all the cab detailing, really nice piece of work!!! -
Kenworth C500 Gin Pole Truck
CRUSADER2 replied to carsntrucks4you's topic in WIP: Model Trucks: Big Rigs and Heavy Equipment
That's going to be some beast, looks great all ready, scratch building looks look's really neat, excellent work!!! -
MARMON coe 86" cab
CRUSADER2 replied to CRUSADER2's topic in WIP: Model Trucks: Big Rigs and Heavy Equipment
Work under way on the new cab, a few photo's of progress so far, lots to think about as I build as I could easily end up causing myself problems later down the line with the cab interior, having to think a few stages in front all the time, keeps you on your toes, plus I am working from only a few close up photo's from the internet, makes modeling interesting that's for sure.
-
It's looking good!!
-
1976 Kenworth W900 (Pics updated 2/3/19)
CRUSADER2 replied to KJ790's topic in Model Trucks: Big Rigs and Heavy Equipment
A really excellent job, lovely neat work and that etched grill just finishes it off perfect!! -
Mack B83SX Heavy Hauler DONE!
CRUSADER2 replied to redneckrigger's topic in Model Trucks: Big Rigs and Heavy Equipment
A really great job!! really looks the part, nice detailing and neat work, excellent!! -
AEC Routemaster RML - London bus
CRUSADER2 replied to Antikainen's topic in Model Trucks: Big Rigs and Heavy Equipment
That looks fantastic, a really nice job and well worth the two months building time. to me that's really quick for the amount of parts involved, excellent work!!! -
Detachable gooseneck lowboy DONE!
CRUSADER2 replied to redneckrigger's topic in Model Trucks: Big Rigs and Heavy Equipment
A really fantastic outfit, it looks great!!! -
That's neat, Excellent job!!!
-
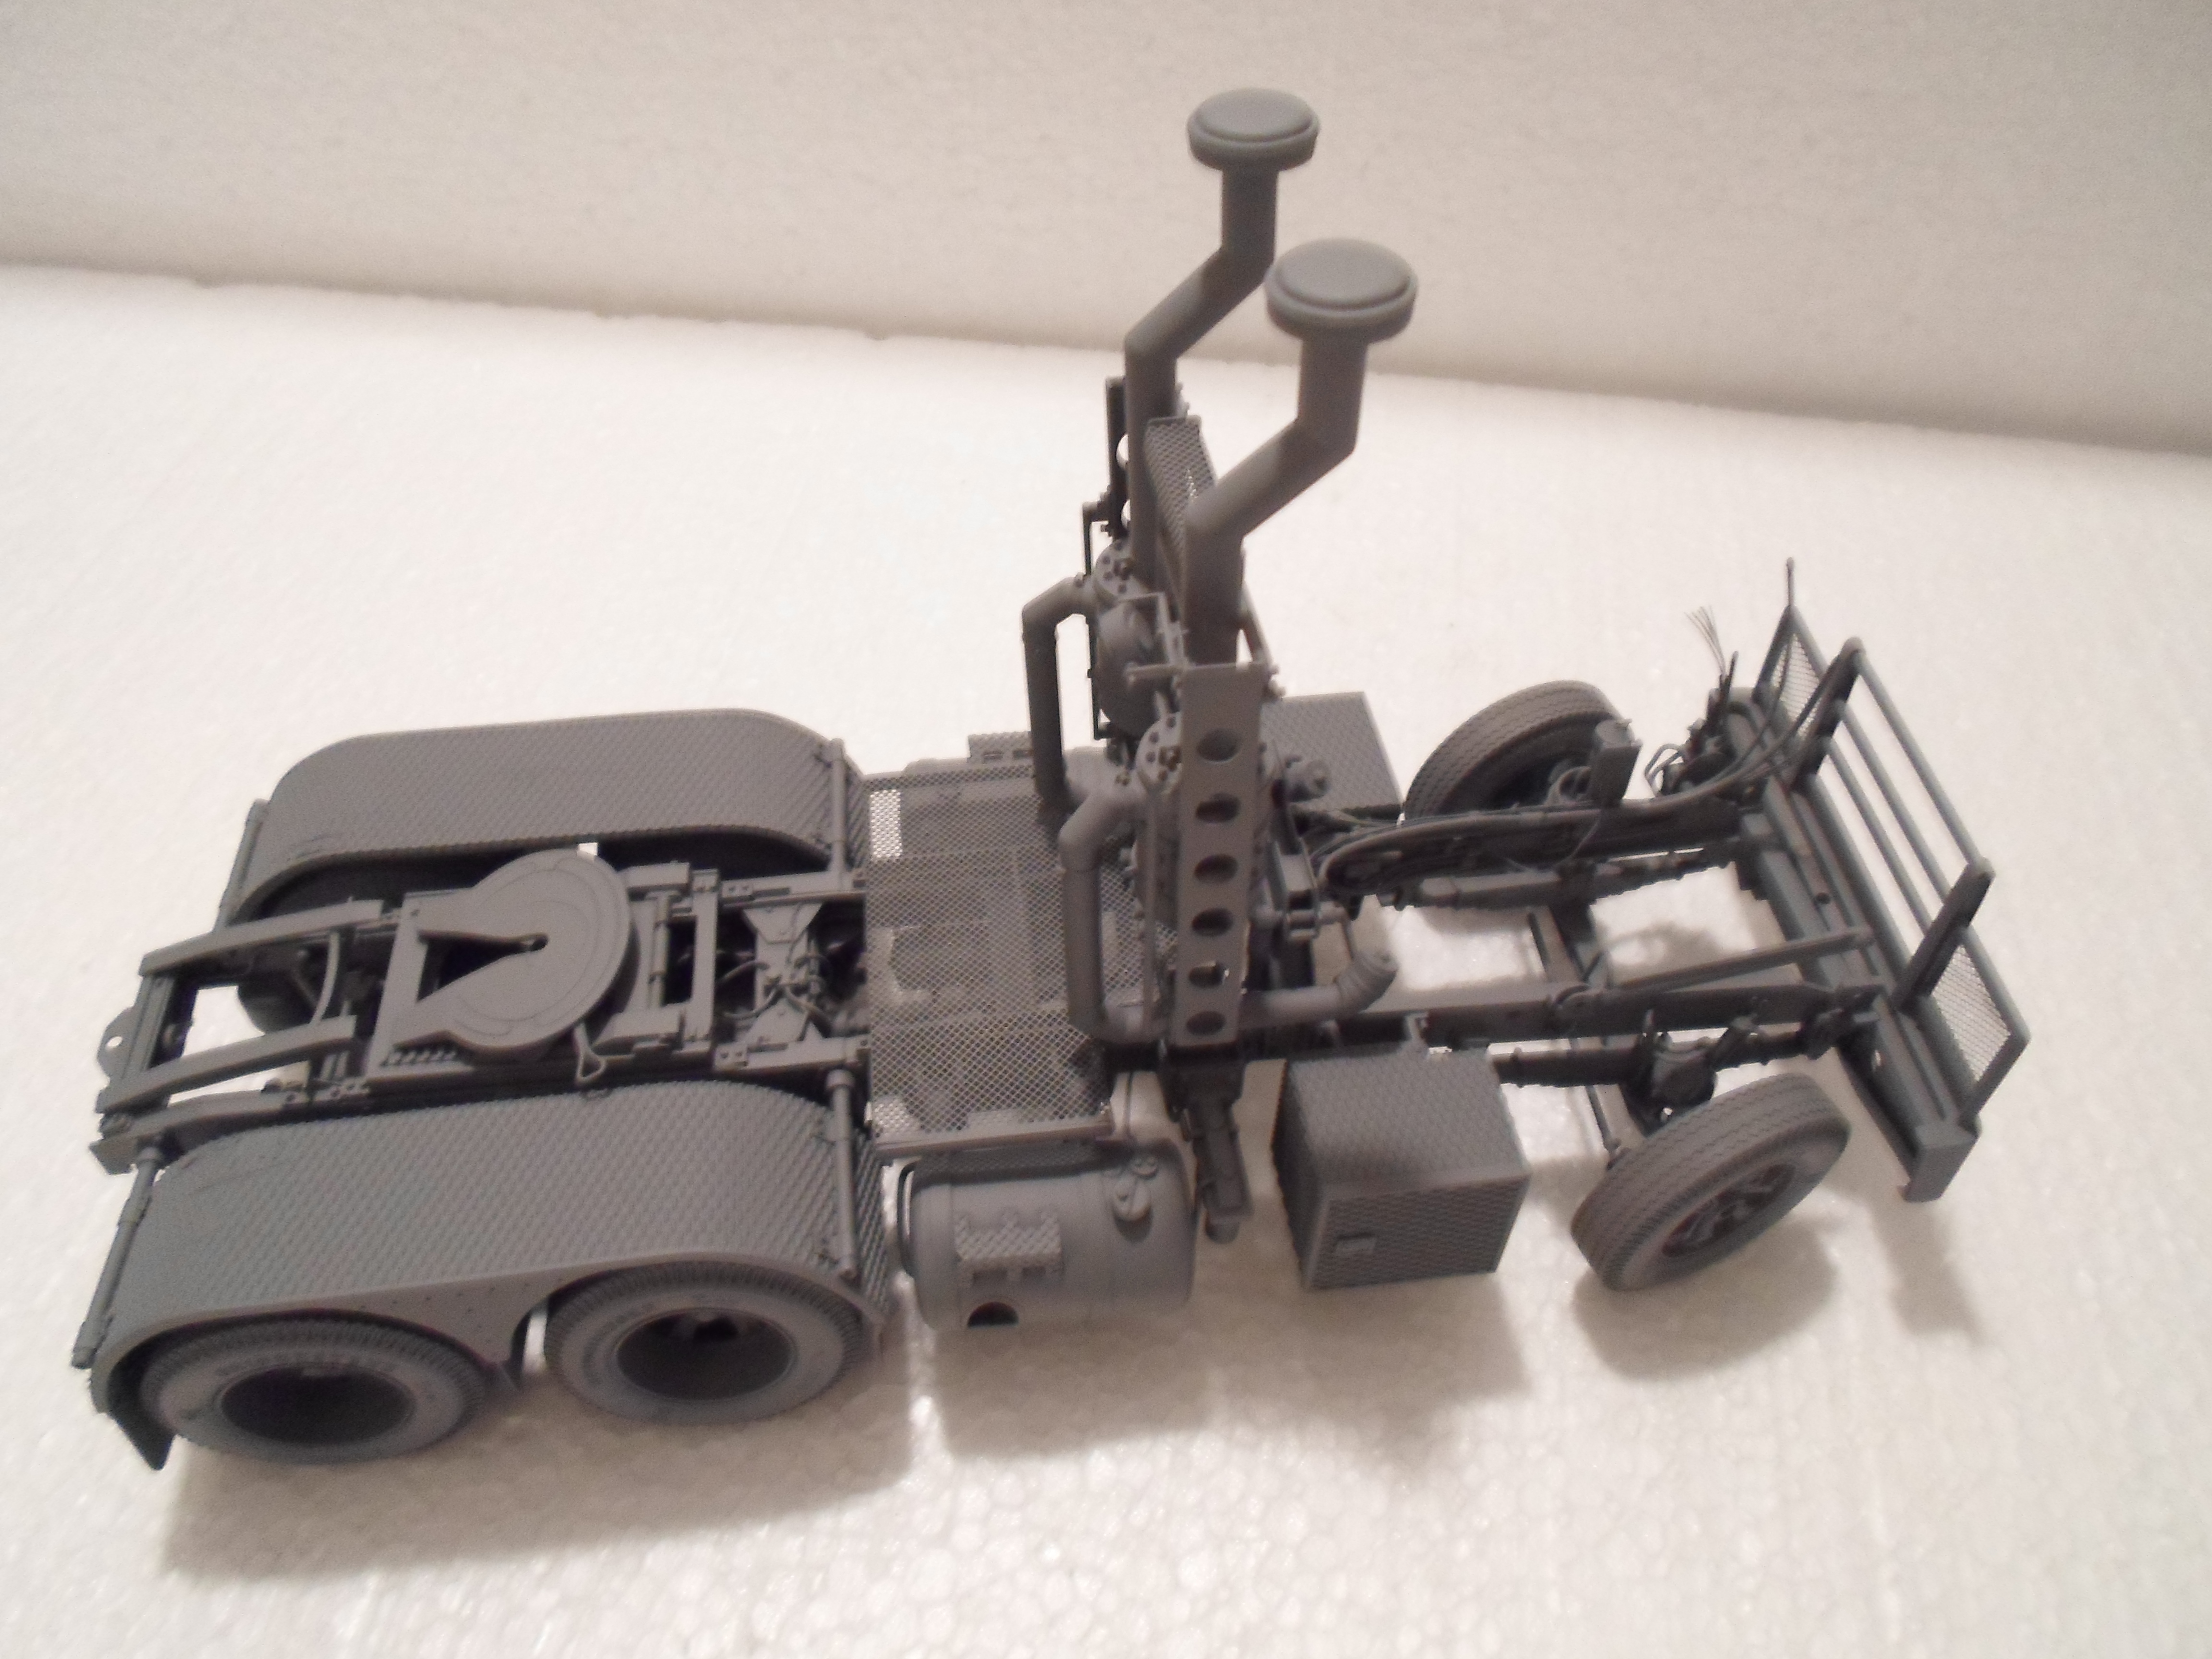
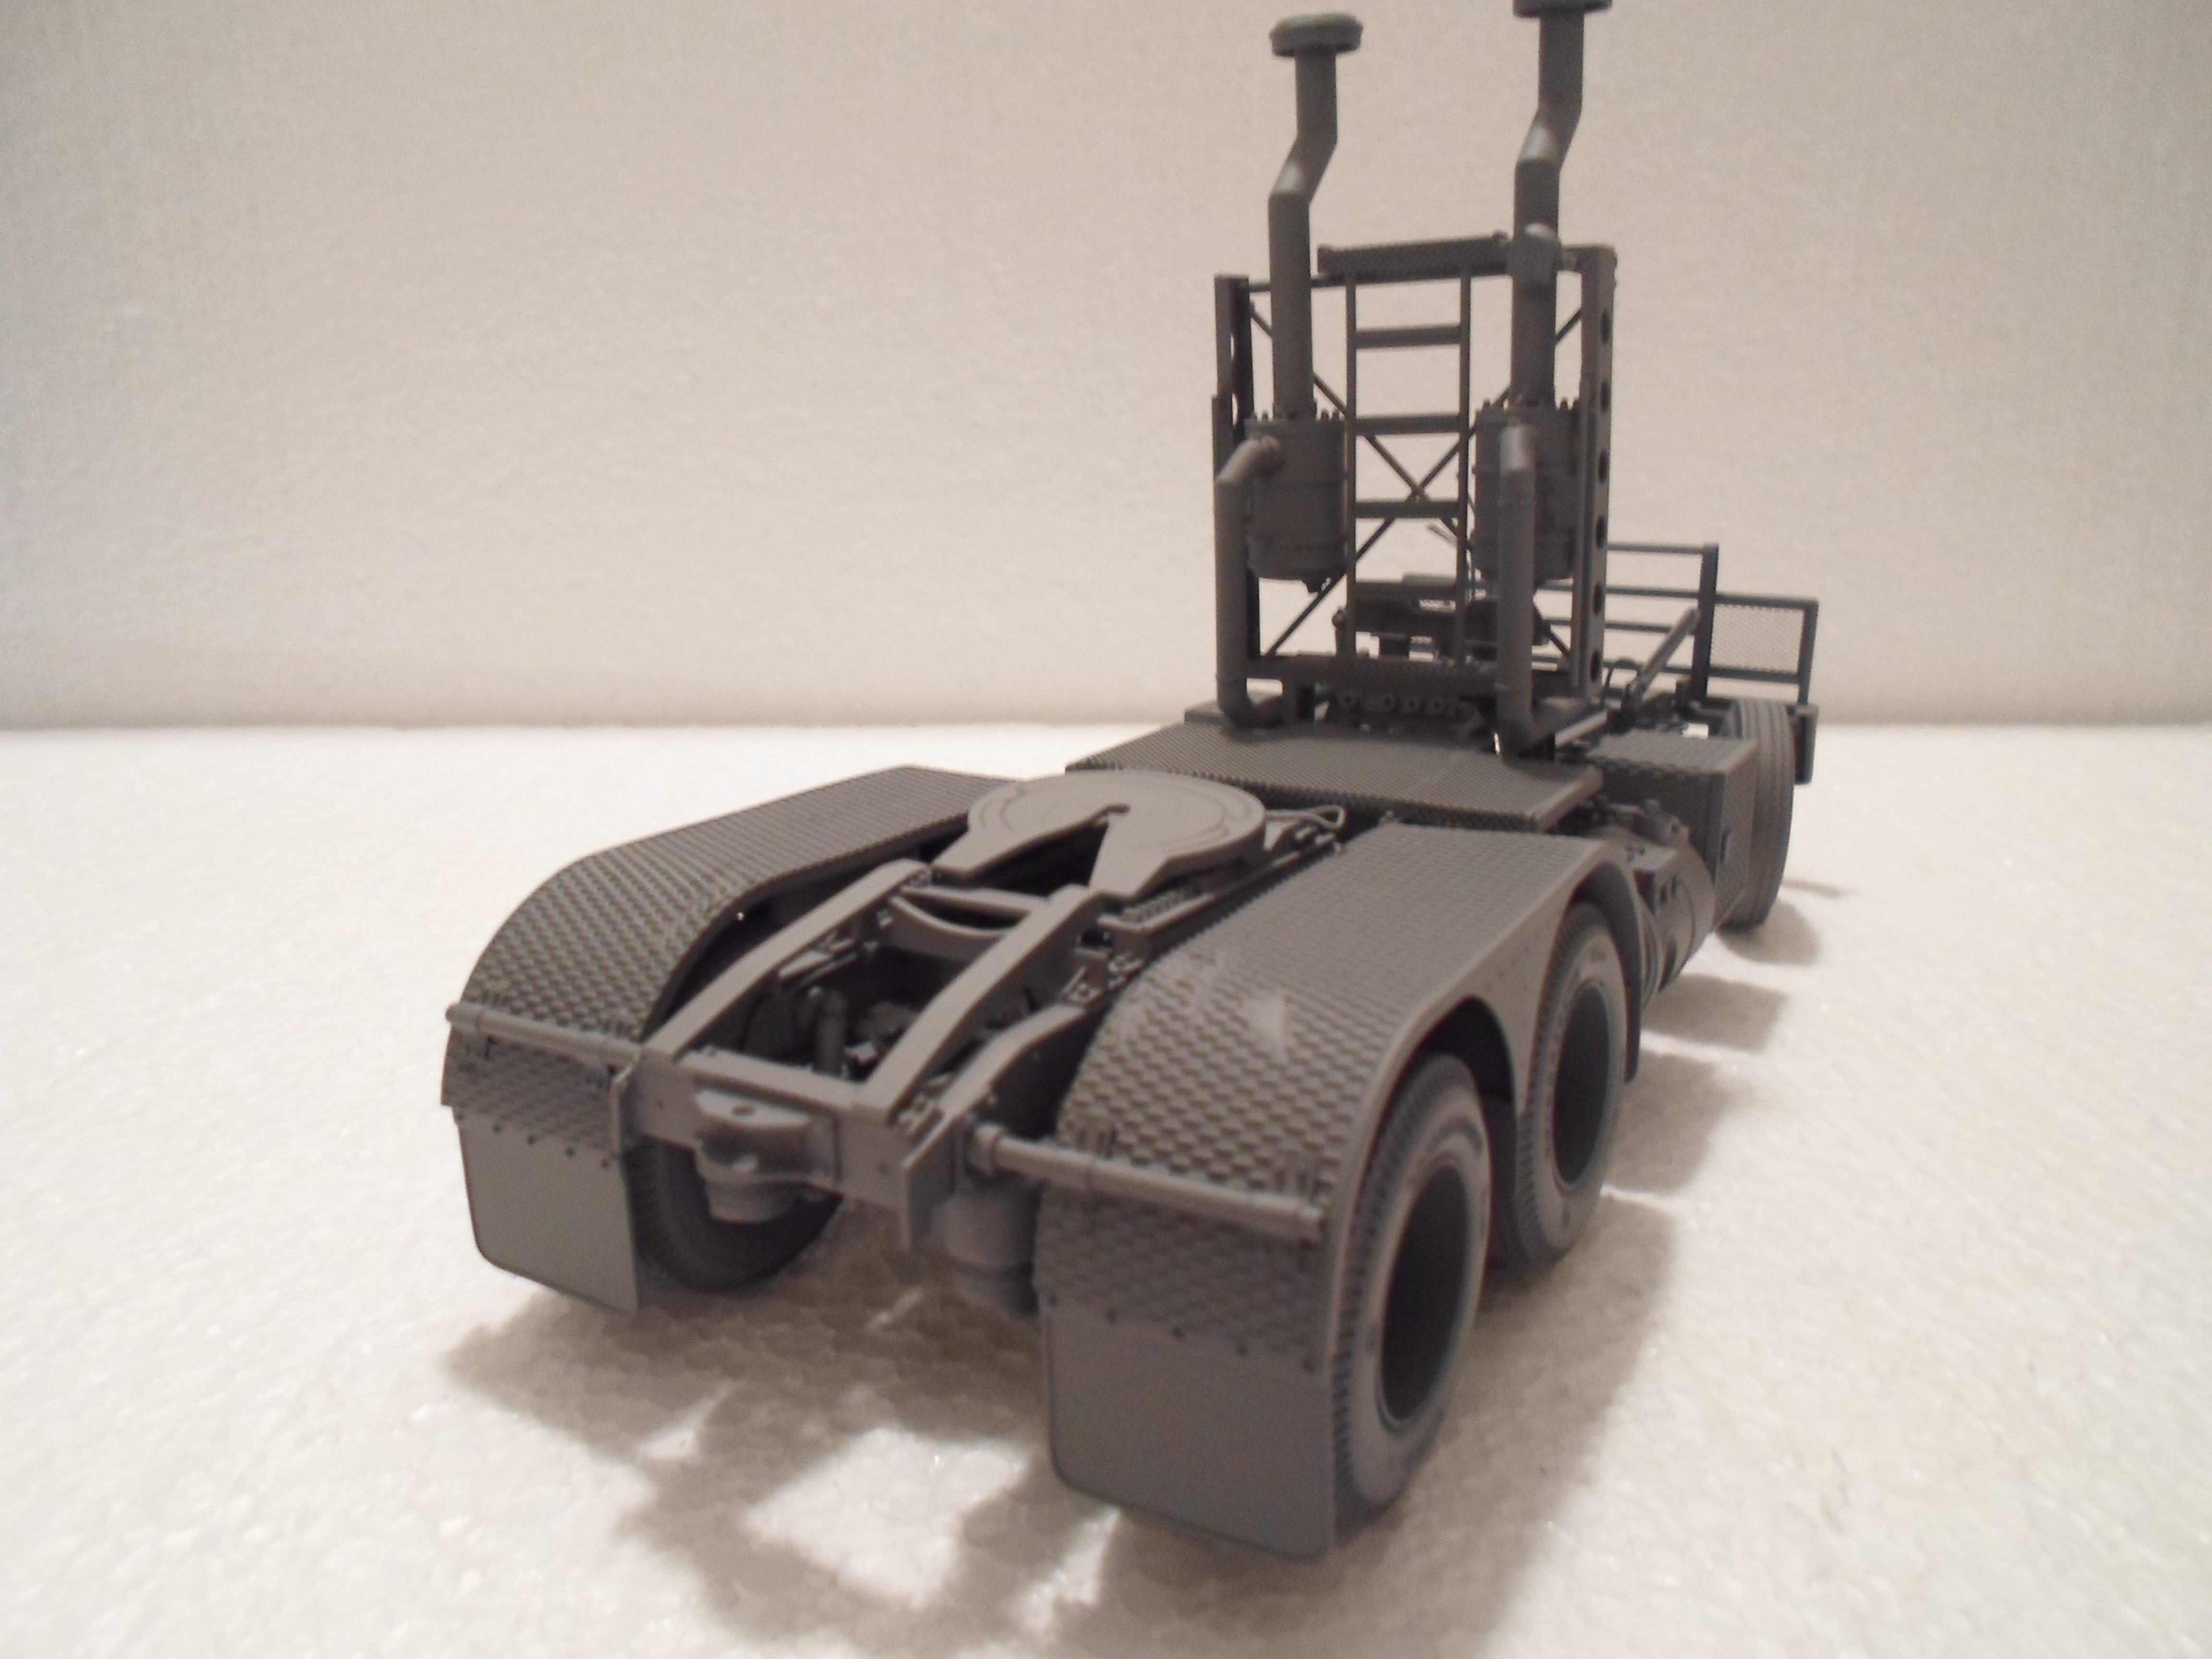
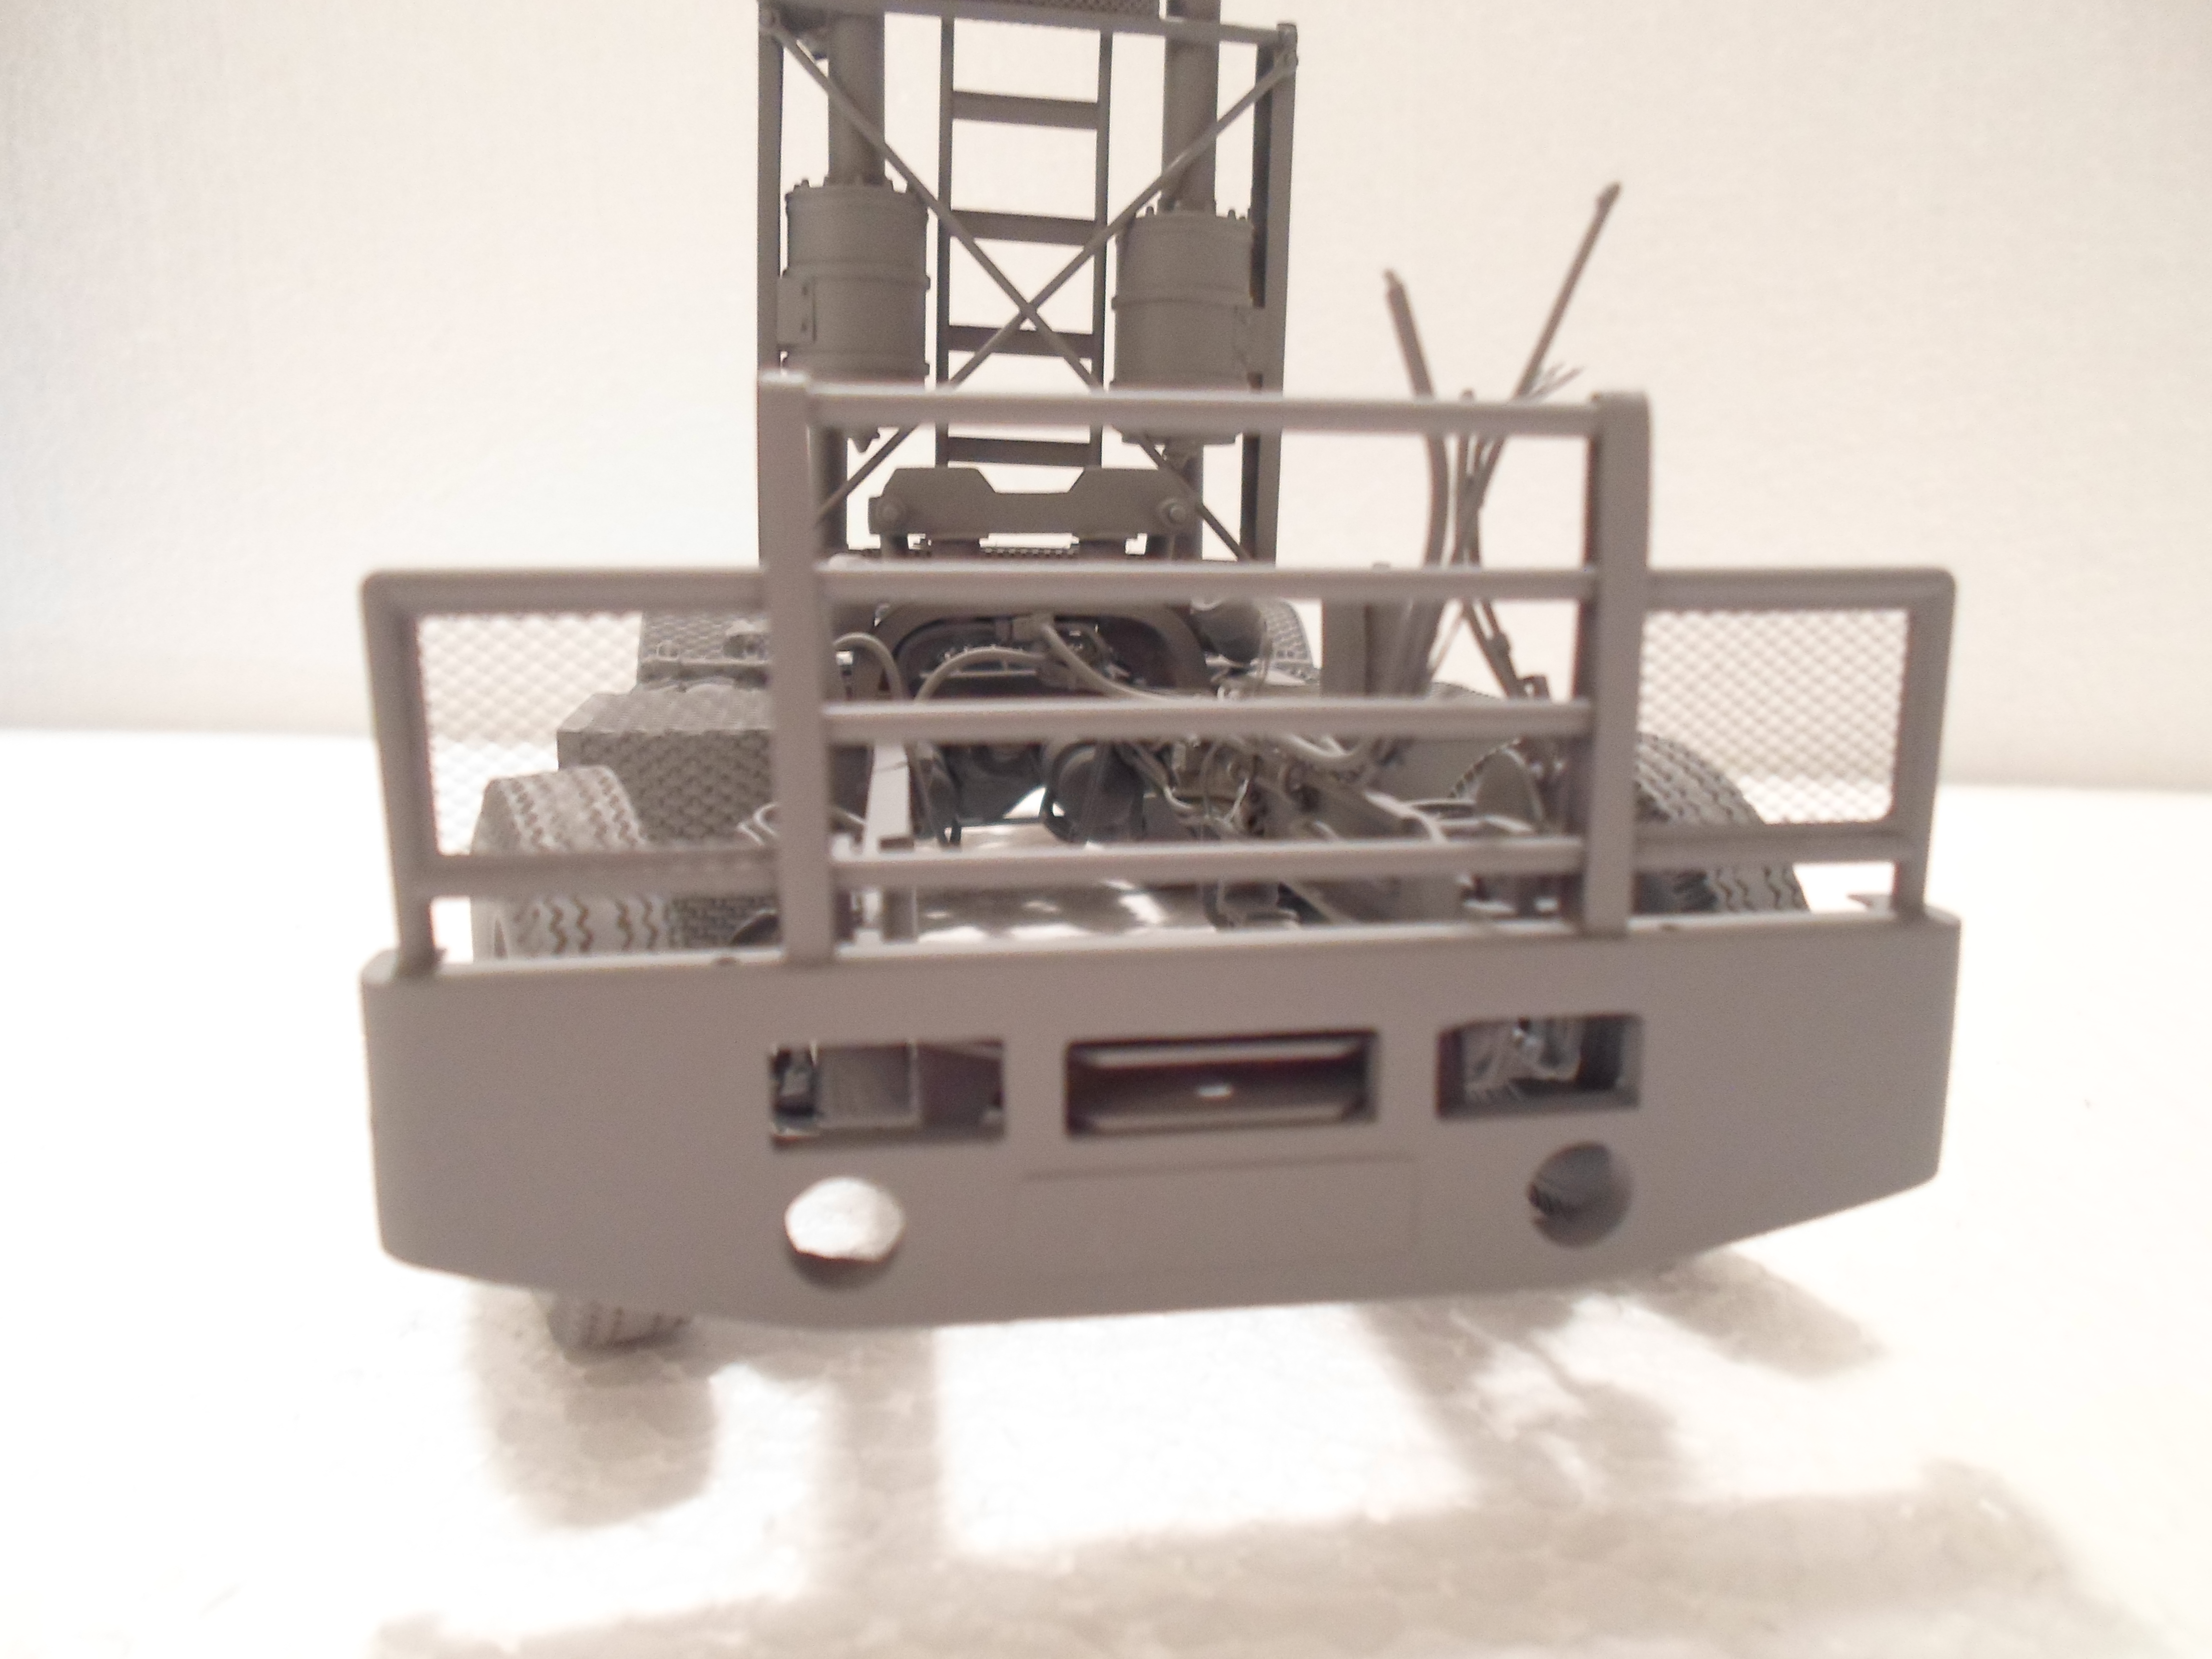
MARMON coe 86" cab
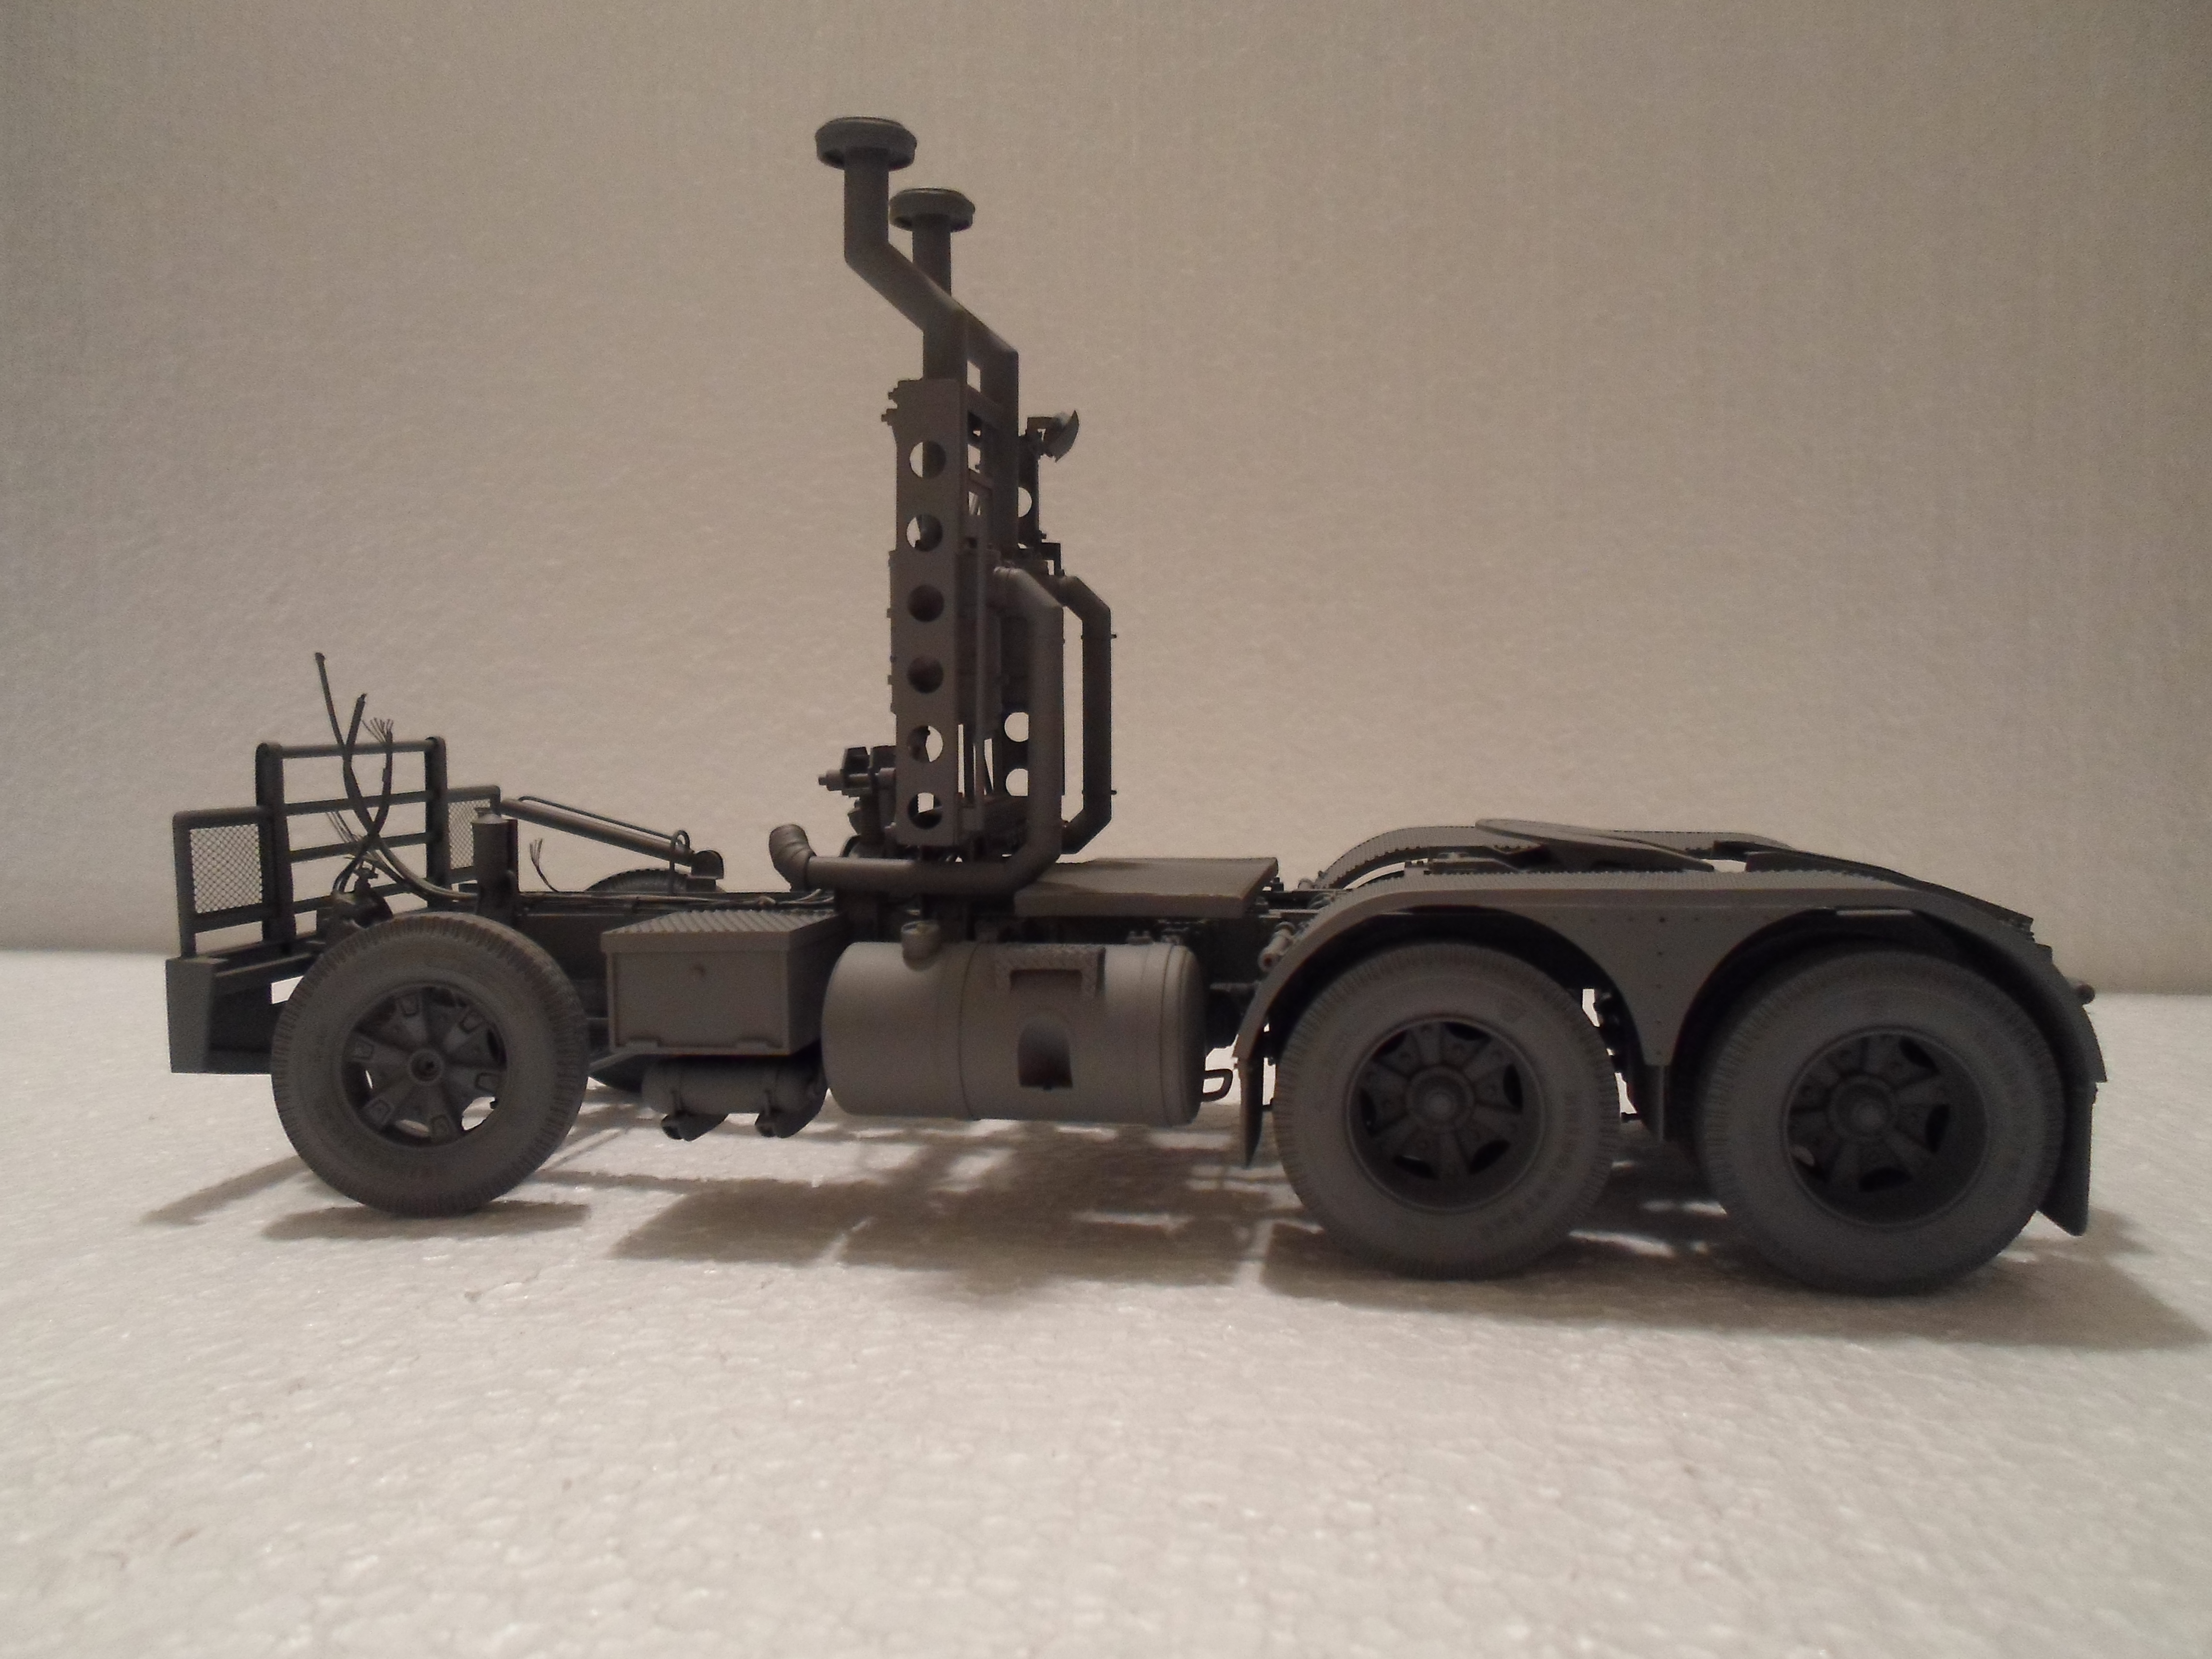
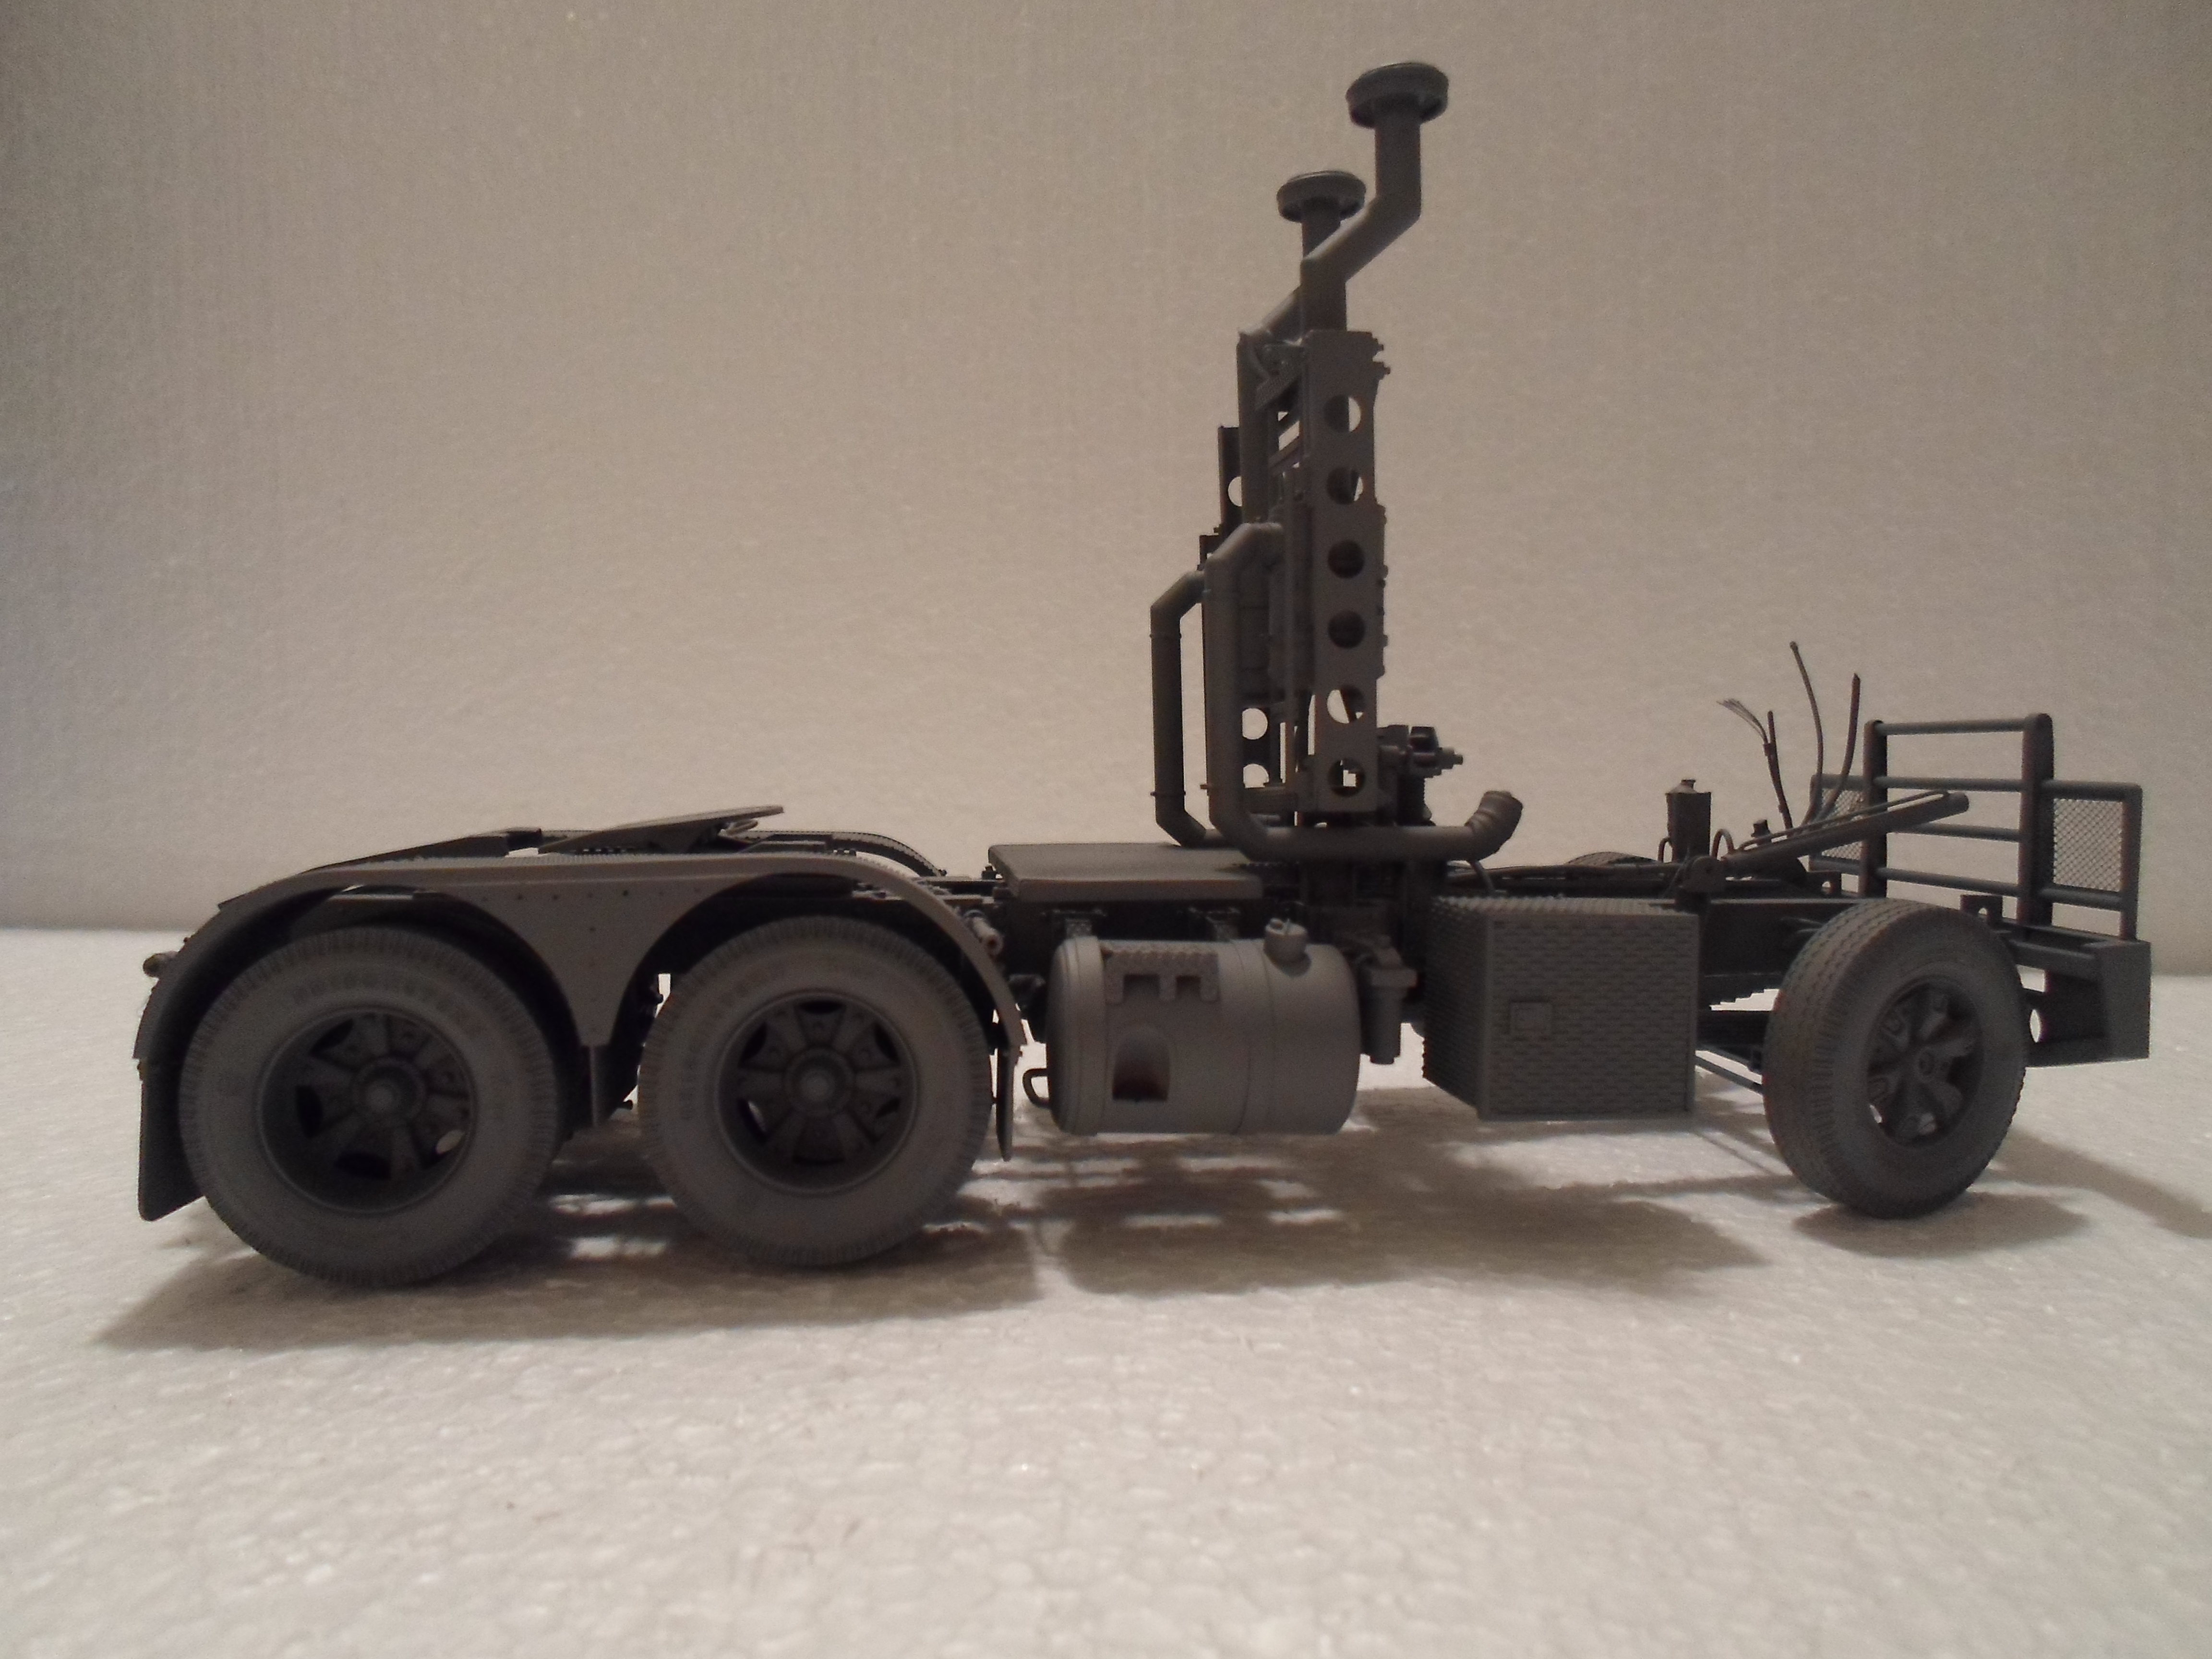
CRUSADER2 replied to CRUSADER2's topic in WIP: Model Trucks: Big Rigs and Heavy Equipment
Chassis primed at last, this will be the finished colour for the rails, tanks etc with maybe a fine coat of satin clear just to fix it after some weathering. The exhaust/air intake frame will be blue along with some blue on the cab so I will have to leave that until the cab is ready to spray and do it all in the same session, this means I can't connect the exhaust and air intake to the engine ( catch 22 again ) but I will be able put the engine in place which I need to do to be able to do the dog house for the new cab.