maltsr
-
Posts
1,640 -
Joined
-
Last visited
Content Type
Profiles
Forums
Events
Gallery
Everything posted by maltsr
-
Great news - I will buy and build several of these. Thank you Tamiya!
-
It seems that you have already learned much from tips and criticisms - that looks terrific. If I may, I suggest you try painting your whitewalls with acrylic paint. They can be sprayed using a circle template as a mask, but I have had success using Citadel (Warhammer) paint carefully brushed on in several light coats. The first coat is the most difficult, but many tyres have a lip to form the outer circumference of the whitewall. Subsequent coats are easier to apply. These were handpainted:

-
Nice clean slumpbuster!
-
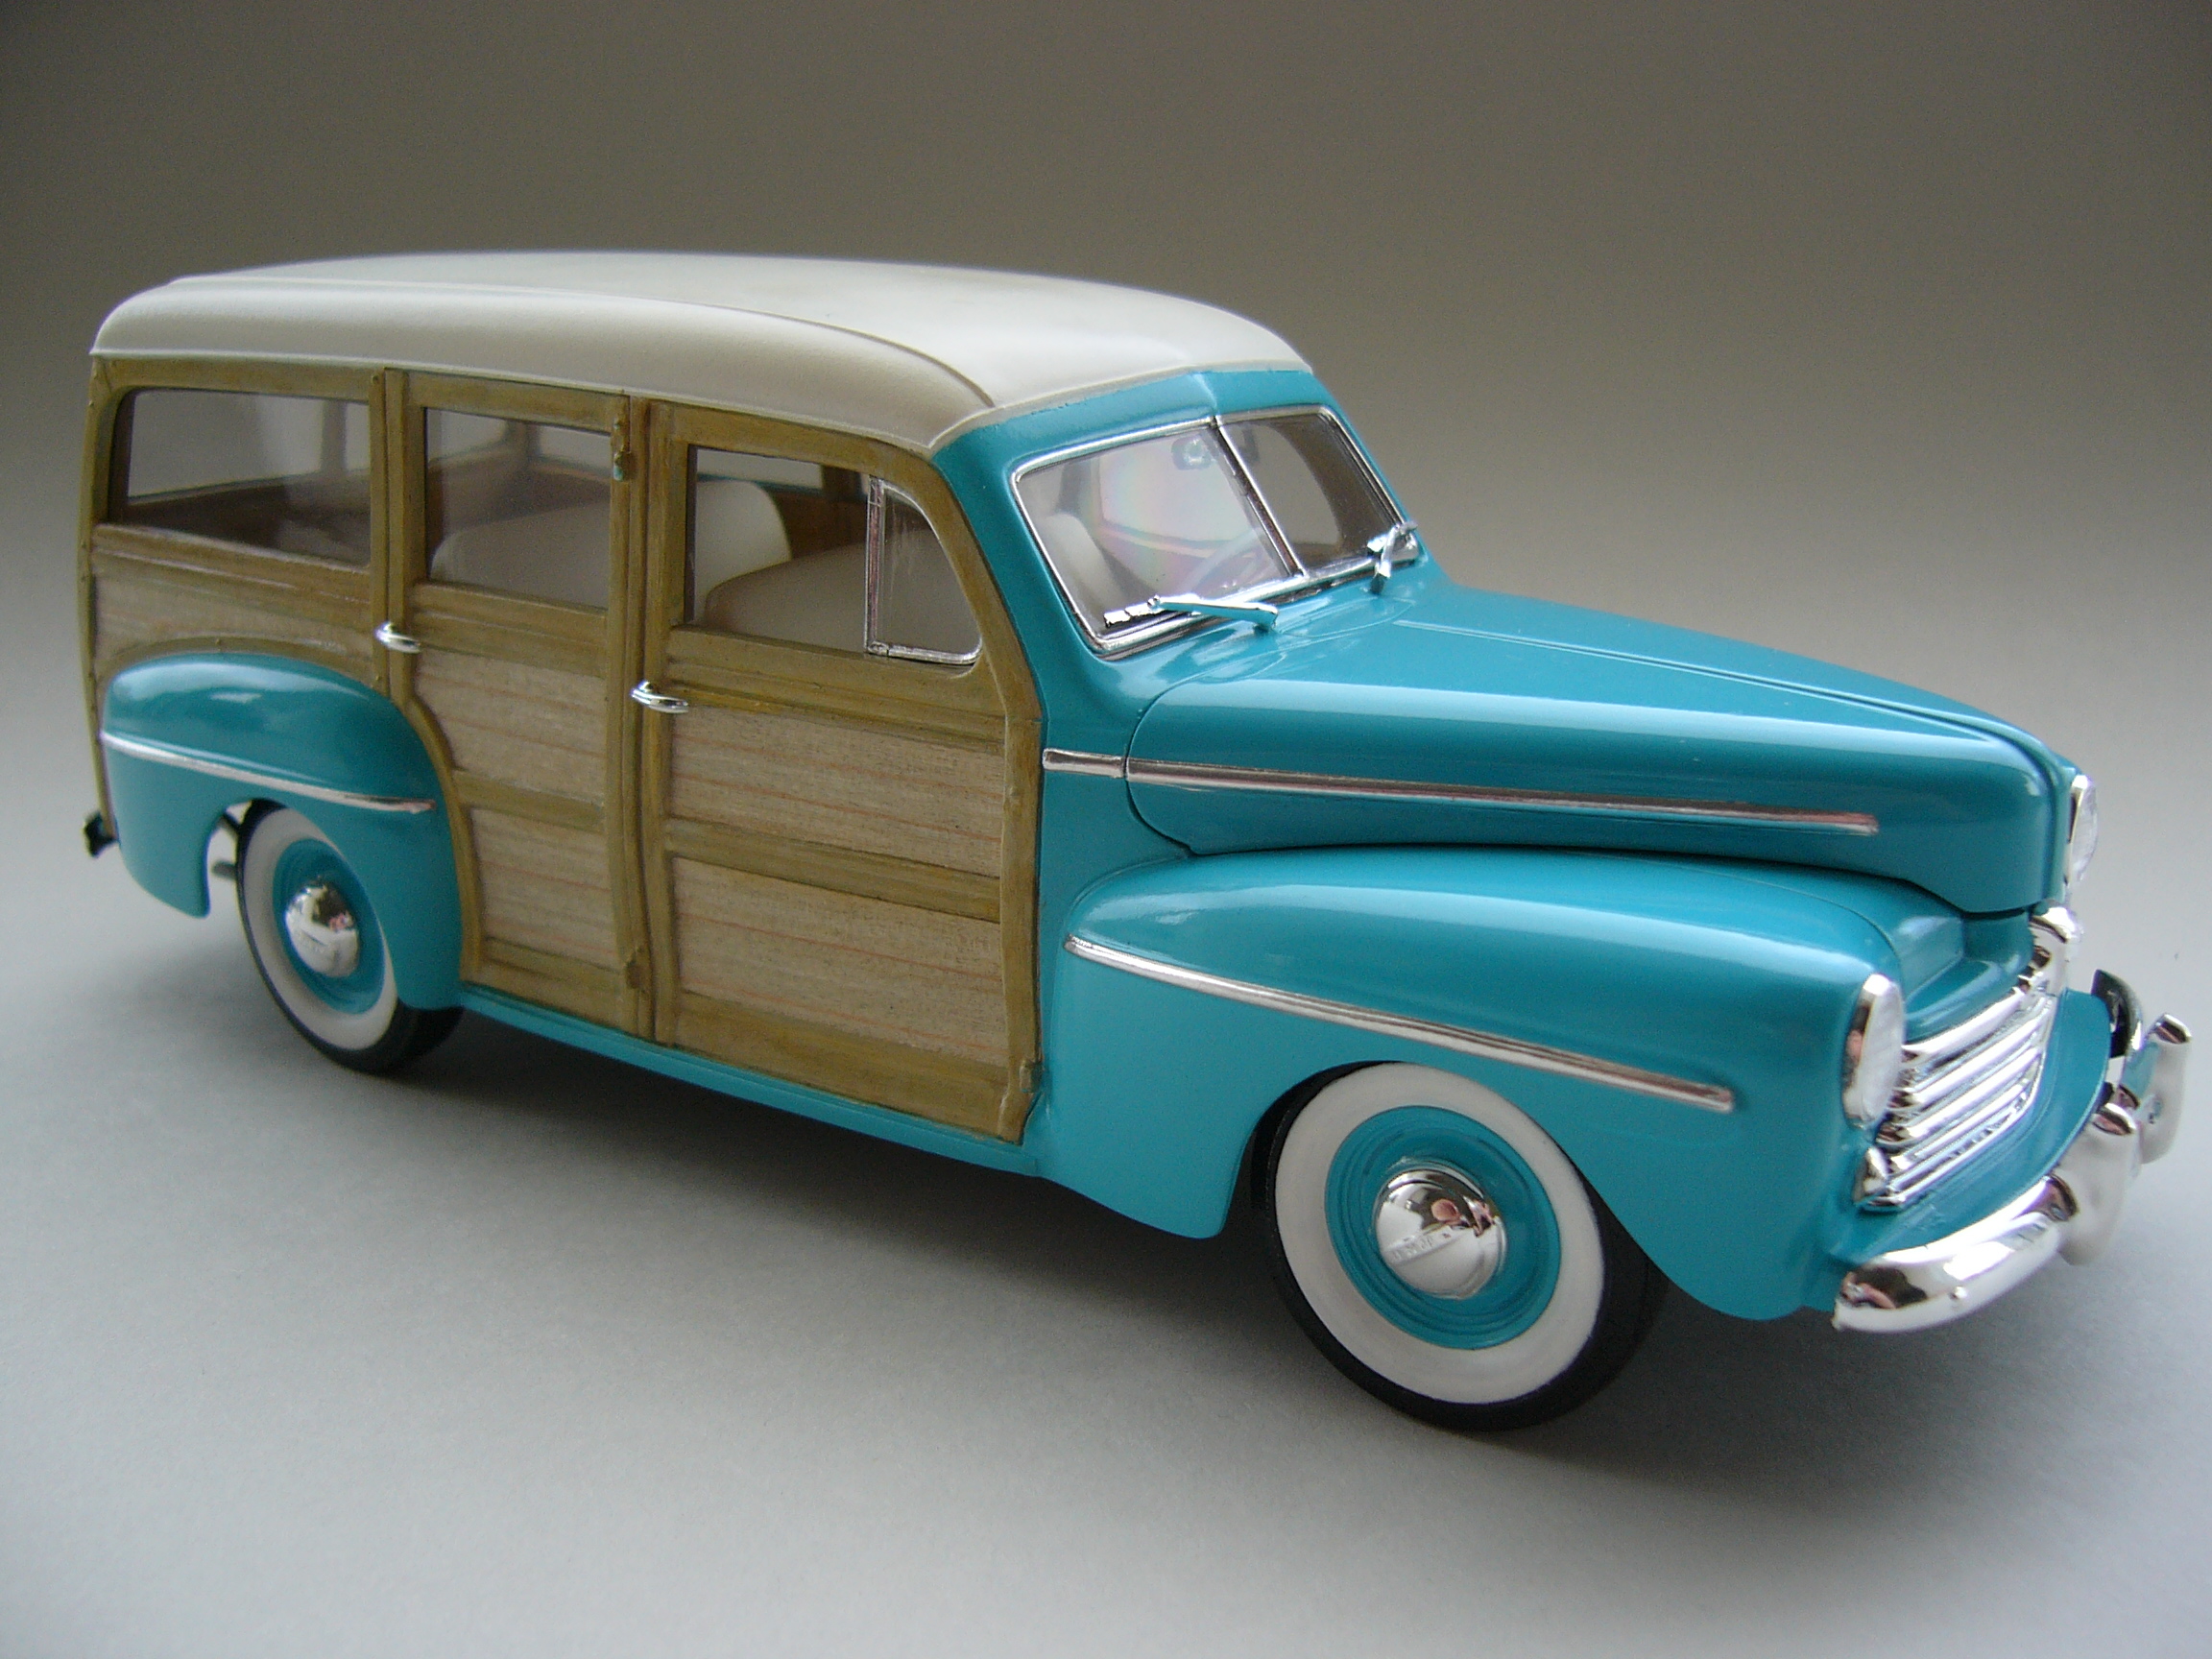
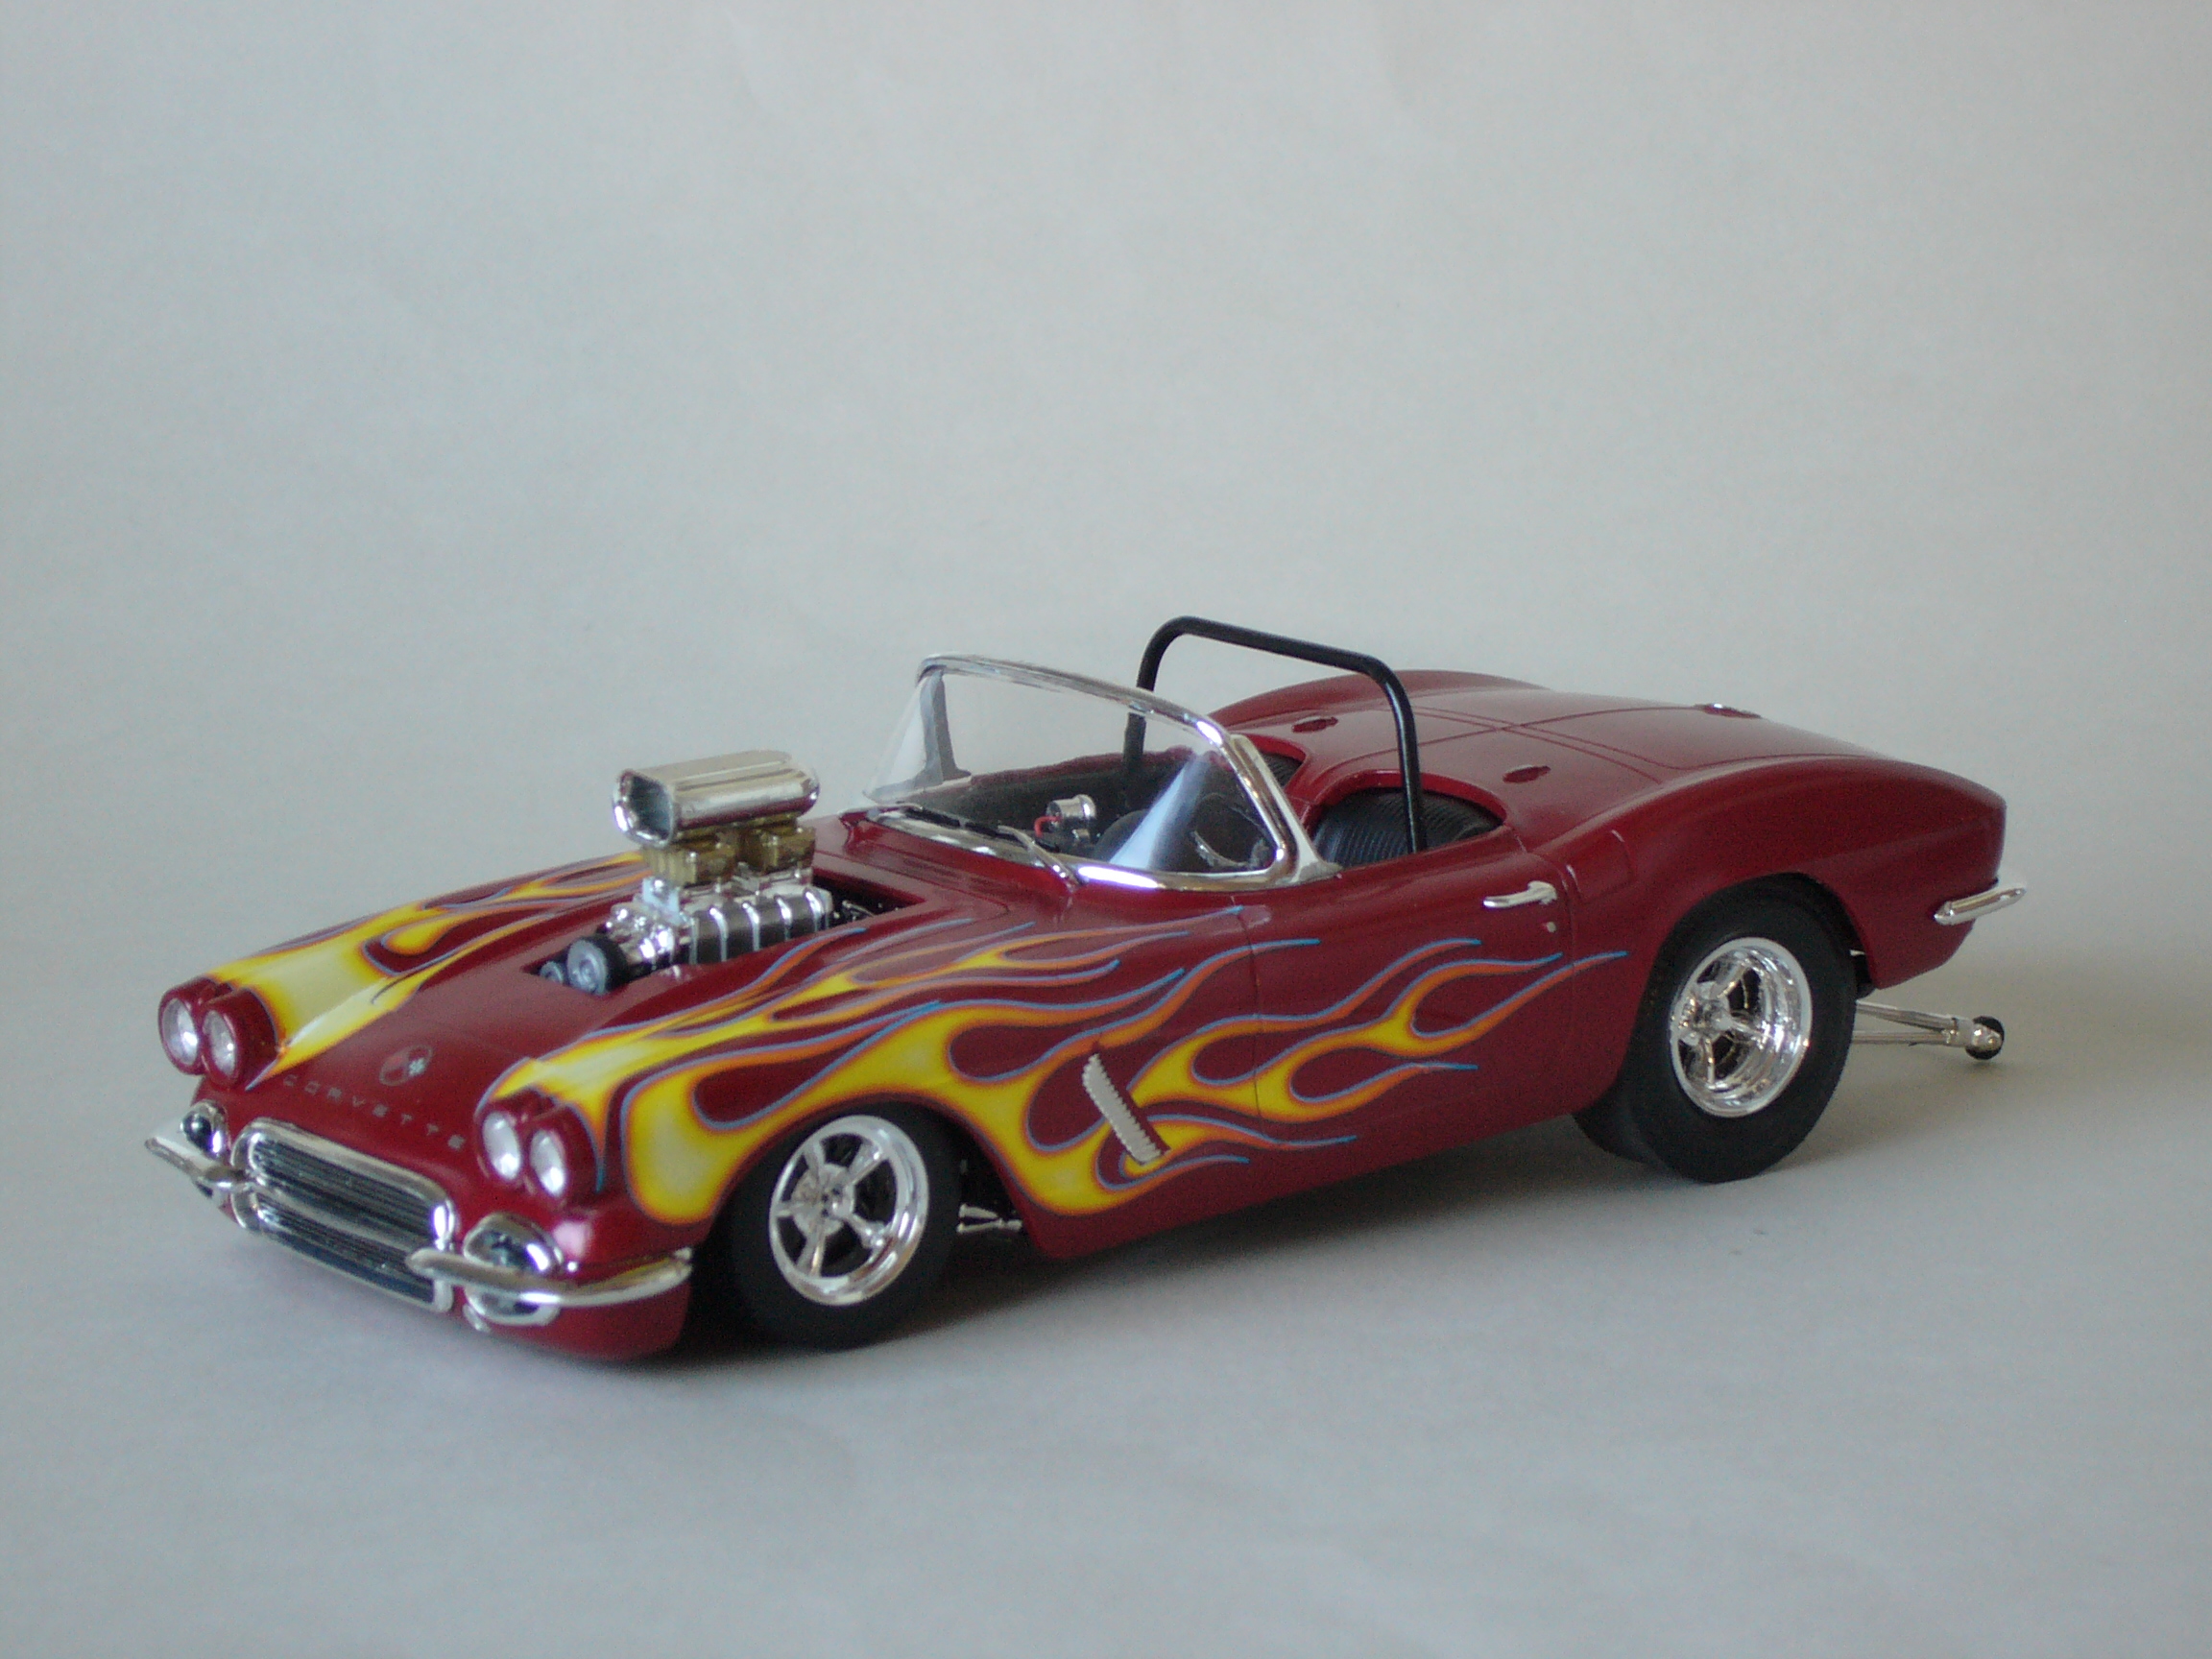
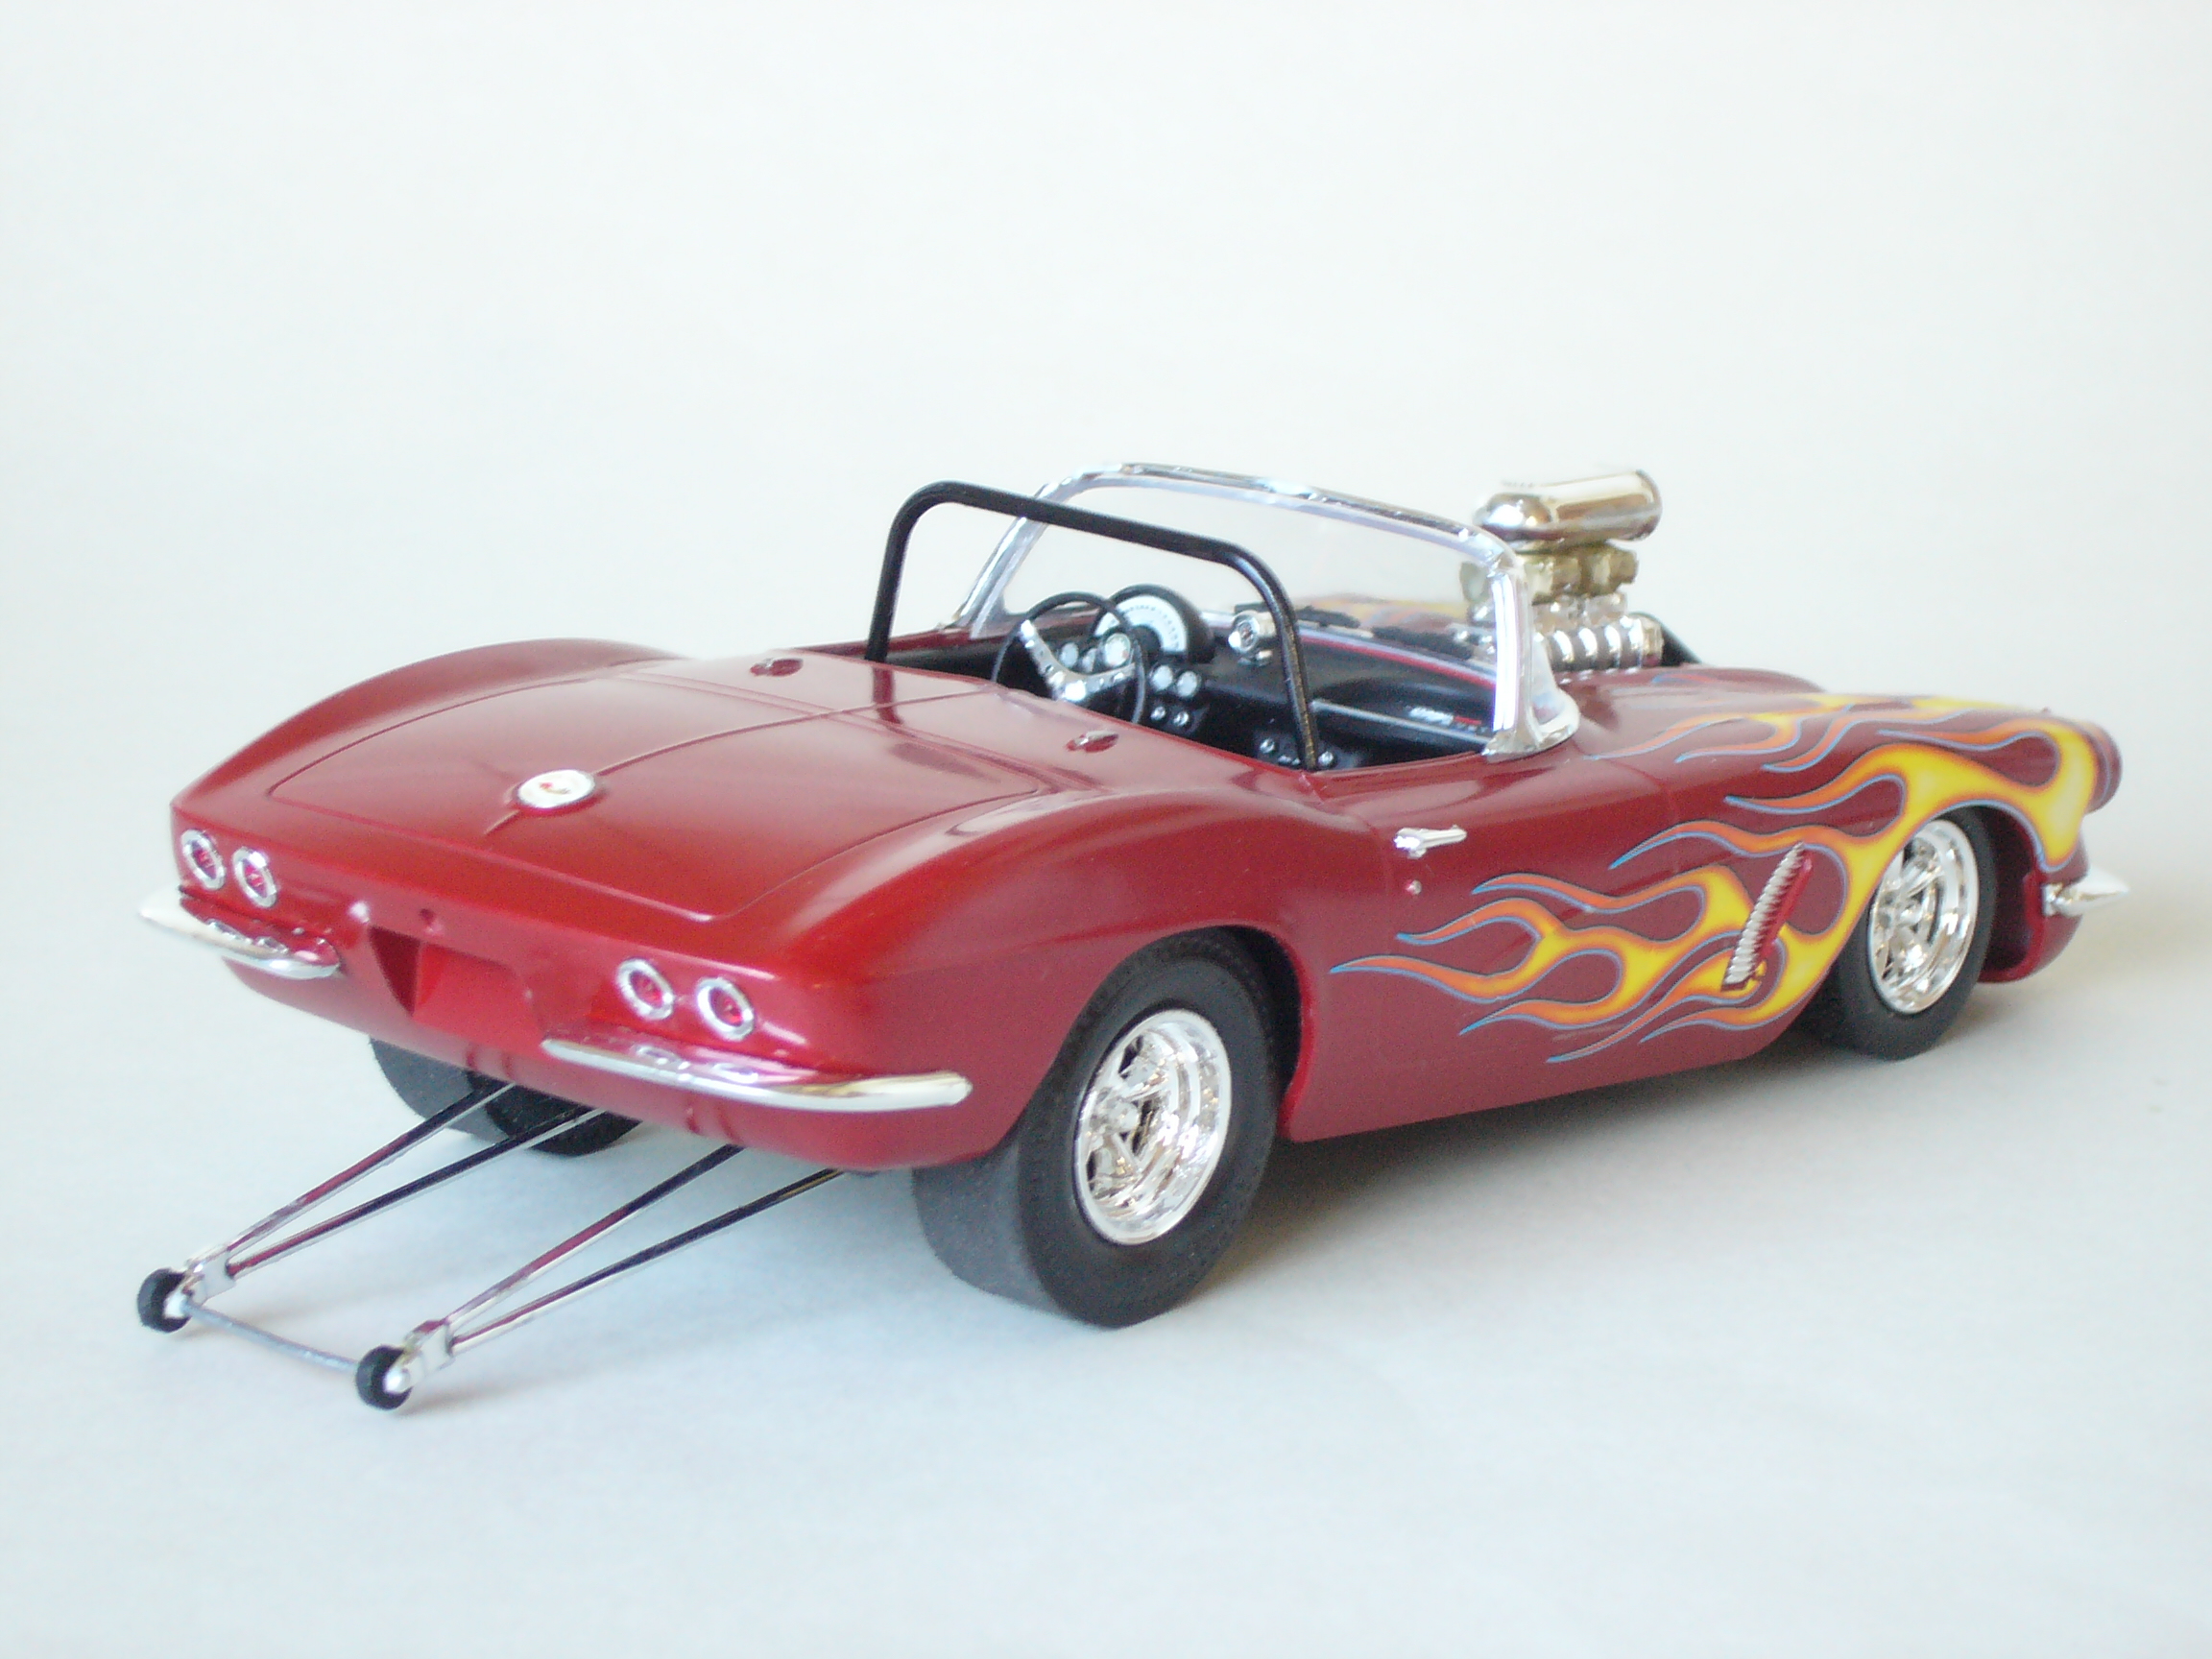
Having already built one of these as a gasser, this time I modified the suspension for a lower stance. The rear has been narrowed so the parts box tyres would fit in the arches, which necessitated narrowing the axle, modifying the spring mounts and X-member, moving the fuel tank into a central position and shortening the leaf springs. The front has parts box lower mounts and coilovers. Paint is Tamiya Mica Red over their red primer with the kit's optional flame decals.
-
I watch this series on YouTube and thoroughly enjoy it. Each manufacturer has 6 cars, making 18 in total. I hope new manufacturers will join in to keep the racing exciting. The second race at Norisring a few weeks ago was superb, with three cars in a photofinish for third place!
-
Great work Jonathan!
-
Good save - that looks much better!
-
Thanks guys. I used Evergreen styrene and gib tape from the DIY store.
-
 Looks like it's the Sprint version, too, with the world's first mass-produced multi-valve engine. It had four valves per cylinder way back in 1973.
 -
I'm speechless, Dann, that is beautiful. Great display too.
-
Despite what you say, it still looks good Jonathan!
-
Great start Mike and thanks for the tutorial - it really helps we amateurs!
-
Here's my second attempt at a diorama. I'm currently working on this startline to display my GT/DTM cars.
-
Thanks Dan. I had already decided to display in this mode, so didn't consider repositioning the windscreen. Mental note for next time though!
-
Cool! I'll be watching this.
-
Tamiya paint drying time and other questions
maltsr replied to Chris1992's topic in General Automotive Talk (Trucks and Cars)
I use a similar method to Ace, and haven't experienced any cracking after several years. I've also applied clear gloss as my final colour wetcoat! -
Nice work Pat. I've used those decals, they are first class.
-
The basic subassemblies shown above went together perfectly and were a joy to build, but the exhausts were a little difficult to line up at the rear. The issues I had were panel gaps where the rear diffuser meets the engine cover. One of the doors wouldn't close properly (perhaps the windscreen wasn't centred, but it was only out by a gnat's hair). That's why I chose the 'exploded' view. I intend to get another kit and try to build a closed version, perhaps sacrificing some of the hidden detail parts as a result. Next time I'll fit the doors before adding the windscreen.
-
This is the Aoshima kit with options of displaying panels open or closed. The underlying detail is excellent and a model in itself, so I thought it would be a shame to cover it. For example, the dashboard has over 20 pieces! Paint is a new Tamiya colour, Light Sand Metallic, with Gunmetal as a secondary colour and their red primer on the interior.
-
If it's US only, count me out! Bummer.....
-
Corvette Grand Sport C7 - July 31 - final stretch update
maltsr replied to RestoModGuy's topic in WIP: Model Cars
Excellent! -
Here's the link http://www.modelcarsmag.com/forums/topic/117495-revell-2017-releases/?page=8
-
Just happened to me too Bernard. Looks like I'll be uploading photos to another site and establishing new links. Bye bye Photobucket! Let's hope the other hosting sites don't follow suit....
-
Build them!
-
Looking good, Jonathan.