LouO Posted May 14, 2019 Share Posted May 14, 2019 great work! Quote Link to comment Share on other sites More sharing options...
peekay Posted May 14, 2019 Share Posted May 14, 2019 Beautifully done, love the colours! And I agree with you - the kit is a bit of a pain in some areas. Quote Link to comment Share on other sites More sharing options...
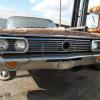
Scalper Posted May 14, 2019 Share Posted May 14, 2019 nice and clean work. .interior is great and the paint is nice Quote Link to comment Share on other sites More sharing options...
Geno Posted May 14, 2019 Share Posted May 14, 2019 I give it an SS for Super Sweet. Quote Link to comment Share on other sites More sharing options...
DaveP Posted May 14, 2019 Share Posted May 14, 2019 Nice. How did you do the carpet? Quote Link to comment Share on other sites More sharing options...
Southern Fried Posted May 14, 2019 Share Posted May 14, 2019 Looks just right.... Quote Link to comment Share on other sites More sharing options...
Trendsetta68 Posted May 15, 2019 Share Posted May 15, 2019 Wow, that color combo is awesome !!! Yeah that kit doesn't seem to fit right for me either Quote Link to comment Share on other sites More sharing options...
slusher Posted May 16, 2019 Share Posted May 16, 2019 Super nice Chevy! Quote Link to comment Share on other sites More sharing options...
minkos Posted May 16, 2019 Author Share Posted May 16, 2019 Thanks again all. Dave, I mixed kens fuzzy fur green and blue together for the carpet. Quote Link to comment Share on other sites More sharing options...
Tommy124 Posted May 16, 2019 Share Posted May 16, 2019 Very well done! I have seen other modelers archieve nice results for that kind of "metallic interior" look by using Tamiya Pearl Clear but your method definitely worked out nicely too! On 13.5.2019 at 3:58 PM, MrObsessive said: I tried your decal trick with a stillborn '55 Ford Victoria for the trunk pattern years ago and yes, that works quite well if you can get the resolution sharp enough. Will you reveal the "decal trick" to the others too? Is a about using printouts for patterns? Quote Link to comment Share on other sites More sharing options...
Mr.Zombie Posted May 16, 2019 Share Posted May 16, 2019 Nice. Quote Link to comment Share on other sites More sharing options...
bbowser Posted May 16, 2019 Share Posted May 16, 2019 That's a beauty! Period perfect colors. Quote Link to comment Share on other sites More sharing options...
MrObsessive Posted May 18, 2019 Share Posted May 18, 2019 On 5/16/2019 at 7:05 AM, Tommy124 said: Very well done! I have seen other modelers archieve nice results for that kind of "metallic interior" look by using Tamiya Pearl Clear but your method definitely worked out nicely too! Will you reveal the "decal trick" to the others too? Is a about using printouts for patterns? Sorry it's taken a bit to get back to you. Sometimes I can read the forum at work and reply...........this was not one of those weeks! When i get home in the morning depending on how the night went, I browse the board to see what's up. This was one of those weeks I hope doesn't repeat itself for a loooong time and I was so glad when Friday at 7:30 AM rolled around! OK...........I don't have pics to show what was done, but I'll try to explain what I did. This will involve a bit of computer work so for those of you out there that are the faint of heart when it comes to computers and manipulating pics, this may not be for you. On the 'net I tried to find the highest resolution pic I could find of the '55 Ford's "Burtex" type pattern. I don't remember where I found it, but I came across a very large pic of that pattern and saved it. I then went into my pic program (an old Paint Shop Pro) and resized the pic down to maybe 85-100 pixels or so. I then put the pic on my desktop and had it displayed as 'tiled' so that all you saw on the desktop was that pattern. I hit the print screen button and then opened up my Wordpad program. Hit Ctrl/V and the image showed up there. I then saved the image as a .jpg file on my hard disc. I turned on my printer and then printed out that pattern on regular paper to what I had and SHAZAM!.............. I had the pattern I needed. Now this took several tries to get the look I wanted and as I said, your results will vary. This will depend on how good your printer, paper and how sharp a resolution you were able to get the pic in the first place. Hope this helps! Many times I don't express in detail what I do, I just go ahead and do it and I don't always translate that well into thought. Quote Link to comment Share on other sites More sharing options...
RAMBENNA Posted May 18, 2019 Share Posted May 18, 2019 you know you did a great job, when your build looks like the real thing. this car is fantastic great job on it Quote Link to comment Share on other sites More sharing options...
Tommy124 Posted May 20, 2019 Share Posted May 20, 2019 On 18.5.2019 at 10:06 AM, MrObsessive said: Hope this helps! Many times I don't express in detail what I do, I just go ahead and do it and I don't always translate that well into thought. Thanks for the explanation, Bill. I have used a similar method for getting small logos etc. and as you said, the outcome depends on the original resolution and the printer's quality. For some of those things printed out on normal paper I have found it helpful to "seal" it with self-adhesive transparent foil, the stuff that is used to protect book covers. Quote Link to comment Share on other sites More sharing options...
David G. Posted May 20, 2019 Share Posted May 20, 2019 Great color choice, excellent work on the interior with that decal technique, very solid looking build. David G. Quote Link to comment Share on other sites More sharing options...
Recommended Posts
Join the conversation
You can post now and register later. If you have an account, sign in now to post with your account.
Note: Your post will require moderator approval before it will be visible.