customline
-
Posts
3,791 -
Joined
-
Last visited
Content Type
Profiles
Forums
Events
Gallery
Everything posted by customline
-
Thanks for your attention and comments. I do have those '62 kits and I believe it's the way to go.....if the object of my affection was the '63.
-
I was reading back and found your post that I missed earlier. Steve, this one just ain't that exciting to me. Picked it up in a junk shop(well, Wifey did.) For $10.00. Otherwise I would never ever ever pay retail for a kit like this AND....this particular Impala is not my favorite. If I had the kits you cited, this kit would be a bash. ?
-
The kit engine ain't that bad, is it? It just needs a little love ?. I was able to actually drill 9 separate holes in the distributor! It is wired with the correct firing order (I never do that.) I added an oil filler and generator brackets. Although It does not has a separate oil pan (a big plus), you can't see the block of plastic that serves as a carburetor once the air cleaner is in place. When heater and radiator hoses are finally added it will look just fine. I dunno, ladies and gentlemen, I find it acceptable ?. Maybe I'd change out that weird fan. Looks like some horrid disease. Why would there be rivets on the fan blades? Ace?

-
I just looked at yours, Mike, it really looks great in bright red. Got me thinking.
-
I really appreciate your advice, Steve.
-
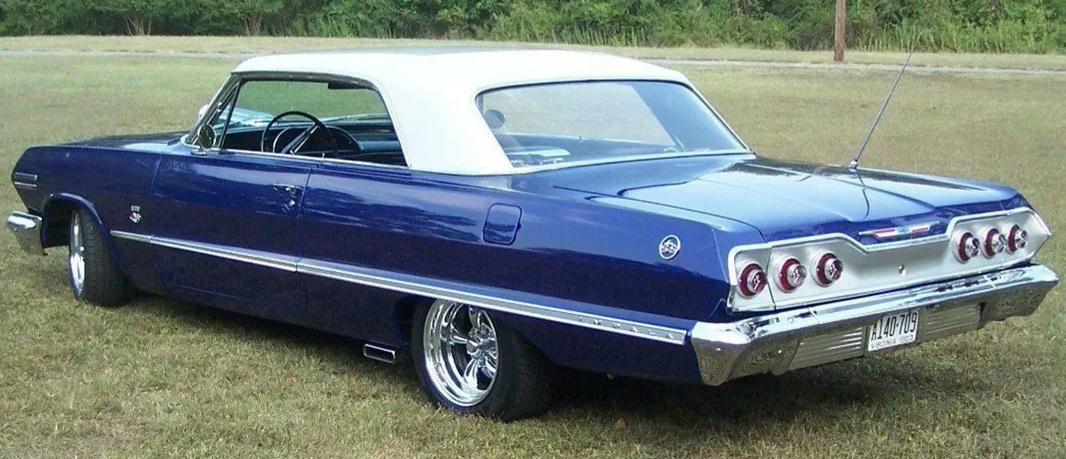
Yup. It's a natural reaction to this one, When I see a rear axle housing molded into the floor I get turned off. So as not to waste the ten bucks I spent for this kit, I figured I would just make my first curbside and use the somewhat decent 409 to replace one I borrowed (from some long forgotten kit....oh, I'll find it eventually ?). Besides, I really like the mags. The blue with the white top is my choice for color scheme (for now.) I may try the bullet thing for the tail lights. So many, though ?.
-
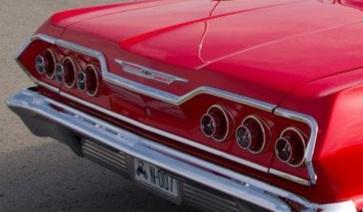
Thanks for your input, Richard, I'm not sure what to do with those pesky tail lights. Maybe drilling them out and frenching or some other custom treatment. I've got to explore my options yet. The flash on that rear panel was horrific. I used Plastruct triangular strip for the trim. The '63 is a cool body style but not my favorite among '60s Impalas.
-
Ah ha. OK, then. And it won't eat plastic? The money works out the same, so.....yeah, thanks again!
-
Thank you for the heads-up, Steven. You just may have saved my neighbors an earfull of the most disgusting language they had ever heard ?. Dupli-color is kinda pricey, though, and it's a high build primer-surfacer, right? By the way, that big Poncho ragtop is AWESOME!
-
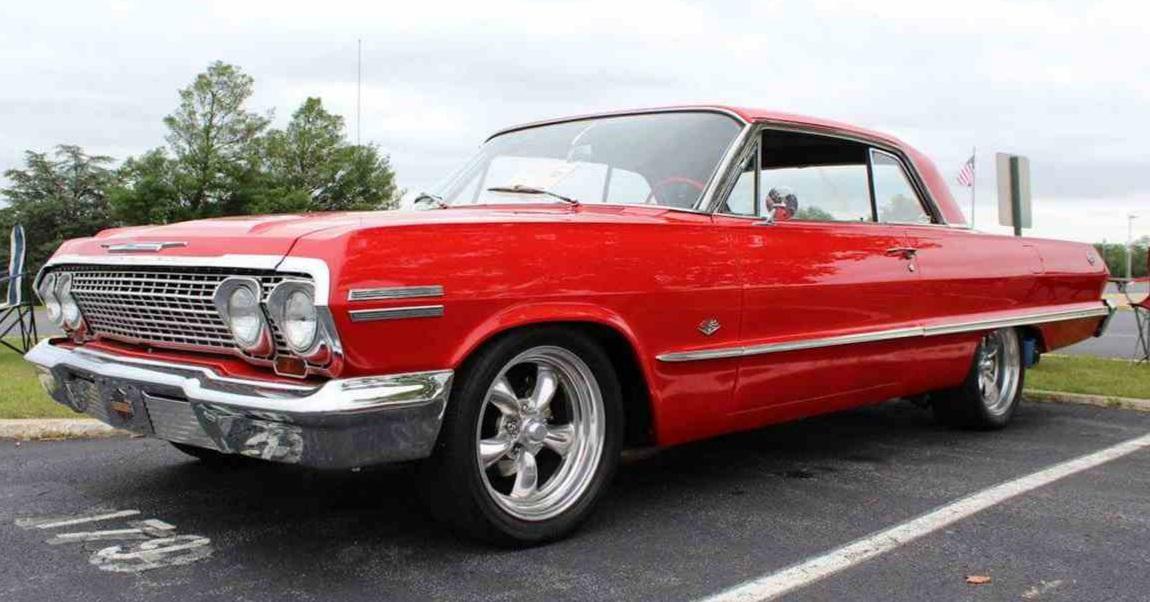
...of a P. O. S. Kit ?. I have never done "curbside". I always like to detail the engines a bit and build a chassis that is half-way authentic looking. The AMT '63 Impala kit is a really old screw-bottom annual, an old promo gone retail. I would do a full build if it had a dam firewall. I will admit there are some nice parts to play with and I will definitely find a home for the big 409. I just can't get excited over this one but I do enjoy making a silk purse. A perfect opportunity! Here's a mock-up for you mock-up lovers. The chassis is easy to do a bit of lowering on. Just drilling new holes is all you need to do.I had to remove a ton of flash and it was in some very inconvenient areas. I added back some trim to the rear just so I had something to foil. Gotta get some primer on it now and then fix all the blemishes. Comments, commiseration, and comedy always welcome !
-
OK, now I'm scared. I have a bottle of MCW paint for my '65 Impala ragtop I think Steven is right about this. I read the directions that they provide and they are very specific about applying their paint. There's enough in the bottle for a practice run. When the '65 is up in queue, I will definitely spray some fenders I have. ( I have numerous '32, '34, etc...) A second coat of Tamiya primer might be a good idea too.
-

Chopped '32 Ford 3-window highboy - 3-19 Update
customline replied to Bernard Kron's topic in WIP: Model Cars
Yup. '55 Stepside Street Machine kit. Found it on Ebay ?
-
Great story about the glass-paks, James. Interior looks super!
-
Chopped '32 Ford 3-window highboy - 3-19 Update
customline replied to Bernard Kron's topic in WIP: Model Cars
It's pretty hairy. I'd love to have a few of those in my stash. Is there a picture of it by itself? -
Chopped '32 Ford 3-window highboy - 3-19 Update
customline replied to Bernard Kron's topic in WIP: Model Cars
A fantastic rendition of an old standard, the Deuce Highboy three window coupe. The stance is awesome. I re-read this to find out what front axle is used but I can't find that info. It looks like an aftermarket type with a BIG drop. What is it? -
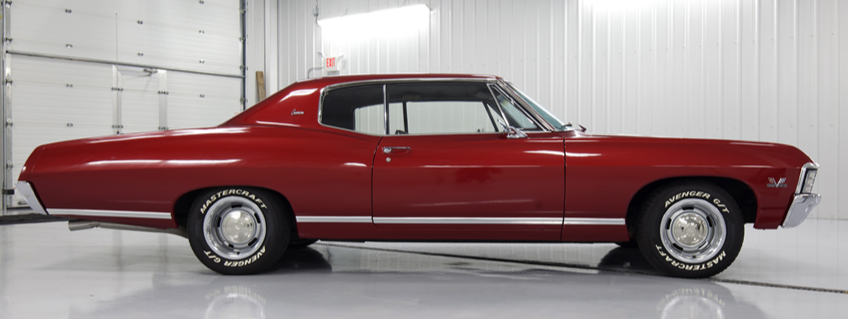
I'm a big fan of the '65-'68 body styles. I learned to drive on a '65 (the family car was a '65 ragtop/283/P-glide/Tahitian Turquoise.) I had a few of these mid-60s full size Chevys and they were great cars that could be had cheaply back then. When you needed wheels, you could always find one for a few hundred bucks. I have the '65 convertible kit waiting for paint at the moment and I'm watching your '66 build, James. Looks great so far ?
-
The dreaded orange peel. I feel your pain.
-
I think this is brilliant! It totally works. Making everything else fit....that's the tough part. if the windshield works out to a nice clean fit it will make all the difference. I'm following this one ?.
-
Nicely detailed, Roman, very realistic!
-
Will the fan and radiator be ok?
-
It's a great custom element but using it sorta begs for some other custom mods for a balanced look. The roof swap alone without the insert and no other mods gives you a pretty convincing '67 Caprice. All you need then would be a vinyl top and a red crushed velour interior ? . I'm loving this.
-
Looks great, James. Are those kit decals? Gas Attack?.
-
Looks great, James. Congrats!
-
Yup, it looks great so far, I'm digging it. This kit is a really good one from AMT, for sure. I'm following. ?
-
Very cool, Cary, I'm glad I thought of it ?. Actually my idea was to use that roof on a '63 body. I think you have a really nice look with the '67, though, it works really well with that body. From the rear, it looks like a T-Bird, but because of the reduced backlight area. That option would cause me some contemplation. I'm on board, gotta see what you do!


.jpg.3819fcb2779d4ac8bd12490bff594bb8.jpg)

.jpg.8a15c1df41b188f4fbfa864453c3ddb3.jpg)

.jpg.28dd20e49b85abf6fdf98a4d404b569e.jpg)