
IMPALA SS 427
-
Posts
314 -
Joined
-
Last visited
Content Type
Profiles
Forums
Events
Gallery
Everything posted by IMPALA SS 427
-
 Thanks guys for the comments. The c pillars i used on the first one came from an old monogram? camaro and was 1/24 so size and shape may have been different.also i did reshape the inner roof line (where the drip rail is) a little on the black one to get a better shape. I have it primered and it looks fine, i think all the scribble made it look weird... with the weekend coming up i am hoping to have the bodywork on the roof/trunk completed so expect updates soon.
 -
Comparison with my first build: The roof is in the same position and everything as the finished one but it looks odd for some reason, Ii think its because of the door lines i drew (they are way off except the front one i cut out, i just scribled them on to see how its coming along... here was a major problem with the first one, the lines where the camaro roof joined the impala showed through a few weeks after completion (i think the putty/paint shrank too much) anyway it looked good for a month or so then they showed up. You can see what i mean in the center of the roof... Another thing was were i modified the hood has cracked and sunken in over time. big sink mark were the 427 ss bulge was. I will possibly cast this in resin if it turns out good, not sure yet. Let me know what you think.
-
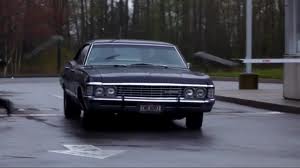
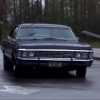
I am making the supernatural impala again, i was planing to do this later on in the year but other projects have stalled, so this will be my main build and i will finish other projects in between, i have done this before (link if your interested: http://cs.scaleautomag.com/sca/modeling_subjects/f/29/t/107258.aspx ) so i know what to do, i will also be making this one very very detailed with all 4 doors hinged and trunk/hood also hinged. Here's my start: I decapitated the camaro (camera was playing up so i didnt' take any pics of how i joined the roof.) These were braces to hold the roof in line while i could glue it, i will remove these and clean it all up once the bodywork is done. It took 2 afternoons to get this at this stage (i removed the front door months ago then got sidetracked with other things) and its all roughed in at the moment, i will alter things as i go.
-
Let me know what you think.
-
the rear bumper had fitment issues on this one, this is the best i could get it.
-
These are the pre-painted polar lights "snap" kits, i added a little paint on interior and engines and changed the wheels on 2 of them. Each took one afternoon after work to complete, i did these to take a break from my problematic stalled builds. Anyway here they are:
-
I am currently gathering the required parts and kits and will convert another to a 4 door sports sedan (sometime in the next 6 months) but this one will have all doors opened and hinged, hood and trunk opened and hinged. Its going to be super detailed and i may consider casting it.i am trying to clear some room on my bench by finishing stalled builds, then i will start.
-
Custom 53 Corvette Hot Rod " Thingamabob" is done !
IMPALA SS 427 replied to cobraman's topic in Model Cars
very cool build, I didn't expect this but its very unique and impressive. Where did you get the skeleton? -
Amazing work, its very realistic looking.
-
very nice, it looks perfect. What kit is this?
-
wow, looking good there, I like where this is going...
-
1957 Ford Fairlane 500 " for parts or restoration ! "
IMPALA SS 427 replied to Piero's topic in WIP: Model Cars
Beautiful result, I like your techniques, I will have to give that a go some day... anyway great looking junker. -
Cool project Richard, what else have you got lined up for 56? I will be watching closely, your builds are always spectacular...
-
Thank you very much for the kind words.
-
Thanks guys. midnightprowler - This was my first real time at doing engine wiring so i wasn't sure what to use, i had some wire that looked about right so i used it. what size wiring would you normally use on 1/25 engines? I am always looking for ways to improve my modeling skills so i appreciate it. realgone 58 - this is neither resin or promo, i converted it from the amt 58 impala. The build is here:http://www.modelcarsmag.com/forums/index.php?showtopic=67703&page=1 I plan on doing another later down the track... maybe a 4 door bel air sports sedan or a 4 door wagon...
-
I built this to replicate a car my dad used to own and gave it to him for his birthday, the tail lights didn't arrive in the mail so i had to make a last minute purchase and collect the Ed Roth Outlaw. In case anyone's wondering the thing on the areal is a fox tail (My dad had one on his 1:1) I will let the pics do the talking.... All comments welcome.
-
I've got 20 days to finish this one and it needs to be done. things left: -finish interior (lots of modifying to go) -Get or make hubcaps -Get blue flame six and install -Add finishing touches (plates,mirrors) So expect updated almost daily.
-
Thanks everyone for the comments. I will fix the lights, I think the glue must have slipped (i literally glued them on a few seconds before i took the pics)
-
Very cool, I like the LED Lights it adds a nice touch...
-
Also i carefully went over the body with Q tips with water and got most of it off then i did the same with polish and it looks better but i sure won't be using super glue during final assembily again...
-
Thanks guys. The colour was a Power Plus Touch up paint i got from Supercheap on sale It was called Cranberry and although you cant really see in the pics its kinda metallic, it looks great in the sun.
-
I was wondering that myself... Anyway Thankyou all for the comments. I am finishing incomplete builds and clearing bench space so that truck might not be too far away... just got 5 to go....
-
Thanks guys This comes as both body only and full kit. Harry P. - yes it would have but i had a full 71 duster kit minus body and I had a resin HQ Monaro Body only plus i think the Dusters detail is better than the Chevelle and after a bit of trimming it fit near perfect.
-
Finished this one today, I had no intentions of chopping it at first (i was going to build it like the box art) but after eyeballing it i thought the roof was too high, so i chopped it about 3 or 4 mm and put it back together. I didn't plan on smoothing the roof but after i brush painted the roof tan it looked bad. paint was uneven and i lost the texture of the roof so i block sanded it smooth and repainted it. the body on this was giving me hell, the paint kept going wrong so when i got it sort of good i settled with it so the paints not perfect. Anyway i like the overall look of it and I'm pleased with the final result. I made the mistake of using super glue during the final assembly and i ended up with the white fogging from it. I cleaned it up as best i could but I'm not sure how to remove it easily All comments welcome.
-
Resin HQ Monaro body from The Parts Box with AMT 71 duster interior/engine/chassis. Pics: Interior All comments welcome.