Ridge Rider
-
Posts
641 -
Joined
-
Last visited
Content Type
Profiles
Forums
Events
Gallery
Everything posted by Ridge Rider
-
Thanks for the support guys. A little more progress to share. I have a basic frame to start with. I used Evergreen 258 as I believe it to be as close to scale as I could find. The length ended up 11 1/8" by just under 1 5/8" with the critical measurement between firewall and the cut edge of the fender being 4 inches. The frame fits between the bumper as seen in the pic. A little bit of chassis work and added the rear chassis to the upper body but removed the gas tank and gave it a flat platform to add a floor to. Thinking ahead I am open to ideas for superchargers and filters similar to this Also need ideas for the flags and poles, keep in mind these are 1/25 scale. Any help is appreciated, thanks for looking.
-
Thanks for the support, I'm going to need it. I look forward to seeing your Elvis build Dennis and that war wagon Dave. I have never built post apocalyptic vehicles before and don't know why I am building this one. But this may be the best action movie I have ever seen and as the "behind the scenes" link alluded to-this is a throne on wheels. I liked the concept and challenge of the Gigahorse so it just kind of happened. I think I will wait until this weekend when I can dedicate more uninterrupted time to fuse the caddys together. I did some work on the scope style tail light detail. I used 1/4" tube, sliced to about 3/32" wide and slid over some tweezers to get a boxy oval shape. I then filed it to make a tapered top, removed from tweezers and added the 4 tabs and trimmed to fit. Still having fun-thanks for looking.
-
Thanks for the kind comments, and I kind of am surprising myself with my progress so far and how it is coming together. It might be tough to paint and was the toughest thing to build yet but the bumper is done. I still need to shape and clean up the boxed in fenders but I am very pleased with the look. Up next will be some chassis and frame work as well as joining the bodies together. Thanks for looking.
-
A busy week but a little progress and some measurements to share. First off though is the issue of scaling from photos. Do not believe everything you see because of camera perspective, photo shop, and multiple builds. In saying that, this is the the technical info that I believe to be fairly scale accurate after much comparison . The cattle guard bumper is being made from .040" sheet stock which scales to just under an inch. The cut out of the hood for the false radiator/ ornament starts from the molded in pre radiator frame work. It extends 11/32" rearward and is 1 7/16" wide. It will be boxed out square to itself as it appears the whole bumper/fender is done this way. I hope to have more info/ progress this weekend. Thanks for looking.
-
X2 - those shotguns are too cool and a nice touch.
-
Nice build-love the colors.
-
That is a bummer about the paint, that is a nice color. Keep at it.
-
I have a little progress on the rear bumper. The model has the same molded grill detail front and back. The 1:1 clearly has different detail so I went to the parts box and found something visually different to contrast the look. I will try to add some bumped out projectile detail to the new mid section to match the look. This is getting real close to molding the cars together. The front grill is also ready to get the cattle guard type bumper-which is proving tougher than I thought to accomplish but I hope to figure out the look this week. Thanks for following.

-
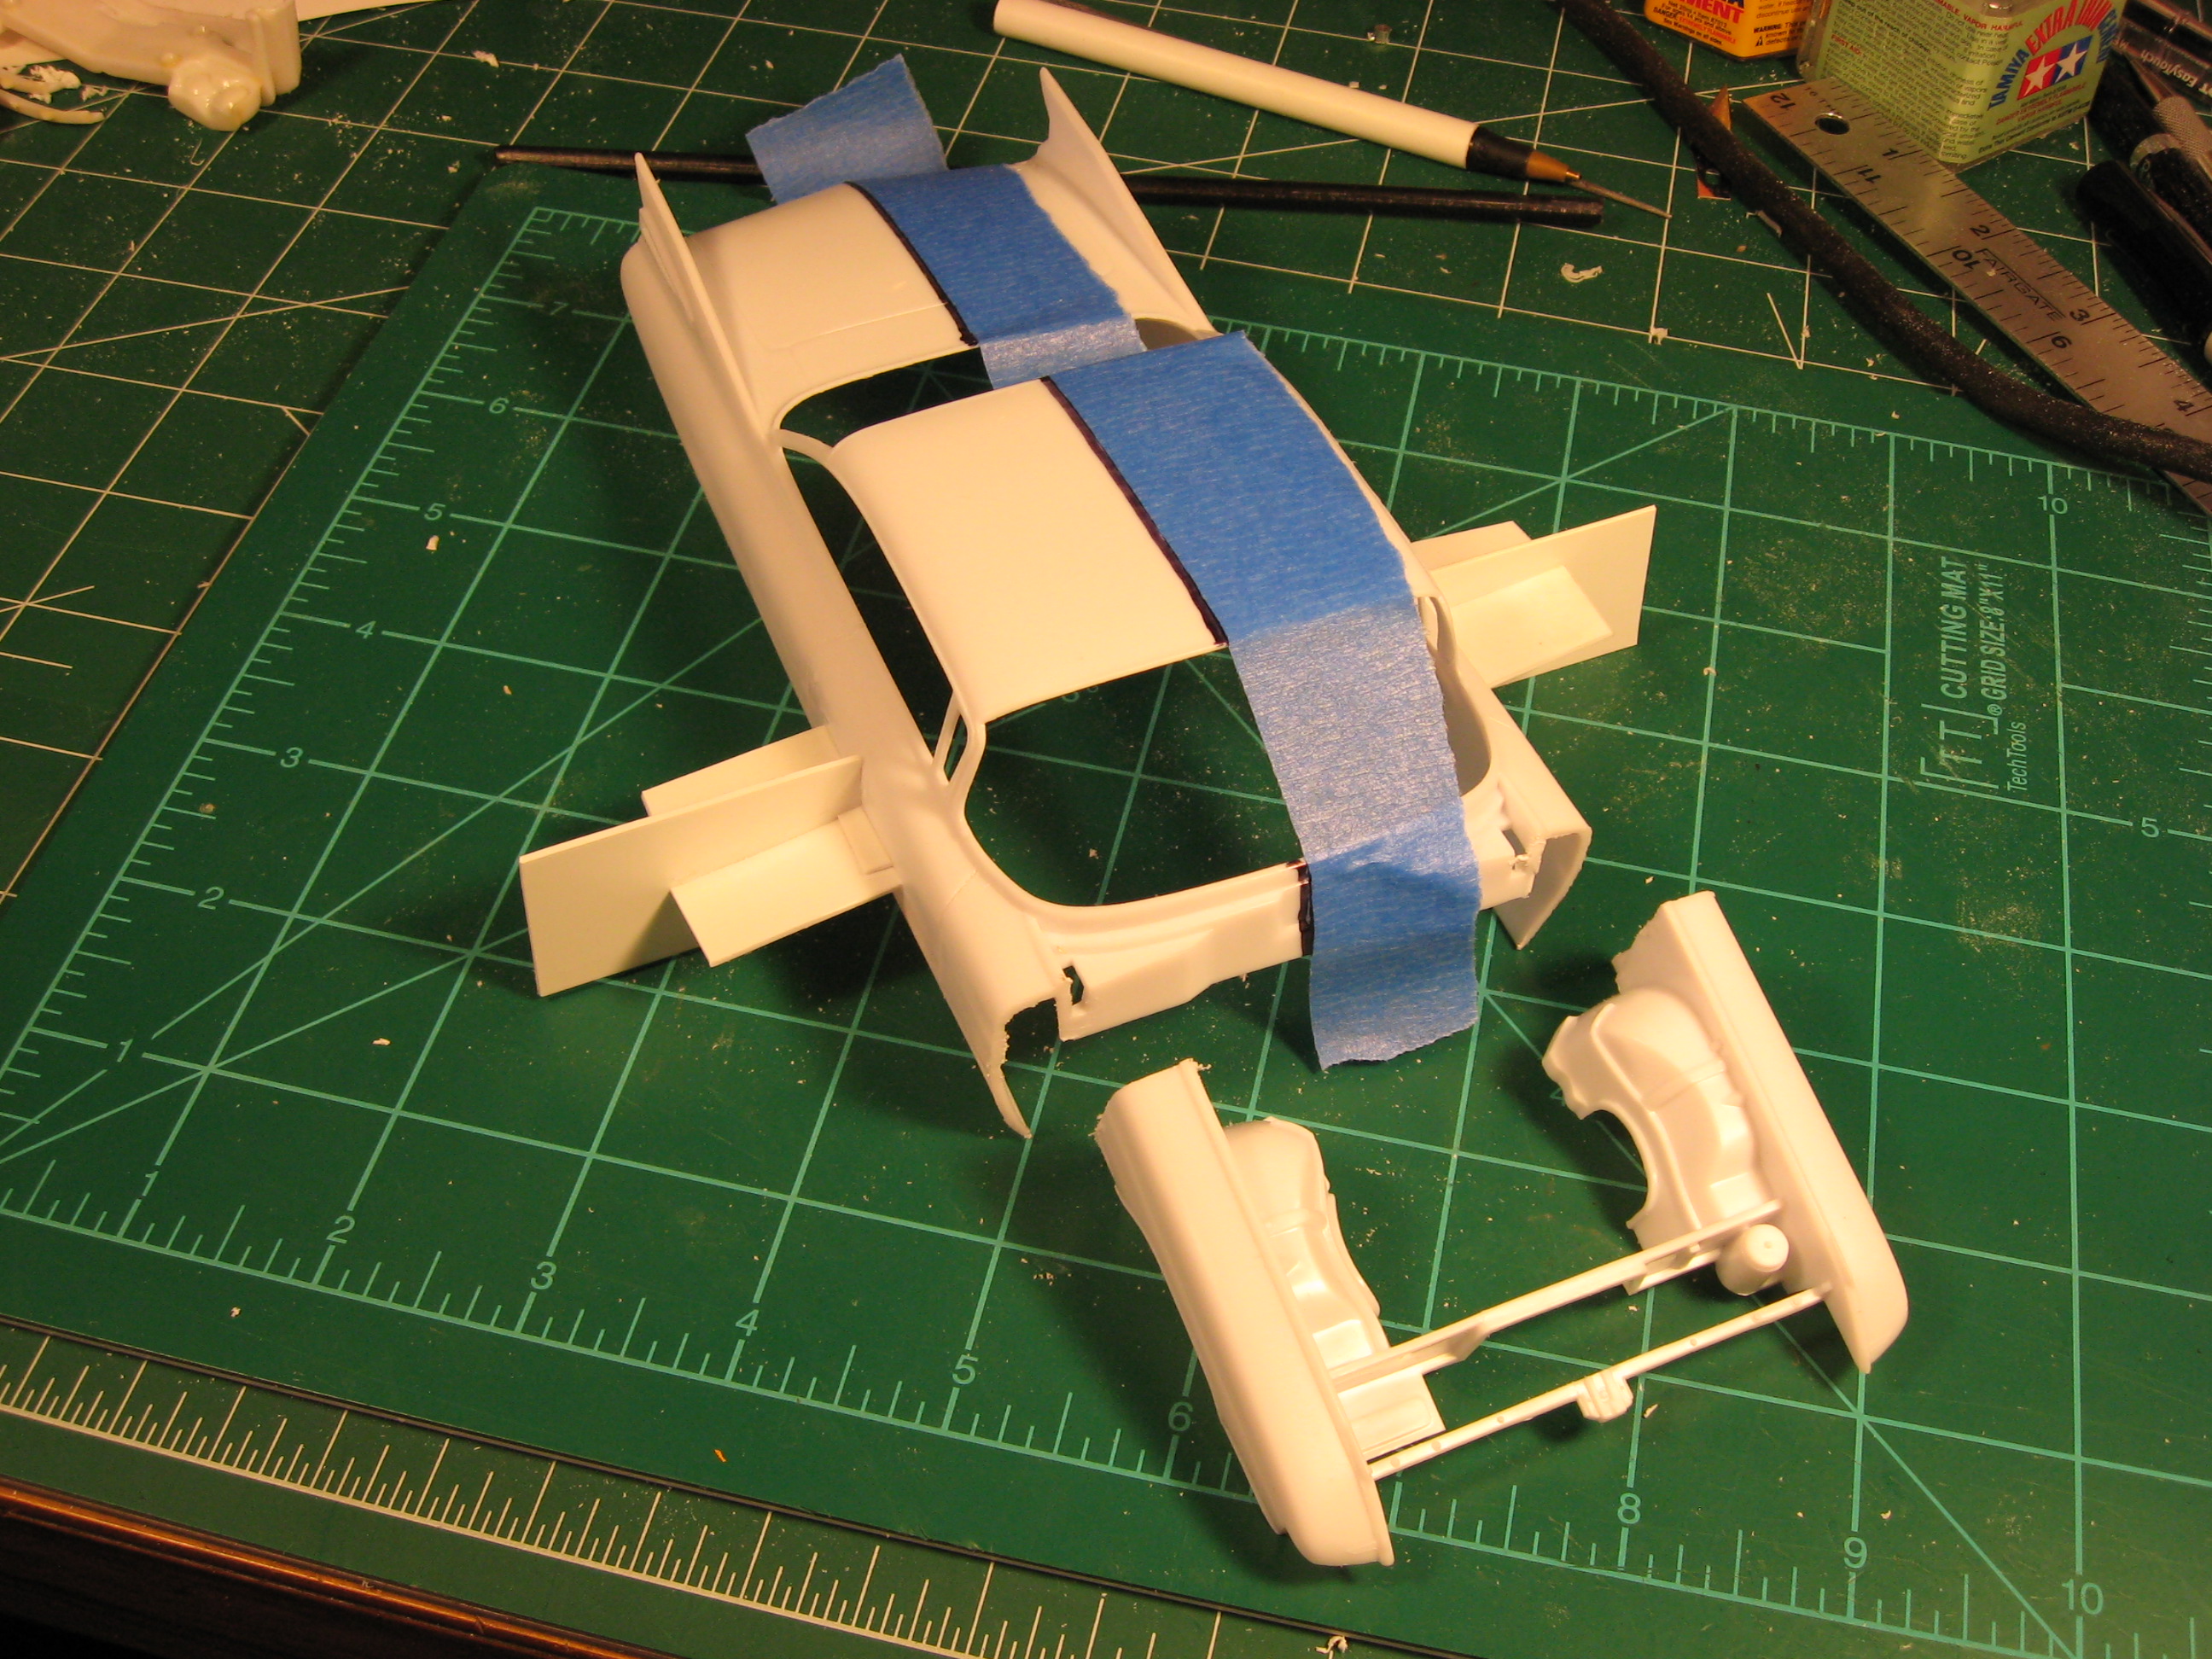
Making some progress. I used a piece of the front fender to frame the corners of the firewall. With some shaping and filling I'm pleased with the result. Also working on the chassis. I split the chassis in half and removed all raised detail to be able to add sheet styrene. Still working on it-the foot and wheel wells will be removed or modified when I get to some of the interior work. The lights were dropped down a heavy 1/8" and moved forward a light 1/8" The grill section around the licence plate will now need to be lowered about an 1/8" to realign the lights and lower crossbar. I will be using a section of the other grill for this. Still having fun-thanks for looking.
-

48 Ford Woody Pickup
Ridge Rider replied to Ridge Rider's topic in Model Trucks: Pickups, Vans, SUVs, Light Commercial
Thank you for the kind words. Mark I wish I could remember the color but I painted it a couple years ago and then put it off until I got brave enough to attempt wood. It was Testors spray enamel from at least 20yrs ago so there is a good chance it is no longer available. -
Thanks for the link David. I had not seen that but it looks like some good reference for things to come.
-
This started as a half built badly painted example of this model. With some modifications and light scratch building I ended up with this. I think turned out quite nice. Thanks for looking.
-
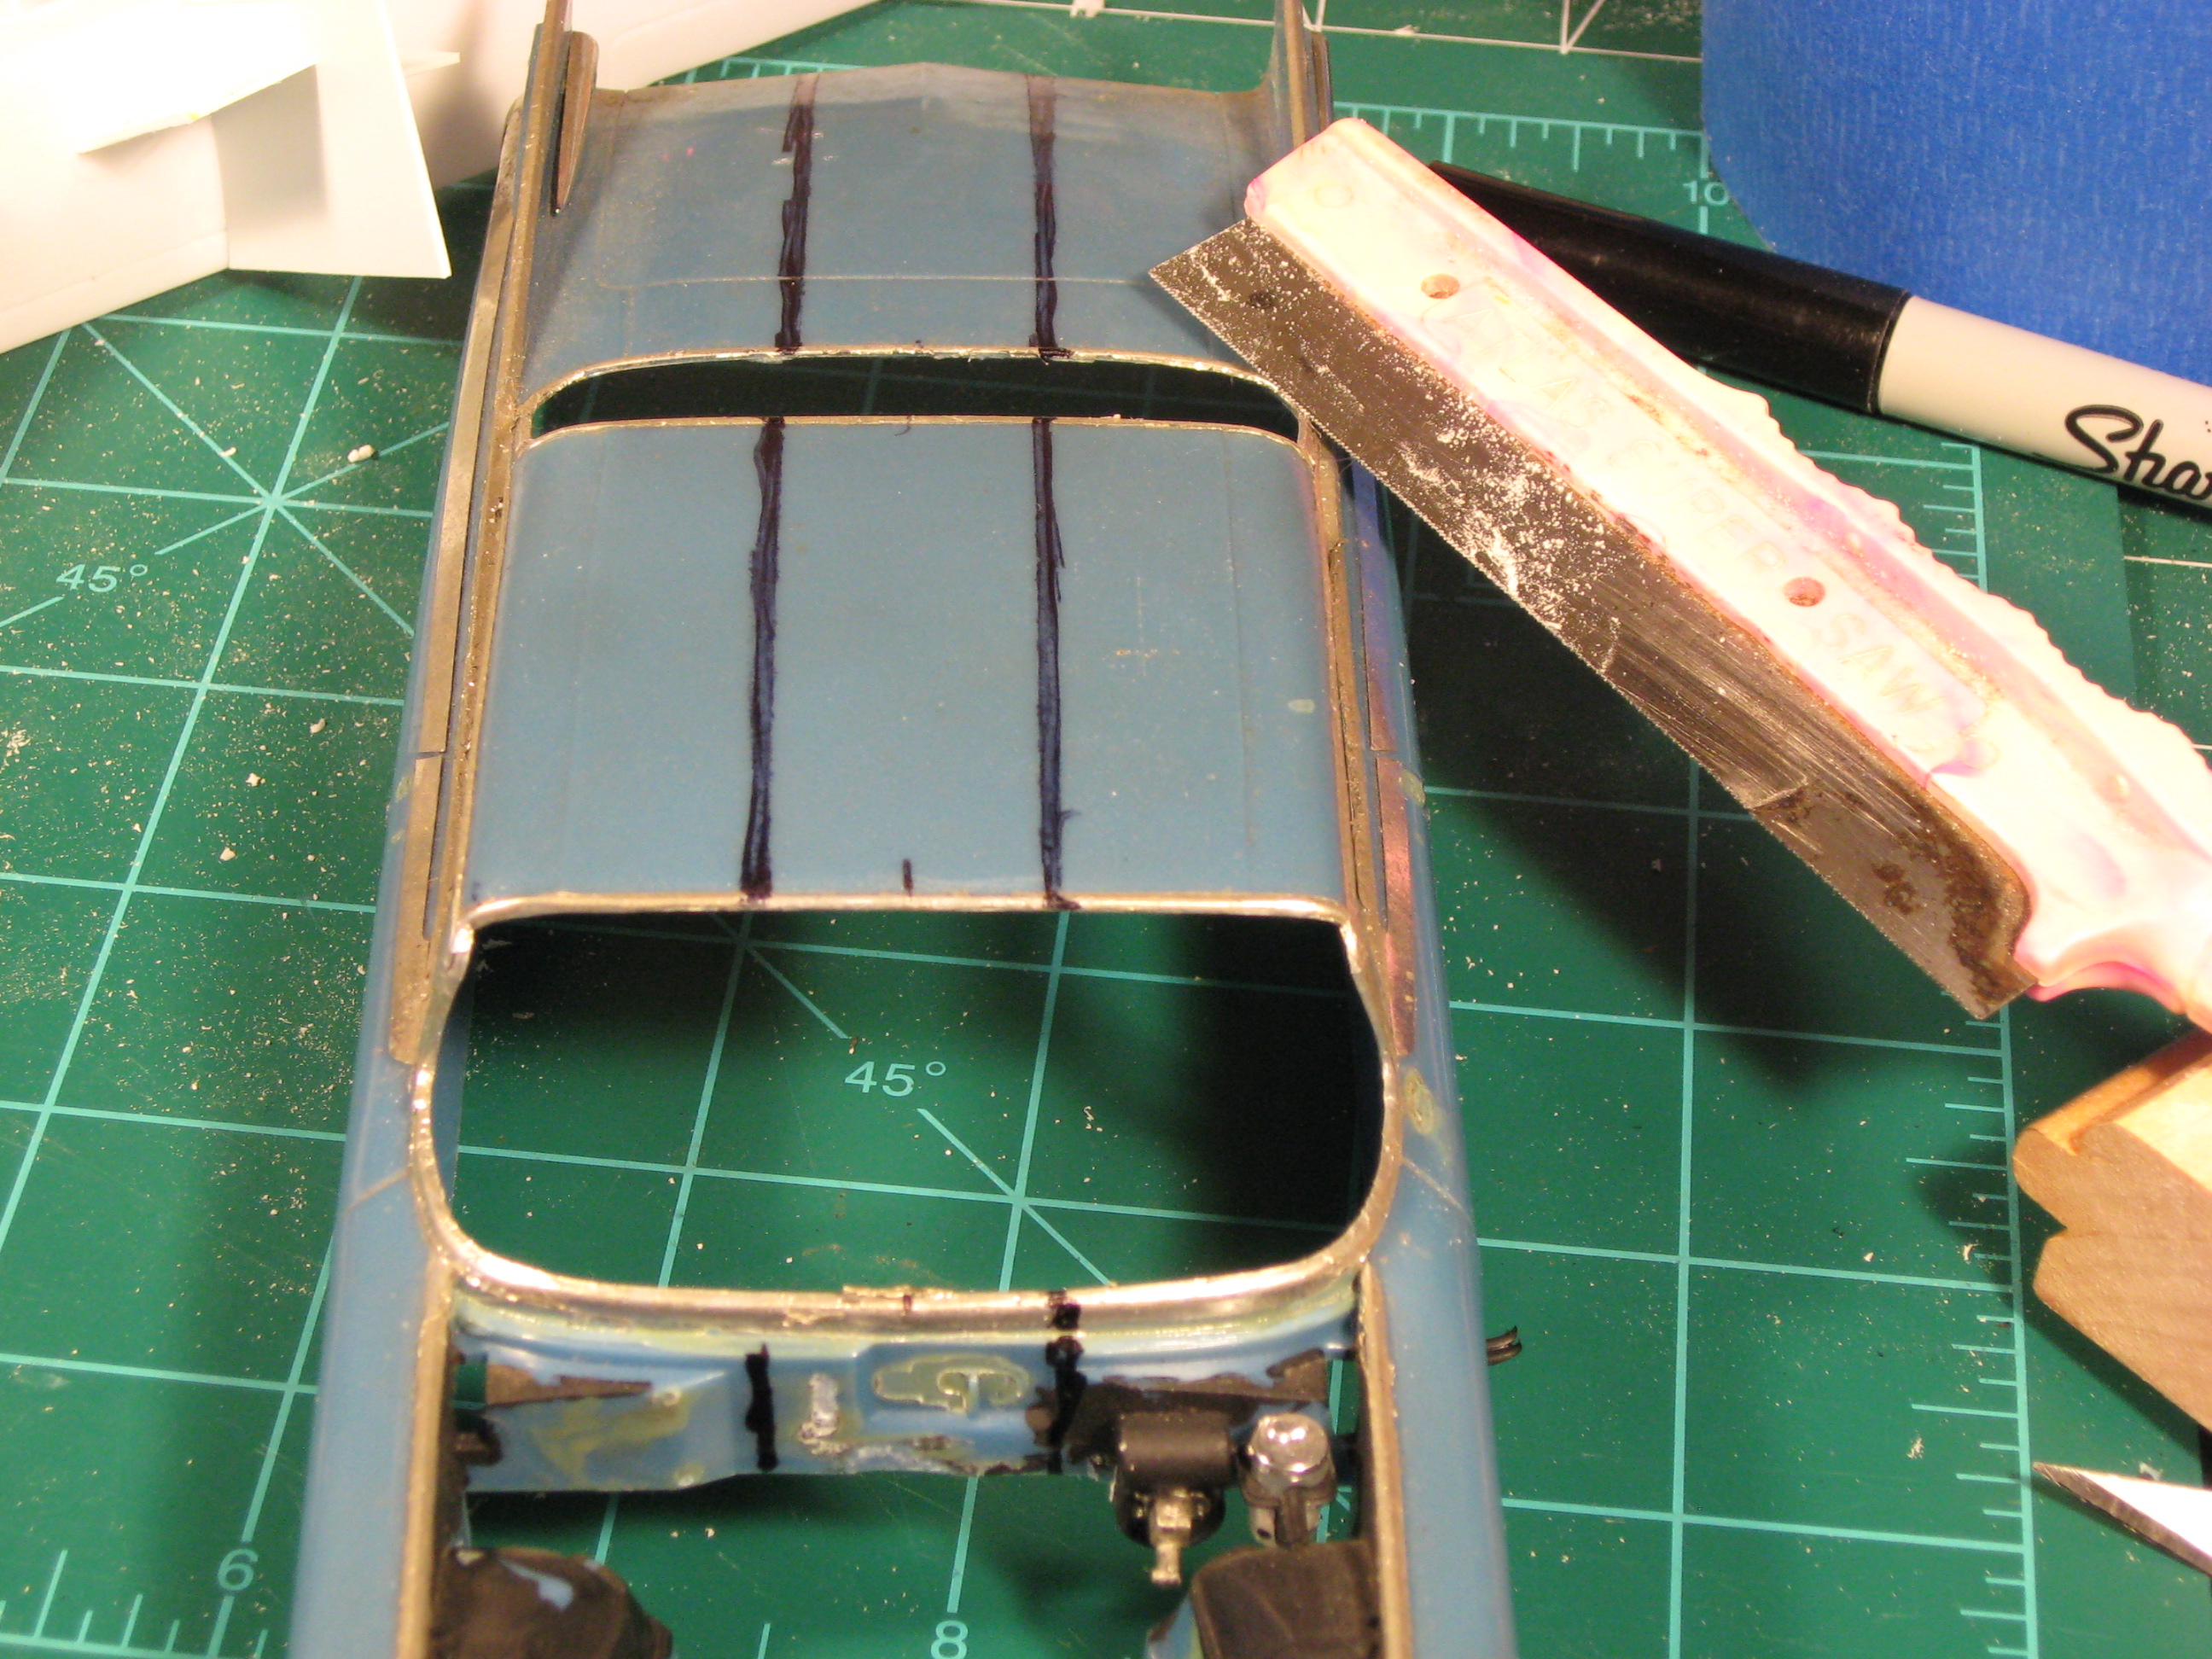
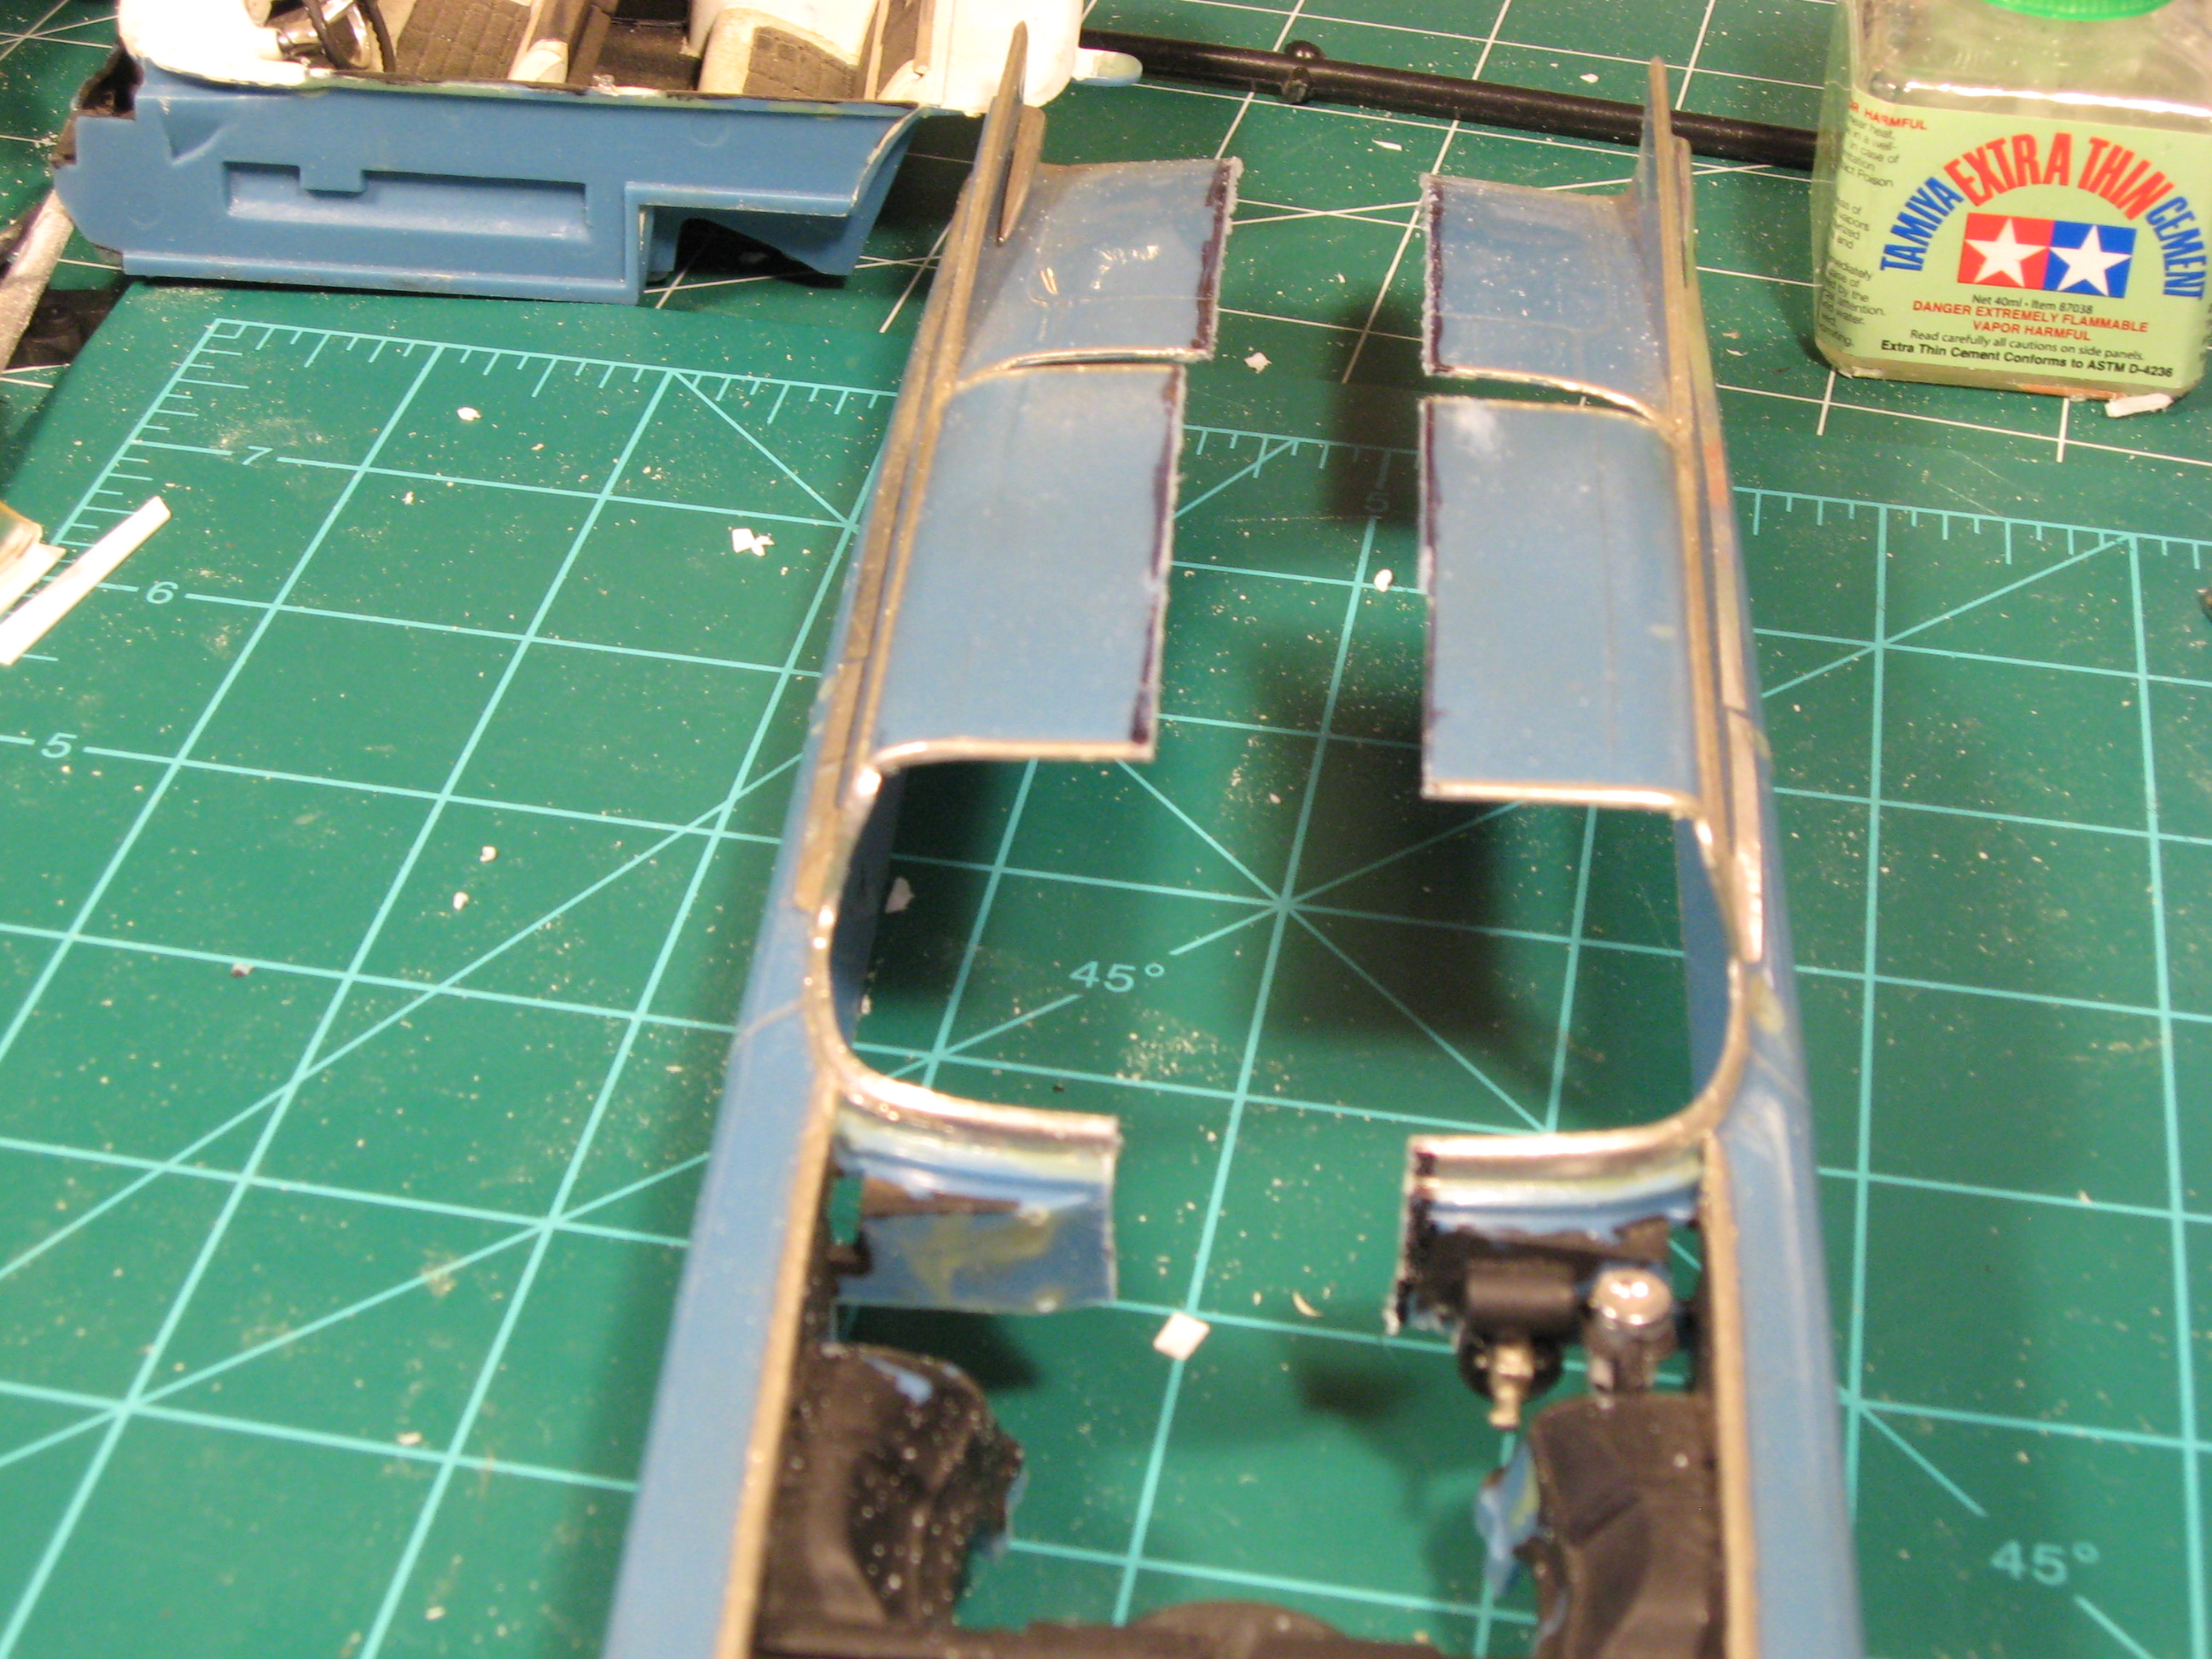
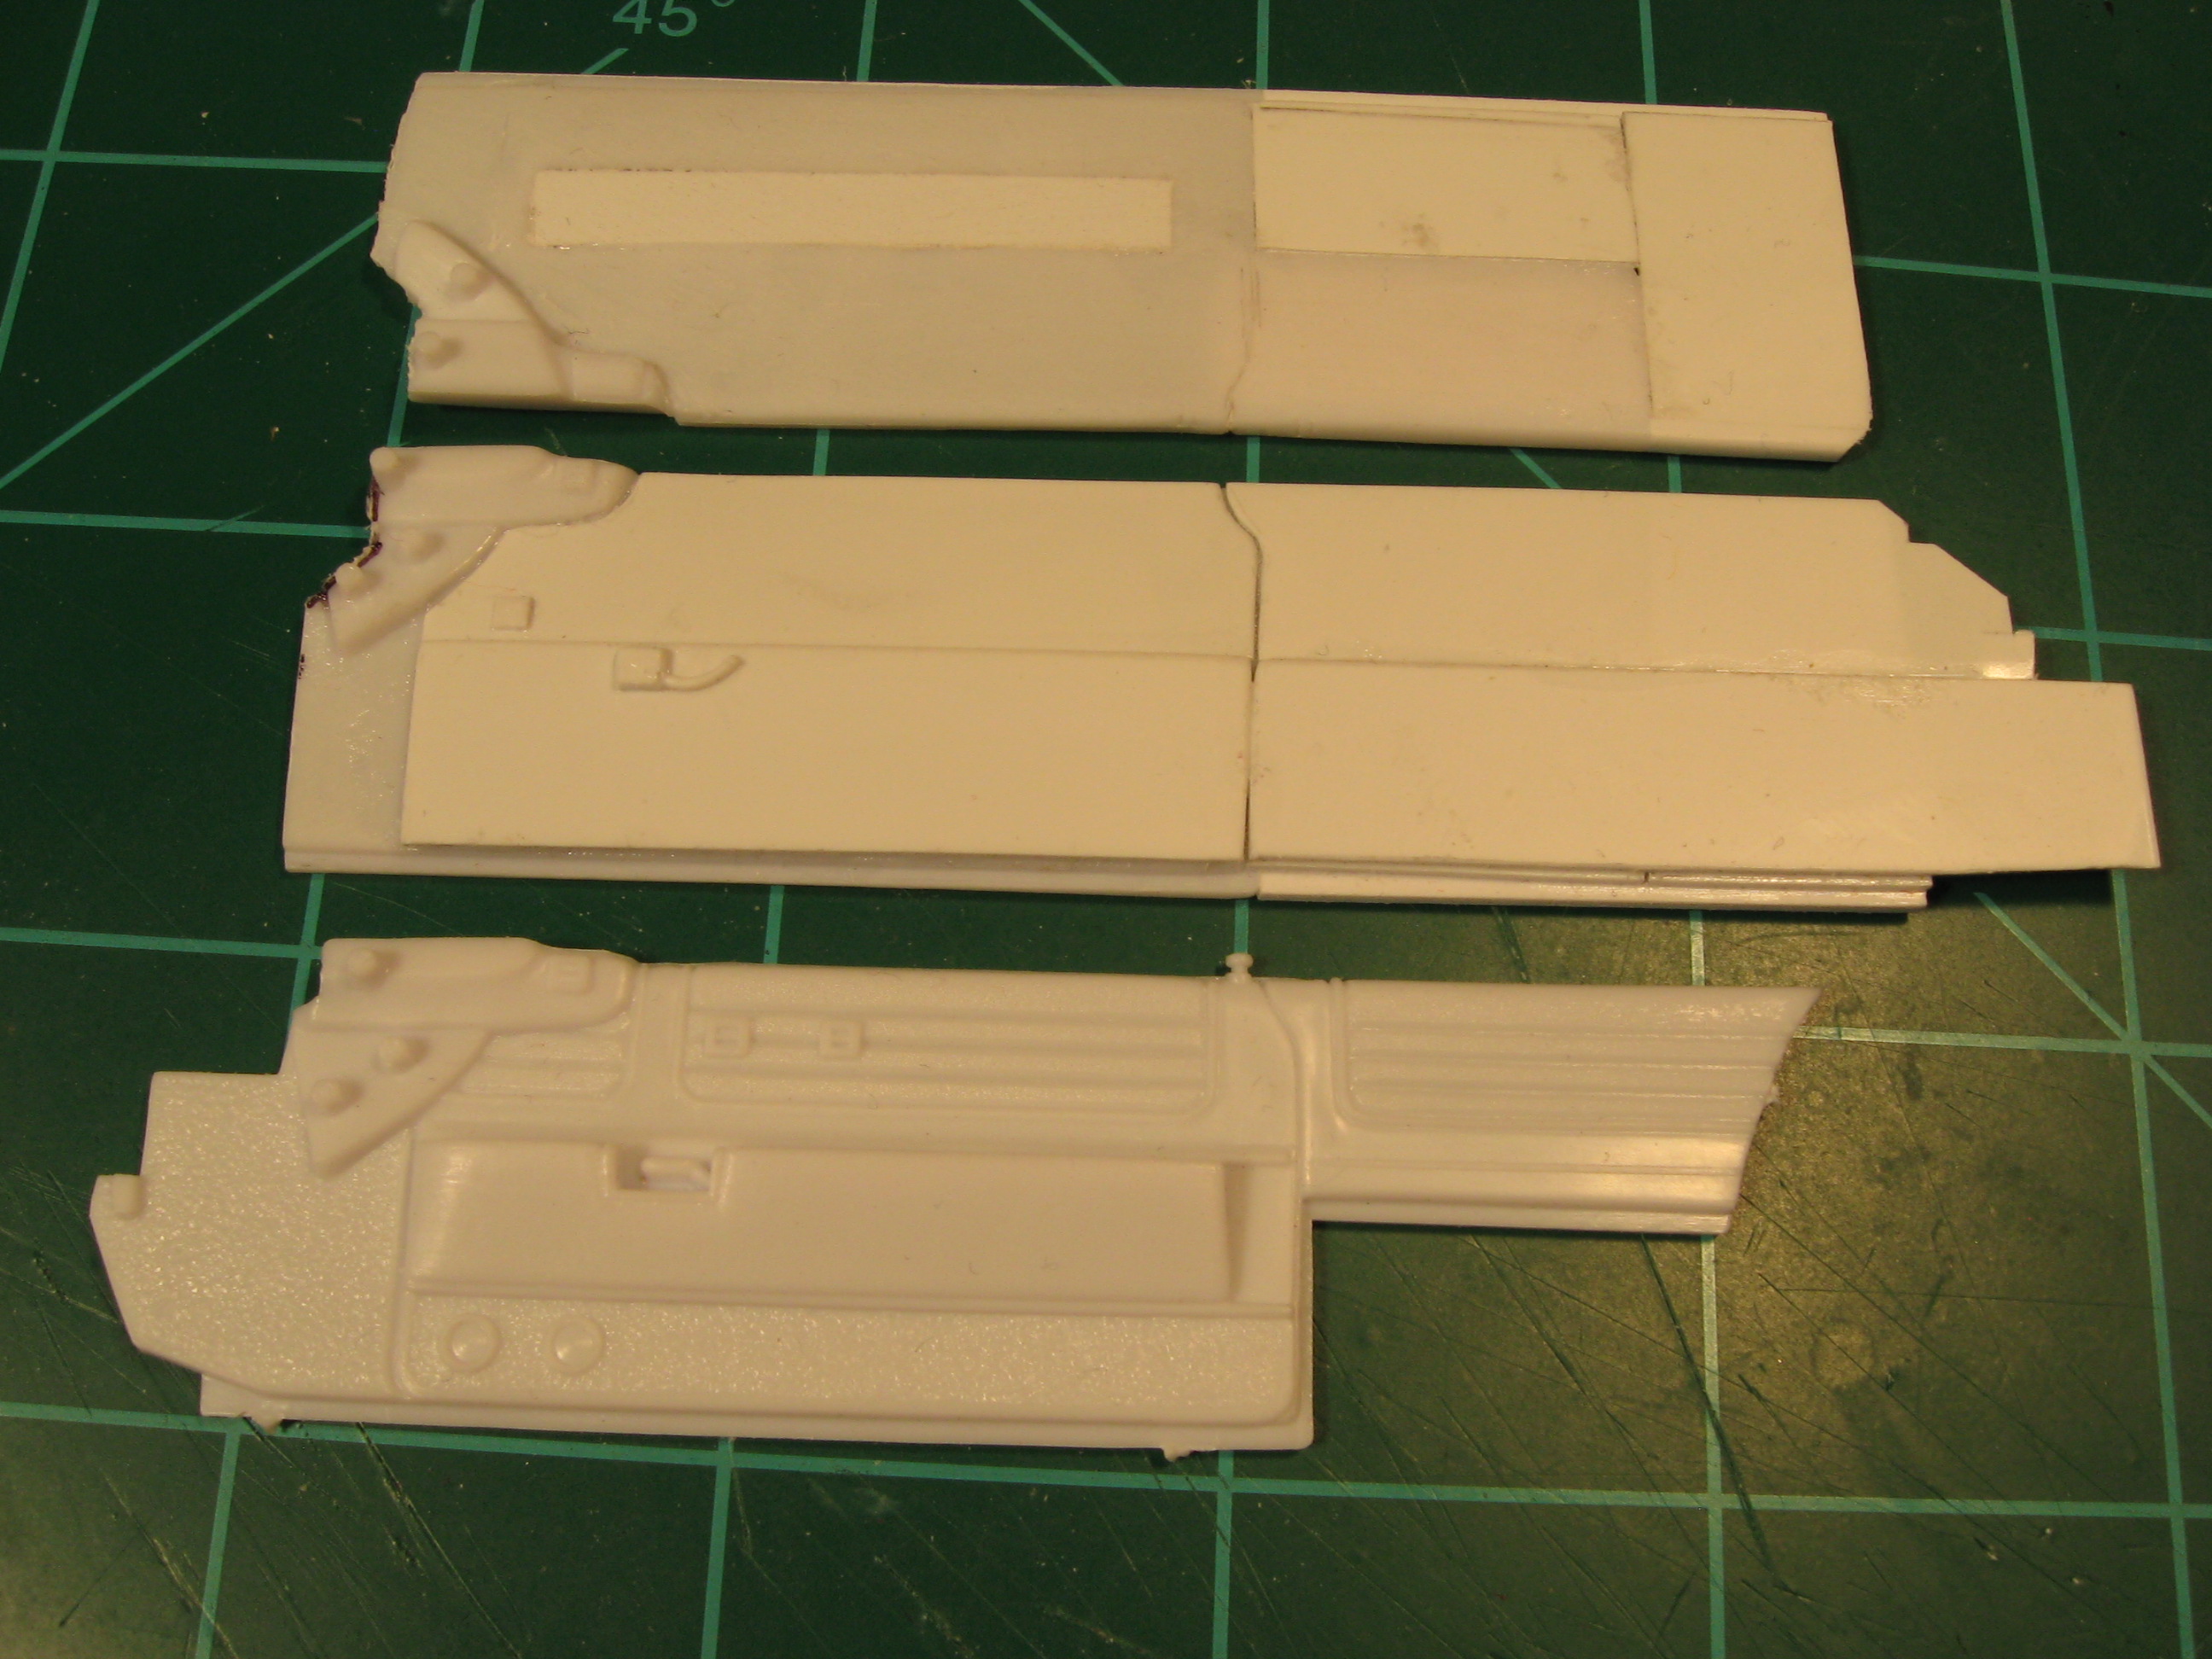
Making some progress on the firewall. I will be framing in the corners and bumping out the upper center next. The blue pieces in front of the door came from the donor car door. They were shaped to fit and simply glued behind the actual door. Also started work on the bumpers. The rear bumper for the upper car has the licence plate cavity opened up and the lower part of the trunk that is molded to the bumper was also removed. The lower bumper will be split down the center and widened 3/4" before it gets similar modifications. The front grill/bumper was sectioned because the space between the upper and lower lights was increased to accommodate the new cattle guard type bumper. It should also make building the front end much easier. Some progress on the hood and headlight section. And a little better picture of the dash with some light cleanup done. Thanks for looking
-
I like what you have going on here. I think you nailed the height and the colors sound like they will work. I look forward to more.
-
The pan contains half of the firewall and needs to be widened 3/4" like the body. The body sits on a custom box frame so the trans tunnel was eliminated from both pans giving me 4 equal parts that together are 3/4" wider than the original. I still am doing cleanup and prep on the pan but will cut at the dotted line across the pan and up the door panel. In doing this I can finish framing in the firewall permanently but will be able to remove the pan to finish the interior. I will use parts of the chassis although the molded in frame will have to go and it needs widened. What I am needing is the reference/locating point of the seat pan which are highlighted in black. The dash has been widened 3/4". It will take a little body work and filing but it is close. I cut the 3/4" filler out of the top dash and split the bottom one in half. Sorry the fuzzy pic. It will need some material at the windshield edge. Thanks for looking.
-
The aftermath of the donor surgery, kind of sad looking. But I am pleased with the results and it glued up with little trouble. I removed the plastic to the front edge of the doors and made a wider vent for the wiper area. Up next is firewall and widening a floor pan. Having fun-thanks for looking and your comments.
-
The bottom caddy will be widened so I cut off the front and found center and marked it. Before I cut I, added horizontal bracing off the door and a couple roof to firewall braces. I will remove them and repair the damage when they are no longer needed. After sawing in half I can now figure out how much it needs to be widened. This task would very frustrating without the horizontal braces. It looks like I need to add 3/4 inch in width. I mark my sacrificial body and will cut the needed strip. Even though most off this roof and trunk will be removed it will make it easier to work with and keep straight. Thanks for looking
-
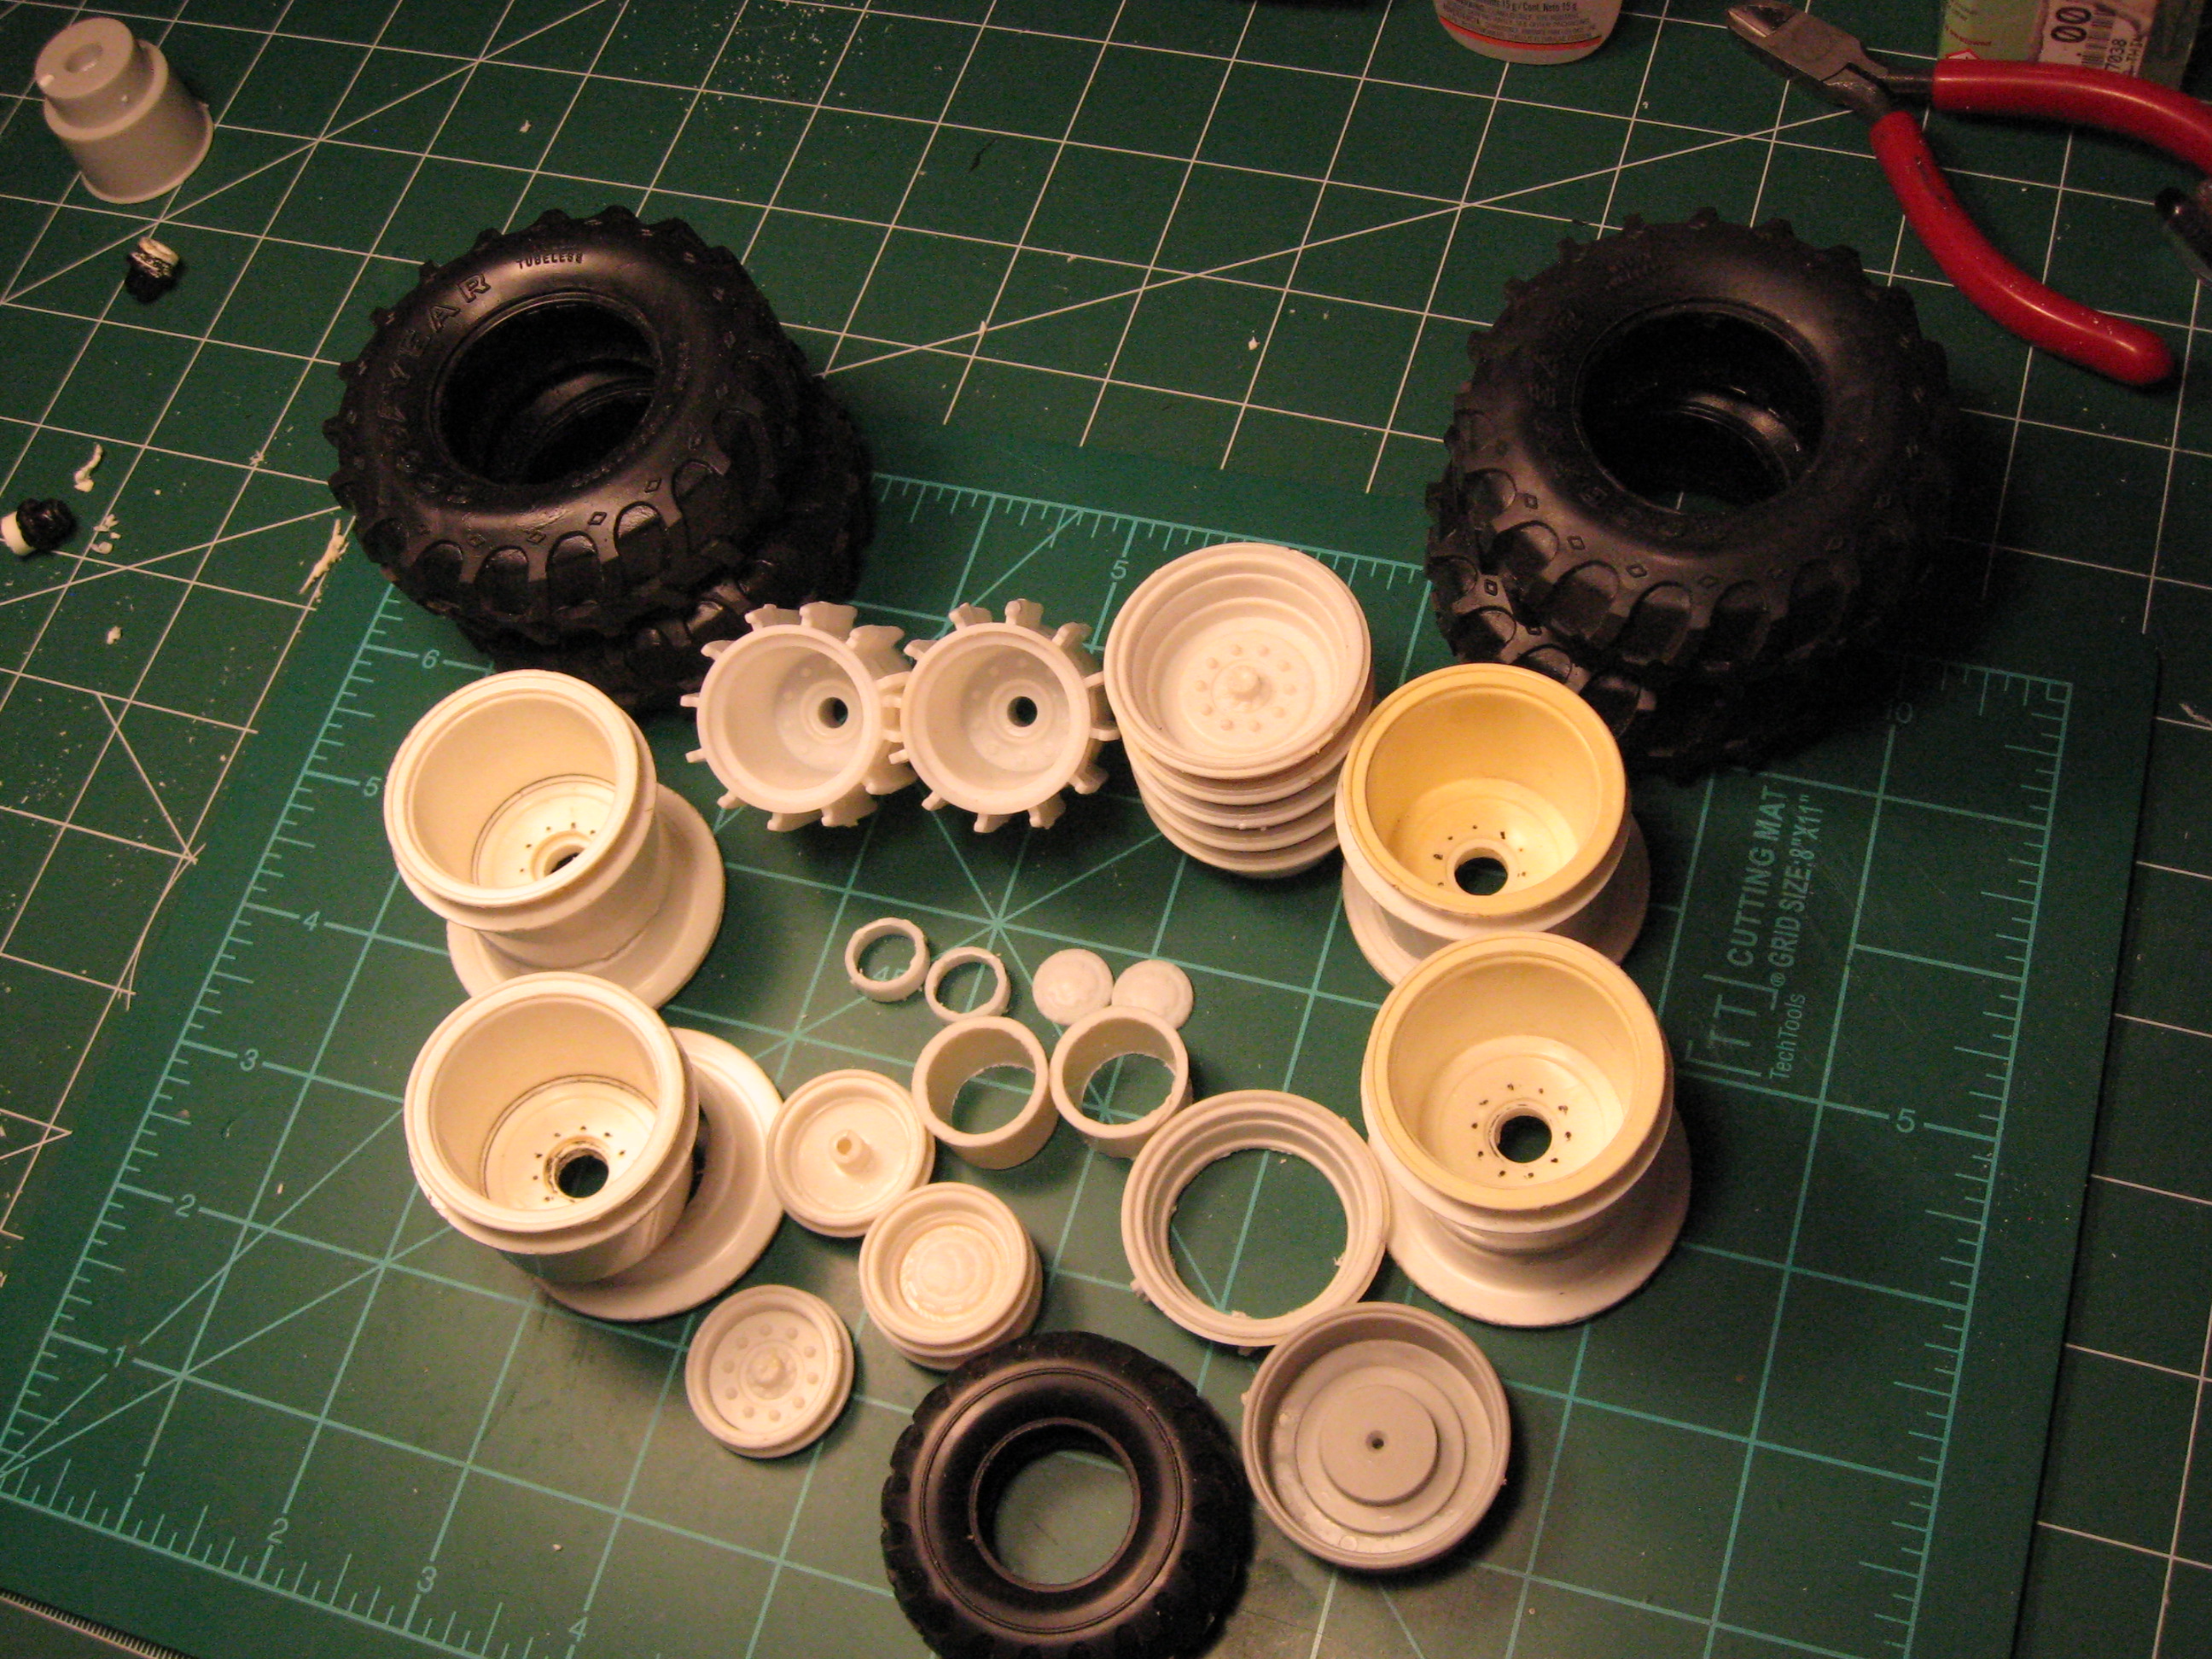
Well with lots of cutting, grinding, and sanding i am calling the wheels done. I took the first row of parts, modified them (second row) and ended up with the duel wheel. And I had to go here. Lots of work ahead. The next step is to remove the molded in trim (highlighted with black sharpie) on both bodies. Then clean up the mold lines and start cutting. Thanks for looking
-
You had me at Cuda. Nice
-
First off thanks for the interest and encouragement . I was kind of hoping someone would have tackled this beast before me but this is also why I am sharing this build. This will take me to task and it will not be an exact replica because of skill, resources, and knowledge of the actual two that were built ( which are not the same). In saying that, I am trying to do the best representation I can and hope to encourage others to build and share. I am open to all input on this build and will grab my popcorn too. Dave, I did put in the dvd and it looks like the depth is to the face of the second wheel but no real bolt pattern. Thanks though it did help. Working on wheels, hope to have done tomorrow with pics.
-
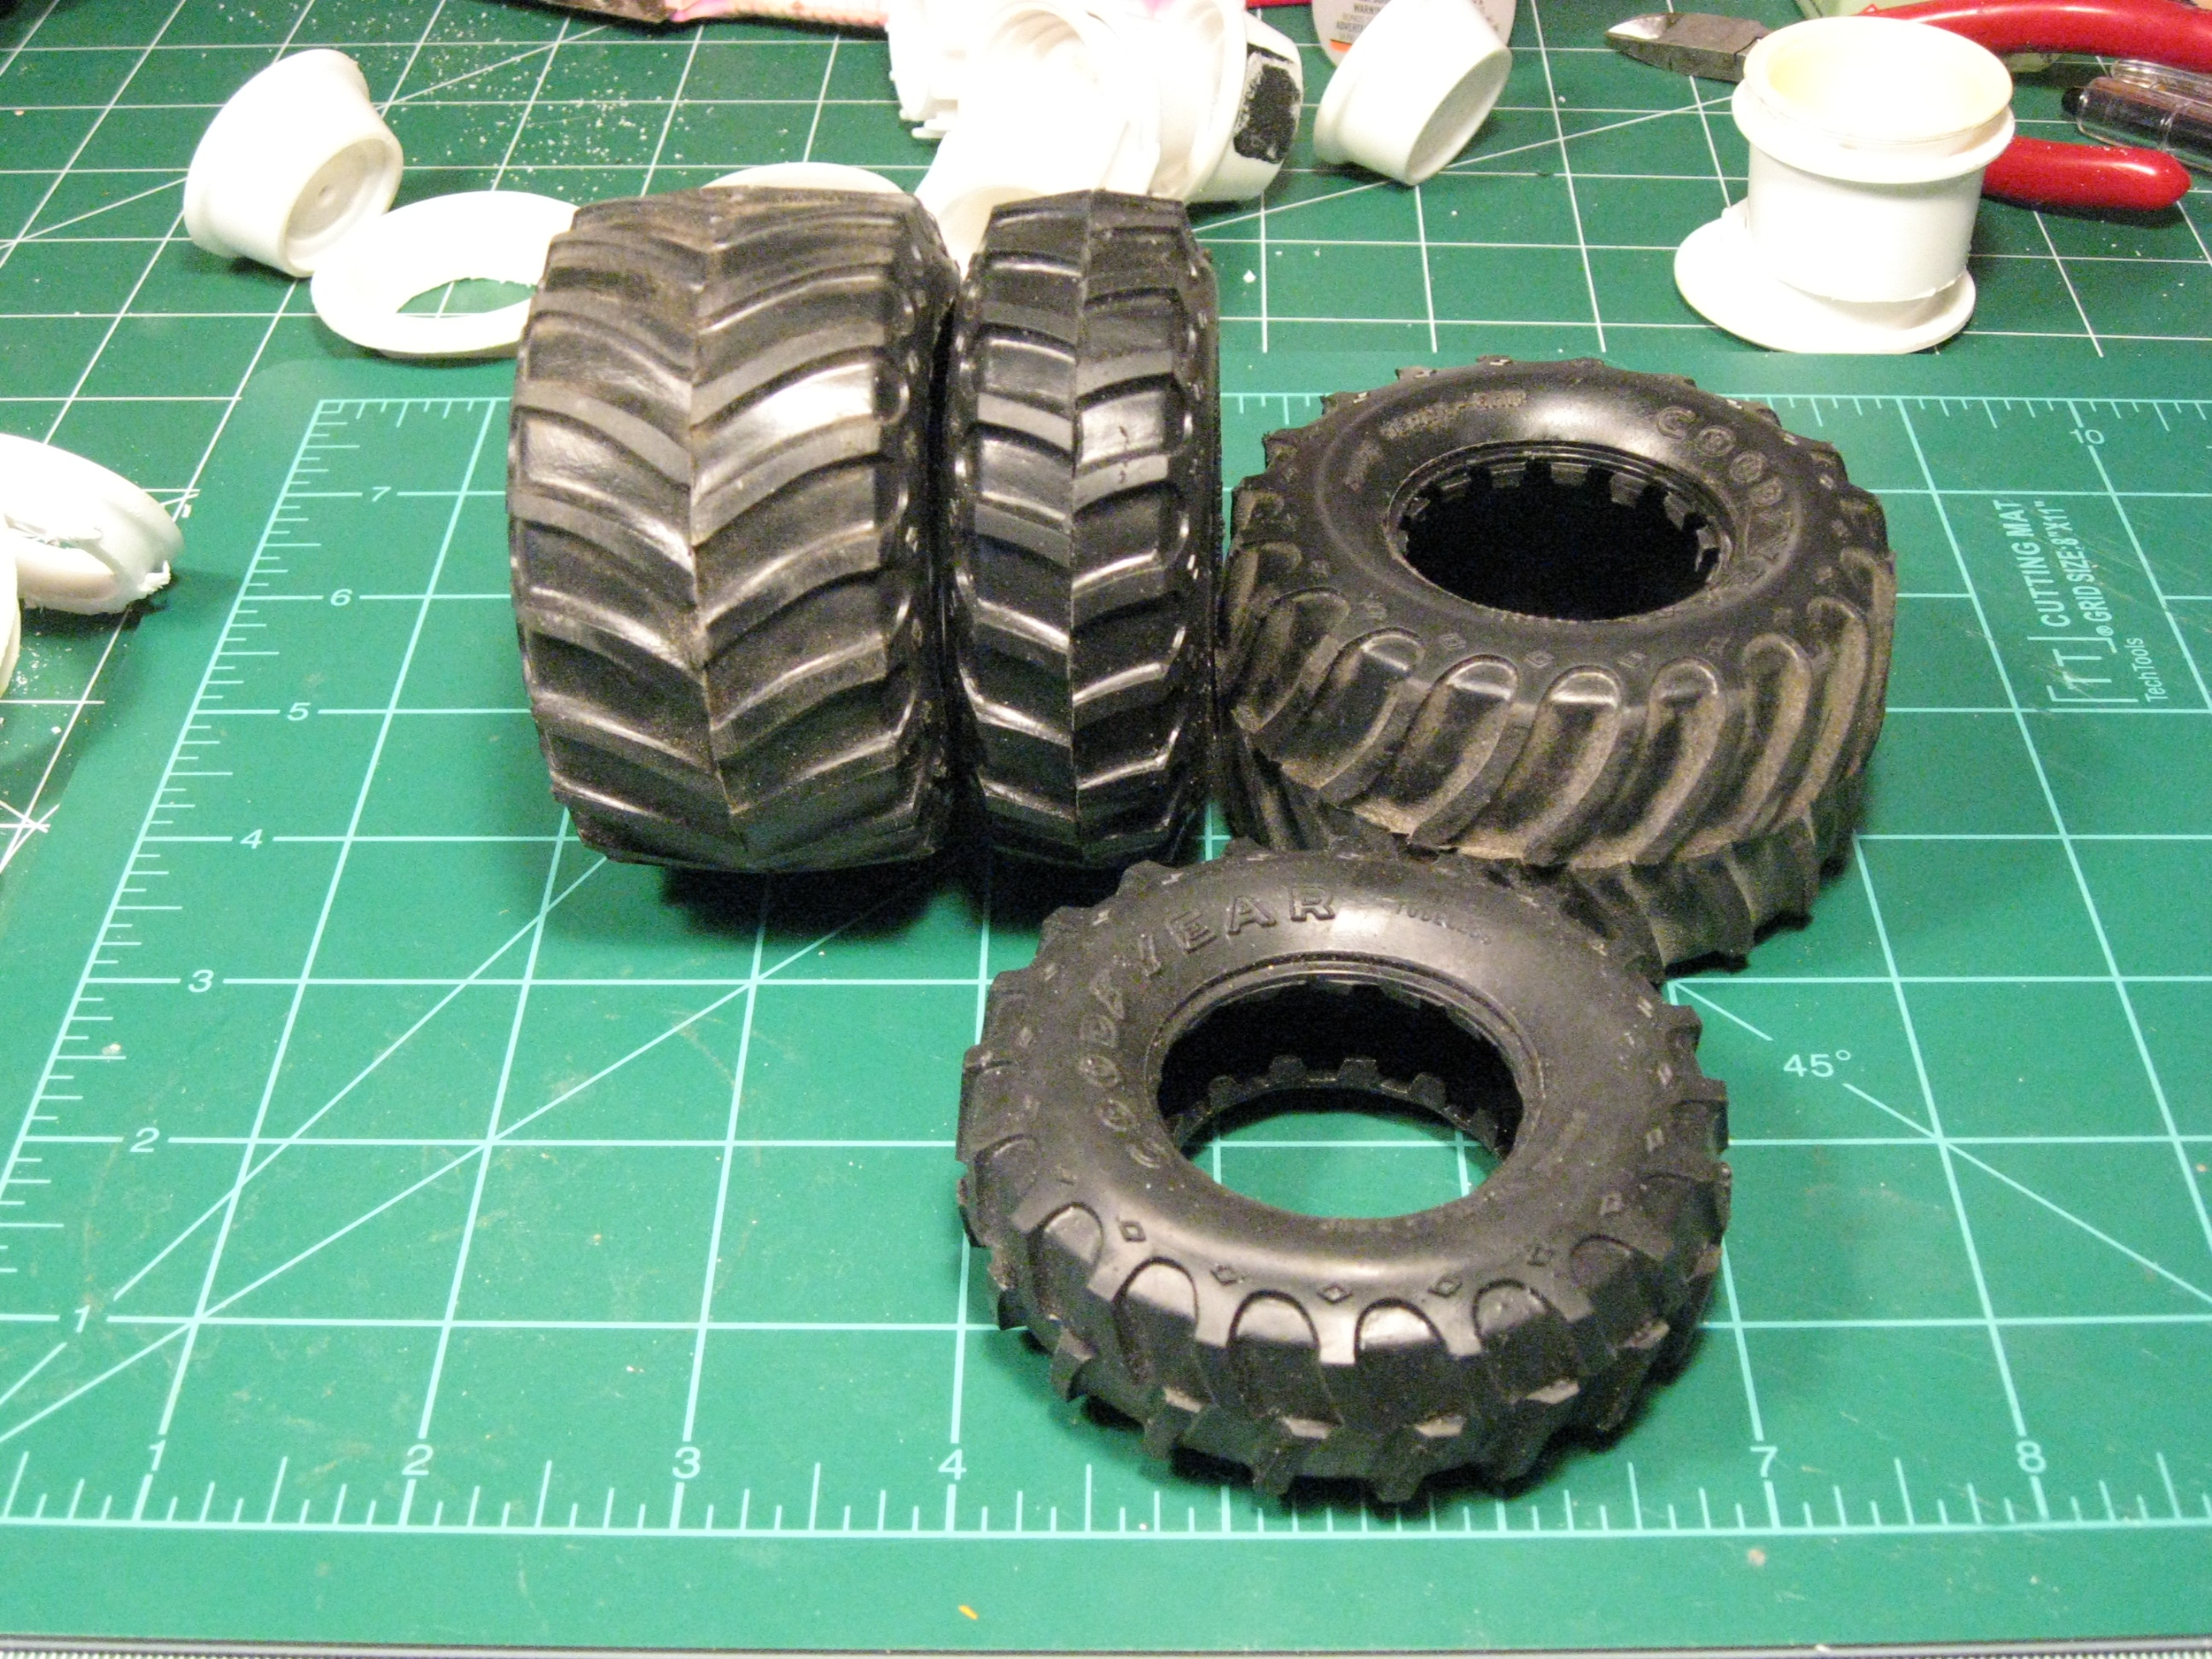
Pictures posted I am off and rolling. The tires. They scale to about 3 inches for the back and 2 for the front. Not the easiest thing to find. Going thru the spare parts I found that the early Monogram monster trucks were 1/24 scale and 3 inches. The AMT 1/32 USA 1 snap kit has 2 inch tall tires. They of course are to wide. The front is about 5/8 wide and the rears are about 7/8. My solution was to lay the tire on the bench, shim an exacto knife to half those measurements and slowly turn the tires to score a line. I then continued following this line making deeper cuts until the were separated. They are not exact replicas but with some time and super glue this is what I am going with. After all the surgery. And some of the parts to try to make convincing wheels. I'm having trouble finding a picture showing how deep and the look of the bolt pattern for rear duals. It may be whatever I think it should be. Wheel work to come. Thanks for looking.
-
I've decided to do my first wip and see where it goes. My main concern was tire source but I think I have figured that out. I have not figured out the engine and turbos as far as the easiest way to represent them but I'll have some time to figure it out. Progress will be slow to start (work) but hope to complete by spring. Some of the main parts sources.
-
http://thecredits.org/2015/05/heres-how-they-built-the-beastly-machines-for-mad-max-fury-road/ This is the best reference I have found. It appears that the rear duels are 72" or 2.88" in 1/25 scale. The fronts look to be about 48" or 1.92" in scale. I have been searching the web but not quite finding what I'm looking for. Any leads or ideas would be appreciated as would any more reference material. Thanks, Steve
-
New Site/Forum Look
Ridge Rider replied to Gregg's topic in General Automotive Talk (Trucks and Cars)
I don't know if it is just me, but I will click on new content and if I reply to a post it will no longer show up in new content. It just disappears even with refresh. I don't know if it does this just to me or the whole forum. -
Same here Chuck. Nice job on your 29s Doc. It's nice to see your work in the forum again. Thanks for sharing.