Ridge Rider
-
Posts
641 -
Joined
-
Last visited
Content Type
Profiles
Forums
Events
Gallery
Everything posted by Ridge Rider
-
That's nice. I'm also diggin the colors.
-
Thanks Lloyd, David. It was just a spool of dollar store wire I picked up several years ago. After I bent it I thought the same thing when it was laying on the workbench. I would have loved to find something in the parts box that would work with little to no modification, but didn't, so I had to get creative. There has been a lot of that on this project
-
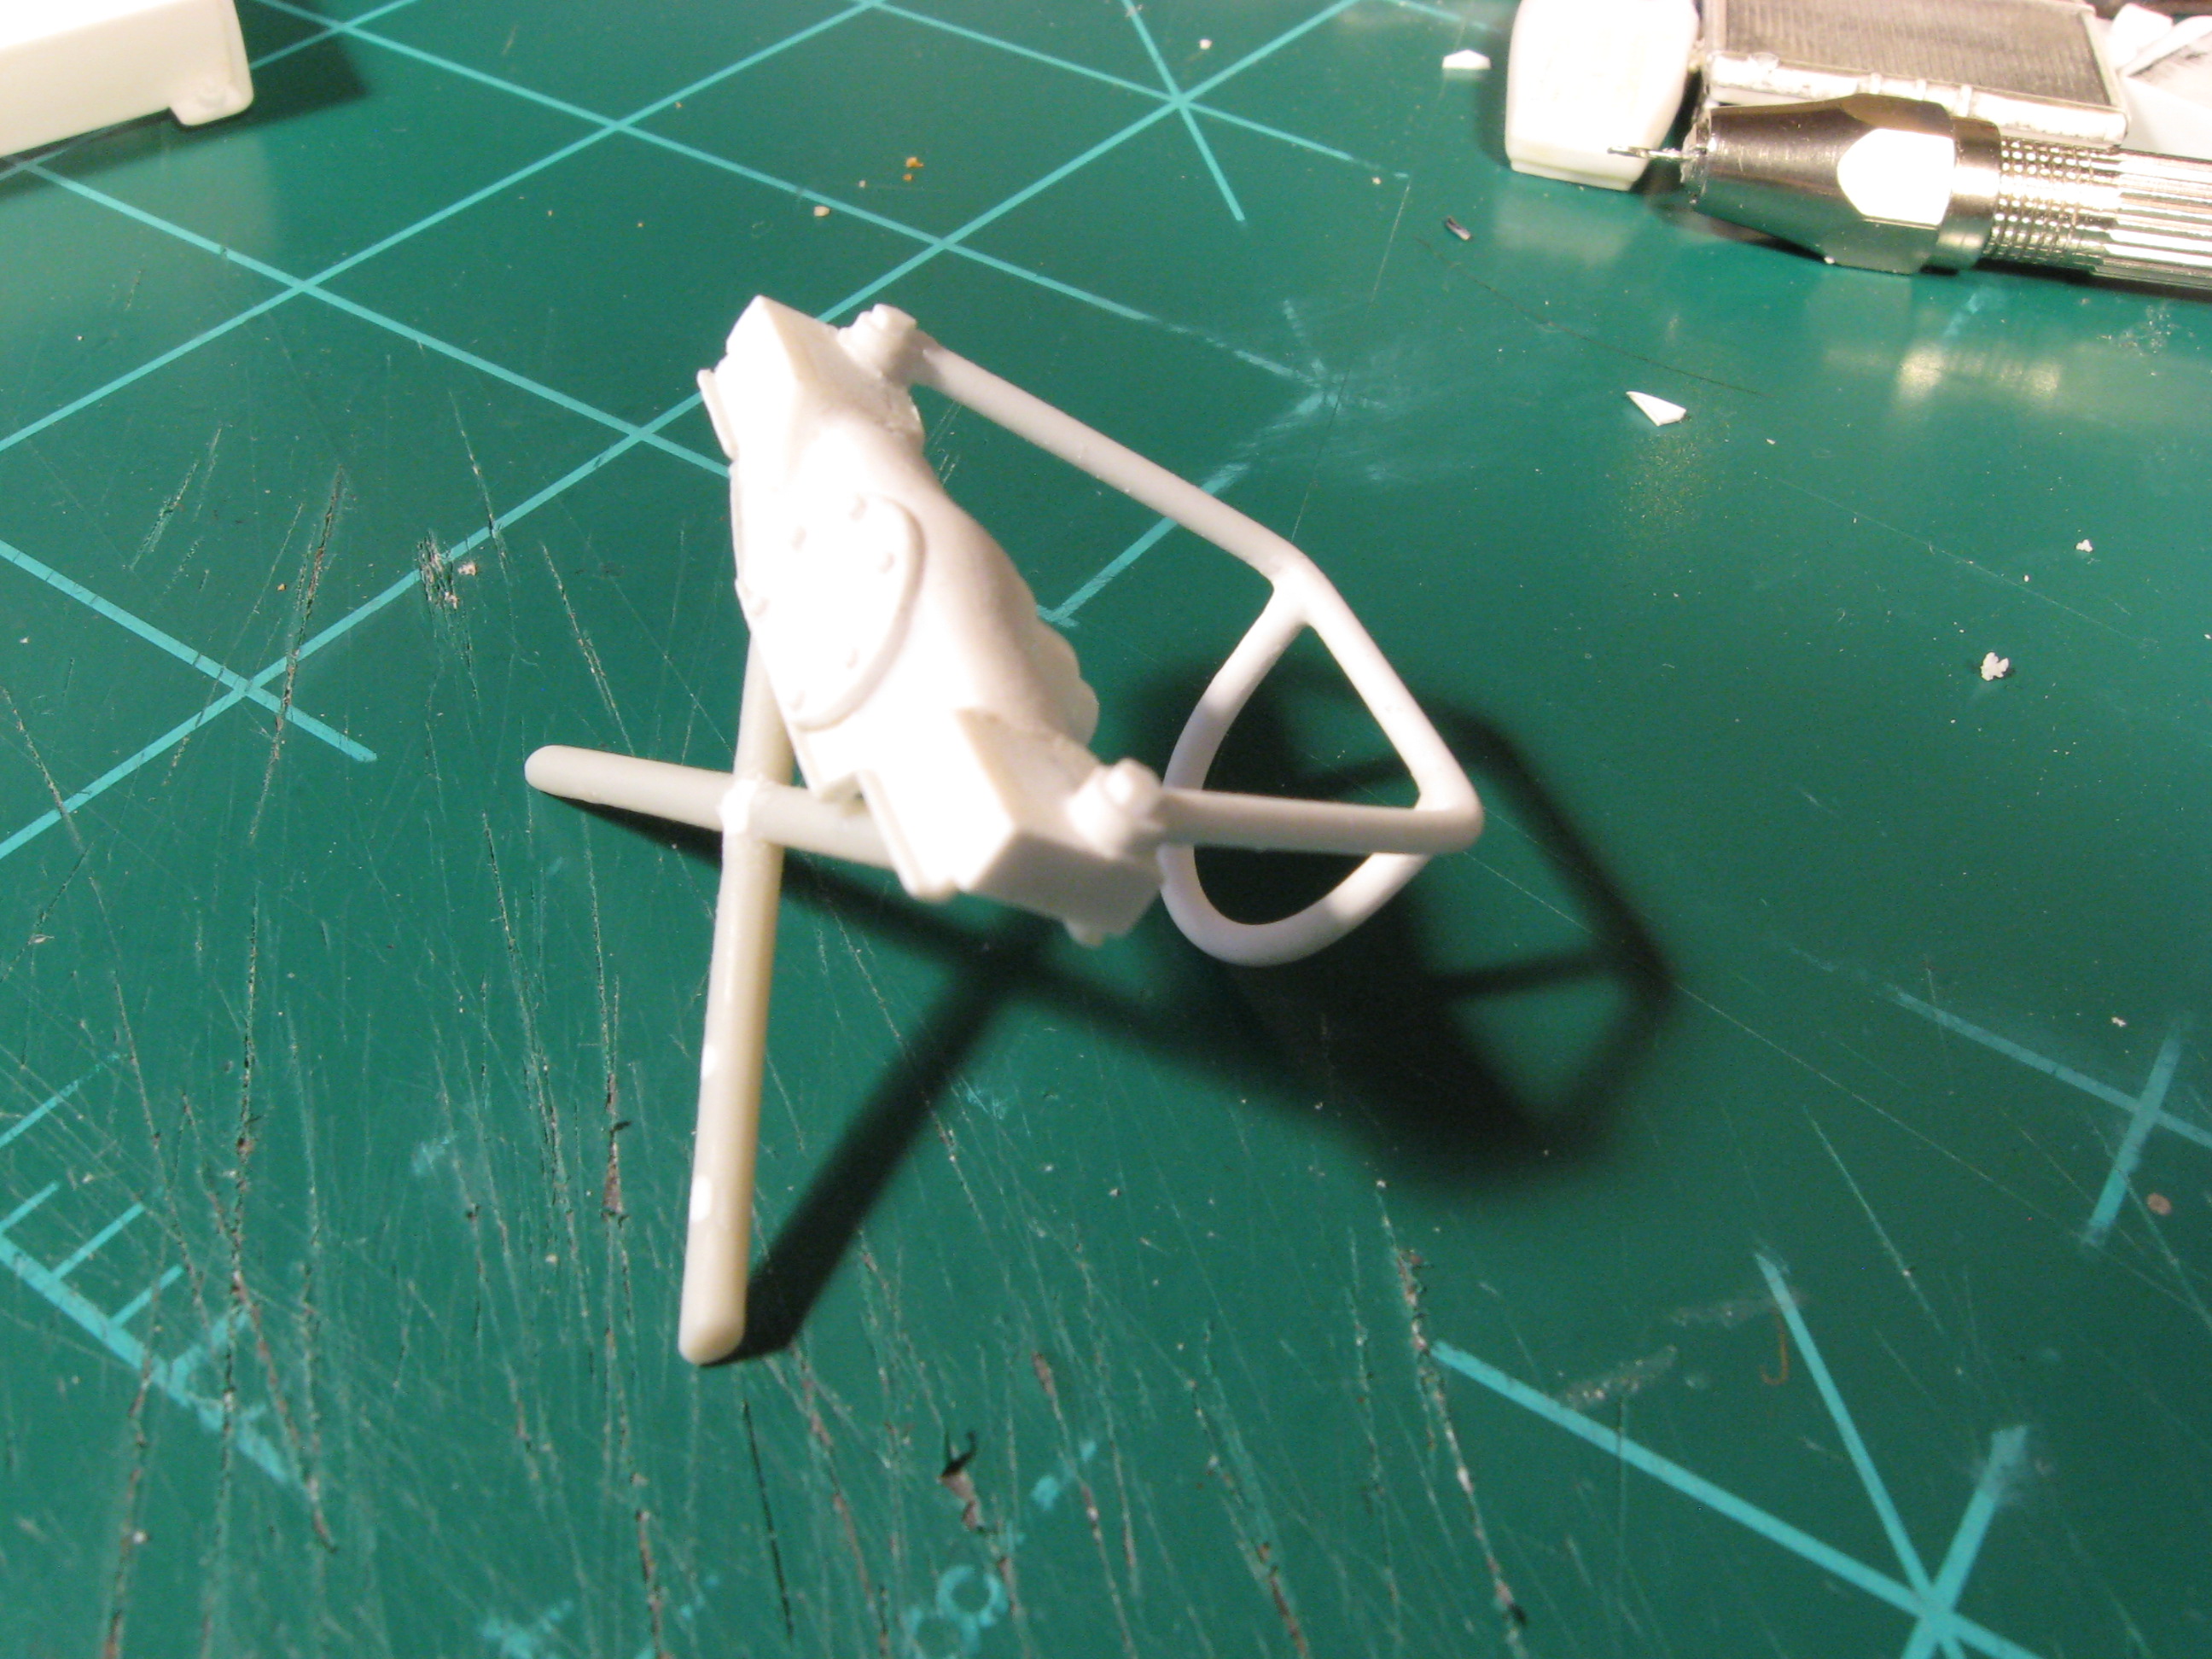
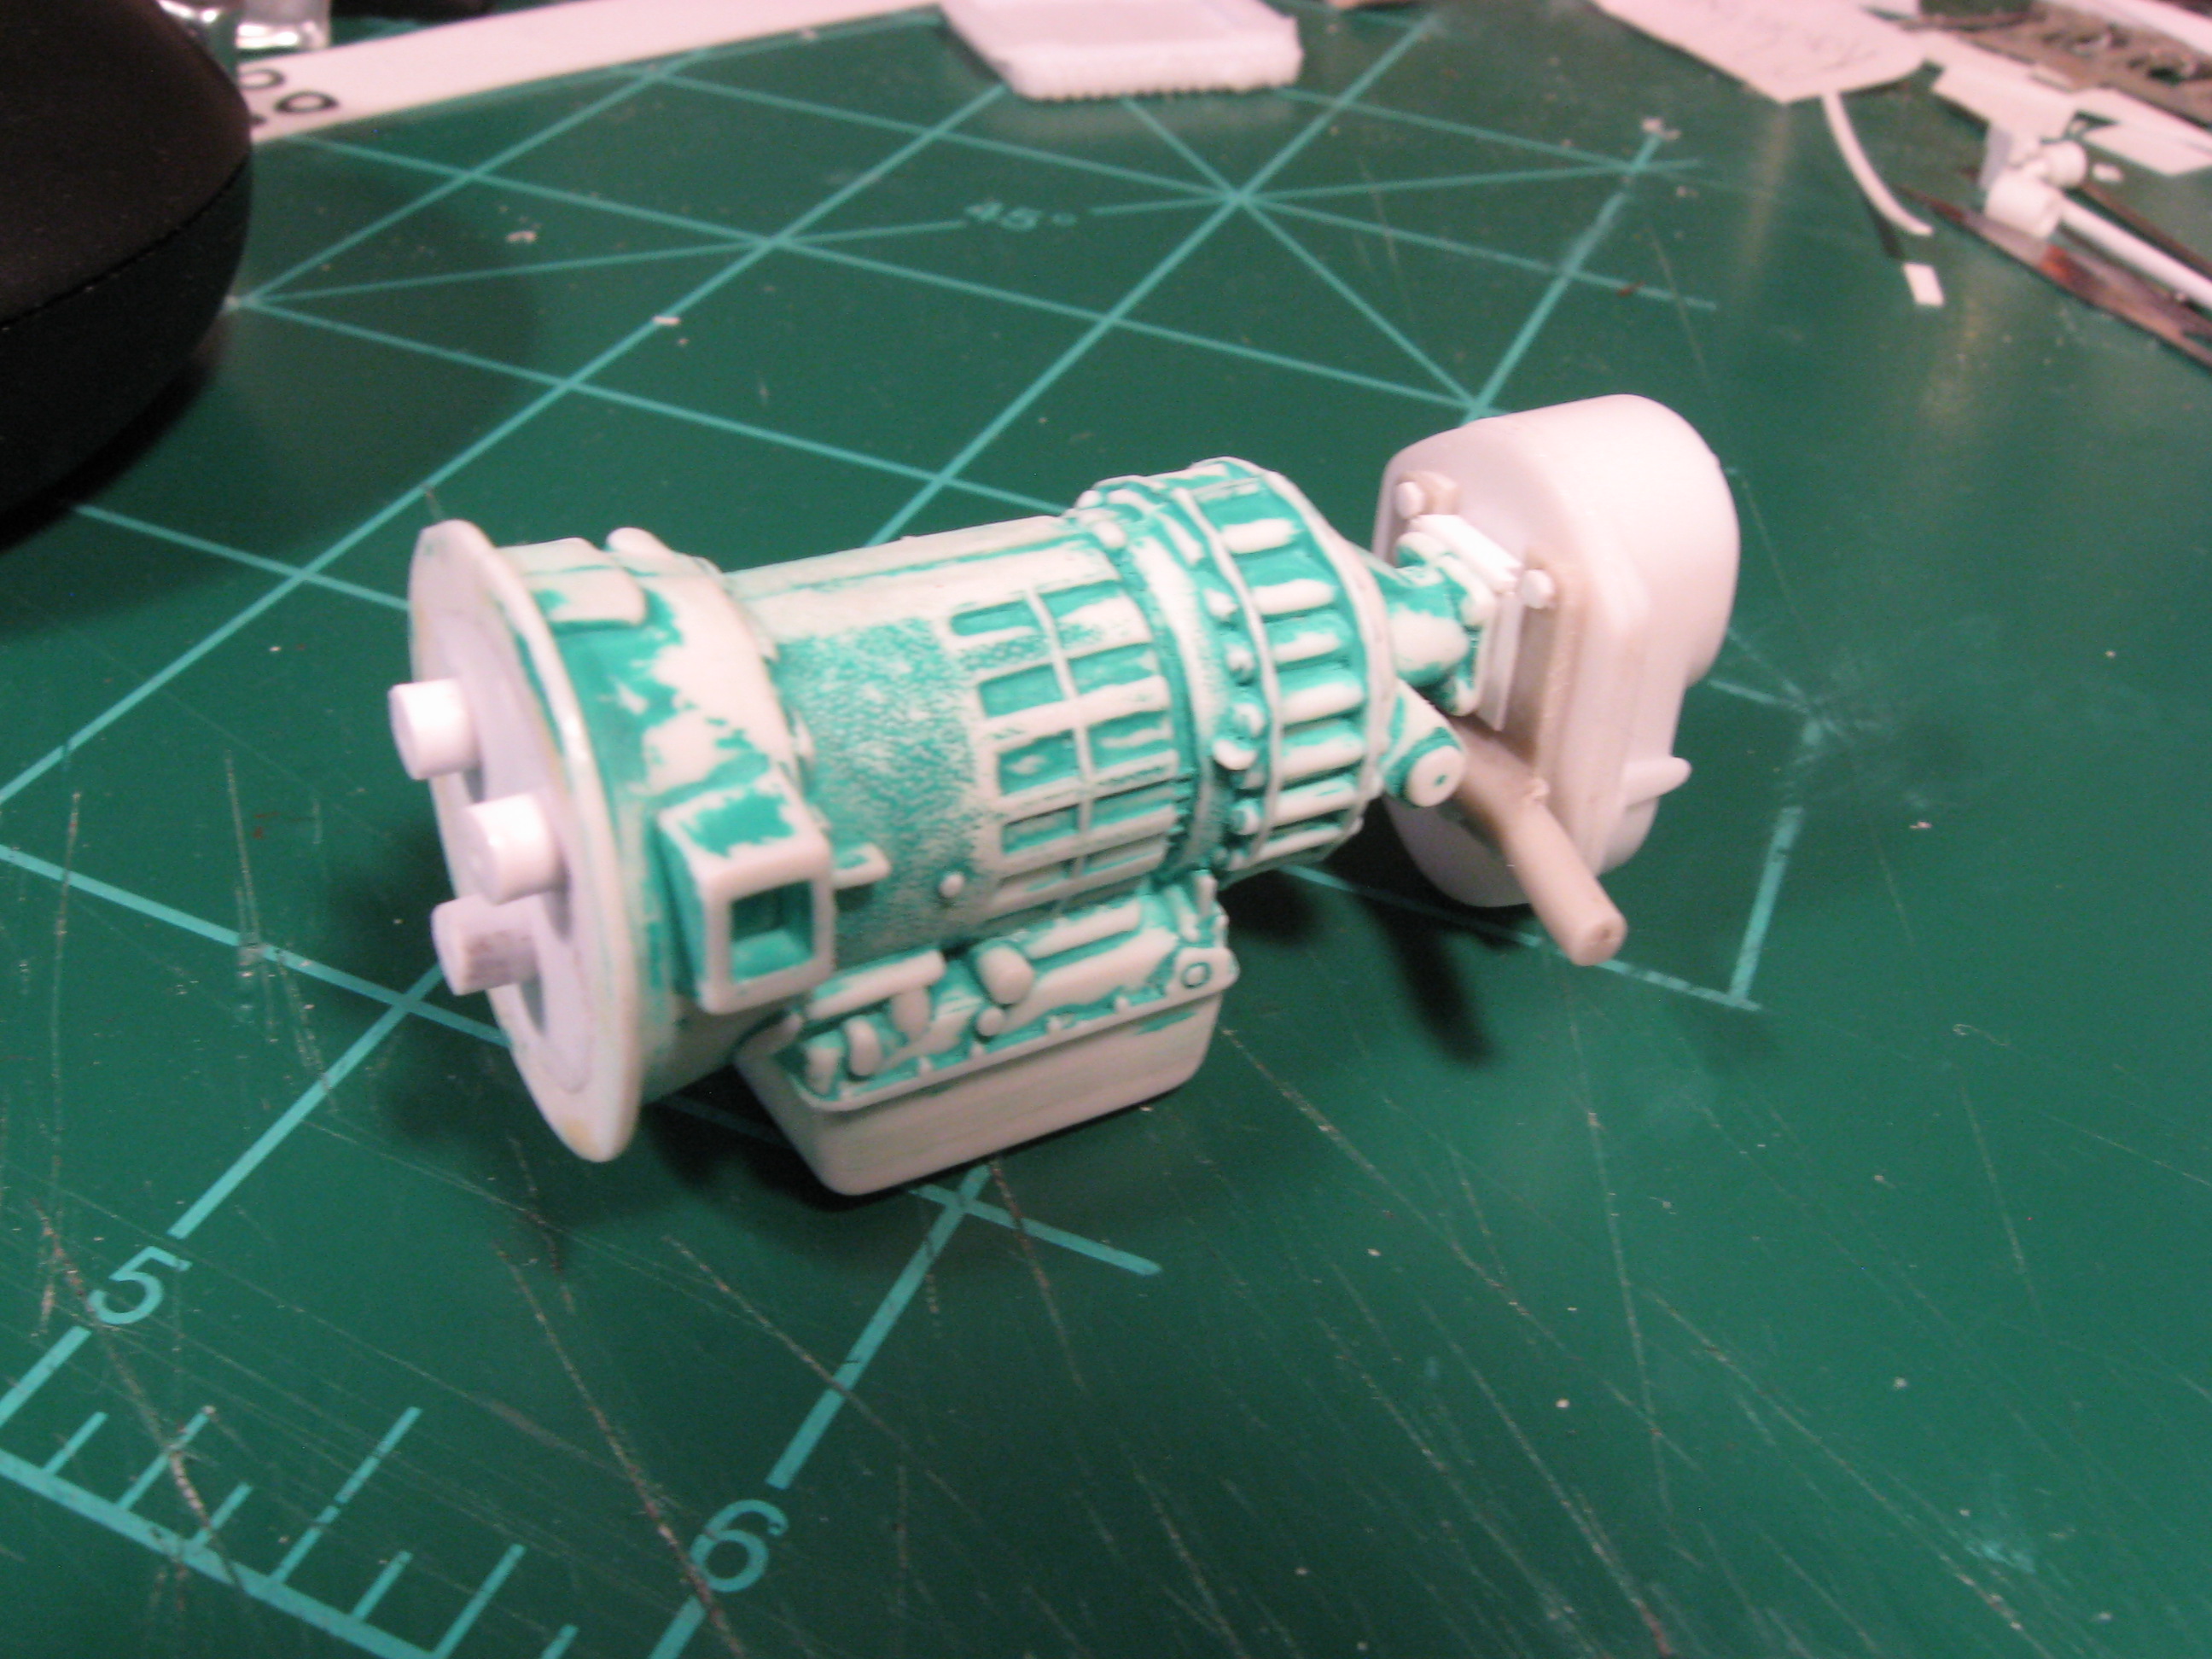
Thanks Scott. The transfer case came from the Lindberg Weird-ohs Dodge Monster Truck pictured in the first post of this build. It was sectioned about 1/4" to make the driveline work but that was the source.
-
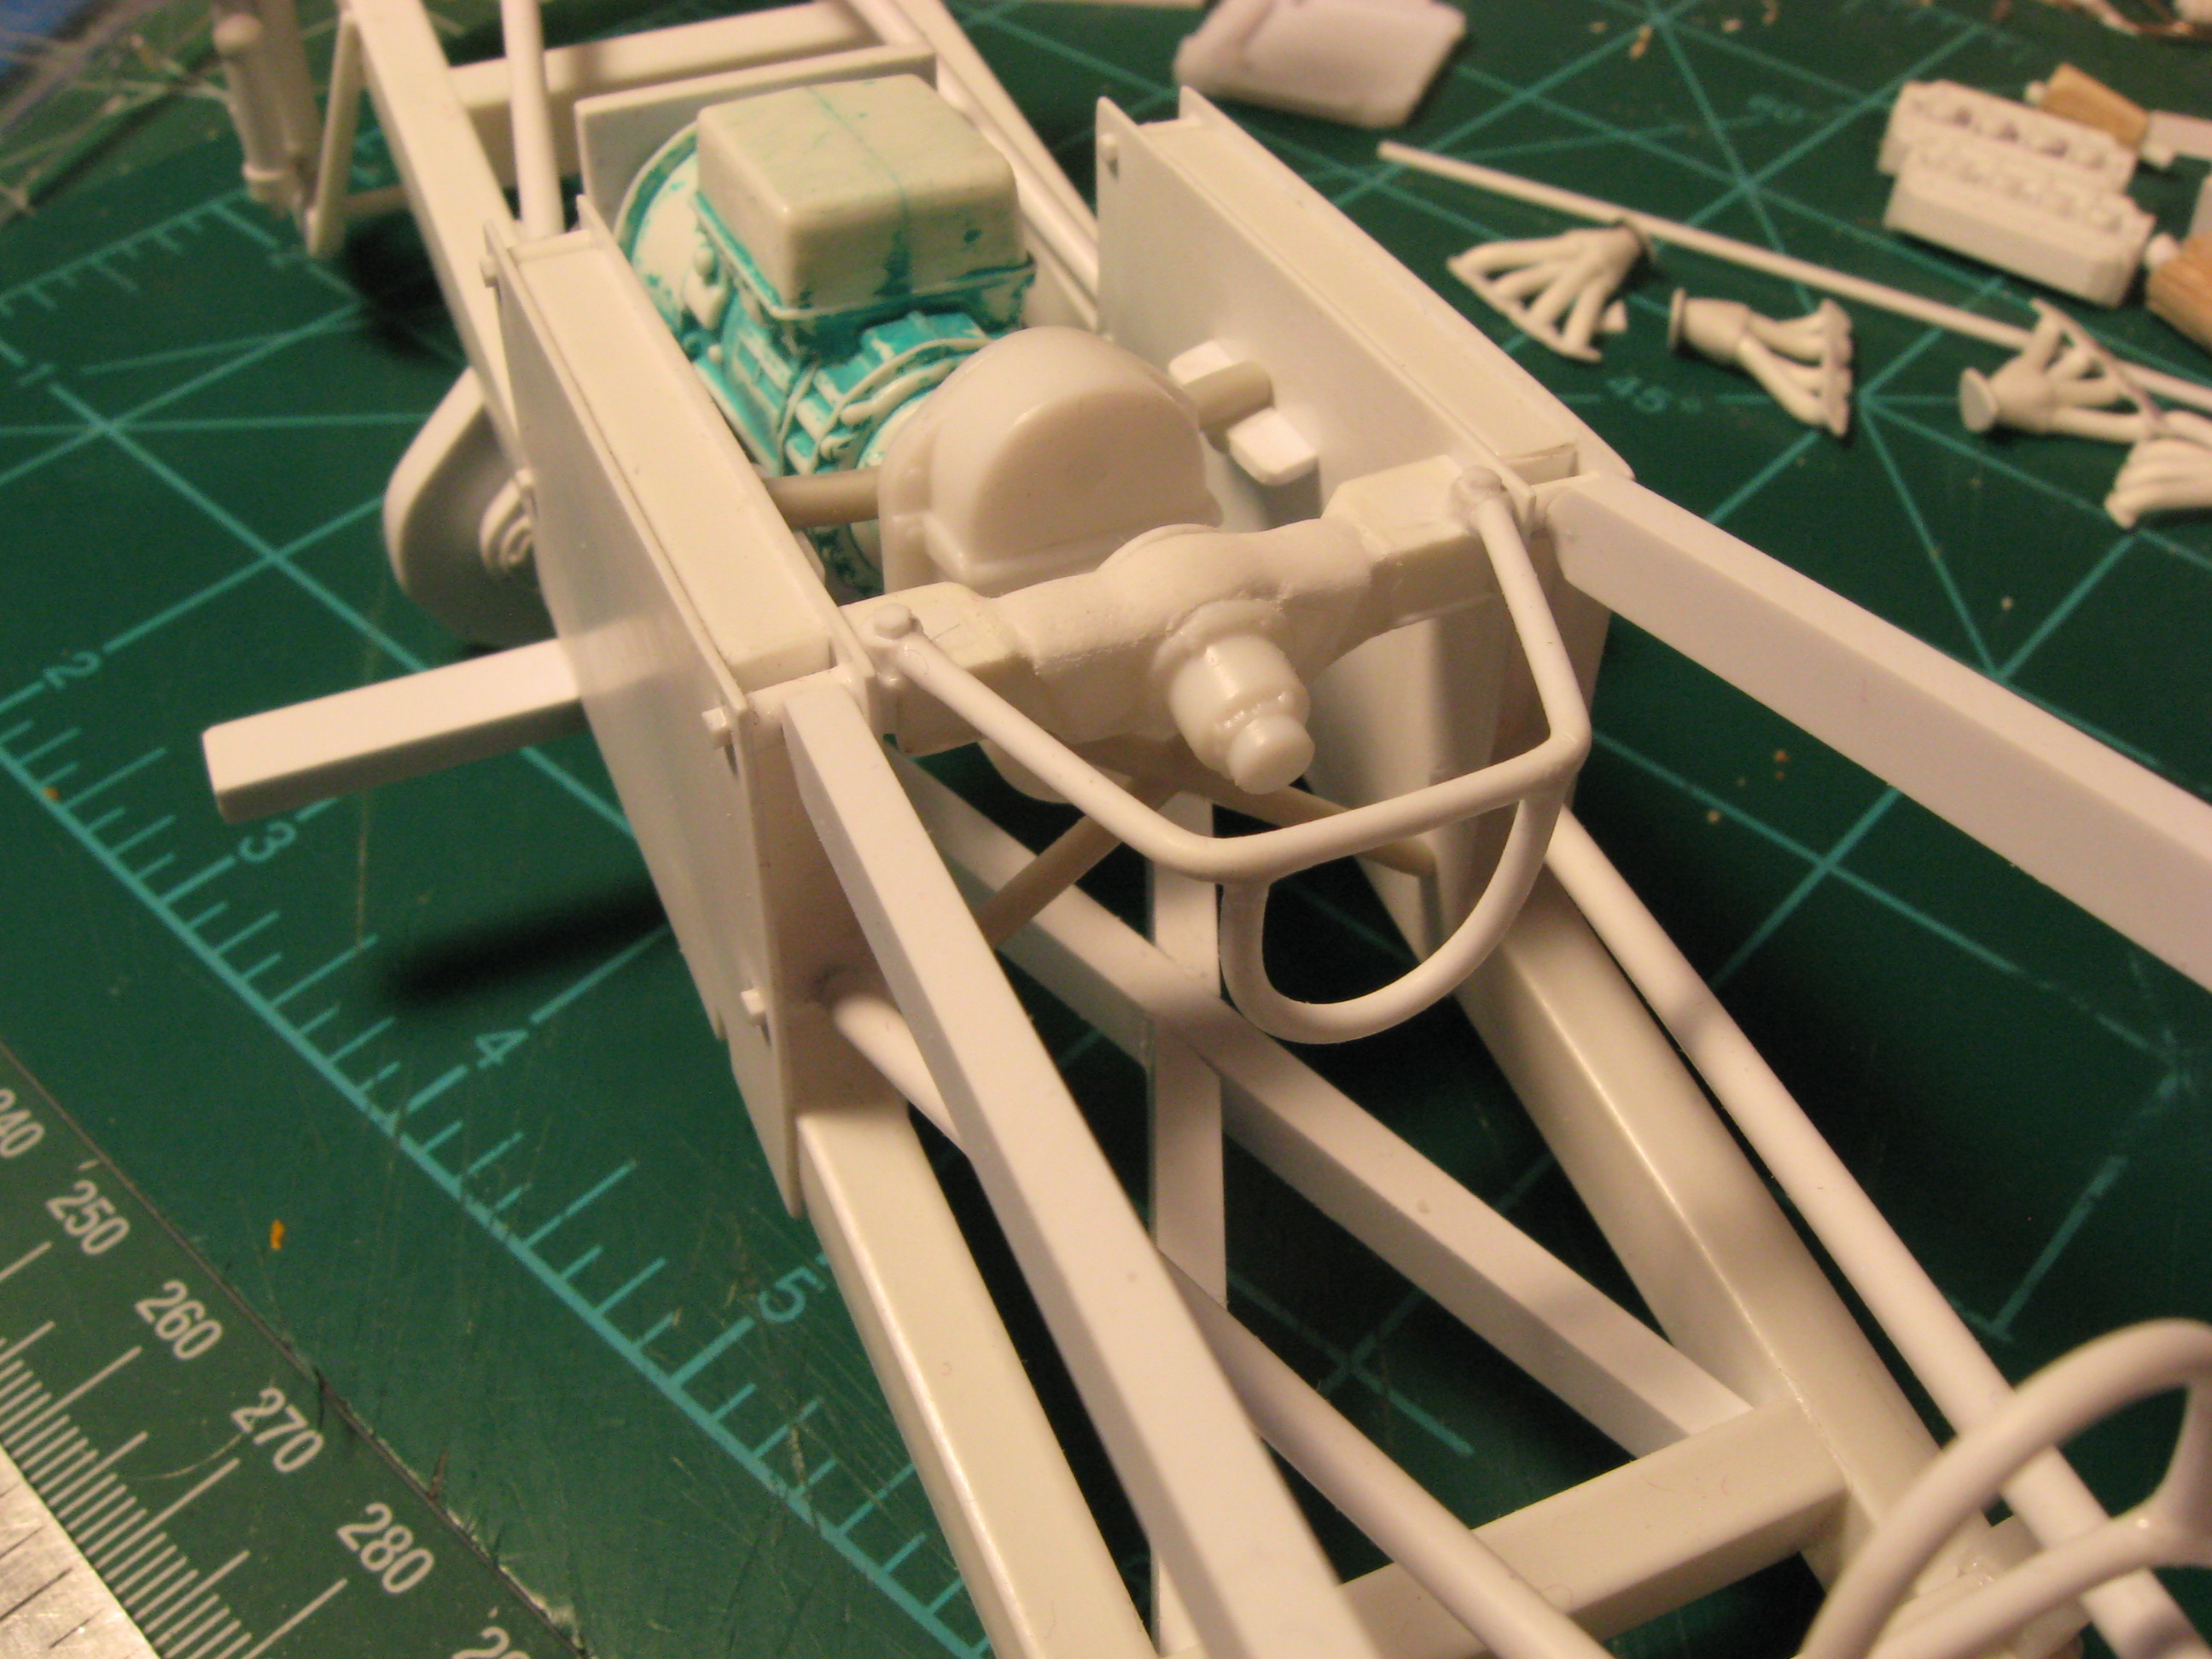
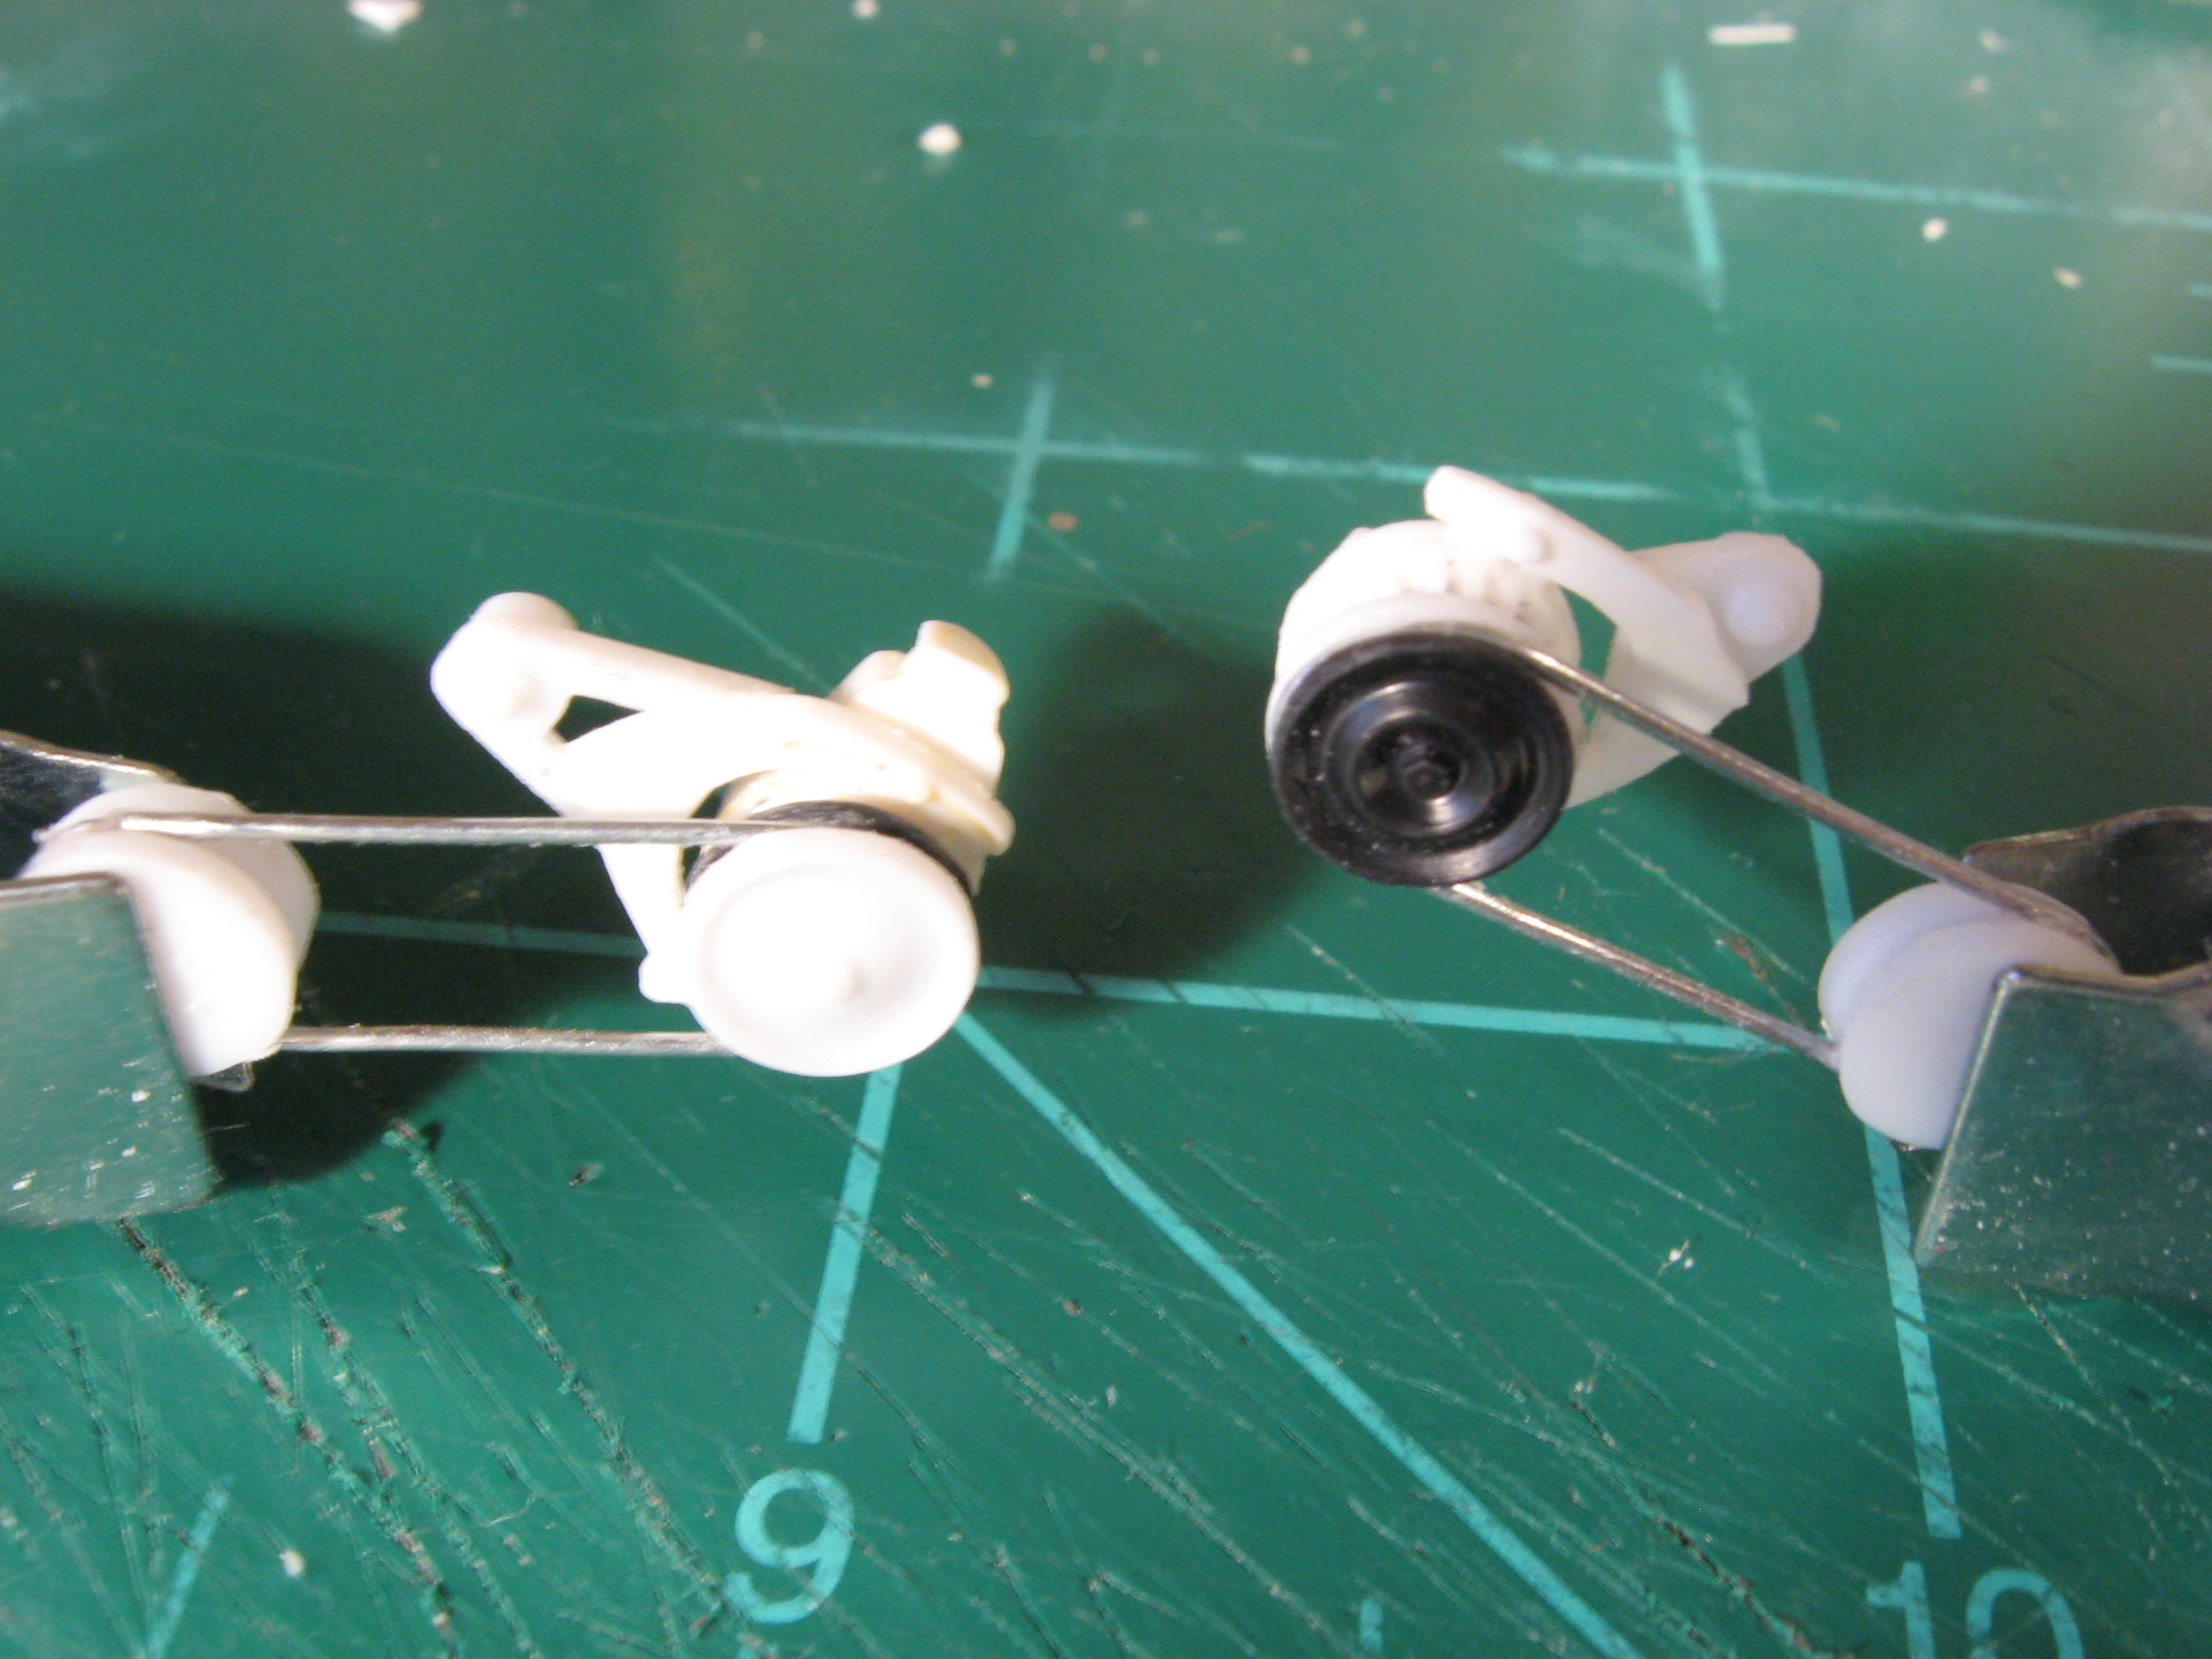
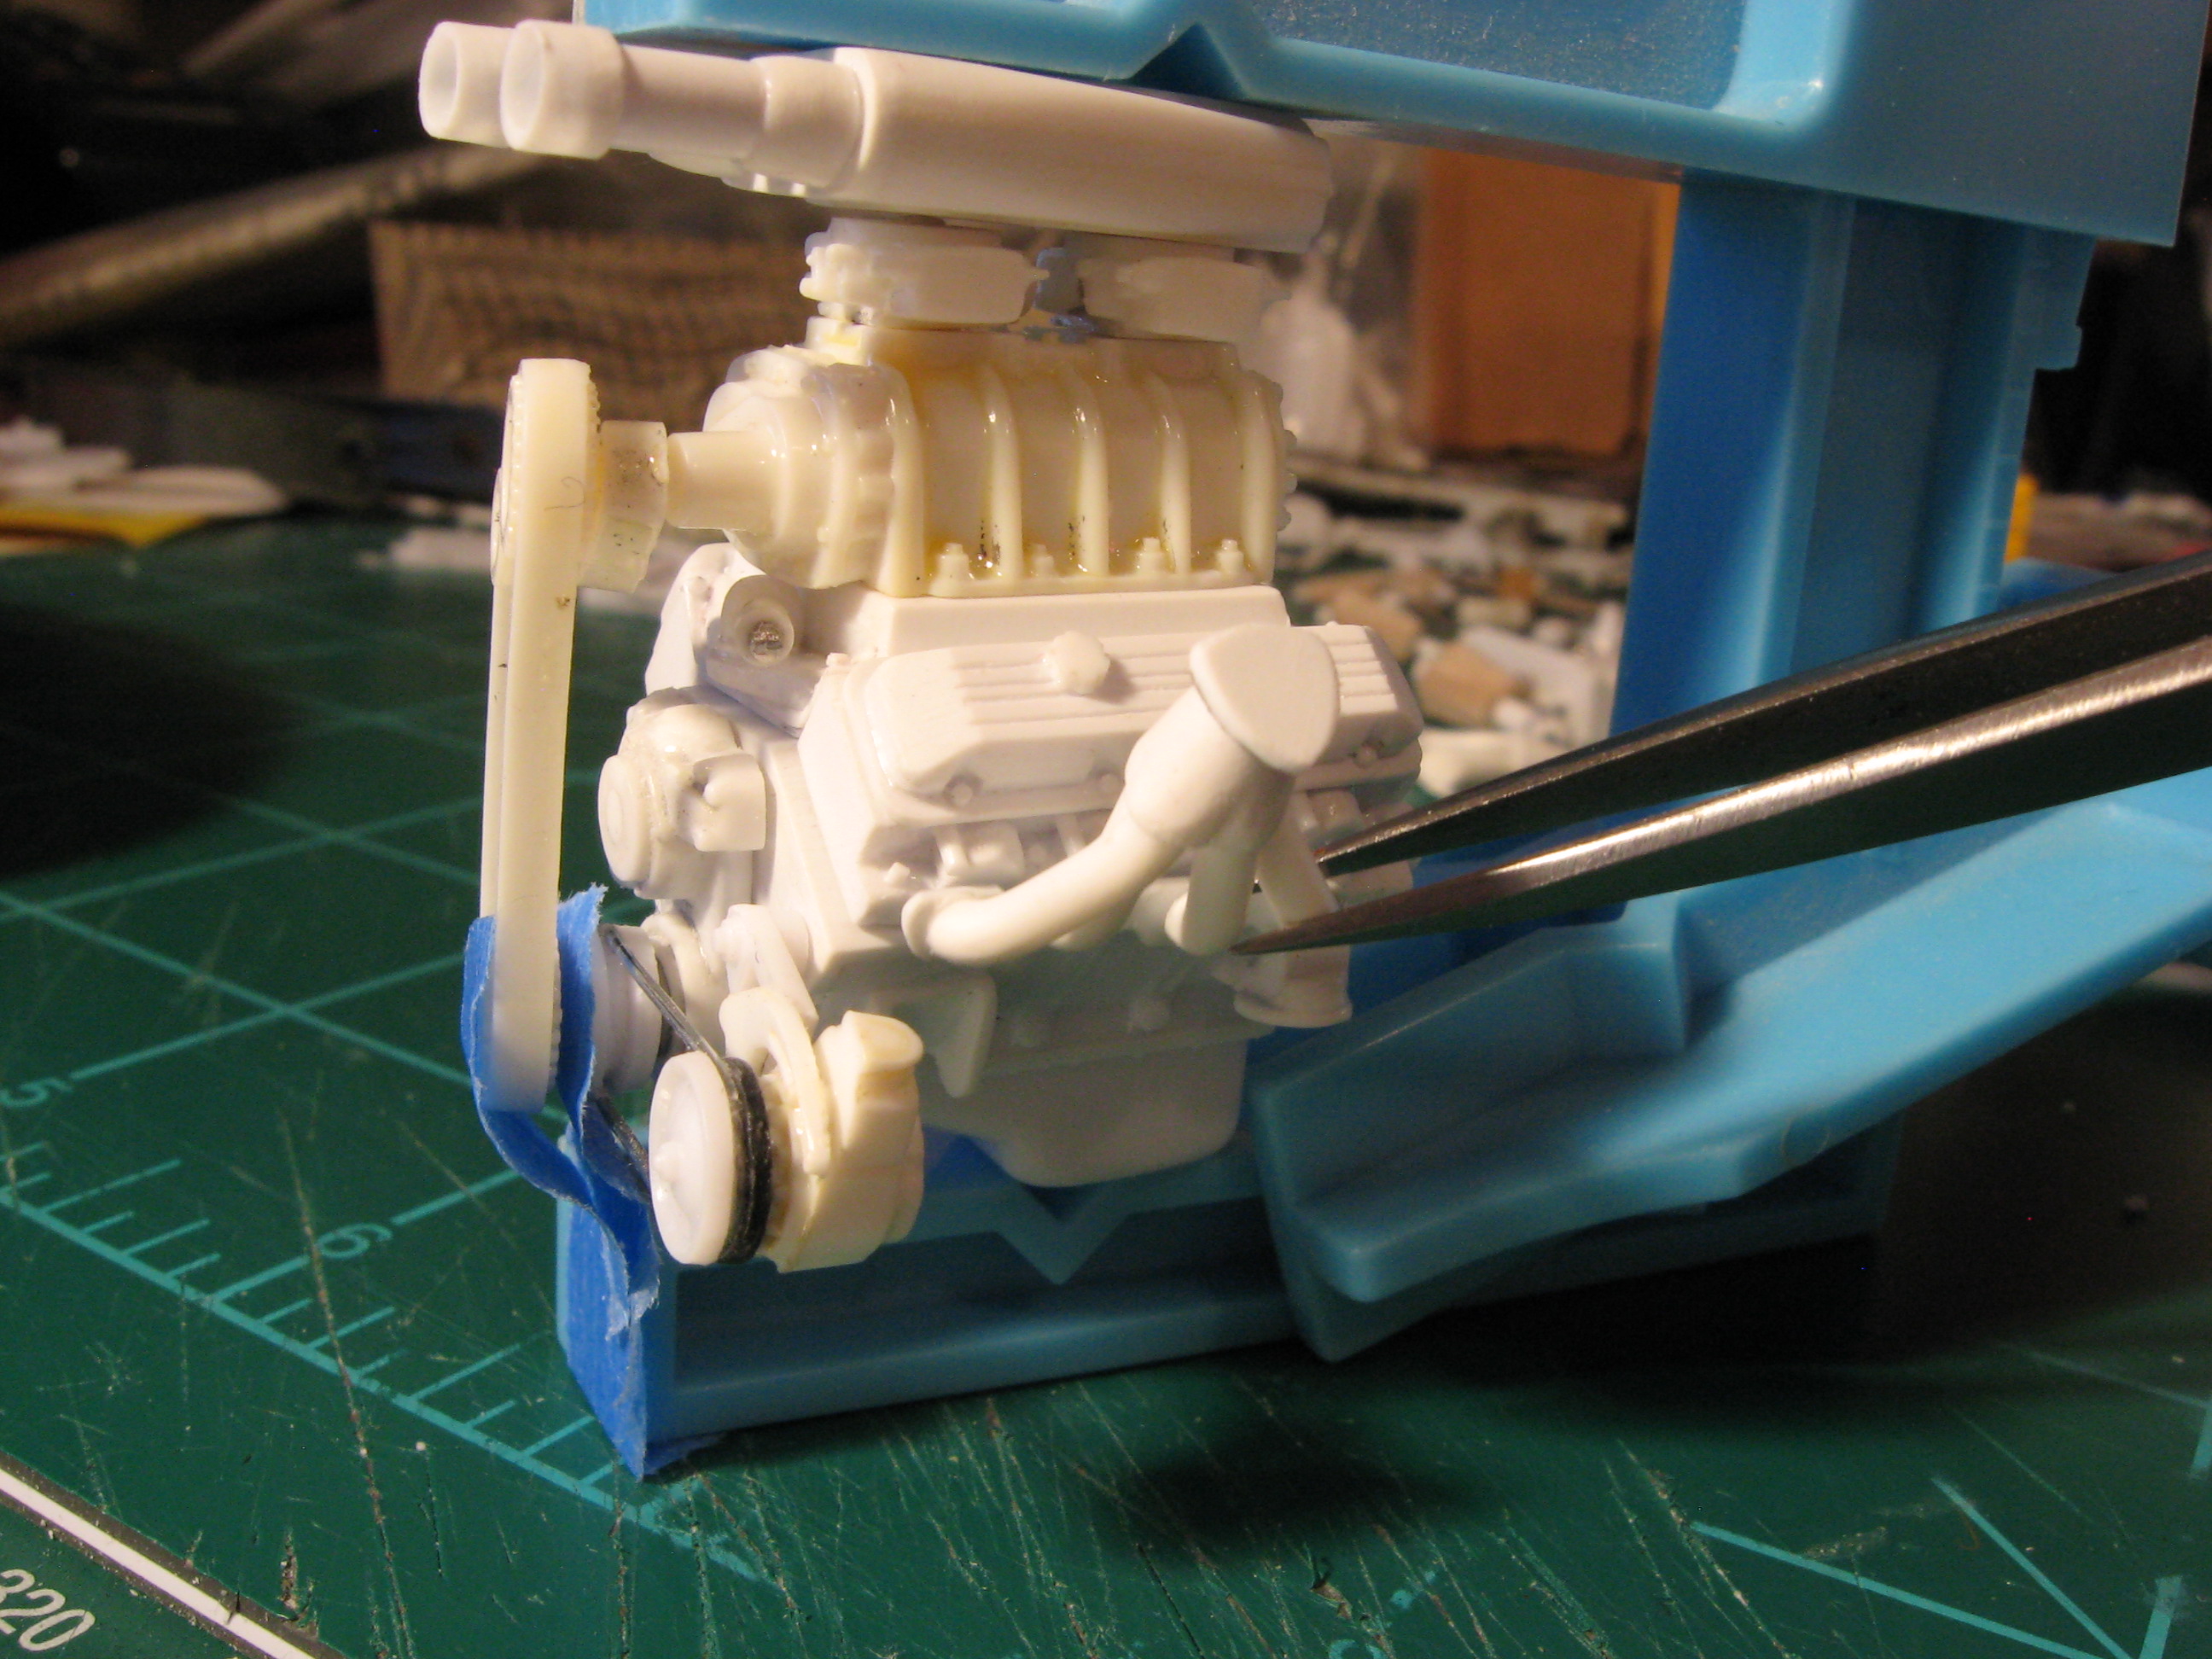
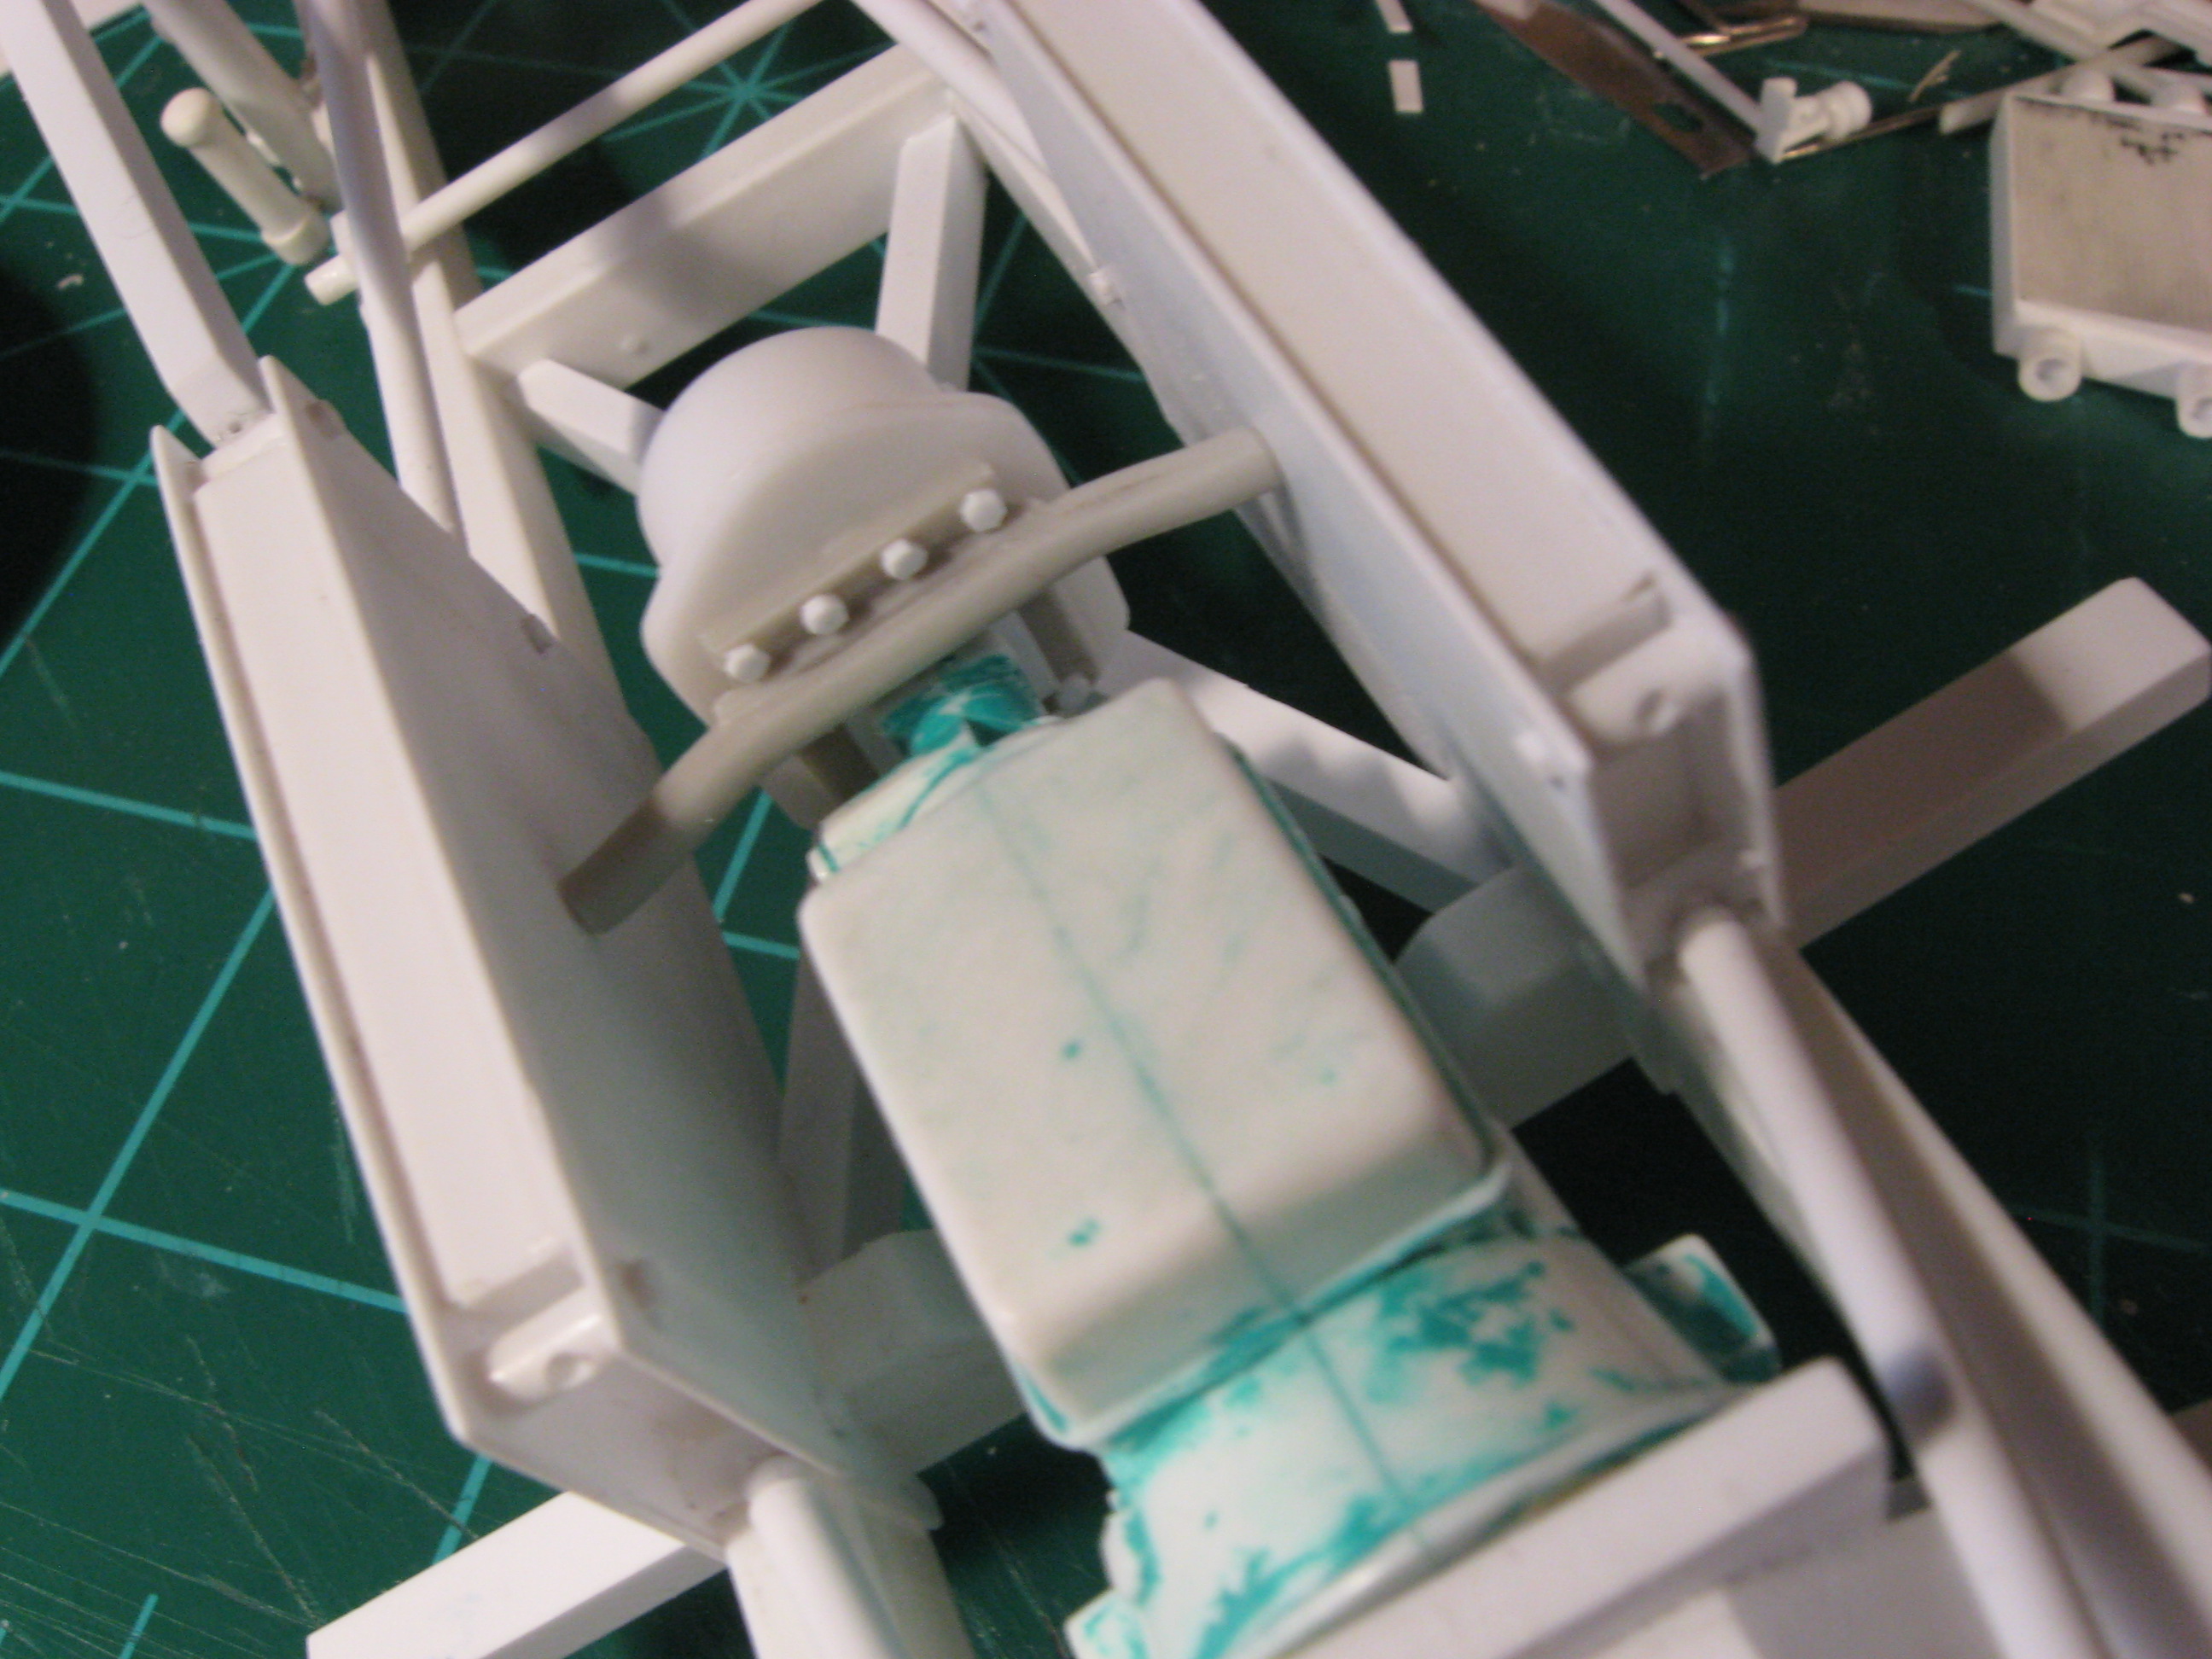
Thanks everyone. Getting closer on the transfer case to driveline structure. This is all just a guess as to what it might look like. The alternator and hydro pump are parts box with modified caddy engine pulleys and wire for belts. Finished the headers. A rough mockup. Finished the intakes, motor mounts and added oil filter structure to the blocks. It's still fun building this thing-thanks for looking. Steve

-
 I have personally had my livelihood stolen from me twice in my career so to me this is relatable. Sadly justice is never served. Police reports and serial numbers mean nothing and insurance finds an excuse to shirk their responsibility. I truly hate thieving lowlifes and hope the victims can overcome.
 -
Nice!
-
This reminded me that I had not changed mine in a while so I did but it did take me a little bit to figure it out again. I clicked on my user name in the top right corner and a drop down menu appeared and I clicked on profile. On the left side of your profile is your picture/box. There is an icon on the lower left of the box that will open an upload or drag and drop menu. Welcome and good luck.
-
Thanks Richard and all followers. The intercoolers are done and I did some work on the turbos. In doing the studying of this vehicle it appears that there is an insulated wrapped tank under the intercoolers and between the front shock towers. It also appears that what look like fuel tanks are dummies that lead to nowhere. This seems more apparent in the under construction video where the vehicle is driven with only single small air and hydraulic tanks mounted. Start at 7:46 in this video. https://www.youtube.com/watch?v=9L67BiENzYs If anyone has more info or better insight I would appreciate it or this is how I am going to build it. Thanks I modified a parts box transfer case and am working on locating points and drive line connections. Thanks for looking. Steve
-
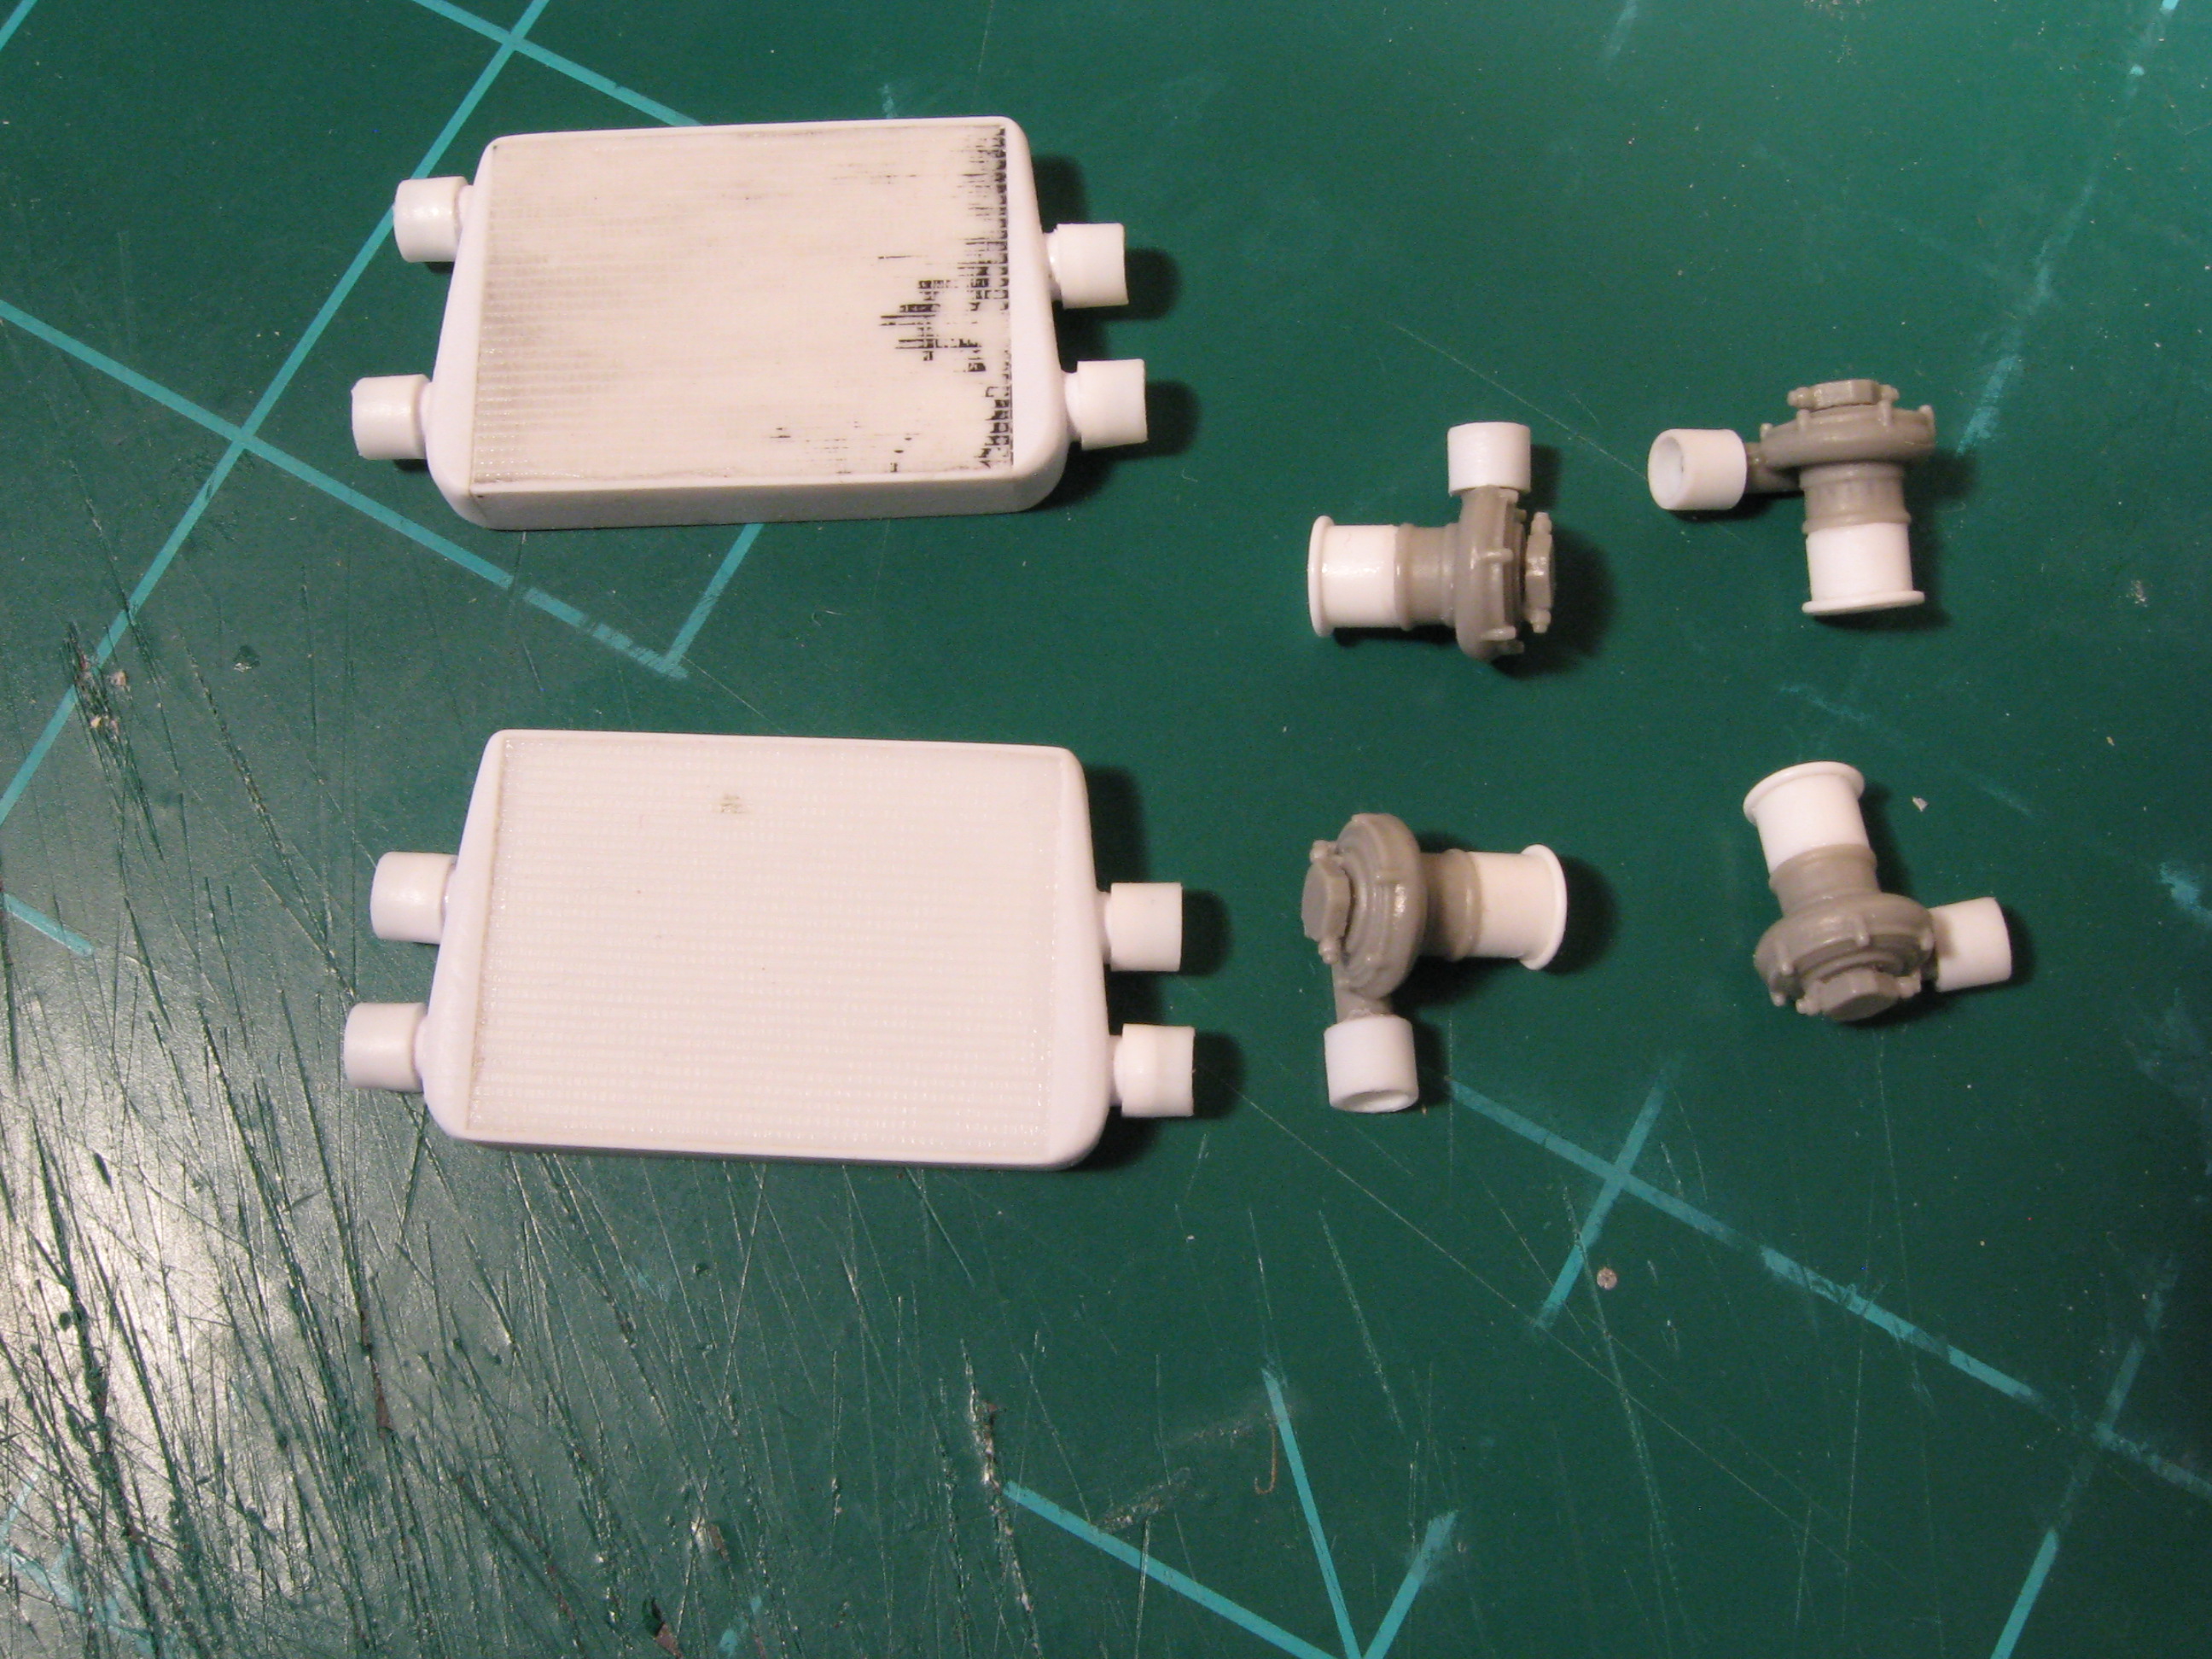
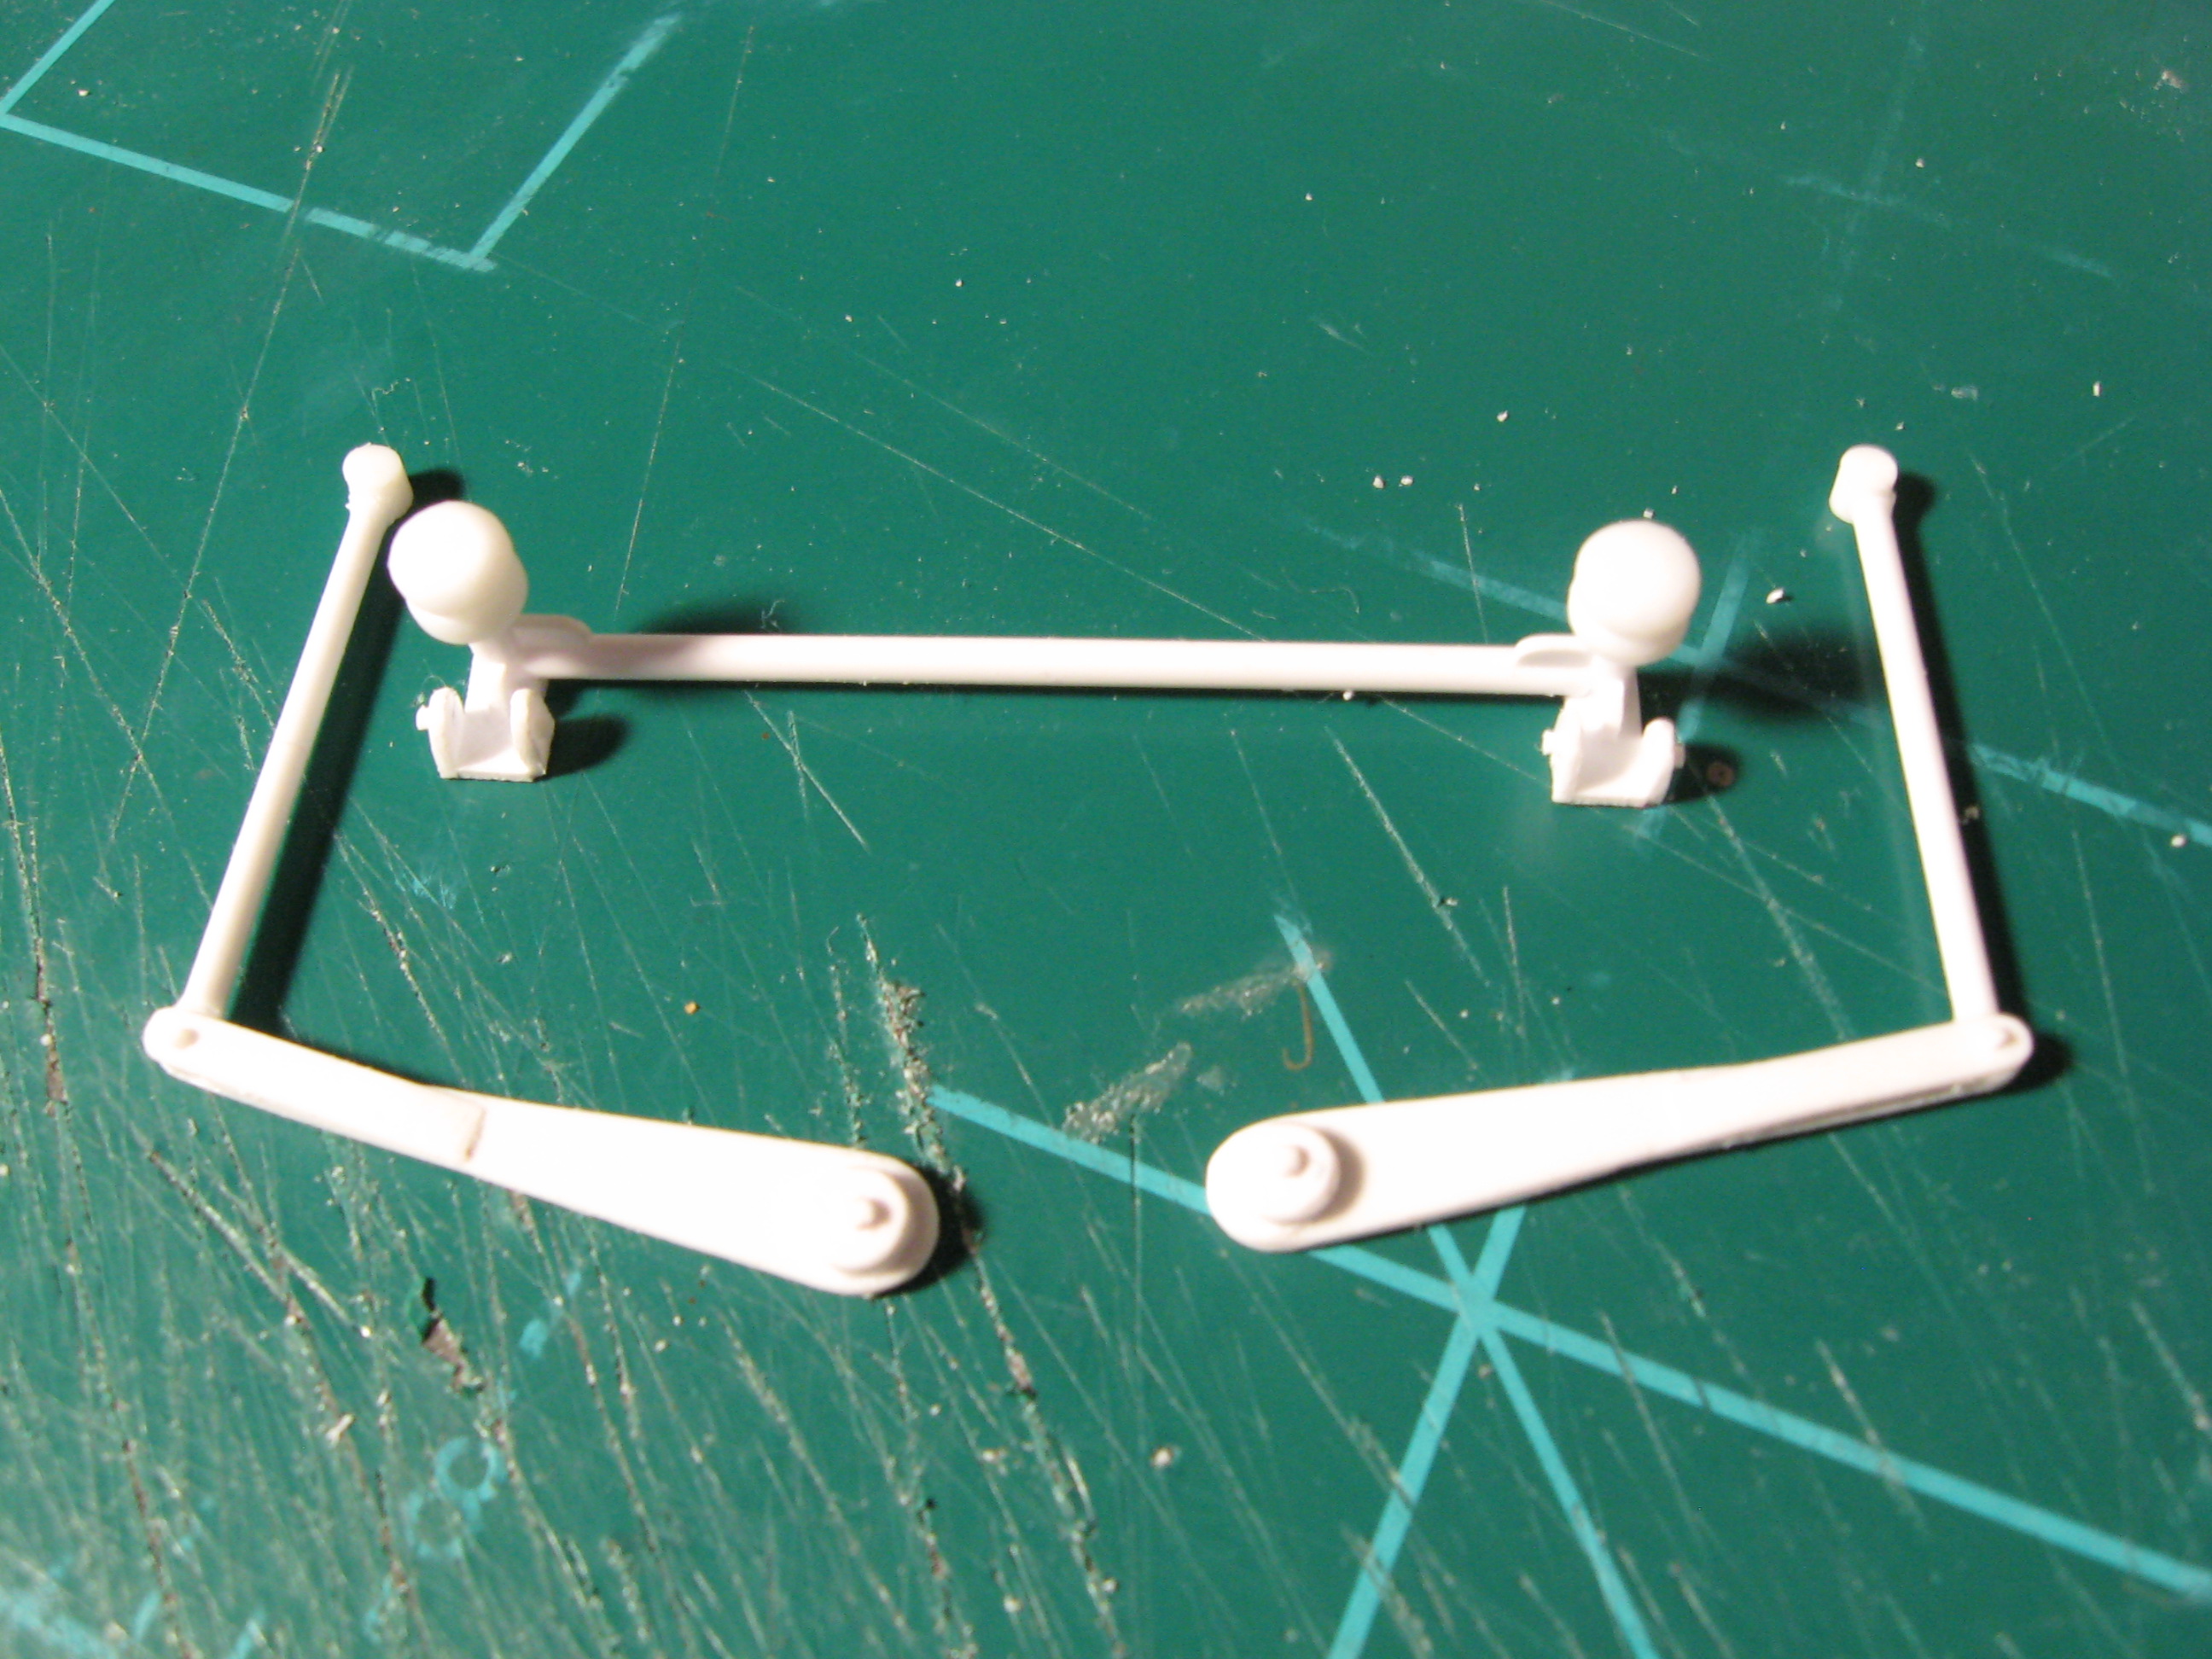
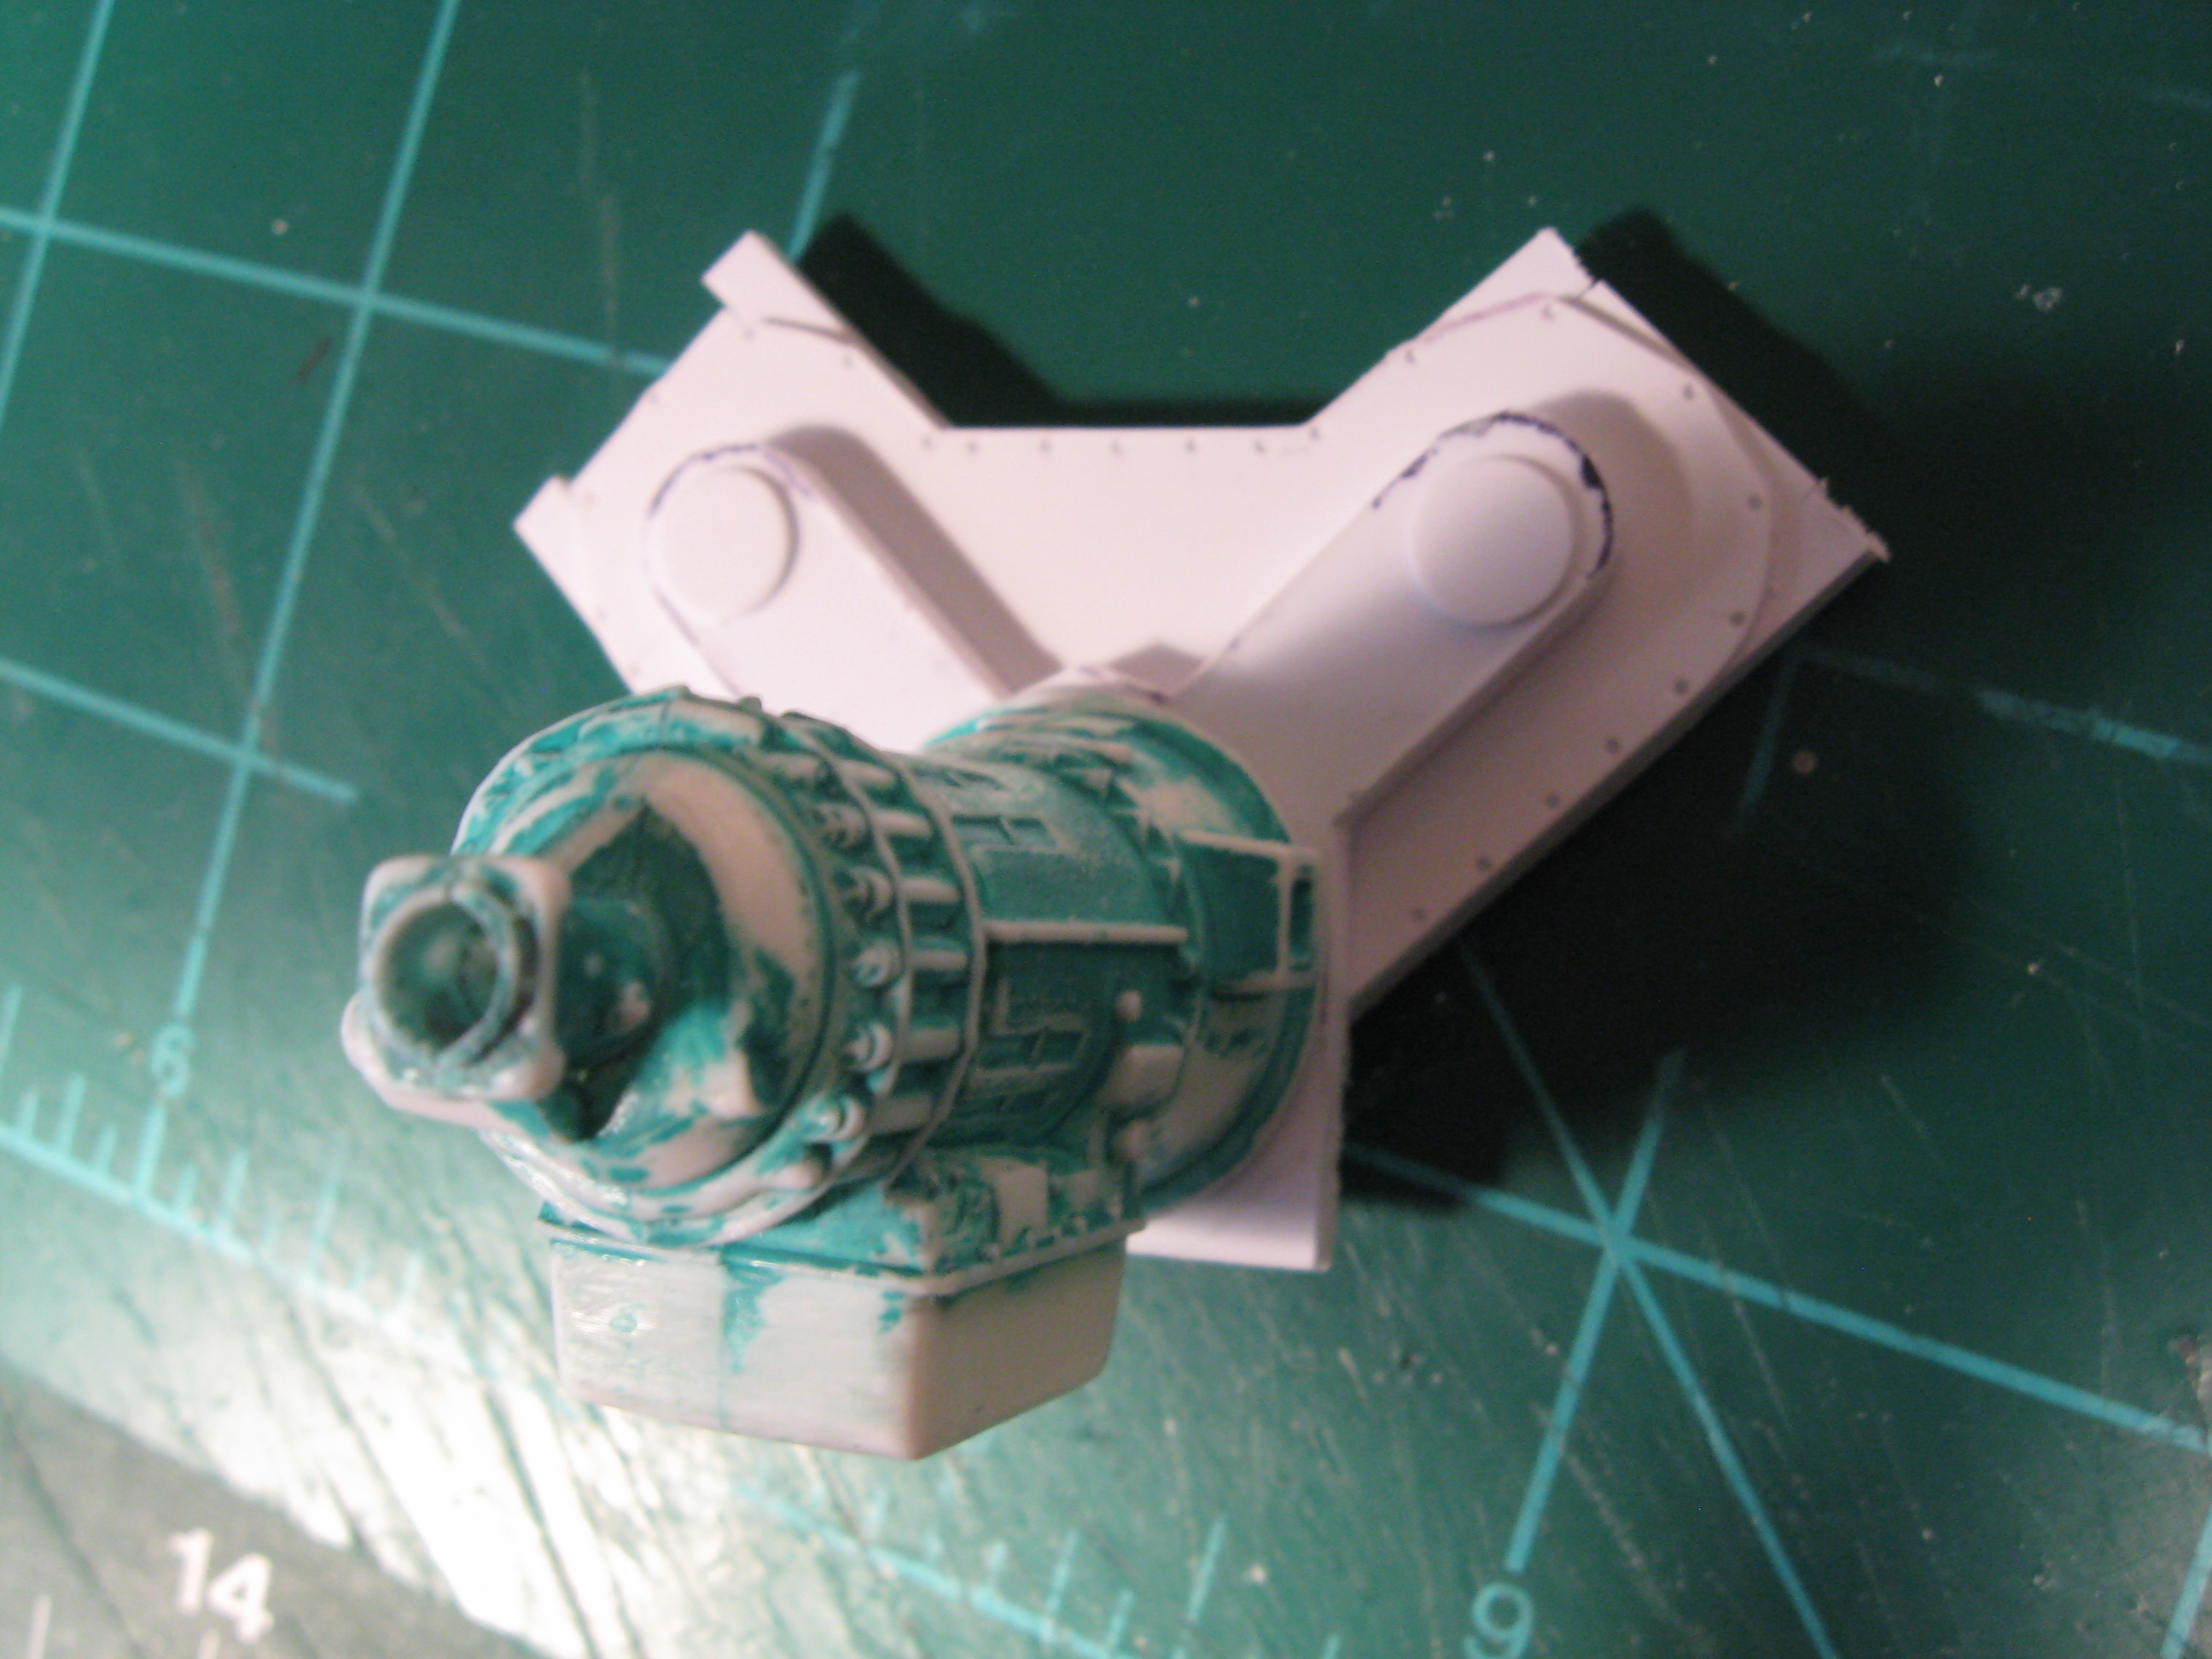
Thanks guys, I like that meme. I finished the stabilizers and bump stops and did a dry fit. They should work. I found some parts box semi radiators and I'm in the process of building the intercoolers. The top right is the first one coming along. Thanks for looking. Steve
-
It's nice to see such a cool project moving forward again. I will be watching.
-
Great build and nice details.
-
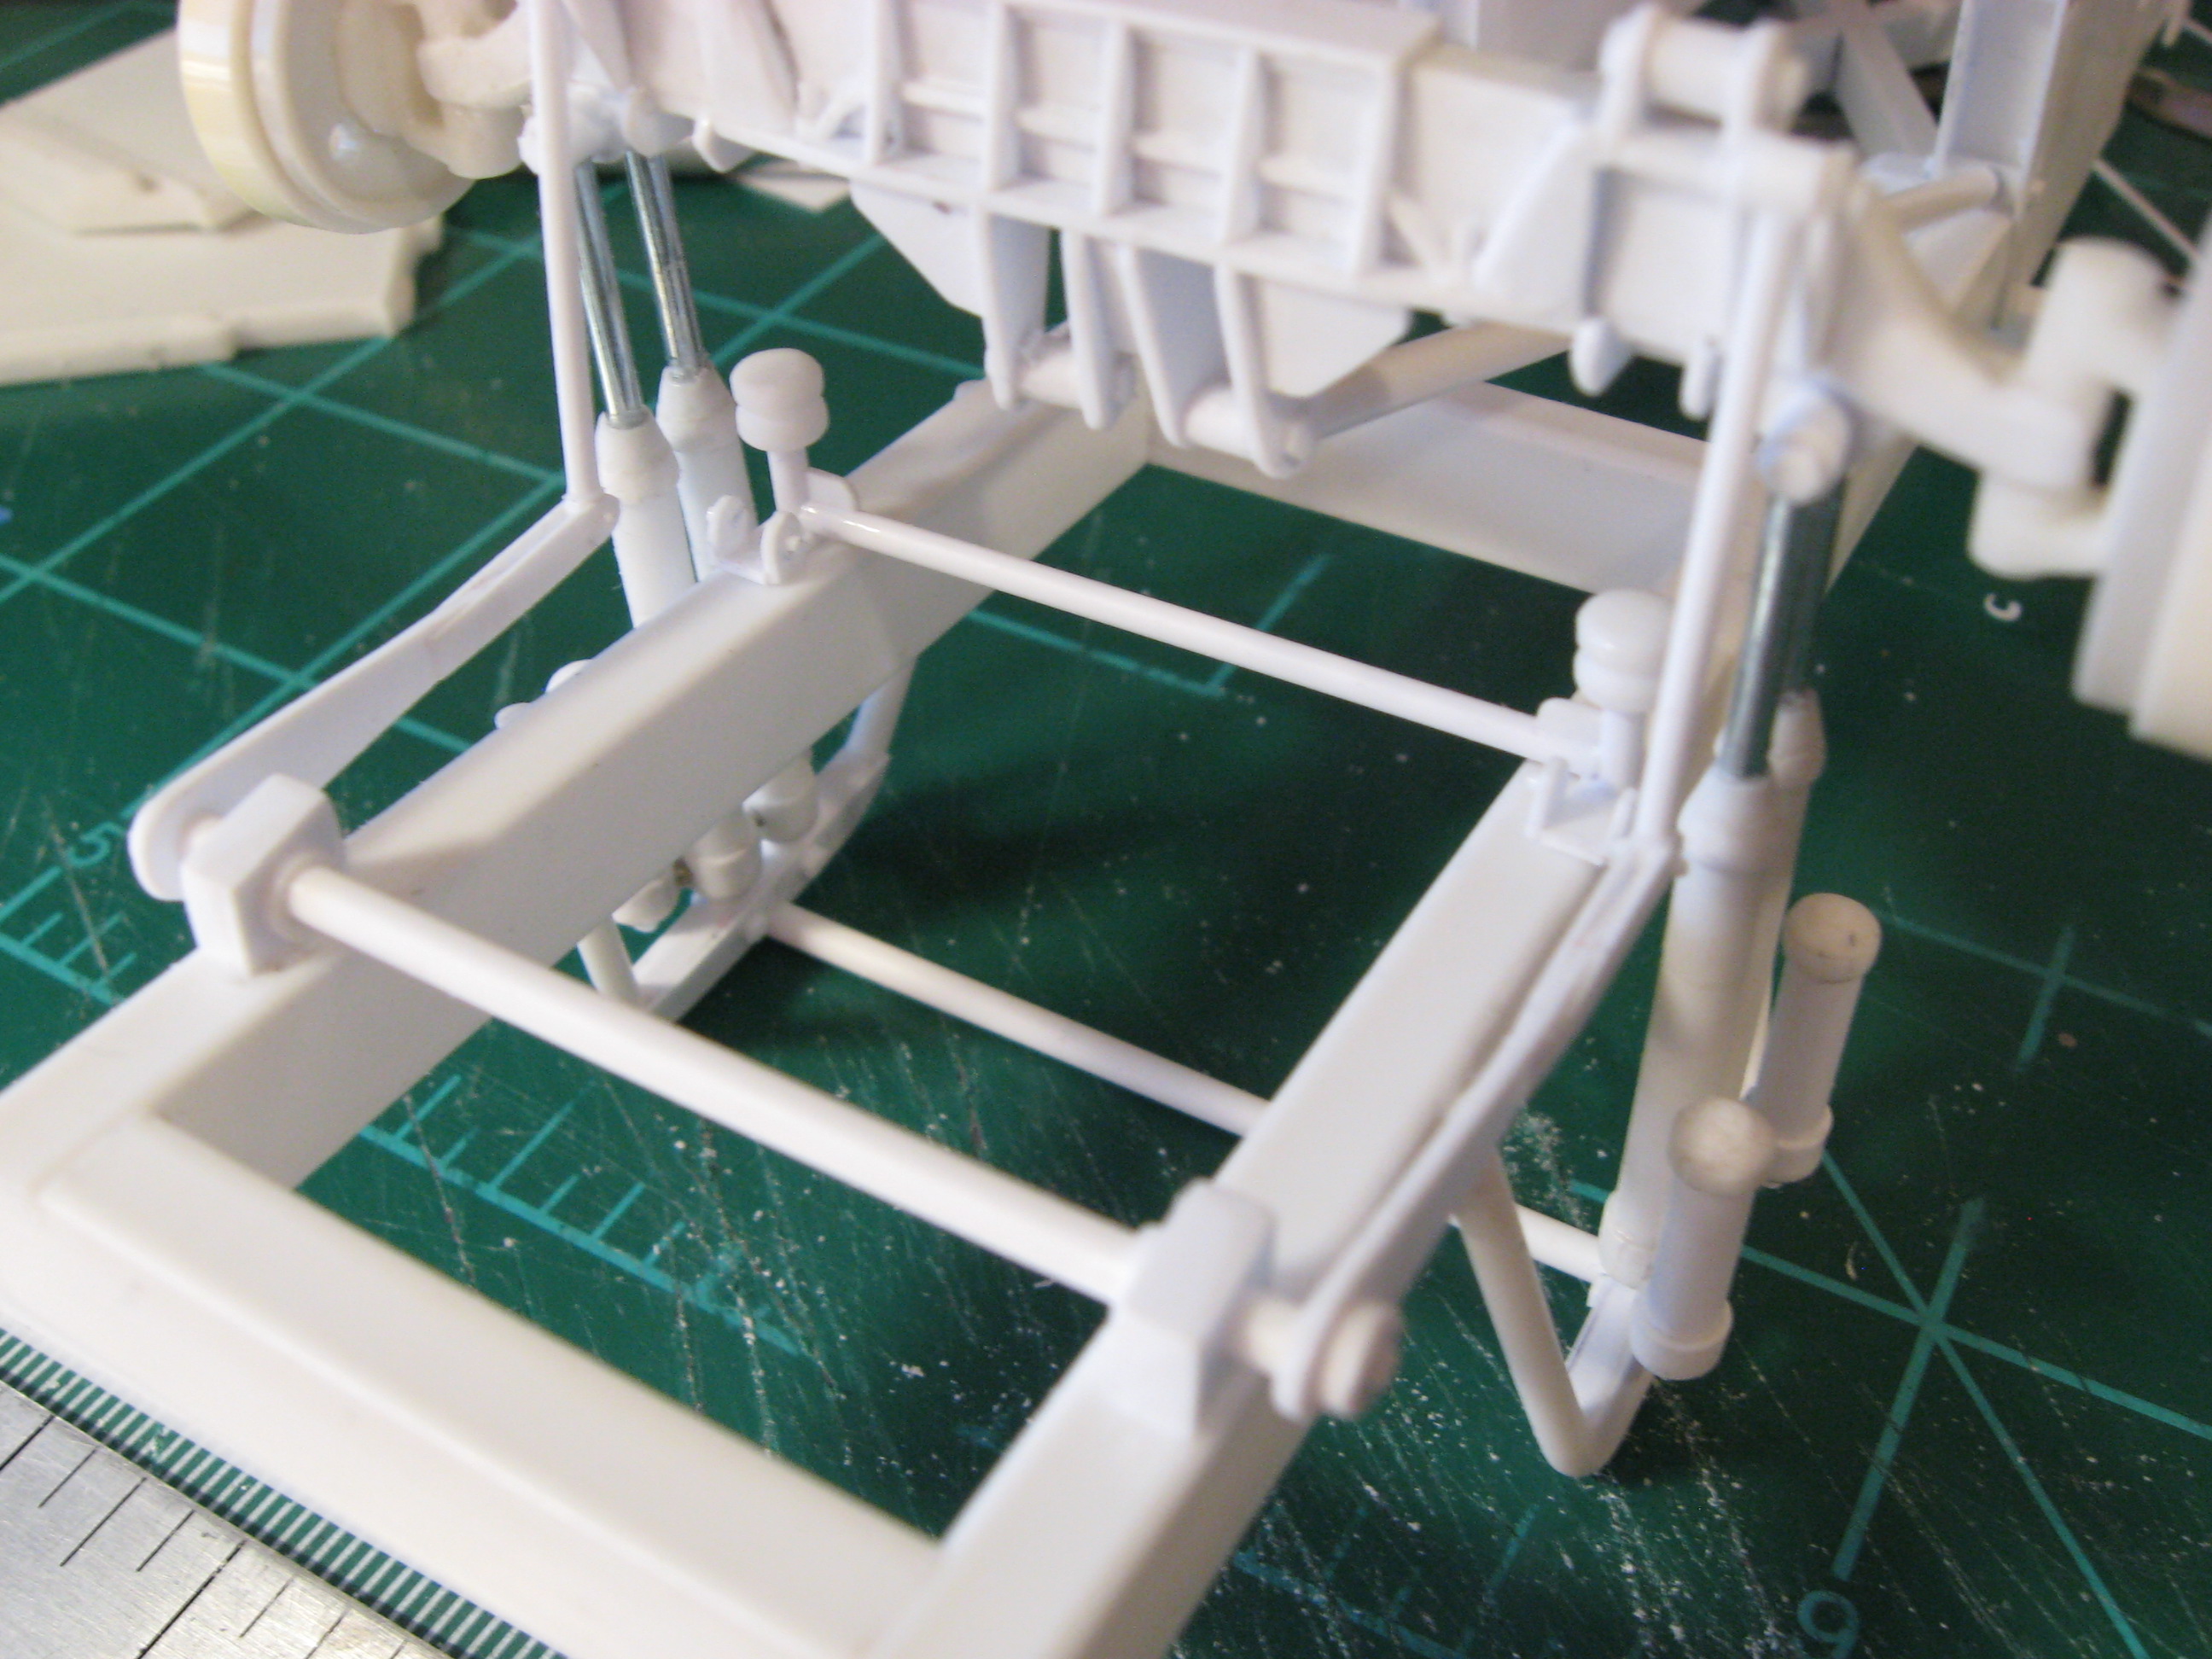
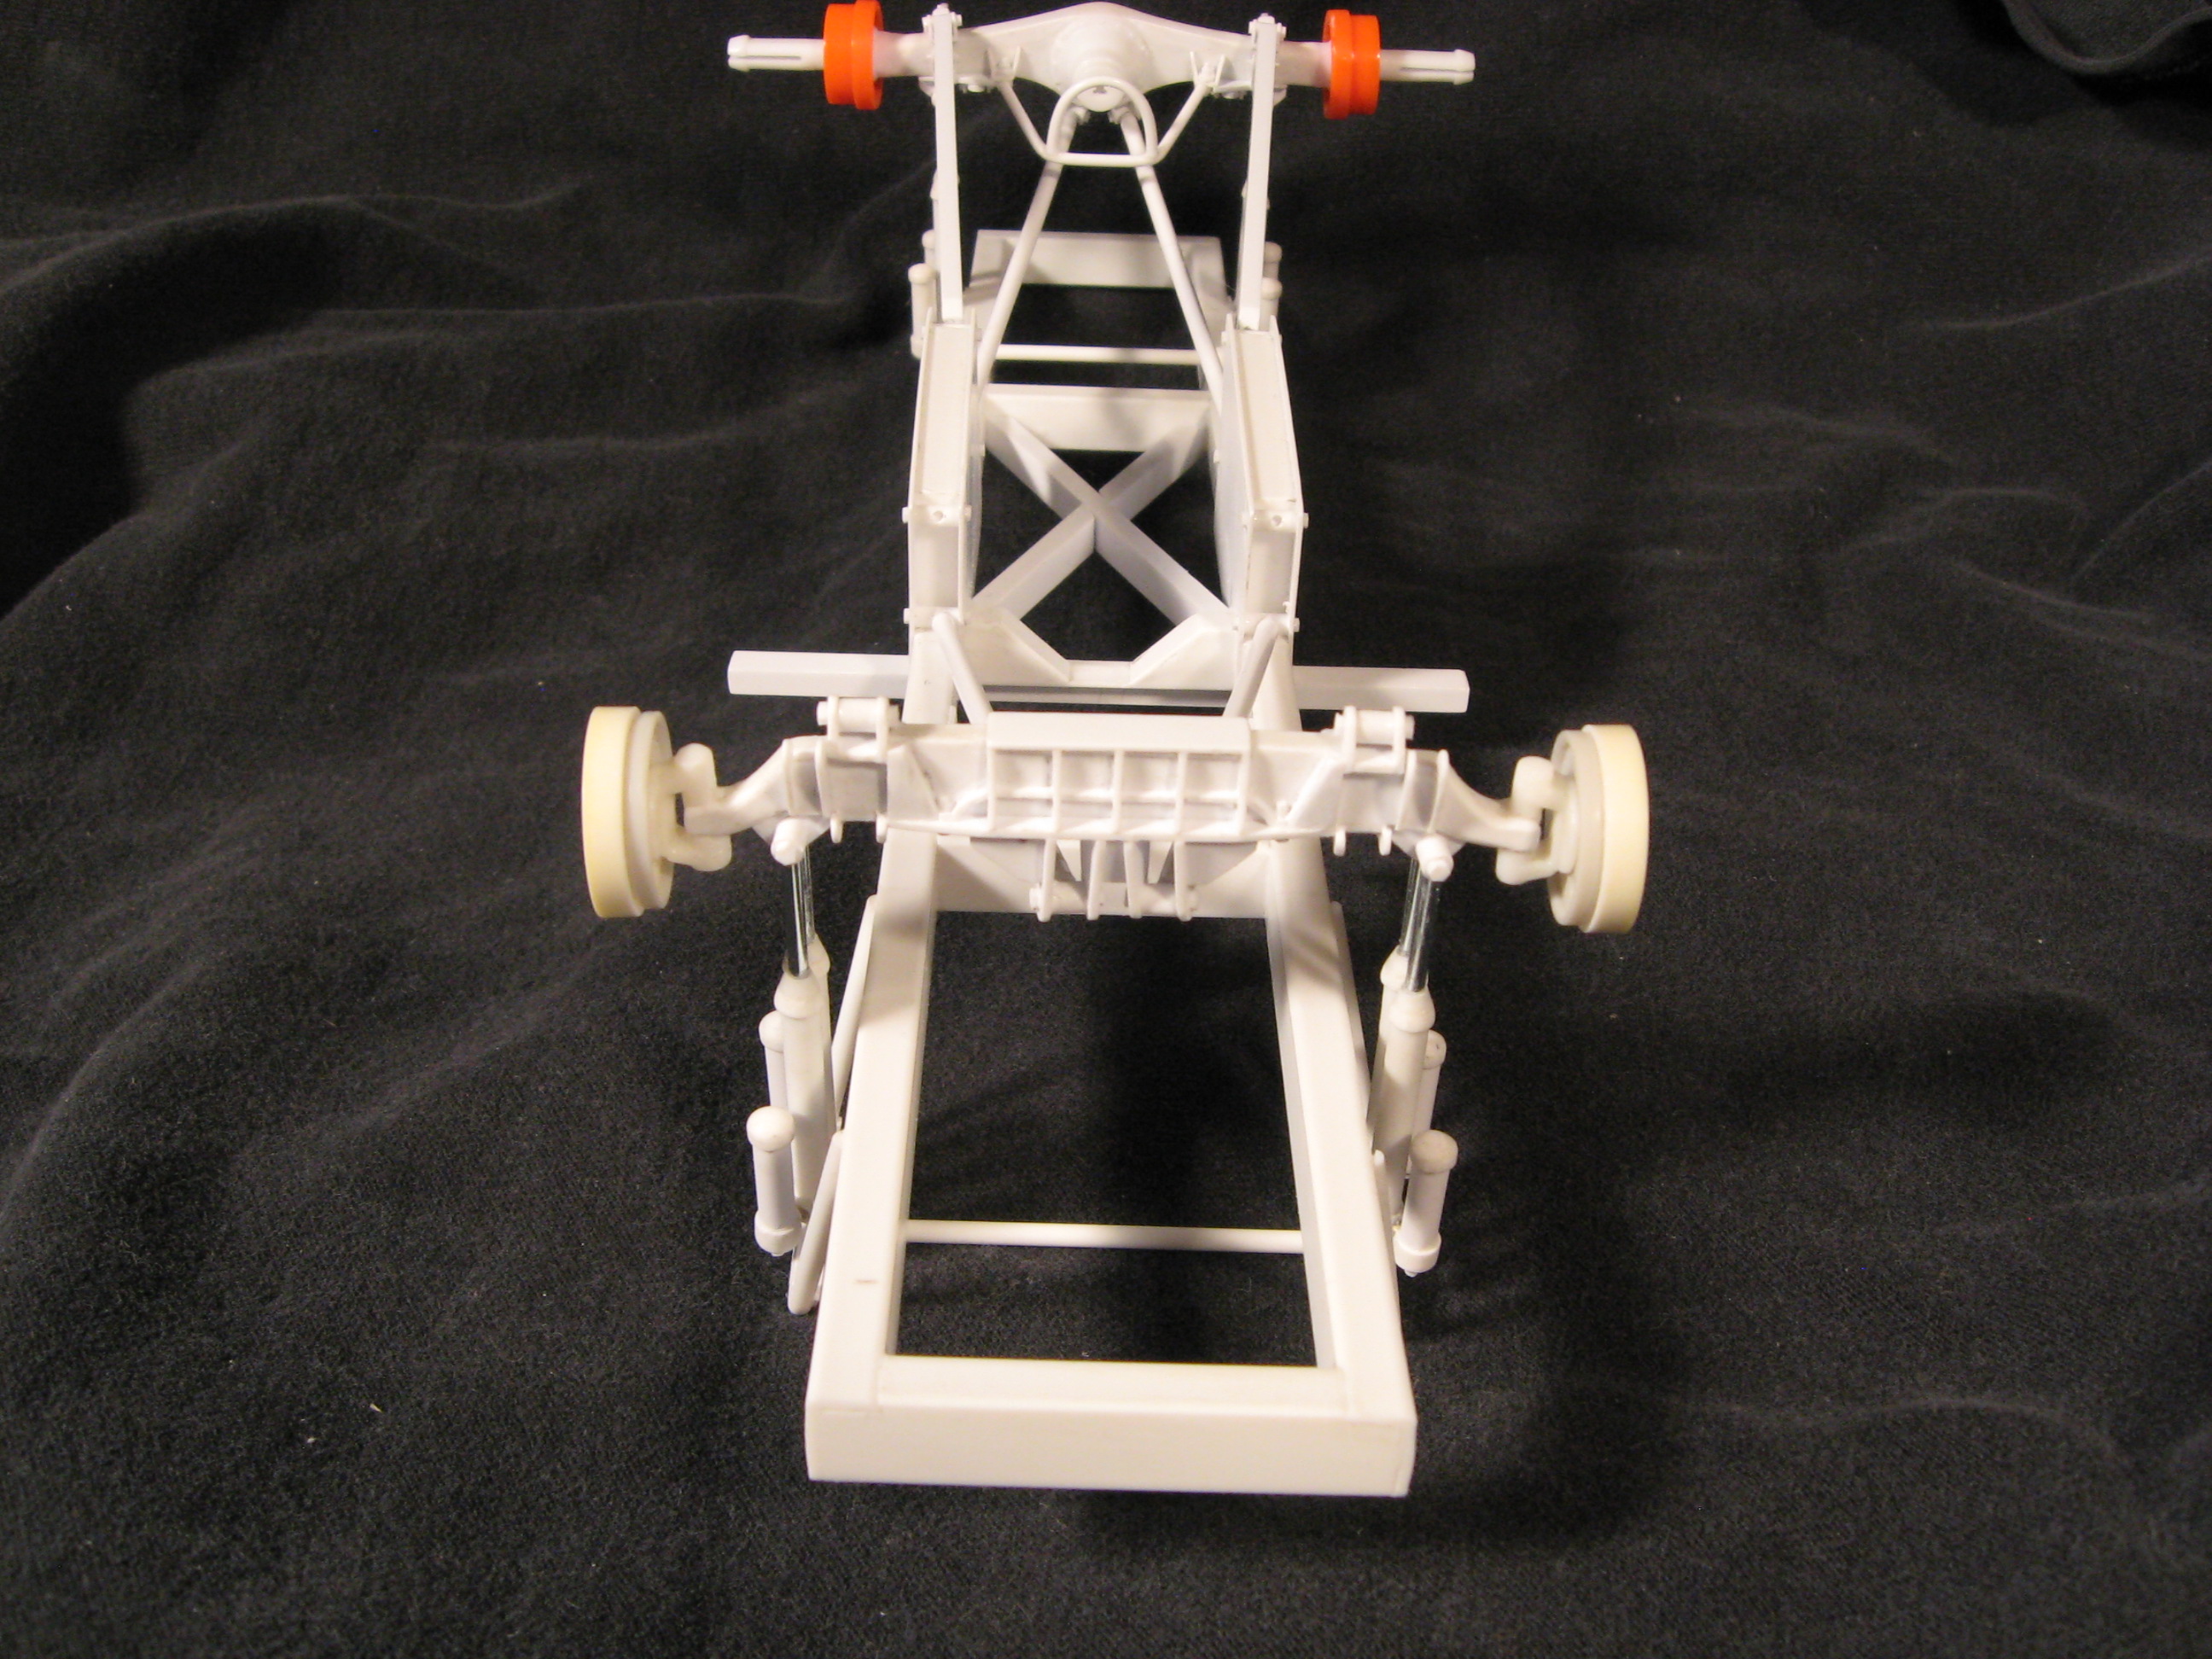
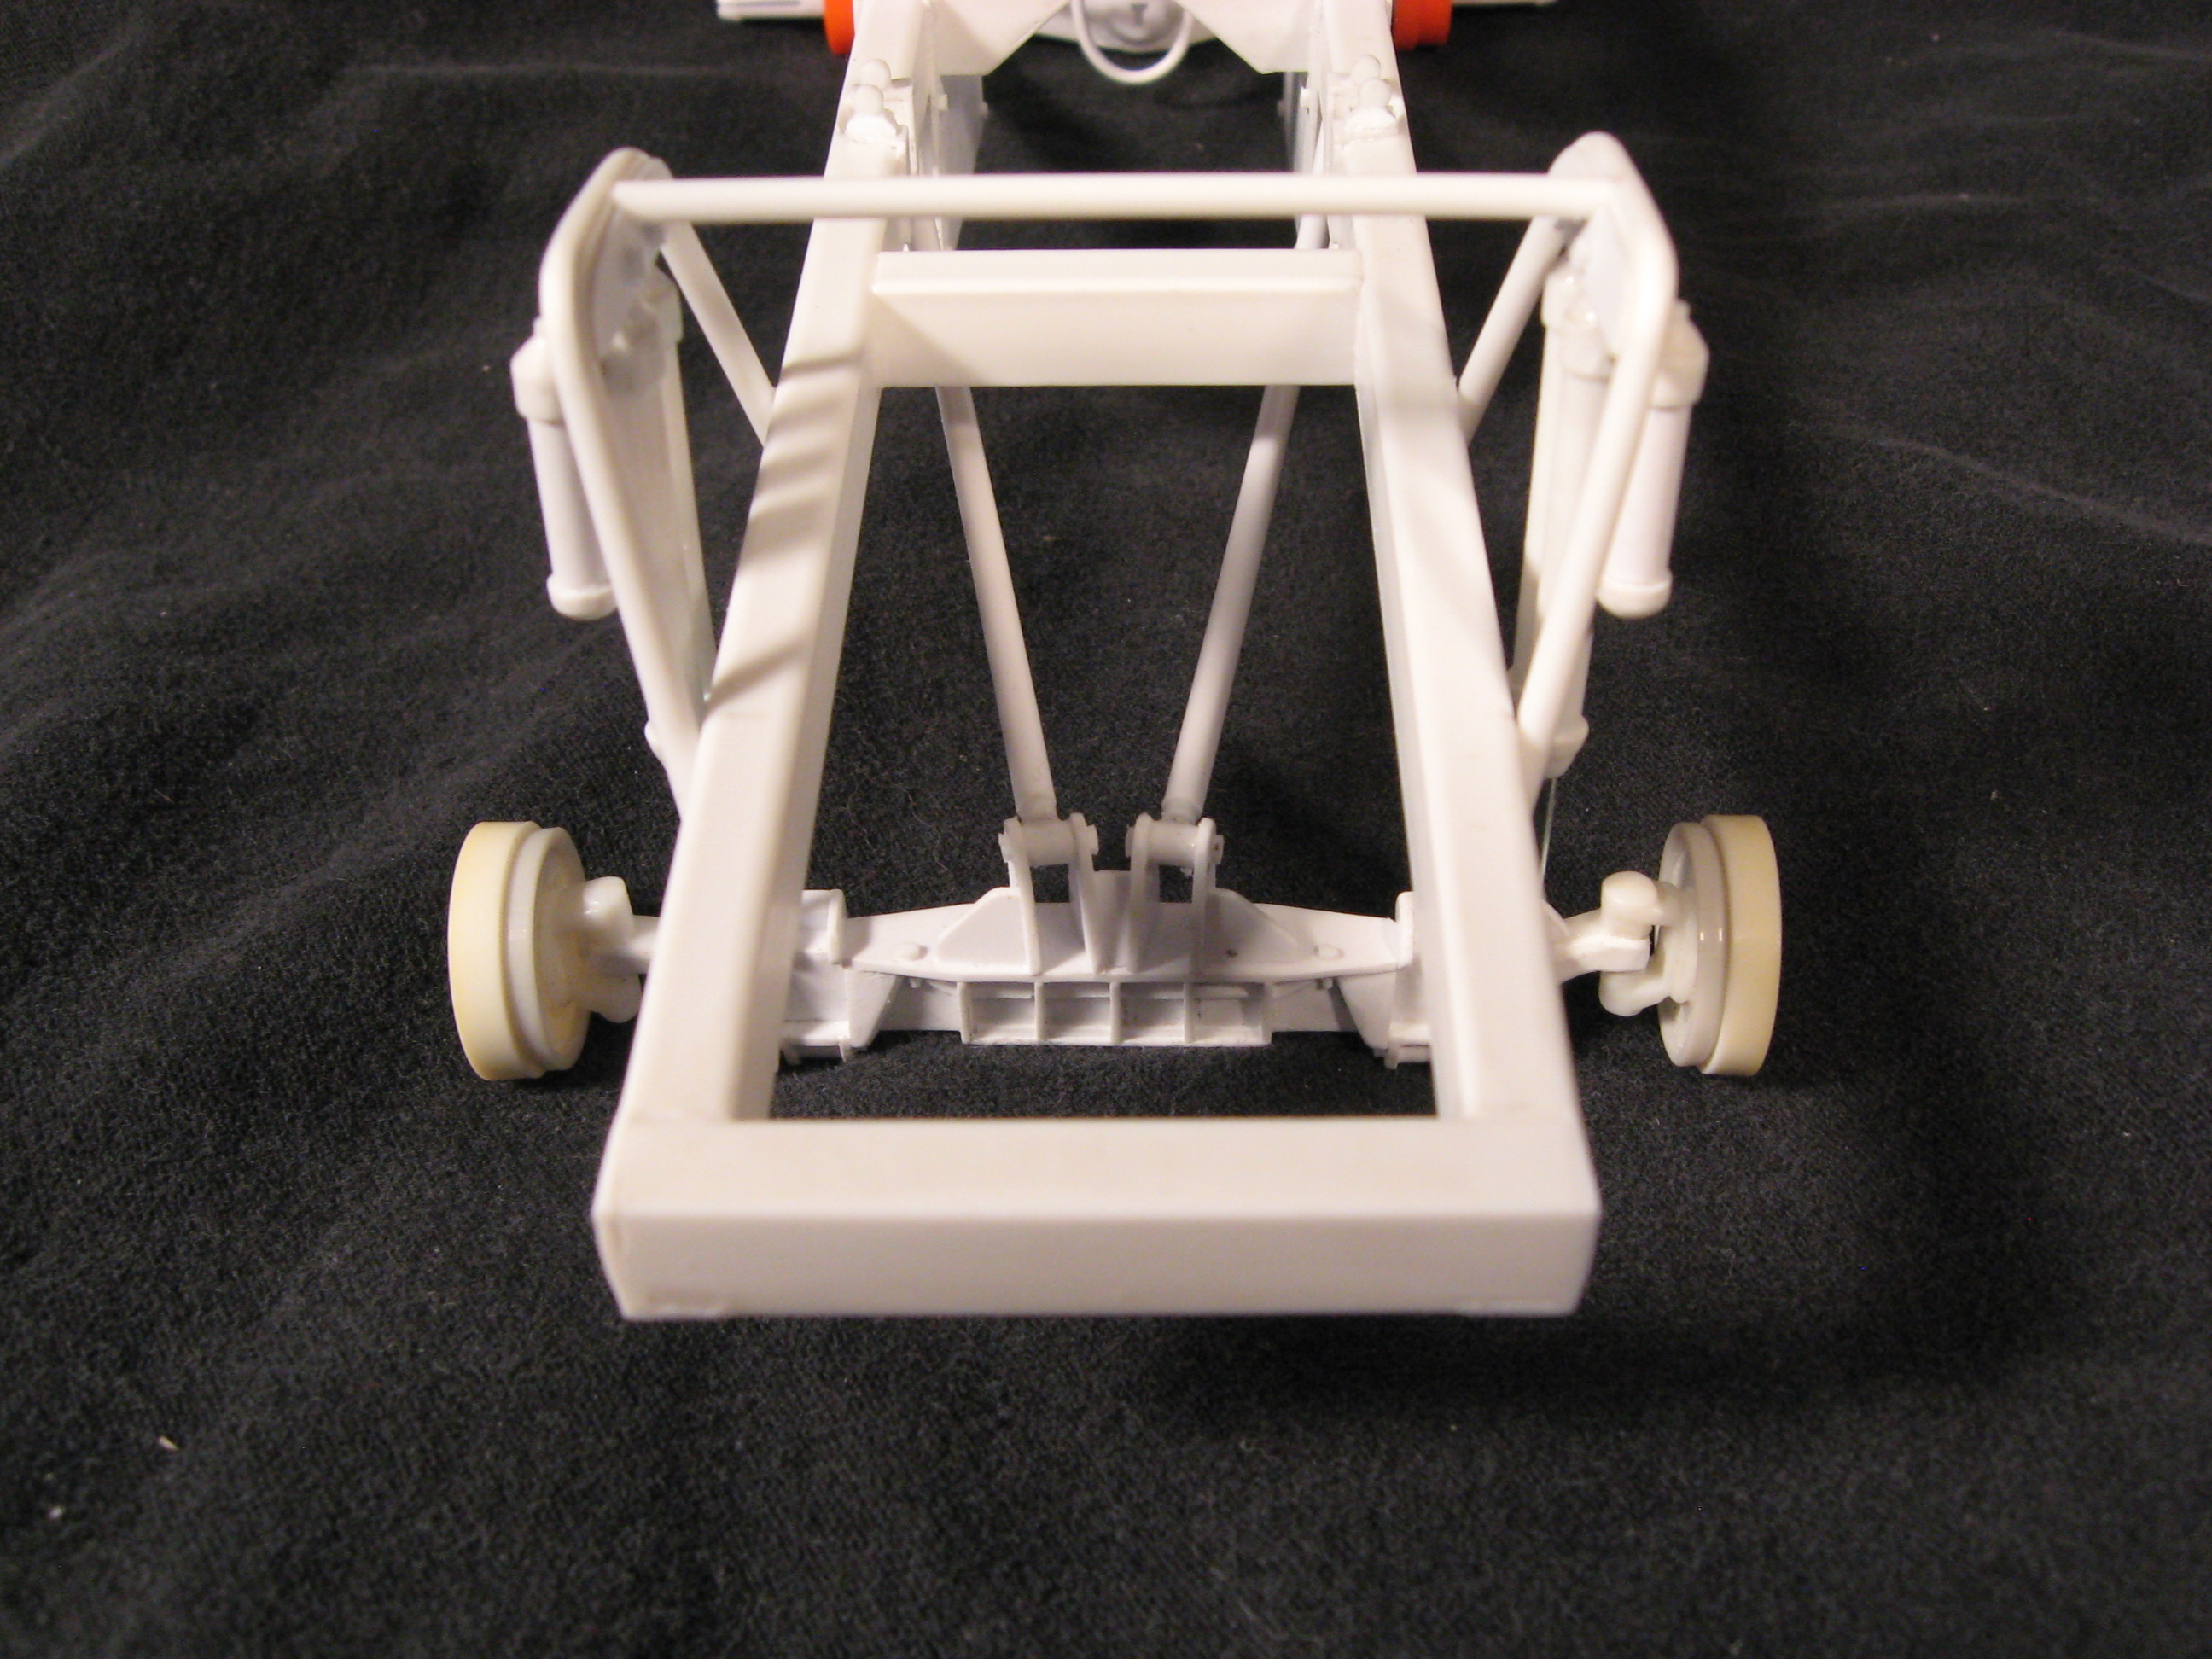
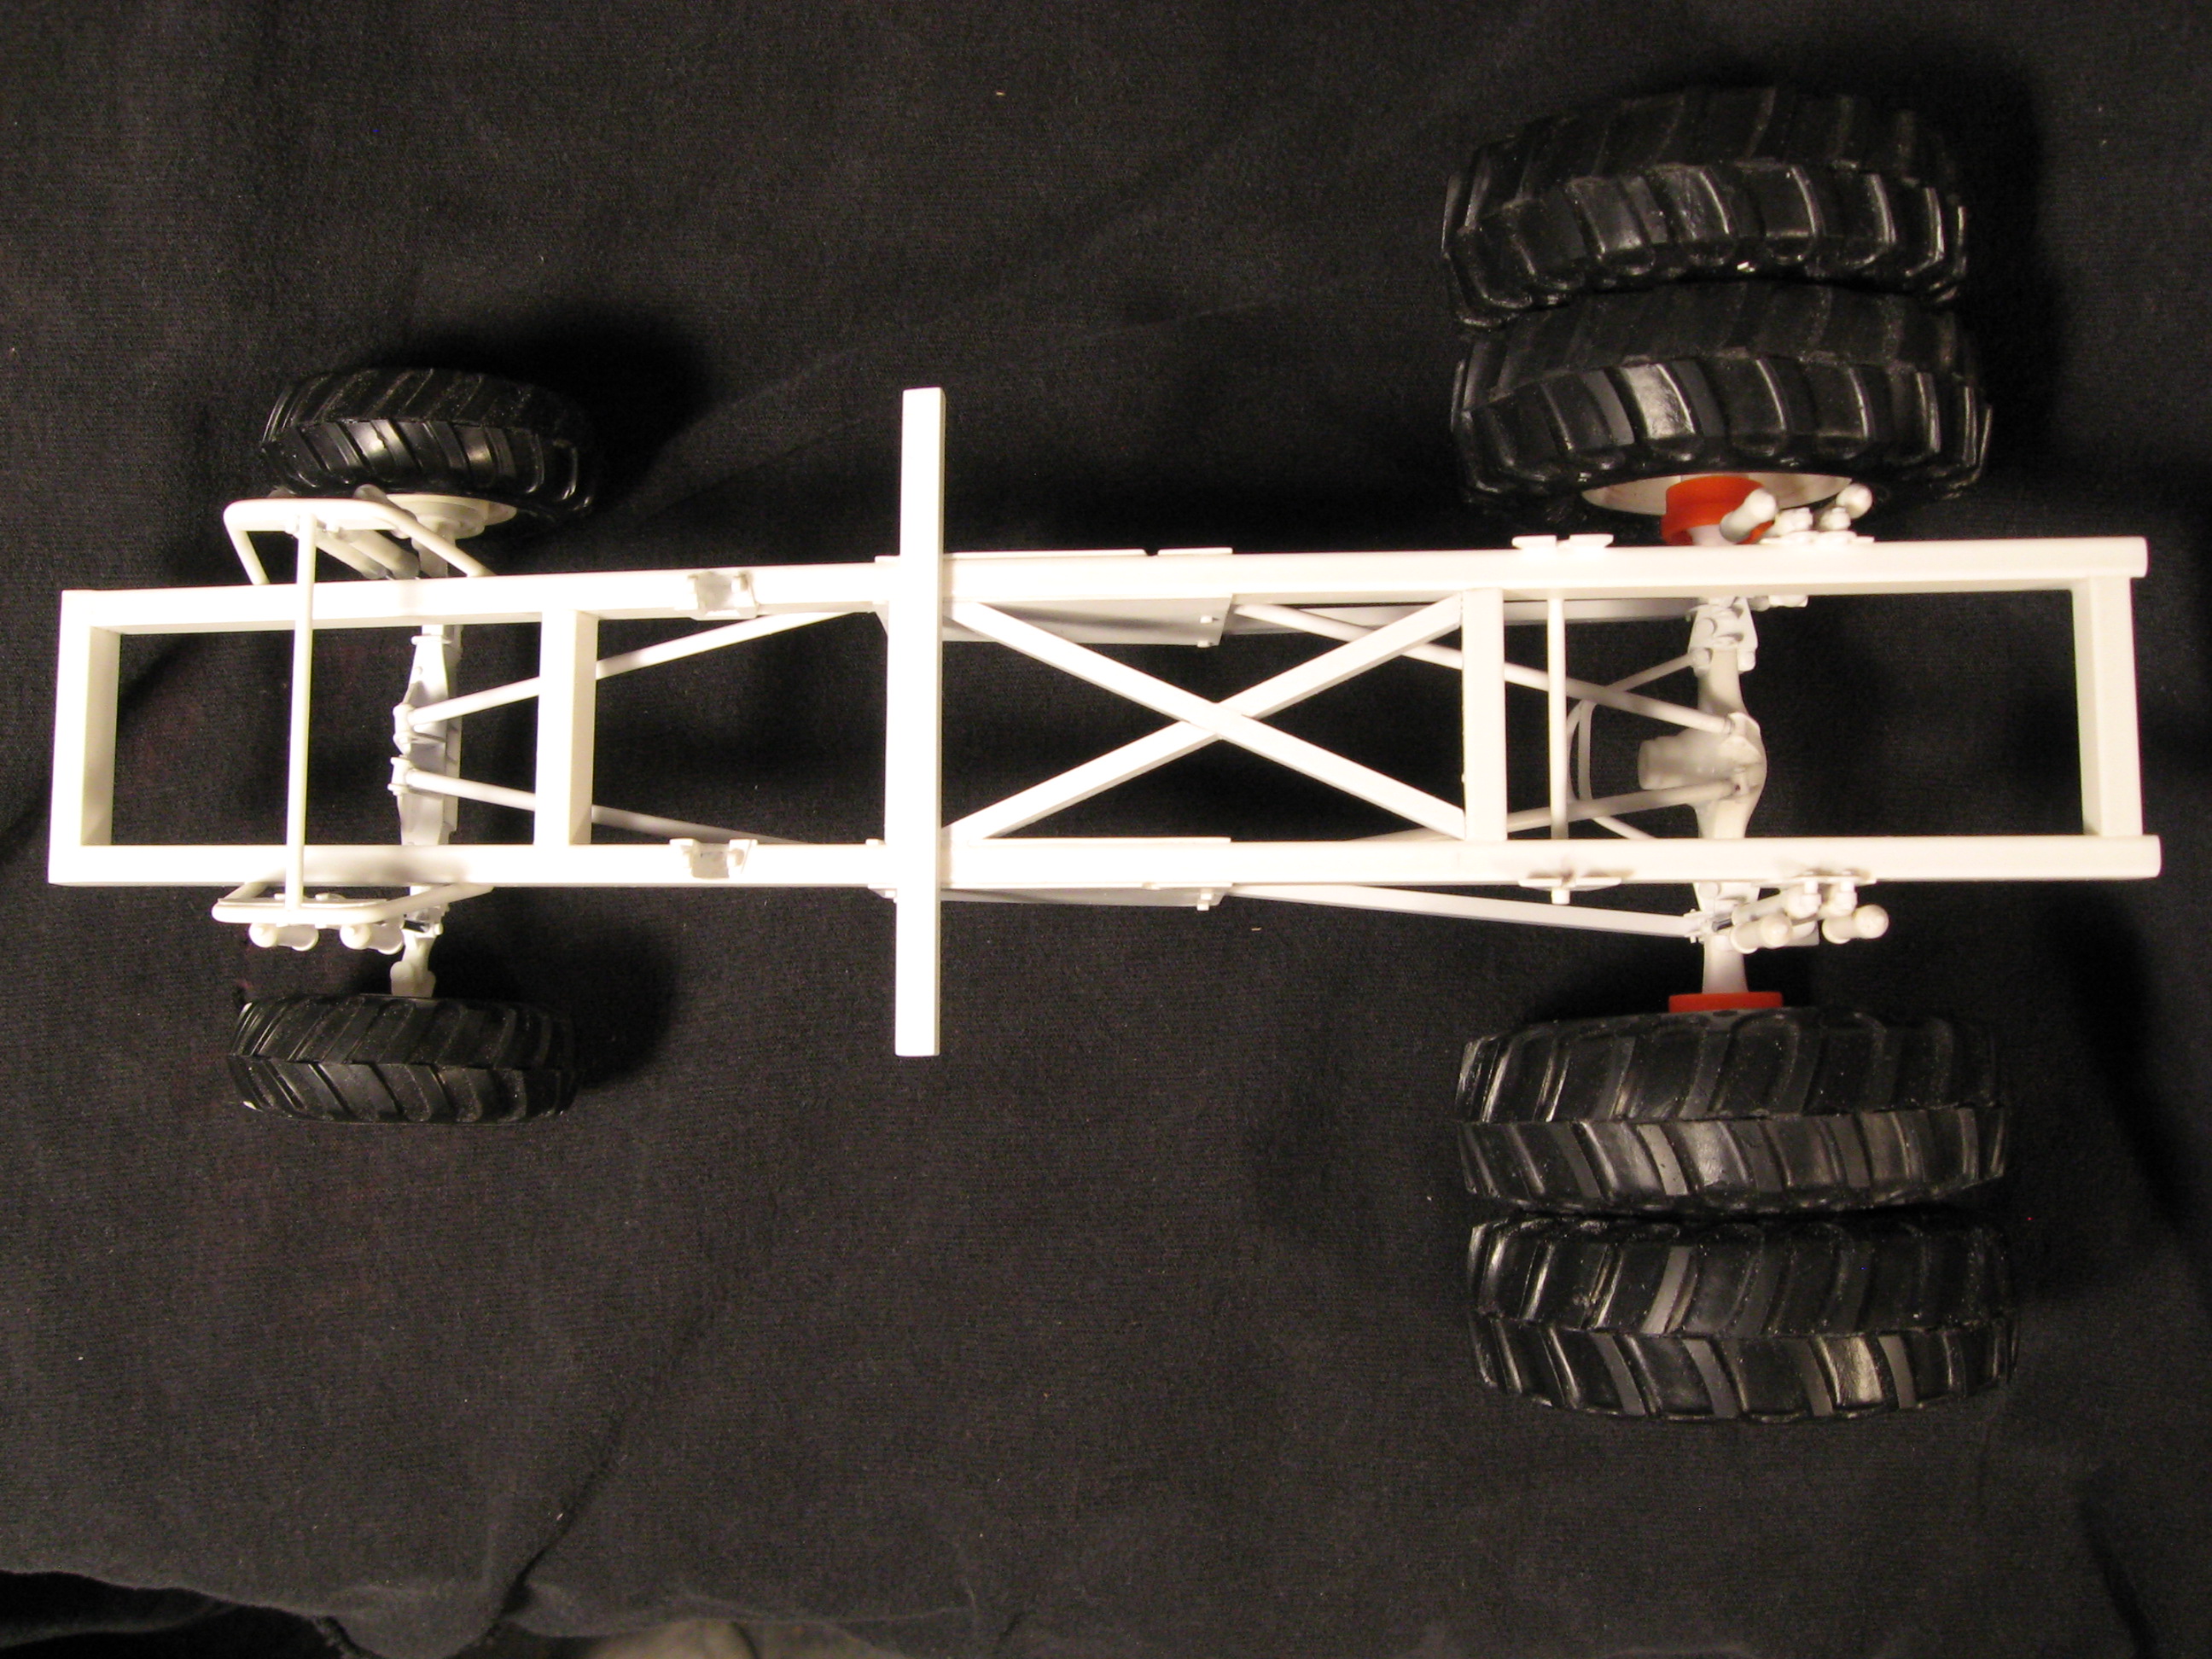
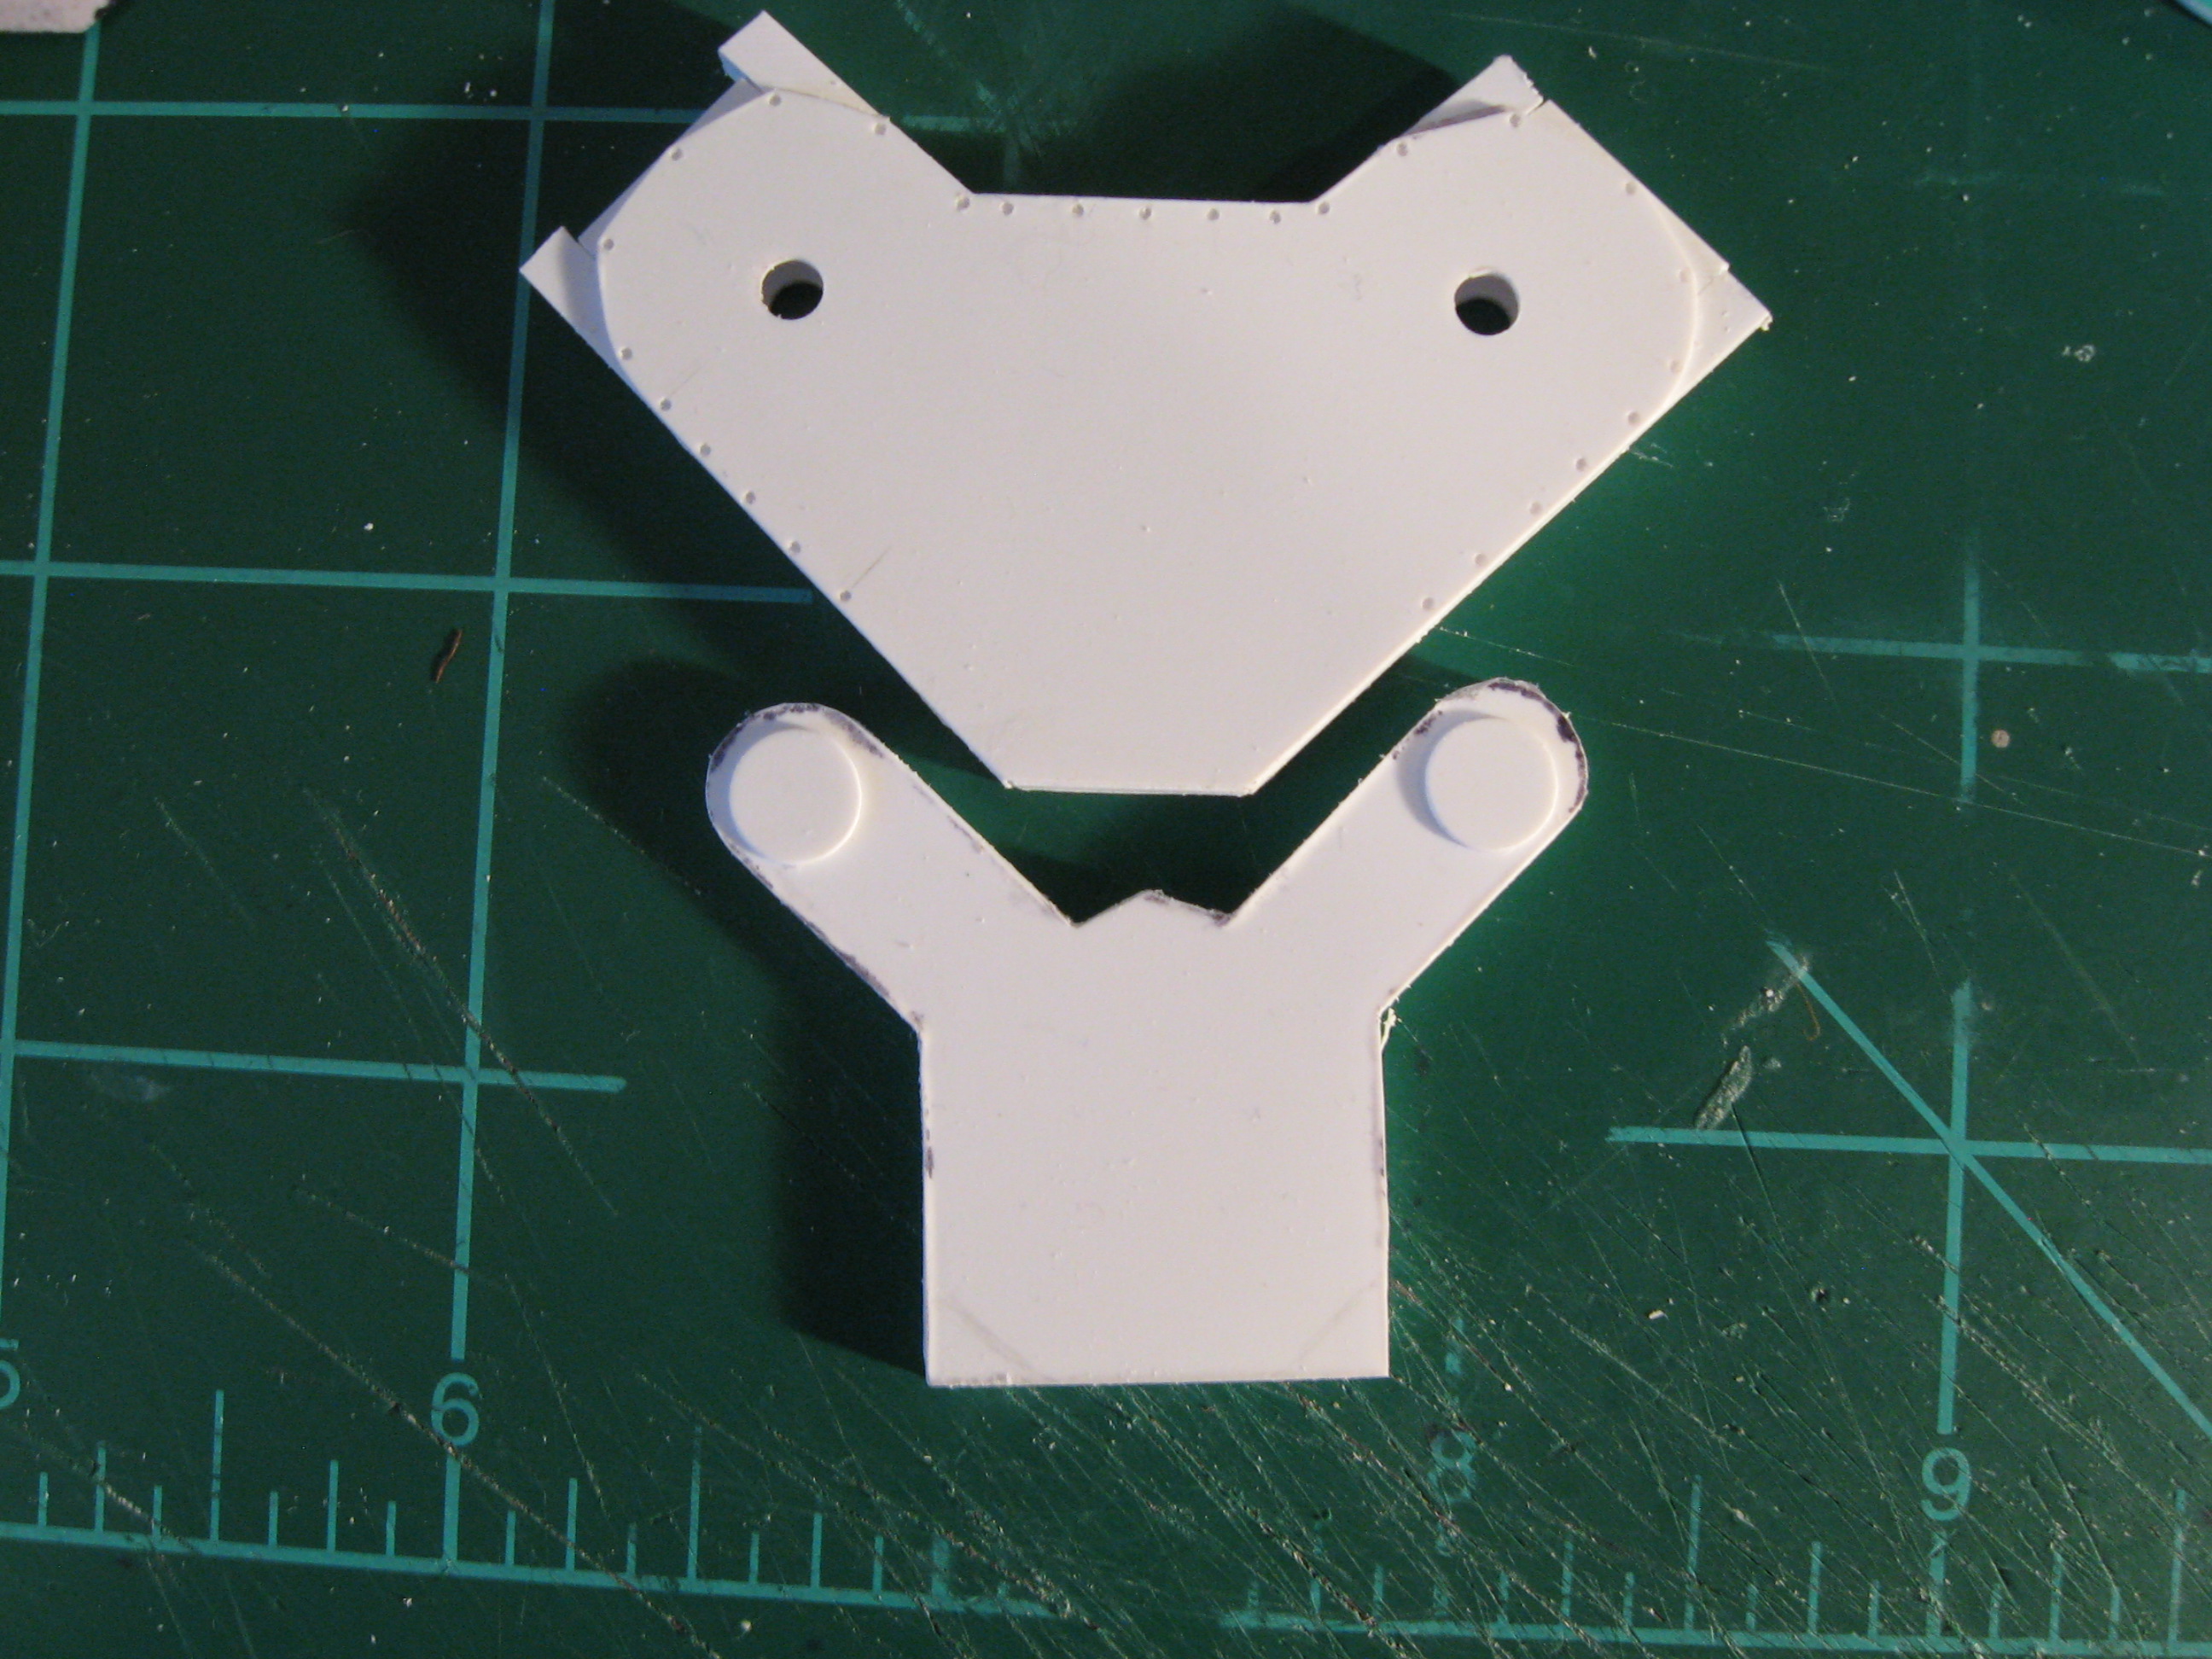
Thanks for the support everyone and I will do a how to on the filters after I have a finished example. I have been working my way forward to get the front axle mounted but I needed the engine, gearbox, and trans established to dictate the placement of the shock towers. I ran out of tube for the lower radius rods but the axle is established and it is finally a rolling/static chassis. I have the bump stops and stabilizers to build yet but a nice milestone has been reached. Thanks for looking. Steve
-
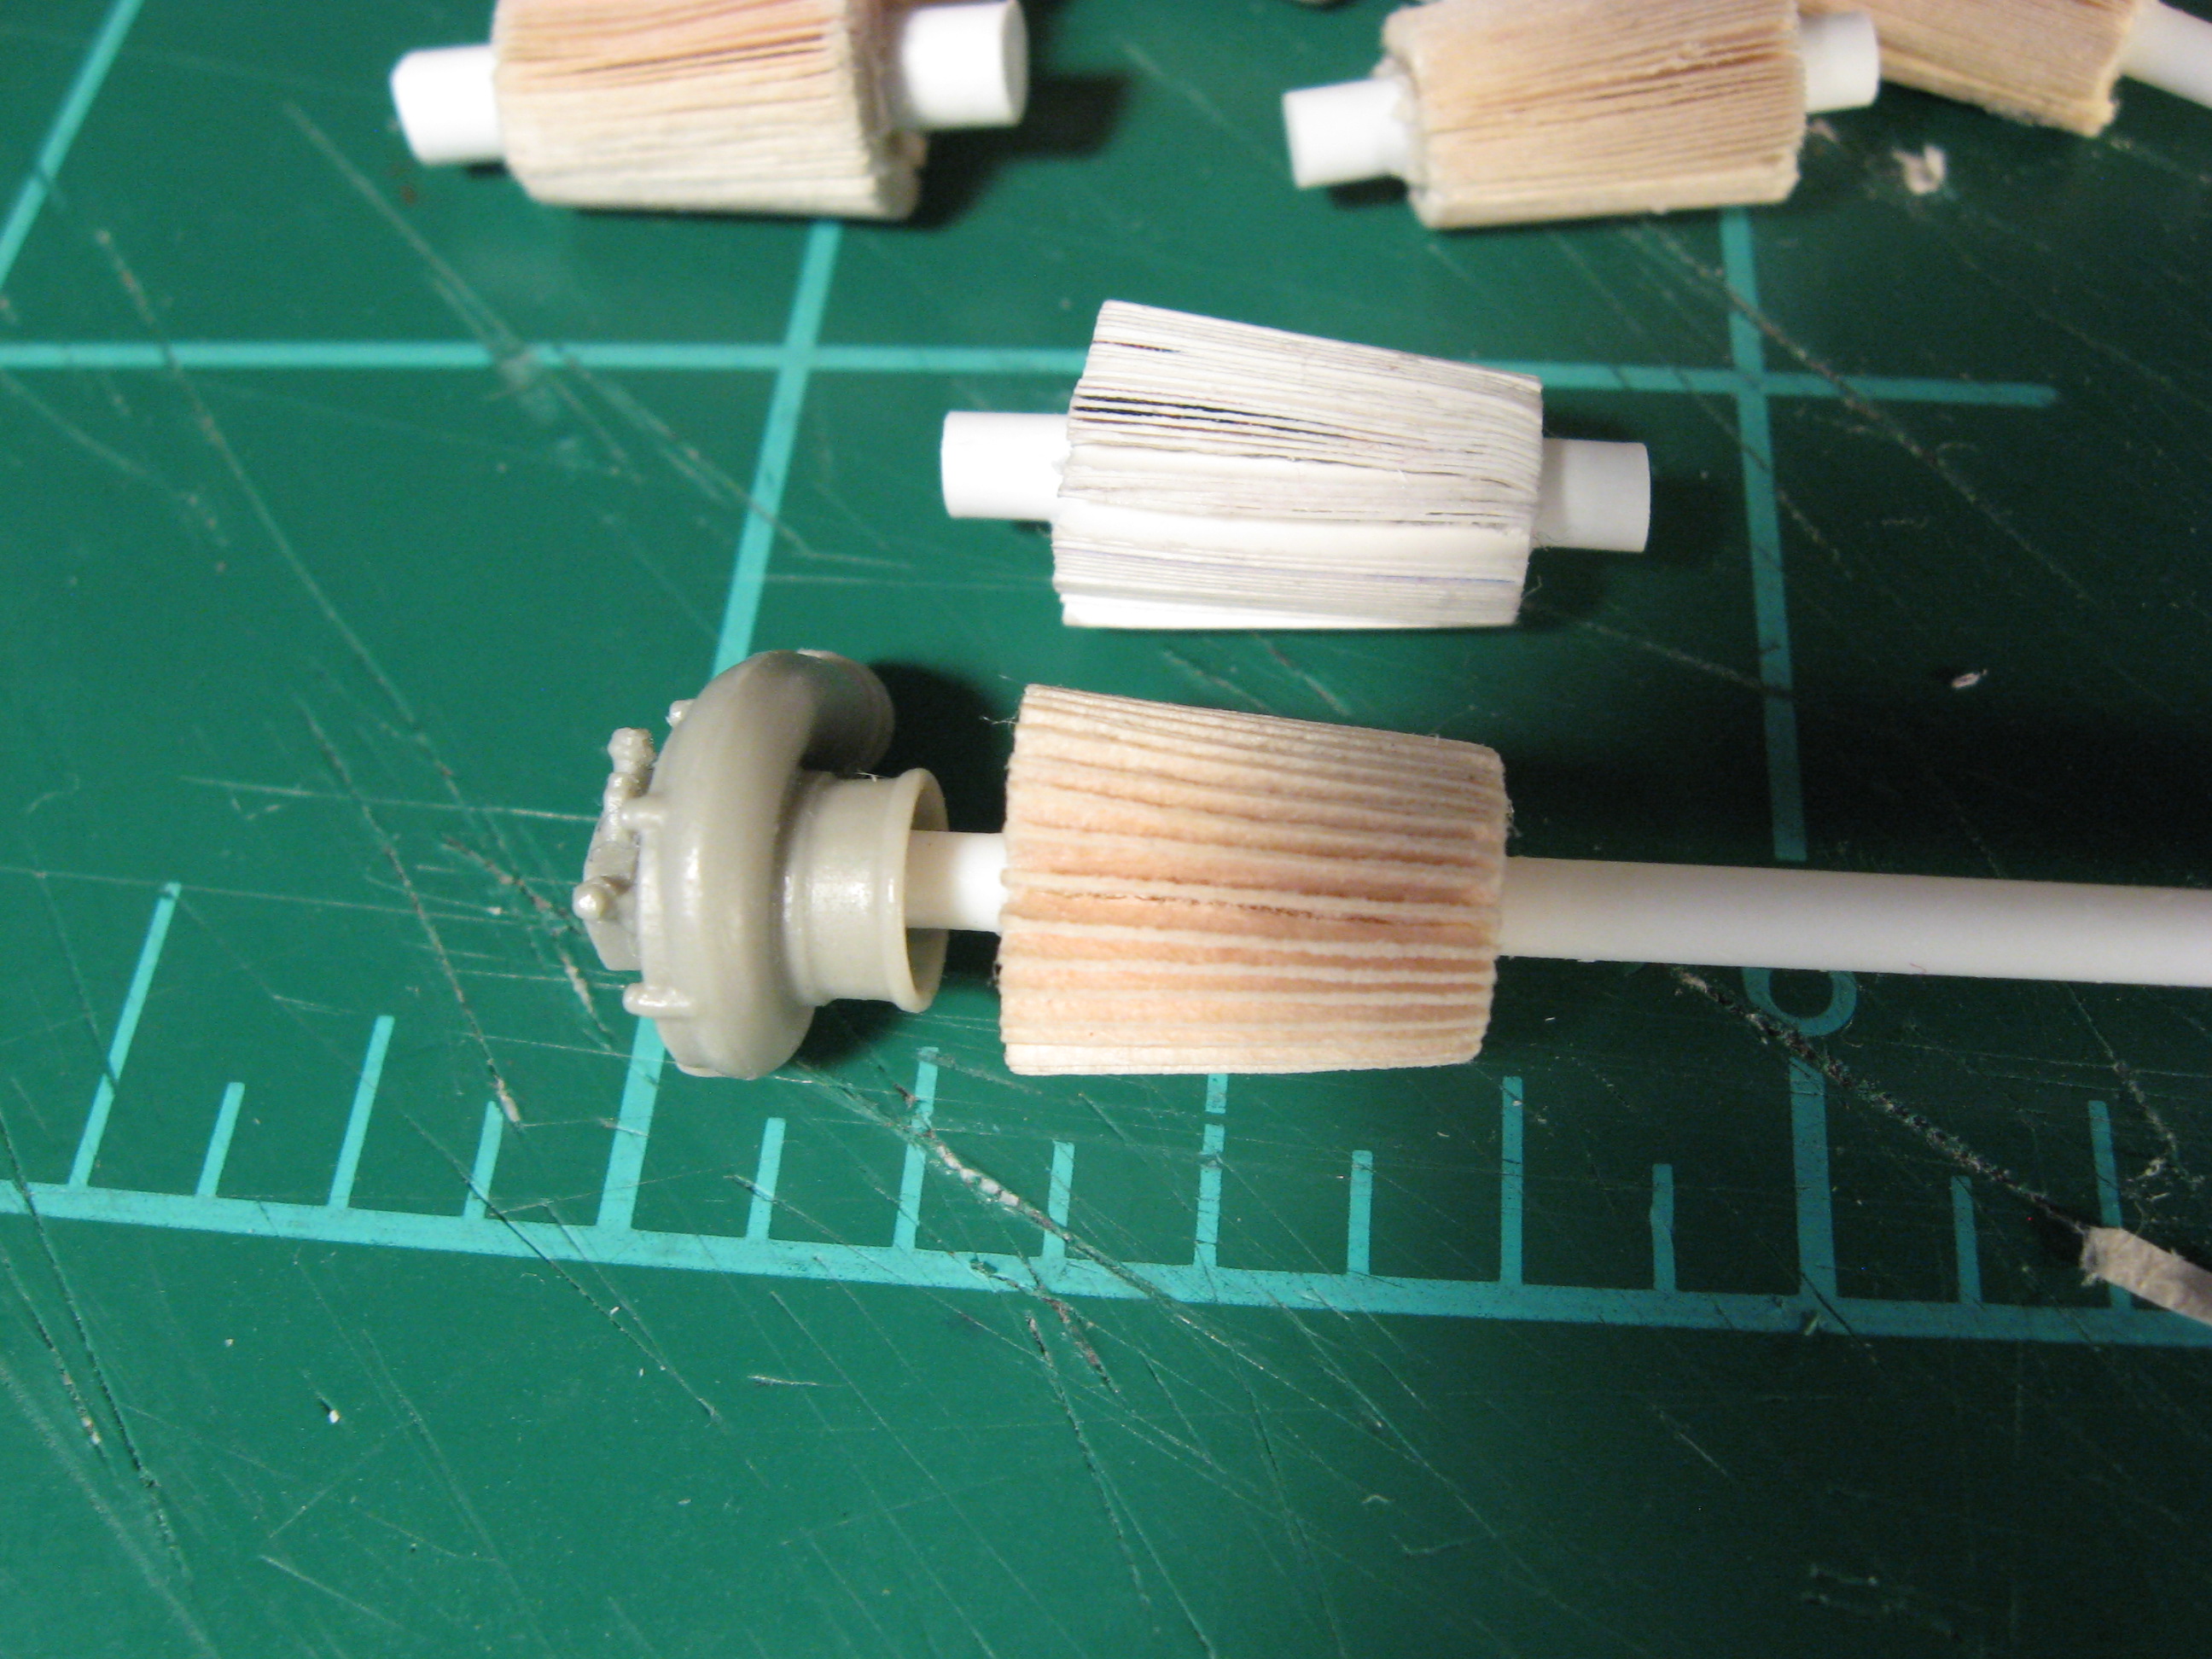
Thanks everyone. I have some in progress updates. I can't say this was one of the more enjoyable parts of this build. The headers- They are a bit rough yet and need some cleanup but I will be happy to move past them. So I have been thinking about the conical air filters and the best way to replicate them. The only thing I could find online were the Shapeways 3D printed parts but the dimensions were wrong. So I thought I would experiment with the spine of a book. I took a simple paperback book and removed the cover and sanded the spine down to the glue. I cut out a 3/8" section and gave it a wedge cut as close to the spine as possible and then superglued it to some rod styrene. I tried several, which are the top row but there just seemed to be too many pages. So I searched through hundreds of books to find thicker pages. This is the lighter single filter in the middle. It was very hard to cut and when wrapped on the rod it had uneven filter element spacing. So I watered down some wood glue and brushed it in the spine of every other page making the first attempt 200 page book now 100 pages. This is the bottom filter. I think there is some promise here. I will keep messing with it but I think it now has the look and I hope I can make 4 that look alike. Thanks for the support. Steve
-
Axl Rose? I just read he's their new singer. If history is any indicator this should be a trainwreck.
-
AC/DC.
-
These courses were offered to me in high school and I took them. I also could have easily been a certified welder, I learned how to rebuild an engine,cook ,sew,type,invest,bank,shop, and play guitar in a school district that still to this day says they are underfunded. This was in addition to 6yrs of wood and metal shop but sadly the structure of education seems more important than the education itself. To stop teaching because you're underpaid isn't fair to the students and mabey these teachers are in the wrong profession. My 2 cents.
-
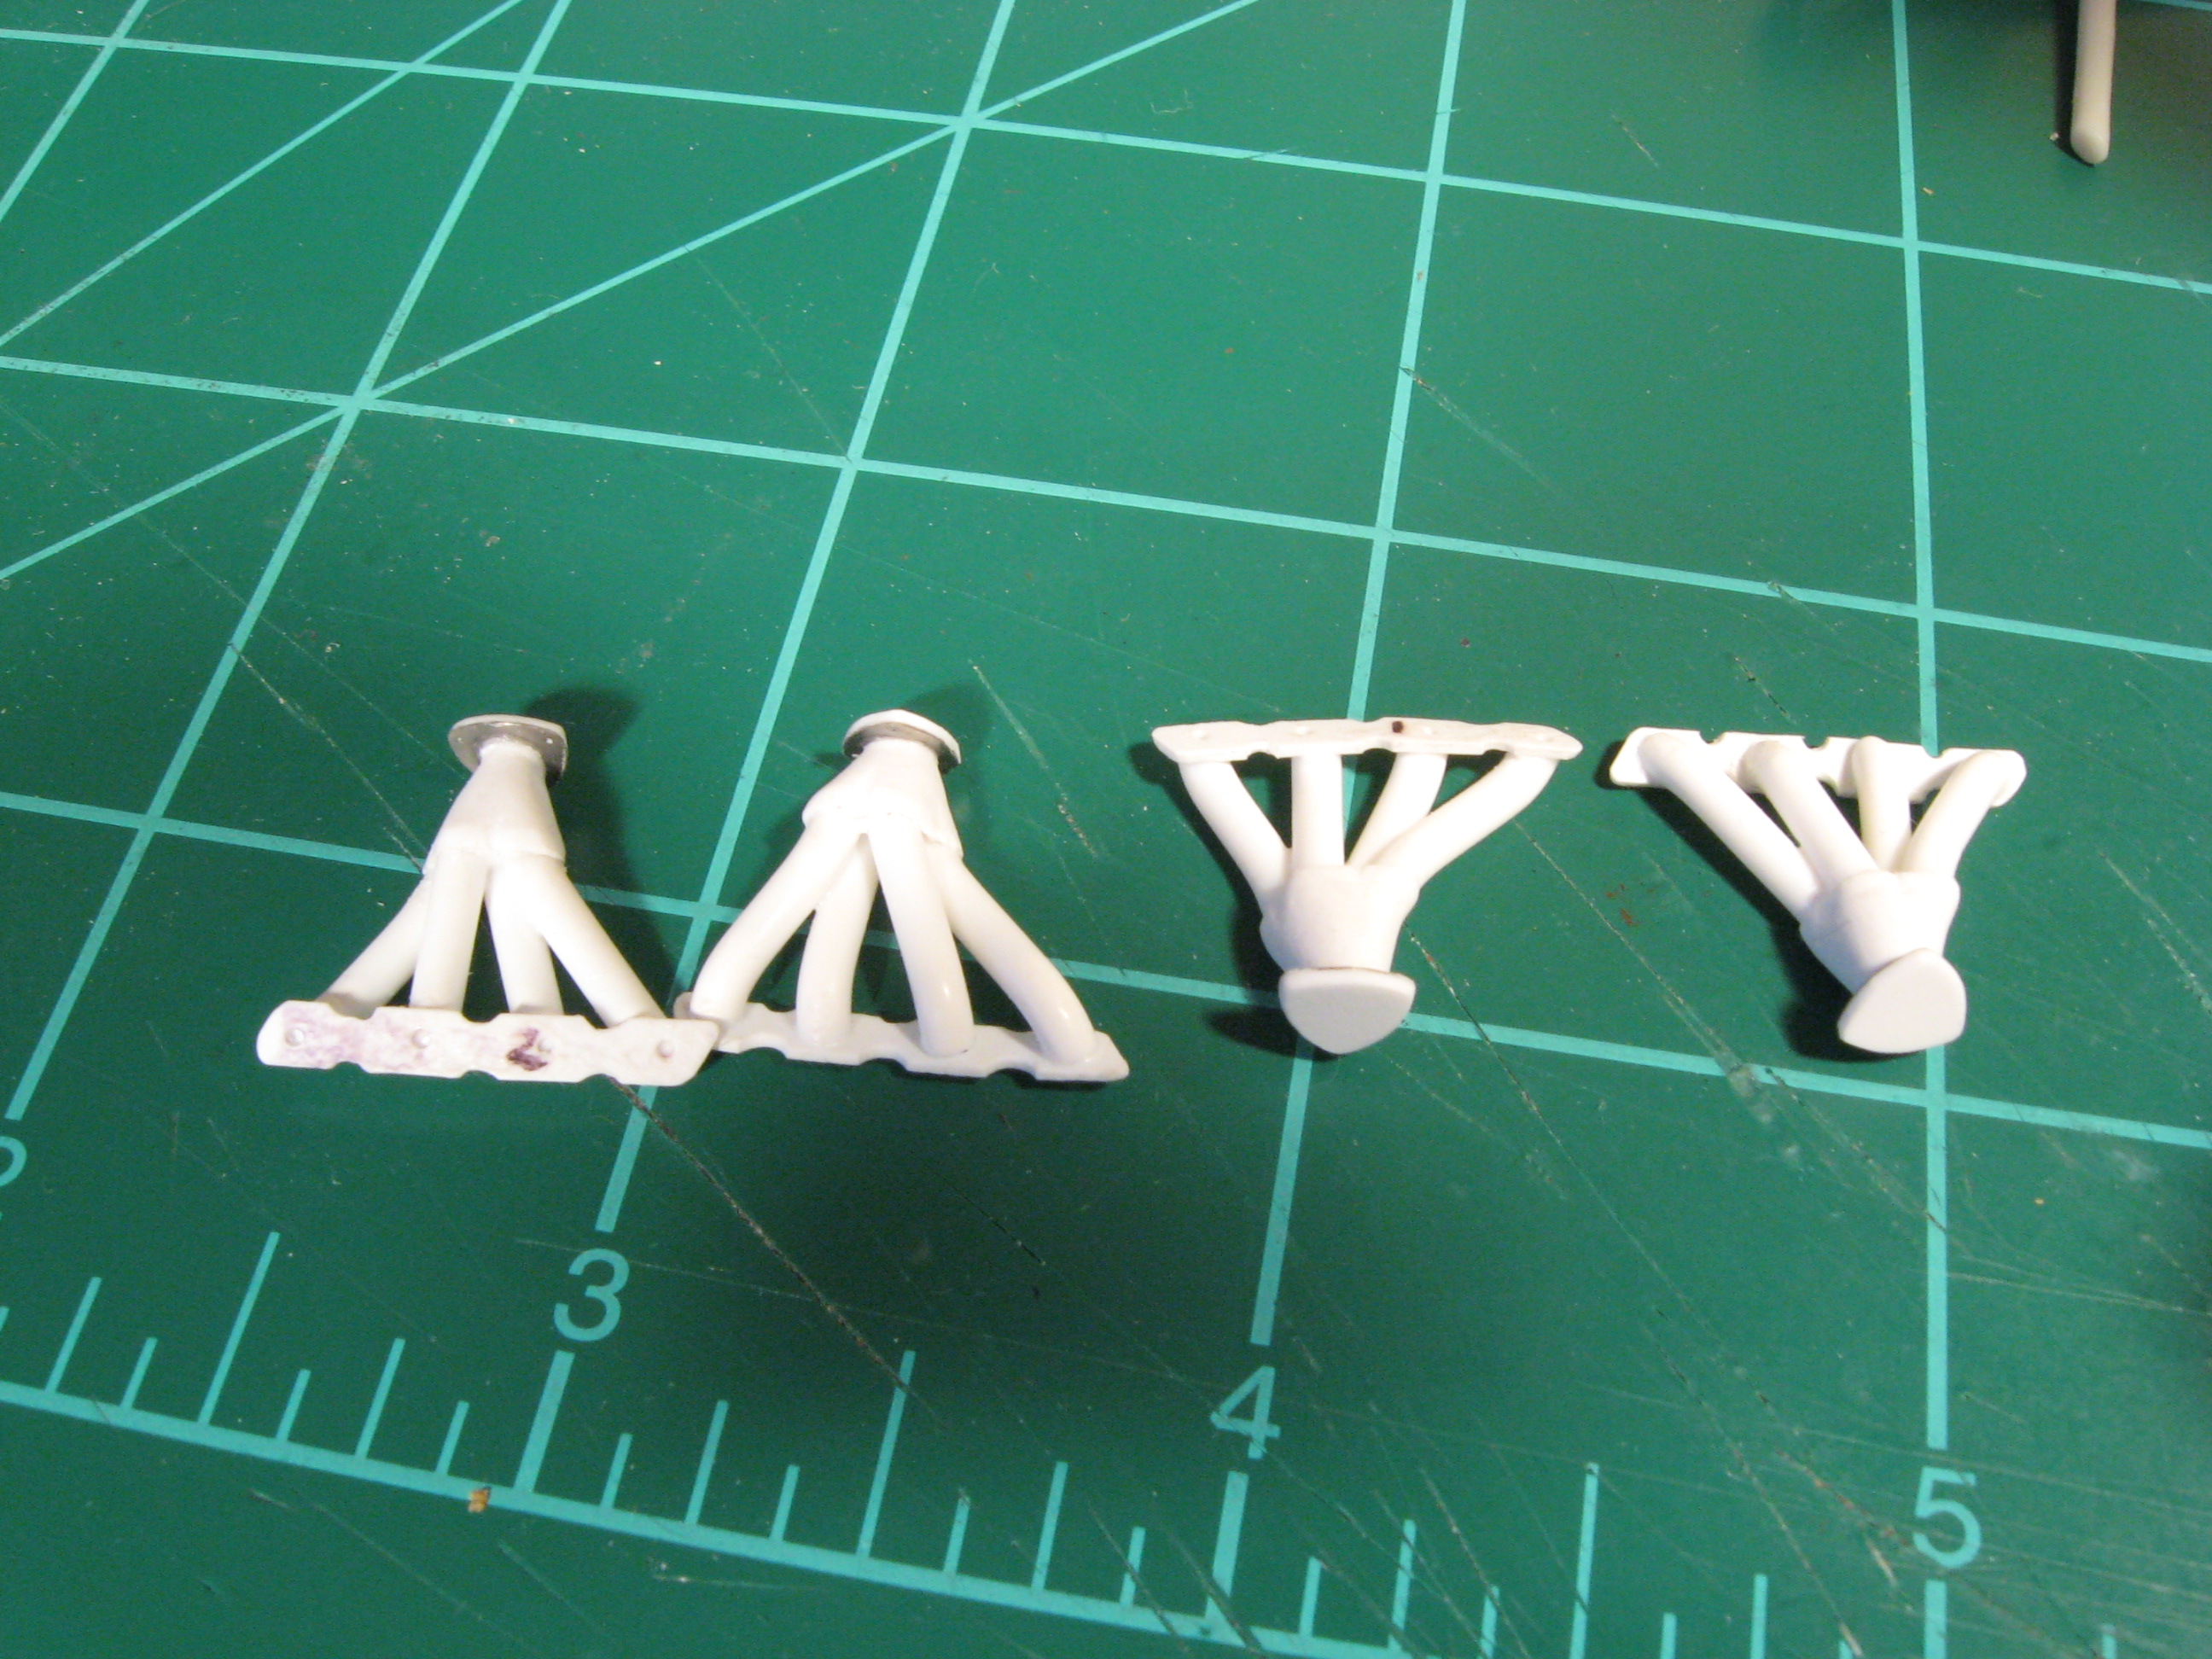
Thanks everyone. I've taken some PTO to rest my tired body and it is allowing me more bench time this week.So some more in progress photos. I drilled and pinned everything I could on the engines to make all the future fabrication and mockups easier. I think I might have a little more room between the blocks than it should. I will have to see how it all comes together. The air intakes are still in progress and I found some parts box carburetors that were a little bigger and had some better detail than the Camaros. And just for fun-the modified caddy compared to the Camaro. I'm so glad I put the extra work in the engines. They were a challenge but also fun to do and should greatly benefit the final look of this beast. Thanks for the support. Steve
-
I have managed to get the gearbox done and set up some spatial comparison pics. I think/hope it's going to work. Thanks for looking. Steve
-
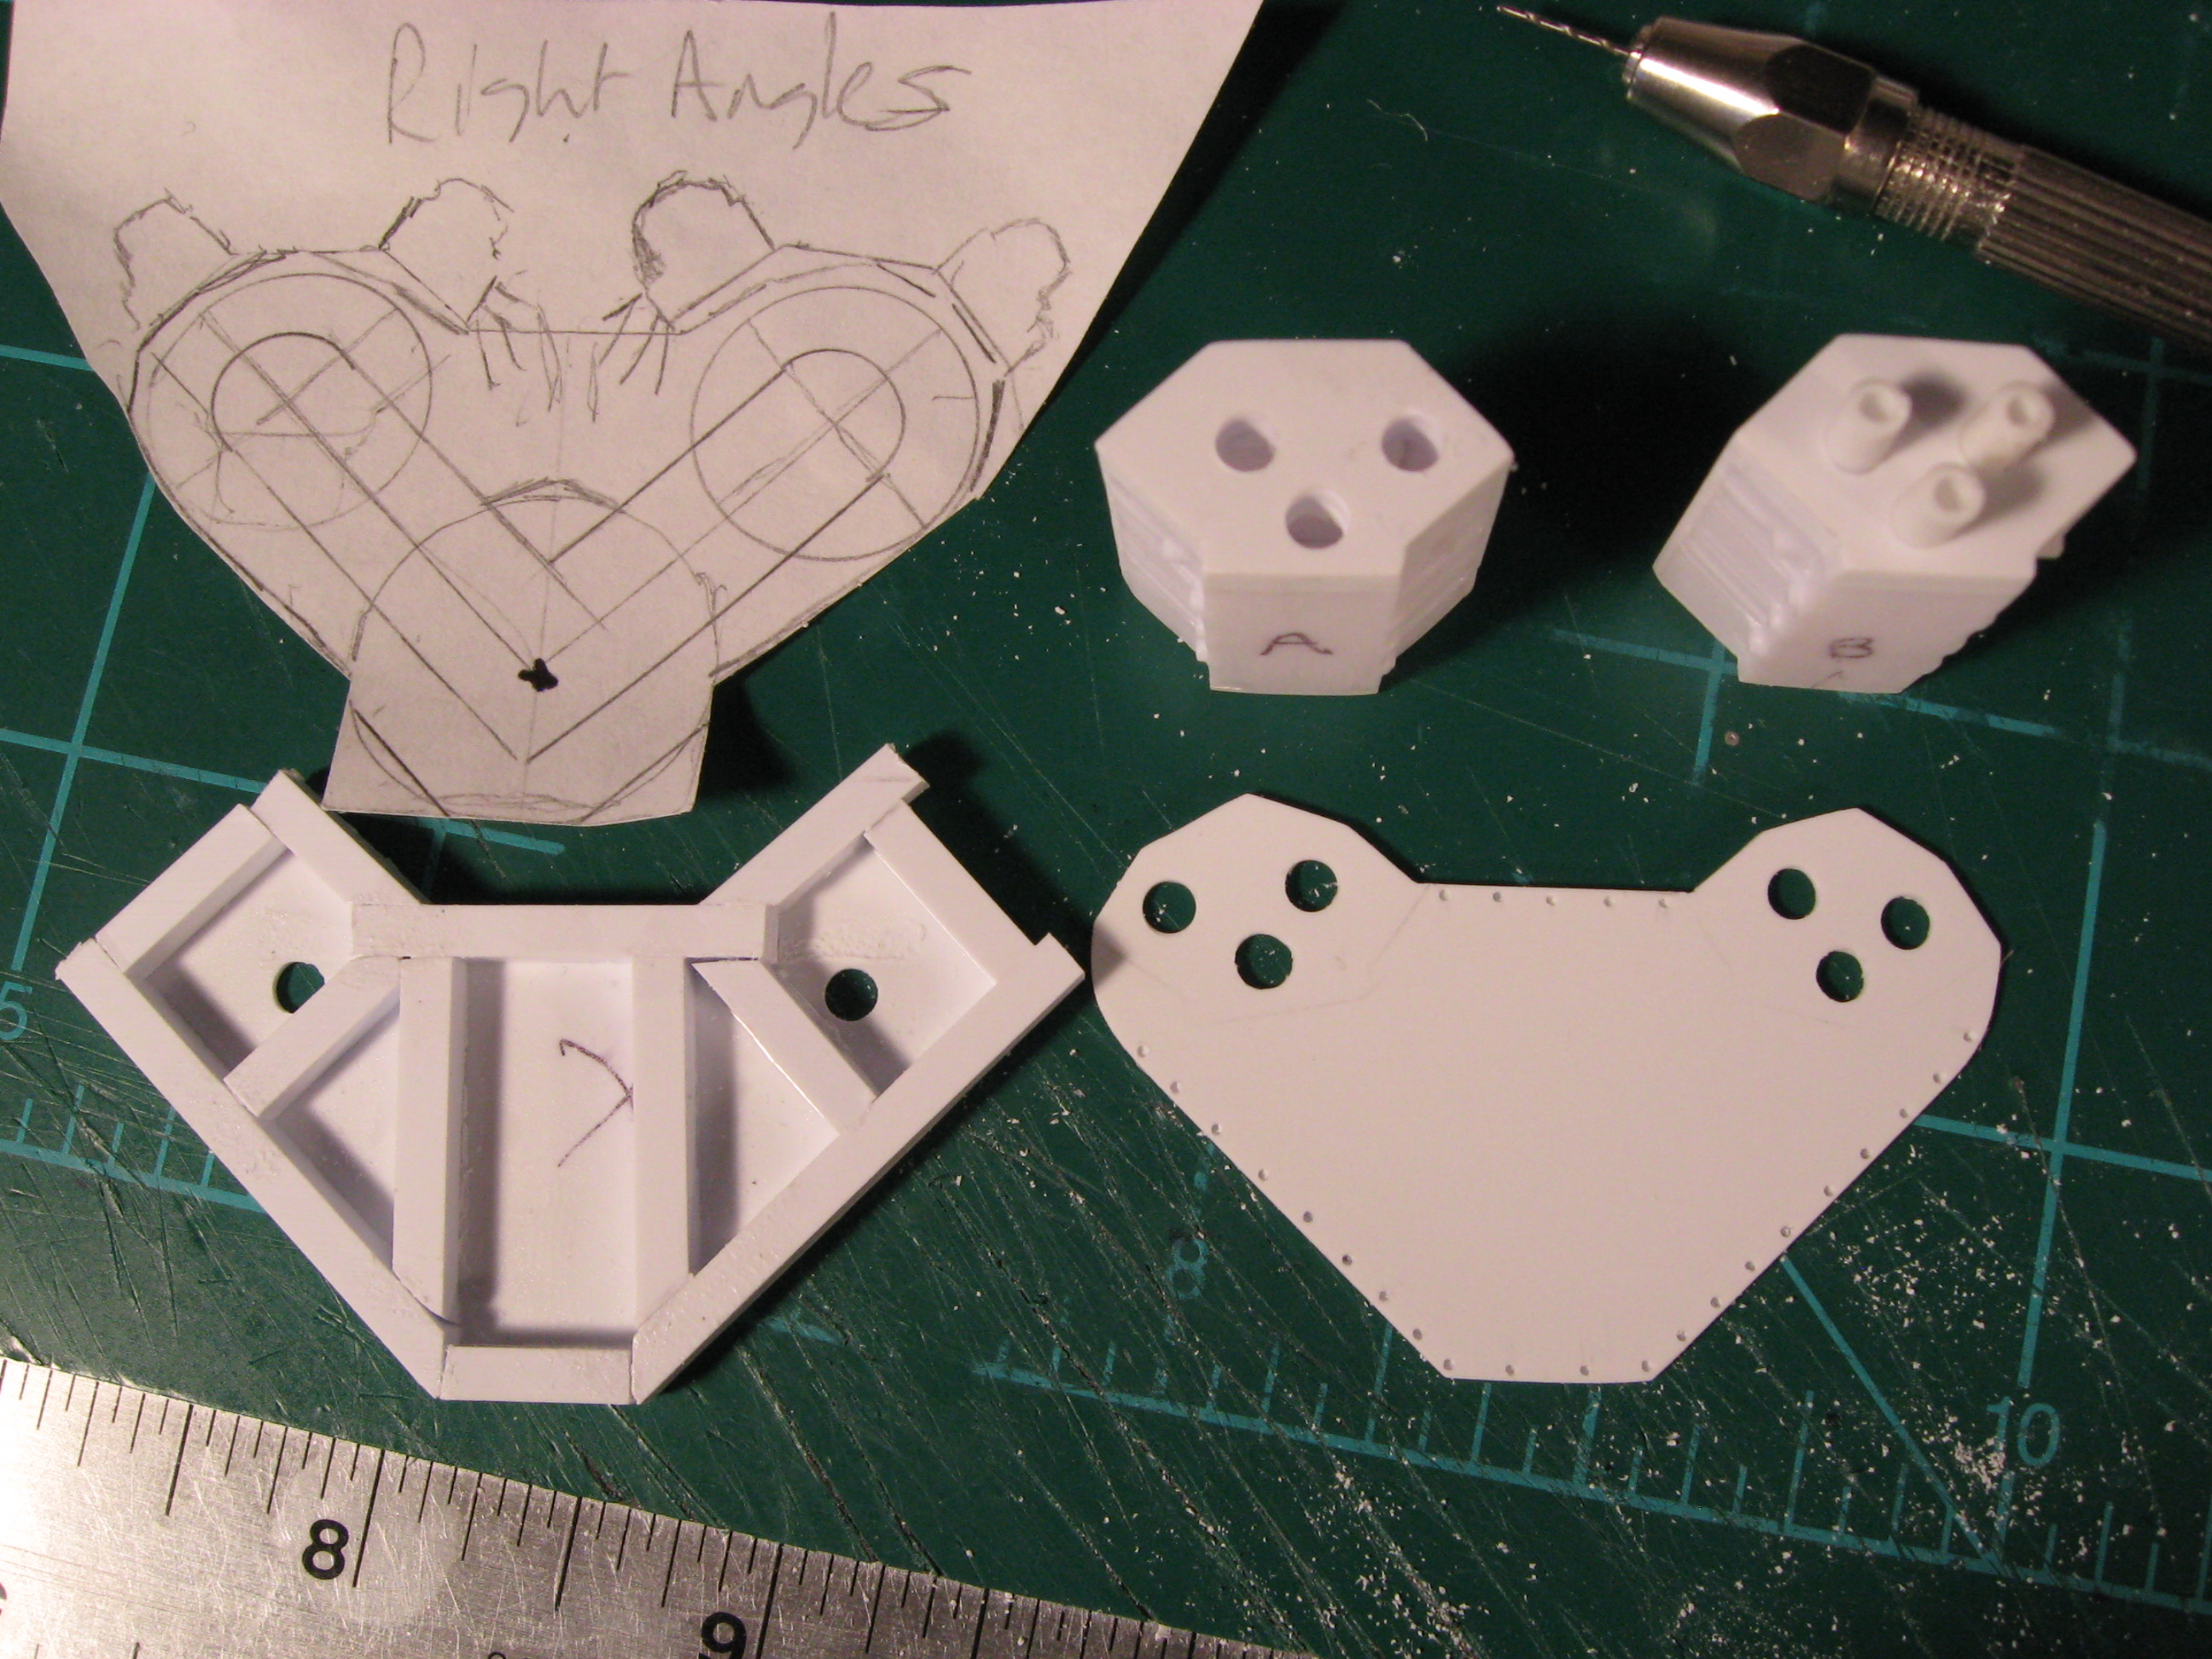
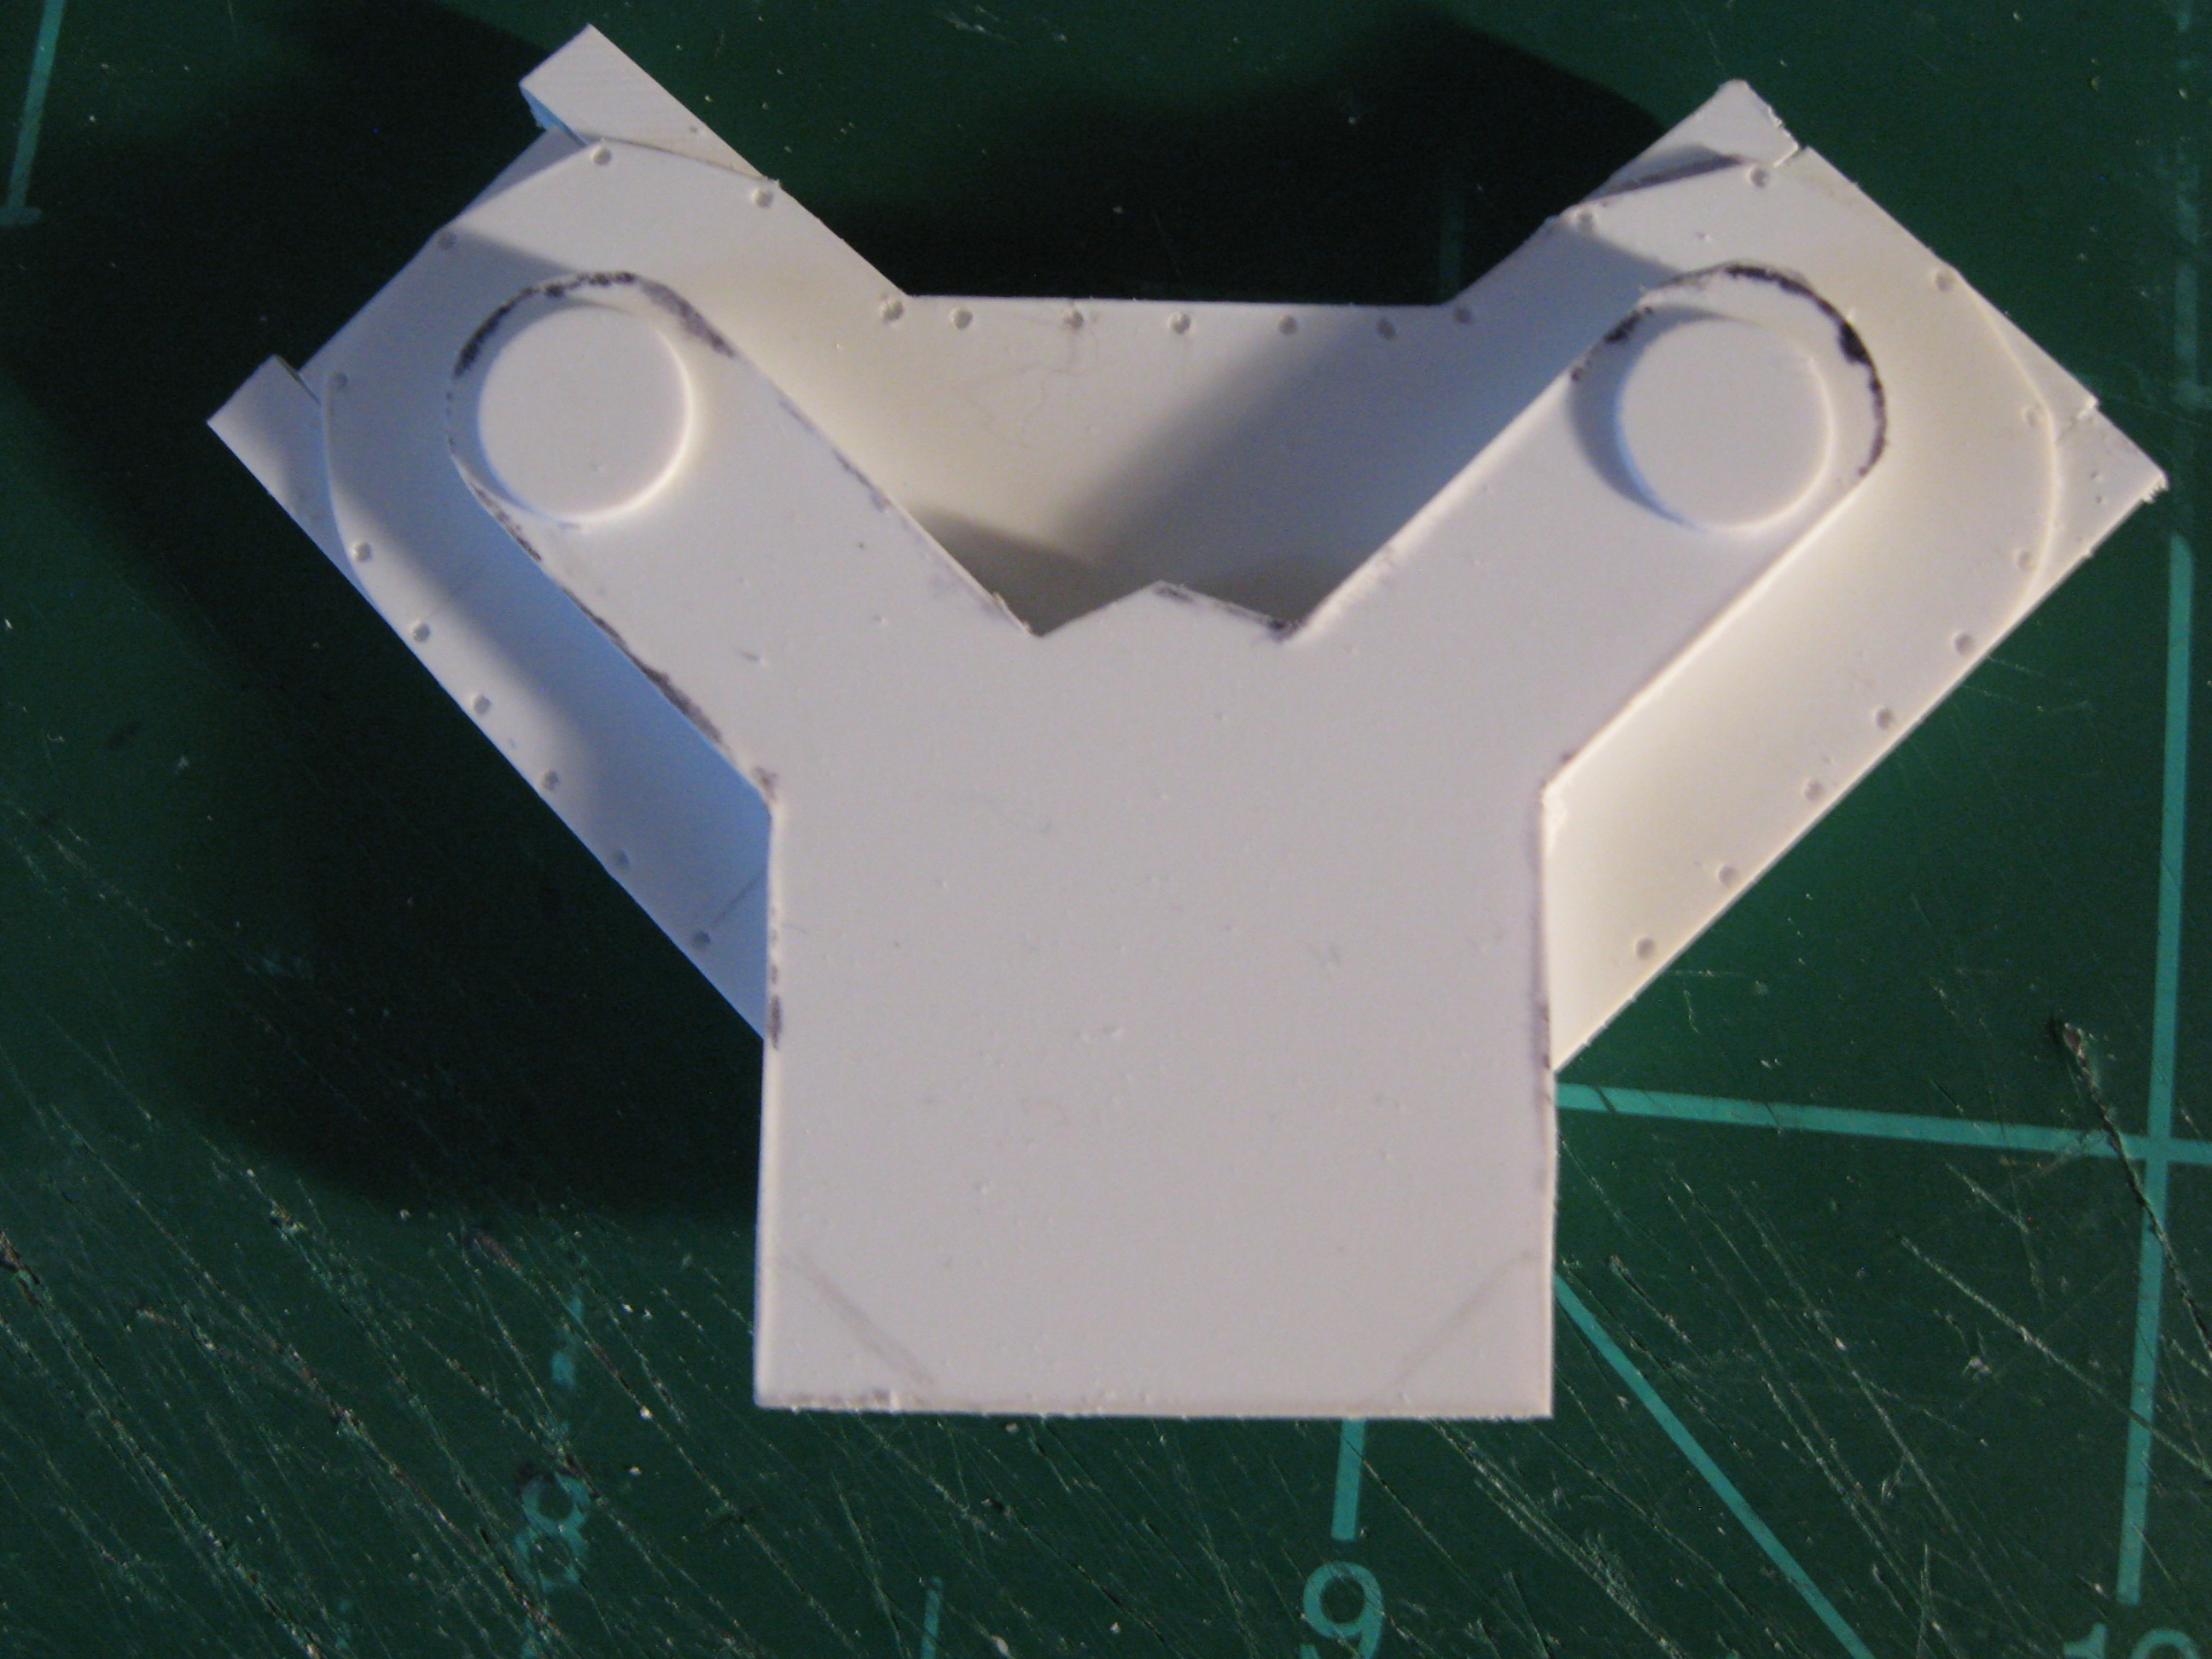
I have been working on the gearbox-it took a few(cough) times to get what I think will work. I cut the plates out of .030" sheet and used .125" strips for the internal structure. Also drilled plates and blocks for quick location/gluing pins. Some quick mockup shots-the gearbox kind of looks happy. It's a little different from the 1:1 but it's whats going to work with this tranny. Thanks for looking. Steve
-
Love it!
-
Thanks for sharing Mike. Looks like a nice turnout by a lot of talented builders.
-
Supercalifragilisticexpialidocious.I have always had a fondness for the 59.
-
This is some great work Richard. I am really liking how it is turning out.
-
Thanks again for all the support. To answer your question Tom, in all the research I have done there were 2 built. The clean and polished one (shiny and chrome) was last seen last May at the movie premiere in Sydney. I was not able to find any newer info or photos of either one since the premiere. I worked on the valve covers tonight and while not quite perfect they are going to work. I drilled holes in these to stick .020" rod through to simulate bolt heads. When they set up the back will be trimmed. Next up is finish the rear of the intake manifold and fit a distributor. Then i can work on the motor mounts and gearbox / tranny fitment. Thanks for looking. Steve
-
Thank you guys-still having fun but I am probably putting more work/details than necessary in these engines. I am testing and expanding my abilities which I am enjoying but it is time consuming. The block was lengthened .030" in front and .120" on the back and heightened .060" in the middle and .030" over the cylinders. I would not suggest doing this the way I have but this is how I ended up with this. The heads are done but need cleaned up. They were made .030" bigger on the sides and back and look great if I say so myself. The valve cover is 3 pieces but the mockup is still 2 and looks a little off but you get the idea. I think these engines will work, I'm liking them more and more as they come together. I did drill the heads for plug wires, which will be another first for me, but I think this one should have them. Thanks for the support. Steve