vincen47
-
Posts
1,654 -
Joined
-
Last visited
Content Type
Profiles
Forums
Events
Gallery
Everything posted by vincen47
-
1970 F 250 Camper Special
vincen47 replied to leafsprings's topic in Model Trucks: Pickups, Vans, SUVs, Light Commercial
Great truck. I agree, wish truck campers more readily available. -
Peterbilt 379 RV
vincen47 replied to vincen47's topic in WIP: Model Trucks: Big Rigs and Heavy Equipment
Thanks! -
Peterbilt 379 RV
vincen47 replied to vincen47's topic in WIP: Model Trucks: Big Rigs and Heavy Equipment
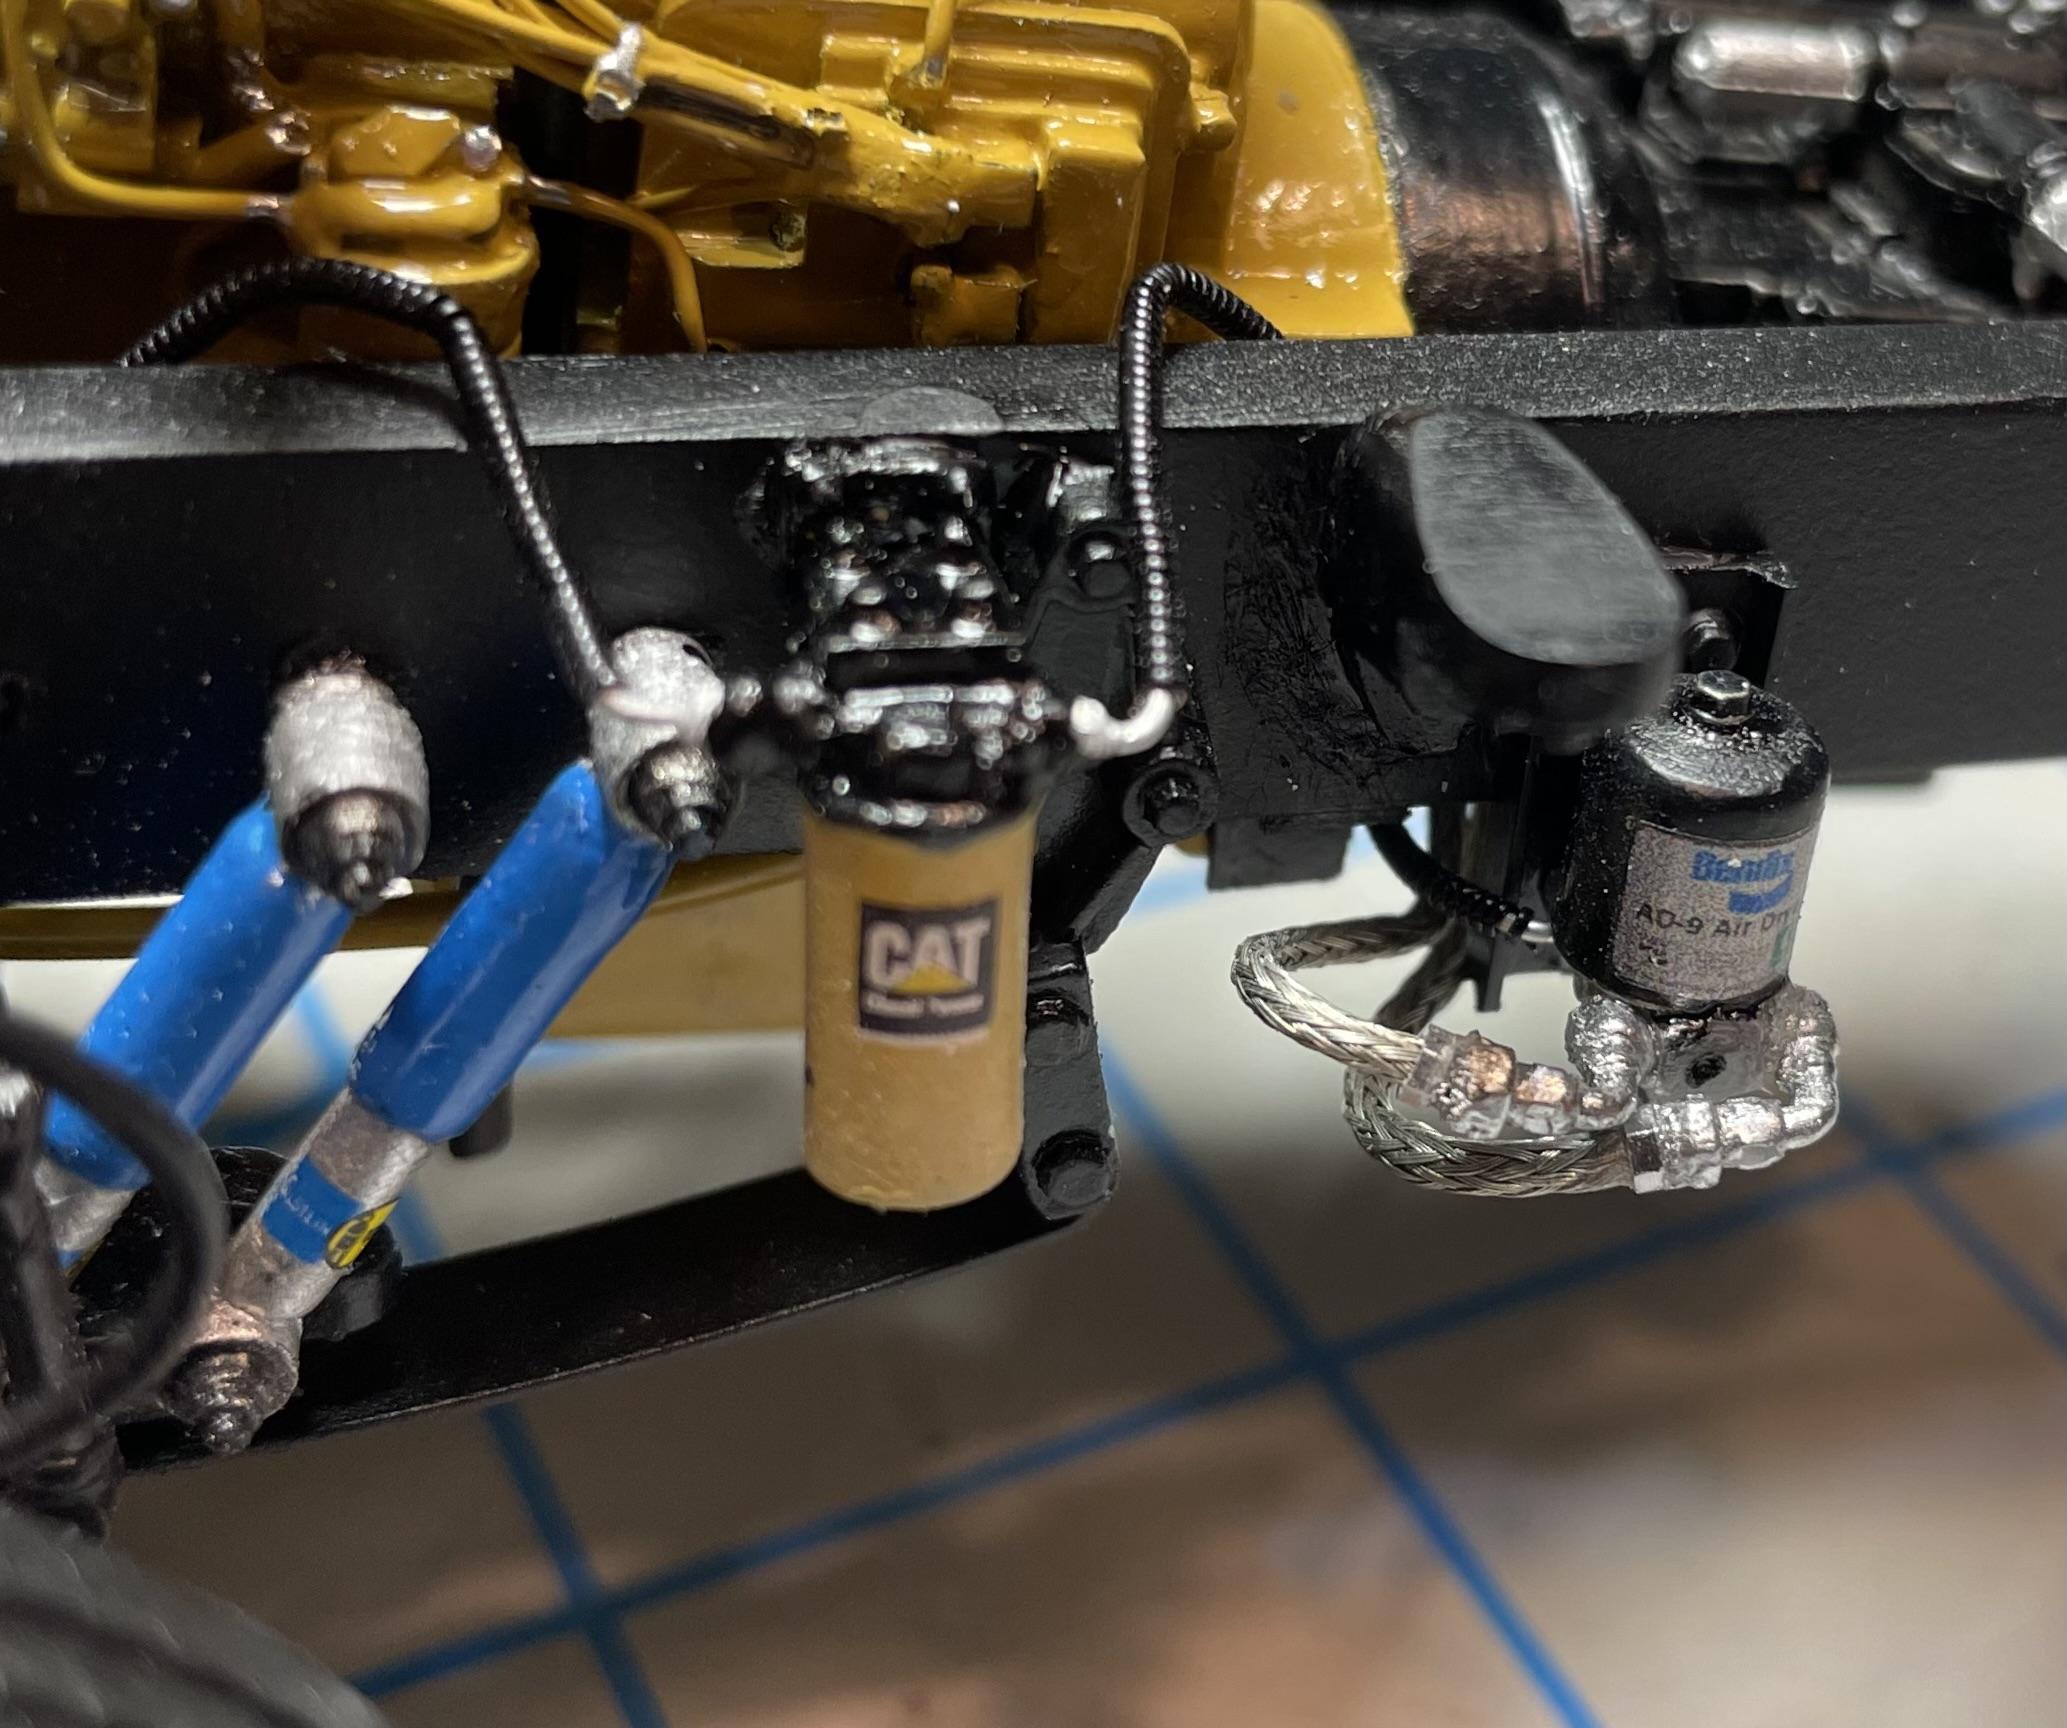
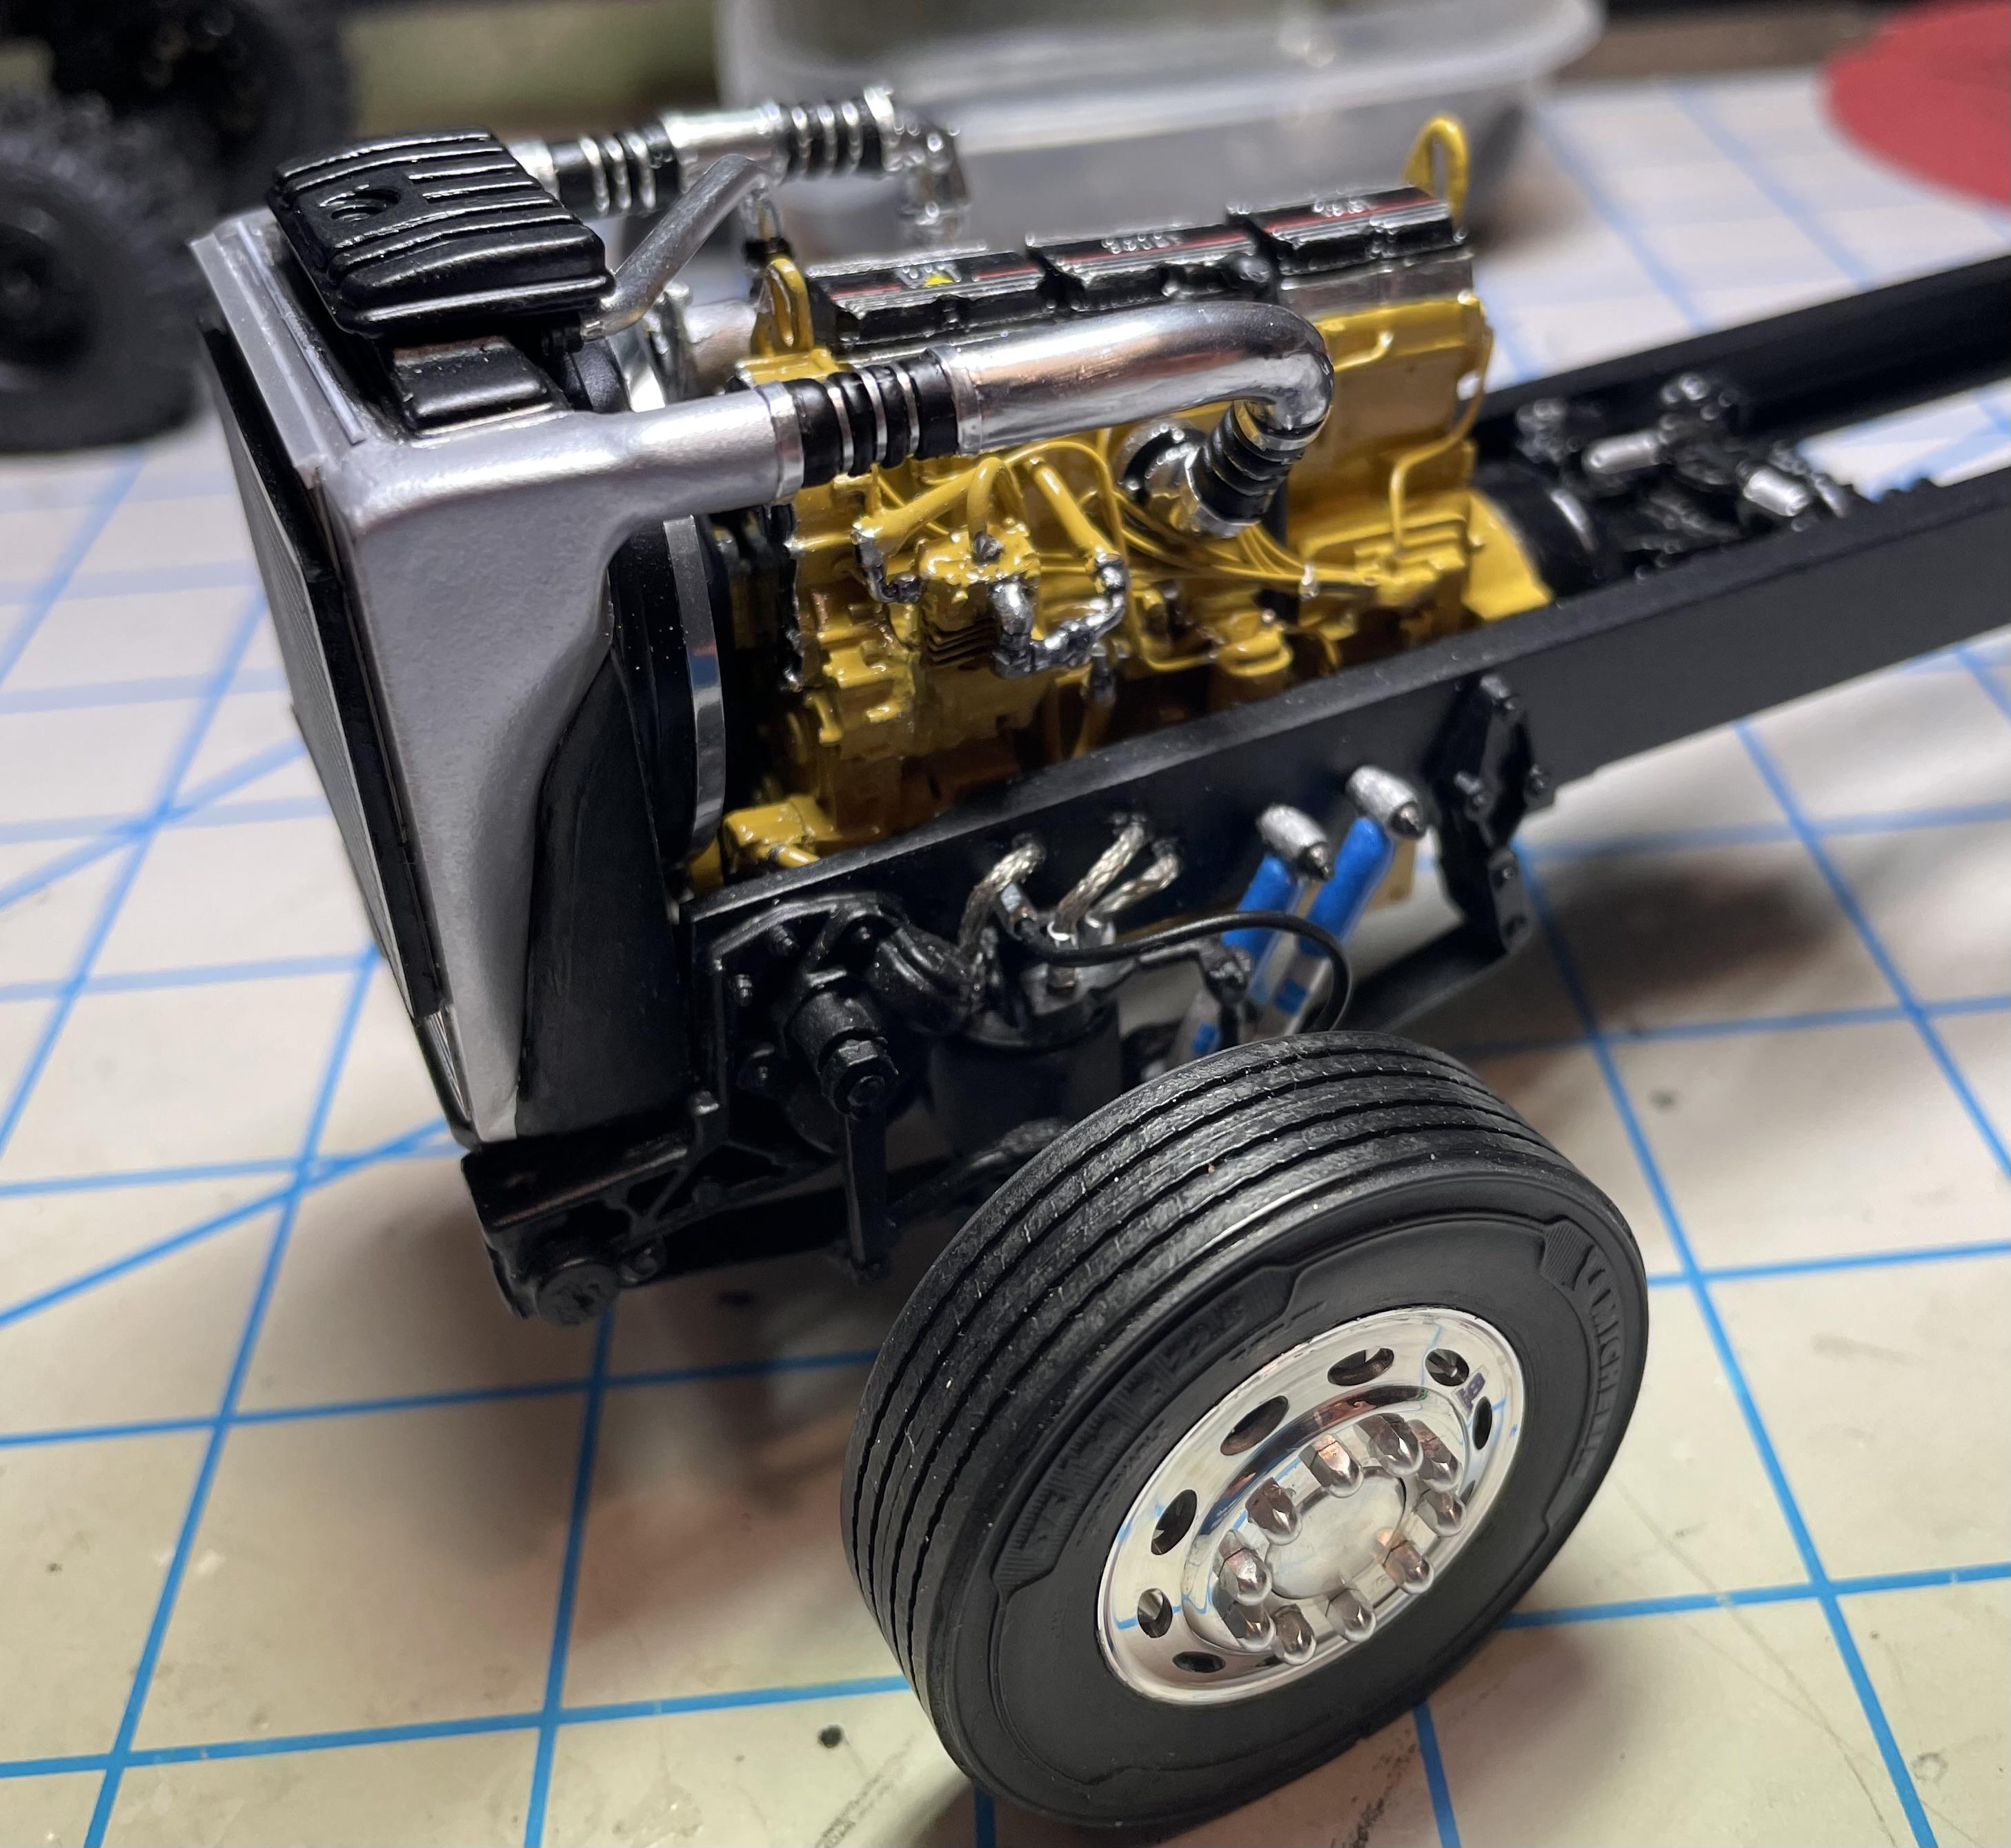
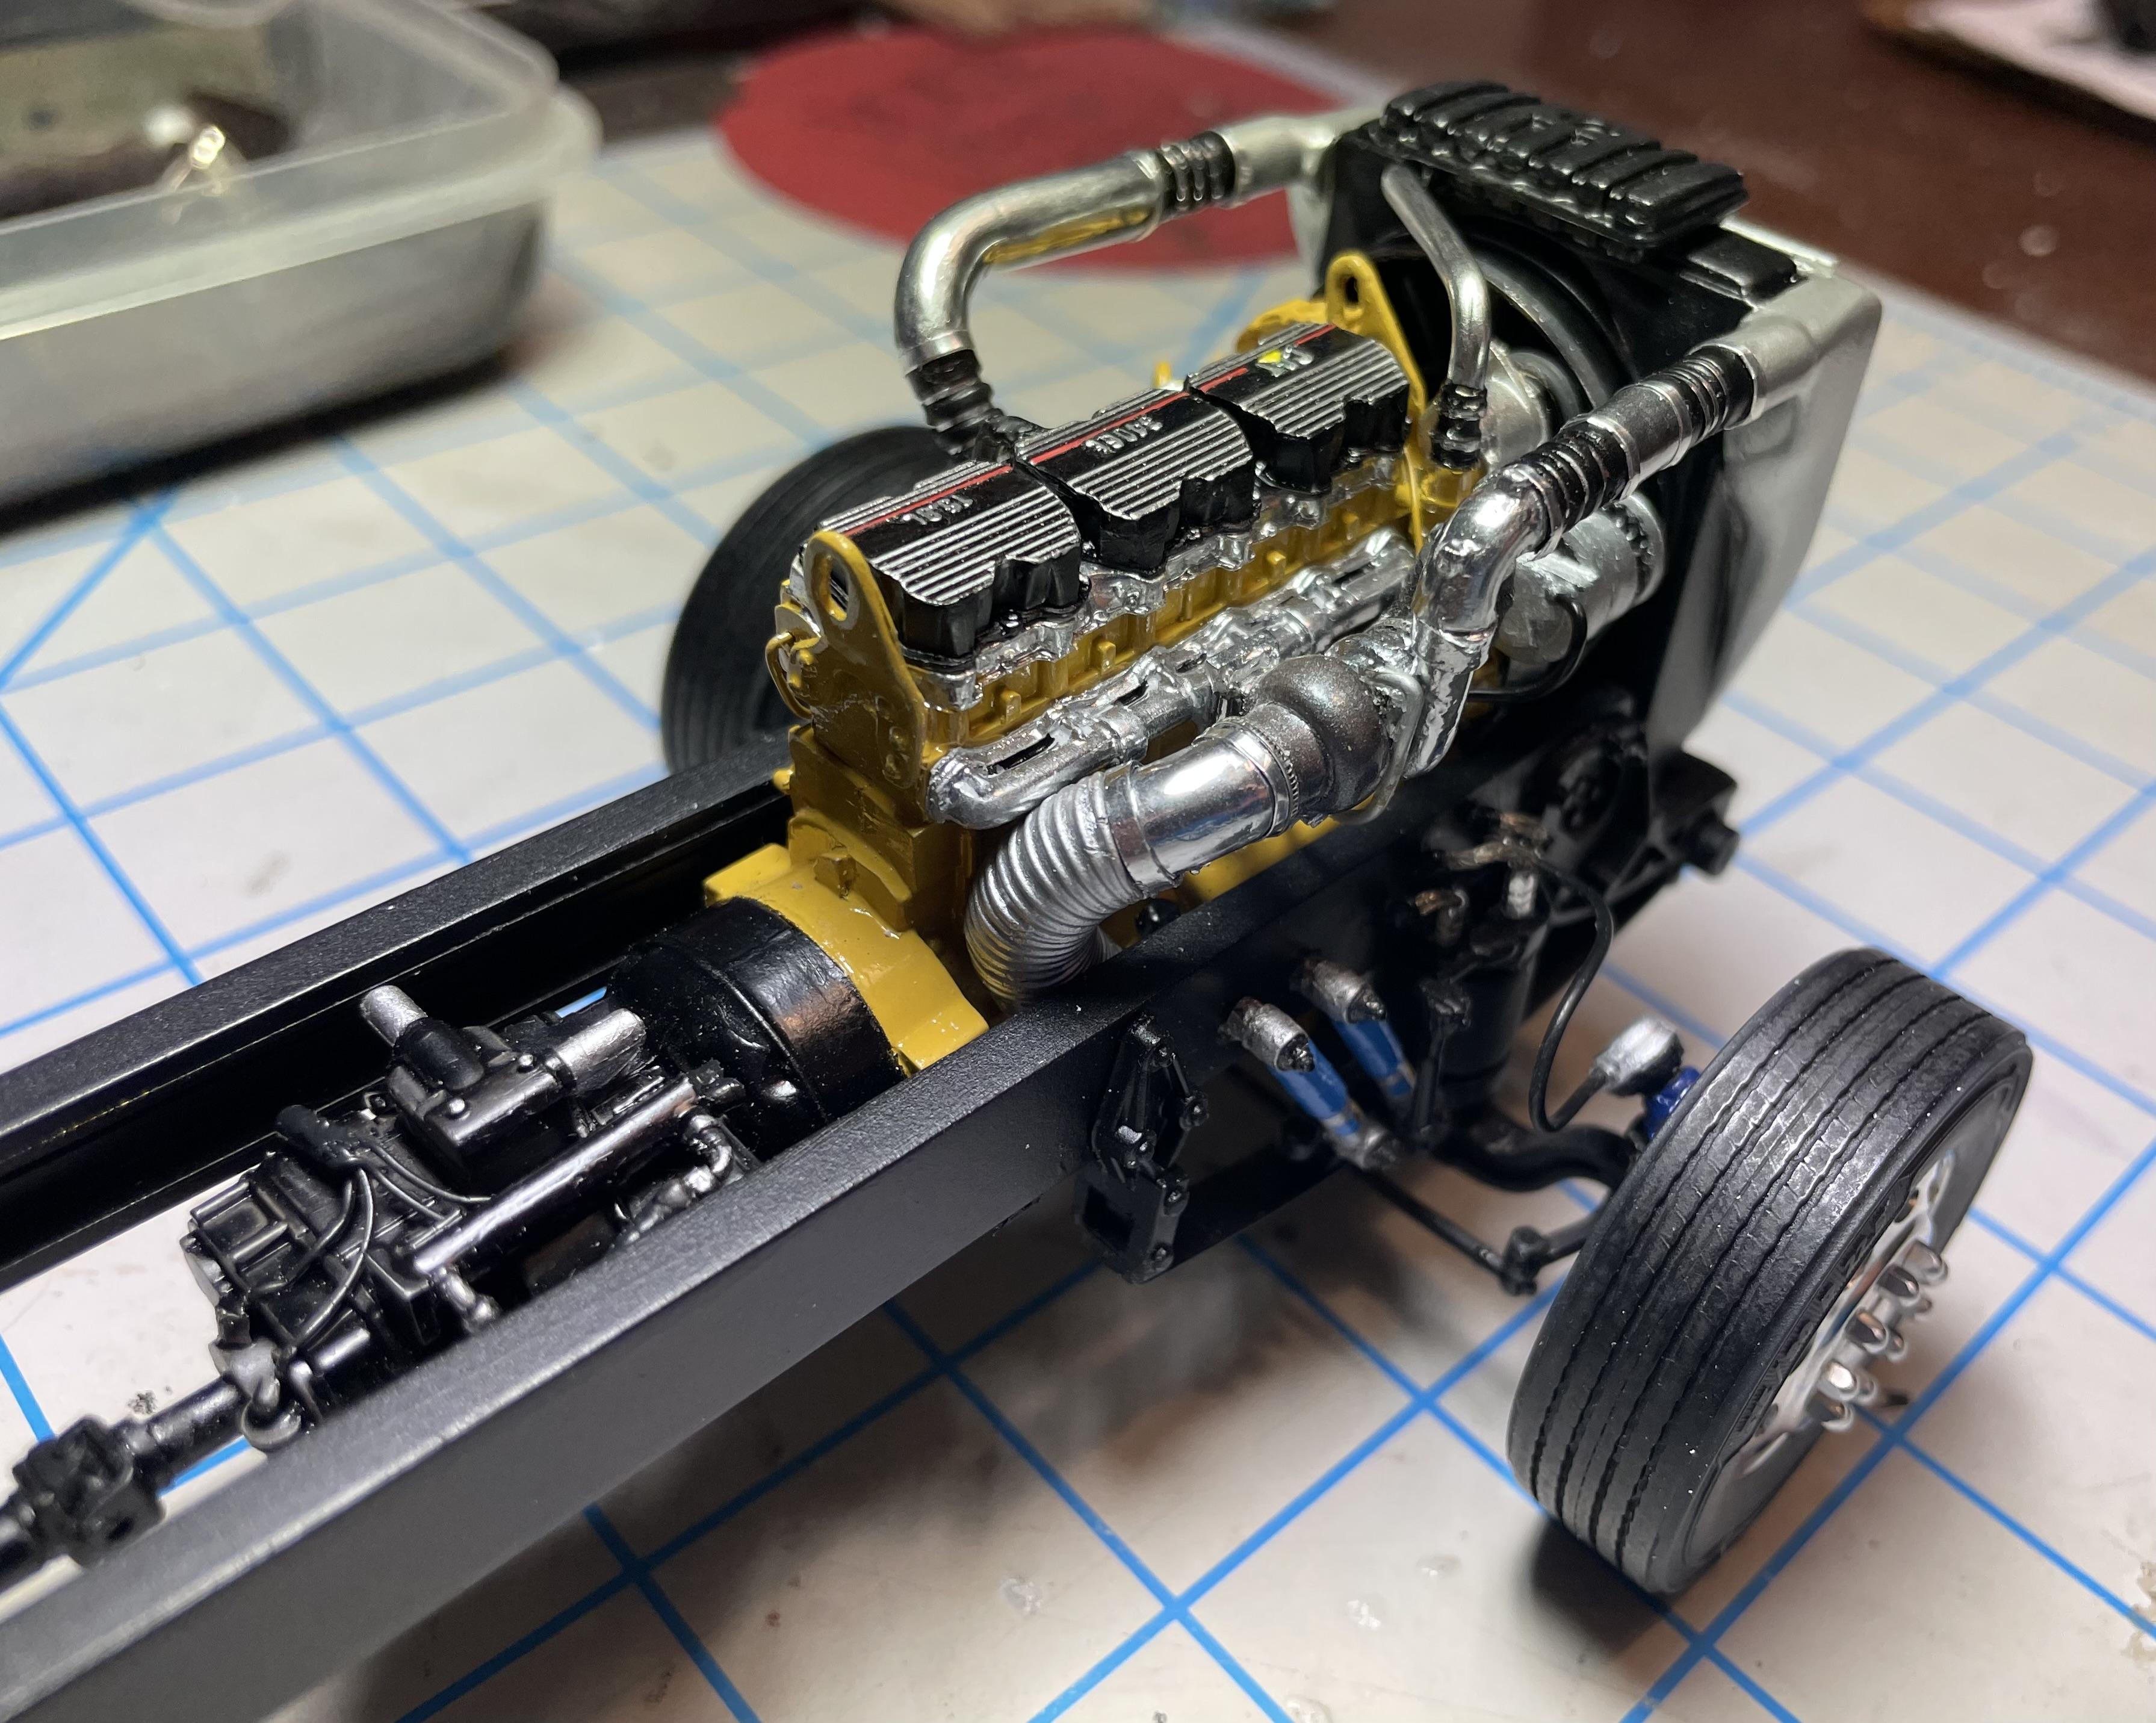
Next up, I’ll add the frame-mounted primary fuel filter, a common sight on these Cats. I took a fuel filter from a Italeri Series 60, with a scratch built frame mount and fuel lines. Just to the right of the cab mount, I added a Bendix AD-SP Air Dryer and associated connections and hoses. I started with an air dryer from CTM, and modified it a bit to better represent the Bendix model, and used decals from Modeltruckin for both the fuel filter and air dryer.
-
Trucks from the Convoy movie is great theme for a collection.
-
Revell Peterbilt 359
vincen47 replied to DANGERUS's topic in Model Trucks: Big Rigs and Heavy Equipment
Nice work! I really like that color. The dash looks great. A build to be proud of, for sure. -
This is getting better and better, I’m really enjoying watching this unique piece of equipment coming together. The track section looks to be 3d printed?
- 88 replies
-
- 1
-

-
- trackmobile
- tractor
- (and 2 more)
-
Peterbilt 379 RV
vincen47 replied to vincen47's topic in WIP: Model Trucks: Big Rigs and Heavy Equipment
A C-15 is a great no matter what hood it’s under. Looking forward to your W900. -
W900L Kenworth and Frameless Dump
vincen47 replied to DRIPTROIT 71's topic in WIP: Model Trucks: Big Rigs and Heavy Equipment
This will be another great project. I appreciate the wide variety of truck builds you make - everything from vintage to modern. -
Peterbilt 379 RV
vincen47 replied to vincen47's topic in WIP: Model Trucks: Big Rigs and Heavy Equipment
Thank you! -
Peterbilt 379 RV
vincen47 replied to vincen47's topic in WIP: Model Trucks: Big Rigs and Heavy Equipment
You’re very welcome, I’m glad you like it. -
A&N Freightliner Wrecker
vincen47 replied to Model Builders Mafia's topic in Model Trucks: Big Rigs and Heavy Equipment
It’s great seeing an A&N kit put to good use. Great build, excellent choices in paint and detail. Really looks the part. I really like the cooler and the work gloves! -
Peterbilt 379 RV
vincen47 replied to vincen47's topic in WIP: Model Trucks: Big Rigs and Heavy Equipment
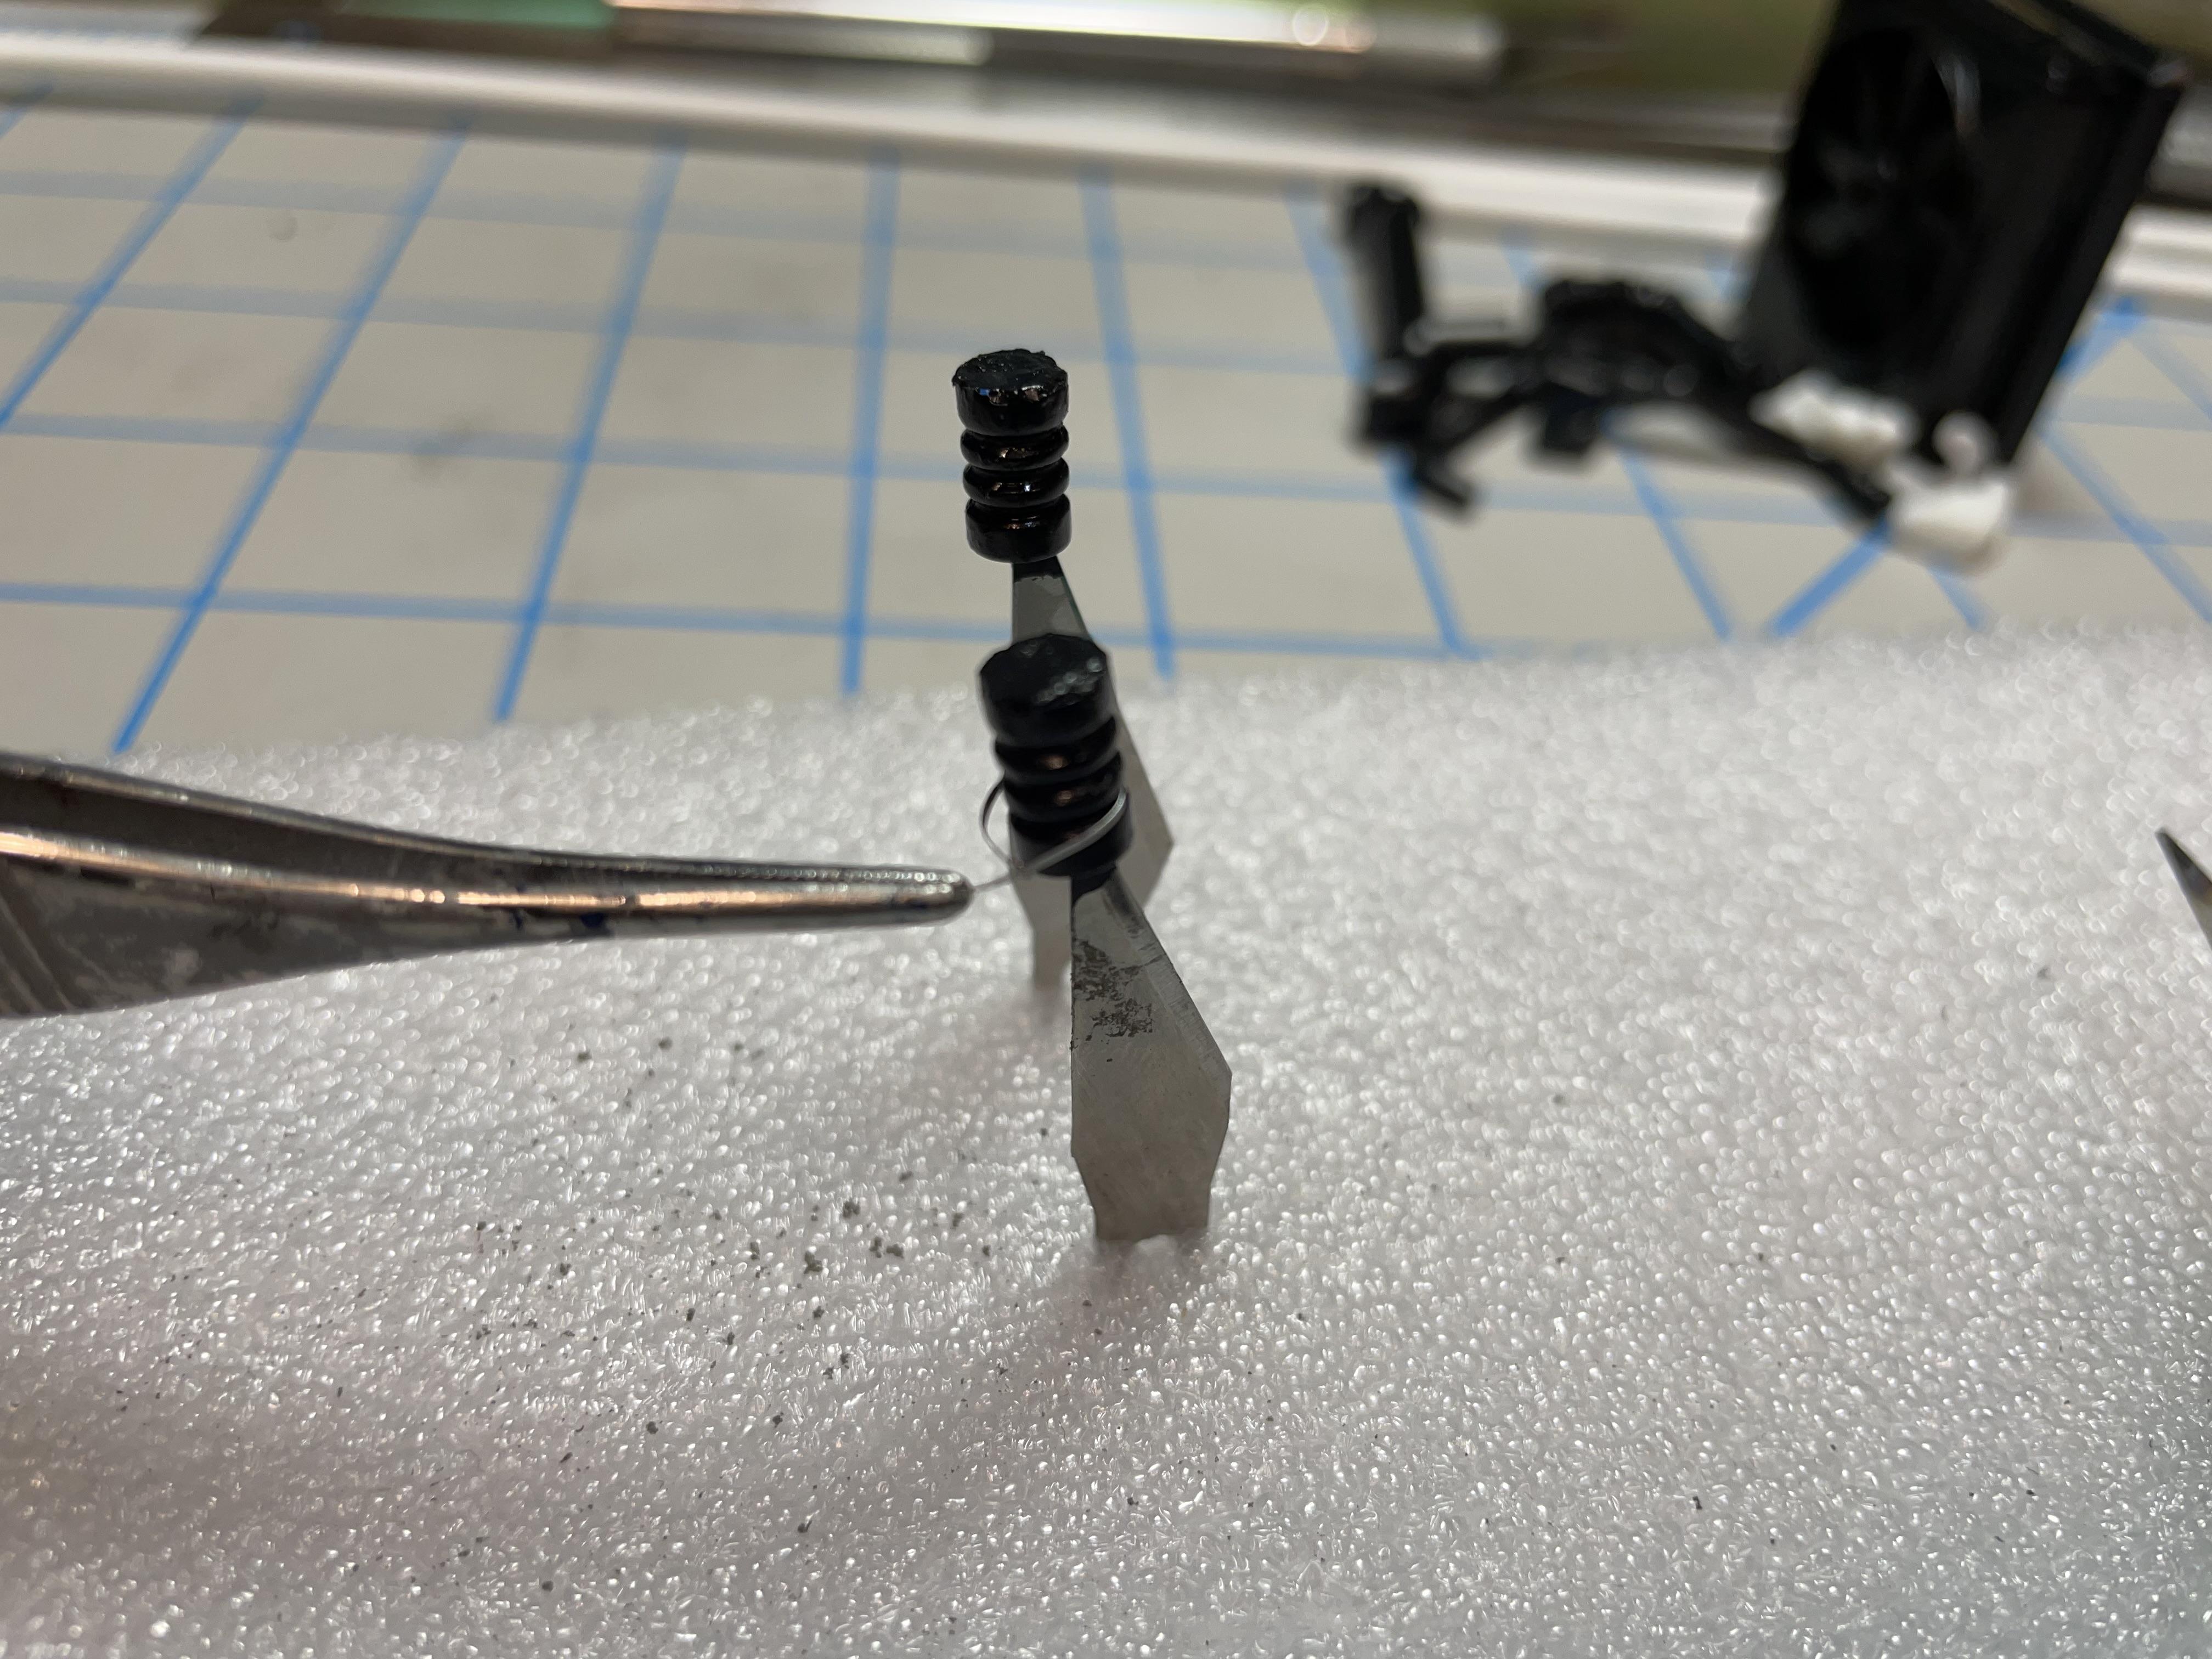
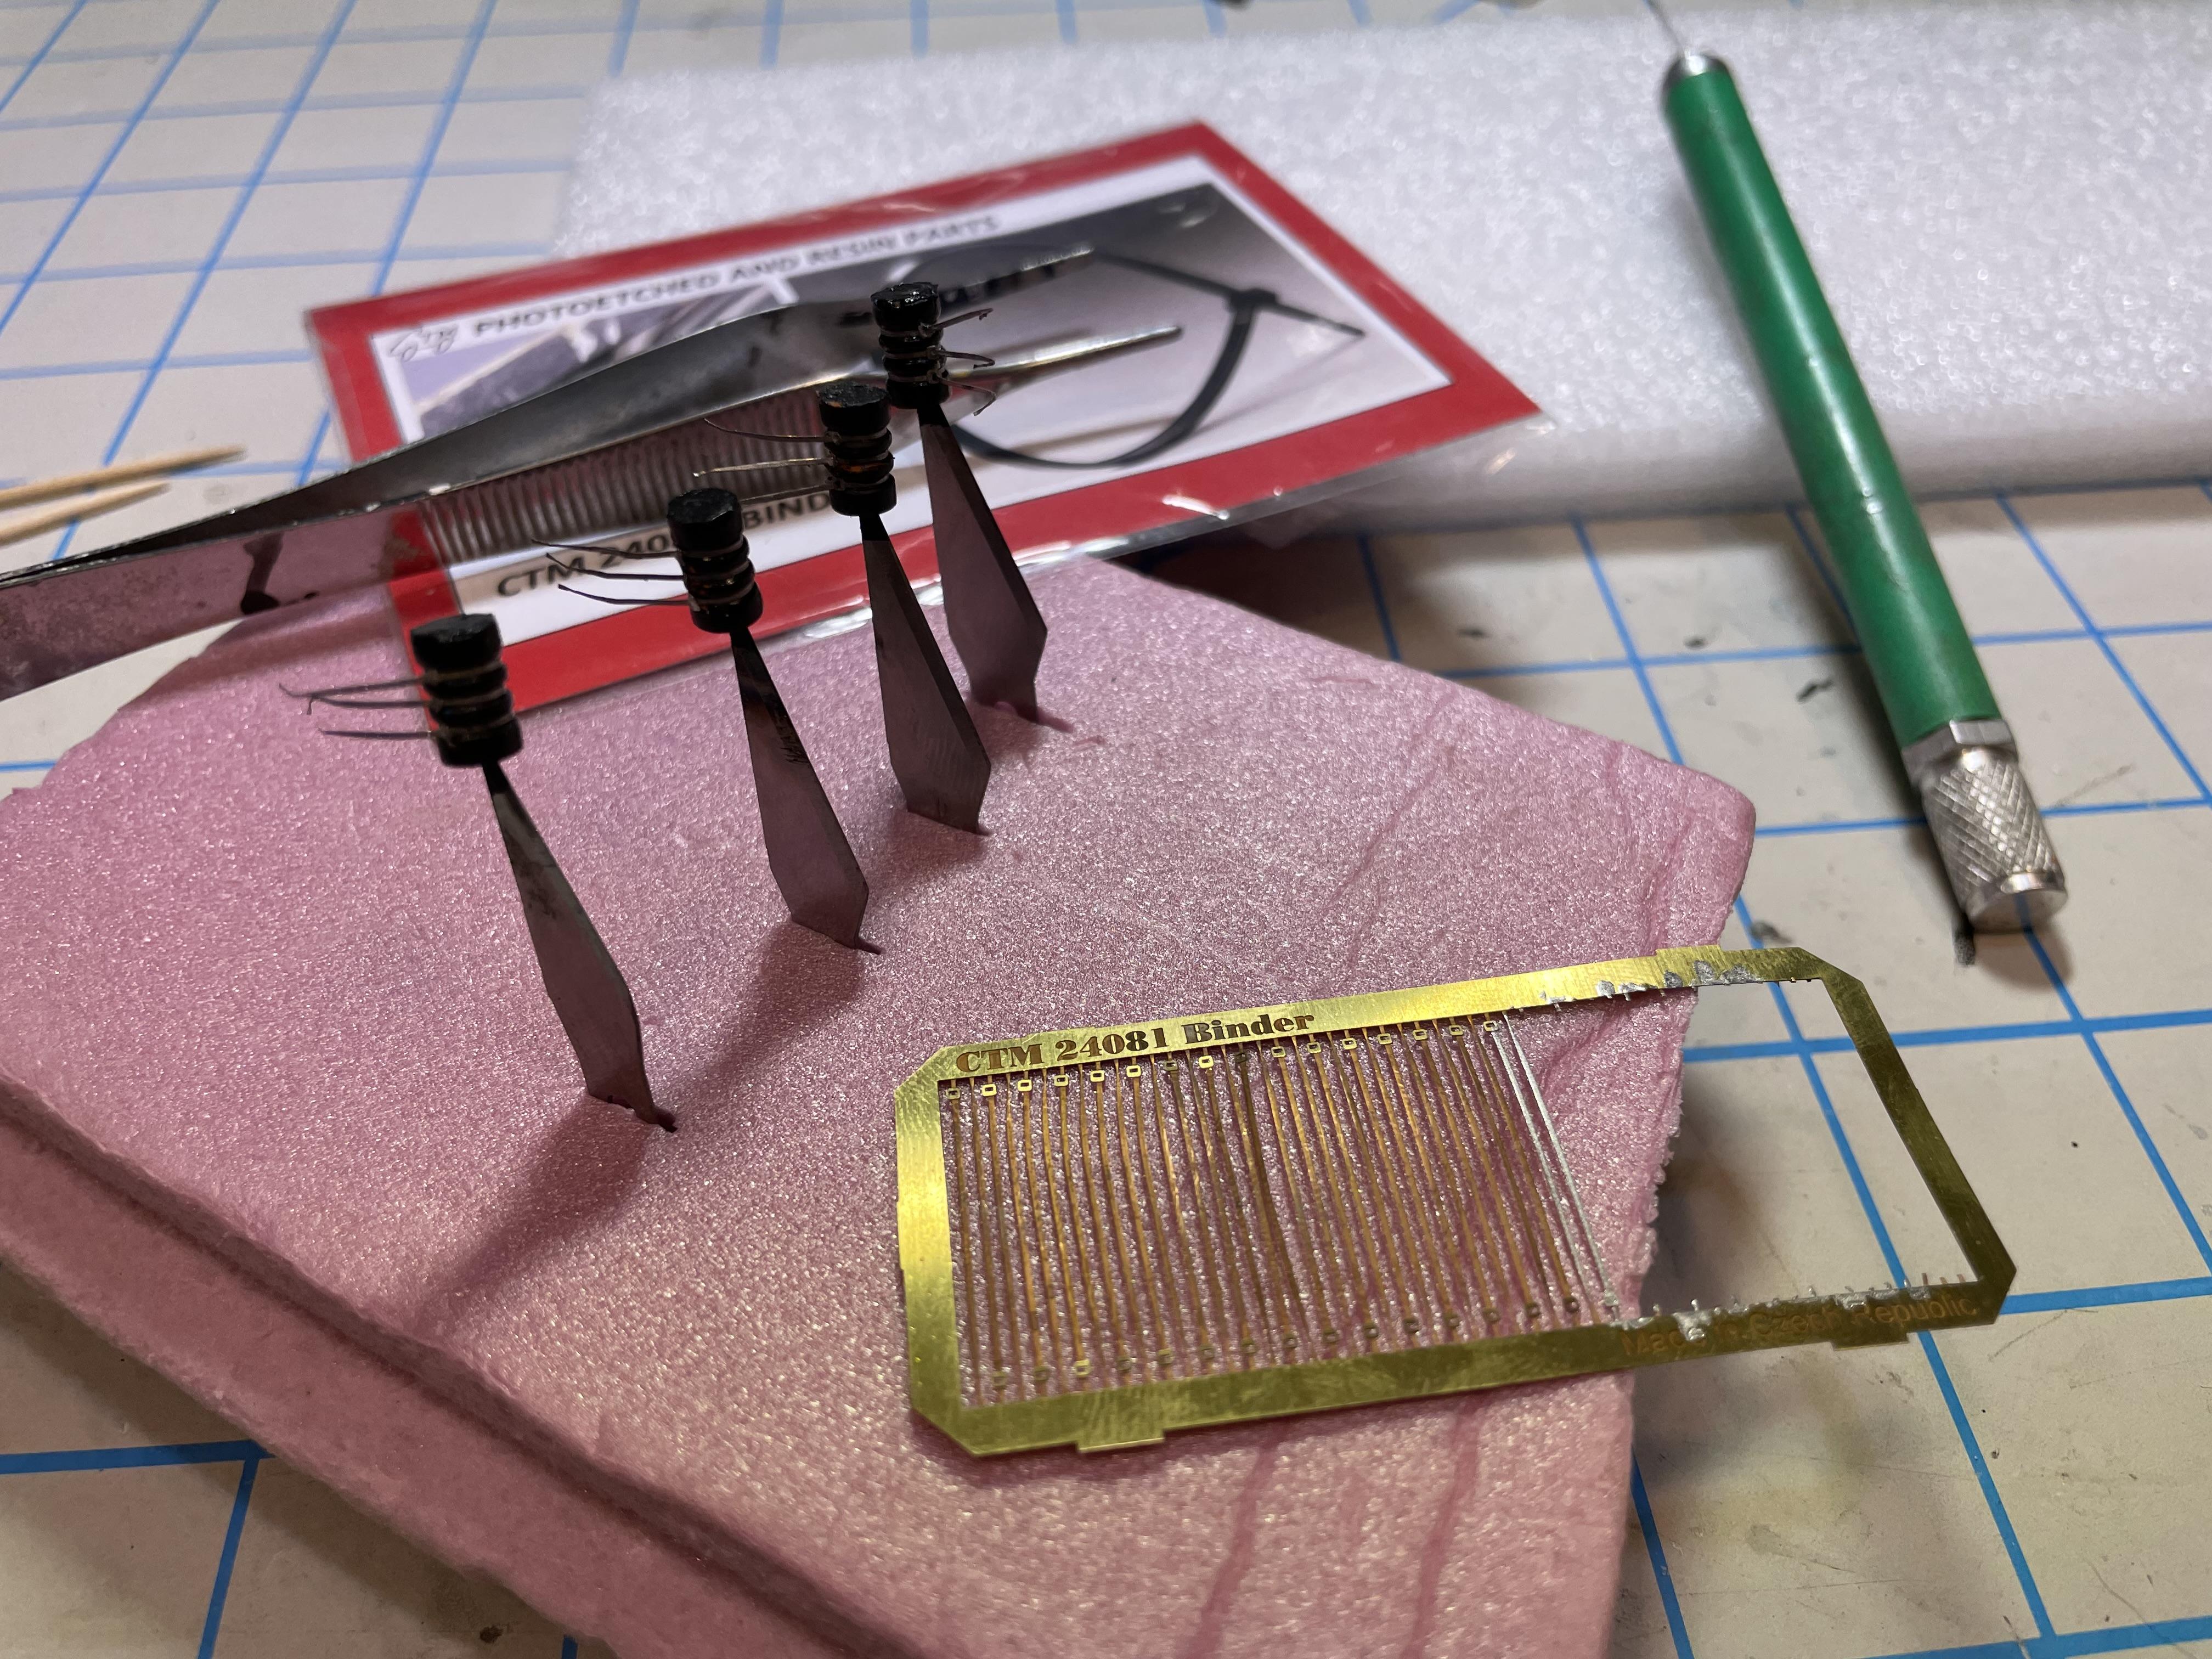
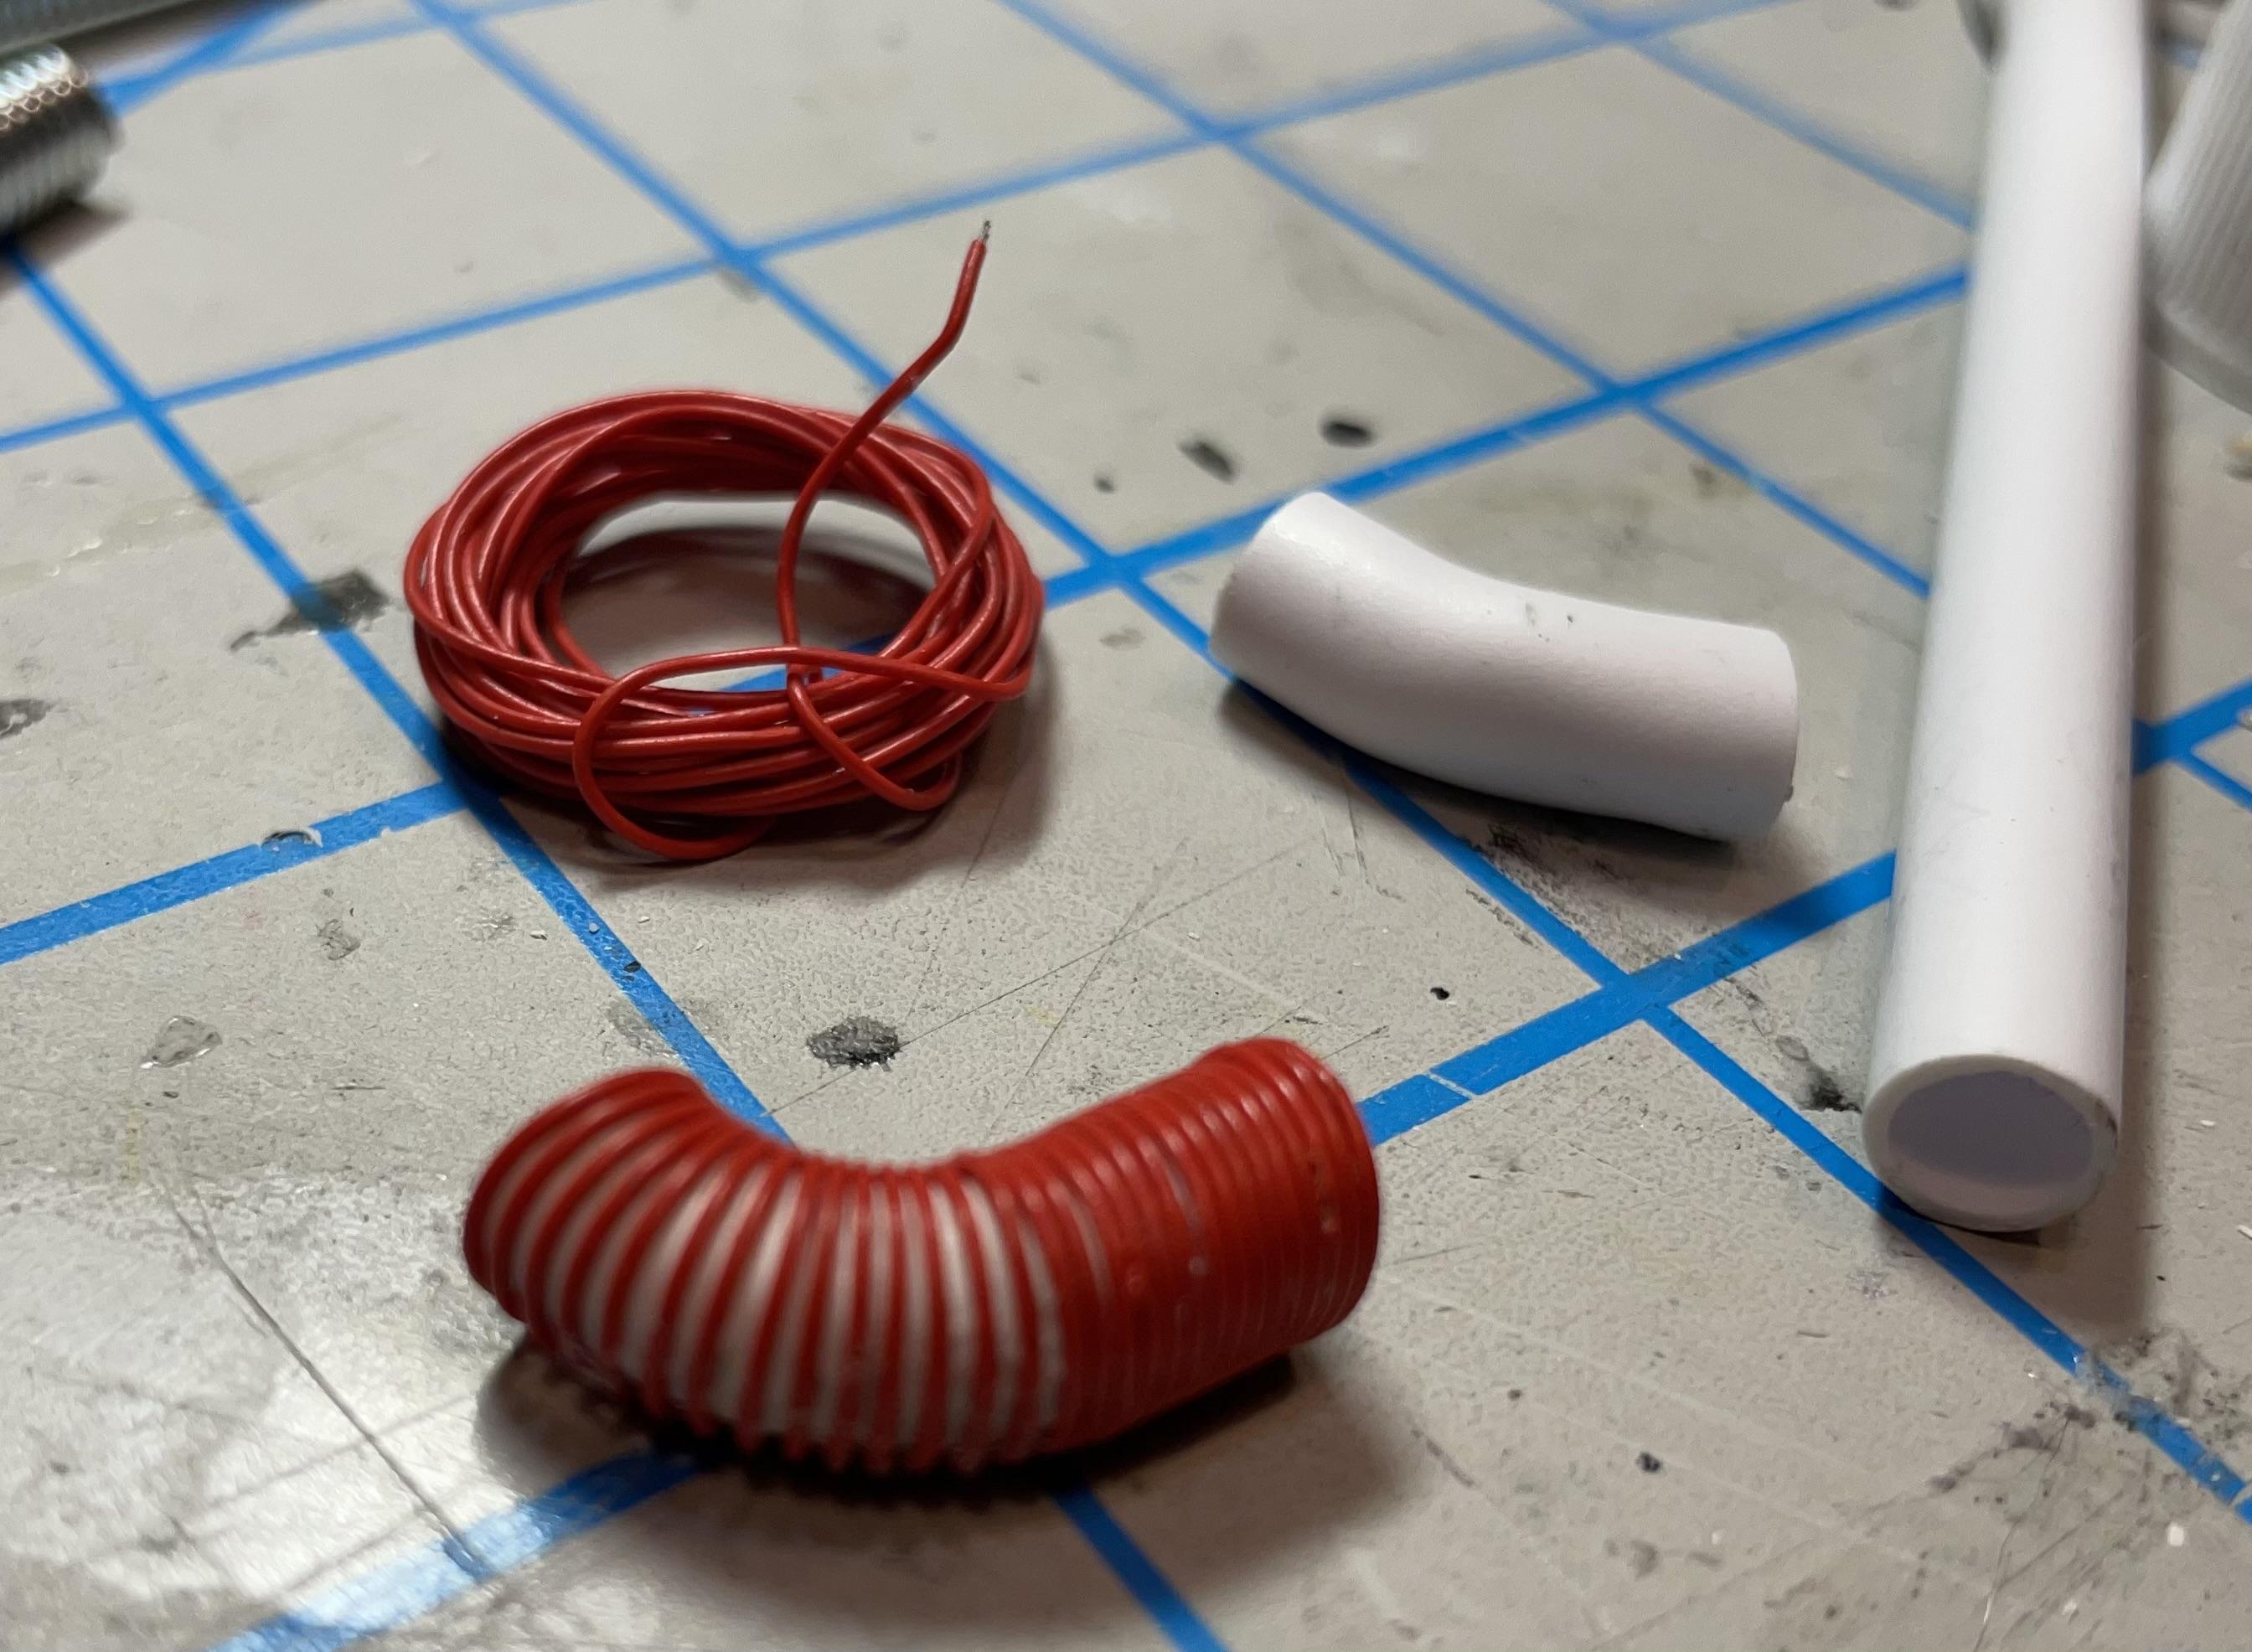
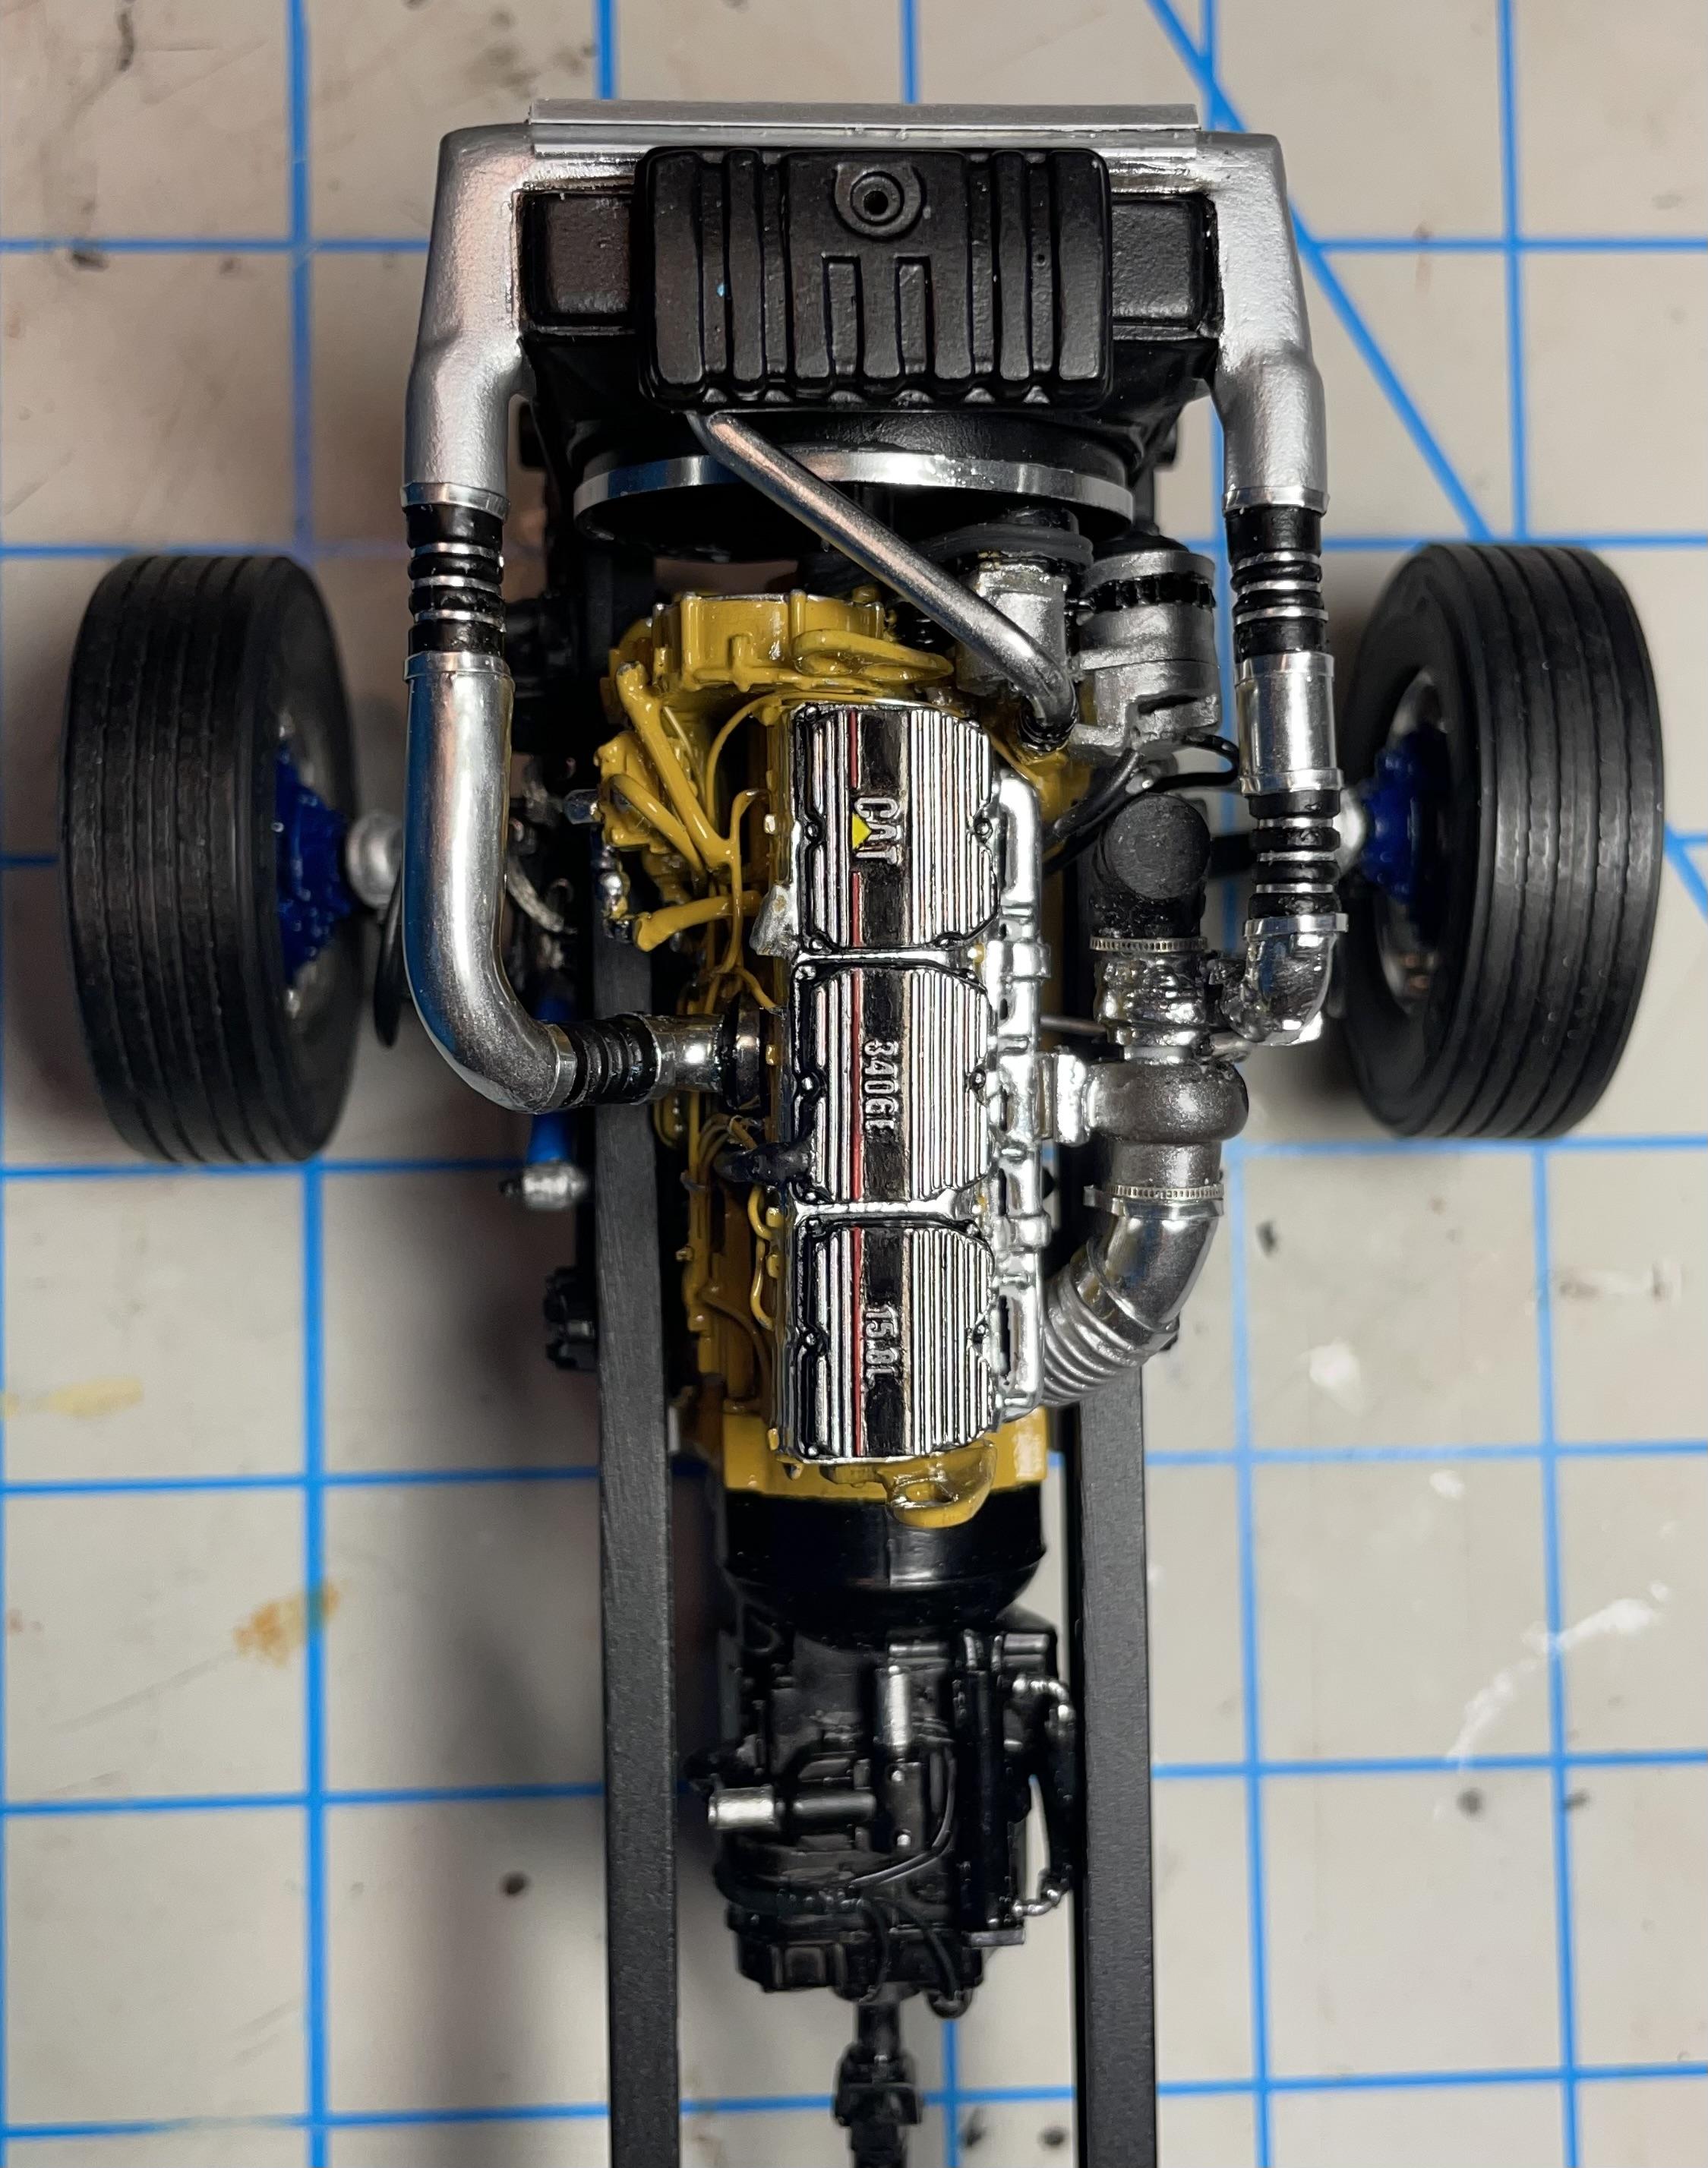
To connect the charge air cooler to the turbo and engine, I used rubber air to air connectors from Moluminum along with Plastruct elbows and aluminum tubing, cut to fit and painted with Molotow chrome. The rubber air connectors came in blue and orange, and though that’s common in real life, I opted to paint them rubber black to better match the overall look. You can find black silicone connectors on 1:1 trucks as well. I also added the chrome rings around the connectors by using brass zip ties from CTM, painted chrome. That was one of the most tedious things I’ve done on this build, but the only option that seemed to work. Painting the recesses chrome was a failure, so CTM to the rescue. For the exhaust exiting the turbo, I needed a flex tube, just like the real thing, in order to make the awkward curvature needed to fit between the engine block and frame. Once I had the plastic tubing bent to fit, I wrapped it in wire, and added putty between to get the look. Painted in aluminum, it works well. I finished the tubing clamps where the connections are with chrome bands made from strips of furnace tape.
-
Ryder IH Loadstar
vincen47 replied to DRIPTROIT 71's topic in Model Trucks: Big Rigs and Heavy Equipment
It’s neat seeing a Loadstar. No matter what the form, it’s a unique model, despite being such a common truck back in the day. A rare resin cab, and you sure did it well. -
Diamond Reo/Montone dump body
vincen47 replied to Scott Eriksen's topic in WIP: Model Trucks: Big Rigs and Heavy Equipment
Nice project, great engine choice with the 6-71. I’ll be looking forward to it. -
Peterbilt 379 RV
vincen47 replied to vincen47's topic in WIP: Model Trucks: Big Rigs and Heavy Equipment
Now that we have a rolling (non-rolling) chassis, time to install the engine and add the radiator and charge air cooler. It’s a squeeze, but she fits. There’s a lot of extra parts adding to the overall engine width, like the serpentine bracket, so I made sure to measure and test fit beforehand. To connect the driveline, I made three driveshaft carrier bearings from styrene to keep each driveshaft section a realistic scale length. Onto the CAC: There’s certainly a void in the aftermarket for a proper charge air cooler/air to air aftercooler. Italeri tried, somewhat, to have one on the Series 60 in the 378 kit, but it leaves a lot to be desired. I used the Italeri kit parts as a basis for creating an aftermarket CAC in the style of a Duralite unit. I added photo etched radiator mesh and modified the side of the kit radiator, carving out some plastic and folding in the outside edges. Then, I added styrene sheet, aluminum tube, and putty to create the overall shape needed. The 378 kit’s radiator coolant reservoir was added to the top at this point, but I will replace it later with a better version. On the front side, I added a parallel flow AC condenser unit, made with photo etched mesh. I’ll add the lines to and from it later, as well as the air intake connectors and pipes to the turbo and engine block. -
A&N Resin Paccar MX-13
vincen47 replied to vincen47's topic in Truck Aftermarket / Resin / 3D Printed
Me too, just put my order in today. I plan to use it in the W990, but without the Traxon transmission. It doesn’t look like that transmission is available in the US. The Euro MX-13 is very close, basically identical, to the US version in appearance. -
Now that’s a unique project. Very cool subject matter.
- 88 replies
-
- 1
-

-
- trackmobile
- tractor
- (and 2 more)
-
It’s too bad nobody makes a drop frame van. It could be crafted from the Moebius kits, but that would be a major modification project.
-
Peterbilt 379 RV
vincen47 replied to vincen47's topic in WIP: Model Trucks: Big Rigs and Heavy Equipment
Thank you, everyone, for your positive comments. -
Love the IH livery. It’ll look fantastic.
-
1988 Chevrolet C1500 Silverado
vincen47 replied to Chuck Most's topic in Model Trucks: Pickups, Vans, SUVs, Light Commercial
Nice work. Have you picked up any of the resin 3d printed aftermarket grilles for the GMT400 series? I just ordered one last night off of eBay. -
Peterbilt 379 RV
vincen47 replied to vincen47's topic in WIP: Model Trucks: Big Rigs and Heavy Equipment
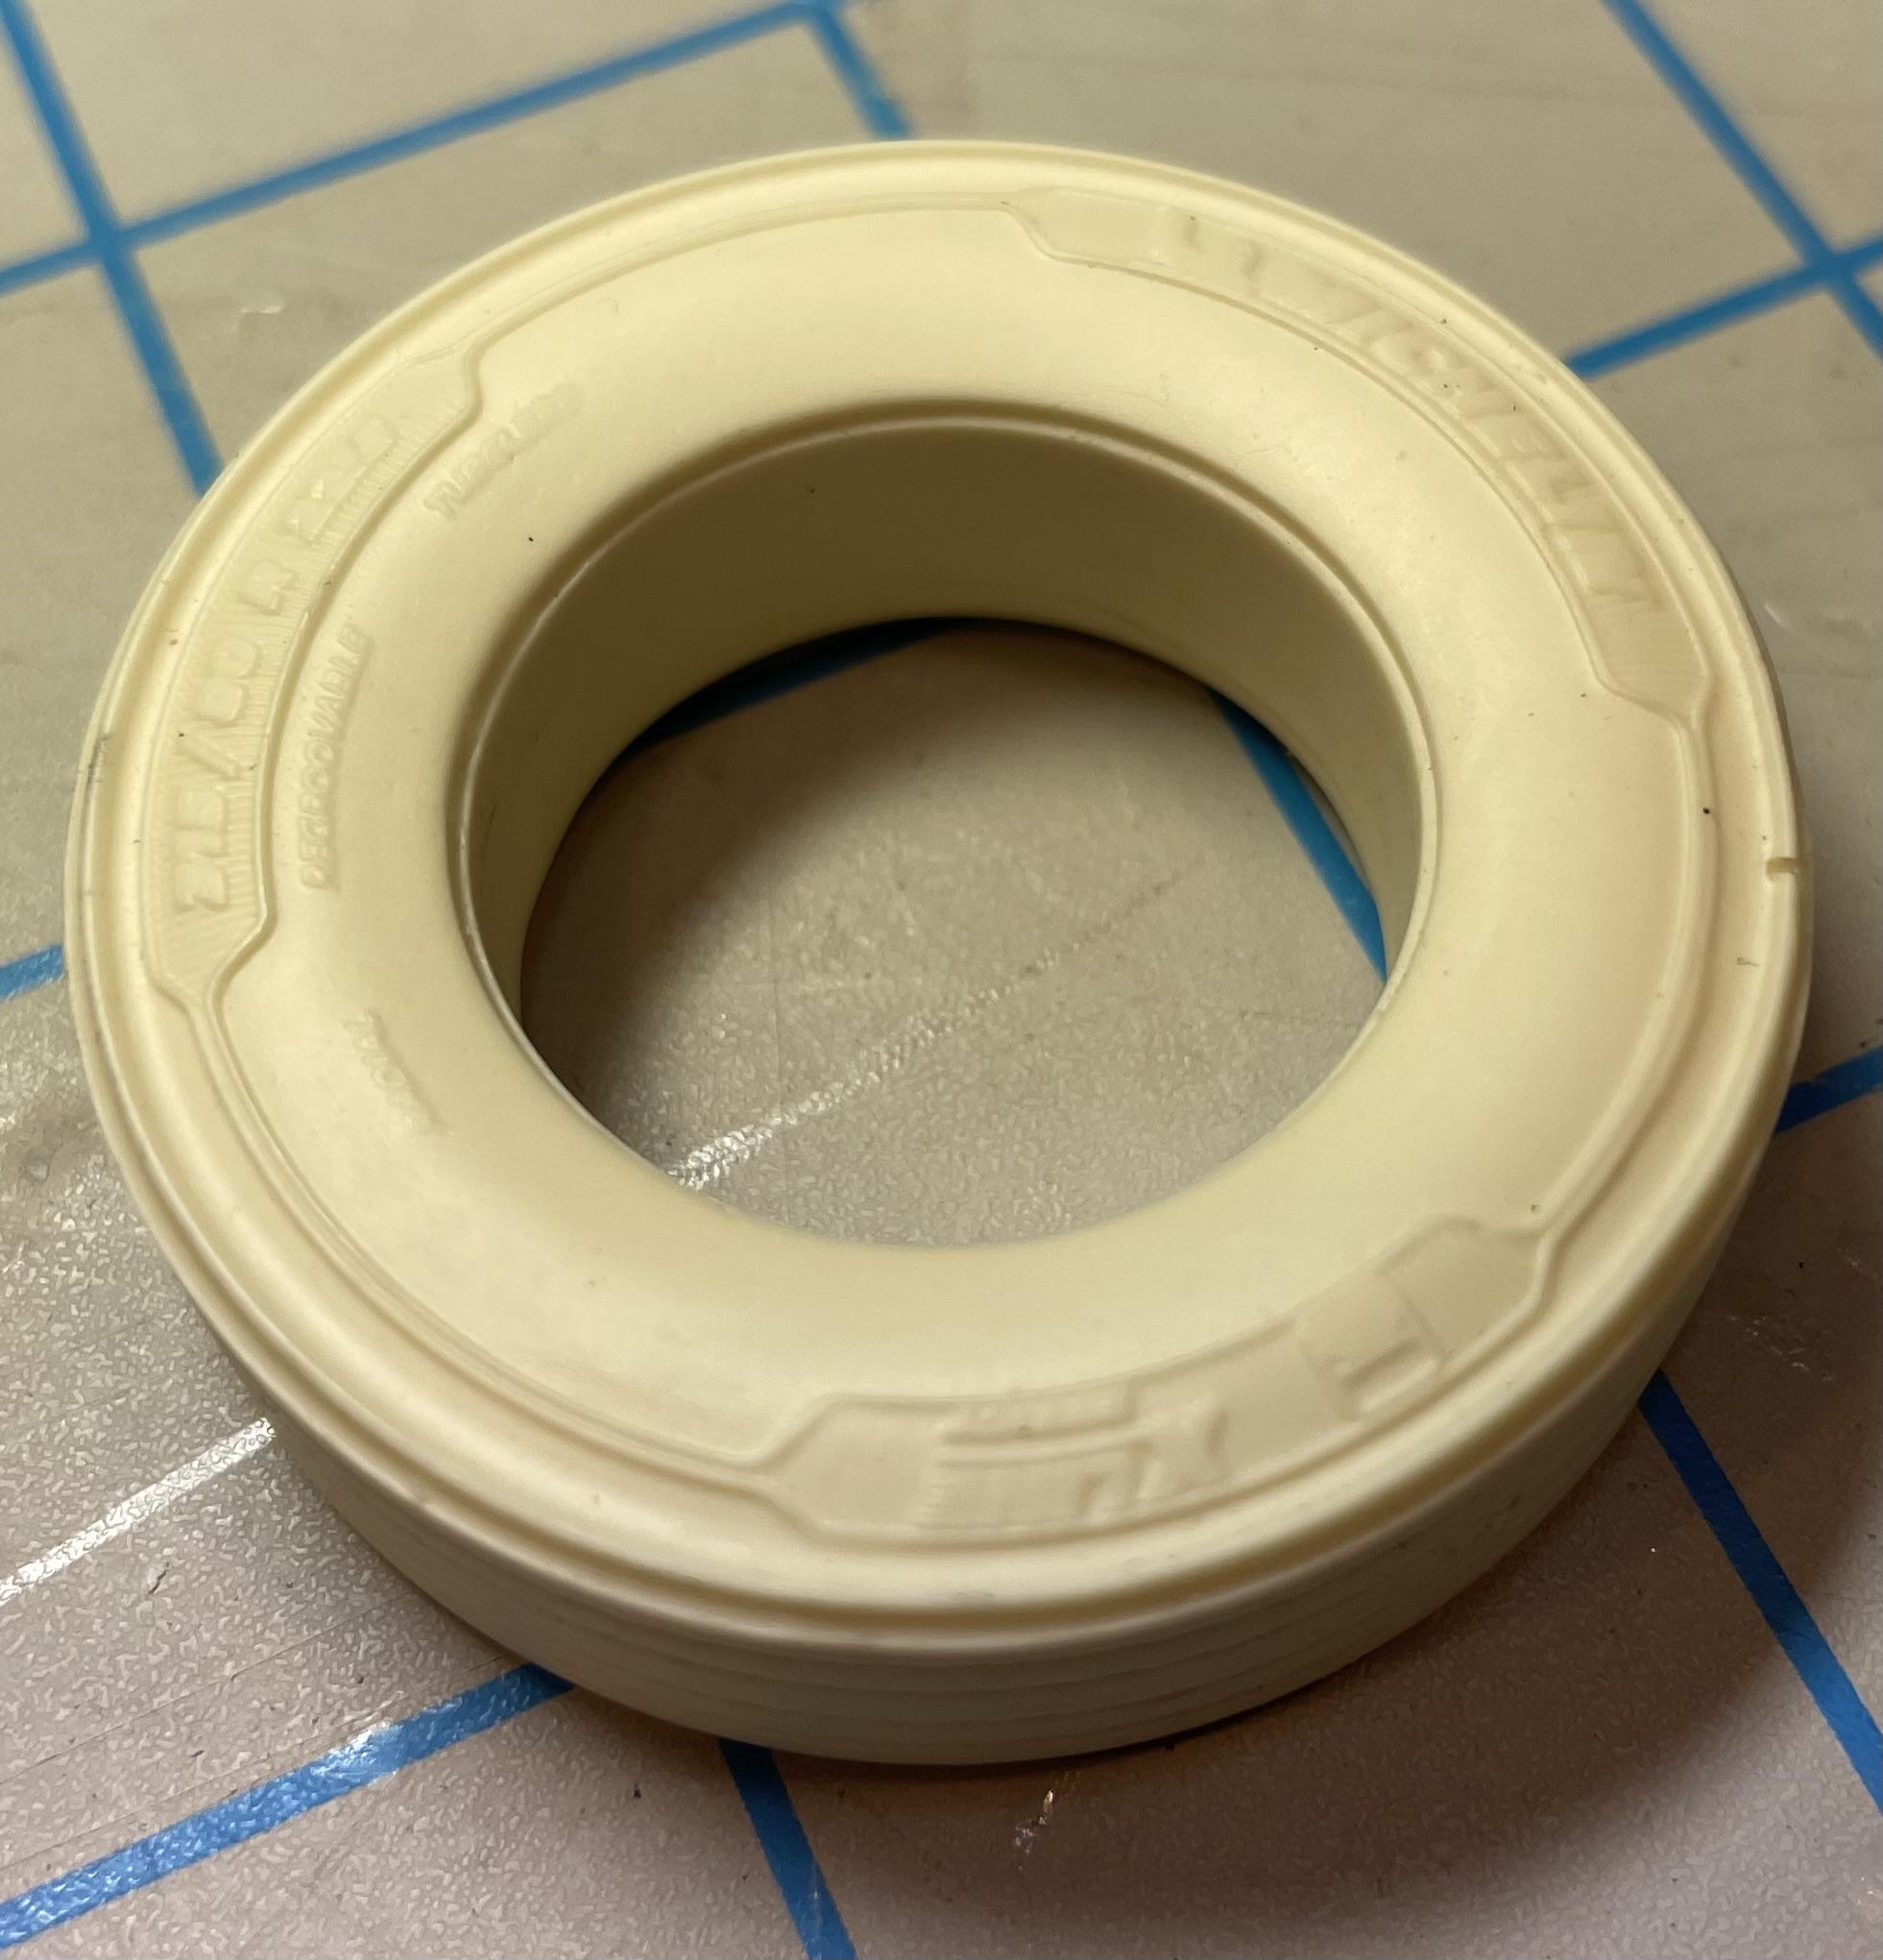
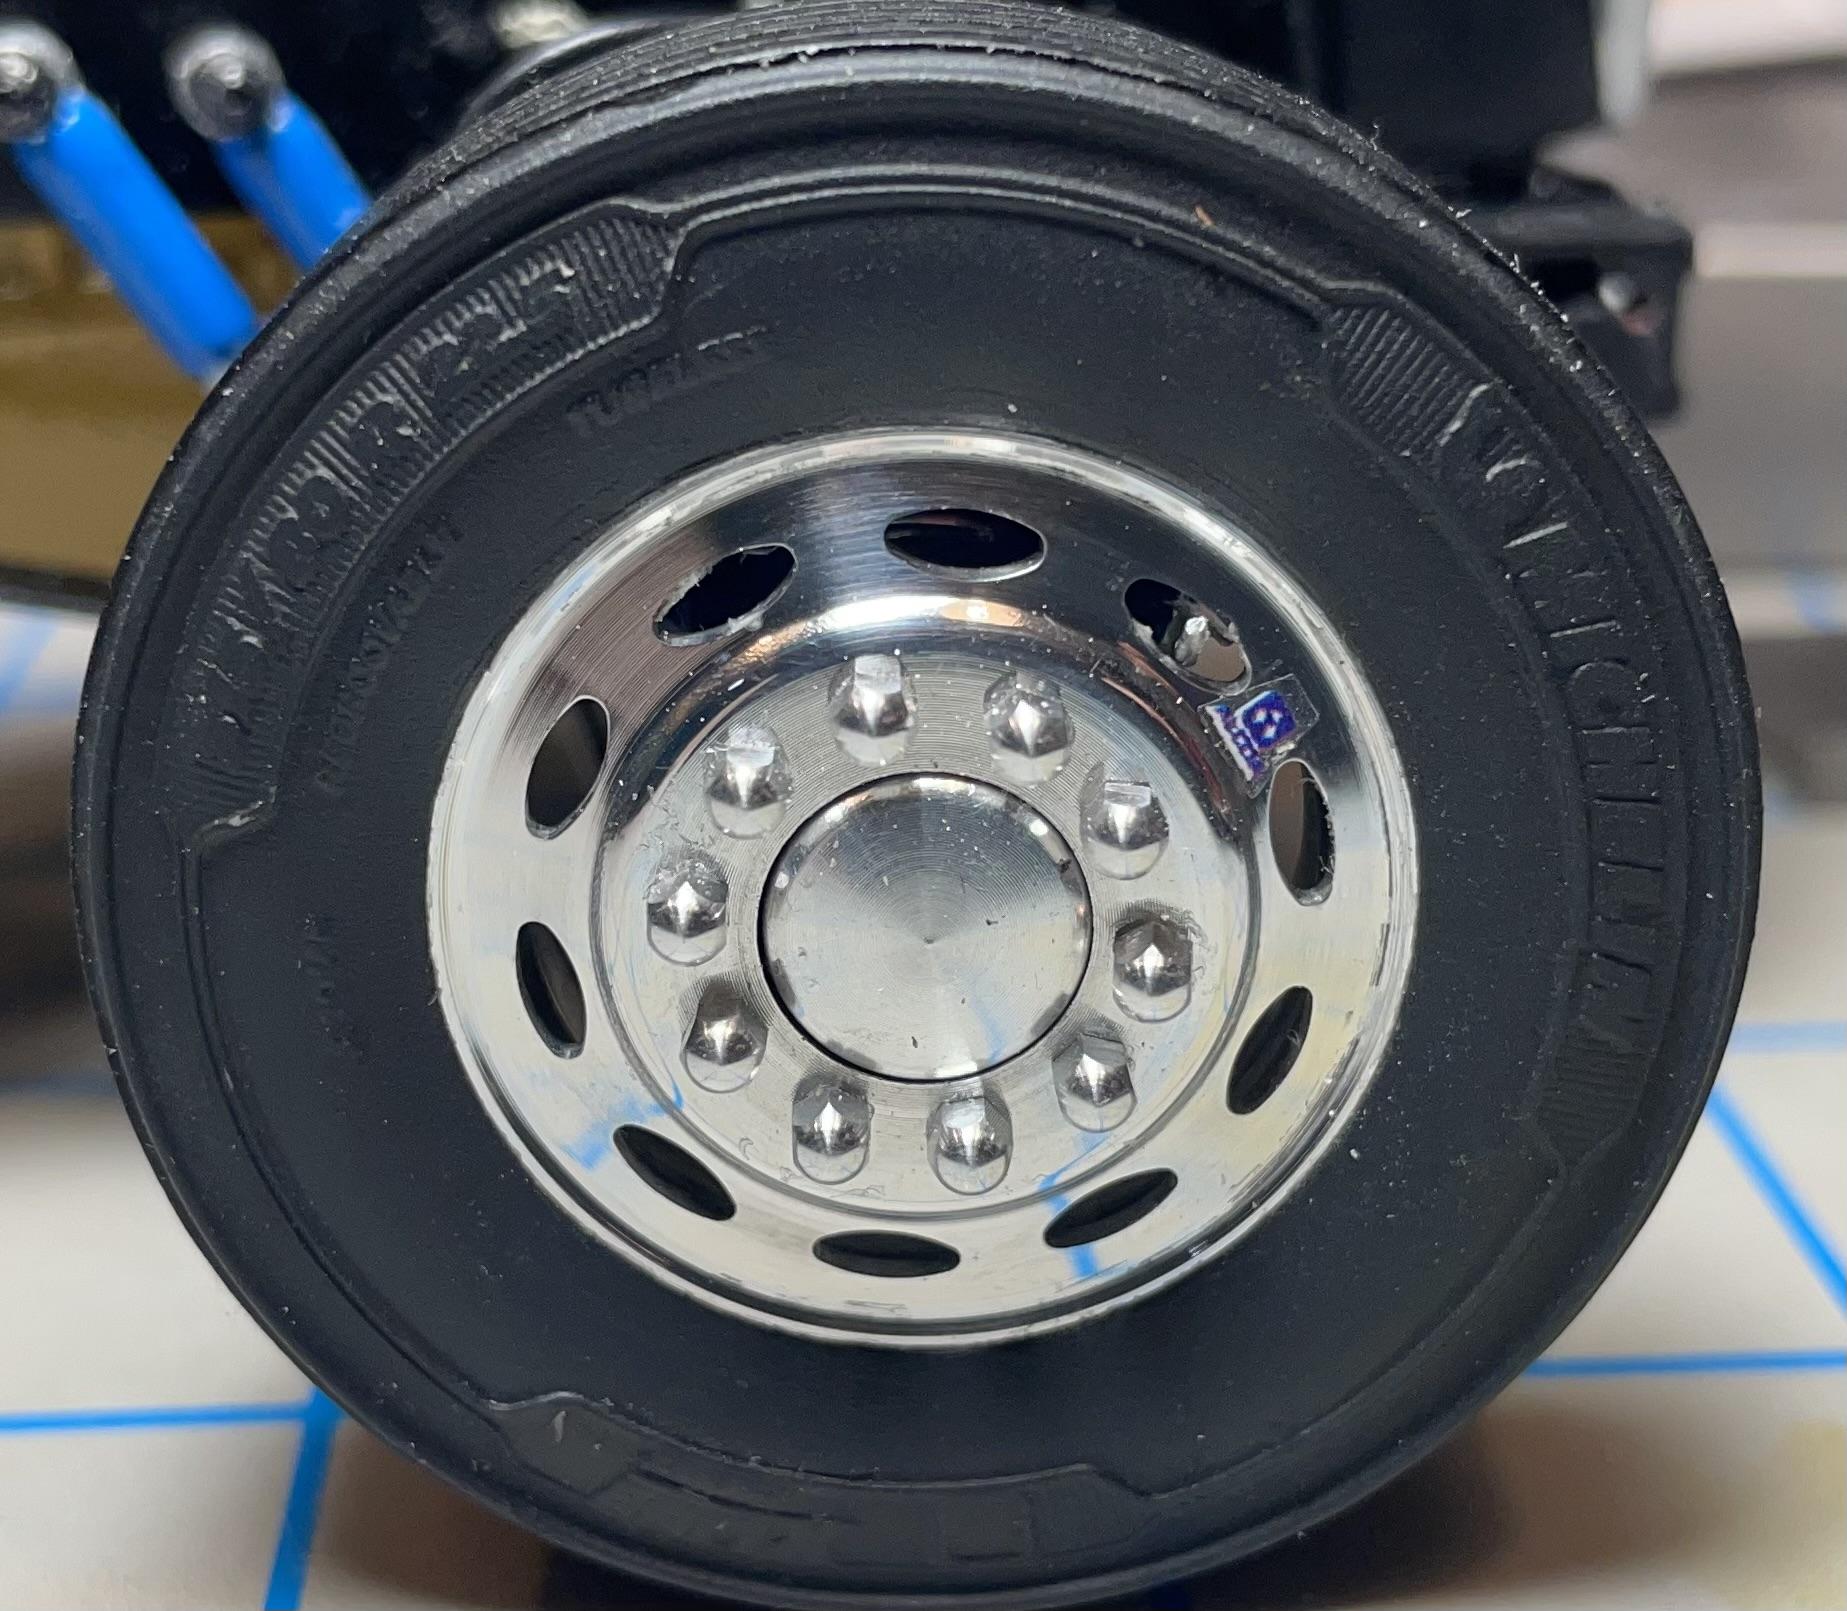
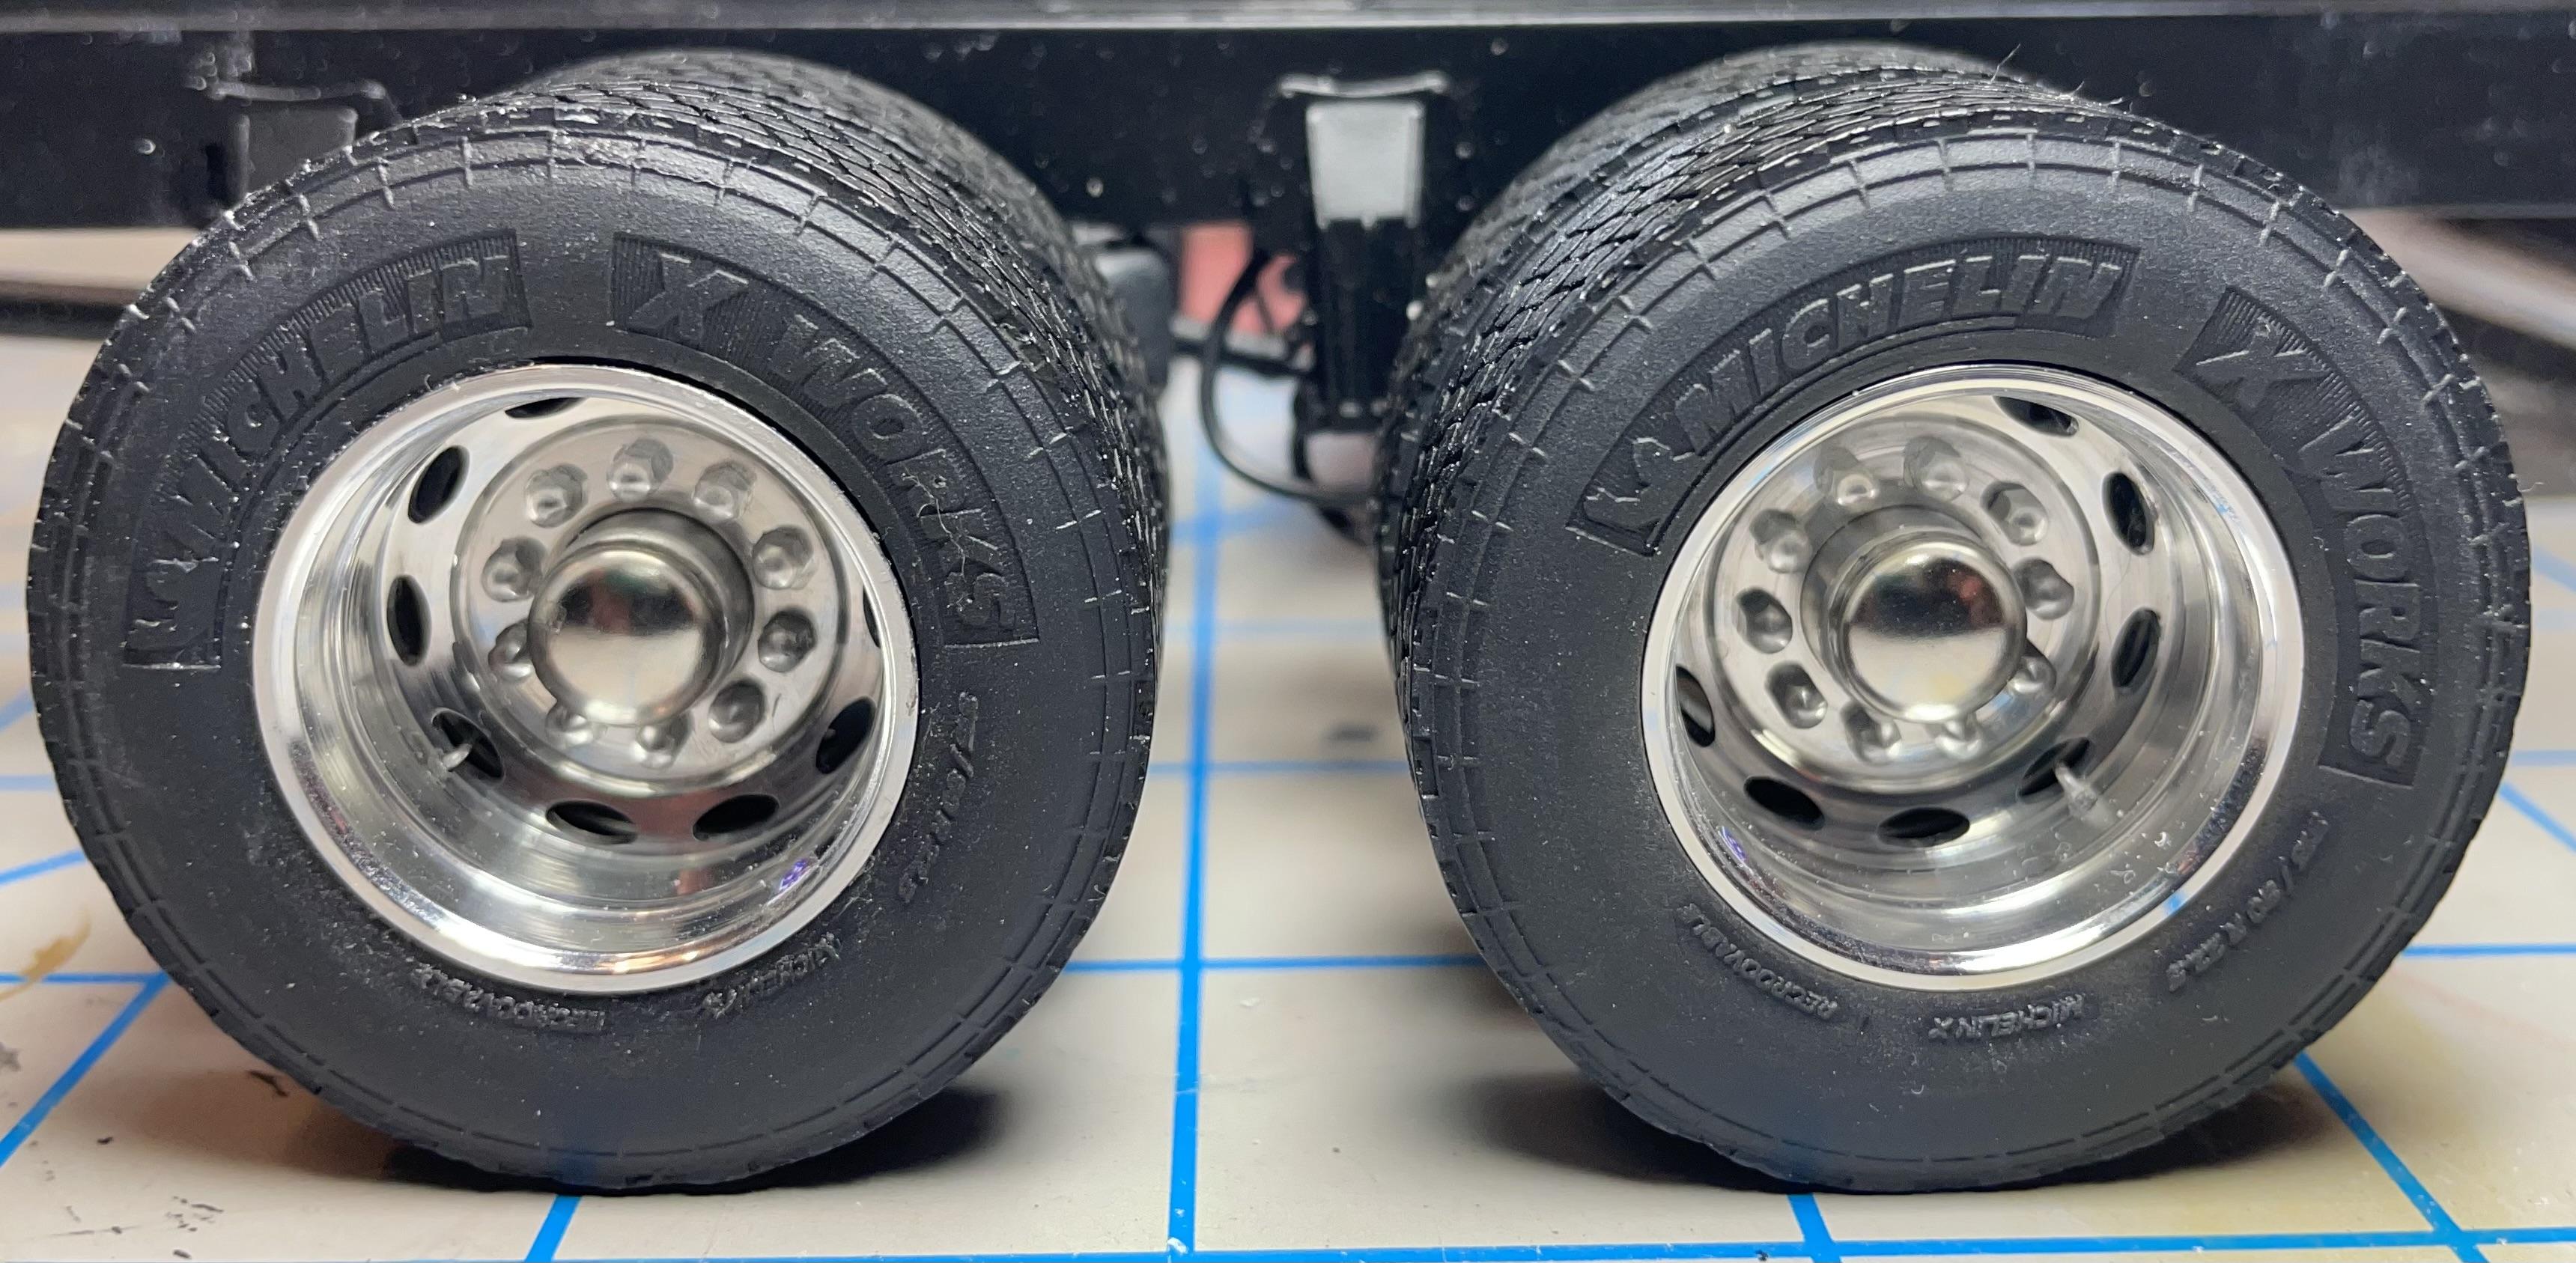
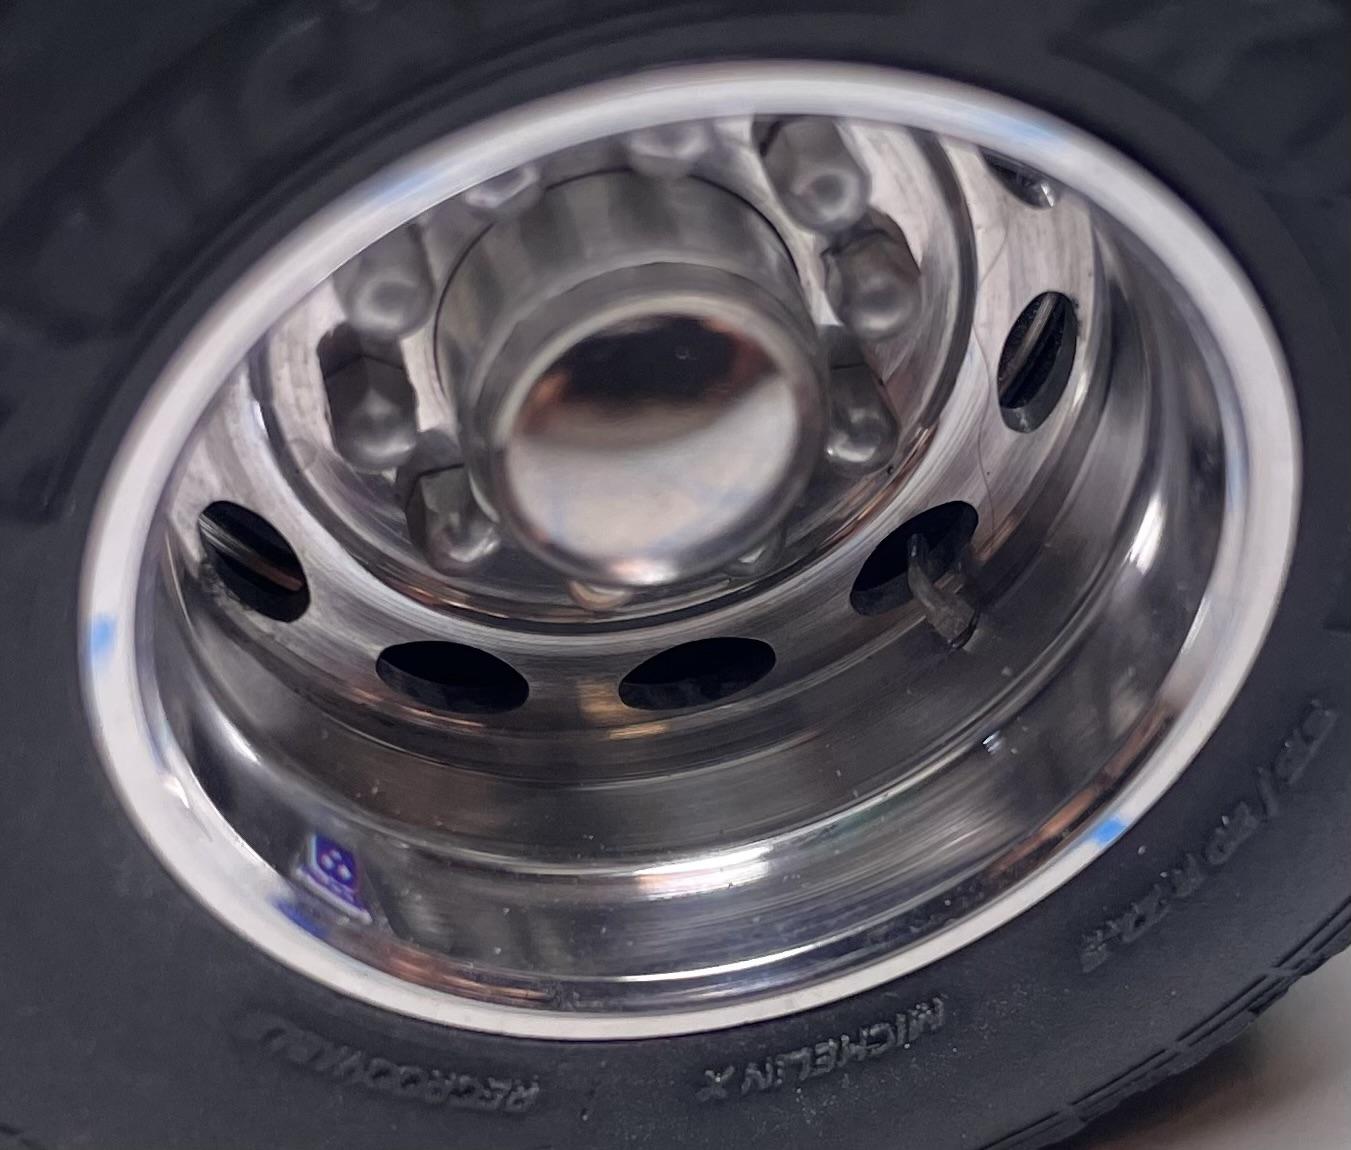
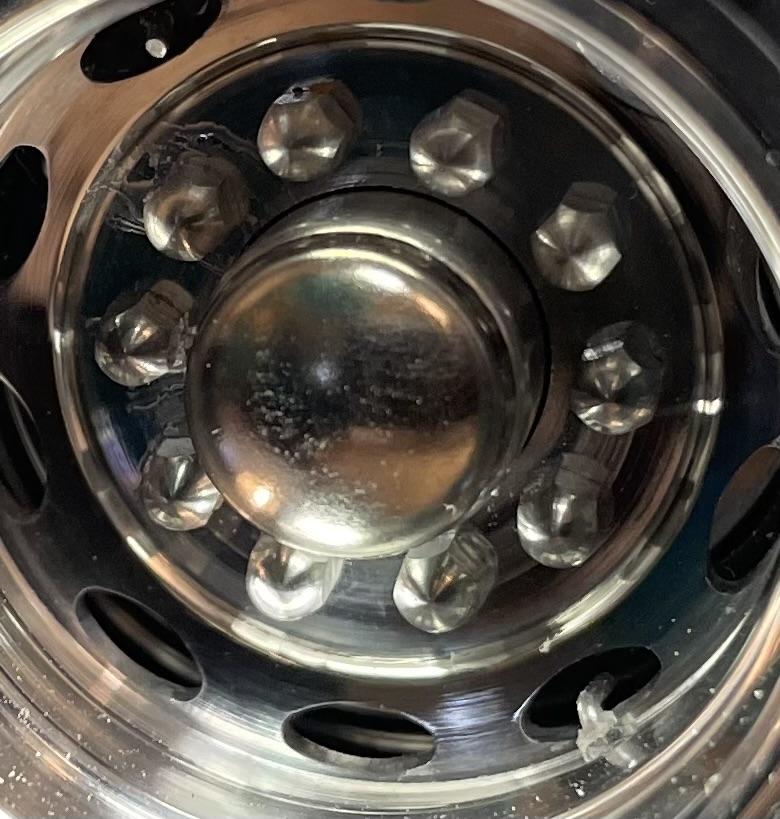
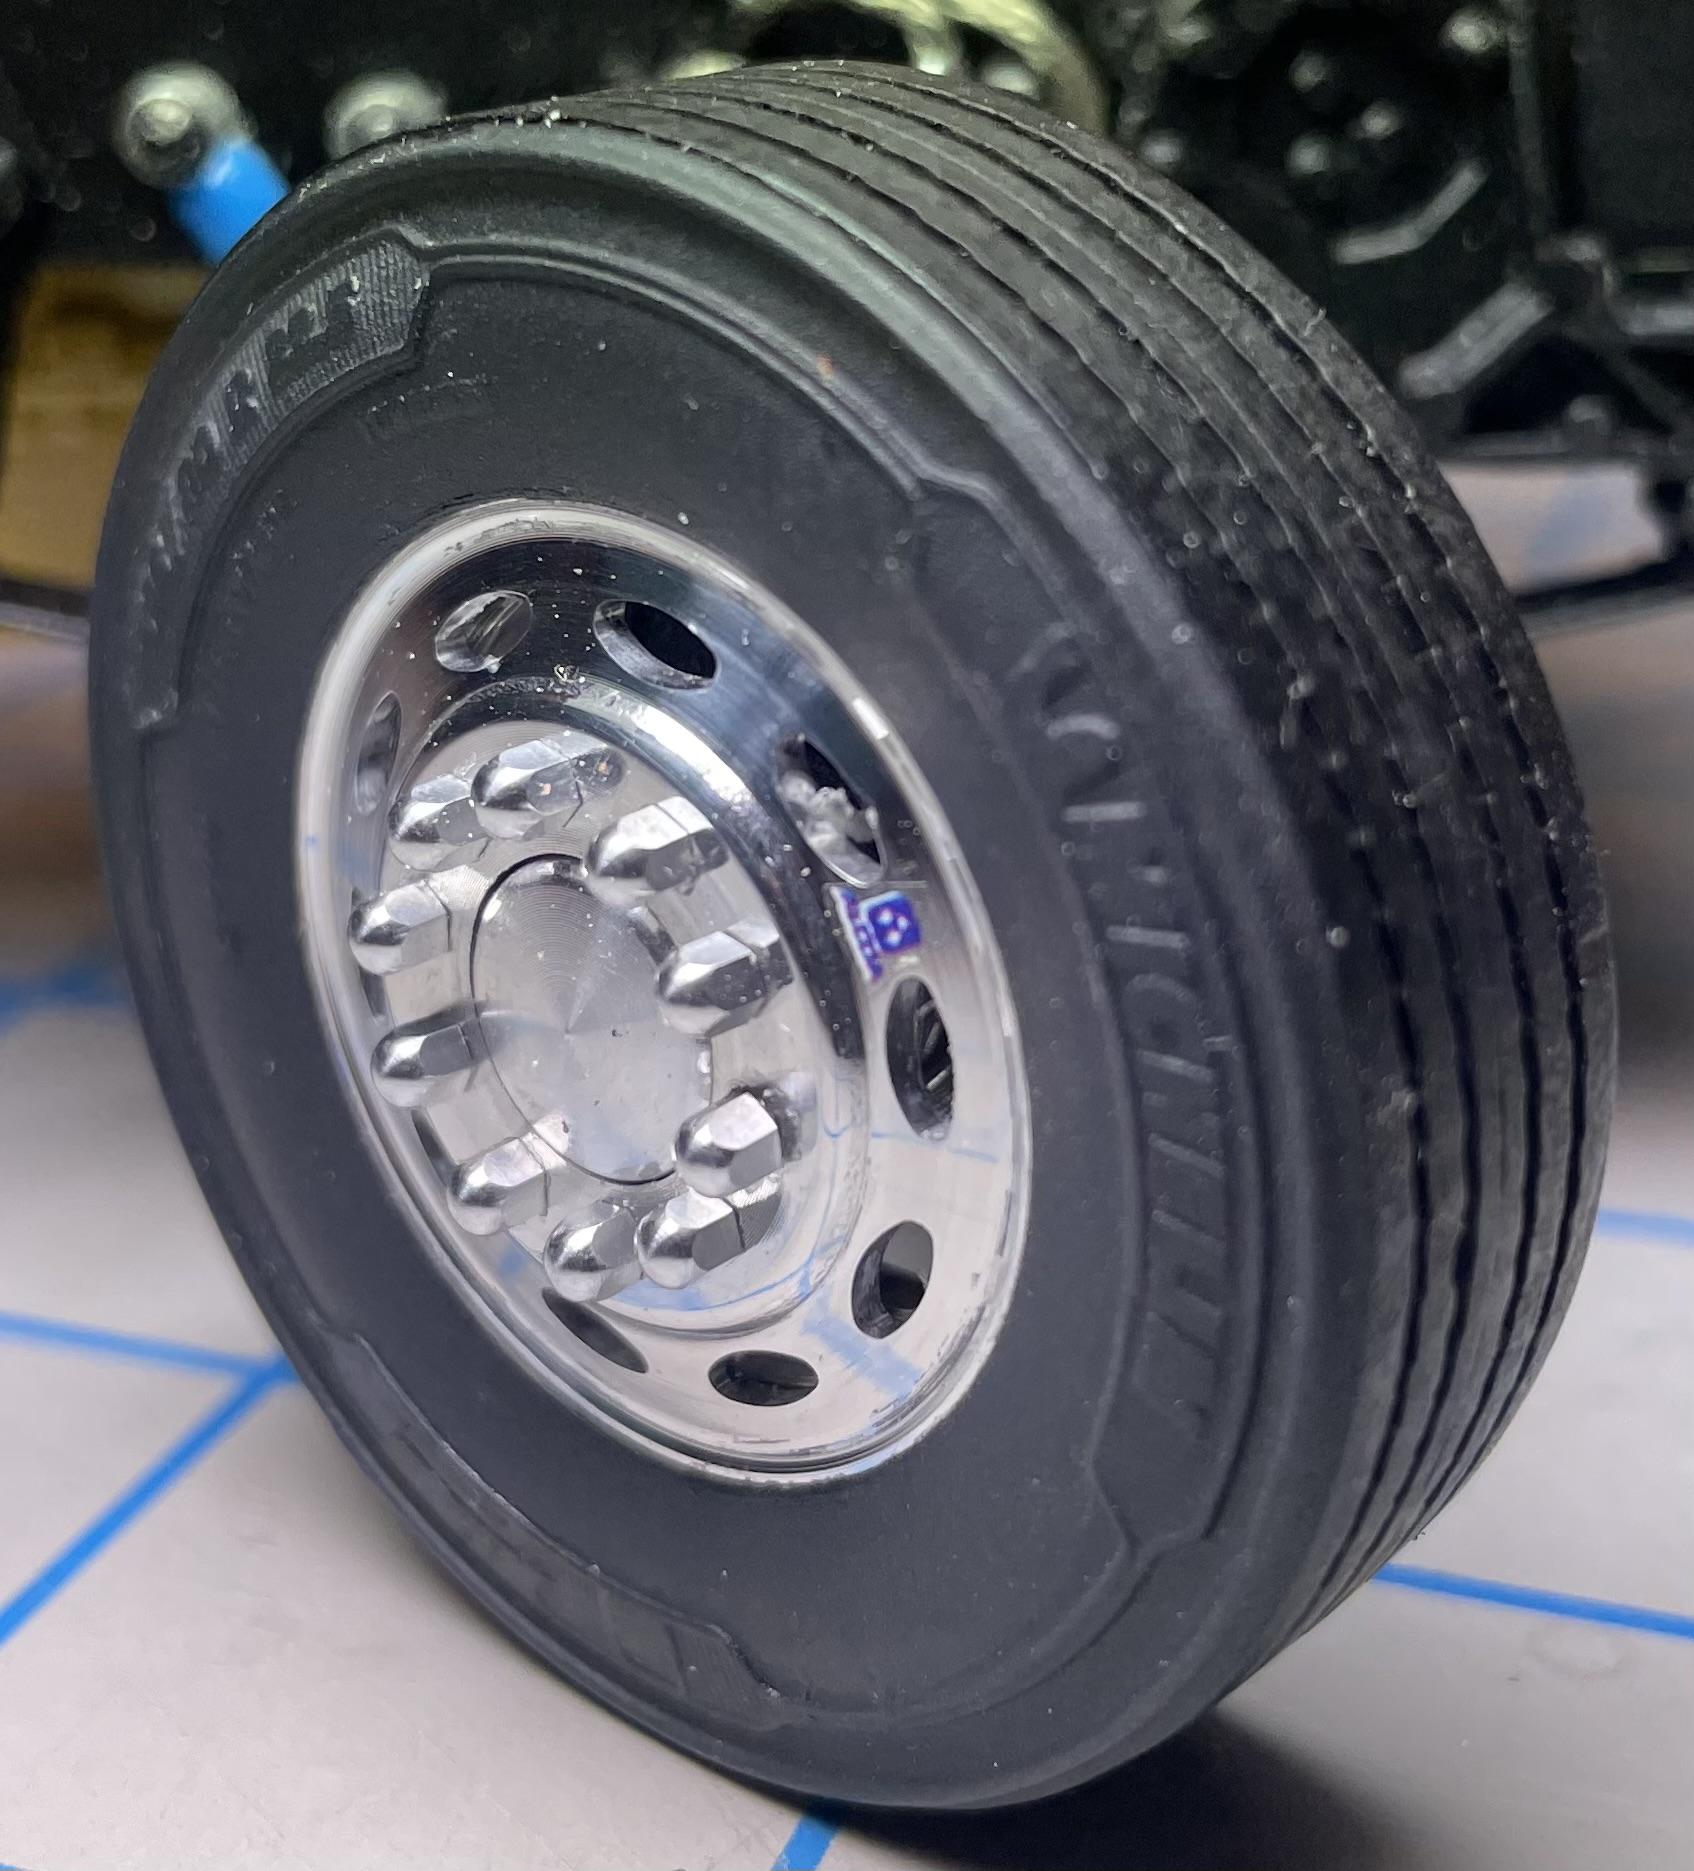
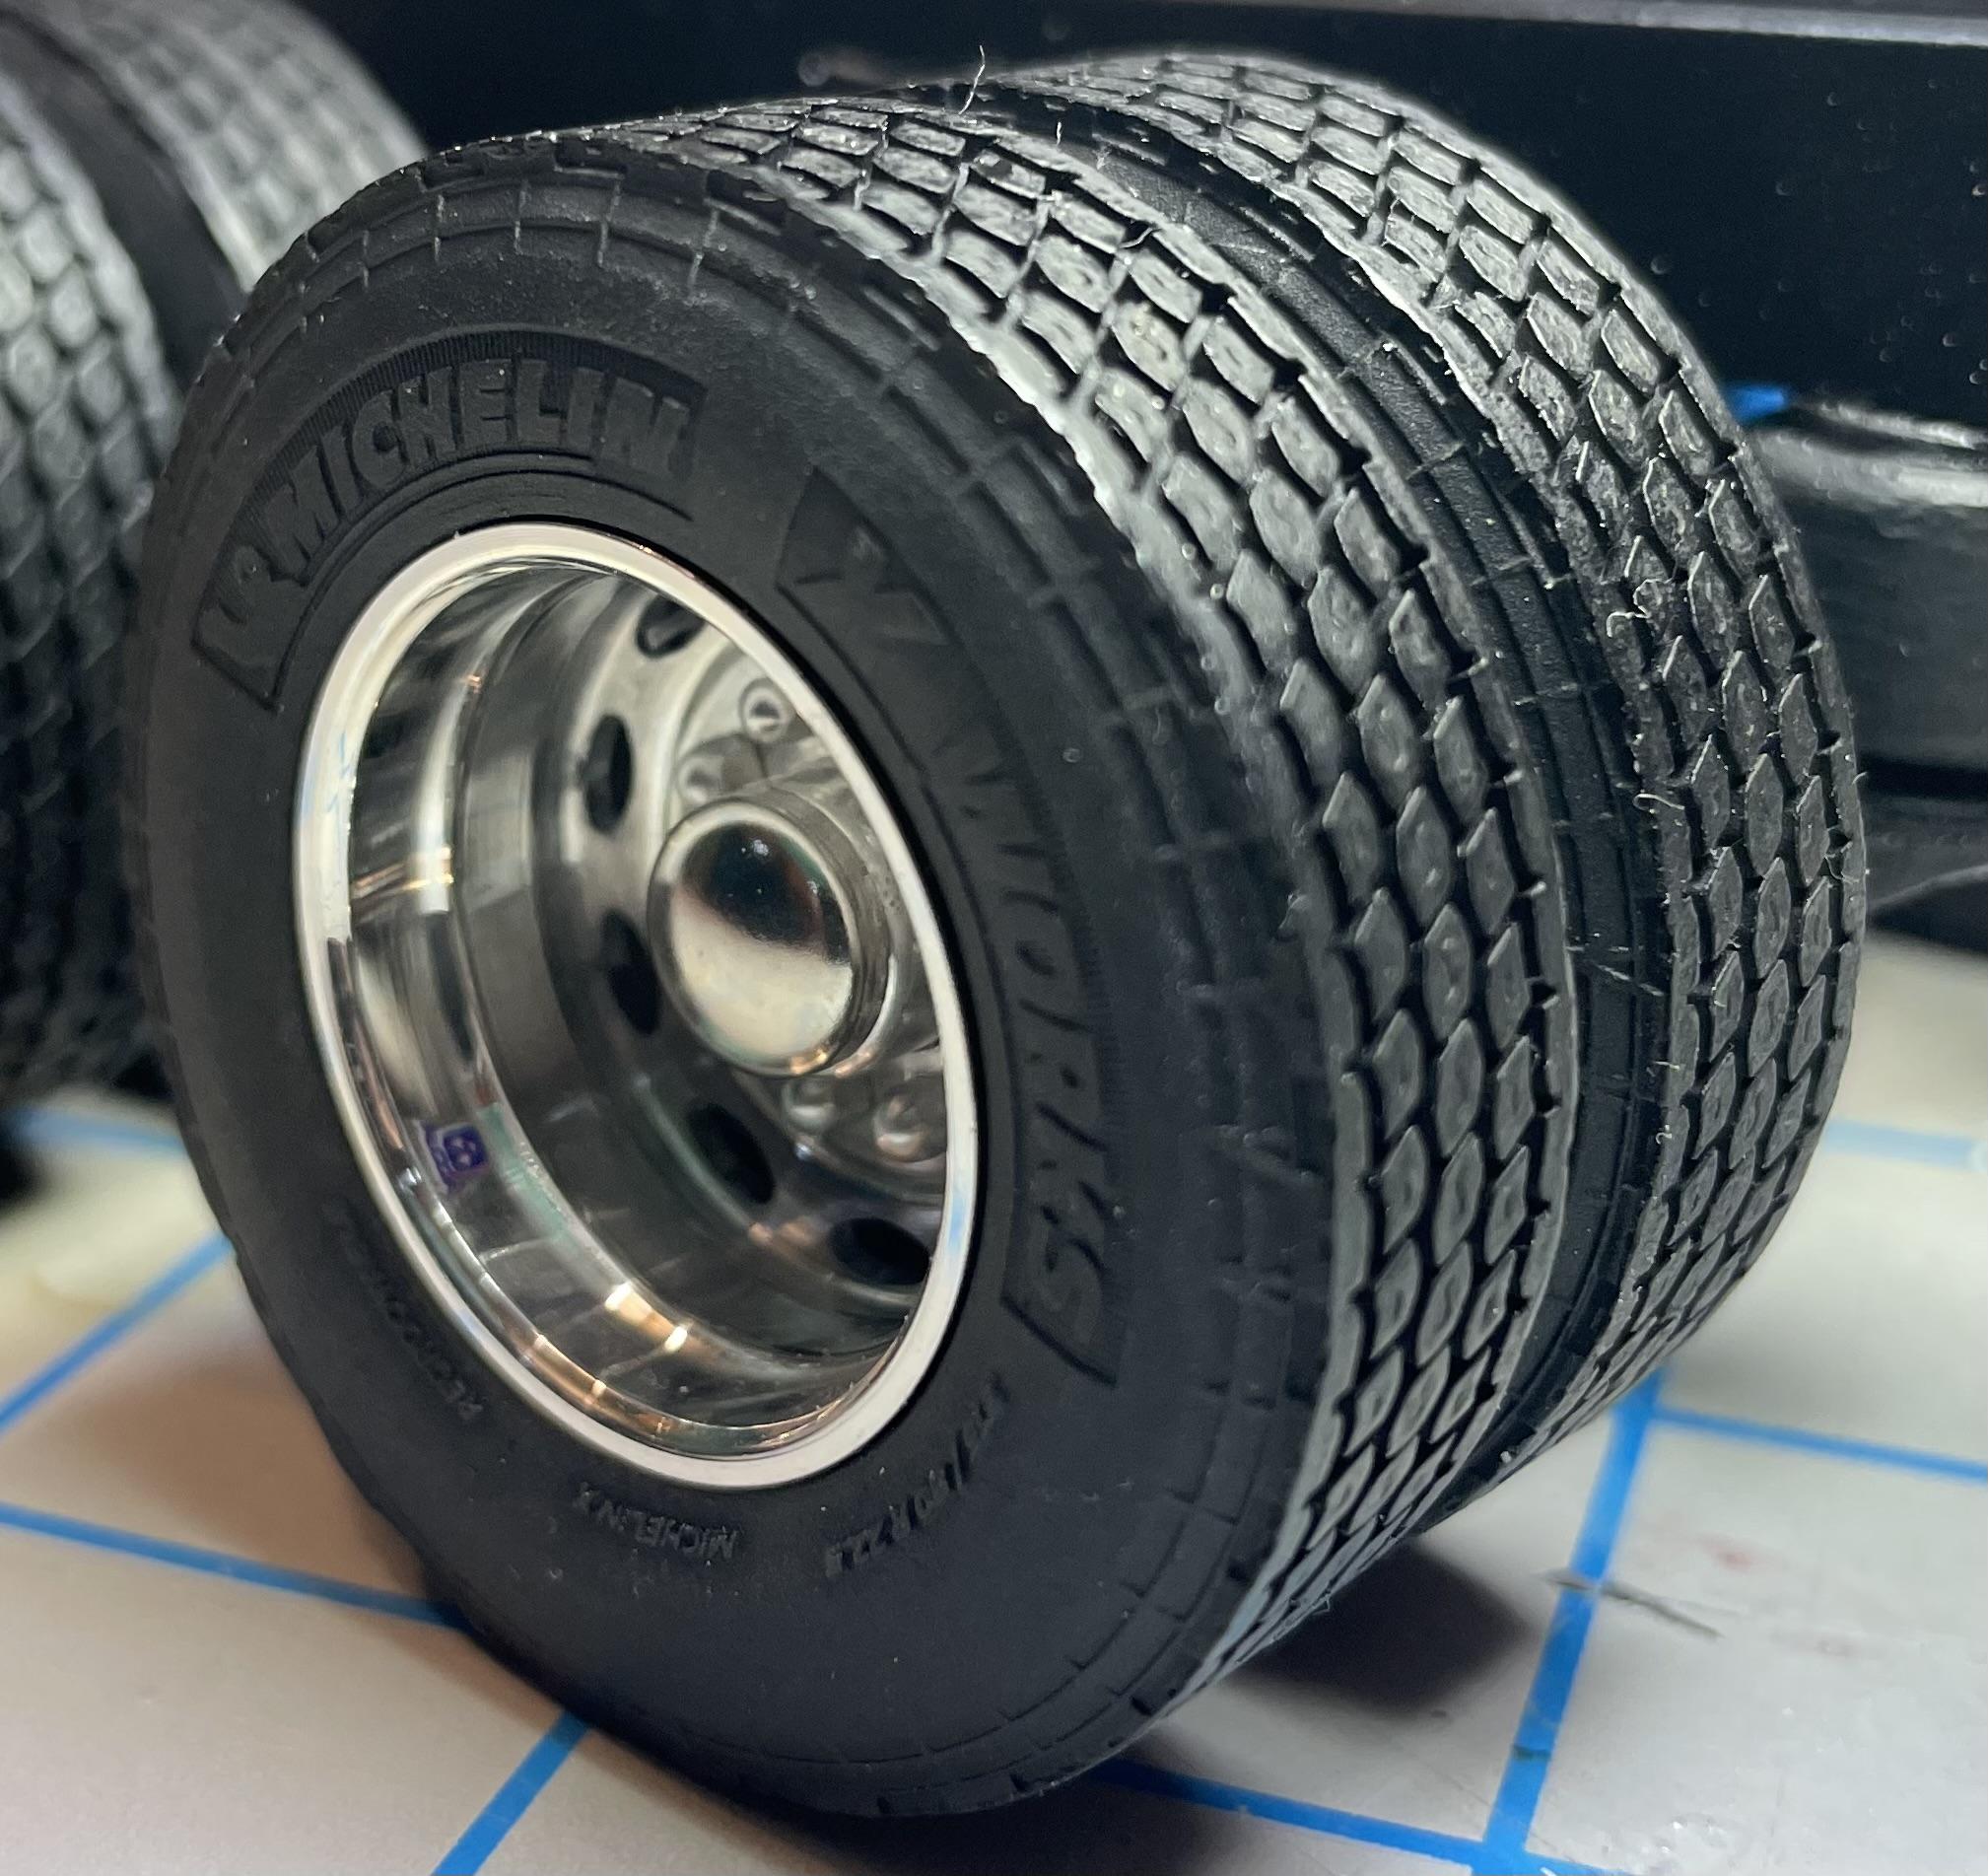
Wheels and Tires… Most 1:1 RVs of this size are running 315 (or larger) tires, especially in the steer position. The hobby market, in my opinion, is lacking in accurate big rig tire offerings - don’t get me started on the generic junk that comes in kits that really look like 1:1 all-position retreads more than anything else… So, I searched for a while looking for detailed, modern tires that would be accurate for the build. A&N Resin came to the rescue when they introduced the perfect tires - Michelin X-Line Energy Z Coach 315/80r22.5 Steers and X-Works 315/80r22.5 Drive tires. Incredibly detailed. At first, I was disappointed they were hard resin, but that turned out to be a blessing as they’d support the weight. I now prefer hard resin tires. Painted with Tamiya Rubber Black, they look the part. The wheels are real aluminum Peterbilt Oval Alcoas from Keystone Aluminum Model Miniatures. Unfortunately, he’s no longer around, but M&R offers great ones, too. The rims fit the M&R hubs perfectly. However, the A&N tires had to be sanded out larger to accommodate the one-piece wheels. Not a fun thing to do. I used sand paper wrapped around a broom handle, gradually adding layers of paper. 10 tires took a while, as you can imagine. I detailed them by adding Acorn nuts from Keystone, Alcoa decals from Model Truckin’ and scratch-made valve stems from Detail Master #1 line and fittings. Tedious, but worth it. I don’t think I took any photos of the rims before I mounted the tires. Wish I had. The outside wheels have inside-facing valve stems, just like they should, but pardon that dust on the rims in the close up. The tread and sidewall detail is fantastic on these tires. They are geared towards the Euro truck market where it’s more common to run 315s in line haul service, but it’s great having the option here in the U.S. for a unique build like this one. A&N also offers heavier tread pattern 315s, along with 385s for highway tread steer, heavy tread steer, and drive treads, for your North American fire, construction, and logging equipment needs. They also have resin wheels designed to easily fit their tires.
-
Finally finished! Diamond Reo
vincen47 replied to Bren's topic in Model Trucks: Big Rigs and Heavy Equipment
Love the added detail, especially to the exhaust. -
His website often says “sold out”, but if that’s what you’re after, send him an email. He usually has the items, but shipping them can take a while. Still, awesome products and a great guy. Jamie makes the non-steerable spring lift, and A&N has the air type.
-
You can also check out A&N and Moluminum, depending on the type you’re after.