vincen47
-
Posts
1,654 -
Joined
-
Last visited
Content Type
Profiles
Forums
Events
Gallery
Everything posted by vincen47
-
 Looks even better with the trailer. I hope Global Scale can add this one to their lineup. I wonder if Alfa has a T660? That would be a great build. I’ve always liked the T660 Kenworth.
 -
Nice build. Even better with the trailer!
-
KW aerodyne cabover
vincen47 replied to Bronzekeg's topic in Model Trucks: Big Rigs and Heavy Equipment
Another great build! She’s beautiful. -
Awesome, glad he could help. Great builds you’ve got going there.
-
Excellent! Another beauty from your “Trucks of Today” series. I like the outdoor photography, too. You certainly live in a scenic area of the country. This might be my favorite modern truck you’ve done so far.
-
International 9670 KFS
vincen47 replied to Hessel Hemstra's topic in Model Trucks: Big Rigs and Heavy Equipment
She’s a beauty! I’d love to get my hands on one of these transkits. Hopefully Models by Dave will be offering them eventually. -
Wow that’s a beautiful yacht.
-
Western Star 4900 FA plow truck
vincen47 replied to BK9300's topic in WIP: Model Trucks: Big Rigs and Heavy Equipment
Great updates on your progress, Brian. Nice work on the hood. I’ll have to remember that “caulk” technique. -
Peterbilt 379 RV
vincen47 replied to vincen47's topic in WIP: Model Trucks: Big Rigs and Heavy Equipment
I got it several years ago, I think around 2018 from a guy on EBay that goes by thorloveseleanor. He’s still an active seller on EBay, but he hasn’t listed anything like that in a long time. He had some custom sleeper frames back then, and I requested him to make a couple for me. The first frame was shorter, and I used it to make the Aeromax RV. The longer one was used for this project. If you message him on EBay, maybe he can help. The prints were rough by today’s standards, requiring a lot of sanding. 3d printing has come a long way since then. Stuff is so much smoother now. -
1974 Peterbilt 352
vincen47 replied to DRIPTROIT 71's topic in Model Trucks: Big Rigs and Heavy Equipment
The sleeper window is great. Haven’t seen a build with that option before. Awesome. -
1974 Peterbilt 352
vincen47 replied to DRIPTROIT 71's topic in Model Trucks: Big Rigs and Heavy Equipment
Great build. Nice wheels, and I love the engine choice. You spec’d this truck very well. -
Peterbilt 379 RV
vincen47 replied to vincen47's topic in WIP: Model Trucks: Big Rigs and Heavy Equipment
Thanks! Yeah, it’s a big one. I’ll be starting on the stacker trailer shortly. -
Favorite Classic Truck?
vincen47 replied to JollySipper's topic in General Automotive Talk (Trucks and Cars)
Same here! -
Peterbilt 379 RV
vincen47 replied to vincen47's topic in WIP: Model Trucks: Big Rigs and Heavy Equipment
🤣 I actually already picked up a couple 3d printed lawn chairs and a grill! -
Peterbilt 379 RV
vincen47 replied to vincen47's topic in WIP: Model Trucks: Big Rigs and Heavy Equipment
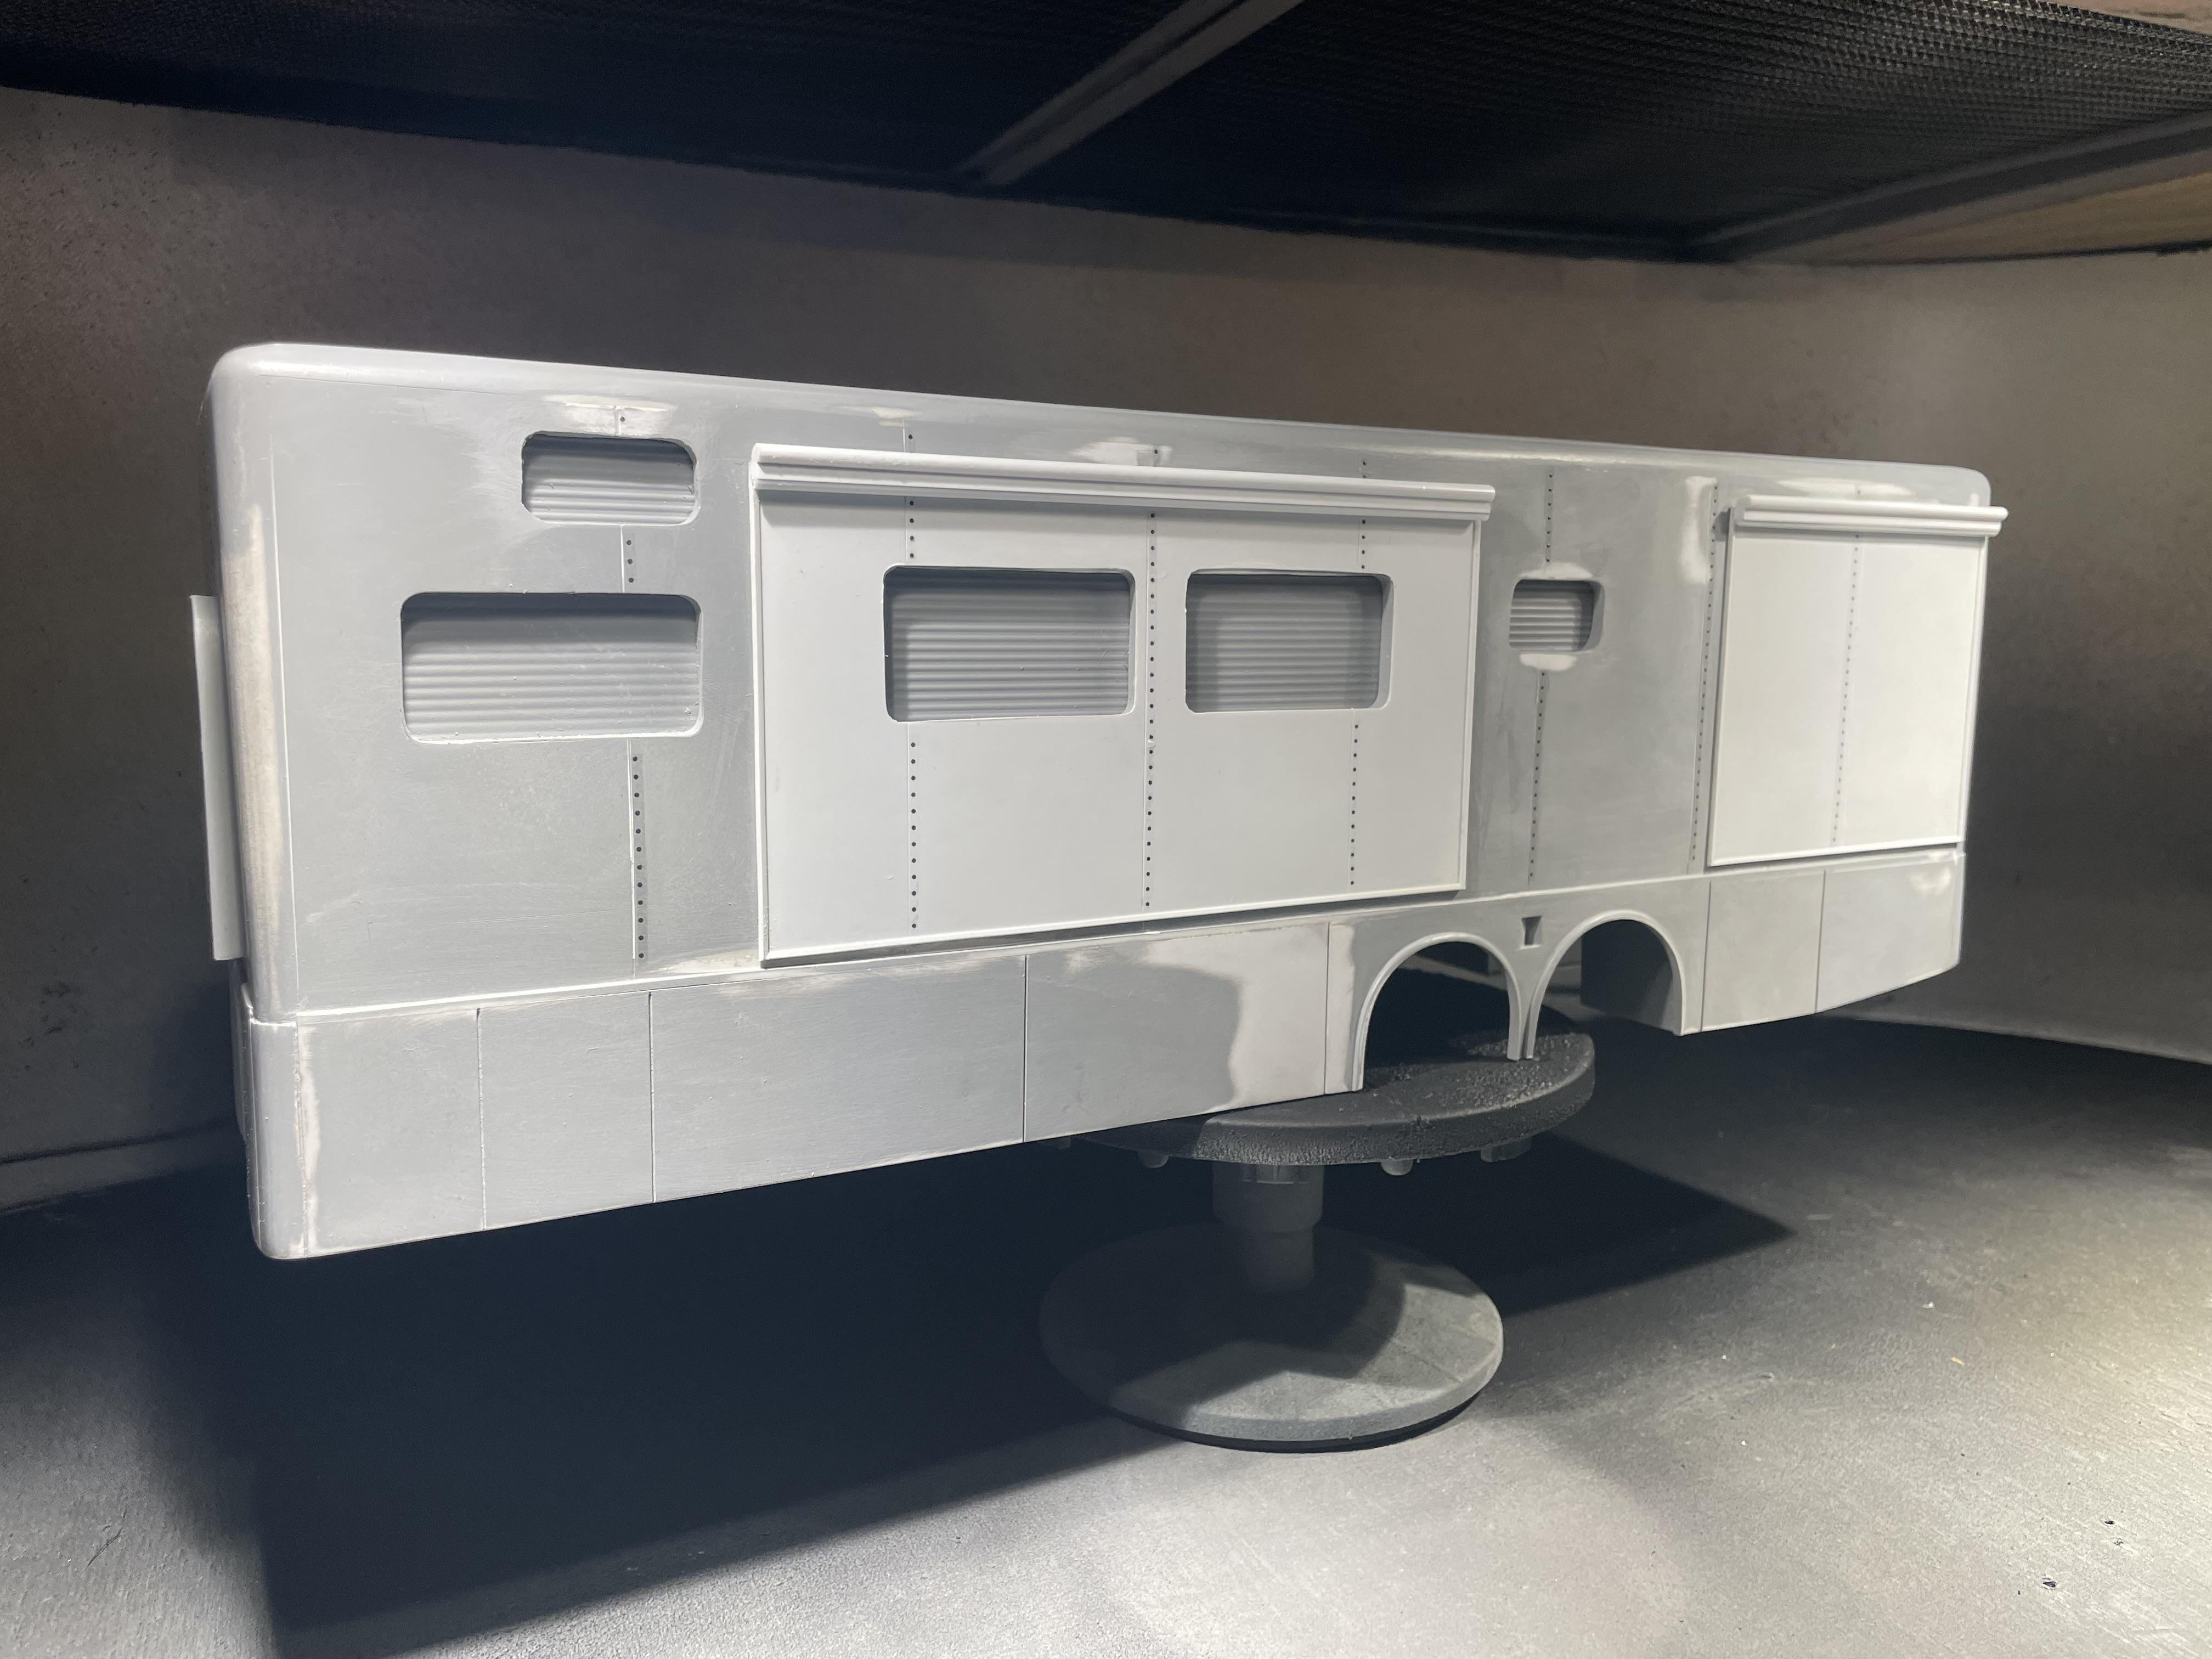
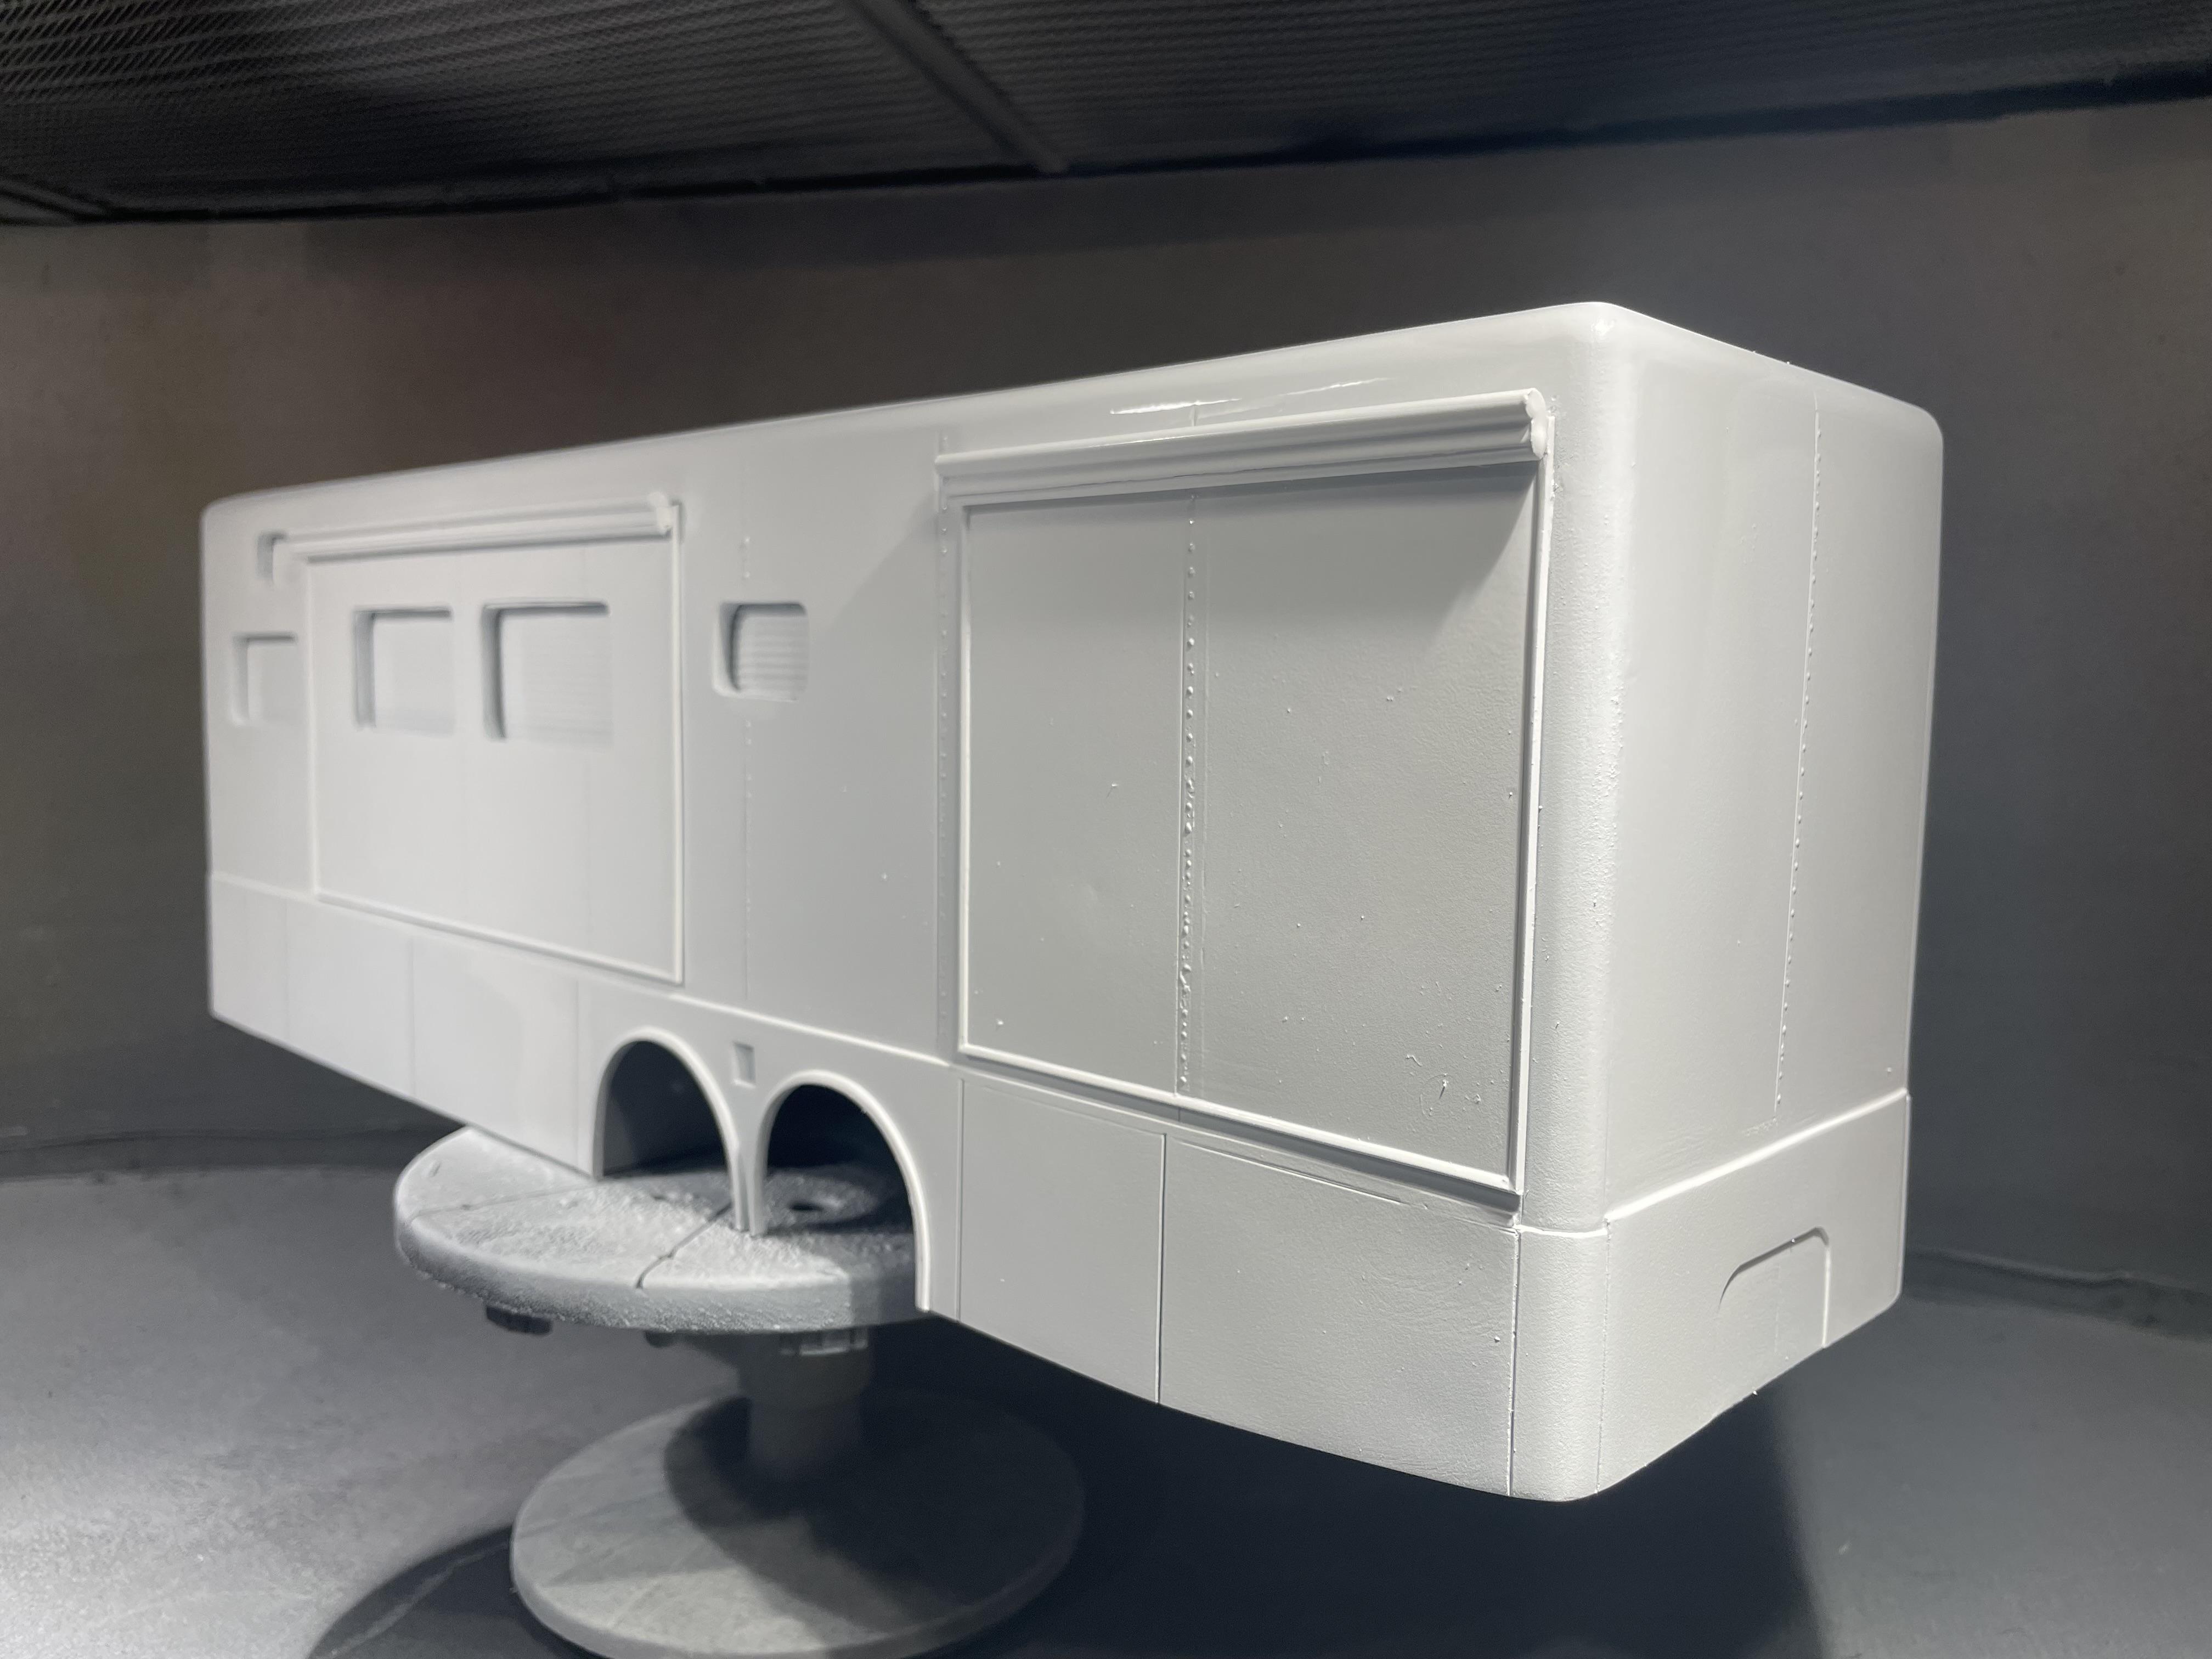
Got the rivet decals applied. To be honest, they are annoying to work with. They are the ones from Micro Mark. Maybe a different brand would be better? They are much more fragile than typical decals. After applying the rivets, I added another coat of primer. A little more touch up body work and then the final primer coat will be next.
-
Kenworth aerodyne cabover
vincen47 replied to Bronzekeg's topic in WIP: Model Trucks: Big Rigs and Heavy Equipment
Coming along so nice. Sleeper bedding is great. -
Peterbilt 379 RV
vincen47 replied to vincen47's topic in WIP: Model Trucks: Big Rigs and Heavy Equipment
Thanks! I appreciate it. They’re an odd vehicle, but really cool in my book. Combines the things I like best in life…trucks and camping. -
Ford LS Rescue truck
vincen47 replied to gotnitro?'s topic in WIP: Model Trucks: Big Rigs and Heavy Equipment
This is coming along nicely. A great build. Excellent concept and execution. -
Build of IH Pumper
vincen47 replied to Chariots of Fire's topic in WIP: Model Trucks: Big Rigs and Heavy Equipment
Creative and unique as always. Great build. -
FDNY Wrecker
vincen47 replied to Scott Eriksen's topic in WIP: Model Trucks: Big Rigs and Heavy Equipment
Yep. Gotta get the true Xacto blades, not the knock off BLAH_BLAH_BLAH_BLAH. Excellent work. Love the way the MP8 turned out. -
ALF Industrial Pumper
vincen47 replied to Firebuilder's topic in WIP: Model Trucks: Big Rigs and Heavy Equipment
What an awesome project. I love the look of the tandem axles. -
Peterbilt 379 RV
vincen47 replied to vincen47's topic in WIP: Model Trucks: Big Rigs and Heavy Equipment
Thanks! What a dream to have a 1:1 like it, for sure. -
I bet if you message him and ask, he may be able to list them.
-
I haven’t located a good set of towing mirrors, yet. Those are needed.
-
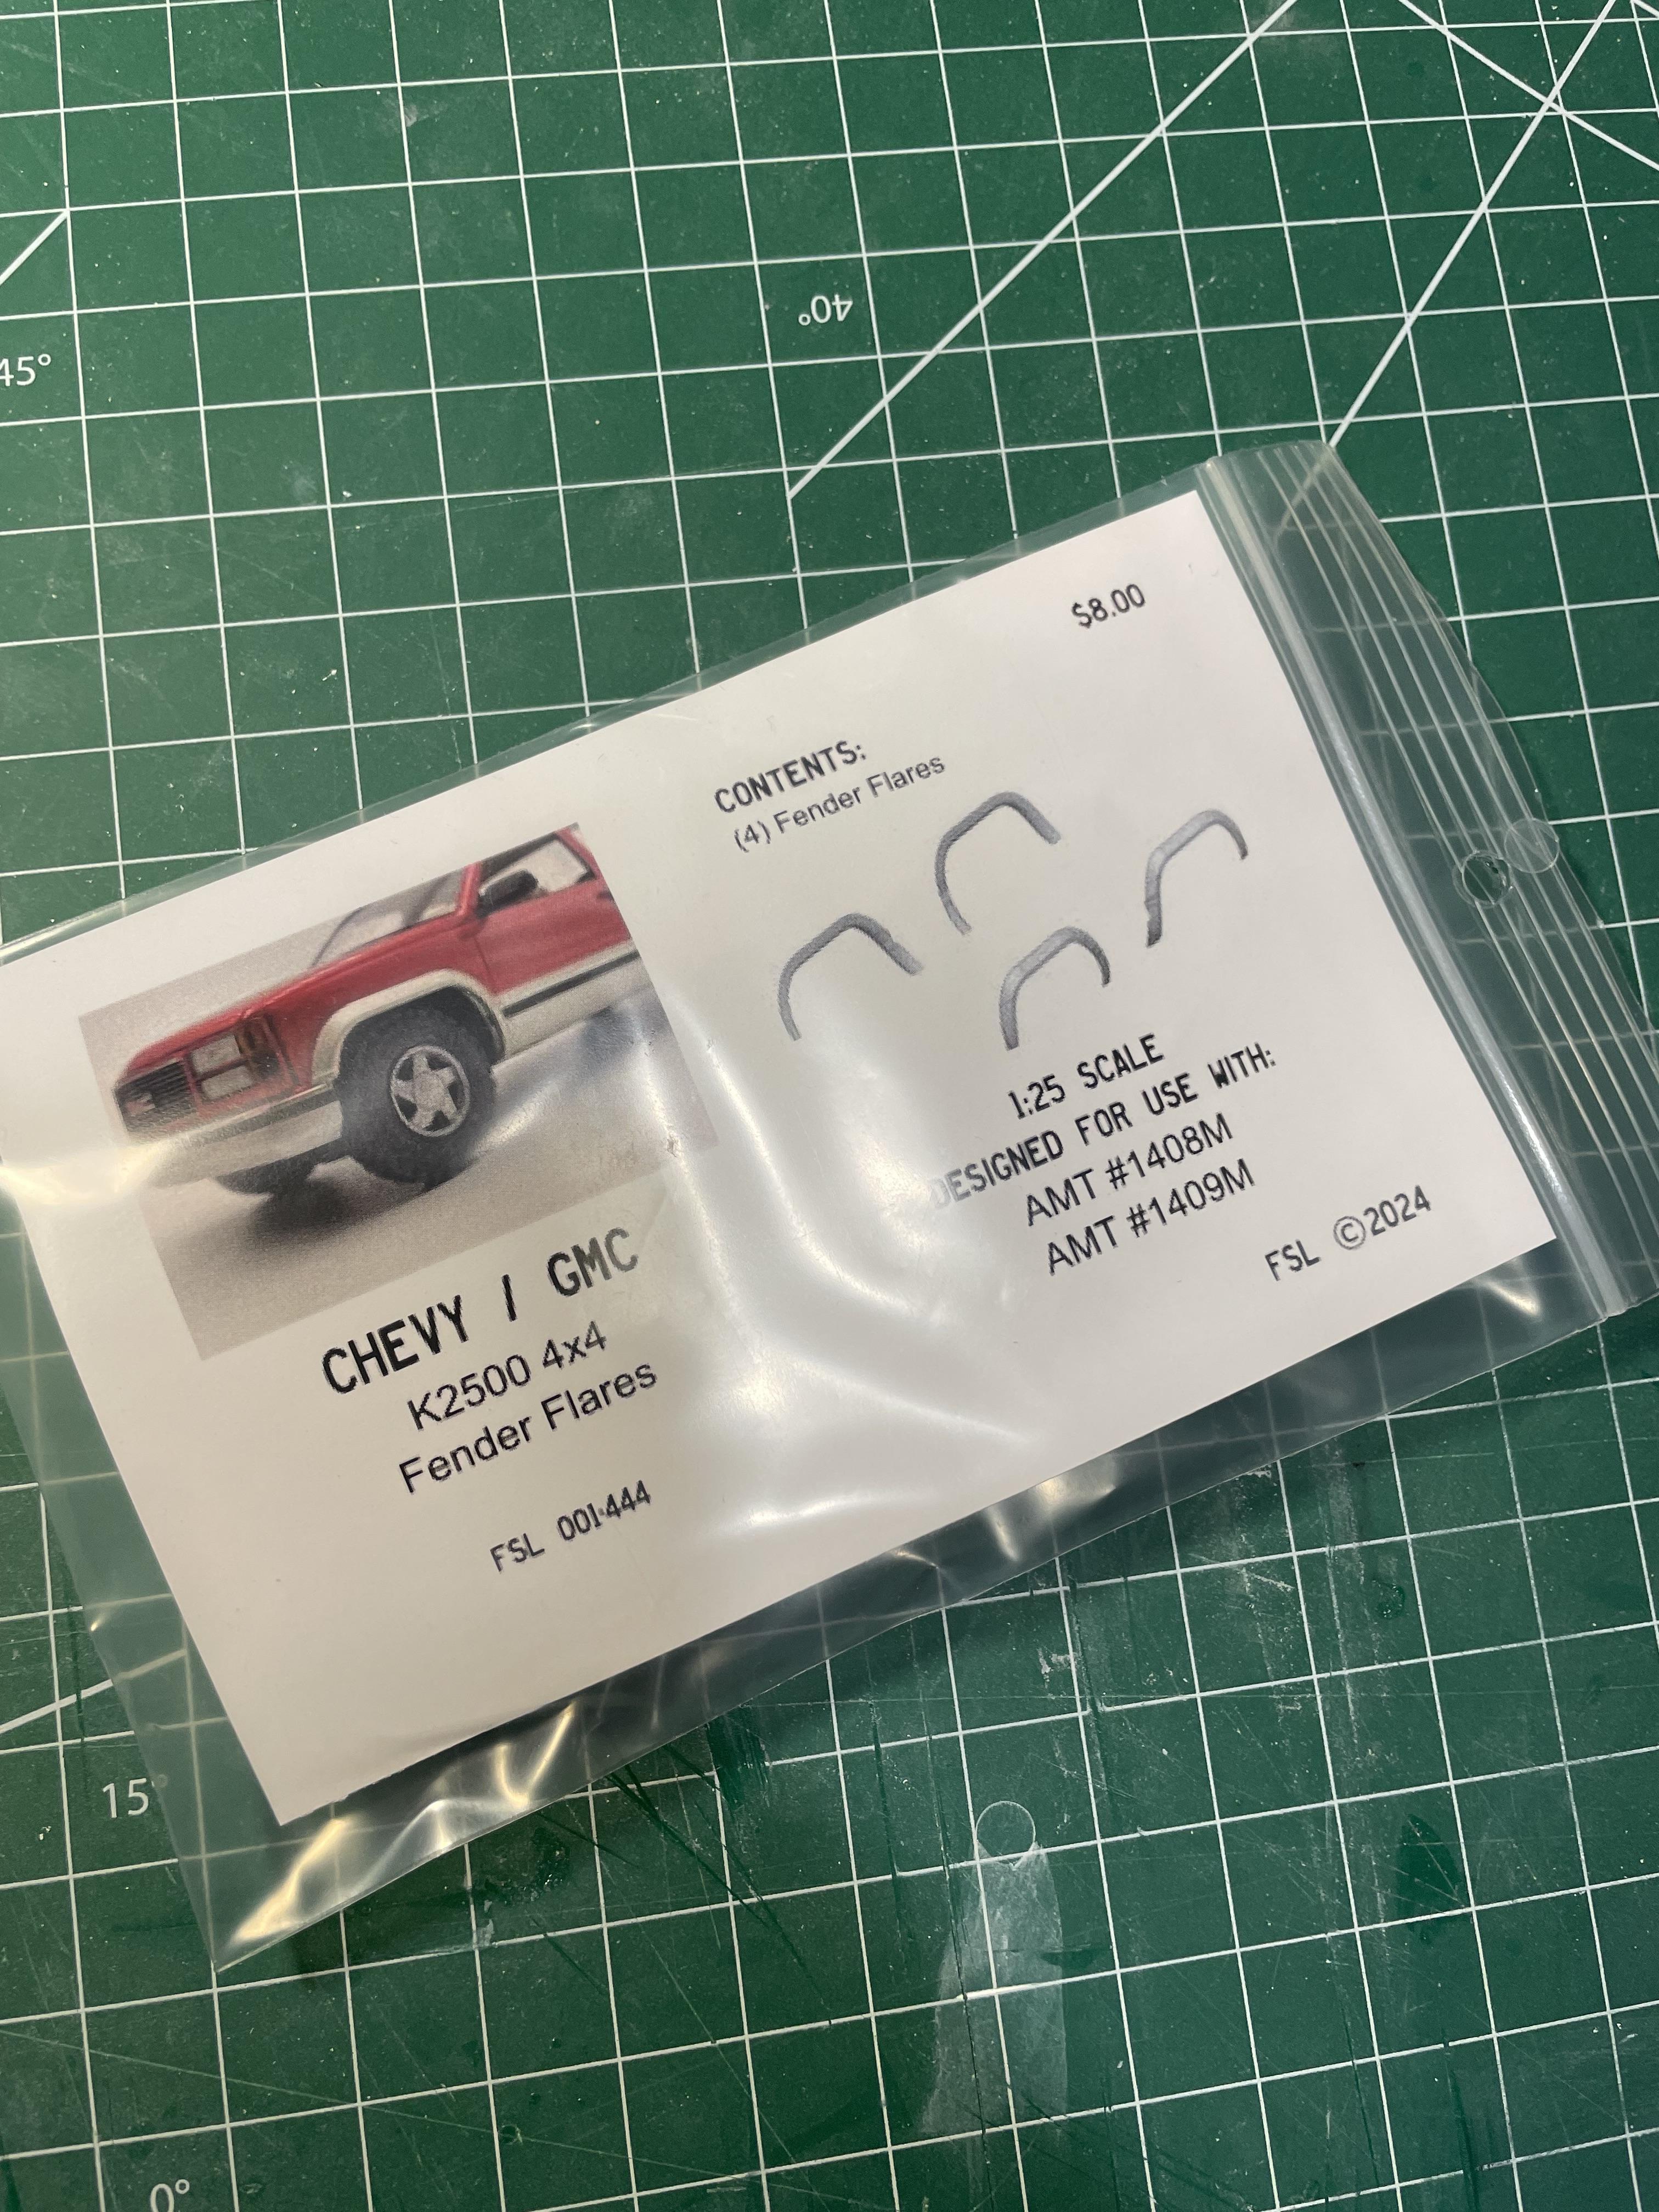
Few Sprues Loose has the fender flares. I picked up a set at the Detroit Show, but he also sells on EBay. Great guy, and great products.