Pete J.
-
Posts
3,982 -
Joined
-
Last visited
Content Type
Profiles
Forums
Events
Gallery
Everything posted by Pete J.
-
What kit is it? You may have a reboxed Italeri. The import and sell them in Japan as Tamiya kits, but other than the box, they are Italeri kits.
-
I always get a chuckle out of this subject when it comes up. There are so many other details that can enhance and engine compartment more that firing order is hardly very high on the list. For instance if you get the firing order right but the wires look like a really skinny spider sitting on top of the engine and don't droop as the real ones do, then the firing order is hardly relevant. A couple of weeks ago, I judged a contest where one builder had a throttle cable routed correctly but didn't have it conected to anything on the carburetor. Points off! When it comes to judging, my first thought of the engine compartment is does it look right. After all, we are creating the illusion of the real deal and the old Mark I eyeball is generally a good judge of that. Then it comes down to details. All the detail in the world doesn't matter if it doesn't look right.
-
Yea, I have had two common scam calls. The IRS one is pretty much the latest one and I just let it go to my answering machine. The other one is the "This is John from Microsoft security and your computer has been sending us messages". The later one has figured out how to spoof caller ID and show a local cell phone. When they come on, I play a game with them and keep them on the line as long as possible which really annoys them. My conversation goes something like this. "Are you at your computer" No, let me go upstairs. Silence. "Are you there" Yes. Silence. "Is it on?" No, should I turn it on? "Yes, please" "Is it on yet?" No, it takes a long time to boot. silence. "Is it up" No, it takes a while. Usually after a couple of these they tell me to commit an unnatural act and hang up. Over time the calls get less and less frequent. They are about 6 months apart now. They use to be a couple of times a week.
-

If I hit the lottery
Pete J. replied to JerseeJerry55's topic in General Automotive Talk (Trucks and Cars)
Though of this one a lot(it happens when you get older) and after the "taking care of friends and family" and buying several nice condos in various parts of the world to enhance the travel experience, the list would be pretty short and specific: 1969 GTO Judge Ram Air IV - any color but carousel red - very rare 1970 AAR cuda - love the 340 engine New Porsche 918 spyder- Got to have a hybrid in there some place- 1969 280 SL 'Benz - Friend's dad had one in college in Ice Blue. Loved cruzing in that car. New BMW M6 for the daily driver. And a pickup - not sure which one but an early 50's model just for kicks. Yea, it is quite an eclectic group of cars, but I am just that type of person. -
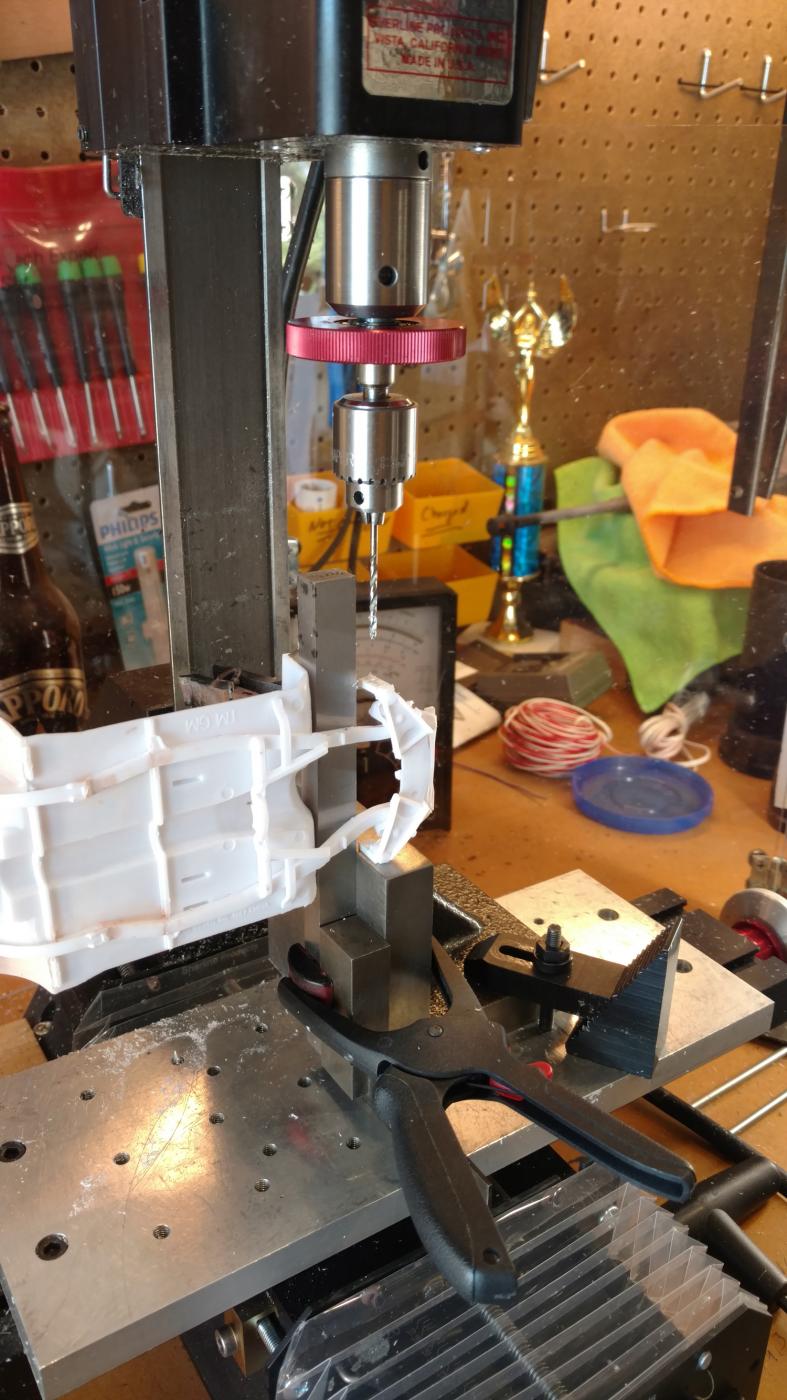
Ok, one of the things that drives me absolutely nuts when judging models is tires that are not square and all four on the ground. I know that when changing suspension geometerey it is not easy to make it work, especially on an older kit like this. This is the jig that I used to drill the axle holes and lower the front end by .150" I know it looks complex but as I said "square and level" are a must. Weird tire alignment just drives me nuts!

-
I didn't know this about you! You definitely need help! Third Tuesday of the month help!
-
How long do ya'll take
Pete J. replied to Chris Evans's topic in General Automotive Talk (Trucks and Cars)
It is a valid question only if you keep track of you time for a reason. I do build for clients and I keep track of hours, so I know what I should quote up front. However that is the only reason. When building for my own pleasure, I don't even want to know how much time I have spent at it. Oh, and Harry is right, the model tells me when it is done. If I have more to do, then I spend the time. -
That is what I was thinking with Red Bull blue bottom and metallic silver top on one side and the reverse on the other. That is how they do the promotional cars that they take to events.
-
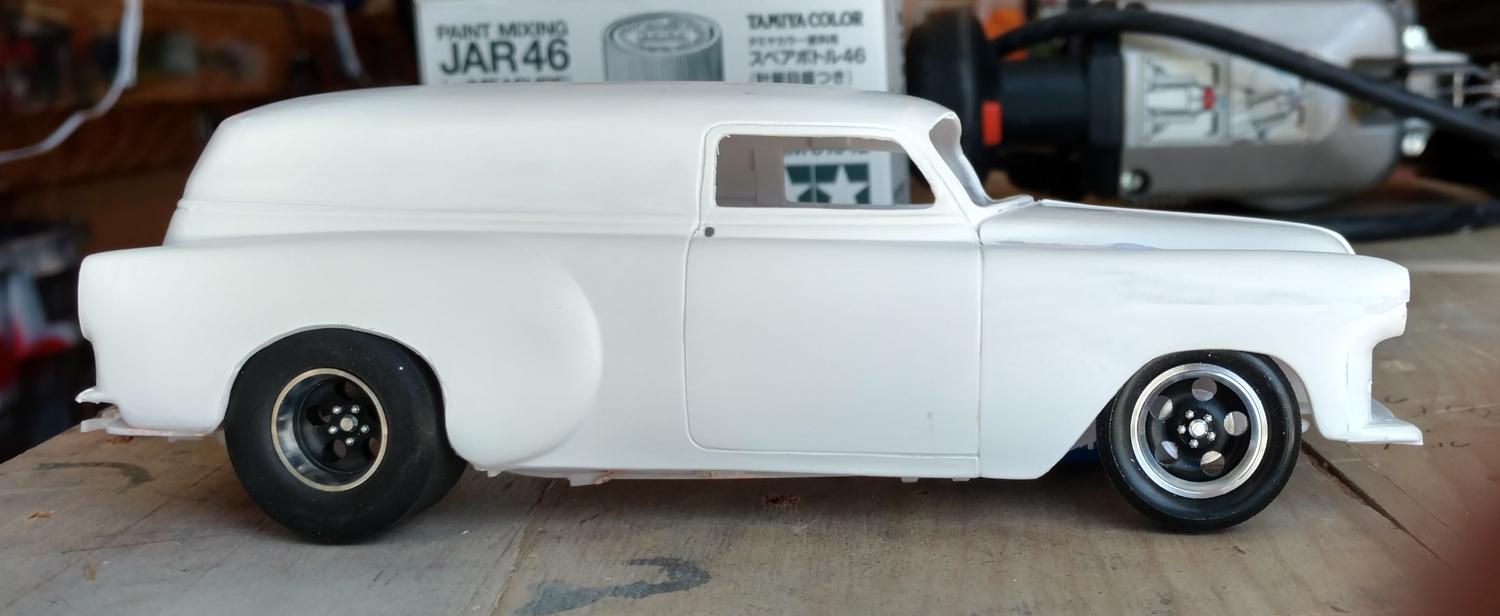
Ok guys, first mockup with tires, chassis and body. I think the rear is ok but I need to get the front down. It is just sitting too level. That would be nice if I slammed it, but I want a little more aggressive stance. What do you think? By the way, I am thinking Red Bull for color.
-
Thanks Shay. I have an engineer friend who's favorite saying is "No modification goes unpunished." That is always the risk is these sort of things. You change one thing and that means you have to change two more. In this case it is the Chassis than now needs modifying to fit the tires as well. That would then mean a change to the width of the axle etc. ect. etc.
-
Randy, Thank you for your kind words. It is a bit unusual for me, but then it is a club challenge build and since I didn't participate in the last two, I felt obliged to tackle this one. From the last build, there was a lot of imagination in the club so I really need to work on this one. I am still designing this one in my head. Not sure what the final design will be, so I am excited to see where it finally winds up!
-
Exspensive starting up
Pete J. replied to Chris Evans's topic in General Automotive Talk (Trucks and Cars)
Personally, I think that thinking outside of the box, when it comes to modeling supplies is part of the fun of the hobby. For instance, there are any number of places that will charge you $4 to $5 for a package of "sparkplug" wire. There is about two or three feet of it in a nice neat package. If you go to a electrical specialty store or on line, you can get a spool with 100 feet(a lifetime supply for you and all your modeling buddies) for less than $10. Model paints are stupid expensive per ounce of paint. You can get a quart of common colors such as blues, whites and blacks from a paint jobber(commercial) for the price of 4 or 5 tiny hobby bottles. Same thing with rattle cans. Get the stuff without the rattle can and you can afford the airbrush to spray it with. Sand paper is cheaper if you go direct to the manufacture than neatly packaged in "polishing kits". In other words, you have to be open to maybe buying a little more than you need and storing it. I guess that is why my model space looks like a junk yard.! -
Exspensive starting up
Pete J. replied to Chris Evans's topic in General Automotive Talk (Trucks and Cars)
I feel your pain getting back into the hobby. I've been at is as an adult builder now for over 20 years and when I look around my shop and apply todays prices to all the stuff I have, it is really scary. I literally have cases of rattle cans, stacks of models, drawers full of accessories and photoetched, not to mention the decals and tools. I would be seriously distressed if I had to try and go out and buy it all over again. It is amazing what you accumulate a little at a time. Good luck! -
Thank you Bill. Been playing with my Sherline's for many years now and am finally getting somewhat proficient with them.
-
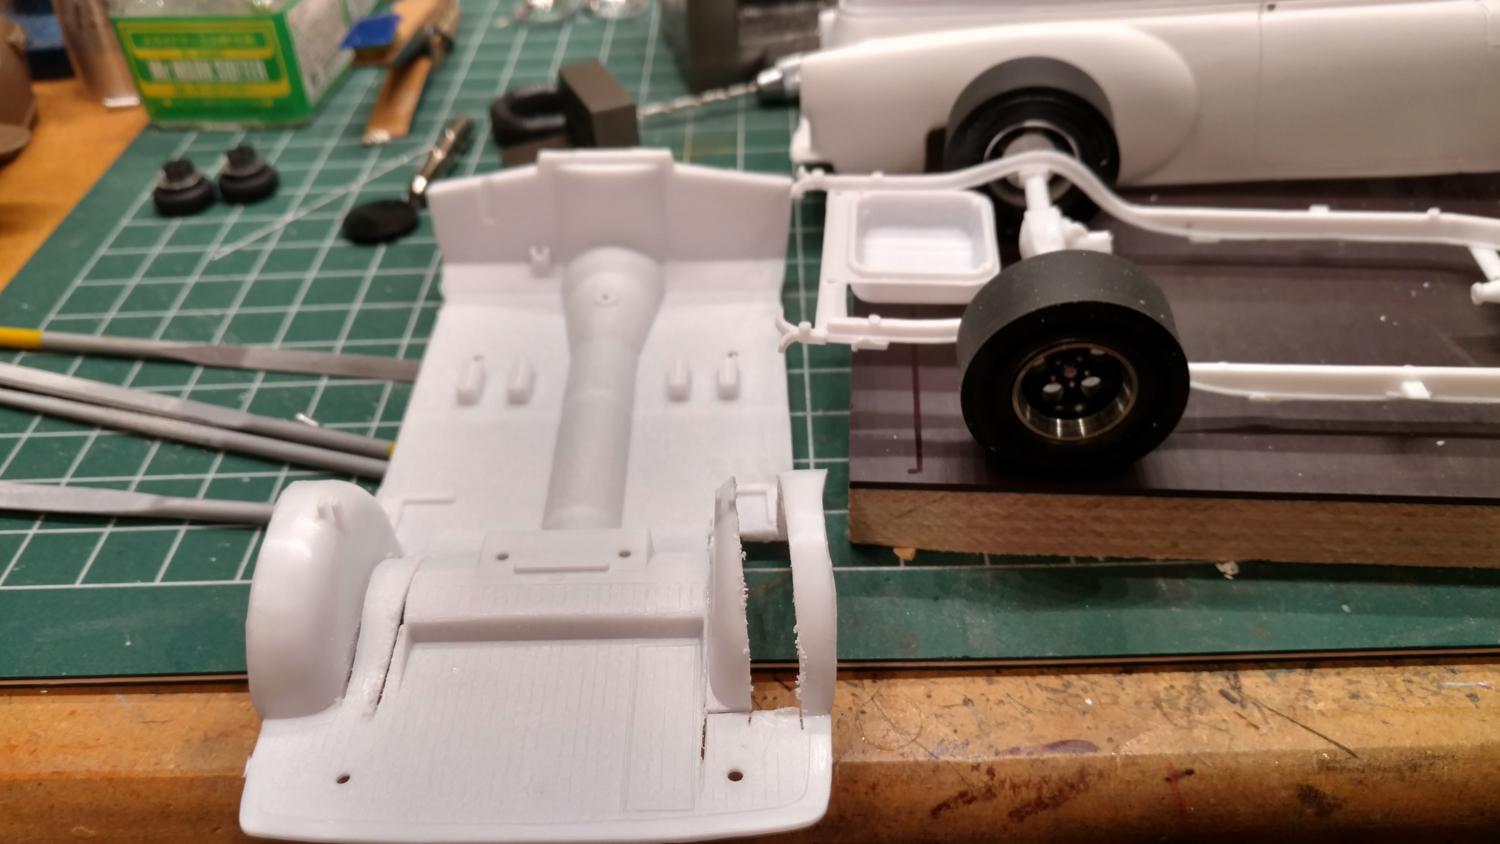
Ok, so we mocked up the chassis and body and I decided I didn't want the rear tires sticking outside the body shell and I couldn't come up with a way to add width to the rear fenders that I liked the looks of. So it is time to do tub the rear fender wells. More cutting, moving, and adding plastic and filler and grinding but that is what I chose. Oh, by the way, I'm ok with the way the fronts sit. Next thing will be figuring out how to mount the rear axle to get the ride highth I want. This car is going to be low, but not a lowrider.
-
Empty kit boxes?
Pete J. replied to 68shortfleet's topic in General Automotive Talk (Trucks and Cars)
Here is some thing different, but it requires that you have some space in your model building area. When I finish a model, I cut off the box top(the rest goes in the trash) and mount it on the wall and write the date I finished it in marker. It adds some art to my garage and reminds me of the good time I had building it. -
Ok, designed and machined the front rims. Kind of a challenge since they are much thinner. Same three piece construction but the two metal pieces don't interlock like the rears. The front metal parts are very thin. Looking at the picture, it appears that I have some more clean up to do. Now we have to get them mounted in the chassis and see how the hole thing sits and then I can make a decision about what to do next on the body.
-
Mark, great work as usual. I love your 1:43 scale stuff!
-
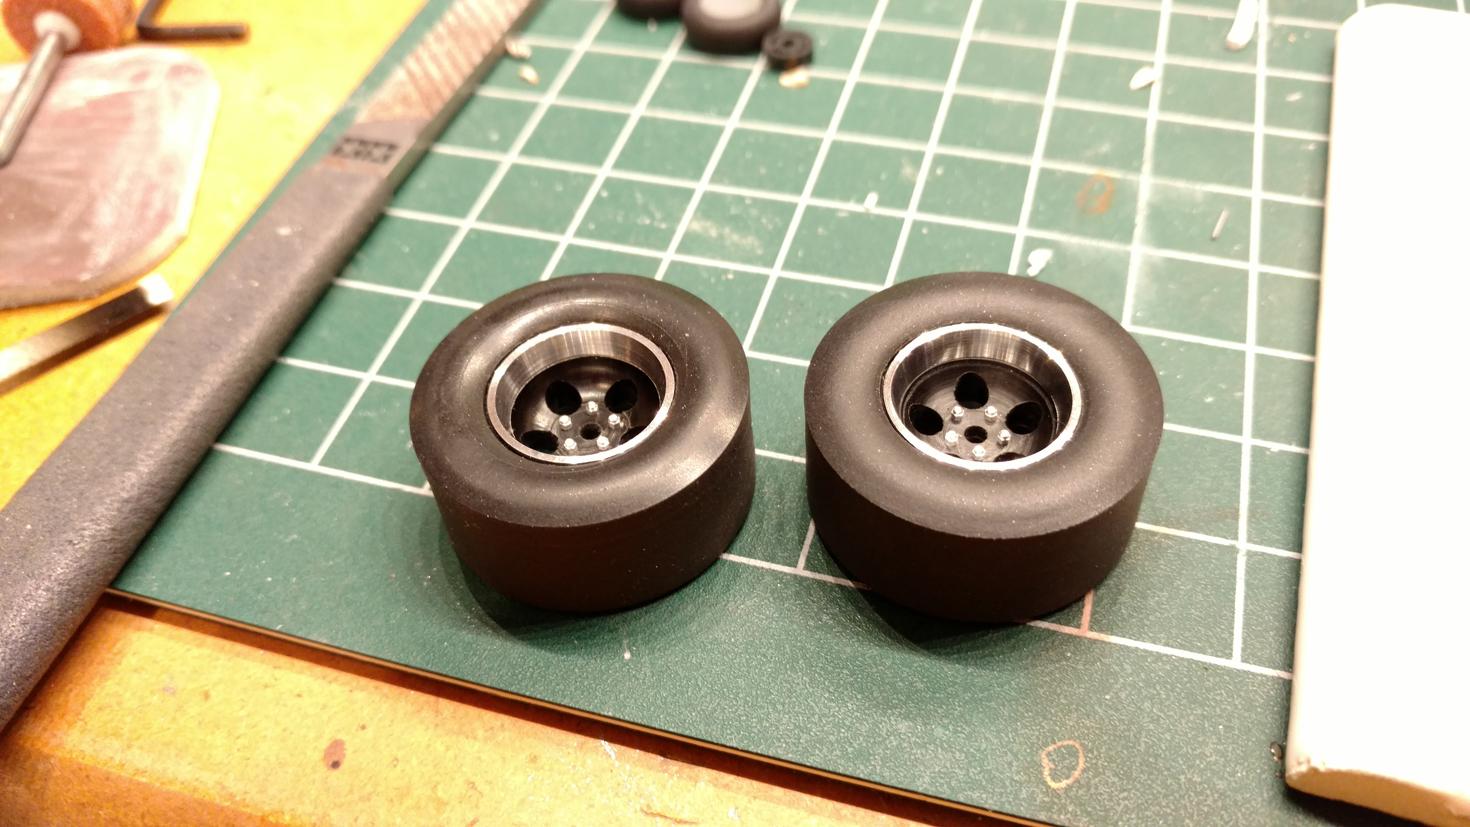
Ok, rear rims done! Turned from aircraft aluminum with Delron centers. Now I just have to figure out what I am doing for the front rims and tires. Acorn nuts are by RB Motion.
-
Working on the rims so I can set the ride height before I tackle sectioning the body. I still have some detail work to do on the rims edges and I still have to decide on the centers.
-
Yup, but just the grunt work part of the build. Filling in the gaps and sanding it even. Not pretty but that is what has to be done. I need to get this done before I go after the sectioning. Also working on a set of rims and tires.
-
Phoro-etched screen source?
Pete J. replied to MonoPed's topic in Car Aftermarket / Resin / 3D Printed
KA models use to have all different types for screen. Hex, square, diamond, round etc. I just did a search but couldn't find it easily. I am sure if you spent the time you could come up with it. -
Yes, I use paint. Well, actually, I use a lot of different paints. Here is my list and why. Lacquers: Tamiya Rattle Can, Testors Rattle can, DuPont Automotive(Lucite), House of Color - Lacquer is great for most things. It is quick drying, polishes out well and you can get a lot of different colors that match the real deal for cars and automotive paint. Down side- getting harder to find especially in "eco-friendly" states like California. Some forms will attack decals and plastic with a vengeance. Enamels- Tamiya and Floquil. These are solvent based enamels. The Tamiya stuff is not available here but you can still find it from Japan. Great for brushing small parts. The Floquils were formulated for railroad use and are for the most part flats, but they have a lot of different shades of blacks and grays. Super for shading under the hood and other parts were one shade of black isn't enough. I also think that the Tamiya Black semi-gloss is one of the most accurate for under the hood. Just the right amount of gloss. Metalizers: I didn't include these under lacquers although they are for the most part lacquers(exception is the black under coat for Alcad. It is an enamel) Testors, Alclad and Alsa- These are all metalizers in different shades. Again, in detailing, one shade of metal just doesn't look right. In an engine bay there are literally a ton of different metal finishes. Acrylics- Vallejo and Tamiya- again different paints for different uses. These are for the most part water/alcohol based paints. You need different levels of gloss and using these works well for that. Also great for figures. You can thin the Tamiya acrylics with their lacquer thinners for a quicker dry time and harder finish, but you can only do it once on the top coat. Why, the different paints. Well in addition to what each does well, you can layer them based on the strength of the thinners. Lacquers on the bottom will not be effected by Acrylic thinners over the top and so on. This is great for weathering and shading. Also solvent based paints generally go through an airbrush better than water/alcohol based paints.
-
Never knew that, but then as I said I don't do hot rods. To me growing up in the 50's and 60's it always meant someone taking an old and maybe worn-out car and making it go as fast as you could on a budget. We just referred to it as hot rodding a car but thanks for informing me.
-
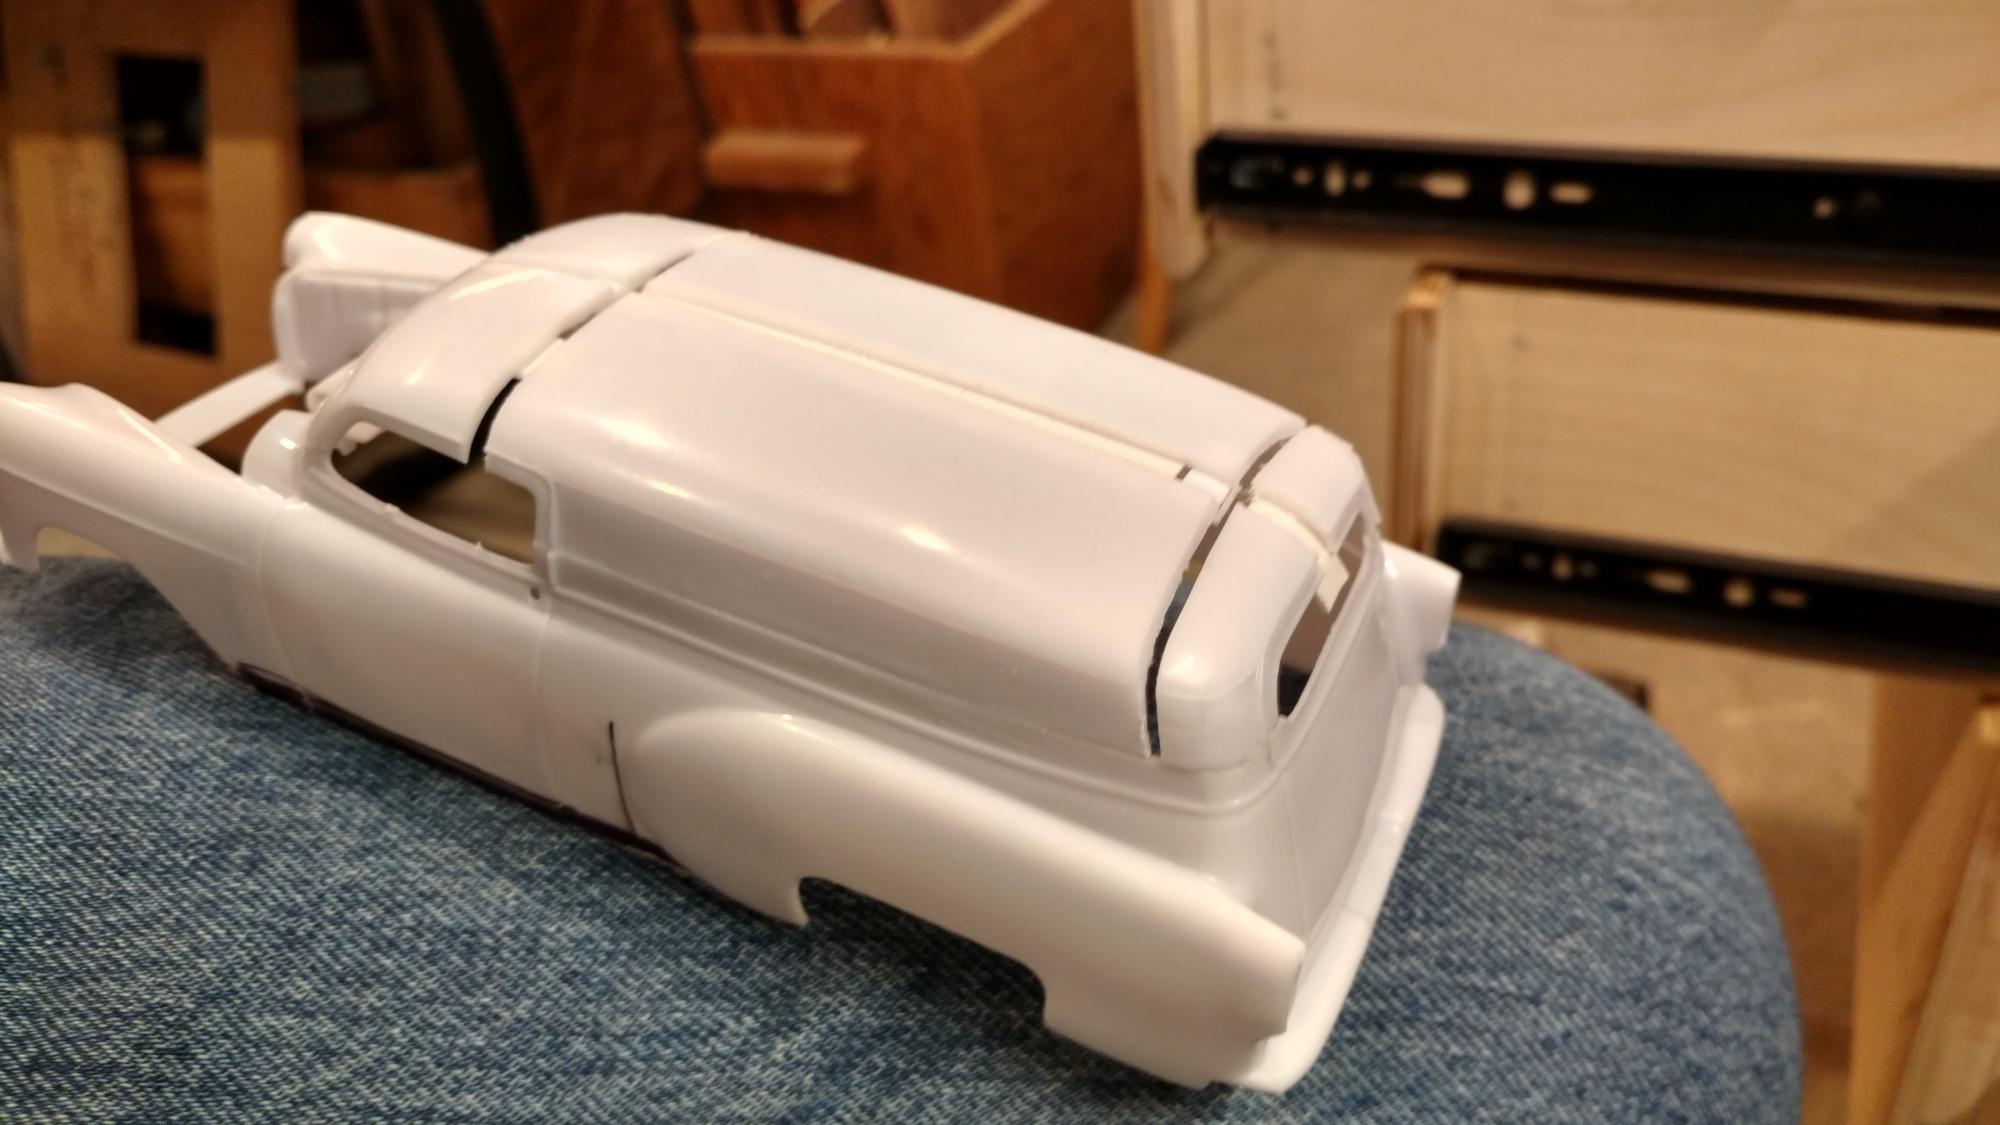
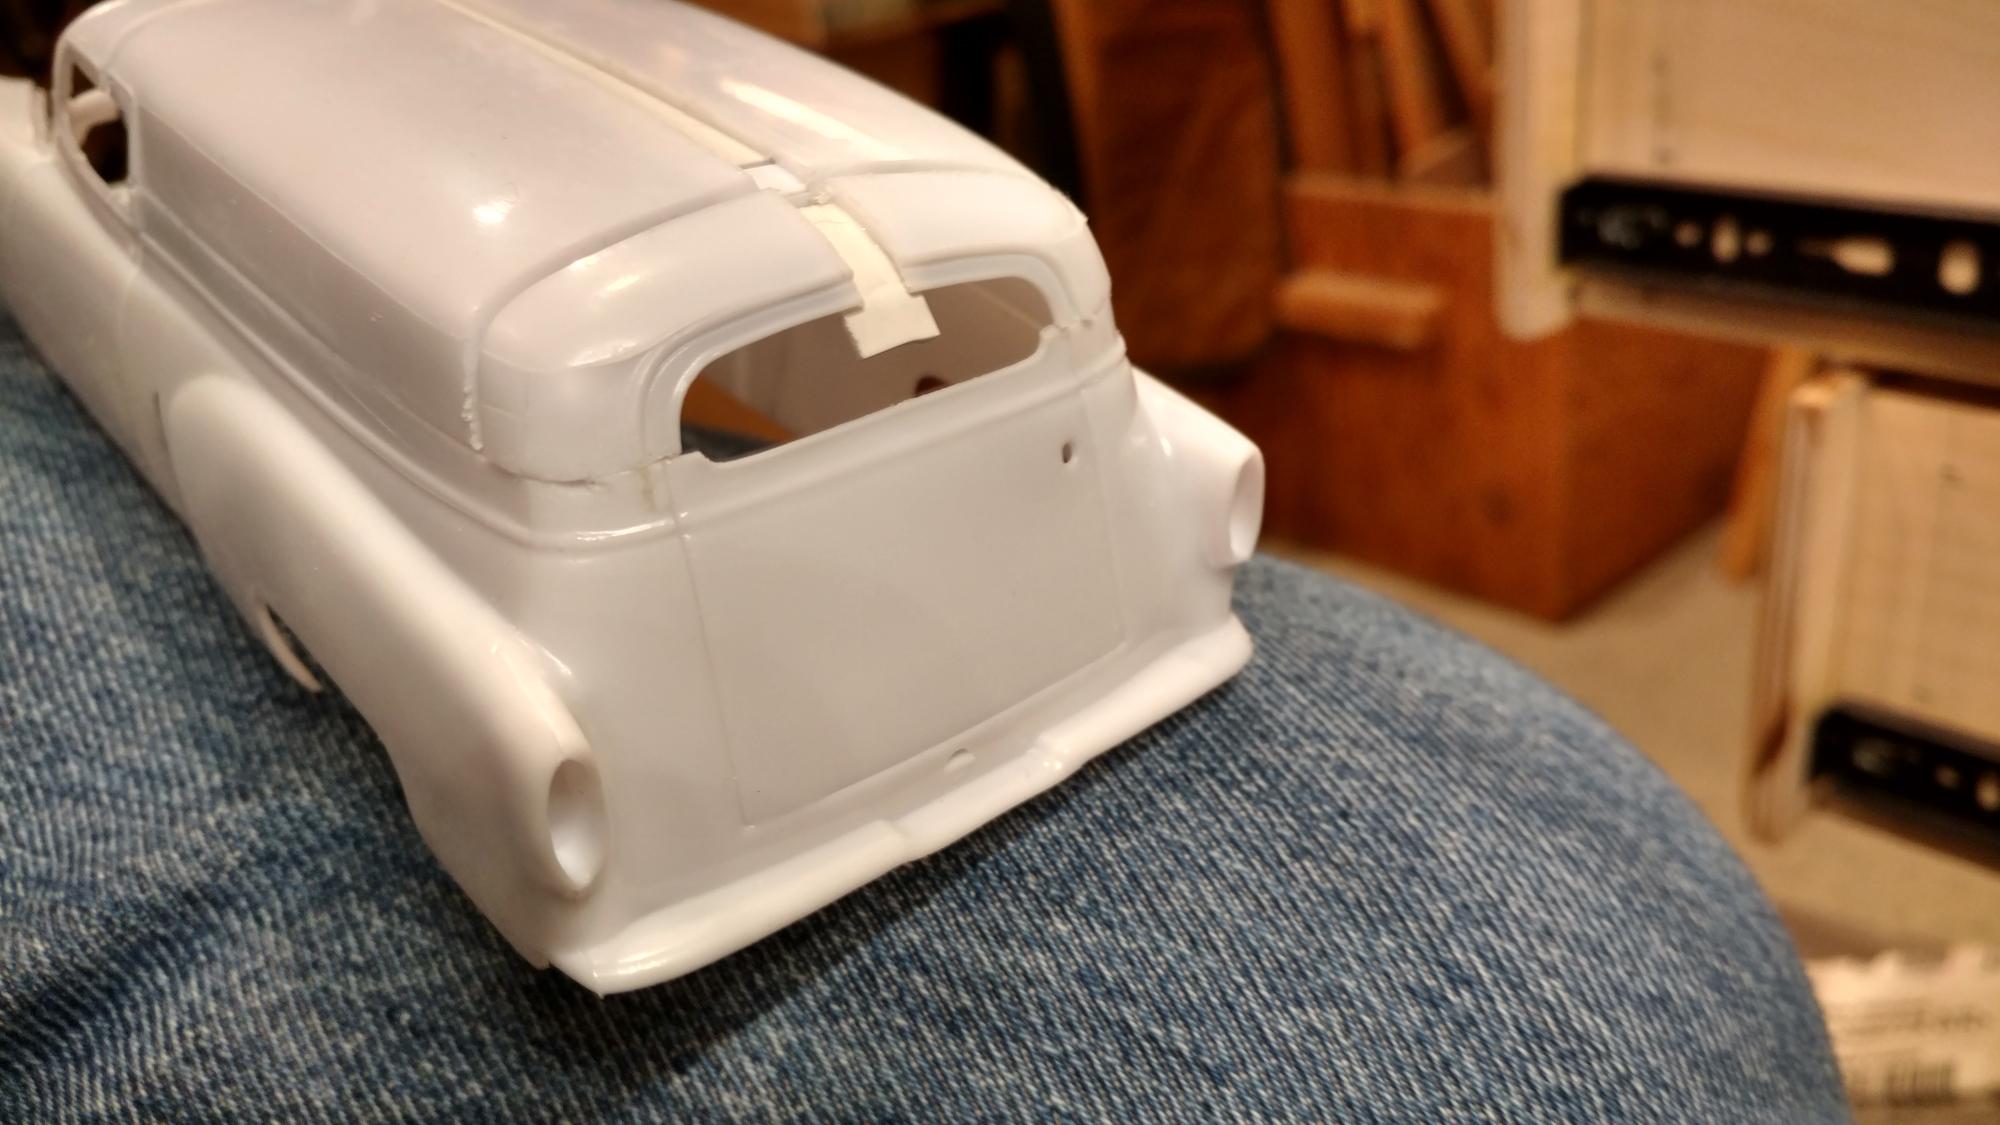
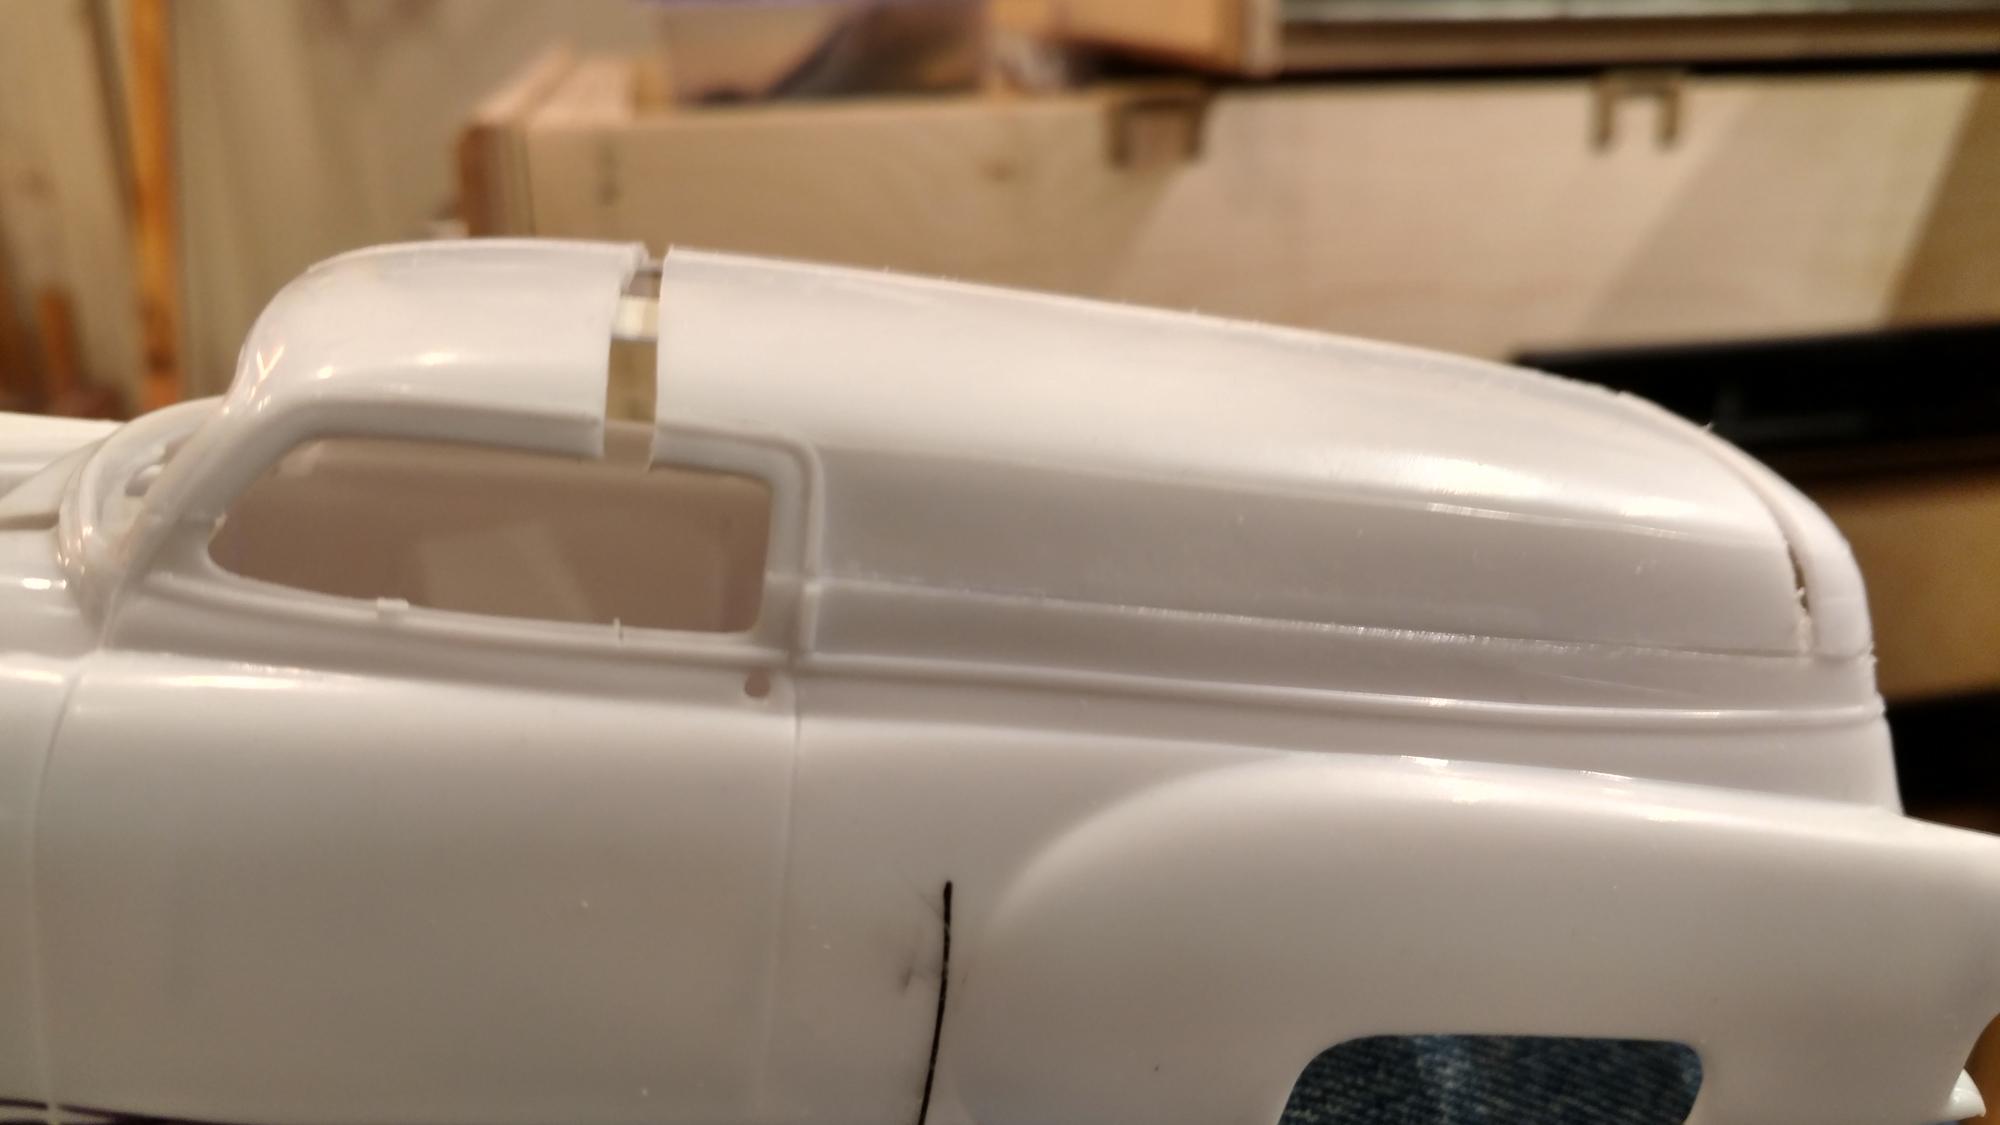
Hot rods are not my thing but I do enjoy the challenge of something different from time to time. Every once in a while I get my arm twisted and this is one of those times. The arm twisting came from a club build and I couldn't not do it. This is a 53 Chevy panel and I decided to start with a six scale inch chop on the top. It is always a challenge to decide how to make the cuts you need and just where to put them. In this case the slab side of the panel really had a lot to do with how to do this. there is a bit of a taper to the body do the centerline cut is slightly tapered to account for that. I'm also considering sectioning the body. I do like a sleeker look. Well slightly sleeker then a brick.