StevenGuthmiller
-
Posts
15,071 -
Joined
-
Last visited
Content Type
Profiles
Forums
Events
Gallery
Everything posted by StevenGuthmiller
-

MCW...any issues?
StevenGuthmiller replied to George Bojaciuk's topic in Car Aftermarket / Resin / 3D Printed
I ordered several jars of paint on June 2nd, and received them on June 10th. No issues whatsoever! Steve -
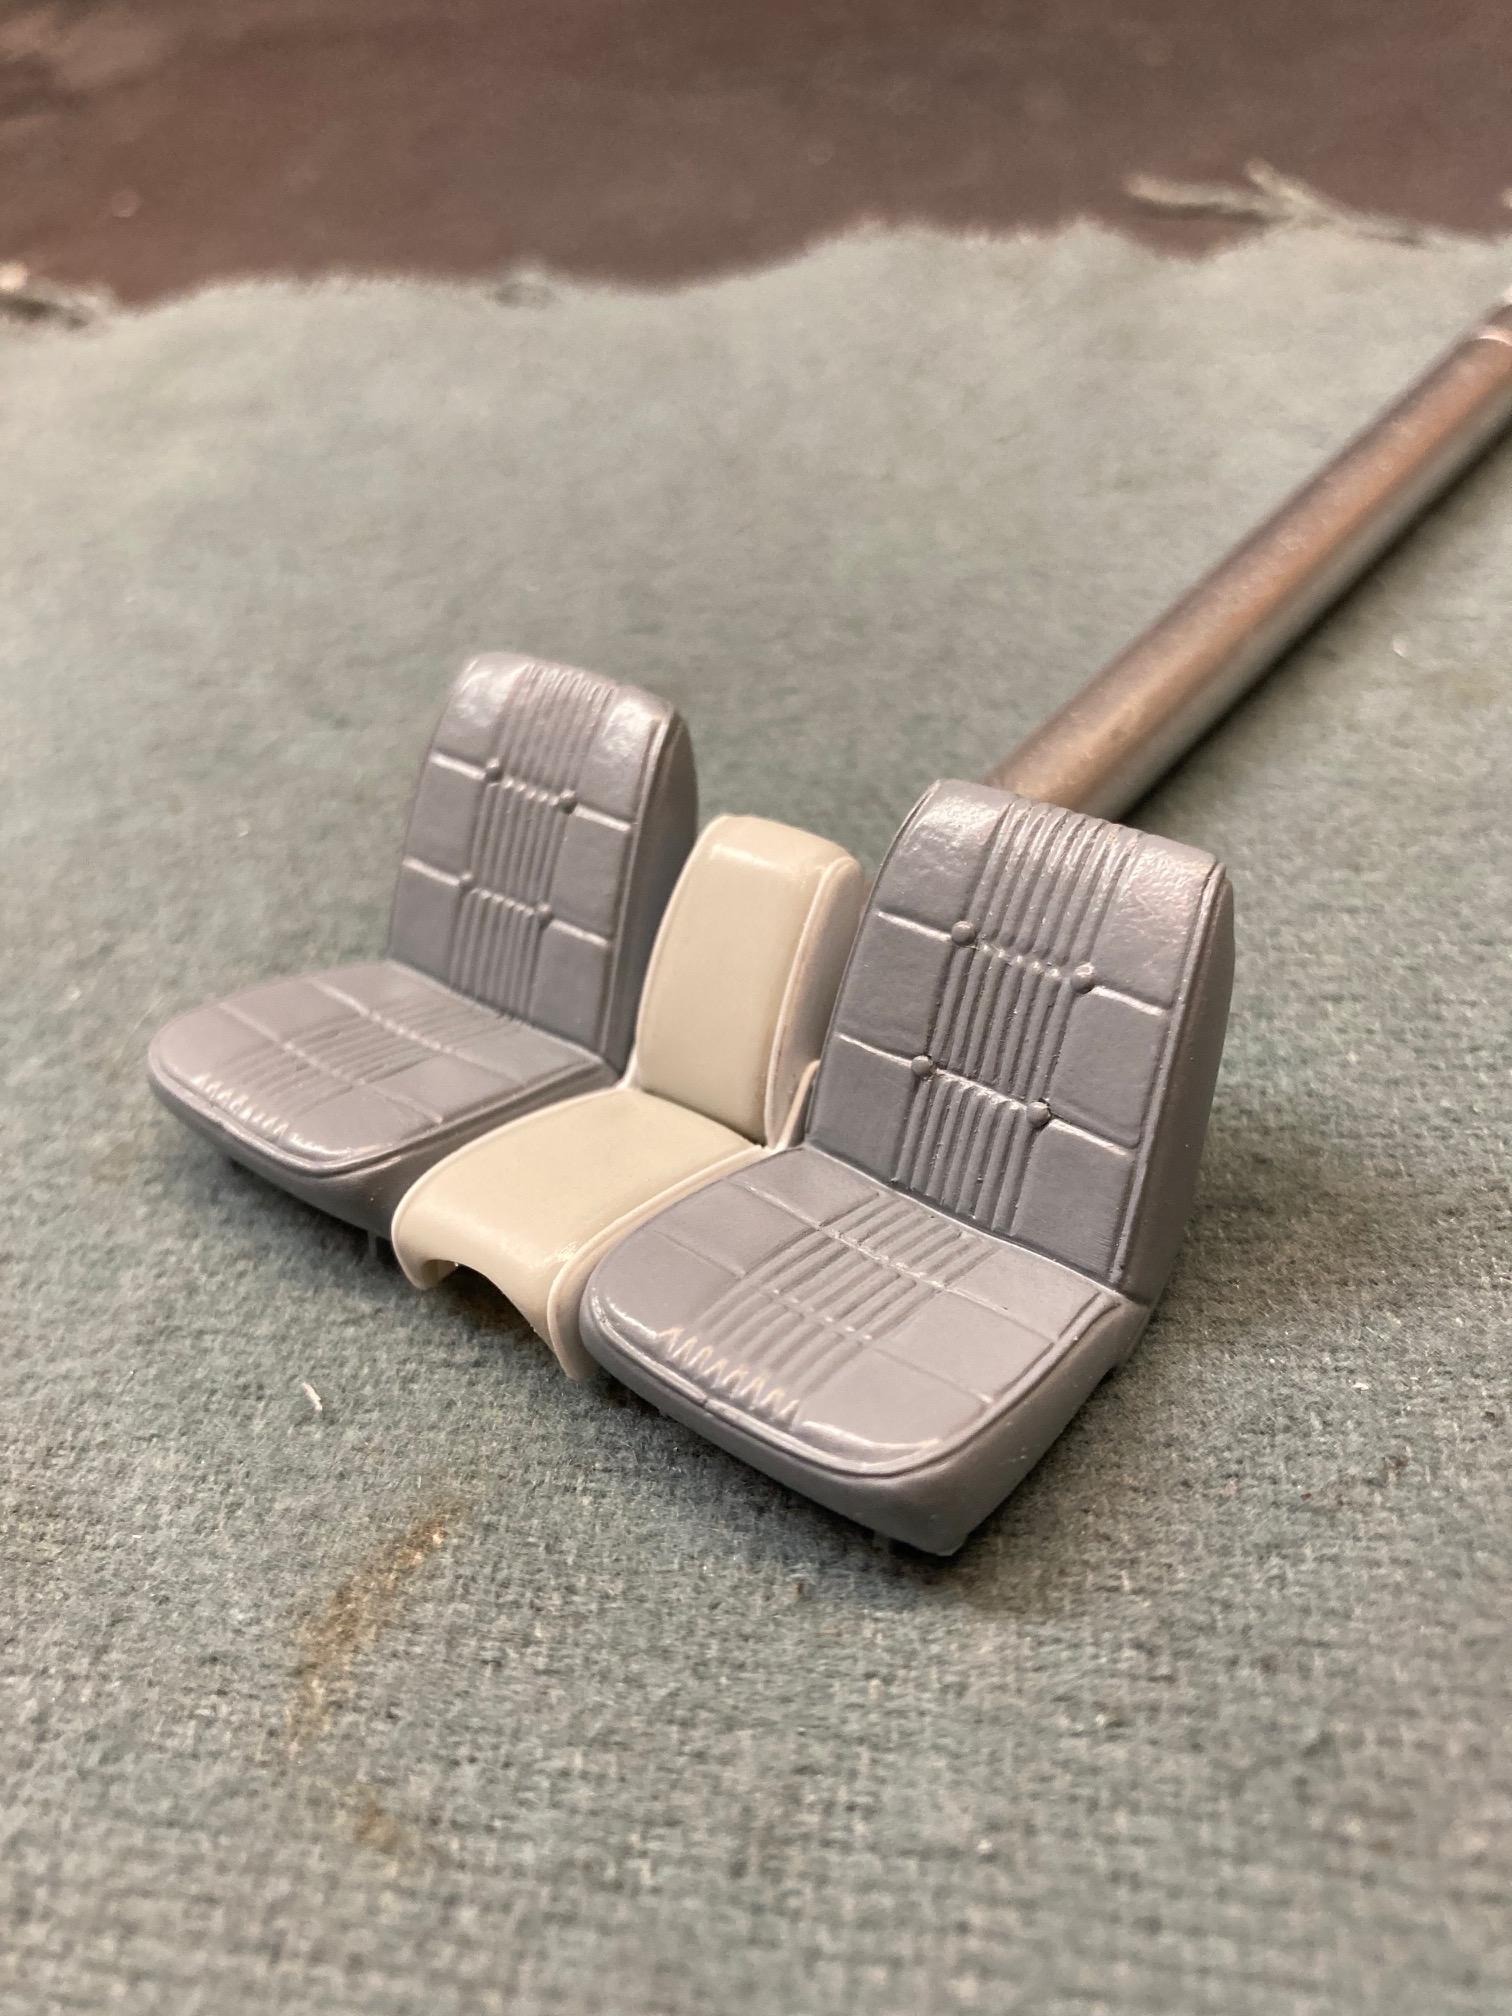
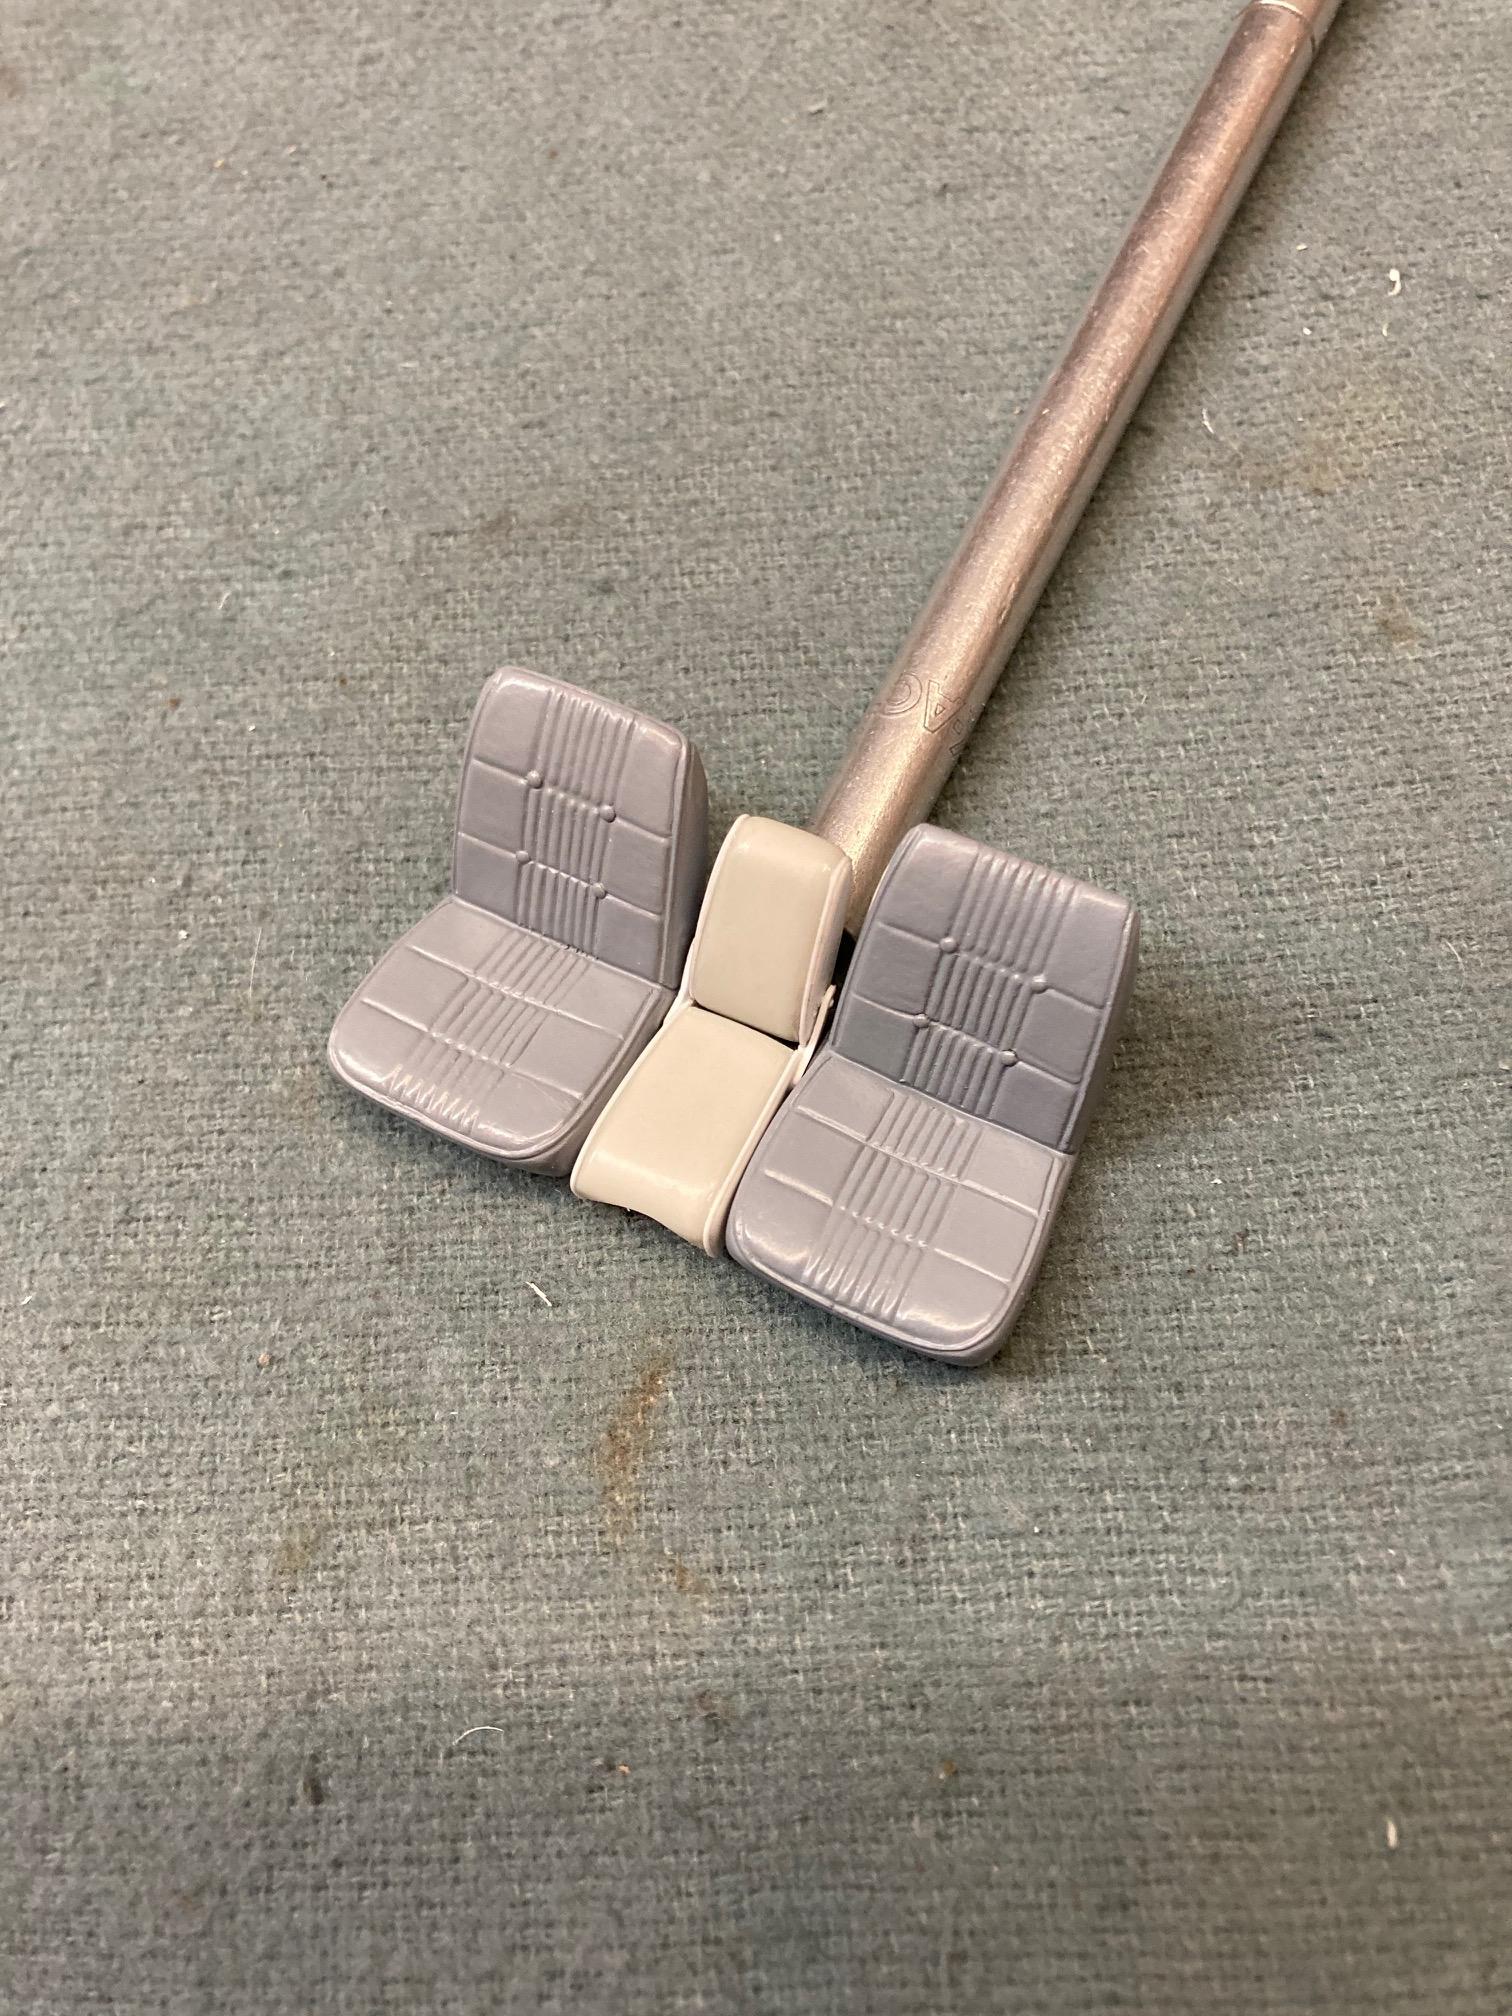
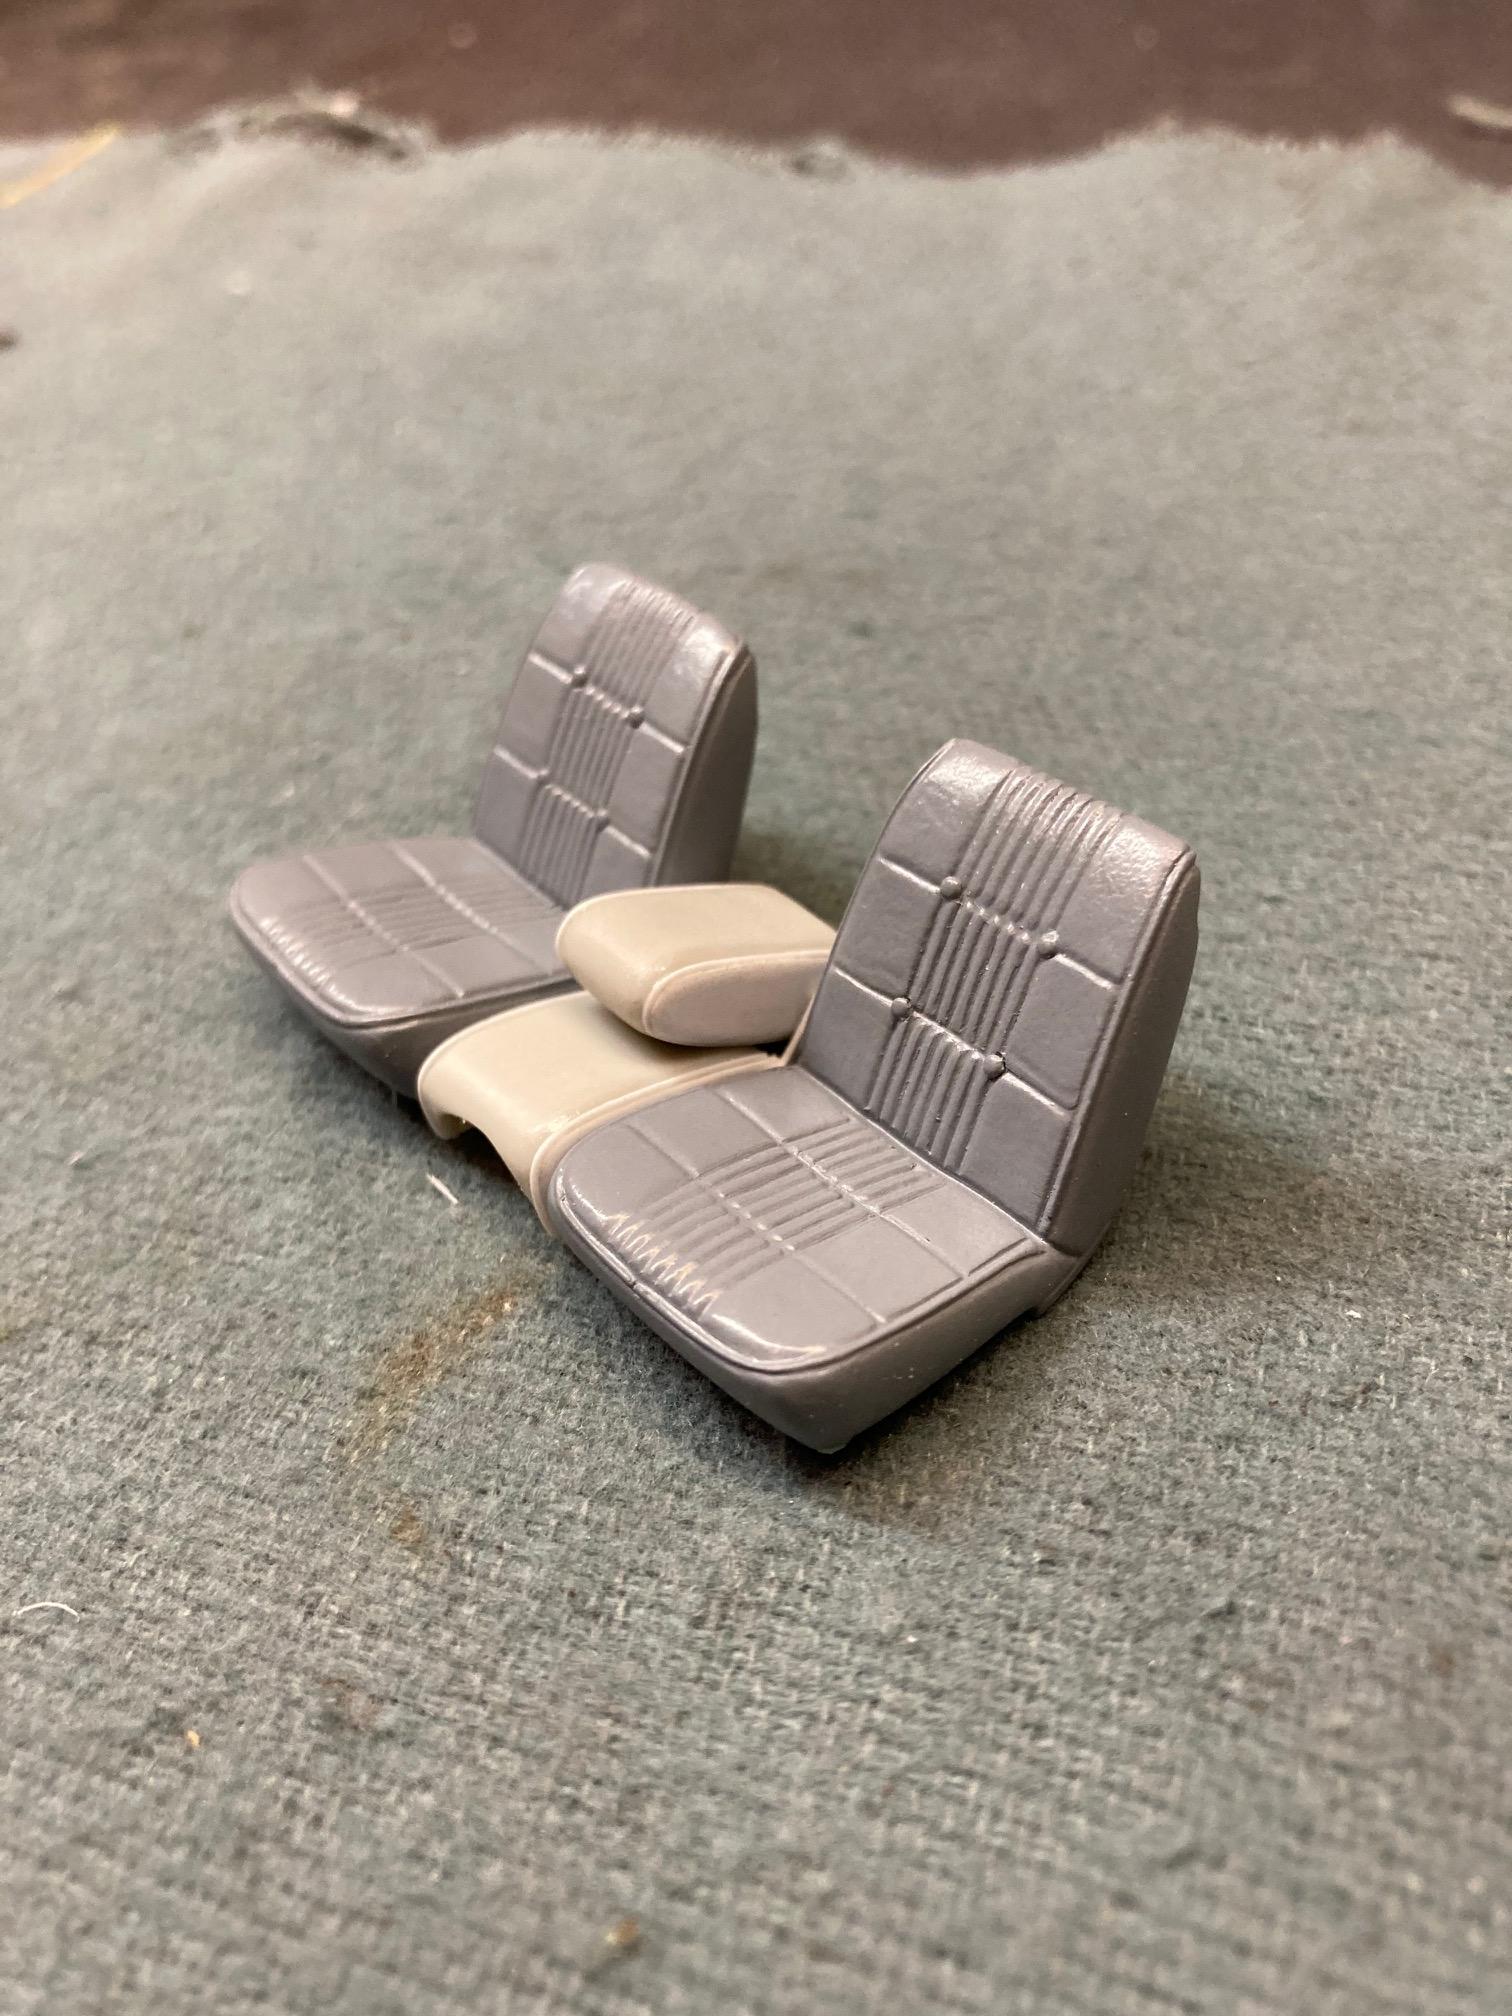
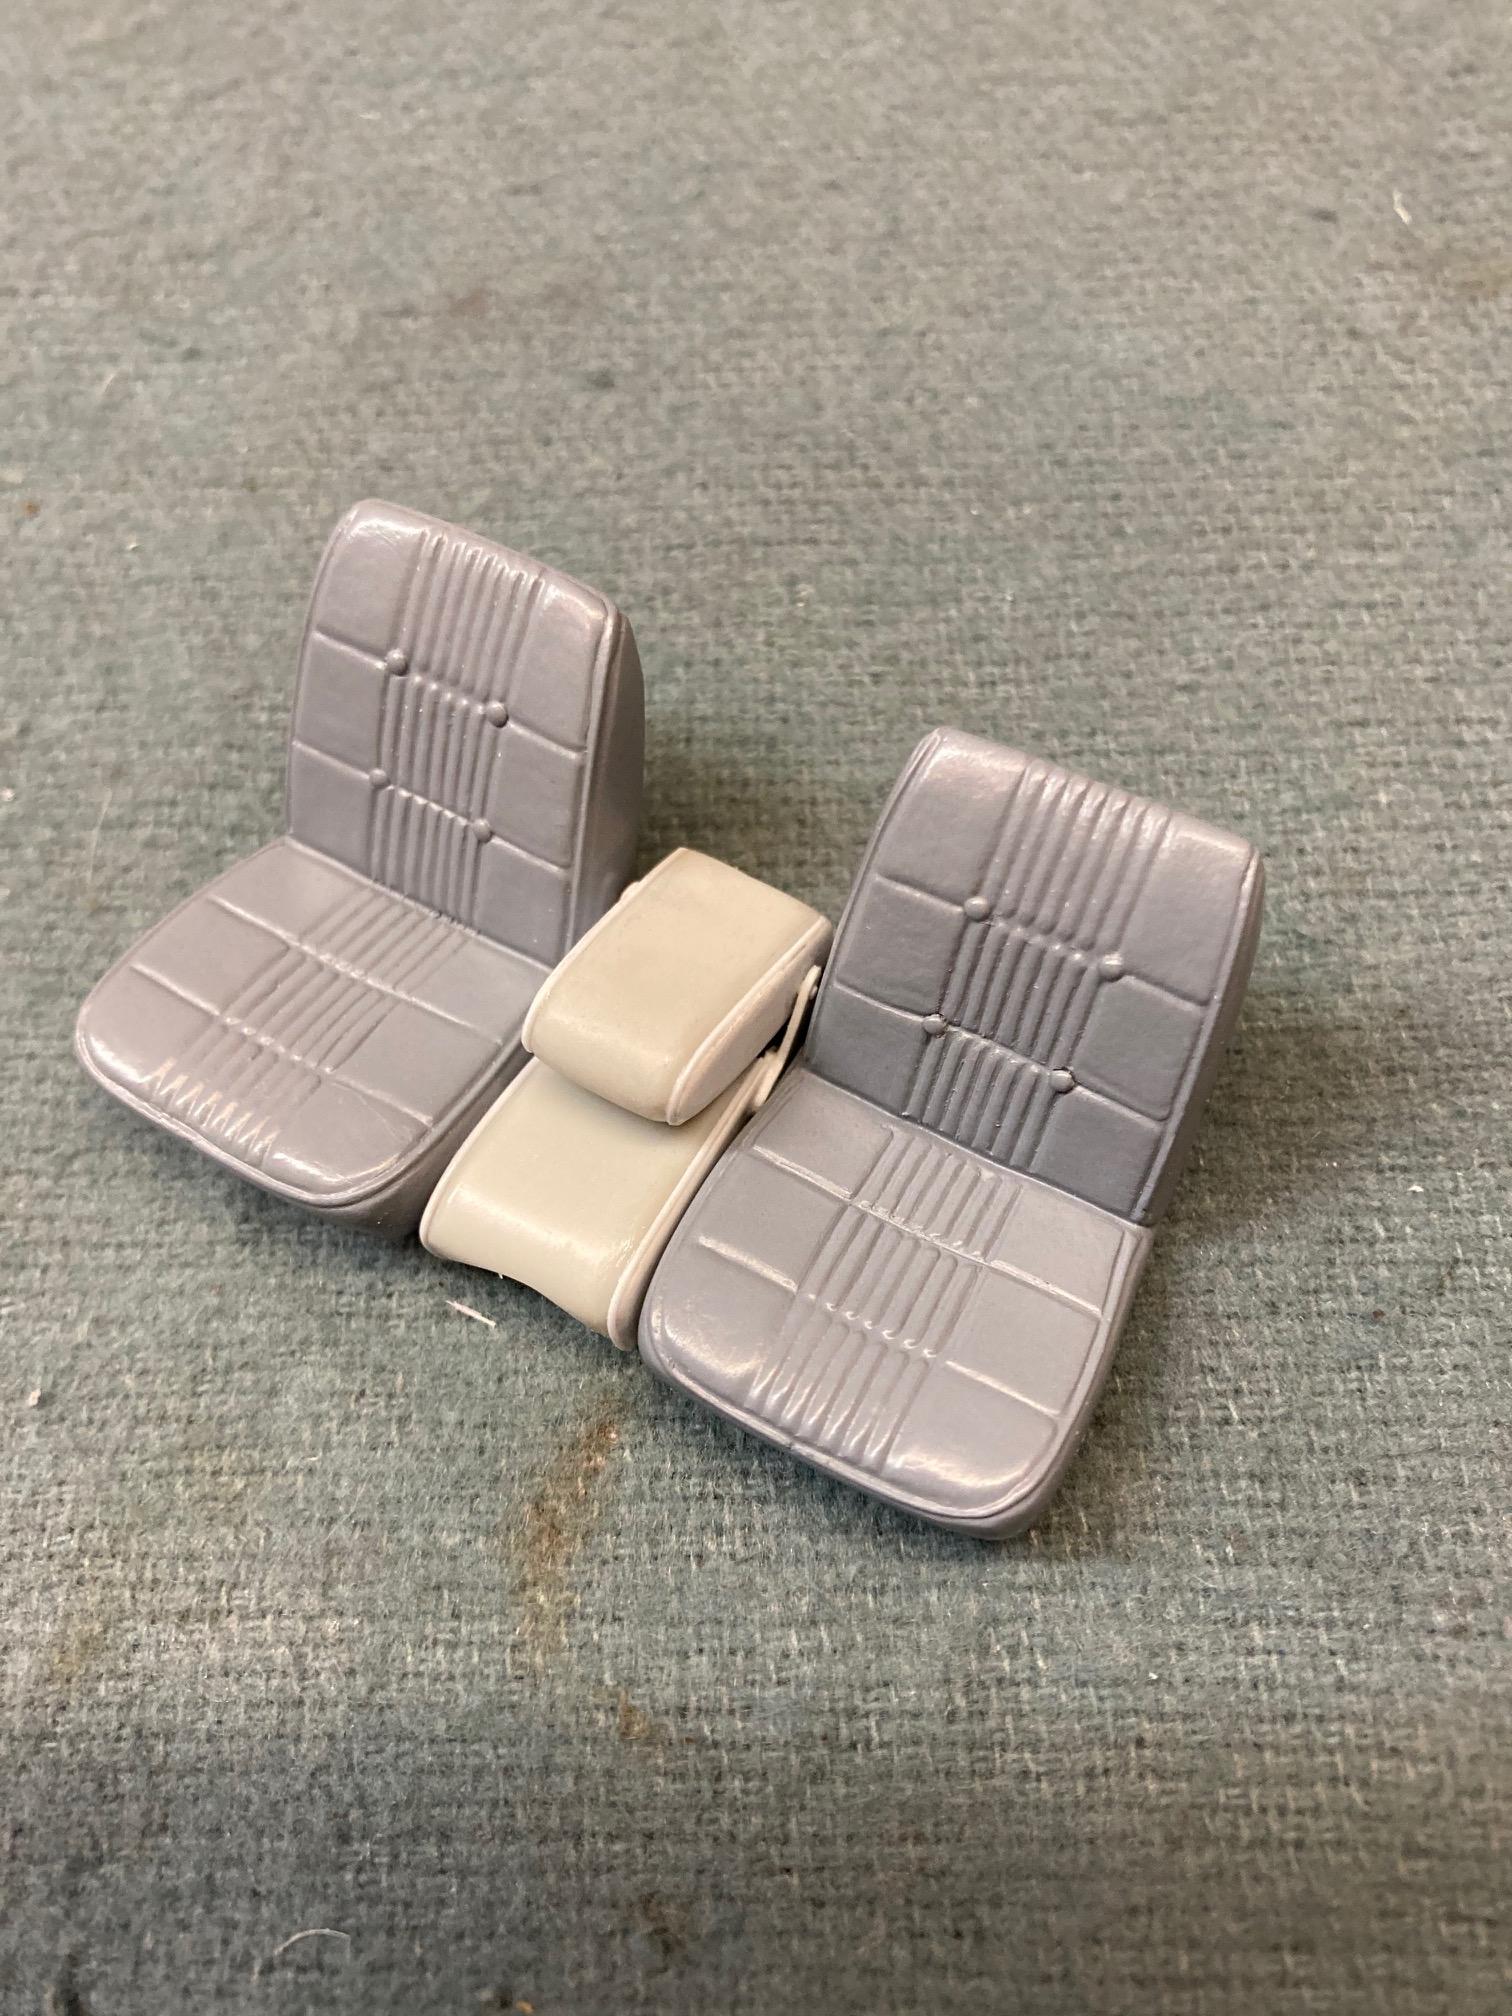
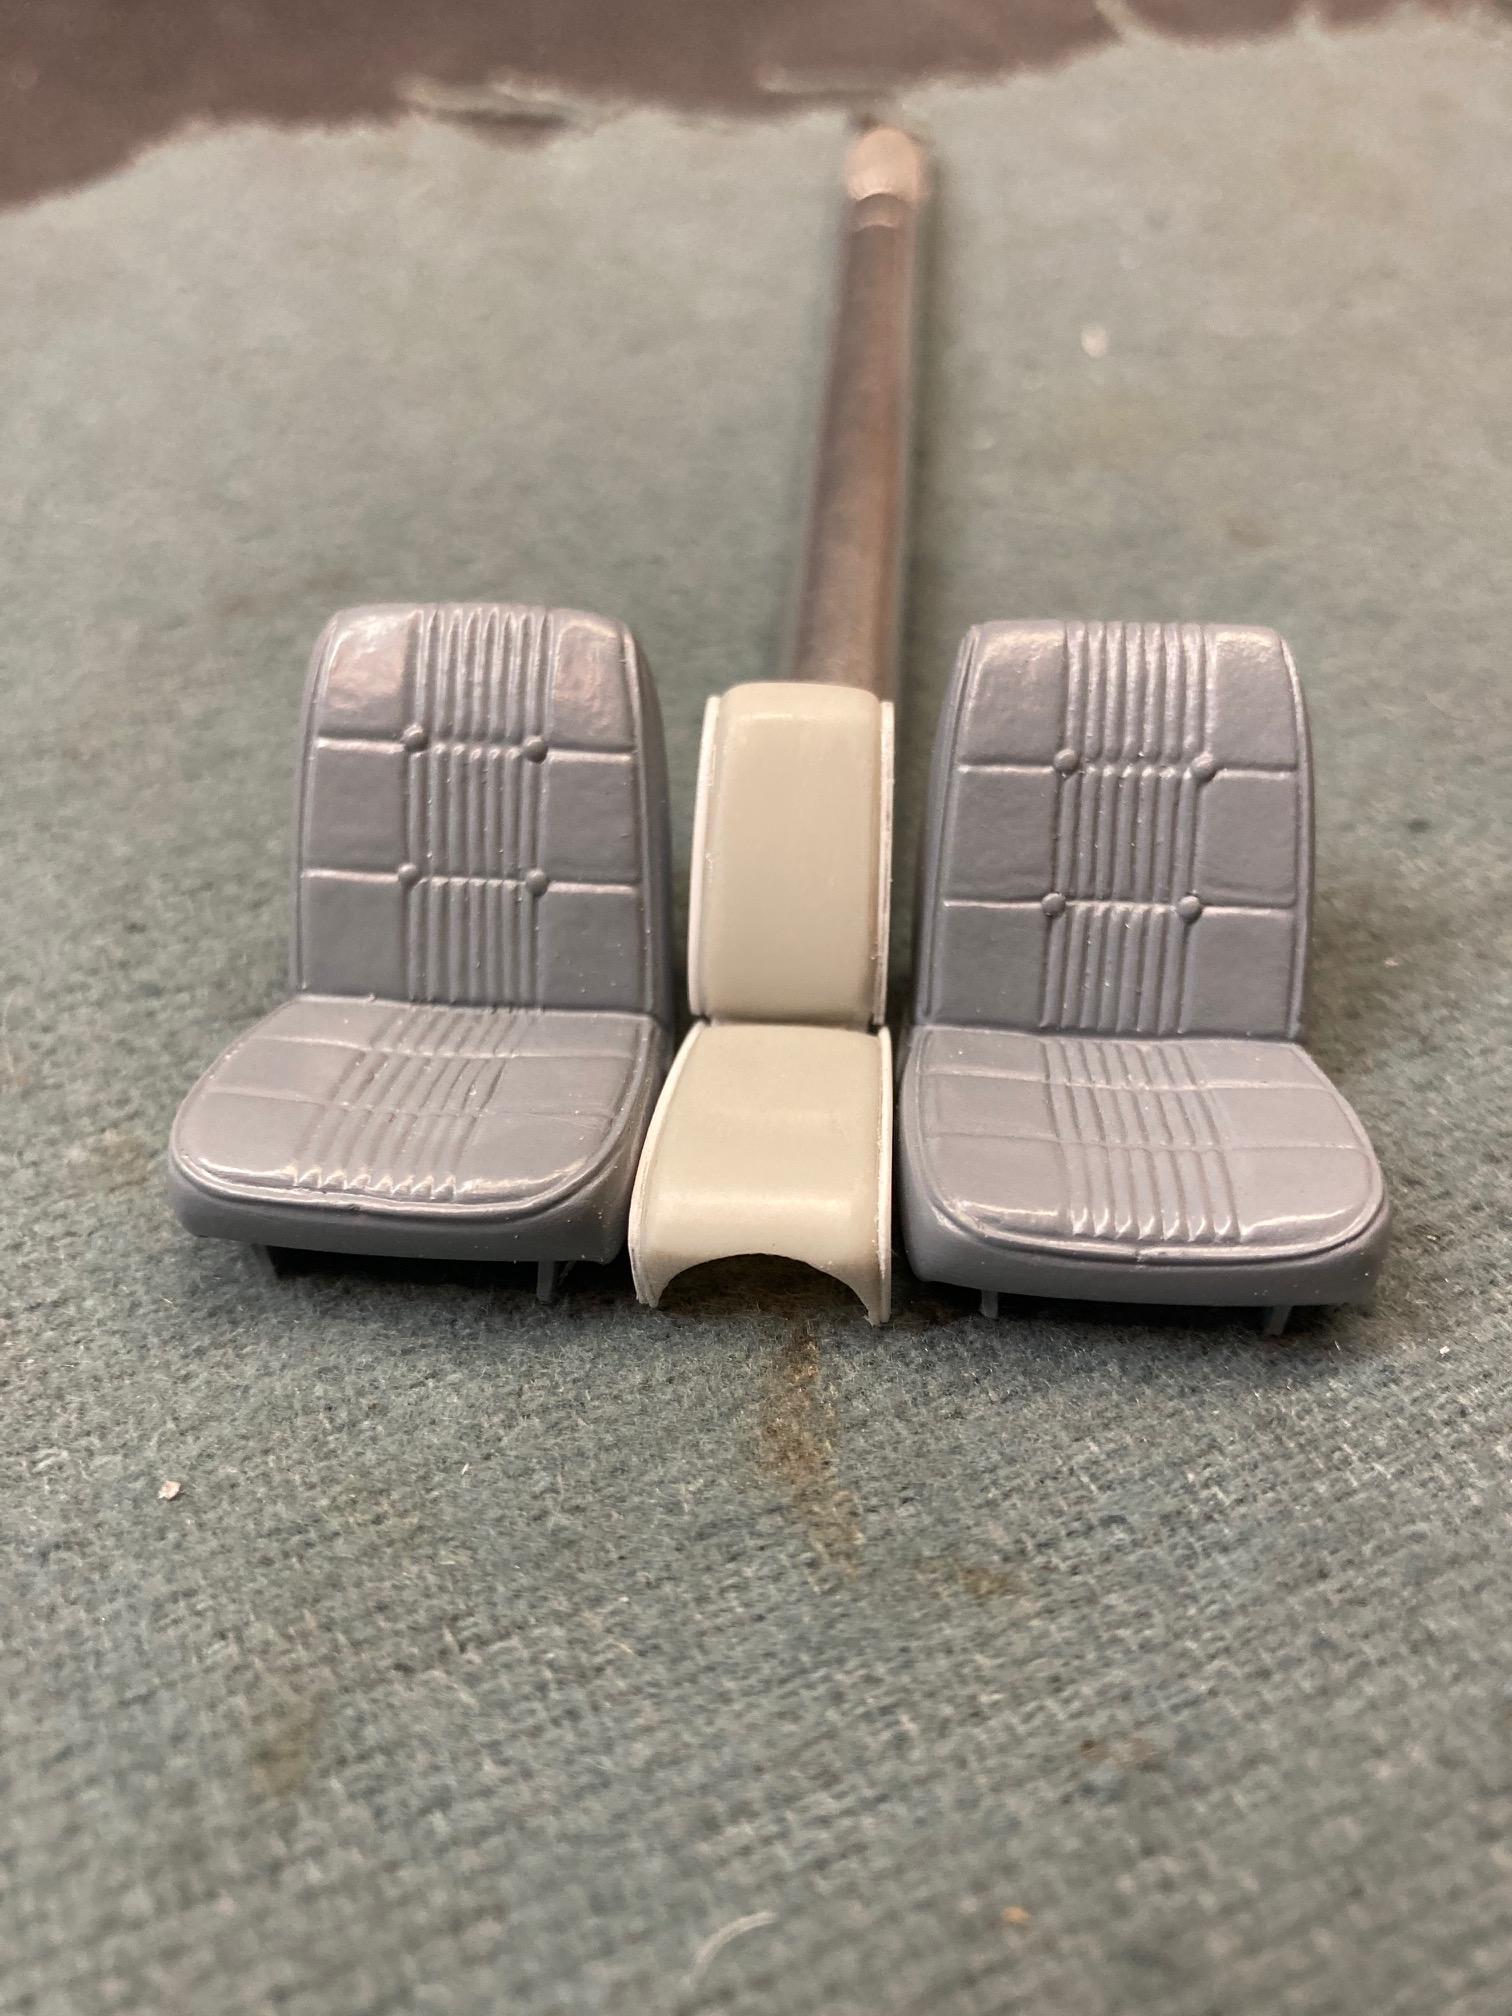
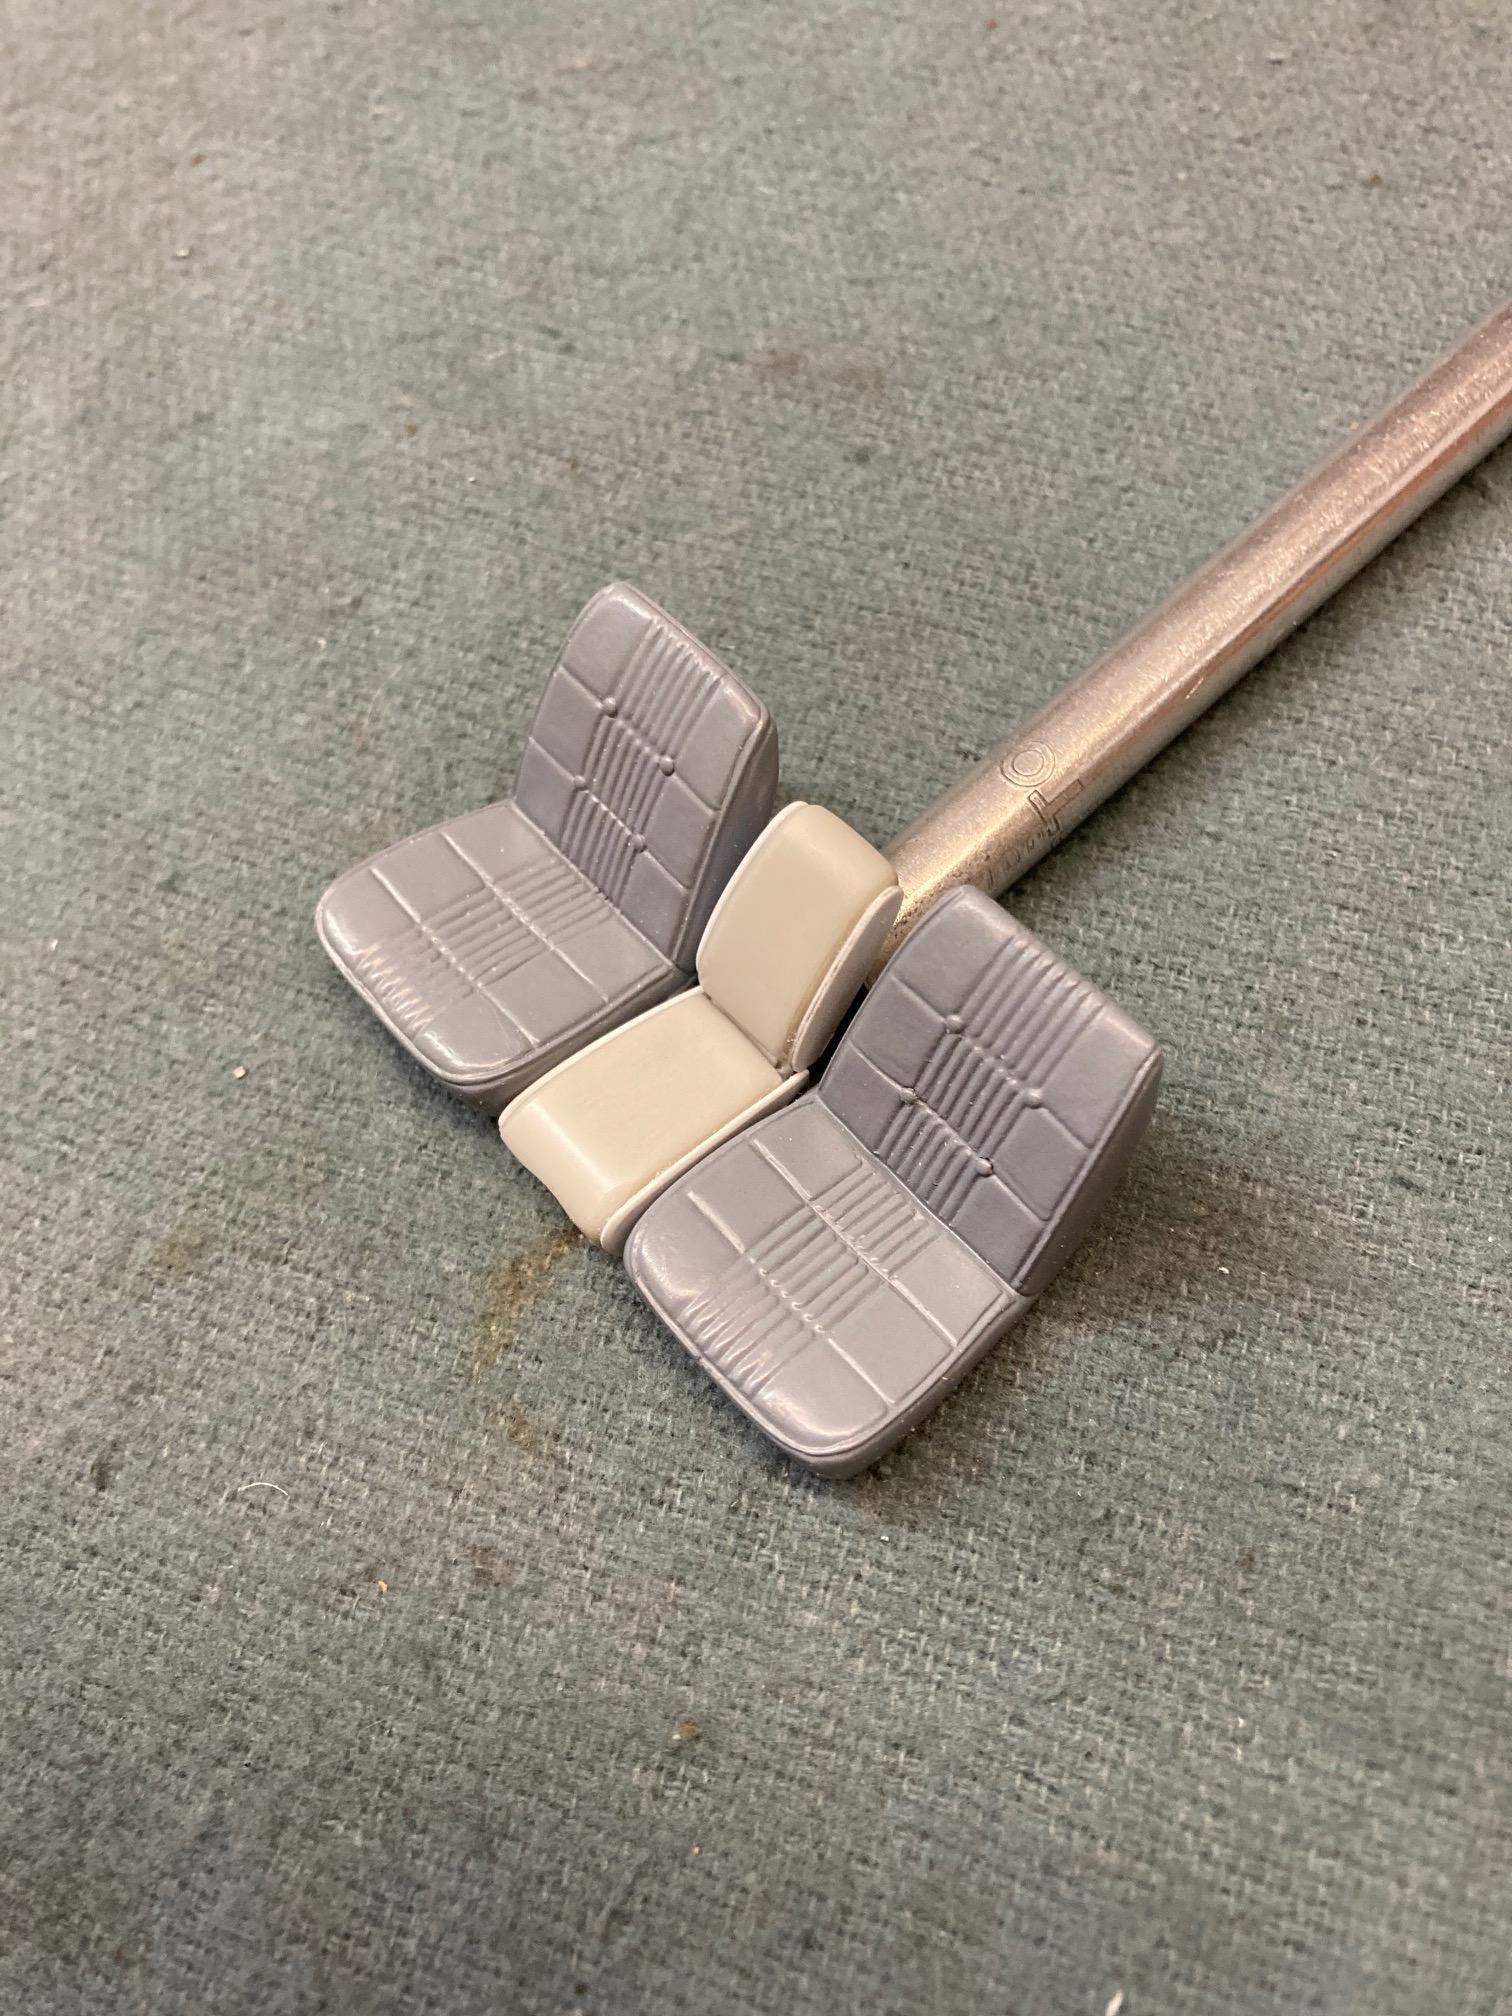
Thanks Gerald! I think I have the "buddy seat" pretty much finished. Added the piping all around, and while I was at it, I went ahead and made it positionable. Steve

-
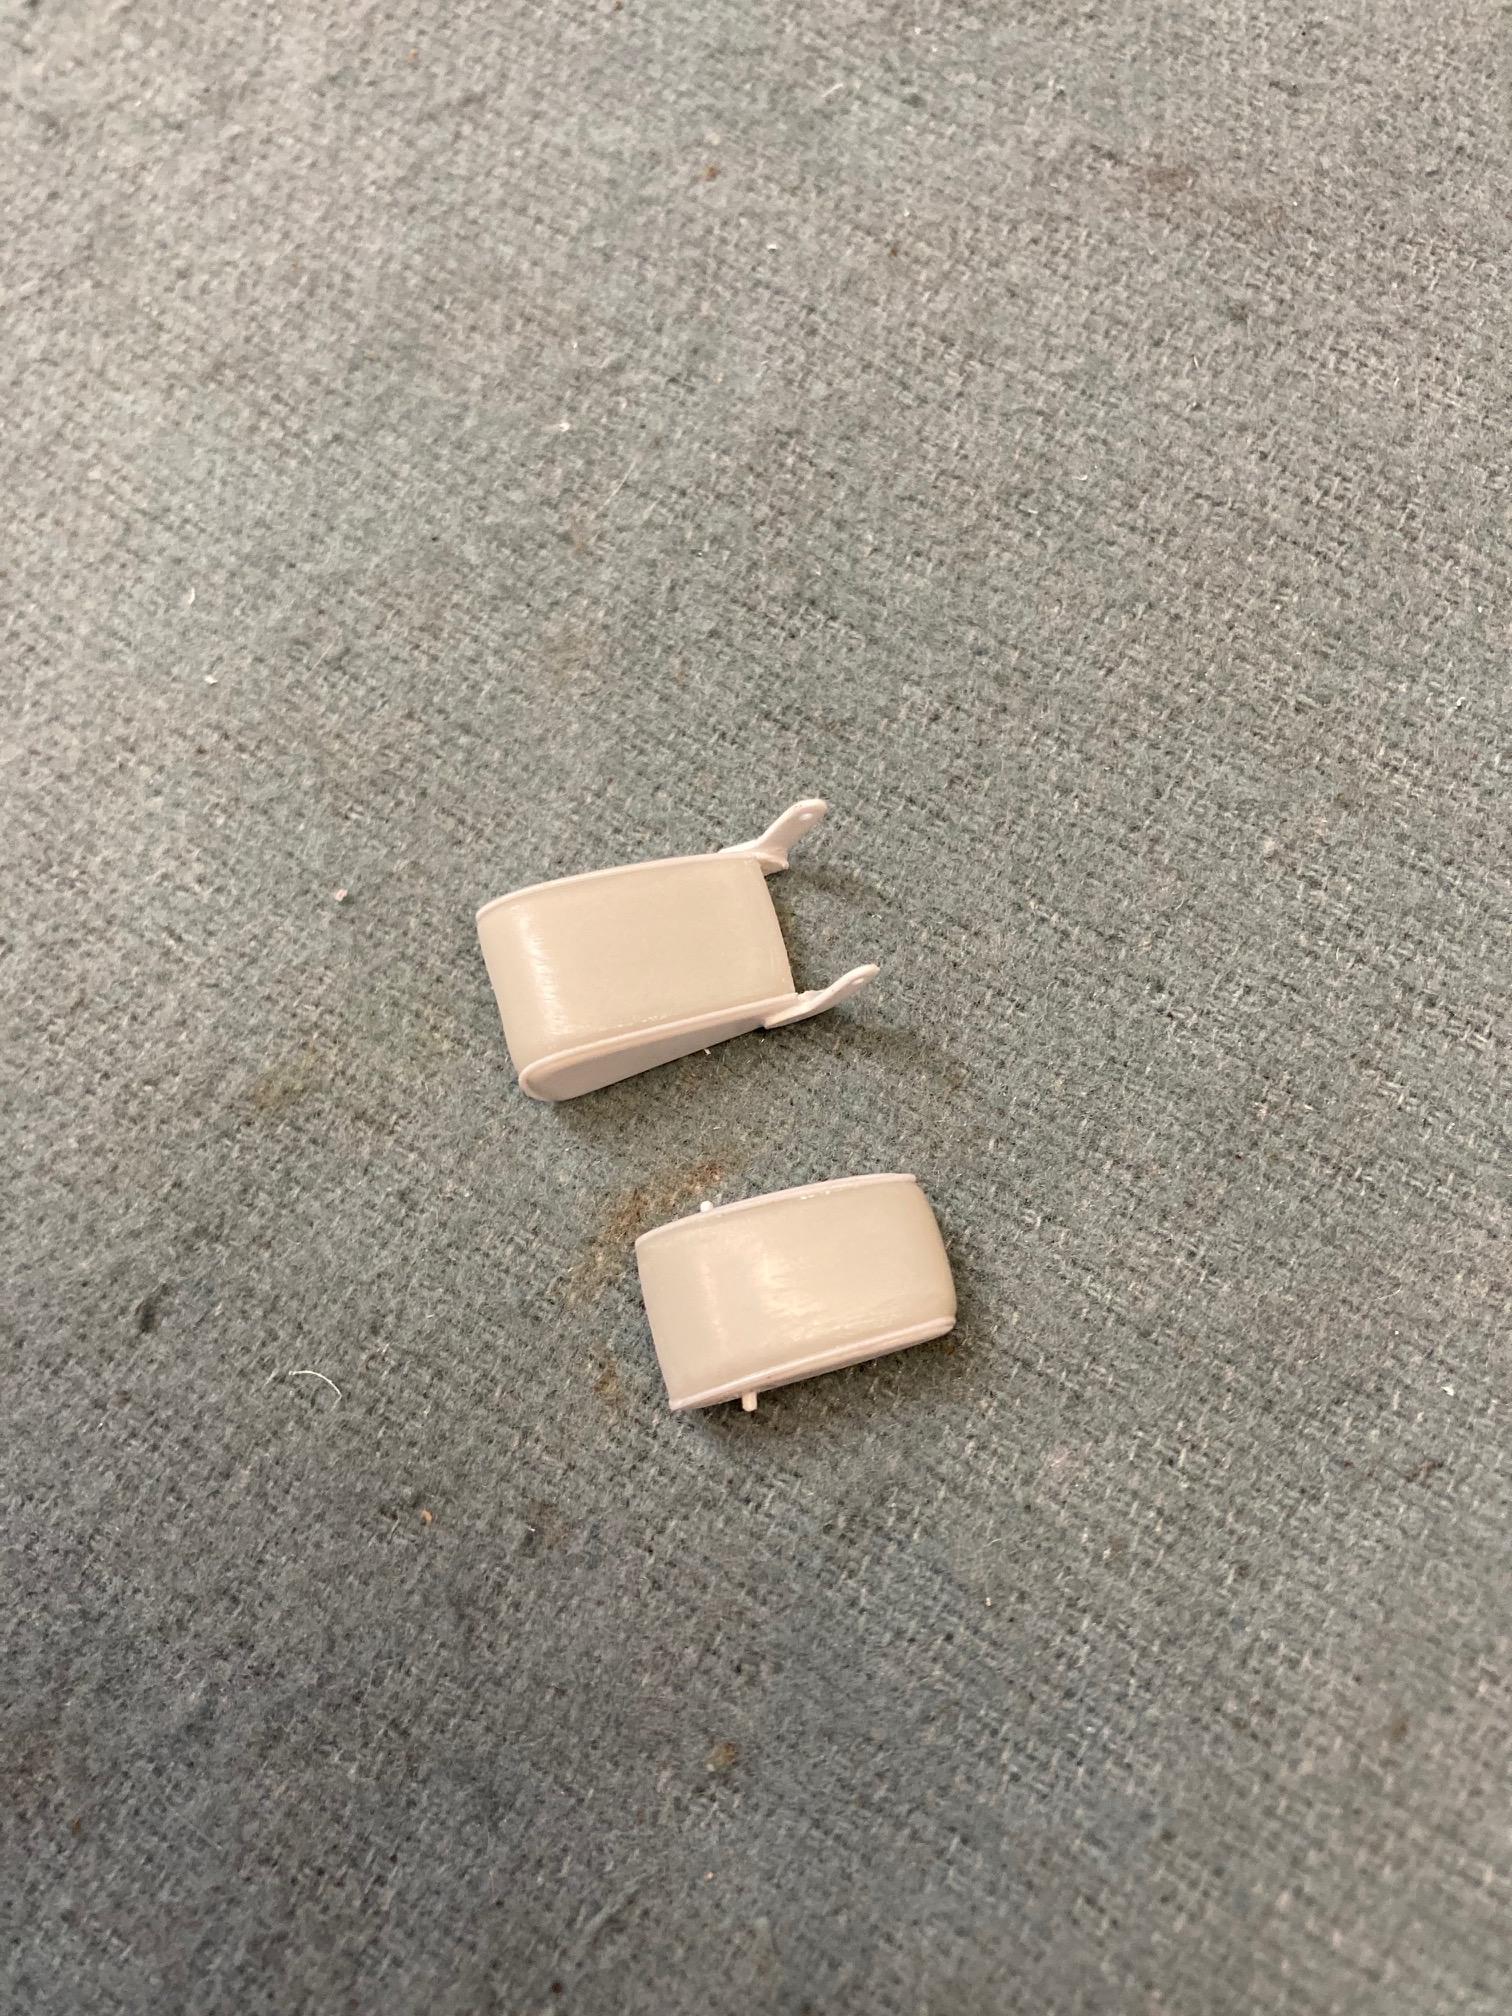
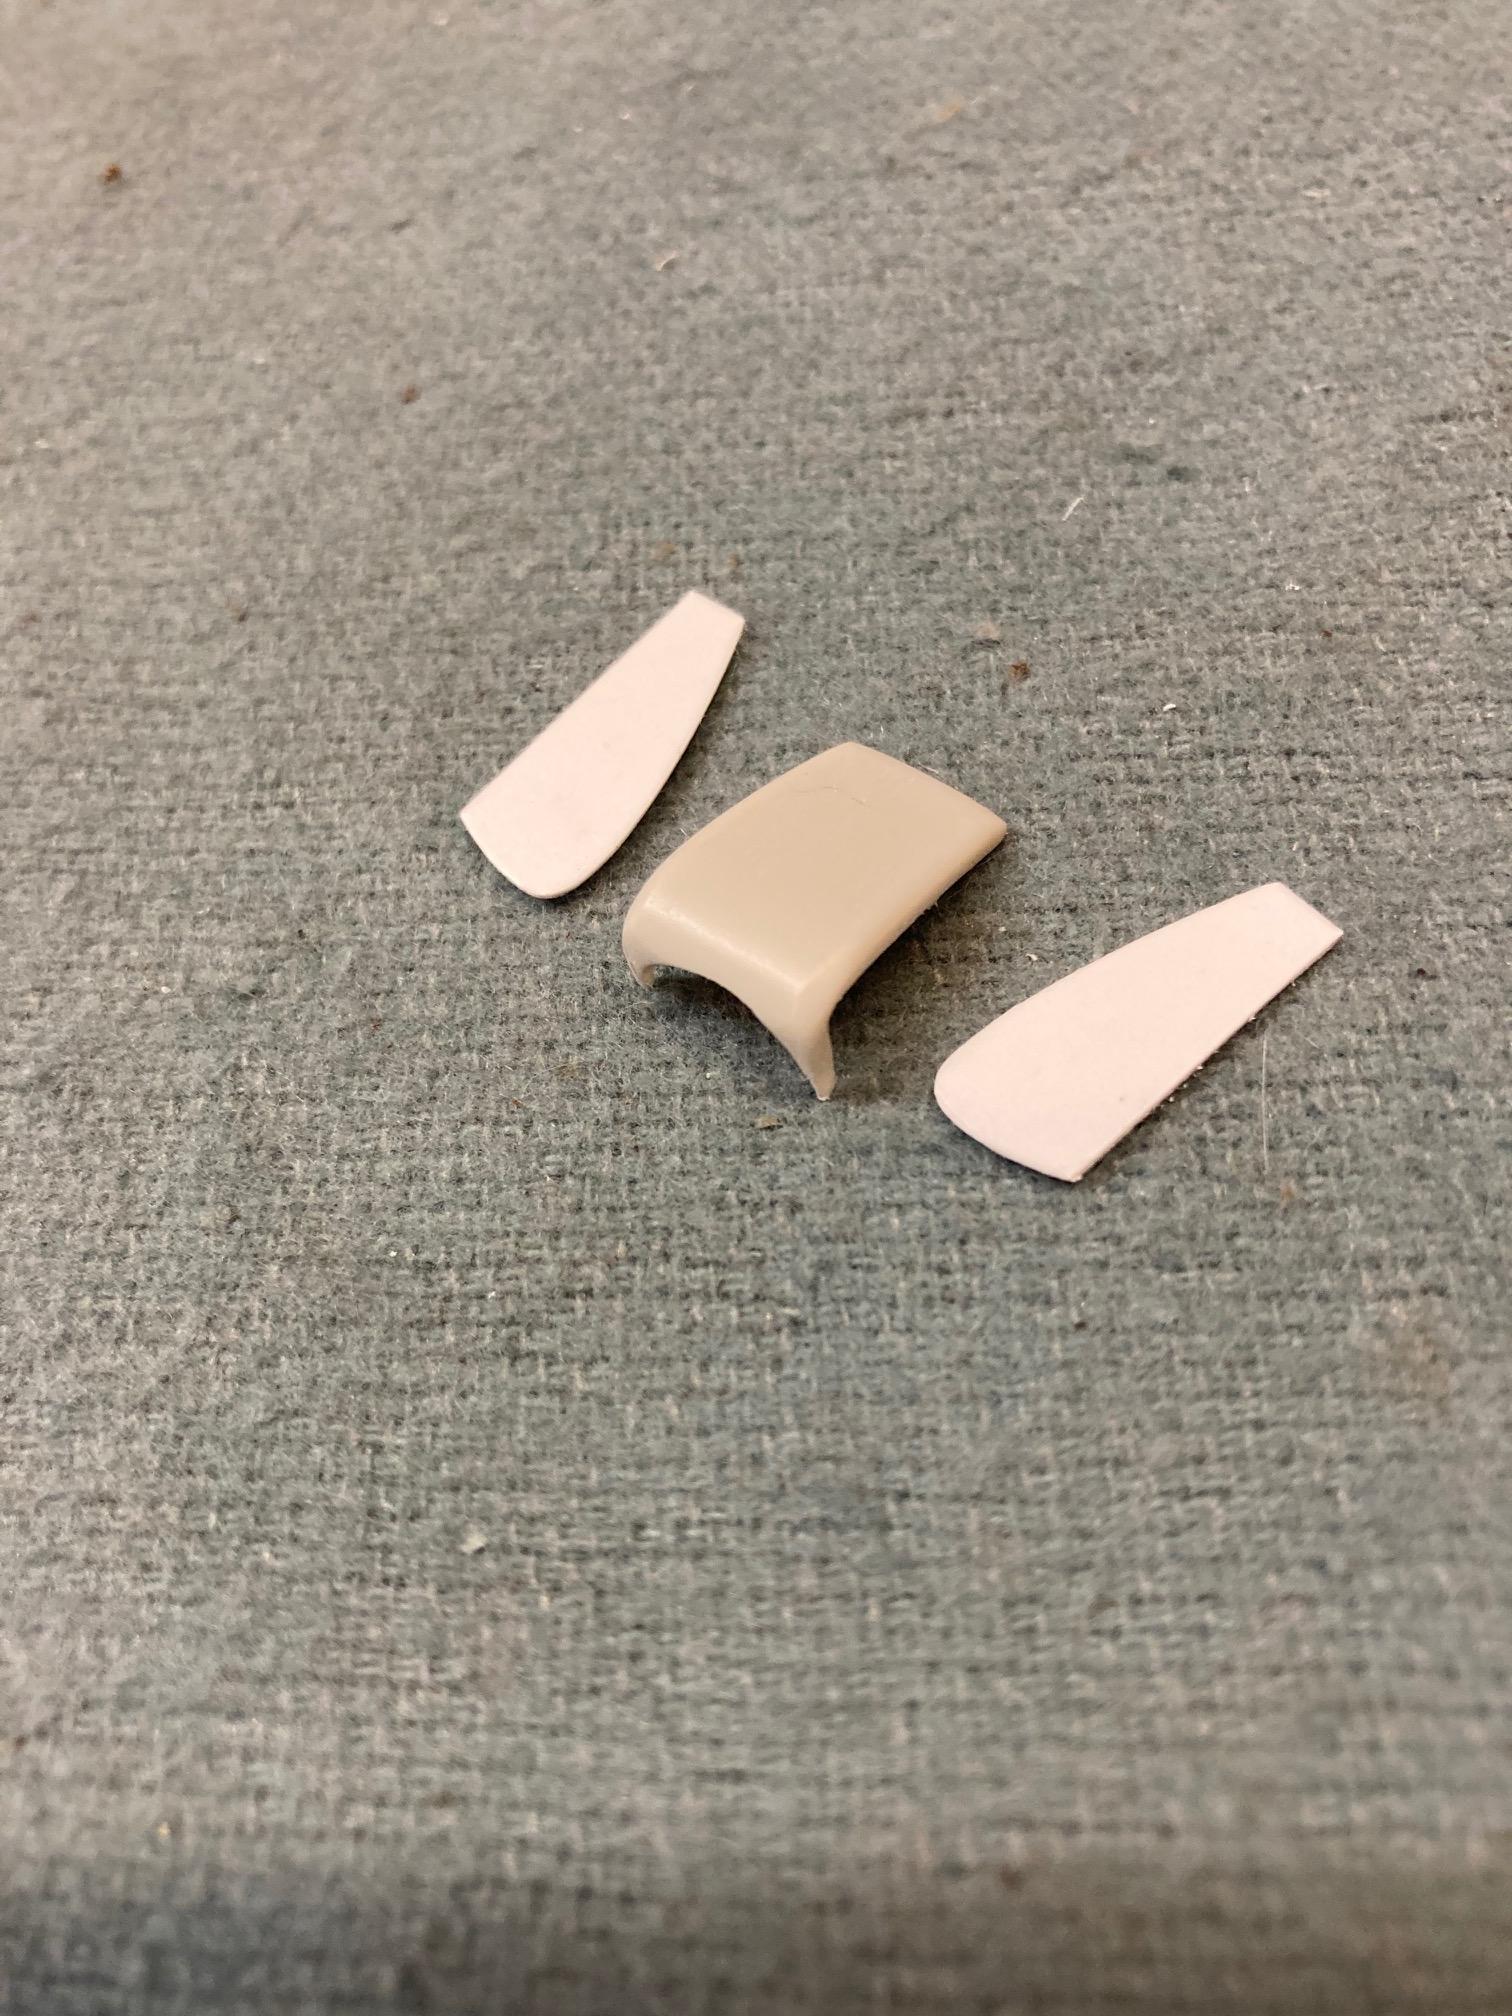
Now that my interior has been returned from Ed, I can continue on with some more interior features. The "buddy seat" was the next thing to tackle. Thanks to a '71 Charger front seat assembly that I received from Frank Filosa, (Dodge Driver) I had a good starting point for this seat. I started by cutting the center from the Charger seat front and back and then ground down the sides of both with the Dremel and some sanding. Then I added some side bolsters to the base and back. I'll do a little more refining and then I'll add some piping. Steve
-
Steve
-
I assumed something like that was likely the case. I know how these mock-ups can be deceiving. Steve
-
She’ll be nothing short of magnificent!!! Steve
-
Top notch work!! Are you planning on a little work on the stance? Might be just me, but it appears a bit high in the front when viewed in profile. Steve
-
There are a ton of paints that are not designed for styrene plastic, but there are always ways around this, and in reality, a good portion of the absolute best paints for models is not designed to be used with them. This shouldn’t stop you. Steve
-
Adding gloss to engine block
StevenGuthmiller replied to Hws5283's topic in Model Building Questions and Answers
I use flat paints all of the time when painting engines. (Usually Testors enamels) There are some nice benefits to using flat paints followed by clear. First, flat paint will dry smoother as a rule, (no orange peel) Second, I can control the degree of gloss depending on the number of coats I add after. Finally, I can do all of my detail painting on the engine prior to the clear coat. This will protect those parts, as well as the engine paint from rubbing off during handling during assembly. I will usually use a coat or two of Testors clear lacquer over the flat enamel to add gloss and protect the paint. Steve -
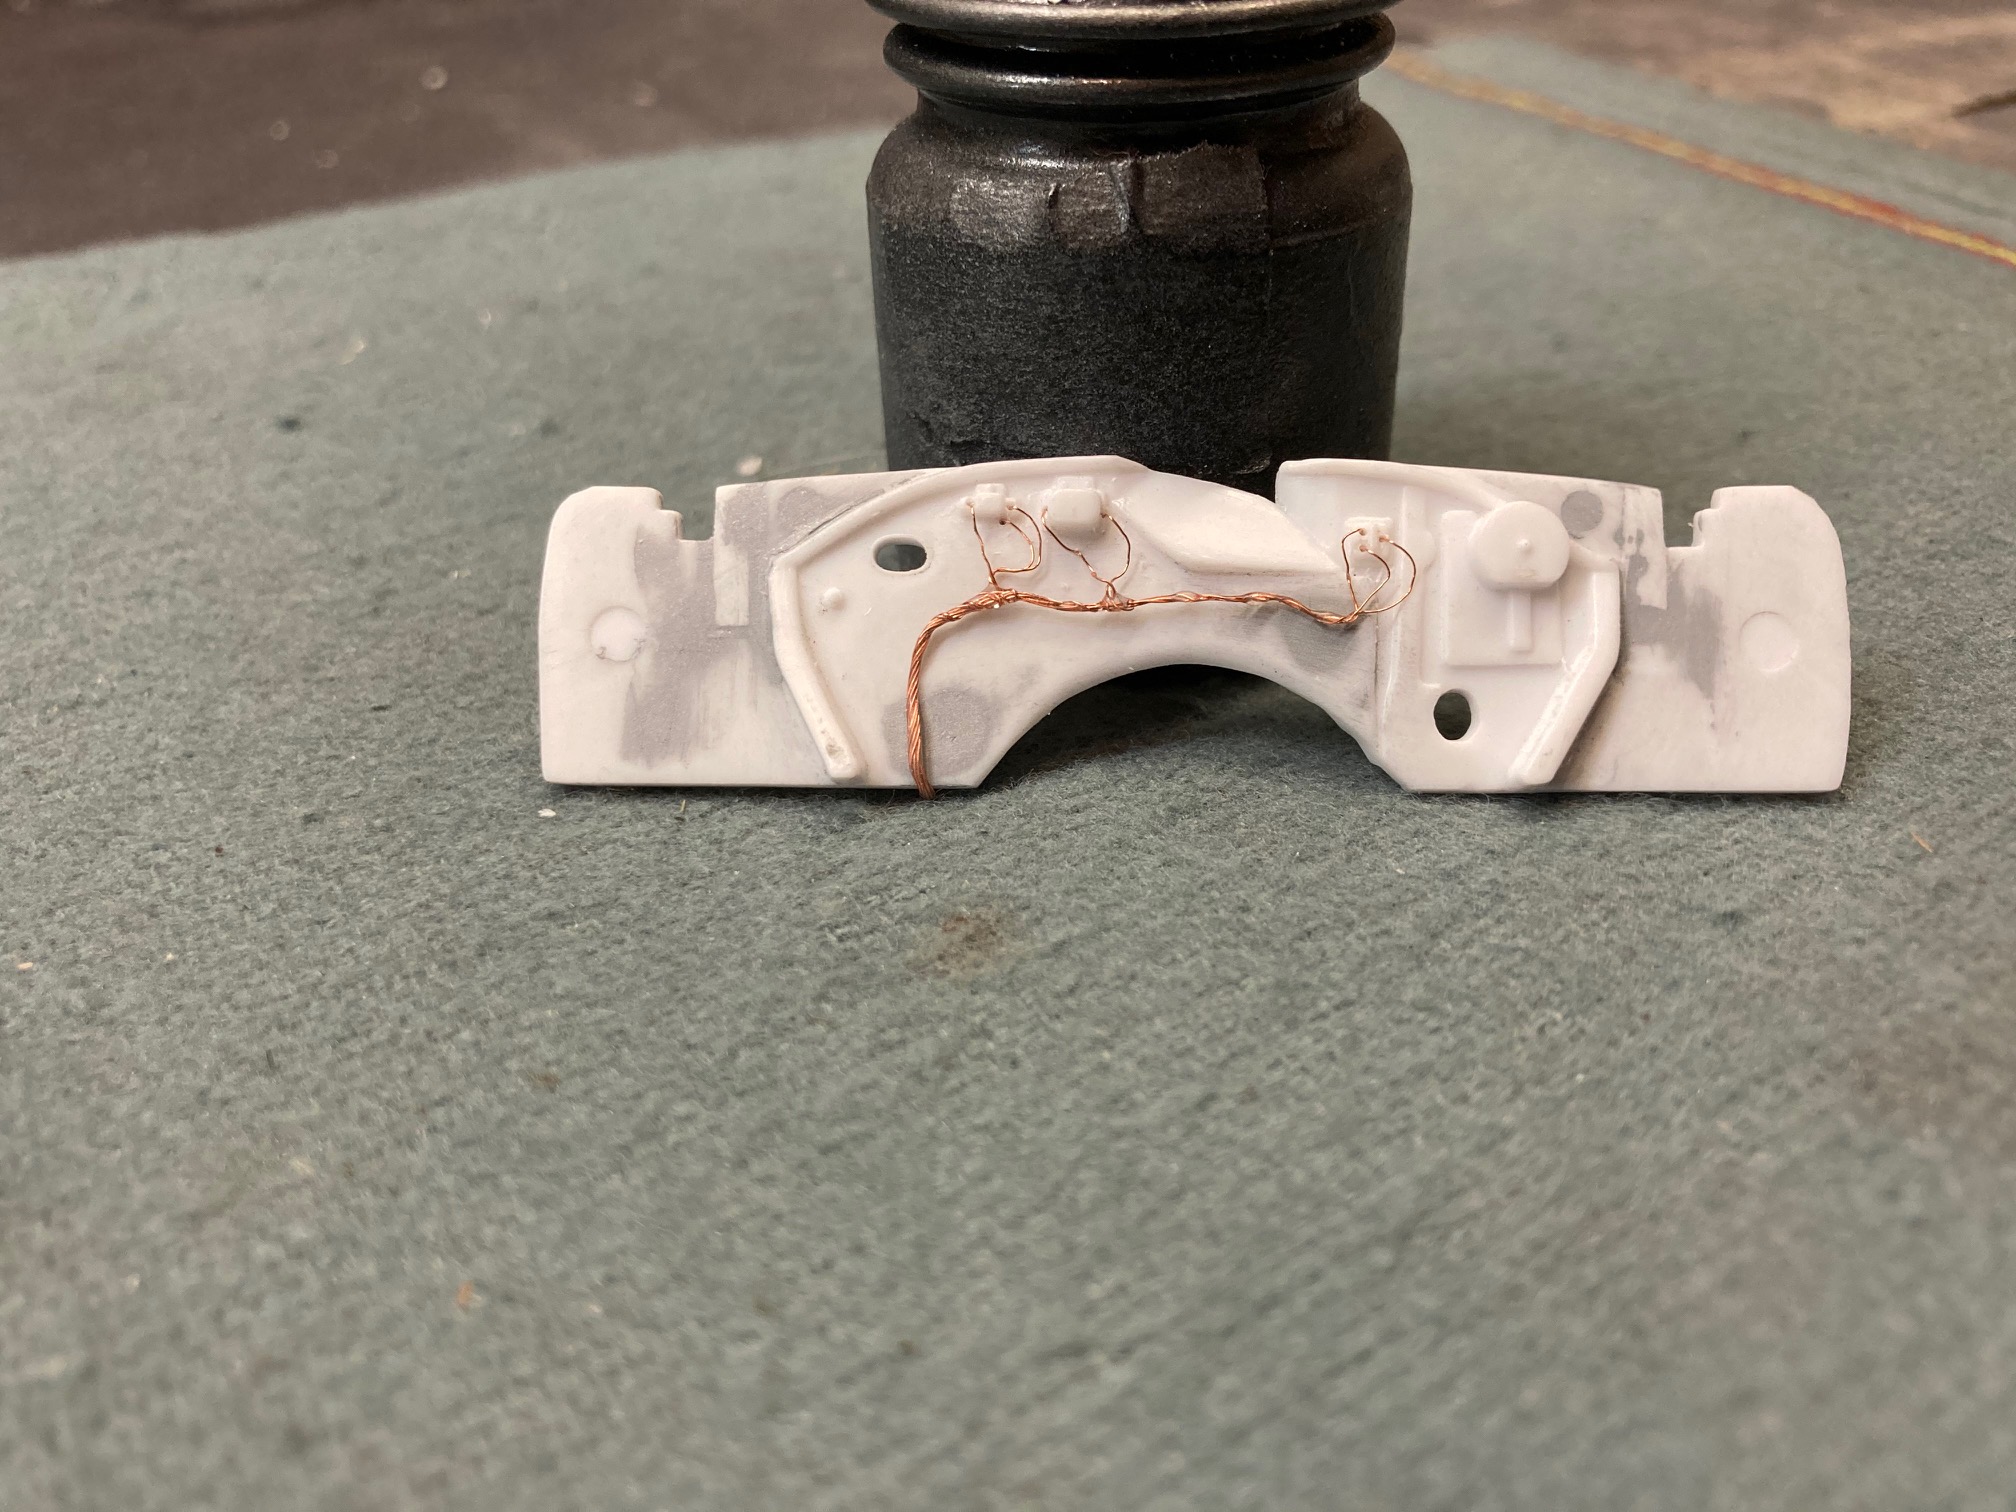
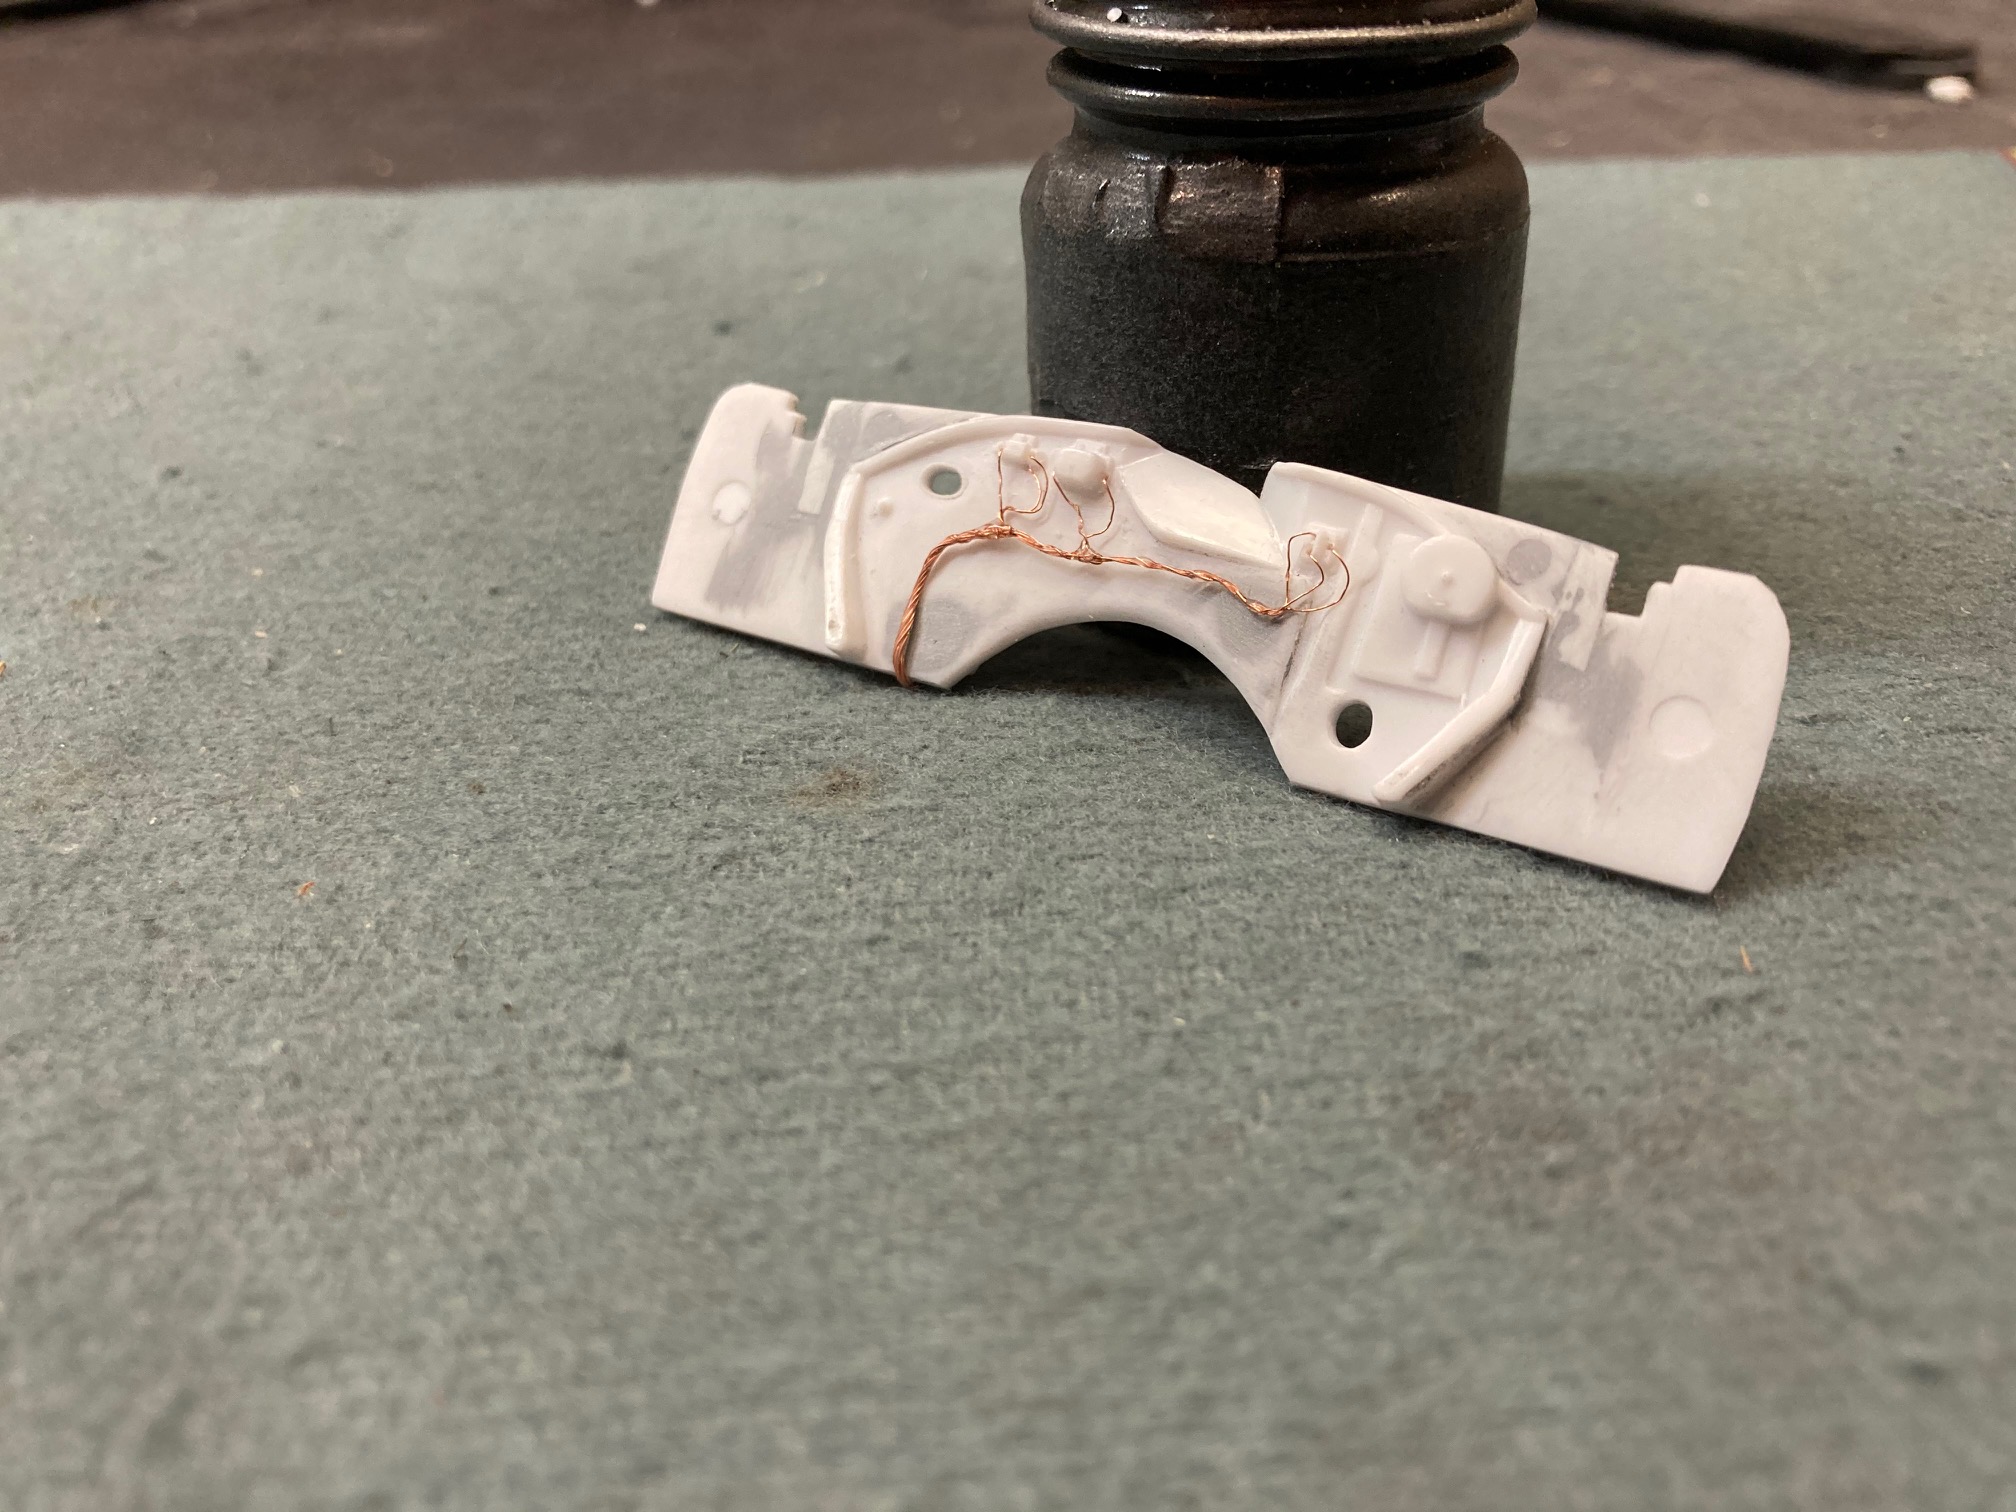
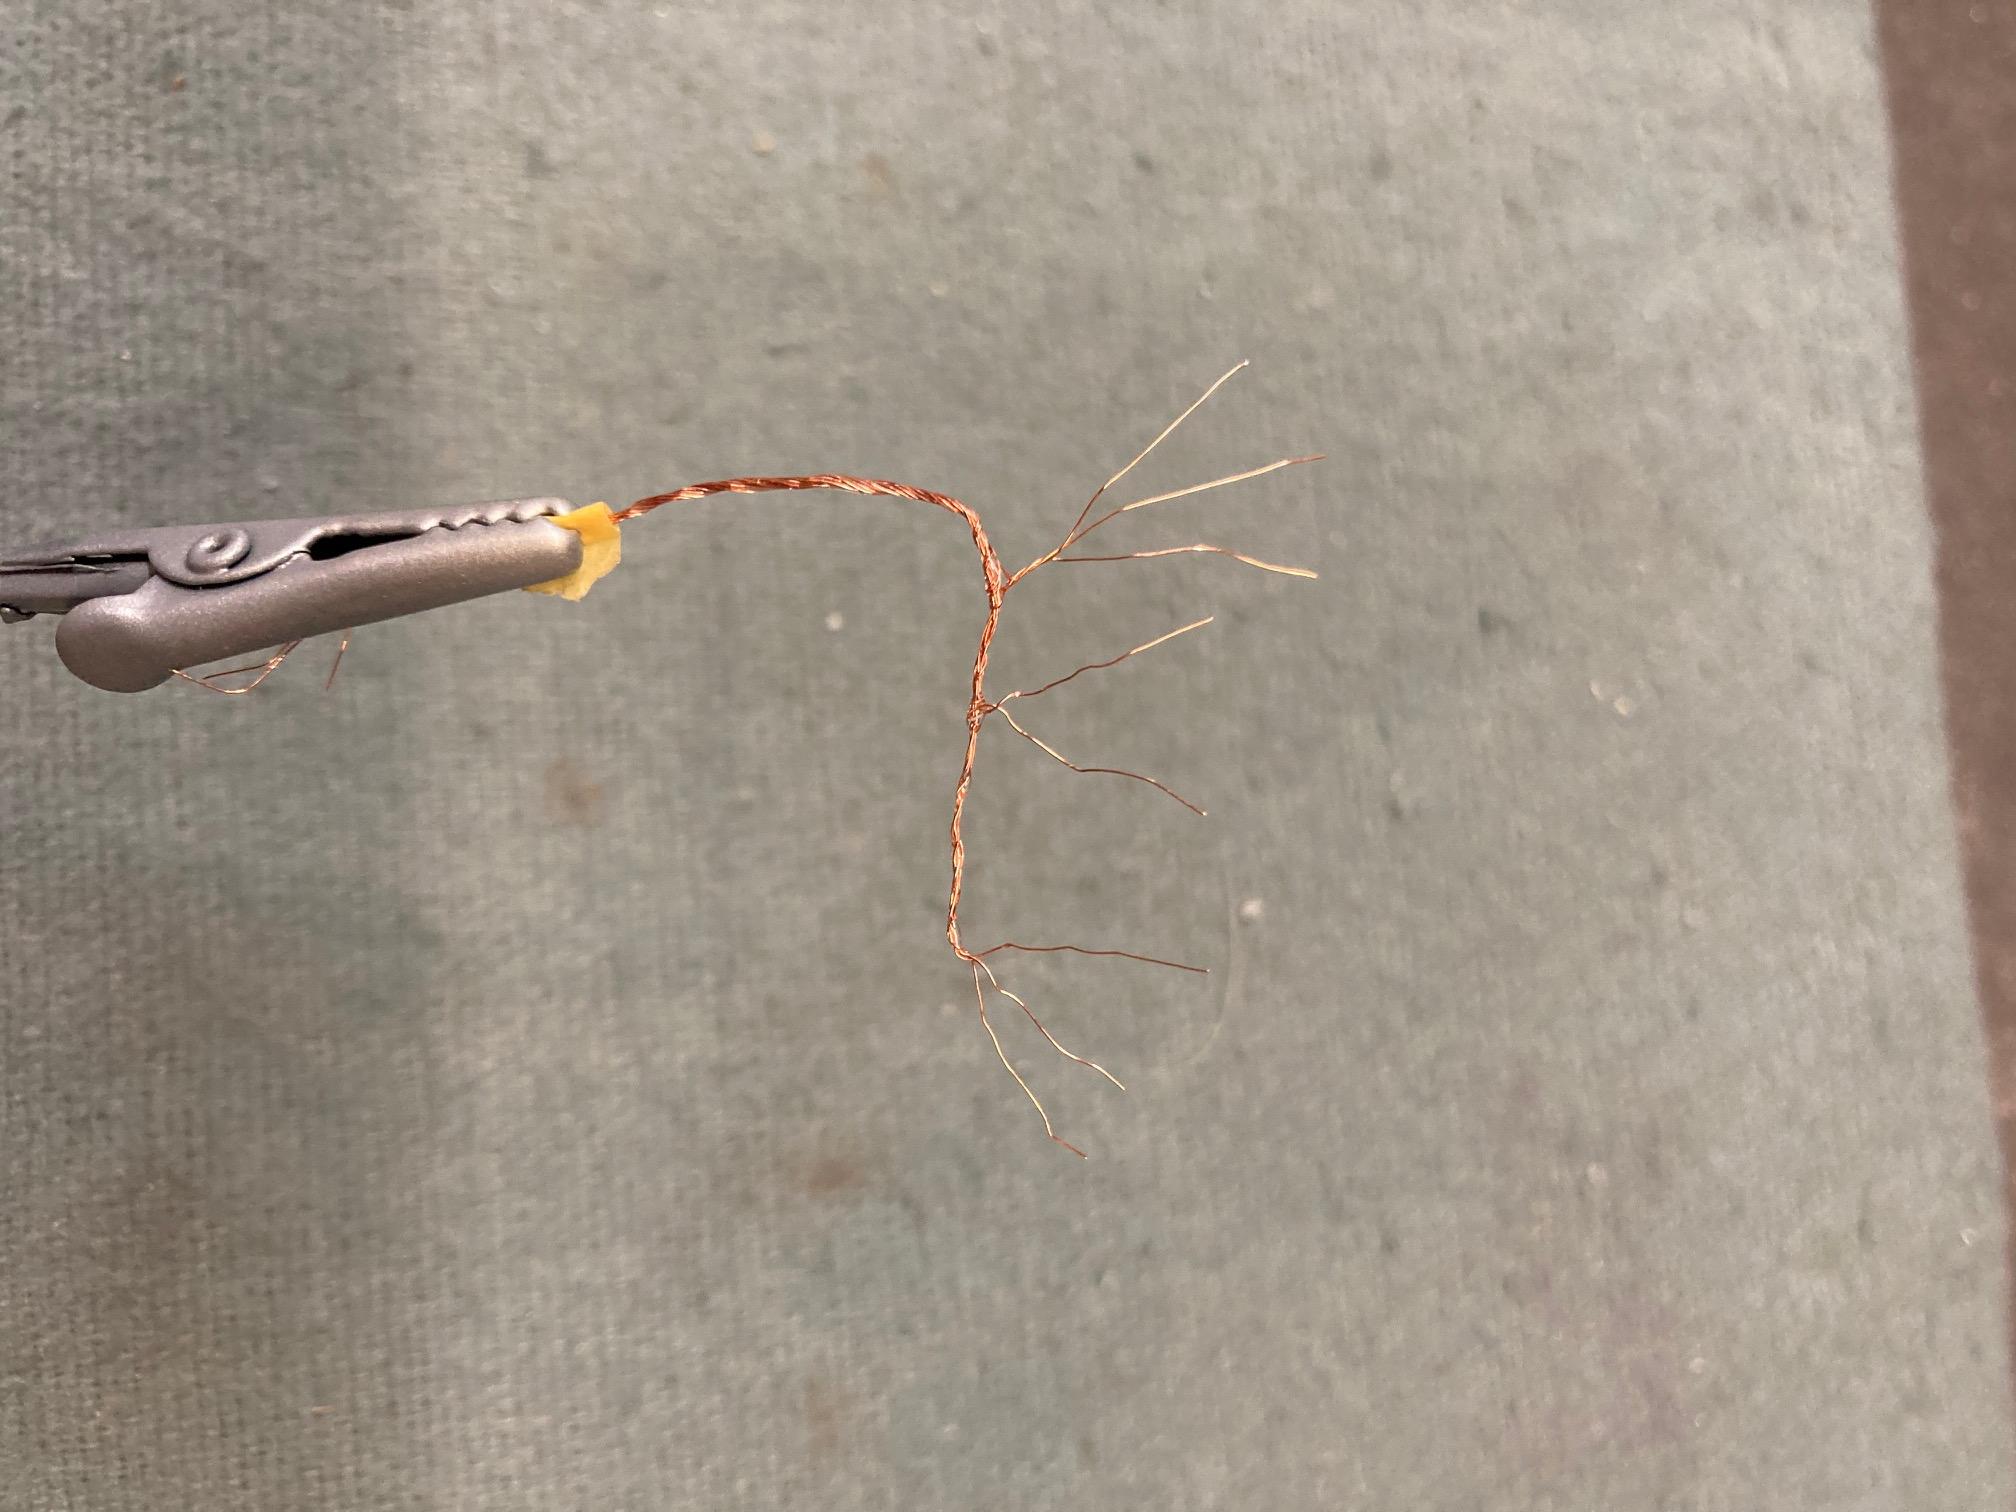
Here's my latest distraction. It was obvious to me that the extremely faint wiring on the Revell Charger firewall was going to be extremely difficult, if not entirely impossible to detail once the firewall was covered in a couple of coats of primer and paint. So I began some experimenting with creating a wiring harness from very thin copper wire. Once I got it to the configuration I needed, I coated the twisted portions of the wire with 5 minute epoxy to hold everything in place. Once cured, I can begin painting the wires and get them routed for installation. Steve
-
I think I'm good. I always try to sand the C-pillar trim down to about the same thickness as the drip rail trim. Steve
-
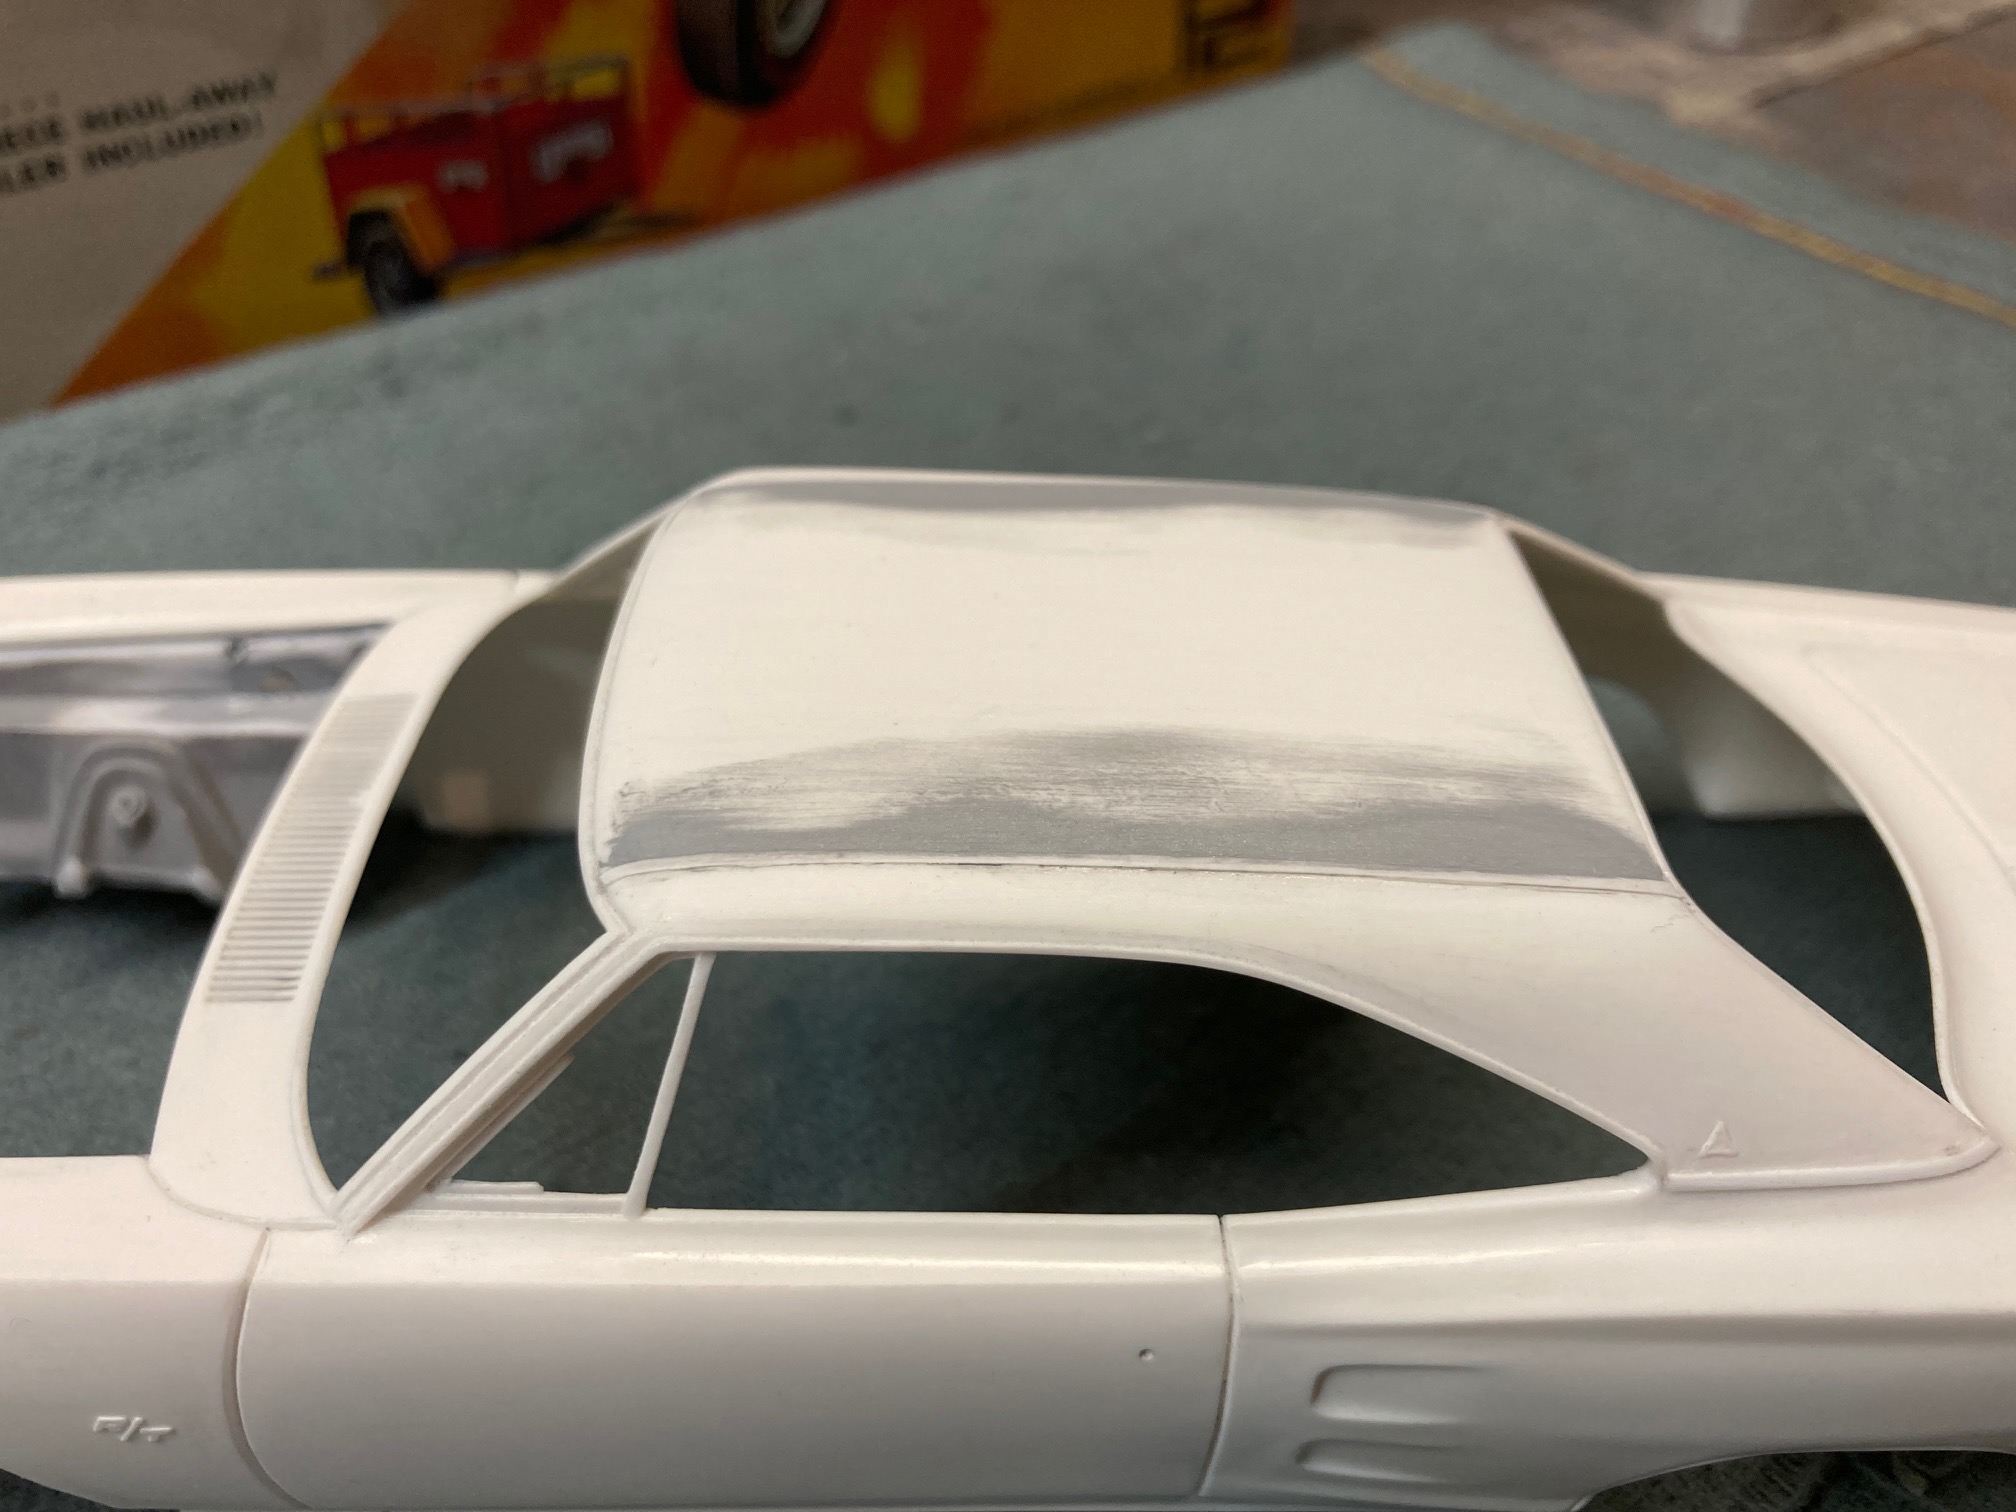
Thanks guys! I think I've finished up the vinyl top work. Installed the chrome strips on the C-pillars and the roof seams using 0.01 x 0.03 evergreen strip. This time I decided to fill the roof side of the seam strips to make them look a little more correct. Steve
-
Thanks Kevin. It will finally give me the opportunity to fully show off one of my rebuilt interiors. By the way, the Plymouth "Chestnut" will most likely be used on an old Johan "flat box" '64 Fury I would like to get going on at some point. Steve
-
I’ve always wanted to do a ‘57 Chevy in this color, so I’m saving it for a future Revell ‘57 Chevy convertible build. I figure at some point I’m going to want a break from these time consuming vintage revamping projects that I’ve been doing a lot of lately. A simple modern kit build might be refreshing at some point. But I’m already planning on my next project being a complete rework of an AMT ‘64 Bonneville convertible. That’s what the Pontiac Turquoise is for. ? Steve
-
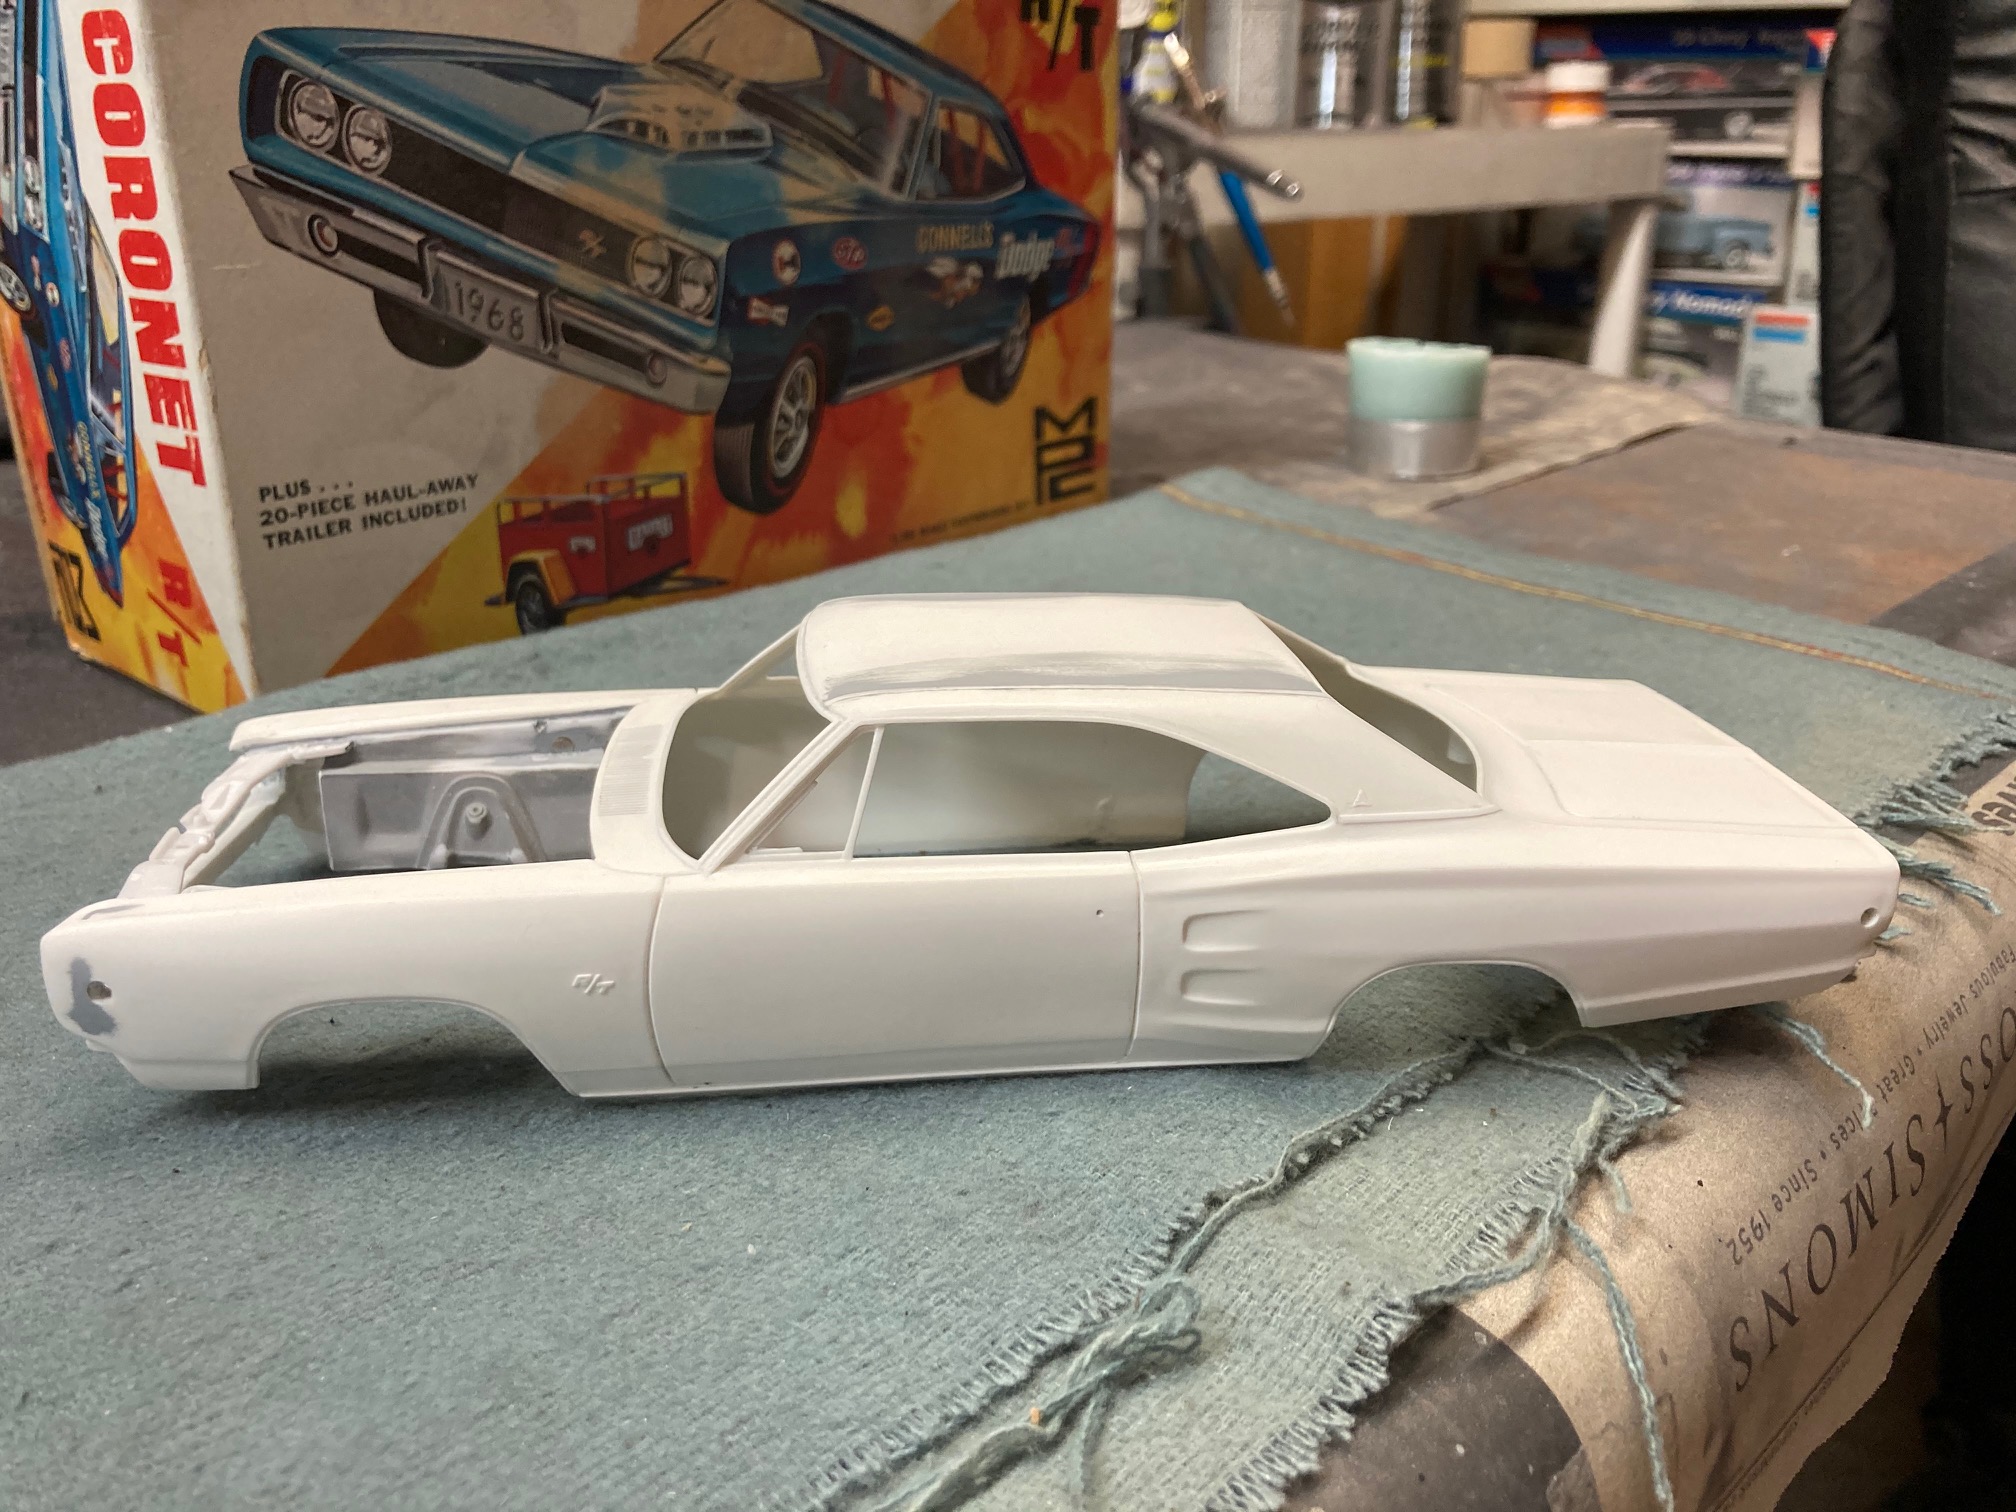
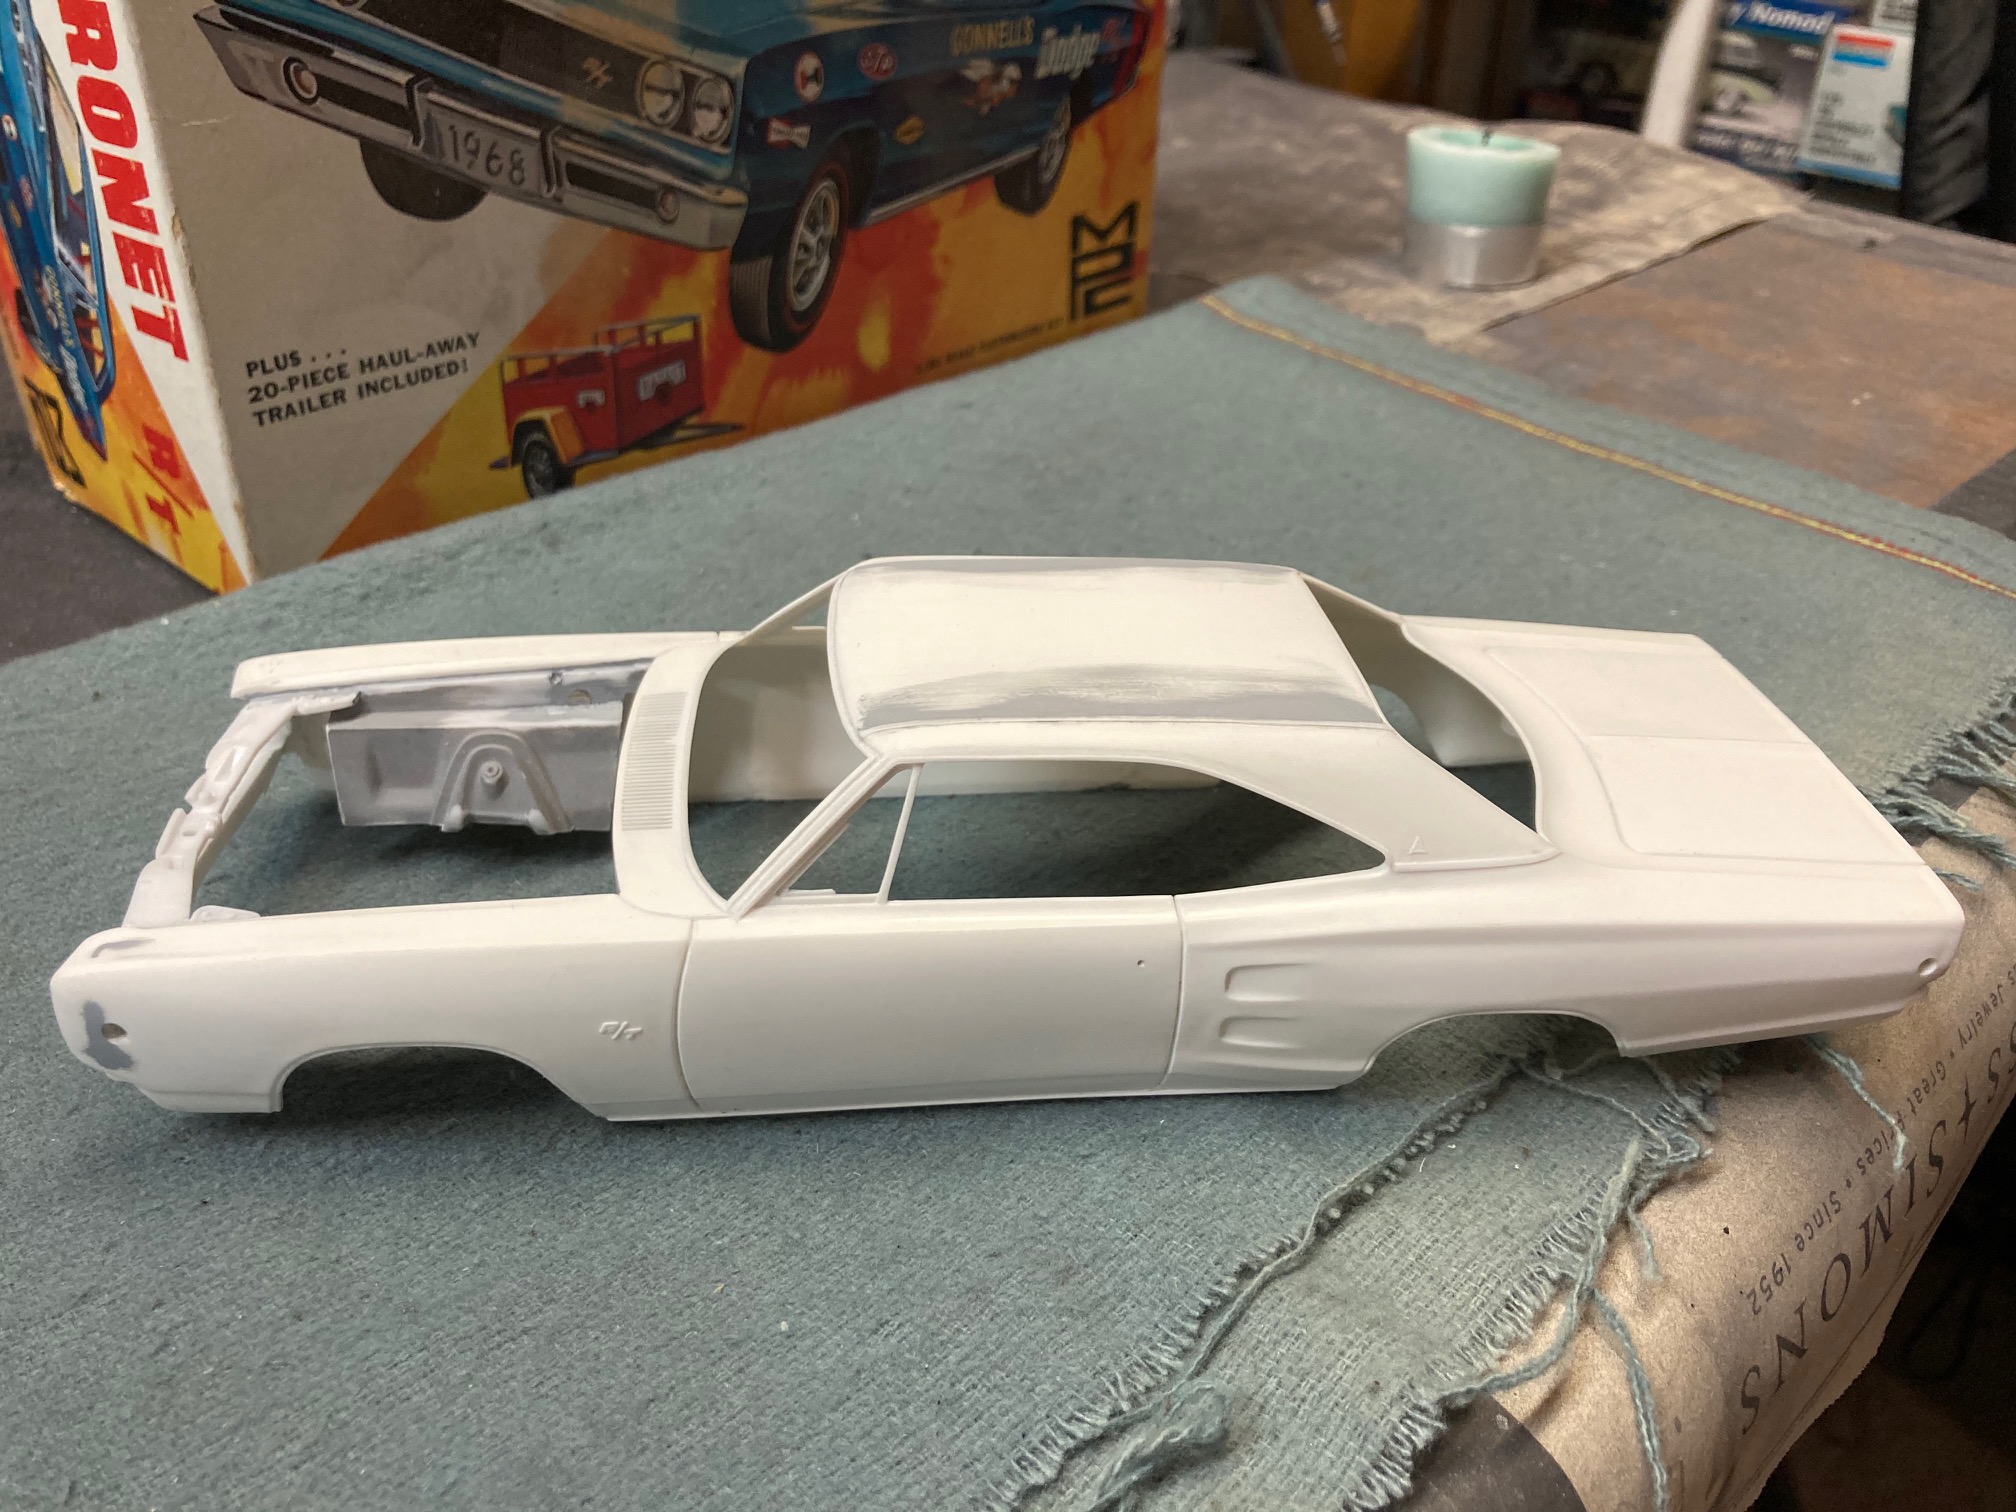
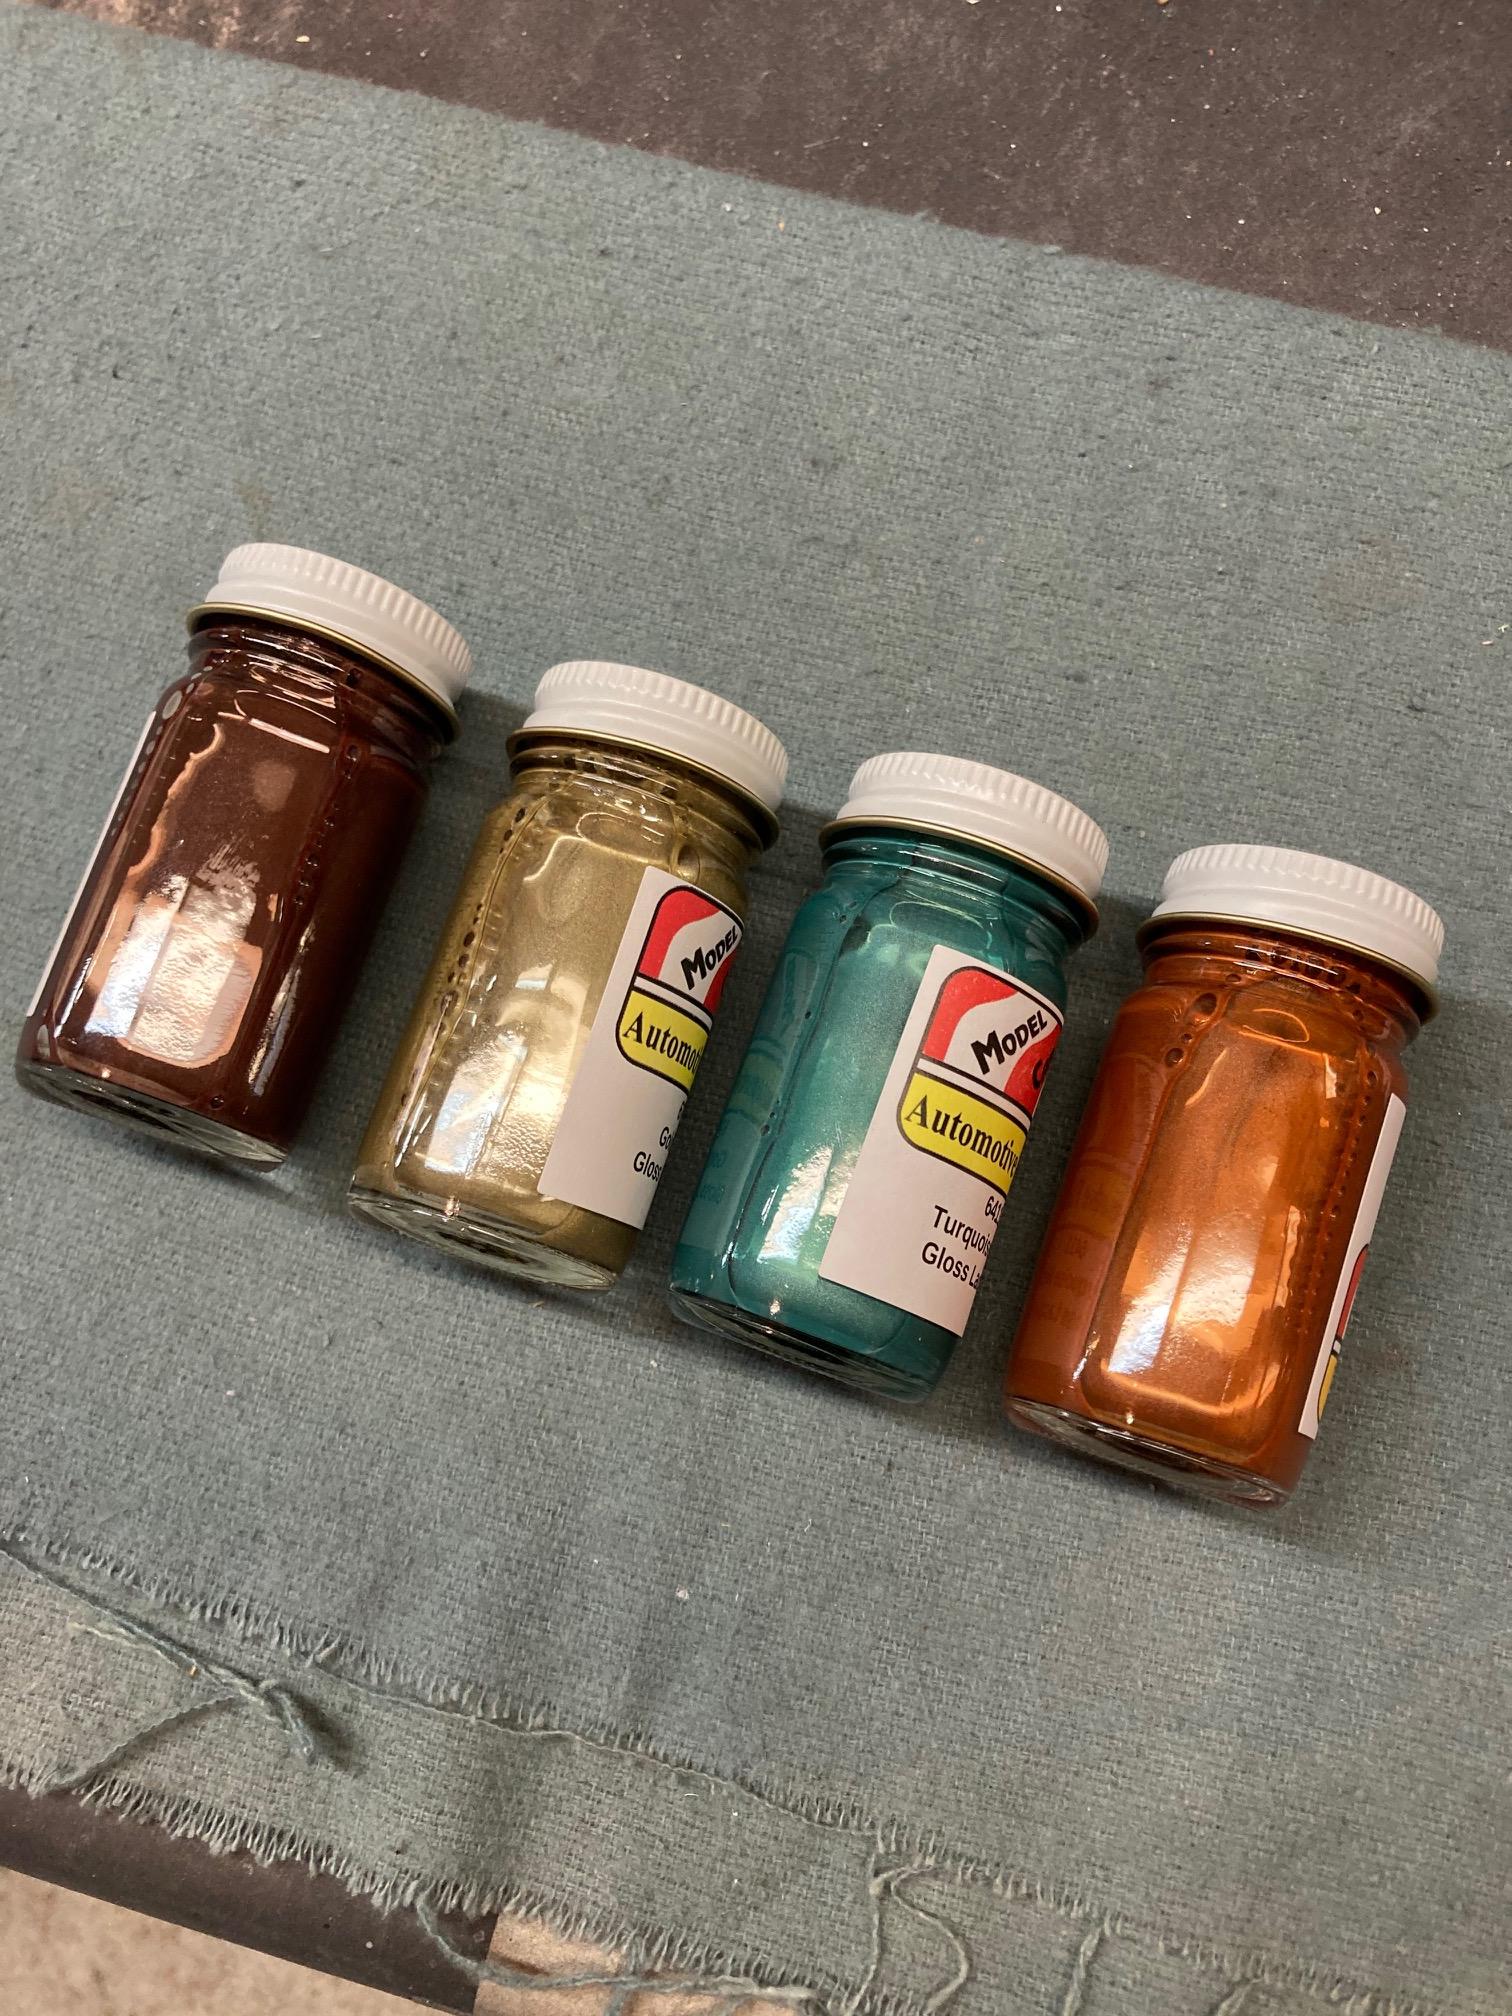
Another bunch of MCW paint. 1957 Chevy "Sierra Gold". 1964 Plymouth "Chestnut". 1964 Pontiac "Turquoise". And 1967 Mopar "Gold", which I'll be using for my '68 Coronet project. Also bought a jar of vinyl top texture paint to try out. Steve
-
Yes, I ground out what I could from the backside with a Dremel tool and then finished with some scraping with a flat X-acto blade, sand paper and sanding sticks. Steve
-
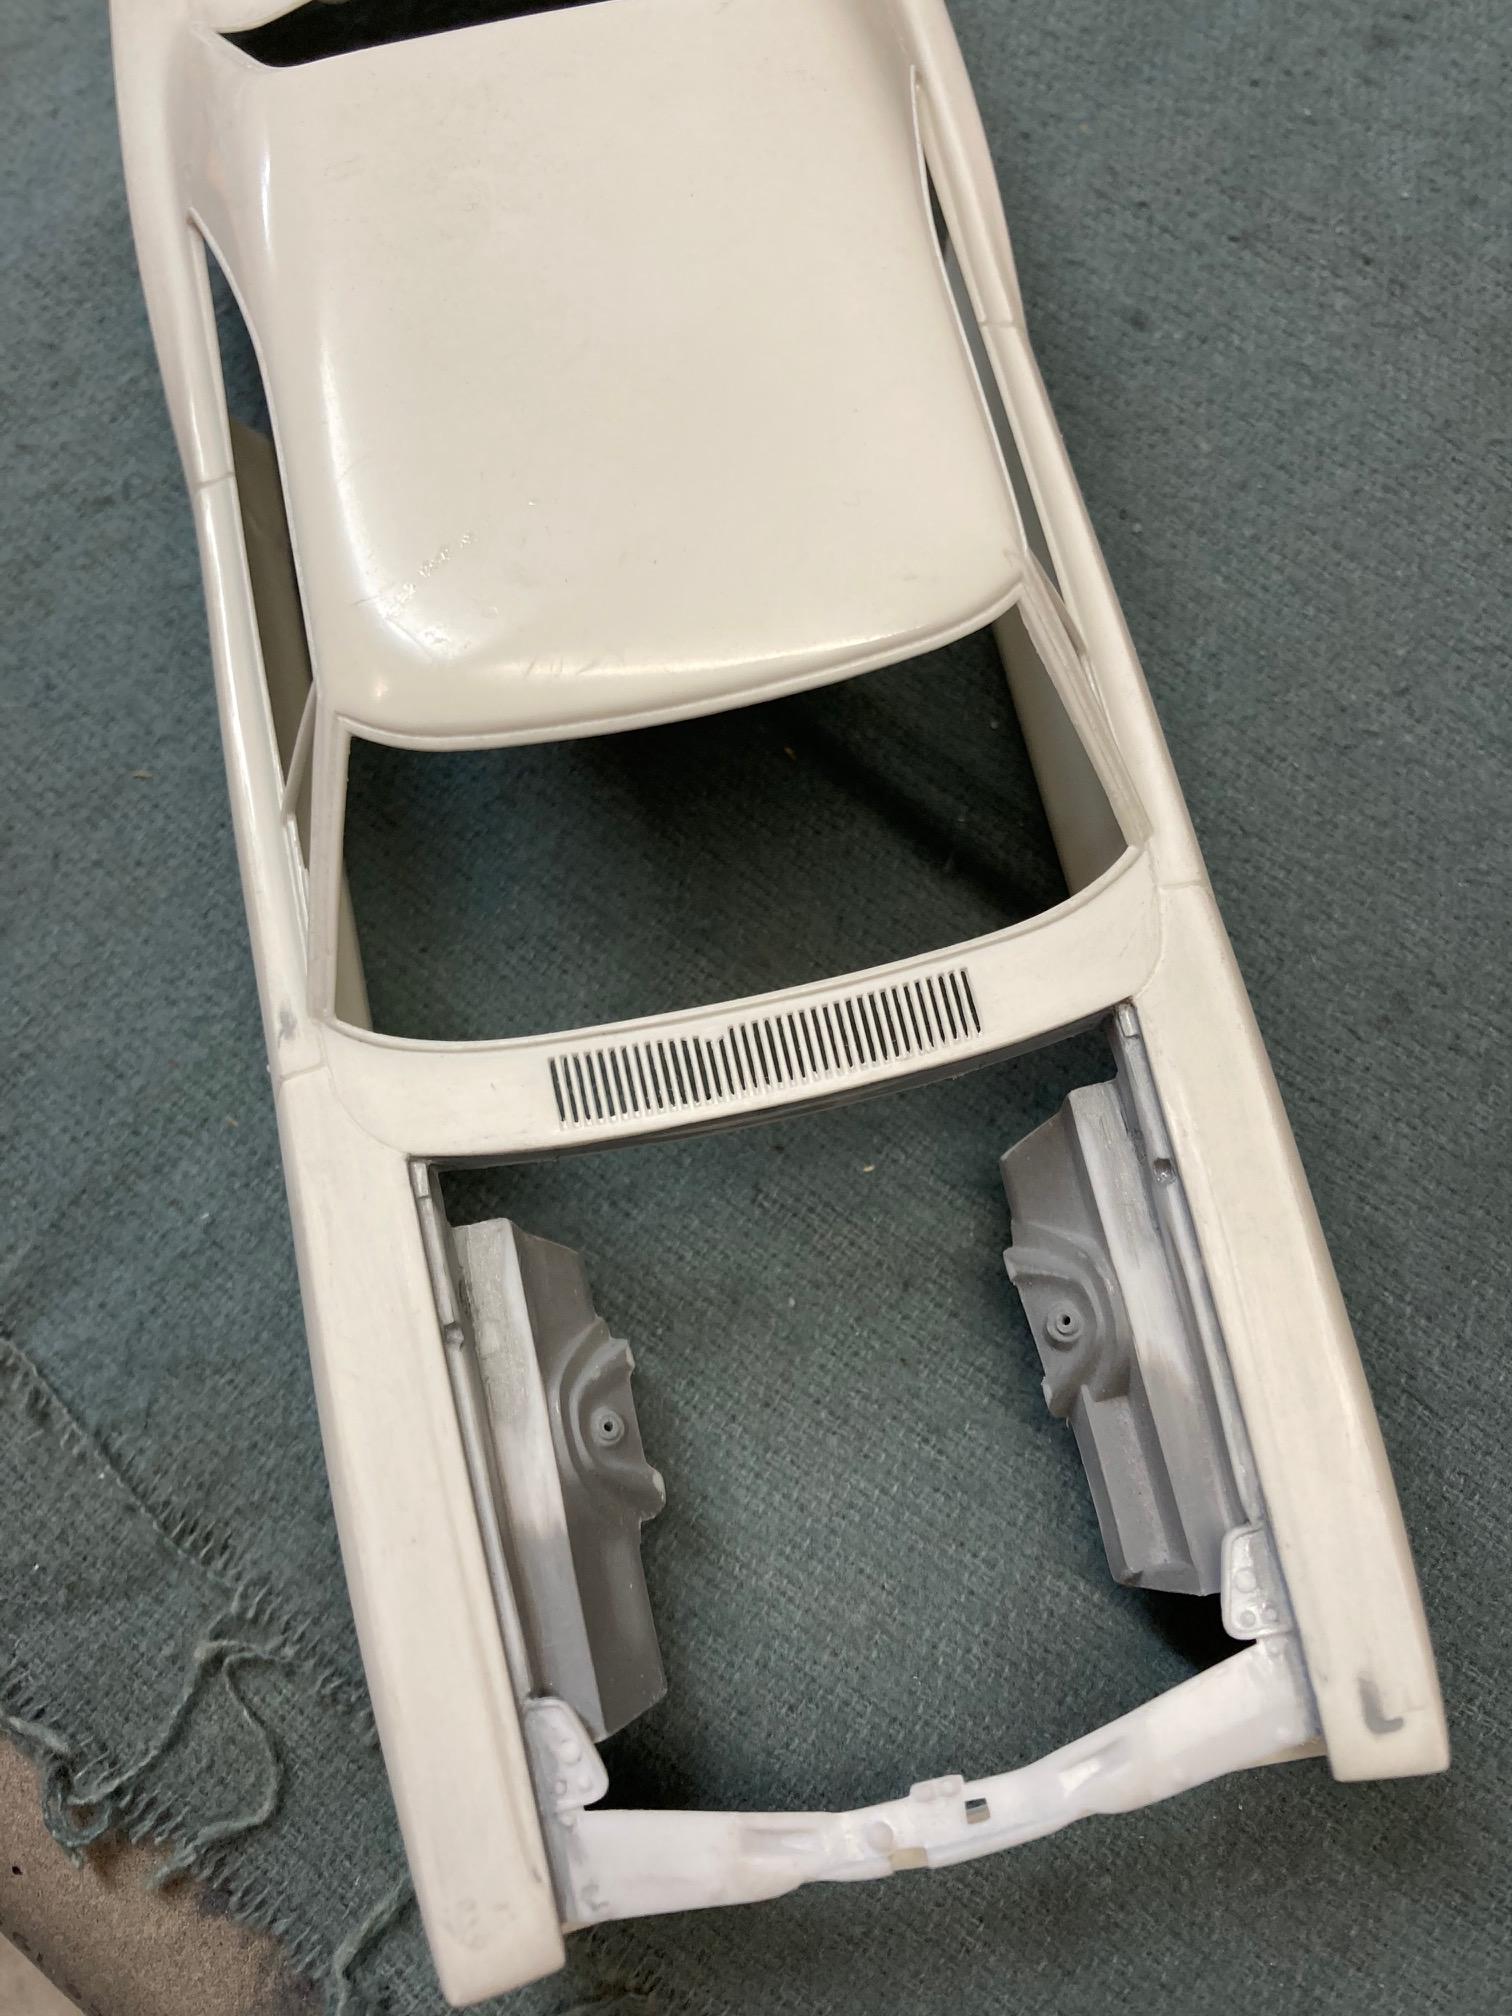
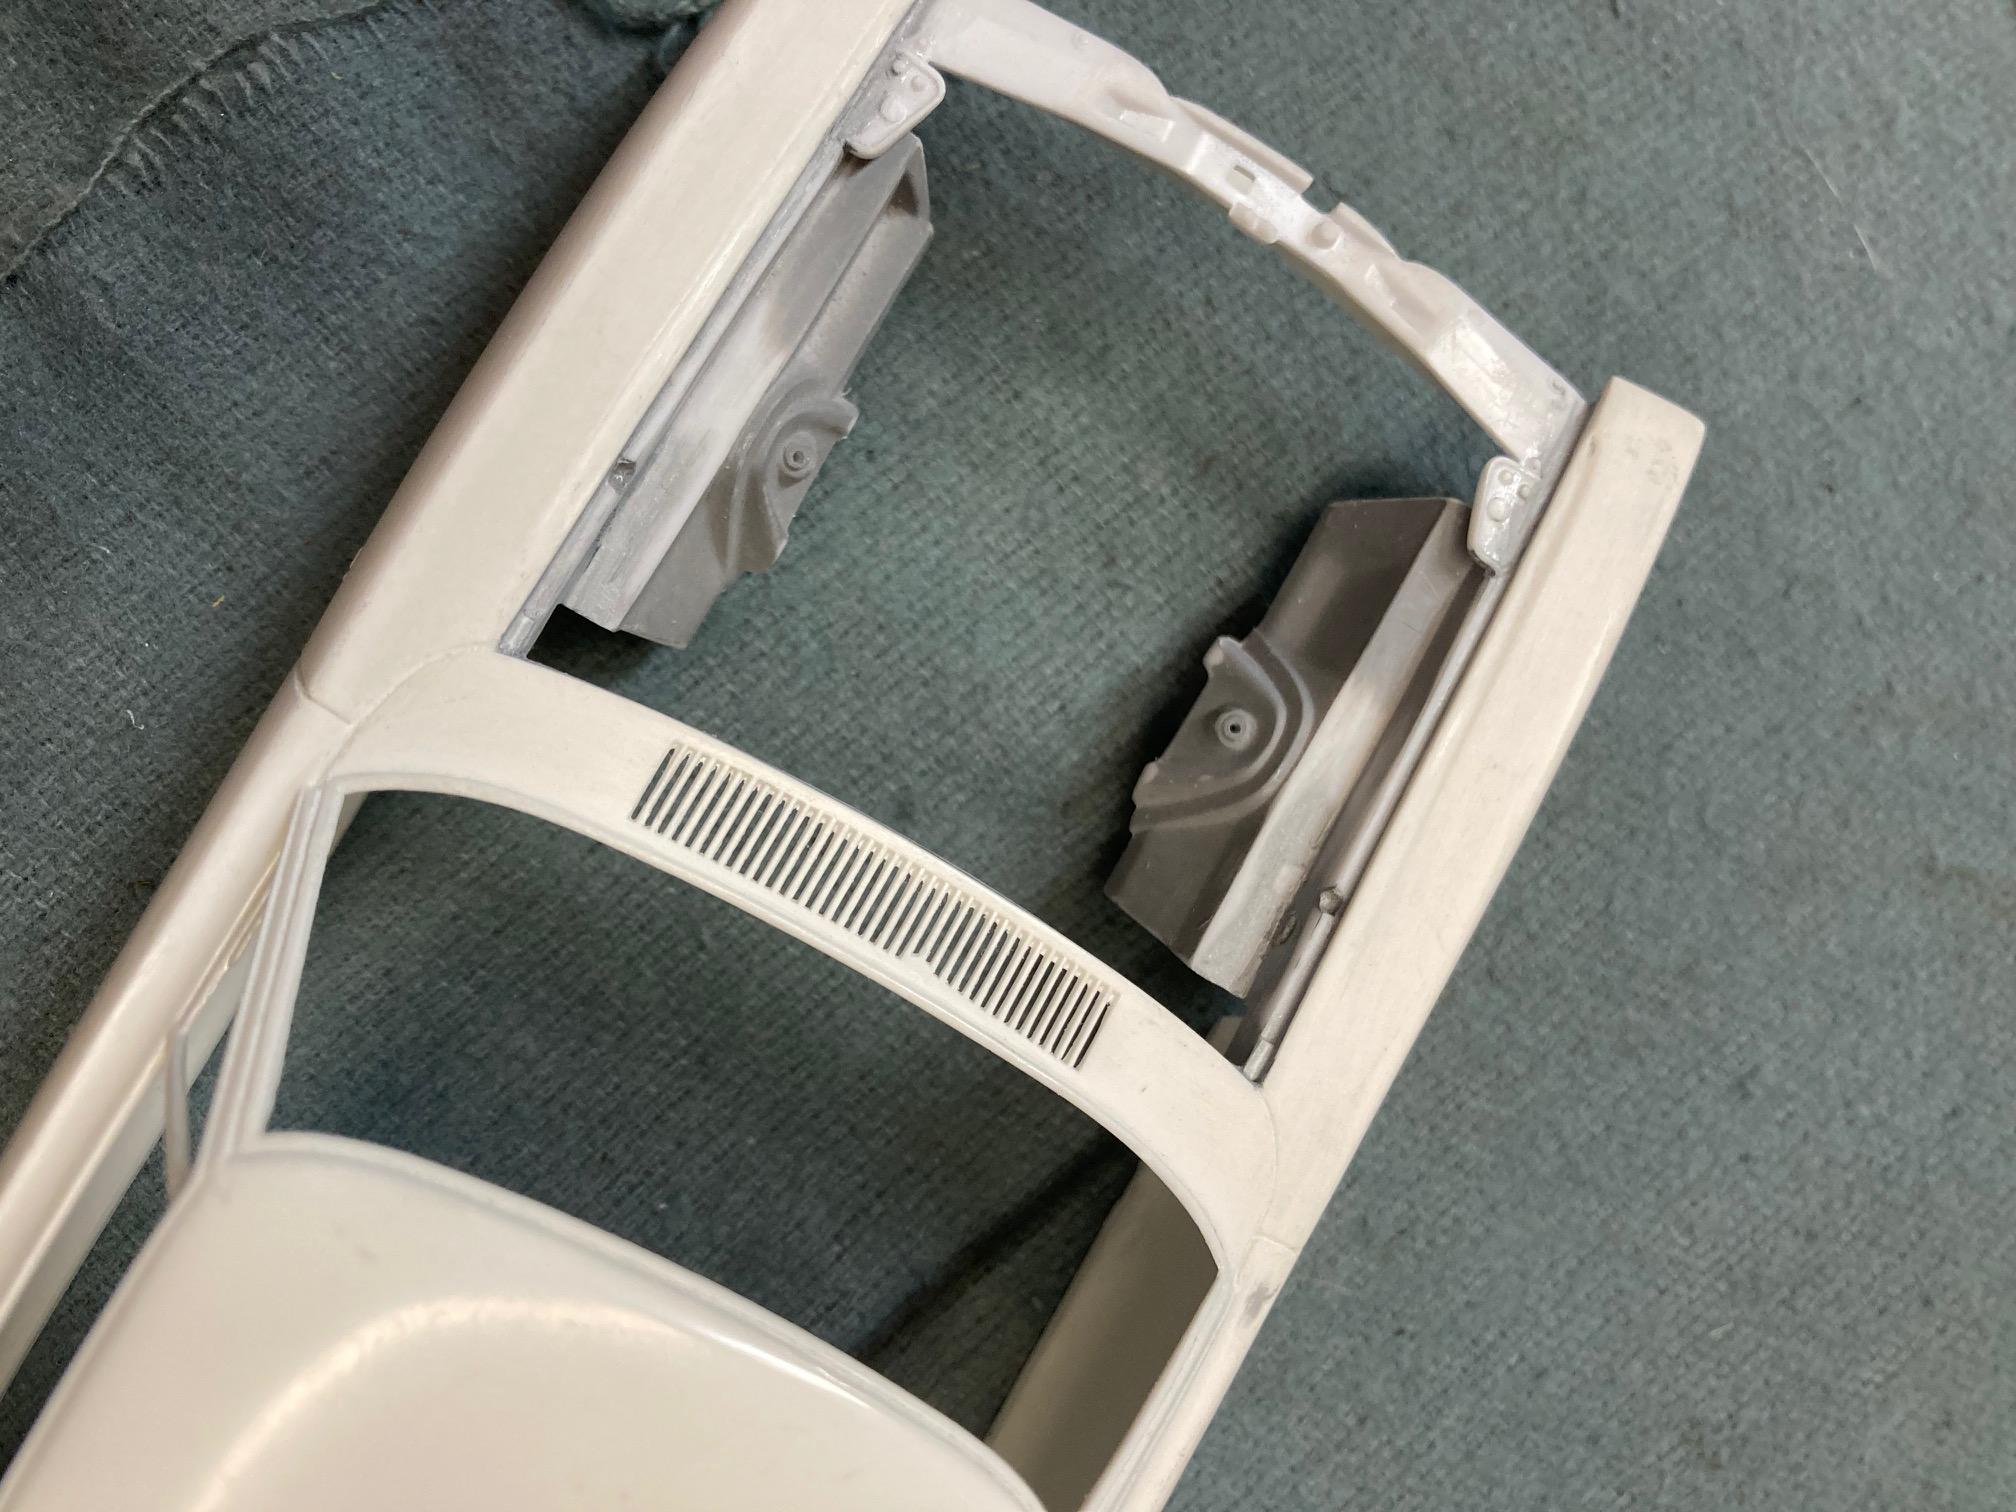
I spent way more time today than I expected opening up the cowl vents!! Steve
-
“Best Model Car Parts” makes a fairly large variety of very nice gauge face decals for many makes and models of vehicles, from modern kits to some obsolete vintage kits. Steve
-
I was thinking along this line. Steve
-
This short video shows how quickly your model can go from being displayed with the hood closed, and then open, and back to closed again with the addition of mini magnets. Actually I'm just kind of enjoying making videos! Steve
-
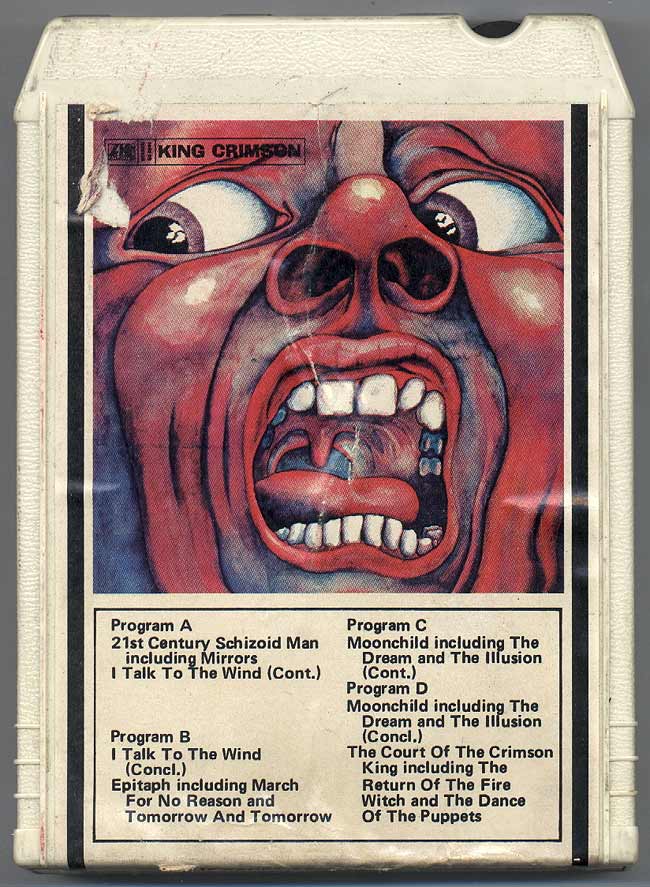
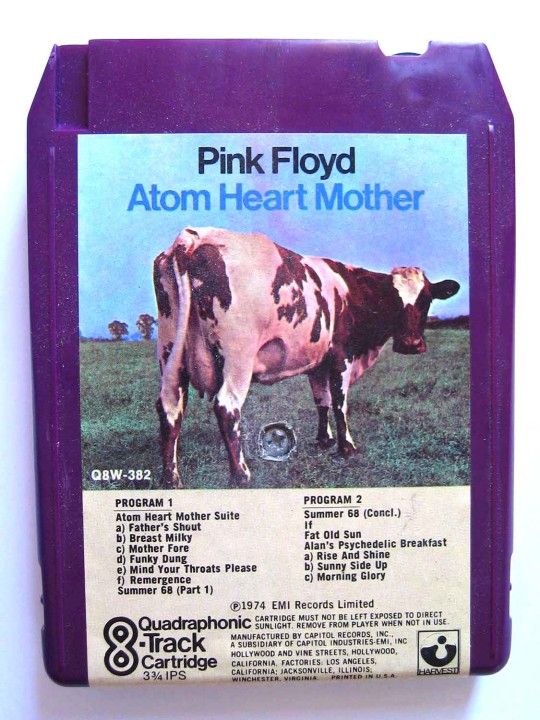
I have a line on getting a few cartridge labels printed. Steve
-
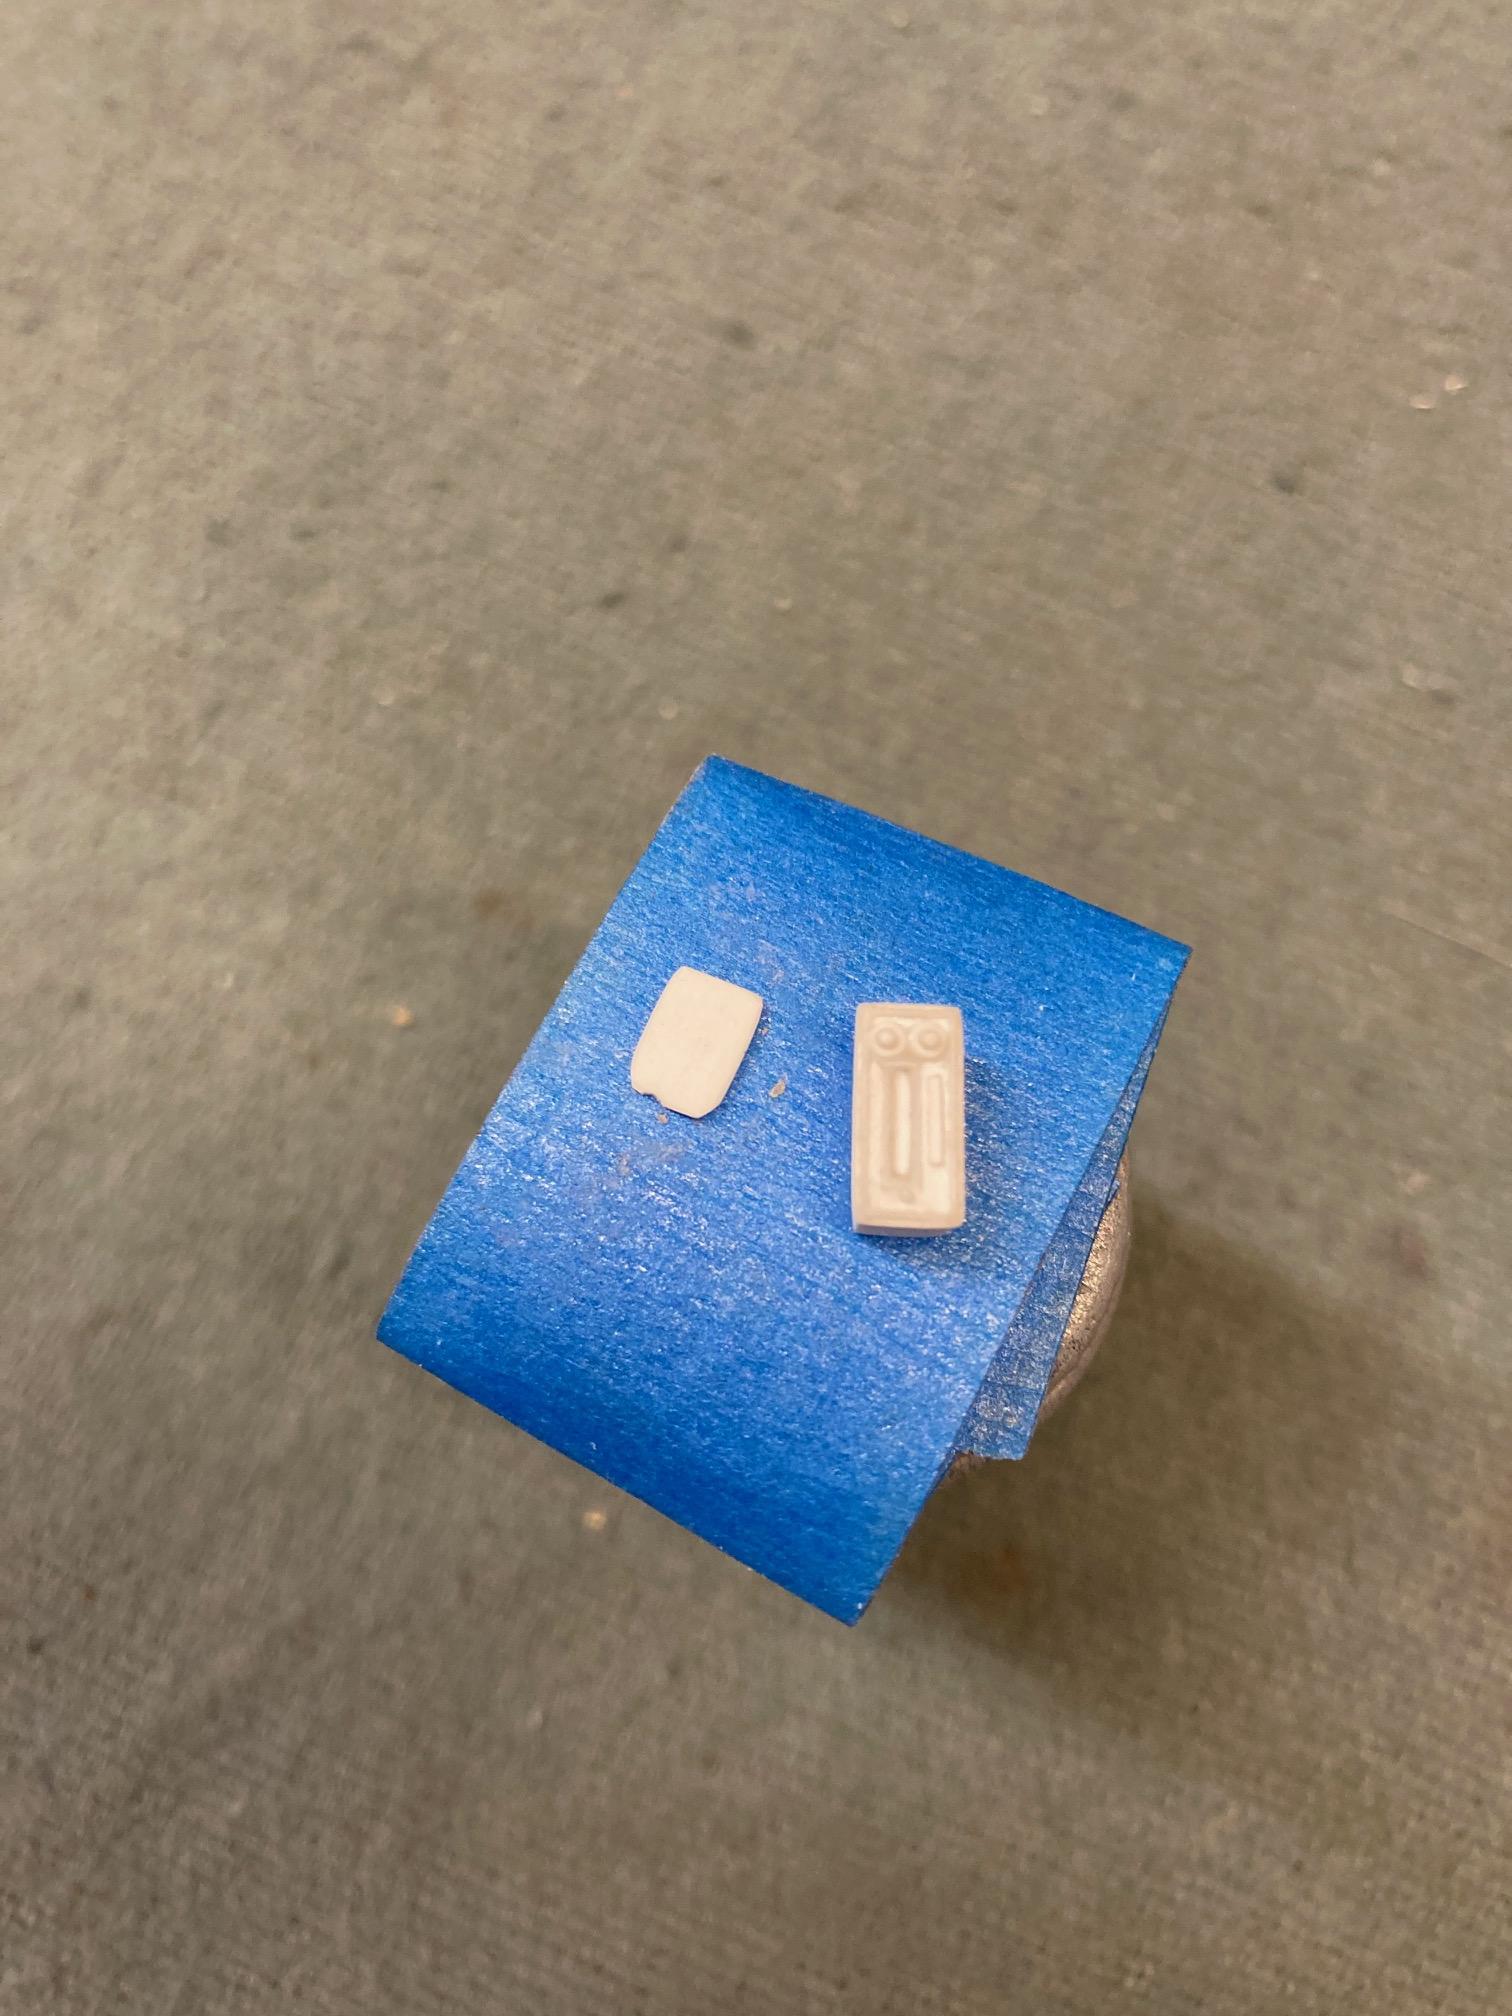
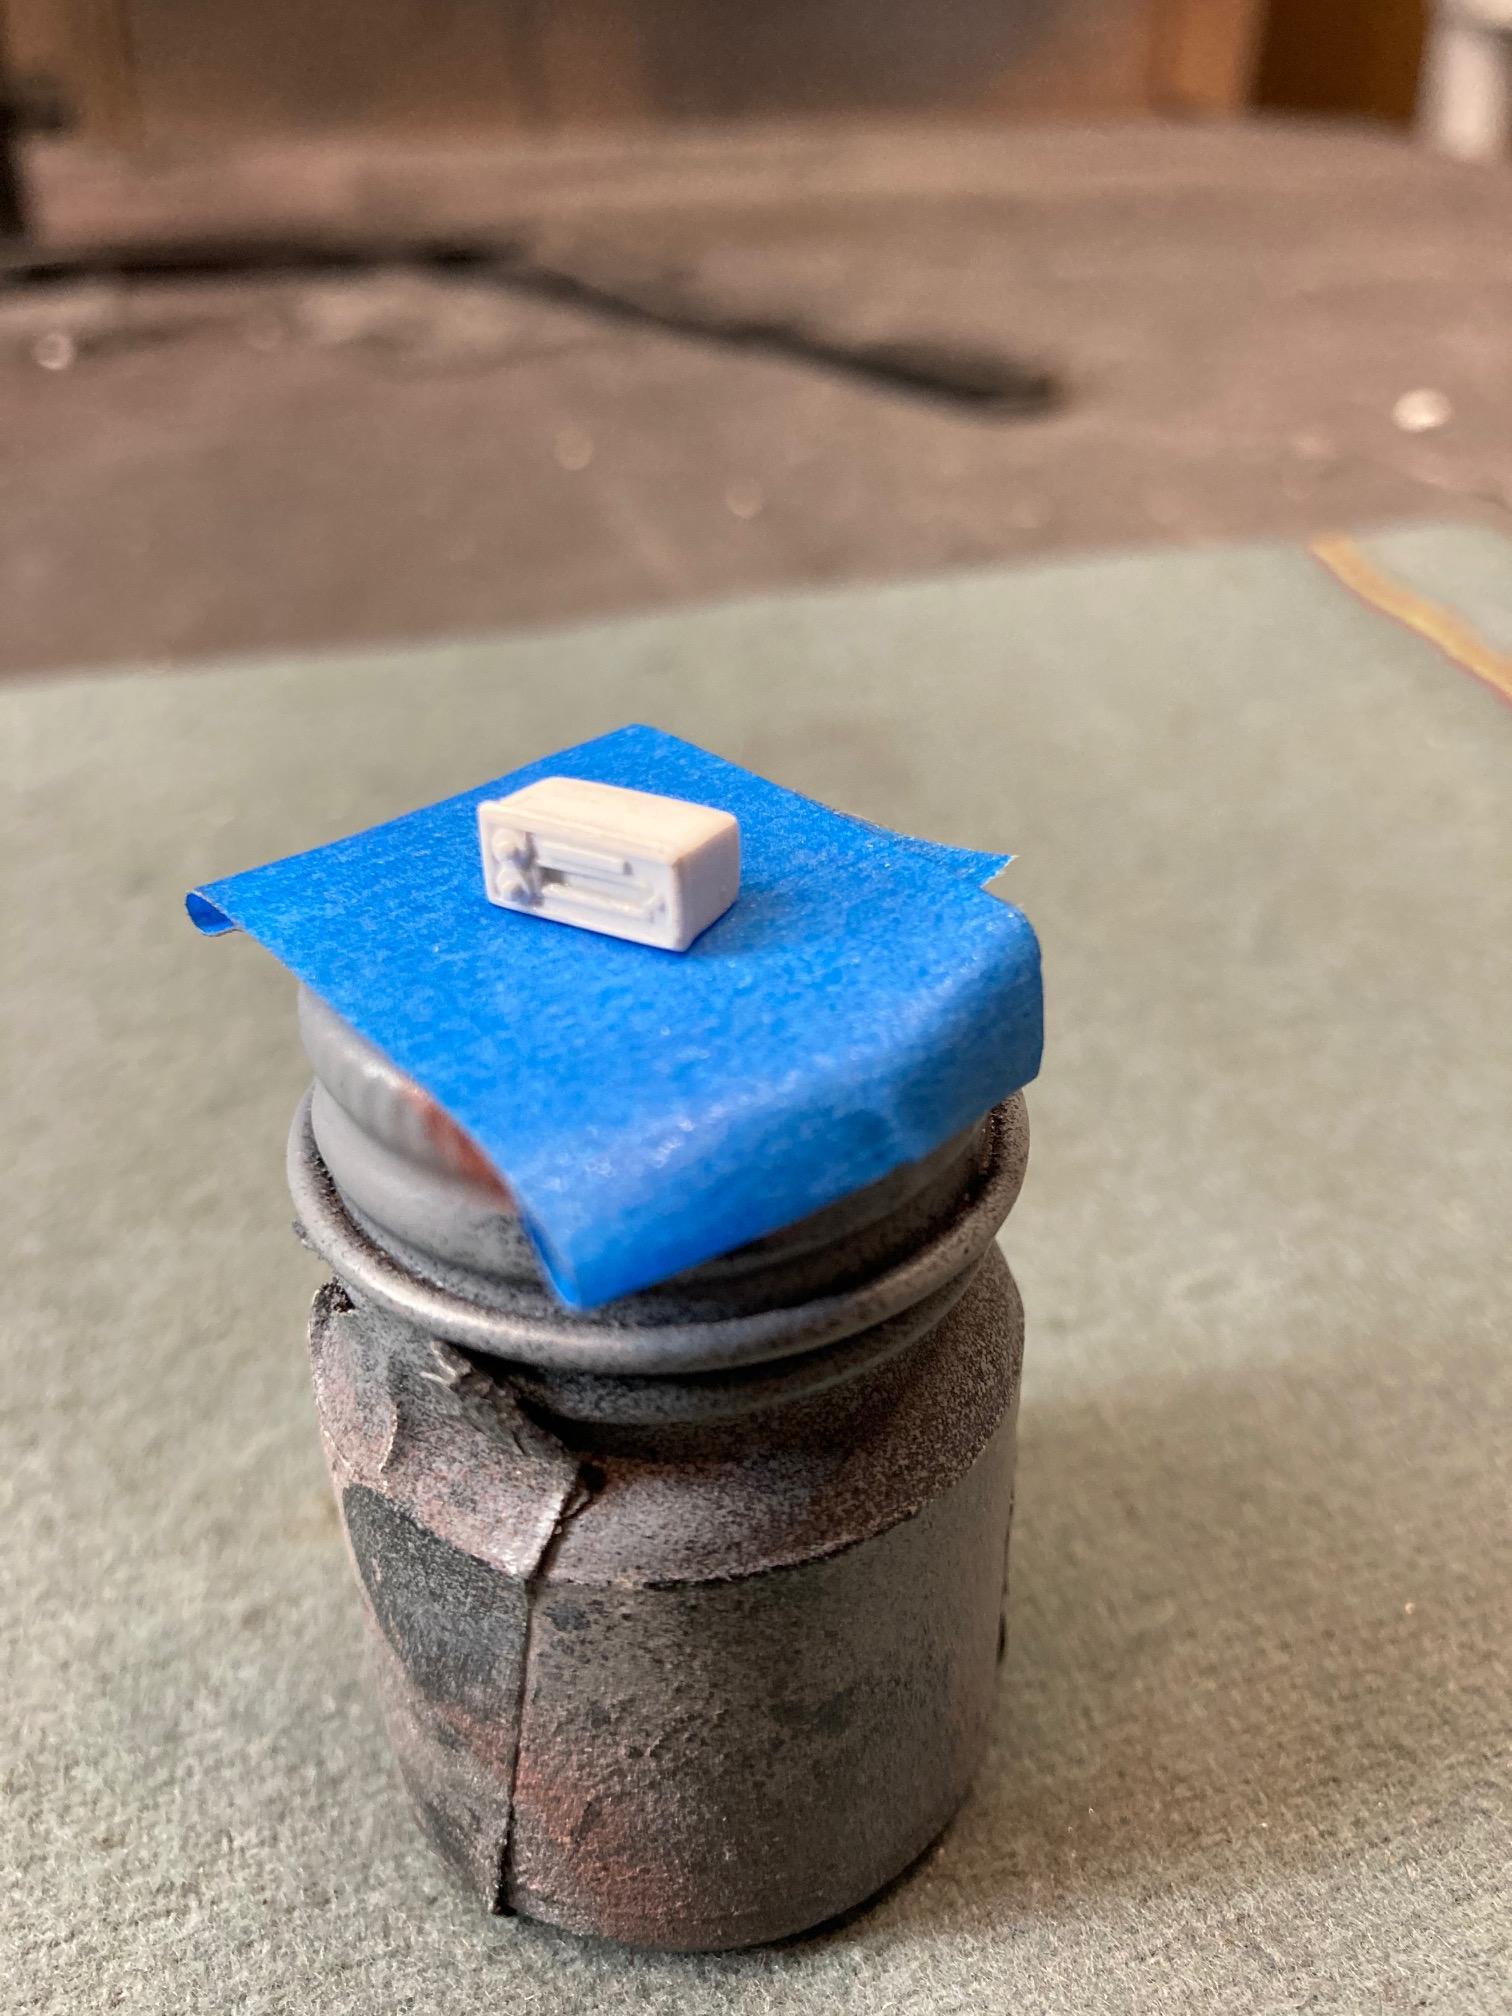
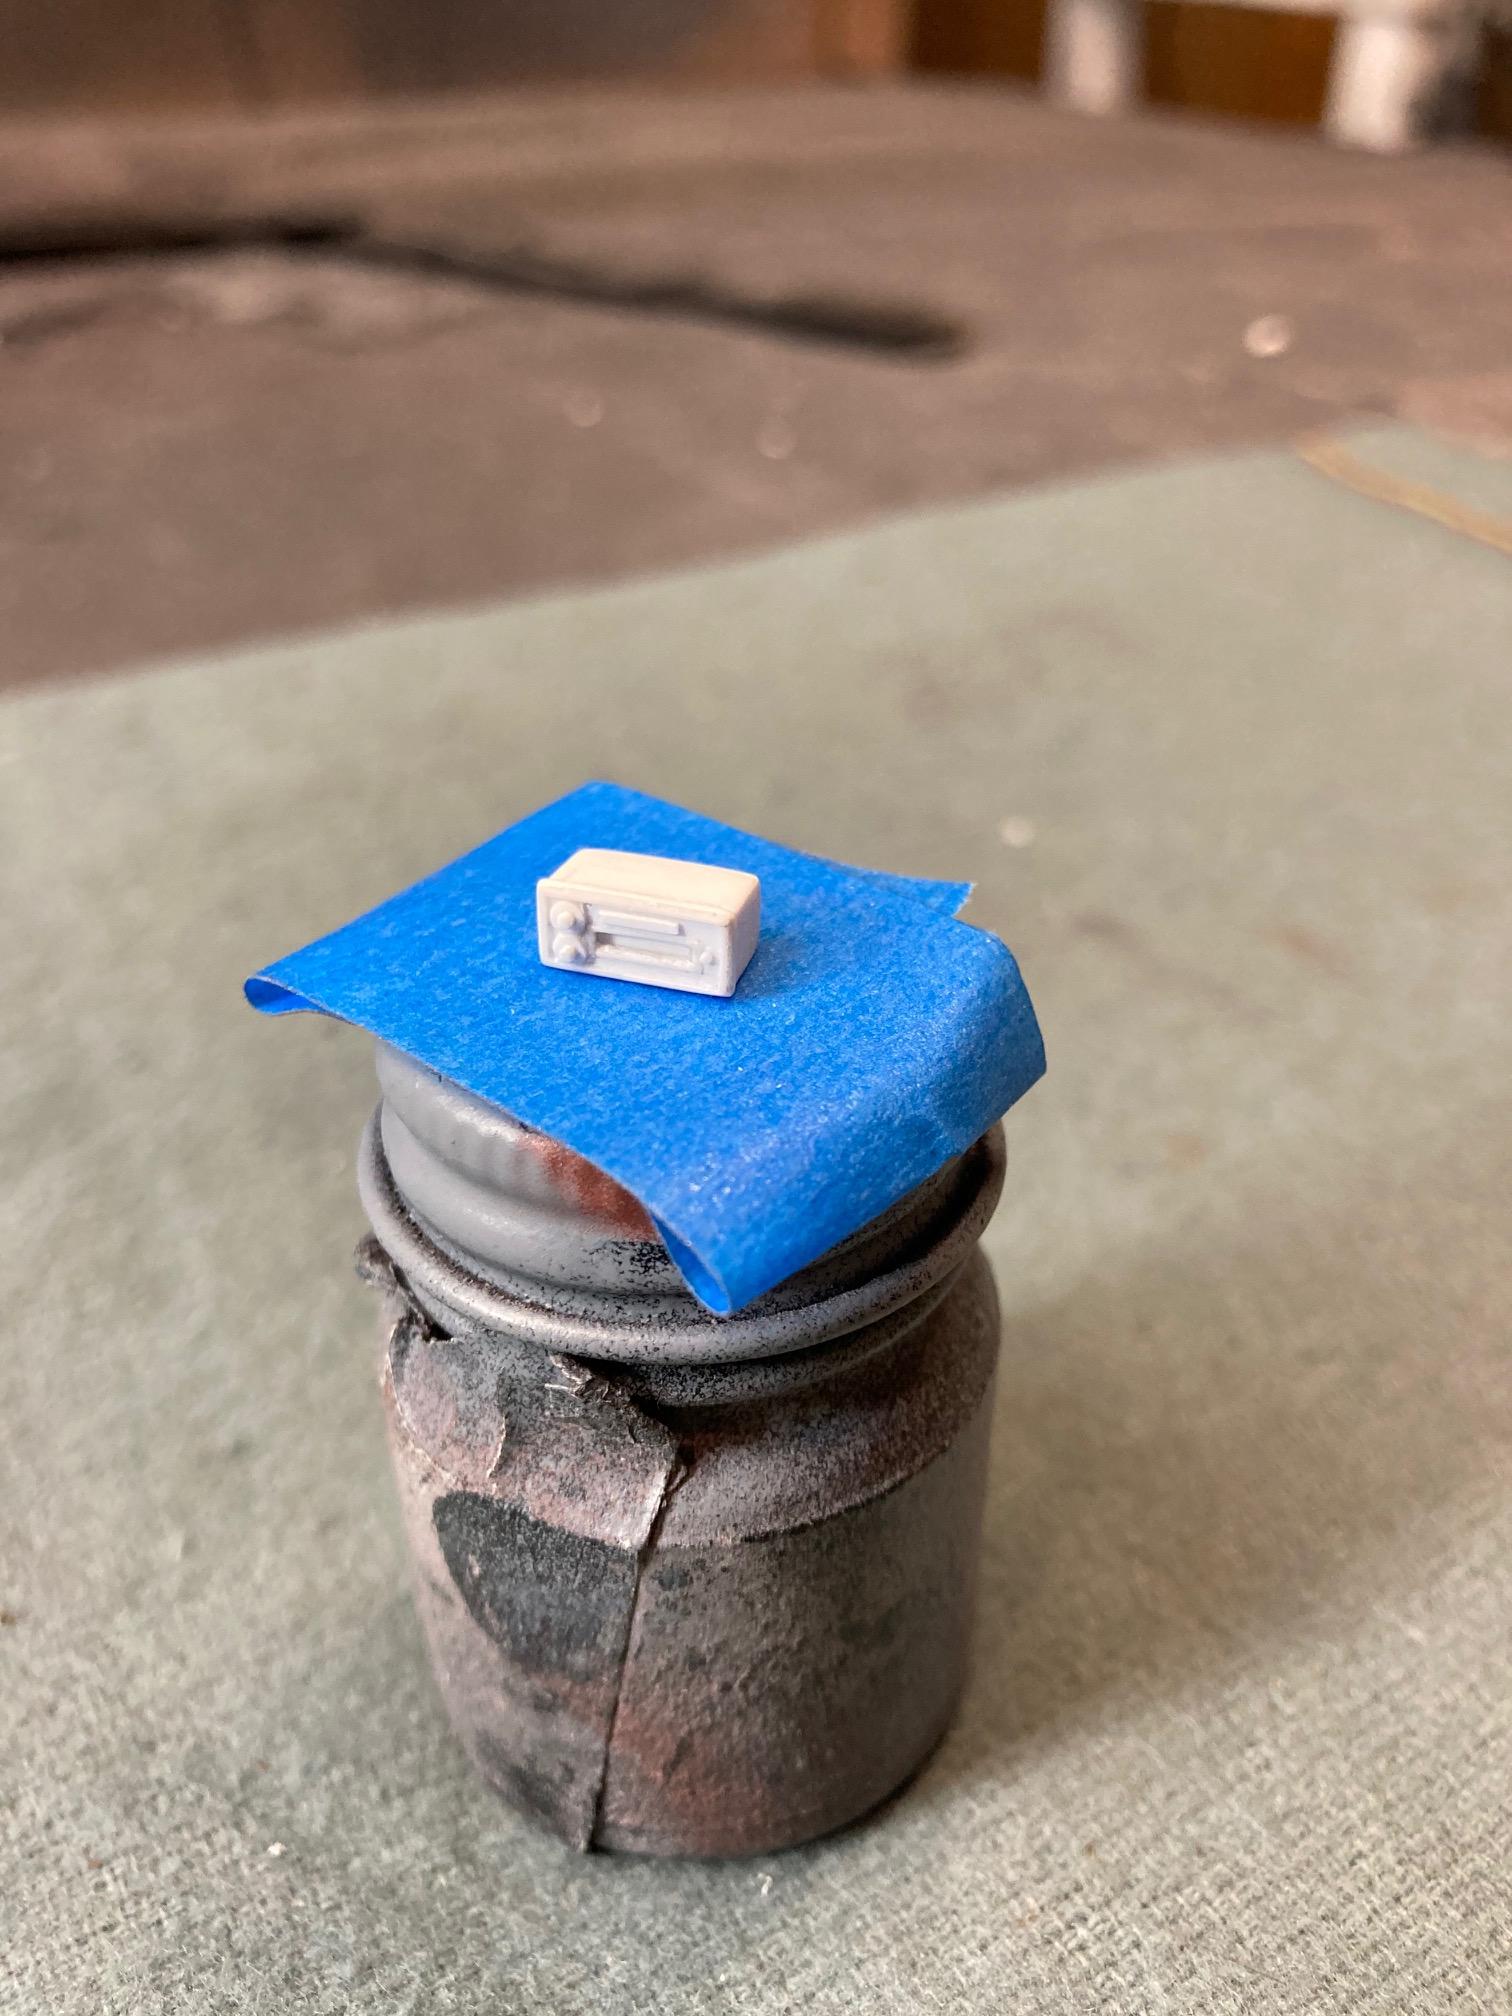
8-track tape? I'm not sure, but it doesn't look quite right. Maybe a little narrower? Steve
-
I don't know whether I should thank you or curse you John!! Steve
-
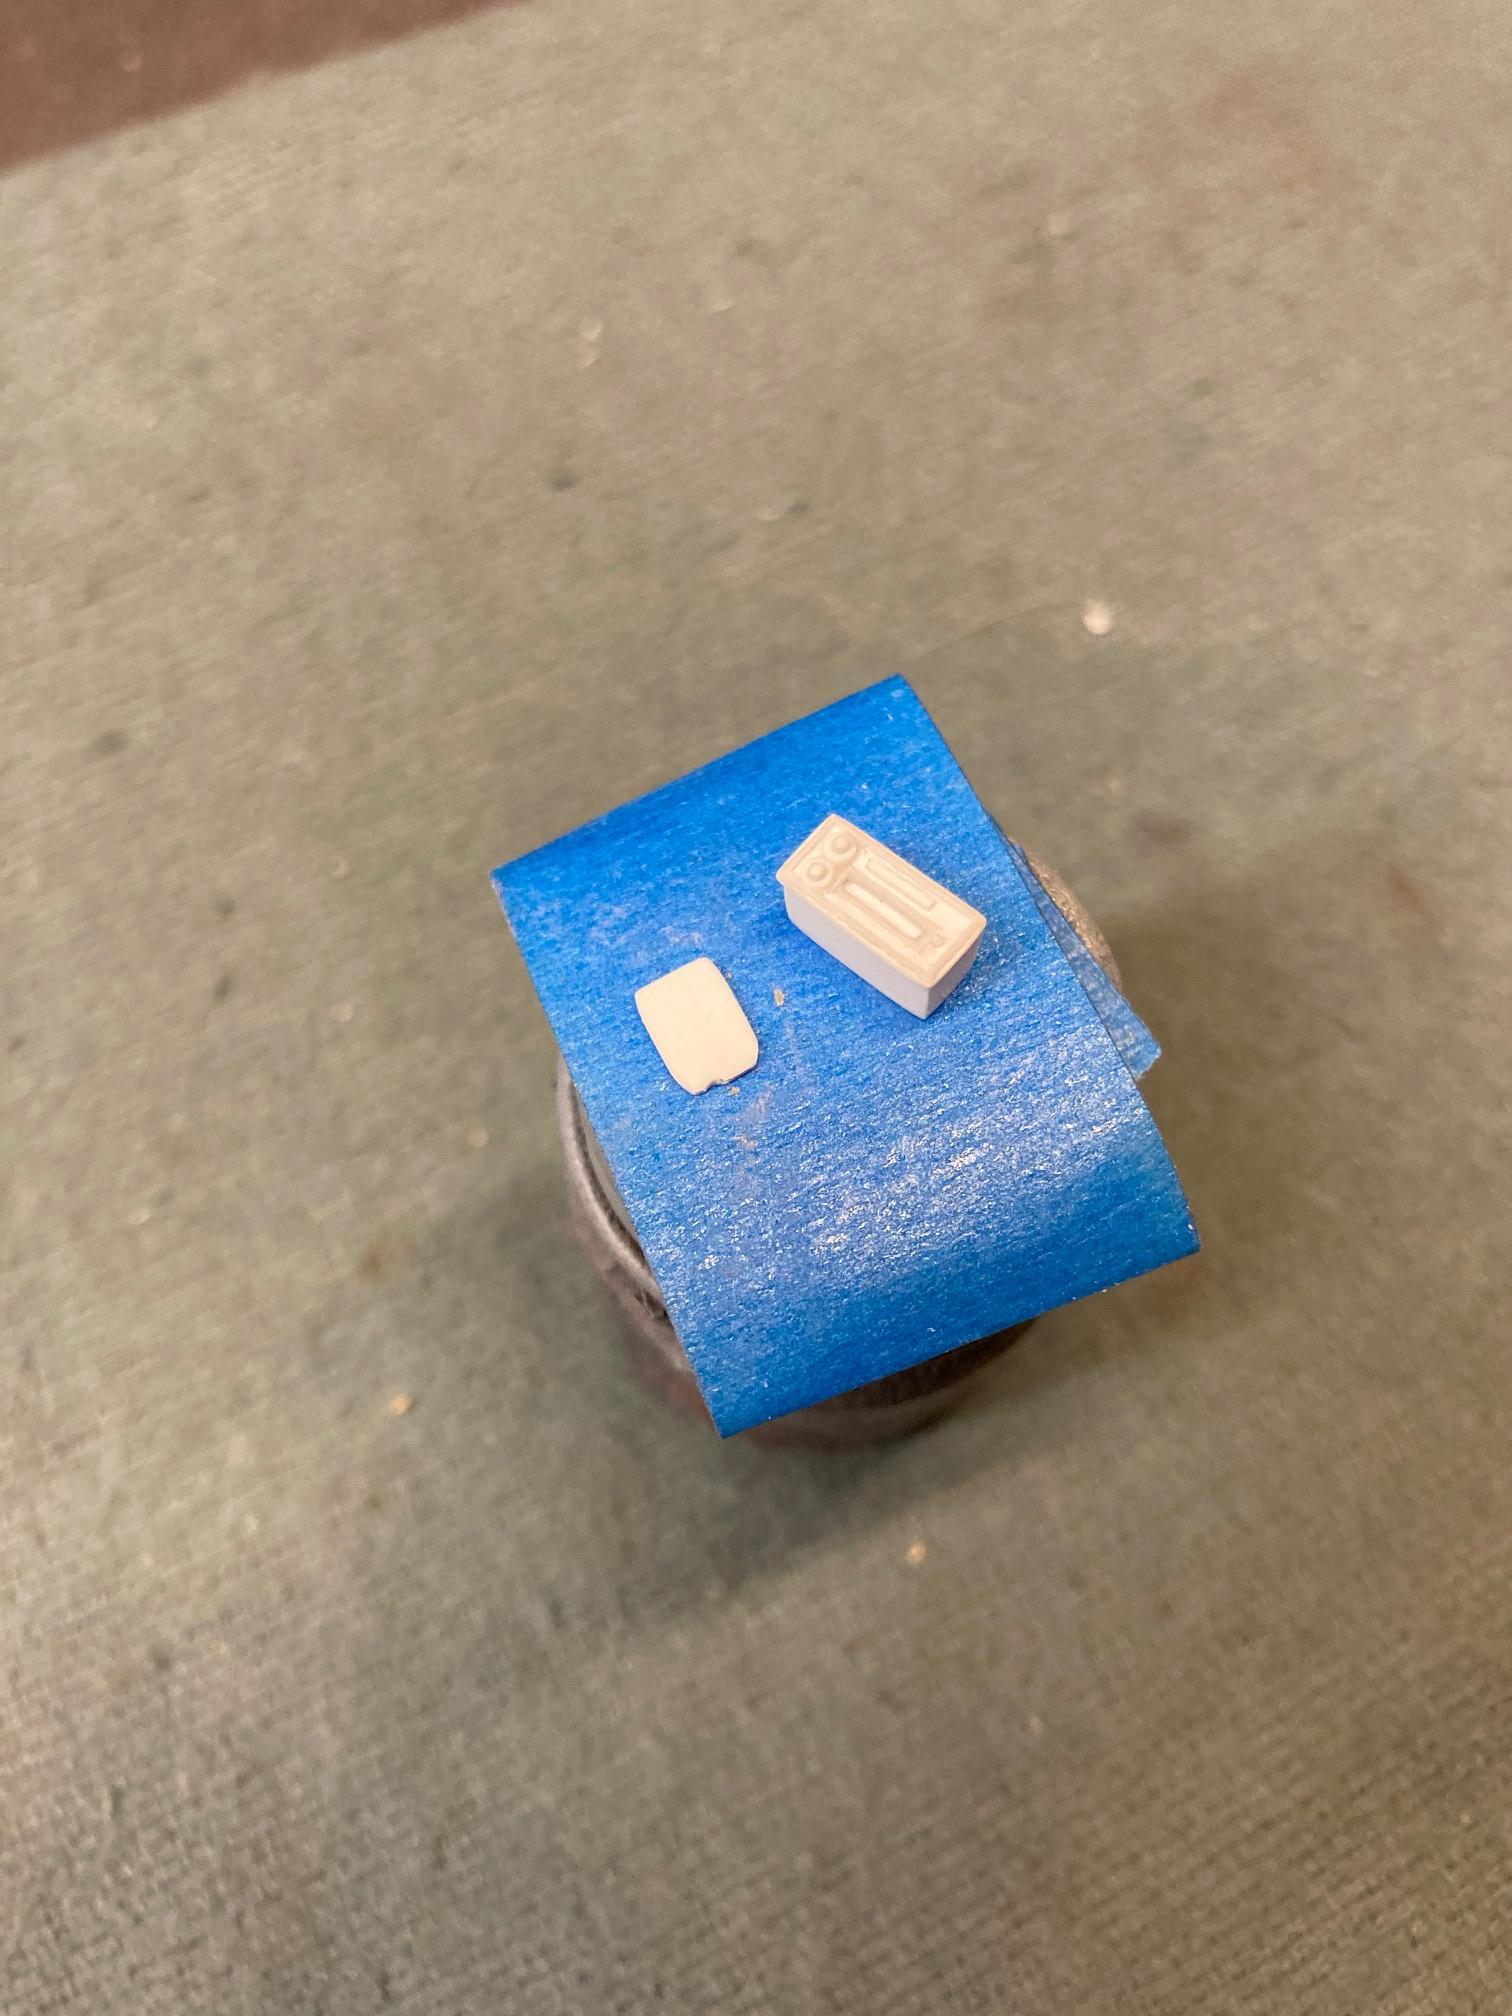
Call it a weakness of mine. It seems like any time someone makes a suggestion like this, pictures begin flashing through my head of possible ways to accomplish the task, and suddenly, like a scratch that needs itching, I find myself sitting at the bench working it out. It's really a happy affliction, but it does have a tendency to distract me from the work that I should be concentrating on. Oh well. It didn't take too long. Here is the finished player. Making a couple of tapes to throw on the seat should be pretty easy........that is if I knew someone who could make some cool 8-track decals for them. Steve
-
Fabulous Bob!!! Just goes to show that there are really no limits when it comes to things like this. If you can scratch build an interior for a '60 Dodge, the sky is the limit! Steve