StevenGuthmiller
-
Posts
15,071 -
Joined
-
Last visited
Content Type
Profiles
Forums
Events
Gallery
Everything posted by StevenGuthmiller
-

Painting Raised Lettering
StevenGuthmiller replied to PeterB's topic in Model Building Questions and Answers
The Grand Prix has 3 pieces. One for “GRAND”, one for “PRIX” and one for the badge. The Mercury does have individual pieces around each letter. But remember, you can apply them as one piece and once they’re burnished down well, you can cut around each letter. Steve -
Build Sequence
StevenGuthmiller replied to bluestringer's topic in Model Building Questions and Answers
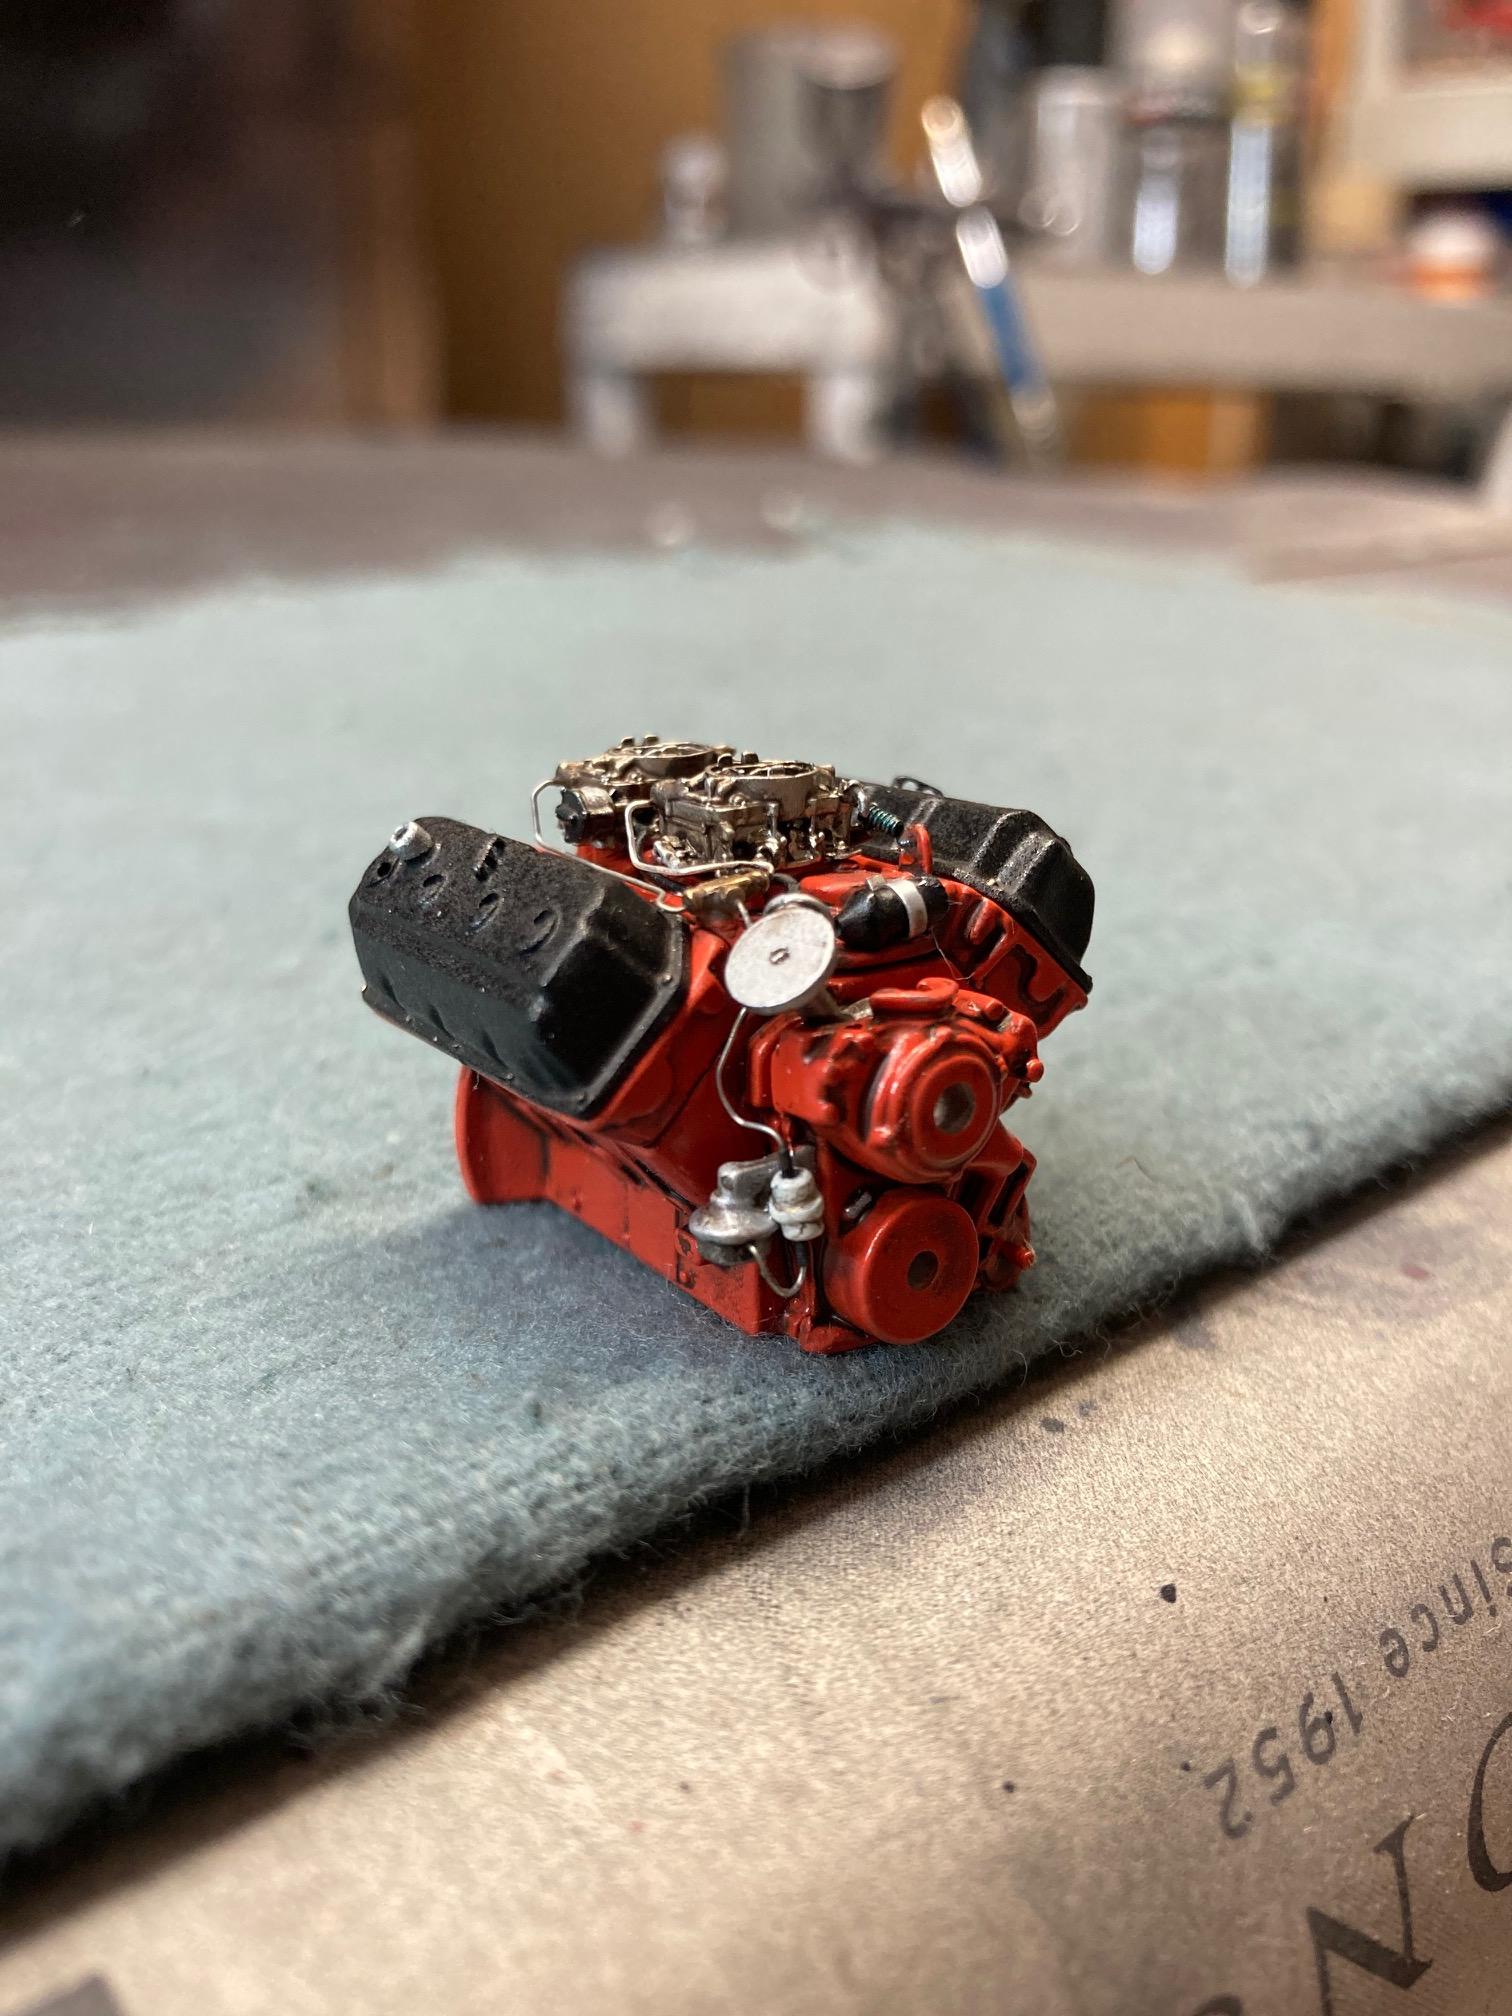
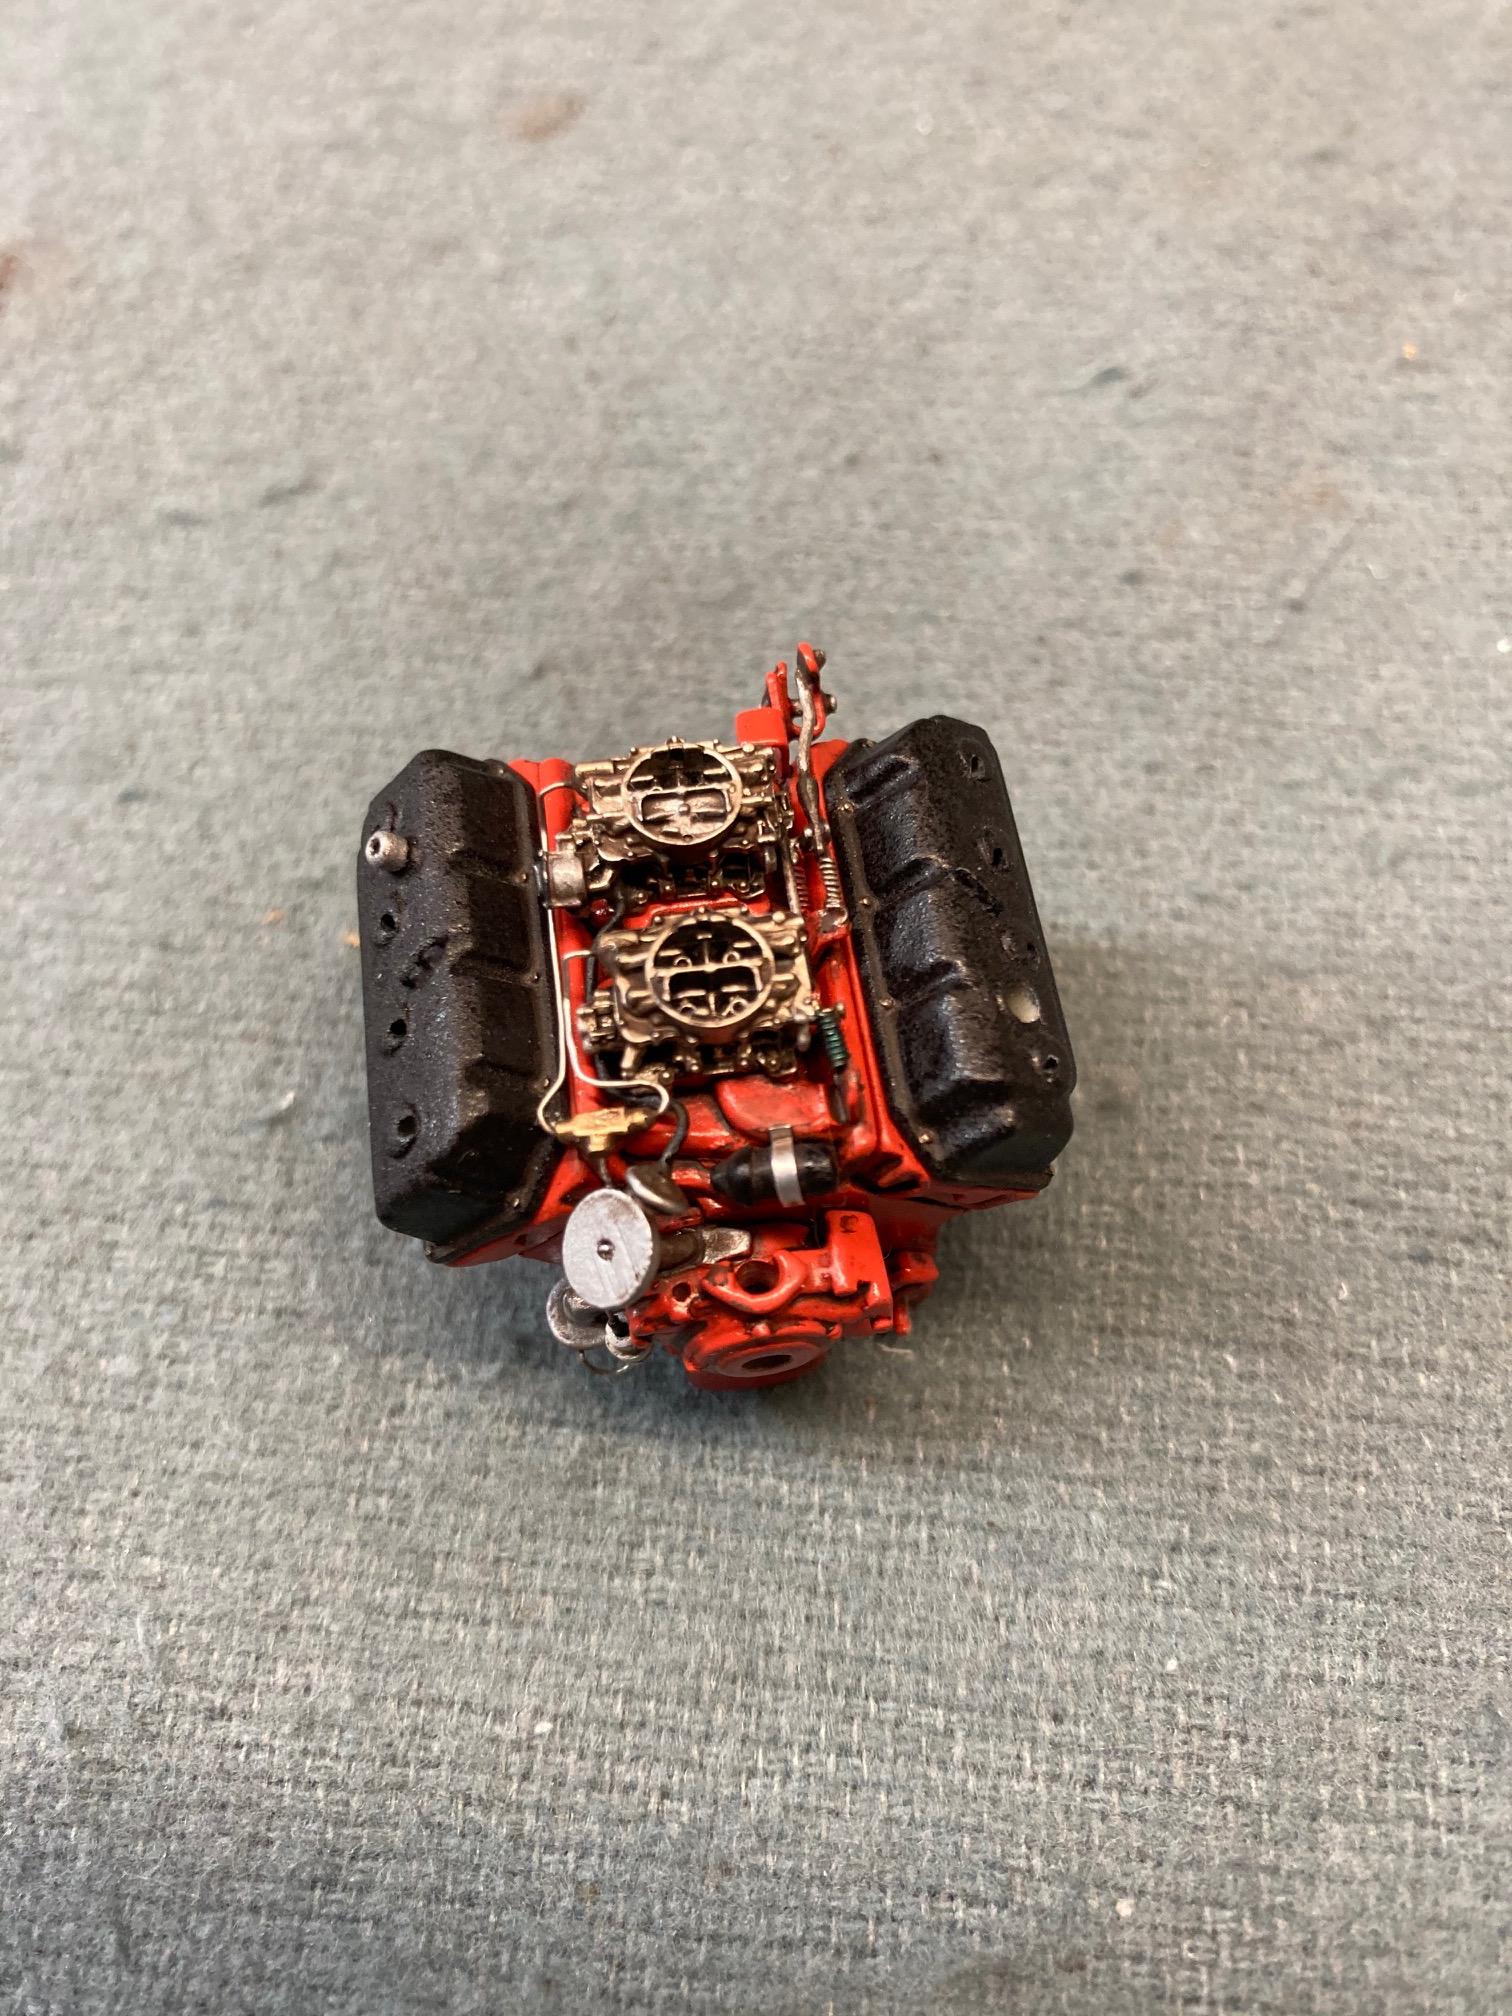
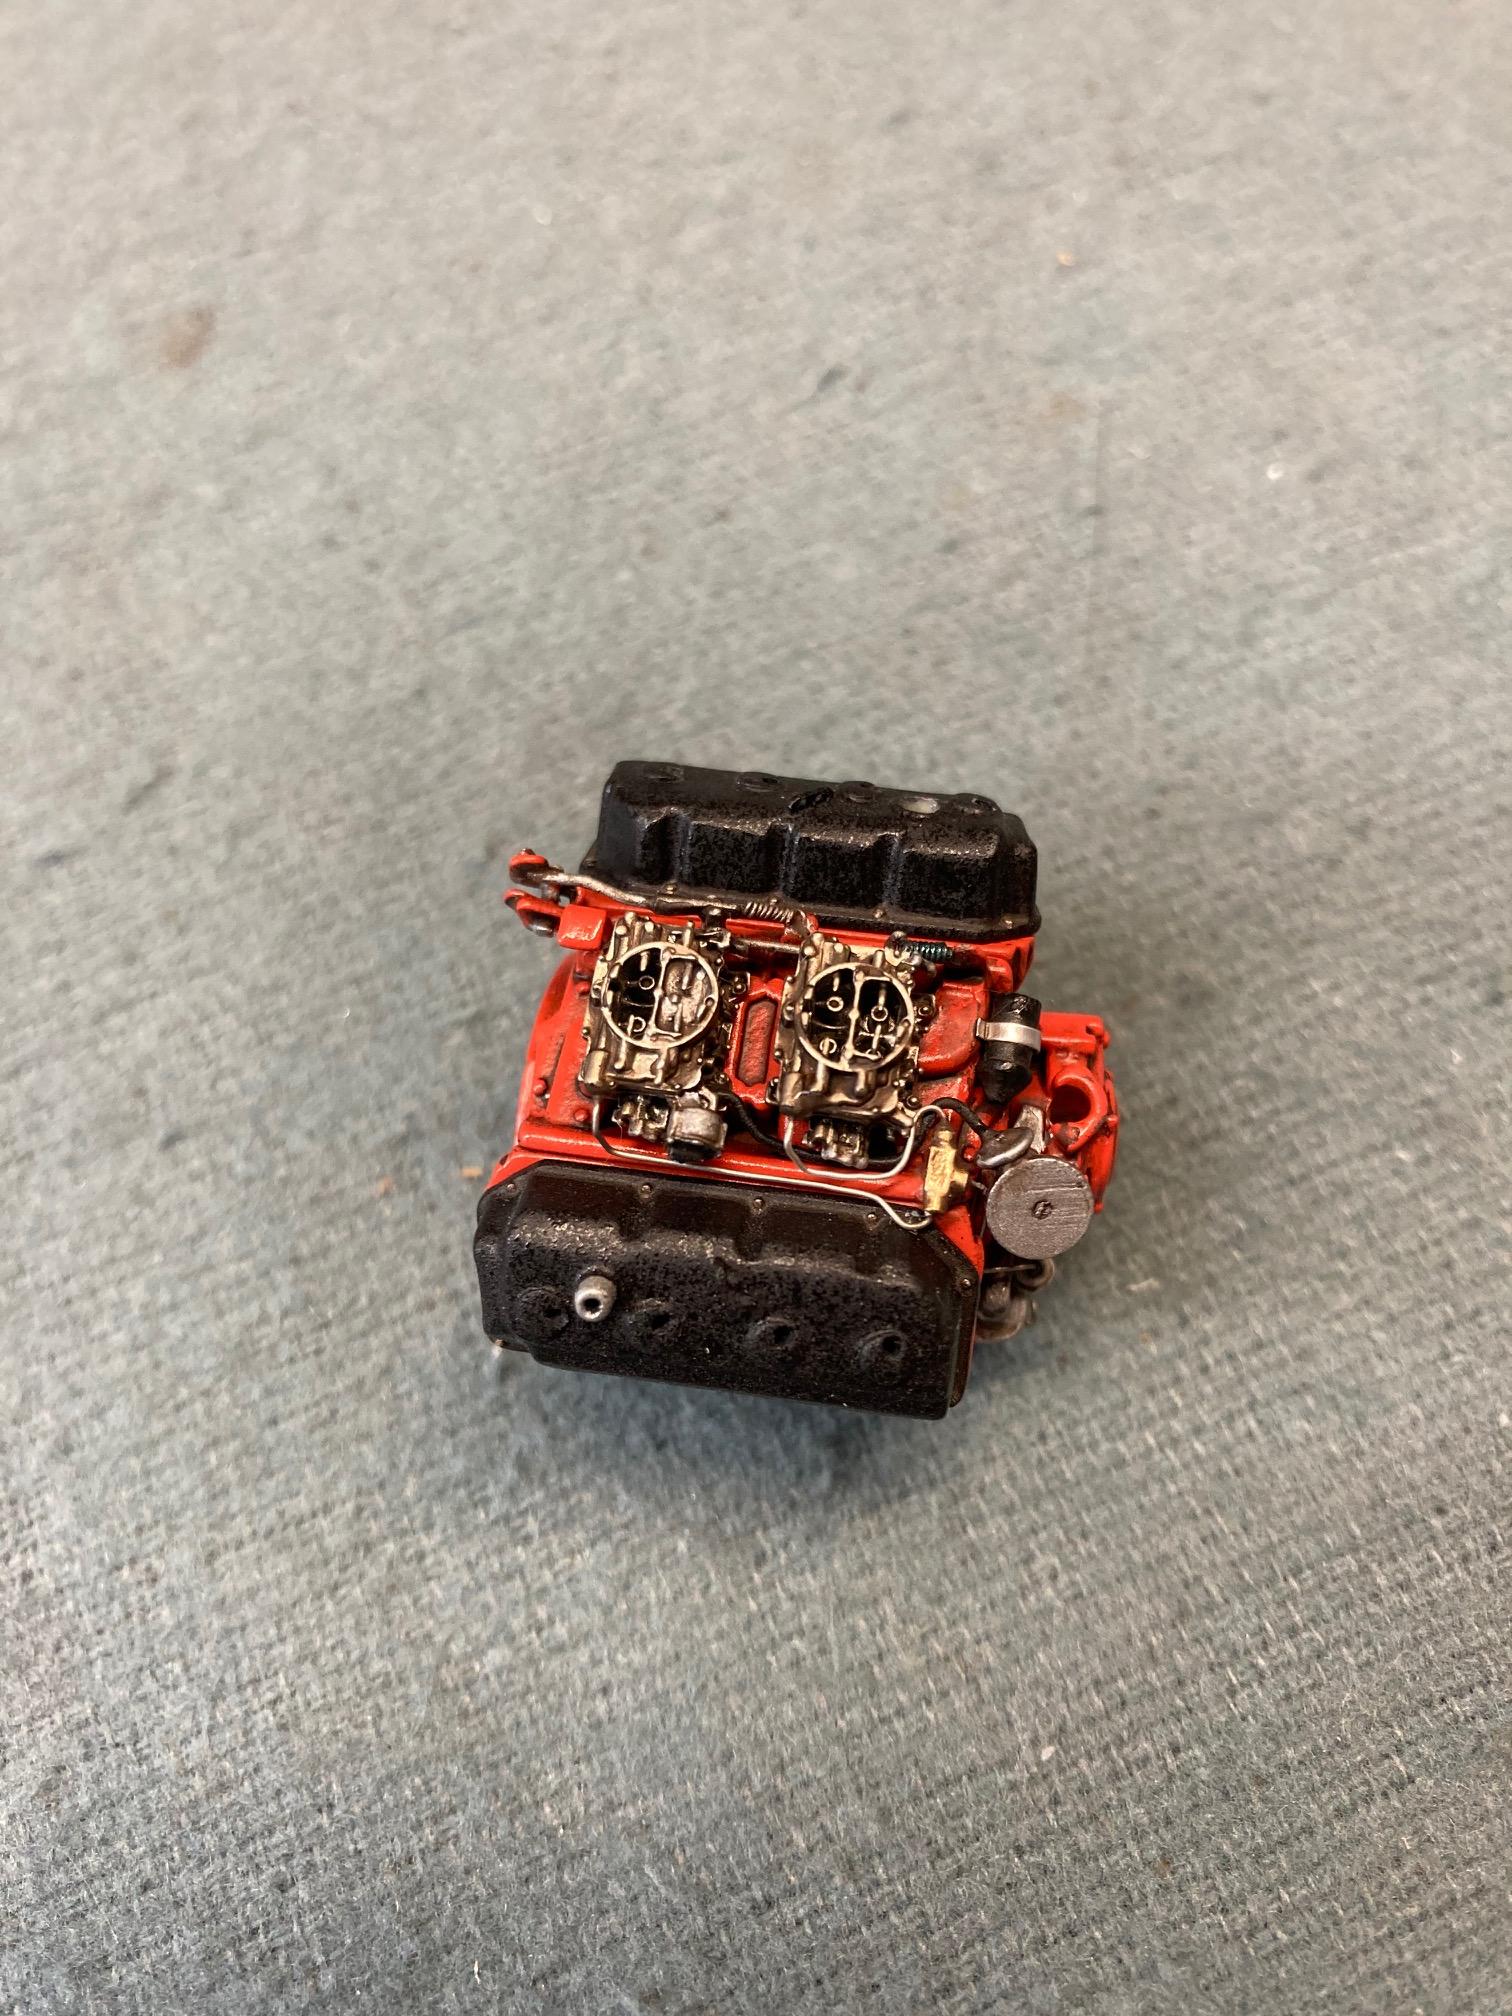
I agree to an extent with the "paint as an assembly" theory, but probably much less so than others might. I almost always assemble the engine block halves and heads before I paint, but in most cases, I leave off the pan, valve covers and intake manifold to be assembled after. Part of the reason for this is that many times I look at individual assemblies as a separate model as I progress and it's much easier to do all of the intricate carb linkage and fuel line detail for example, if the intake manifold is not attached to the block. Sometimes certain parts can just be in the way as you work. As an example, the oil pan in most instances, just makes assembly of the other details more difficult, because I can't set the engine down on a flat surface and keep it vertical while I work. Therefore, for me the oil pan gets installed relatively late in the process. Sometimes you have to look at the big picture and the logistics of how the build will commence to strike the right sequence. Steve
-
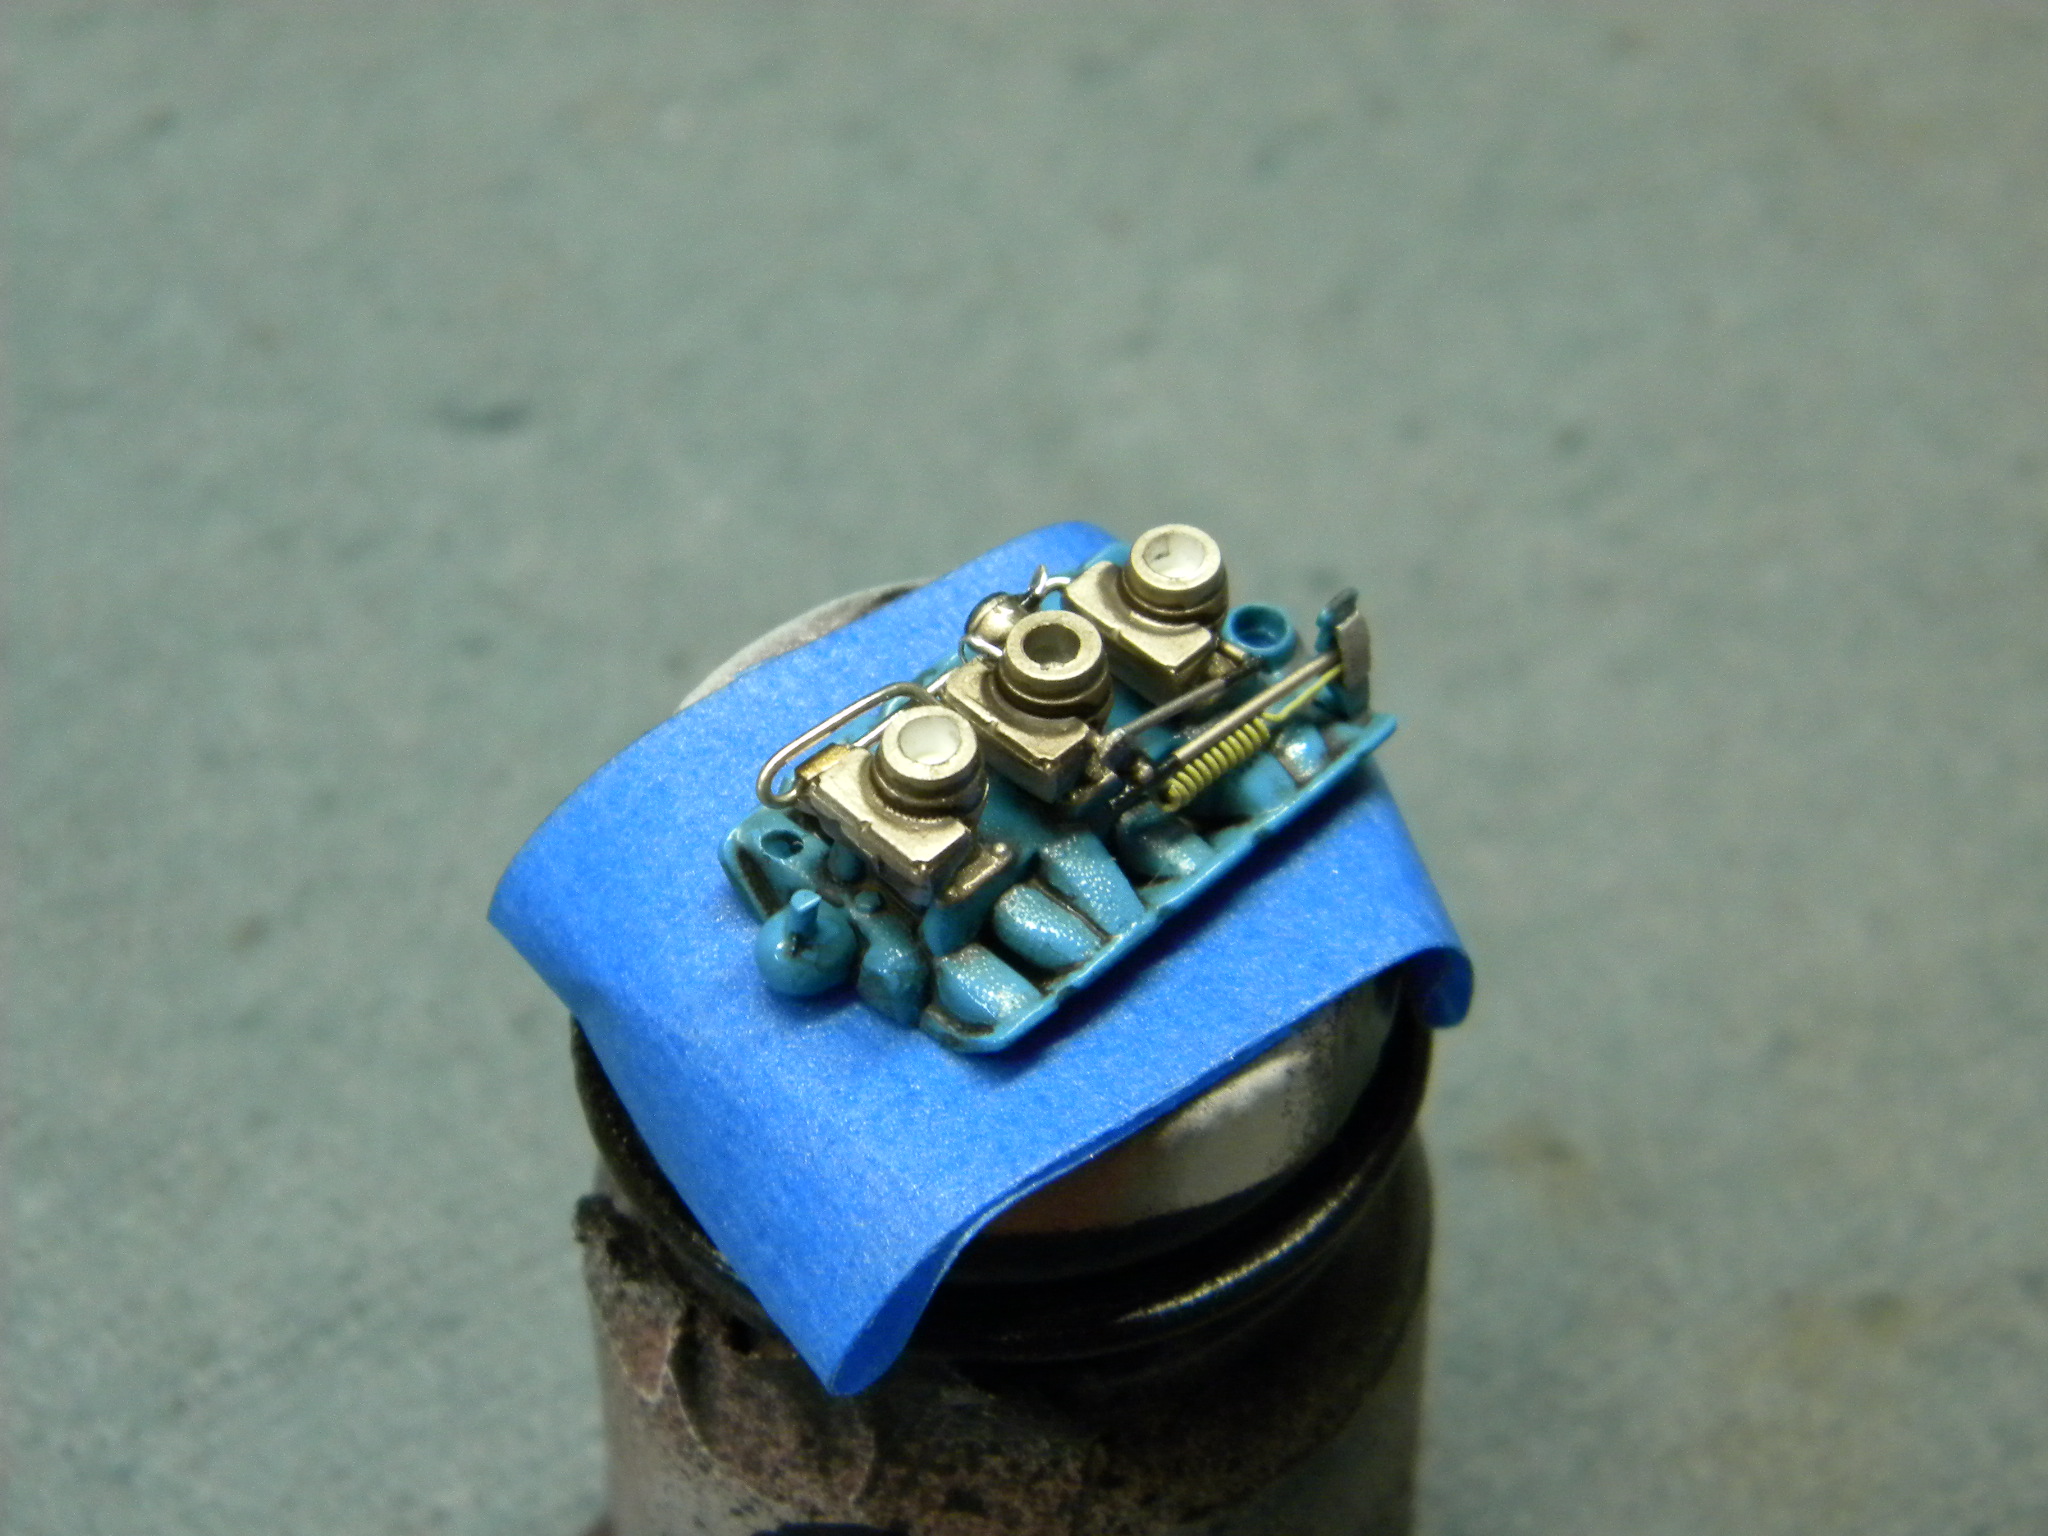
A strip of aluminum from a soda can. Steve
-
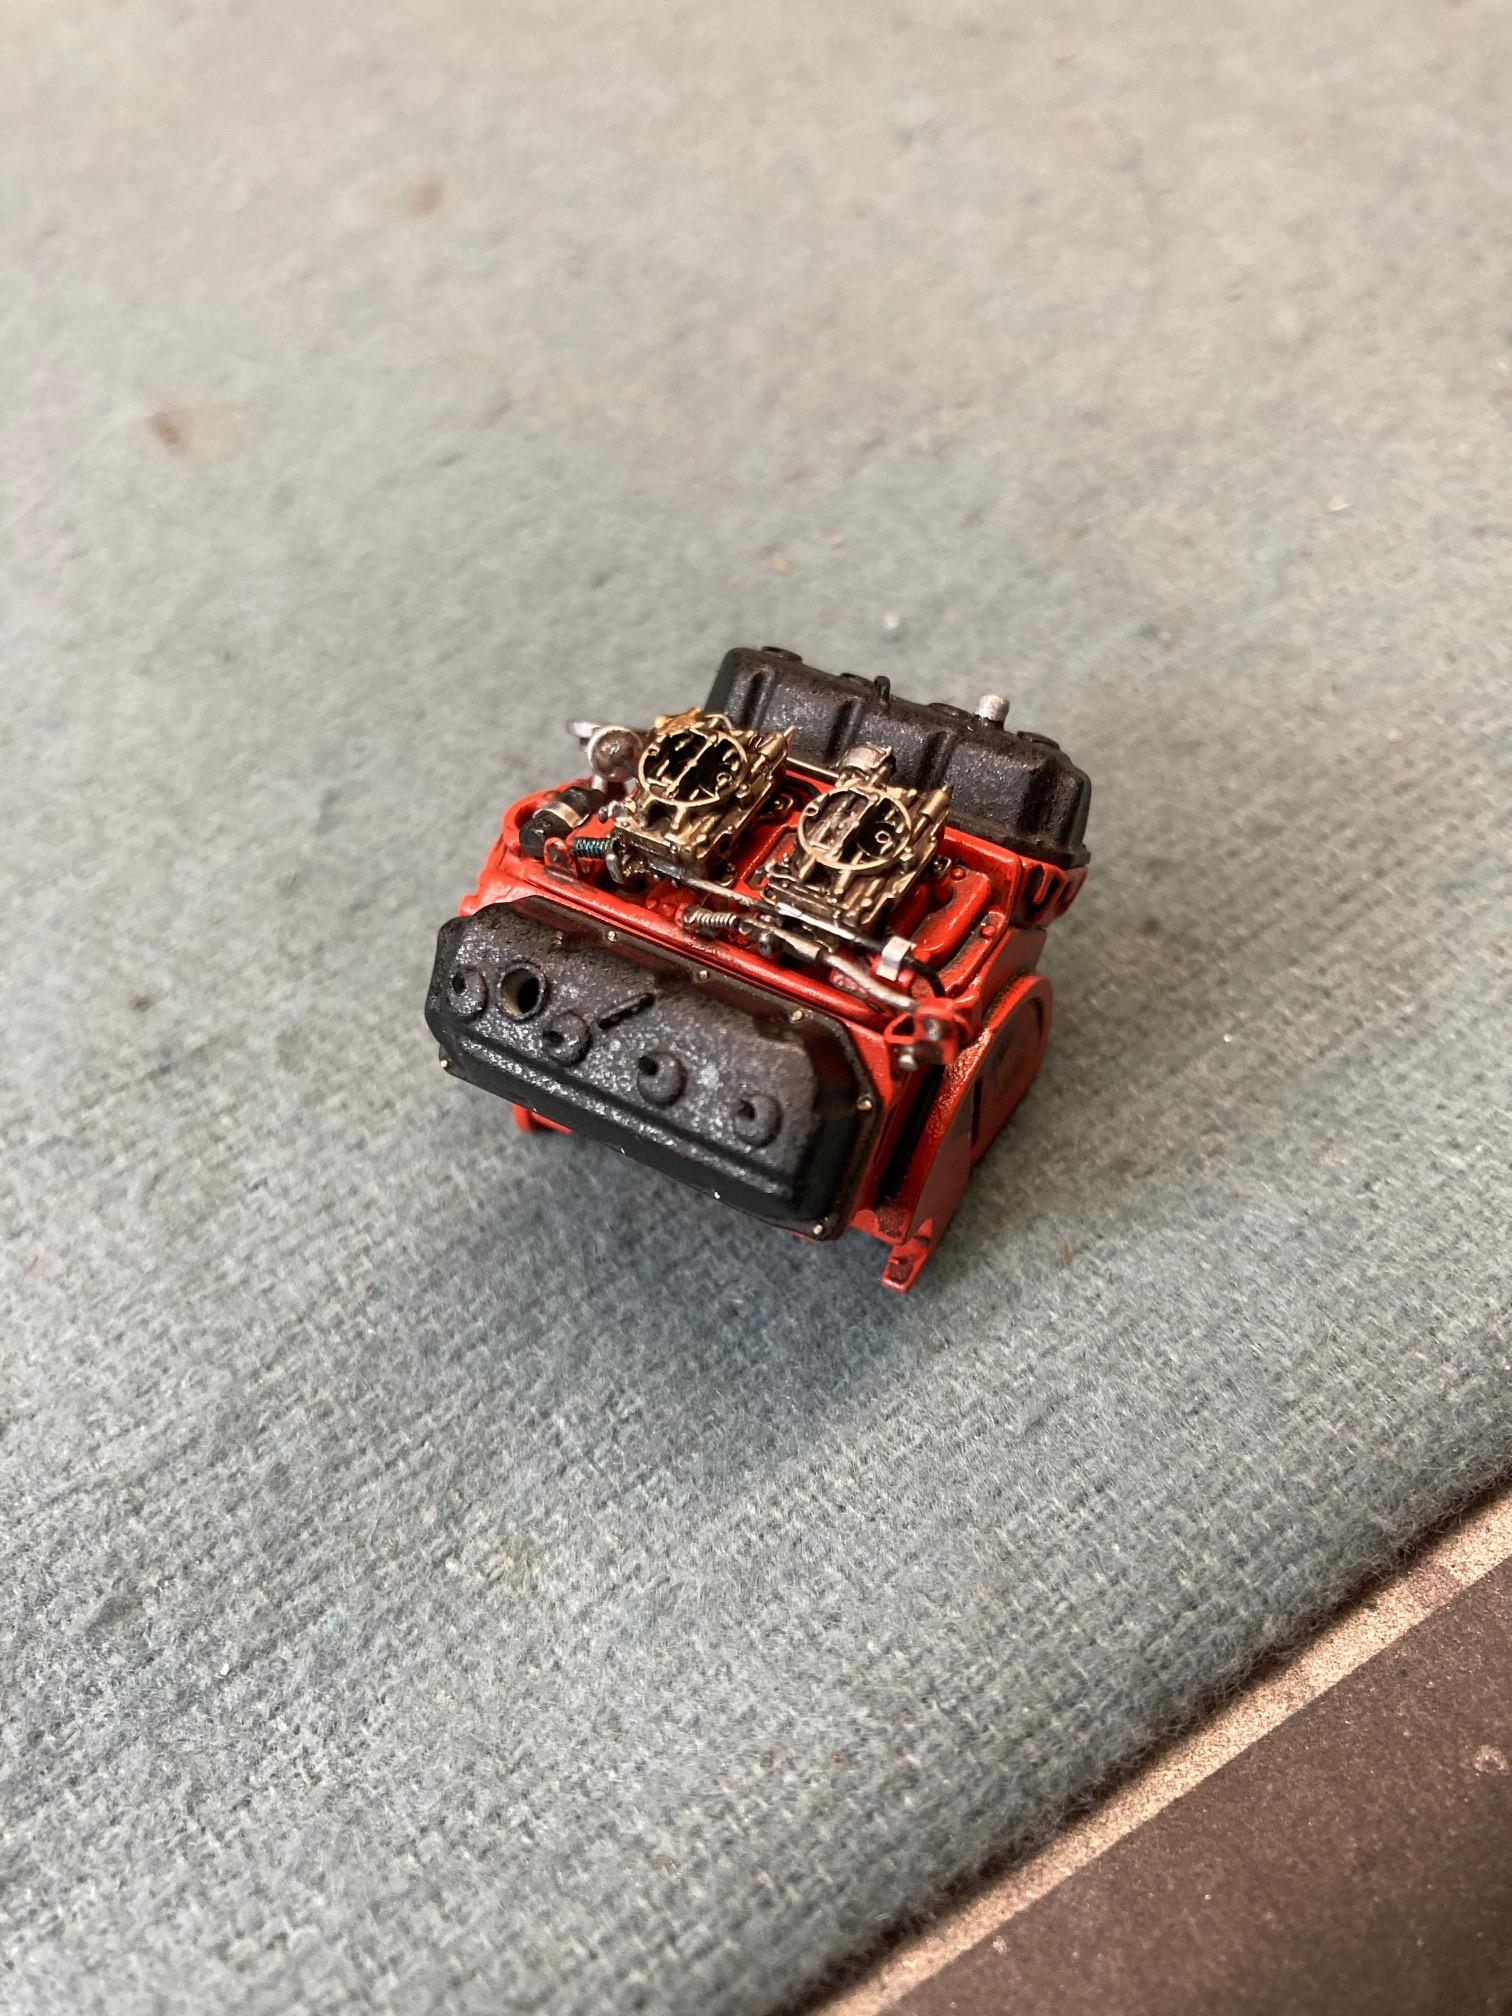
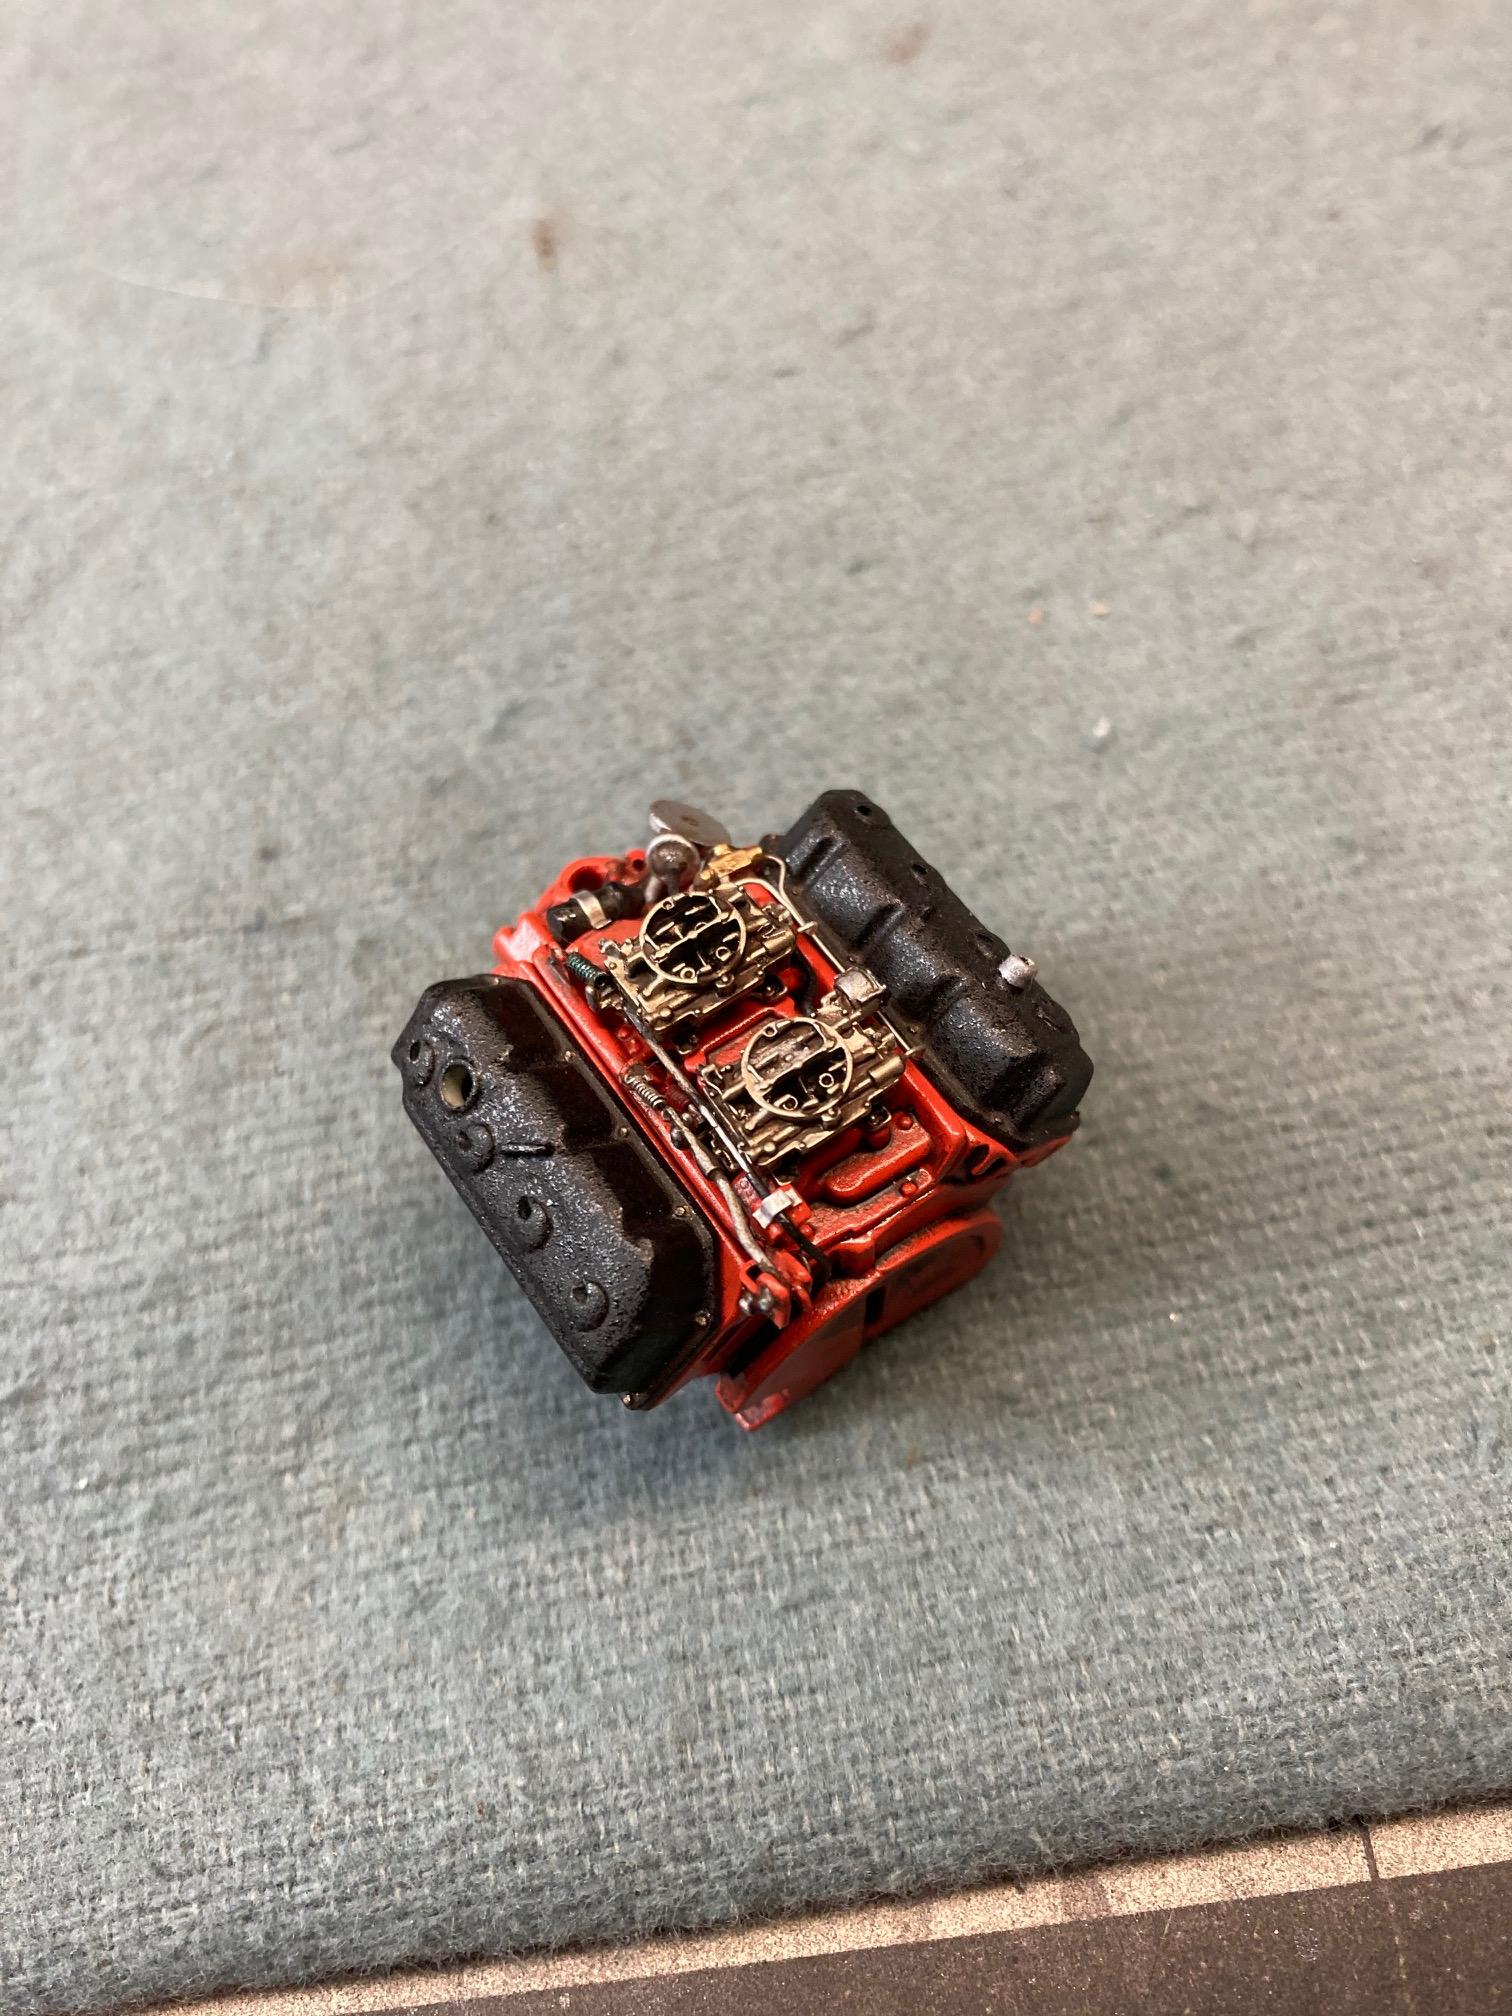
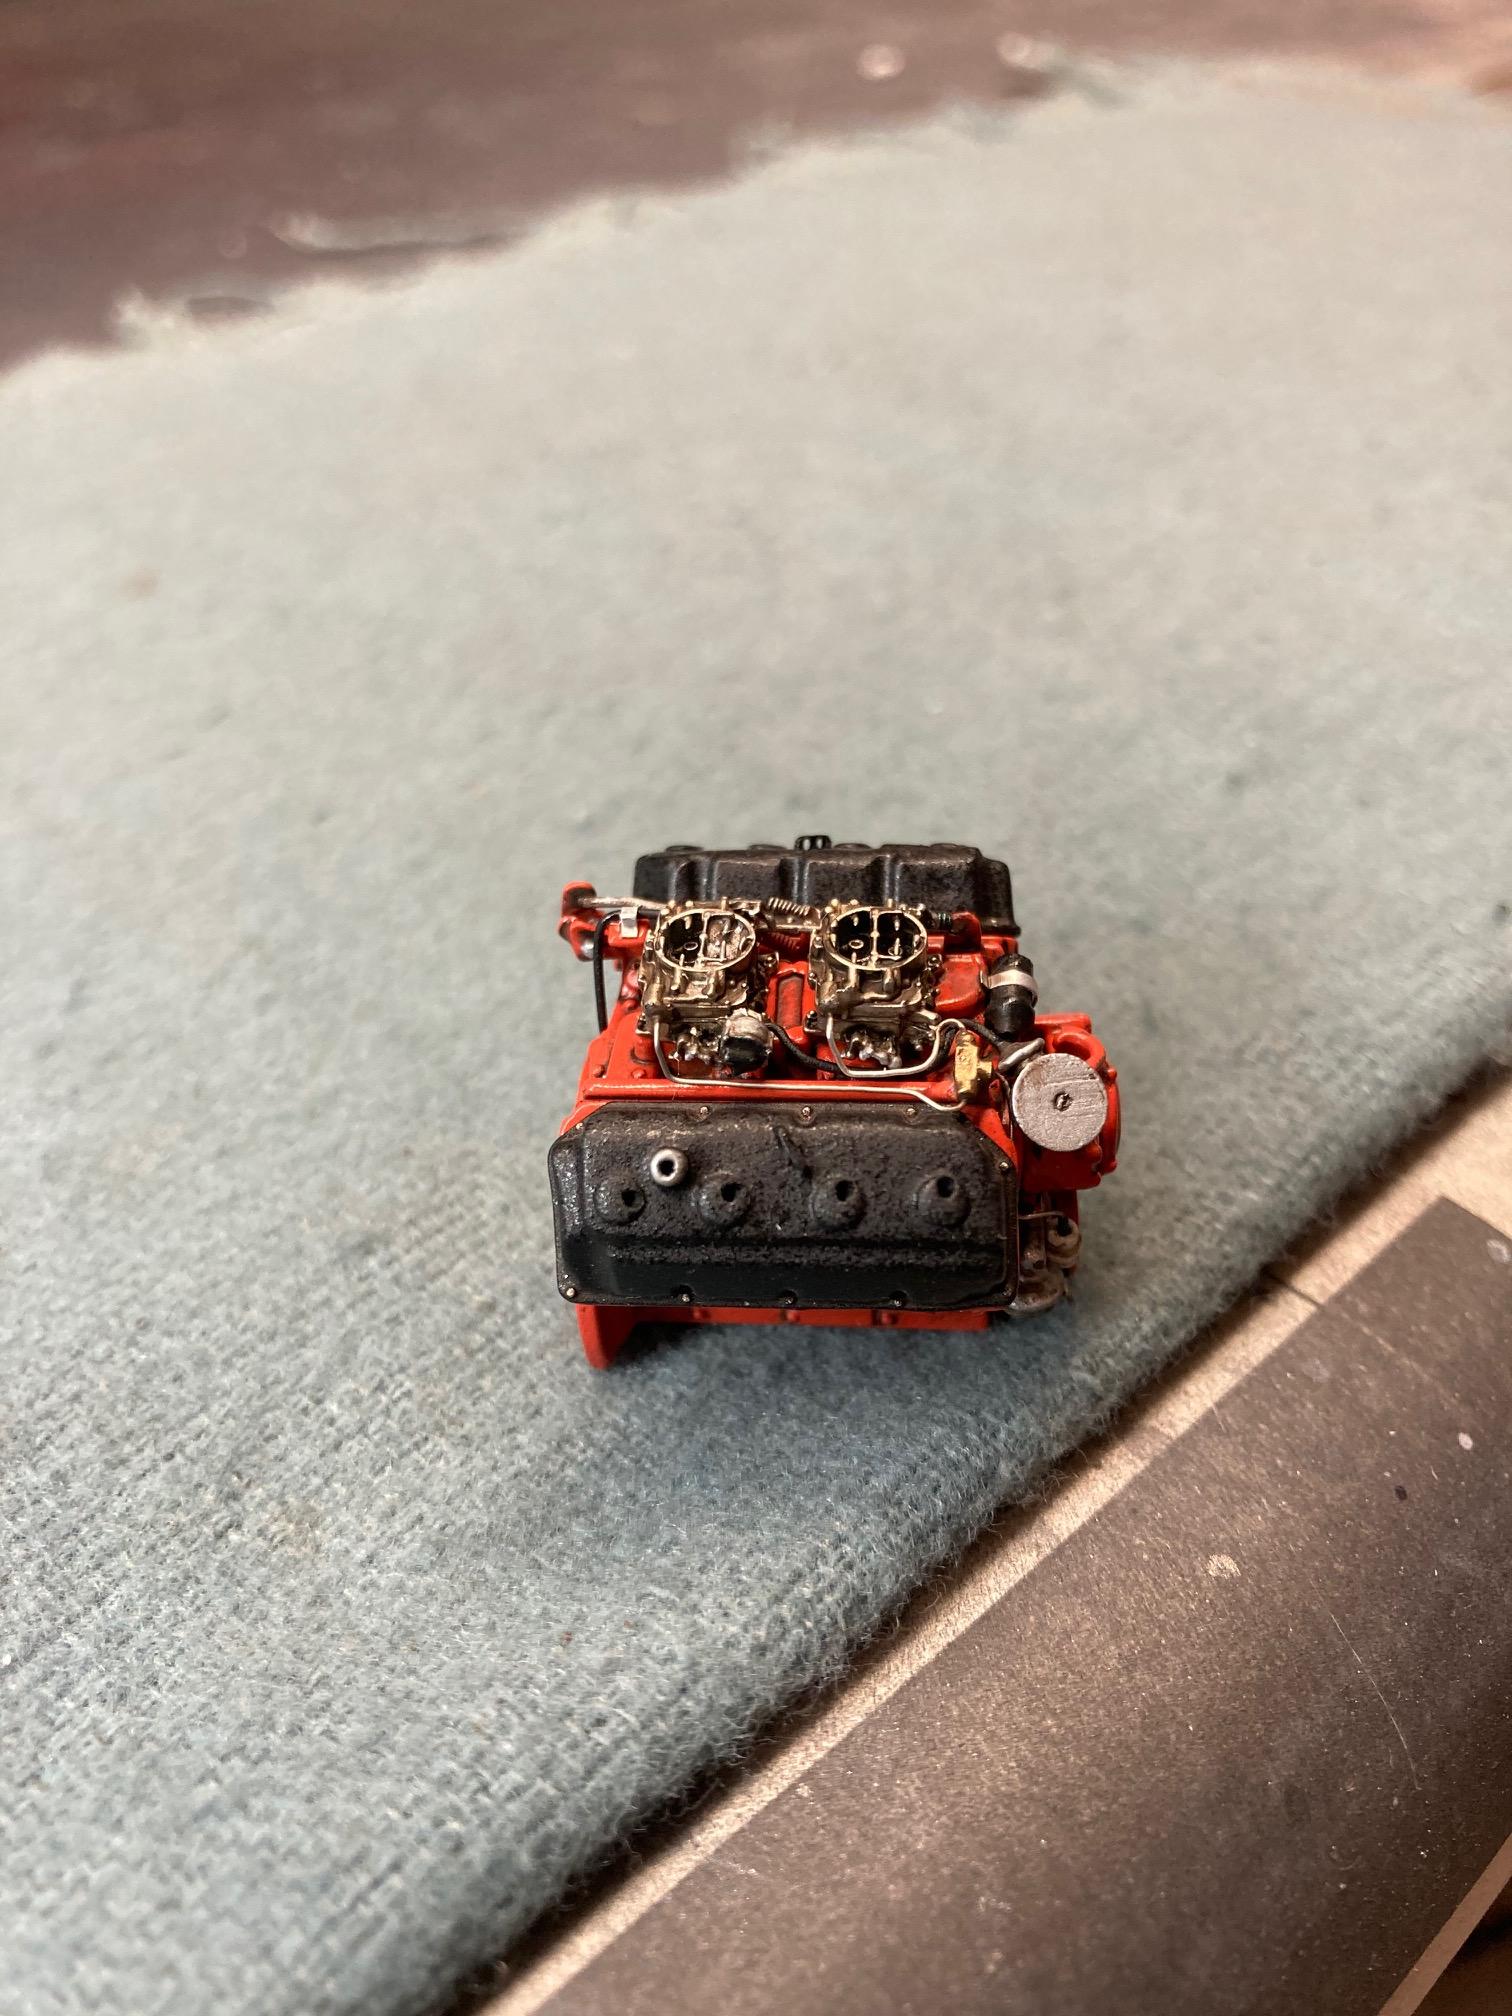
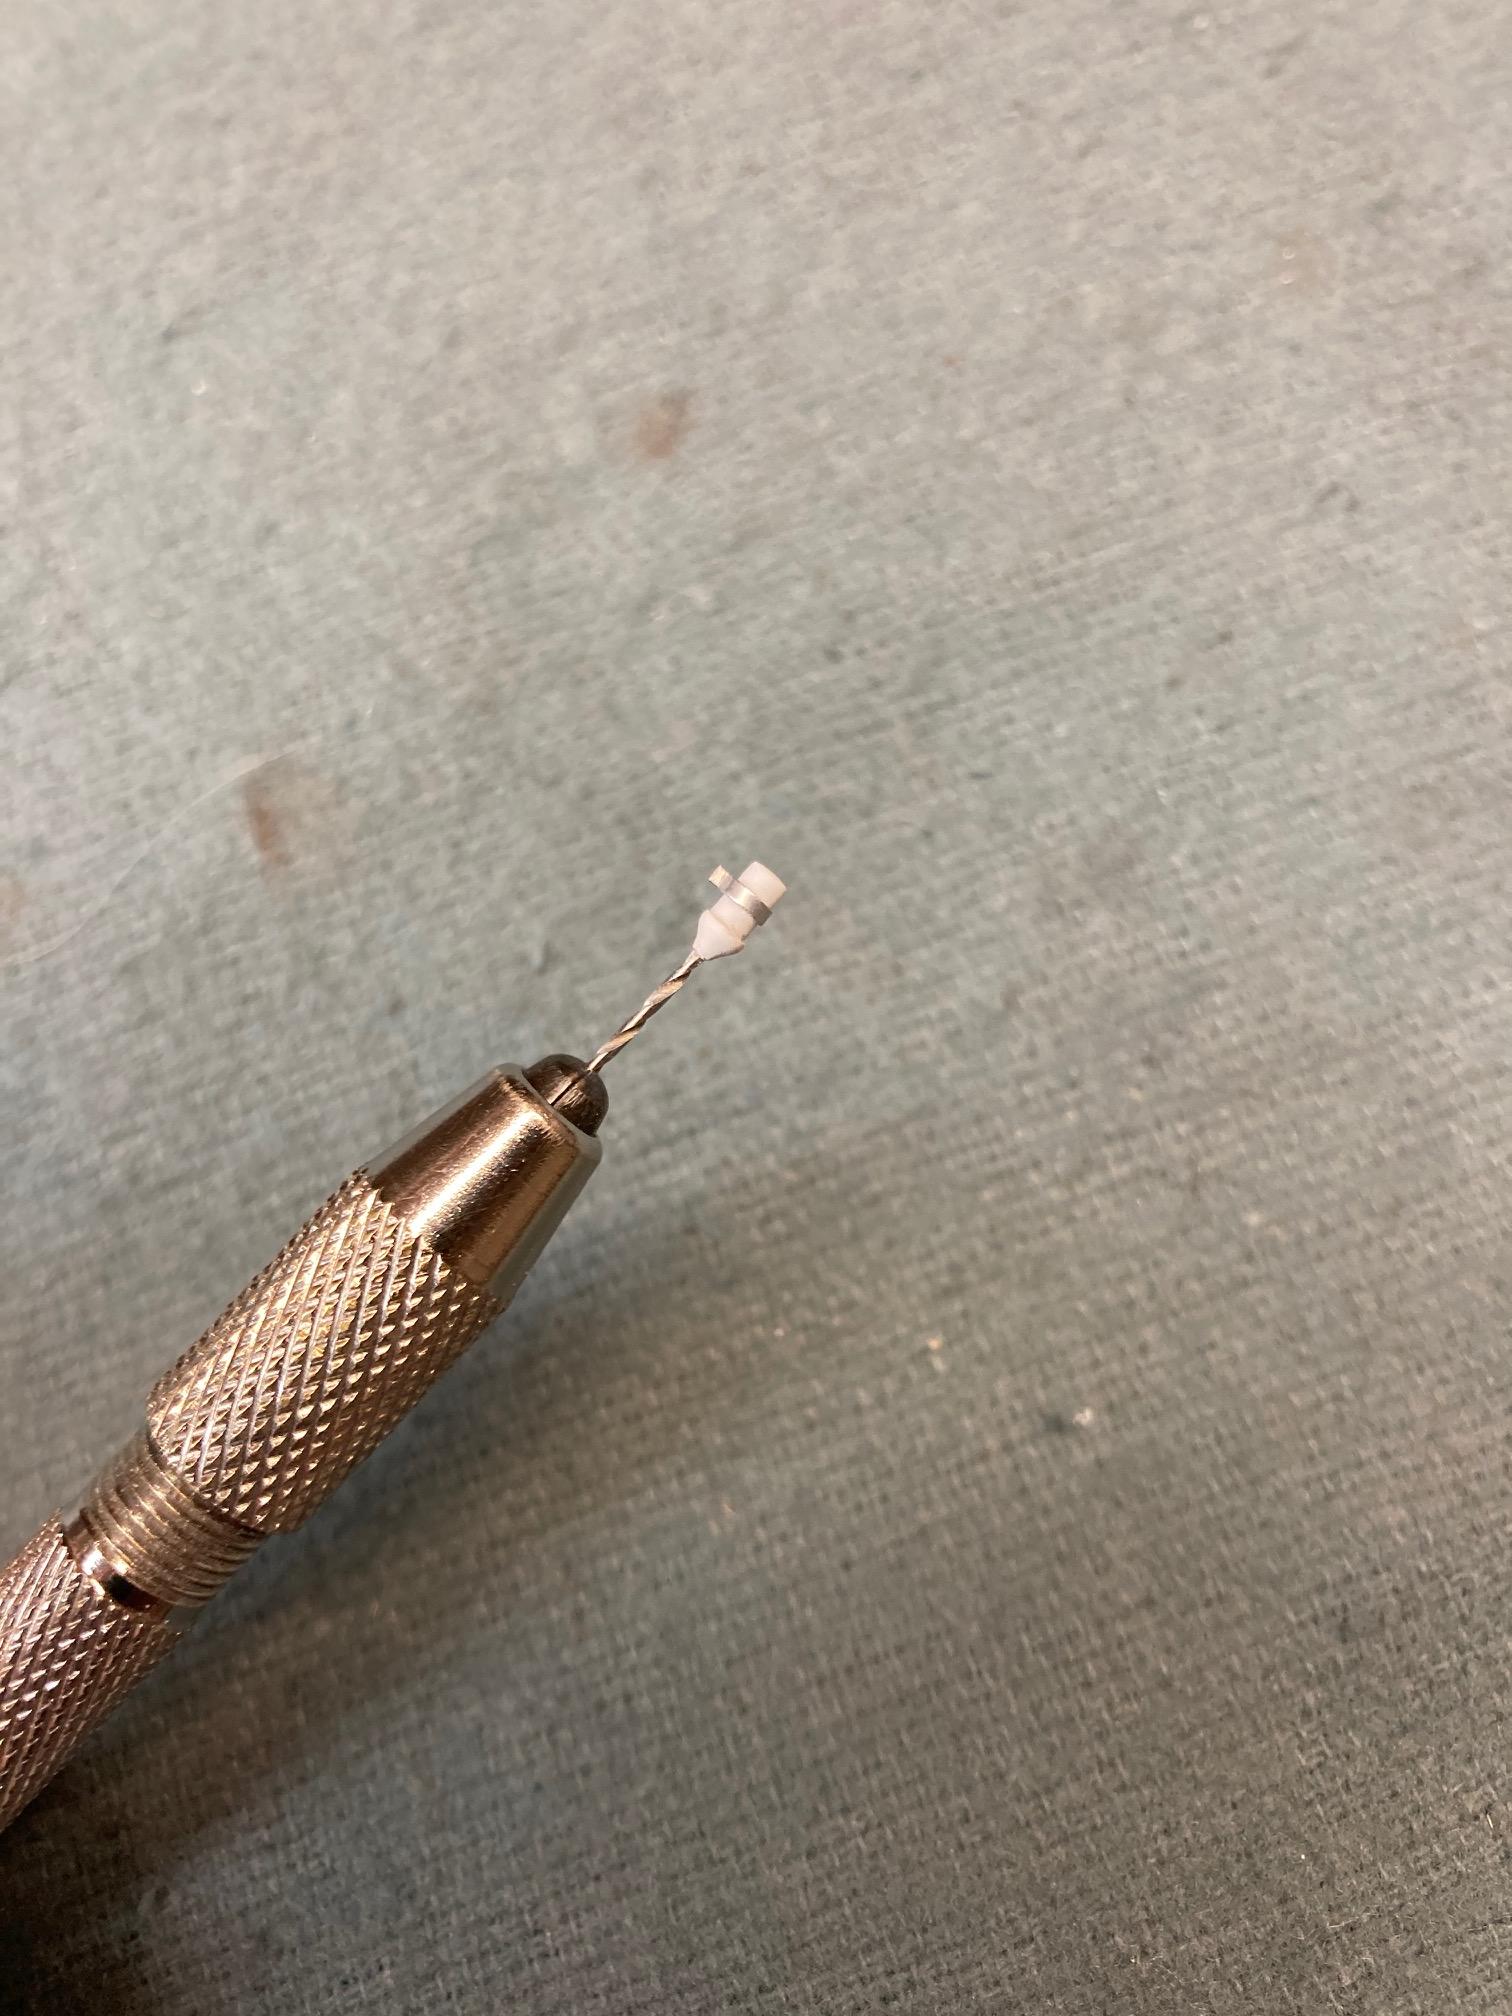
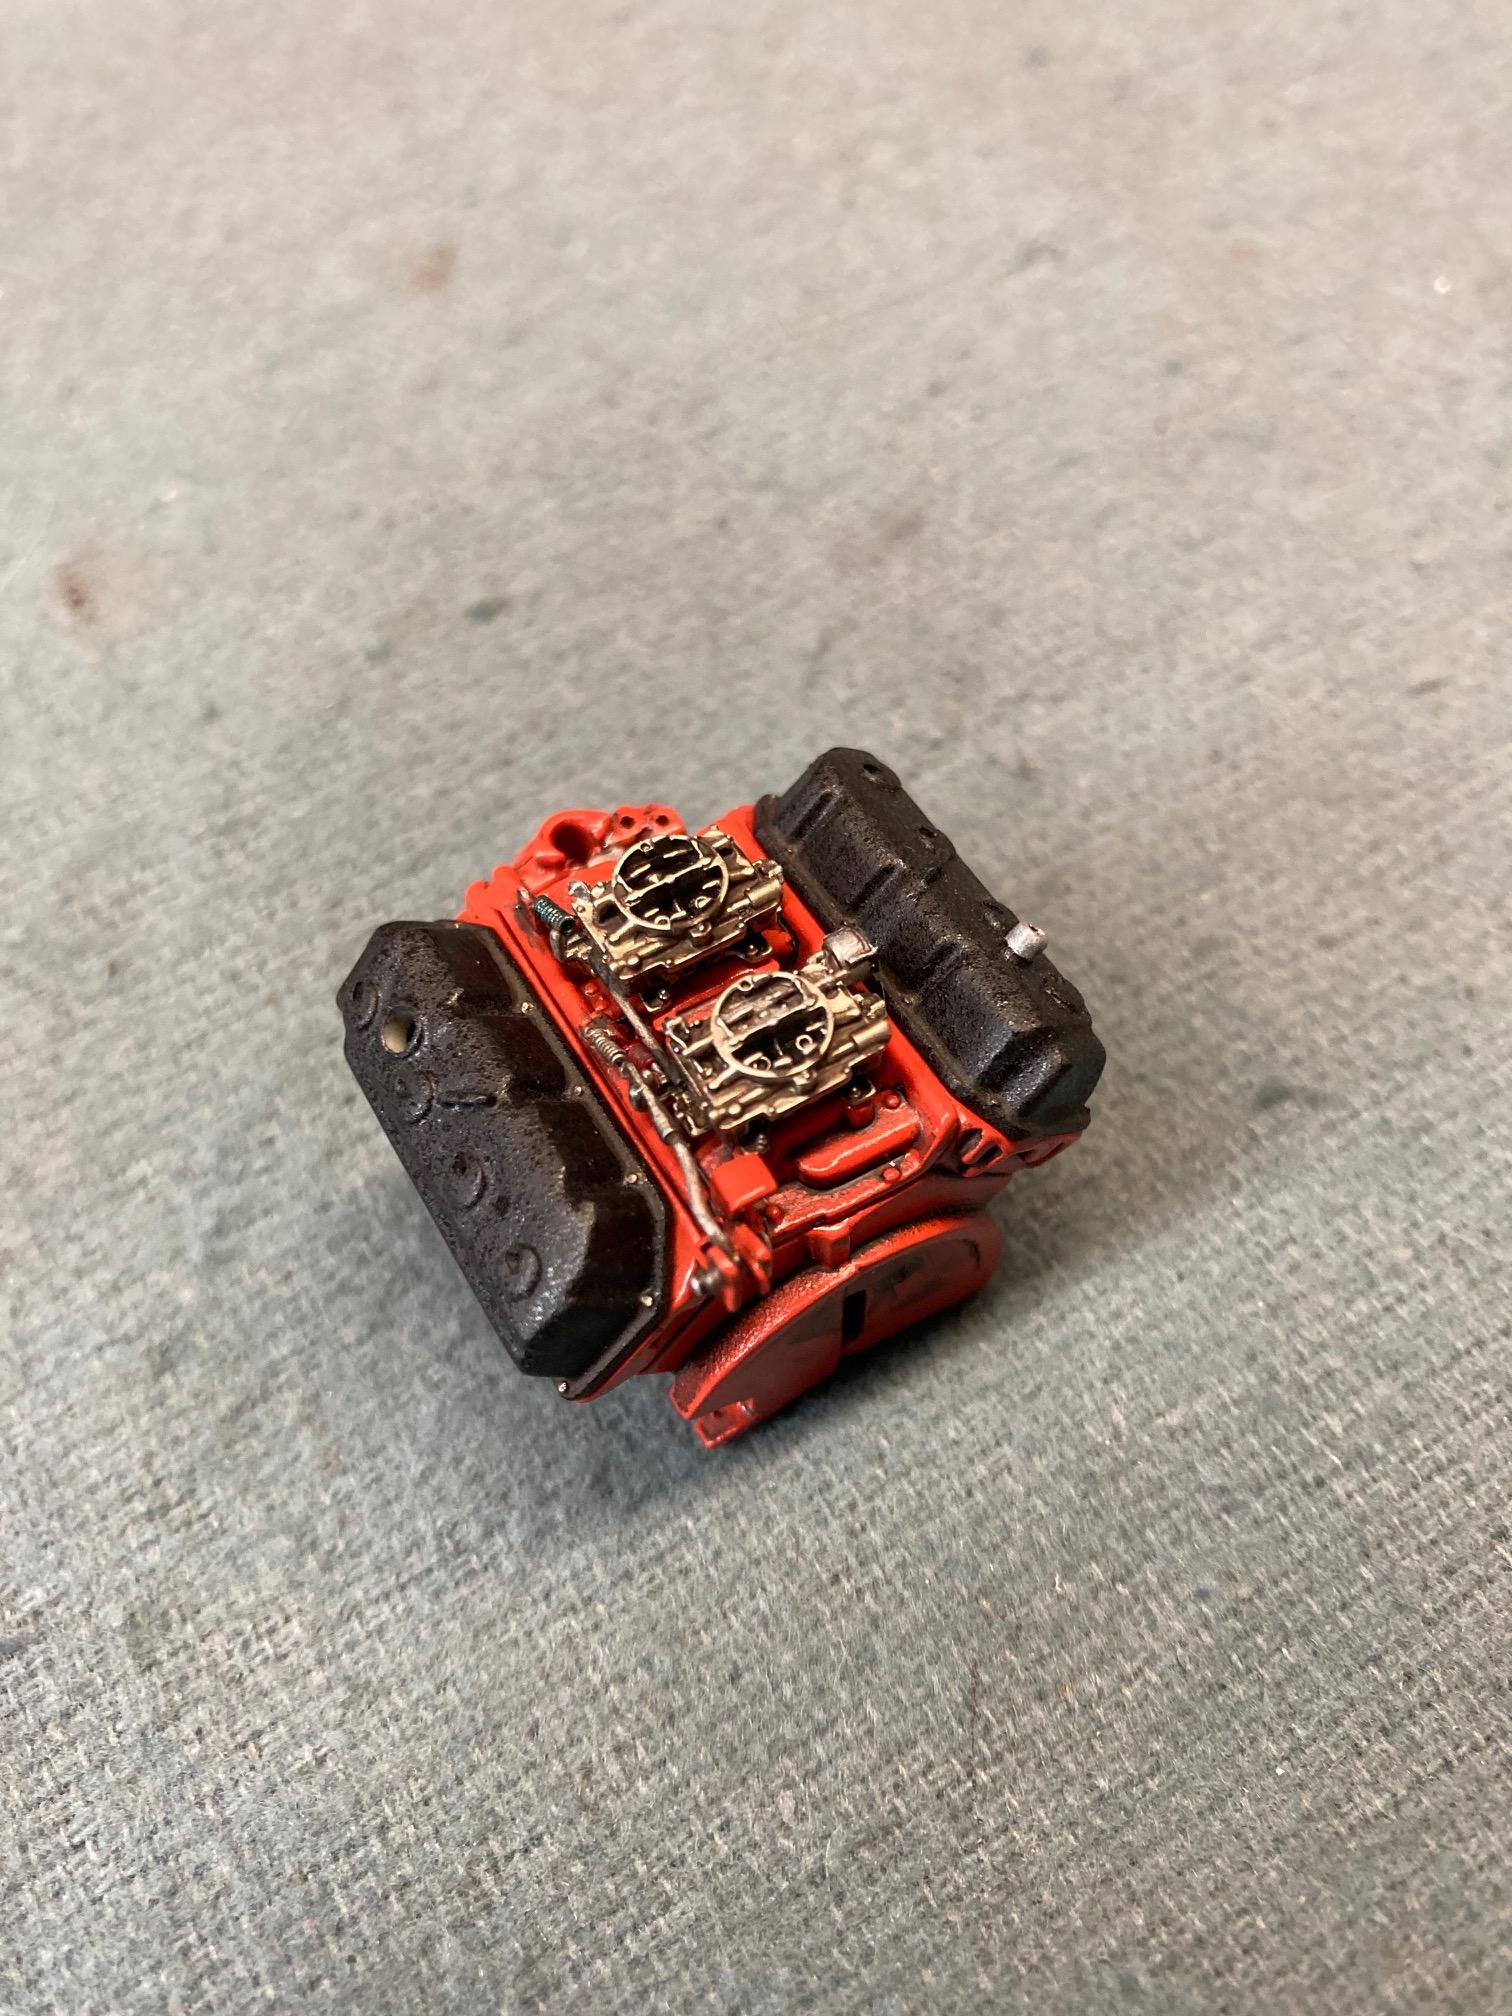
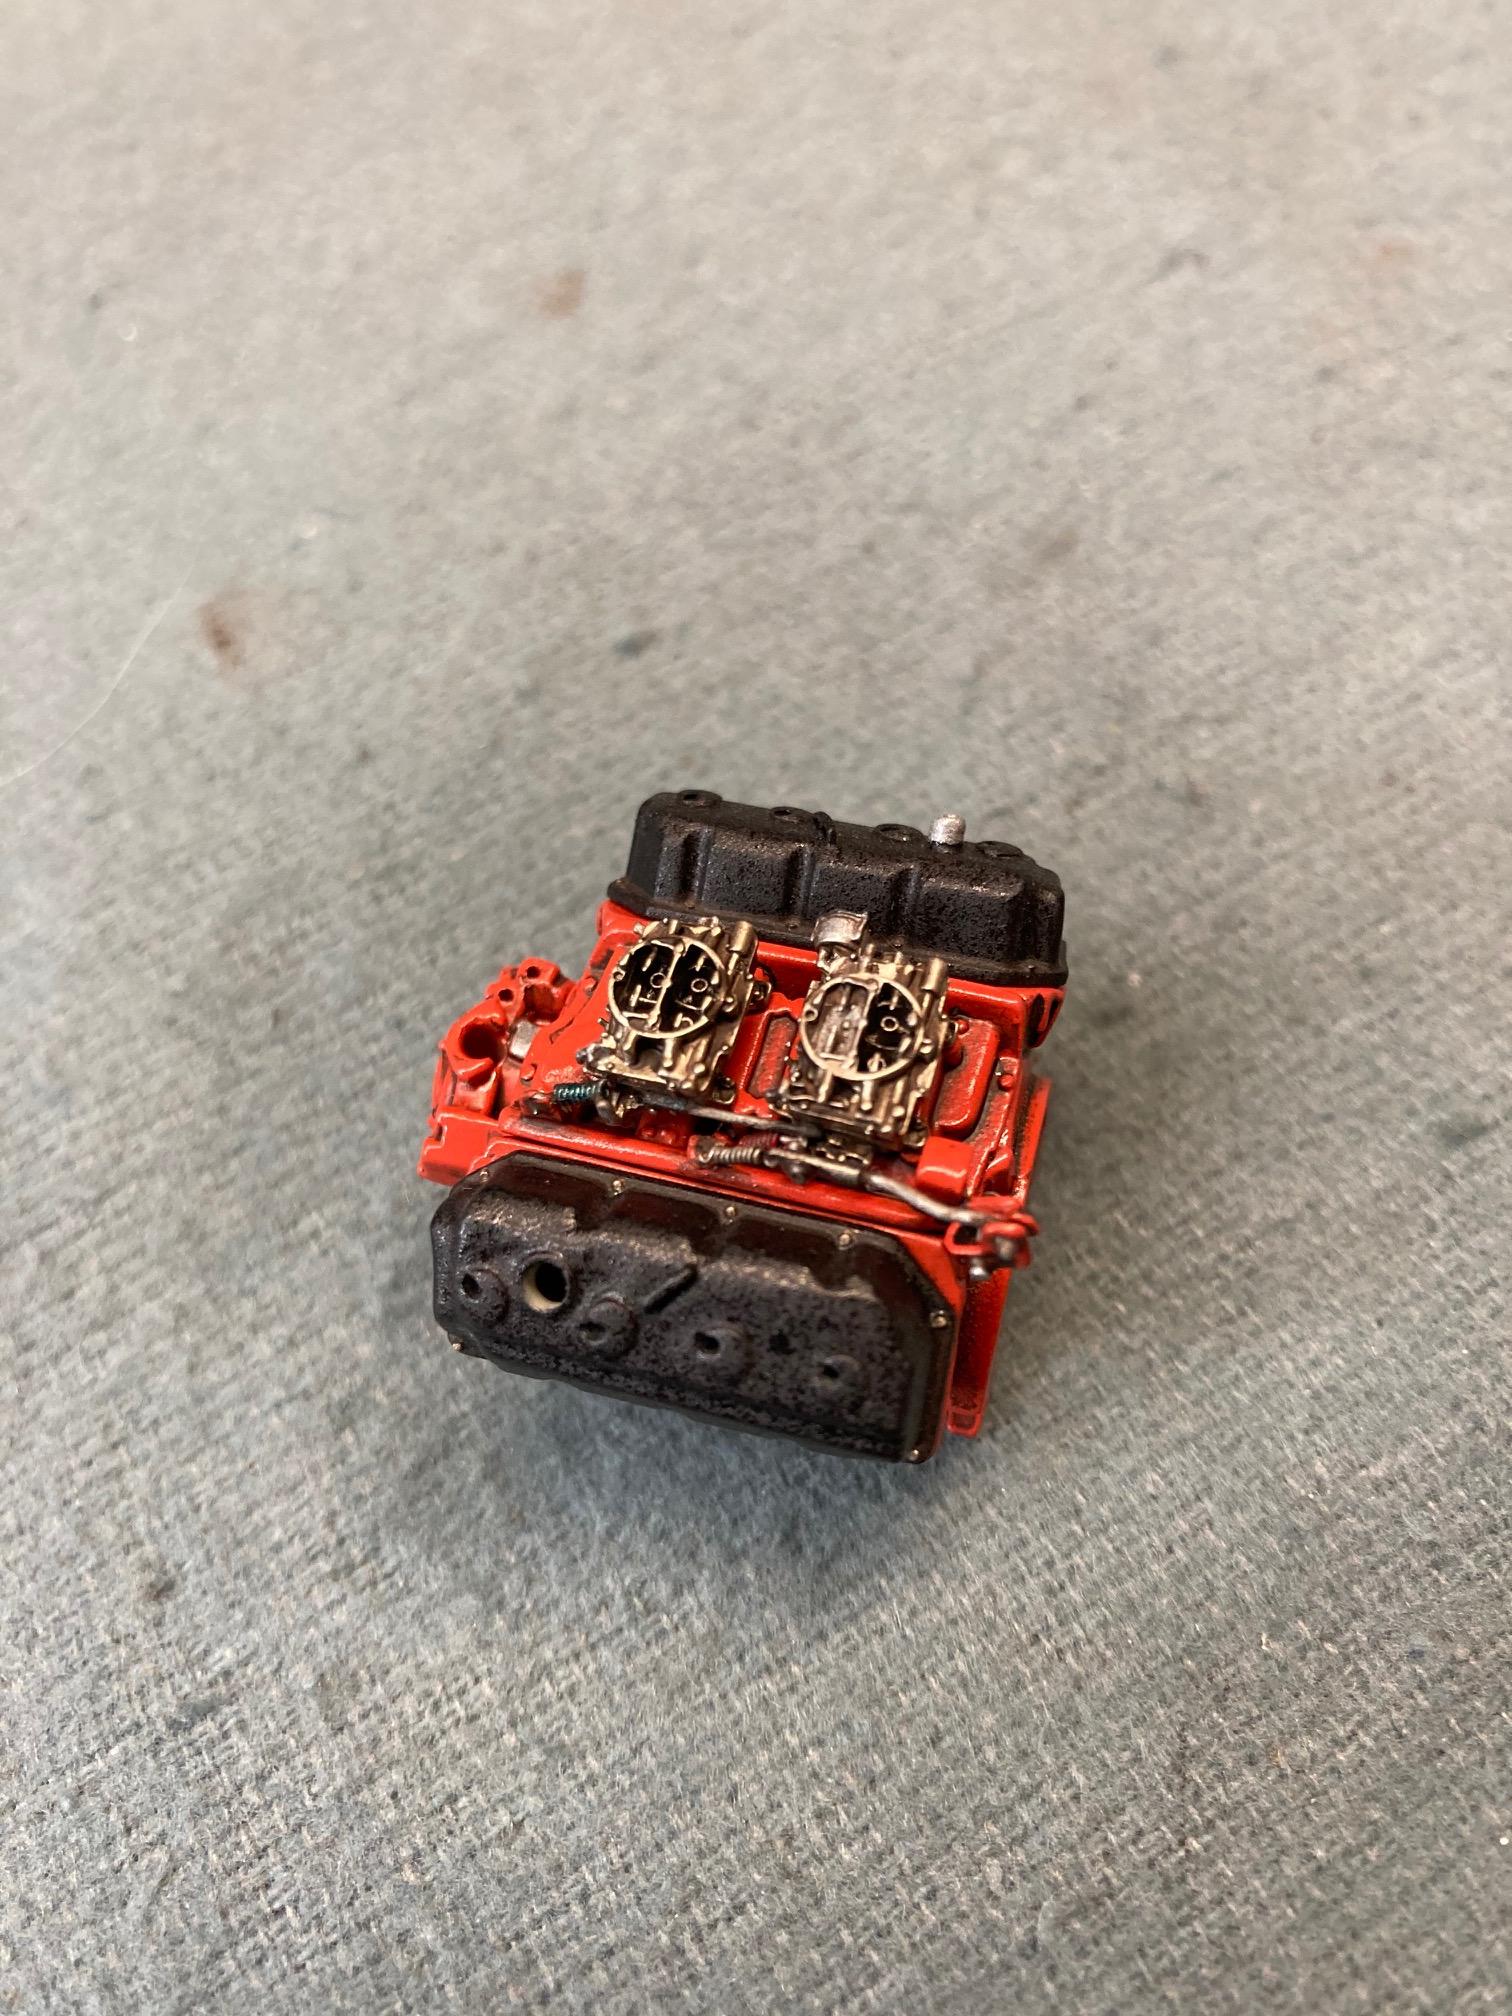
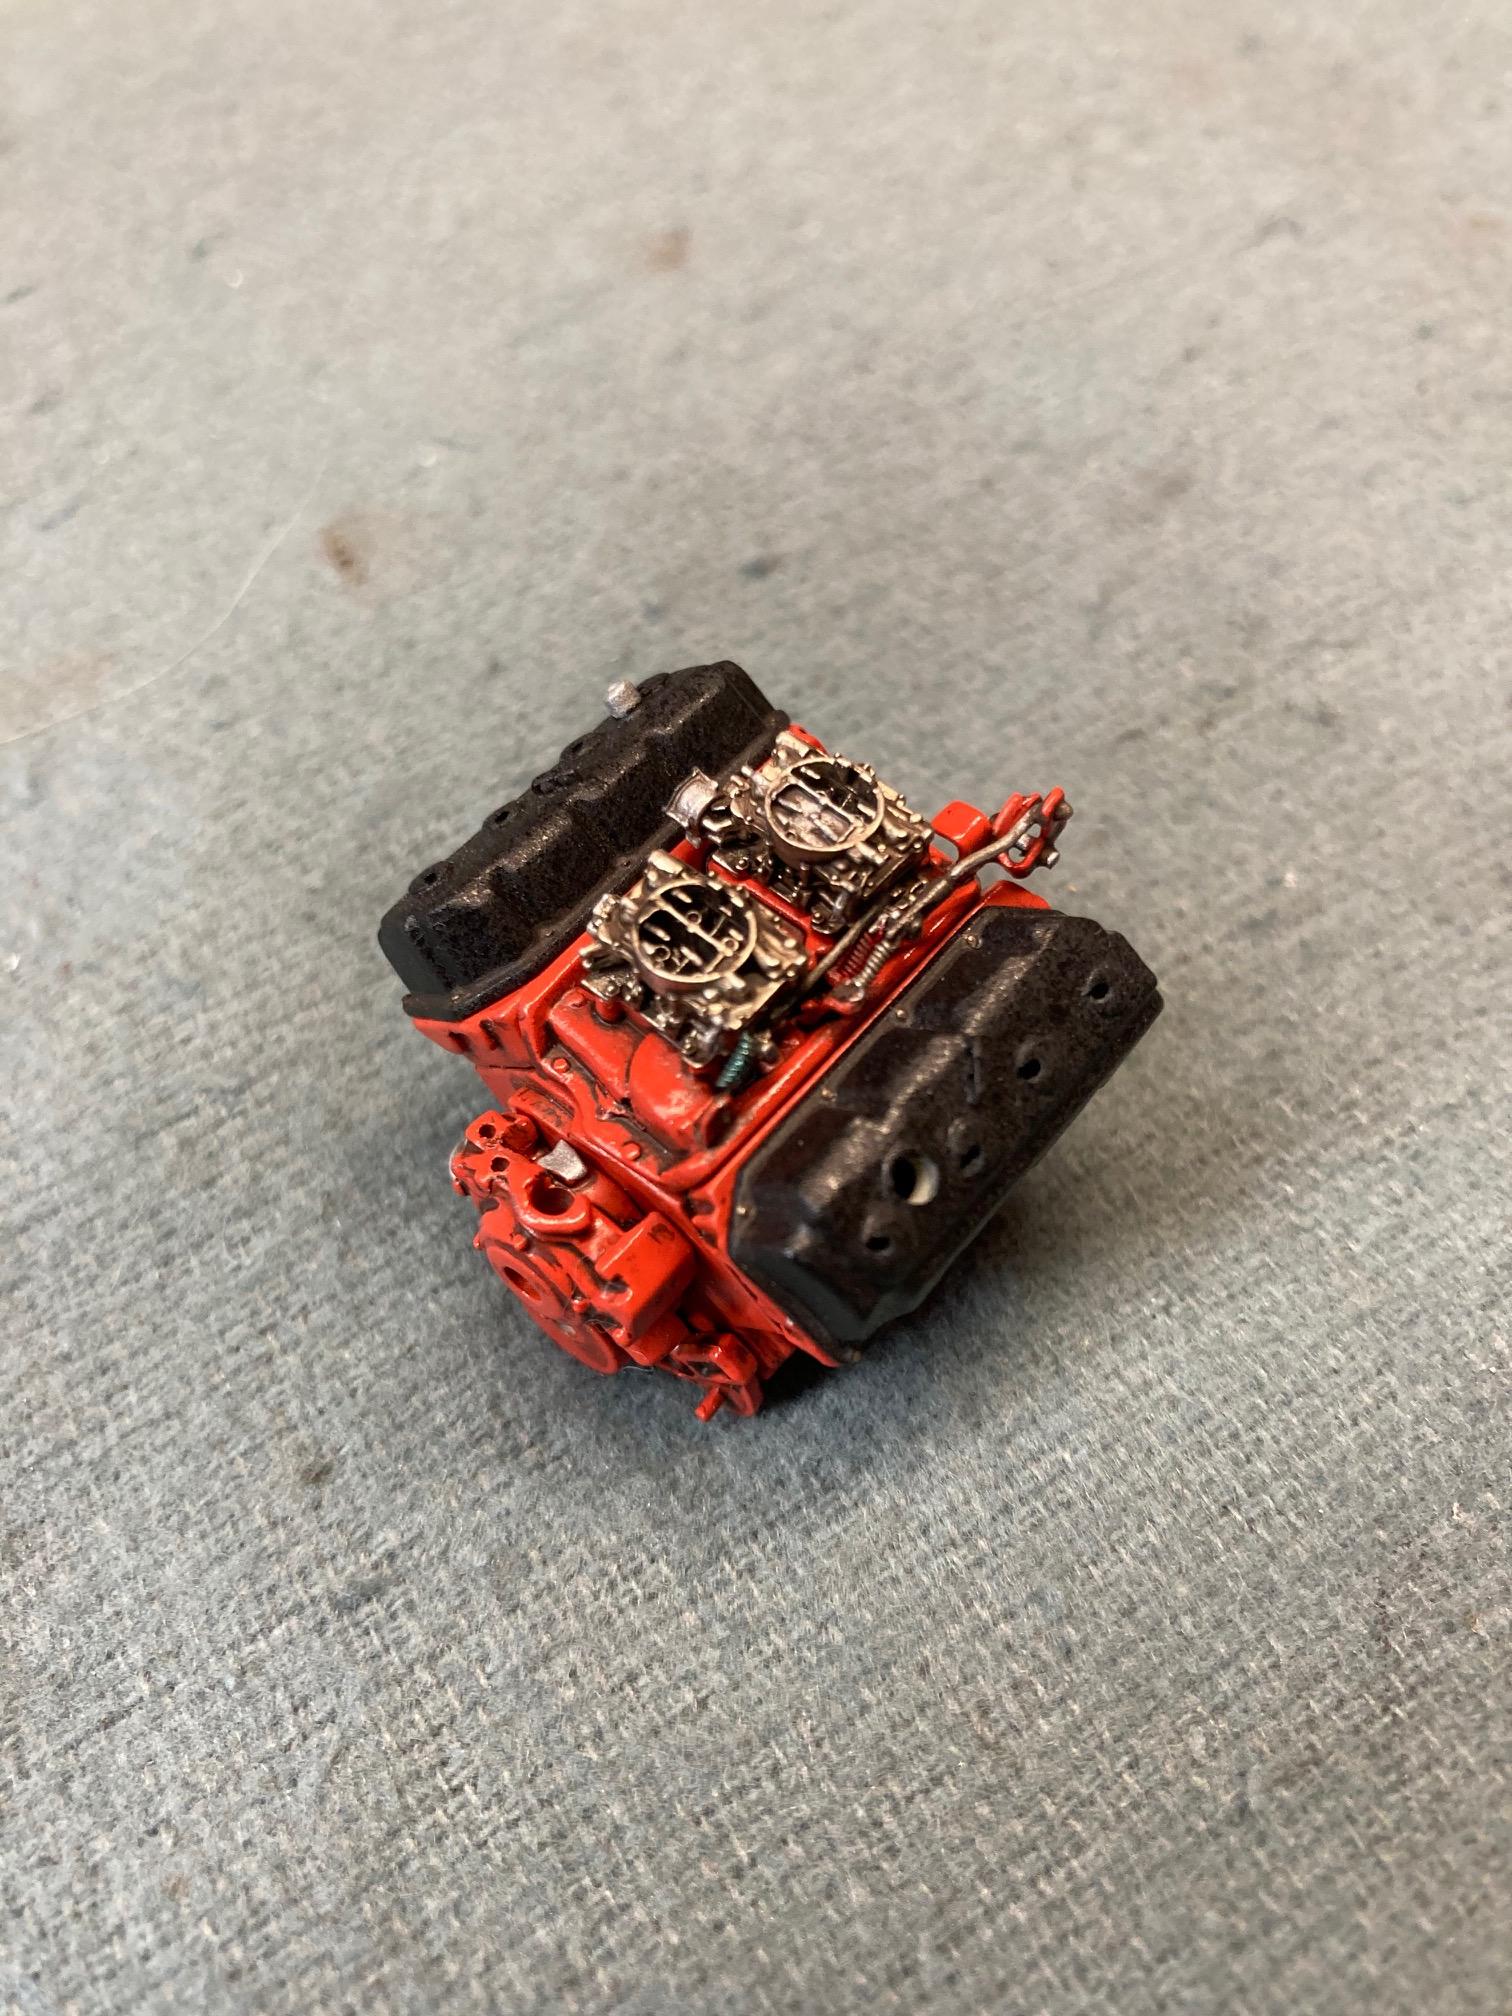
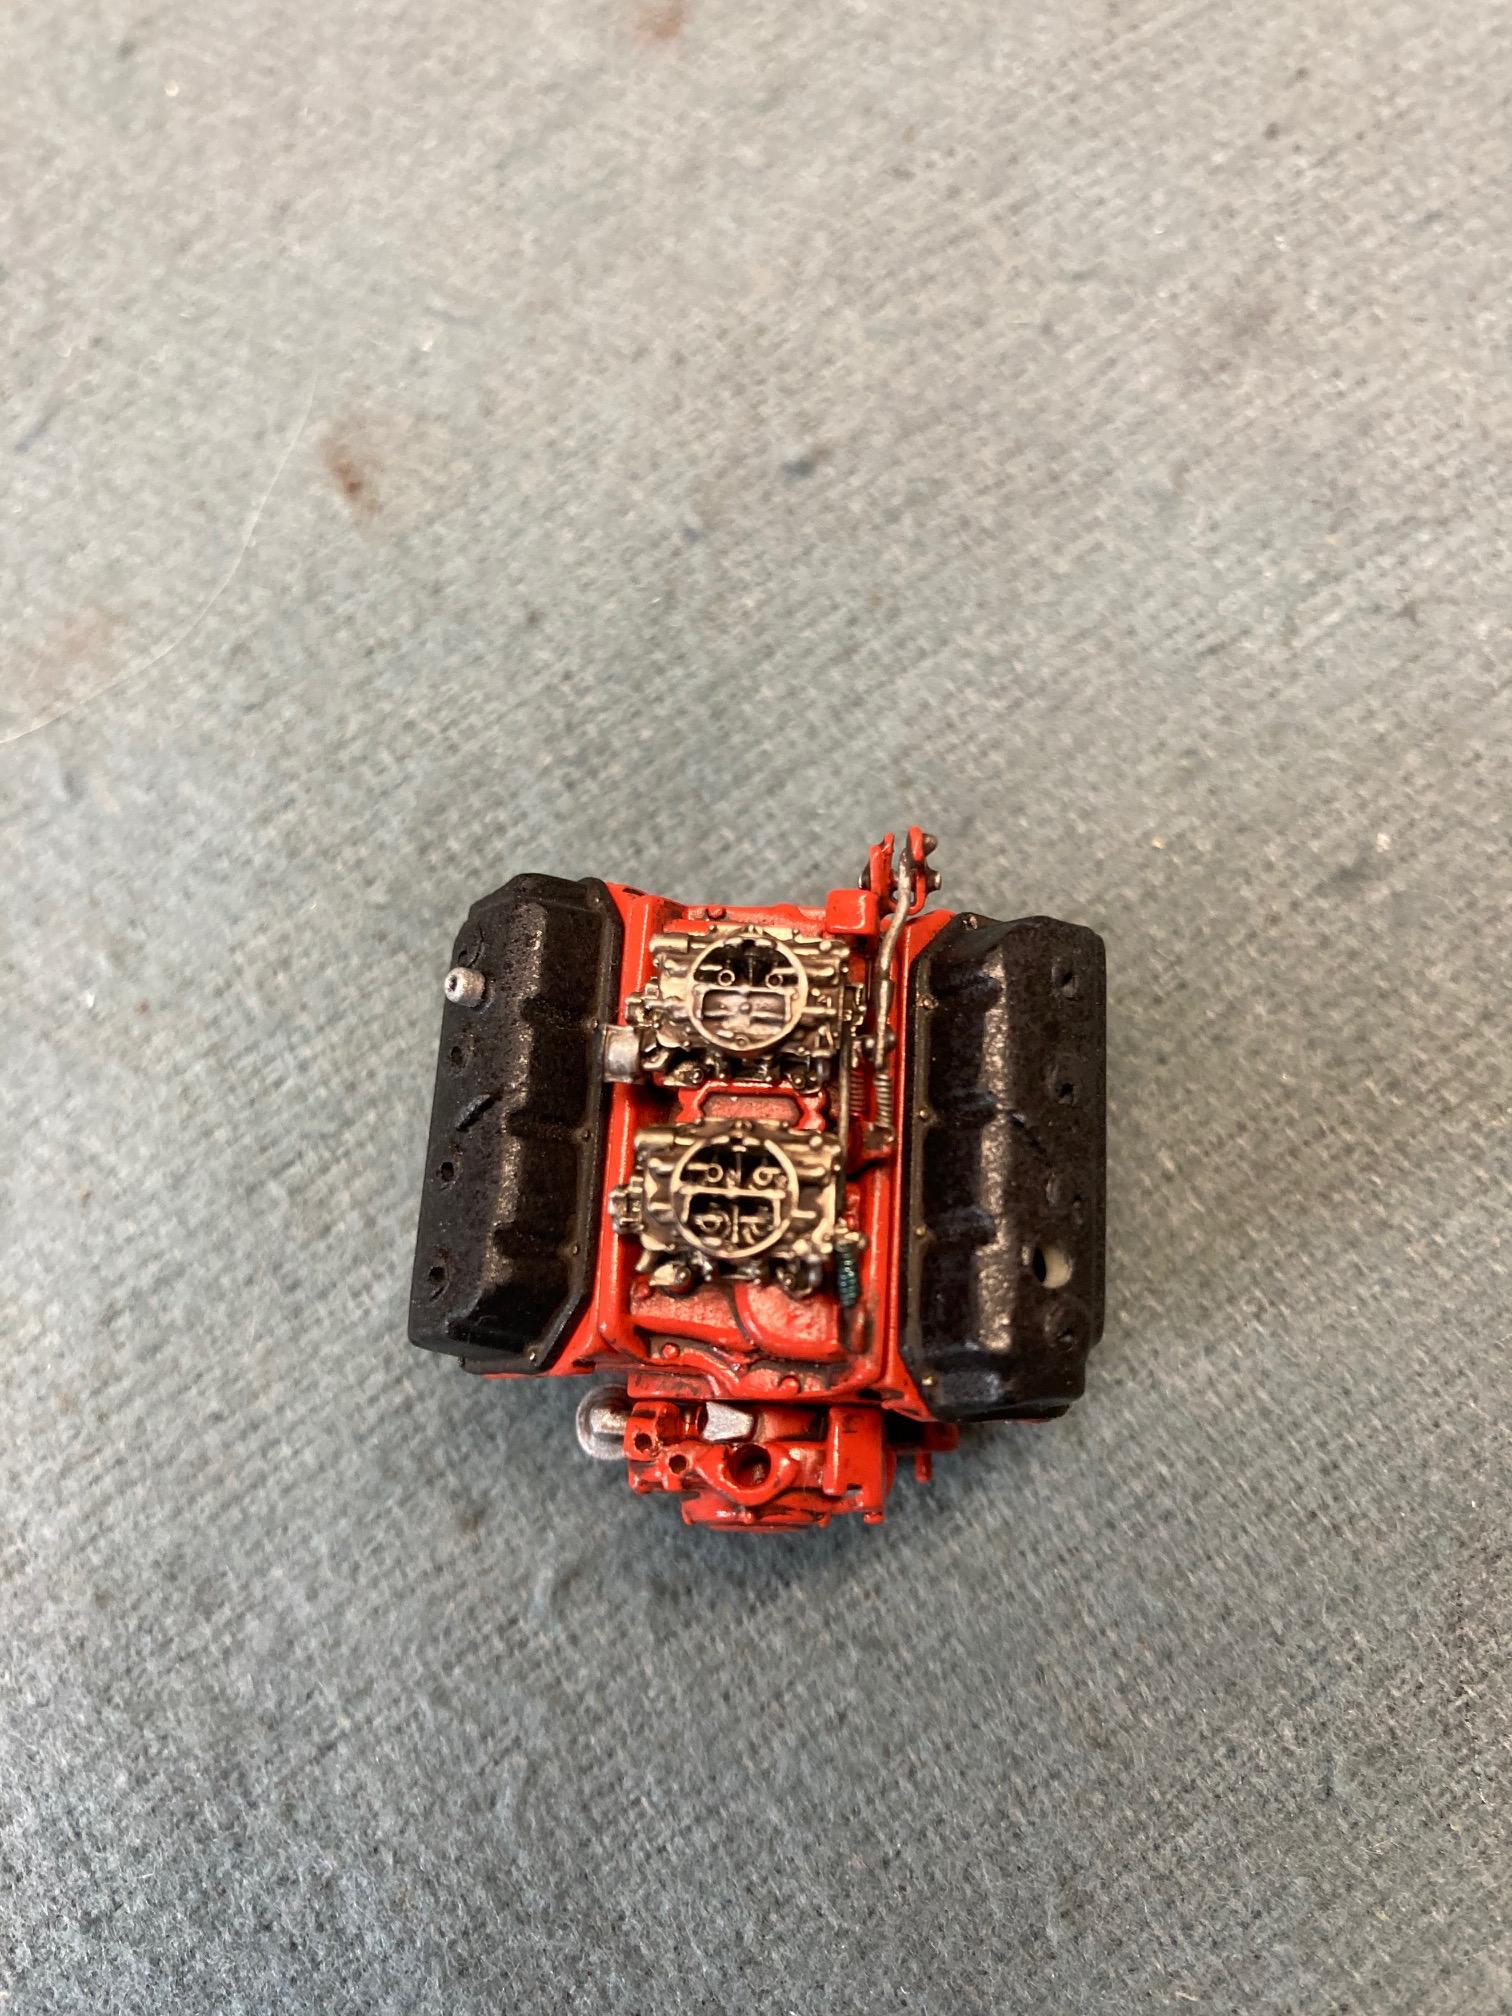
Thanks guys!! Today I installed the coil, distributor base, and the fuel splitter. then added the vacuum advance hose, fuel lines and throttle cable. Steve
-
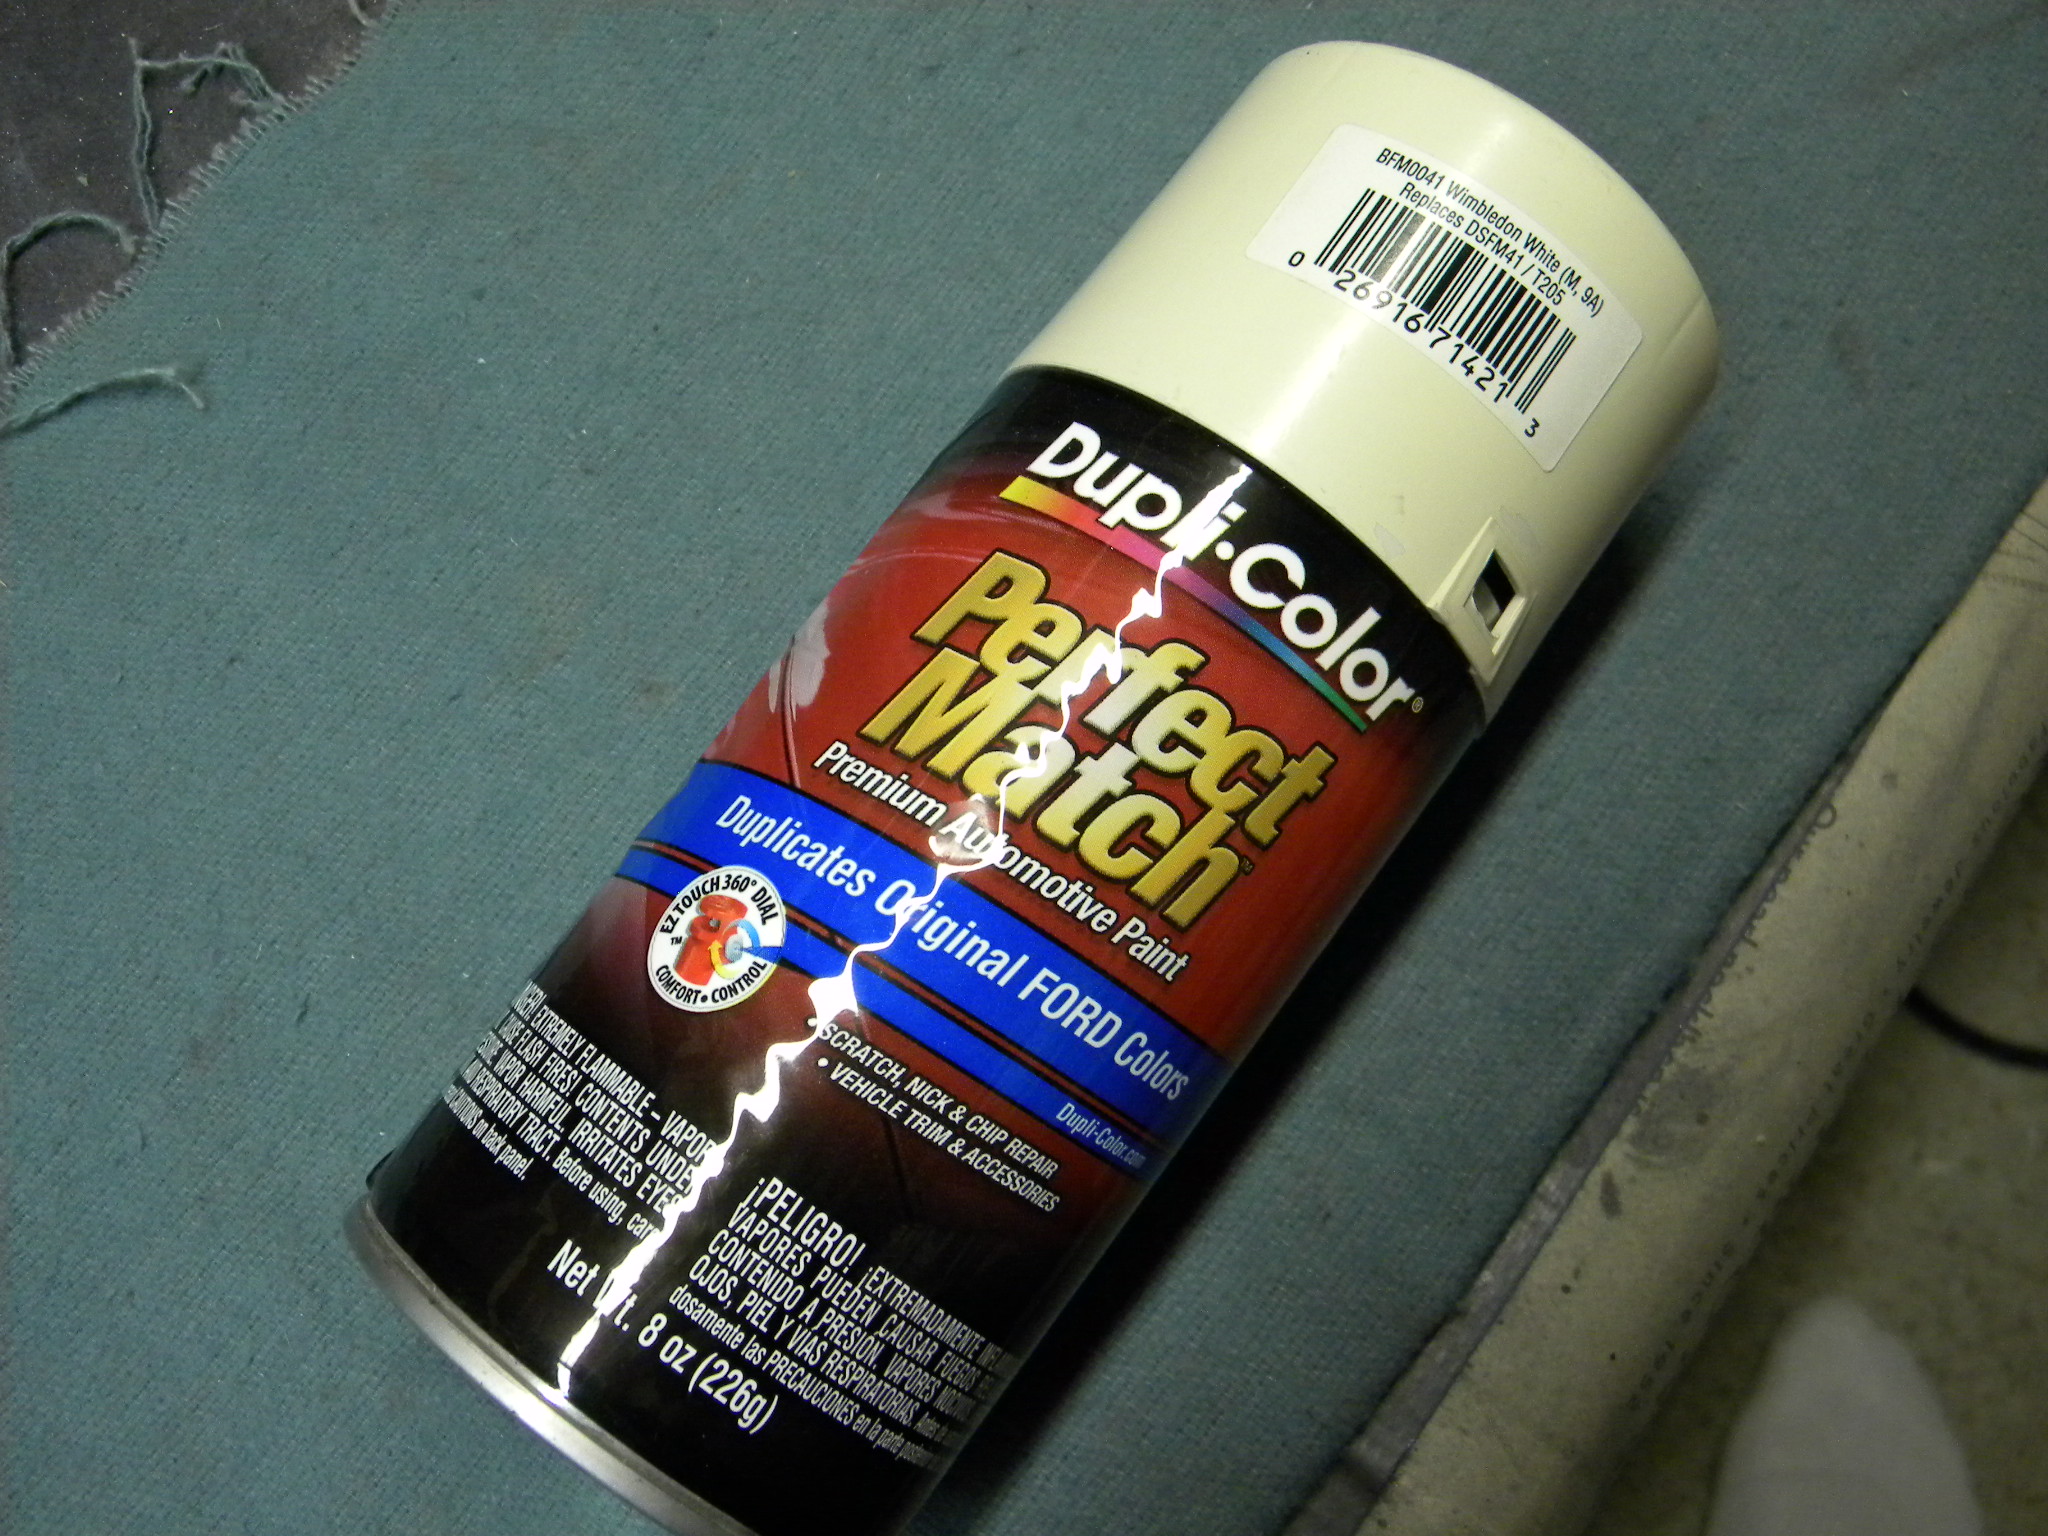
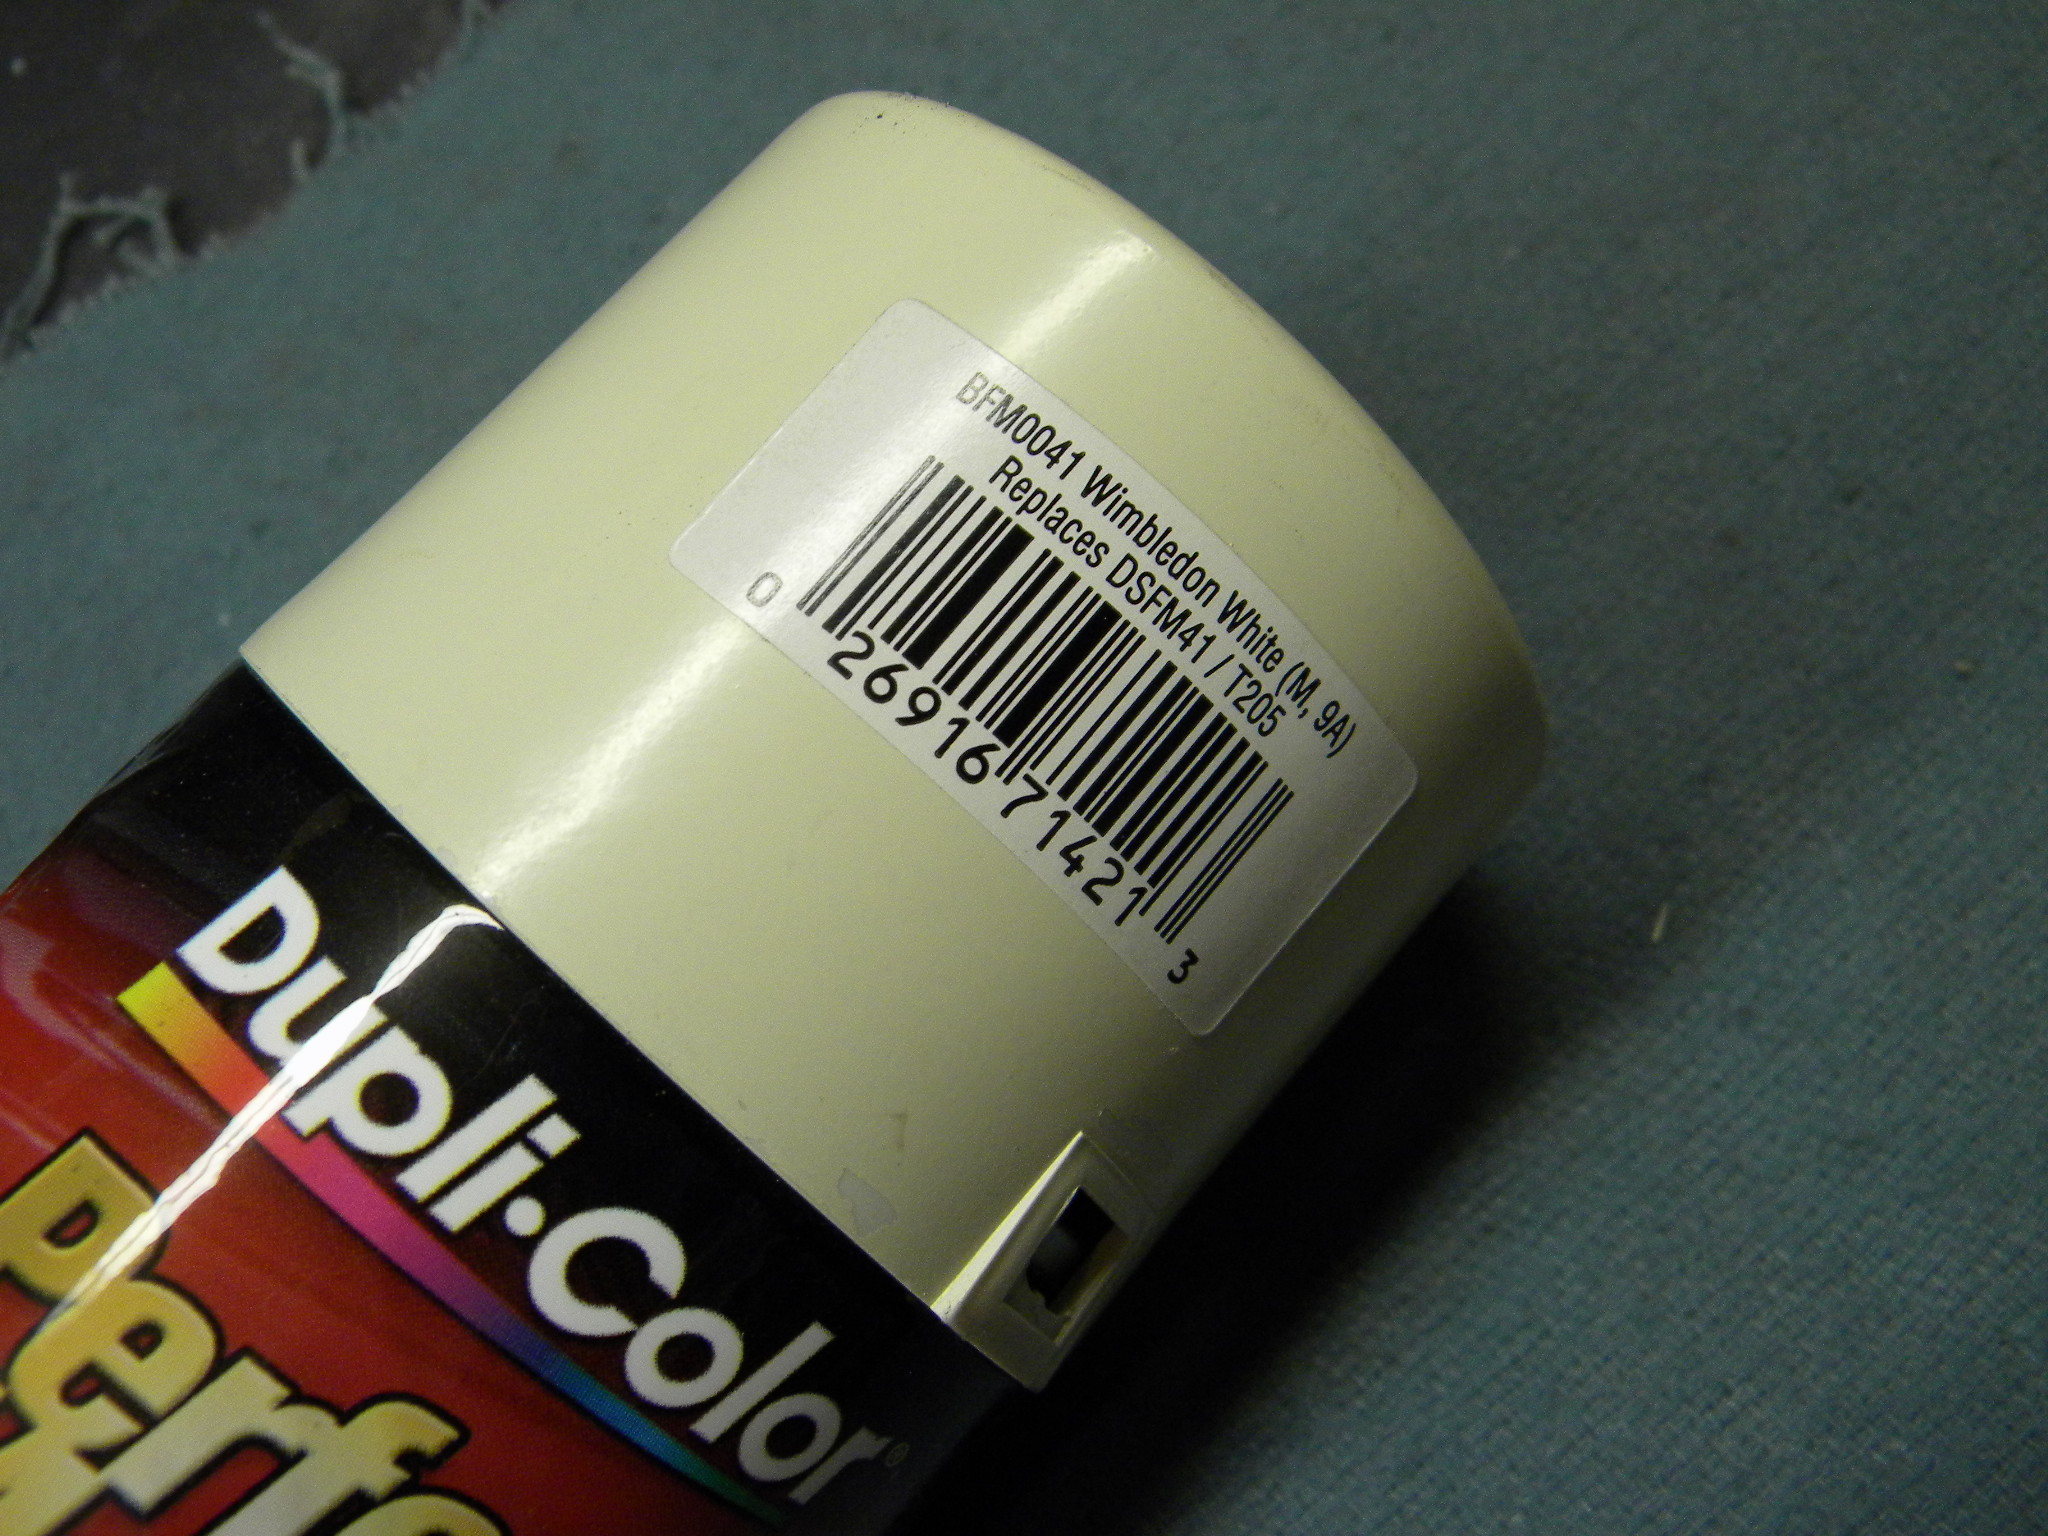
Wimbledon White for 1966 cobra stripes
StevenGuthmiller replied to jacko's topic in Model Building Questions and Answers
Believe it or not, Duplicolor still sells Wimbledon White in it's "Perfect Match" touch up paint line. Steve
-
I understand all that you guys are saying, and I respect it, but the whole thing of just appearing out of nowhere, proclaiming that something sucks, regardless of what it is, and then basically disappearing into the ether, just rubs me the wrong way. I'm not going to pretend it doesn't. I'm going to return now to my lousy old models. By the way, If there is anyone that has a lousy model from the same era that the AMT '57 Chevy tooling comes from, I would be more than happy to take it off of your hands. And while we're on the subject, Tamiya's kits are lousy, and so is their paint! Steve
-
Lord, how did we make it for 40 years when all there was were "lousy" kits before the "good" ones came along? Steve
-
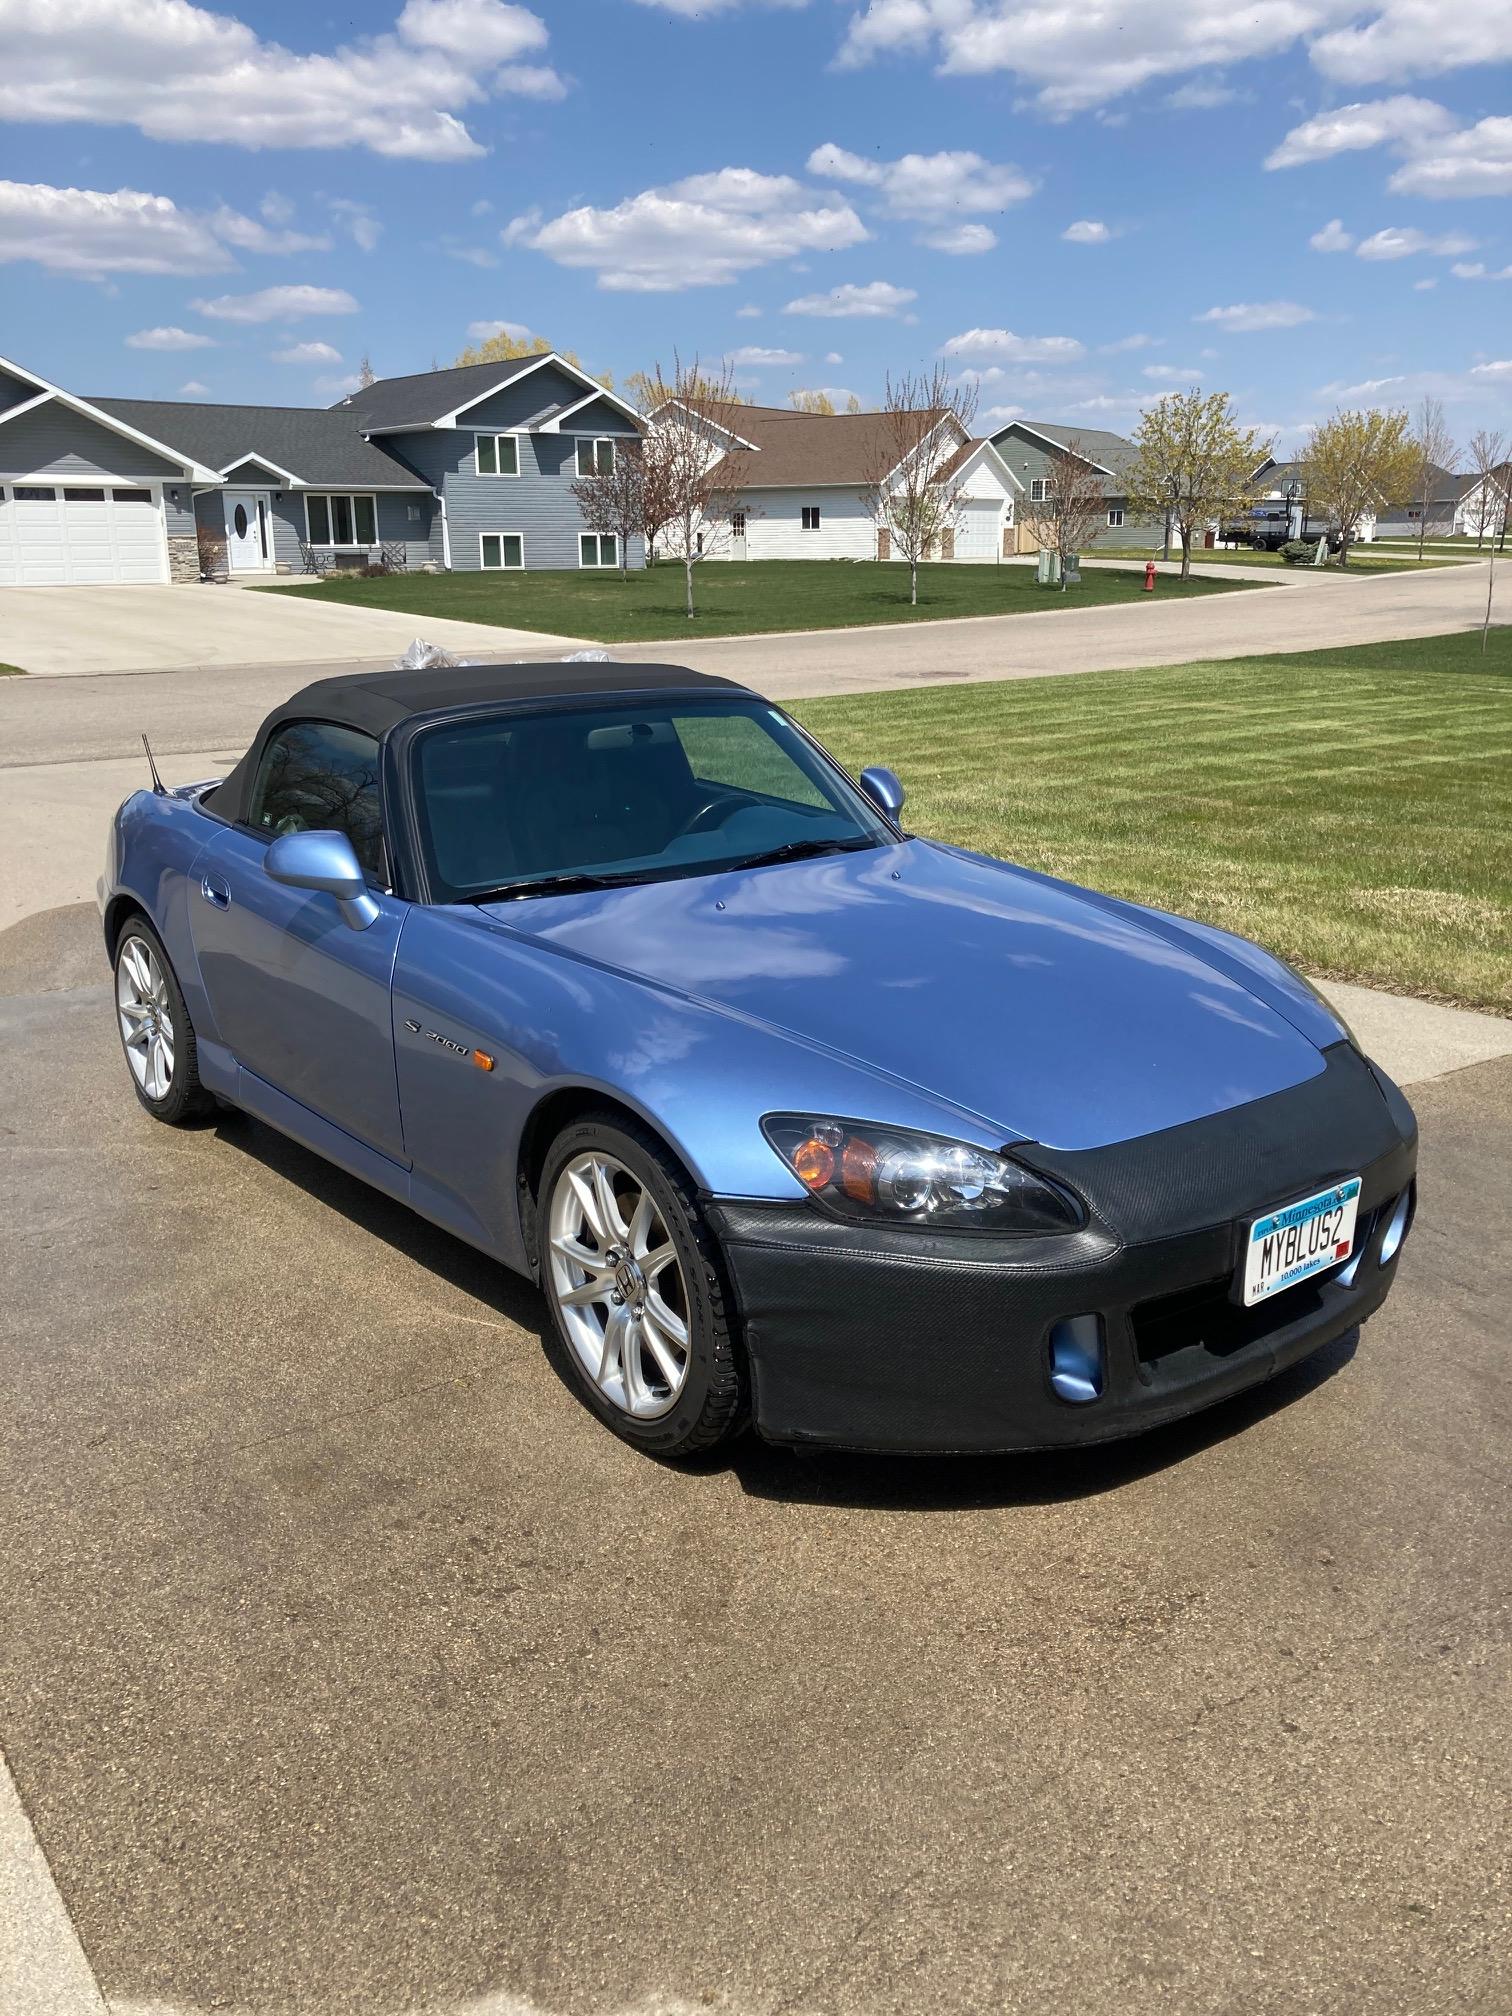
Thanks guys. It was purchased by my wife back in ‘05 as a “midlife crisis” cure. She gave me the option of her either having an affair, or buying the sports car. I picked the sports car! ? Steve
-
What it all boils down to from my perspective is that this OP had no intention of starting a relevant and civilized conversation about the pros and cons of this particular kit. It was obviously conceived as nothing more than an "I don't like it, end of discussion" thought. No interest, no inquiries, no curiosity about other peoples experiences with the kit, just "I hate it, and so should you". Personally, I think the discussion has become quite informational to anyone who's truly interested in the characteristics of this particular kit, but I don't think any of the impetus falls on the OP, other than the fact that the discussion started with his post. Steve
-
It's not that I take it personally. I don't. I've built this kit more than once over the years, but haven't built one in a long time. Granted, there are better kits available now, but there's nothing wrong with this one either. What bothers me is when people feel the need to make blanket statements like this about a perfectly viable kit because they don't want to put any effort into it themselves. It bothers me that there might be some other fledgling modelers out there that might see a post like this and automatically dismiss considering a particular kit because they think that the OP knows something. As you probably know, I have a real affinity for these old annual style kits, and it just irks me a little when people throw their noses in the air with these "holier than thou" criticisms, not really because these are kits that nobody should consider because there's anything seriously deficient about them, but because they think that every kit should be a puzzle that they should be able to just throw together in an afternoon and end up with a masterpiece. Often, the most worthwhile things in life are things that you have to work at a little. Steve
-
Delete.
-
Exactly!! Put at least as much effort into building it as complaining about it and you might surprise yourself. Steve
-
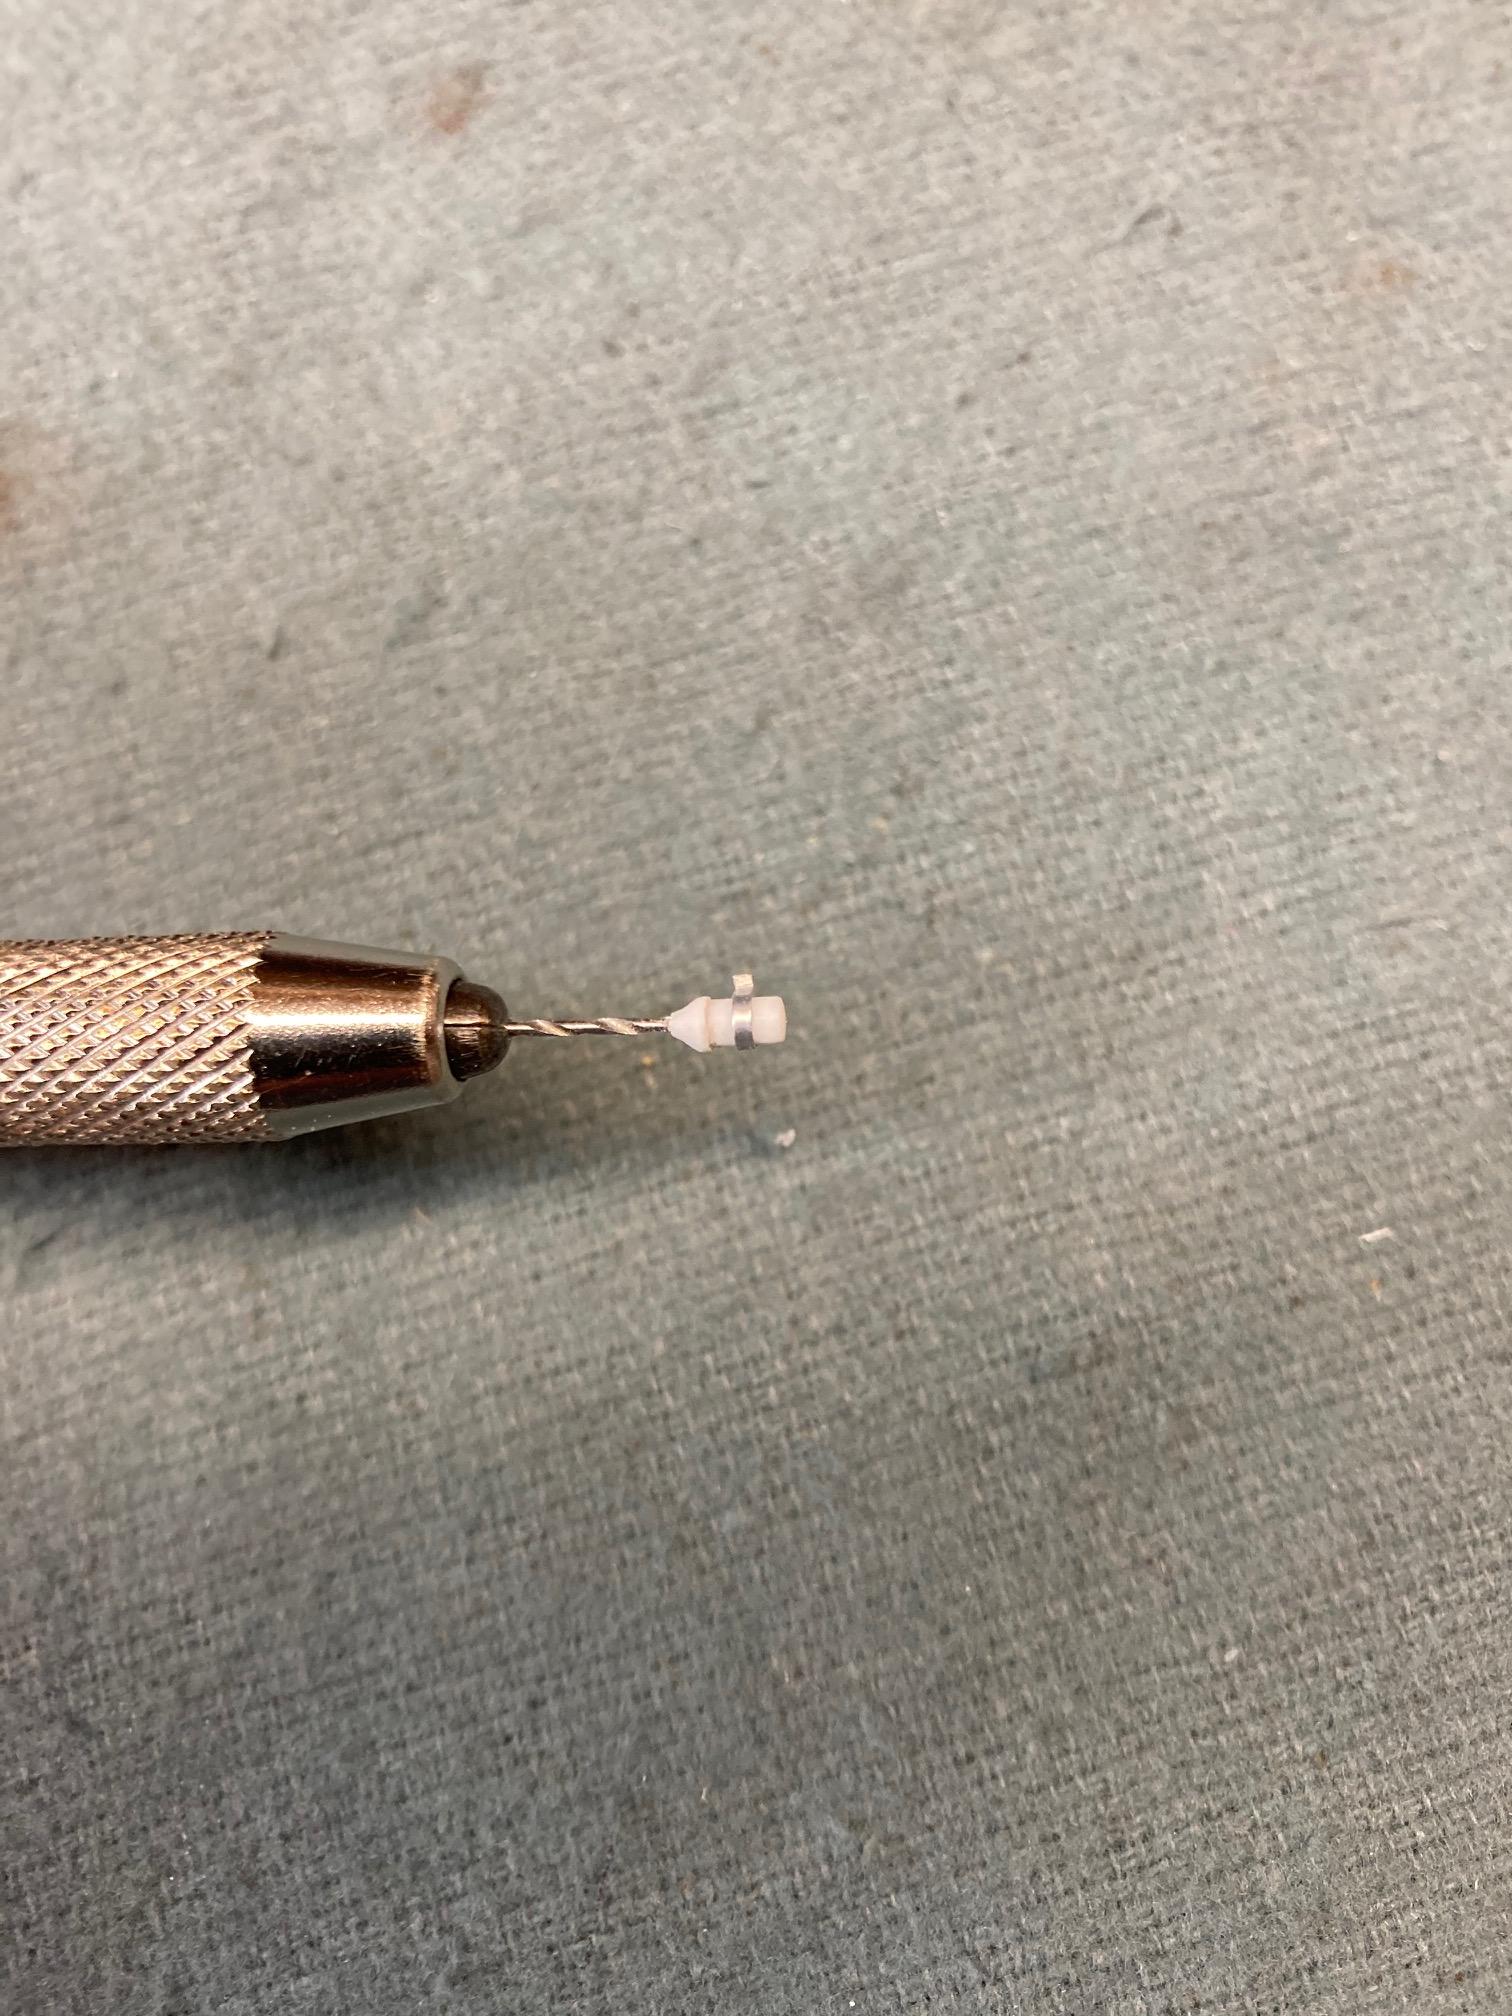
I don't use a visor. Just a lighted table magnifier. I decided that I didn't really like the kit provided coil, (I never really do like them) So I threw together my own. They're pretty easy to make, so why not. Steve
-
Getting the buggy all shined up and ready for the road pleased me today. Steve
-
Well, the OP's initial post wasn't particularly respectful in itself. Steve
-
So because someone doesn’t have the “desire or skill set”, that makes it a lousy kit? Hmmm, I guess by that logic, because someone doesn’t have the skill set or desire to restore a 1:1 ‘57 Chevy, that makes it a lousy car. It would probably have been more constructive for the OP to have either asked for help, or offer it to someone else rather than just proclaiming that it’s lousy. Steve
-
This was obvious to me when I had the engine overhauled in my 1:1 '69 Grand Prix. It probably took all of about five minutes running the engine to burn the paint off of the exhaust manifolds. Steve
-
Right? I hate to say it, but if it's too much of a task to fill in a simple square hole, well............I'll just leave it at that. I agree. If it's too much for you to handle, pitch it. Steve
-
Fine Detailing
StevenGuthmiller replied to bluestringer's topic in Model Building Questions and Answers
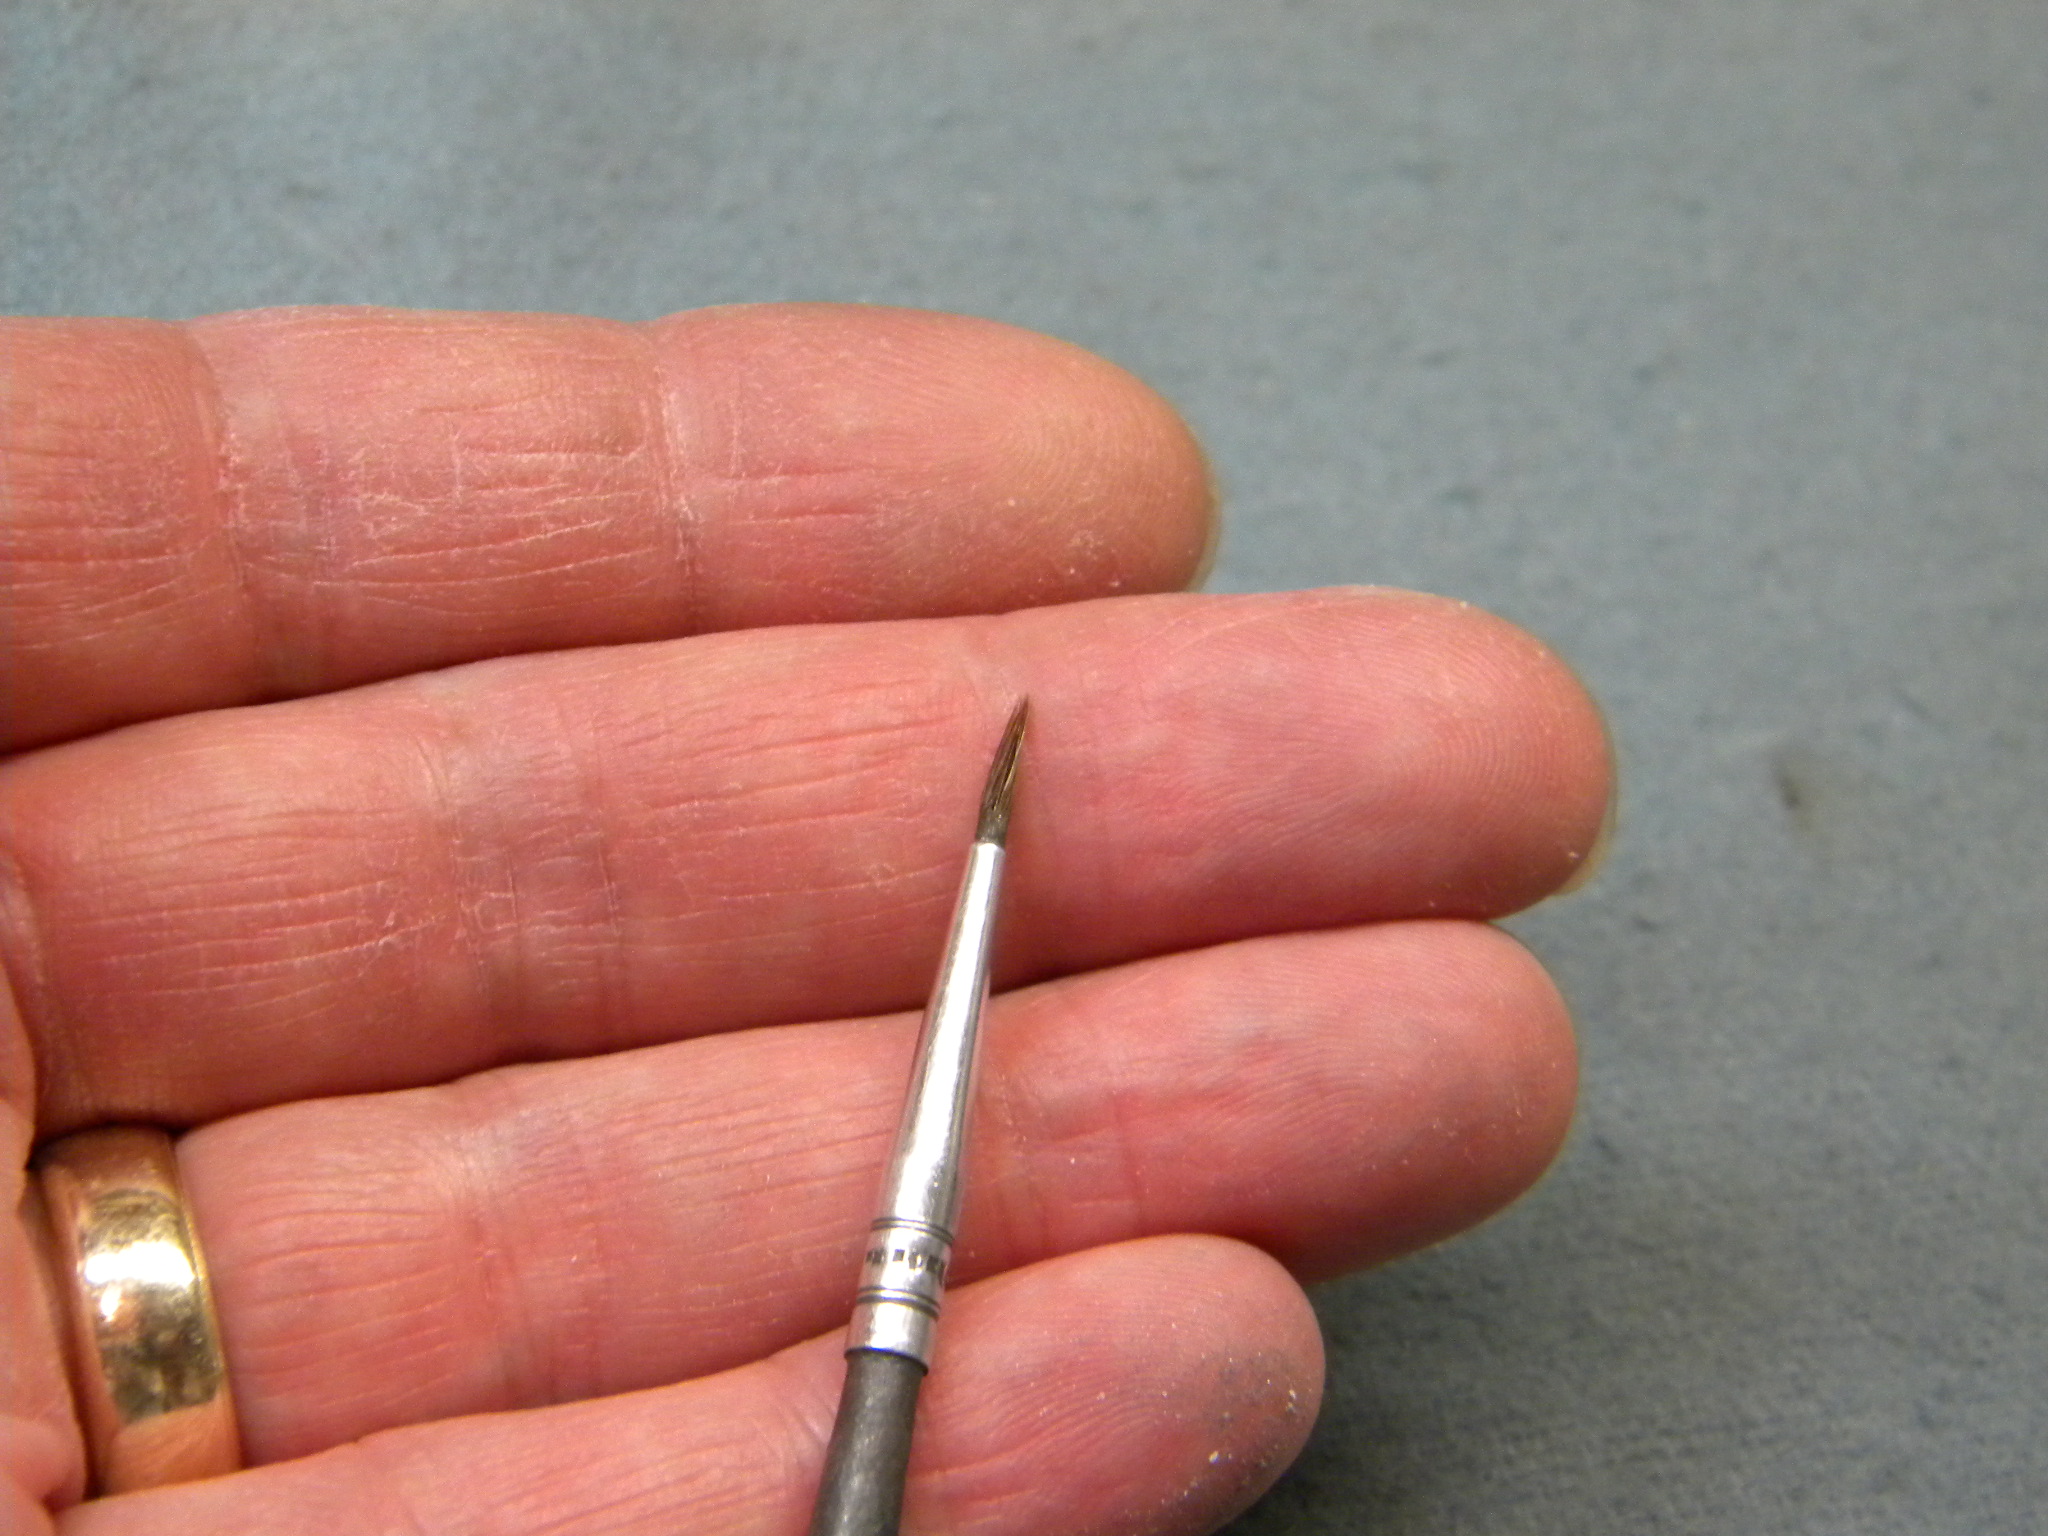
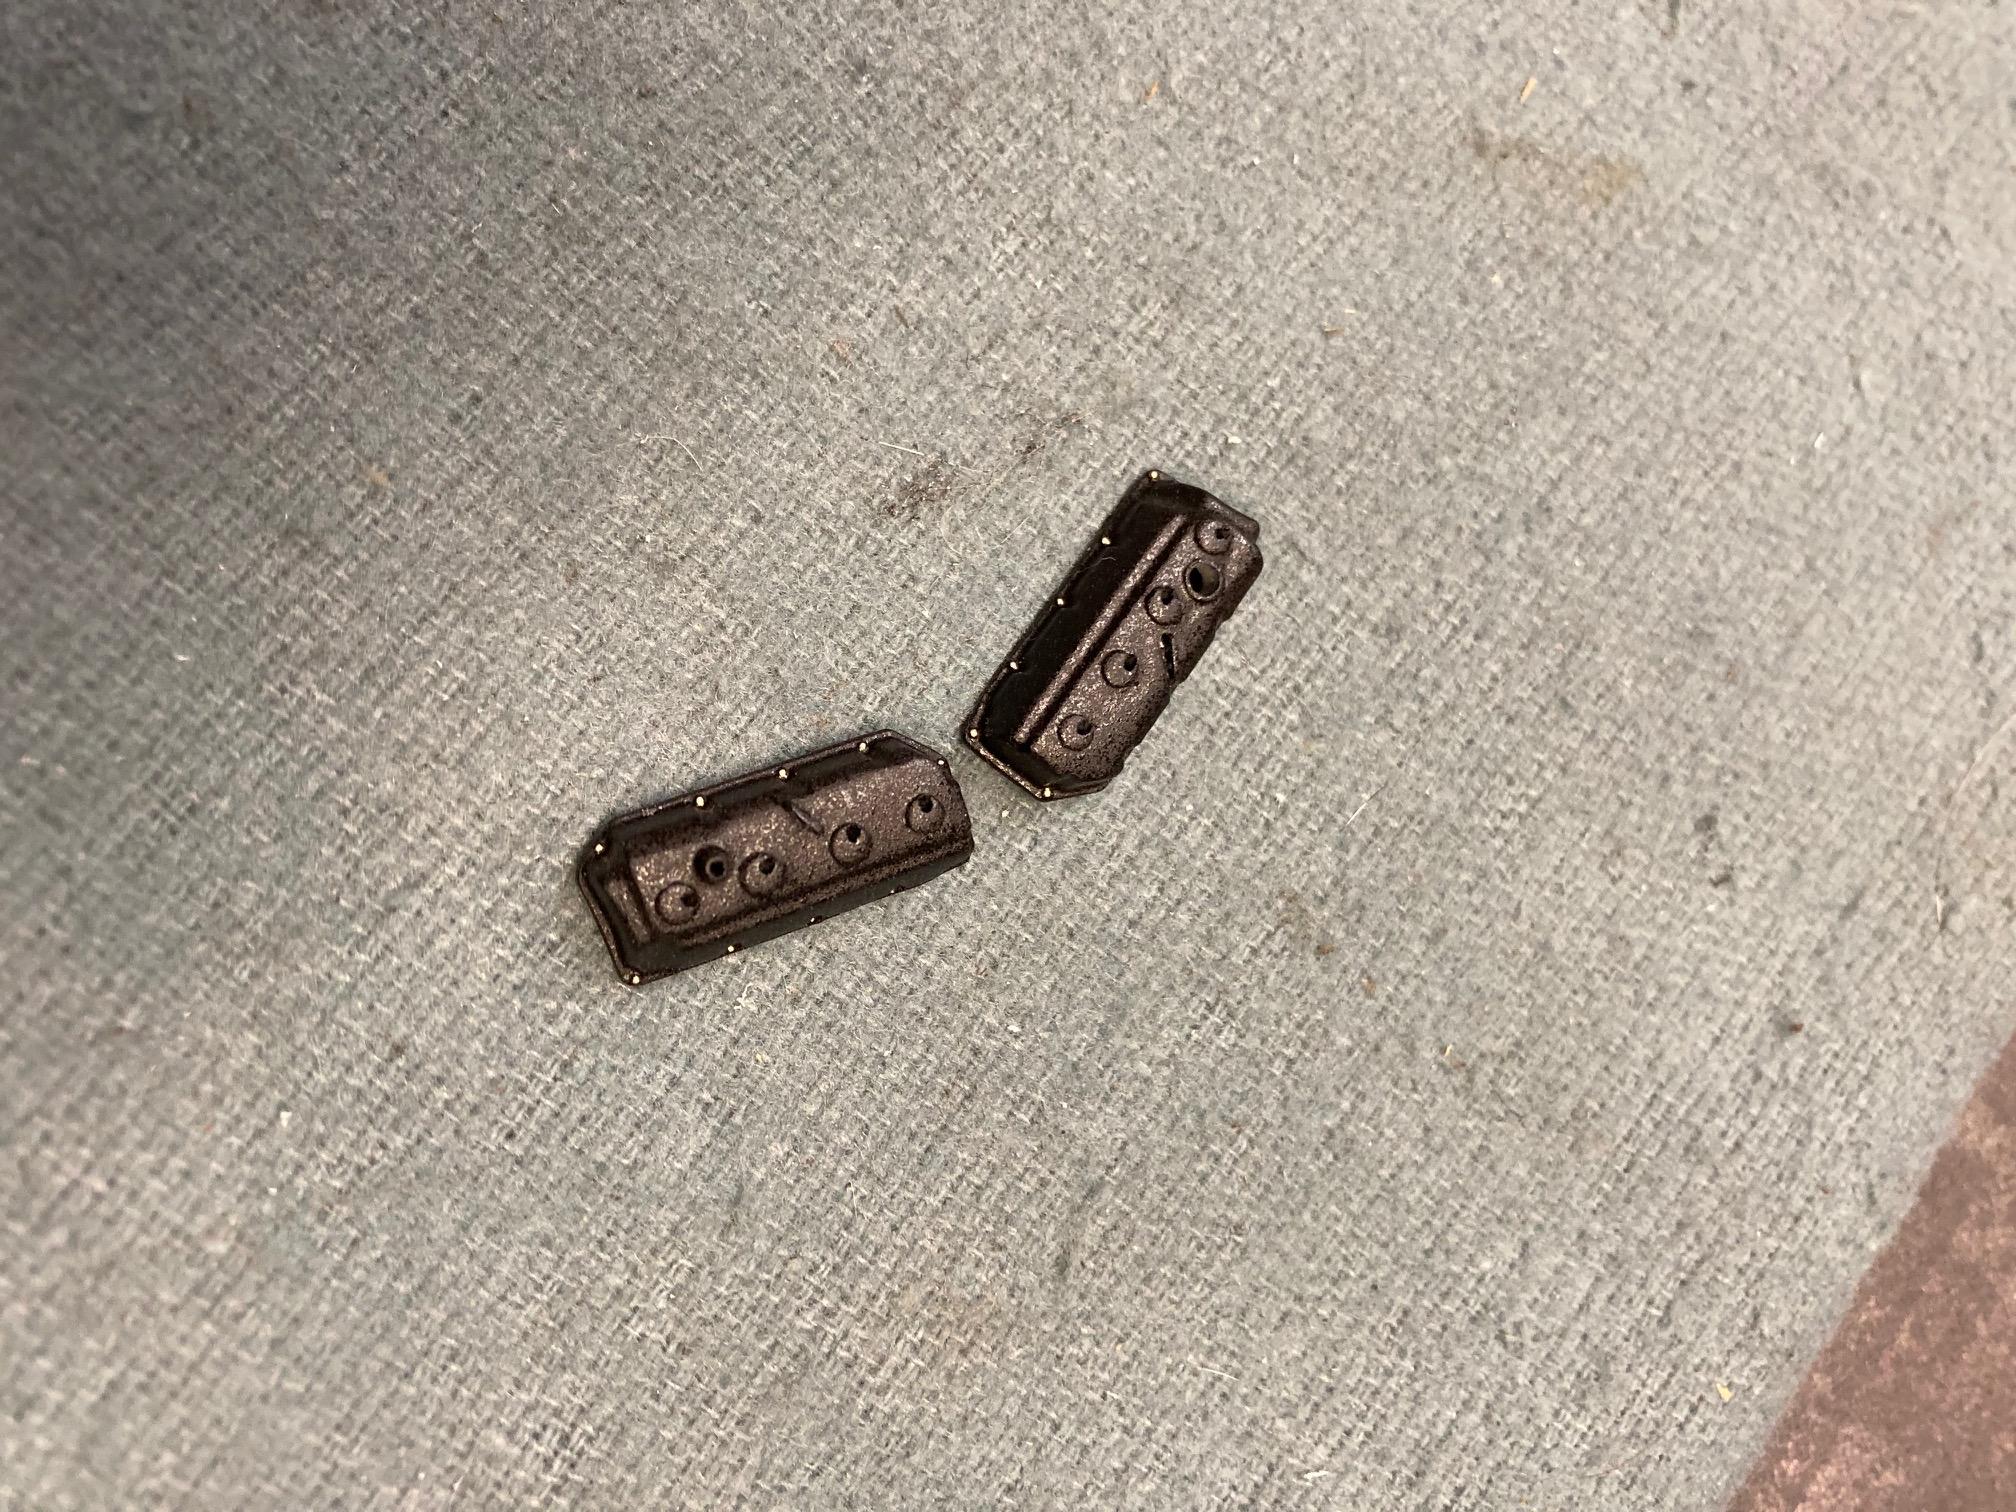
I know that you'll all think I'm nuts and it might not be of much help to the OP, but I use a relatively fat brush for my finest detailing. I was never able to get the hang of one of those tiny "single hair" brushes, or even a tooth pick for that matter. It works better for me to use something that holds a decent quantity of paint. I load the brush with a pretty good amount of paint and then "wick off" a good portion of the paint with a rolling motion on a paper towel before applying it. This concentrates what paint remains in the very tip and assures that the paint will flow, but only as much as allowed, determined by how much you wick off. It's a little hard to explain, but I can usually tackle even the smallest details in this fashion. I almost never use Sharpies or other markers because I generally like to clear coat over much of my finest detailing to protect it from rubbing off during any handling or final assembly. Sharpies will bleed all over the place if you try to clear over them. This is the smallest painting tool that I use. I don't have a lot of examples of small detailing available to view at the moment, but these Hemi valve cover bolt heads were done with the above brush. Steve
-
You’re never “too old” for this hobby James. Just look around the forum and you’ll see that there are a ton of old coots just like yourself! ? Steve
-
I believe so, but running the engine for a very short period of time burned the paint off of the exhaust manifolds very quickly. Steve
-
Thanks guys. Already stripped a chrome fan from the leftover parts from my '65 Fury kit. I'll get it cleaned up an painted and the issue will be resolved. Steve
-
Thanks guys! I figure that I might as well do it now while I still can. The steady hands and good eyes won’t last forever. ? Steve
-
Got most of the carb linkage and return spring detail done this afternoon. Steve
-
Those are going to be a little tougher to identify! Steve