StevenGuthmiller
-
Posts
15,071 -
Joined
-
Last visited
Content Type
Profiles
Forums
Events
Gallery
Everything posted by StevenGuthmiller
-

alternative to 'The Treatment' model-wax
StevenGuthmiller replied to fiatboy's topic in Model Building Questions and Answers
The "Treatment" is just carnauba wax. Any automotive wax with carnauba will do basically the same thing. Steve -
"Modelhaus Tires" makes exact replicas of the old Satco whitewalls. #428 Here is an example of a model with the Modelhaus tires. Steve

-
Micro Pin Vice Bits.
StevenGuthmiller replied to StevenGuthmiller's topic in Model Building Questions and Answers
I need the smallest bits possible. I have plenty of the larger bits, and my vices will accommodate the smallest bits. A set with bits small enough for a single strand of wire for fuel lines, and smaller. Steve -
Who can recommend a good set of the smallest pin vice bits? I have a couple of sets, but one doesn't go as small as I need, and the other's smallest bits are about as useful as drilling a hole with a sewing needle! Steve
-
Door gaps painting
StevenGuthmiller replied to youpey's topic in Model Building Questions and Answers
Well, if it works for you, go for it. Steve -
Door gaps painting
StevenGuthmiller replied to youpey's topic in Model Building Questions and Answers
I suppose that you could do it then if you prefer, but then the type of paint you use would have to be considered. I use automotive clear lacquer on my projects. Spraying acrylic lacquer over acrylic craft paint would probably not be advisable. I do the panel lines as one of the final steps before assembly. Steve -
Door gaps painting
StevenGuthmiller replied to youpey's topic in Model Building Questions and Answers
In this case, a dark brown wash of acrylic craft paint was flowed into the panel lines and then cleaned up around the edges. That is another recommendation that I can offer. If you do use a wash at the end, it's a good practice to not just wipe the surface clean, but to try to clean at least a little way down into the panel line to expose the door and fender edges a little bit. Not always easy to do depending on the depth of the line, but it will help make the line appear "less heavy". Steve -
Door gaps painting
StevenGuthmiller replied to youpey's topic in Model Building Questions and Answers
This question pops up quite frequently. There are a number of ways to tackle the issue. I have tried darkening the panel lines before paint as mentioned above, but have had no luck with this technique, probably due to the fact that I use multiple coats of automotive type lacquers which can be very opaque and will cover up the color in the panel lines very quickly. Deepening the panel lines by scribing is a technique that I will try in the near future, but it will remain to be seen whether it will produce the desired affect with the paint regimen that I use. For quite some time, I have been darkening the panel lines at the final stages of the build with acrylic craft paint with fairly good results. Not the optimum solution I suppose, but it works pretty well in most instances. I agree to an extent that black looks too stark on a lighter colored car, but I believe this has much more to do with the width of the panel line, and less to do with using black to do them. You frequently will hear the argument that black looks out of place, but if you look at the panel lines on the average 1:1 car, you will see nothing but black in the recesses, but the lines are very thin making them look as you would expect. In any event, I usually will use a darker shade of the body color to mitigate the starkness of the panel lines. But again, all panel lines are black. It's just that most models have too wide of a gap between panels for black to look correct. Steve
-
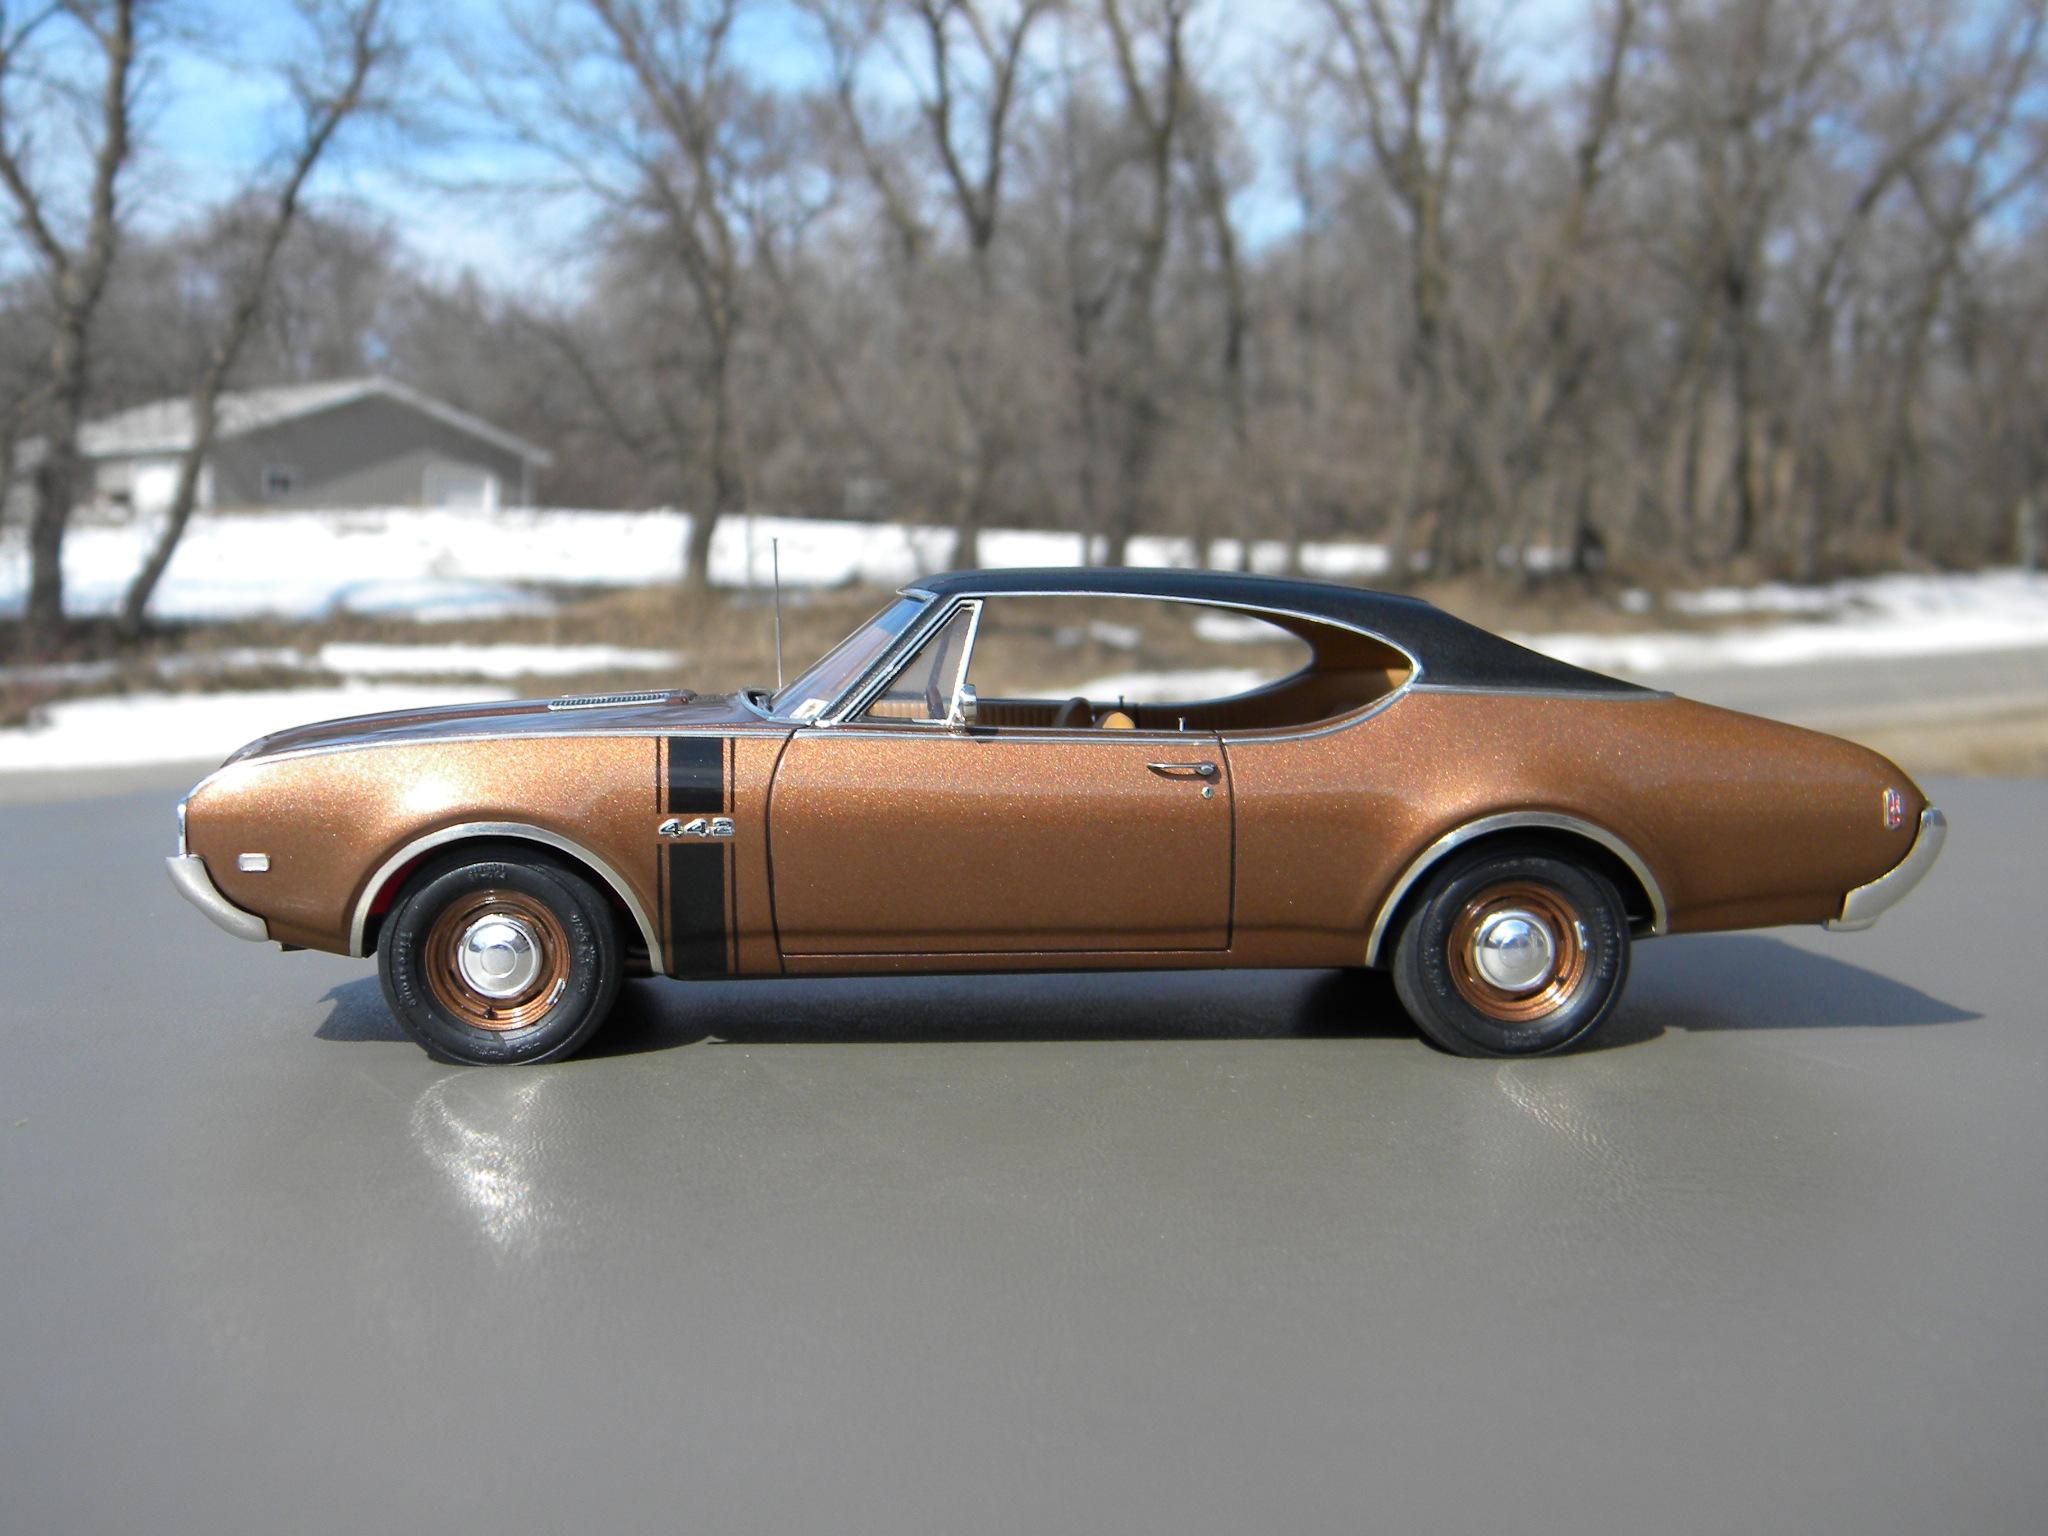
I see that you are just as surprised as I was to find out that my '65 Fury was on the cover as well as inside, along with my '68 Olds as part of the "dscV-16" contest coverage. Think of it this way. No prizes or remuneration, but you get to see one of your models in print, along with everyone else that buys the magazine. What could be cooler than that! Better pick up a copy! Steve
-
What Say You?
StevenGuthmiller replied to TarheelRick's topic in General Automotive Talk (Trucks and Cars)
Looks pretty typical for s good number of automotive customizers that think they have some great flair for automotive design. more often than not, it winds up just looking stupid. Steve -
I have to offer my congratulations to forum member Gareth Muldoon, (doorsovdoon) for his full page spread in the "forum finds" section of MCM issue #208 of his 1971 Thunderbird! Great work Gareth, and a hearty congratulations!!! Steve
-
That’s exactly how I do it. just trim as close to the script as possible. Steve
-
restorations
StevenGuthmiller replied to thomascoffey1959@gmail.com's topic in General Automotive Talk (Trucks and Cars)
I’ll bet it’s considerably more than half. ? Steve -
Just have to be sure to wash the model well before any additional paint work or decals are applied. Steve
-
I use WD-40. Steve
-
*Painting Small Badges On Car Body*
StevenGuthmiller replied to Zippi's topic in Model Building Questions and Answers
Very true. Steve -
Or use a conical swab dampened with a little bit of lacquer thinner to clean up the remainder on the fender script. Just use a lighted magnifier and a light touch and you’ll be golden. Steve
-
*Painting Small Badges On Car Body*
StevenGuthmiller replied to Zippi's topic in Model Building Questions and Answers
I would be surprised if PE scripts were not available for the ‘67 Chevelle as well. Steve -
I've only done it once to date and it just involved shaving a little off of the bottom of the tire. This technique is called "flat spotting" and is frequently used in aviation modeling. I imagine that it will not work well on a hollow tire, but it's relatively simple on a solid tire. As far as getting a realistic looking bulge, your guess is as good as mine. Steve
-
*Painting Small Badges On Car Body*
StevenGuthmiller replied to Zippi's topic in Model Building Questions and Answers
This subject has been discussed on the forum many times. If you are not aware, there is a technique that is referred to as "Foil Under Paint". Basically, it's an operation involving covering the script with foil, painting over it, and then using either a solvent or sand paper to remove the paint from the script. It produces very satisfactory and realistic results. There is really no tip for painting the scripts other than dry brushing, replacing with decals or PE, or just having an extremely steady hand. Examples of Foil Under Paint on some very fine scripts. Steve
-
Issue 208 is here!!
StevenGuthmiller replied to Danno's topic in Model Cars Magazine News and Discussions
Oddly enough, the copy that I ordered on ebay that arrived today came from Burbank's House of Hobbies. Steve -
Issue 208 is here!!
StevenGuthmiller replied to Danno's topic in Model Cars Magazine News and Discussions
I don't have subscriptions so I ordered MCM #208 and a copy of the May 2021 FSM on ebay. I ordered them both on Wednesday of last week and just checked the tracking on both this afternoon. The MCM #208 is "out for delivery" today. 3 days is pretty good, especially coming from California! The FSM mag should be here the middle of next week. Steve -
You can buy PE examples of the door sill trim as well. Steve
-
Thanks Bill! That will be very helpful! There are always little details that are difficult to find photos of. I will absolutely take you up on that offer. Steve
-
Congrats Steve Guthmiller
StevenGuthmiller replied to Classicgas's topic in General Automotive Talk (Trucks and Cars)
Issue #208 is out now and is the issue that has my '65 Plymouth on the cover. I'm assuming issue #209 will be the one with my Olds in it. Steve