StevenGuthmiller
-
Posts
14,971 -
Joined
-
Last visited
Content Type
Profiles
Forums
Events
Gallery
Everything posted by StevenGuthmiller
-

Rust-oleum paint
StevenGuthmiller replied to TracerB's topic in Model Building Questions and Answers
Sure. I understand the idea of being short on time. But if the OP was legitimate in his curiosity about any useful answers to the question that he asked, my guess would be that he has probably been able to find 2 minutes to commit to checking the forum for those answers at some point within the past 2 weeks, at which point, it would have taken a maximum of 3 seconds to type 6 letters......"Thanks". Maybe I'm weird. but when I ask a question, I'm usually curious enough to stick around, at least for a little while, or take 30 seconds occasionally to check back, to see if I have gotten any answers to what I apparently had the time to ask in the first place. I'm not hung up on getting any response personally either. I could care less about that. But it would be nice if we had any indication whatsoever if the OP was receiving any of the information that he was seeking, or not. And it would be nice if he would at least acknowledge the fact that others may be taking valuable time out of their day to answer him. I would never even consider asking someone in my own family, or complete stranger, a question of any kind without offering a small symbol of my appreciation after getting the answer. Just....... thank you! In the age of smart phones and tablets, not having a minute to show your appreciation for the feedback that you requested is a pretty lame excuse. It's more like disengagement and selfishness than it is anything else. Steve -
Rust-oleum paint
StevenGuthmiller replied to TracerB's topic in Model Building Questions and Answers
I'm not judging anybody for their post count. There are plenty of members here, some of whom build some of the best models that I've ever seen, that post very infrequently. Doesn't bother me in the least. I don't respond to every response that I get in a thread either, but I am respectful enough to at least let people know that I am reading their posts and absorbing their answers. A simple "thank you" at some point during the course of the thread, even if it's just once, let's people know that what they're offering to the OP is not falling on deaf ears. In my opinion, it's along the same lines as the guys who we've probably all dealt with at some point, who posts a request for a part in the wanted section, and then once he gets what he was looking for, not even a thank you. I know that is a little more extreme in most people's minds, but it's the same principal. Just a little common courtesy goes a long way. My feeling is that if you don't have the time to post a simple thank you, don't ask the question. Steve -
Rust-oleum paint
StevenGuthmiller replied to TracerB's topic in Model Building Questions and Answers
I guess we shouldn’t have expected much from the OP. A member since October of last year, and 4 whole posts! ? Steve -
Rust-oleum paint
StevenGuthmiller replied to TracerB's topic in Model Building Questions and Answers
Happens all the time on this forum. People ask a question and then disappear. The OP’s only post on this entire thread was the first one. You would think it might be to his advantage to interject and try to steer the discussion in the direction of the information that he’s looking for, but apparently he’s not that interested. Steve -
Clear coat then foil. There’s really no advantage to clearing over the foil. Steve
-
Rust-oleum paint
StevenGuthmiller replied to TracerB's topic in Model Building Questions and Answers
My father once did that with a 1953 Chevy. Except he did it old school. He used a brush! Steve -
Almost all of these old AMT annuals had convertible interior tubs. About the only ones that weren’t were cars that were not offered as convertibles Steve
-
Morgan Automotive Detail?
StevenGuthmiller replied to Sidney Schwartz's topic in Model Building Questions and Answers
Whoa!! That makes too much sense!! Steve -
Sources for clear 1/25 headlight lenses?
StevenGuthmiller replied to Monty's topic in Model Building Questions and Answers
I used a 2 part, 5 minute epoxy to make lenses for this ‘62 around 8 years ago. No real sign of any yellowing yet. Not to say that it won’t happen, but it obviously doesn’t happen quickly by any stretch. I use JB Weld “Clear Weld” as a rule, but there’s a possibility that these might have been done with “Laser Bond” UV setting glue. I don’t remember which. Steve
-
Rust-oleum paint
StevenGuthmiller replied to TracerB's topic in Model Building Questions and Answers
I’m of the impression that Rustoleum spray cans were apparently designed for “one shot” use. Spray your lawn chair, and then throw the can out. ? Steve -
Sure, but the problem started with the original color coat. Spray paint over a booger, and you’ve got a painted booger. ? Steve
-
Looks pretty good to me. If it were mine, it would get a couple more coats of clear, and then polished. Steve
-
Morgan Automotive Detail?
StevenGuthmiller replied to Sidney Schwartz's topic in Model Building Questions and Answers
Well, there’s an easy remedy. If you don’t approve of the way that someone does business, take your business elsewhere. The tried and true concept of capitalism. I avoid Walmart at all cost. Nothing political. I just don’t like the way that they do business. Done! Steve -
Rust-oleum paint
StevenGuthmiller replied to TracerB's topic in Model Building Questions and Answers
Yes, I know how to clean a spray can nozzle. They plug up on me in spite of it. Steve -
Rust-oleum paint
StevenGuthmiller replied to TracerB's topic in Model Building Questions and Answers
It’s easier just not to use them. Steve -
Monogram ‘59 Caddy
StevenGuthmiller replied to NOBLNG's topic in Model Building Questions and Answers
The 4 banger in my Honda S-2000 has 40 more horses.? Steve -
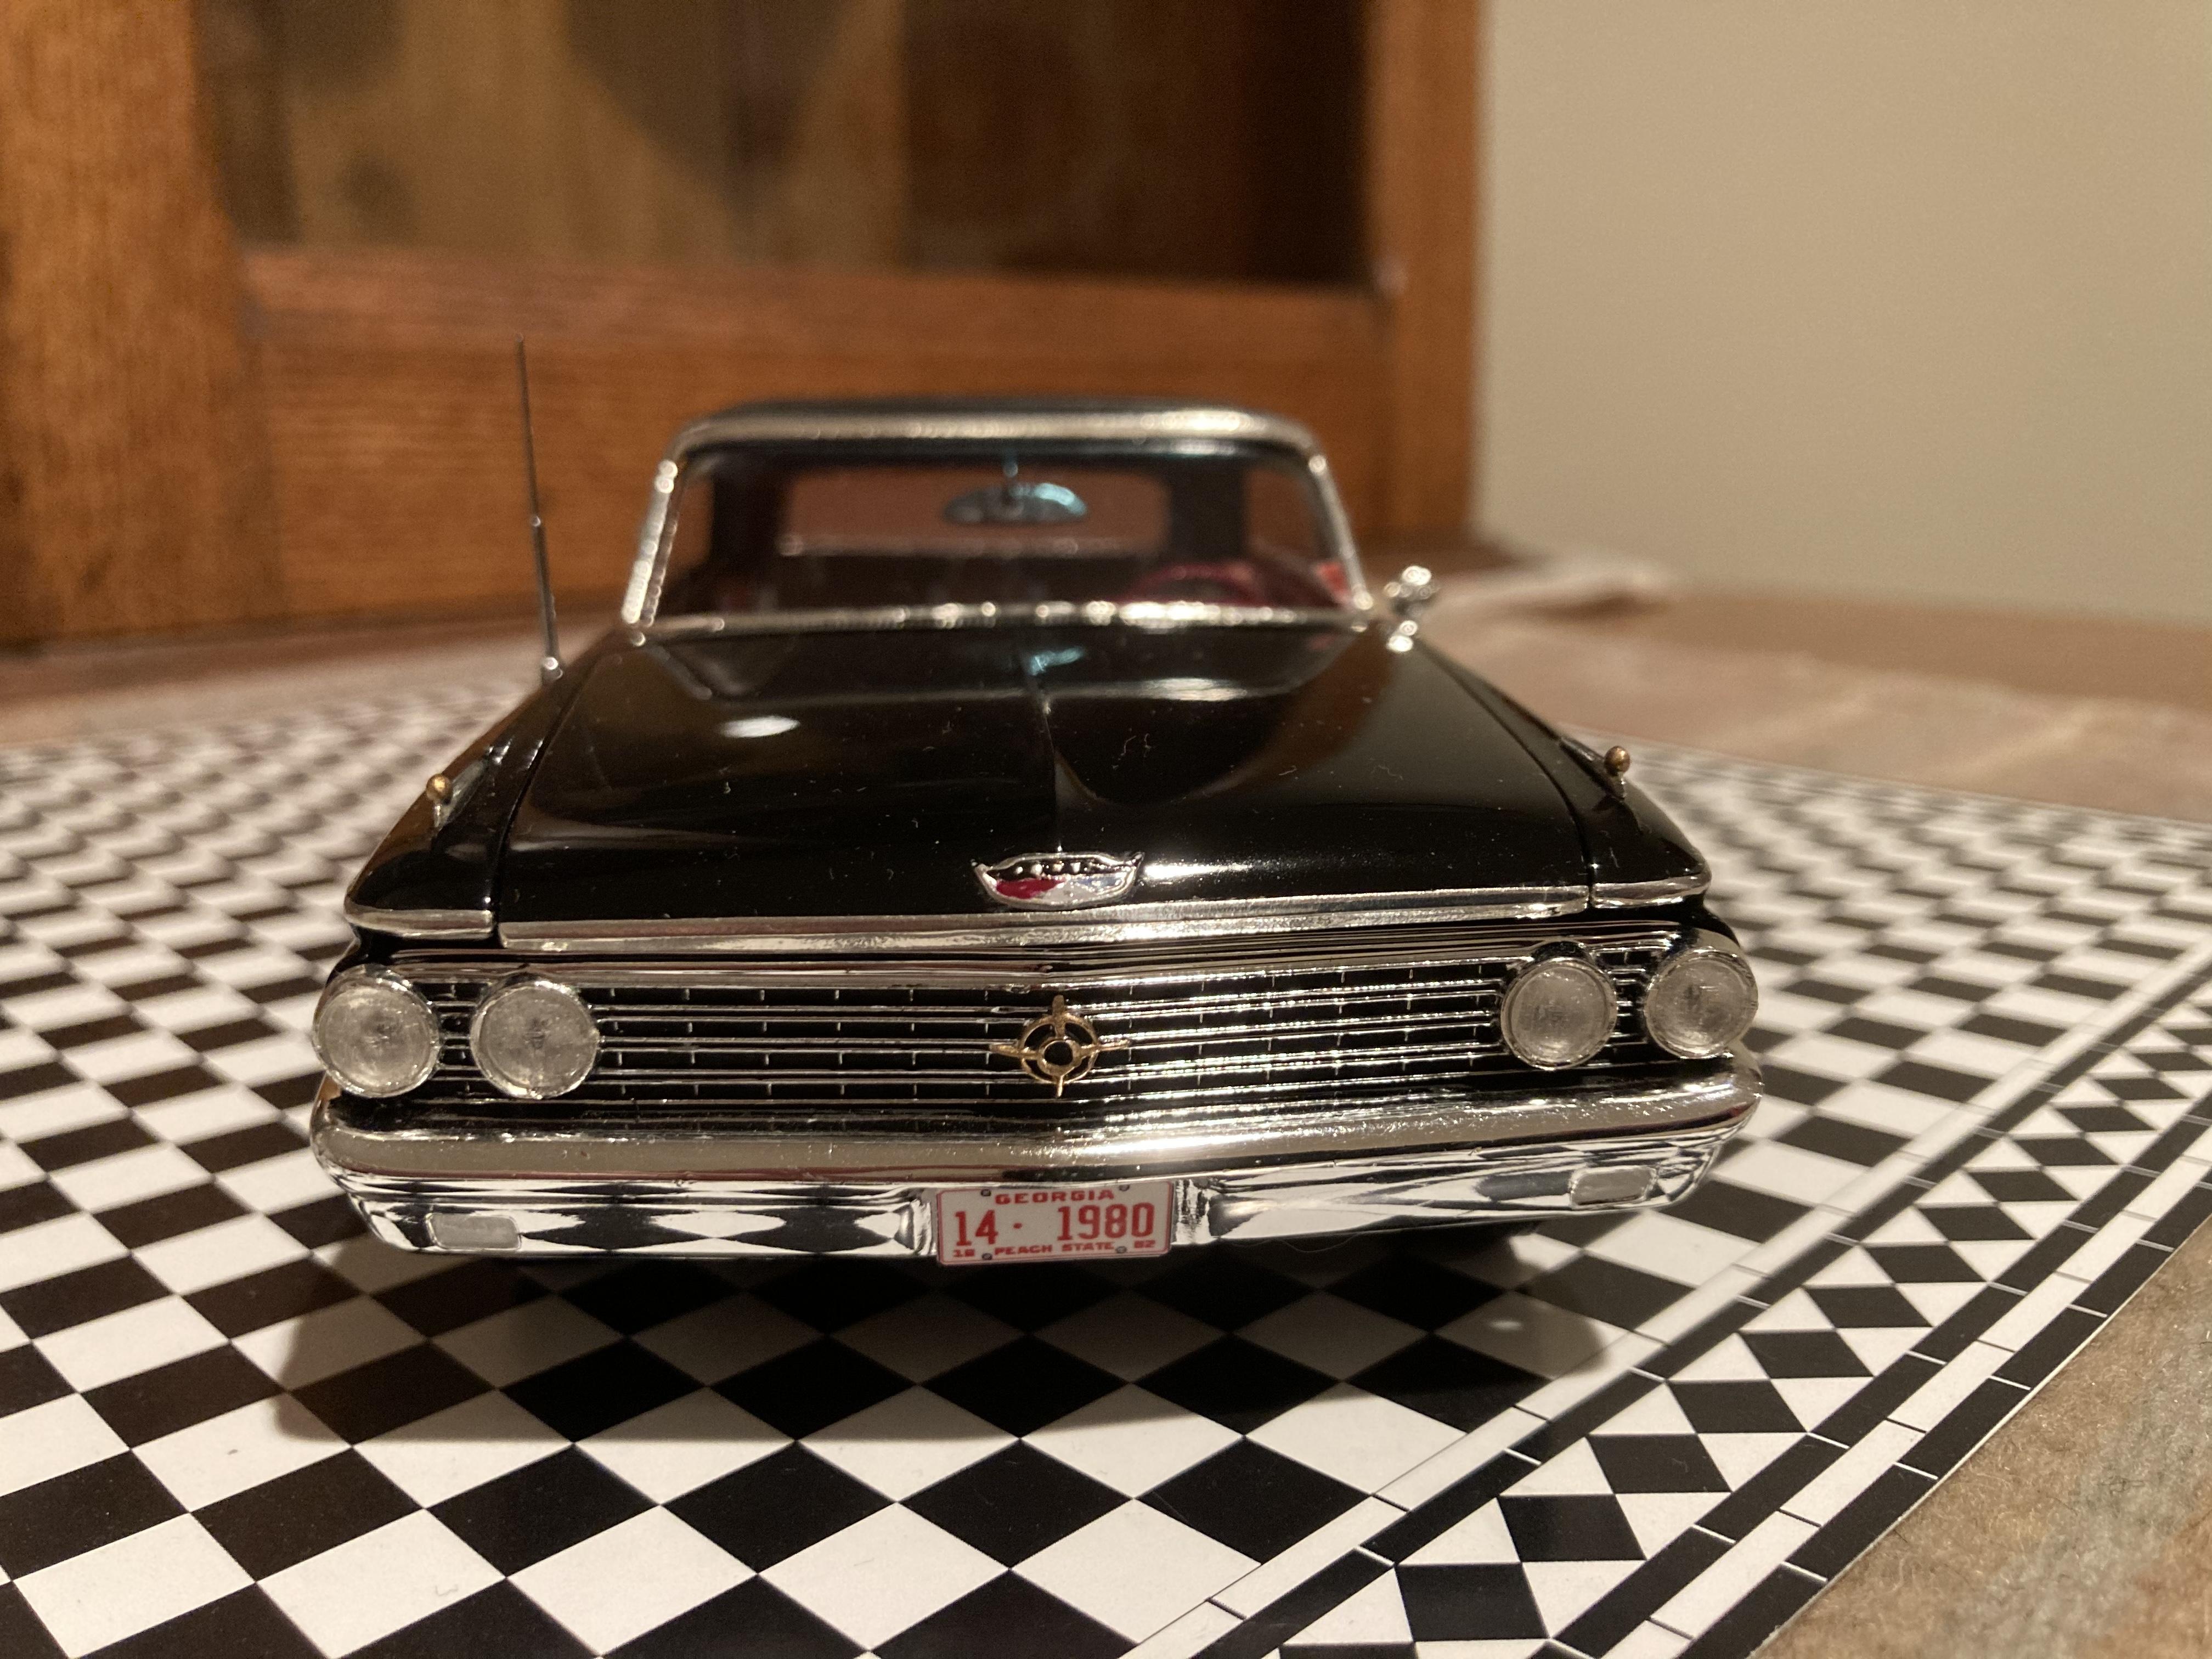
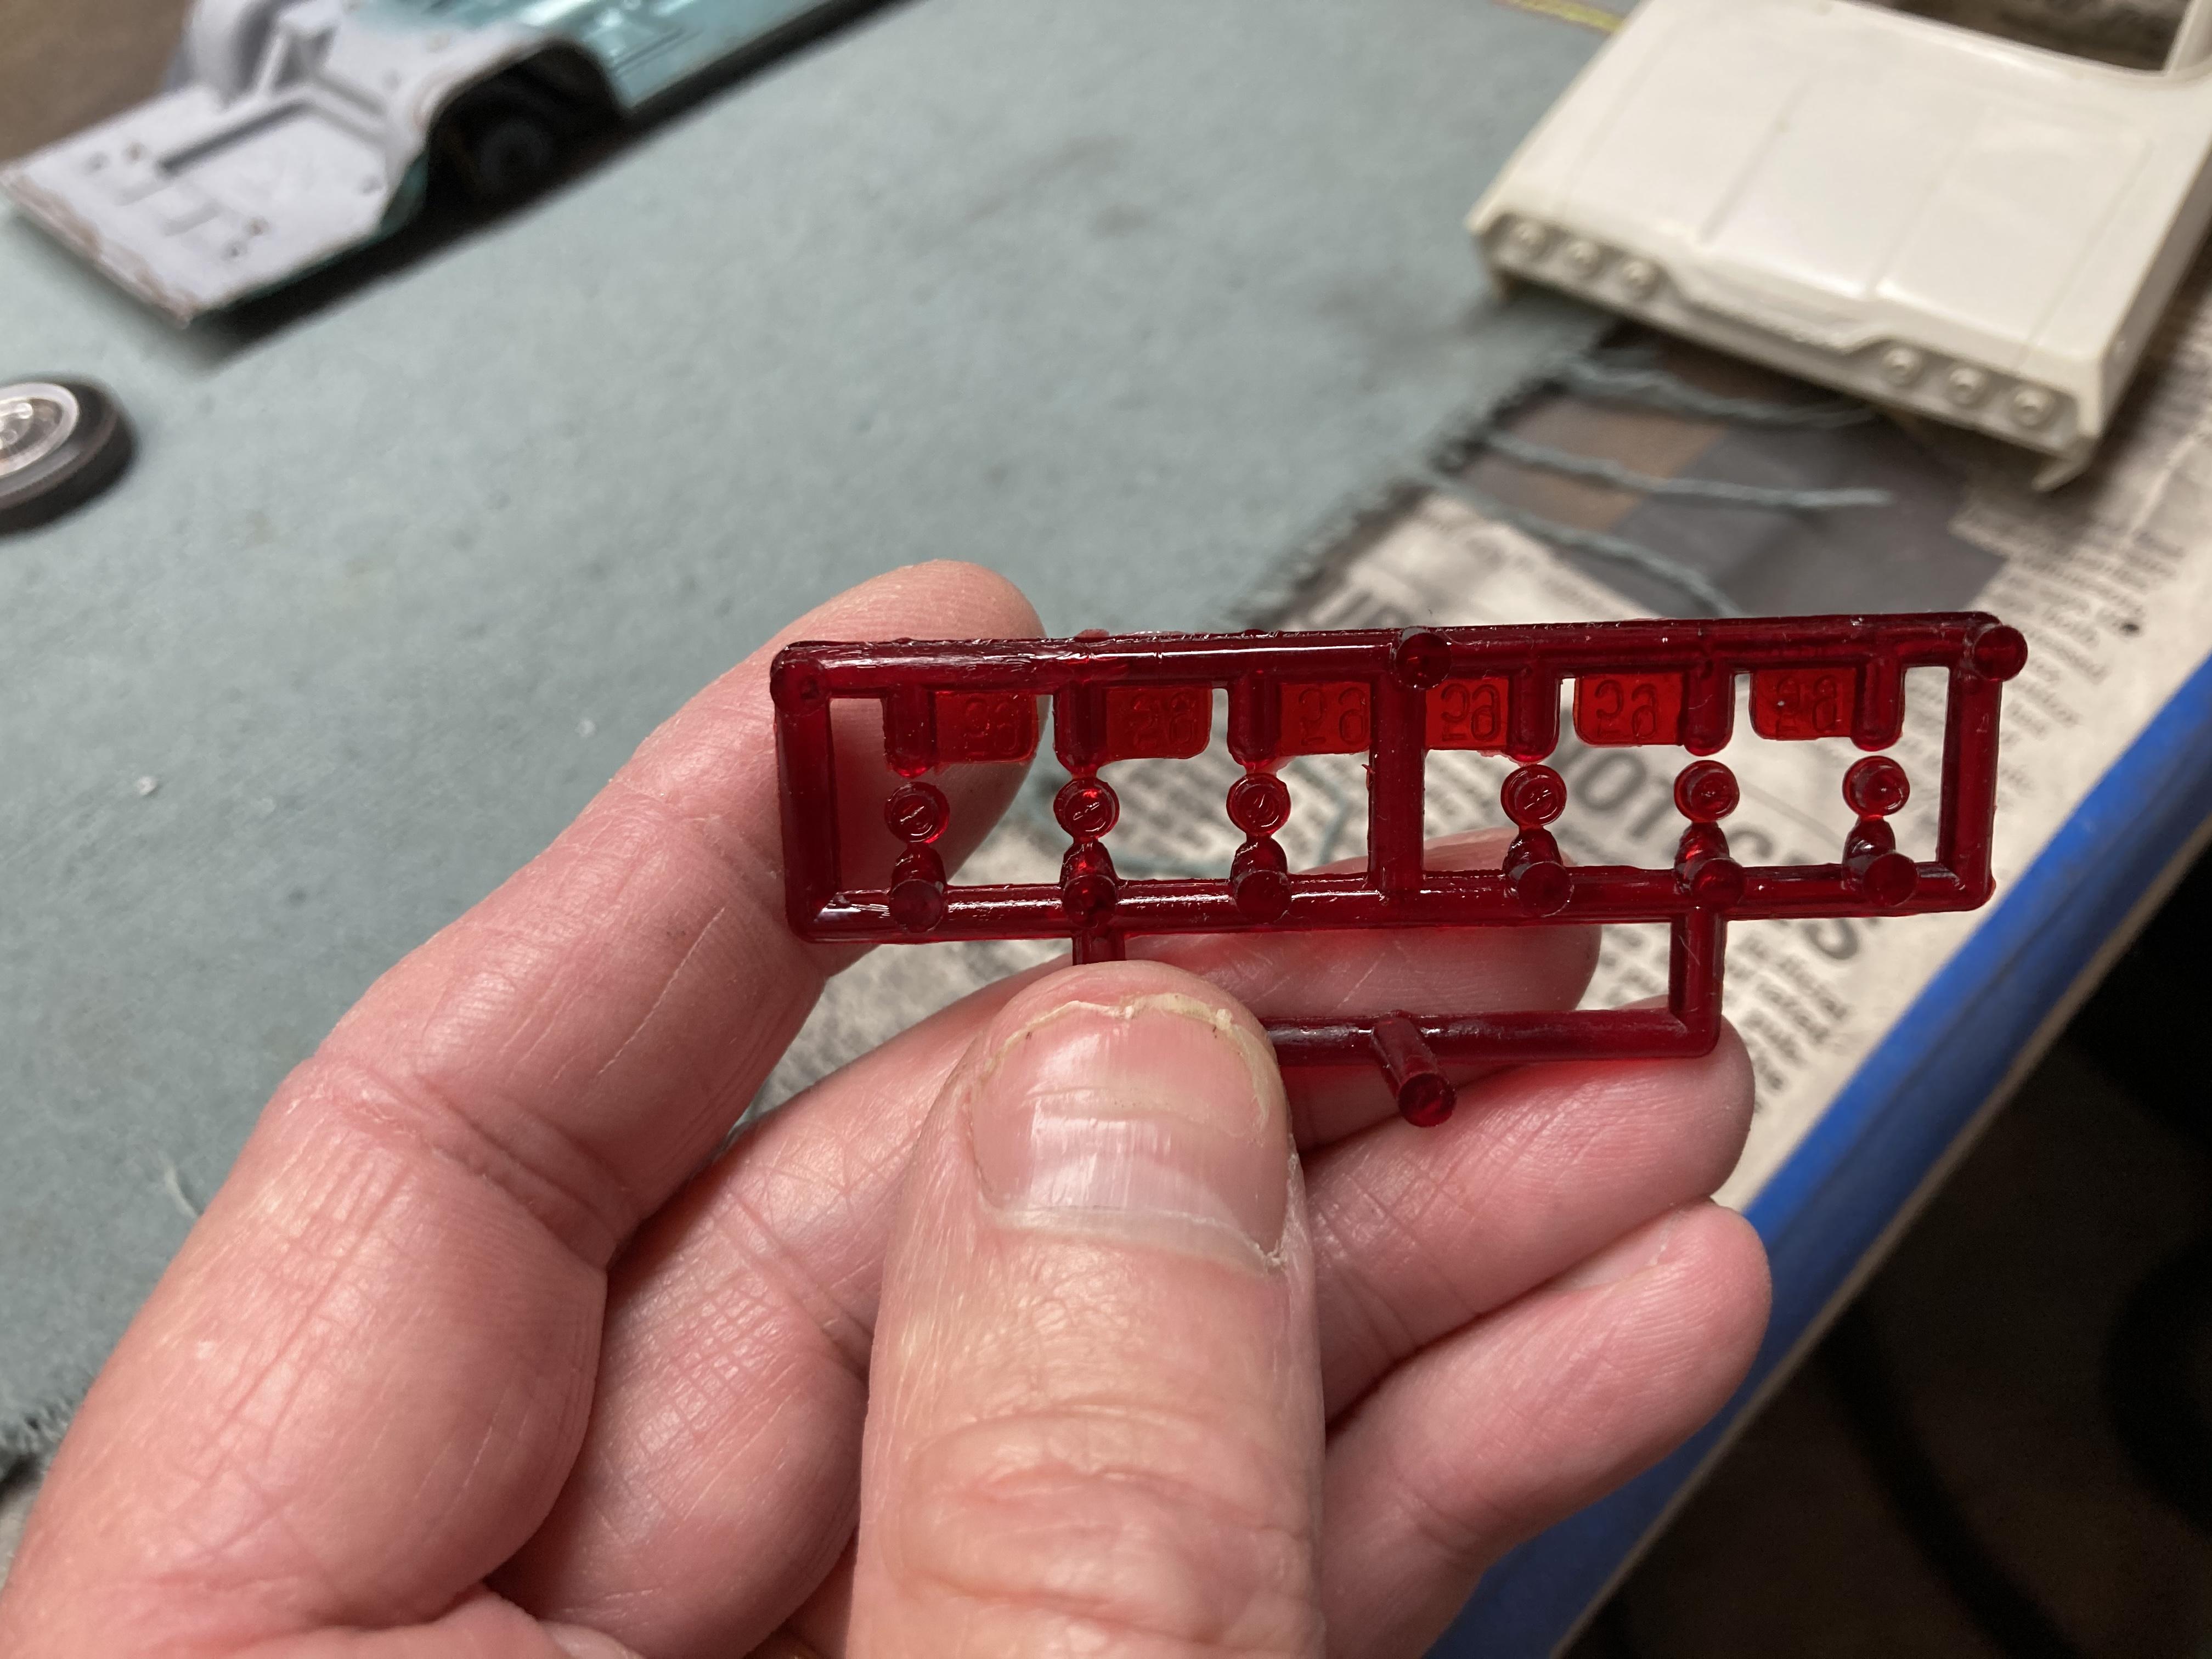
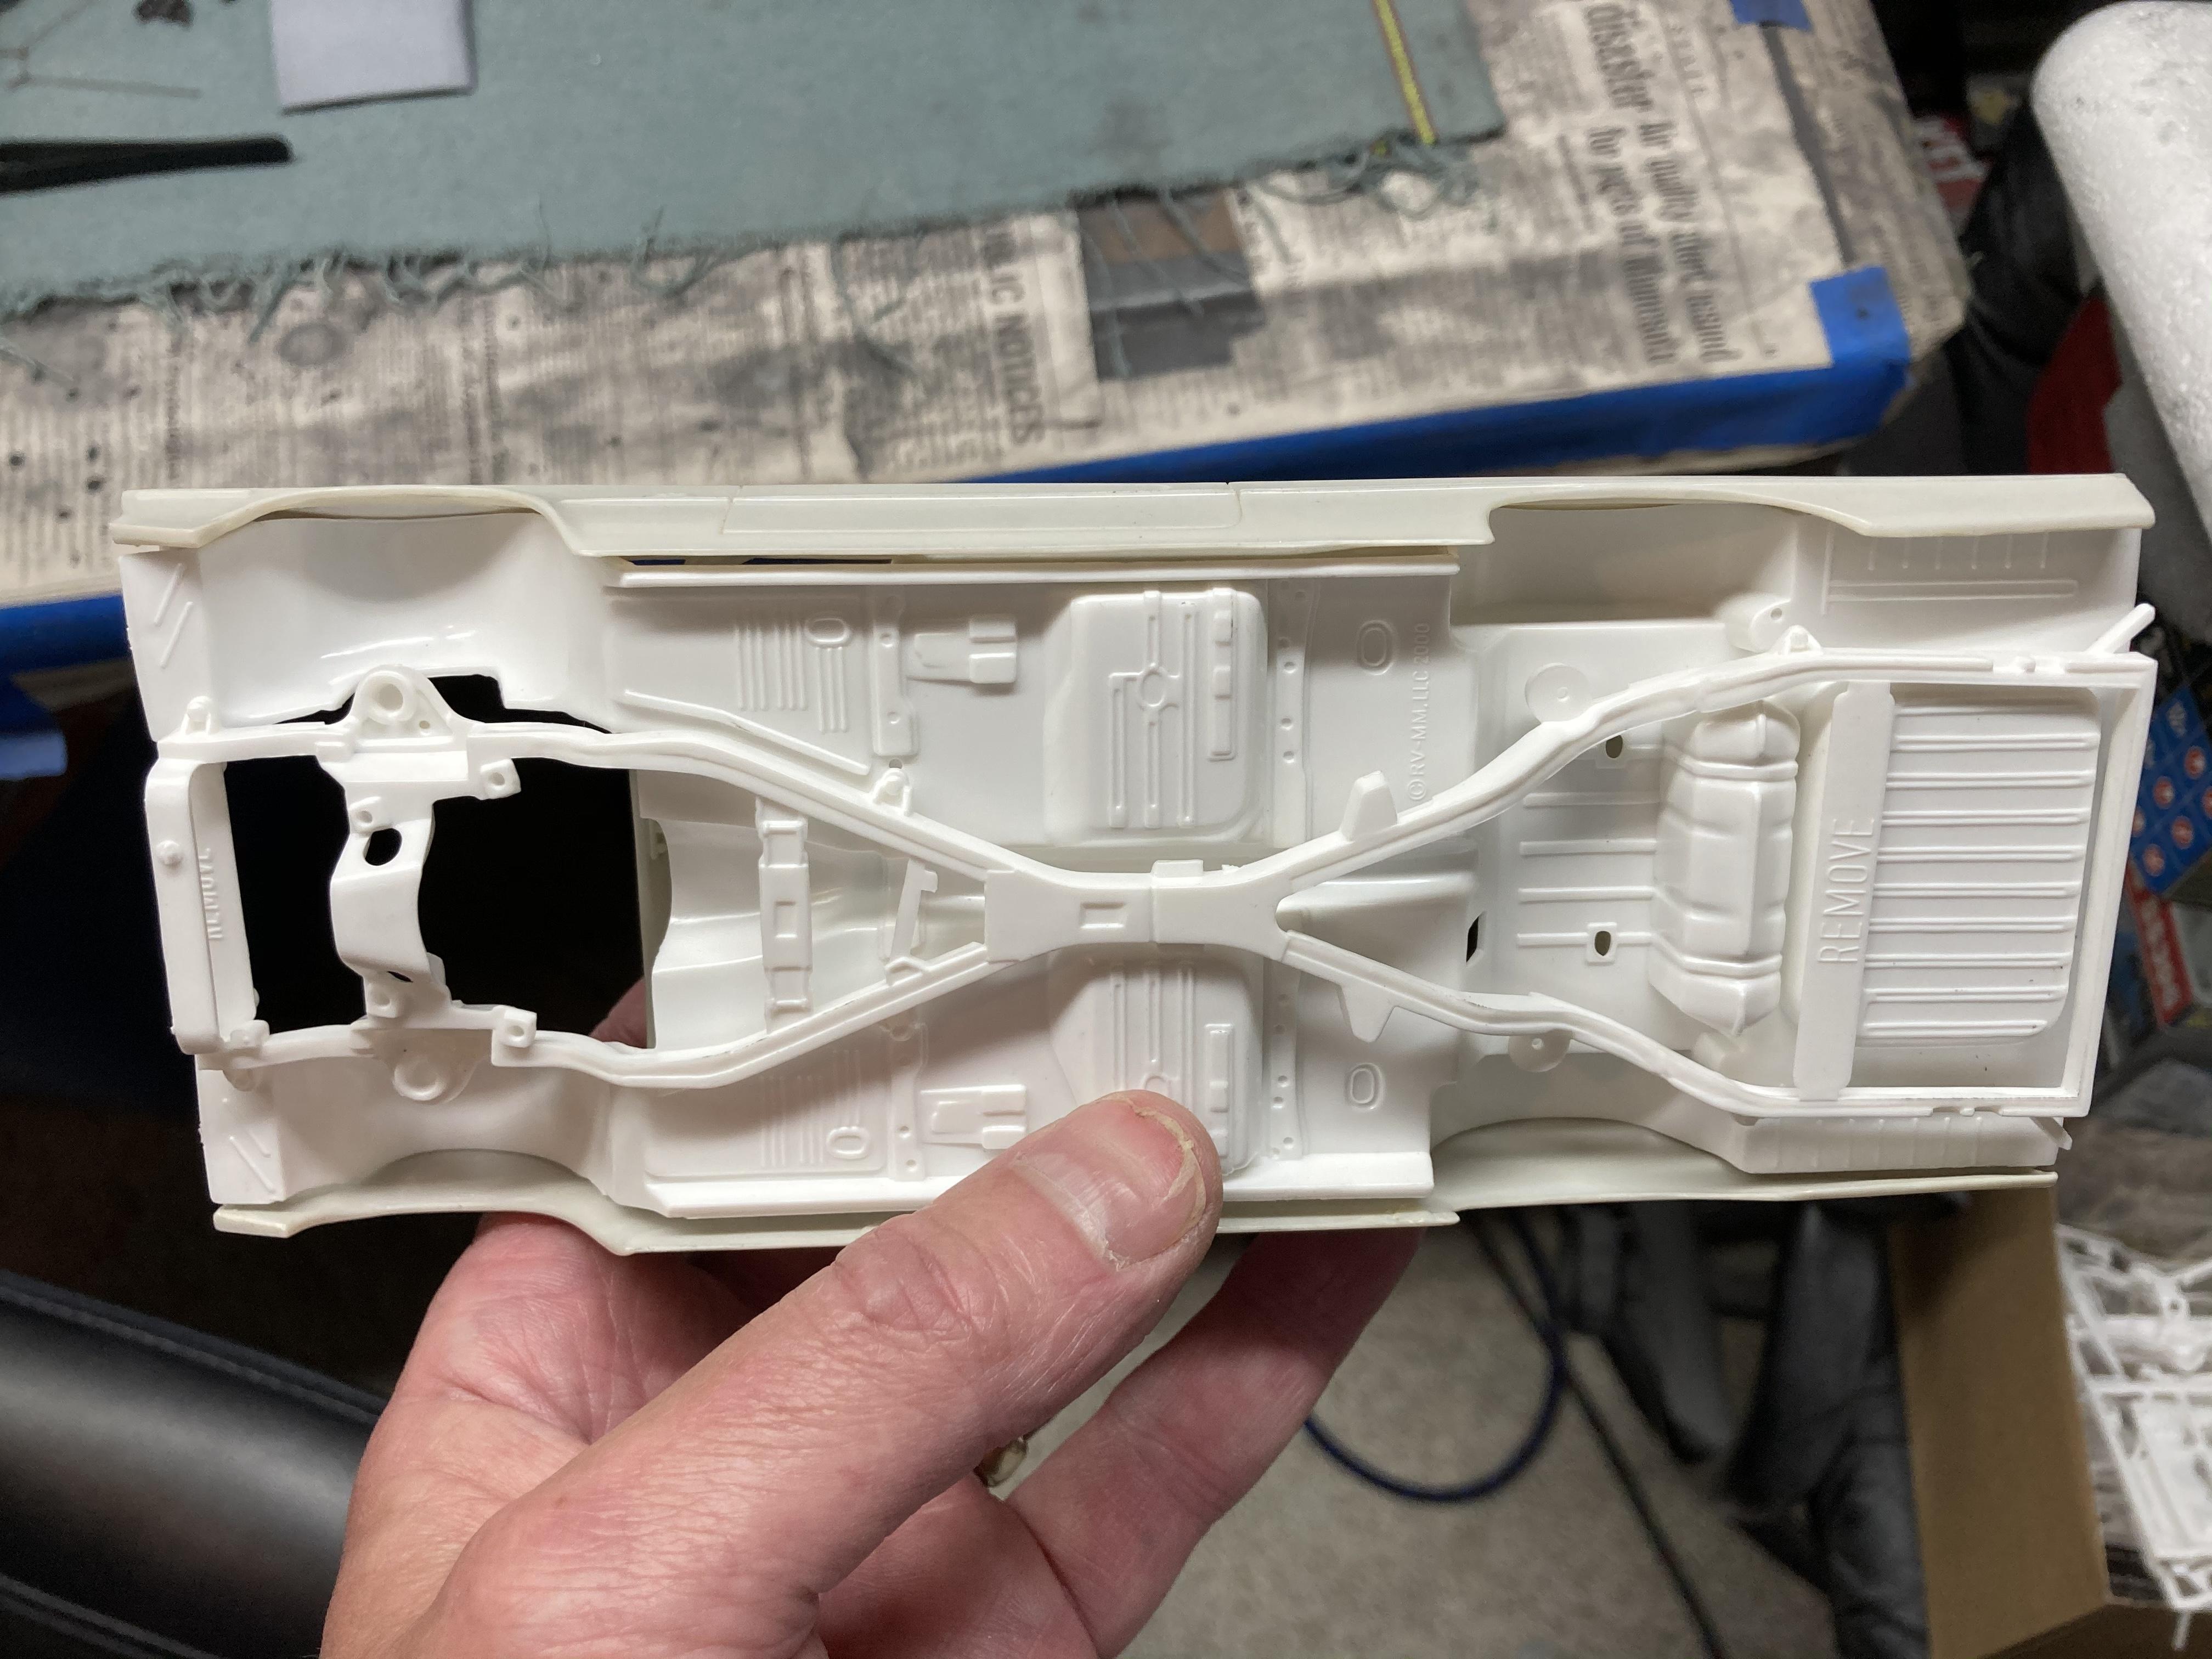
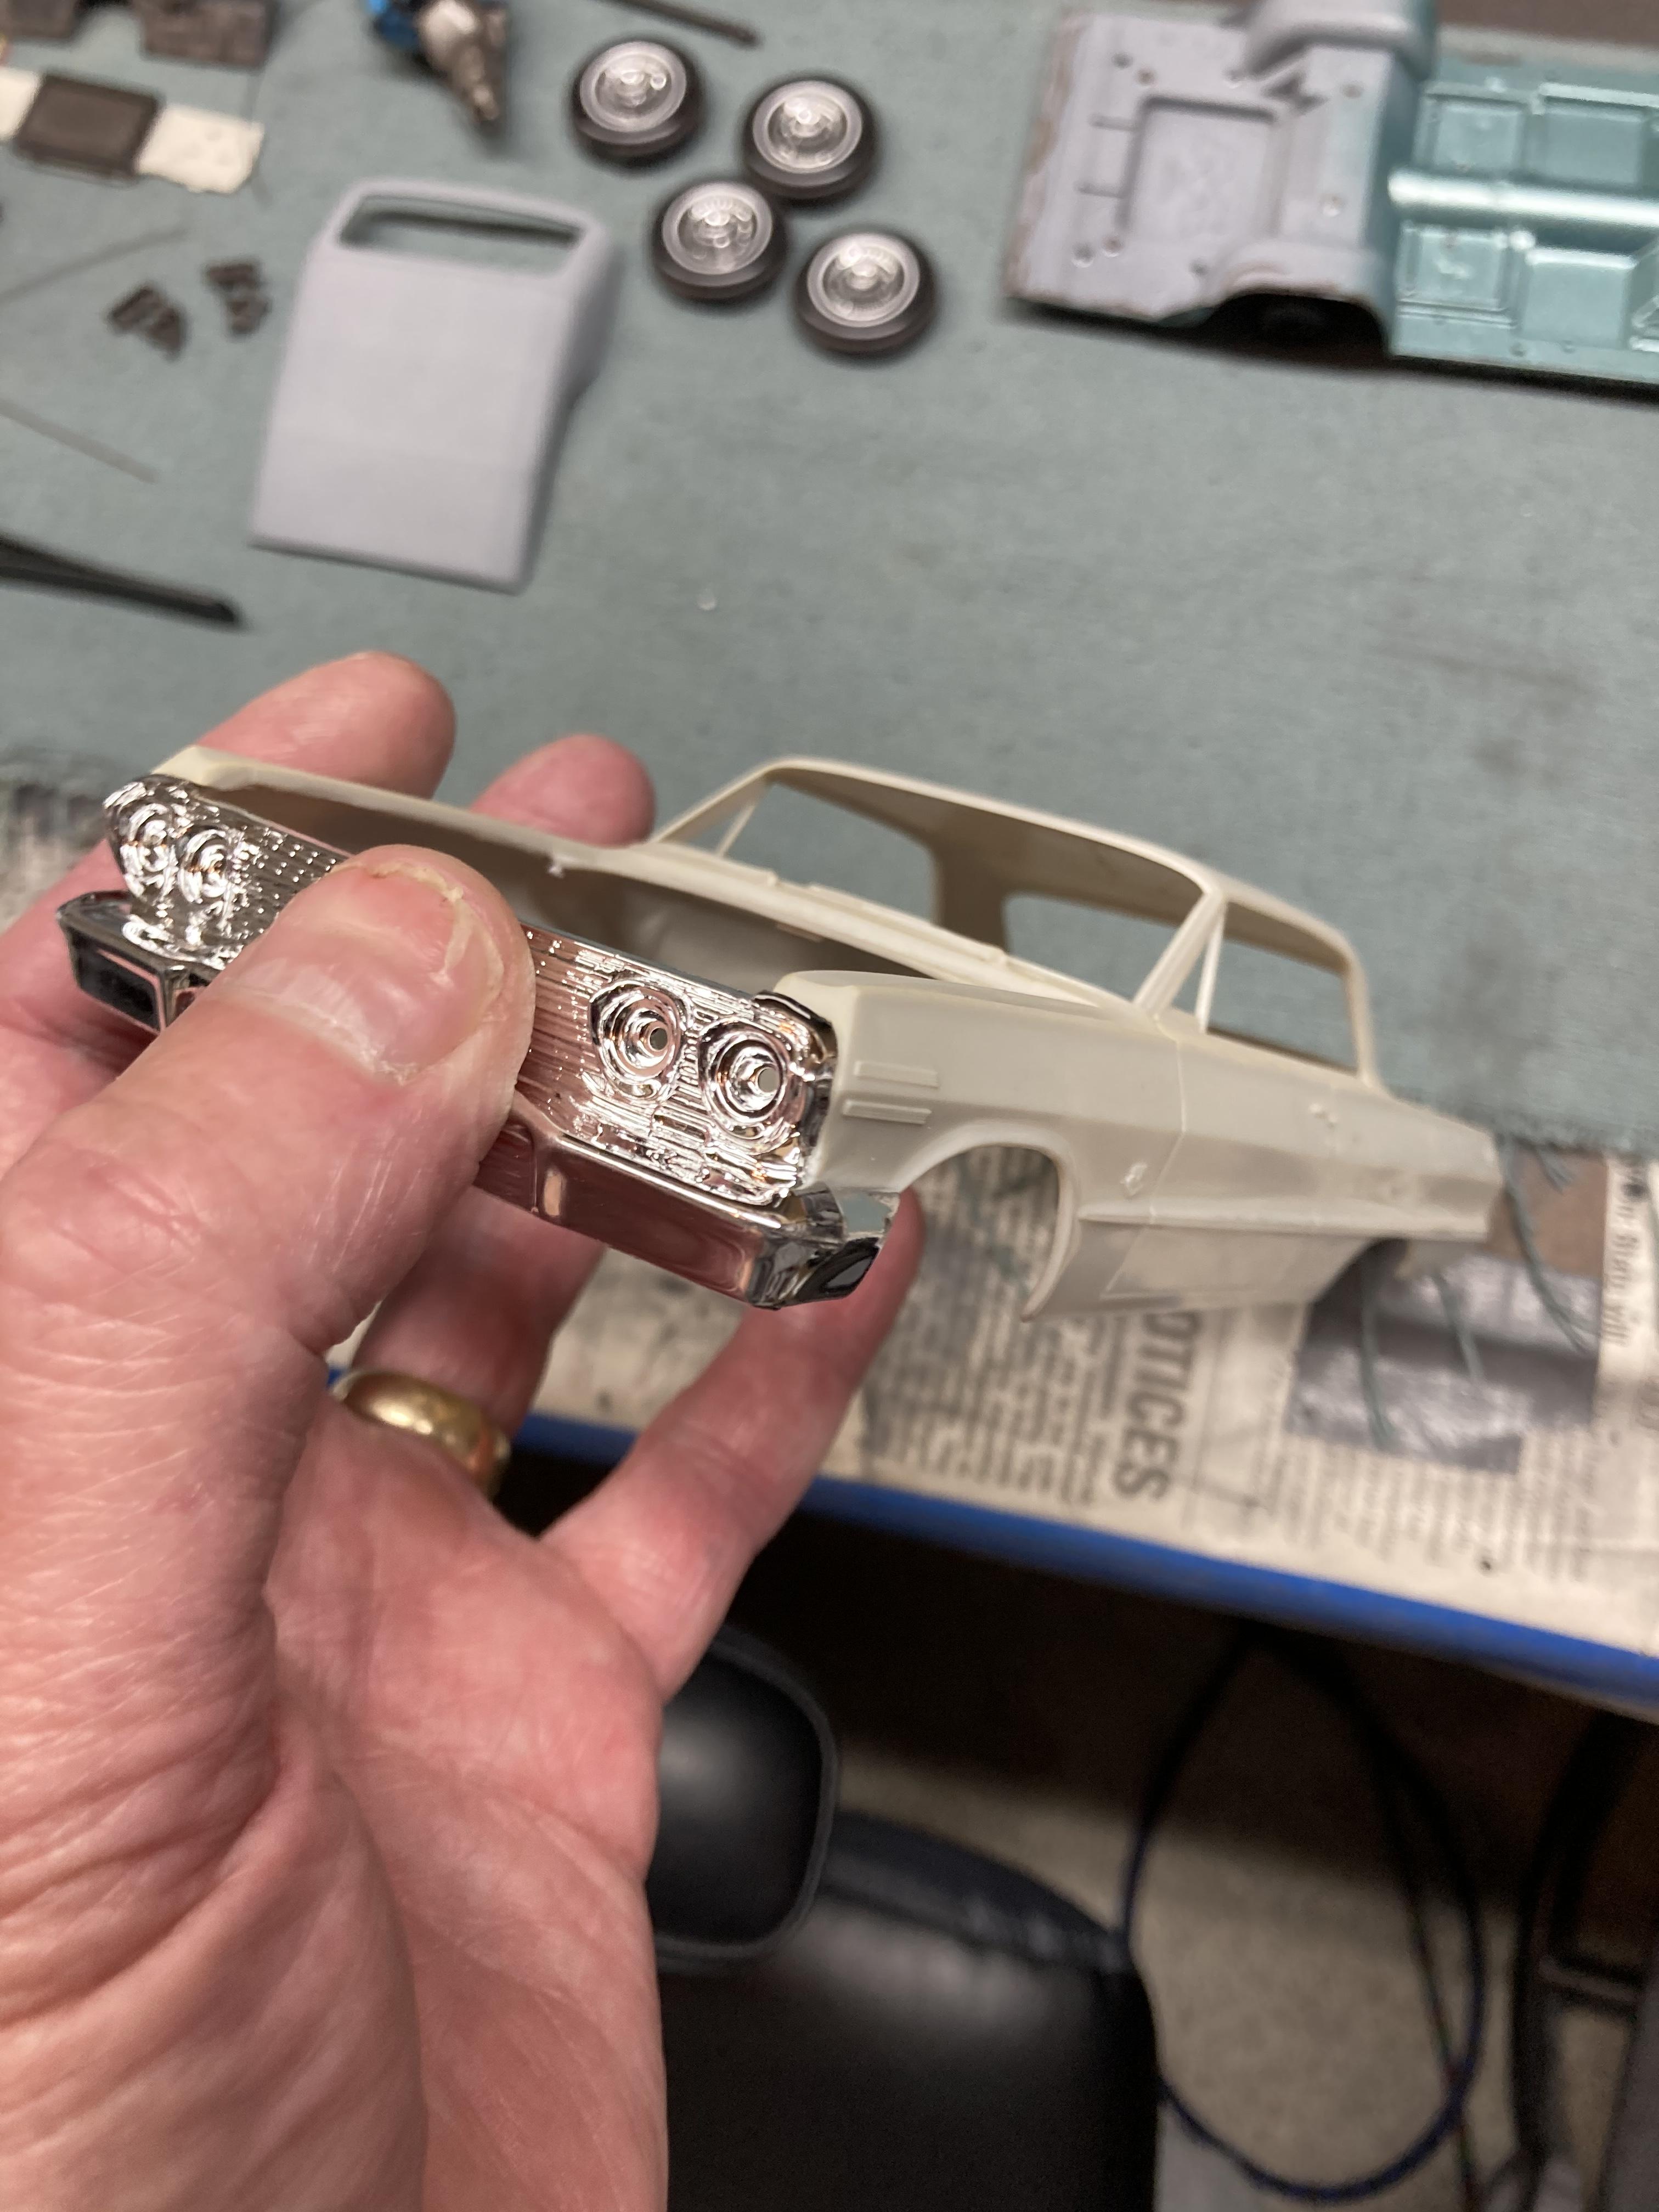
Now I’m starting to think that I should build one of these AMT ‘63 Impalas. Decided to pull out the boxes, and all of the discussed issues in this thread would be easily addressed with some kit bashing. Easy operation to drill out the tail lights and replace with the lenses from the Revell ‘63. The Revell interior is very nice compared to the AMTs, and the chassis from either the Revell ‘63 or ‘64 drops right in. Hell, even the Revell grille fits the AMT! ? Steve
-
That’s the ONLY thing that I would do with the Revell ‘63. (Cannibalize) From the first time I saw the body, I knew something was wrong. Steve
-
Monogram ‘59 Caddy
StevenGuthmiller replied to NOBLNG's topic in Model Building Questions and Answers
Yes, everything’s a sports car these days. Can’t think of a single car today that doesn’t have a console. Bench seats are pretty much a thing of the past, except for some pickups. Steve -
Morgan Automotive Detail?
StevenGuthmiller replied to Sidney Schwartz's topic in Model Building Questions and Answers
Sure, but dealing with someone whom the vast majority of people on this forum consider a reputable and reliable provider, and some random seller on eBay are two different things. ebay can often be a risk because you’re not really sure who you’re dealing with, but when I order something from Kris, or Joseph @ Fireball Modelworks, or MCW, I know that I’m going to get my order sooner or later. I’m also intelligent enough to know that these are side jobs for these guys, they’re human, have lives and problems, and will do the best that they can for me. If that means a month or six weeks, so be it. When I used to send parts out for plating to Chrome Tech years ago, average turn around was 6 weeks, sometimes 2 months. In the age of instant gratification, if we just learn to relax a little and let things play out......well, as Jagger said, “you can’t always get what you want. But if you try sometime, you just might find, you’ll get what you need”. Steve -
Monogram ‘59 Caddy
StevenGuthmiller replied to NOBLNG's topic in Model Building Questions and Answers
I doubt that there was any console available. After all, it’s a Caddy, not a vette. ? Steve -
Yeah, those tail lights certainly wouldn’t slow me down any. Steve
-
It’s my opinion that the Revell kit’s body is out of whack anyway. The AMT body looks more accurate to me. If I felt the need to build a ‘63, I’d use the AMT body, interior from the Revell, (if possible.....I have one) and most likely the rest of the guts from the Revell ‘64. Should make a very nice model. Steve
-
Side-mirror glass template help
StevenGuthmiller replied to atomicholiday's topic in Model Building Questions and Answers
Just lay it facedown on a piece of very thin sheet plastic, (white or clear) and trace around it. Cut out to shape as close to the line as you can, and then slowly and carefully begin sanding around the edges until it fits fairly tight. Stick on a piece of chrome Mylar tape and trim around it tight to the shape you cut, and then glue them in place. Steve -
Morgan Automotive Detail?
StevenGuthmiller replied to Sidney Schwartz's topic in Model Building Questions and Answers
This kind of stuff really irritates me. People get this impression that these small parts providers are Walmart and they moan and whine when their parts don’t arrive yesterday. And then they moan some more when they don’t get immediate reactions from them when they bombard them with emails. Personally, these would be the people that I would be shrugging off if I were offering a cottage service. They’re the ones that are likely to be a thorn in your back side every time they order anyway, so you’re better off without their business, especially when you’re a top notch, established provider and you’ve got plenty of loyal customers and too many orders to fill anyway. Their loss, and good riddance to ‘em. Steve