NYNS Franky
-
Posts
189 -
Joined
-
Last visited
Content Type
Profiles
Forums
Events
Gallery
Everything posted by NYNS Franky
-
Current race car decal question
NYNS Franky replied to NYNS Franky's topic in General Automotive Talk (Trucks and Cars)
Thank you for the responses! The picture was a great addition to this thread! -
so I'm building the Revell Corvette C7.R. Should I paint, decal then clear, or paint, clear and decal? I try to make everything I build as realistic as possible. So how are decals done on race cars these days. I know in the past the decals were applied on the finished car, but is it done the same way these days? Does it really matter how I build my model, will I enter it in a show? I don't know but I try to be a perfectionist at everything I apply myself too. Really tough way of going through life! Lol. Thanks for any information you can provide!
-
Nice work, that turned out really well. Liking the color of the carpet as well.
-
That looks awesome! Great job, love the diorama!
-
Thank you all once again!
-
´29 Ford Pickup.
NYNS Franky replied to Toni L.'s topic in Model Trucks: Pickups, Vans, SUVs, Light Commercial
That looks awesome, great work! -
The decals actually came with the kit!
-
That turned out very nice, purple was my second choice when I did mine. Engine details are awesome!
-
That turned out awesome!
-
Great job, love the stance and color! What type of paint was used?
-
Nice work, it is a good looking build.
-
Thanks for the positive comments! Funny but after looking at pics that I post I always find something I forgot. This time was the trunk lock, will have to add a dot of chrome there. Also have to add an antenna when I get a chance. I was really impressed with this paint. Laid down really nice and used about half of the small jar, you do have to thin it.
-
Great job on this one, choice of wheels was perfect. I would be happy to have it on my shelf!
-
Last Pic is with it's 1/24 cousin a '71 Hemi Cuda I did a couple years ago.

-
-
-
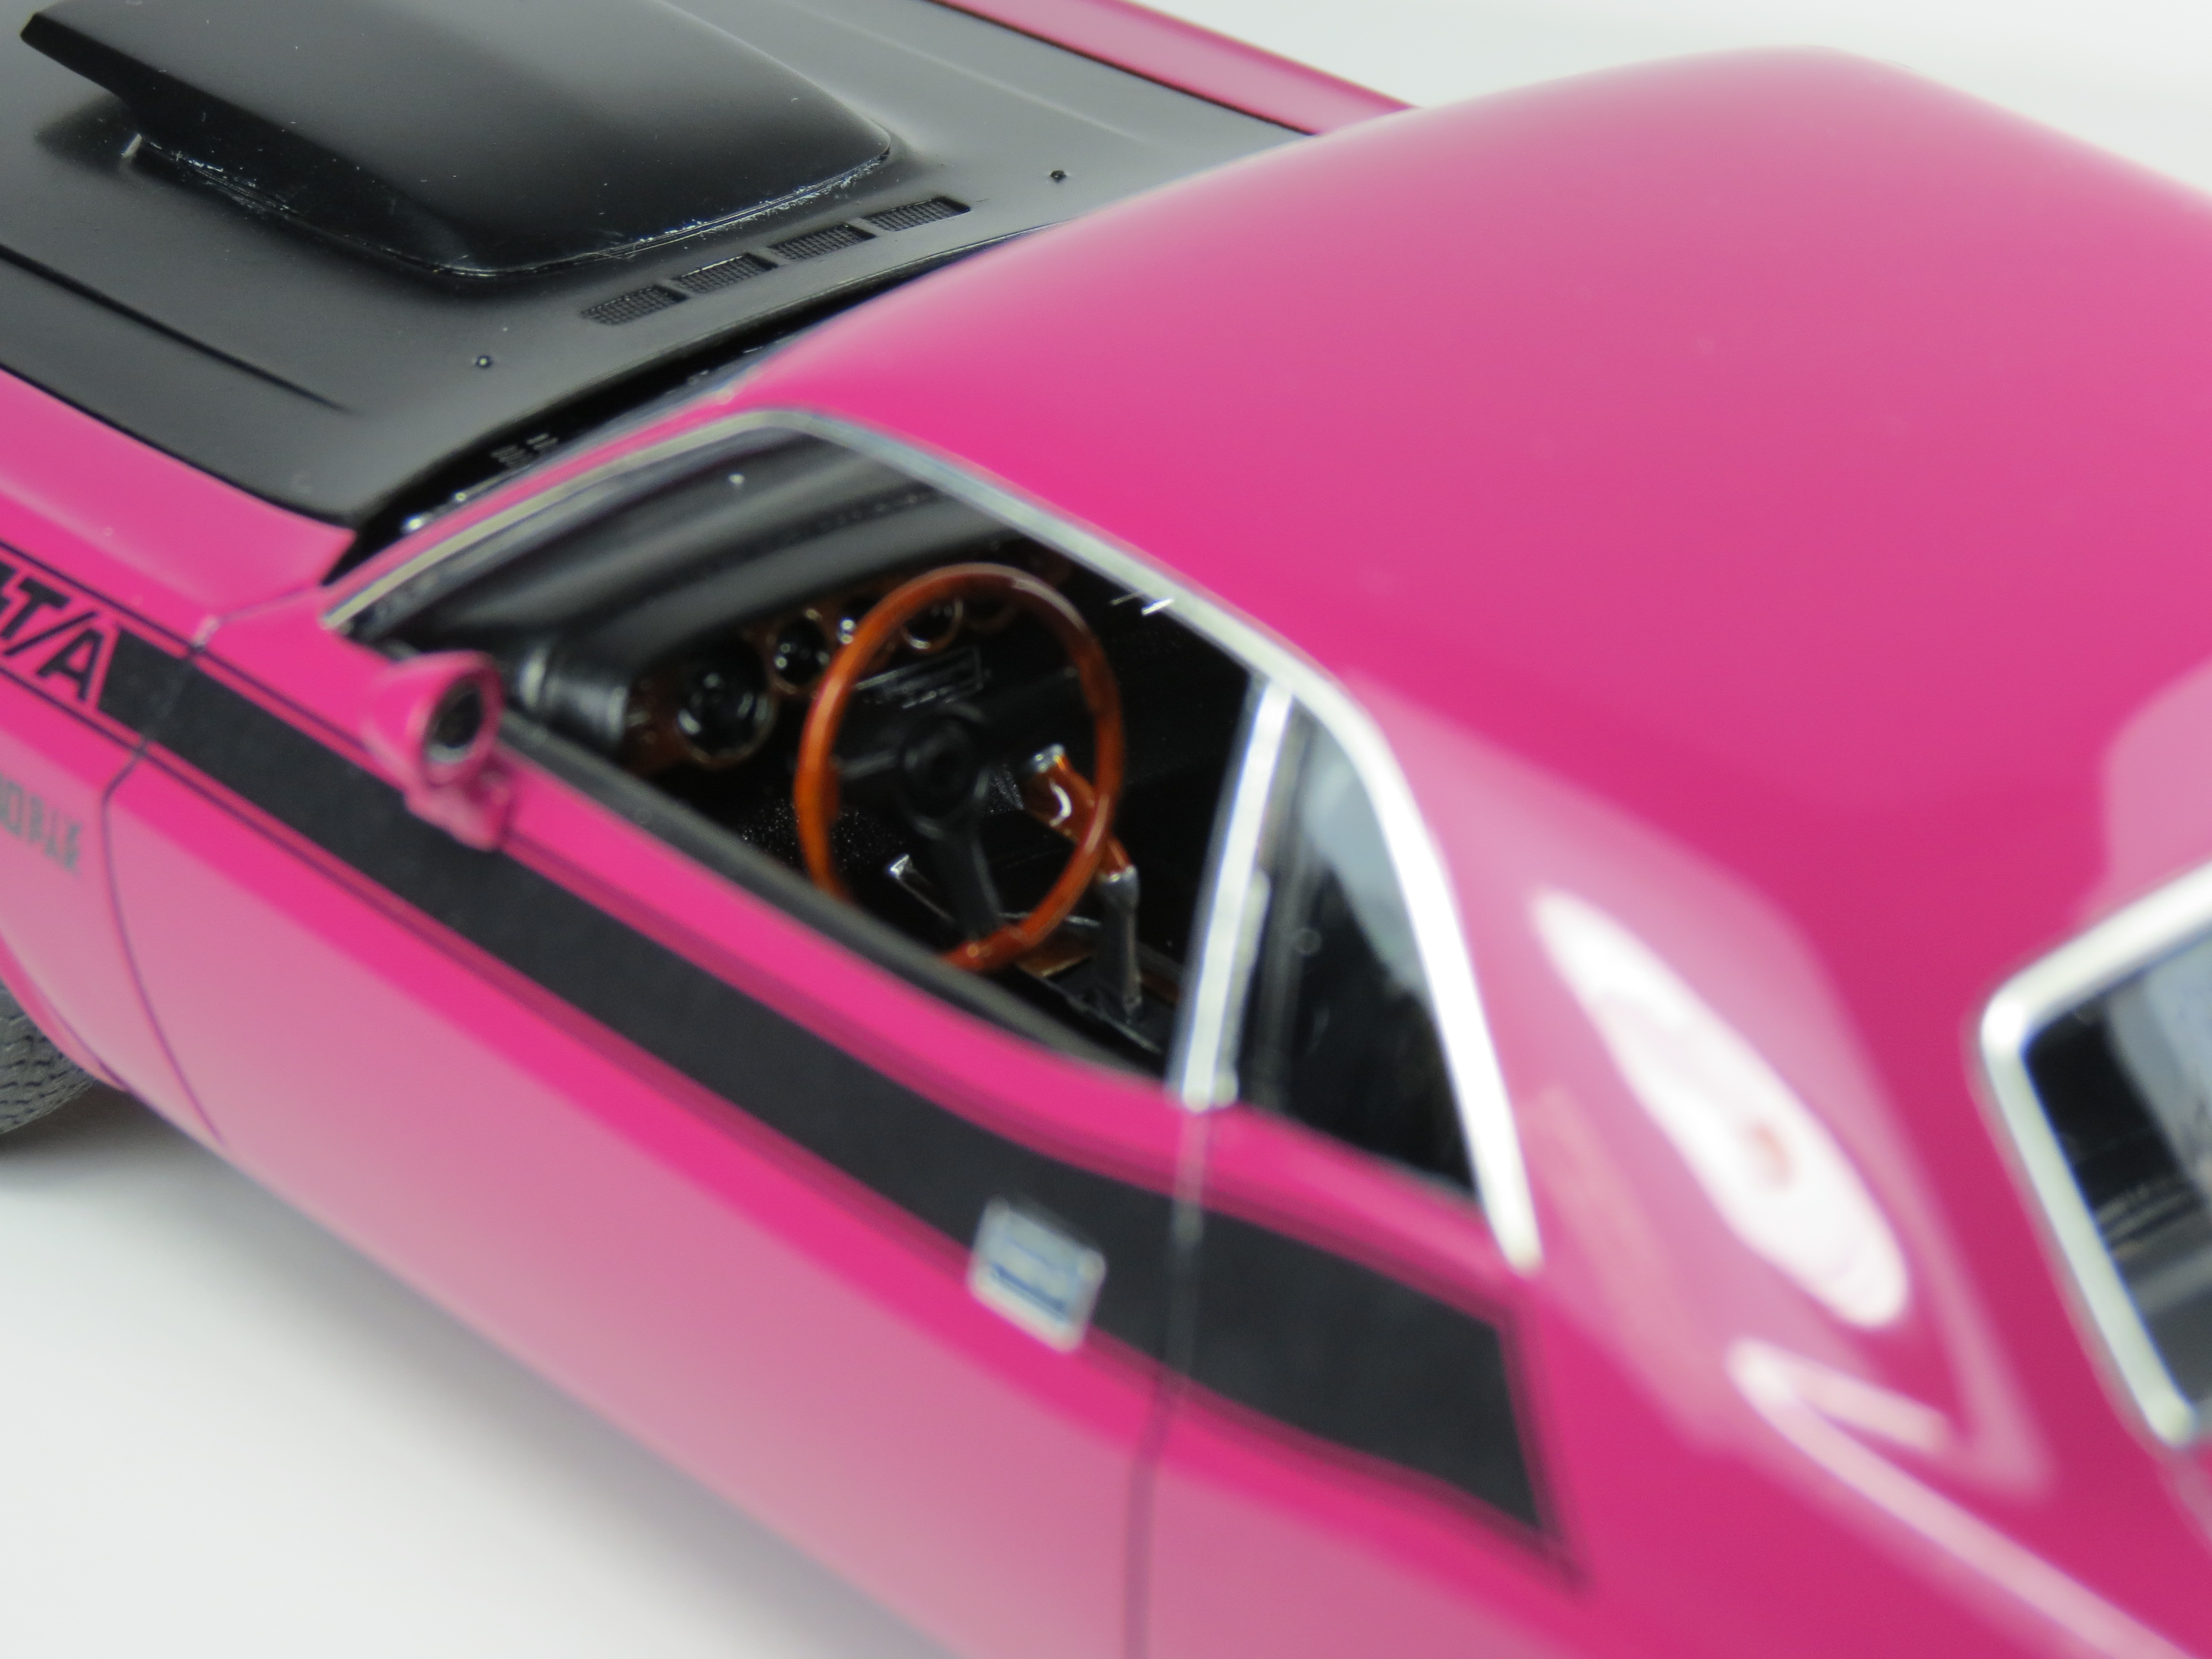
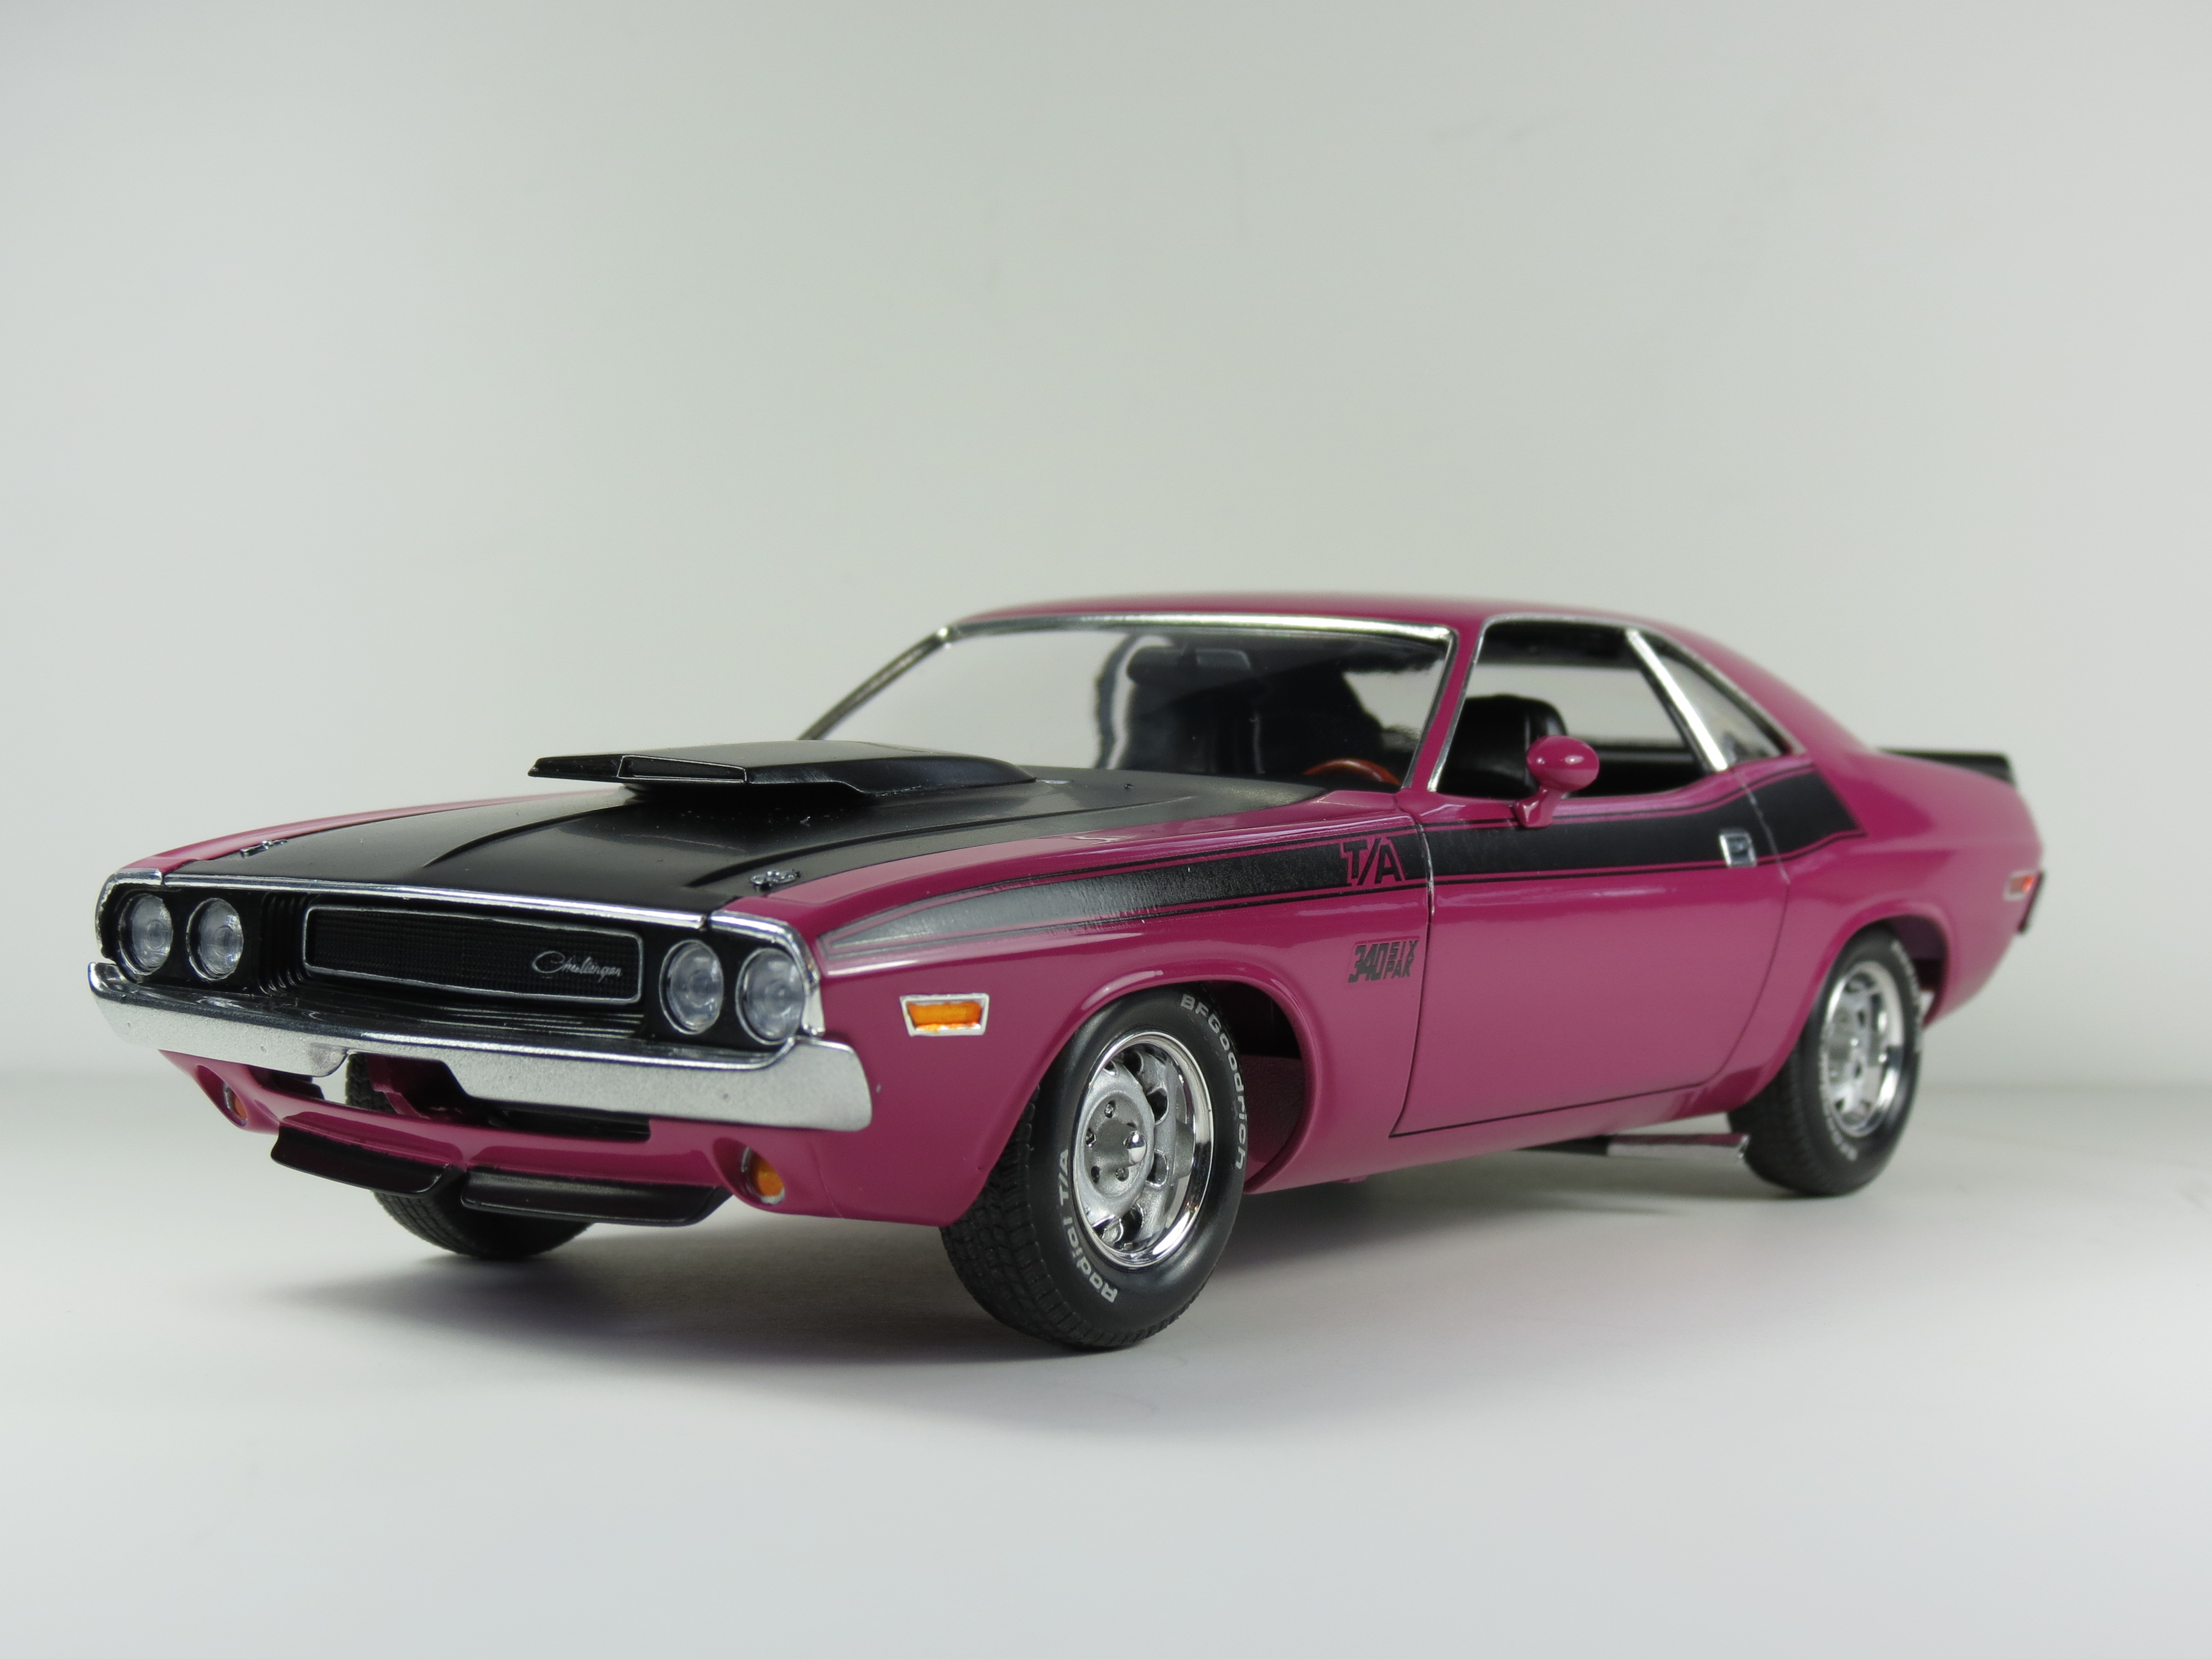
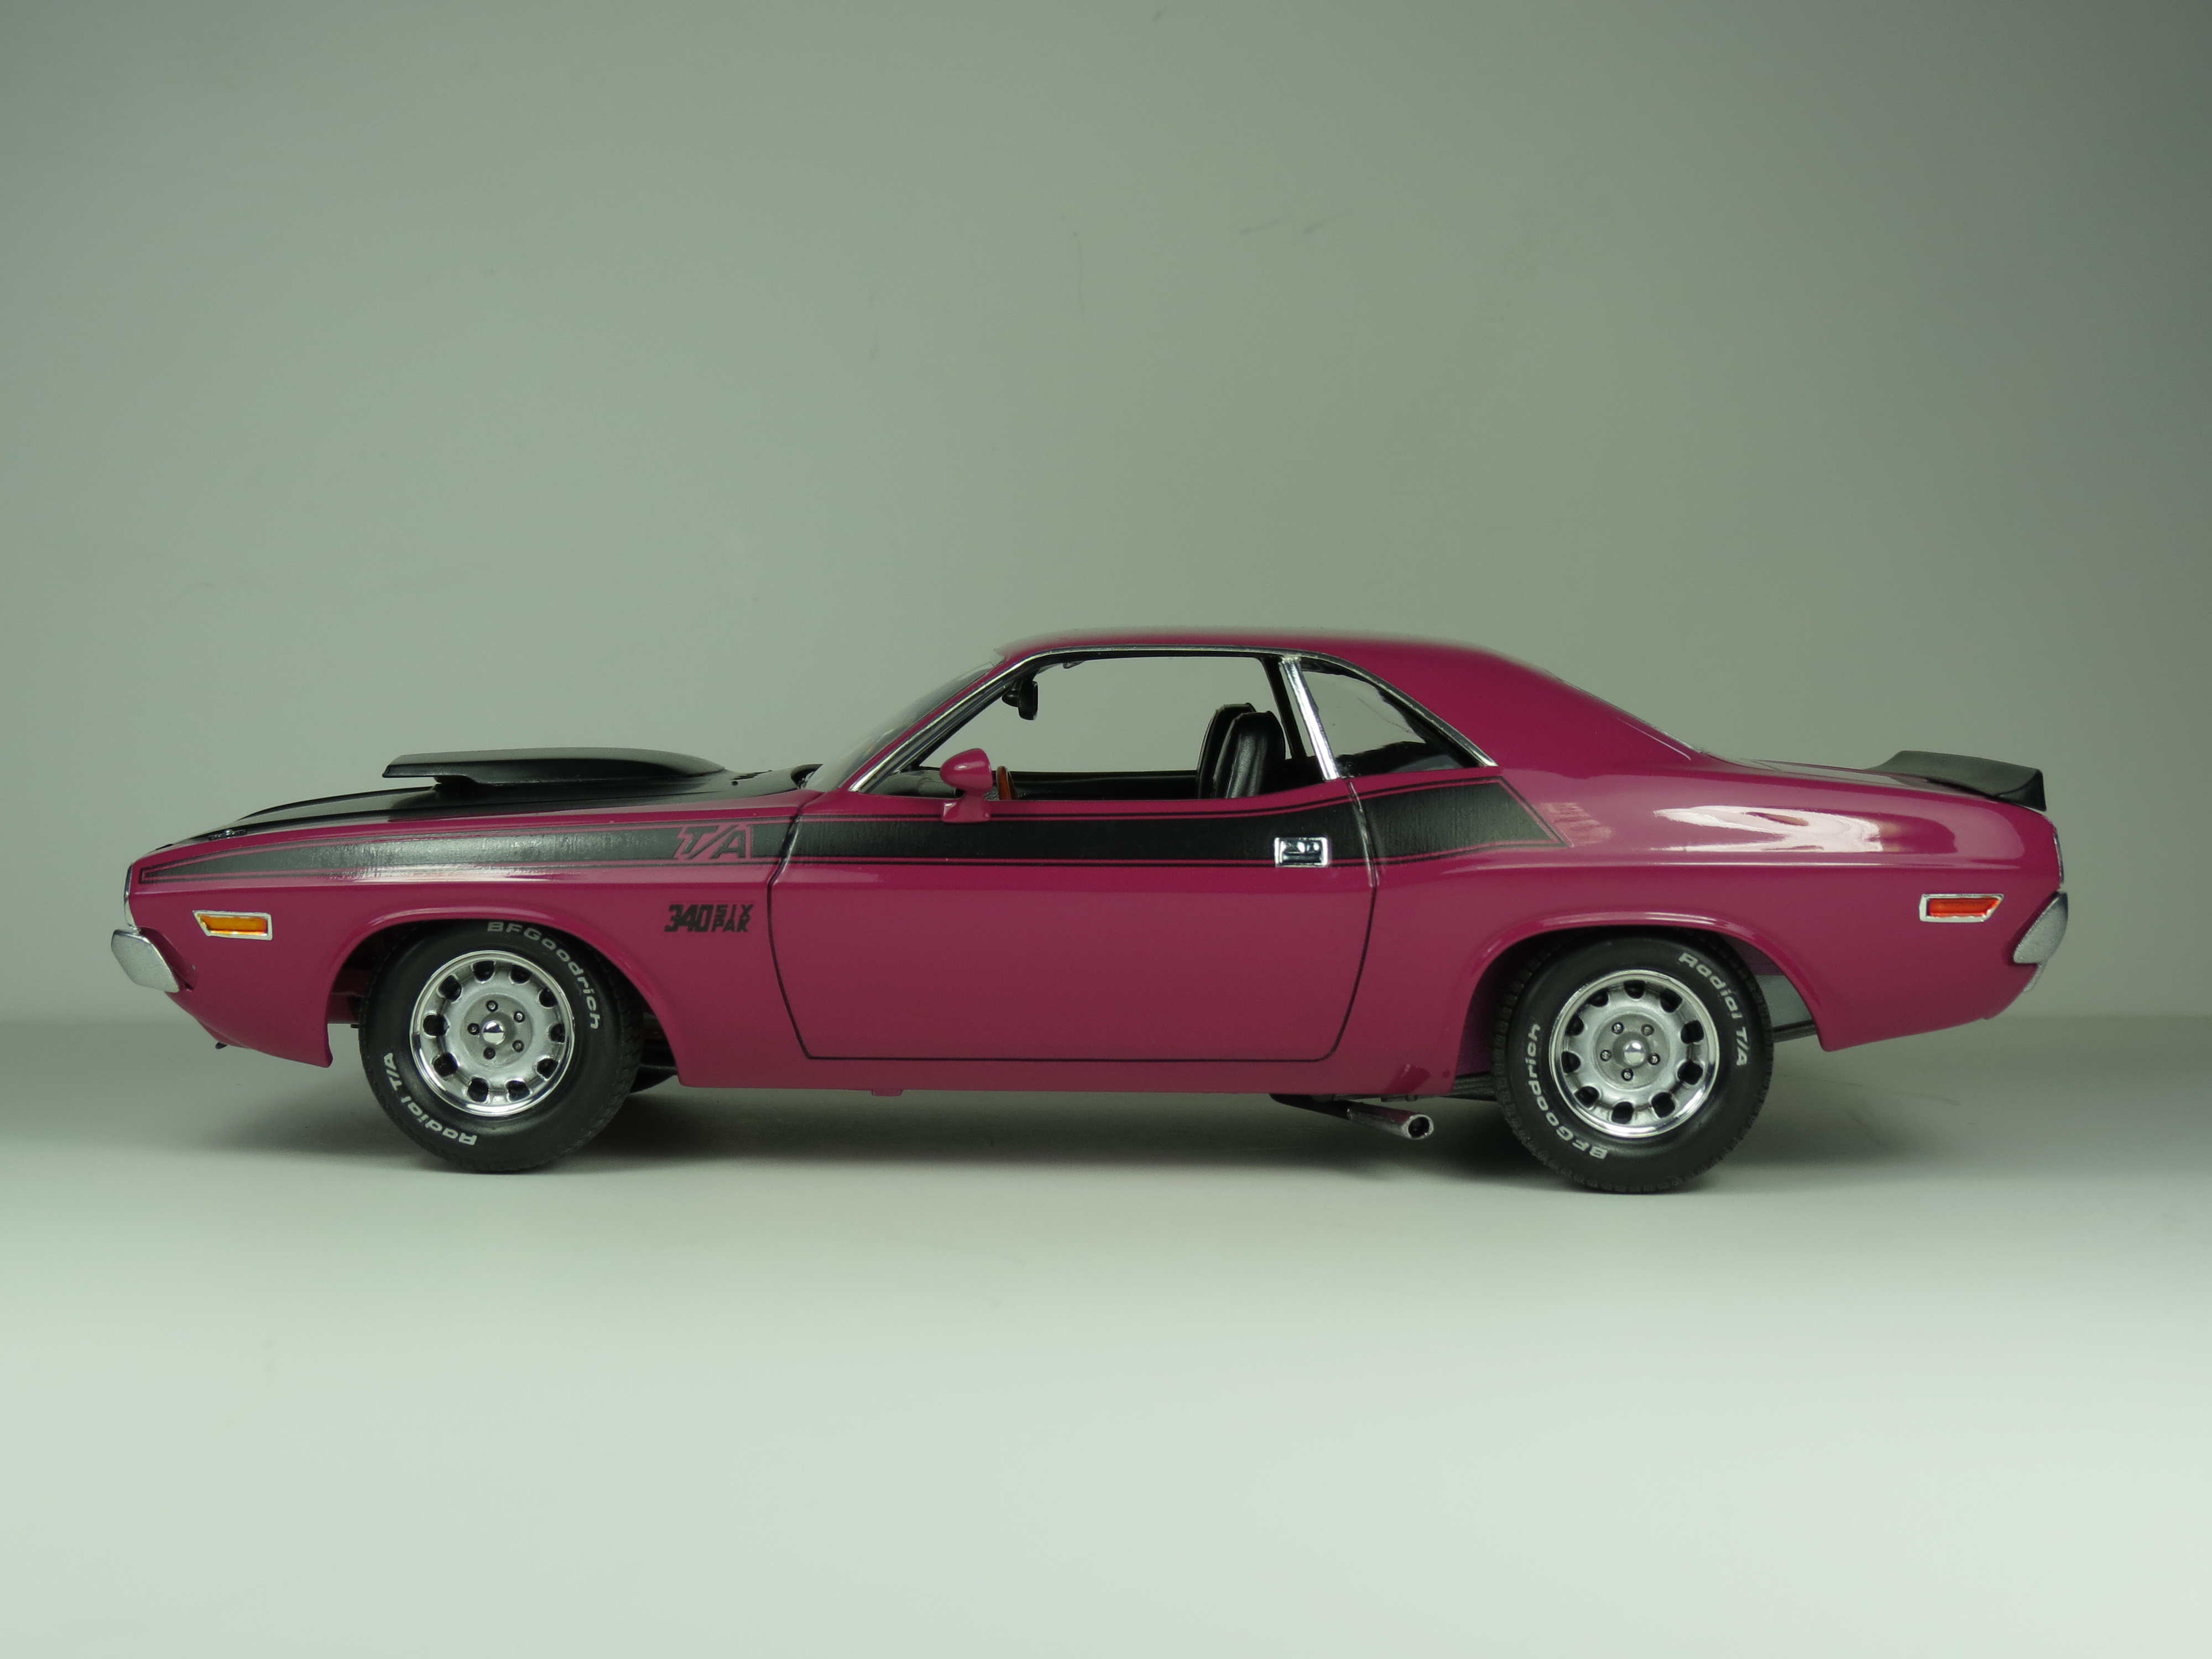
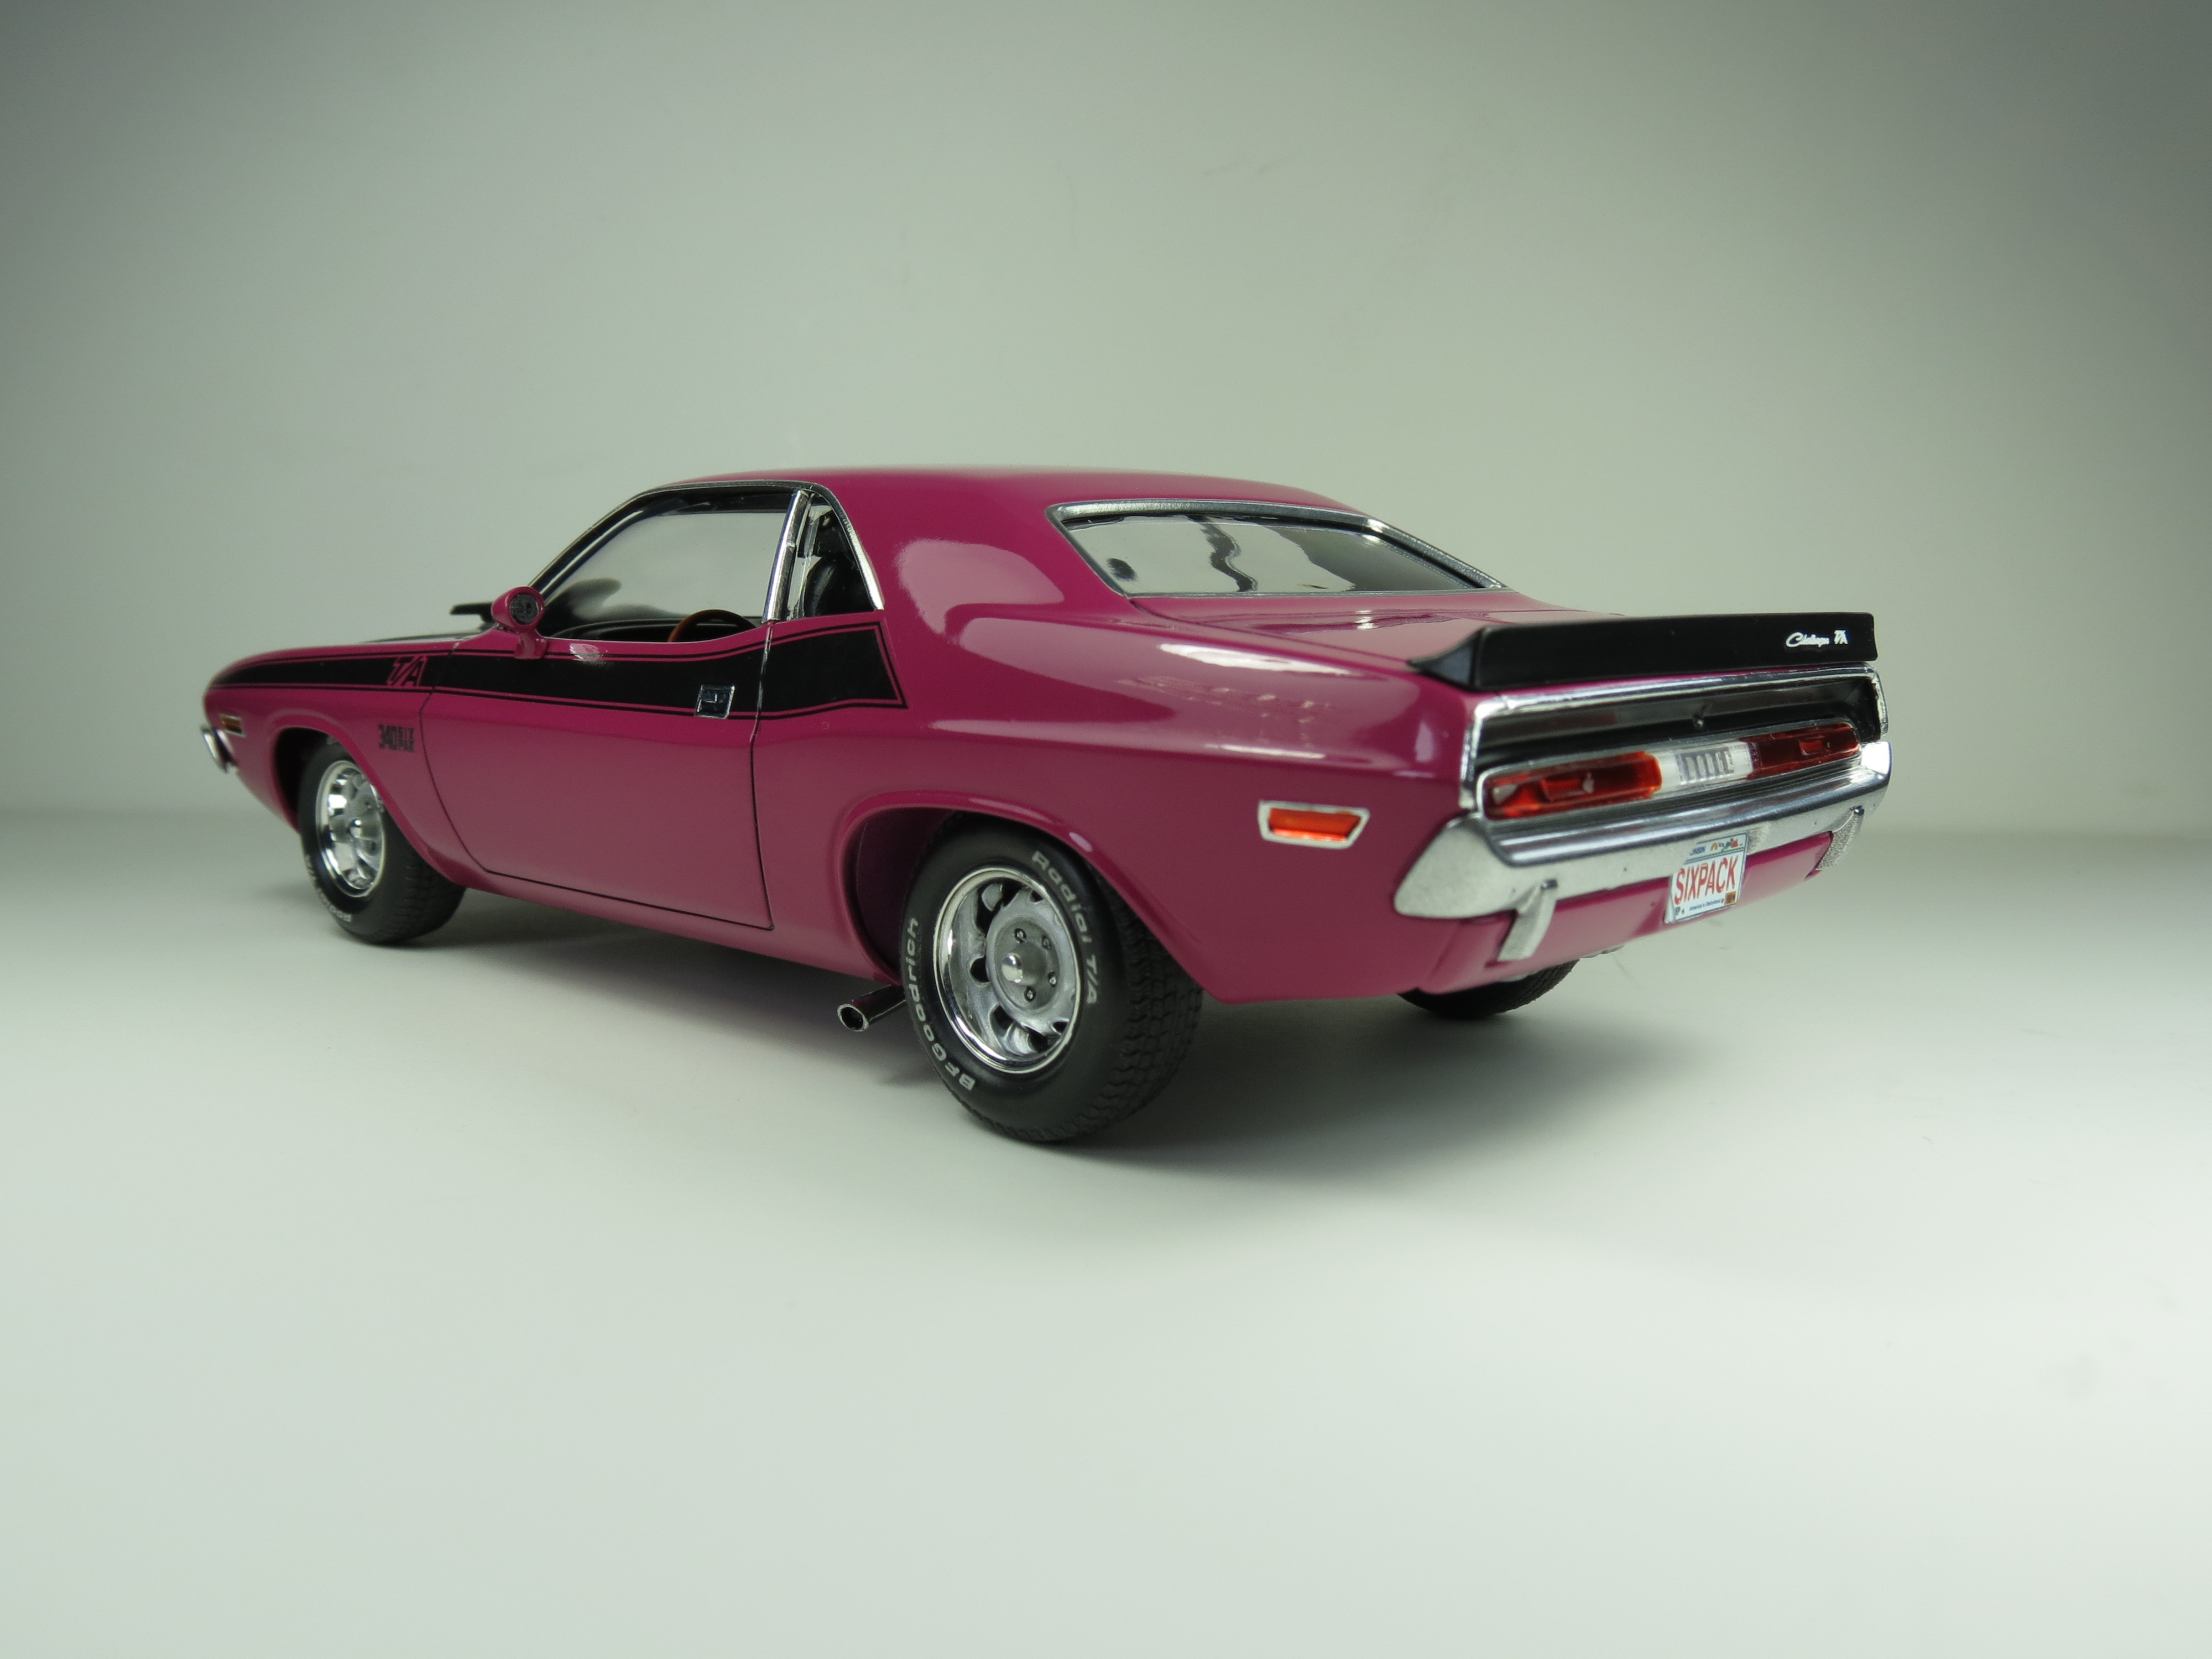
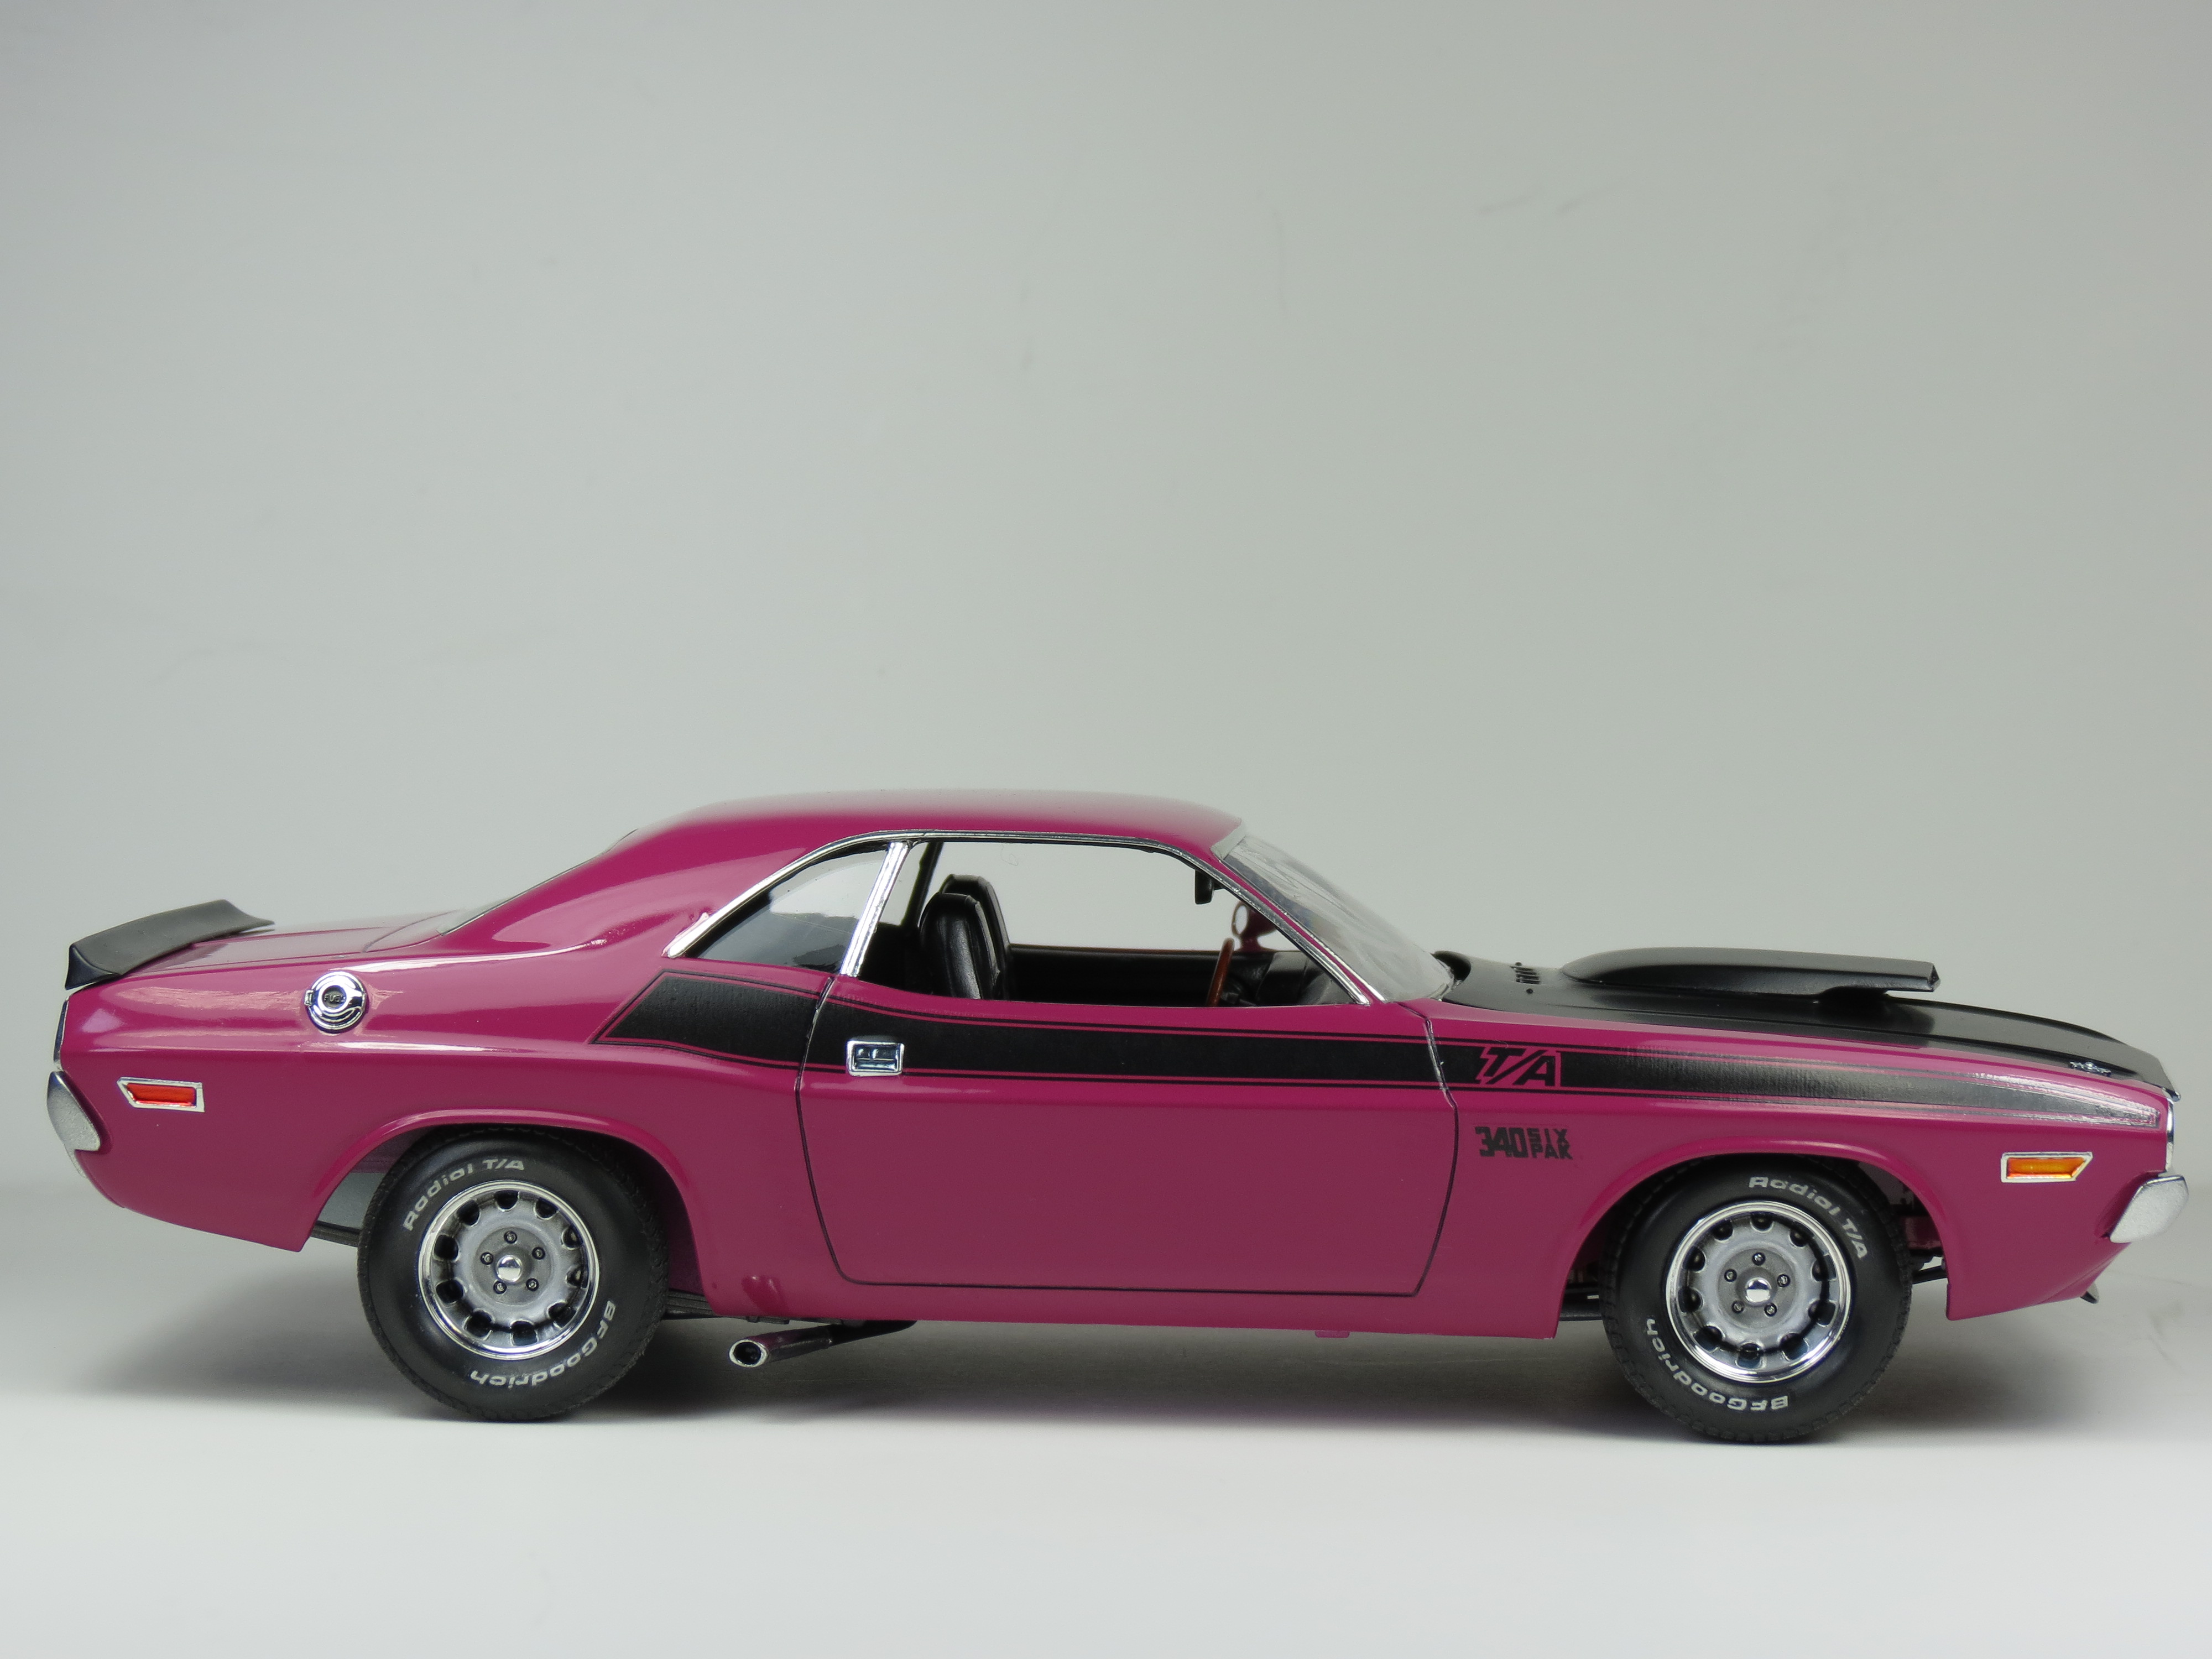
Wrapped up another one, having time off has been very productive in the hobby room. This is the 1/24 Revell kit from 2004 (thats what the decal sheet said). Tons of flash, but if you take your time cleaning it up you are rewarded with a beautiful model. I'll try to remember everything that I did on this kit. Starting with the body the front valance is incorrect, or maybe I should say modeled incorrectly. So I glued and blended the valance into the fenders, and scribed the panel lines in the front where they belong. I forgot to take pictures of the interior before it was installed but I used embossing powder for the carpet, added seat belts, and used white glue for the gauge lenses. As for the engine / engine compartment I did ignition wires, a positive battery cable, fuel lines, vacuum lines, and brake lines. The body is painted Model Masters Panther Pink enamel that I picked up years ago, wet sanded and polished out. On to the pics, hope you like it and questions and constructive critisim are always welcome. Forgot to mention the due to the massive flash on the parts the chrome tree was no exception, so the bumpers were stripped, cleaned, front license plate bracket removed, and repainted using Alclad chrome.
-
Wow, excellent work and great choice on the color combo!
-
Revell 2012 Ford Raptor
NYNS Franky replied to NYNS Franky's topic in Model Trucks: Pickups, Vans, SUVs, Light Commercial
Thanks for the positive comments! The navigation screen is a decal, I painted the gauges. I would recommend this kit, it just builds up so nice! -
It was that article that made me buy the kit! Happy I did because I never would have thought the snap tites could look this nice! Thank you all for the great comments!
-
Good save Matt! It turned out great!
-
Nice work, paint looks like it's still wet! Love the garage!
-
Thank you for the great comments. I will have to agree with Matt on the stance that it is not factory correct, but I love the look. For those interested, the wheels can be set further in. I set them were I liked it. Cheers!
-
This turned out beautiful! Love the stickers on the tires, and the dash looks amazing!
-
Thank you all for the great comments! The roof siren was included in the kit, as was the centre light. I just modified the height to resemble the car I was referring too.