peteski
-
Posts
9,217 -
Joined
-
Last visited
Content Type
Profiles
Forums
Events
Gallery
Everything posted by peteski
-

BMF-ish “Mirror Chrome” by TFI (Japan)
peteski replied to BDSchindler's topic in Tips, Tricks, and Tutorials
No it isn't. It is a very thin stretchy plastic film. Nothing like automotive window tint which is thick and not stretchy at all. I only mentioned the transparent blue material because I bough it (for depicting the top tinted band on tinted windshields). While the film is stretchy and has a strong adhesive, when it is burnished over certain types of recessed areas does not permanently deform (stretch) like BMF does, and after some time (days or weeks) the film will unstick in the bottom of the recessed area and start going back to its original relaxed state. BMF is also capable of compressing slightly so small creases can be smoothed out. The film is compressible slightly, but not as compressible as the BMF. I'm a big fan of BMF (they are using photo of my '57 BelAir on the BMF envelopes). I bought the Hasegawa Mirror Finish to try it out after seeing it discussed here couple of years ago. I'm not abandoning BMF by any means. The Hasegawa stuff will have its applications, but I'll be continuing using BMF. Hasegawa film is just another item in my stash of modeling materials. -
BMF-ish “Mirror Chrome” by TFI (Japan)
peteski replied to BDSchindler's topic in Tips, Tricks, and Tutorials
if that's the case then this stuff after some time will raise from any small recessed areas, because the plastic film stays elastic and the adhesive will not be able to hold it down when it wants to return to its natural relaxed state. Similar to Hasegawa chrome "foil". This material is good for smooth flat applications. BMF, since it is a soft pliable metal will actually permanently stretch and stay in the recessed areas. EDIT: I just looked at my Hasegawa foil and this stuff *IS* Hasegawa's. TF1 is not a company name but a part number for that foil. My Hasegawa foil has TF1 in the same spot on the identical label. The Hasegawa Trytool logo and name are on the bottom end of the cardboard package and it was all enclosed in a transparent plastic box. I also have their gold foil (part number) TF5, and blue window tint material TF21. Looks like Brian got a hold of partially used foil with the bottom of the package (and plastic box) missing. Nothing new here - move along . . .
-
Seat belts in real cars come in different width. Passenger var belts are narrower than racing belt harnesses. Sometimes racing harnesses uses multiple width belts. I'm sure you know that already. But in this case I suspect that the photoetched hardware is either designed for a larger scale model, or the belt material is the wrong size (I know, the packaging shows 1:24/25 SCALE). But clearly, something's off. Even the included instructions show the buckles and other hardware fitting tighter to the belts. Racing belts are usually 3" wide. That scales out to 3/25=0.12" in 1:25 scale or smidge smaller than 1/8". How wide is the belt material? If it is 1/8", then the photoetched metal pieces are designed for larger scale models.
-
The wheel sizes in that chart are incorrect, which is a common mistake made by modelers. Since model wheels and tires aren't made like 1:1 counterparts, the actual visible rim diameter on most automotive wheels (which is what most model wheels depict) is about 1.5" larger than the wheel diameter (or bead diameter) as specified by the 1:1 wheel manufacturer. So a 15" wheel will have visible diameter of 16.5", which scales out to 0.66" (not 0.60"). Small but noticeable difference. But wheels and tires are often incorrectly sized even by manufacturers, however the proper size is worth mentioning for those who design and 3D print their own wheels and tires.
-
That's because if that spring was accurately scaled, the wire diameter used to make the spring would have to be thinner than human hair and the spring would be too fragile to handle. And yes, even scratchbuilt models made by master modeler Gerald Wingrove don't have *EVERY* part scaled correctly. There are always some compromises to be made, but more we strive for accuracy (within physical limitation of the materials used) the more realistic the model will look. Also worth mentioning that models viewed in person look a bit different than in photographs. Something that doesn't look "off" viewed in person might look out of scale in a photograph or the other way around too.
-
I used detail Master 0.012" OD wire in my 1:43 scale Cobra. It comes in a bit oversize (0.51") for even fat high-performance wires, but I really liked that yellow color.
-
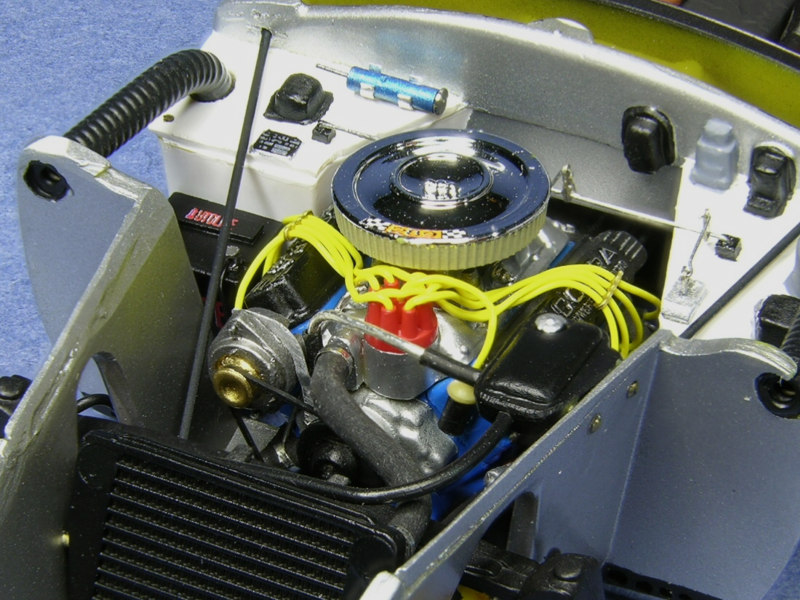
32AWG wire itself has a diameter of 0.008" But that is the wire itself, not to OD of the insulation. That can vary depending on the type of wire and the material used for insulation. Unfortunately the OD of the insulation is not a parameter usually included in wire specs. So it is a guess. It might be 0.012" or 0.015", or something else? One has to have the wire at hand and actually measure it. Again, if one is going for accuracy. Then there are multiple diameters of 1:1 ignition wires. Then again is the question of what scale is the model? Yes, I'm being anal, but if accuracy is important, it all has to be considered, no?
-
I totally missed this one. How could I give you simple answer? Dude, don't you realize that heater hose come in multiple sizes? Then the question what scale is your model. 1:8, 1:12, 1:16, 1:18, 1:20, 1:24, 1:25, 1:32, 1:43 are the common automotive model scales. There is no single answer. You specifically mentioned you are striving for accuracy, and now you wanted a simple answer? I'm not going to even address the rest of your reply to me.
-
That's why in my first reply I stated "we can ask others for the proper 1:1 dimensions. Odds are someone will know the answer. Some 1:1 dimensions can be estimated." Or do some online research by yourself. Internet is a wonderful resource. Or did I misunderstood? I guess you question was not very clear to me, but it seems that others also responded to you with info on to how to convert 1:1 dimensions to scale. After rereading your question I now suspect that you were asking how to get dimensions of the actual aftermarket scale parts, not the 1:1 parts. If that's the case than my original answer still applies. Sense there are no detailed dimensional drawings for most aftermarket (scale) parts, if you want to know their actual dimensions you will have to reach out to the modeling community (like this forum) to see if someone has the parts in question and is willing to take measurements for you. or reach out to the parts manufacturers or hobby shop owners to get this info. Is that better, or am I still not understanding your question?
-
We live in an "instant gratification" world. If something can be done quick and easy with acceptable results using rattle can, that is often preferred than taking the time on honing airbrushing skills. Personally I would not use any water-based paints for painting model car bodies. I still airbrush using the old-school stinky lacquers and enamels. BTW, if Alex gets better results using spray cans that is likely in large part due to the fact that those contain the old-school stinky paints.
-
In my fastidious way of thinking I'm not sure why is everybody so afraid of the little basic math? Why approximate when every friggin' phone has a calculator built-in. Same for home computers. They're on the Interwebs too. No need to strain your brain to use the knowledge we learned in elementary school - just have your fingers do the walking on the calculator's keyboard and get an exact answer.
-
He also starred in a very silly comedy called "Top Secret!"
-
Mike, use whatever "stuff" will result in properly scaled items. We know that 1:1 scale dimensions of every part of a car, so all you have to do is to divide the 1:1 size by 24 or 25 to get the scale size. If we don't we can ask others for the proper 1:1 dimensions. Odds are someone will know the answer. Some 1:1 dimensions can be estimated. Then find materials which have those dimensions. It is not Saturn V rocket science. Using this method, as you noted, the model will look realistic. Some modelers are not too concerned about using over-scale items (like spark plug wires). Often because the oversize wire is cheaper and easier to obtain than in-scale wire. Many car modelers are a thrifty bunch. Many go on-the-cheap and just use wires extracted from old electronic devices (radios, etc.) Yes, their models do not look super-realistic but if the modeler is happy with their model, that's all that counts. Not everybody is super fastidious and detail-oriented.
-
Removing Layering from 3D Printed Bodies.
peteski replied to Kayma367's topic in Model Building Questions and Answers
LOL Charles, it is you who doesn't get it. To me the word "striation" describing the visible stepping of printed layers on 3D printed objects is perfectly in-context. Whether you think is right or wrong makes no difference to me, and everybody you ask will know exactly what I mean when I use the word "striation" in relation to surface of 3D printed objects. STRIATIONS, STRIATIONS, STRIATIONS! John came to the forum asking for some technique to eliminate those pesky striations on 3D-printed surfaces due to the way 3D printing builds the object in layers (which gives it a look of a topographical map). I'm not sure about this "not telling the whole story". What's the story and who is not telling it all? -
Removing Layering from 3D Printed Bodies.
peteski replied to Kayma367's topic in Model Building Questions and Answers
Absolutely! That butt-reaming I received from you was save-worthy. Remember, what you post on the Interwebs stays out there for as long as the Internet is around. As you can see here, I'm not the only person who is not directly involved in 3D printing who sees those layers as striations (that term is not exclusive to geology). -
Most new cars have LED headlights and most other lights are also LED-based. LEDs last much longer than halogen (incandescent) light bulbs and they are usually integrated into the housings (not replaceable). For example the taillight in my car is LED-based (except for directional and backup, which are standard bulbs). If the red taillight/brake light dies, the entire taillight housing needs to be replaced. Fortunately my headlights are still halogen bulb based and the bulbs are accessible.
-
Removing Layering from 3D Printed Bodies.
peteski replied to Kayma367's topic in Model Building Questions and Answers
Well, here's a quote from one of his angry PMs to me: All I did was show you a picture of my bodies you go off using that stratation word Man nobody uses that word and it is referring to geological features you want to try to turn into something 3D printing to sound fancier whatever you want to do go ahead voxels That's actually a very common 3D printing term I'm sorry that you're out of your league and you don't understand the common terminology for 3D printing but you want to act like you're an expert in it go ahead prove me wrong But whatever he says, striations is a perfectly good word to use for this printing artifact because the printer builds the object in layers and those look like striations. I don't care what he says. Voxels are the single print elements, not the entire striated layers. This has nothing to do with being right or wrong - If I want to call it striations I should be able to do do so without anybody having a conniption. -
Oh boy! I suspect that the S-F meant slow-fast (as in adjustment for the watch's balance wheel if it runs too fast or slow). There is no Start/Finish lever in watches. https://en.wikipedia.org/wiki/Mechanical_watch
-
Removing Layering from 3D Printed Bodies.
peteski replied to Kayma367's topic in Model Building Questions and Answers
John, I hope Texas_3D_Customs doesn't see you using the term "striations" for describing those 3D printing artifacts. I did that once and he reamed me a new you-know-what for that. I still have that exchange of PMs between us. -
I'm a self-admitted CA glue addict! I like the instant glue action. I rarely use typical styrene cement or glue in my builds. I use BSI brand CAs and accelerator. I also use epoxies for some joints and I do occasionally (when a specific task calls) use thin solvent cements (like Testors or Tamiya). I haven't used the old standby Testors cement in orange tube for decades. For nostalgic reasons I still have a tube of it, but it is hardened.
-
When I have to paint parts before assembly I mask the gluing surfaces before I paint them. I use all sorts of methods for masking. Most commonly masking tape, vinyl tubing (heat shrink or just insulation stripped from wires), liquid masking agent. If not, I will remove (scrape off) paint to expose bare plastic or metal (if those are metal parts). CA glue will often attach paint (epoxy is inert and does not seem to attack paint). But remember that since the layer of paint is between glue and the part itself, the glue joint will only be as strong as the adhesion of the paint to the plastic item (which is usually much weaker than the glue joint itself).
-
Another fine example of incompetence seen everywhere these days. Lack of troubleshooting skills, and lack of pride and responsibility in performing tasks which are part of their job. When a tech comes out to fix a problem, they should own it from the start to successful completion of the job. If their shift ends, they should get another tech engaged. Especially if the customer is a business which depends on the service. But in today's world nobody seems to give the rat's you-know-what. And in the end, after all those "professional techs" didn't find the problem, the customer (you) actually figured it out.
-
Largest kit box ever?
peteski replied to OldNYJim's topic in General Automotive Talk (Trucks and Cars)
And then you'll find out how much the built models take up on your display shelves! I had plenty of models in large boxes. Of course the 1:8 scale Pocher models. Then there are 1:8 Monogram Trans AM, OTAKI 1:12 Lamborghini and Corvette, Tamiya 1:6 bikes, Revell sailing ship models like 1:96 USS Constitution, Can-Do Wrecker, AMT Christie Fire Engine, Airfix 1:72 Boeing 707, and several other ones in my collection which escape me at this point. While all the above-mentioned boxes have larger footprint than the Revell Advent box we are discussing here, this box appears to easily beat them all in its height. -
Largest kit box ever?
peteski replied to OldNYJim's topic in General Automotive Talk (Trucks and Cars)
Marketing at its best! -
how to make transverse leaf springs?
peteski replied to rattle can man's topic in Model Building Questions and Answers
Or just use thin aluminum sheet cut into strips for the leaves. That way you you can form it and it'll retain its shape. Use CA glue to hold it together.