peteski
-
Posts
9,210 -
Joined
-
Last visited
Content Type
Profiles
Forums
Events
Gallery
Everything posted by peteski
-
LOL, not quite that long. This phenomenon is often discussed in threads in online forums about decanting paint. I don't really watch YouTube videos and I'm not sure why they fail to mention that the paint will be degassing for quite some time. I don't think it is malicious. I leave the decanted bottle's lid slightly loose for couple days, gentling swirling the bottle from time to time. If you were to search this forum for decanting info, you would find multiple threads about the subject.
-

How do YOU clear coat?
peteski replied to dreadpyrat's topic in Model Building Questions and Answers
Over (water-based?) acrylic color coat? Safe to do? -
Since the YT video is embedded in the post, what you see all comes from YT (the large image) and it is rendered by your browser. The only space taken up on the MCM forum is the embed code (text). Here is an example showing the YT embed code in a page source listing of one of your posts. <iframe width="1080" height="633" src="https://www.youtube.com/embed/Qxxp0ZA0t0o" title="Bypassing a Non-Serviceable Fuel Pump Relay on a 2017 Ford F350" frameborder="0" allow="accelerometer; autoplay; clipboard-write; encrypted-media; gyroscope; picture-in-picture; web-share" referrerpolicy="strict-origin-when-cross-origin" allowfullscreen></iframe> The "src=" is a URL pointing to YT and used by the forum to display the large YT image on your browser. Similar to what is used when a forum user uses Fotki to store their images. The images will display on the forum's page you're viewing, while the actual image sits on Fotki servers. Your browser fetches the Fotki image and displays it in the MCM post.
-
Embedded YT videos are just links to the actual YT video - they do not reside (or take space on the forum). As for photos quoted in replies to posts, those are also links to the original photos - not actual copies of the images themselves - no extra space is wasted in the forum's storage space. I often use the same attachment (photo) in multiple posts. Again, the same image gets used in all of those posts. If you go to your attachments you will see a lost of posts each attachment was used in. It is too bad that more and more people have no knowledge how to edit their photos down to size before uploading them to the forum. As I mentioned on one of the initial posts of this thread, I resample my photos to about 1200 pixels wide, which with the JPG compression I use it results in images less than 500kB (half a Megabyte). Many are even smaller (200-300kB or less). It would be very handy if the forum had a way to auto resampling photos members upload, I'm surprised it is not a feature of the forum's software. For example here is one of my earlier uploaded photos. It is 800X600 pixels (which works out to about 0.5 Megapixels). The JPG file size is only 90kB (or 0.09MB). Perfectly acceptable photo for a forum post. Another one: This one is 1200X615 (0.8 Megapixel). JPG file size is 100kB (0.1MB) So as you can see perfectly reasonable quality photos can be uploaded without taking up Megabytes of forum's storage space. Yes, it takes time to edit photos, but it is possible (and I've been doing this all along).

-
I always resized my photos to no more than 1200 pixels across (way under 1MB, usually less than 500kB in size) and I suspected that we would take up too much space, so and advocated for others to do the same (or have the forum automatically resize the photos). I recall that admins (Dave) reason for allowing large size images was because they might want to use them in the printed magazine articles I always thought that was lame excuse (because even if the photo was resized for the forum, the original author likely still has the high res version which if needed could easily be provided to the magazine's staff). I also didn't realize that the forum allow for video uploads. That is a real space hog. I don't think I ever seen anybody include locally uploaded video in their post. And like others, I no longer have the ability to add images to my posts.
-
This scam has been around for some time now. Just like any other scam or SPAM emails or texts, they dont' actually target people who live in toll road areas. They just send their emails/texts to whoever is in the contacts list they purchased from the Derk Web, or maybe even just test a bunch of consecutive phone numbers. Don't try to make sense of any scams - there likely isn't any. Actually I just got one of those today on my cell phone. Just report it as scam, block the number (which does no good anyway because they use disposable or fake numbers) and move on with your life. We really live in sucky times constantly being accosted by all sorts of bad actors.
-
I think that Revell (or any for-profit company) doesn't make products to minimize cost. They make them to maximize profits. So selling expensive spray cans is what they want to do.
-
Airbrushing Testors enamels???
peteski replied to doorslammer68's topic in Model Building Questions and Answers
While everybody touts using lacquer thinner, I think using the dedicated Testors thinner works even better because it evaporates much slower than lacquer thinner, allowing the wet paint to level out to a smooth glossy surface. Modelers also mention that using lacquer thinner allows the paint to dry into a harder coating but is that proven scientifically? I again suspect that, because lacquer thinner fully evaporates fast the paint hardens quicker, while Testors thinner needs more time to fully evaporate. But in the end after long drying time, both methods result in the same fully cured paint hardness. -
Does putty soften plastic?
peteski replied to topher5150's topic in Model Building Questions and Answers
Is it the added water or the heat from your fingers making it softer? Hey, but the important thing is that it works for you. -
Source for white decal paper?
peteski replied to bh1701's topic in Model Building Questions and Answers
Yes, I use BMF clear decal paper in my Alps printer, but they also sell white film. Unfortunately they seam to also be out of stock at this time. https://www.bare-metal.com/experts-choice-decal-film.html Make sure to select the paper for laser printers. You might try Sunyscopa paper. https://www.sunnyscopa.com/products/laser-waterslide-decal-paper?srsltid=AfmBOopL_iZFxwrUZQrYZ_fpvThBLvhiC8wSBJEpg0am8Cr7l3N1pVlu&variant=44756694925478 They seem to be in stock. Warning: their thin film is *VERY* think. I found it difficult to deal with. I would go with standard thickness. -
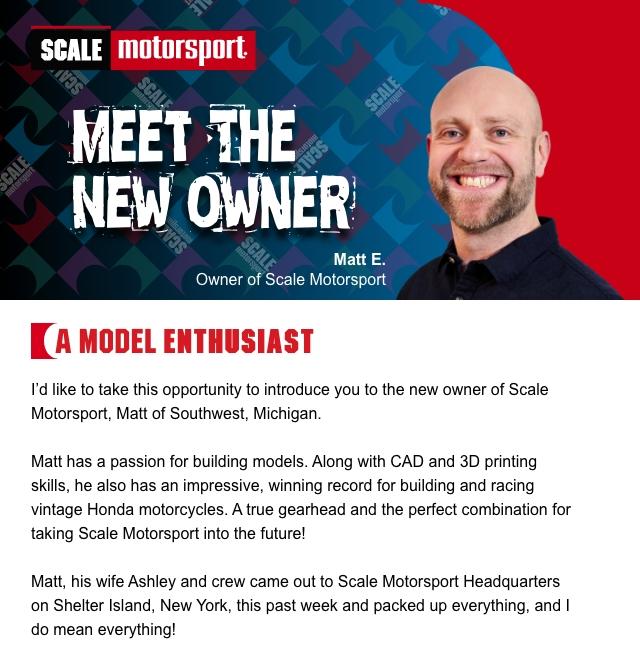
Scale Motorsport closing sale
peteski replied to 1320's topic in Car Aftermarket / Resin / 3D Printed
I received an email from them with the following info
-
That looks like similar cutter I own made by North West Short line. Problem with these is that unlike using a saw blade which removes the material from the kerf, these have a blade which displaces the material being cut. That results in a cut which is not straight (perpendicular to the base). This is not much of a problem with very thin materials, but if you try getting a 90 deg. cut in a thicker item, you will be disappointed and likely will need to sand the cut face to make it true.
-
Does putty soften plastic?
peteski replied to topher5150's topic in Model Building Questions and Answers
That is absolutely true! Notice that I stated "Well, you can use water on its surface to prevent it from sticking to things, but not to make the mixture thinner. " I sometimes even use saliva on my fingers to prevent the epoxy from sticking. Might be gross to some, but it works. After all saliva is mostly water. But that was not what is not what you originally posted. You mentioned "It is two part, can be thinned with water". That to me clearly means that you mixed the water into the putty mixture to make it softer/thinner, no? I'll say again: epoxy and water to not mix. -
Does putty soften plastic?
peteski replied to topher5150's topic in Model Building Questions and Answers
Water? Is that some sort of new Milliput 2-part putty? The older one I have is 2-part epoxy putty and it does not get along with water at all. Just like any other epoxy putties or adhesives - water and epoxy do not mix. Well, you can use water on its surface to prevent it from sticking to things, but not to make thinner. -
Yes, standard plastic cements are useless for sticking to metal (BMF). A thin bead of epoxy (clear glue) applied carefully to the edge of the window should work, or instead epoxy use canopy glue (which is white but dries crystal clear). Canopy glue is water based to it is easier to clean up if something goes wrong. Trevor's advice of using clear paint or Future Floor Finish (which is basically water based acrylic clear) is also good advice. And if the rear window does not fit because it is too large then carefully sand the edges until it fits. It might not fit due to the added thickness of the paint and BMF in the window opening. Manufacturers usually do not take that into consideration when designing a kit.
-
Auto quiz #632 - Finished
peteski replied to carsntrucks4you's topic in Real or Model? / Auto ID Quiz
Good point, but it was likely a global corporate design with input from designers in Europe and U.S. -
Auto quiz #632 - Finished
peteski replied to carsntrucks4you's topic in Real or Model? / Auto ID Quiz
Obviously is a European car with the looks of its contemporary American Ford Mustang. I always earn new things here. -
Fixing scribing mistakes
peteski replied to countrypapa's topic in Model Building Questions and Answers
While that's funny, the solvent which turns the solid plastic into a liquid Goo *HAS TO* evaporate to get the plastic back into its hard state. Since liquid (which evaporates) takes up some volume, I guarantee that there will be shrinkage (even if the water was not cold). -
Joann Closing All Stores
peteski replied to Perspect Scale Modelworks's topic in Tips, Tricks, and Tutorials
That is an excellent question for Joann Fabrics management and lawyers. I have no clue. -
Fixing scribing mistakes
peteski replied to countrypapa's topic in Model Building Questions and Answers
You could use CA glue and some mild-acting accelerator (like BSI brand) to fill the mistake. Then sand and rescribe the fixed area within few hours of the glue hardening. CA glue continues to harden over time, but within few hours it will be about the same hardness as the surrounding styrene. But also don't do it right away. It will be too soft. Wait about an hour before working in it. Good thing is that CA glue (like 2-part putties) desn't shrink like other putties or Goo which use solvent that evaporates. -
Is anybody familiar with F&F Resin?
peteski replied to Riser70's topic in General Automotive Talk (Trucks and Cars)
They key word here is "was". -
Thanks for confirming that any Lye-based product like oven cleaner or several others will strip the metalization (and even the clear undercoat). With 250+ posts in this thread it has probably been mentioned over a dozen times.
-
I believe the goal here is not to have a solid-color textured roof but have it finished in the wild paisley colors in shown in the initial post. If that's applied as a decal, any texture would have to be a clear coat. Personally, in 1:24/25 scale to me any visible texture would be out of scale. Just a coat of semigloss clear would likely look realistic.
-
That is a good idea for 90 deg. cuts. I have a miter box which uses the same aluminum extruded shape as yours but in mine the slots for the saw blade are much narrower. Mine is made (or packaged) by X-ACTO.
-
I successfully use sharpened brass tubing punches to cut out gauges printed on paper (either directly or as decals). For backing surface I use one of those self-healing hobby mats. It is hard enough not to yield under pressure, but soft enough not to run the edge of my brass tube punch. EDIT: I think I sound clarify my method. I don't use the sharpened-end tubing as a punch, but more like a hole saw. I put the tube over the decal laying on the cutting mat, then place the tube over the image I want to cut. Then while pressing down on the tube I also spin it until I cut all the way through.