peteski
-
Posts
9,217 -
Joined
-
Last visited
Content Type
Profiles
Forums
Events
Gallery
Everything posted by peteski
-

Joann Closing All Stores
peteski replied to Perspect Scale Modelworks's topic in Tips, Tricks, and Tutorials
That is an excellent question for Joann Fabrics management and lawyers. I have no clue. -
Fixing scribing mistakes
peteski replied to countrypapa's topic in Model Building Questions and Answers
You could use CA glue and some mild-acting accelerator (like BSI brand) to fill the mistake. Then sand and rescribe the fixed area within few hours of the glue hardening. CA glue continues to harden over time, but within few hours it will be about the same hardness as the surrounding styrene. But also don't do it right away. It will be too soft. Wait about an hour before working in it. Good thing is that CA glue (like 2-part putties) desn't shrink like other putties or Goo which use solvent that evaporates. -
Is anybody familiar with F&F Resin?
peteski replied to Riser70's topic in General Automotive Talk (Trucks and Cars)
They key word here is "was". -
Thanks for confirming that any Lye-based product like oven cleaner or several others will strip the metalization (and even the clear undercoat). With 250+ posts in this thread it has probably been mentioned over a dozen times.
-
I believe the goal here is not to have a solid-color textured roof but have it finished in the wild paisley colors in shown in the initial post. If that's applied as a decal, any texture would have to be a clear coat. Personally, in 1:24/25 scale to me any visible texture would be out of scale. Just a coat of semigloss clear would likely look realistic.
-
That is a good idea for 90 deg. cuts. I have a miter box which uses the same aluminum extruded shape as yours but in mine the slots for the saw blade are much narrower. Mine is made (or packaged) by X-ACTO.
-
I successfully use sharpened brass tubing punches to cut out gauges printed on paper (either directly or as decals). For backing surface I use one of those self-healing hobby mats. It is hard enough not to yield under pressure, but soft enough not to run the edge of my brass tube punch. EDIT: I think I sound clarify my method. I don't use the sharpened-end tubing as a punch, but more like a hole saw. I put the tube over the decal laying on the cutting mat, then place the tube over the image I want to cut. Then while pressing down on the tube I also spin it until I cut all the way through.
-
That's a bad news. Some time ago I bought a very nice 3D printed wire wheels and front suspension upgrade for Revell Jaguar XK-E and looking at their website, they had many other very useful items available. Like you, I hope someone else takes over their operation. I wonder why the business closed.
-
MR. COLOR LEVELING THIINER
peteski replied to Andrew McD's topic in Model Building Questions and Answers
My local hobby shop has few bottles in stock. -
Looking for replacement blades
peteski replied to dragstk's topic in Model Building Questions and Answers
I have a larger version of that tool made by Olfa for scoring acrylic. The blade itself has asimilar shape but it is larger and double ended. I'm also surprised how a blade made of hard steel got dull while being used on soft plastic. I thought it would remain sharp for a very long time and possibly only need replacement if the blade broke -
Comparison between Tamiya and Rustoleum
peteski replied to bobthehobbyguy's topic in Model Building Questions and Answers
LOL! If someone was keeping score, it seems that you're now the one with the last word. Funny how things work out. -
Which glue for smp24 kits
peteski replied to tooltime-fan's topic in Model Building Questions and Answers
I'm not familiar with the glue name you mentioned but as others mentioned, for cast polyurethane or 3D printed resin models CA glue (super-glue) or epoxy should work. Make sure that the parts you are trying to glue are very clean (free or mold release agent or other contamination). -
That makes sense.
-
So it must be pressurized inside the frame, correct?
-
Congratulations Topher! I'm curious as to the origins of the name Rabell.
-
Ok, I'll bite. Why nitrogen and how exactly it would indicate a frame crack? It is not like nitrogen is a liquid die which would seep out of the crack. It is a gas. Or was the gas pressurized in the airtight frame and they would check if the pressure dropped after a race? The ambient air is 78% nitrogen. Why not just use plain atmospheric air?
-
Well Future itself (or whatever its current name is) is a glossy Acrylic Finish (not polish as Bill mentioned), so yes, ammonia will likely affect any of the other water-based acrylic paints modelers seem to be using more and more. It should not harm any old-school organic solvent based "stinky" lacquers or enamels.
-
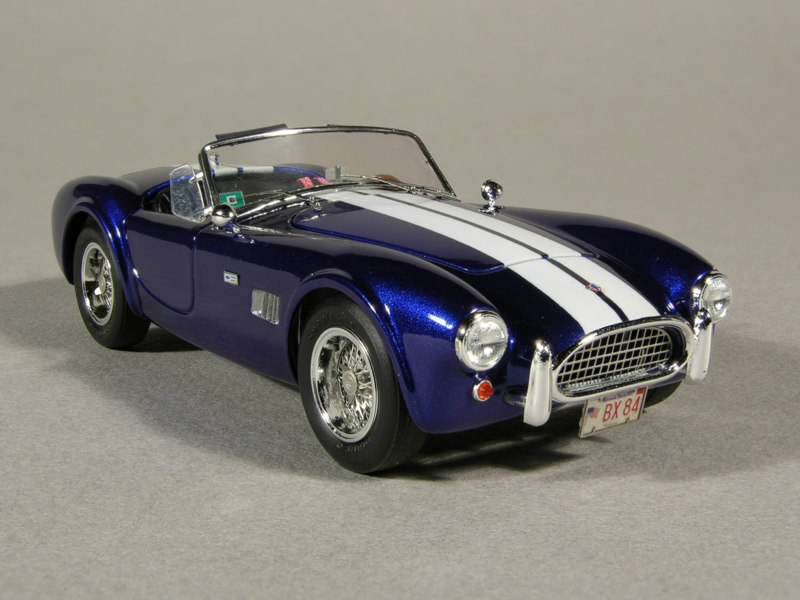
Bill, my exact statement was "To me sanding the a smooth primer coat is a waste of time. " I guess you missed the "to me" part. I have models which won awards at the shows with the paint applied over bare plastic (no primer at all) or unsanded primer. I'm happy with them. Like I said "to me". Are they flawless? No way, but they make me (and show judges) happy. For example my 1:43 289 Cobra painted with unsanded Tamiya Fine White primer, nail polish (and white paint for stripes) and Testors Wet Look Clear looks pretty darn good. If your model painting technique requires sanding the primer, have at it! And I believe the manufacturers recommend sanding the primer to take down any schmutz or other tiny imperfection, not specifically to improve the paint adhesion. You know opinions are like you know what - everybody has one.

-
2-part epoxy adhesive hardens (polymerizes) due to a chemical reaction between part A and B, regardless of whether it sits on a non-porous surface or gets partially absorbed into the cardboard. For mixing epoxy I use a small piece of plastic with masking tape placed on top. Masking tape surface good for mixing epoxy and I can easily remove discard and replace the masking when the remains of the glue harden.
-
As I understand primer is a special coating designed to adhere well to bare plastic or metal surface, and also provide a suitable surface for the top coat of paint to adhere to it. Primer already has a satin surface finish perfect for maximum adhesion of the top coat. Another function of the primer/filler is to even out any imperfections in the painted surface and also provide uniform color for the top coat. No sanding should be required to further improve top coat adhesion, but if there are imperfections in the primed surface additional sanding will remove those imperfections. To me sanding the a smooth primer coat is a waste of time.
-
No Bob, I'm not using those sliced like a donut. Those backer rods come in fairly small diameters. I cut a length of a backer rod and stuff around the inner perimeter of the tire. It fills it up nicely and probably easier to do than stuffing a donut-shaped piece of foam.
-
Interesting. That is not my experience with 5-minute epoxies (I'm currently using Devcon brand, but I have used multiple brands in the past, but not JB Weld). While it does take longer to set in cooler ambient temperature (my workshop is currently at 59 deg. F) even then, after 10 minutes mine would be gelled enough not to be able to push the emblem into it. Anyway, forget I mentioned it. If someone waits too long, at least in that stage the gelled epoxy can be easily peeled off the surface of the model for another attempt.
-
I fully expected you to chime in. You're such a wonderful guy, I don't know how I would survive without your friendly and helpful input. I am also complete aware that Steve did not mention curing time. My post was directed at Steve G. mainly because from his prolific responses in the recent epoxy thread I knew he uses 5-minute epoxy in his modeling. It also seems illogical to use a longer setting epoxy (I think 15 minute stuff is the next step after 5 minutes) when attaching an emblem. Call me crazy, but that's my story and I'm (after 10 minutes) stickiness with it. 😜
-
Has the site been slow/unresponsive for anyone else? 3/9/25
peteski replied to DJMar's topic in How To Use This Board
LOL! The future is here! -
10 minutes? You are the likely not using 5-minute epoxy because in my experience after 10 minutes while not fully hardened it is hardened enough not to adhere to anything.