mr68gts
-
Posts
1,464 -
Joined
-
Last visited
Content Type
Profiles
Forums
Events
Gallery
Everything posted by mr68gts
-
69 pro mod chevelle, chassis started mock ups
mr68gts replied to mr68gts's topic in WIP: Drag Racing Models
Thanks Tim, It's getting there and I am glad I have gone back in a reworked much of it! It's severely pushed the project back however. I got involved with a little detail contest online where it was just a section (engine or interior) so it's pushed me to get it done. Thanks Dave, I still have some issues on occasion, especially when changing types of resin. Printing in the trailer has also added to the difficulties of it all as it is not easy to print where we are now! (dirt lot and the printer is in the basement lol) I did have it at work for a while but printing at work had it challenges too! Like if there is an issue I can't easily correct it since the computer is here at home. Also, I appreciate all the help you have given me with this project! Much of it couldn't happen without your assistance! Paul -
69 pro mod chevelle, chassis started mock ups
mr68gts replied to mr68gts's topic in WIP: Drag Racing Models
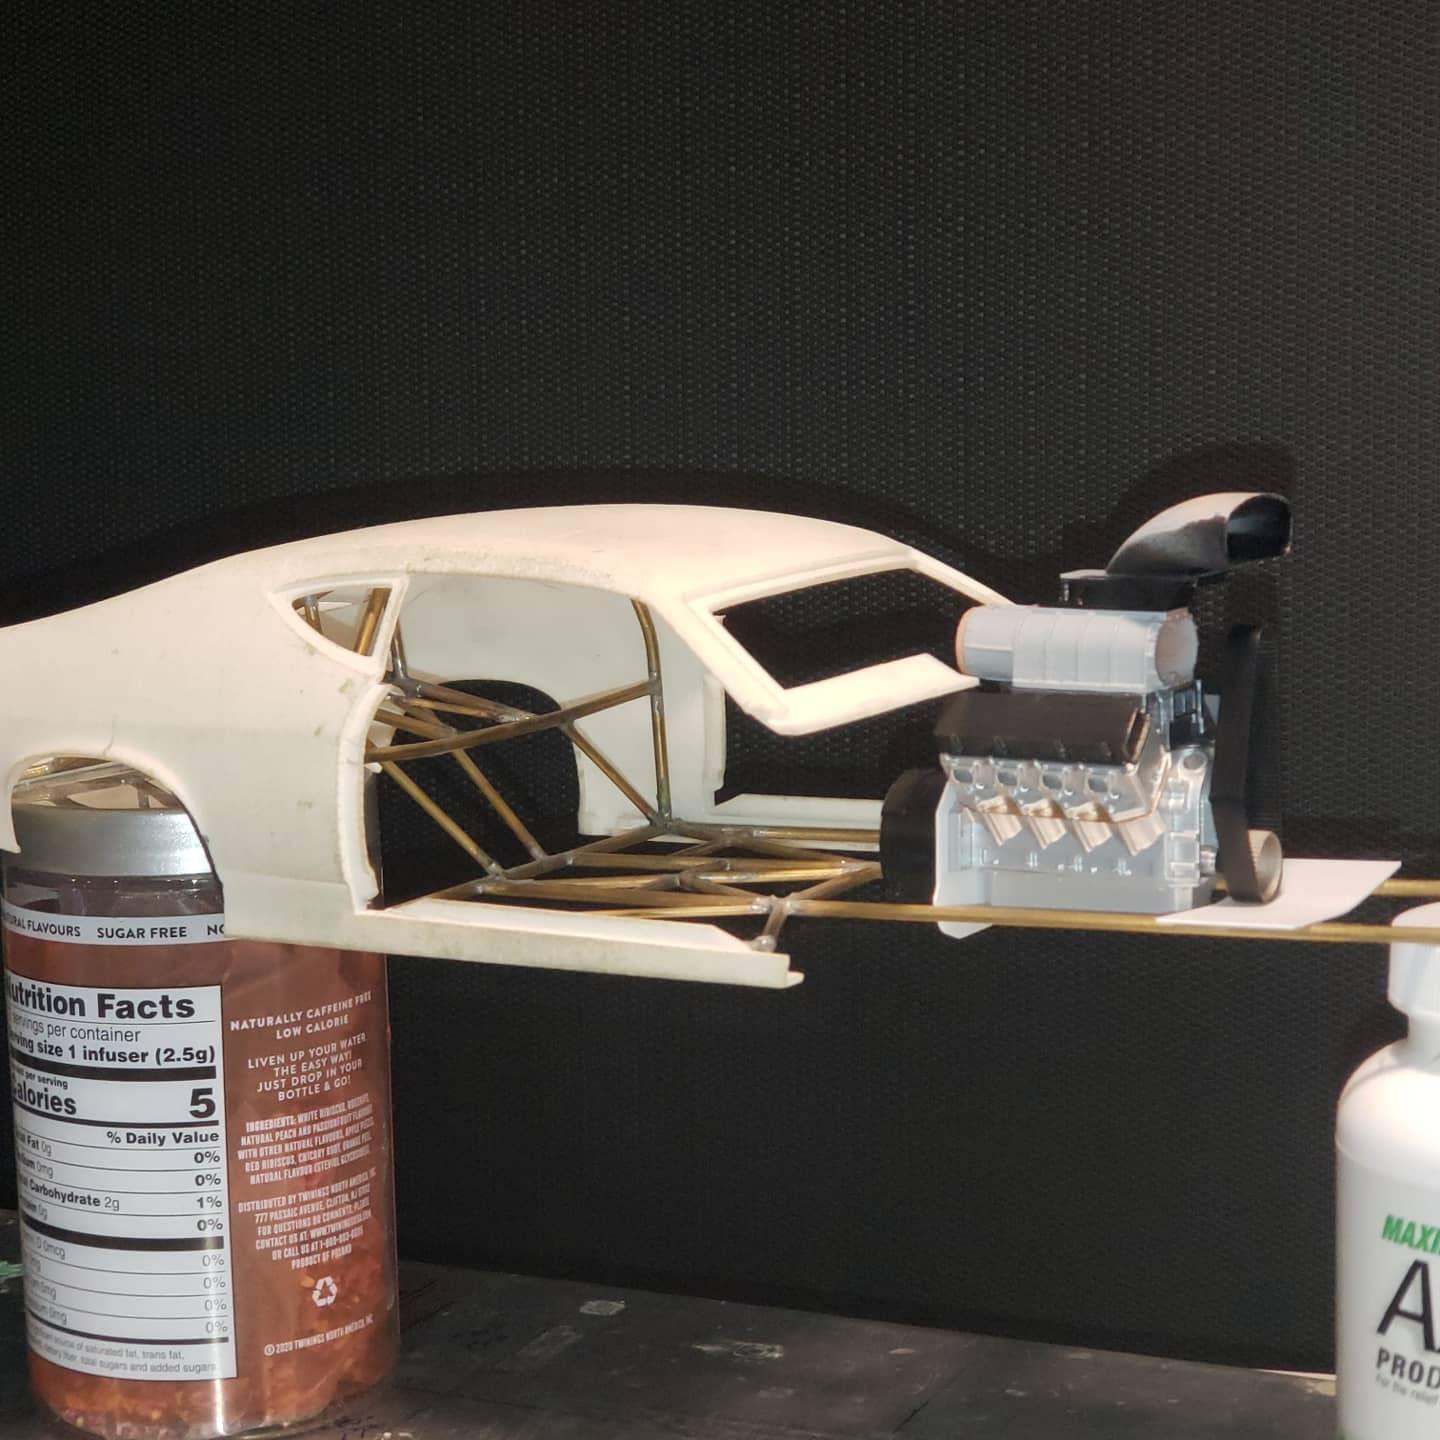
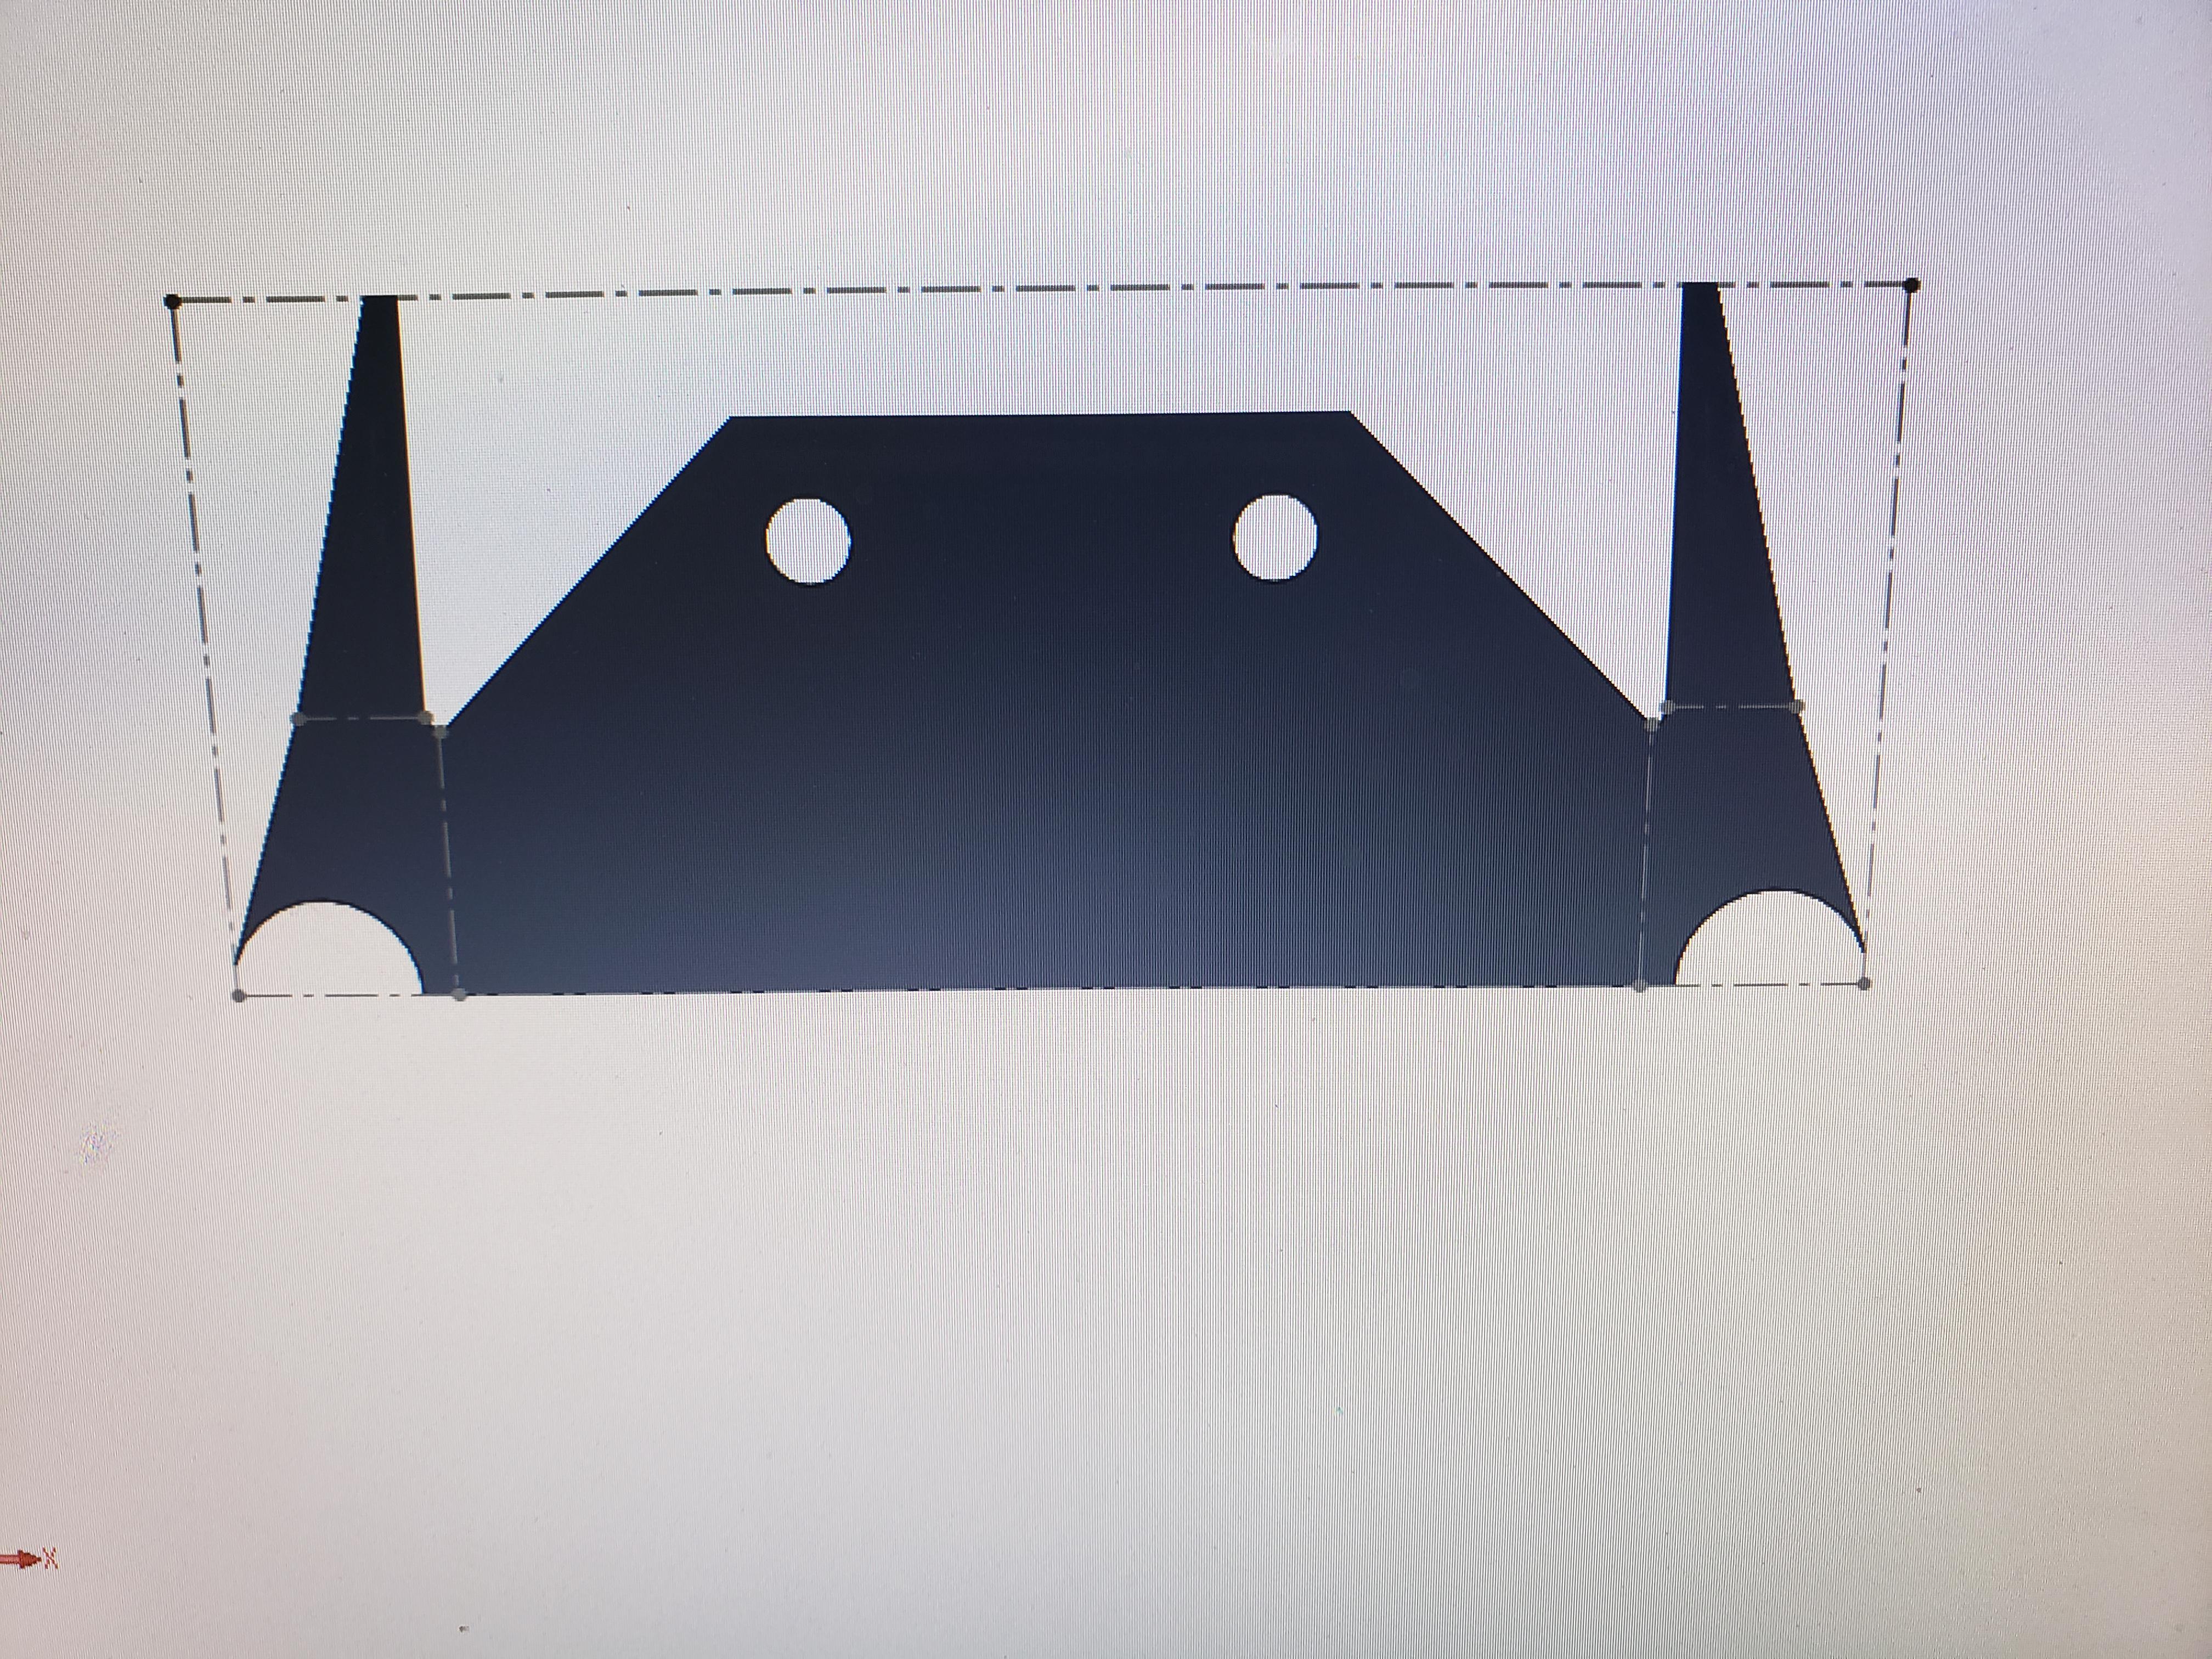
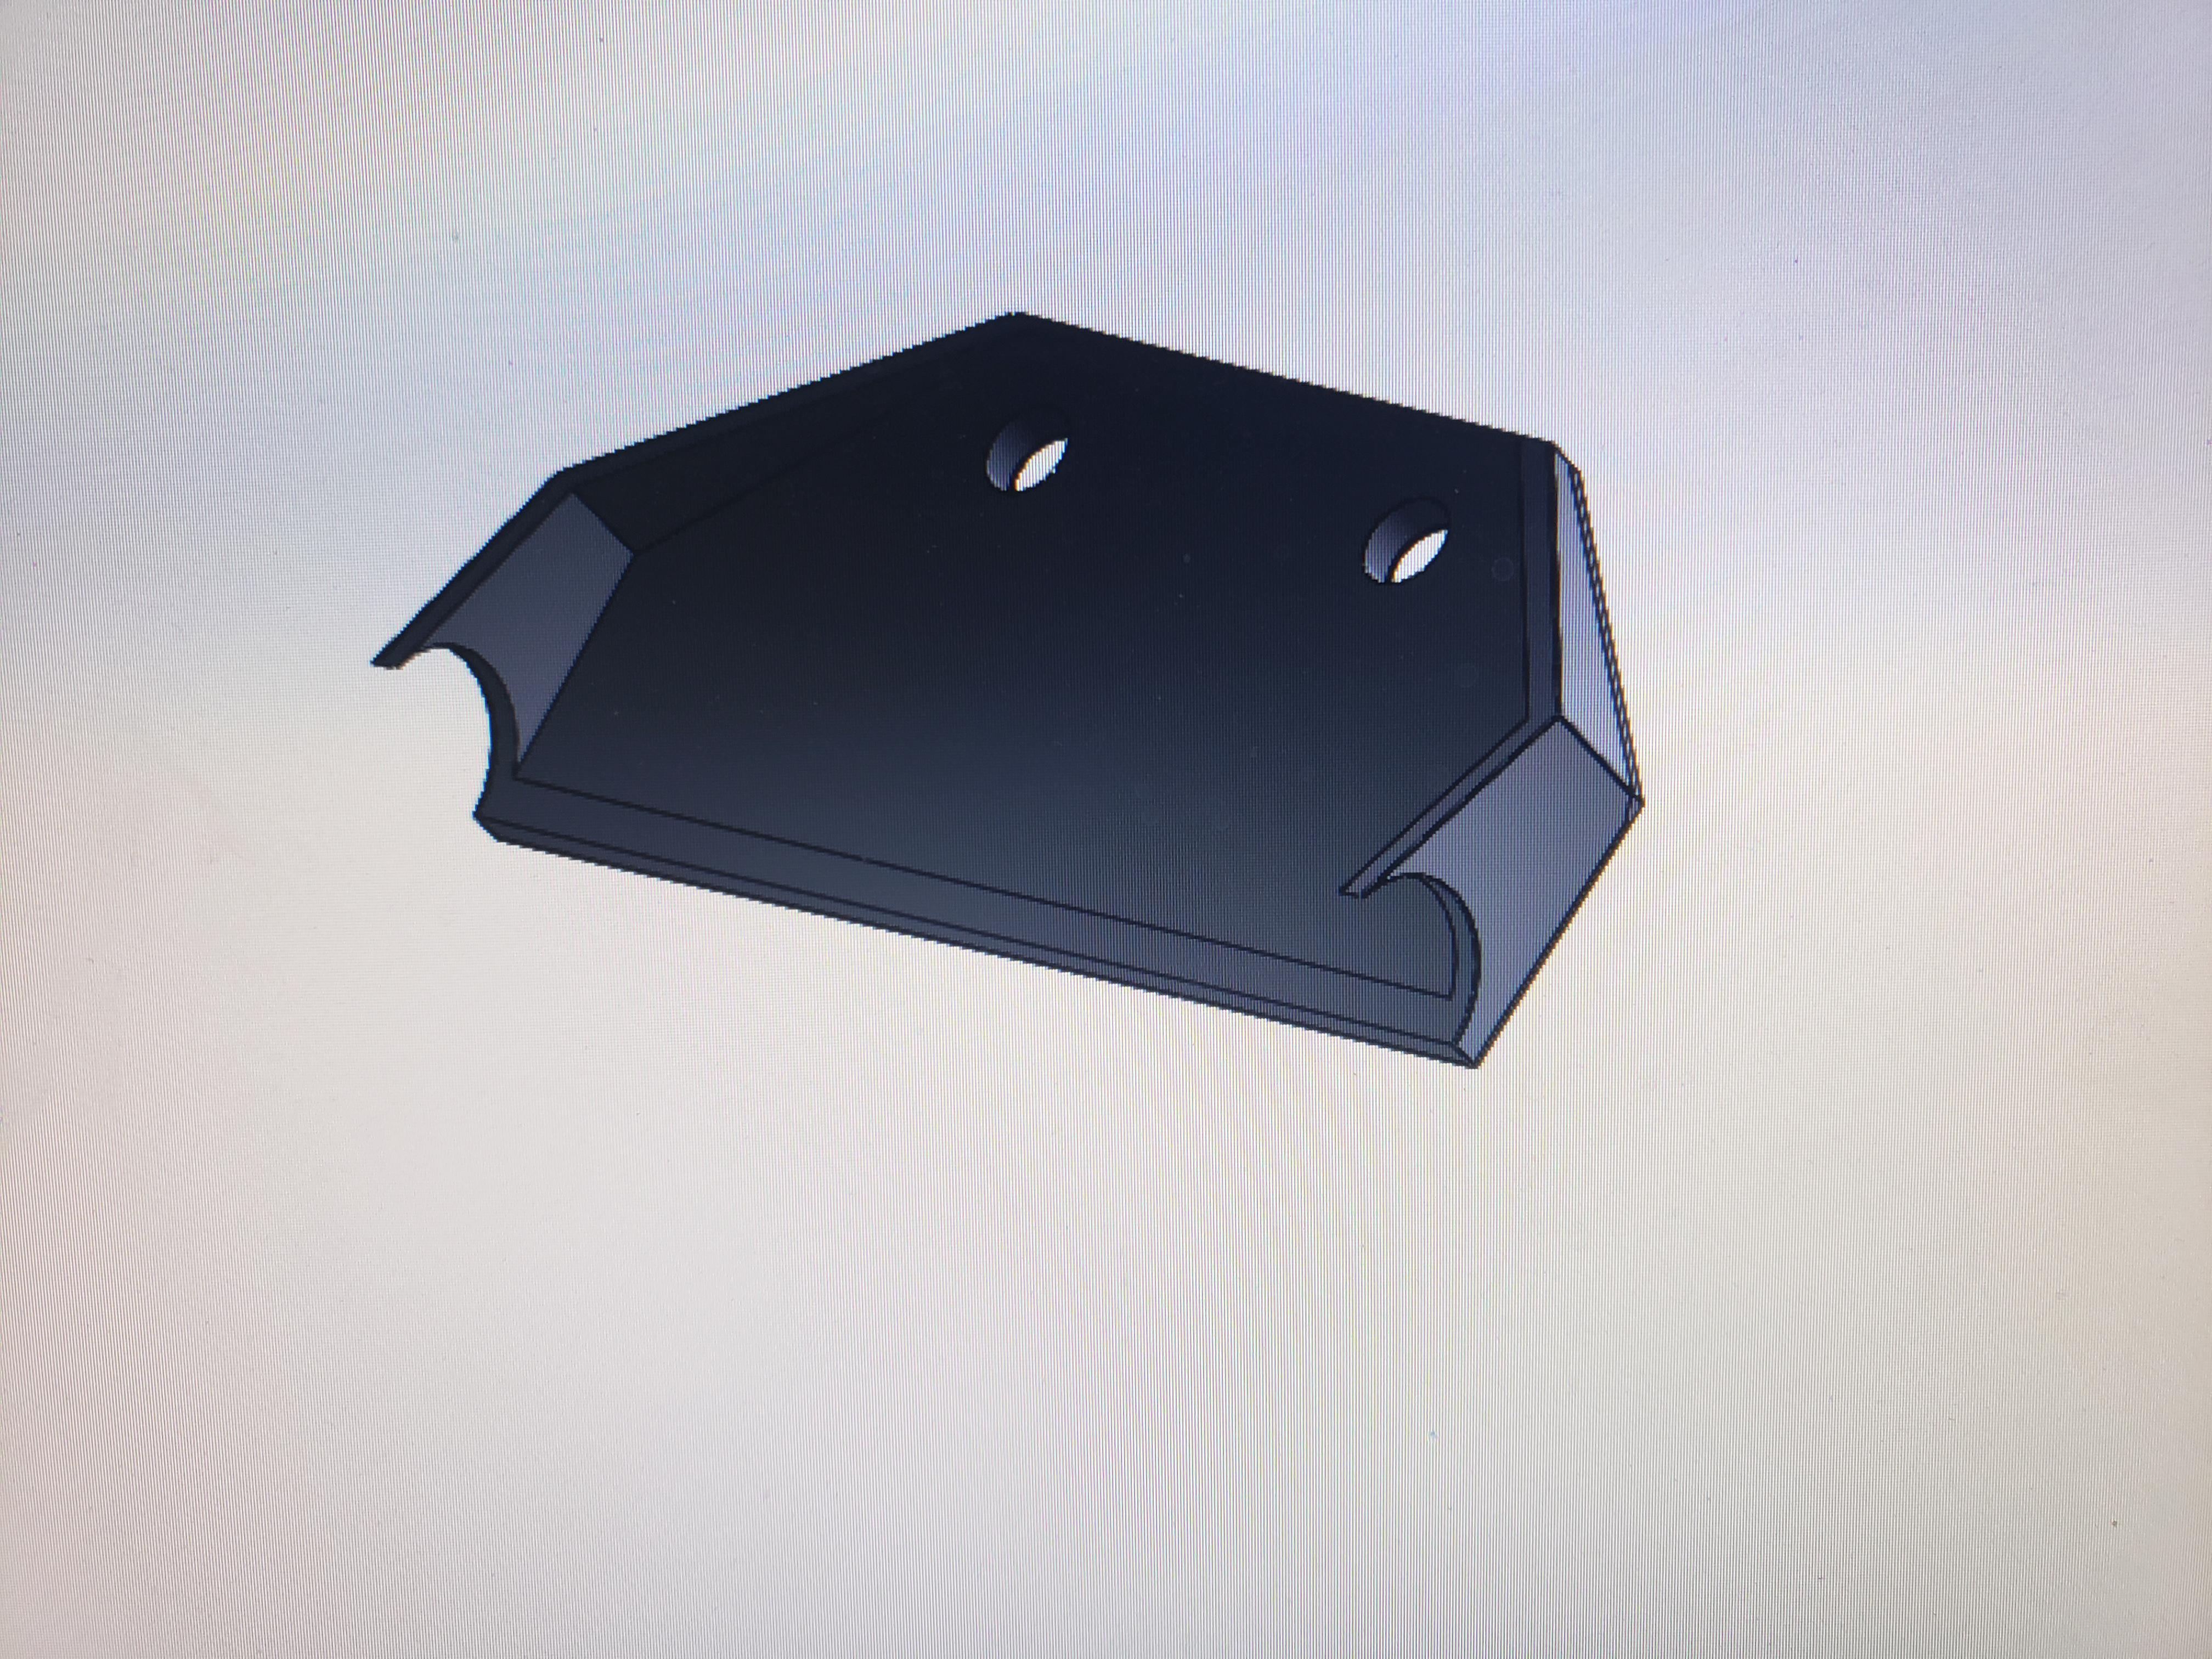
Thanks guys! So I decided to cut the mid plate out. I did this one in plastic but will cut the final one in aluminum. It is actually sitting on the bellhousing dowels in the block! So with all this hard work, I had to mock it up in the chassis to see how it looks. Well....BLAH_BLAH_BLAH_BLAH...... Color me motivated now! ?
-
69 pro mod chevelle, chassis started mock ups
mr68gts replied to mr68gts's topic in WIP: Drag Racing Models
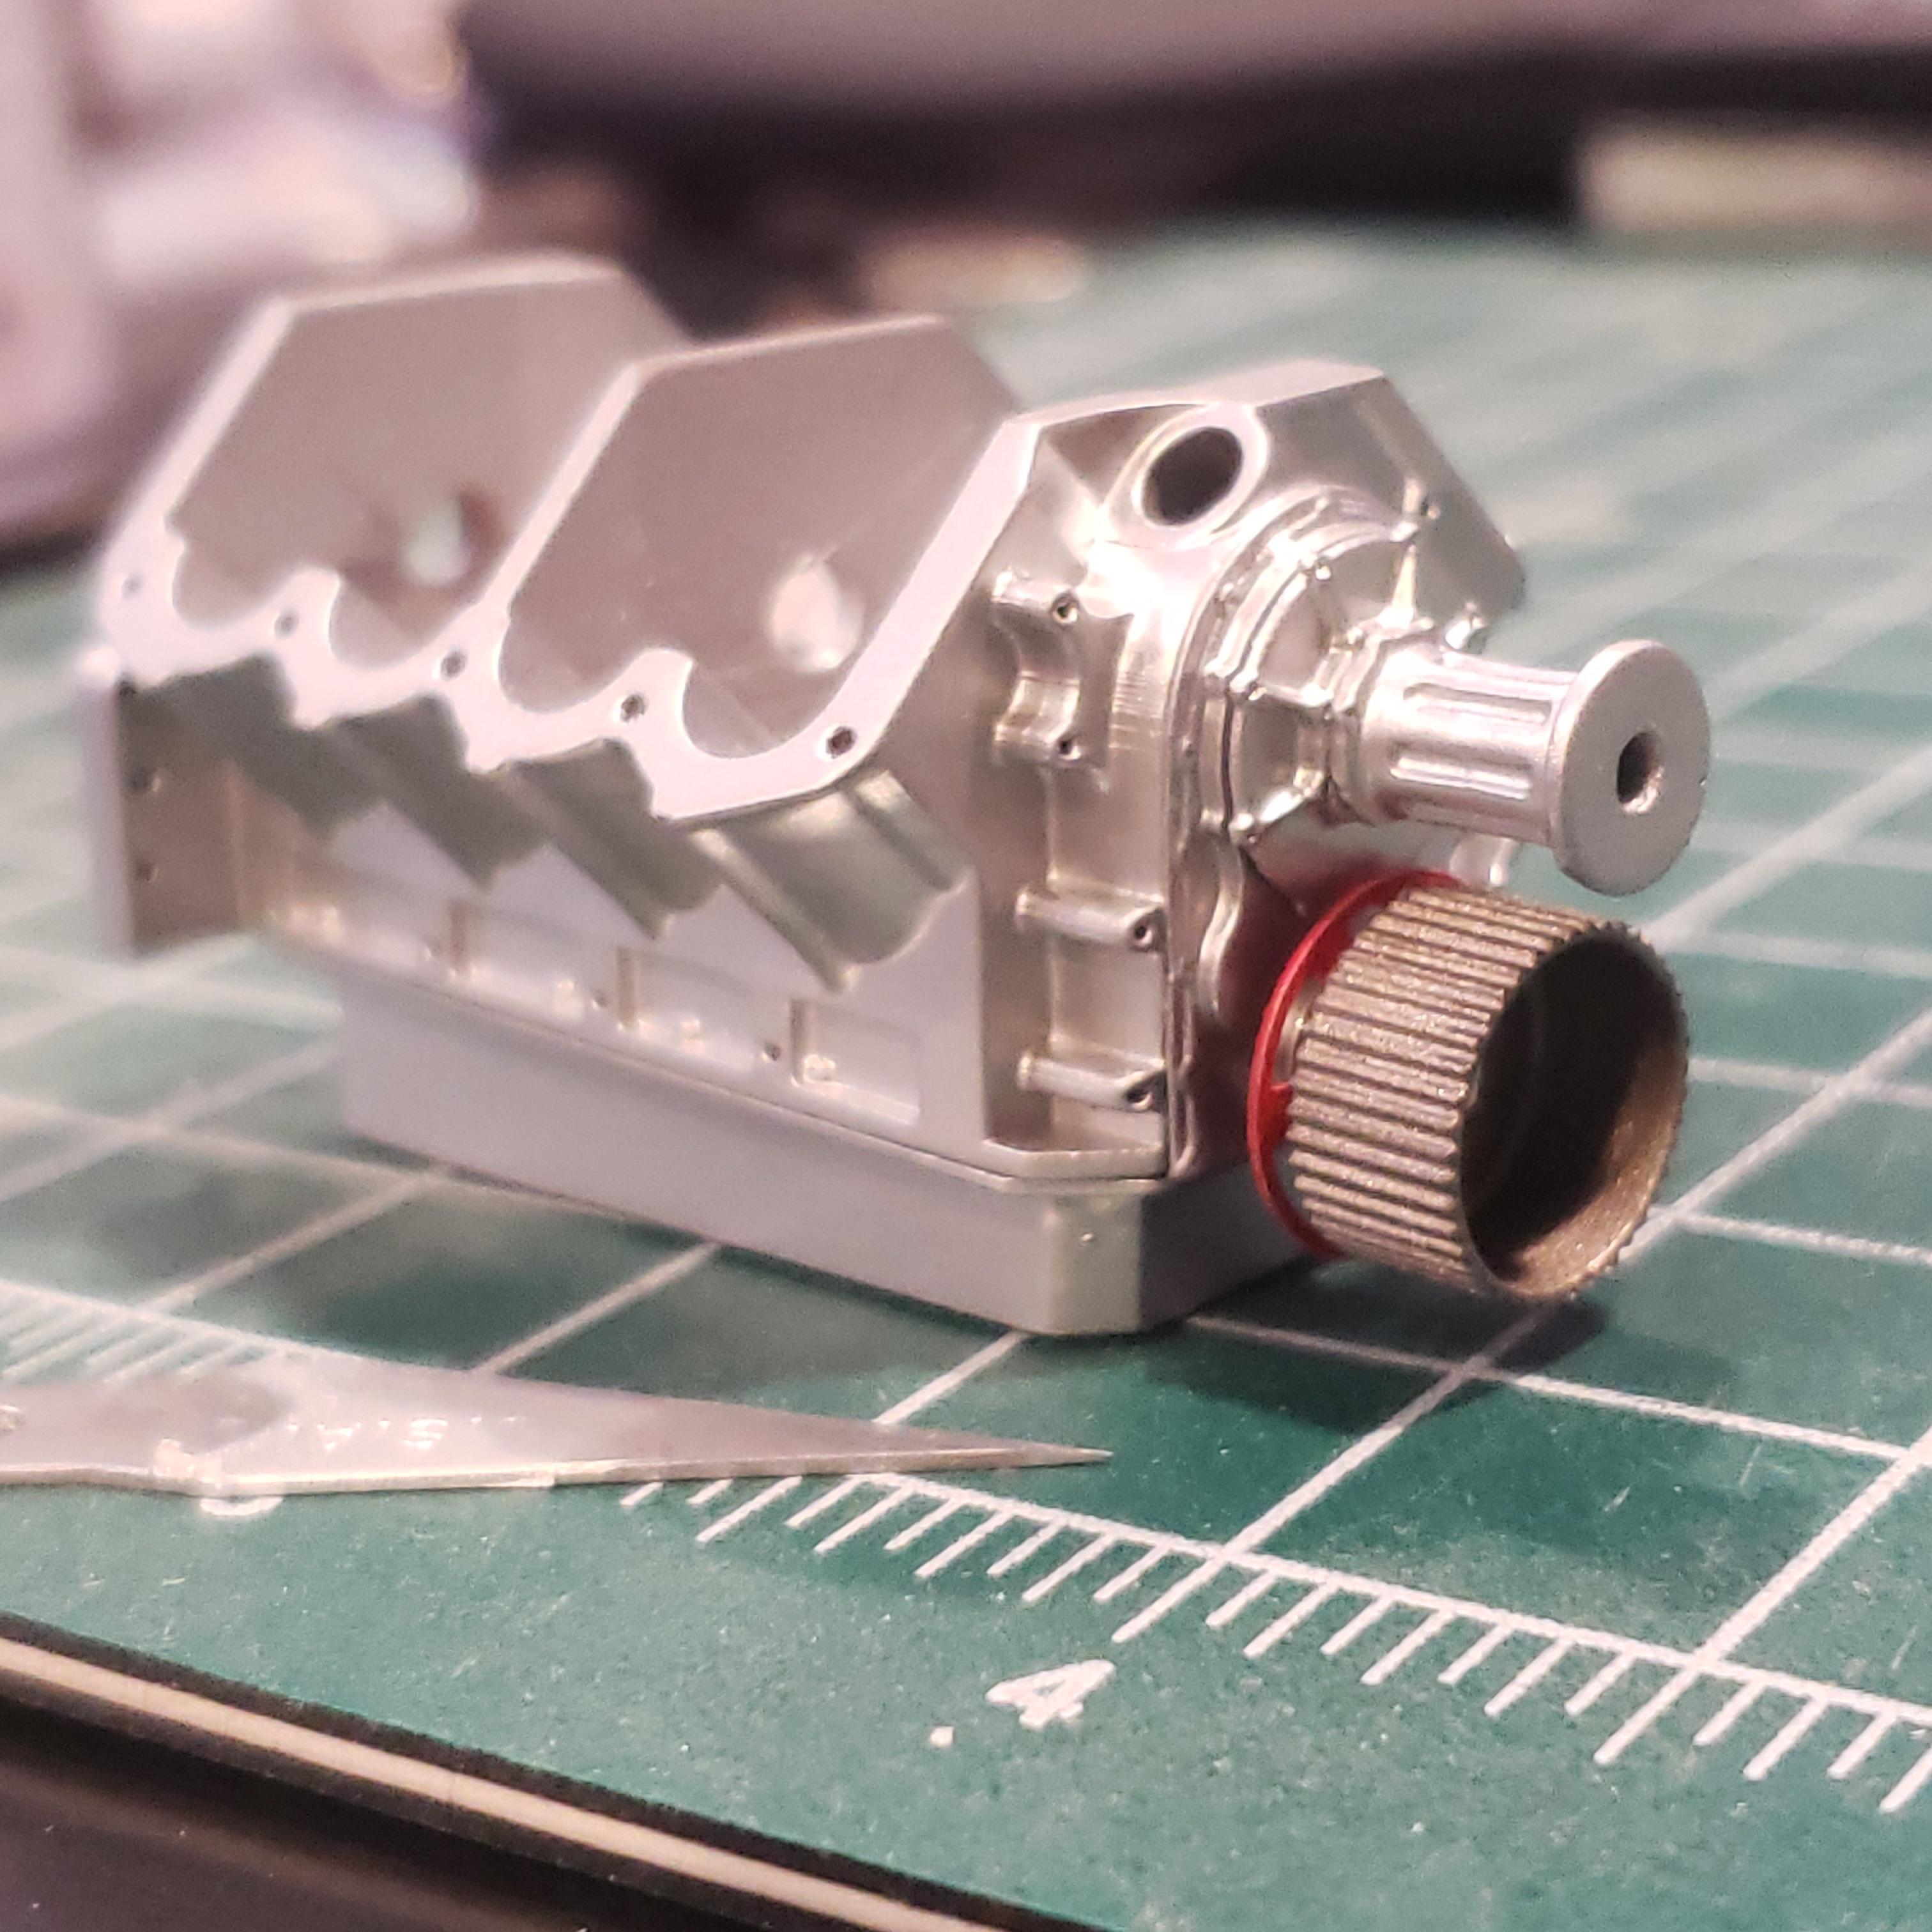
I am getting seriously close to printing all of this thing! New timing cover since I chipped the other one. Injector spacer printed awesome! Kinda surprised it printed as its pretty thin along with the blower belt!
-
69 pro mod chevelle, chassis started mock ups
mr68gts replied to mr68gts's topic in WIP: Drag Racing Models
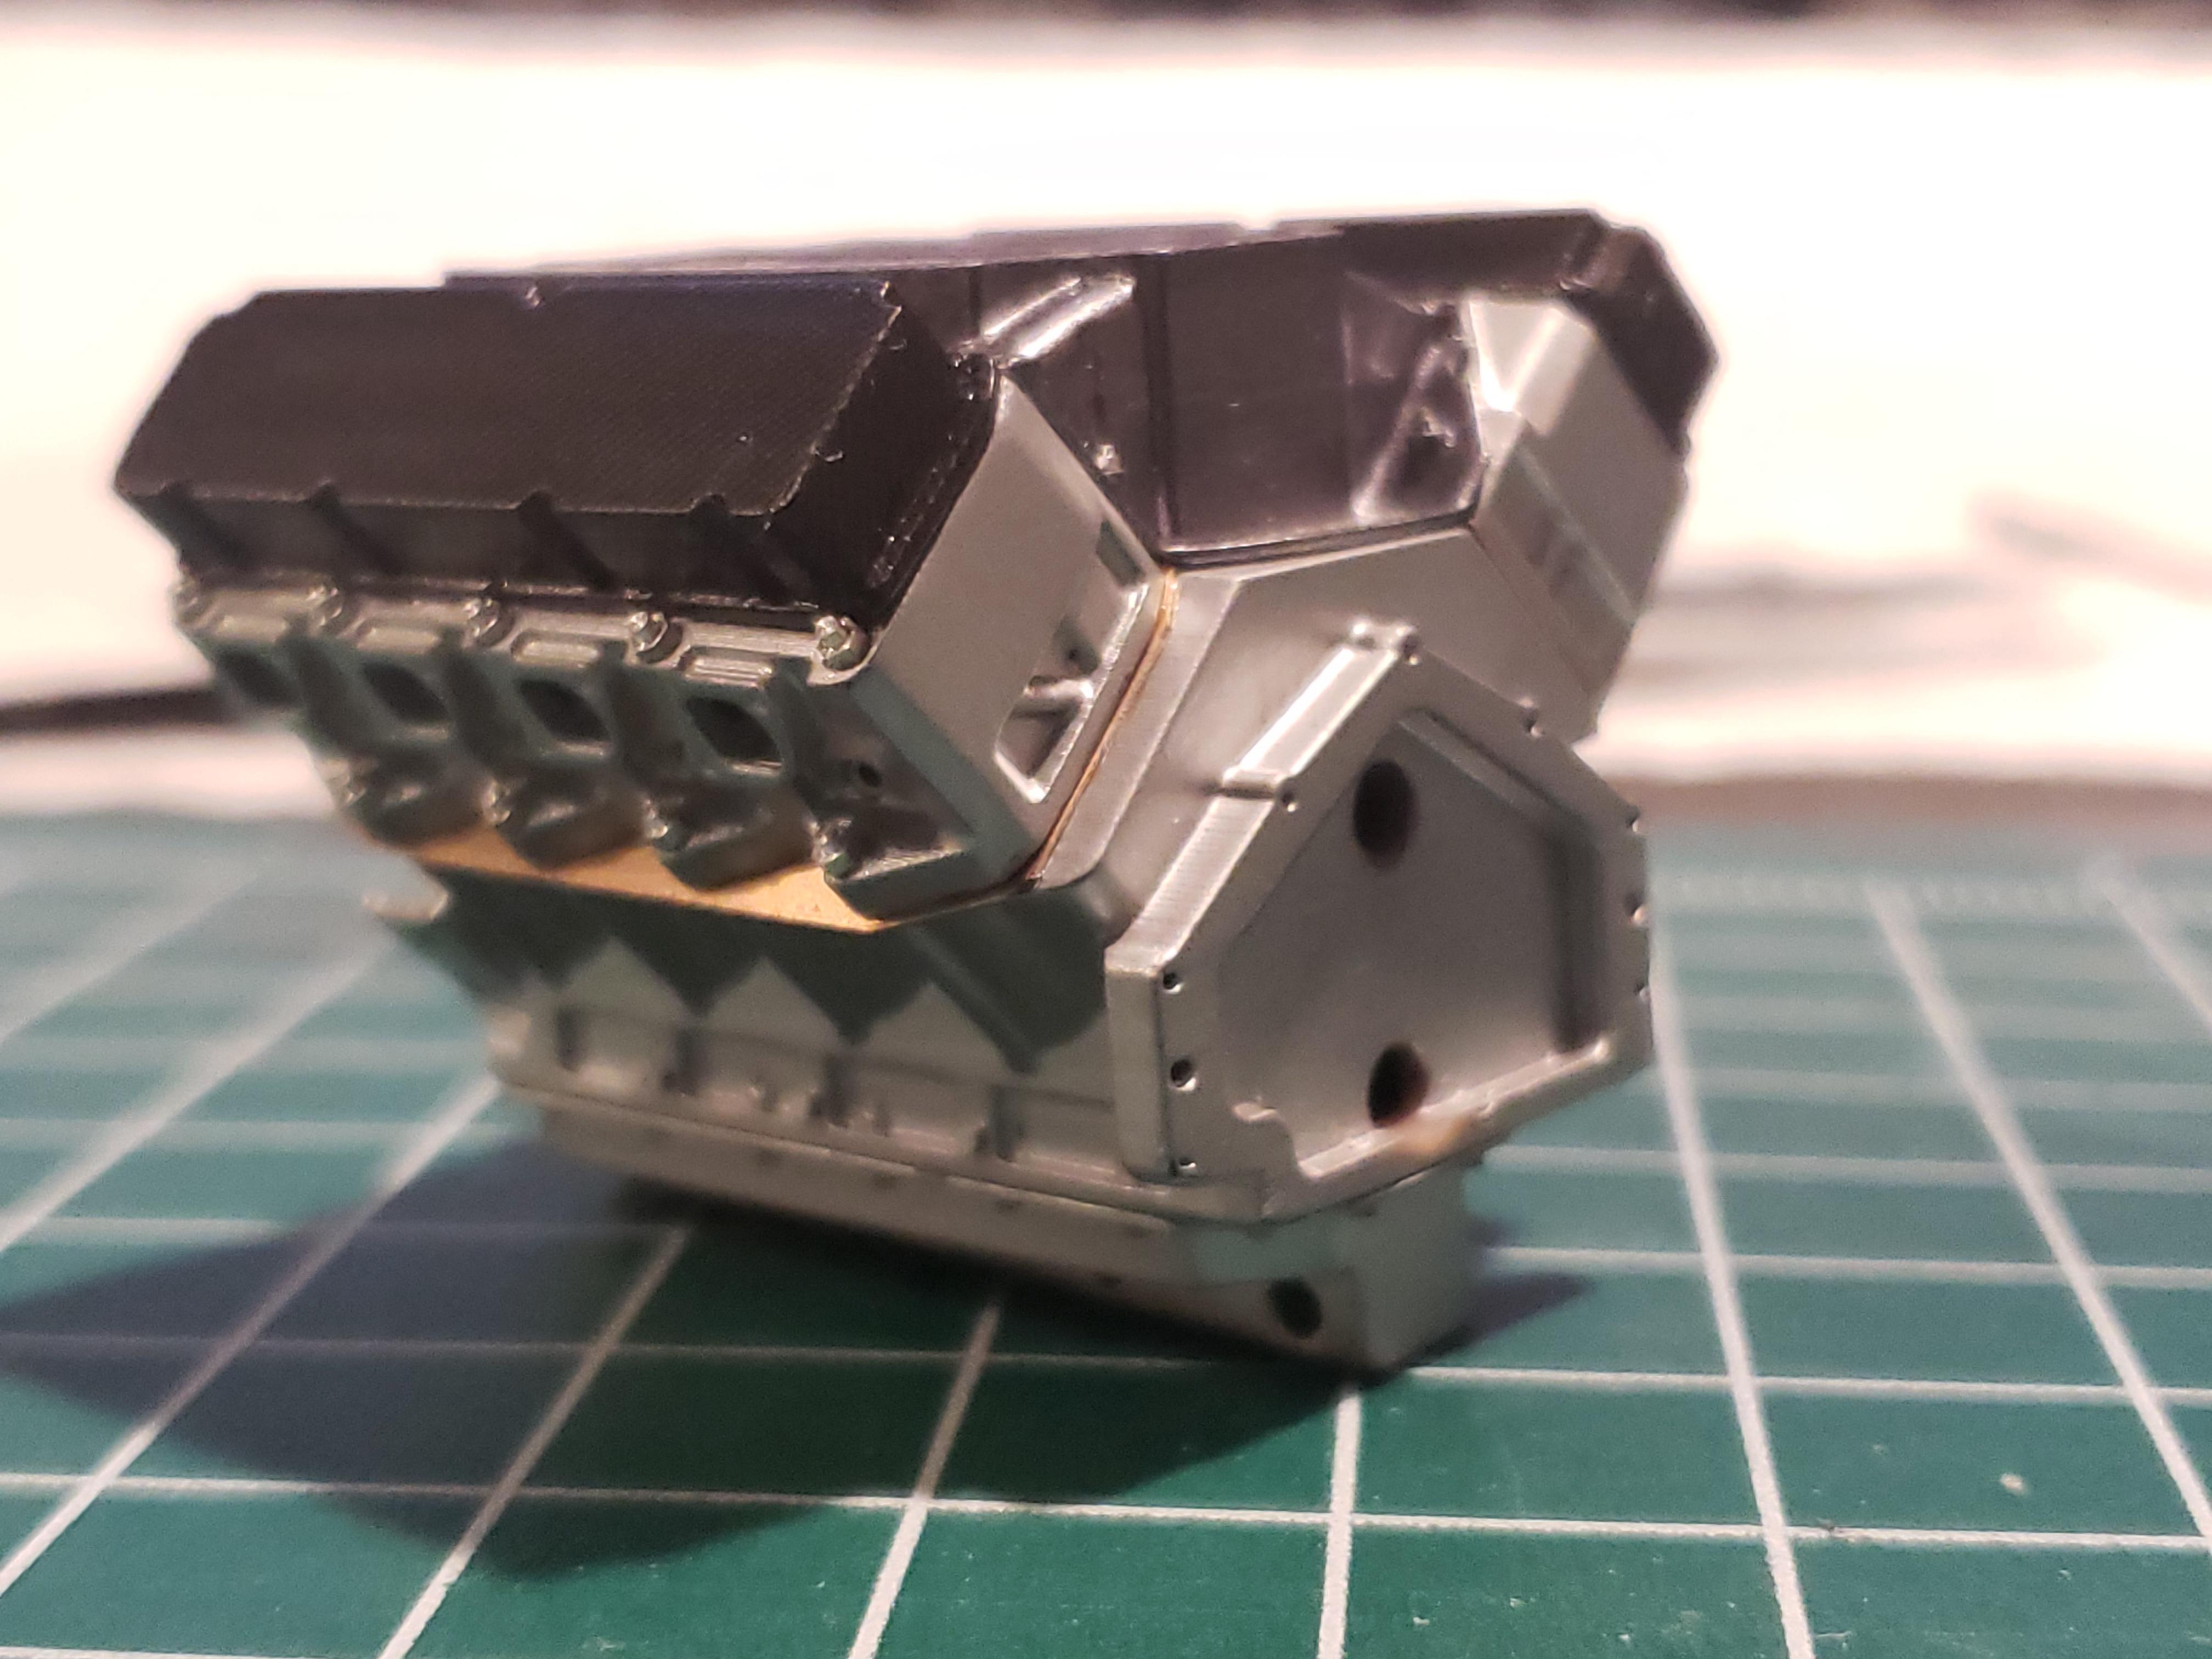
Getting further along with this engine! Valve covers have been covered in carbon fiber from scale motorsports and semi gloss cleared. Just gotta drill for the hardware and install the bolts. I chipped the front timing cover drilling for the hardware and had to print a new one. Its been printed and is ready to prep and paint. Hopefully this one goes better than the last...?
-
69 pro mod chevelle, chassis started mock ups
mr68gts replied to mr68gts's topic in WIP: Drag Racing Models
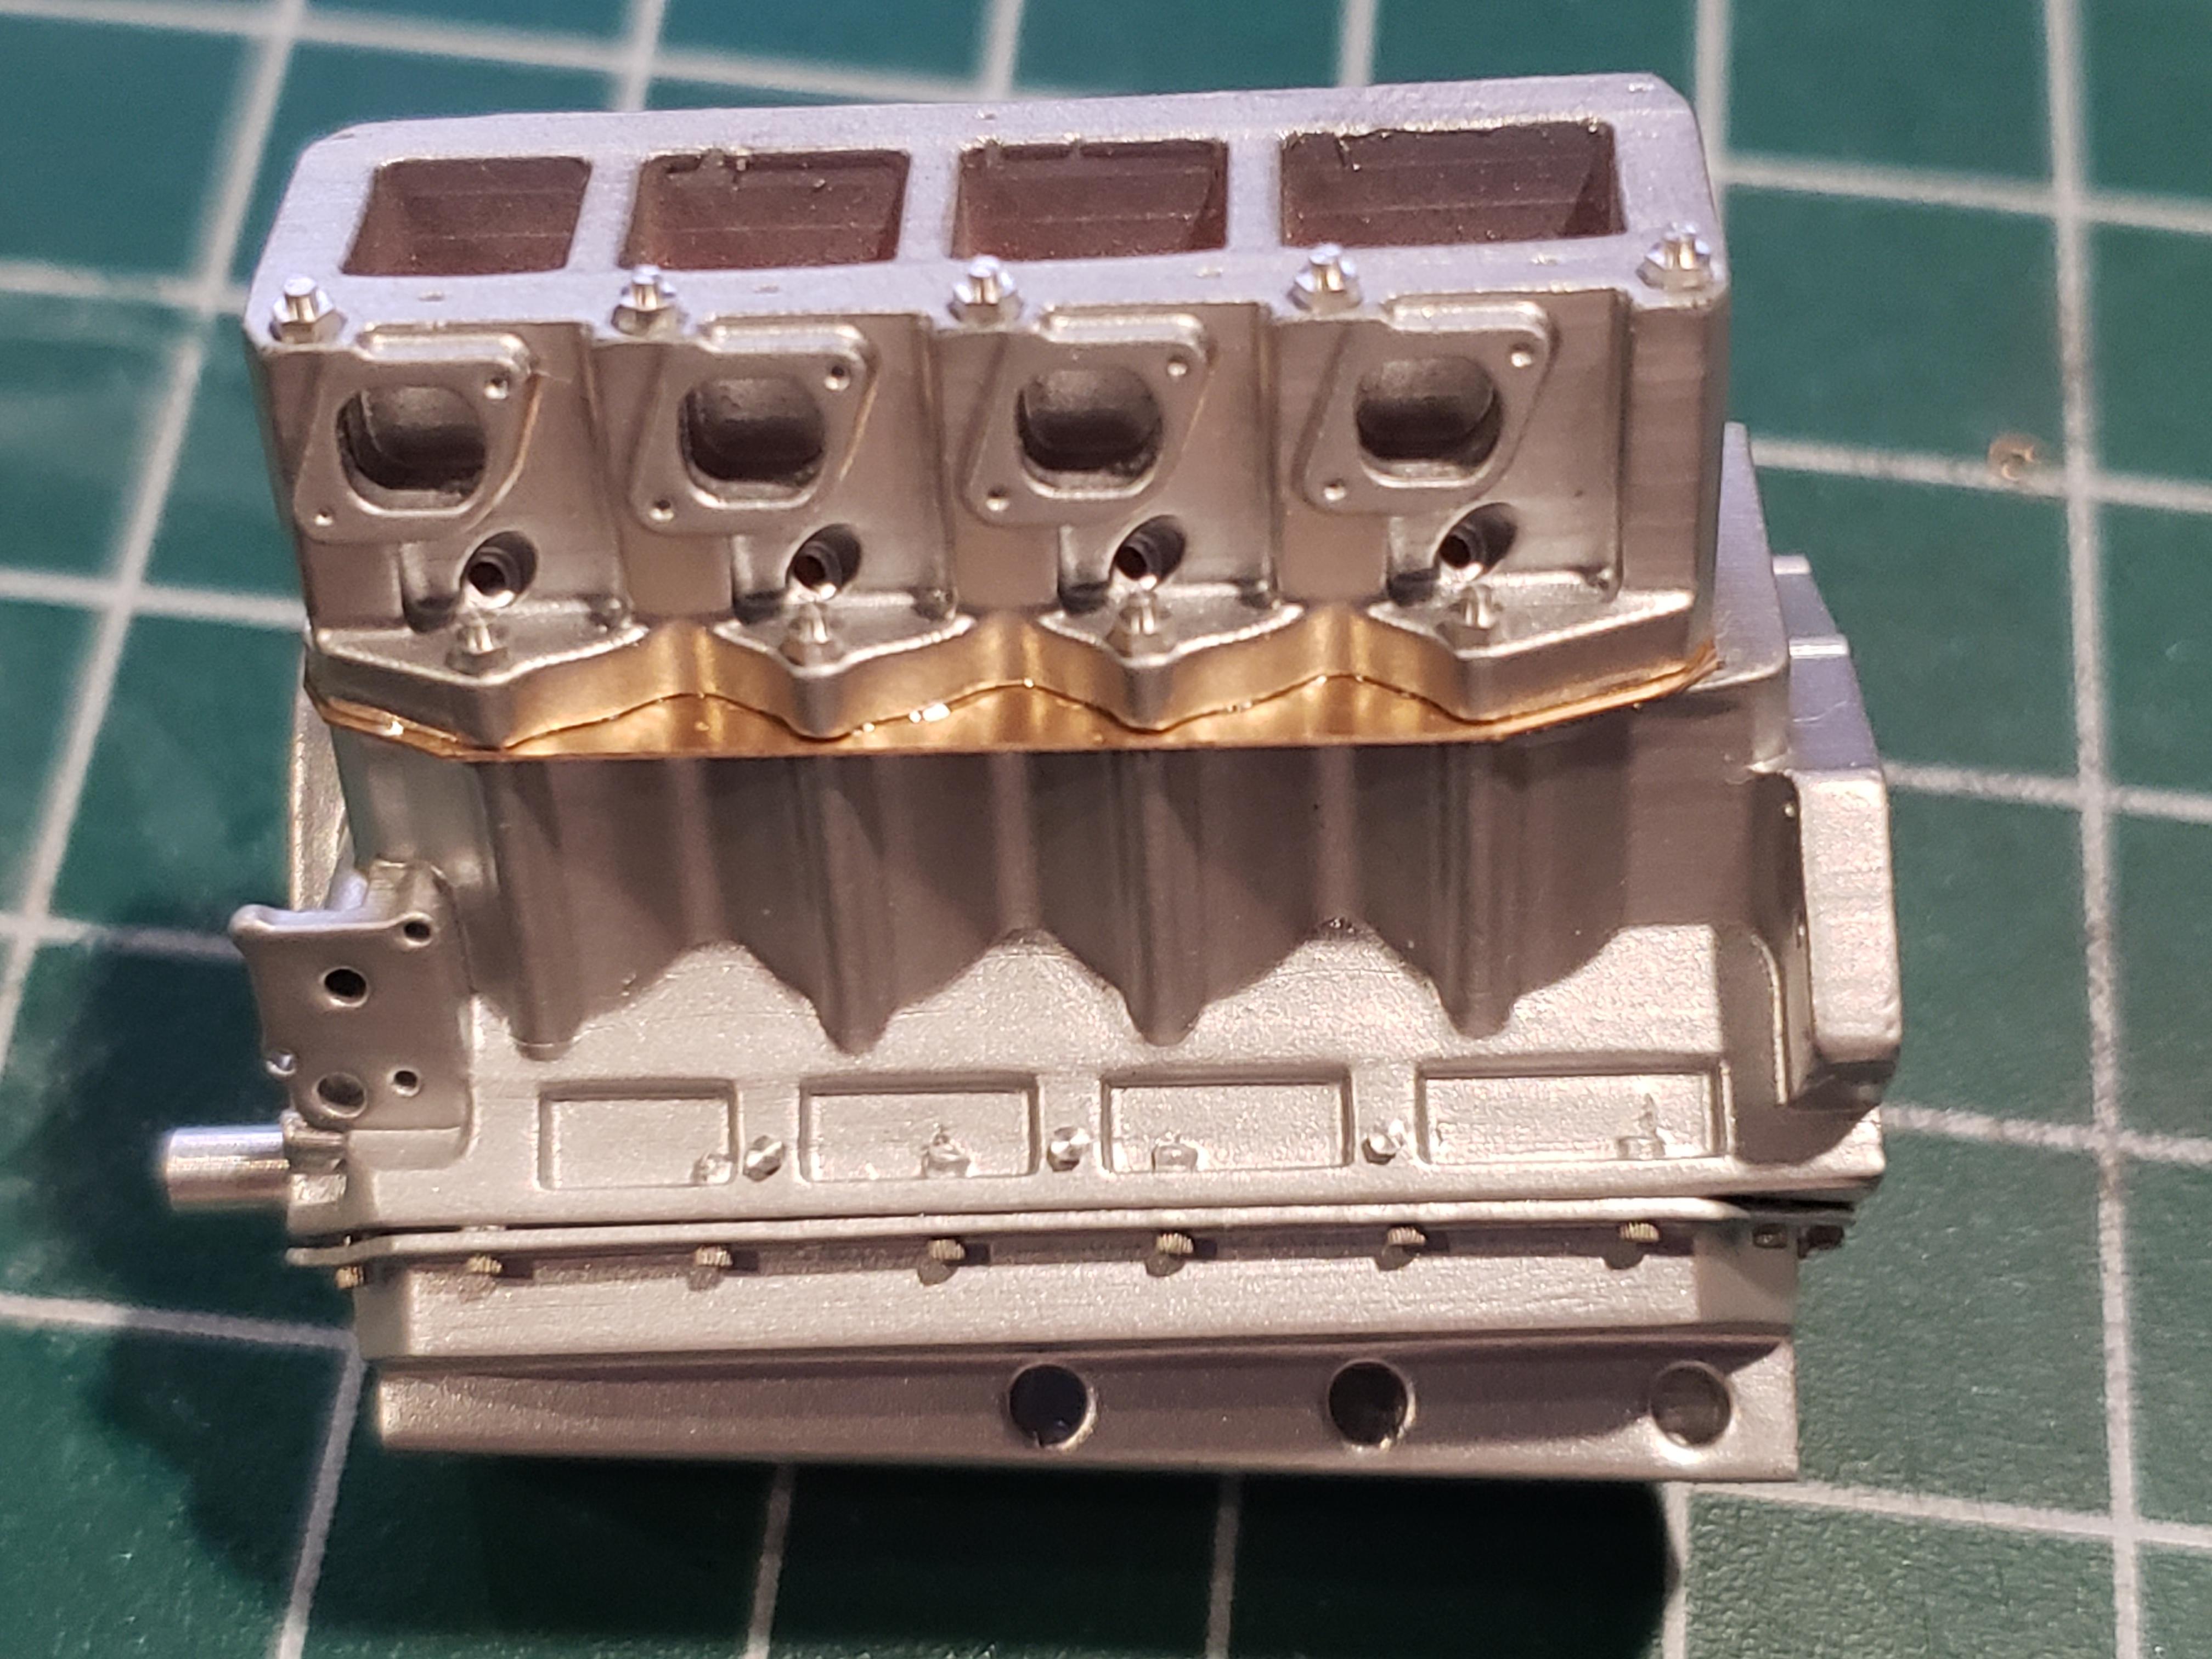
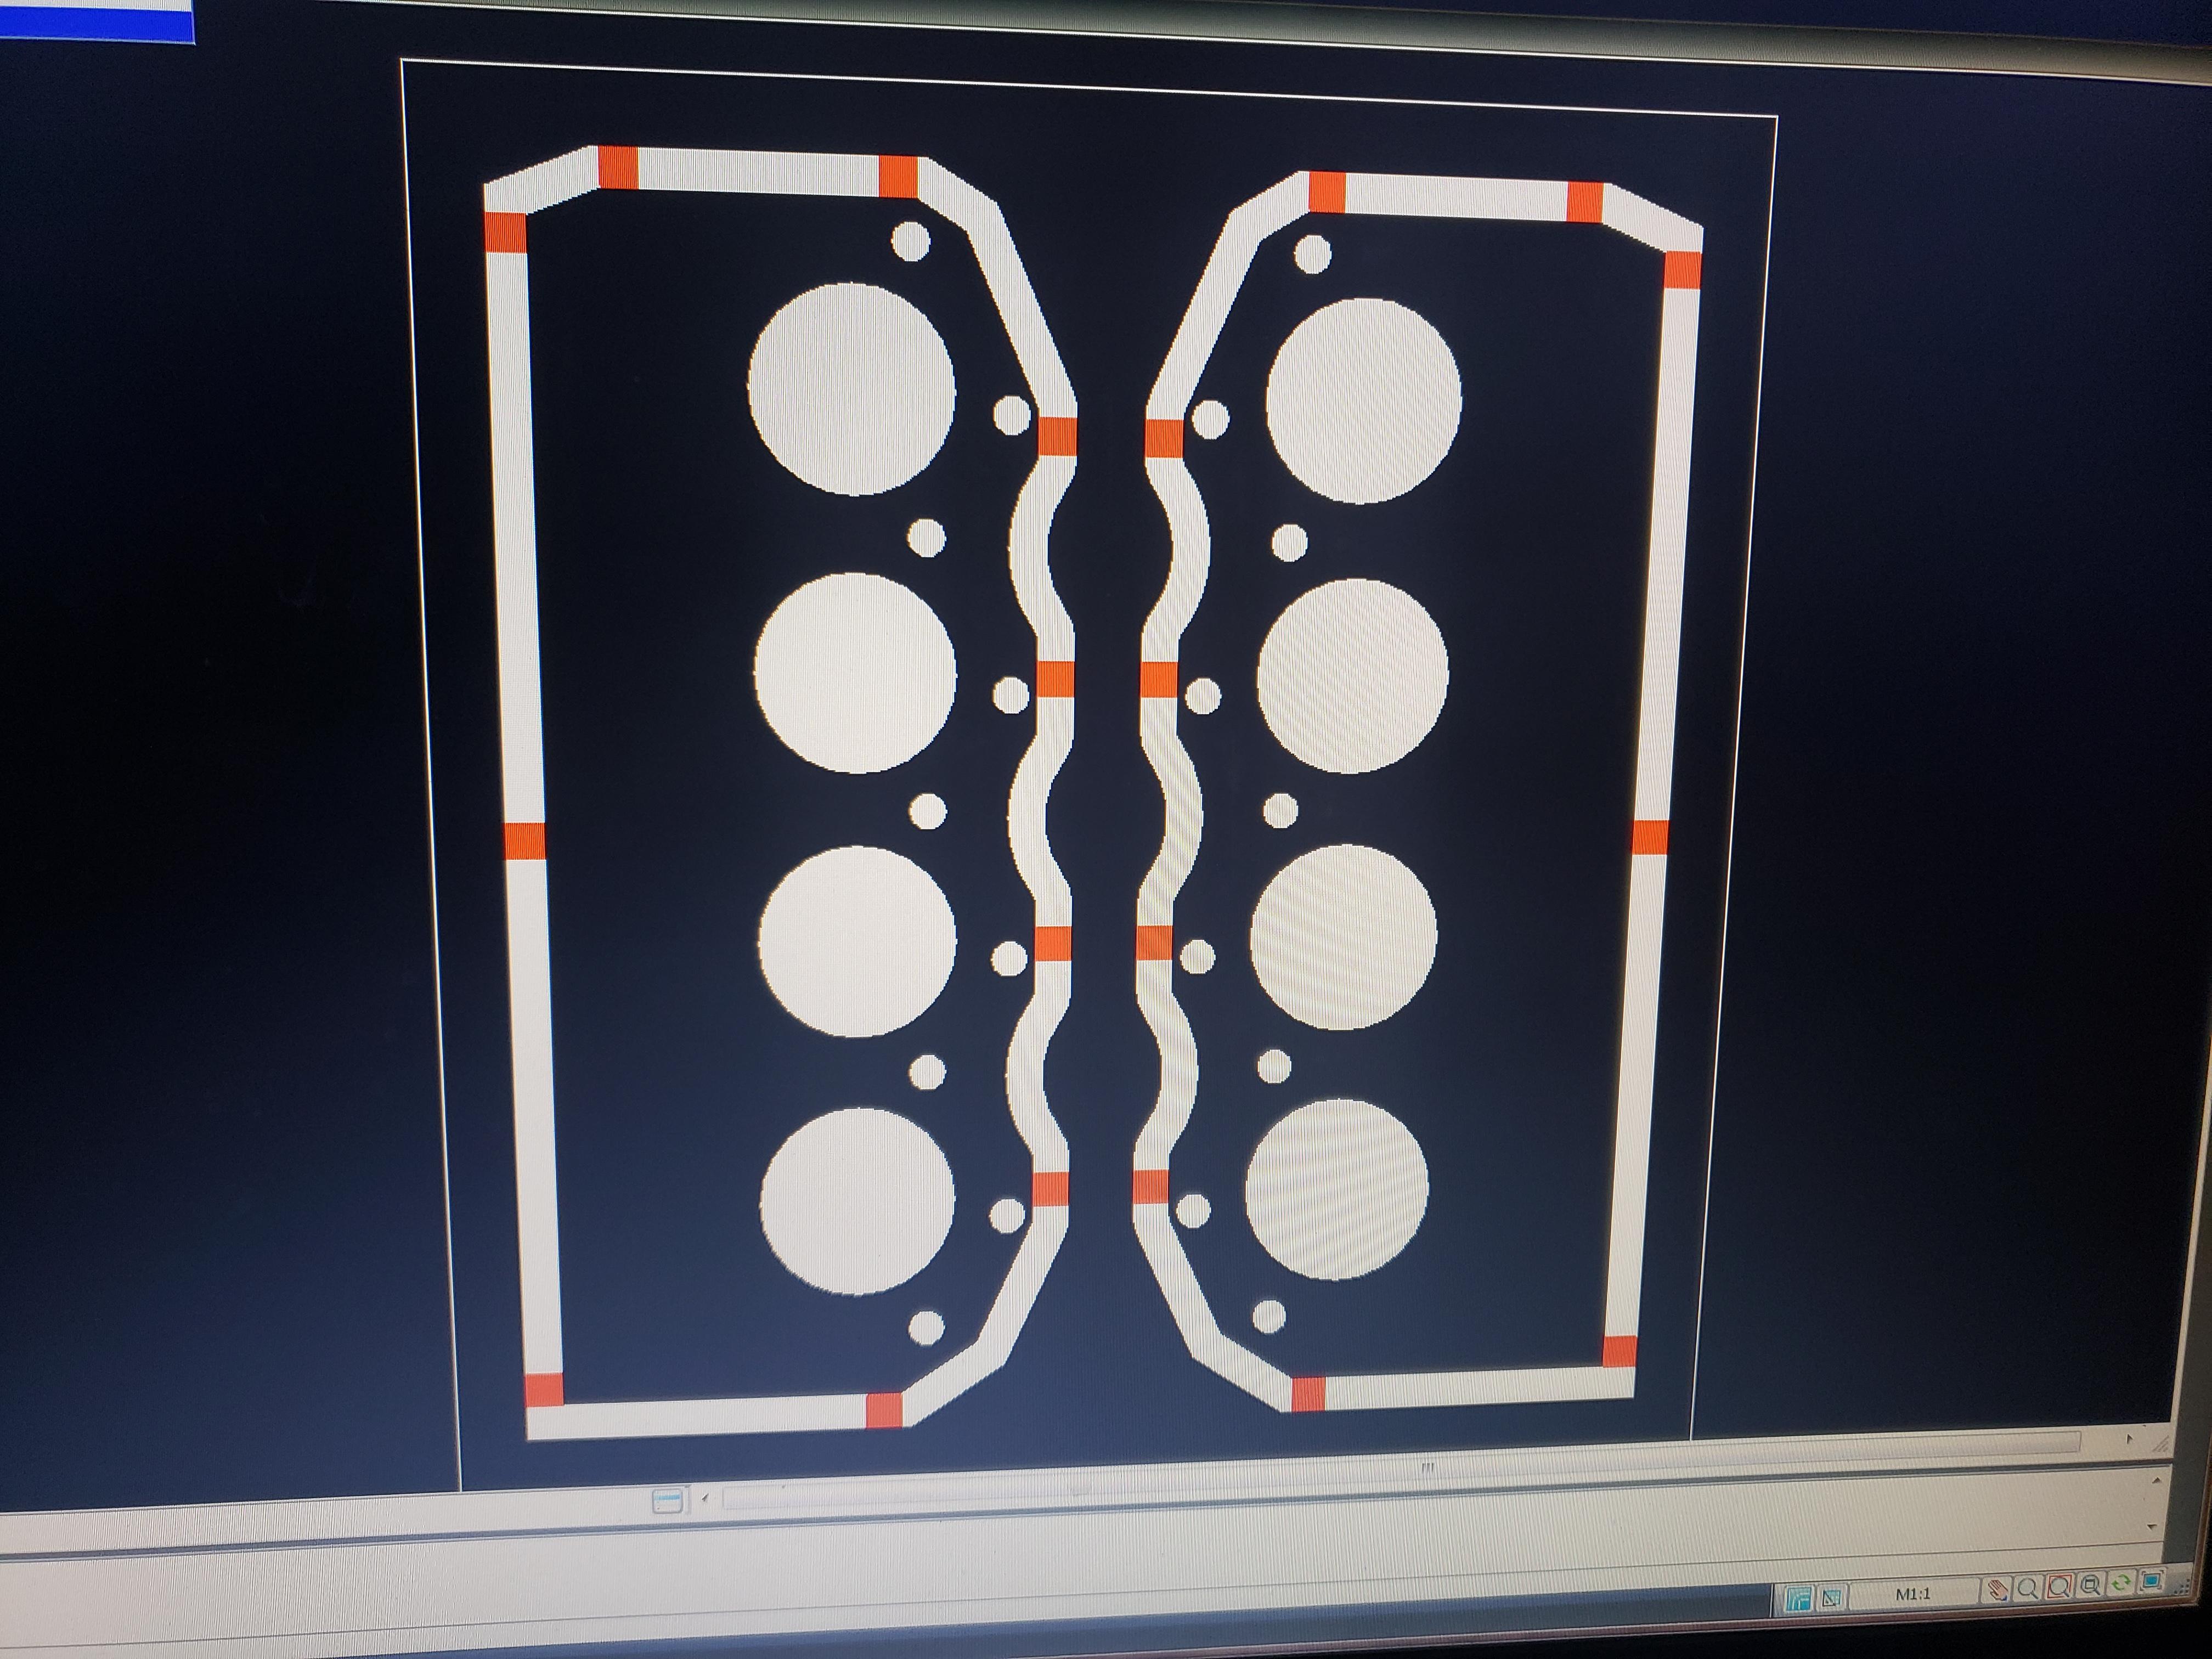
Thanks everyone! Sobi had a couple of mishaps. The timing cover chipped while drilling and there's an issue with the front end. Discouraged but not swayed, this model will still get done. Just gotta concentrate on the engine for now and go from there. Head studs are in and I'm making new gaskets for the heads. There are "dowel pins" that properly locate the heads to the block so I had to drill the holes first then cut the gasket to shape....
-
I don't know Tom, maybe this year I won't have to 2k clear model parts on the road! ? Every year, every model has been built or buttoned up on the road. Hmm, I wonder if my 2k clear is still on the driveway covering.....wait....what.. .. I mean allegedly?
-
69 pro mod chevelle, chassis started mock ups
mr68gts replied to mr68gts's topic in WIP: Drag Racing Models
Shortblock is about put together now! Nee to do the hardware in it now!
-
I know I'm not complaining about the extra time one bit! I've got a ton of work to do and time is going by fast!
-
So lets all show up at his house next year and be like we are here for the contest. ?
-
69 pro mod chevelle, chassis started mock ups
mr68gts replied to mr68gts's topic in WIP: Drag Racing Models
Thanks Tim! It was definitely a move in the right direction even though it was a giant pain in the rear to go back in a modify it all! I can't wait to print it and see how it comes out. I have some new precision model resin coming next week to give a try! With all these engine parts nearing the end it's going to be time to build soon! Paul -
I thought I was the only one.....?
-
69 pro mod chevelle, chassis started mock ups
mr68gts replied to mr68gts's topic in WIP: Drag Racing Models
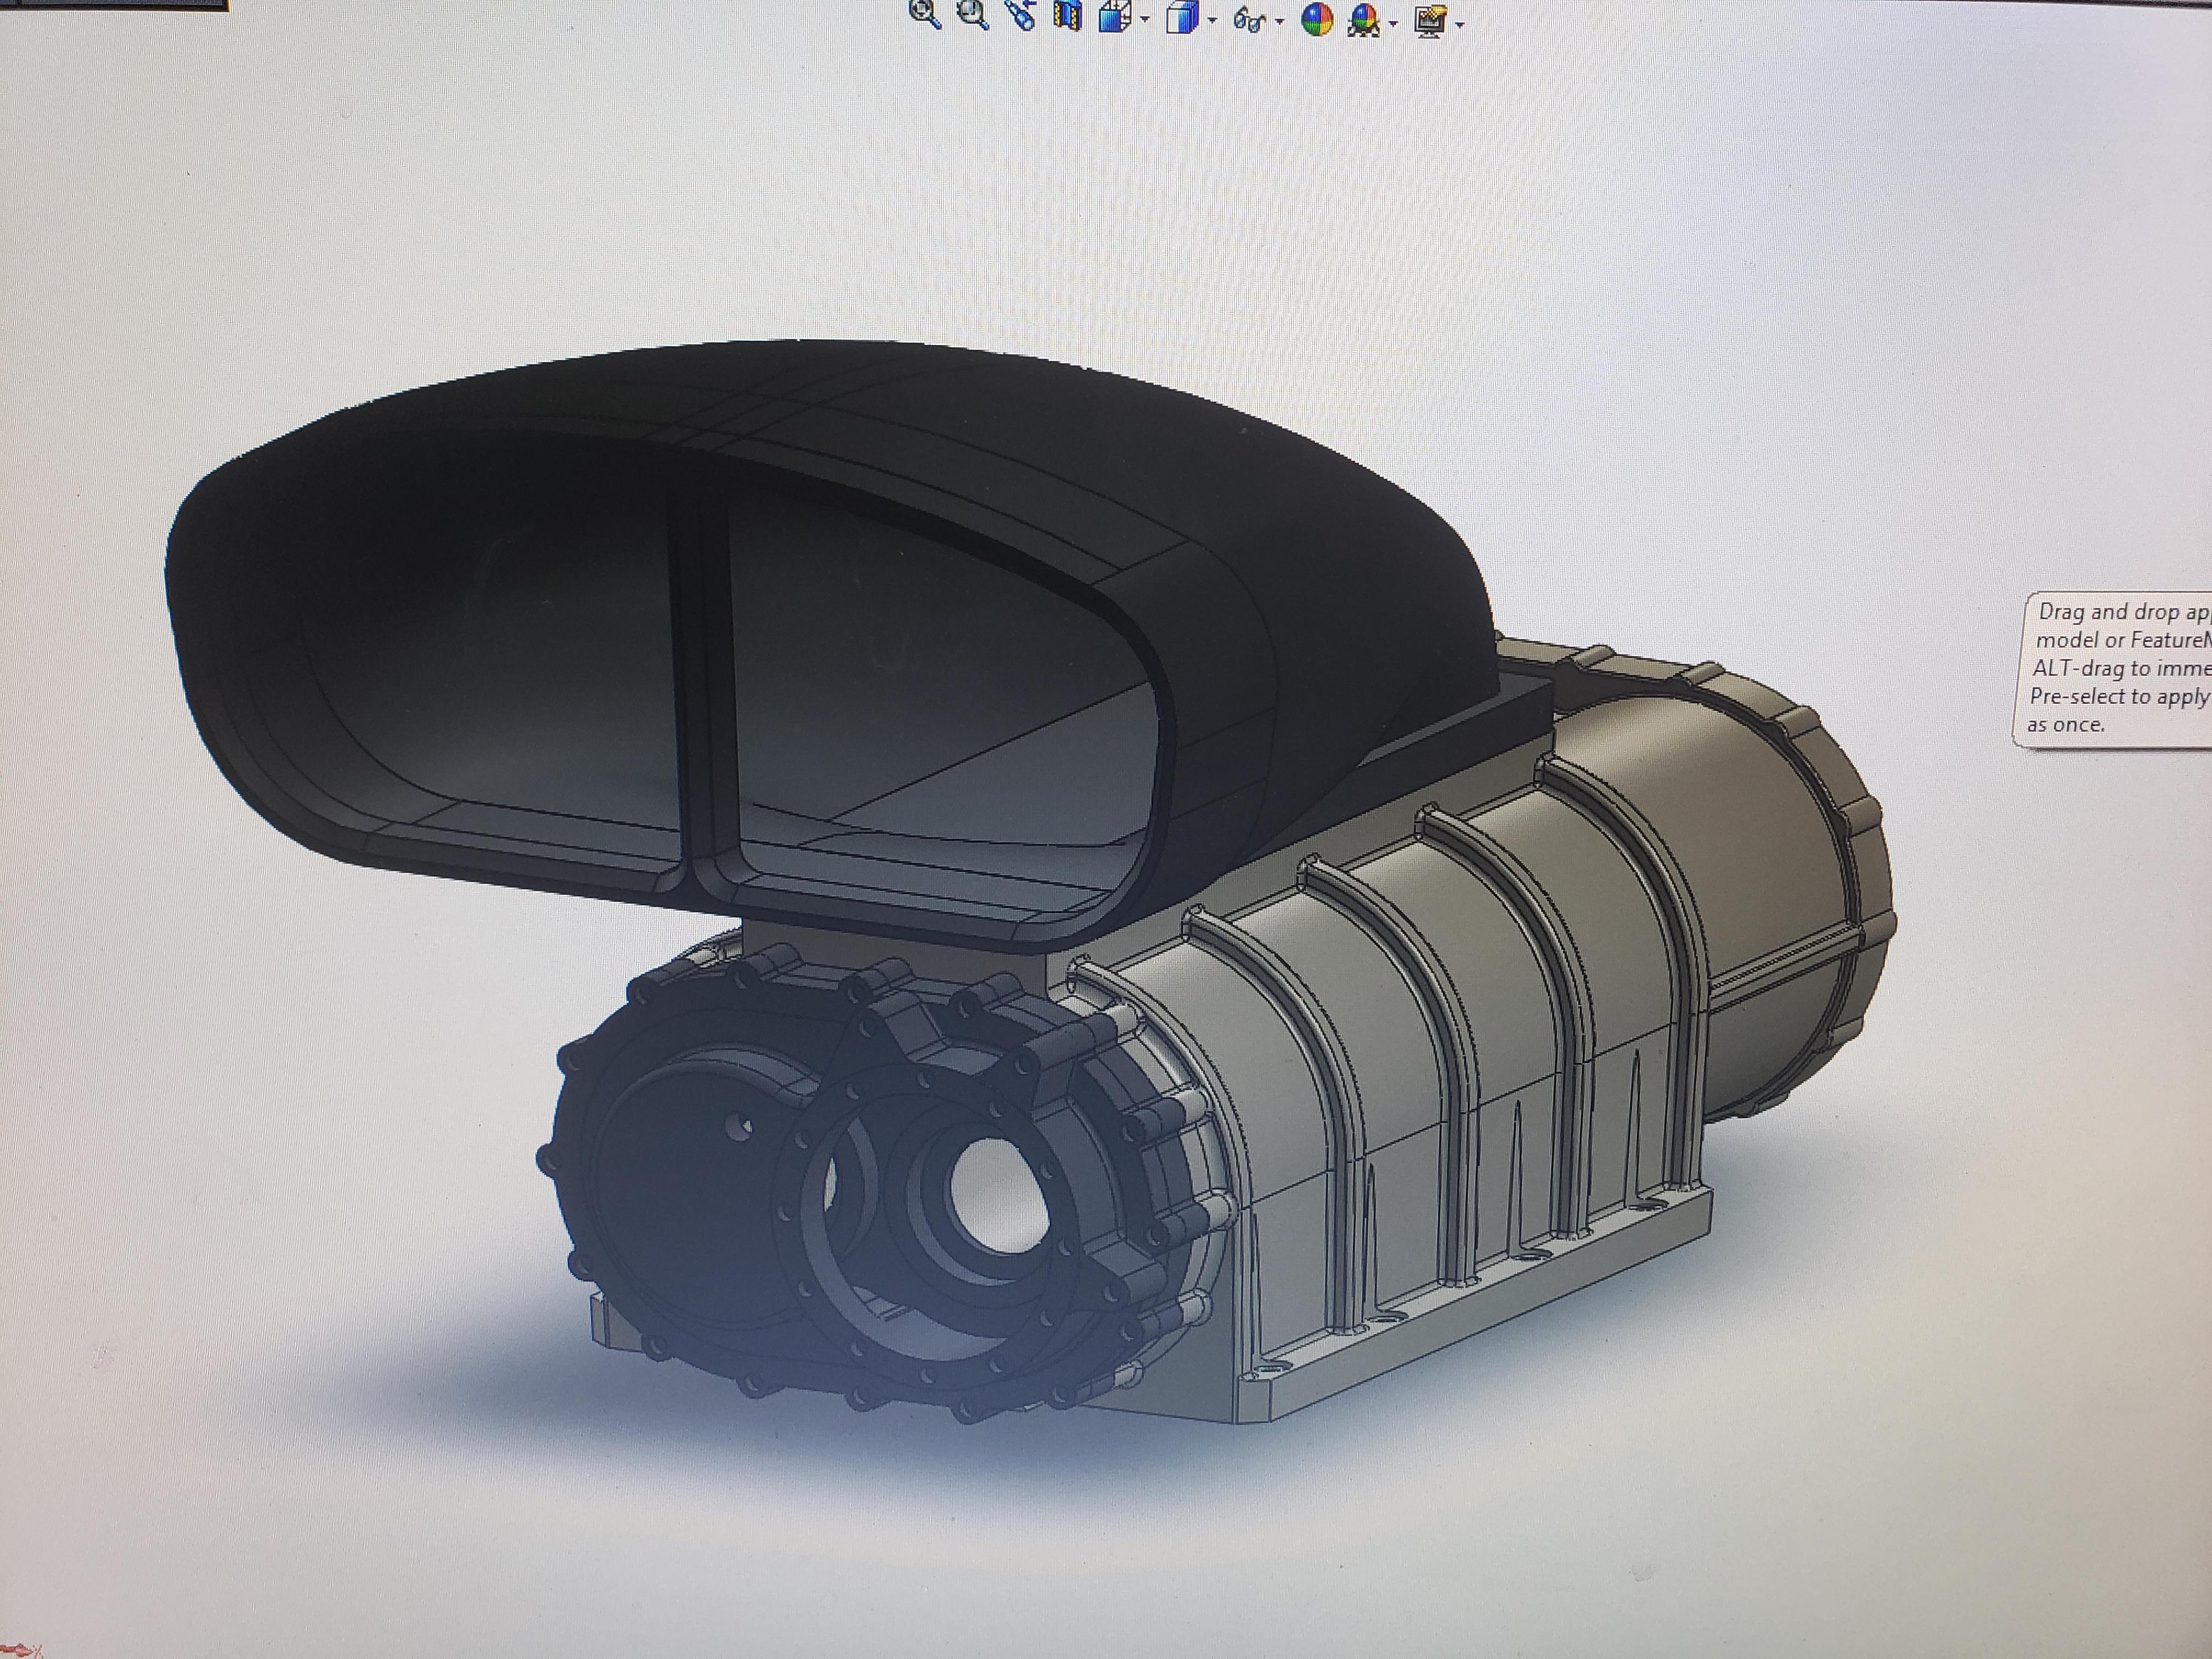
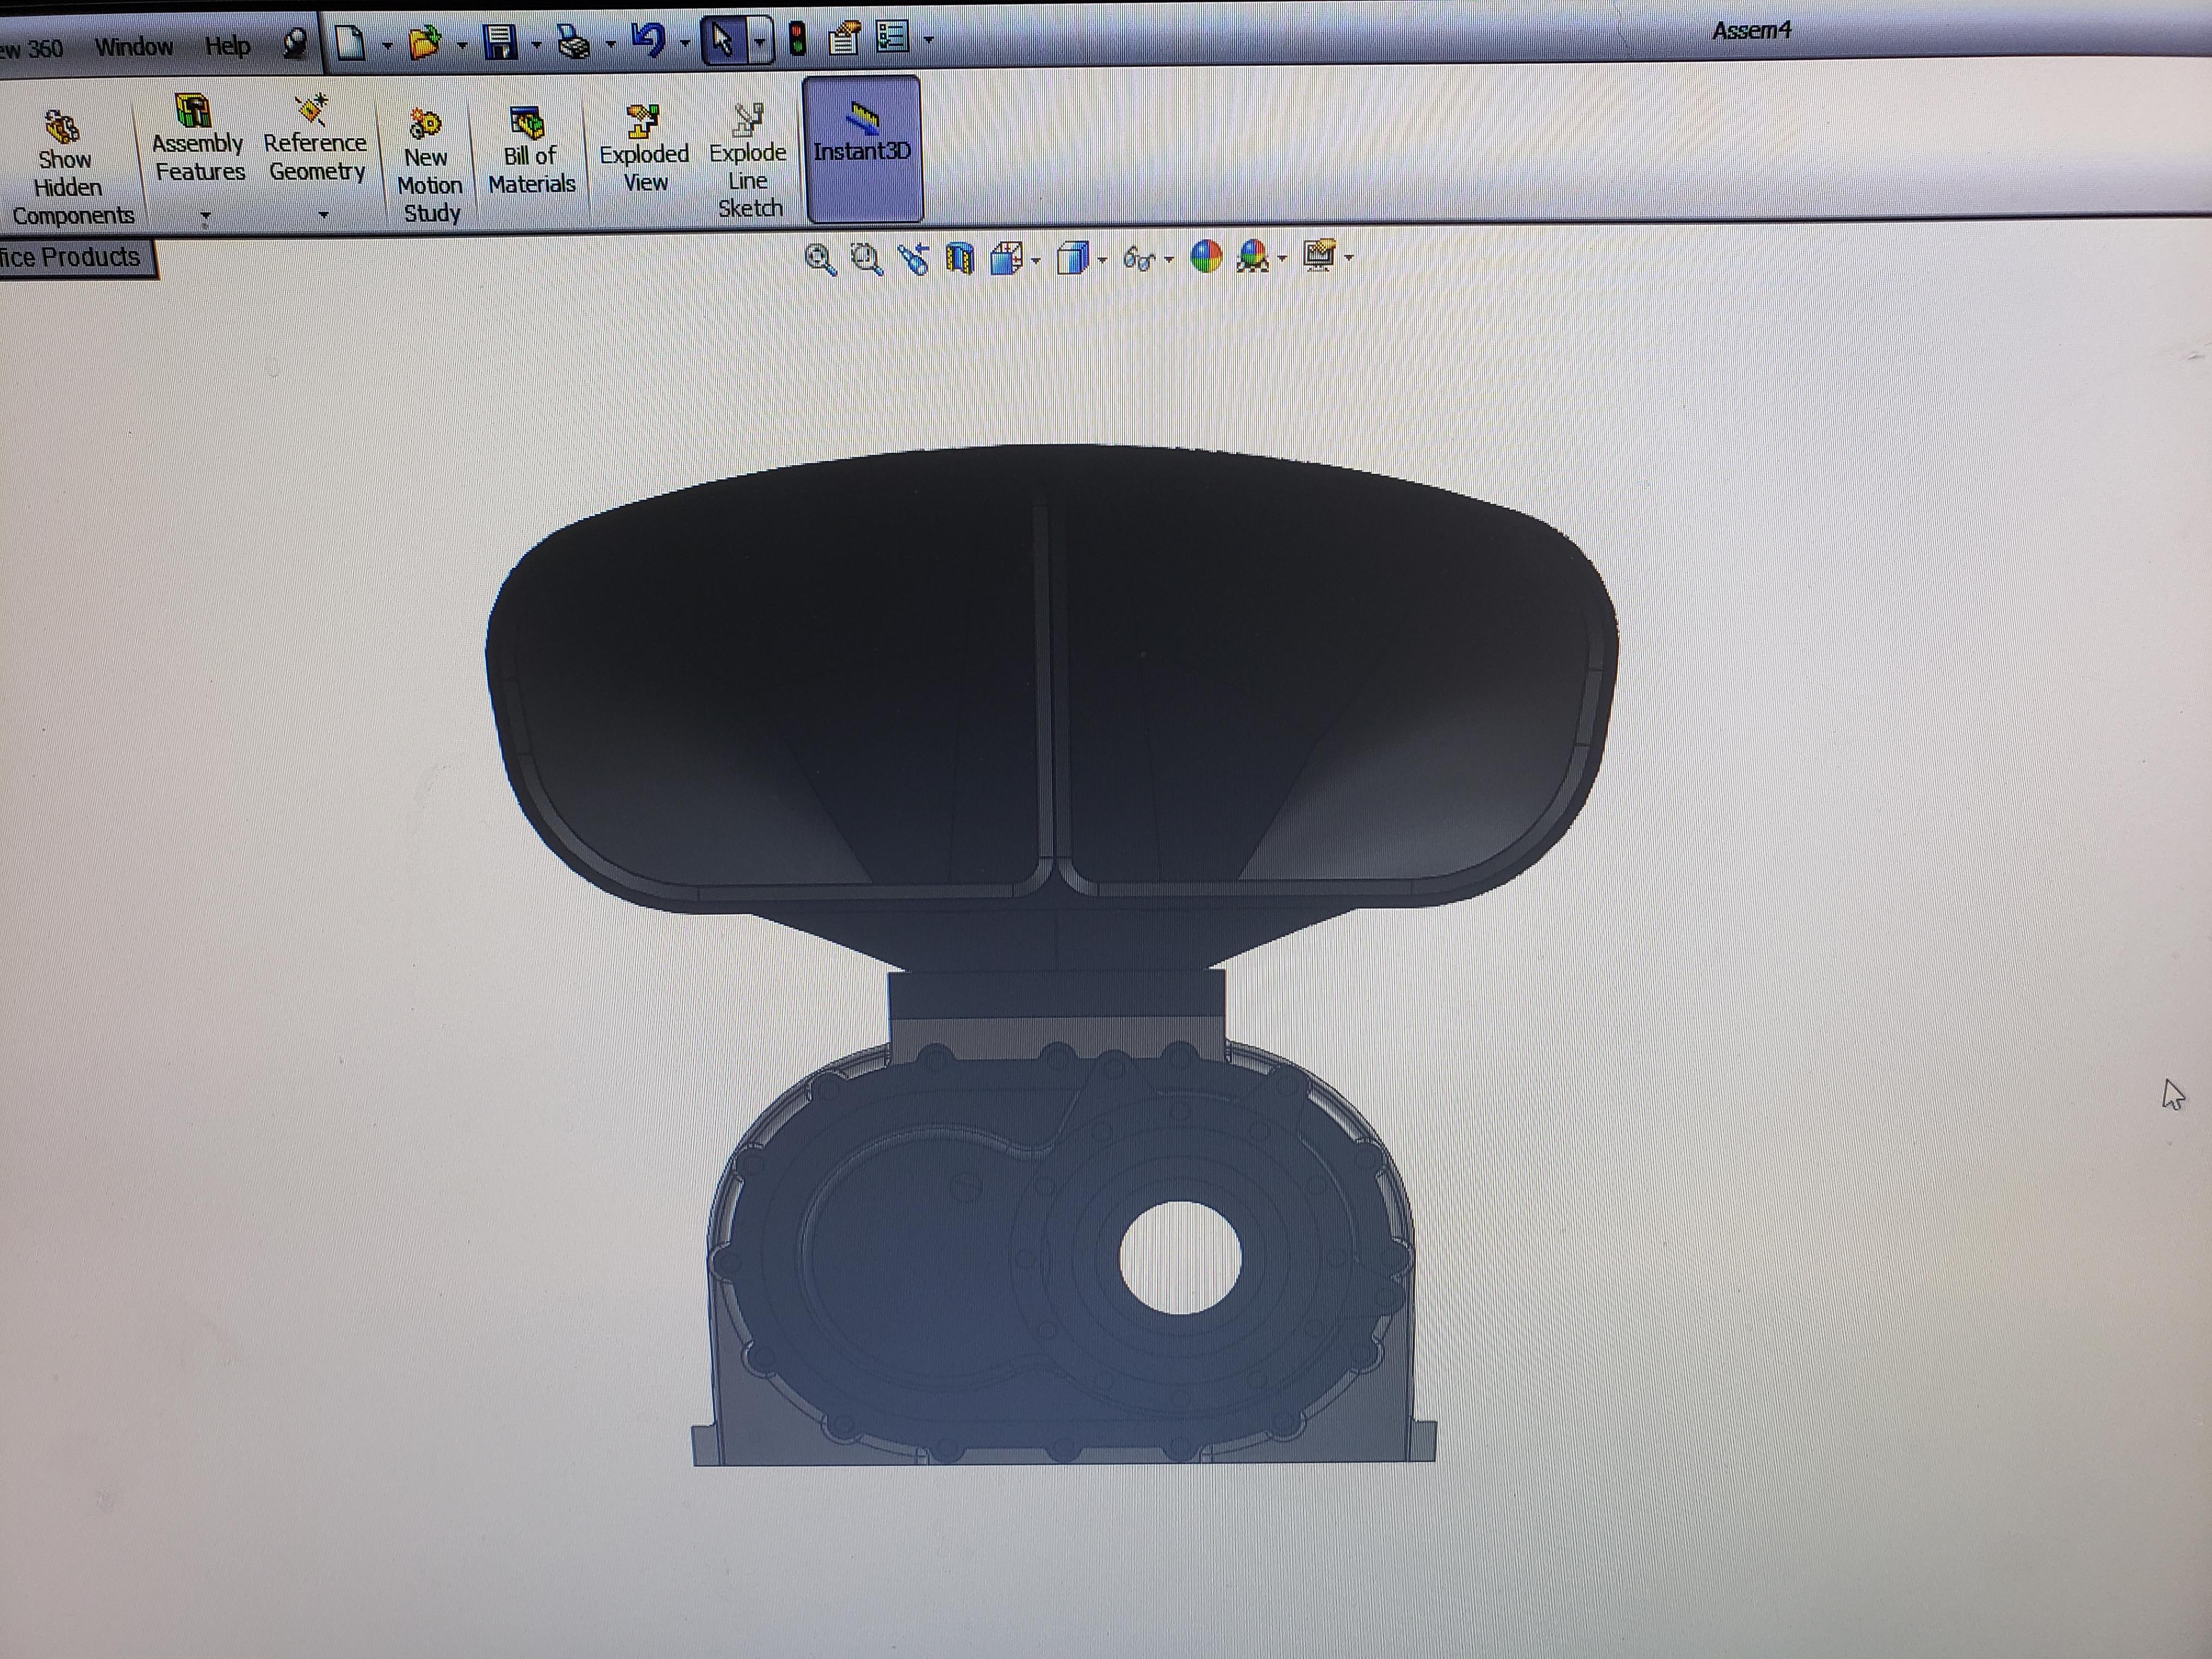
played with the scoop some more! After several more hours of changes and fixes I am now going to leave it and get it ready for printing! I did leave the spacer alone instead of changing it. Changing it would require a new supercharger print as I'd have to change the flange at the supercharger to reflect what Matt Bohr had posted. Assembled with the supercharger and spacer.
-
69 pro mod chevelle, chassis started mock ups
mr68gts replied to mr68gts's topic in WIP: Drag Racing Models
I had some time to fix the injector hat tonight. Looks much better I think. When mocked up with the old one it looked to wide. Still need to change the spacer to look more like Matt Bohr posted a while back. Paul
-
69 pro mod chevelle, chassis started mock ups
mr68gts replied to mr68gts's topic in WIP: Drag Racing Models
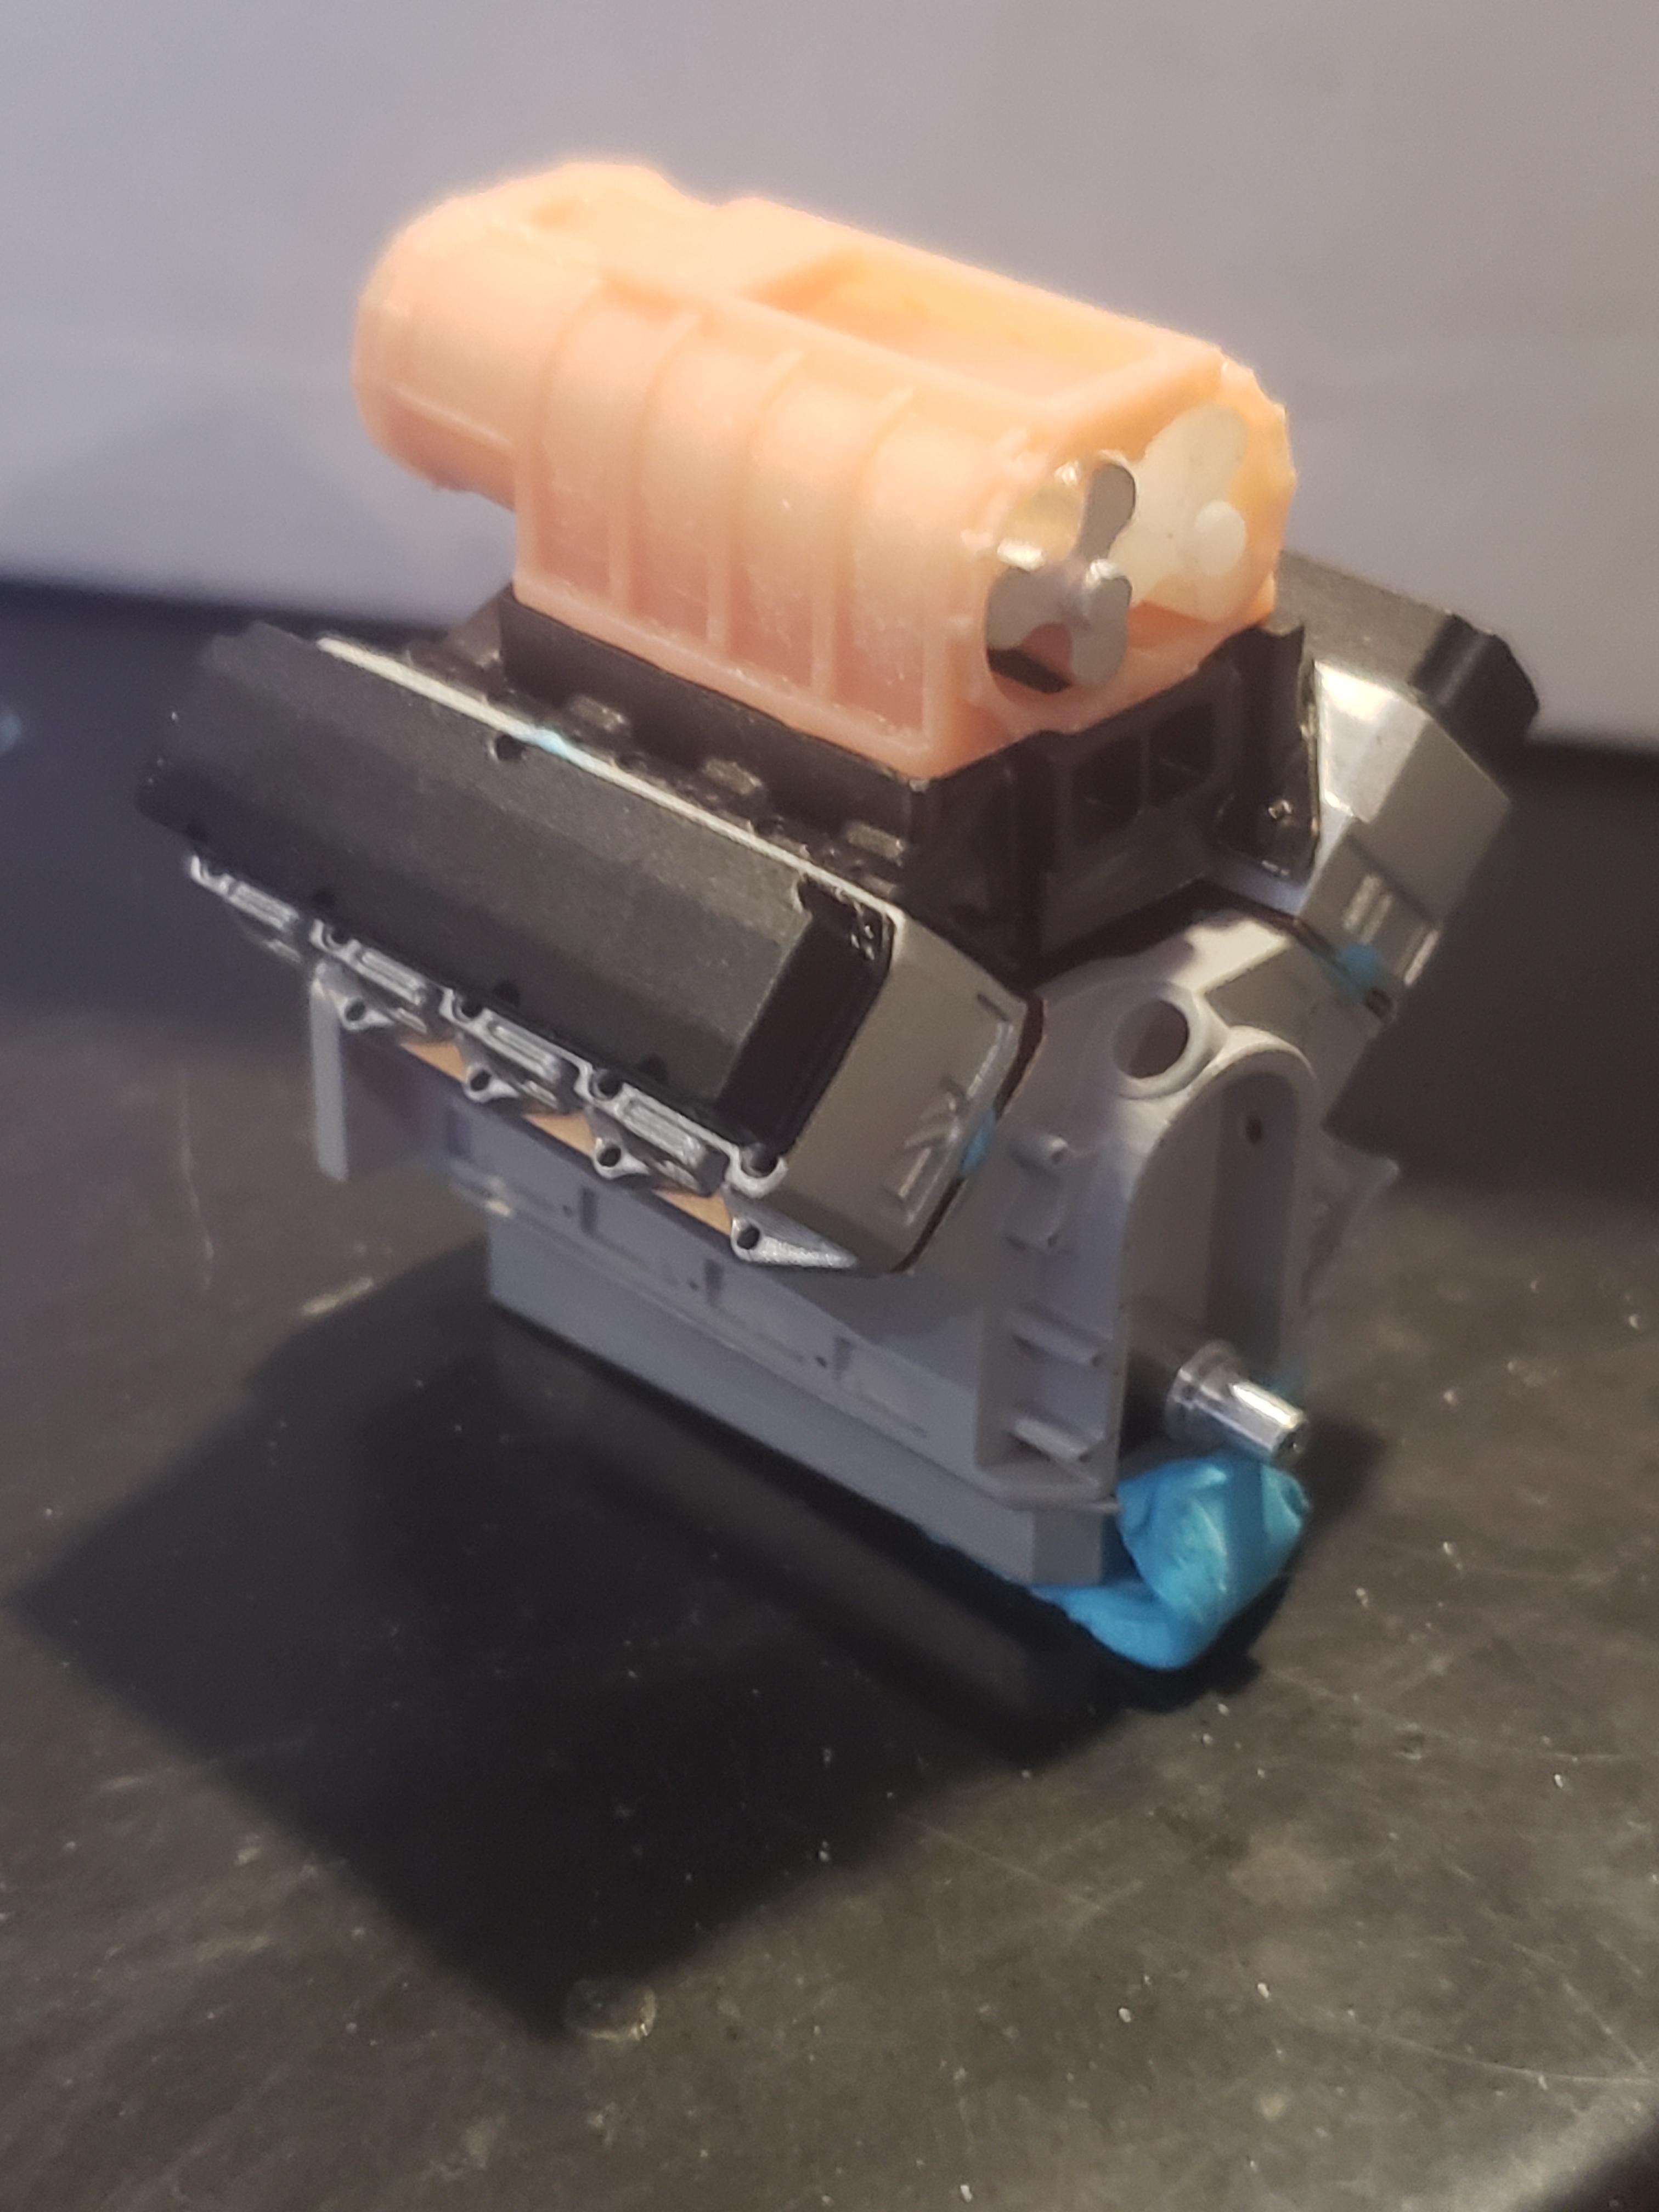
Little bit of mock up using blu tack! Getting there! Need to locate some carbon fiber for the valve covers still. (Hence the black paint)
-
Yes i know. I was referring to the 66 car is the one Roger and Rich built.
-
That would be the 1966 car he built.
-
69 pro mod chevelle, chassis started mock ups
mr68gts replied to mr68gts's topic in WIP: Drag Racing Models
We are! I've managed to get some paint on a few of the parts. I need to break out the lathe and get busy with the air servos and the adapter ring in-between the lenco cases. I may still machine the rear lid for the lenco but not sure yet. I will probably have the lench assembled this weekend. -
69 pro mod chevelle, chassis started mock ups
mr68gts replied to mr68gts's topic in WIP: Drag Racing Models
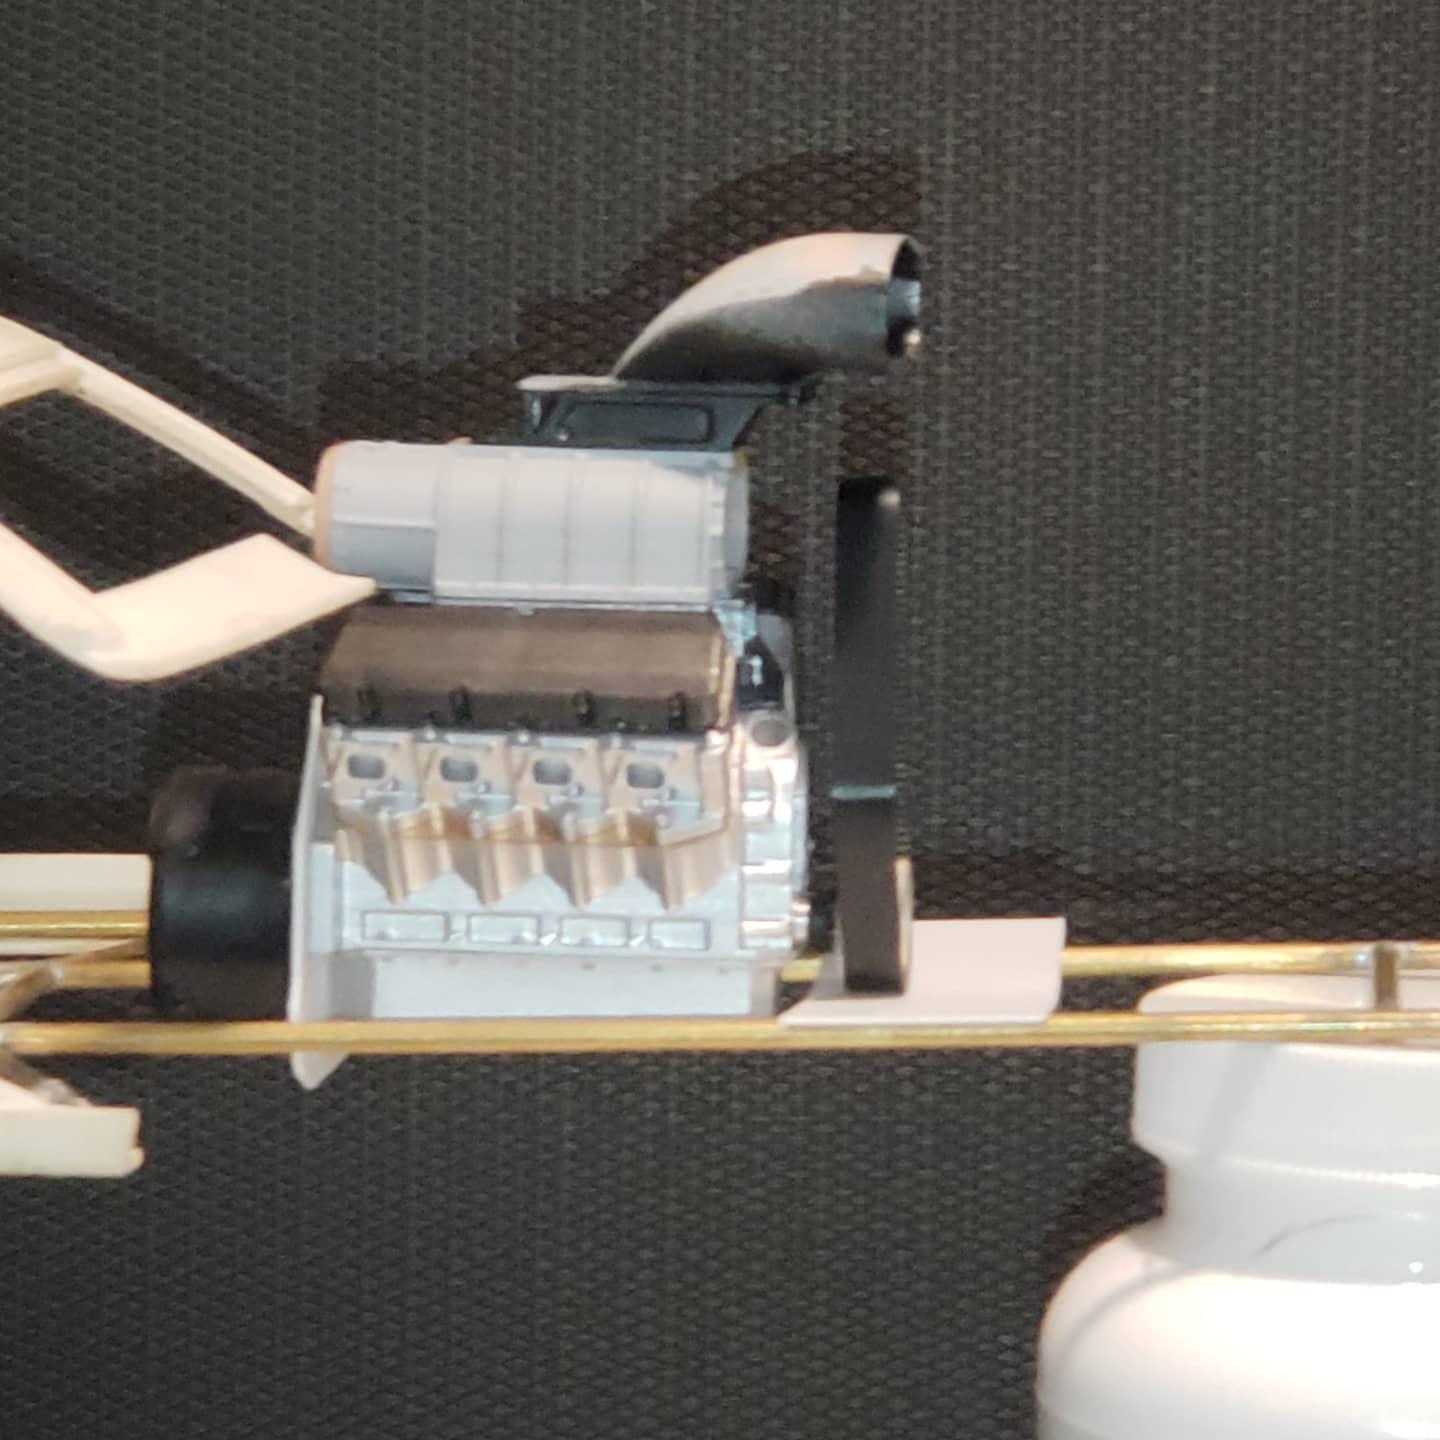
Thanks Dave! It's certainly getting there! I got involved with a instagram build off with this thing so I need to have the engine done in roughly 3 months time. Just want I needed to kick my arse in gear and get this done! A bit difficult working in the 5th wheel trailer whilst we look for a house but I'm making it work. Had to take the printer to work. Trailer too small to have it buzzing away with fumes and a wife and dog here. Update: Got the supercharger belt some what figured out! I am literally one tooth too long or 3 teeth to short to having an accurate belt! I need to change the length a bit so the teeth match up correctly but it's BLAH_BLAH_BLAH_BLAH close! How close? the mating portion of the belt is .01 too short! I have some dimensions from rcd so I will be redrawing the belt and going from there to make it correct. Paul
-
69 pro mod chevelle, chassis started mock ups
mr68gts replied to mr68gts's topic in WIP: Drag Racing Models
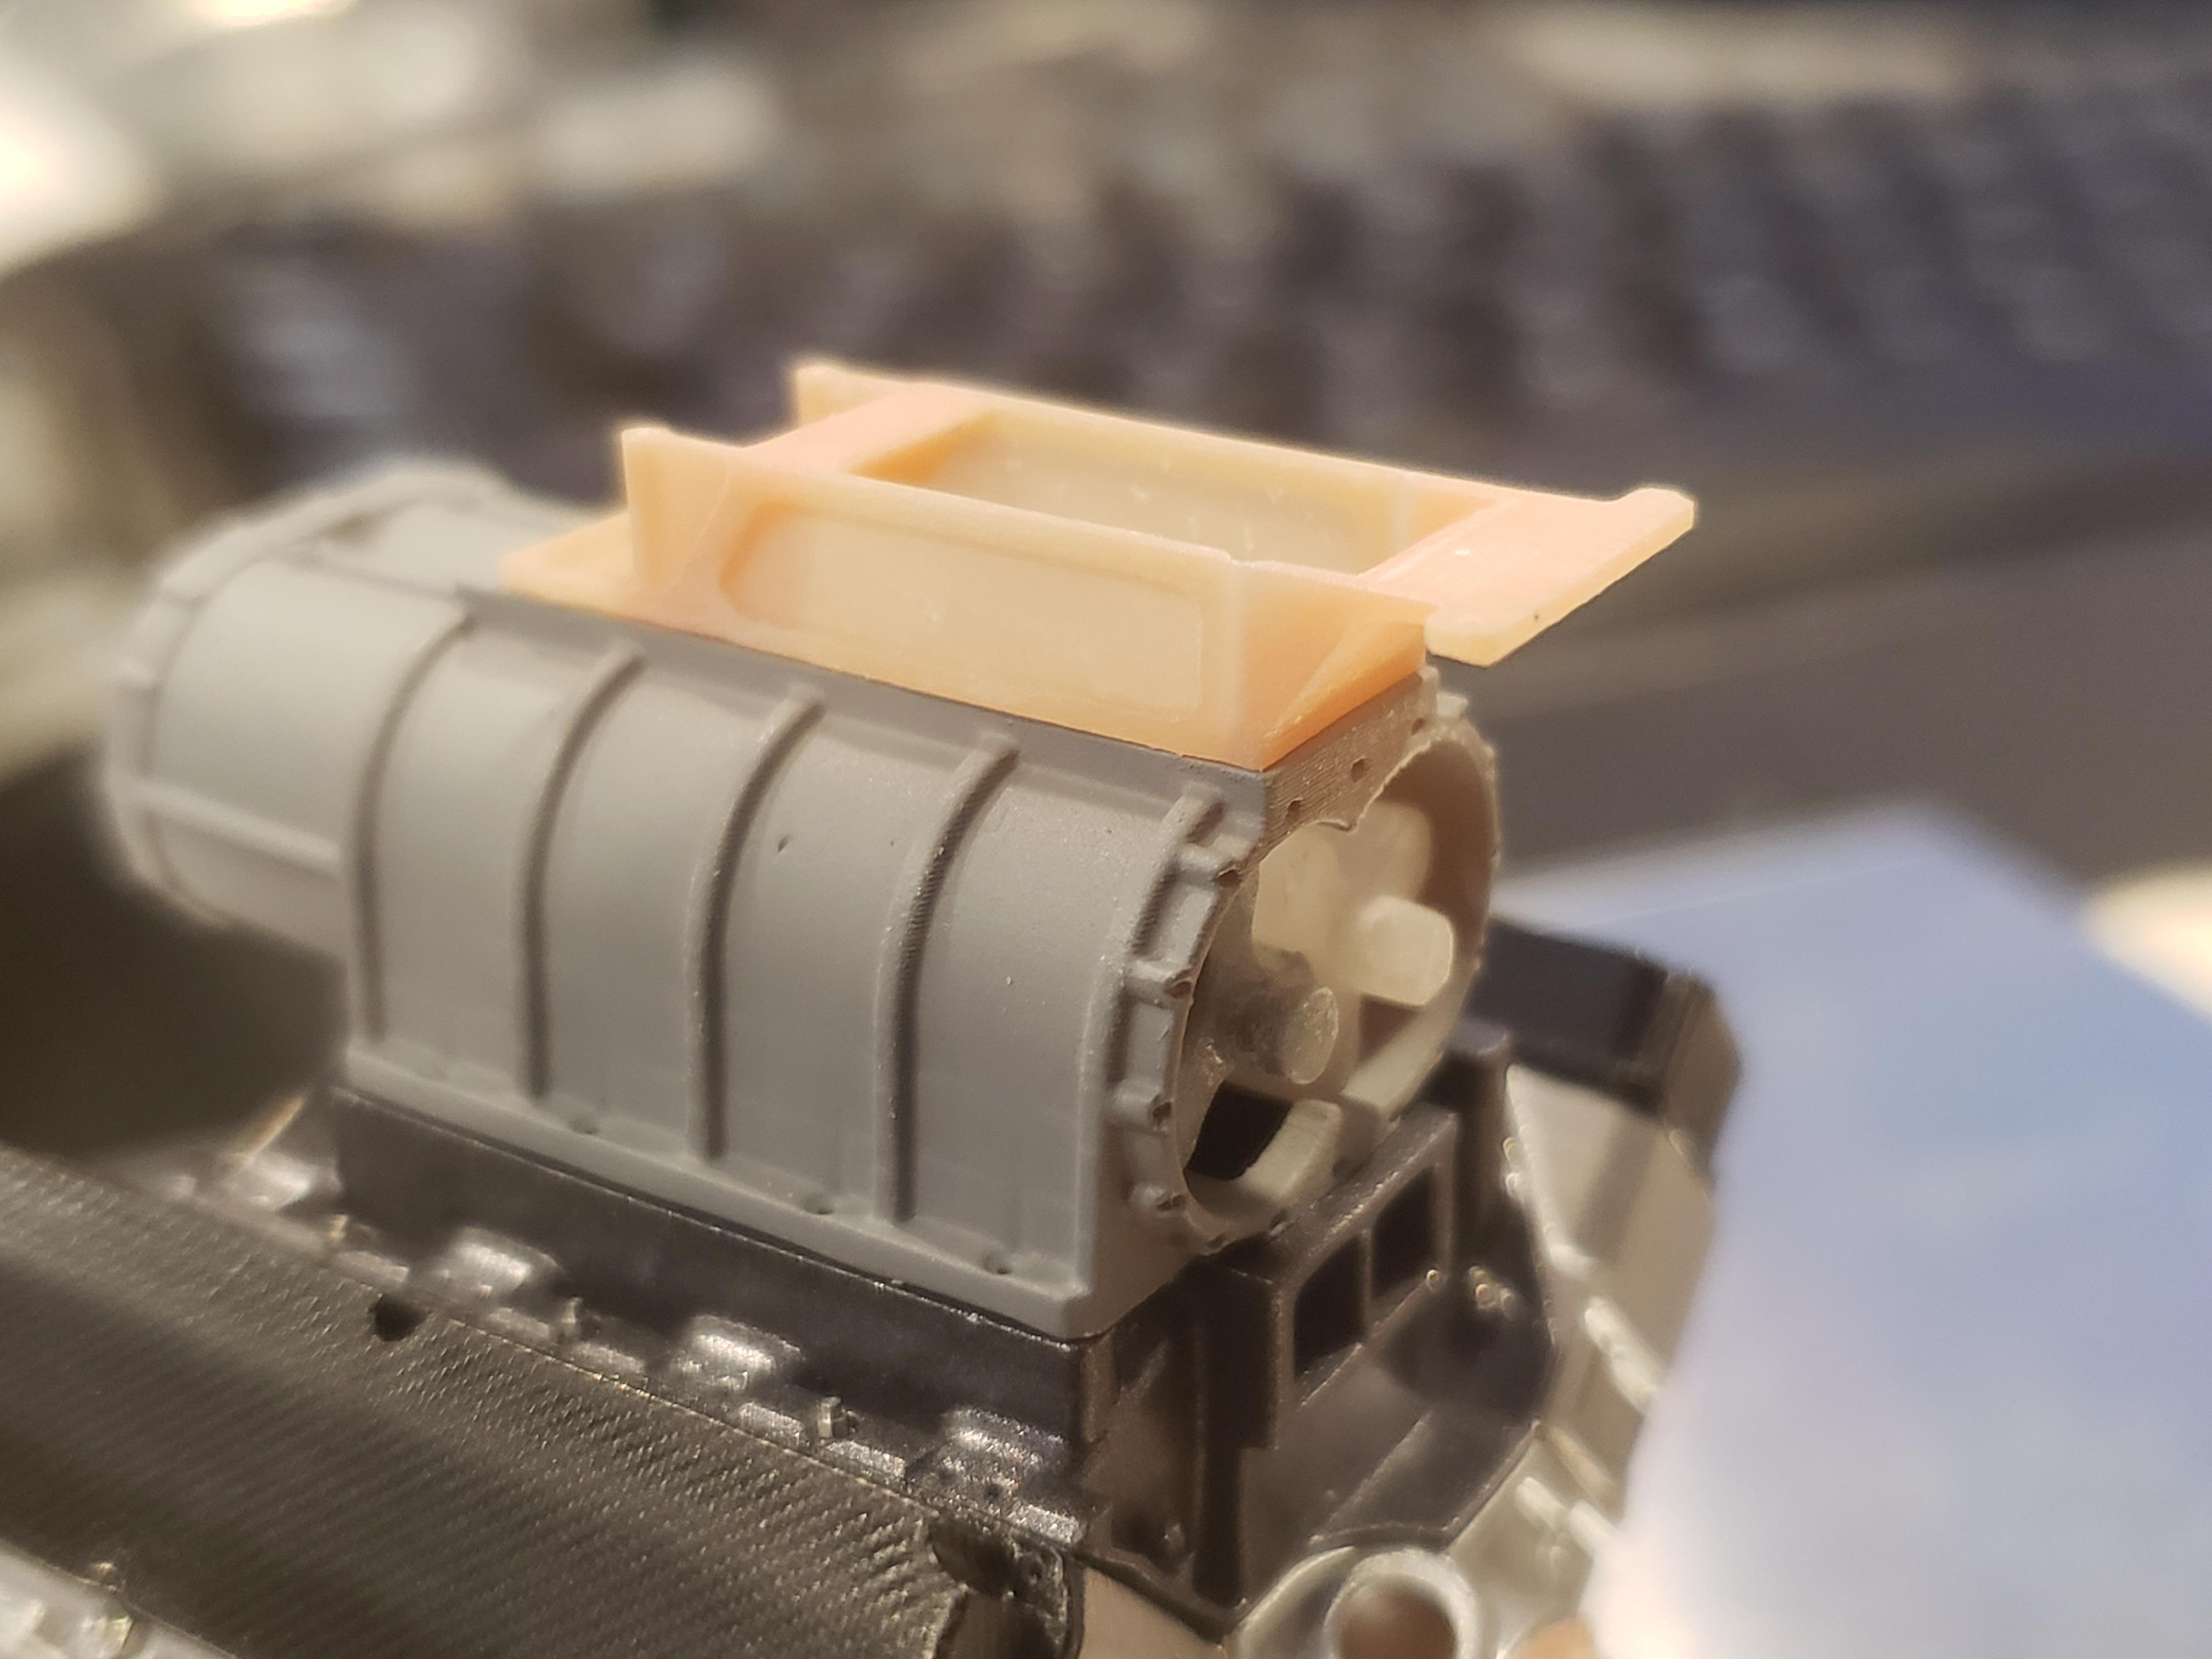
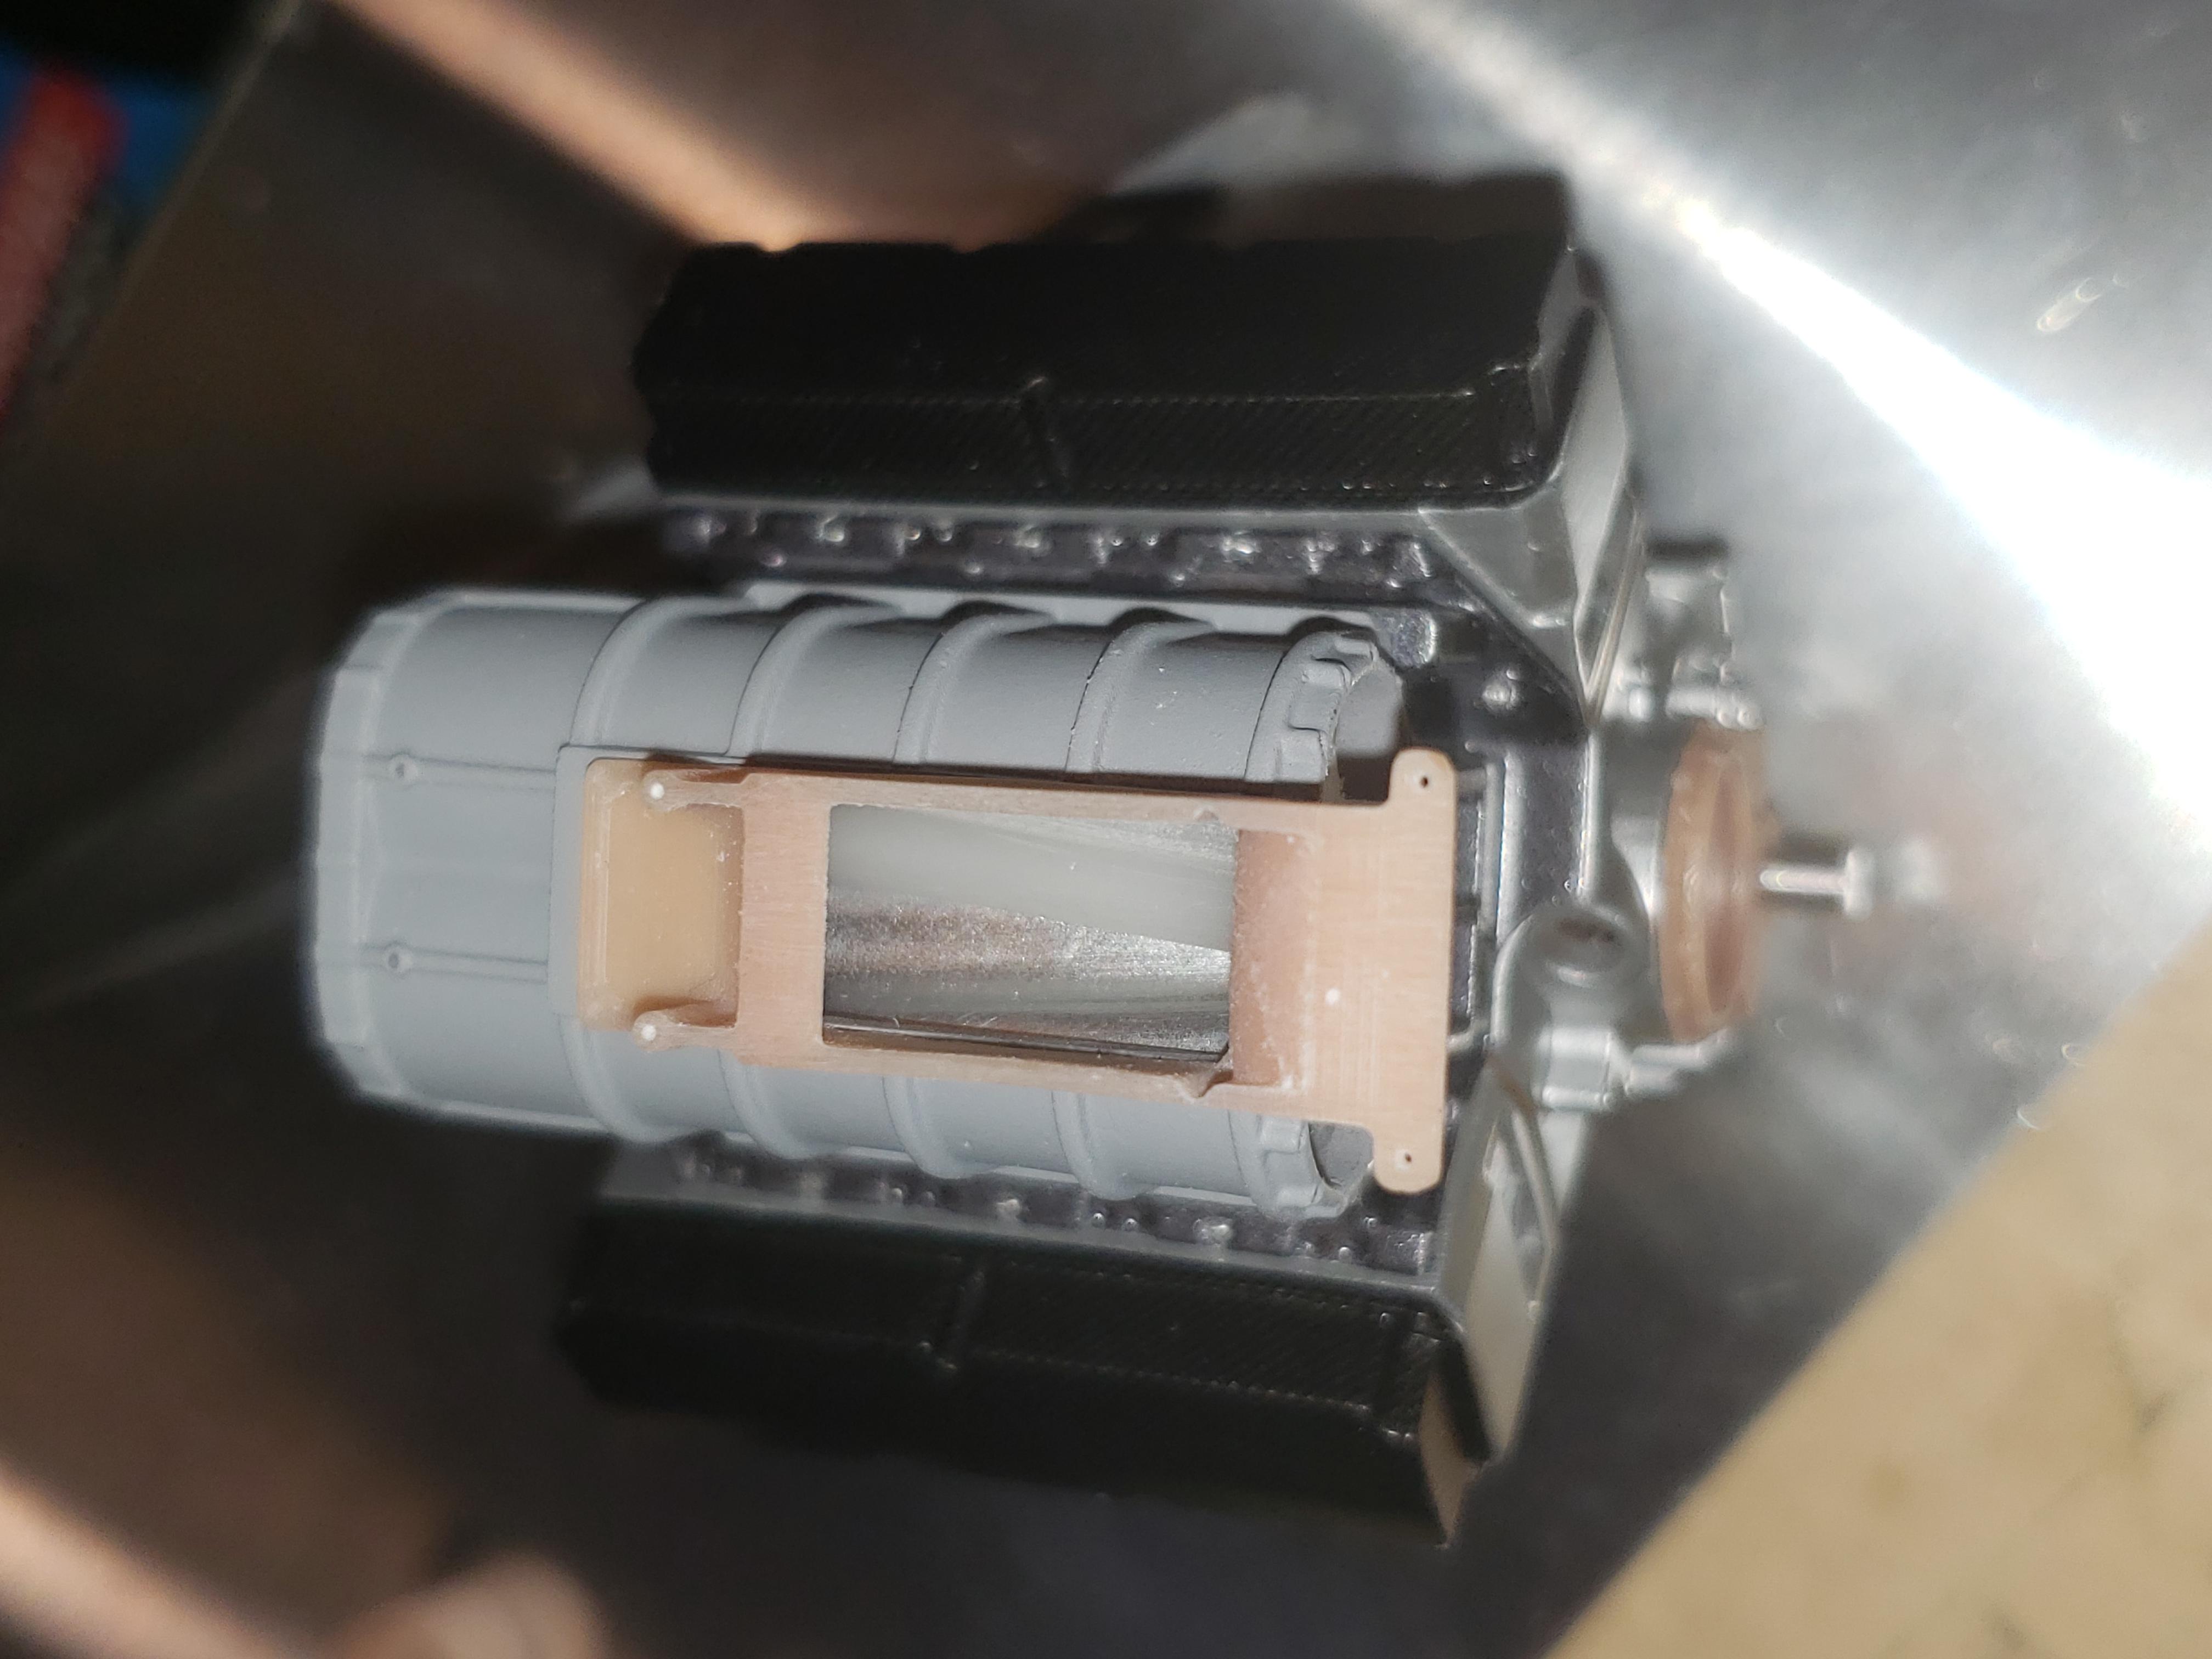
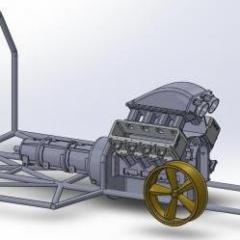
New oil pan for dry sump set up! Got the dry sump pump just about done. I need to finish up the photo etch for the rear end then move onto the engine pieces as there is some parts that need to be photo etched instead of 3d printed. Engine program is moving along nicely at this point and am nearing the end of all the parts for it! (finally!) lol -
69 pro mod chevelle, chassis started mock ups
mr68gts replied to mr68gts's topic in WIP: Drag Racing Models
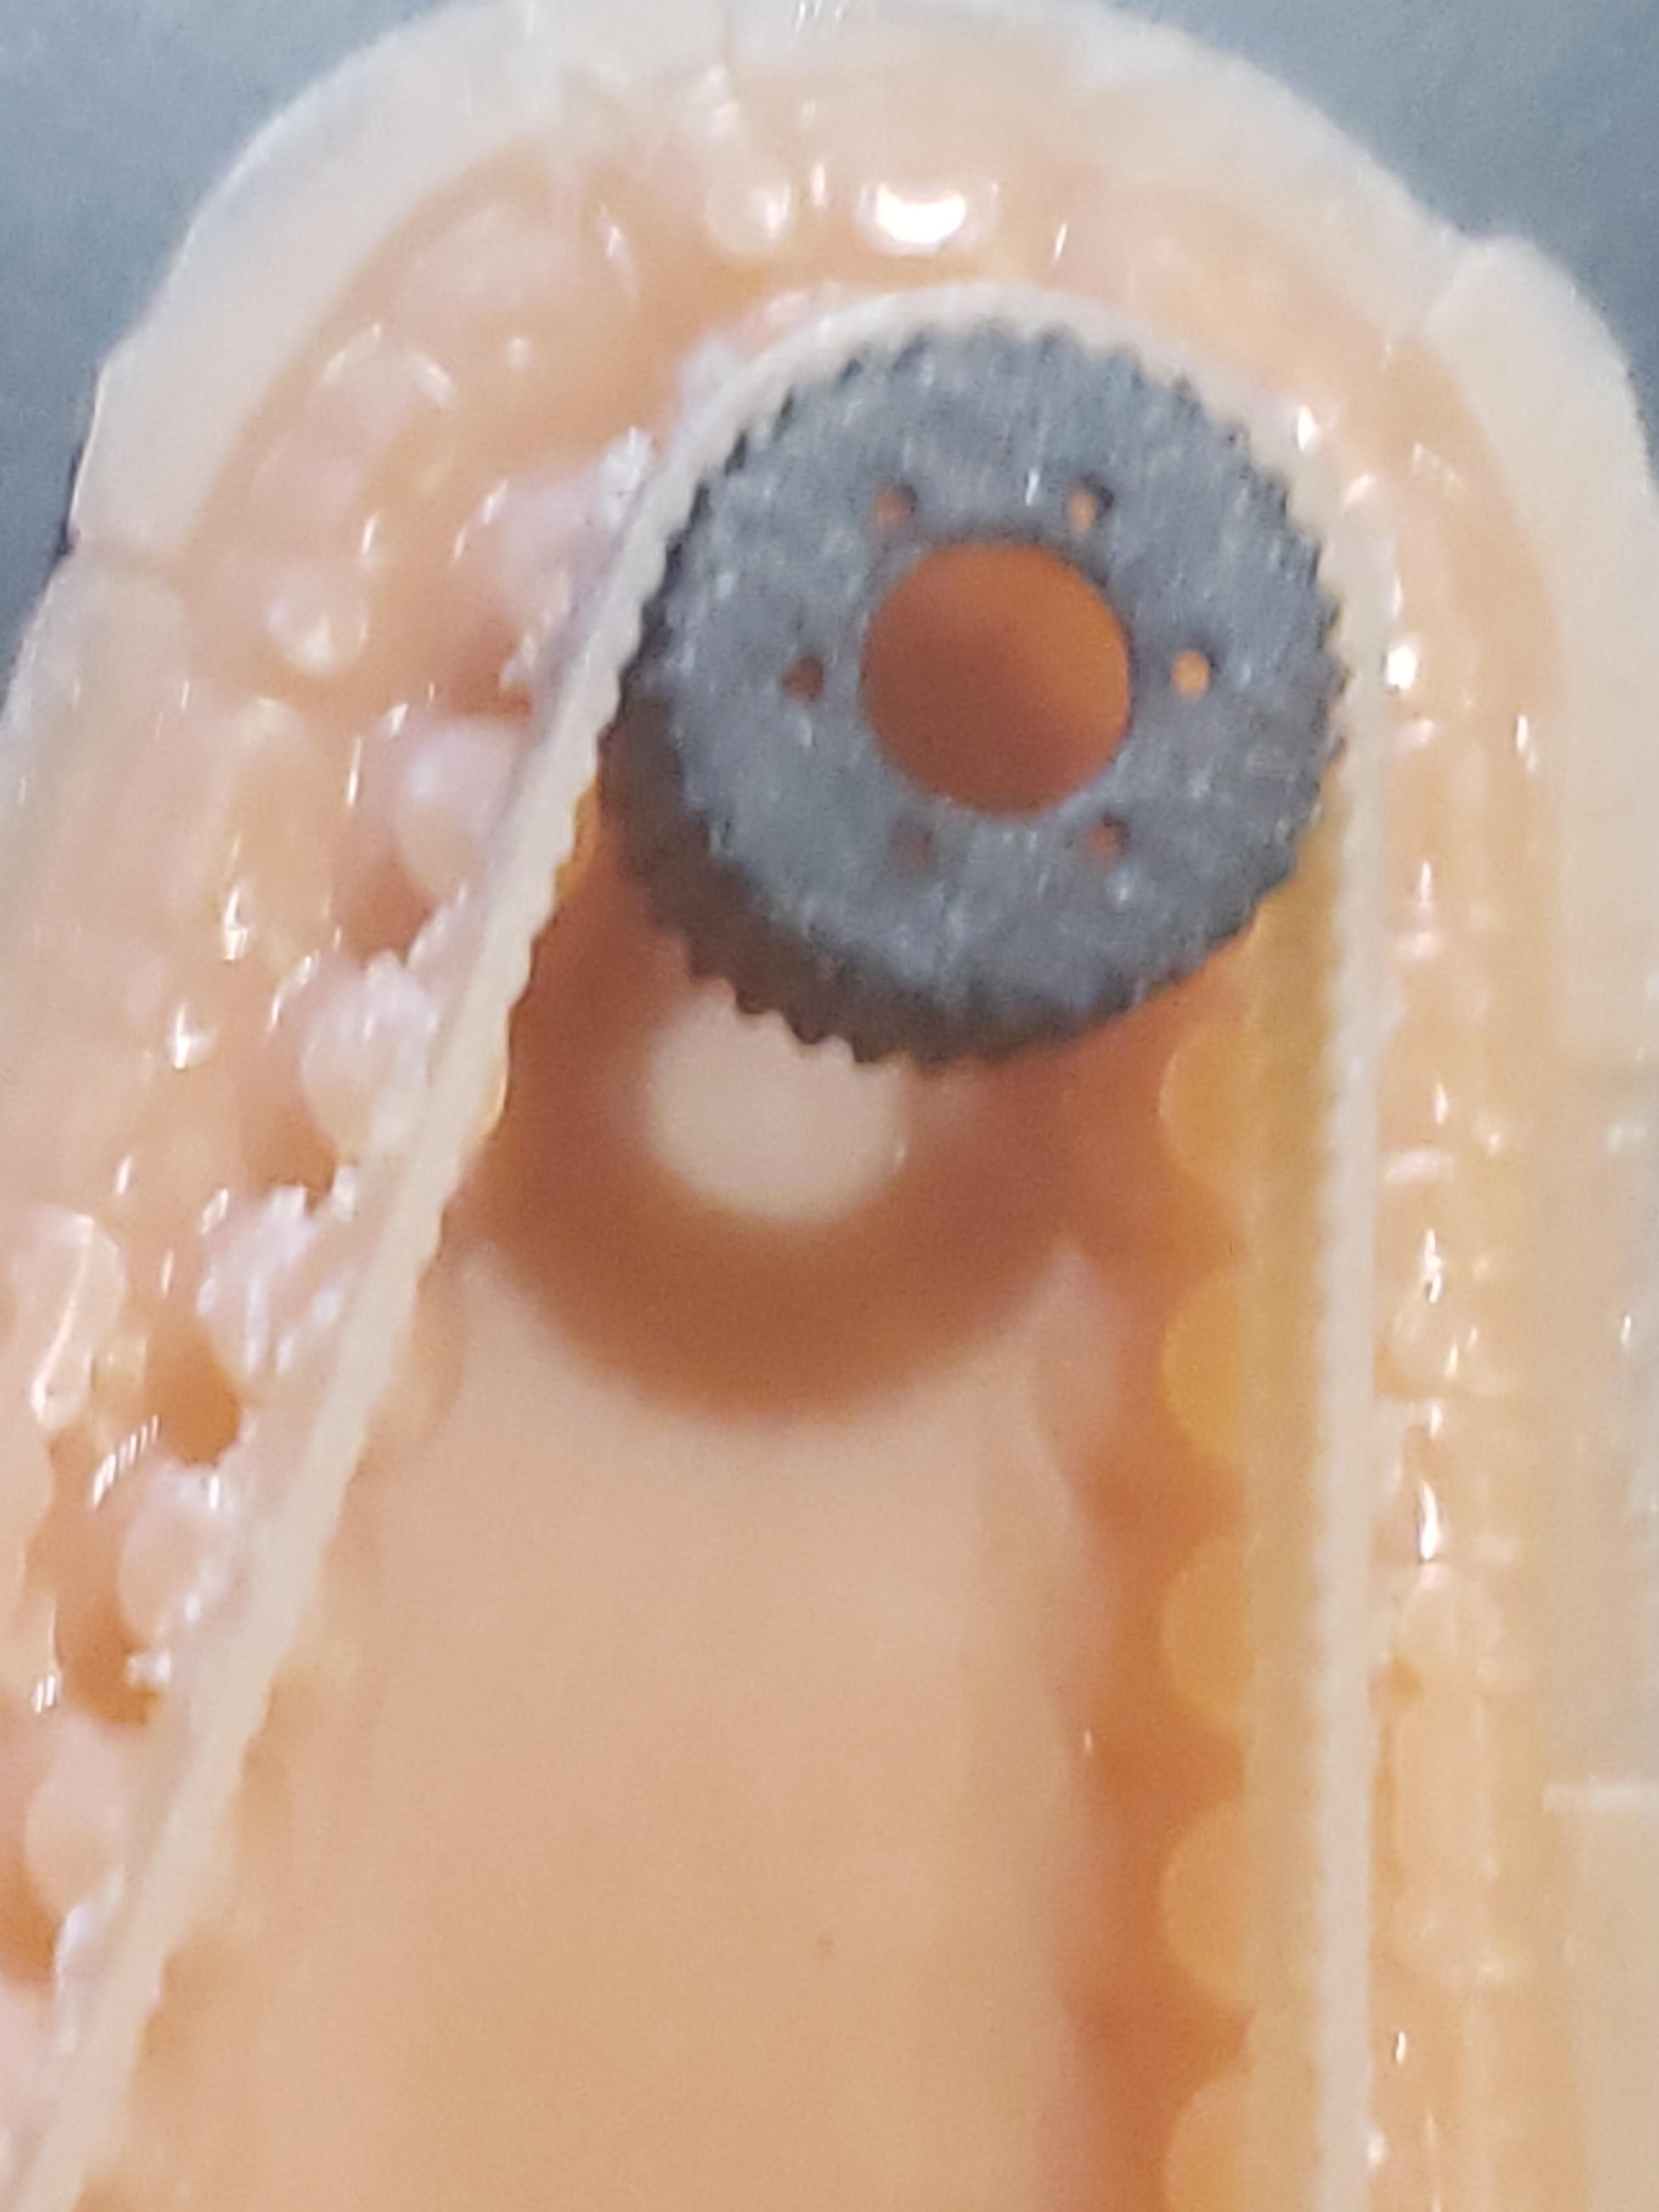
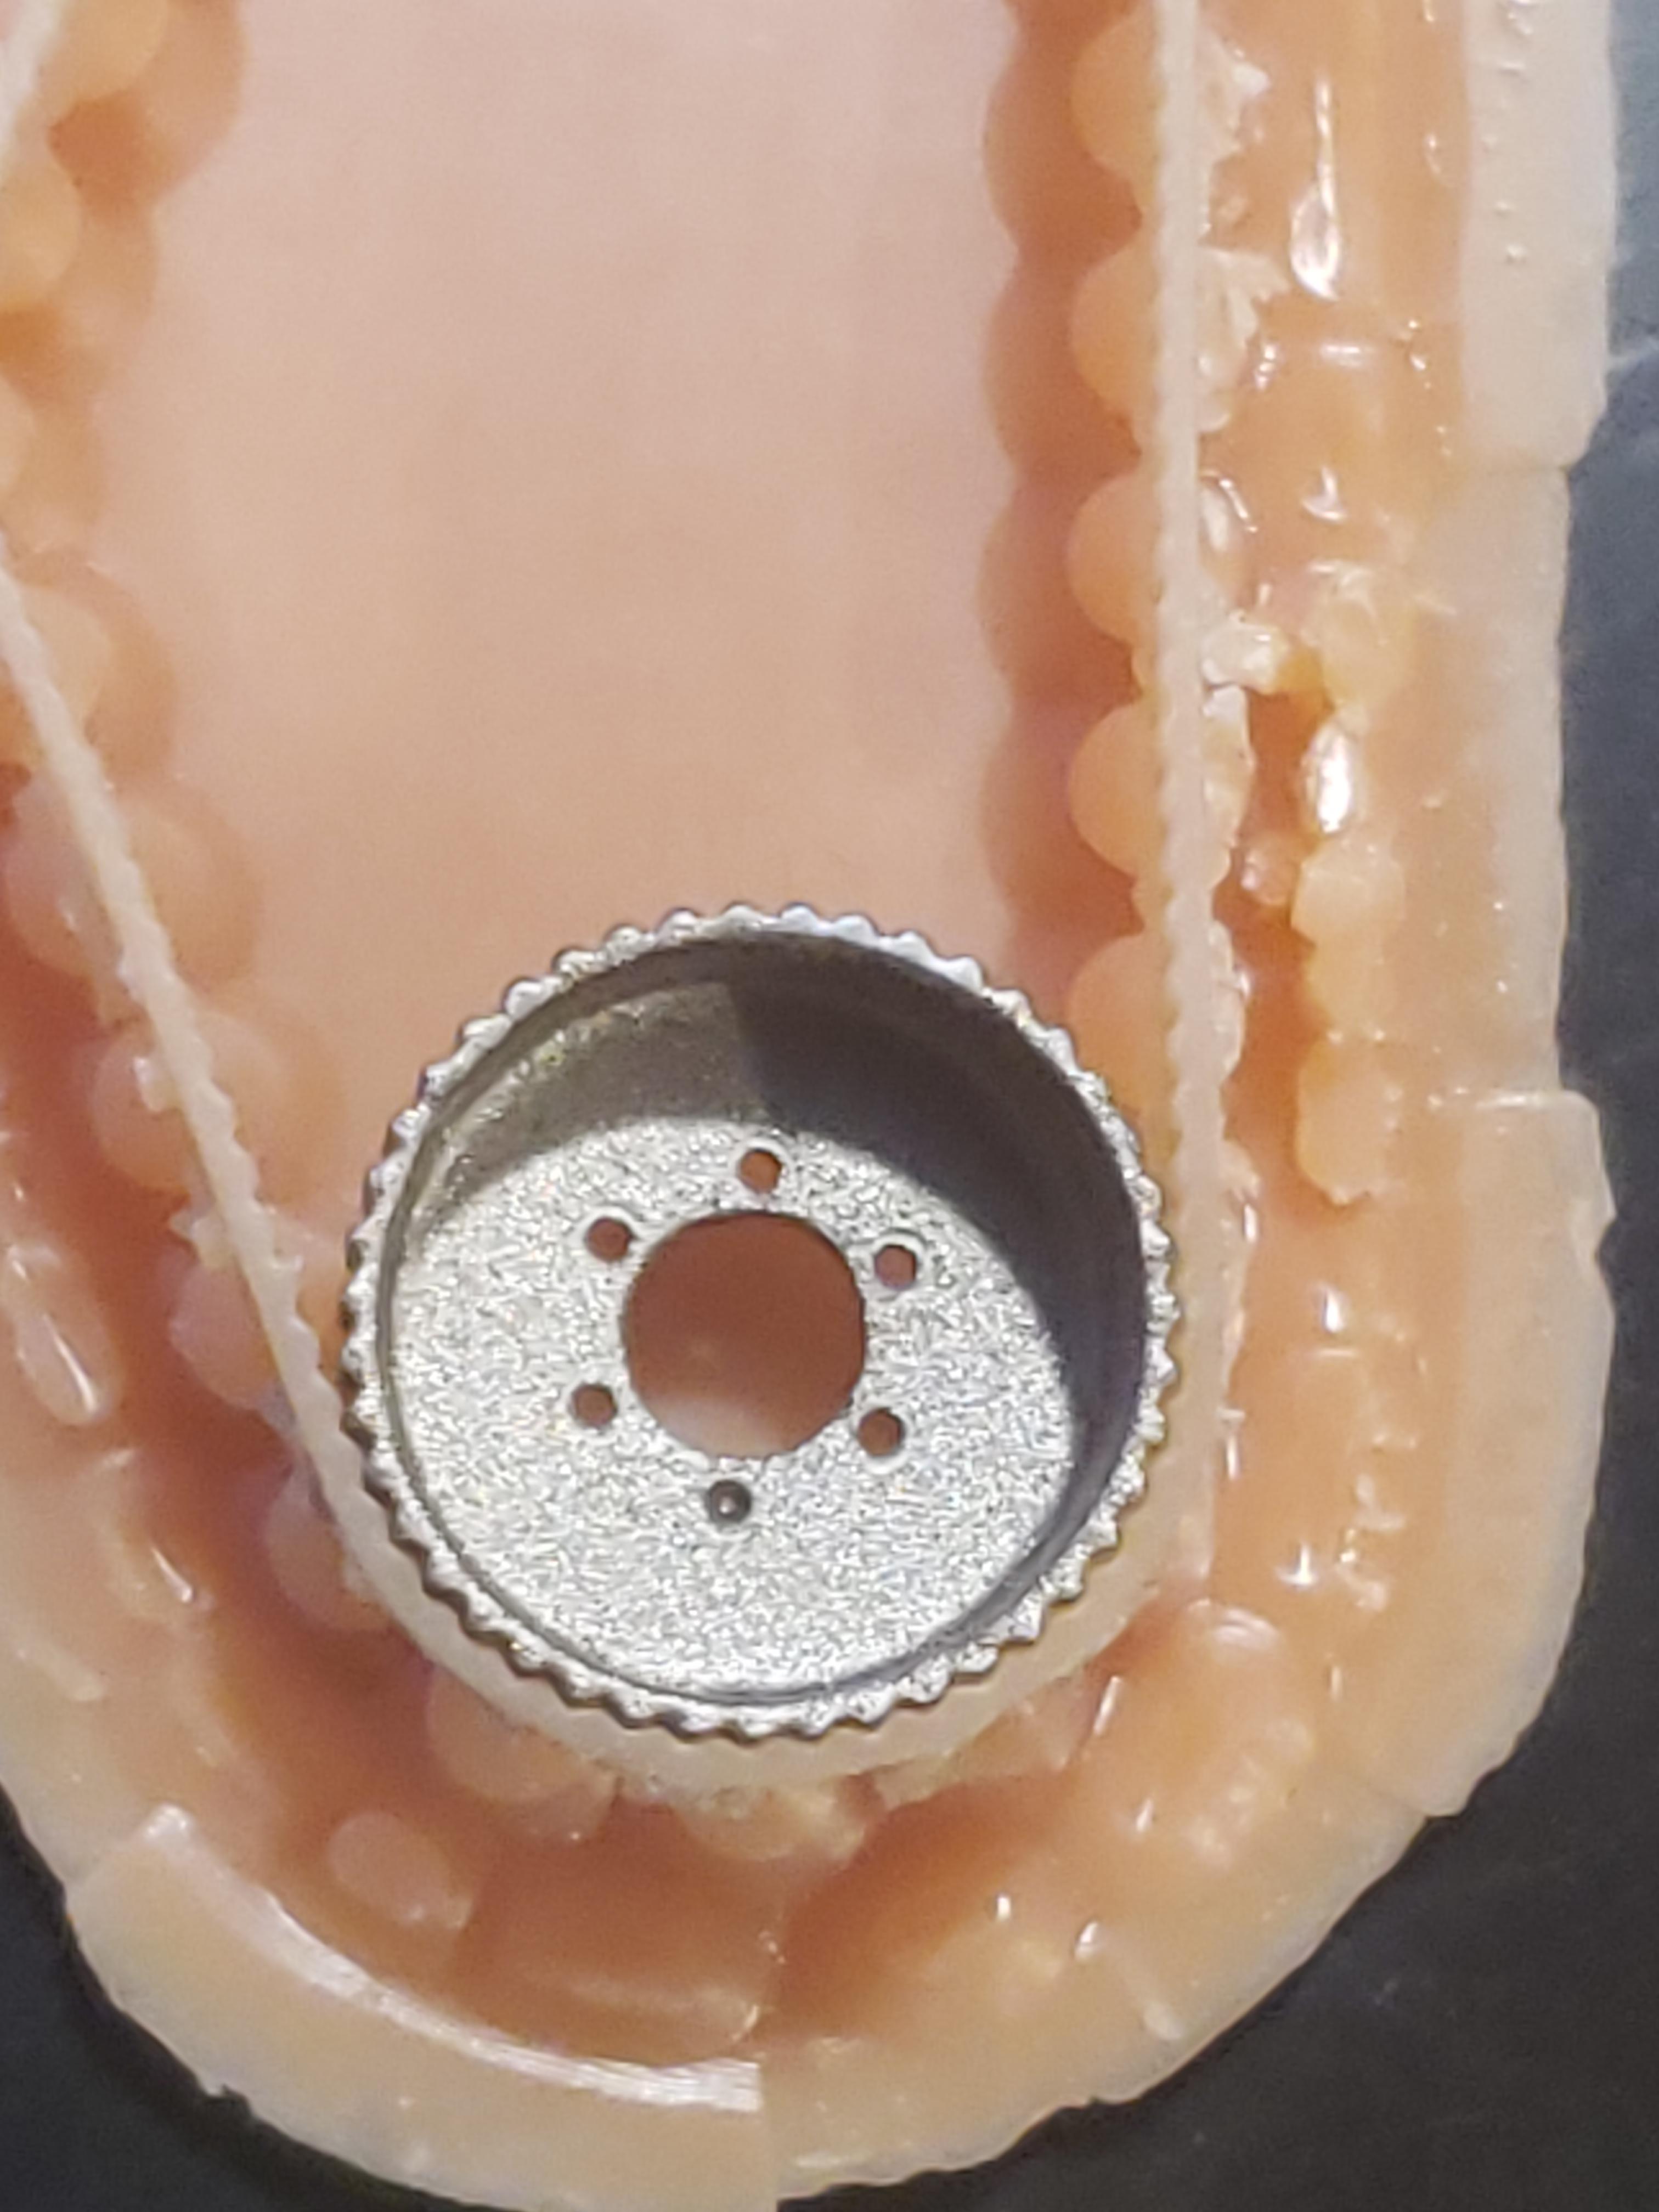
Time for the next logical step.... PHOTO ETCH! ?
-
as much as I love that little roadster of his, with or without correct class designation, someone seriously needs to build that 41! That thing is sweet! Paul
-
Hmm, I didn't notice that but I didn't use the decals either so the sheet still sits complete in the parts box...
-
They corrected the scale issues with it and is now supposedly 1/25
-
Tim, nice job! I built one a while back but scratch built a chassis as I needed it longer to fit both engines (aka "the odd couple" dragster style) It's a fun little kit despite the few short comings you exprienced. I didn't have those problems since many of those parts I didn't use. I used Buick finned drums I casted in resin (62 buick wagon) and drilled out the center to fit over the axle. They fit nicely in the wheels. Paul
-
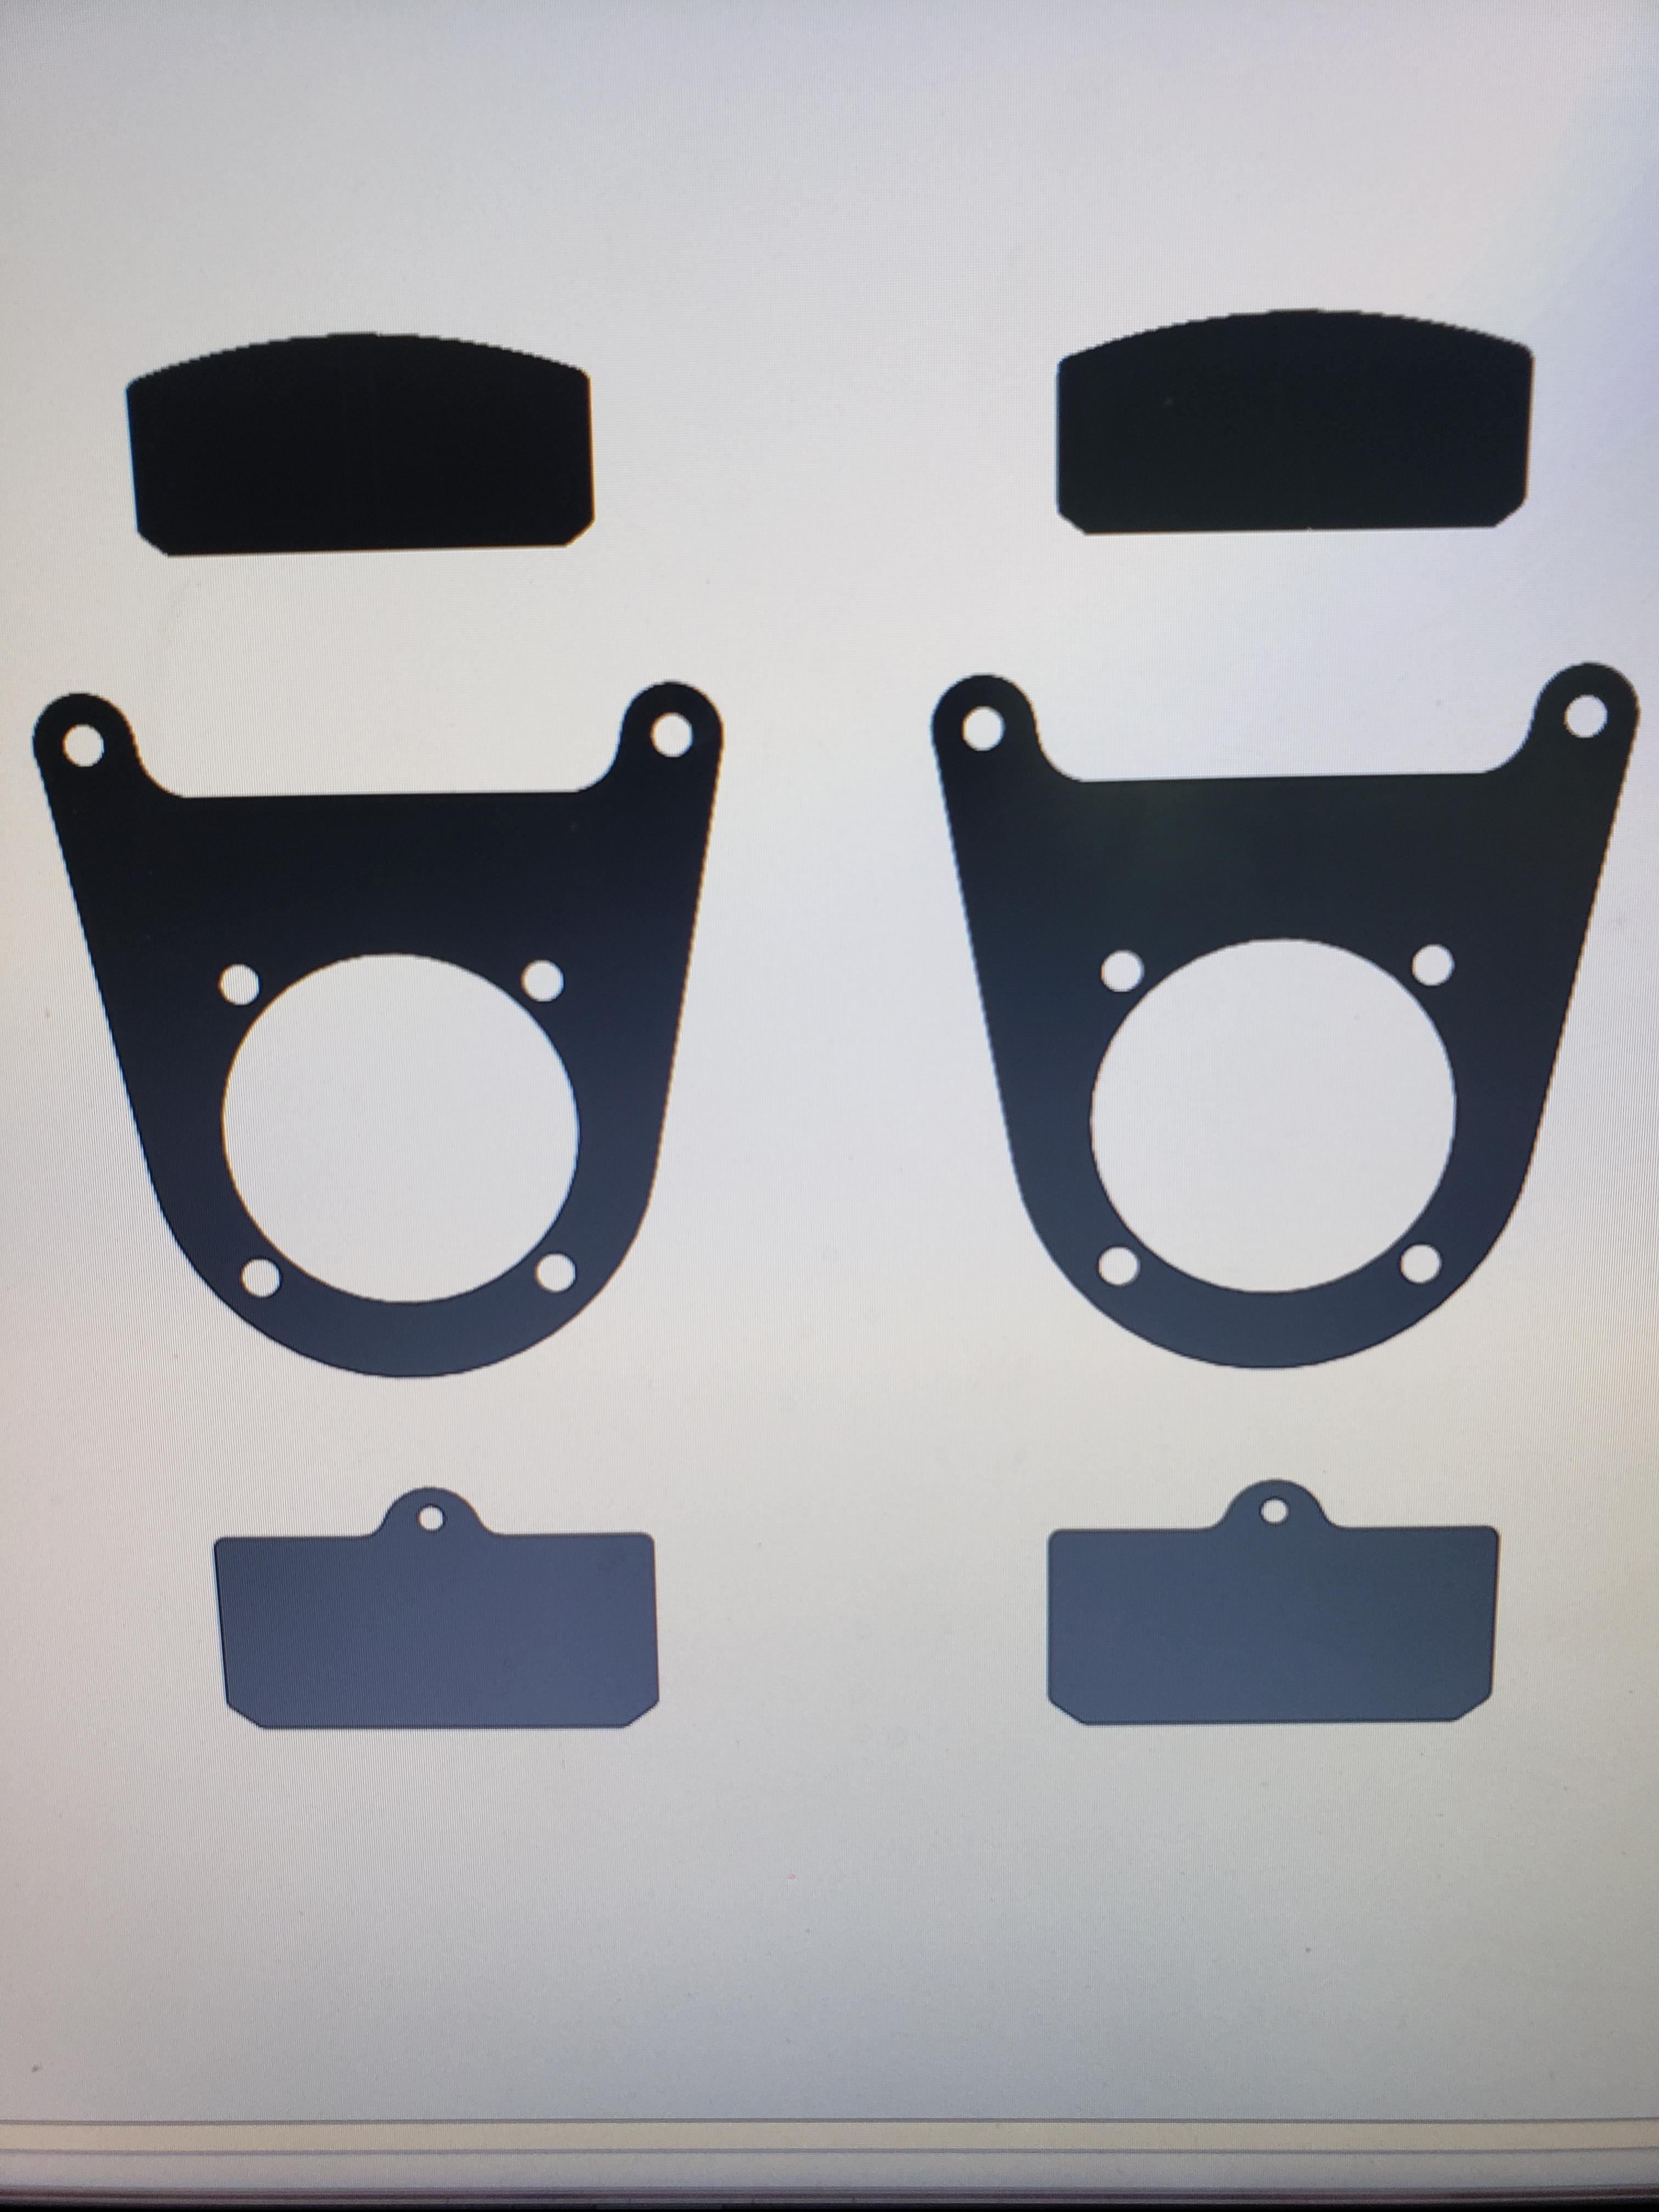
69 pro mod chevelle, chassis started mock ups
mr68gts replied to mr68gts's topic in WIP: Drag Racing Models
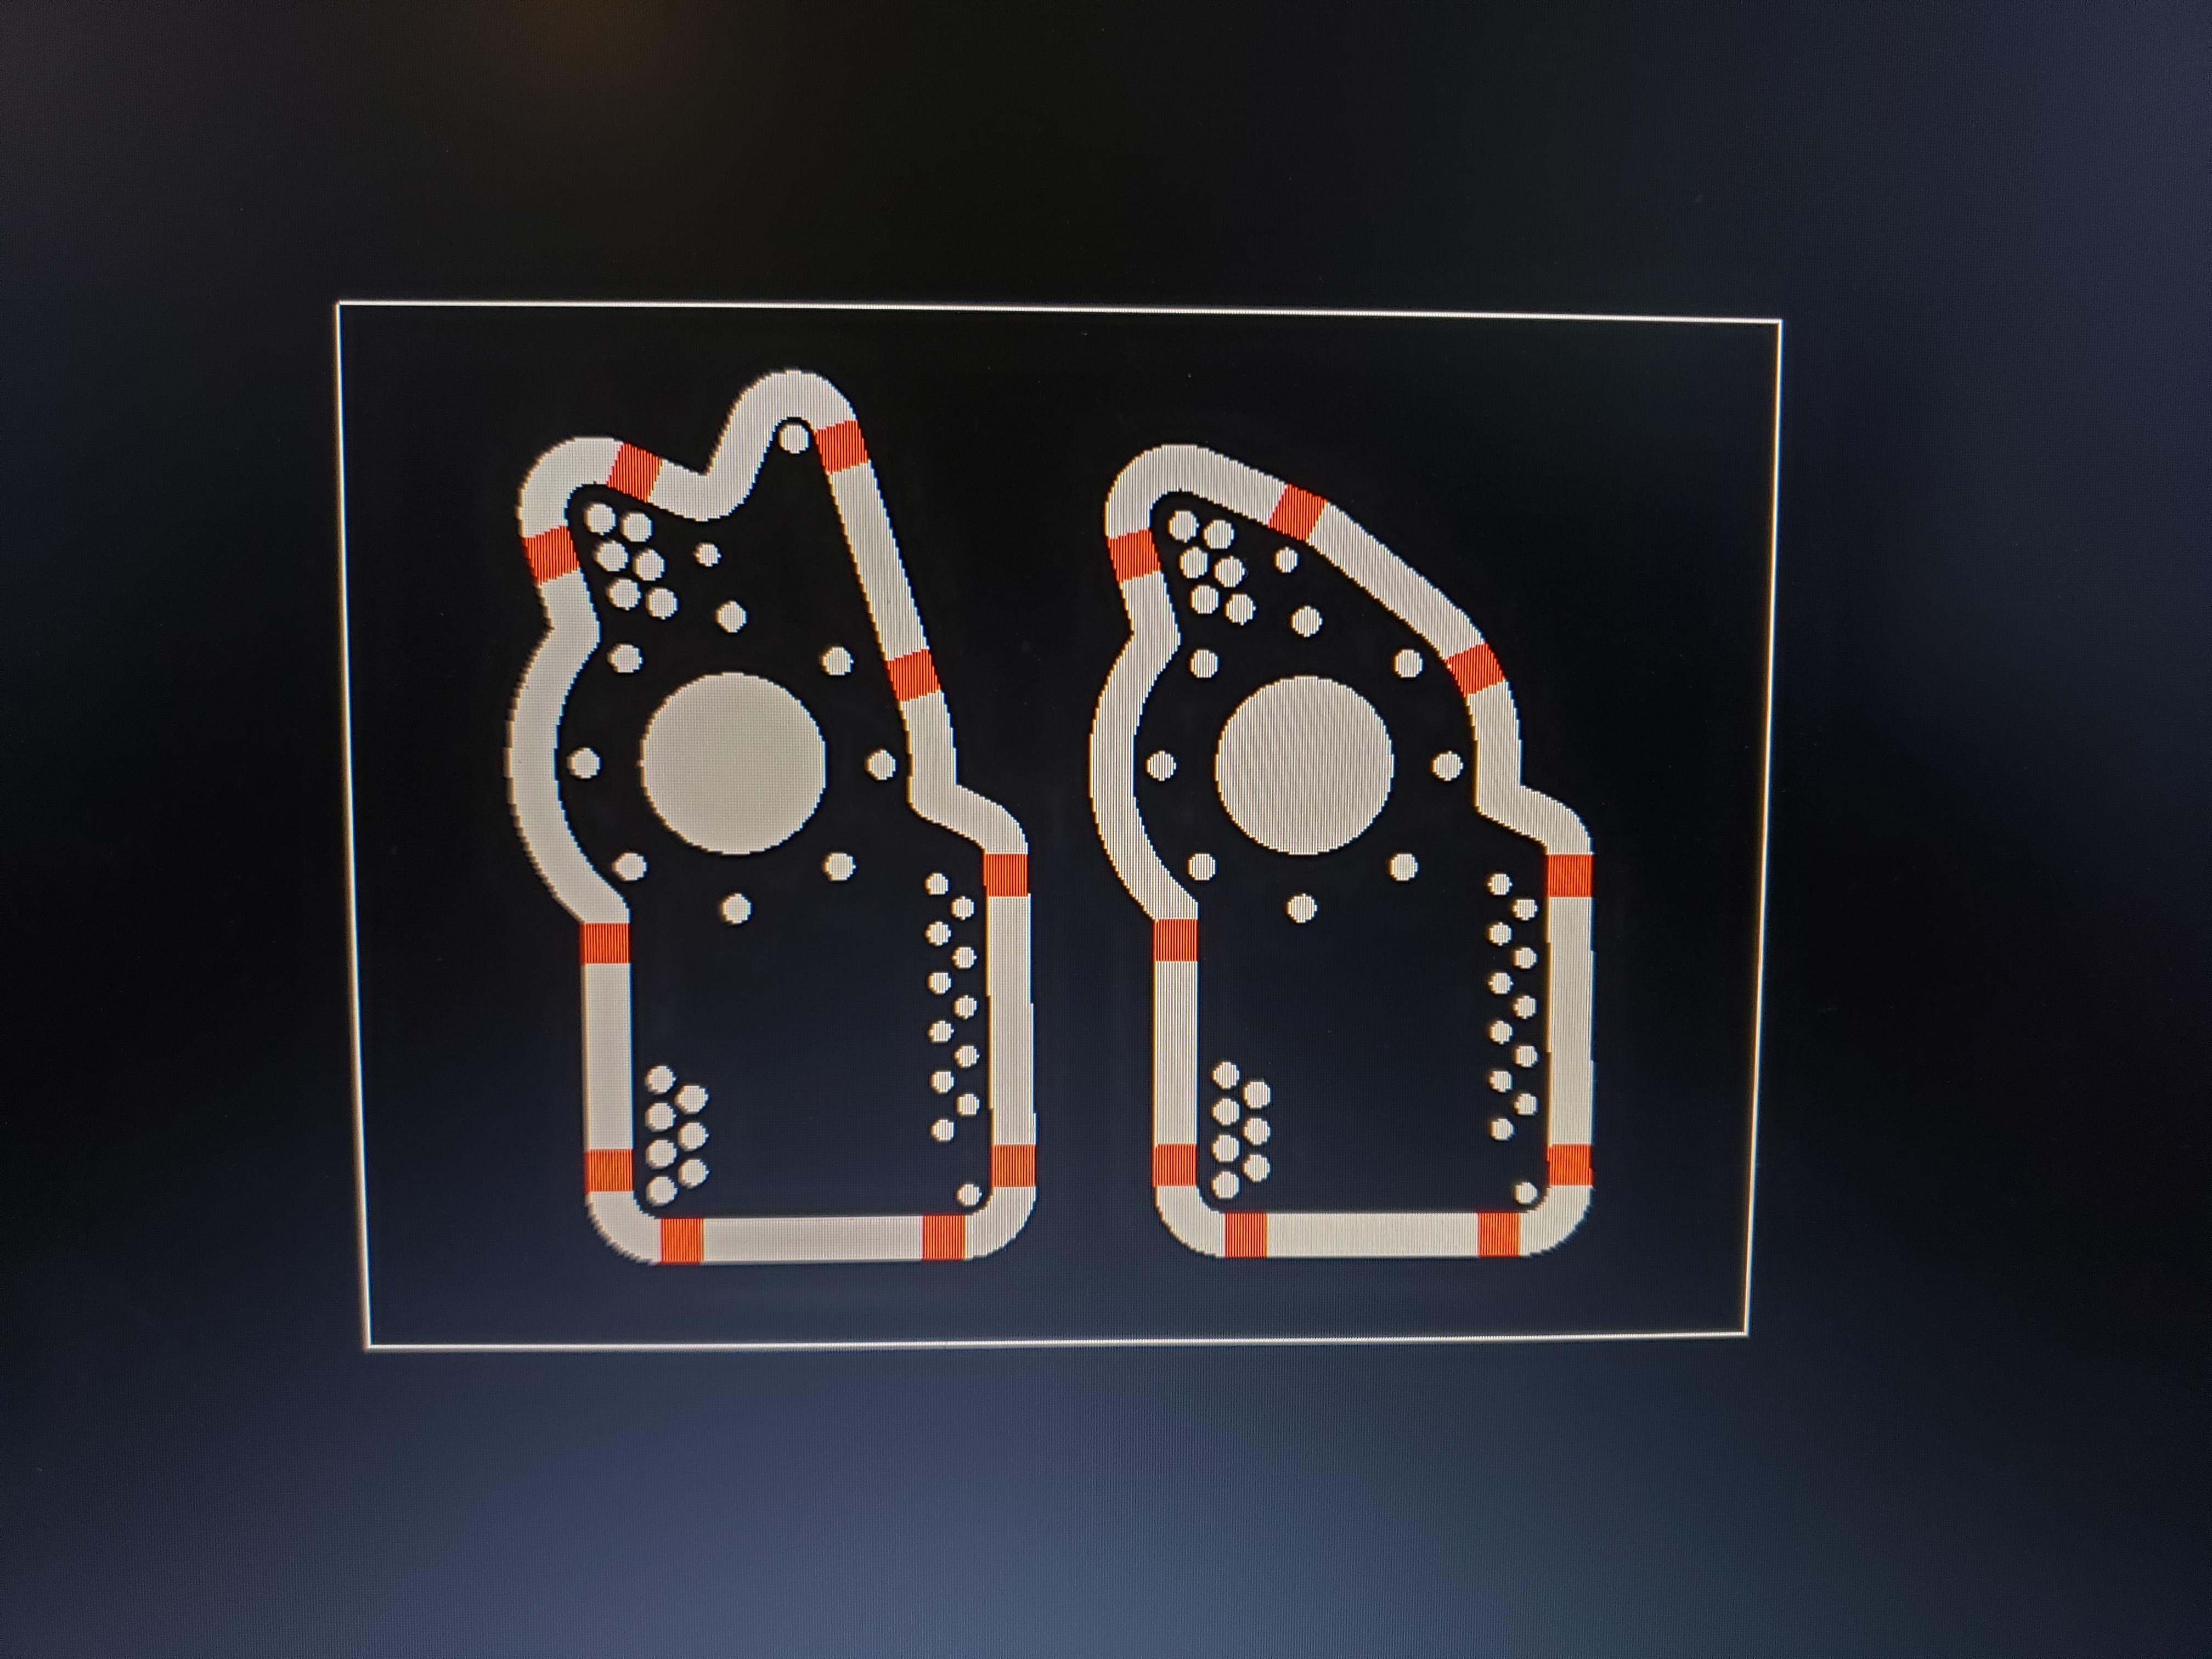
Not much progress but some is better than none! Made the "copper head gaskets" for both sides. Mocking up the new printed block and front timing covers with the existing lower pulley. Checking fit of the Lenco CS1 to the Bellhousing. New dry sump pan for the 481x New dry sump oil pump. This is actually individual pieces just stacked together in Solidworks. I need to look into photo etch services as the plates in between the main rotor bodies would be to thin to print. Paul