
taaron76
-
Posts
806 -
Joined
-
Last visited
Content Type
Profiles
Forums
Events
Gallery
Everything posted by taaron76
-
Very, very nice, Jim!!! What build is next? Tim
-
Awesome! Glad I could help. Tim
-
That lens will work fine but I'd say anywhere between 3'-5', depending. Are you using a tripod? I always shoot pics with the timer function so I know it will be completely still. Tim
-

what is flocking? help?
taaron76 replied to the weapon x's topic in Model Building Questions and Answers
I think I'm going to try this as well and see how it comes out. Any pics? I'd love to see everyone's methods. Tim -
Monogram 1970 Challenger T/A Rebuild-Under Glass 03-13
taaron76 replied to mustang1989's topic in WIP: Model Cars
You're getting close to having this one done, Joe! What is next on the build list? Tim -
Spectacular! Tim
-
I appreciate all the help I can get with the pics, Jim, and it certainly helped. Like I said earlier, I'm just another one of the new guys trying to catch up with all you experienced pros's... One build at a time. It freezing crazy cold here in D.C., so I feel your pain. Tim
-
Thanks, Jim! Every pic I looked at was different, but as long as I throw a couple in there, it will help with the detail. I actually despise clutter in an engine bay! So much that I took a year with my real life Mustang in order to clean up the engine bay. My goal was to not have any wires along the inner fenderwells under the hood, so I pulled the motor (rebuilt it and polished everything), welded up all of the holes, painted it and rerouted all of the wires to hide them. It took a year, but was well worth it in the end. This is probably one of the reasons that most of my builds will only have the essentials underneath the hood. To me, its like walking into a mansion and noticing laundry and trash all over the place. There is a little method behind my madness... I probably won't build any original models either, and I probably will never paint an engine bay anything but what the body color is. Just personal preference. Tim
-
Jeremy, another good tip is to shoot the pic from a further distance, zoomed in, if you have the lenses to do it. I use a 55-300mm lense on my Nikon DSLR when I take pics. Tim
-
Joe - I hear ya! That's the best part about the build... The engine and paint are always my favorite now. I'll add the heater core lines tomorrow... Tim
-
I always clean the edges that BMF will be laid down with a touch of thinner or alcohol to make sure you get all of the wax or polish out. I put some on a Q-tip and rub it down, but make sure you don't temove any paint that you don't want removed. Tim
-
I'll be following as well. Tim
-
Thanks! The Shaker covers up all of the details. Lol Tim
-
Looking good! Tim
-
This will be cool to watch! Tim
-
I love working with the 426 Hemi because it so big and easier to handle and work with. Building this model has definitely made me a much bigger Mopar fan. Anyhow... I redid the fuel lines, ran distort and wires, as well as the breather lines from the valve covers to the rear of the manifold. Some pics of the 426 I saw one and sometimes two breather/vacuum lines, so I went with two for more detail. I'm sure I will keep adding detail as the week passes. Thanks for looking! Tim
-
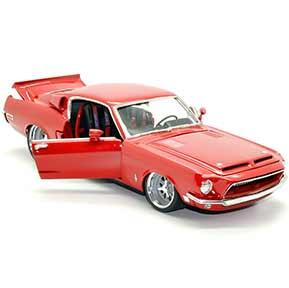
Yep, that's a pivotal piece of advice that many people miss. Lighting is so critical as well. I shot my '66 Shelby with glossy photo paper underneath and behind it. I also increased the exposure rate on my DSLR to +1, but I also take tons of pics with different settings and see which ones come out best. I never shoot with the flash on either and this photo is with an overhead fluorescent light, as well as one on the side. Tim
-
Thanks! I was able to find a few good references... It always happens when you're not looking. lol Tim
-
Monogram 1970 Challenger T/A Rebuild-Under Glass 03-13
taaron76 replied to mustang1989's topic in WIP: Model Cars
OMG, Joe! There really is body to put on that chassis. lol Looks great!!! Tim -
Mopar guys - Can you tell me where the dipstick is located on a 426? I can't find it on any of the references pics I've looked at. Thanks! Tim
-
Another stellar build! Tim
-
Nice work, John! Tim
-
426 or 427? Regardless, it looks great! Keep those pics coming along with your progress. Tim
-
Nice work, Andy! Keep those pics coming. Tim
-
Thanks, guys! I believe I used International Orange... I couldn't find Chrysler Orange/Red, and I thought Chevy Engine Red was too red. Tim
