Roadrunner
-
Posts
4,469 -
Joined
-
Last visited
Content Type
Profiles
Forums
Events
Gallery
Everything posted by Roadrunner
-
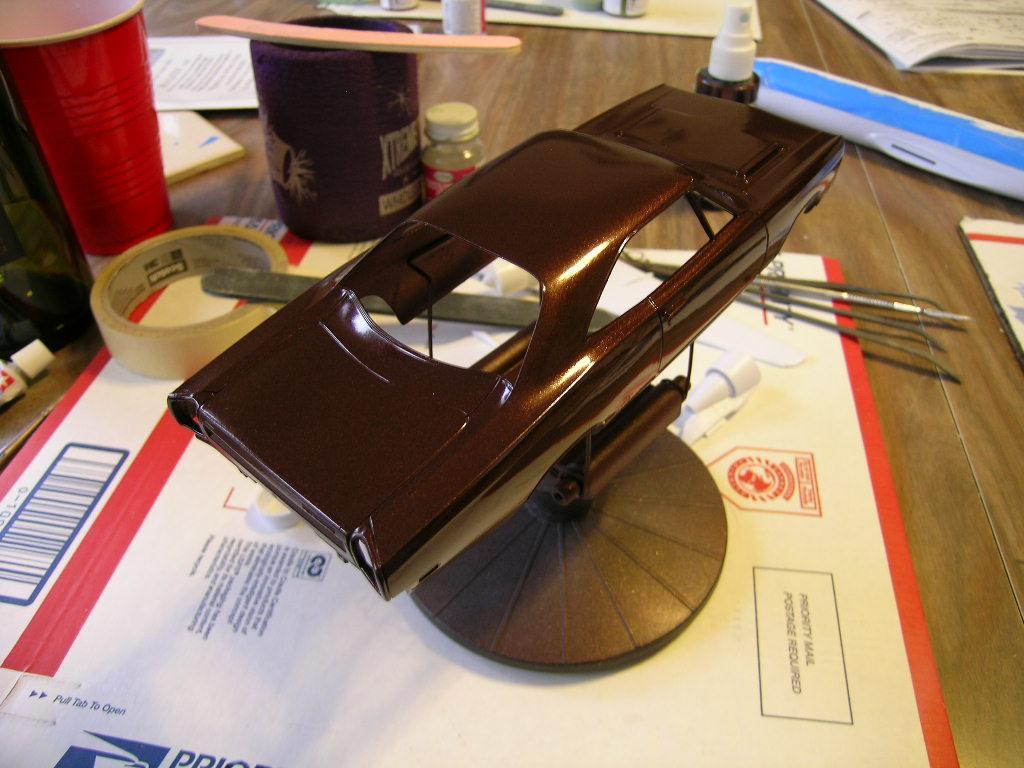
Thanks, Tony. It certainly does look "root beerish" in color.
-
I like the new wheel selection better too.
-
Indeed,... more like gigantic.
-
It was Duplicolor sandable white primer. I really didn't notice anything out of the ordinary until after I applied color, then every tiny scratch and flaw became immediately visible. Seems to be OK now though. Oh, and thanks very much for the compliment. I think it has the potential to turn out real nice.
-
Second wet coat just applied. There had been numerous sanding marks still evident (poor prep work on my part I guess), but this coat seems to have straightened that out.

-
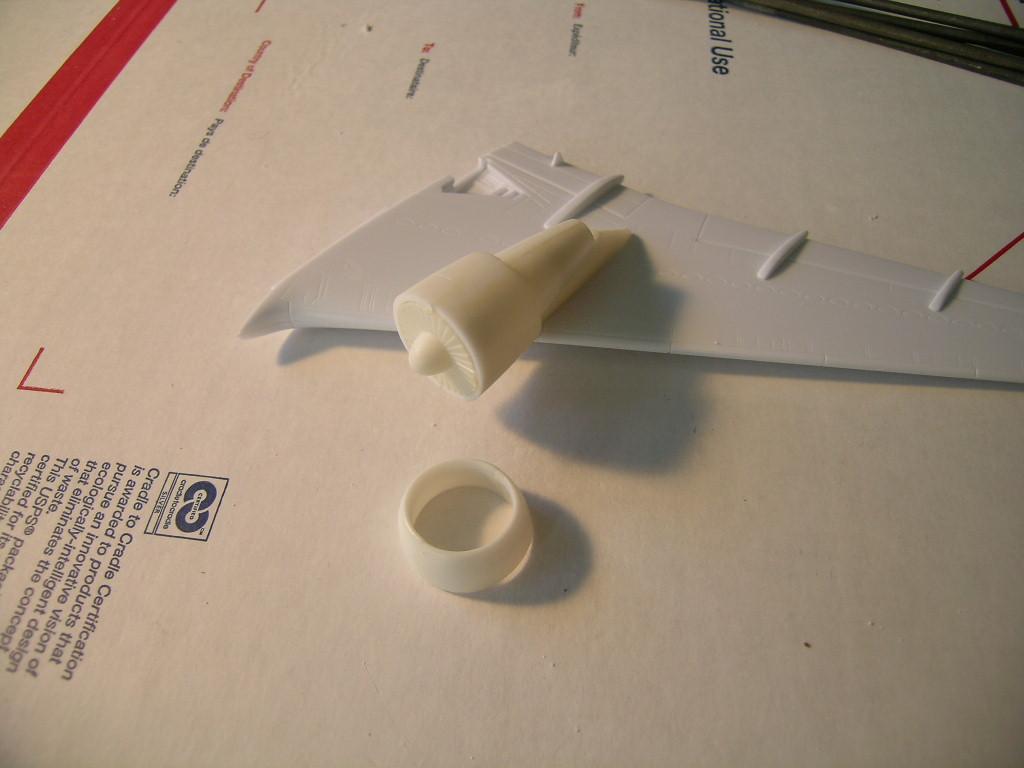
 It's also come to my attention that the big GE engines are too short in length, so I'll be adding a ring of material at the rear of the detached cowl fronts to stretch them somewhat.
 -
Yep, there are some gorgeous airliner specific bases available. Most of these in the provided link are of course military in nature, but the printed base concept has certainly caught on, big time. The downside of an "at the gate" type base, is there are virtually no vehicles available to place in the vicinity for scale reference. It was never my intent to build a diorama or anything, but vehicles would certainly be nice.
-
Gear down. That's why I epoxied the nose weight in. Otherwise, it's a bit of a tail setter.
-
Thanks, Jim. It'll be a nice break from all the military stuff I do.
-
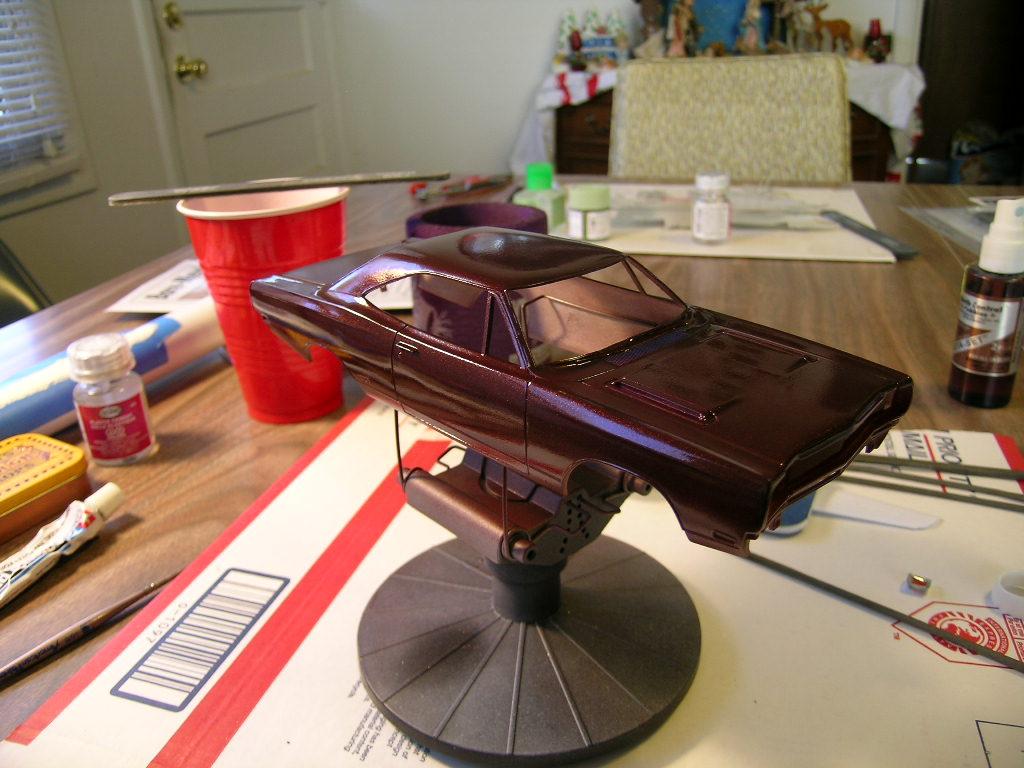
On hold again. I realized after I painted the Root Beer, that I need to order some black lacquer for the bottom portions of the car (I want to keep it sort of stock looking), so I'll need to wait for that to arrive before I can proceed further. (I'm beginning to wonder if I'll ever be able to work straight through on one of these models without needing something that I don't have.)
-
My New Years Resolution. Finish the Still Born Projects.
Roadrunner replied to Ron Hamilton's topic in WIP: Model Cars
I can certainly relate to this concept. Since joining this site a little over a year ago, I have finished exactly zero kits that I've started. Botched paint jobs, needing parts, distractions from other projects, wrong or lost parts, etc. have kept me from finishing anything in 2015, but I hope to rectify that this year. We'll see I guess. -
The only car model that I can recall that I'd really like to have again, is the old AMT '59 El Camino w/camper. I've managed to do an end run around the problem by grabbing a '59 and a '65, then robbing the camper from the '65, but it would be really cool to have a mint copy of the original kit. Other than that, most that I want can usually still be found for reasonable prices, even if no longer in production.
-
Your reasons for disliking the term, are well grounded.
-
Changes at Model Cars Magazine
Roadrunner replied to Gregg's topic in General Automotive Talk (Trucks and Cars)
Yep, I too hope that the surgery has a positive impact for you, Gregg. The news about the magazine seems good too. -
Getting another kid into the hobby
Roadrunner replied to mikemodeler's topic in General Automotive Talk (Trucks and Cars)
My experience in this area has been poor, at best. Two young fellas in my old neighborhood practically begged me for some models to build (once they discovered the large stash I had in the basement then). Fat forward a couple of years, and they now spend all of their free time getting drunk and texting everybody. I probably won't bother with it anymore. -
Models in films(movies)
Roadrunner replied to HotRodaSaurus's topic in General Automotive Talk (Trucks and Cars)
Yep, models in movies (cars airplanes, ships and tanks) are as common as dirt. -
Wet coat just applied, and I must say that it’s a marked improvement. Gloss coat will make it even shinier, then polishing the clear coat should of course “kick it up a notch” further.
-
OK, finally the first light color coat is on. Not 100% uniform, but I thought it best to stop here. I have "issues" with patience, so I'm trying to force myself not to be too hasty.
-
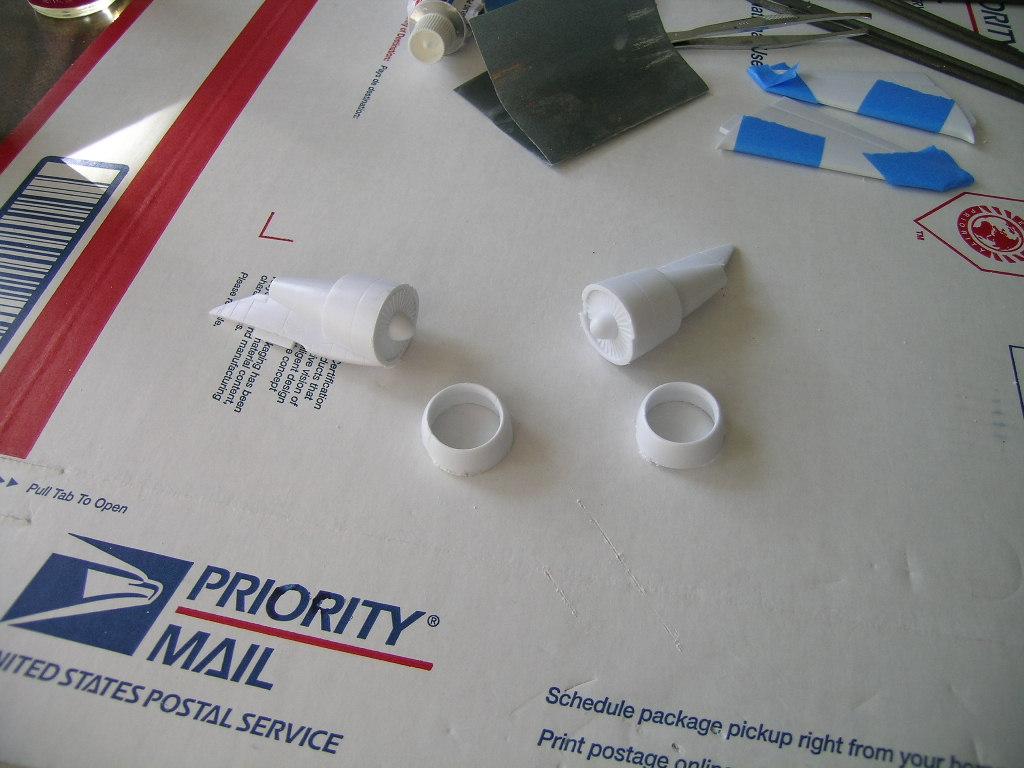
Fortunately, I was able to source one from another kit. Slightly different color, but it'll be fine.
-
I've somewhat arbitrarily decided that these GE engines are not so bad, and that with a little effort, they can be made to look quite acceptable, even if not necessarily accurate. To that end, I've cut the forward portion of the cowls off, so that I can more easily eliminate the nasty seam on interior. While doing this, I cut one too short (the one on the right) and ruined it, so I'll have to scavenge one from one of my other kits.
-
And the window puttying begins. This will obviously need another coat, maybe more.
-
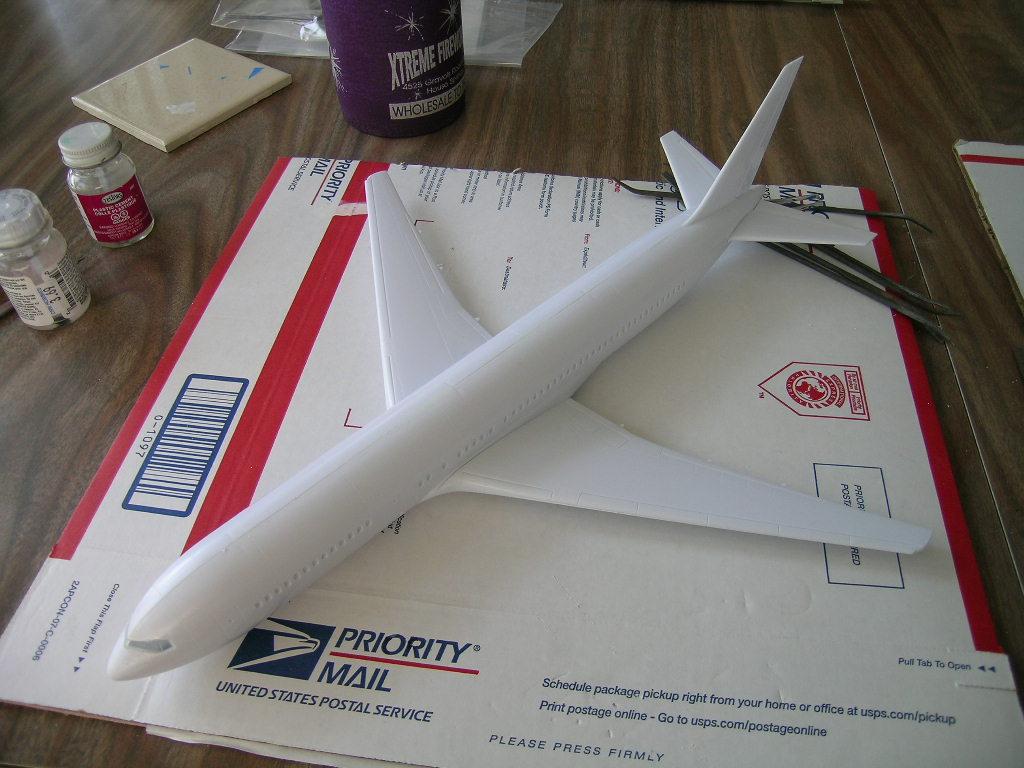
Straight as straight can be. Perhaps I just lucked out, Kev. The one problem that I've consistently had with these 767 kits, is the inboard trailing edge flaps are always bent, I think they have been on every Revell 767 kit that I've worked worked on.
-
OK, with everything dry now, time for the test fit. I really don't know why I bother though, the Revell kit parts fit so well, that the wings can easily be attached later, after all the painting and decaling is finished.
-
Wings got the same treatment. I almost messed up and sanded off the wing tip trailing edge lights, but caught myself in time.
-
I also took a stab at the stabs. Had them all zipped up that night, but forgot to post them here.