pcm1977
-
Posts
146 -
Joined
-
Last visited
Content Type
Profiles
Forums
Events
Gallery
Everything posted by pcm1977
-
AMT Construction Bulldozer
pcm1977 replied to pcm1977's topic in Model Trucks: Big Rigs and Heavy Equipment
Thank you all for the kind words. I was hoping to enter it in a show and see how it does once I get the DM600 done. -
AMT Construction Bulldozer
pcm1977 replied to pcm1977's topic in Model Trucks: Big Rigs and Heavy Equipment
Thank you everyone, I hope that my entire idea with an old beat up DM600 and lowboy works out. -
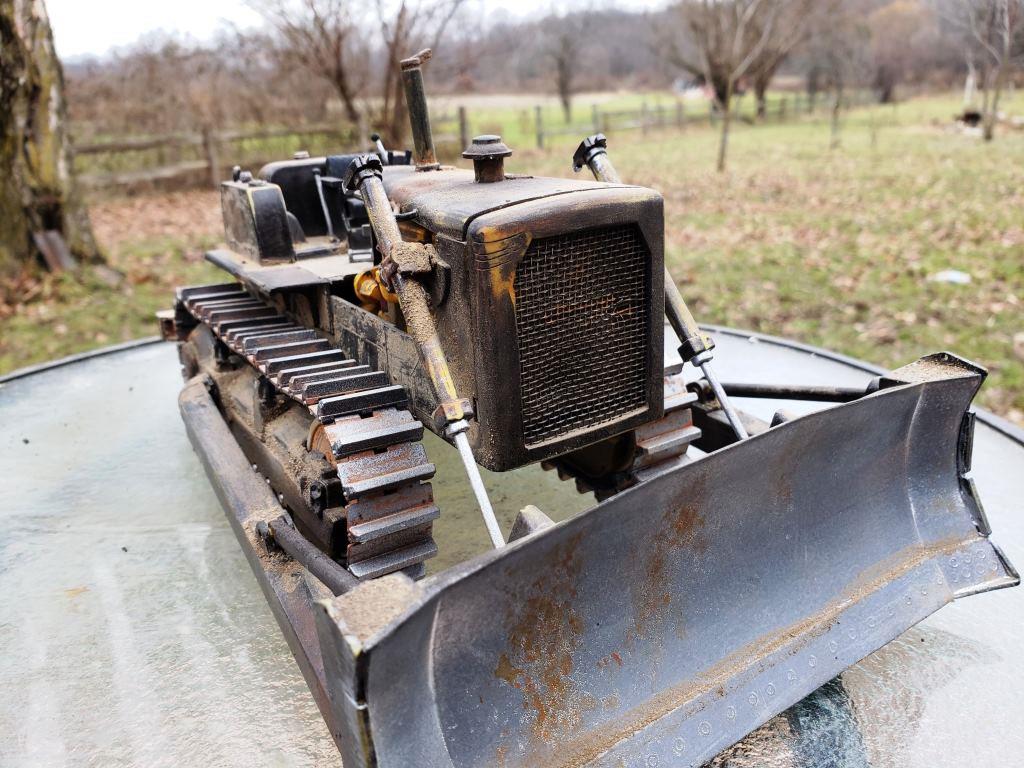
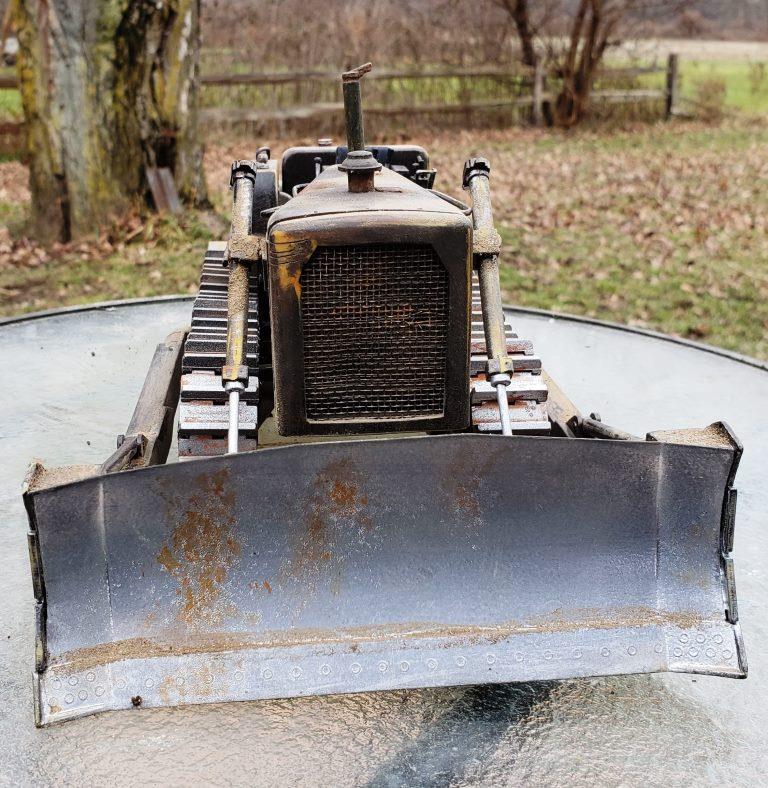
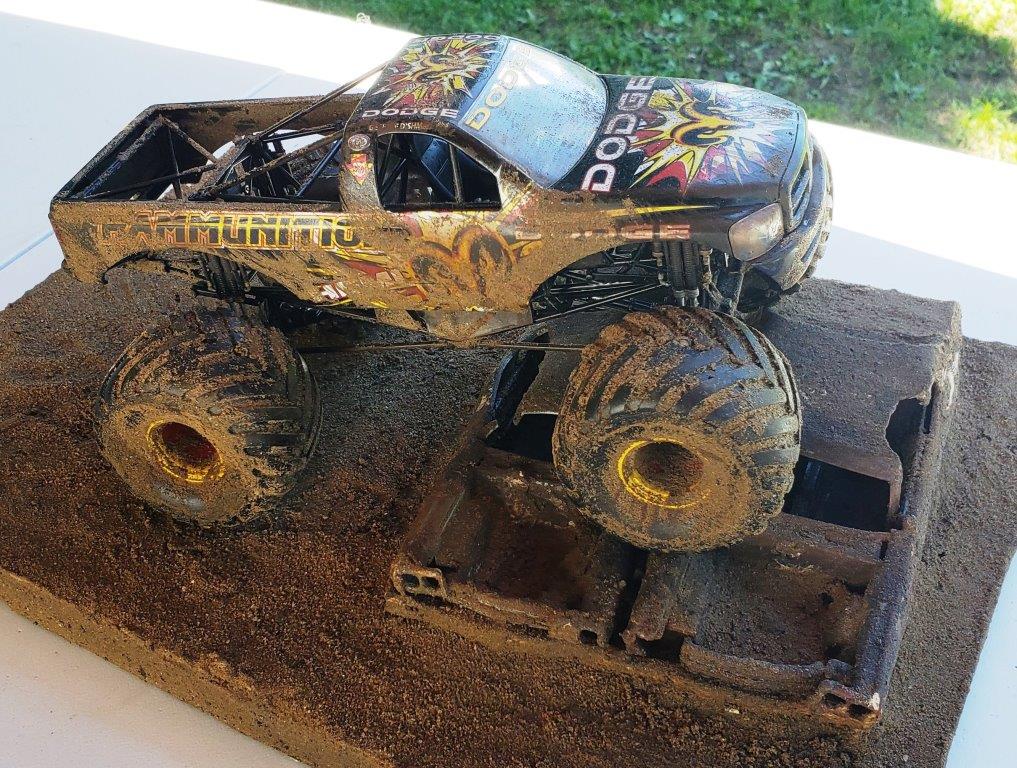
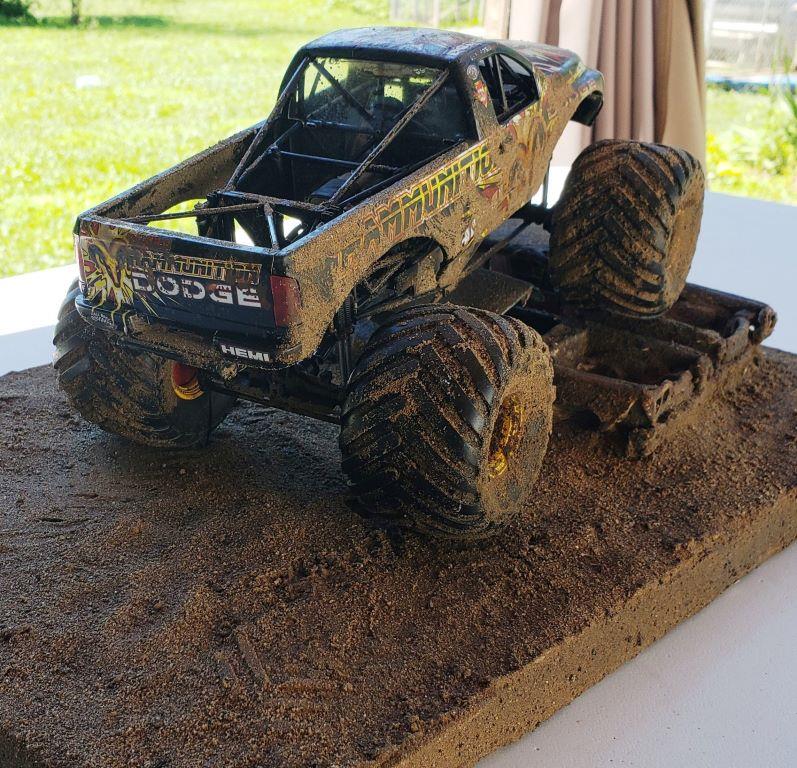
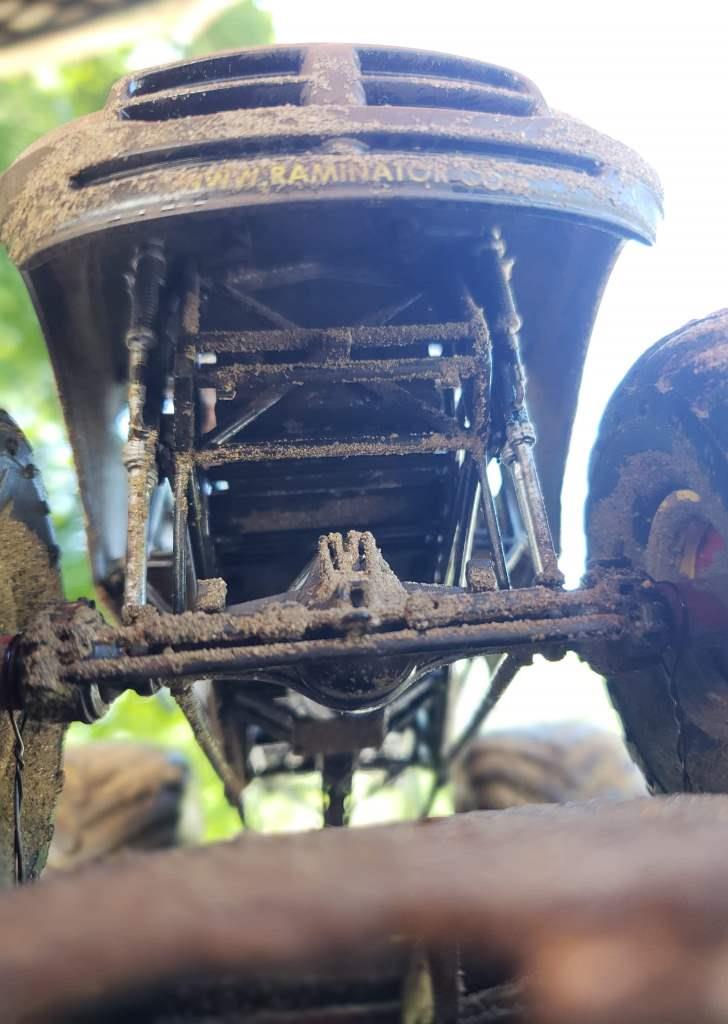
I don't know where else to post this one, but eventually the dozer will will be chained to a lowboy and towed around by a Mack DM600, plus this forum seems to be the location of others talking about this kit. I wanted to go with a very used dozer. The thought behind this was that the guy would have bought a yellow Cat a while back and painted to to match the color of the company truck and trailer. The dozer was a fun build and I hopefully did not spend too much time weathering it. This was my first time rusting and such to a model. Glamour Shots... The engine... Closeups... Working Shots...

-
Ollie's strike again
pcm1977 replied to GLMFAA1's topic in General Automotive Talk (Trucks and Cars)
Just got back from the Olies in North Olmstead Ohio. Don't waste your time there. The only new thing they had that was not left over from months ago when I was last there was some Lindburg ships and the Kevin Harvick snap kit. What they did have was not much more than a couple dozen boxes of stuff too. Not worth the 20 minute drive... good news is that my wife did get some hair dye and we got a bag of candy. -
Ollie's strike again
pcm1977 replied to GLMFAA1's topic in General Automotive Talk (Trucks and Cars)
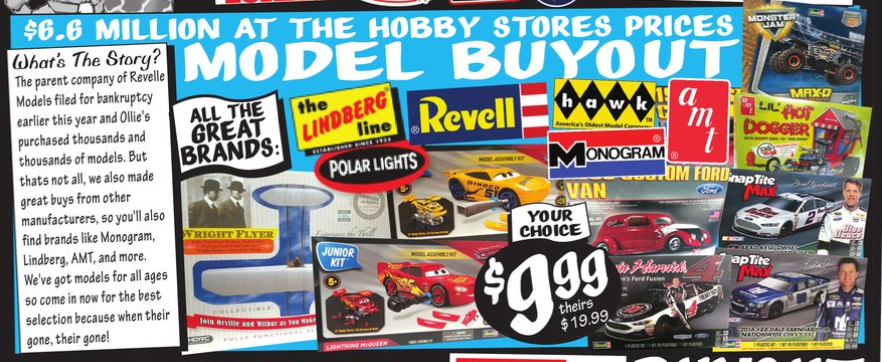
Got the newest Ollie's email and this was in it. https://www.ollies.us/currentflyer/flyer.html?store_code=71
-
I just checked and it is already in stock at Hobbylinc https://www.hobbylinc.com/amt-great-dane-flat-bed-trailer-plastic-model-vehicle-kit-1:25-scale-1111
-
Rammunition Monster Truck
pcm1977 replied to pcm1977's topic in Model Trucks: Pickups, Vans, SUVs, Light Commercial
I put dry wall mud down on a painted board, then painted it. After it dried I painted some white glue all over it and put some sand on it before it dried. I then sprayed the sand with "Auqa-net" hairspray so it would hold some of it peaks an valleys. in all it took about 4 days to do just the base. The truck was done in a similar fashion except I painted some mud paint under the glue. Wish i had a better way to create a "mud" effect rather than using the sand. Thanks -
Rammunition Monster Truck
pcm1977 replied to pcm1977's topic in Model Trucks: Pickups, Vans, SUVs, Light Commercial
Thanks Doc. I hope to take it with me next week to a show in Port Clinton OH. See what I can do with it there. -
Rammunition Monster Truck
pcm1977 replied to pcm1977's topic in Model Trucks: Pickups, Vans, SUVs, Light Commercial
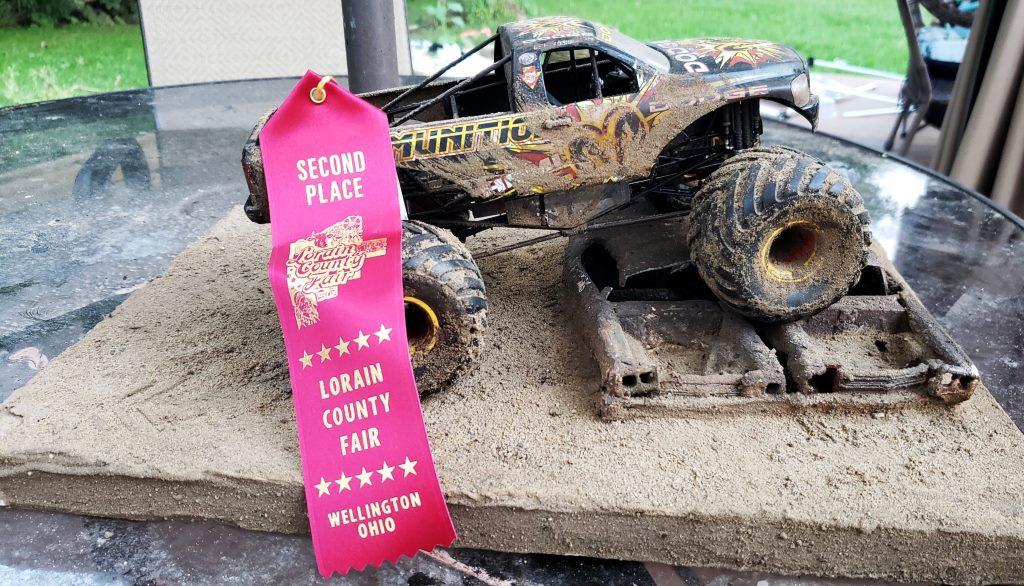
I scored a second place at the county fair this past week with this one. I lost out to a really nice two -tone Revell Kenworth
- 18 replies
-
- 1
-

-
- monster truck
- dodge
- (and 2 more)
-
Does anybody know what is going on with this kit? Also can this kit be used for a standard flatbed? I have been looking for a regular flatbed, but don't want to pay $75 for it. Thanks
-
Rammunition Monster Truck
pcm1977 replied to pcm1977's topic in Model Trucks: Pickups, Vans, SUVs, Light Commercial
Thank you for all your kind comments. -
I finally finished my Linburg Rammunition Monster Truck diorama. The kit was pretty easy and went together easily. This was my first model with a roll cage and fitting it together concerned me a bit, but it just slide together and required no cursing at all. What made it best was the $9.99 price tag from Olies. The crushed cars are my first also and it was also my first time spattering mud/sand. Thanks for looking
- 18 replies
-
- 3
-
-
- monster truck
- dodge
- (and 2 more)
-
Ollie's strike again
pcm1977 replied to GLMFAA1's topic in General Automotive Talk (Trucks and Cars)
Got the newest Ollie's email and this was in it. Guess I know where I am going tomorrow
-
Nice Viper!! I have a kit sitting around and some left over Ohio State Patrol decals... I might just have to do one myself.
-
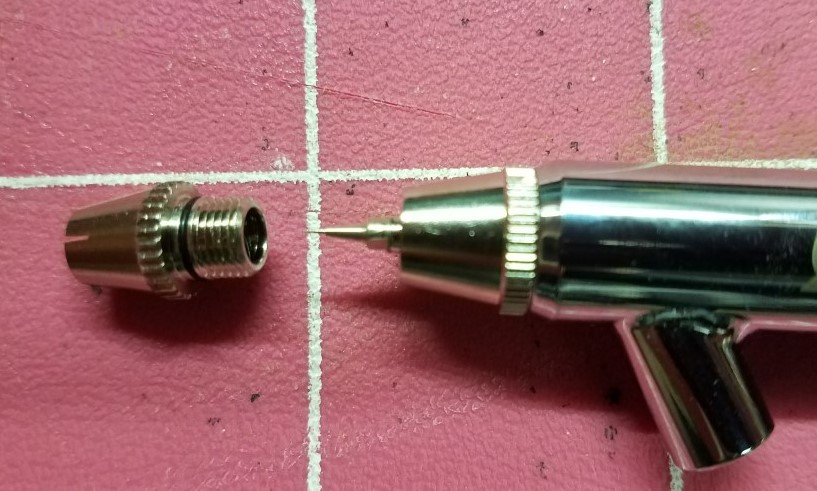
Campbell Hausfeld Airbrush Kit (tested 4/22/18)
pcm1977 replied to pcm1977's topic in Model Building Questions and Answers
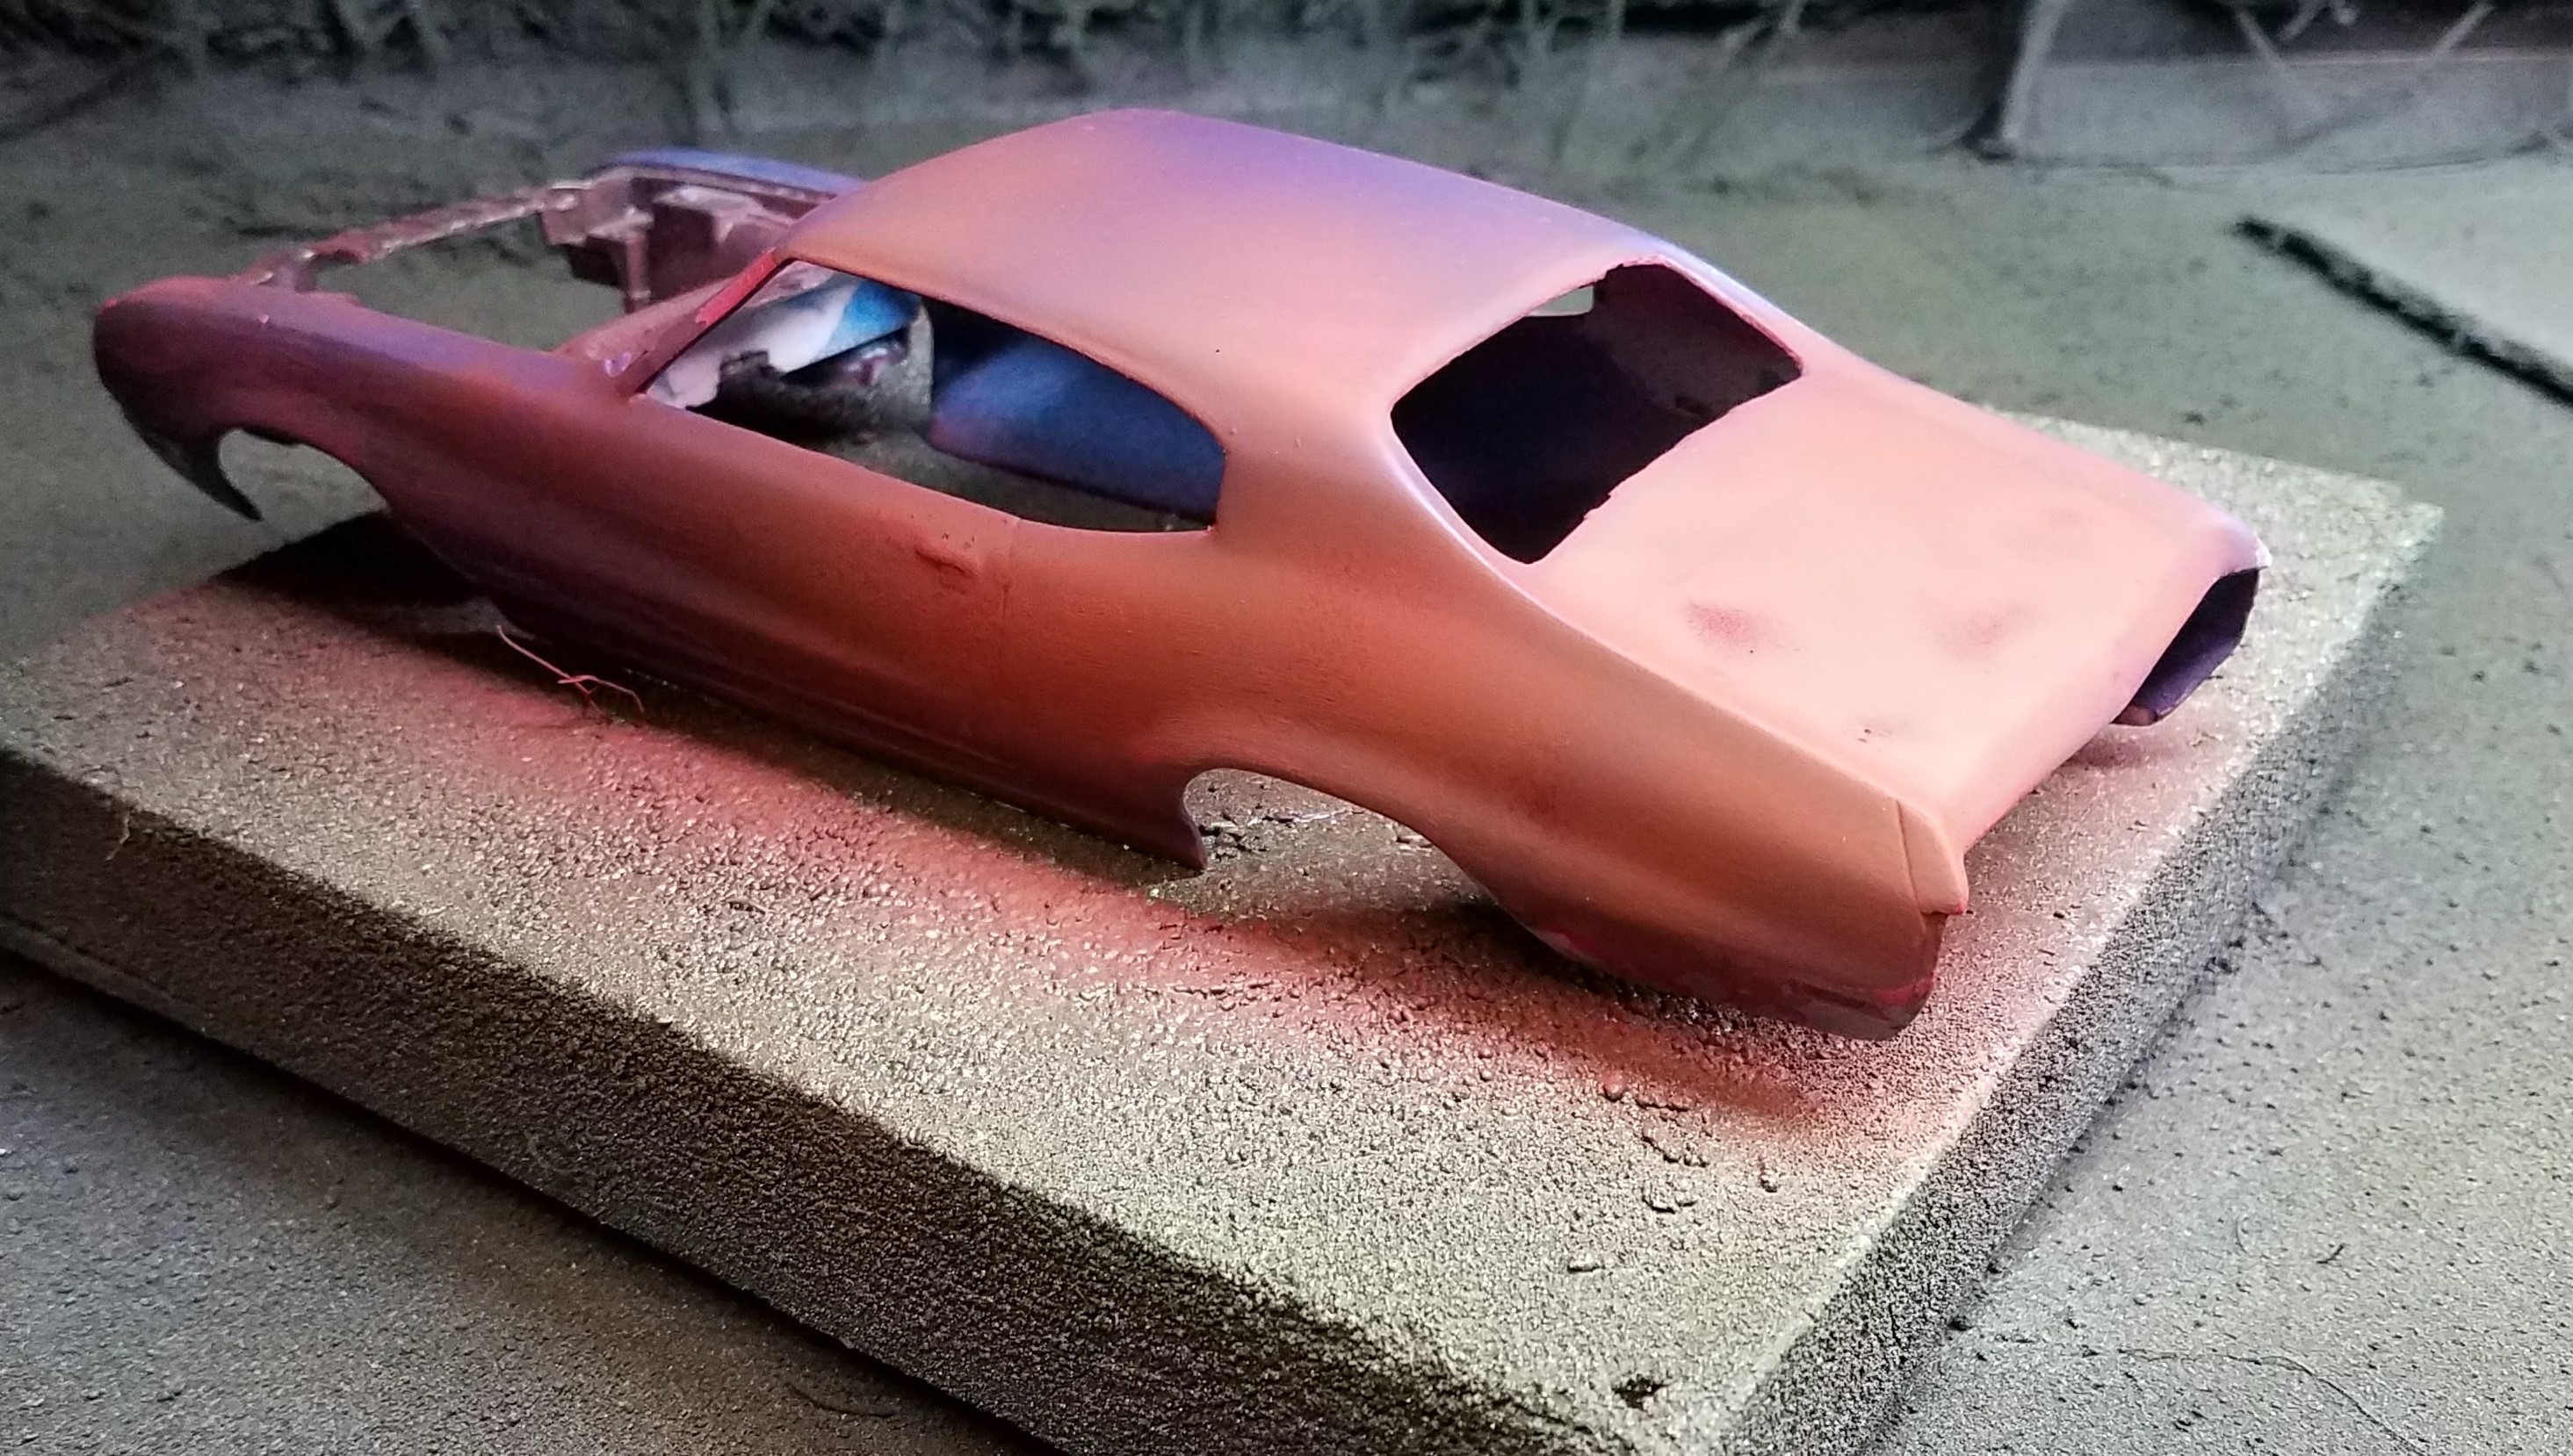
UPDATE (4/22/18) I finally got my regulator hooked to the compressor and then the airbrush to that tonight. I took some tap water and ran it through the brush just as Don suggested. It seemed to work good with the plain water, but in my messy booth it was hard to tell so I added a bit of Vallejo rust color to the water to give it a bit of color. It seemed like there was a bit too much pressure in the brush. I lowered the regulator pressure a bit and it still seemed to be too much. My son heard the compressor running and came downstairs wanting to paint something with it. We found an old body and thinned some red enamel (1 to 1 ratio). He sprayed the body with the little bit of paint. It still seemed a bit thin to me, because at first it seemed to be creating small circles like the pressure was still too much, or the paint was thinned too much. As he moved back from the body (~6 inches) the rings became less noticeable, but the width of the spray increases significantly. Will getting a different tip for the airbrush fix this issue? Below are the results after I let the body dry.
-
Campbell Hausfeld Airbrush Kit (tested 4/22/18)
pcm1977 replied to pcm1977's topic in Model Building Questions and Answers
Thanks Don. It is my first airbrush (single or double) action. Once I get a regulator/water trap for my compressor I might give your idea a try. Personally I have no expectations since it is my first. I hope it works good. -
I went to my local Wal-mart (Oberlin, OH) today and found a cheap Campbell Hausfeld air brush kit. I have been looking for a starter air brush for a while now. I figured I would give it a try and could not beat the $20 price tag otherwise I would have walked right past it for many reasons, one of them that fact that Campbell Hausfeld is a Berkshire Hathaway company and I have seen first hand how they treat their employees. The instructions are well written and even have a couple of pages of triggering exercises. The airbrush does come in a nice plastic box that can be reused. It is double action which I have never heard of in one this cheap. The hose seems a bit cheap, but might work OK. Those two bottles are glass, not plastic. The bottle lids are plastic and I can see them breaking at some point. Everything else seems pretty typical of an airbrush kit. I know very little about ari brushes and have just begun to look into them. My father had one for years he would paint military models with, but I never learned anything about it. I inherited his old compressor (which still works), a Miller 2000, which I know he used for years. I do need to by a regulator/water trap before I can test the air brush, but once I do I will be happy to report back if anyone would like to know how this airbrush works.
-
Cleveland Browns Ram VTS
pcm1977 replied to pcm1977's topic in Model Trucks: Pickups, Vans, SUVs, Light Commercial
Thanks everyone for you kind words. I have another kit that I was going to use the engine out of on another car, but I could see if I can find and engine to put in the other kit. -
1934 Ford tow truck
pcm1977 replied to landman's topic in Model Trucks: Pickups, Vans, SUVs, Light Commercial
Nice tow truck, looks sharp. I love the boom. -
No need to laugh, made one myself a while back. I love the black, looks sharp.
-
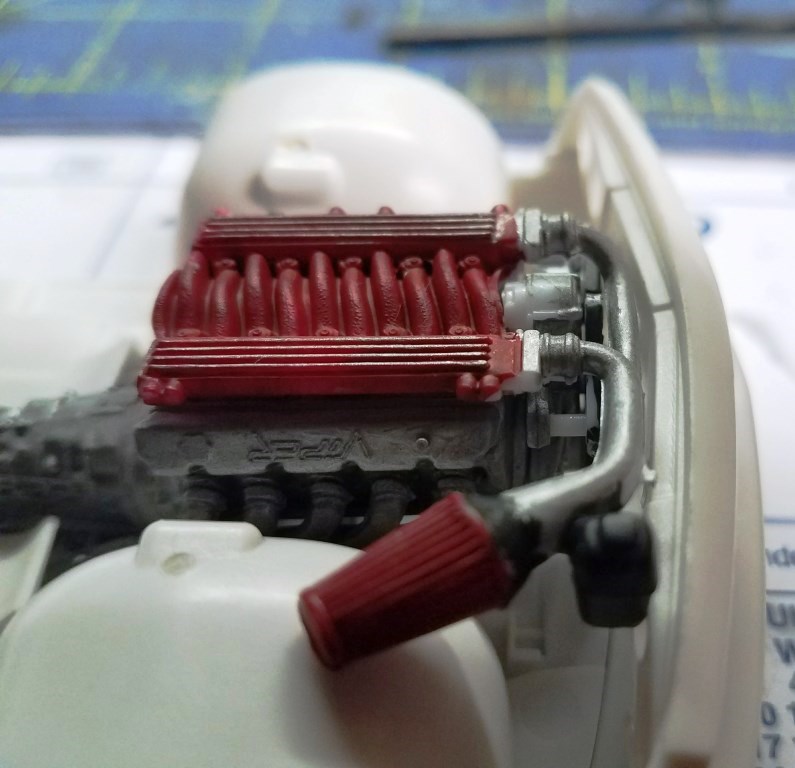
Thanks Belgawrx, I looked at the pictures and yep they are on upside down... will have him fix them. espo, I was looking at the car/engine again tonight. I think maybe it can go back bit, but there is some room behind the bumper that a radiator might fit. I might have to angle it a bit like the one in a '69 Vette. Casey429, I googled that Challenger... and wow it is real, thanks great reference material. Thanks everyone for you input.
-
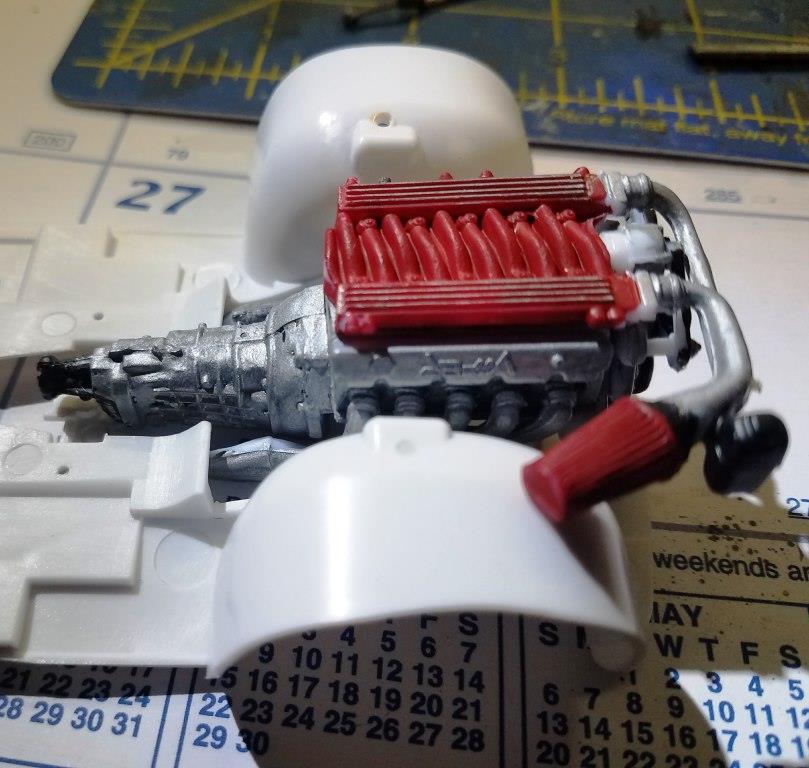
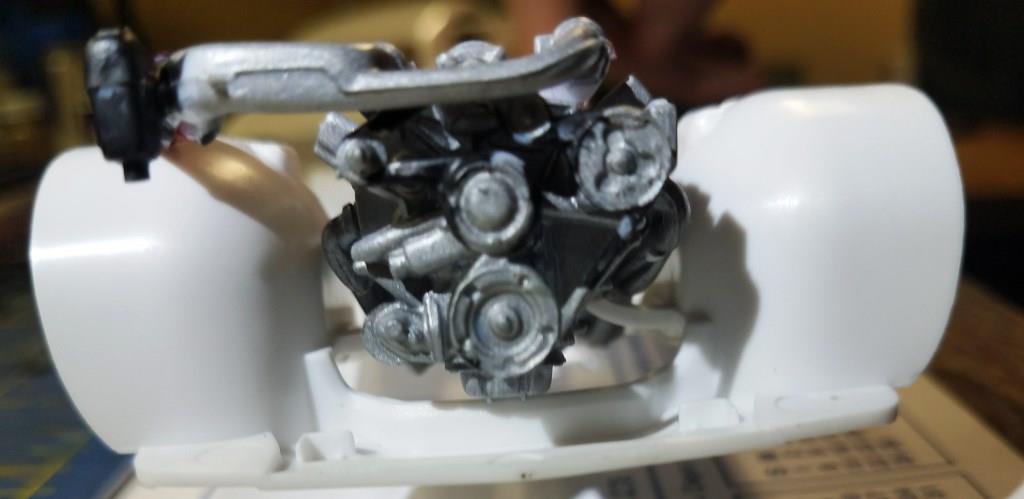
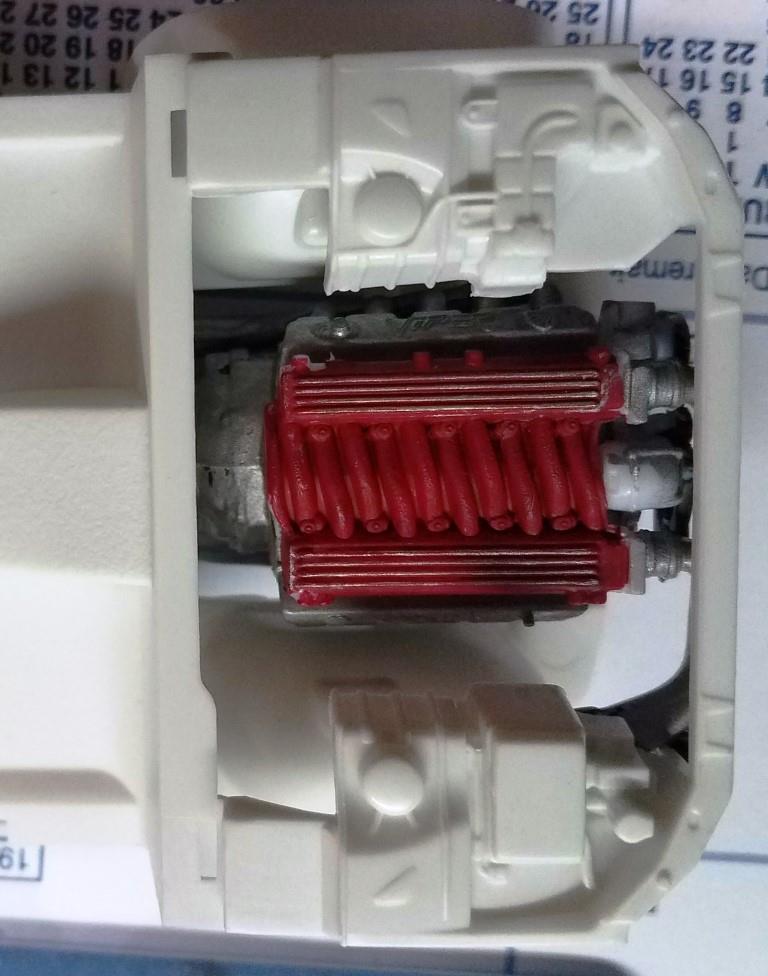
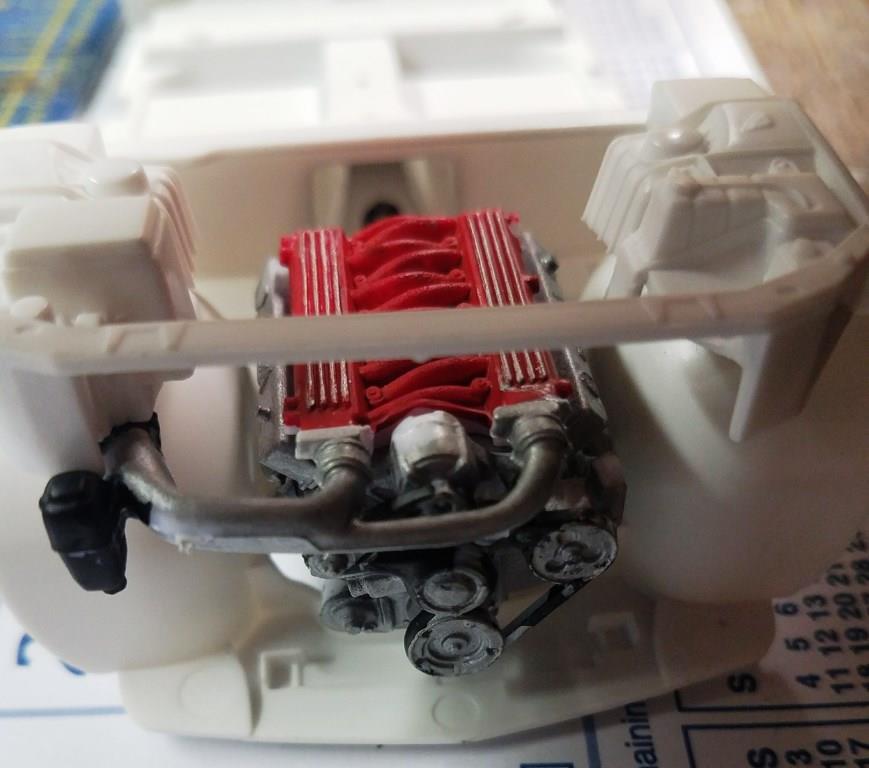
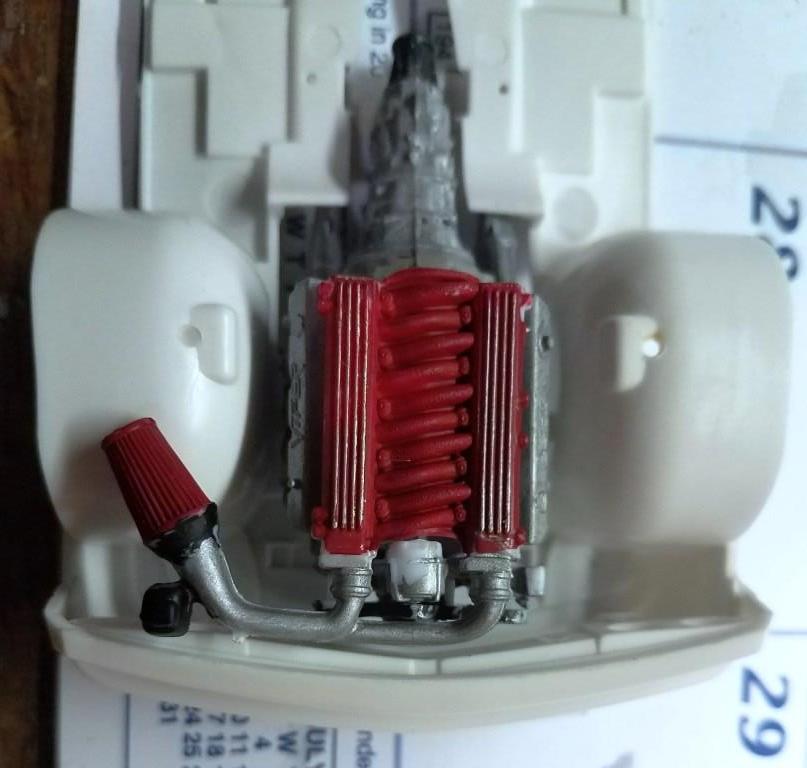
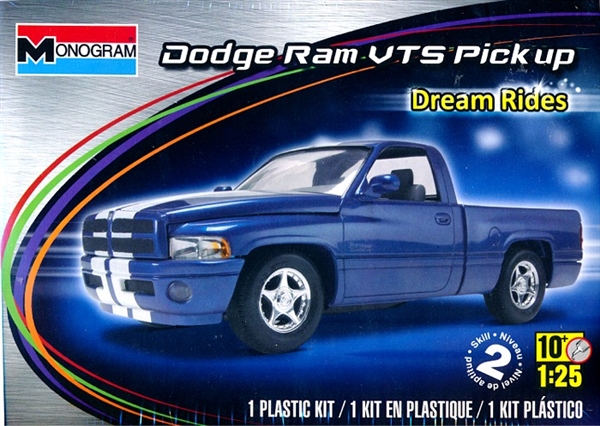
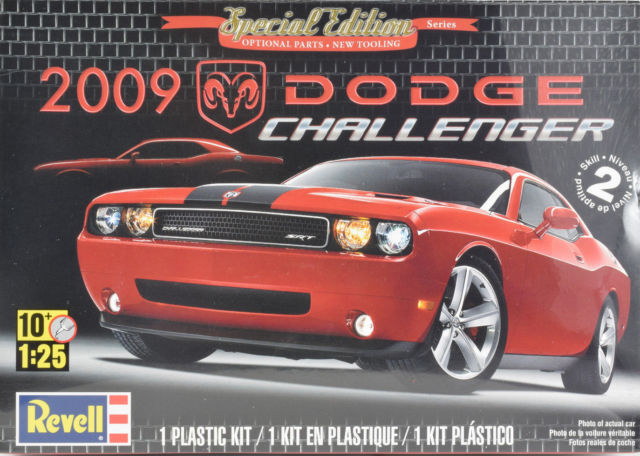
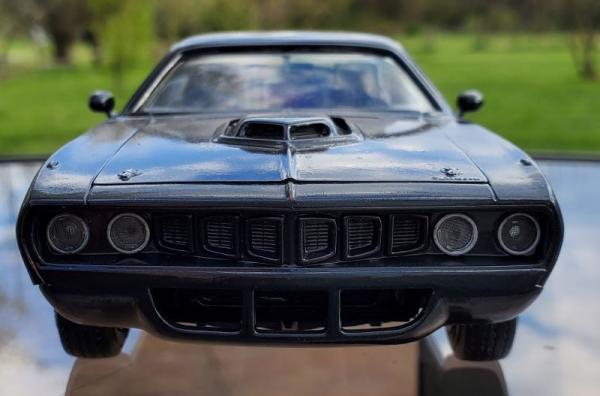
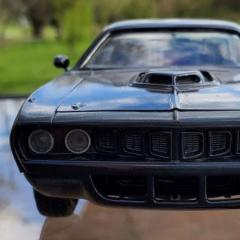
A while back I had pick up some of the Revell 2009 Dodge Challengers and when I went to Ollies some time ago my son and I picked up some Revell Dodge Ram VTS Pickups. I built one of the Rams and my son had started on the other. All he finished was the engine and put it away to do a WW2 tank model. This evening he pulled the model out and was looking at it. He then pulled one of the Challengers out and started "playing" around with them. He then placed the Challenger on my desk with the V10 in it. I took a look at it and if I modify the intake and oil pan it might fit right into the engine bay. What do you guys think? Should I take his idea further? This might just give a Hellcat or Demon a run for their money
-
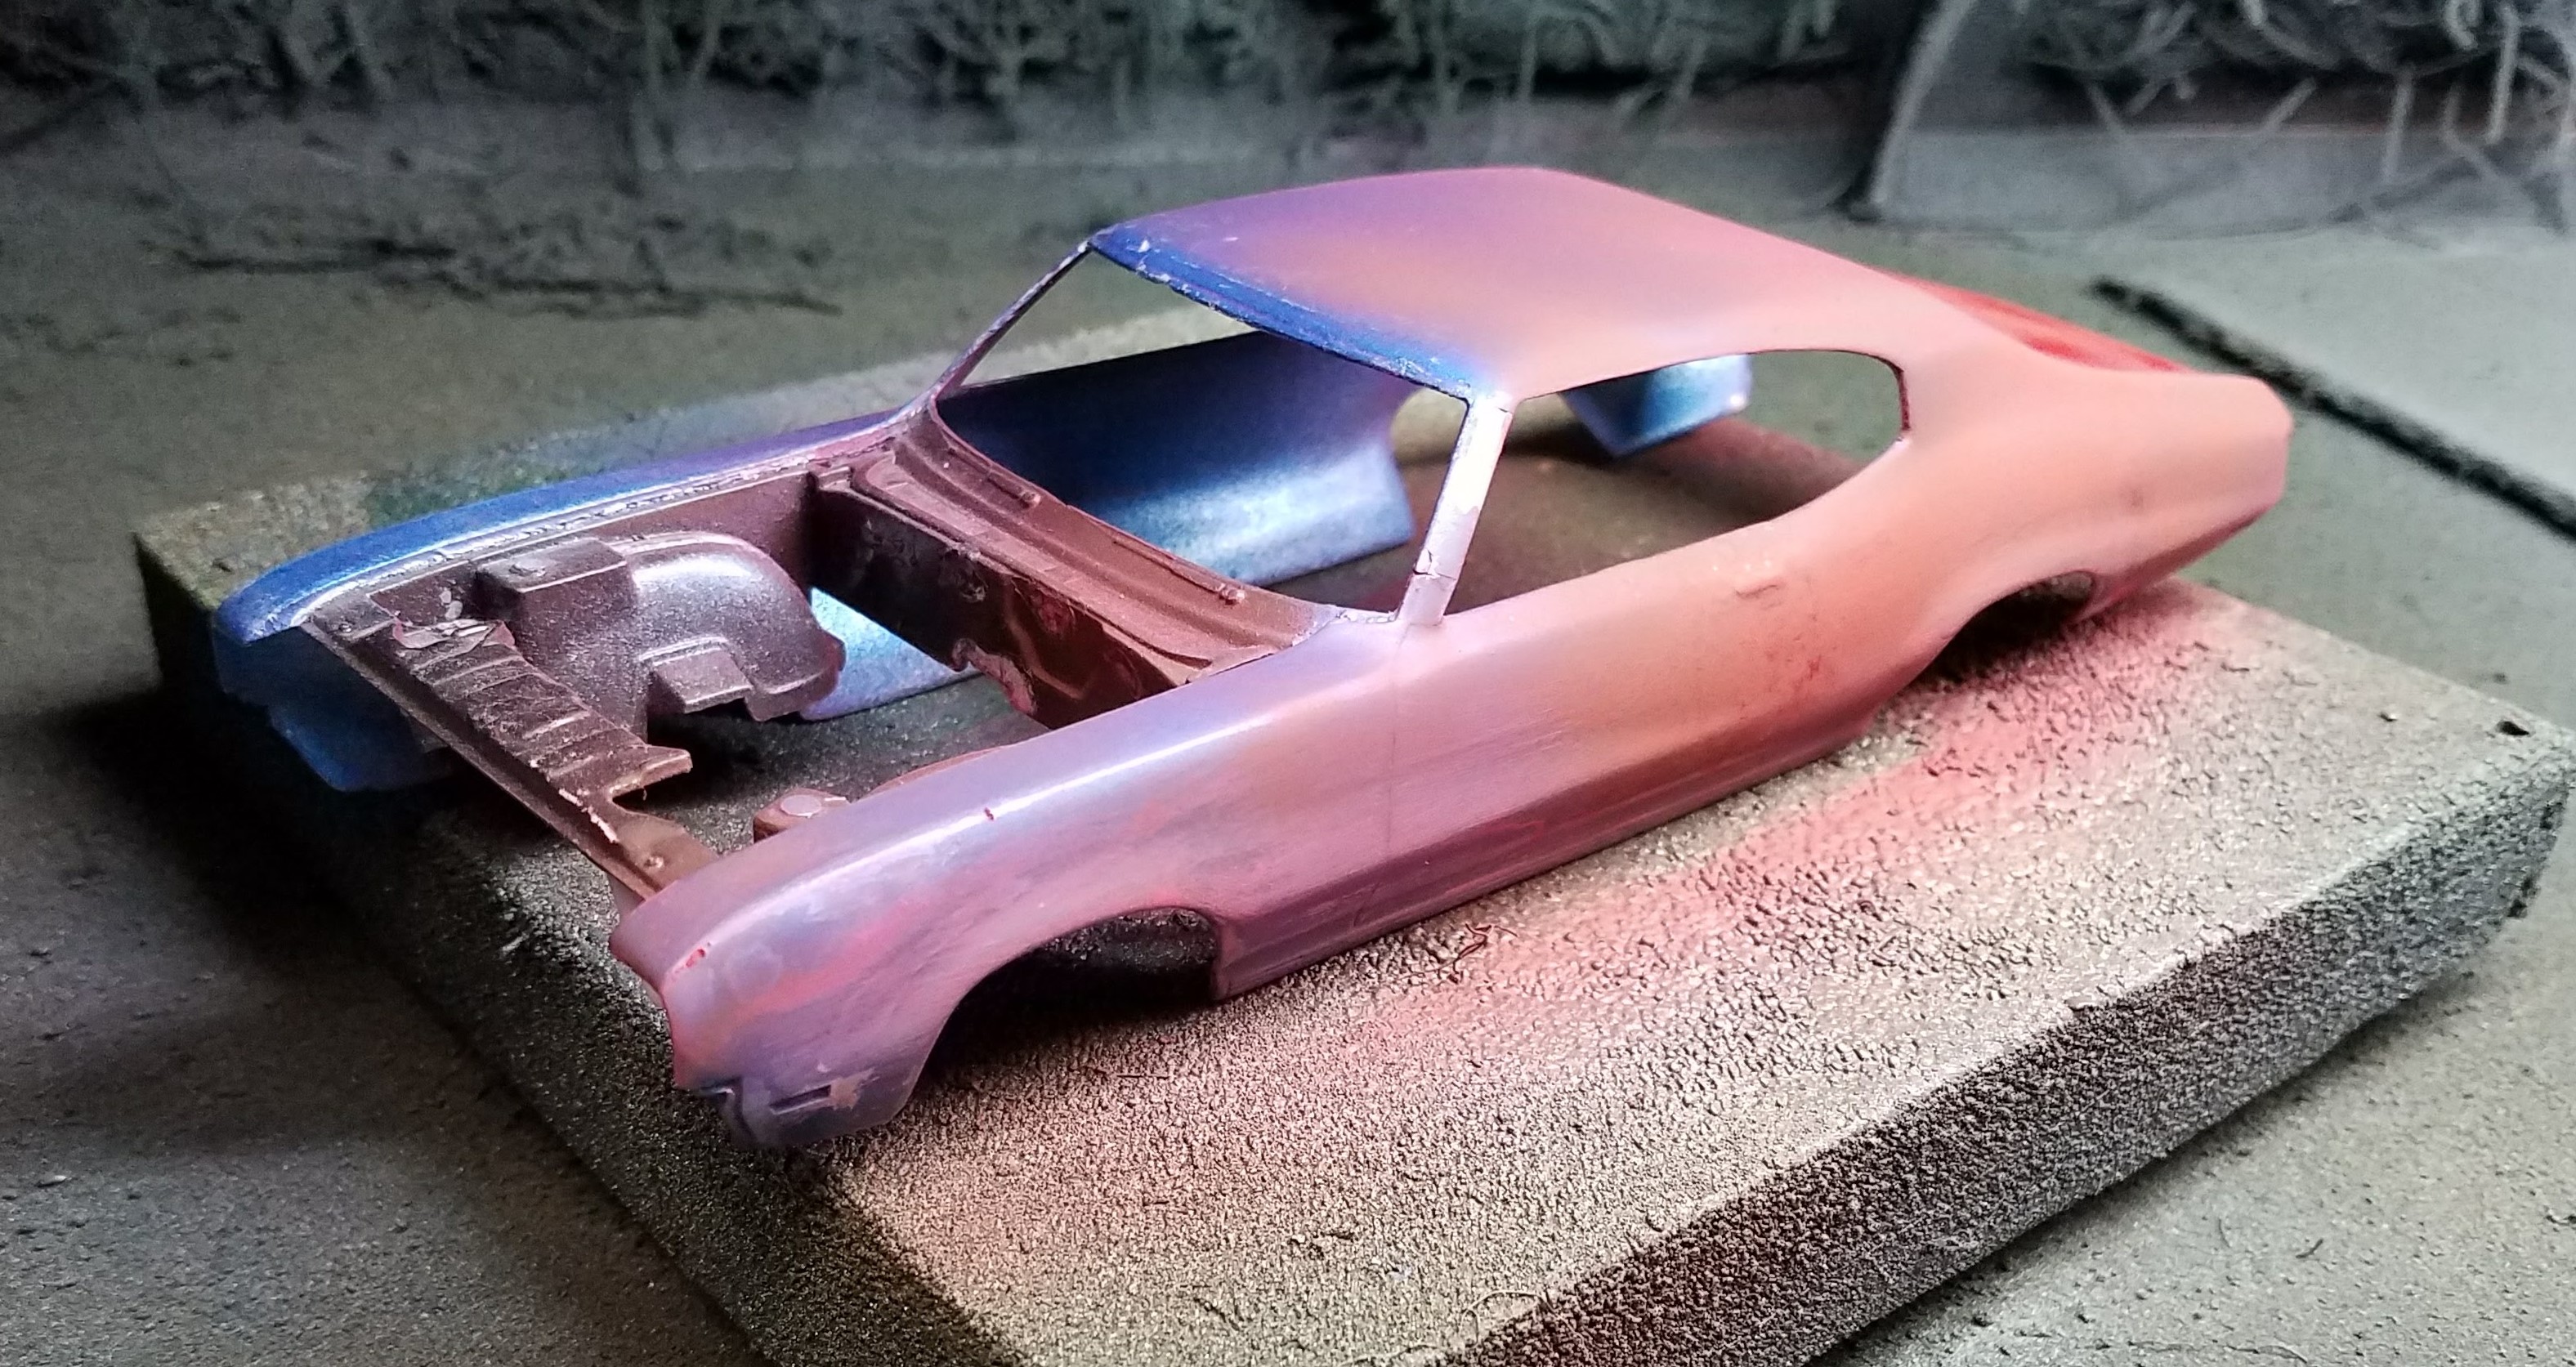
Gloss Custom Transparent Black Issues
pcm1977 replied to pcm1977's topic in Model Building Questions and Answers
Update...3/24 I cleaned the paint off with paint thinner and repainted the windows. After about 3 very light coats they are looking good and when I showed my son this evening and he pointed out that I have been painting on the wrong side of the glass. If I look from the other side they look pretty sharp...not perfect but could pass as tinted windows. Will try to post pictures tomorrow. Thanks -
Gloss Custom Transparent Black Issues
pcm1977 replied to pcm1977's topic in Model Building Questions and Answers
JollySipper: The real auto tint might work, but I have some other windows of other kits that I want to tint also. I am trying to get it right on this car, but thanks for the idea. -
Gloss Custom Transparent Black Issues
pcm1977 replied to pcm1977's topic in Model Building Questions and Answers
Thanks rsxse240, I will give that a try. Update: I cleaned the tint off and polished the clear parts real well. When I put a clear coat of gloss on the window it seemed to give it a frosted look. I let it dry and then a thin coat of tint over top of it. Now it looks almost the same, but with a frosted look to it. I am at a loss here. I painted some taillights from a different kit with two (2) coats of the transparent black and they look great. However theses windows from this kit seem like they will not accept this paint. Is there something I am doing wrong? Thanks