Sidney Schwartz
-
Posts
418 -
Joined
-
Last visited
Content Type
Profiles
Forums
Events
Gallery
Everything posted by Sidney Schwartz
-
I was impatient and didn't allow the clear coat to dry completely enough before adding another coat. The result is some fine cracks. In spite of that I'm giving it a Not Bad. The panel lines are also not quite what I was hoping for...the color is uneven. Oh well. On to the BMF.

-
My criticism is that you're way better at this than me. That kit is on my To Do list. Nice to see it looking so beautiful.
-
Polish or not?
Sidney Schwartz replied to Sidney Schwartz's topic in Model Building Questions and Answers
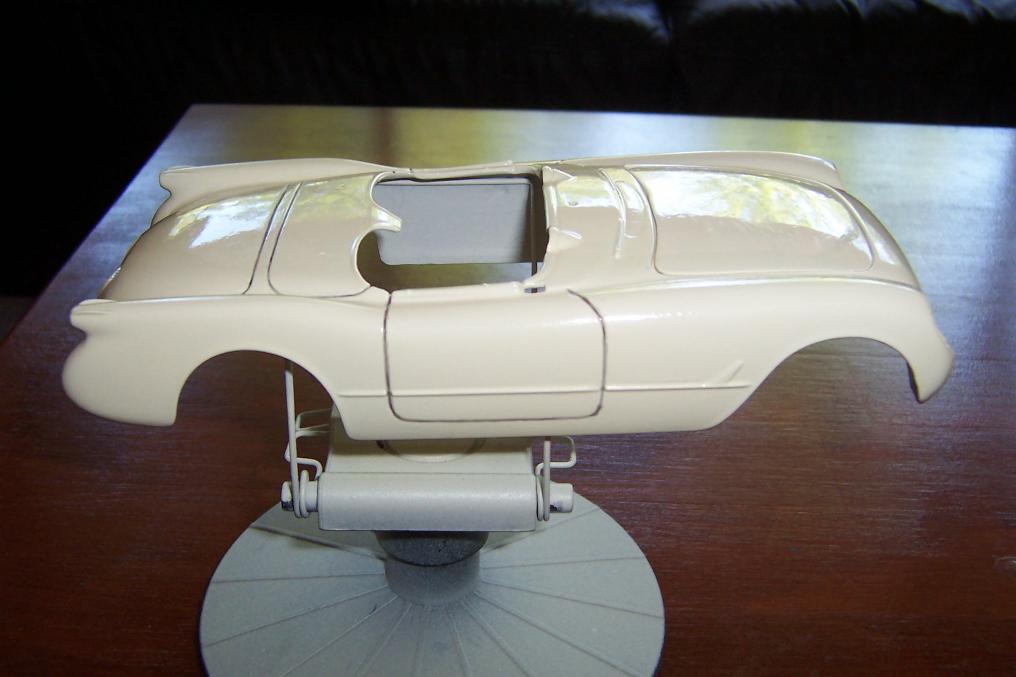
I think that's just what I did. Impatience has tripped me up again. And I was so close to getting it right. I may have to strip it yet again and give it one more try. That photo you posted is the first one I've seen in that cream color. All the others where white, or at least they looked that way in photos. Man, that's gorgeous! I forgot to mention that I'm using Novus for the polishing. Does anyone know what grit level of sandpaper the Novus #2 would be equivalent to? Mike, greetings from up north in Beaverton. -
Polish or not?
Sidney Schwartz replied to Sidney Schwartz's topic in Model Building Questions and Answers
Thanks, Steve. The color is not "official"...the car was offered only in primary white with primary red interior that year. I don't care much for that combination so I used warmer versions of white and red. The body color is Americana Light Buttermilk. It's a bit more yellow than it shows in the photos. Polishing went well, but I'm seeing a few cracks in the clear coat. Probably my fault. I sprayed on a couple of coats of Krylon clear, then a coat of Future. I should have stuck with just the Future as I've used that before without any cracking. Oh well...it still looks pretty good. I'm feeling that I've spent enough time on this kit and am eager to finish it and move on. -
Polish or not?
Sidney Schwartz replied to Sidney Schwartz's topic in Model Building Questions and Answers
Thanks, Mike. I have a few coats of clear on it. I've tried polishing before, but as you say it's easy to burn right through it, especially if the finish is not smooth to begin with and needs lots of polishing. This finish is the smoothest I've managed to achieve, so I'm hoping that makes it a better candidate for polishing. -
On my third try I finally managed an OK finish. I'll be highlighting the panel lines with a wash and applying foil to the side and door trim. I've learned a lot about using airbrushes, thinning paint, etc., and I expect it to be much easier the next time. As far as this one goes, should I attempt polishing it, or should I leave well enough alone? I don't want to risk ruining it again if the gain would be minimal. I also realize it's completely a matter of personal taste, but I'd like to know what y'all think.
-
Testor kits?
Sidney Schwartz replied to Sidney Schwartz's topic in Model Building Questions and Answers
Thanks...I should have thought to check the galleries. It does look like a nice model. I really have no specific year in mind. It depends on the kit and what options it offers. I'd like to eventually build at least one example of each of the major 'Vette models, at least through the '80's. -
Testor kits?
Sidney Schwartz replied to Sidney Schwartz's topic in Model Building Questions and Answers
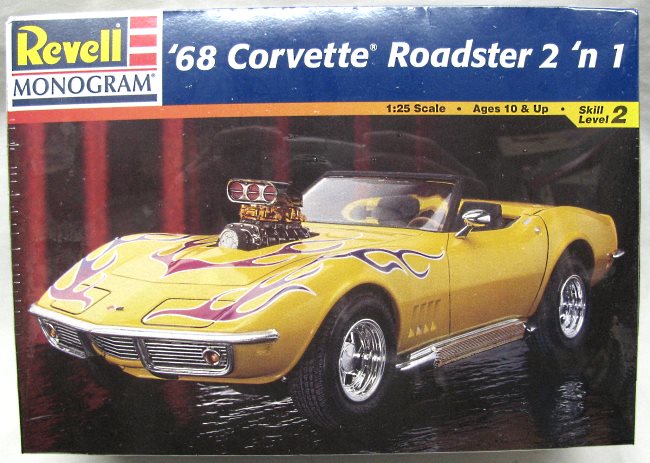
What about this one...?
-
Testor kits?
Sidney Schwartz replied to Sidney Schwartz's topic in Model Building Questions and Answers
That's the only Testor Vette I've seen Glenn. Based on the comments here, I think I'll not take a chance on Testor's kits. There are lots of other Vette's to choose from. Thanks everyone for the education. -
Testor kits?
Sidney Schwartz replied to Sidney Schwartz's topic in Model Building Questions and Answers
1980 Corvette? -
Any comments on the quality of Testor's model kits? They make versions of a couple of cars I'm interested in.
-
Removing metallizer powder
Sidney Schwartz replied to Sidney Schwartz's topic in Model Building Questions and Answers
The first photo shows the results I got with the metallizer applied over grey primer. Not bad, but a bit too dark for my taste. (My camera didn't do a very good job of picking up the color.) I'm told I can get better results applying it over light blue paint. I'll try that some other time. Removing the metallizer was no different than stripping paint. The rest of the photos show the parts I sprayed with Krylon Metallic Original Chrome, also over grey primer. Pretty good, I think. I'm going to stick with that for now.
-
Removing metallizer powder
Sidney Schwartz replied to Sidney Schwartz's topic in Model Building Questions and Answers
Thanks, Art. Stripping would be fine...I've been doing lots of that. -
I got the C1 Metallizer powder. Before I try it I'd like to know if I can remove it if I don't like it, or am I stuck with it? The powder came with no instructions or information. Thanks for your help.
-
Gorgeous. I have Challengers on my projects list. Which model is that one?
-
AMT 1965 Riviera Curbside Custom - DONE!
Sidney Schwartz replied to Impalow's topic in WIP: Model Cars
Crazy great! -
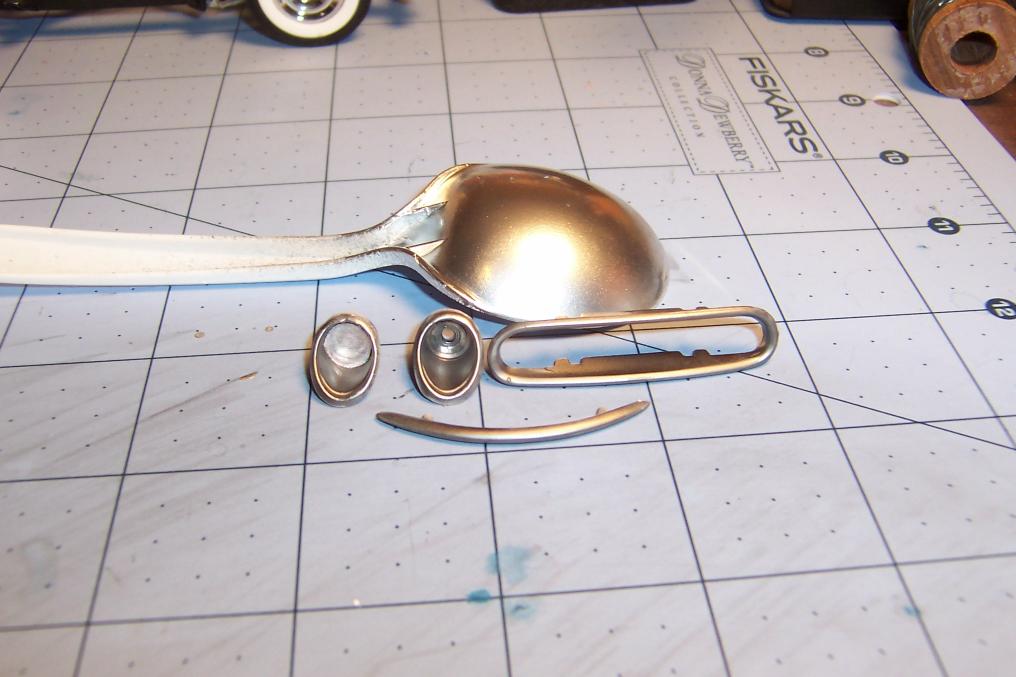
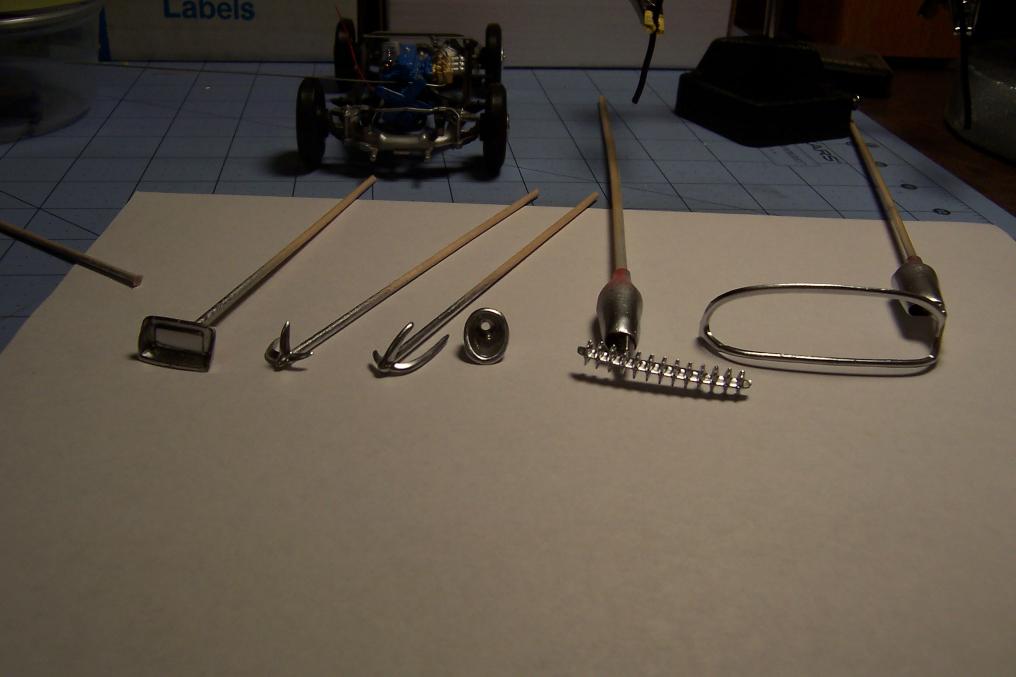
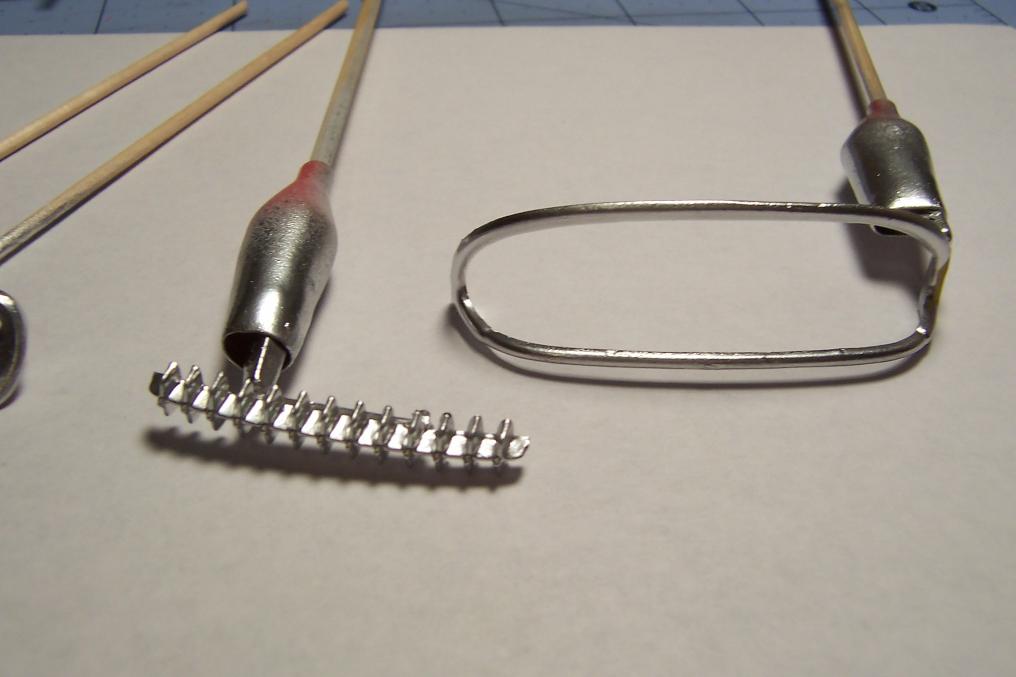
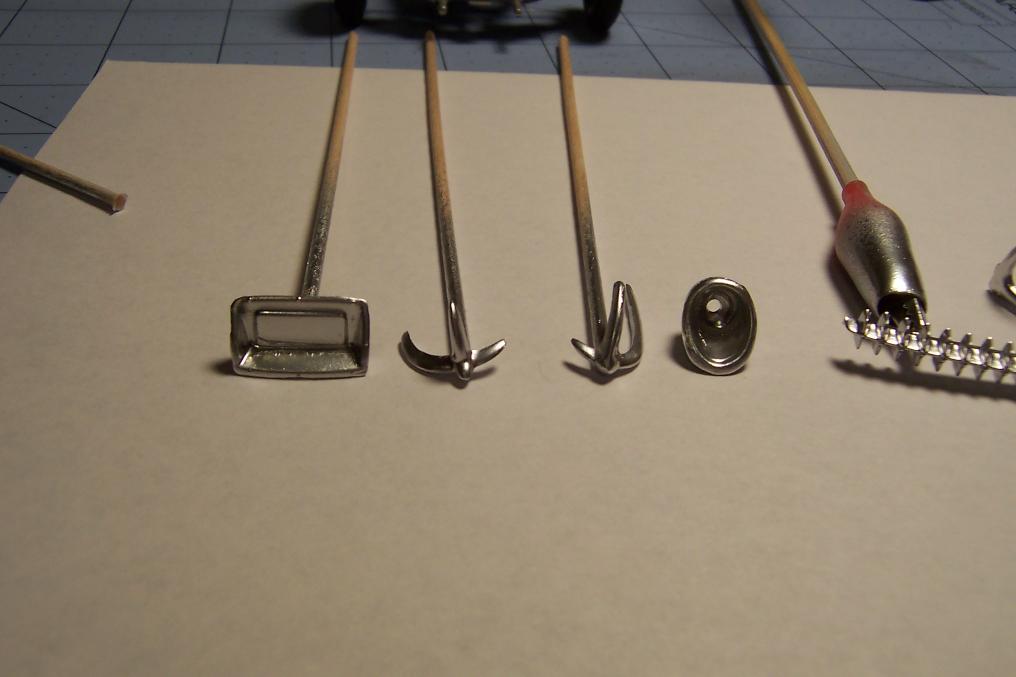
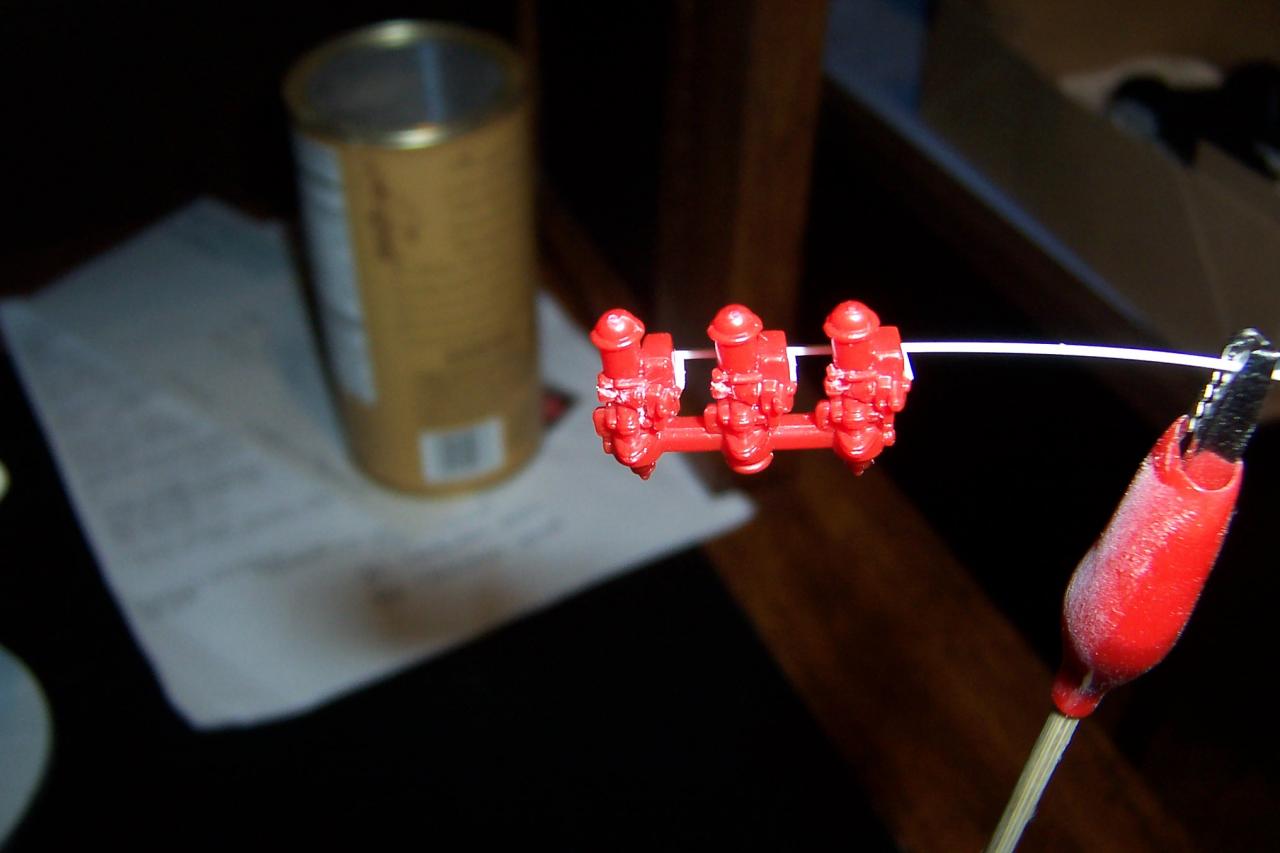
The air cleaner/carb/intake manifold has been the trickiest part so far, but it's almost finished. The fuel line was fabbed from styrene rod and the throttle cables from braided beading wire. I had to try several combinations of materials and glue before I could get everything to stick. I especially wanted to be able to include the throttle cables since they're a very distinctive feature of this engine. The fuel line needs to be routed around the engine and into the fuel pump. The throttle cables will be trimmed and glued to the firewall at final assembly.
-
Beadalon Wire & Accessories
Sidney Schwartz replied to taaron76's topic in Tips, Tricks, and Tutorials
I've already bought some of that wire, but I had no idea those crimp tubes existed, and they are just what I've been looking for! Thanks! Love your engine. -
Help for a Newbie
Sidney Schwartz replied to MattPack25's topic in Model Building Questions and Answers
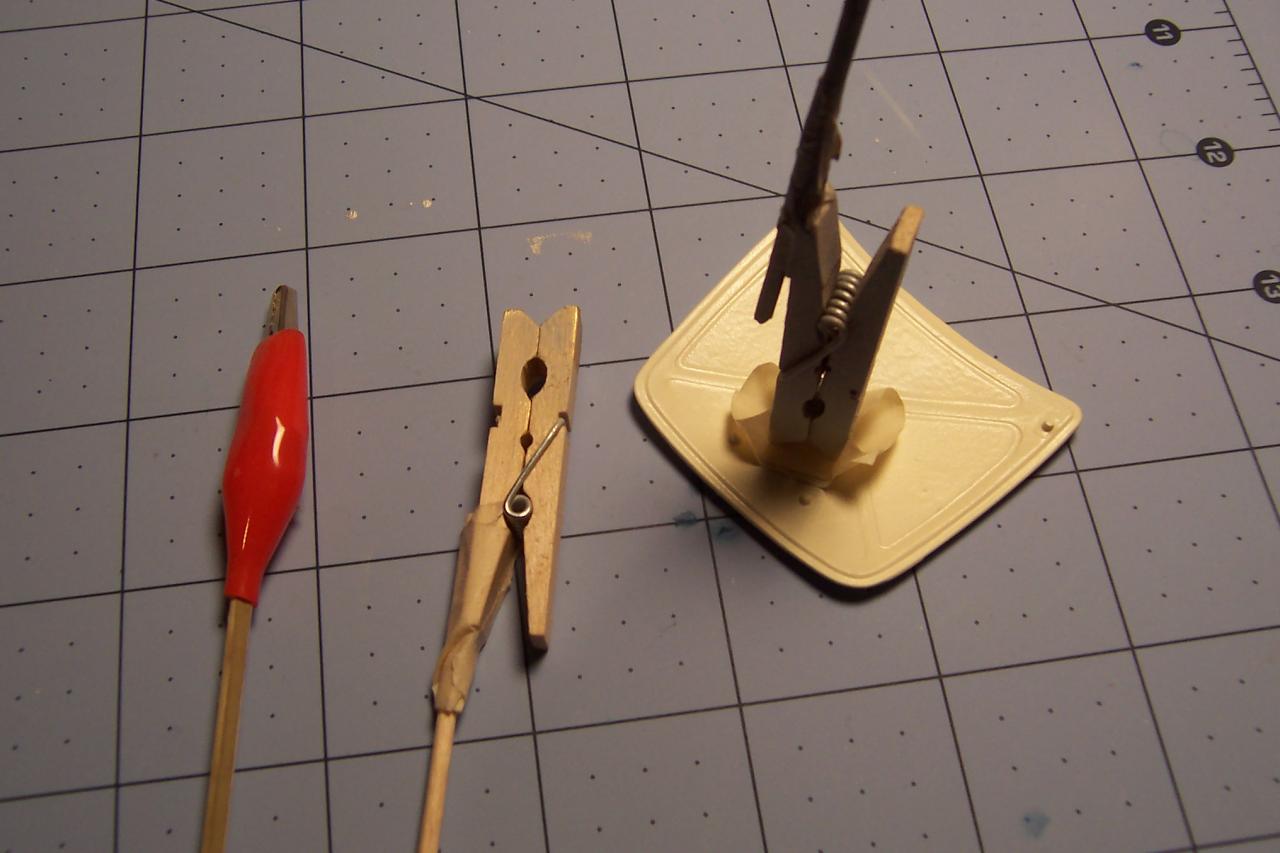
I also use the Tamyia paint stand for the body, but lots of folks use less spendy alternative like wire hangers. For small part, I like alligator clips or clothepins taped or glued to the end of some kind of stick, drinking straw, whatever. Tape on the end of a stick can work too. American Scientific & Surplus http://www.sciplus.com/ is a great place to get all sorts of stuff very cheaply. It's worth your time to browse through their catalog. One of the best things I got there was one of those headband mounted magnifiers. They sell it for 1/2 to 1/3 the price as other places. Working with small parts would be impossible for me without it. A great deal mentioned by someone else here is a pack of 100 surgical blades with handle for about $7 from odontomed2011 on eBay. I also got three pairs of surgical scissors from the same outfit for a whopping $4.40. They have cheap sets of dental picks and other useful things. If you have a Michael's or Joann's in your area, they have paint, brushes, wire, and lots of other useful things, and they're pretty much always running sales on something or other. Probably the most important thing I've learned here is to think outside of the hobby store box. I only use the hobby stores for things I can't get cheaper someplace else.
-
using aluminum foil
Sidney Schwartz replied to jacoballardtattoo's topic in Model Building Questions and Answers
Why would you paint it? -
They're all great. It's hard to choose a favorite.
-
Thanks, Bill. Nice to hear I'm on the right track. Ha ha! Just realized I posted this in the wrong section. Sorry. I'd appreciate it if one of the forum moderators could move it. Also forgot to mention that a few of the chrome parts had chrome missing in spots.
-
The final engine part to be done is the triple carb/intake assembly. I tried using bare beading wire to fabricate the fuel lines but couldn't get it to stay glued to the assembly. Using styrene rod worked much better, though it won't have that nice metal finish that wire does. The fuel line will be routed around the front of the engine and attached to the fuel pump. The triple throttle cables with be mesh covered like the real ones.
-
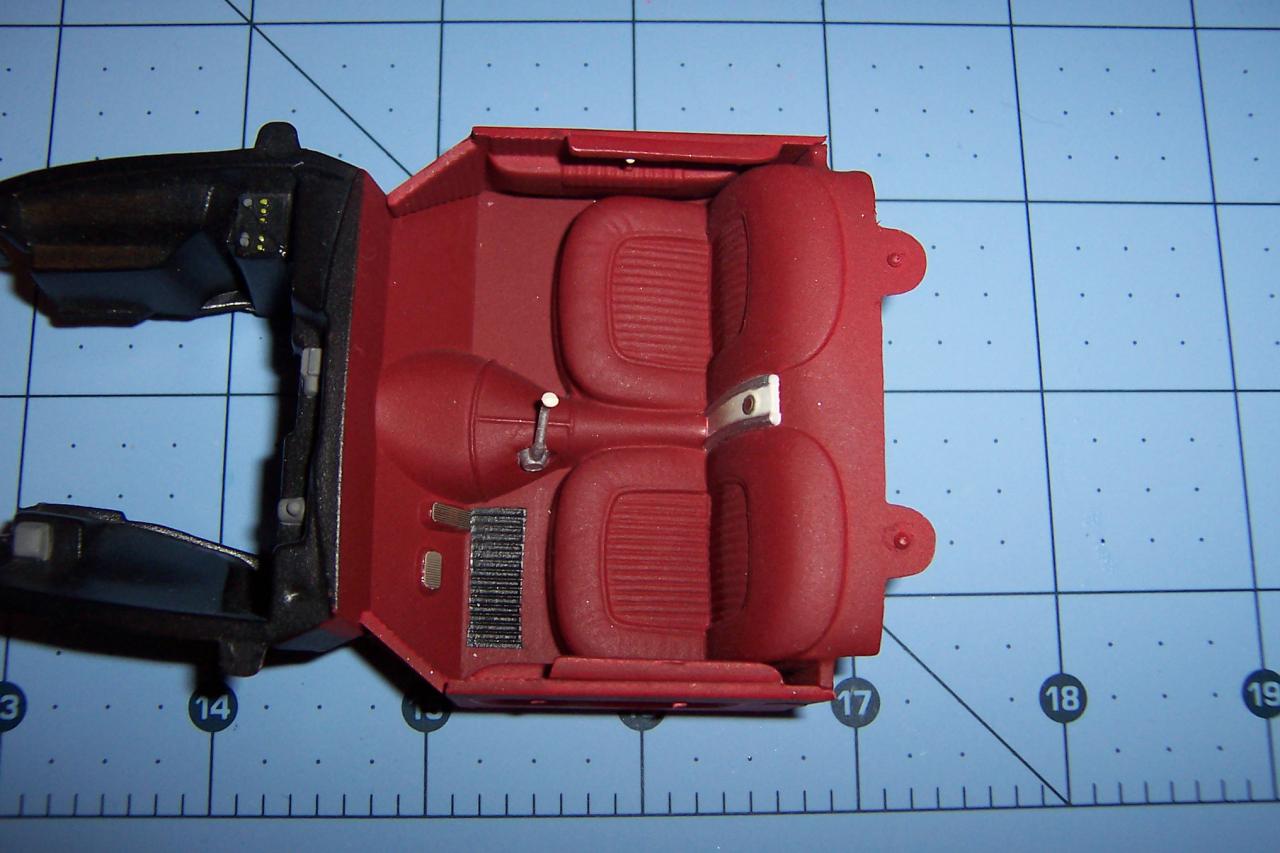
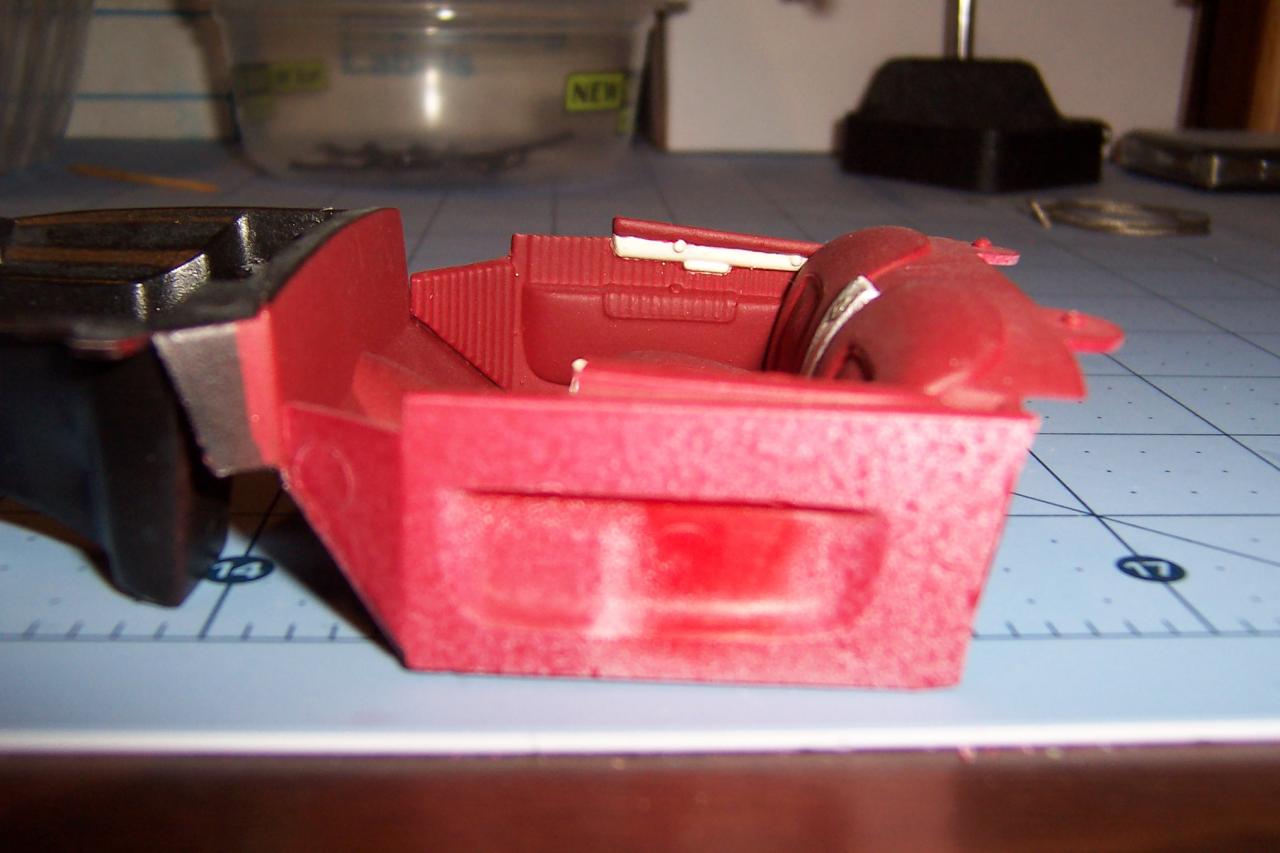
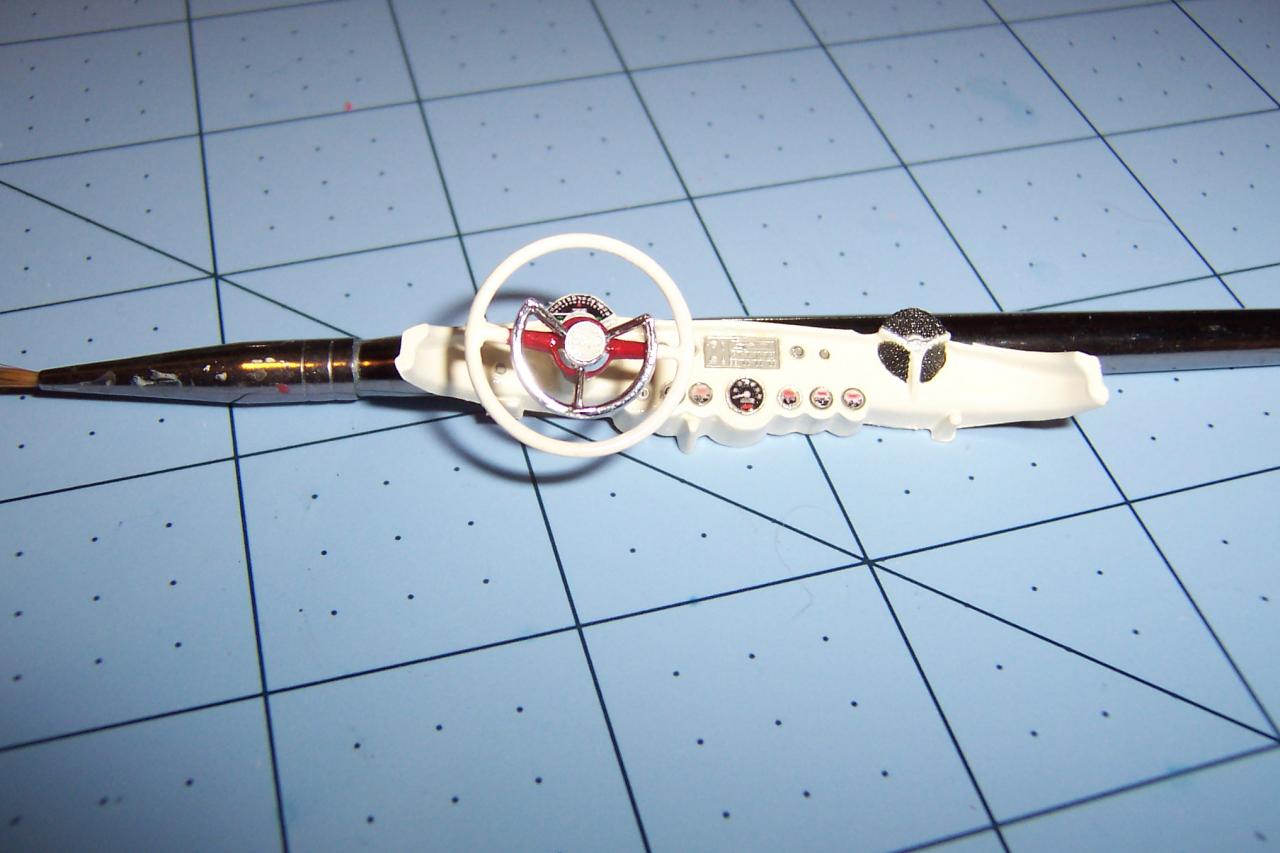
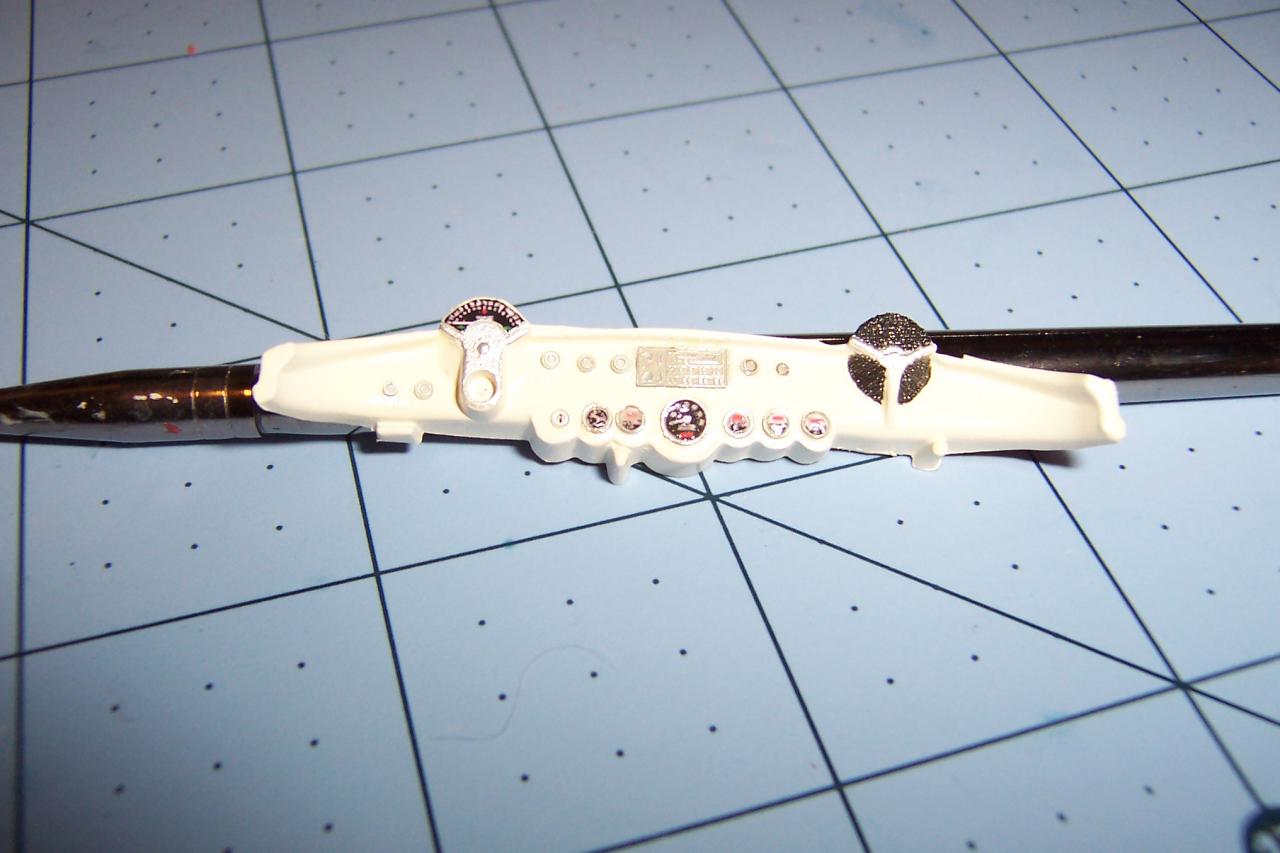
Interior is completed except for final assembly. The dash is probably the part I was dreading the most, having been traumatized by them as a kid. It came out much better than I'd hoped, thanks to the PE details and printed gauges I bought.
-
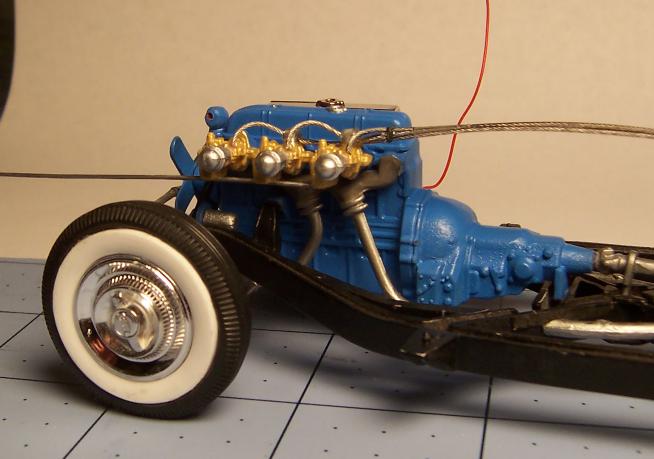
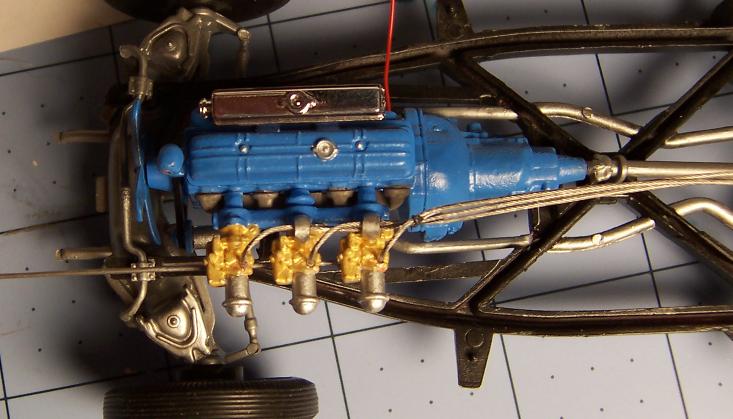
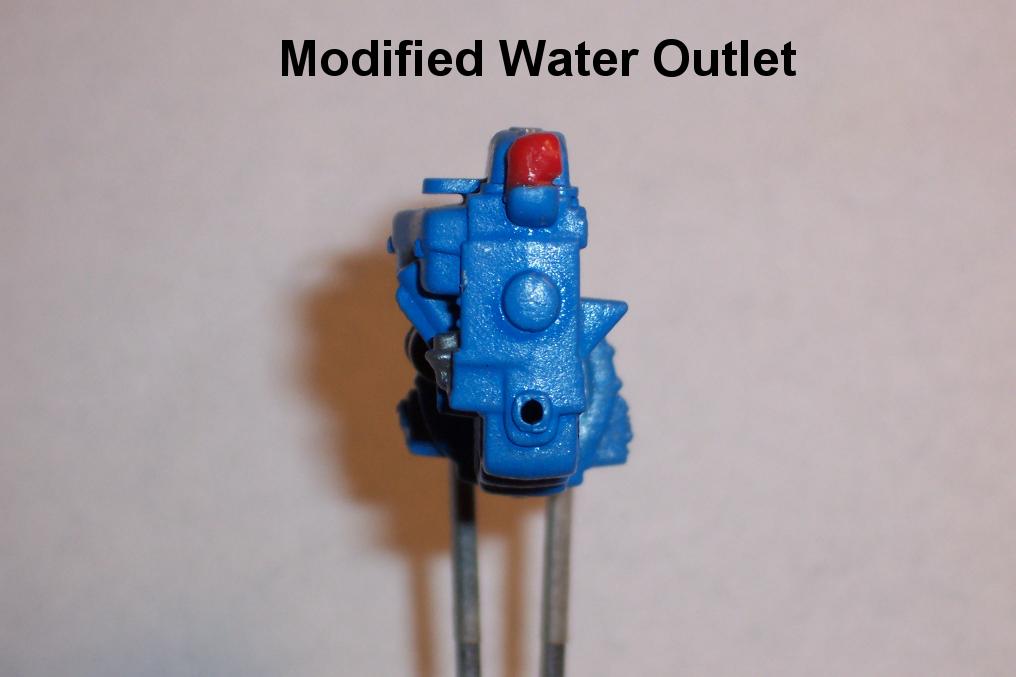
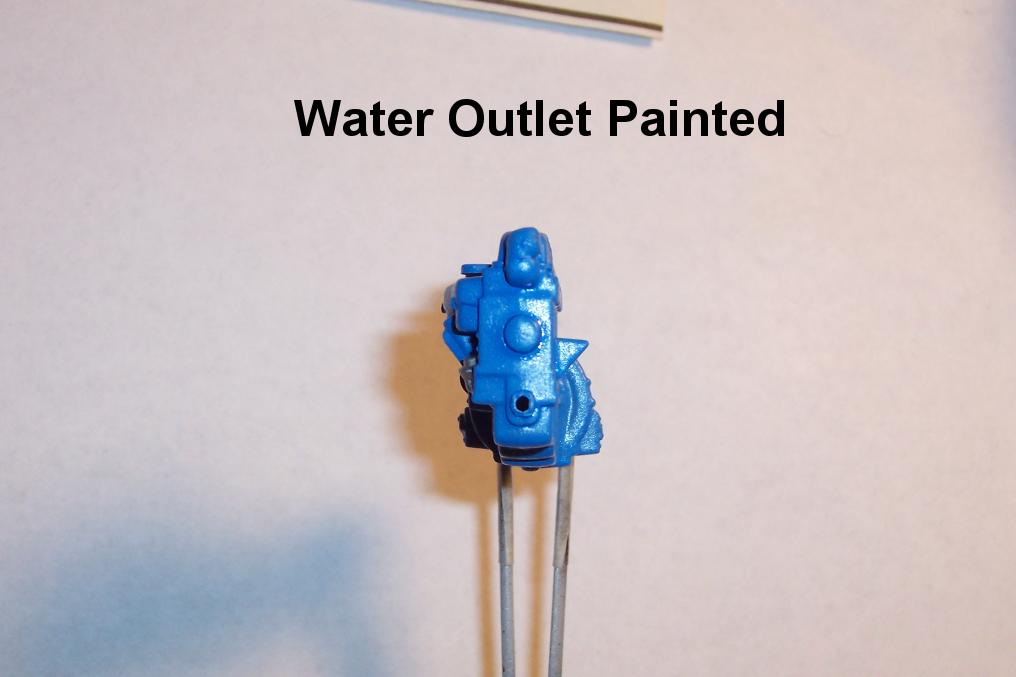
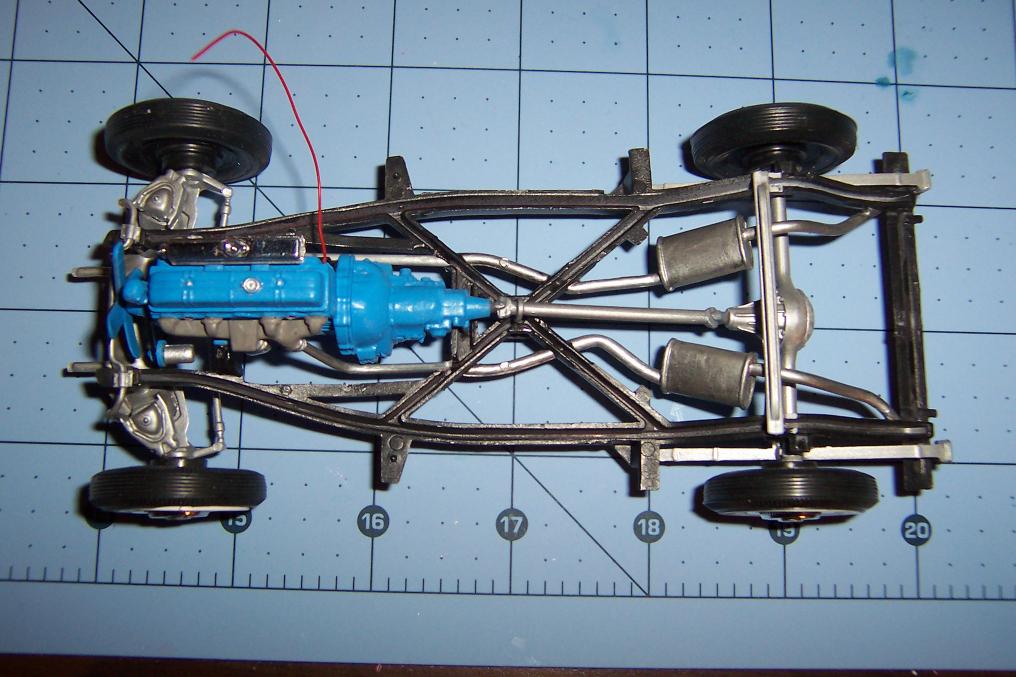
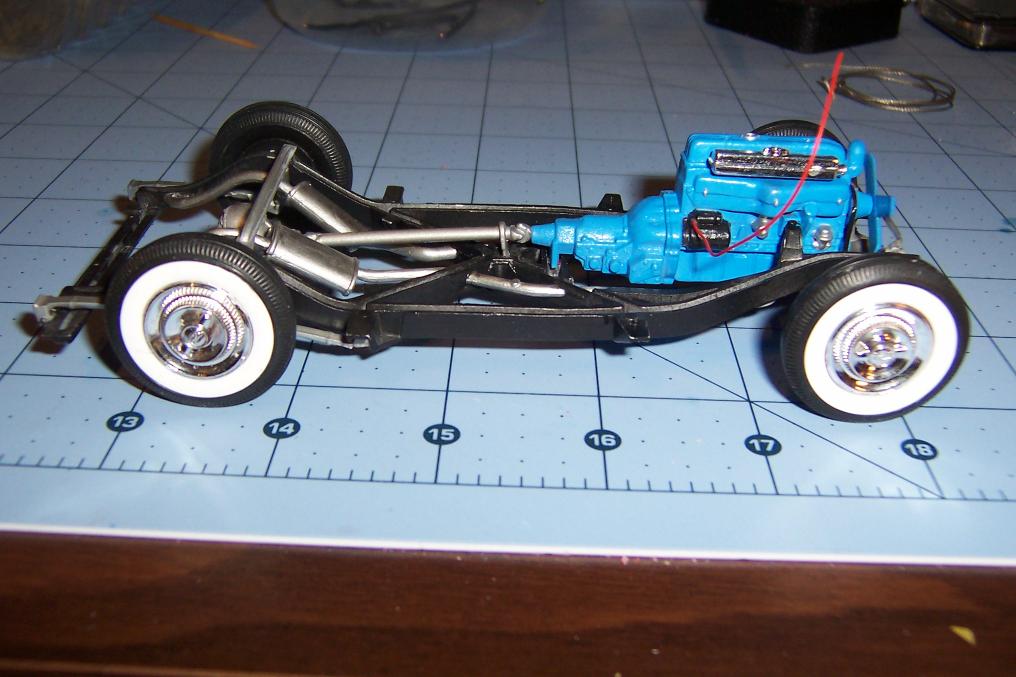
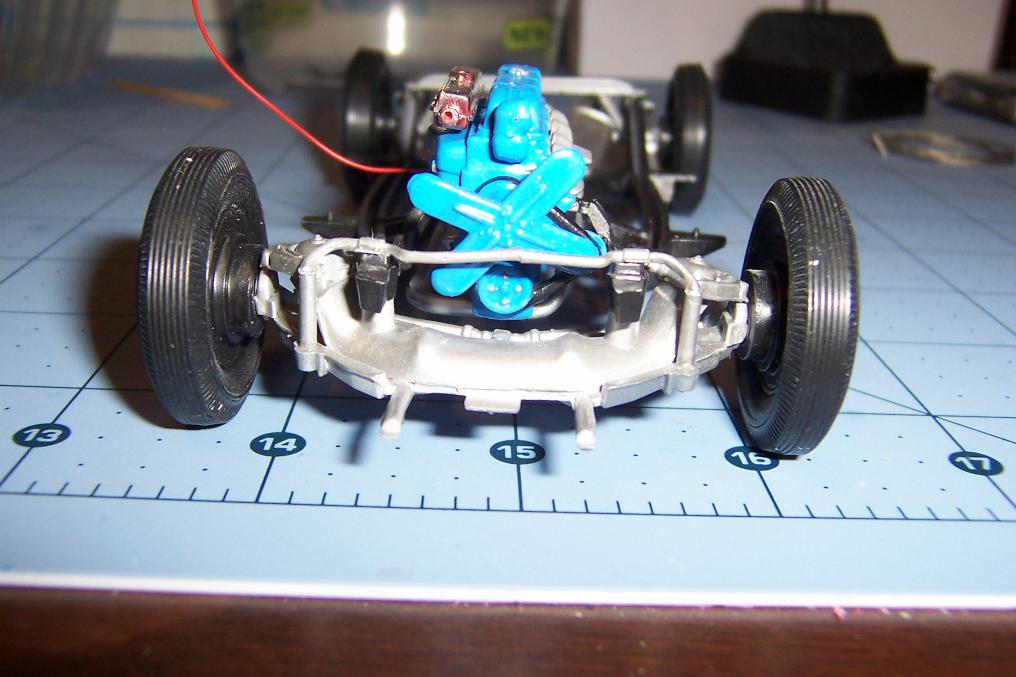
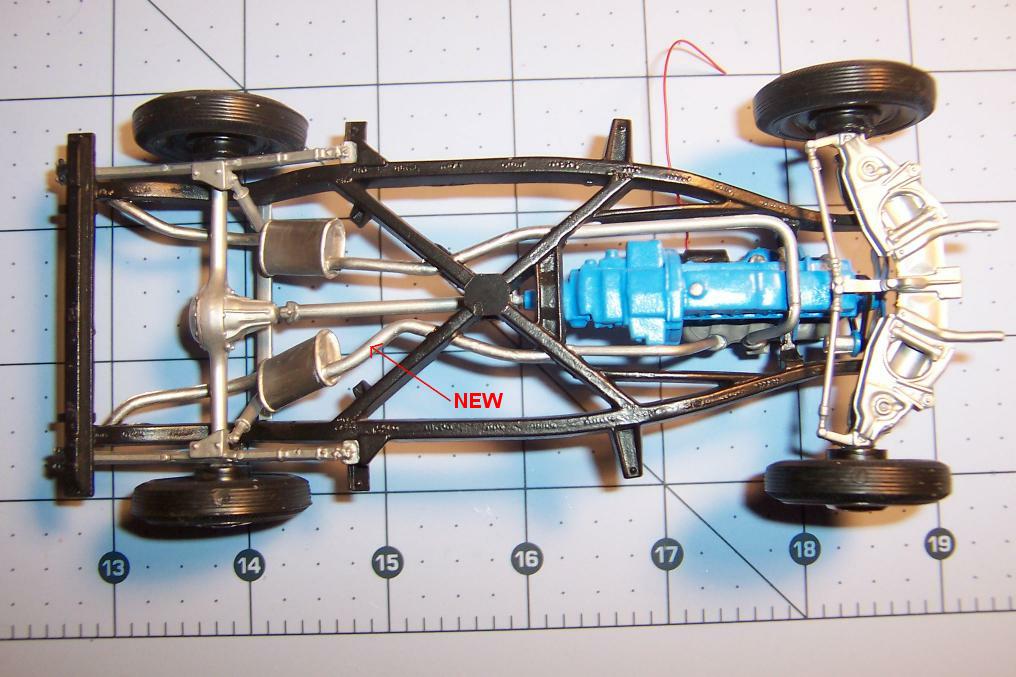
Engine and chassis mostly assembled. The distributor and plug wires on this engine are concealed, which is fine with me. The red battery cable is attached to the starter. I'll be making radiator hoses, the fuel lines and throttle cables. The top surface of the head was far from level and had to be scraped and sanded quite a bit before the valve cover would fit correctly. I also modified the water pump outlet so it would point in the right direction for the hose. I had to replace part of the exhaust as the muffler was contacting the drive shaft.