DoctorLarry
-
Posts
1,135 -
Joined
-
Last visited
Content Type
Profiles
Forums
Events
Gallery
Everything posted by DoctorLarry
-
I don't know how you find the time to keep them moving. Mine go in fits and starts. This was another beautiful outcome. Did you do body mods on this one or use the stock body?
-
T Bird chassis? I have one sitting along with a Monte Carlo. I'm trying to finish the Buicks first.
-
I'm like Gerald- "box stock" has little meaning so I am as slow as anyone. I think Tim has an assembly line in his house somewhere. He must have a replica of Junior Johnson's shop in miniature.
-
Clear Over Decals
DoctorLarry replied to DoctorLarry's topic in WIP: Stock Cars (NASCAR, Super Stock, Late Model, etc.)
The clear did cause some crazing of the foil decals on my Olds. The clear film decals did fine. Thanks for the tip about putting clear film over them. I ordered a new decal set and will replace the foil 28 numbers on the side but now I know better. -
You can build it out of the box but the body lacks some lines in it, the chassis is the old MPC NASCAR chassis with torsion bars and leaf springs, although the new kits have upgraded suspension. The seat is also out of the old MPC kit and it was wrong. So I modified the body to get it right, re-engineered the chassis is to make it accurate, added a correct seat and modified the cage (it was lacking some bars). So, do you need to do all that to make a nice model? No. Scale Auto Magazine had an article on a box stock build and it was exceptionally well done. Very neat when done. I just wanted to see what it would take to make it better reflect the real car. Not necessary, but that's just me.
-
I think it is time to call this one done. Body does not fit that well, chassis has a little warp to it, decals got funky but overall it was fun to do. I used the "updated" grilles and bumpers. I had to widen the back one because I modified the body and it took two hours of filing to get the grilles to fit. Next time I will dry fit everything like most of you all do before painting. Oh well, live and learn.

-
1987 Wrangler Monte Carlo
DoctorLarry replied to jjsipes's topic in WIP: Stock Cars (NASCAR, Super Stock, Late Model, etc.)
My father bought one of the first 3 A100 vans in the state of California in 1964 -
1987 Wrangler Monte Carlo
DoctorLarry replied to jjsipes's topic in WIP: Stock Cars (NASCAR, Super Stock, Late Model, etc.)
Is that a D100 in your avatar? -
1987 Wrangler Monte Carlo
DoctorLarry replied to jjsipes's topic in WIP: Stock Cars (NASCAR, Super Stock, Late Model, etc.)
Looks like some hard work going on in the background there! Car looks good. -
Saw the pic-they look great. I have found that for small areas like window moldings, I can brush Molotow and it looks okay. The pens are sometimes hard to control. Molotow does NOT brush well on bigger things like bumpers.
-
It is regular chrome and is probably old but it did not want to stick. I tried it on the Cutlass and gave up and went to Molotow pen.
-
Bare Metal foil around the windows? I can't seem to get it to stick. Maybe the adhesive is no good after awhile.
-
Aluminum pulleys and rubber belts? How did you make the fuel lines? Inquiring minds want to know. Looks great. Very cleanly detailed.
-
Was the length about the same?
-
Pulleys and dry sump pump from the T Bird as well?
-
Salvinos Baker Olds
DoctorLarry replied to DoctorLarry's topic in WIP: Stock Cars (NASCAR, Super Stock, Late Model, etc.)
Well, good to know. I am not going to change it now though! -
Has anyone built one of the Salvino's kits with all the parts, including the engine? It has no detail and scale-wise looks way off. Anybody found a way to snazz it up?
-
Tim, what did you use for an engine?
-
Salvinos Baker Olds
DoctorLarry replied to DoctorLarry's topic in WIP: Stock Cars (NASCAR, Super Stock, Late Model, etc.)
Boy that's for sure! -
Salvinos Baker Olds
DoctorLarry replied to DoctorLarry's topic in WIP: Stock Cars (NASCAR, Super Stock, Late Model, etc.)
It was a Testor's Aqua enamel. Takes forever to dry. I was trying to Match the Rhine Built restoration of the car. That was the only interior shot I could find so I'm assuming they had the real car or consultation when they painted it that color. -
Salvinos Baker Olds
DoctorLarry replied to DoctorLarry's topic in WIP: Stock Cars (NASCAR, Super Stock, Late Model, etc.)
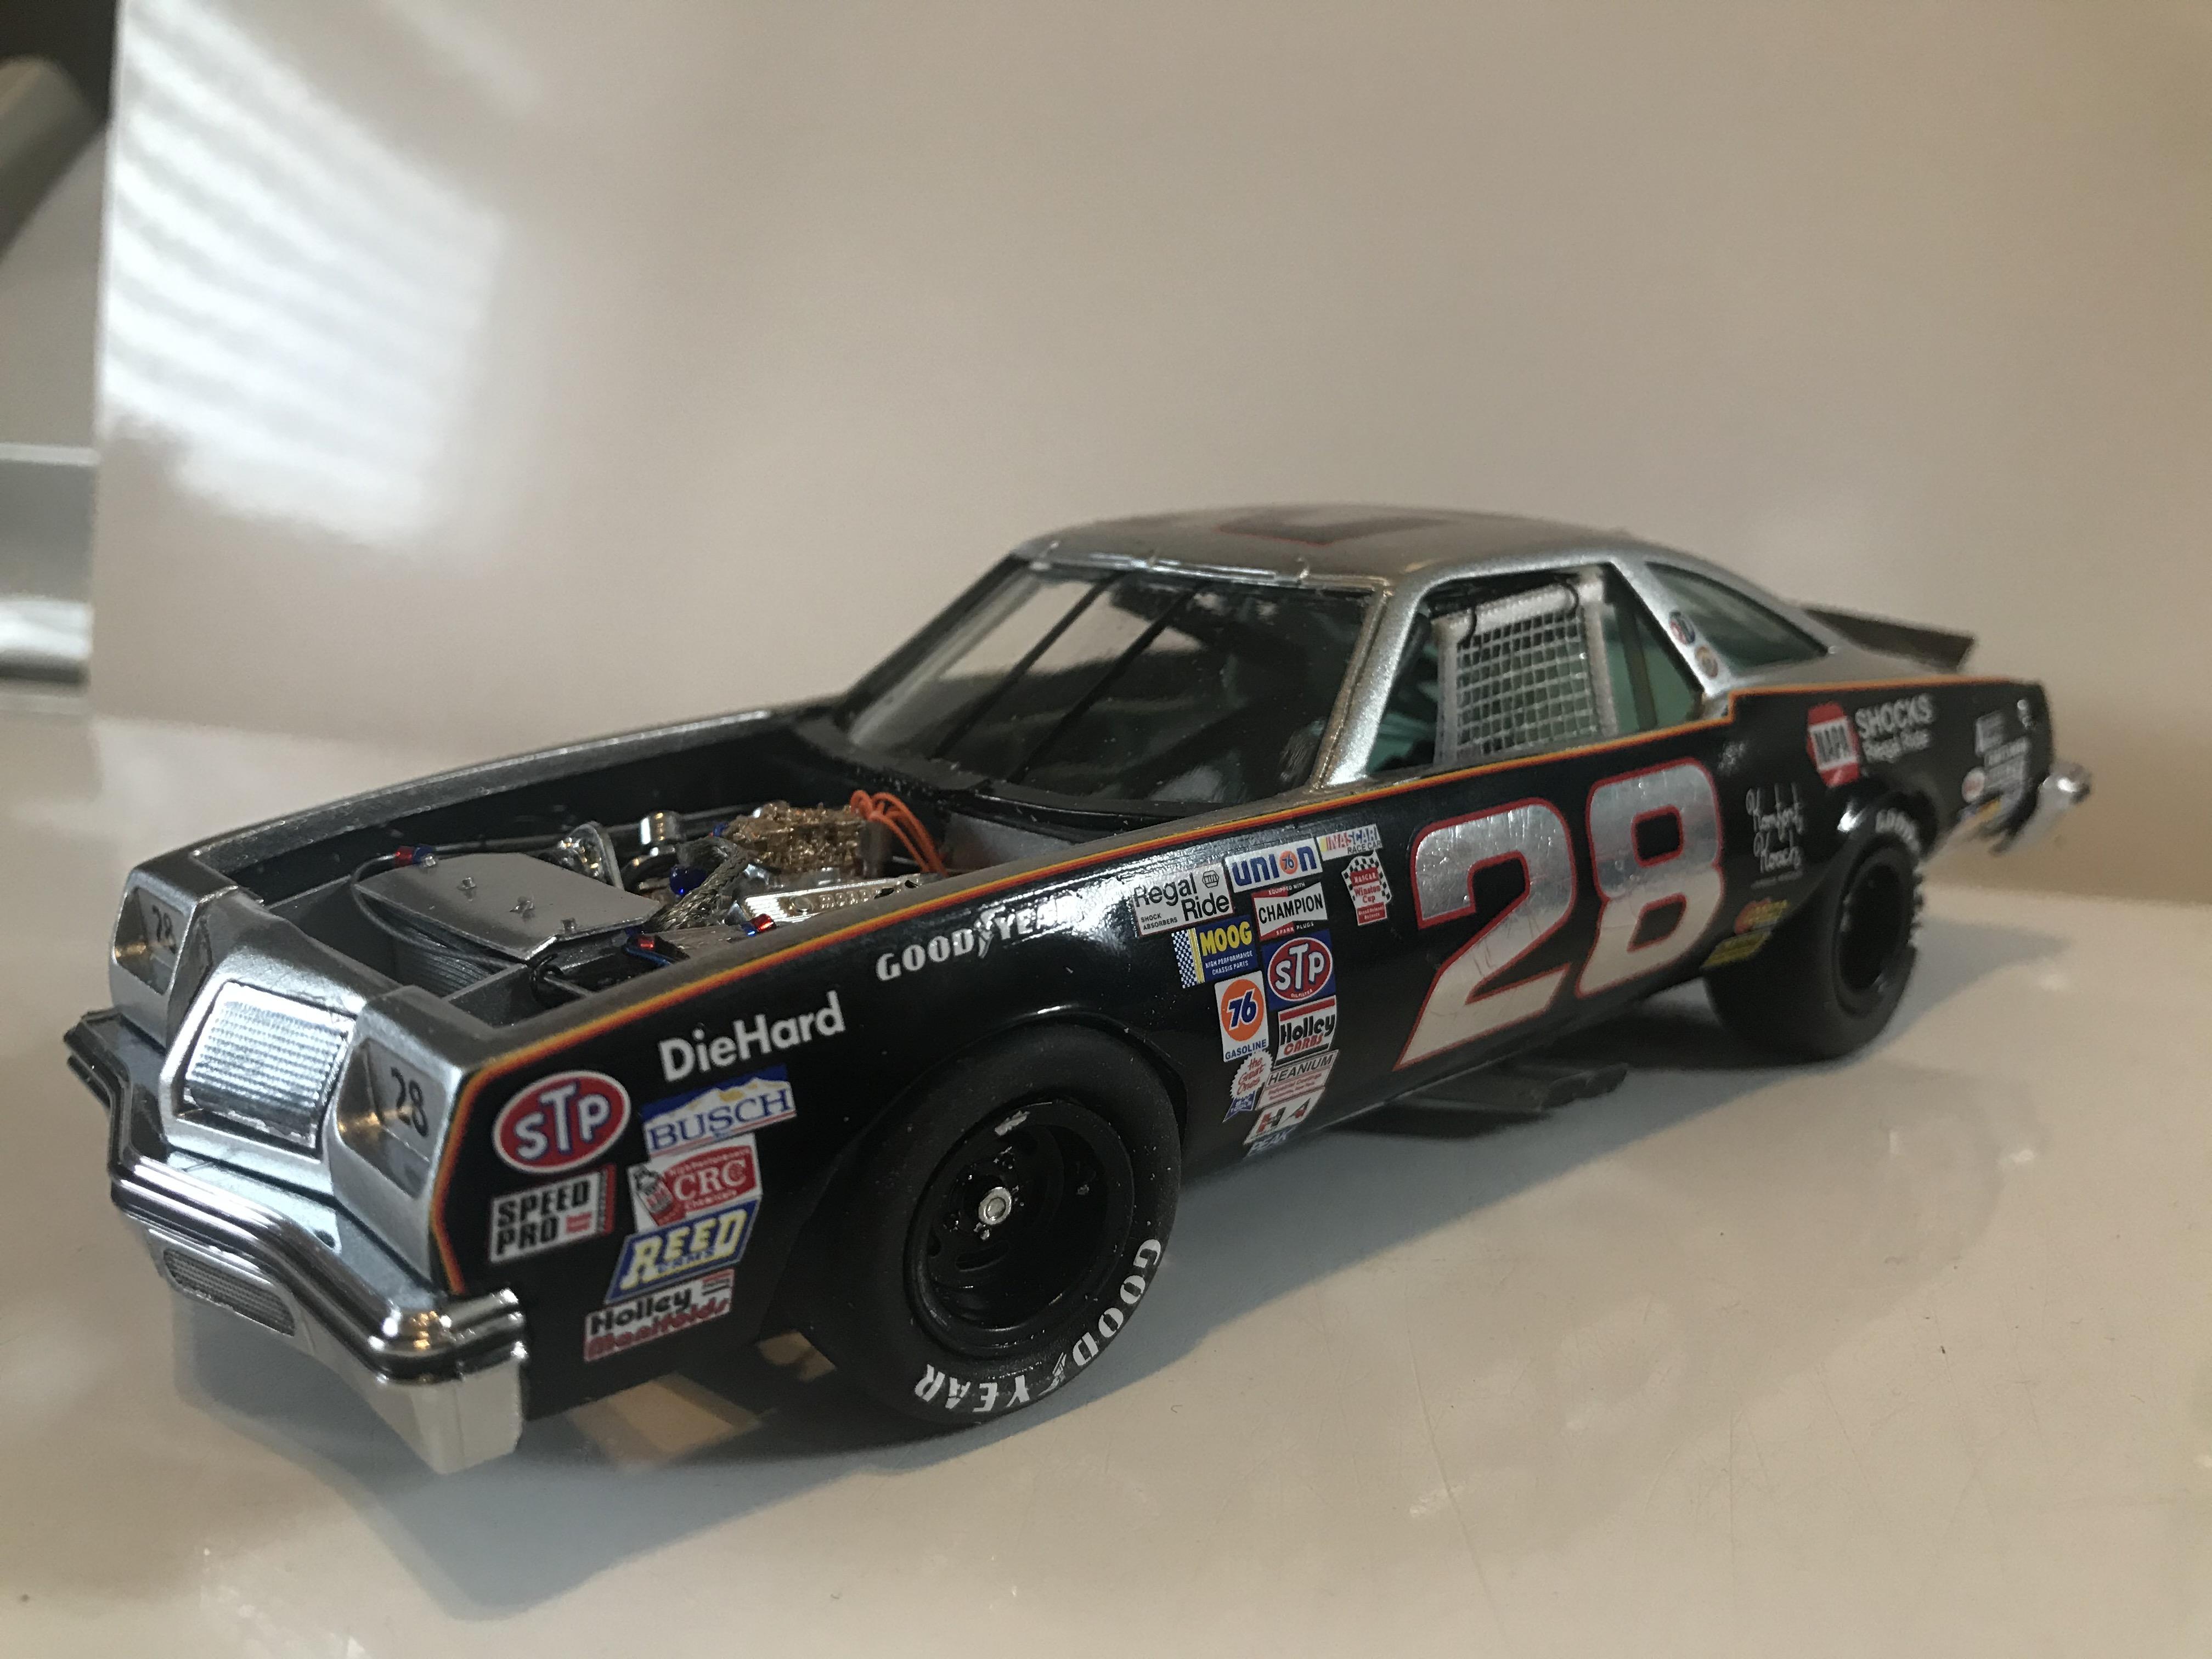
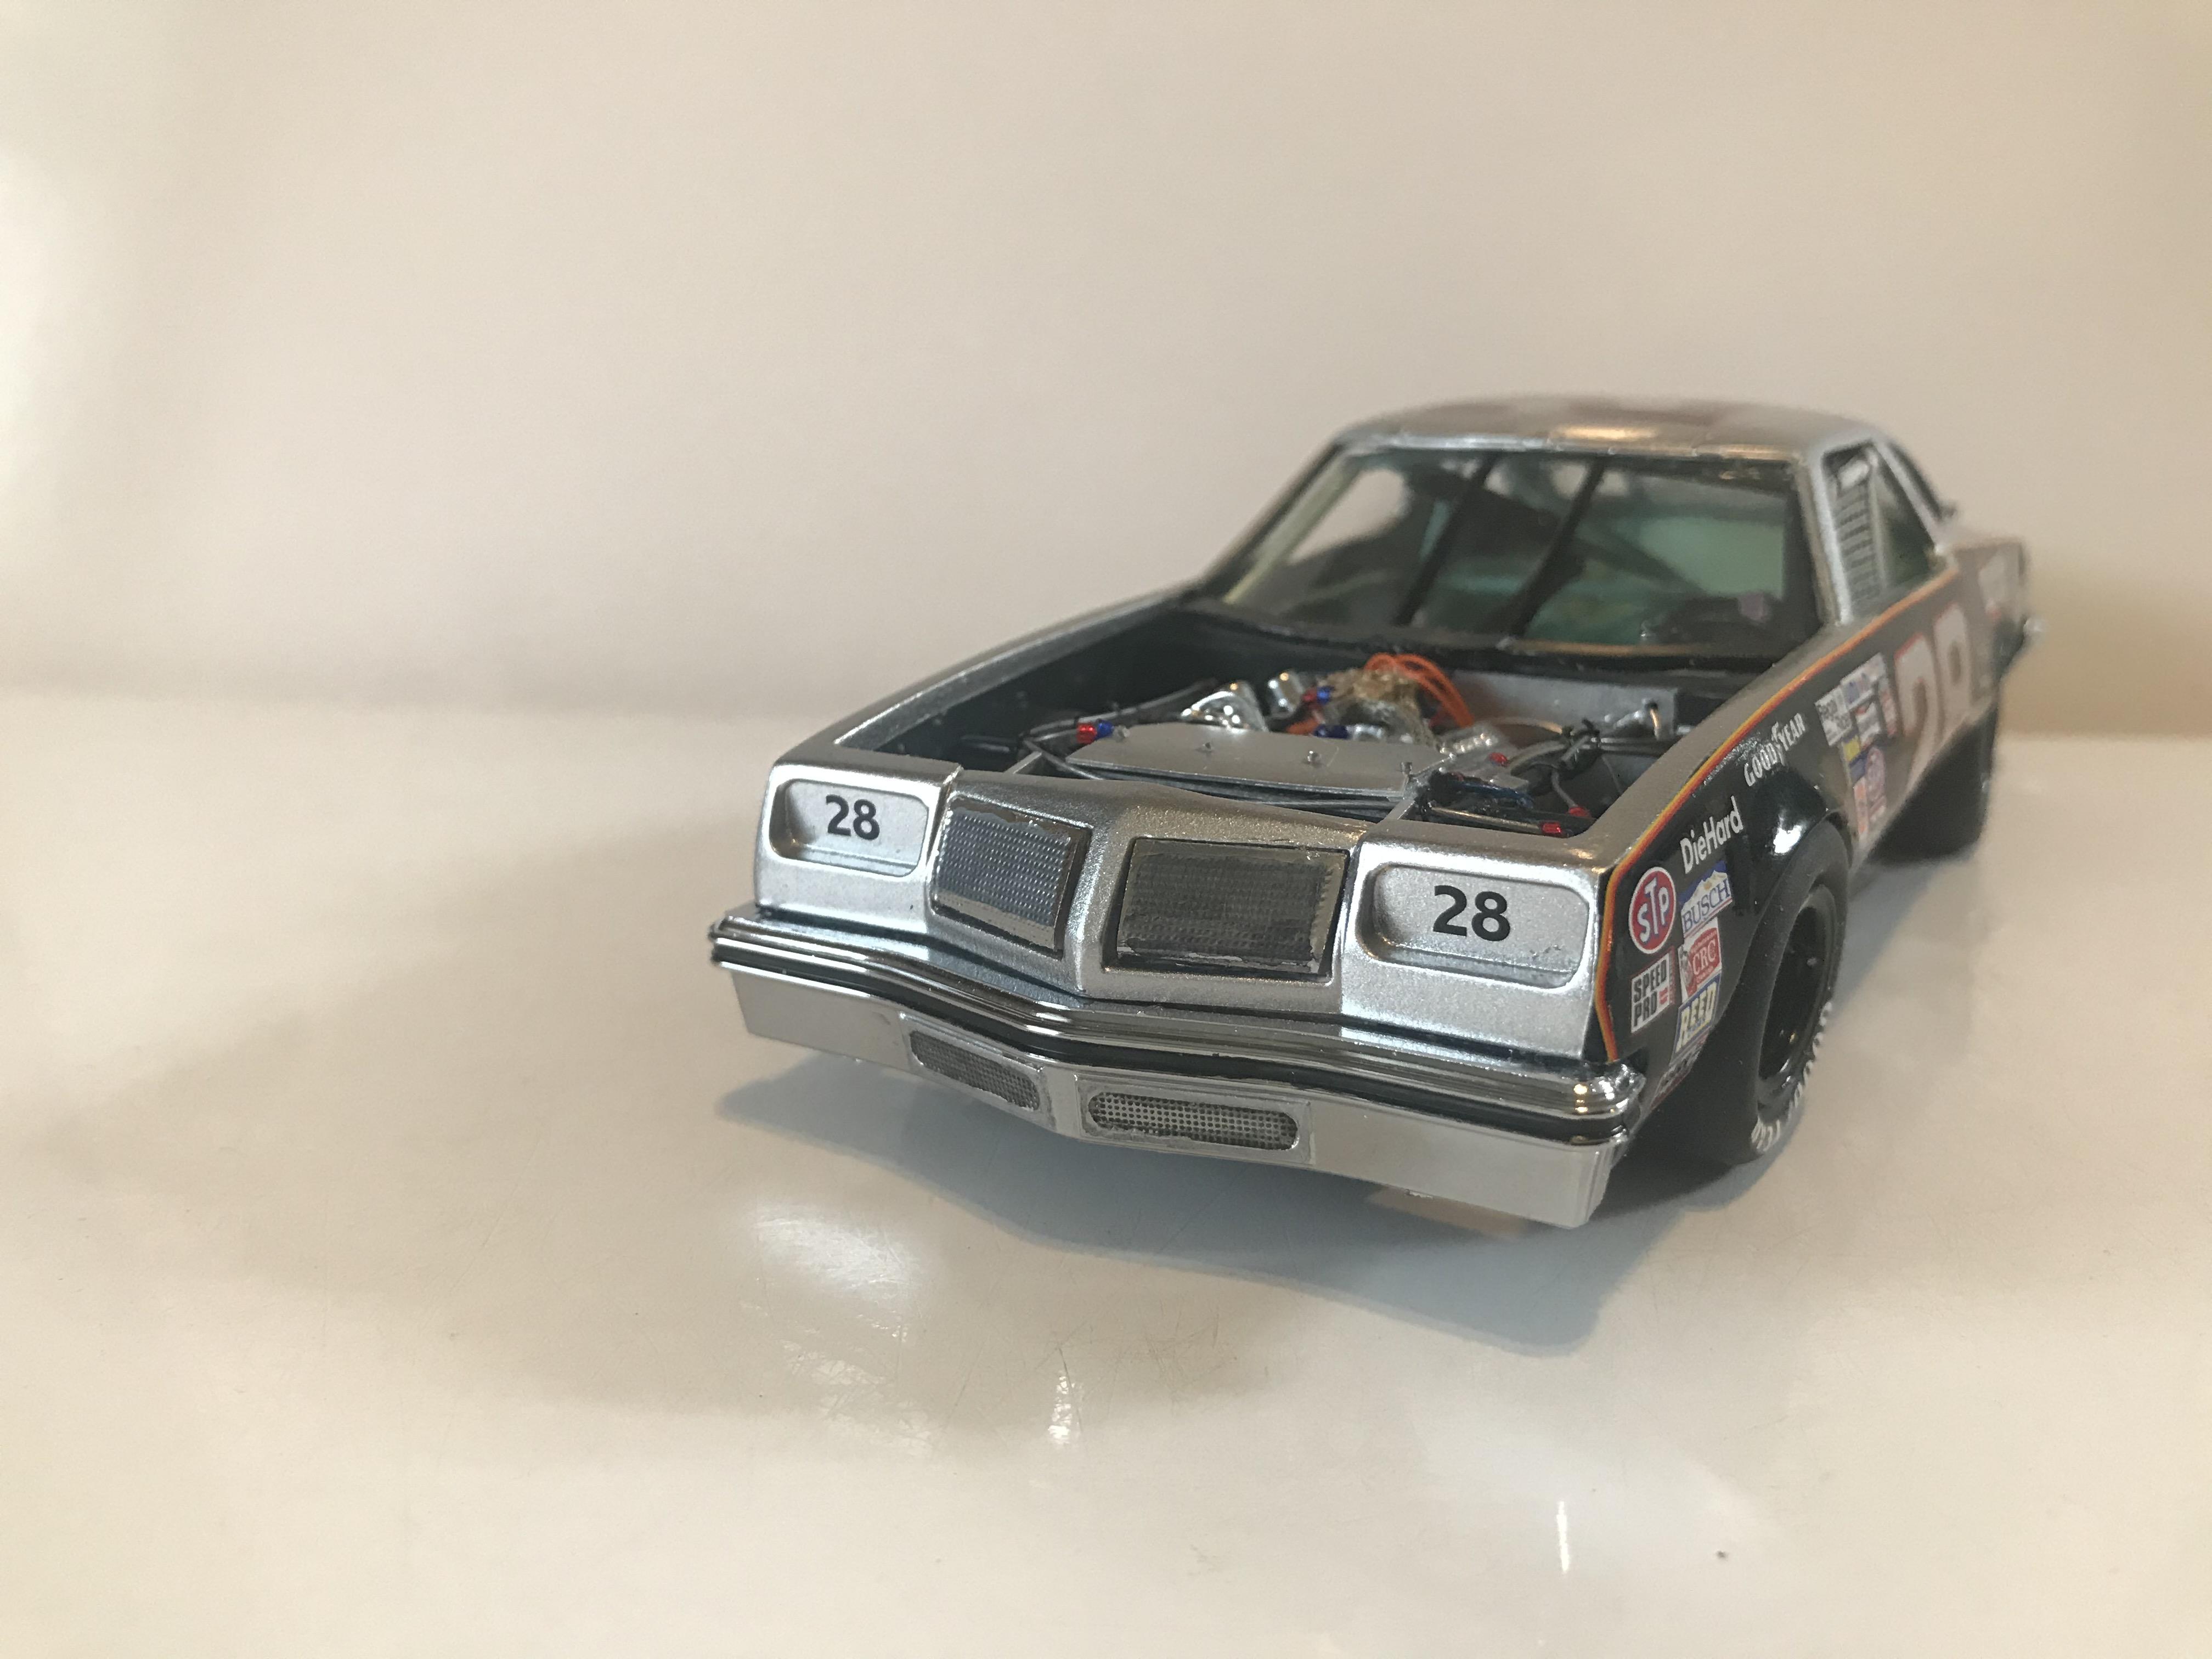
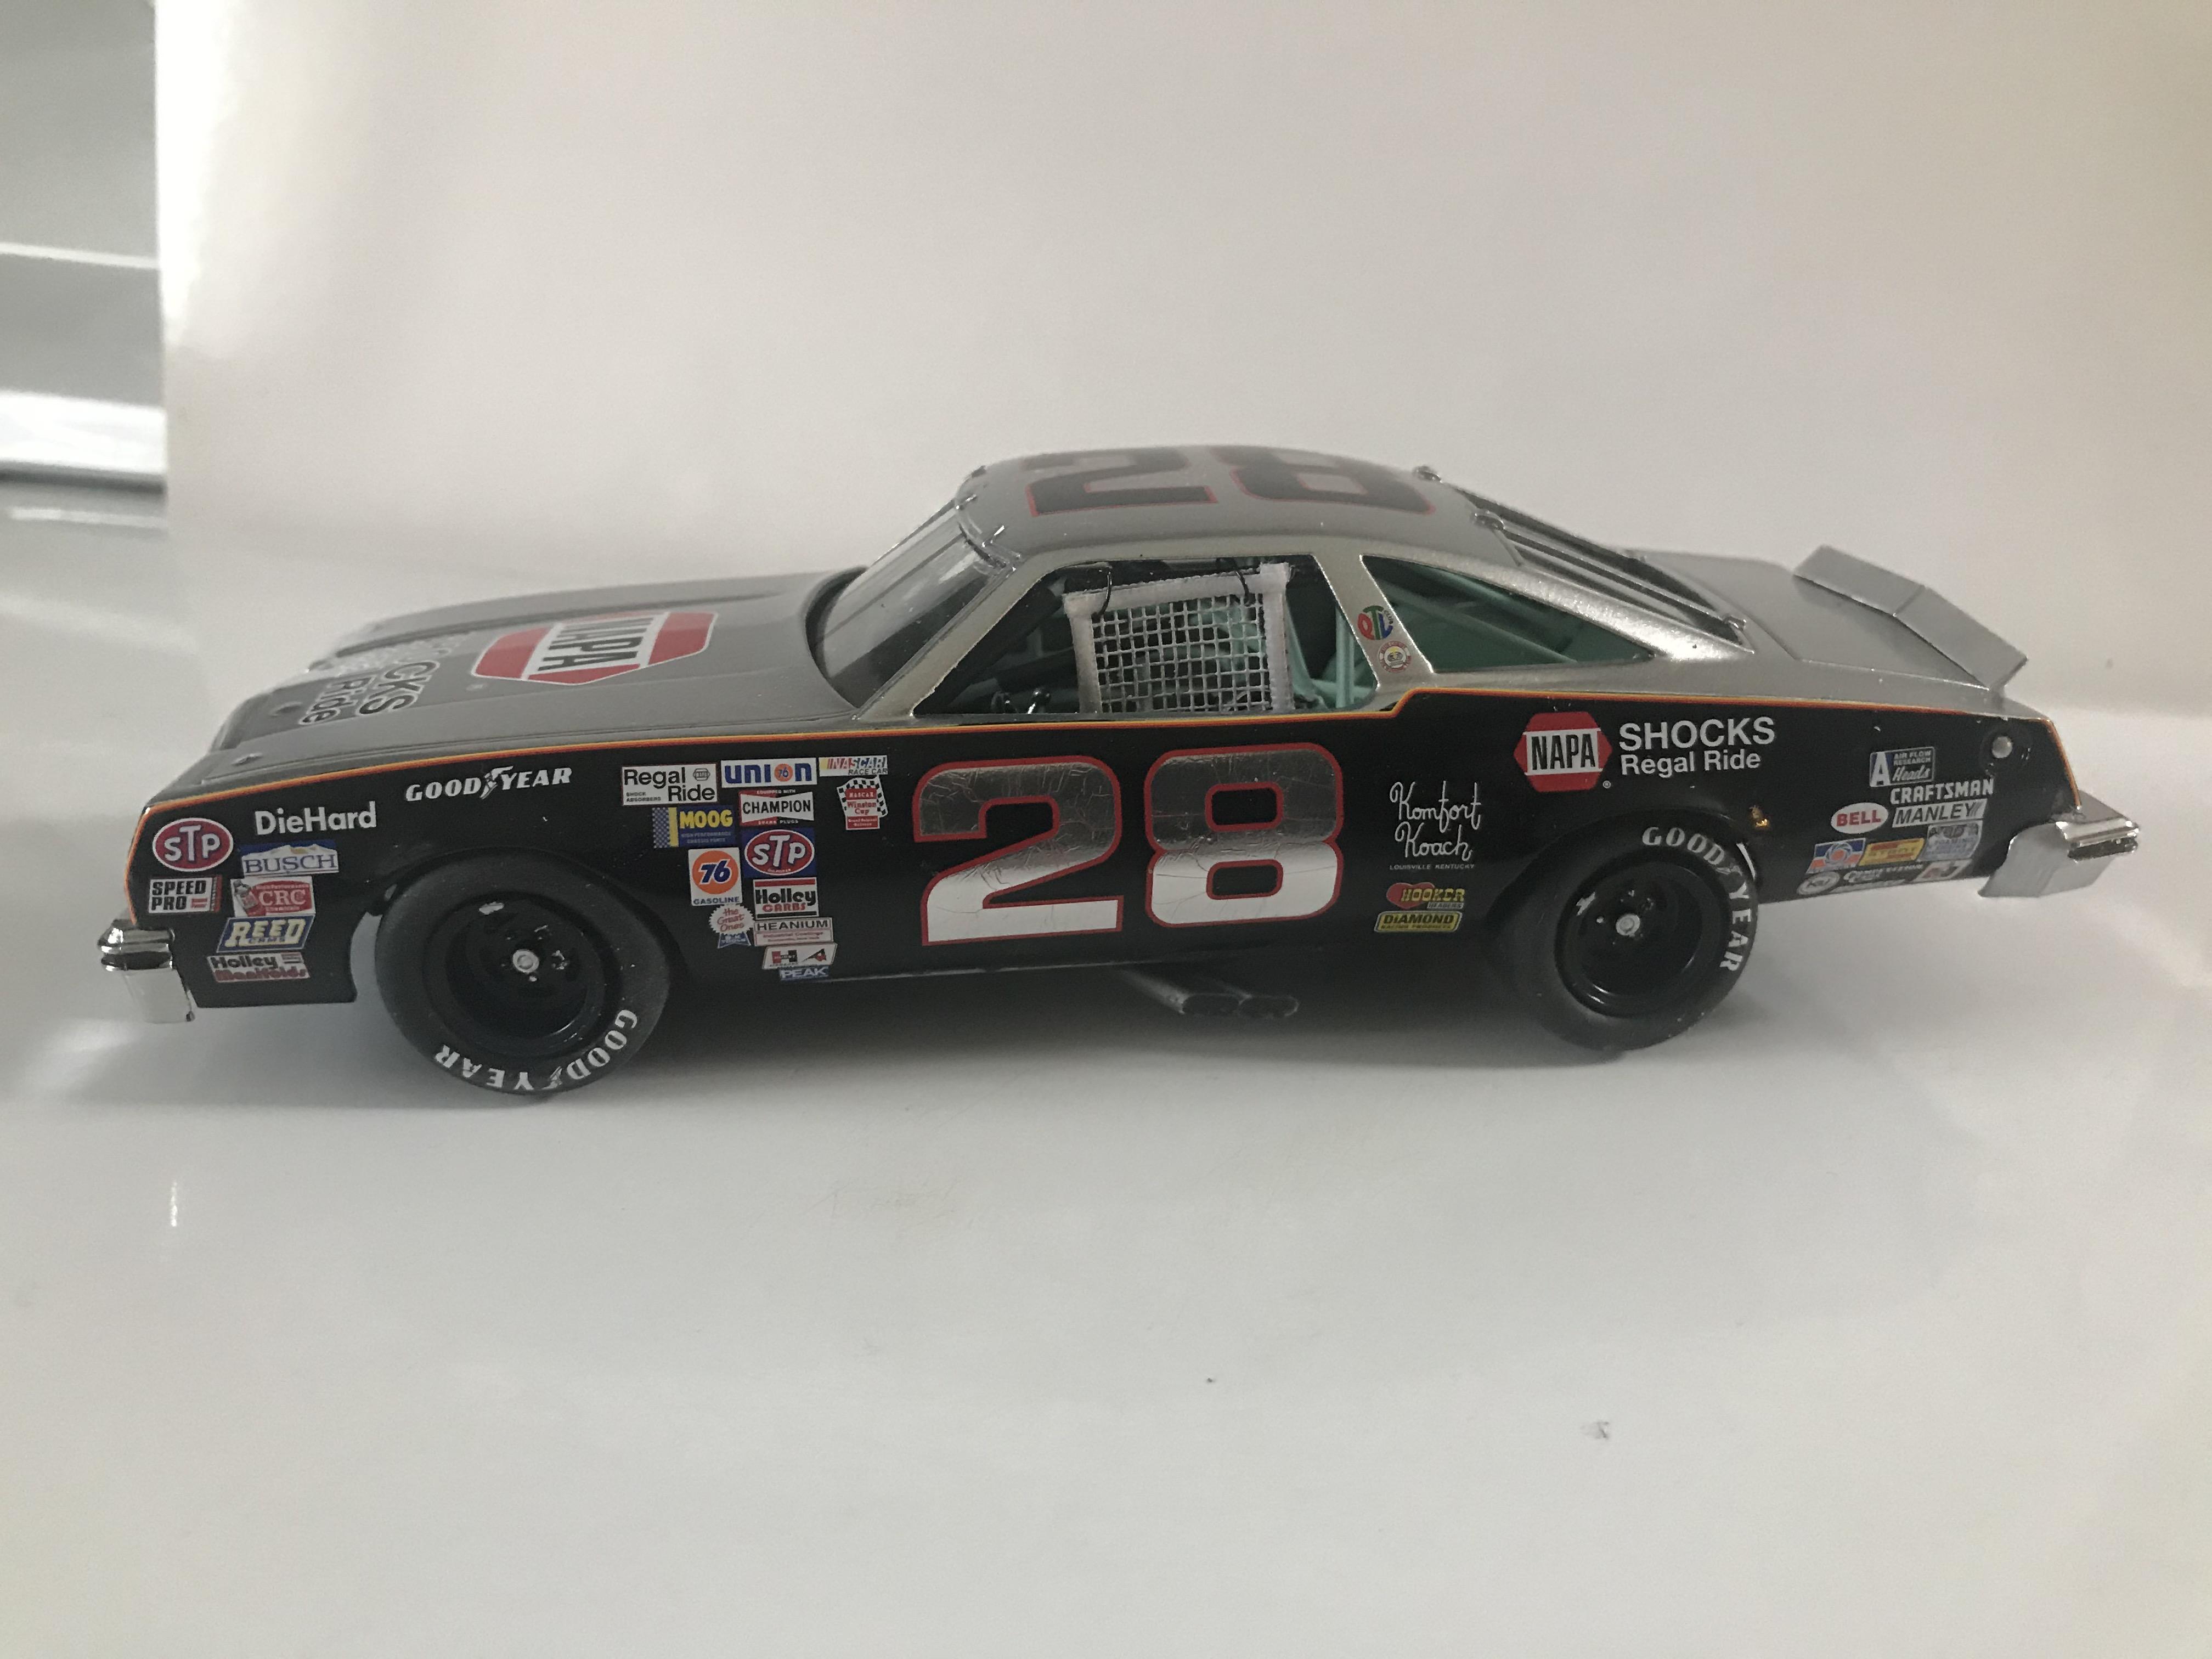
Call it "COVID Progress". Chassis work is almost complete. Body is decaled, cleared. Need to do windows, grille, bumpers, spoiler. A few chassis parts like the radiator shroud and fan. Getting almost done. I ordered a Salvinos Monte Carlo. It's in the queue.
-
Very clean build.
-
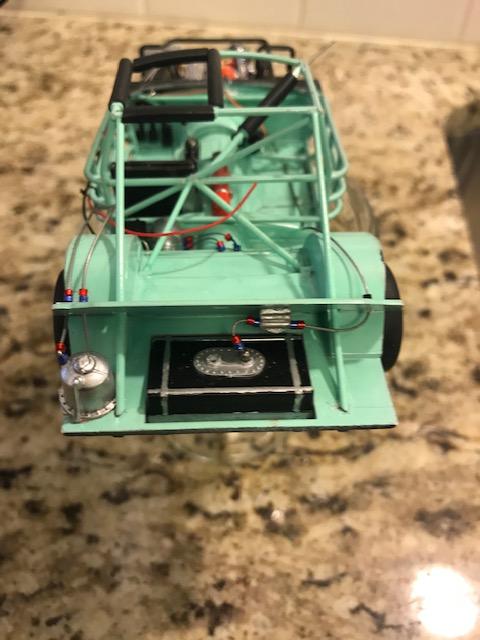
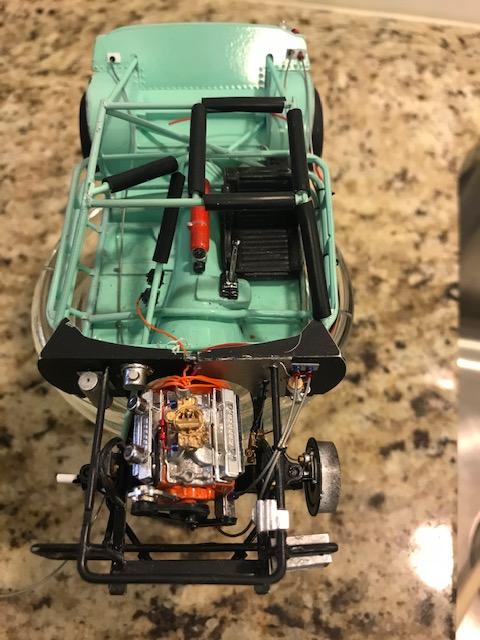
Oil lines not done, battery wiring not done, fuel line to pump not done, no radiator in yet, radiator hoses not done, puke tank not plumbed, one brake line yet to run. These cars have a boat load of plumbing on them!
-
Here is my Baker Cutlass project. Not completed yet.
-
You can also check electrical supply houses for very fine wire or hobby shops with model railroad supplies. They use fine wire for building lights and other small low voltage wiring. Also check EBAy-there are crafting places that have fine wire but it is too big for plug wires. I got that at a wiring supply place in Indianapolis.